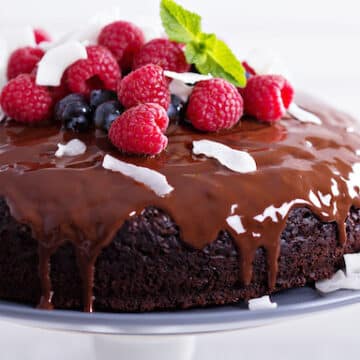
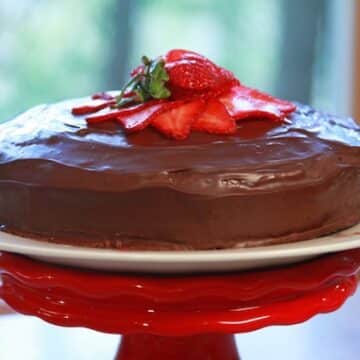
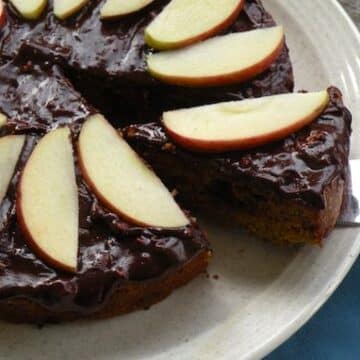
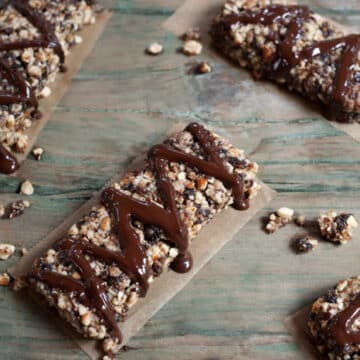
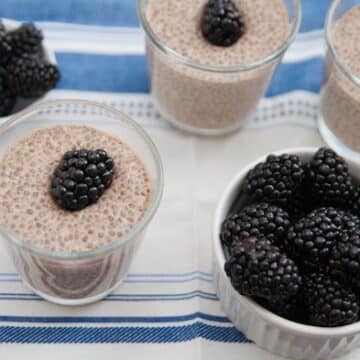
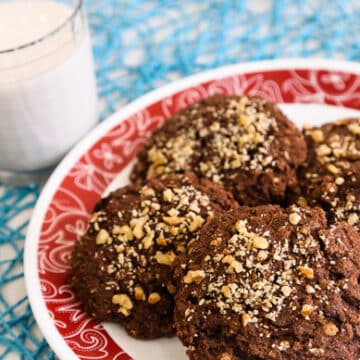
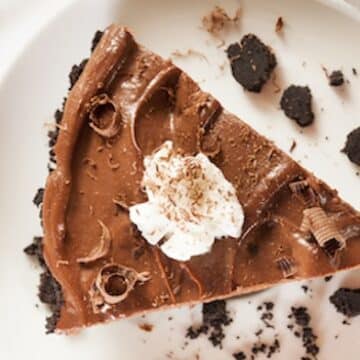
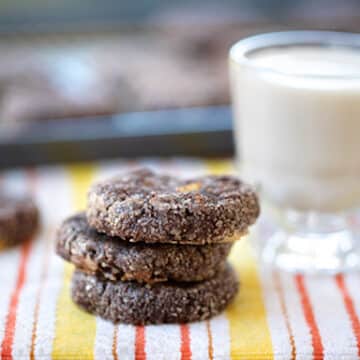
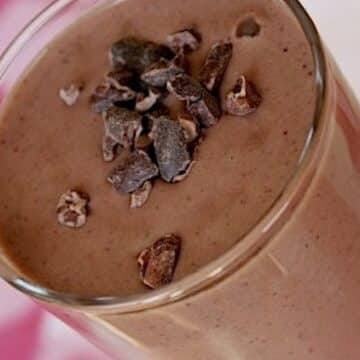
Chocolate is most compatible with pears as a winter treat. Enjoy these chocolate-drizzled poached pears as a light dessert. Photos by Hannah Kaminsky.
Search Results for: chocolate
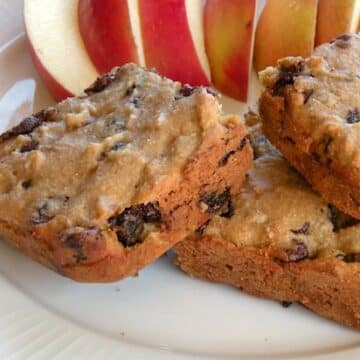
Chocolate Chip Apricot Blondies
Here's a fruity variation on brownies - with plenty of dried apricots and a dollop of applesauce - that my family likes just as much as the all-chocolate version. [Read more...]
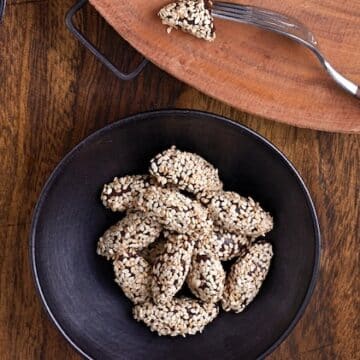
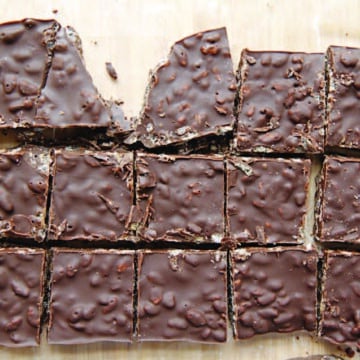
Chocolate Matzo Brittle
This recipe for chocolate matzo brittle is rich, but an excellent way to use your surplus of matzo. A little goes a long way as a dessert after the Passover Seder. Adapted from Vegan Holiday Kitchen by Nava Atlas. Photos by Hannah Kaminsky. [Read more...]
Vegan Sweet Potato Brownies
These vegan sweet potato brownies are fudgy, deeply chocolatey, and made with just six simple ingredients - no eggs, no dairy, and absolutely no one will guess there's a vegetable hiding in there.

Key Ingredients & Substitutions
- Mashed sweet potato. The star of the show - it adds natural sweetness, moisture, and acts as a binder in place of eggs. You can use freshly roasted and mashed sweet potato or canned sweet potato purée as a shortcut.
- Dark chocolate. Use at least 70% cacao for the richest, most intense brownie flavor. Double-check the label to make sure it's dairy-free - most good-quality dark chocolate is.
- Maple syrup. The primary sweetener here. Agave nectar or date syrup both work as 1:1 swaps if that's what you have on hand.
- Peanut butter. Smooth peanut butter adds body and a subtle nuttiness that pairs beautifully with chocolate. Almond butter or sunflower seed butter are great substitutes for a nut-free version.
- Coconut flour. Keeps the brownies gluten-free while giving them structure. If you don't have coconut flour, use ¾ cup almond flour instead - coconut flour is much more absorbent, so the ratio changes.
- Salt. Just a pinch, but it makes a real difference in balancing the sweetness and deepening the chocolate flavor.
Helpful Tips
- Blend, don't just stir. Using a blender or food processor ensures the batter is completely smooth with no sweet potato chunks. If you're mixing by hand, mash the potato very thoroughly before combining.
- Use room-temperature sweet potato. Cold mashed sweet potato can cause the melted chocolate to seize up and turn grainy. Let it sit at room temperature for a few minutes before adding it to the blender.
- Line your pan. Line the brownie tin with parchment paper with a slight overhang on the sides - this makes lifting the finished brownies out a breeze and keeps them intact.
- Don't overbake. The biggest brownie mistake is leaving them in too long. Pull them from the oven when a toothpick inserted in the center comes out with a few moist crumbs, not completely dry.
- Let them rest. These brownies firm up as they cool. Give them at least 15 minutes before slicing - or, for the cleanest cuts, cool completely and refrigerate for an hour first.
Variations
- Almond butter brownies. Swap the peanut butter for almond butter for a slightly milder, more neutral flavor that lets the chocolate shine even more.
- Chocolate chip swirl. Fold a small handful of vegan chocolate chips into the batter just before pouring into the pan, then press a few extra on top for a bakery-style finish.
- Walnut brownies. Stir in ½ cup of roughly chopped walnuts or pecans for a satisfying crunch in every bite.
- Spiced brownies. Add a pinch of cinnamon and a tiny pinch of cayenne to the batter for a Mexican hot chocolate-inspired twist.
- Mocha brownies. Dissolve 1 teaspoon of instant espresso powder into the melted chocolate before blending - the coffee flavor amplifies the chocolate and adds a subtle depth.
- Rocky road. Top the batter with vegan mini marshmallows and crushed graham crackers before baking for a fun, shareable version.
Serving Ideas
These brownies are wonderful on their own at room temperature, but they really shine served slightly warm with a scoop of vegan vanilla ice cream melting over the top. For a dessert spread, pair them alongside vegan chocolate avocado cookies and a bowl of fresh raspberries - the tartness cuts through the richness beautifully. For Halloween, our vegan halloween cupcakes are a festive alternative, and our vegan Halloween candy guide has all the best store-bought options. For Valentine's Day, they'd fit right in on our full list of vegan Valentine's Day desserts. A dusting of cocoa powder or a drizzle of melted dark chocolate takes them from casual snack to dinner-party dessert in seconds.
Storing & Freezing
Store leftover brownies in an airtight container in the refrigerator for up to 5 days. They taste even better on day two once the flavors have settled - warm individual squares in the microwave for 20-30 seconds before serving. These brownies also freeze exceptionally well. Wrap each square in plastic wrap and store in a freezer-safe bag or container for up to 2 months. Thaw at room temperature for an hour or microwave straight from frozen for about 45 seconds.
Also worth trying: our pumpkin seed butter.

More Vegan Chocolate Treats
If you loved these brownies, here are a few more chocolatey recipes to try:
- Fudgy Avocado Brownies (Vegan!)
- Vegan No-Bake Chocolate Cookies
- Vegan Chocolate Avocado Cookies
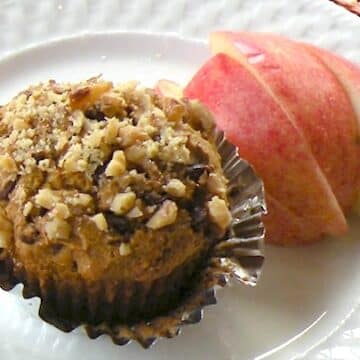
- Pumpkin Chocolate Chip Muffins
Recipe

Vegan sweet potato brownies
Equipment
- Conventional oven
- Brownie tin
Ingredients
- 1 cup mashed sweet potato from about 1 medium sweet potato, roasted and mashed
- ¾ cup maple syrup
- 3 tablespoon smooth peanut butter
- ¼ cup coconut flour
- 3 oz dark chocolate dairy-free, at least 70% cacao, melted
- ½ teaspoon salt
Instructions
- Preheat the oven to 180°C (350°F). Line a brownie tin with parchment paper.
- Add the mashed sweet potato, maple syrup, peanut butter, coconut flour, melted dark chocolate, and salt to a blender or food processor. Blend on high until the batter is completely smooth. Alternatively, mash the sweet potato very thoroughly and mix all ingredients in a large bowl until no lumps remain.
- Pour the batter into the prepared brownie tin and spread evenly. Bake for 40–45 minutes, until a toothpick inserted in the center comes out with just a few moist crumbs. Do not overbake.
- Remove from the oven and allow to cool in the tin for at least 15 minutes before slicing and serving.
Nutrition (Estimate per Serving)
Vegan Gluten-Free Pancakes (made with almond flour!)
These almond flour pancakes are light, fluffy, and naturally vegan and gluten-free, with a deliciously nutty flavor. An easy vegan breakfast that's perfect with maple syrup, fresh fruit, or your favorite pancake toppings.

If you're looking for pancakes that feel a little wholesome but still taste like a treat, these almond flour pancakes deliver in the best way. They're fluffy, lightly nutty, and naturally gluten-free, with a soft texture that's perfect for soaking up maple syrup.
I'll admit, I was skeptical the first time I made pancakes with almond flour. I've had my share of dense, crumbly "healthy" pancakes that were more disappointing than satisfying. But these? Total game changer.
These pancakes cook up tender with slightly crisp edges, and the flavor pairs beautifully with classic pancake toppings like berries, yogurt, or a generous drizzle of maple syrup.
This Almond Flour Pancake Recipe Is…
- Naturally gluten-free
- Freezer-friendly
- Light, fluffy, and tender
- Simple to make with a few ingredients
- Perfect for weekend brunch
Drizzle on some syrup, dust with powdered sugar, or add on some fresh berries. No matter how you serve up these homemade vegan pancakes, they are a hit.
And while you're here, don't forget to grab a copy of my free vegan cheat sheet. It's packed with all my favorite substitutions to vegan-ize any recipe!

Helpful Tips
Use medium heat: The pancakes can brown very quickly, so cooking them over medium heat helps them cook evenly without scorching the outside.
Let the batter rest: Giving the batter a few minutes to sit before starting to scoop your pancakes helps it thicken slightly.
Grab a pancake flipper! Basically a really large spatula. For just a few bucks, I have found this to be a handy tool to keep in my kitchen.

Fun Variations
- Berry pancakes: Fold some blueberries or chopped strawberries into the batter.
- Banana almond pancakes: Mash a ripe banana into the batter for natural sweetness and extra moisture.
- Chocolate chip pancakes: Add a handful of dairy-free chocolate chips for a breakfast that feels like dessert.
- Cinnamon Spice pancakes: Mix in a pinch of cinnamon or nutmeg for warm, cozy flavor.
- Almond pancakes: Swap the vanilla extract for almond extract, to go all-in on the almond flavor.

Serving Ideas
These almond flour pancakes are delicious straight off the skillet, but the toppings are where the fun really begins.
- Classic maple syrup and vegan butter for a simple, traditional pancake stack.
- Fresh berries and coconut yogurt for a bright, brunch-worthy plate.
- Nut butter drizzle like almond or peanut butter for extra richness. My personal favorite is this homemade vegan nutella! or a drizzle of vegan apple honey for a naturally sweet finish.
- Sliced bananas and chopped nuts for added texture and flavor.
- A dusting of powdered sugar when you want them to feel a little extra special.
If you love quick, single-serve vegan treats, you might also enjoy our vegan cinnamon roll in a mug - a warm, gooey cinnamon bun ready in minutes.

Recipe FAQs
What does flaxseed do in vegan pancakes?
The ground flaxseed is used to create what we call "flax eggs". Adding water to the flaxseed creates a egg-like liquid that makes a great egg replacement in a traditional pancake recipe. (For more easy vegan substitutions, grab my free vegan cheat sheet!)
How do I store leftover pancakes?
If you do not eat all the pancakes, go ahead and refrigerate them. They will last 2-3 days in the fridge. You can eat these refrigerated pancakes cold or warm them up in the microwave or toaster oven.
Pro Tip: If you choose to reheat using the microwave, place a small cup of water in the microwave along with the pancakes. This will help keep the pancakes moist!
Can you freeze almond flour pancakes?
Go right ahead and freeze any vegan pancakes you don't want to eat right away. Just lay out the pancakes in a single layer and flash freeze them. Once the pancakes are frozen, transfer them to an airtight container or freezer bag. Then freeze the for up to 3 months.
More Vegan Breakfast Recipes
If you love a big breakfast spread, be sure to check out my new Vegan Brunch Book. It's loaded with all my favorite brunch-worthy vegan recipes!
And for more creative vegan breakfast ideas, check out these recipes:
- Vegan Blueberry Pancakes
- 35+ Healthy Vegan Breakfast Recipes
- 20 Savory Vegan Breakfast Ideas
- Vegan Pumpkin Waffles
Recipe

Vegan Almond Flour Pancakes
Ingredients
- 1 cup almond flour
- ½ cup gluten-free baking flour
- 1 teaspoon vanilla extract
- 1 teaspoon baking powder
- ¼ teaspoon salt
- 1 banana mashed, overripe is best
- ½ cup almond milk add additional up to ¾ cup, as needed
- 1 tablespoon ground flaxseed
- 3 tablespoon warm water
- ½ teaspoon ground cinnamon optional
- fruit and maple syrup optional toppings
Instructions
- In a small bowl, whisk together the ground flaxseed and warm water. Let it sit for five minutes to thicken before proceeding. This is your "flax egg".
- In a medium bowl mix vanilla extract, almond milk, and the "flax egg". Stir well to combine.

- Add mashed banana and stir again until the batter is smooth.

- Add both almond and gluten-free flour, ground cinnamon, and salt. Mix until combined. Batter should be thicker now.

- Heat a thin layer of oil in a nonstick skillet. Then pour in 2 tablespoon of the batter for each pancake. Cook on low heat about 2-3 minutes for each side.

- Serve immediately. Garnish with maple syrup, fruits, or nuts.

Nutrition (Estimate per Serving)
Pumpkin Protein Balls
These Pumpkin Protein Balls are simple, delicious, and packed with healthy protein. And they're vegan friendly too!

These protein balls make for a healthy homemade vegan snack or a delightful bite-sized dessert. And with all that creamy pumpkin flavor - they're the perfect treat for Fall. They taste like tiny slices of perfect pumpkin pie.
These Pumpkin Protein Balls are:
- Protein-packed
- A wonderful two-bite snack
- Made with healthy, simple ingredients
- Vegan
- YUMMY
- Easy to make in less than an hour
They are the perfect energy fix when you're in a crunch!
This recipe uses simple but delicious ingredients like rolled oats, raisins, cinnamon, and pumpkin puree. So believe me when I say your house will smell DELISH when you make these pumpkin energy balls!
Helpful Tips

Making the "chia egg".
To make this recipe egg-free, we're pulling out a classic vegan move: the chia egg. All you do is mix chia seeds with water, let the mixture set for about 15 minutes, and you've got yourself a gel-like substance that mimics the texture of a regular egg.
It holds everything together just as well as a traditional egg, and bonus points? Chia eggs are packed with nutrients, so you're sneaking in a little health boost too.
Making your own oat flour.
Oat flour is super easy to make, which is why the recipe includes making your own. All you need are some rolled oats and a high-speed blender to process them until they are ground into a powder. It's that simple!
Of course, if you want to make this recipe a little bit quicker, you are welcome to substitute a store bought oat flour as well.
Sweeten up your protein balls.
These pumpkin energy bites are so delicious, but they're not overly sweet. If you're looking to sweeten things up a bit, add 1-2 tablespoons of maple syrup or additional raisins. You could also add dark chocolate chips or craisins for a fun twist.
FAQs about this recipe!

How long can I store these protein balls?
These pumpkin protein balls can be stored in an airtight container in the fridge for up to five days. Alternatively, you could keep them in the freezer for a month or two. Just let them thaw before eating them again!
Are these vegan protein balls healthy?
These protein balls are packed with nutrition! Thanks to the rolled oats, raisins, and chia seeds, these protein balls make for a delicious, nutrient-dense treat. You can find the full nutrition details in the recipe card below.
More Tasty Recipes
If you love pumpkin season as much as I do, you need to try these recipes too:
Also worth trying: our pumpkin seed butter.
Recipe

Pumpkin Protein Balls
Ingredients
- ⅓ cups rolled oats
- 2 cups homemade oat flour see directions
- ⅓ cup raisins
- 1 teaspoon baking powder
- 1 teaspoon cinnamon
- ¼ teaspoon salt
- 1 teaspoon pumpkin pie spice
- 1 tablespoon chía seeds
- ¼ cup water
- ¾ cups pumpkin puree
- ⅓ cup maple syrup may add additional for a sweeter treat
- 3 tablespoon non-dairy milk
- 1 teaspoon vanilla extract
- ¼ cup vanilla protein powder vegan, optional
Instructions
- Preheat the oven to 350°F. Prepare a baking tray with baking paper and set it aside.
- Mix the chia seeds with water and let them sit for 10-15 minutes until the chia egg has developed.
- Make homemade oat flour: Process rolled oats in a high-speed blender until oats are ground. To make two cups of homemade oat flour, you'll need 2 ⅓-½ cups of rolled oats. However, you can also use store-bought oat flour if desired.
- Mix wet ingredients-pumpkin puree, non-dairy milk, vanilla extract, maple syrup, and chia egg-in a large bowl until well combined.

- Add raisins, cinnamon, pumpkin spice, and baking powder and combine.

- Finally, add oat flour (and protein powder if using) and stir to combine.

- Cover the batter with wrapping paper or a silicone wrap and place it in the fridge for 20-30 minutes to allow the oats to absorb any excess liquid.

- Roll the batter into 20 balls and then coat each of them with rolled oats.

- Bake the balls for 10-12 minutes or until oats get lightly brown.

Notes
Nutrition (Estimate per Serving)
Vegan Fudgesicles
When it comes to frozen treats, few things beat a classic fudgesicle. These Vegan Fudgesicles are rich, creamy, and loaded with chocolate flavor-everything you love about the original, but completely vegan.

These fudgesicles aren't just good - they're ridiculously good. With simple ingredients like coconut milk, cocoa powder, and dark chocolate, they're easy to make and even easier to enjoy.
Whether you're a chocolate fanatic or just looking for a refreshing treat, these fudgesicles deliver in every way.

What Makes These Fudgesicles Special
Ultra-Creamy Texture: Thanks to full-fat coconut milk and a touch of cornstarch, these fudgesicles are smooth and luscious.
Deep Chocolate Flavor: Both cocoa powder and melted dark chocolate create an intense, rich chocolate taste.
Vegan and Allergy-Friendly: These are dairy-free, gluten-free, and soy-free, making them a great option for everyone.
Customizable: Add coffee liqueur for a boozy version or tweak the sweetness to suit your taste.
Perfect for Summer: These popsicles are an easy, no-bake treat that's perfect for warm weather.

Helpful Tips
Popsicle Molds: I have used every type of popsicle mold imaginable, and I am convinced that these cheap molds are all you need.
Use Full-Fat Coconut Milk: For the creamiest fudgesicles, stick with full-fat coconut milk. Lower-fat options or other non-dairy milks will result in a more icy texture.
Don't Skip the Cornstarch: A small amount of cornstarch ensures the mixture stays smooth and doesn't separate during freezing. Arrowroot powder works as a great alternative.
Enhance the Chocolate Flavor: Coffee, vanilla, and a pinch of salt are added to deepen the chocolate taste. You won't taste the coffee - it simply makes the chocolate shine.
Strain the Mixture: For the smoothest popsicles, strain the liquid before pouring it into molds to remove any lumps or bits of chocolate.
Freeze Completely: Let the fudgesicles freeze for at least 6 hours (or overnight) to ensure they're firm enough to enjoy.
Also worth trying: our guide to vegan Halloween candy.

Storing & Serving
Once frozen, these fudgesicles can be stored in their molds or individually wrapped in plastic for up to one month, in the freezer. To easily remove them from the molds, run the bottoms under warm water for a few seconds.
Serve them as-is, or dress them up with a drizzle of melted chocolate or a sprinkle of chopped nuts!

Variations to Try
Boozy Fudgesicles: Replace the coffee with coffee liqueur for a grown-up twist.
Add Some Crunch: Stir in chopped nuts, coconut flakes, or even chocolate chips before pouring the mixture into molds.
Extra Sweetness: If you prefer sweeter treats, increase the brown sugar slightly.
Mint Chocolate: Add a few drops of peppermint extract for a refreshing minty flavor.
Espresso Kick: Use espresso instead of brewed coffee for an even richer flavor.
If you love rich, fudgy chocolate treats, our fudgy avocado brownies are another must-try - avocado replaces butter for a surprisingly decadent result.

More Vegan Treats
If you love these vegan fudgesicles, be sure to check out these other plant based recipes:
Also try: our Vegan Sweet Potato Brownies.
- Vegan Cookies & Cream Popsicles
- Vegan Strawberry Mango Popsicles
- 8 Incredible Vegan Frozen Treats
- 25+ Best Vegan Recipes for Summer
Recipe

Vegan Fudgesicles
Ingredients
- 3 cups coconut milk full fat variety
- ¼ cup light brown sugar
- ¼ cup cocoa powder
- Salt just a pinch
- 1 tablespoon cornstarch
- ¼ cup strong brewed coffee or substitute additional coconut milk
- 1 tablespoon vanilla extract
- 4 oz dark chocolate chopped
Instructions
- Prepare the base: In a saucepan, heat the coconut milk and brown sugar over medium heat. Stir gently until the sugar dissolves and the mixture is just below a simmer. Avoid letting it boil.

- Make the cocoa mixture: In a small bowl or spouted measuring cup, mix together the cocoa powder, cornstarch, and salt. Stir until evenly combined.

- Combine with coffee: Slowly stir in the coffee* to form a smooth paste.

- Gradually whisk this paste into the warm coconut milk mixture until fully blended. Lower the heat to maintain a gentle warmth.

- Melt the chocolate: Add the finely chopped chocolate and vanilla extract to the saucepan. Whisk until the chocolate is completely melted and the mixture becomes smooth and glossy. Continue stirring constantly as it cooks, allowing it to thicken slightly. Remove from heat.

- Fill the molds: Pour the mixture into popsicle molds. For an ultra-smooth result, strain the liquid through a fine-mesh sieve before filling.

- Add the sticks: If your molds have a lid, secure it before inserting the popsicle sticks, leaving about 1 inch of the stick exposed. If there's no lid, cover the molds tightly with plastic wrap or aluminum foil to keep the sticks in place.

- Freeze: Place the molds in the freezer and let them set for at least 6 hours, or until fully frozen.
- Serve: Carefully remove the fudgesicles from the molds. If using a metal or plastic mold, it can help to dip the tips in hot water for 10 seconds and then remove.

- Store: Keep the popsicles frozen in plastic bags or tightly wrapped in plastic for up to 1 month.
Notes
- Taste/Texture: These fudgesicles are intensely chocolatey with both cocoa powder and melted dark chocolate and you can't tell they are vegan. They are perfect for a cool dessert or snack with limited sugar but a big punch of flavour. The addition of vanilla and coffee help balance out the coconut milk for a treat that is smooth and creamy but not tropical. You can even add coffee liqueur for a slightly boozy version.
- Coffee: Coffee is a flavor enhancer for chocolate, creating a richness to it to balance out the flavor of coconut milk. This is also why vanilla and salt are added - they will help boost the chocolate flavor rather than detract from it. For a slightly boozy popsicle, add coffee liqueur in place of the coffee after the mixture has been removed from the heat.
- Full fat coconut milk: For the creamiest fudgesicles, use full fat coconut milk because it will help prevent forming ice crystals in the mixture. Low-fat coconut milk or other non-dairy milks will create icier popsicles.
- Cornstarch: Using a small amount of cornstarch helps suspend the fat evenly throughout the mixture so that the popsicle doesn't separate during freezing. For a corn free version, use arrowroot powder.
Nutrition (Estimate per Serving)
Best Vegan Halloween Candy Brands (and they're easy to find!)
Just because you've gone vegan doesn't mean you have to miss out on the Halloween candy madness. In fact, some of the best candies out there are accidentally vegan. Whether you're filling a candy cauldron, assembling the ultimate treat bags, or just hoarding a stash for your Halloween movie marathon (same), this list is here to help you snack responsibly.
Here are the best vegan Halloween candies that prove you don't need animal products to have a scary-good time!

Non-Vegan Ingredients to Watch Out For
You may be surprised at just how many candy brands are accidentally vegan - meaning they just happen to be vegan without making that a part of their marketing. But there are a few ingredients that pop up most often - so be sure to check your ingredient labels for these:
Dairy Products - This one is typically easiest to spot, and will come up often in milk chocolate candies. Check the labels for milk, butterfat, whey, or anything similar.
Egg Products - Egg and egg whites are also found in some surprising places.
Gelatin - This is the chief offender in many gummy-type candies. Gelatin is derived from animals (like pigs and cows), and is used to give gummy candies that chewy texture.
Carmine - This is a lesser known one. This ingredient is derived from insects and is sometimes used as a red coloring in food products.
What about Sugar?
Sugar can be a hot topic in the vegan community, as it can often be tough to tell if a specific brand is vegan-friendly or not. What's the issue? Some brands use bone char in the process of refining their sugar. This is especially common in the USA.
But of course most candy brands do not disclose the source of the sugar used in their manufacturing, or they use multiple sources. Because of this, many vegans choose to not overthink sugar. My personal approach is to purchase vegan-friendly sugar brands for use in my own home cooking, but not to overthink it too much when buying commercial products. There's only so much you can do.
Vegan Halloween Candy
Here are all my favorite vegan-friendly Halloween candy ideas!
🍓 YumEarth Organic Halloween Fruit Gummies
Gummy ghosts and goblins? Yes please. These fruity little guys are organic, allergy-friendly, and freakishly fun.
🐟 Swedish Fish Mini Packs
Chewy, fruity, and unapologetically weird in the best way. The OG of accidentally vegan gummies.
🍭 YumEarth Organic Halloween Pops
Classic lollipops with a clean conscience. They’re organic, flavorful, and free of scary stuff like dyes and gelatin.
💎 Candy Necklaces by Smarties
Wearable candy? Iconic. It’s jewelry you can snack on, and yes, it’s totally vegan.
🧟♂️ Sour Patch Spooky Zombies Gummies
These blue raspberry zombies are the kind of undead we want to see - sweet, chewy, and plant-based.
🍓 Twizzlers Strawberry Twists
Chewy, twisty, and strangely addictive. A classic candy bowl filler that’s accidentally vegan and always a hit.
🍬 Smarties Original Rolls
Old-school and totally underrated. Tart, sweet, and 100% animal-free—your nostalgic fave never looked so good.
🧡 Sour Patch Dipping Lollipops
Lollipops and sour powder? That’s a double feature. These are spooky, sweet, and make your tongue tingle in the best way.
🍓 Annie’s Fruit Tape
Like a fruit roll-up, but organic and bunny-approved. Peel, snack, and feel just a little superior.
🧱 Vegan Gummy Blocks Candy
Who says you can’t play with your food? Stack, snack, repeat—these gummies are fun for builders of all ages.
🌪️ Airheads Variety Pack
Stretchy, tangy, and perfect for stuffing trick-or-treat bags. Bonus points for coming in full-size—be the cool house!
🍺 Dad’s Root Beer Barrels
Old-fashioned flavor that hits like a fizzy blast from the past. No dairy, no gelatin, just pure root beer nostalgia.
🍿 Cracker Jack Caramel Popcorn with Peanuts
Salty-sweet and totally vegan, with a surprise in every box. Because Halloween deserves a little mystery.
🐰 Annie’s Organic Bunny Fruit Snacks
Wholesome-ish, chewy, and adorable. These little bunnies hop right into your heart, and your candy bowl.
🍭 Dum-Dums Original Pops
A rainbow of flavors in tiny pop form. Everyone has a favorite, and luckily, they're all plant-based.
🌈 Tie-Dye Fruit by the Foot
Throwback to school lunch vibes - and totally vegan too. Bright, bold, and bursting with strawberry fun.
🍉 Jolly Rancher Hard Candy
Bold, tangy, and built to last—just like your Halloween sugar high. These classic mouth-puckering gems are vegan and totally addictive.
🌈 Skittles
Taste the vegan-friendly rainbow! These chewy, fruity pops of color are like edible confetti for your Halloween haul.
And if you're a Halloween lover like me, be sure to check out these other tasty ways to celebrate the spooky season:
Pumpkin Seed Butter
If you're looking for a creamy, nut-free alternative to traditional nut butters, you've got to try this homemade Pumpkin Seed Butter!
With just a few simple ingredients - pumpkin seeds, oil, and a pinch of salt - you can whip up a batch of this rich, green-hued spread. It's a delicious vegan alternative to traditional nut butters.

Not only is it super easy to make, but pumpkin seed butter is also loaded with nutrients like healthy fats, protein, and magnesium.
Plus, it's wonderfully versatile. Spread it on toast, drizzle it over oatmeal, or add a spoonful to your smoothies for an extra boost of flavor and nutrition. And did I mention it's ridiculously easy to make? Let's dive in!

Why I Love Pumpkin Seed Butter
There's something satisfying about transforming a handful of raw pumpkin seeds into a smooth, creamy butter with just a little time and patience. It makes me feel like some kind of homesteading rockstar.
I love that it's a great alternative for those with nut allergies or for when I want to switch up my usual peanut butter or almond butter routine.
And let's not forget - it's green, which makes it visually fun and unique! Every time I spread this pumpkin butter on toast or stir it into a recipe, it's a conversation starter.

This Pumpkin Seed Butter Recipe is...
- Vegan: As always, 100% plant based.
- Nut-Free: Perfect for anyone with allergies or sensitivities to nuts.
- Versatile: Spread it, drizzle it, or use it as a dip.
- Nutrient-Dense: Packed with healthy fats, protein, and essential minerals like magnesium and zinc.
- Easy to Make: With just three simple ingredients and a food processor, you'll have a creamy, homemade spread in no time.

Key Ingredients & Substitutions
Pumpkin Seeds: I started with raw, unsalted pumpkin seeds (also known as pepitas) for this recipe.
Oil: A little oil helps smooth out the texture. I like using neutral oils like avocado oil or grapeseed oil, but you can also use olive oil for a richer flavor. Just add it slowly to get the perfect consistency.
Salt: A touch of salt brings out the natural flavors of the pumpkin seeds. You can adjust the amount to your taste preference or omit it entirely if you're watching your sodium intake.

Helpful Tips
Toasting the Seeds for Flavor: Toasting the pumpkin seeds before processing helps release their natural oils and enhances the flavor, making the butter richer and nuttier. Just be sure to let them cool completely before processing to avoid heating your food processor too much.
Patience is Key: The transformation from whole seeds to smooth butter takes time - about 15 minutes of processing. Be patient, and make sure to stop and scrape down the sides of your food processor occasionally. The seeds will first turn into a crumbly texture before becoming smooth and creamy.
Add Oil Slowly: Start with 1 tablespoon of oil, and only add more if necessary. You want a smooth, spreadable consistency, but not too runny. The natural oils from the pumpkin seeds will help create the butter, so you may not need much extra oil.
Also worth trying: our chocolate avocado cookies.

Variations to Try
Sweet Pumpkin Seed Butter: Add a teaspoon of maple syrup or agave syrup along with a dash of cinnamon for a naturally sweetened, fall-flavored spread.
Spicy Pumpkin Seed Butter: If you like a bit of heat, add a pinch of chili powder or cayenne to the mixture for a spicy kick. Perfect for dipping veggies or crackers.
Chocolate Pumpkin Seed Butter: Stir in a tablespoon of unsweetened cocoa powder and a bit of sweetener (like maple syrup) for a chocolatey version that's perfect for spreading on toast or eating straight off the spoon!

How to Use Pumpkin Seed Butter
- On Toast: Spread it on toast or rice cakes for a simple, nutritious snack.
- In Smoothies: Add a spoonful to your vegan smoothies for a boost of healthy fats and flavor.
- Drizzle over Oatmeal or Yogurt: For a creamy, nutty addition to your morning bowl.
- As a Dip: Pair it with apple slices, celery sticks, or crackers for a wholesome snack. It's a great alternative to traditional peanut butter dip.
- In Baking: Use it in place of other nut butters in cookies, energy balls, or even homemade vegan granola bars.
- On Waffles: Drizzle it over vegan pumpkin waffles for a fall-flavored breakfast that's packed with nutrition.

Storing Pumpkin Seed Butter
Once you've made your pumpkin seed butter, store it in an airtight jar in the refrigerator. It will keep for up to 2 weeks (though it usually disappears much faster in my house!).
Because it's made without preservatives, refrigeration helps keep it fresh and prevents separation. If the butter starts to separate over time, just give it a good stir, and it's ready to go again!

More Vegan Treats
If you love this pumpkin seed butter, be sure to check out these other tasty ideas:
Recipe

Pumpkin Seed Butter
Equipment
Ingredients
- 2 ½ - 3 cups raw pumpkin seeds
- 1 teaspoon salt
- 1-2 tablespoons avocado oil or other neutral oil, as needed
Instructions
- Preheat the oven to 300F. Line a baking sheet with parchment paper and set aside.
- Spread the pumpkin seeds alone the baking sheet in an even layer, then toast in the preheated oven for 10 minutes, stirring halfway through.

- Allow the seeds to cool completely.
- Add the seeds, salt, and 1 tablespoon of oil to a high speed food processor.

- Process until smooth, stopping to scrape the sides as needed. Add additional oil if required to get the right consistency.

- After about 15 minutes, you should have processed the seeds enough that they become the consistency of natural peanut butter.

Nutrition (Estimate per Serving)
Vegan Halloween Cupcakes
Add a dash of spookiness to your Halloween spread with these fang-tastic Vegan Halloween Cupcakes! Bursting with sweet flavor, these creepy-cute treats not only look good but taste amazing, and they're 100% vegan-friendly.

Halloween is one of my all time favorite holidays! Our decorations go up on October 1st without fail, and we love getting into the spirit of the season with Fall festivals and pumpkin themed everything.

But somehow I have failed to keep up with the Halloween themed recipes around here. So let me make that up to you with these simple and delicious Vegan Halloween Cupcakes.
These cupcakes are:
- Spooky and sweet.
- An easy, family friendly Halloween treat.
- Ready in just about 30 minutes.
- 100% vegan!

Helpful Tips
Get creative with the decorations!
You can use any Halloween themed sprinkles or candies of your choice - just be sure to check the label to make sure they are really vegan. Halloween cupcake liners are a fun touch too!
Cool before frosting
Cool the cupcakes completely before applying the frosting, so it doesn't melt!
Coloring the frosting
Start with a small amount of food coloring and gradually add more until the desired shade of orange is achieved. I like these Americolor gel food colorings, which are vegan friendly. For a more professional look, use a piping set to apply the frosting in big swirls!

Variations
Gluten-Free Vegan Cupcakes: Replace the all-purpose flour with a 1:1 gluten-free baking flour blend.
Chocolate Vegan Halloween Cupcakes: Add ½ cup of unsweetened cocoa powder to your dry ingredients for a chocolate version.
Pumpkin Spice Cupcakes: Add a teaspoon of pumpkin spice to the dry ingredients and top the frosting with crushed vegan ginger snap cookies.
Coffee Flavored Cupcakes: Replace half of the almond milk with strong brewed coffee and decorate the cupcakes with dark chocolate shavings along with Halloween sprinkles. Yum! For more easy chocolate treats, try our chocolate avocado cookies or our vegan no-bake chocolate cookies. Planning a Halloween party? Check out our vegan Halloween candy guide.
Also worth trying: our vegan funfetti cake.

More Tasty Vegan Ideas
If you love these Vegan Halloween Cupcakes, be sure to check out these other delicious ideas:
- Pumpkin Juice (a Halloween Treat!)
- Best Vegan Halloween Treats
- Vegan Pumpkin Bars
- Vegan Cinnamon Roll in a Mug
Recipe

Vegan Halloween Cupcakes
Equipment
- piping set optional
Ingredients
For the Cupcakes:
- 1 ½ cups all-purpose flour
- 1 cup sugar organic
- 1 teaspoon baking soda
- ½ teaspoon salt
- 1 cup almond milk or any other plant-based milk
- ½ cup vegetable oil or other neutral oil
- 2 teaspoon vanilla extract
- 1 tablespoon apple cider vinegar
For the Orange Vegan Frosting:
- ½ cup vegan butter softened to room temperature, such as Earth's Balance Buttery Sticks
- 4 cups powdered sugar ensure it's bone-char free
- ¼ cup almond milk or any other plant-based milk
- 2 teaspoon vanilla extract
- orange food coloring adjust amount to achieve desired shade
For Decoration:
- Halloween-themed sprinkles vegan friendly brand
Instructions
Cupcakes:
- Preheat the oven to 350°F (175°C) and line a cupcake tin with cupcake liners.
- In a large bowl, whisk together the flour, sugar, baking soda, and salt.
- In another bowl, combine the almond milk, oil, vanilla extract, and apple cider vinegar.
- Slowly pour the wet mixture into the dry mixture and stir until just combined. Do not overmix.
- Evenly divide the batter into the cupcake liners.
- Bake for 18-22 minutes or until a toothpick inserted into the center of a cupcake comes out clean.
- Let the cupcakes cool completely before frosting.
Orange Frosting:
- In a large mixing bowl, beat the vegan butter until creamy and smooth.
- Gradually add the powdered sugar, almond milk, and vanilla extract. Beat until light and fluffy.
- Add vegan orange food coloring a little at a time until you achieve your desired shade.
- Once the cupcakes are cooled, pipe or spread the frosting onto the cupcakes using a knife or a piping bag.
- Top each frosted cupcake with vegan-friendly Halloween-themed sprinkles.
- Serve and enjoy your spooky Vegan Halloween Cupcakes!
Nutrition (Estimate per Serving)
Vegan Funfetti Cake
This homemade vegan funfetti cake is fluffy, moist, and bursting with colorful sprinkles! And topped with a delicious funfetti frosting too. Perfect for a birthday party or just to satisfy your everyday sweet tooth.

There's something undeniably magical about funfetti - it transforms a simple cake into a totally party-worthy treat. This particular funfetti cake is a family favorite in our house, even among the non-vegans in the crew. In fact, my son swears it's the best funfetti cake he's ever had!
This vegan funfetti cake is:
- Easy to make with simple ingredients.
- Fun and colorful.
- A surefire crowd pleaser.
- Better than any boxed cake mix.
- Perfect for a vegan birthday cake!

Key Ingredients & Substitutions
All of the ingredients for this cake (and the funfetti frosting) are simple and easy to find. No weird vegan ingredients here. 😉 But here are just a few notes to help you get the best results.
Rainbow Sprinkles
The heart of any funfetti cake is the sprinkles! But be sure to check the ingredients for any sneaky non-vegan ingredients. I like to buy these big jugs of vegan friendly sprinkles for all my baking.
Non-Dairy Milk
You can use any dairy free milk of your choice in this vegan cake. Almond, cashew and soy milk all work very well for baking.
Apple Cider Vinegar
This might seem like an odd cake ingredient, but it reacts with the baking powder to give the cake a perfect rise. I suggest using a high quality apple cider vinegar like Bragg's for the best results.
Sugar
This recipe calls for granulated sugar. Depending on the region you live in, your regular old white sugar may or may not be vegan. In the US, you will want to choose a brand clearly marked organic or vegan. This one from Whole Foods is cheap and vegan friendly.

Tips and Tricks
Parchment Paper is Your Friend
To ensure your cake layers come out of the pans cleanly, don't skip lining your pans with parchment paper.
Cool Completely
Patience is key. Frosting a warm cake can lead to a melting disaster! So make sure to let the cake cool all the way down to room temperature before frosting it. You can speed up the process by putting it in the fridge for a bit.
Storing the Cake
Cover the cake and store in the fridge for 4-5 days. You can also freeze the cake for up to two months. If freezing, you will want to remove from the freezer to thaw the day before you plan to serve it.
If you're after a rich chocolatey cake, try our vegan chocolate orange cake, or for Halloween gatherings our vegan halloween cupcakes are perfect. For a refreshing chocolate treat, our chocolate raspberry banana smoothie doubles as a breakfast or dessert. If you want a quick single-serve vegan treat, our vegan cinnamon roll in a mug is ready in just minutes.

Variations to Try
Make it Gluten-Free
Replace the all-purpose flour with your favorite gluten-free flour blend for a gluten free version. Be sure to choose a gluten free brand of sprinkles too.
Switch Up the Sprinkles
While rainbow sprinkles are classic, feel free to use any vegan-friendly sprinkle variety you like. You can theme this cake to just about any occasion by just changing out the sprinkles. Halloween? Grab some orange and black sprinkles. Christmas? Go with red and green. Valentine's Day? Pink and red. You get the idea.
Alternative Frostings
Not a fan of buttercream? Try a vegan cream cheese frosting for a tangy twist.
Looking for more festive vegan dessert ideas? Our vegan Valentine's Day desserts roundup has 25 chocolatey, fruity, and romantic treats to choose from. Or for a breakfast-friendly alternative, our vegan pumpkin waffles are a festive fall option.

More Vegan Sweets
If you love this Vegan Funfetti Cake, be sure to check out these other delicious recipes:
Also worth trying: our guide to vegan Halloween candy.
Recipe

Vegan Funfetti Cake
Ingredients
For the Cake:
- 2 ½ cups all-purpose flour
- 1 ½ cups granulated sugar organic
- ½ cup rainbow sprinkles vegan-friendly
- 1 tablespoon baking powder
- ½ teaspoon salt
- 1 ⅓ cups unsweetened non-dairy milk such as almond or soy
- ½ cup vegetable oil
- ¼ cup unsweetened applesauce
- 1 tablespoon apple cider vinegar
- 1 tablespoon pure vanilla extract
For the Vegan Funfetti Frosting:
- 1 cup vegan butter softened
- 4 cups powdered sugar sifted
- 2 teaspoons pure vanilla extract
- 2-4 tablespoons unsweetened non-dairy milk as needed for consistency
- ¼ cup rainbow sprinkles
- Additional rainbow sprinkles for decoration
Instructions
For the Cake:
- Preheat your oven to 350°F (175°C). Grease two 8-inch round cake pans and line the bottoms with parchment paper for easy removal.
- In a large mixing bowl, sift together the flour, sugar, baking powder, and salt. Stir in the rainbow sprinkles to distribute evenly.
- In another bowl, whisk together the non-dairy milk, vegetable oil, applesauce, apple cider vinegar, and vanilla extract until well combined.
- Pour the wet ingredients into the dry ingredients and mix until just combined, being careful not to overmix.
- Divide the batter evenly between the two prepared cake pans, using a spatula to smooth the tops.
- Bake for 25-30 minutes, or until a toothpick inserted into the center comes out clean.
- Let the cakes cool in the pans for about 10 minutes, then transfer to a wire rack to cool completely.
For the Vegan Buttercream Frosting:
- Using a hand mixer or a stand mixer with the paddle attachment, beat the vegan butter until creamy.
- Gradually add the powdered sugar, 1 cup at a time, beating well after each addition.
- Add the vanilla extract and 2 tablespoons of non-dairy milk. Beat for an additional 3-5 minutes or until the frosting is light and fluffy. If the frosting is too thick, add more non-dairy milk, one tablespoon at a time, until reaching the desired consistency.
- Once the cakes are completely cool, place one layer on a serving plate or cake stand.
- Spread a layer of frosting on the top of the first cake layer, then place the second cake layer on top.
- Frost the top and sides of the cake with the remaining buttercream frosting, smoothing it out with a knife or spatula.
- Decorate the top with additional rainbow sprinkles to match the Funfetti theme.
- Chill the cake in the refrigerator for at least 30 minutes before slicing to allow the frosting to set.
Nutrition (Estimate per Serving)
Vegan Lemon Ginger Scones
Add a tangy twist to tea time with these simple Lemon & Ginger Scones. Bursting with flavor from ginger, lemon zest, and vanilla - and they're 100% vegan too!

When my husband and I were still dating we spent a weekend and the cutest little bed and breakfast in wine country. And while they served up many delicious morsels at breakfast, the one thing that I couldn't get off my mind was the ginger scones!
So I thought I would do my best to finally re-create them here - but as a totally vegan recipe this time.
These Vegan Lemon & Ginger Scones are incredibly easy to whip up. With one bowl and just a few simple steps, you'll have a batch of warm scones ready to enjoy in no time.
These vegan scones are:
- A delicious breakfast or brunch time treat!
- Kid-friendly.
- Ready in just 30 minutes.
- 100% plant based

Useful Tips
Zesting the lemon
Grate the lemon zest with a microplane for a finer consistency and to ensure the lemon's natural oils are released into the dough.
Use cold butter
Make sure you use cold vegan butter or coconut oil for maximum flakiness in the scones.
Use any plant based milk
Any non-dairy milk that you prefer will work fine in this recipe. Try almond, soy, oat, or even coconut milk.
Serving the scones!
These scones are perfect all on their own. But for a more indulgent treat, serve them up with a dollop of vegan butter, some raspberry jam, or a drizzle of vegan apple honey. Add some fresh fruit and a cup of lemon ginger tea for a full breakfast!
Make it gluten-free
This recipe is easy to make gluten free by substituting a gluten free baking flour.
Storing leftover scones
The scones will stay fresh for 3-5 days in a covered container in the refrigerator. I recommend warming them in the oven or toaster oven before serving again. You can also freeze the scones for 2-3 months.

Variations
Extra ginger! For extra ginger-y scones, sprinkle some crystalized ginger on top before baking.
Add mix-ins. Try folding some chopped macadamia nuts or walnuts into the batter for a nutty crunch. Or add dried cranberries or blueberries for a pop of sweetness.
Make a glaze. Try finishing off the scones with a drizzle of lemon glaze. Mix together powdered sugar and lemon juice until you get the desired consistency, then drizzle over the warm scones.
Orange Ginger Scones: Replace the lemon juice and lemon zest with orange juice and orange zest for an equally zesty and flavorful scone with a slightly different flavor.
Chocolate Ginger Scones: Mix ¼ cup of cocoa powder with the dry ingredients for an indulgent chocolate-ginger scone.
Chocolate Chip Scones: Add some vegan dark chocolate chips to the dough for a sweet and indulgent treat.

More Vegan Treats
If you love these Vegan Lemon Ginger Scones, be sure to check out these other delicious recipes:
Also try: our Vegan Chocolate Orange Cake.
- Best Vegan Scone Recipes
- Vegan Peanut Butter & Jam Scones
- No Bake Vegan Lemon Bars
- 25 Vegan Valentine's Day Desserts
- Vegan Cinnamon Roll in a Mug
Recipe

Vegan Lemon Ginger Scones
Ingredients
- 2 cups all-purpose flour or a gluten-free blend if preferred
- ⅓ cup granulated sugar ensure it's vegan
- 1 tablespoon baking powder
- ½ teaspoon salt
- Zest of 1 lemon
- 1 tablespoon fresh lemon juice
- ¼ cup crystalized ginger chopped finely
- 1 teaspoon vanilla extract
- ½ cup cold vegan butter or coconut oil
- ¾ cup plant-based milk such as almond, soy, or oat milk
Instructions
- Preheat your oven to 400°F (200°C). Line a baking sheet with parchment paper.
- In a large bowl, mix together the flour, sugar, baking powder, salt, and lemon zest.
- Cut the cold vegan butter or solidified coconut oil into small pieces and use a pastry cutter or fork to blend it into the flour mixture until it resembles coarse crumbs.
- Make a well in the center of the dry ingredients and pour in the plant-based milk, lemon juice, vanilla extract, and chopped crystallized ginger. Stir until just combined; do not overmix.
- Turn the dough out onto a lightly floured surface and knead gently a few times to bring it together. Flatten the dough into a circle about 1 inch thick and cut into 8 wedges.
- Place the wedges on the prepared baking sheet and bake for 15-20 minutes, or until the scones are golden brown.
- Remove the scones from the oven and allow them to cool slightly on a wire rack.
- Serve the scones warm or at room temperature.
Nutrition (Estimate per Serving)
Vegan Pumpkin Waffles
These simple Vegan Pumpkin Waffles are packed with delicious pumpkin flavor and made with healthy plant-based ingredients. Serve them up with your favorite toppings for a delicious breakfast treat!

Mmmm.. pumpkin spice season! I know, I know. You either love it or hate it. And personally... I love it. (As evidenced by all of these vegan-friendly pumpkin recipes!)
I've been meaning to try out my new waffle maker, and figured this would be the perfect opportunity. These pumpkin waffles are perfectly crispy on the outside, soft and pillowy on the inside, and loaded with classic Fall flavors. What's not to love?
Let's get cooking!

Helpful Tips & Substitutions
You can substitute coconut oil with melted vegan butter if you prefer. I like Earth's Balance Buttery Spread.
Try adding a tablespoon of ground flaxseed for an extra dose of protein.
For sweeter waffles, add a tablespoon of organic brown sugar or coconut sugar to the batter.
To keep the cooked waffles warm while you cook the rest of the batter, place them on a baking sheet lined with parchment paper in an oven set to low heat (around 200 degrees).
If you have any leftover pumpkin puree after making this recipe, store it in an airtight container in the refrigerator and use it to make pancakes or muffins.

Topping Ideas
Get creative with a variety of sweet and savory waffle toppings. Here are some fun ideas:
- Fresh fruit, such as berries or apple slices.
- Agave Syrup
- Vegan Apple Honey
- Maple Syrup
- Chopped Nuts
- Vegan Cream Cheese Frosting
- Vegan Whipped Cream
- Homemade Vegan Nutella
- Shredded Coconut
- Serve alongside vegan lemon ginger scones for a full brunch spread. For a savory pumpkin dinner, try our vegan pumpkin mac and cheese. For even more pumpkin inspiration, browse our collection of fall pumpkin recipes.

Recipe Variations
Coconut Waffles - Replace the oat milk with coconut milk and add ¼ cup of shredded coconut to the batter.
Chocolate Pumpkin Waffles - Add 3 tablespoons of cocoa powder to the batter.
Cinnamon Sugar Waffles - Add a teaspoon of cinnamon to the batter and sprinkle each waffle with a bit of organic pure cane sugar before you flip it in the waffle iron.
Apple Filled Waffles - Core and dice 1 apple and fold it into the batter before adding to the waffle iron.
Sweet Potato Waffles - Replace the pumpkin with mashed sweet potatoes. Add a teaspoon of cinnamon to the batter.

More Vegan Breakfast Ideas
If you love these vegan pumpkin waffles, be sure to check out these other delicious recipes:
Also try: our Pumpkin Chocolate Chip Muffins.
Also try: our Almond Flour Pancakes.
- Vegan Pumpkin Donuts
- Vegan Banana Oat Pancakes
- 35+ Healthy Vegan Breakfast Recipes
- Vegan Cinnamon Roll in a Mug
Recipe

Vegan Pumpkin Waffles
Ingredients
- 2 ¼ cup all-purpose flour
- 2 cups oat milk
- 15 oz pumpkin puree 1 can
- ¼ cup coconut oil
- ¼ cup organic pure cane sugar
- 2 teaspoon baking powder
- ½ teaspoon baking soda
- ½ teaspoon cinnamon
- ¼ teaspoon salt
Instructions
- In a medium size bowl add the pumpkin puree, oat milk, coconut oil and sugar. Whisk until well combined.

- Then add the flour, baking powder, baking soda, salt and cinnamon to the same bowl and whisk until well combined and smooth.

- Heat your waffle iron to medium high heat and spray with non-stick spray.
- Add about ⅓ cup batter to the iron. Let it cook for about 3-4 minutes.
- Repeat until batter is done.
- Serve with your favorite toppings.

- Enjoy!
Nutrition (Estimate per Serving)
Vegan Cinnamon Roll in a Mug
Craving a warm cinnamon roll, but don't have hours to spend in the kitchen? Enter this Vegan Cinnamon Roll in a Mug. You can whip up a warm, gooey cinnamon bun in just minutes. It's the ultimate vegan dessert for one!

You may have seen these cinnamon bun mug cakes making the rounds on TikTok over the last few months. So of course I had to try my hand at creating a vegan version of this tasty little treat. And I am totally in love with the results!
This Vegan Cinnamon Roll in a Mug is:
- Quick and easy to make in just minutes!
- An easy vegan dessert.
- Perfect for just one or two people.
- 100% Vegan and Vegetarian friendly.

Tips & Variations
Make it gluten free.
For this recipe I utilized regular all-purpose flour, however, for individuals following a gluten-free diet, almond or coconut flour can be an excellent substitute. Alternatively, you can also replace it with your preferred 1:1 gluten-free baking flour.

Add mix-ins.
Add new flavors or mix-ins for a completely new spin on the cinnamon roll. Some ideas include:
- Dark chocolate chips for a chocolate-chip cinnamon roll.
- Add a dash of cocoa powder for a chocolate cinnamon roll.
- Chopped pecans or walnuts for extra crunch.
- Shredded coconut.
- Raisins or dried cherries for a fruity spin.
- Maple or agave syrup.

Plant based milk.
I used oat milk for my cinnamon bun mug cake. But you can substitute any vegan friendly milk of your choice. Cashew, almond, or soy milk would all work fine.

Use organic sugar.
Note that I have specified organic sugar in the recipe. This is because many brands of non-organic sugar are not actually vegan! If this is important to you, choosing brands marked organic will ensure no bone char was used in the processing.

More Tasty Ideas
If you love this vegn cinnamon roll in a mug, be sure to check out these other tasty treats:
Also worth trying: our vegan sweet potato brownies.
Recipe

Vegan Cinnamon Roll in a Mug
Ingredients
Ingredients dough:
- 9 tablespoon unbleached all-purpose flour
- 4 tablespoon plant based milk I used oat milk
- 1 ½ tablespoon organic cane sugar
- 1 tablespoon coconut oil
- ½ teaspoon baking powder
- ¼ teaspoon salt
- ¾ teaspoon cinnamon
Ingredients frosting:
- 4 tablespoon organic powdered sugar
- 1 teaspoon plant based milk I used oat milk
Instructions
- Start by making the dough. In a small bowl whisk together the flour, baking powder, salt and 4 tablespoon of vegan milk. Mix until you get a dough ball. You can add a little bit more flour if it is stick, or a little bit more milk, if it seems dry.
- Put some flour on the surface of your counter and roll out the dough in a square, about the height of your mug.
- Brush some coconut oil on one side and then sprinkle the sugar and cinnamon over the dough. Roll up the dough.
- Brush the remaining coconut oil on the inside of your mug. Place the rolled dough in the mug.
- Put the mug in the microwave for 50 seconds. If it seems too wet, you can add a few more seconds (in increments of 5 seconds), until no longer wet.
- In a separate small bowl mix together the frosting ingredients, the powdered sugar and vegan milk, and pour this over the cinnamon bun in the mug, and let it sit for 30 seconds before serving.
Nutrition (Estimate per Serving)
Fudgy Avocado Brownies (Vegan!)
These fudgy avocado brownies are loaded with rich and creamy chocolate flavor. Easy to make in 30 minutes - and 100% vegan too!

If you're on the hunt for a healthy, vegan friendly brownie recipe - look no further than these avocado brownies.
These Fudgy Avocado Brownies are...
- Vegan.
- Dairy-Free.
- Made with Simple Ingredients.
- Ready in 30 minutes.
- Kid Friendly!
- Freezer Friendly too.
For more healthy options, check out my raw vegan brownies or whip up these sweet potato brownies or vegan brownie bites!
How to Make

Full directions for these avocado brownies are in the printable recipe card below. This is a quick walk through of the key steps!
- Prepare a 9-inch baking pan by lining it with parchment paper, and preheat your oven to 350 F.
- Mash the avocado and measure out ¾ cup.
- Combine the mashed avocado, sugar, flour, cocoa powder, almond milk, peanut butter, baking powder, and salt in a food processor. Process the mixture until it becomes smooth.
- Pour the batter into the prepared pan, and sprinkle chocolate chips on top if desired.
- Bake the brownies in the preheated oven for approximately 30 minutes, or until a toothpick inserted into the center comes out with just a few crumbs attached.
- Allow the brownies to cool for approximately 30 minutes before slicing and serving.
Scroll down for the full instructions in the printable recipe card!
Tools You'll Need

Baking dish
Use a nonstick 8"x8" or 9"x9" baking pan for these brownies. Lining the baking pan with parchment paper will also help to ensure your brownies don't get stuck!
Blender or Food Processor
I recommend using a food processor or high speed blender for mixing this brownie batter, rather than a traditional mixer. It is needed to get the right consistency of the brownie batter!
Helpful Tips For Avocado Brownies

Choose ripe avocados.
Make sure your avocados are very ripe, soft and easy to mash. This will ensure that the texture of your brownies is smooth and creamy.
Allow the brownies to cool before slicing.
Let the brownies cool in the pan for at least 30 minutes before slicing. This will allow them to set and make for cleaner cuts.
Quality Cocoa Powder
Make sure to use a high quality cocoa powder for that rich and delicious chocolate flavor. Brownies are one of those recipes where the quality of ingredients really show. I'm a big fan of this Ghirardelli cocoa powder!
Variations

Add Sea Salt
Consider sprinkling some sea salt on top of the brownies for a savory finish! The salt will enhance the flavor of the rich chocolate.
Add Nuts
Want to add some crunch to your avocado brownies? Consider adding in some chopped walnuts or pecans. I would recommend ¼ cup to ⅓ cup of nuts.
If you love easy, fuss-free vegan treats, also check out our vegan sweet potato brownies or our vegan no-bake chocolate cookies or our vegan cinnamon roll in a mug - a warm, gooey treat ready in minutes.
Serve with Fruit or Ice Cream
Serve your brownies up with some fresh fruit like strawberries or blueberries, and a big scoop of dairy free ice cream!
FAQs

What is the difference between fudgy and chewy brownies?
Fudgy brownies are rich and dense with a moist, almost gooey texture. They have a high fat-to-flour ratio, which gives them their signature fudgy texture.
Chewy brownies, on the other hand, have a more cake-like texture with a slightly springy and chewy crumb. They have a lower fat-to-flour ratio and rely more on eggs and sugar to give them their structure.
How do you store avocado brownies?
Store the brownies at room temperature for 2-3 days, or in the refrigerator for 5-7 days.
How do you freeze vegan brownies?
If you want to store your brownies for longer, you can freeze them for 2-3 months. To freeze avocado brownies, wrap them tightly in plastic wrap or aluminum foil, or place them in an airtight container. When you're ready to eat them, thaw the brownies at room temperature for a few hours before serving.
More Vegan Desserts
If you love these fudgy avocado brownies, be sure to check out these other delicious vegan treats:
Also try: our Vegan Chocolate Avocado Cookies With Double Chocolate Chunks.
- Vegan Peanut Butter Cups
- Chickpea Chocolate Chip Cookies
- Vegan Chocolate Shake
- 25 Vegan Valentine's Day Desserts
Recipe

Fudgy Avocado Brownies (Vegan!)
Equipment
Ingredients
- ¾ cup mashed avocado about one large avocado
- 1 cup sugar
- 1 cup all-purpose flour
- ½ cup unsweetened cocoa powder
- ½ cup almond milk
- ¼ cup peanut butter
- 1 teaspoon baking powder
- ½ teaspoon salt
- ½ cup vegan chocolate chips
Instructions
- Preheat oven to 350 F, line a 9" baking pan with parchment and set aside
- Mash the avocado and measure out ¾ cup

- Add the avocado, sugar, flour, cocoa powder, almond milk, peanut butter, baking powder and salt to a food processor and process until smooth

- Mix in the chocolate chips.

- Mix until well combined.

- Transfer the batter to the prepared pan, sprinkle chocolate chips on top if desired

- Bake in preheated oven for 30 minutes, or until a toothpick inserted into the center comes out with just a couple crumbs

- Allow to cool 30 minutes before slicing and serving

Nutrition (Estimate per Serving)
25+ Vegan Valentine’s Day Desserts
Show your love with these Vegan Valentine's Day Desserts! From a classic Red Velvet Cake to a creamy Chocolate Mousse to delightful Raspberry Truffles- there's a sweet treat for everyone here!

25+ Vegan Valentine’s Day Desserts
Here's your guide to finding the perfect vegan Valentine’s Day dessert recipes.
Everyone's favorite decadent dessert has been vegan-ized! Check out this vegan tiramisu for the most romantic Valentine's Day dinner yet.
This vegan red velvet cake is rich, chocolatey, and topped with a decadent dairy-free buttercream frosting. You would never guess it's entirely vegan!
This decadent layered cake is full of crushed pineapple, coconut, and bananas, Topped with a silky smooth vegan cream cheese frosting!
Dark chocolate hummus makes for a terrific dessert on Valentine's Day. It is entirely vegan, and with it being chickpea-based, it's hearty and healthy, and its exquisite taste makes it versatile. Our dessert hummus can be served with pretzels, cookies, fresh fruit, wafers, and whatever else you want to pair it with. It has a great thick texture, and its' chocolatey goodness makes it irresistible!
Need a quick and easy dessery idea? You can whip up a warm, gooey cinnamon bun in just minutes. It's the ultimate vegan dessert for two!
This vegan strawberry shortcake features layers of moist, homemade shortcake, juicy fresh strawberries, and buttery smooth coconut cream. Our vegan strawberry shortcake is easy to make and tastes fantastic. It’s a simple, fresh, delicious dessert.
This vegan cherry pie tastes so good that your Valentine (s) won't believe it's vegan. It offers a juicy cherry filling wrapped in a homemade golden crust. How about making it a little more decadent? Add a dollop of ice cream on top! This vegan cherry pie is fail-proof, beginner friendly, and ready to indulge and enjoy in only about one hour.
This vegan strawberry tart is bursting with flavor from fresh seasonal strawberries, wrapped up in a perfectly crisp homemade pie crust. This dessert is every bit as beautiful as it is delicious!
Our vegan thumbprint cookies are a terrific simple Valentine's Day dessert. They have a tremendous chewy-soft texture with a drop of yummy chocolate in the center. They're effortless to make and will be a hit for whomever you serve. They're easy, tasty, and made with chocolate. It doesn't get better than that!
These avocado brownies and rich, fudgy, and totally delicious. Plus they're easy to make in just 30 minutes.
Smooth, chocolatey, and straightforward, our easy vegan chocolate mousse is a no-brainer Valentine's Day dessert. It's a decadent, beginner-friendly dessert, and despite being vegan, it has a unique and satisfying airy texture. Need a few ideas of what to serve alongside chocolate mousse? No worries! Try some sliced bananas, fresh cherries, orange slices, pear pieces, or coconut chunks for a simple but exquisite Valentine's Day dessert.
A luscious, creamy filling rests atop a crumbling sweet crust with fresh fruit and crunchy nuts used for garnish and extra flavor. Our vegan banana cream pie is a textural masterpiece! From the crumbly crust to the smooth, creamy filling, it's delicious and addictive!
You can't go wrong with our vegan version of millionaire's shortbread this Valentine's Day. It begins with an effortless two-ingredient shortbread and is topped with layers of caramel and chocolate. Even though it sounds ultra sweet and tasty, our vegan millionaire's shortbread is made with nutritious ingredients, giving it a health factor that traditional millionaire's shortbread skips!
Make our chocolate caramel pretzel gelato and swap it for traditional ice cream. It's an impressive dessert made with chocolate. You can't go wrong! It's creamy, sweet, salty, and has a heavenly texture.
Guests won't ever guess this cheesecake is 100% vegan, but nonetheless, it is. Our vegan cheesecake has a creamy, thick, beautiful texture and is topped with juicy, fresh strawberries. It's vegan, luscious, thick, and simple. Our vegan cheesecake makes for a decadent dessert, and you can customize the toppings to your favorite fruits. Try our favorite juicy strawberries, fresh blueberries, tart raspberries, or even a delicious dessert mousse.
Fresh strawberries hug our vegan chocolate chip cheesecake in this fantastic Love Day dessert. The strawberries have a terrific juicy sweet taste, complementing our chocolate chip cheesecake beautifully. The best part is that these stuffed strawberries can be guilt-free as the cheesecake is cashew-based.
Looking for a cute Valentine's Day dessert? We have it right here. Our raw chocolate raspberry cheesecake parfaits with whipped coconut cream look beautiful and taste fantastic. A satisfying combination of chocolate, raspberry, and whipped coconut cream makes an entirely vegan dessert. The cheesecake is cashew based with a few other simple ingredients mixed in to make a 100% vegan, simple, and yummy treat.
Our vegan banana cream pie mini tarts are basically perfection in tiny form. They are 100% vegan, and thanks to the addition of magic-food cashews, our banana cream pie is ultra creamy. These little tarts are easy to whip up and make for a wonderfully cute Valentine's treat.
The comforting taste of dark chocolate meshes beautifully with pomegranate juice to make this vegan Valentine's Day dessert. It's simple to make, looks exquisite, and incredibly versatile. You can serve chocolate mousse with anything! Try fresh sliced apples, orange pieces, juicy strawberries, cantaloupe chunks or wafers, cookies, or biscuits. This tofu-based mousse won't ever be detected over its satisfying texture and taste!
The perfect pie for all pie-lovers and whomever else loves chocolatey-packed desserts! Our vegan chocolate pie is dairy-free, versatile, and has a satisfying texture. It's rich, creamy, chocolatey deliciousness with an endless list of topping options. Explore sprinkling your pie with shaved vegan chocolate, fresh juicy berries, fresh jam or toasted pine nuts for an even more diverse flavor.
Picture a luscious and creamy mousse that rests inside a homemade crust, and you have yourself our vegan chocolate tart. The mousse filling is made with a secret, healthy ingredient that gives the dessert an impressive texture. Our vegan chocolate tart is packed with nutrition, flavor, and a satisfying finish. For a Love Day flair, garnish the chocolate tart with festive strawberries, raspberries, or toasted nuts.
Is there anything better than one-bowl desserts? We don’t think so either! These one-bowl vegan peanut butter cookies have a beautiful crispy outside matched with a chewy soft cherry inside. It’s a simple cookie that makes for a lovely Valentine’s treat for guests of all ages. They’re kid-friendly, teacher adored (you know, in case you want to whip up a batch for the next classroom Valentine’s Day party), and best of all, we know you’ll love them too!
Our raw strawberry chocolate dessert pizza is a fun, exciting, and even wholesome way to indulge in sweets this Valentine's Day! Imagine a delicious crust made from pureed dates, almonds, cacao powder, and dark chocolate chips, giving both nutrition and flavor.
Valentine's Day is a perfect time to indulge in these vegan fresh raspberry truffles. They are a light, easy dessert and ready to enjoy in less than 20 minutes. Our veganized raspberry truffles are made by simply coating fresh juicy raspberries in vegan ganache. It's equally as decadent as it is simple!
Our vegan strawberry nice cream is packed with frosty fresh flavor. It is a sweet, fruit-based dessert that doesn't require an ice cream maker to prepare. It's a no-fuss treat that can be dressed up easily with a topping of sliced strawberries, mint leaves, or even a slight drizzle of chocolate sauce.
With a plethora of satisfying textures, our cranberry-carrot cake with maple cream cheese frosting is a vegan sweet treat that you're bound to love. It's a tasty combo of sweet and fluffy while offering a creamy coating on top. Every bite is indulgent as creamy combines with moist and fluffy to create a sensational dessert.
These little dessert bites are ready to indulge in less than half an hour. It's a simple no-bake dessert with an amazing chocolatey taste blended with a nutty coconut flair. Our dark chocolate almond coconut bites taste terrific and look great too. Their mini size makes them irresistible, while their flavor combines the coziness of chocolate with swirls of coconut to make a delectable dessert!
Our sesame berry squares are a spectacular treat to make for Valentine's Day. They're nutritious and made with healthy ingredients like chia and hemp seeds. These sesame berry squares can be enjoyed guilt-free as they are packed with vitamins and minerals. Our sesame berry squares have a great texture and are beginner-friendly to bake.
Celebrate Valentine's Day with our chocolate ganache cake. It's an impressive dessert ideal for even the pickiest of cake eaters. It has a terrific texture and is blanketed in our vegan chocolate ganache, which is DELISH!
Imagine a fluffy almond flour cake with a subtle, soft flavor topped with a simple but yummy three-ingredient strawberry jam, and you have our drool-worthy Valentine's Day dessert. It's naturally gluten-free and looks really pretty. Our almond flour cake with strawberry jam topping is a decadent dessert.
Looking for a melt-in-your-mouth type of delicious dessert for Valentine's Day? Try our vegan chocolate pudding! It's a light, thick, and heavenly dessert that couldn't be any simpler. It's very versatile and tastes great with nearly anything or on its own.
And if you love these Valentine's Day desserts, be sure to check out these other delicious vegan ideas:
Vegan Christmas Cookies
These Vegan Christmas Cookies are packed full of holiday cheer. Simple vegan sugar cookies are topped with a homemade dairy-free icing. And they're fun and easy to make as a family!

I have created so many vegan cookie recipes for the blog over the years. There's everything from chocolate crinkle cookies to vegan thumbprint cookies to chickpea chocolate chip cookies.
But it wasn't until this holiday season, that I realized I was seriously lacking a simple vegan Christmas cookie recipe!
So here it is - the easiest and most delicious Vegan Christmas Cookies you'll ever make. These simple vegan sugar cookies are perfect for making with kids over the holidays, and are easy to pull together in just 30 minutes (plus time for the dough to chill).
So let's get baking!
And if you're here planning your holiday menu, don't forget to check out our new Vegan Thanksgiving and Vegan Christmas cookbooks!
The Ingredients
These vegan Christmas cookies are simple to pull together. In fact, you probably have most of these ingredients in your pantry already.

For the vegan sugar cookie dough, you'll need:
All Purpose Flour. Or you can use a gluten free baking flour.
Vegan Butter. I use Earth Balance.
Vegetable Shortening. Crisco Vegetable Shortening is accidentally vegan!
Sugar. Choose organic to ensure it is vegan.
Almond Milk. Or other plant based milk of your choice.
Vanilla Extract.
Baking Powder.
Salt.
For the vegan icing, you'll need:
Powdered Sugar.
Almond Milk. Or other plant based milk.
Corn Syrup.
Food Coloring. I used these gel food colorings.
Sprinkles! Any kind you like. These holiday sprinkles are vegan friendly.
See recipe card for detailed measurements and instructions.
Other Equipment You'll Need
These Christmas cookies are pretty simple, but there are a few key items that will make your life a lot easier:
Cookie Cutters. I used Christmas tree shaped cookie cutters!
Parchment Paper. For lining the baking sheets, so your cookies don't burn on the bottom or stick to the pan.
Rolling Pin. Obviously essential.
Cooling Rack. Nice to have, but optional. I have these inexpensive ones.

Making the Vegan Cookies
Start off by preparing the cookies themselves. We will use a simple vegan sugar cookies recipes as the base for our Vegan Christmas Cookies.

Cream together the vegan butter, shortening, and sugar. Add the almond milk and vanilla and mix. The mixture should be light and fluffy!

Add the dry ingredients - baking powder, salt, and flour. Mix until dough forms. Pause here and refrigerate the dough for at least one hour.

Roll out dough into a ¼" thick sheet. Use cookie cutters to cut out your Christmas trees - or any holiday shapes you like!

Arrange on a parchment lined baking sheet. Bake the cookies at 350 degrees Fahrenheit for 8-10 minutes.

Important Tip!
Let the baked cookies cool completely on a cooling rack before topping them with icing. Trust me - don't get impatient. If you ice the cookies while they are warm, the frosting will melt!
Making the Vegan Icing
While the cookies are cooling, you can get started preparing the simple vegan icing, which we will use to frost the Christmas cookies!

Mix together the powdered sugar, almond milk, and corn syrup to make the vegan icing.

Add a few drops of food coloring. If you want to make several colors - simply divide the icing into smaller bowls and color each one!

Add icing to the vegan cookies! I used green icing to decorate my Christmas tree shaped cookies.

Add additional decorations like colorful sprinkles to finish off the Vegan Christmas Cookies!
And there you have it - beautiful and festive vegan Christmas Cookies that are so easy the kids could make them!

Fun Variations
Make it gluten free. To make gluten free vegan Christmas cookies, just substitute a gluten free baking flour.
Sandwich cookies. Simply sandwich two cookies together, with a layer of jam or chocolate in between. Try it with this vegan strawberry jam!
Chocolate dipped cookies. Melt some vegan chocolate chips in the microwave in a small microwave-safe bowl. Dip half of the cookie into the chocolate, decorate with sprinkles, and set it aside to cool.
Mix up the shapes and colors! Make multiple icing colors and a variety of holiday themed shapes. Thing candy canes, stockings, and gingerbread men. You can even decorate with crushed candy canes - yum.

More Vegan Treats
If you love these Vegan Christmas Cookies, be sure to check out these other holiday ideas:
And for the easiest holiday yet, don't forget to check out my complete Vegan Christmas cookbook!
Recipe

Vegan Christmas Cookies
Equipment
- cooling rack optional
Ingredients
Cookie Dough:
- ½ cup vegan butter
- ¼ cup vegetable shortening
- ¾ cup sugar organic
- 3 tablespoons almond milk
- 1 teaspoon vanilla extract
- 1 teaspoon baking powder
- ½ teaspoon salt
- 2 ¼ cups all purpose flour
Icing:
- 3 cups powdered sugar
- 2-3 tablespoons almond milk
- 1 tablespoon corn syrup
- Food coloring colors of your choice
- Christmas Sprinkles of your choice!
Instructions
- In a large bowl, cream together the butter, vegetable shortening, and sugar until light and fluffy
- Add the almond milk and vanilla extract and beat again
- Add in the baking powder, salt an half the flour and mix well; then add the remaining flour and mix until smooth
- Flatten dough into a disk, wrap with plastic, and allow to chill in fridge for at least 1 hour
- Preheat oven to 350 F, remove dough from fridge and roll out until ¼" thick, use cookie cutters to make various shaped cookies, then transfer to a parchment lined baking sheet
- Bake for 8-10 minutes, then remove from oven and allow to cool for 5 minutes before transferring to a wire rack to completely cool
- Meanwhile, prepare the frosting but mixing together the powdered sugar, almond milk and corn syrup until smooth; divide into smaller bowls and tint with the food coloring if desired
- Decorate cooled cookies with the frosting and sprinkles, allow for 8 hours for the frosting to harden
Nutrition (Estimate per Serving)
Vegan Banana Cake
This vegan banana cake is a layered homemade banana cake that is then topped with a vegan cream cheese. If you have some overripe bananas on your hand this is a must make cake.

I used chopped pecans and walnuts so you have tons of flavor bursting from this vegan cake recipe. Also, make sure to check out these other banana recipes, or dig in to this banana pudding. Or start your morning with these banana oat pancakes.
This Vegan Banana Cake Is...
- Vegan Dessert
- Dairy Free
- Layered Cake
- Overripe Banana Recipe
How to Make Vegan Banana Cake

Full steps and measurements on how to make vegan banana cake are in the printable recipe card. This is a quick walk through.
- Preheat and prep your cake pans.
- Next add your dry ingredients in a medium sized bowl.
- Then in another bowl add your wet ingredients and mix until fully incorporated.
- Then slowly add the flour mixture into the wet ingredients.
- Pour the batter into the pans and bake as directed.
- Prep your cream cheese frosting an once the cake is done, frost and stack your cakes.
Tips For Making Vegan Banana Cake

Ripe Bananas
It is important to use ripe bananas for this cake. You want brown speckled bananas for this. If they are not ripe you can place the banana in the peel at 225 degrees for 15 minutes or so. You want the peel to turn black. Once it does, remove and allow the bananas to cool. Then mix in the batter as normal. It will give you a ripe banana flavor.
Room Temperature Vegan Cream Cheese
Make sure that your vegan cream cheese is softened an room temperature. That way you can get that ultra creamy texture from the frosting.
Stand Mixer or Hand Mixer
I love using a mixer for making the cake batter and the frosting. I find especially when making frosting it helps to give you that ultra creamy texture.
Vegan Banana Cake Variations

Nuts
Leave out the nuts if you don't want to have a crunch in your cake or the frosting.
Coconut Flakes
Stir in ⅓ cup of coconut flakes in the frosting to add a nice twist of coconut flavor to the cake.
Raisins
Grab either some regular or golden raisins an add ¼ cup into the cake recipe. It will add a bit more sweetness to the cake.
Frosting
Skip the cream cheese vegan frosting if you don't want it. Spread on any of your favorite vegan frostings you would like. From peanut butter to vanilla and all things in between.
Vegan Banana Cake FAQs

Does this cake need to be refrigerated?
Yes, you will want to refrigerate the cake. You will find since the vegan cream cheese frosting needs refrigerated then don't leave the cake out for longer than two hours.
Can you freeze this banana cake?
Yes you can freeze this cake. Just place in a freezer friendly container. Then freeze for 3-4 months. Then thaw in the fridge or on the counter for an hour. If you love easy vegan chocolate bakes, also try these fudgy avocado brownies - ready in 30 minutes and irresistibly fudgy.
Recipe

Vegan Banana Cake
Ingredients
For the cake:
- 2 cups flour
- 2 teaspoons cinnamon
- 1 teaspoon baking powder
- ½ teaspoon baking soda
- ½ teaspoon salt
- 1 cup sugar
- ⅓ cup oil
- 1 ½ cups mashed banana
- 1 teaspoon vanilla extract
- 1 cup chopped pecans
For the frosting:
- 8 oz vegan cream cheese
- 5-6 cups powdered sugar
- 1 teaspoon vanilla extract
- ¼ cup chopped walnuts optional
Instructions
- Preheat oven to 350 F, grease or line two 6" cake pans and set aside
- Make the cake by mixing together the flour, cinnamon, baking powder, baking soda, salt and set aside

- In a medium bowl, combine the oil, sugar, mashed bananas, and vanilla

- Mix together until smooth.

- Pour the flour mixture into the banana mixture and stir until just combined

- Fold in the walnuts

- Combine until well mixed.

- Pour batter into prepared baking pans, and

- Bake in preheated oven 40-45 minutes, or until a toothpick inserted into center comes out clean

- Meanwhile, prepare the frosting by creaming the vegan cream cheese with half the frosting on high until smooth

- Add the remaining powdered sugar a cup at a time, mixing well after each addition, mix in vanilla extract

- Allow cake to cool completely before frosting between the layers and topping with additional walnuts

Nutrition (Estimate per Serving)
35+ Vegan Summer Desserts
These 35+ Vegan Summer Desserts are dairy-free, egg-free, healthy, delicious, and easy treats that will keep you satisfied all summer long.
Also try: our chocolate raspberry banana smoothie.
Also try: our Vegan Chocolate Orange Cake.
Also try: our Vegan Fudgesicles.

35+ Vegan Summer Desserts
Our 3-ingredient vegan mango ice cream is a fantastic vegan summer dessert. It's easy to make and ready to toss in the freezer in only 30 minutes. It has a melt-in-your-mouth thick, creamy texture, and it's a simple recipe that doesn't require an ice-cream churner. After a hot summer day, our vegan mango ice cream is sure to hit the spot.
There aren’t enough words to tell you how delicious these cookies and cream vegan popsicles really are! They are the perfect vegan summer dessert to serve on a hot summer day. They’re chilly, creamy, and delicious.
Our vegan strawberry-mango popsicles are a must-have summer dessert that everyone will adore! They're fruity, creamy, dairy-free, sweet, and made with real, healthy ingredients.
If you want a cold, frosty, sweet vegan summer dessert, our vegan strawberry nice cream is perfect for you! It's packed with fresh flavor thanks to all the strawberries and bananas. In addition, the texture is similar to traditional ice cream and free from any added sugars. It's a healthy, frosty treat that will be a hit this summer!
Our no-bake vegan lemon bars are made with shredded coconut, zesty lemon juice, and sweet maple syrup. They’re a simple, effortless vegan summer dessert that delivers fresh, sweet flavor. They’re delicious and fantastic.
This easy peach crisp is a great way to highlight delicious summer peaches. This quick dessert can be enjoyed shortly after you make it — no baking or chilling required!
Raw vegan chocolate mousse makes for a decadent vegan summer dessert. It is made with fresh avocado and a few other simple ingredients. In addition, our raw vegan chocolate mousse looks beautiful! It tastes great and is perfect for all summer gatherings.
Our kiwi and apple popsicles are a fresh combination of juicy, sweet fruit and mint. They’re a chilly dessert that is simple to make and delicious! Our kiwi and apple popsicles are kid-approved and fantastic.
This easy rustic summer berry pie is bursting with fresh berry flavors combined with sweet sugar and spicy cinnamon. It’s low in calories and packed with flavor. Our summer berry pie is a great summer dessert to serve at all your summer gatherings. It features fresh, sweet berries wrapped in a flaky pie crust.
This vegan vanilla fruit cup soup is a satisfying, bright dessert packed with fresh berries. Enjoy fresh blueberries, raspberries, and strawberries in each bite! This vegan vanilla fruit cup soup is colorful, juicy, and packed with a fantastic sweet flavor. This vegan summer dessert looks beautiful in a bowl and tastes excellent.
Our gluten-free peach pie bursts with fresh peachy flavor and is topped with an addictive crumb topping. It's simple to make and perfect tasting.
Avocado combines with chocolate to make this delightfully creamy and smooth smoothie. It's packed with nutrition and makes a fantastic breakfast. Our avocado and chocolate smoothie is sweet, thick, and delicious.
Our vegan chocolate banana nice cream is your recipe if you're on the hunt for the perfect chilly summer dessert. It is low in fat and made with three simple healthy ingredients. Our nice cream recipe is terrific, but it's also simple to make!
Our vegan strawberry shortcake is the ultimate dessert for the strawberry season this year! It's dairy-free, vegan, sweet, and has the most satisfying texture. Vegan strawberry shortcake is made with plenty of crispy, fresh strawberries, luscious coconut cream, and powdered sugar. It's delightful! Our vegan strawberry shortcake is a wonderful summer dessert. It's simple to put together and has terrific taste.
This almond milk ice cream is made with only three ingredients and requires just 5 minutes to prepare. It is kid-friendly and has a heavenly, sweet flavor. Almond milk ice cream is a chilly, creamy treat.
Serve up this vegan key lime pie at your next summer gathering! It has a thick, tangy, creamy filling with a crust made from nuts, dates, and coconut. Our vegan key lime pie looks fantastic as well! We recommend garnishing it with lime zest and slices. It's spectacular and has a citrusy-zesty flavor.
Our vegan lemon tart is a bright, lemony explosion! It features an indulgent creamy filling with a perfectly crumbly crust. Our vegan lemon tart is perfect for serving all summer long! Top this vegan lemon tart with vegan whipped cream for an added gourmet twist! It's ideal for all summer occasions and decadent enough for even the most decorative events.
Our raw strawberry chocolate dessert pizza begins with a satisfying crust. The crust is made from dates and almonds, giving it a nutrition boost. The filling is dense, creamy, and sweet. The dessert pizza is finished with a generous drizzle of chocolate sauce. You will enjoy mouthfuls of succulent strawberries combined with sweet chocolate with this dessert pizza. It's satisfying and terrific. In addition, it looks beautiful. It's the perfect summer dessert!
These soft and chewy spiced apple rings can be used to replace candy. We're not joking! They're kid-approved, healthy, and straightforward. They're made with the comforting spices of cinnamon and ginger. Our soft and chewy spiced apple rings will be a hit this summer.
These amaretto strawberries are almost embarrassingly simple, yet luscious and low in fat. Amaretto is a liqueur made from almonds. It’s a good way to serve this fruit during strawberry season.
Our grilled peaches are a delightful summer dessert. They're sweet, caramelized, and smell delicious. These grilled peaches are simple to make and taste fantastic with vanilla nice cream!
This simple recipe is perfect to make when fresh berries are in season. It's a versatile sauce to serve over cakes, pies, or nondairy ice cream.
Our no-bake vegan lemon tart is a terrific summer dessert. It has a poignant, creamy lemon filling that is hugged by a crunchy homemade crust. It is 100% plant-based and topped with clusters of brightly colored berries. Our no-bake vegan lemon tart is a simple, delicious sweet treat that all will adore.
Our fruit kabobs are a fun and exciting vegan summer dessert. The cashew-based chocolate dip has a satisfying buttery texture. The kabobs combine juicy pineapple chunks, soft, sweet strawberries, grapes, and blueberries. Our fruit kabobs are both thrilling and enjoyable. The combination of sweet mixed with smooth chocolate is divine.
Looking for an inviting summer dessert that is juicy and sweet? Our vegan strawberry crumble features irresistible, succulent strawberries hugged by a pecan oat crumble. This lush vegan summer dessert is delightful!
Our pineapple poke cake is a heavenly, sweet vegan summer dessert. It has a light, spongy texture and is vegan-friendly. You can top this poke cake off with vegan whipped cream for a further sweet touch! Our pineapple poke cake is fridge and freezer friendly. It combines tangy flavors with citrus and zest. Not only is our poke cake fantastic, but it's quick to prepare and is sure to be a hit this summer!
We have the perfect frozen treat that is kid-friendly and tasty! Our strawberry, orange, and mango popsicles are layers upon layers of sweet fruit. They are a cold, frozen treat that everyone will adore.
Our vegan strawberry ice cream is dairy-free and is made without coconut. It's thick, creamy, and has a similar texture to traditional ice cream. Our vegan strawberry ice cream is bound to be your new favorite summer dessert!
Vegan blackberry cookies are a wonderful summer cookie. They're made with fresh blackberries and orange zest, uniting two unique flavors. They're extra soft and sweet. Our vegan blackberry cookies are drizzled with a lovely glaze.
Our chocolate raspberry ice cream is made with simple, pantry-staple ingredients. The wonderful flavors of chocolate and raspberry combine to create a satisfying and addicting taste. Chocolate raspberry ice cream is a tasty, sweet frozen treat.
Lavender ice cream is a soft, floral, sweet summer dessert. It's made with fresh lavender flowers and a few other simple ingredients. It's simple to make and tastes fantastic.
Our four-ingredient apricot bars are a delicious, effortless summer dessert. They're made with smooth, plump, sweet apricots and a couple of other simple ingredients. Our apricot bars are super tasty and satisfying!
Healthy pizza! Did you think that wasn't possible? Our watermelon pizza proves that wrong. It's healthy, juicy, and bursting with nutrition. The recipe is fairly flexible and allows for more or less of whatever fruit you like. Our watermelon pizza has a lot of watermelon, of course, but also macadamia nuts, blueberries, and more!
Our soft serve mocha banana ice cream has a thick, velvety smooth texture. It combines the flavors of coffee and chocolate to create a decadent summer dessert! Our soft serve mocha banana ice cream is tasty and terrific.
Our chocolate-coated key lime coconut creme pie is outstanding. The homemade crust is made with healthy ingredients like walnuts and hemp seeds. The coating of the crust is made from chocolate chips, coconut flakes, and vanilla extract. The center of the pie is creamy, thick, and lush. The flavors are delicious and compliment each other well.
Looking for a mouthwatering kid-approved summer dessert? We got you covered! Our cocoa-cashew coconut ice pops are a delicious, dainty summer dessert that is tasty and simple. They're made with a combination of cashews, coconut milk, and vanilla extract. They have a soft chocolatey, nutty flavor.
These key lime tarts are the perfect summer dessert for all your summer gatherings. They're bright, flavorsome, and look quite elegant. Our key lime tarts are bold in color and taste. They're simple to make, and everyone will adore them!
Our raspberry lemon mousse tart has the most appealing texture. The crust is made from almonds, nuts, and shredded coconut, while the dense mousse comes together with cashews, coconut water, vanilla extract, and a few more ingredients. Our raspberry lemon mousse tart is satisfying. It's light, refreshing, and great-tasting.
Our blackberry watermelon popsicles are an ice-cold sweet treat everyone will beg for! They're sweet, savory, and delightful. Blackberry watermelon popsicles are low in calories and high in satisfaction!
Vegan Sugar Cookies
Soft, sweet, and delectably chewy, these Vegan Sugar Cookies are a show-stopper dessert! They are made with simple ingredients like unsweetened apple sauce, vanilla extract, and flour.

These vegan sugar cookies are sprinkled with coarse sugar giving them a satisfying taste. This recipe is simple to make and is even suitable for cookie cutters!
Sugar cookies are a staple cookie for all your cookie needs! In addition, they can accompany any other cookie type to make a lovely gift basket. Pair these sugar cookies with an assortment of your other favorite cookies:
These vegan sugar cookies don't lack flavor, that's for sure. They are packed with sweetness and have a wonderful soft crumbly texture.
This Vegan Sugar Cookies recipe is...
- Egg-less
- Easily cut with cookie cutters
- Ready in under 30 minutes
- Sweet and tasty
- A great cookie for any occasion
How to Make Vegan Sugar Cookies

- Preheat the oven and spray your cookie sheet with cooking spray.
- Combine the dry ingredients (except the coarse sugar) in a bowl and set aside.
- In a separate bowl combine the butter and sugars.
- Add the vanilla extract and apple sauce to the mixture and stir well.
- Combine both the mixtures and stir until it's a thick cookie batter.
- Roll the dough into small 1-inch cookie dough balls and place on a baking sheet.
- Use a fork to create a criss-cross pattern and sprinkle cookies with coarse sugar.
- Bake, let cool, and enjoy!
Full directions for how to make Vegan Sugar Cookies are in the printable recipe card at the bottom of the post.
Tips & Tricks for Vegan Sugar Cookies

Choose an excellent vegan butter.
When choosing a vegan butter, look for one with a low level of refined oil that is free of artificial additives. We have a few favorites in particular that we shared in our post about the Best Vegan Butter brands.
Our list includes Earth Balance, Miyoko's Vegan Butter, and I Can't Believe It's Not Butter: Vegan. It's helpful to read reviews about vegan butter if you're new to that particular brand.
Using cookie cutters?
Don't worry! You can easily use cookie cutters with this cookie dough in a few simple steps. If you don't already own cookie cutters-or you want some new ones-here are a few of our favorites:
In order to use cookie cutters with this cookie dough, simply make the dough, cover, and chill it for two hours. Afterward, sandwich the dough between wax paper and roll the dough out using a rolling pin. Make sure to use a generous amount of flour to prevent sticking. Proceed to use the cookie cutters, bake, cool, and enjoy.
Preventing a dry cookie.
The key to a moist cookie is ensuring the right amount of fat. Fat is what makes the cookie soft and moist instead of crumbly and hard. This vegan sugar cookie recipe uses vegan butter to produce a cookie that is soft and heavenly.
The significance of fork-pressing.
Though it might seem minor, the crisscross pattern on the cookies is quite significant. The fork-pressing flattens the dough and allows for even cooking. It also gives the cookie a neat design and allows the coarse sugar to sink into the grooves, giving a delicious taste bite after bite.
Vegan Sugar Cookies FAQs

What makes these vegan sugar cookies so great?
Everything about these sugar cookies is great! These cookies come together with little effort and are ready to eat in only half an hour. These vegan sugar cookies are a healthier alternative, but you wouldn't even know it by tasting them-they aren't lacking in flavor, that's for sure!
This recipe makes approximately twenty-four cookies, the perfect amount for sharing. They have a beautiful golden color and are sprinkled with coarse sugar. These vegan sugar cookies sure are heavenly!
How do I stop my vegan sugar cookies from cracking?
There are a few things to do to ensure your vegan sugar cookies don't crack. Be cautious to not overspray the baking sheet as it might cause the cookie dough to become too runny and lead to cracking. Baking your cookies on a silicone mat is beneficial to keep the cookie together as well. It helps the cookie dough to stay gripped together.
A Guide to Vegan Baking is a great resource for understanding the craft of vegan baking. Certain ingredients hold a lot of significance in vegan baking, and proper measurements are necessary to create the correct cookie texture and consistency. These vegan sugar cookies shouldn't crack if you follow the steps.
What is coarse sugar? Is it different than refined sugar?
Coarse sugar is, in fact, different from refined sugar. It is a much larger-sized crystal, about the size of pretzel salt. It gives these vegan sugar cookies a dynamic texture and a satisfying taste. Also, because of the size, coarse sugar doesn't melt and adds a nice crunchy texture to the baked goods.
Recipe

Vegan Sugar Cookies
Ingredients
- 1 ¾ cup flour
- ½ cup vegan butter room temp
- ½ cup sugar
- ¼ cup brown sugar
- ¼ cup unsweetened applesauce
- 1 tablespoon pure vanilla extract
- 1 tablespoon cornstarch
- 1 teaspoon baking soda
- 1 teaspoon baking powder
- ½ teaspoon salt
- cooking spray
- coarse sanding sugar optional
Instructions
- Preheat the oven to 350°F and lightly spray a cookie sheet with cooking spray.
- In a bowl, combine all the dry ingredients except the coarse sanding sugar and mix well.

- In a separate bowl, cream together the butter, both sugars, and the vanilla.
- Add the applesauce to the sugar and mix well again.
- Combine both the dry and wet ingredients and mix well into a thick cookie dough.
- Roll into 1-inch balls and place on the prepared baking sheet.

- Use a fork to press down the cookie dough balls, leaving a criss-cross pattern. Sprinkle with the coarse sugar and bake for about 8-10 minutes or until the edges start to turn a very light gold color.

- Remove from the oven and leave the cookies on the pan to cool for a few minutes.

Notes
- If you want to cut shapes out of the sugar cookies, prepare the dough, then cover it and chill for two hours. Next, sandwich the dough in between two sheets of wax paper and roll it out, making sure to use plenty of flour so it doesn't stick. Cut out your shapes and bake them following the same baking time and temps in the recipe.
Nutrition (Estimate per Serving)
Vegan Tiramisu
Vegan Tiramisu gives you all the flavors of the classic Italian dessert but in a vegan-friendly recipe. There isn't any dairy in this dessert-just wholesome ingredients with a big flavor payout.

Skip the classic ladyfingers version and try my homemade vegan-approved Italian dessert! This vegan dessert recipe will impress anyone with its presentation value and the rich decadent flavors. Vegan Tiramisu is a moist and delicious cake soaked in rich coffee syrup, smothered with creamy topping, and dusted with chocolate and cocoa.
This Vegan Tiramisu recipe is...
- Vegan
- Dairy-free
- Vegetarian
- Make-ahead friendly
- An Italian dessert
How to Make Vegan Tiramisu

- Prep your pan and preheat the oven.
- In a bowl, whisk together dry cake ingredients and set aside.
- In a small bowl, combine yogurt, milk, vanilla.
- Now pour the wet mixture into the dry and mix well.
- Spread cake batter into pan and bake as directed.
- Once cake is baked, let cool and slice into squares.
- Mix up the coffee syrup in a cup, and allow the sugar dissolve.
- In a mixer, whip together cream layer and until light and fluffy.
How to Assemble Vegan Tiramisu

- Take the sliced squares of cake and dip them into the coffee mixture.
- Layer the coffee-dipped cake pieces in a casserole pan.
- After one cake layer, add a whipped topping layer.
- Repeat cake and cream laters ending with the whipped topping mixture.
- Dust tiramisu with cocoa powder, then shaved dark chocolate.
- Cover tiramisu with plastic wrap, and store in the refrigerator until serving.
Full directions for how to make Vegan Tiramisu are in the printable recipe card at the bottom of the post.
Tips & Tricks for Vegan Tiramisu

Soaking Cake
Soaking the cake in the coffee syrup is what give this recipe the traditional flavor of tiramisu. I like to use espresso to help give my cake a nice rich flavor.
Mixing Whipped Topping
I find that using a hand or stand mixer for mixing up the whipped topping ingredients will give you that ultra creamy texture you want. You can do it by hand, but it will take some work-and I recommend using a whisk if you go that route.
Make In Advance
This dessert is best made in advance. You have to allow the cake to cool first. Then once you get your layered dessert assembled, you will need to refrigerate it again. It's a good idea to make this tiramisu a day early to ensure your dessert is fully set up - which also makes it a perfect Valentine's Day dessert! For more romantic sweet inspiration, check out our 25+ Vegan Valentine's Day Desserts.
Variations to Vegan Tiramisu

Strong Coffee
Instead of an espresso, just use some strongly brewed coffee. If your coffee isn't strong enough, you will find it gets kind of hidden in the flavor of the cake and topping.
Pipe On The Topping
You can place your whipped topping in a piping bag, and pipe little dollops of cream all over the top of your cake. This extra piping can really elevate the look of your dessert!
Boozy Tiramisu
Consider adding some alcohol to your tiramisu. Just add the booze to the coffee syrup once it's fully mixed. This will make your vegan tiramisu into an adult dessert. Brandy, Baileys, rum, and so many other alcohol options work great.
Vegan Tiramisu FAQs

What is Tiramisu?
Tiramisu is a layered Italian dessert. It is traditionally made with lady fingers but I used a homemade cake. This cake is soaked in a coffee syrup and topped with whipped topping and cocoa powder. Tiramisu is a very popular dessert all around the globe!
Can I double this recipe?
You can easily double this tiramisu recipe. Just reach for a larger pan to bake up the cake. I have found that doubling the recipe to serve a larger crowd works great.
Is tiramisu suitable for vegans?
Traditional tiramisu contains egg and dairy products, while my vegan version does not. Depending on your diet, you may find that this recipe is a great fit!
Recipe

Vegan Tiramisu
Ingredients
Cake
- 2 cups flour
- ¾ cup sugar
- 1 teaspoon baking soda
- ¼ teaspoon salt
- 1 cup coconut milk
- ⅓ cup coconut yogurt
- 1 teaspoon vanilla extract
- ¼ cup oil
- 1 tablespoon apple cider vinegar
Coffee Syrup
- 4 shots brewed espresso ~½ cup
- 3 tablespoon sugar
- 3 tablespoon kahlua liquer
- warm water ¼-½ cup
Creamy Layer
- 1 cup plant-based cream cheese
- ¾ cup coconut yogurt
- ½ cup coconut milk
- ¼ cup coconut oil
- ¾ cup powdered sugar
Topping
- 2 tablespoon cocoa powder
- dark chocolate grated; optional
Instructions
Cake
- Preheat oven to 350°F, and line a 9x13 baking pan with parchment paper.
- Stir together the flour, sugar, baking soda, and salt. Then set aside.

- In a small bowl, whisk together the milk, yogurt, vanilla, oil, and apple cider vinegar.

- Pour the milk mixture into the flour mixture and stir until just combined.

- Spread the cake batter evenly into the prepared baking pan.

- Bake in the oven until cooked through.

- Allow to cool, then slice into small rectangles.

Coffee Syrup
- Mix together the espresso shots, sugar, and kahlua. Then add the warm water until you have one cup of liquid total, and stir until the sugar dissolves.

Creamy Layer
- Beat the cream cheese, yogurt, coconut milk, and coconut oil until smooth and fluffy.

- Then add the powdered sugar and beat again.
Assembly
- Dip the cake squares into the coffee mixture.

- Place a layer of the coffee-dipped cake squares in a medium casserole dish.

- Add a layer of creamy whipped topping on top.

- Continue layering, ending with the creamy mixture.

- Top tiramisu with a dusting of cocoa powder and some grated dark chocolate if desired.

- Place tiramisu in fridge to chill for at least 2 hours.

Nutrition (Estimate per Serving)
Vegan Thumbprint Cookies
Looking for a delicious soft and jam-filled thumbprint cookie? These Vegan Thumbprint Cookies are so easy to make, taste absolutely delicious, and only require 5 simple ingredients!

These buttery soft cookies are creamy, moist, and filled with your favorite jam filling. We're talking melt-in-your-mouth tasty. You can make these cookies anytime of year, but they are especially perfect as a holiday treat!
This Vegan Thumbprint Cookies recipe is...
- Vegan
- Made with 5 ingredients
- Homemade
- Versatile (different jams)
- Great for holiday baking
And if you're here planning a plant based holiday menu, be sure to check out our complete Vegan Thanksgiving and Vegan Christmas cookbooks too!

How to Make Vegan Thumbprint Cookies
- Start by lining your baking sheets and preheating the oven.
- In a stand mixer, cream together the butter and sugar.
- Add in the flour and vanilla.
- Roll into balls, and press a hollow into the center of each cookie.
- Bake as directed. Press the hollow into the cookies again, then let cool.
- Fill hollows with your favorite jam.
- Serve and enjoy your cookies!
Full directions for how to make Vegan Thumbprint Cookies are in the printable recipe card below.

Tips & Tricks for Vegan Thumbprint Cookies
Use Silicone Mats
I love using silicone baking mats on my cookie sheets. They provide a non-stick surface, which means no need for cooking spray. Even better, silicone baking mats make clean up a breeze!
Get a Cookie Scoop
I always recommend using a cookie scoop. Using a cookie scoop will ensure that all your cookies are the same size so they all bake evenly. You won't have any more under- and over-baked cookies from eyeballing the size!
Indent the Center Twice
You will indent the center of your thumbprint cookies before baking them, but they will puff up a bit in the oven. Once you pull your cookies out of the oven, use the back of a spoon to indent your cookies a second time before they cool. This is important so you have room for the jam in the center.
Variations to Vegan Thumbprint Cookies

Mix Up the Filling
Try using a chocolate ganache (vegan friendly), pie filling, or any jam or jelly of your choice to fill your cookies. The choices are pretty endless! I love filling my cookies with strawberry, blueberry, or apricot jam.
Drizzle with Vegan Chocolate
For some added flavor and a pretty finish, try melting some vegan-friendly chocolate chips and drizzling them over top of your baked cookies!
Add Sprinkles
Sprinkles are fun! So go ahead and add some holiday inspired sprinkles to your cookies for a fun and festive garnish.
Vegan Thumbprint Cookies FAQs

Do I need to refrigerate these cookies?
With the jam in the center, you will want to refrigerate your thumbprint cookies. Otherwise, the cookies will spoil at room temperature. Store your cookies in an air-tight container in the fridge until you're ready to eat them. They will last in the fridge up to 5 days.
Can I freeze jam-filled cookies?
These jam-filled cookies can be frozen. Layer them in a freezer-safe container, placing wax paper between each layer so the cookies don't stick together.
Can I make these cookies in advance?
If you want to make your thumbprint cookies in advance, go right ahead. I recommend only making them 24 hours in advance. Otherwise, the cookies can dry out quite a bit. Just make sure to cover them well and refrigerate until ready to serve.
Which vegan butter should I use?
Any brand of vegan butter that melts well will do the trick in this recipe. I've head great luck with Earth Balance brand!
More Recipes
If you love these vegan thumbprint cookies, be sure to check out these other tasty ideas:
- Chocolate Crinkle Cookies
- Boozy Chocolate Bread Pudding
- 20+ Best Vegan Pie Recipes
- 25+ Vegan Valentine's Day Desserts
And if you're here planning your holiday menu, don't forget to check out our new Vegan Thanksgiving and Vegan Christmas Cookbooks!
Recipe
Vegan Thumbprint Cookies
Ingredients
- 1 ½ cups vegan butter softened
- ¾ cup sugar organic
- 1 teaspoon vanilla extract
- 3 ½ cups all-purpose flour
- 1 cup jam any flavor
Instructions
- Preheat oven to 350°F degrees.
- Line two baking sheets with parchment paper or silicone mats.
- In a stand mixer, beat the butter and sugar together until it becomes light and creamy, about 2 minutes. Mix in the vanilla extract.

- Slowly add in the flour, while mixing, until it is just incorporated.

- Roll the dough into 35 balls, and arrange them on the baking sheets about 1" apart.

- Use a spoon to press down on the top of the cookies,

- Press on the bowl of the spoon, making a small divot in the center of each cookie.

- Bake the thumbprint cookies for 12-15 minutes, until lightly golden brown.
- Immediately after baking, press the spoon into each "thumbprint" indent again, as the cookies will have likely risen back up a bit during baking.

- Cool the cookies on the cookie sheet until they are safe to handle.
- Fill each thumbprint cookie with approximately 1-1 ½ teaspoons of jam.

- Serve and enjoy!

Nutrition (Estimate per Serving)
Vegan Pumpkin Pie Recipe
The ultimate vegan pumpkin pie - made totally from scratch! This dreamy dairy-free dessert has a golden, flaky homemade crust and a silky-smooth, gently spiced pumpkin filling. It's the kind of pie that'll steal the show at your Thanksgiving table (and no one will miss the dairy, promise).

Who doesn't love pumpkin pie?! It's certainly one of my favorite Fall desserts. And the great news is that it's easier than you may think to make a homemade vegan pumpkin pie from scratch.
Even if you're not an expert baker, you can whip up an impressive dessert like this one for special occasions like Thanksgiving and Christmas. I can guarantee that everyone will be impressed!
(And if you are planning a meatless holiday feast, be sure to check out my complete Vegan Thanksgiving cookbook!)

My vegan pumpkin pie recipe features just simple ingredients and a very approachable methods, anyone can handle it!
I love making a homemade crust which is buttery and flaky. The pumpkin pie filling is smooth and custardy, and will make your whole kitchen smell amazing.
So if you're looking for a go-to vegan pumpkin pie recipe, look no further!
Key Ingredients & Substitutions

Pie crust. I used my homemade vegan pie crust recipe, but you can also use a store-bought one if you want to save time. They typically come in a ready-to-fill shell and disposable foil pan, which makes it very easy to use.
Pumpkin Purée. You can use either canned pumpkin purée (make sure it's plain and unsweetened), or make your own from scratch using my tutorial on how to make pumpkin purée.
Cornstarch. This will be used for thickening the pie filling, resulting in a custardy, smooth consistency.
Cinnamon. You can also use a store bought pumpkin spice blend instead, if you prefer.
Brown sugar. You can also use coconut sugar, if you prefer. But I do like the richer flavor from the brown sugar. Be sure to choose a vegan-friendly brown sugar brand.
Maple syrup. You can also substitute another liquid sweetener of your choice, such as agave nectar.
Plant based milk. Use any unsweetened variety of your choice, such as almond milk or soy milk.
A pinch of salt.
Dairy-Free Heavy Cream Substitute of your choice. I am currently a fan of this one from Califa Farms. You can also use coconut cream - be sure to use the coconut cream and not coconut milk in this case.
Vanilla extract.
How to Make Vegan Pumpkin Pie
Start by preheating the oven to 350 degrees F/180 C.


To a large mixing bowl, add the pumpkin purée, cornstarch, cinnamon, brown sugar, maple syrup, plant based milk, soy cream and vanilla extract. Use a handheld mixer to whisk until the mixture is smooth. You can also do this in a food processor or blender.
Pour the filling into a 9-inch tin lined with the vegan pie crust. Bake in the preheated oven for 50-55 minutes.


Transfer to the fridge and allow to cool for at least an hour before slicing and serving with vegan whipped cream.
How to Make Pumpkin Pie Ahead of Time
This is a perfect dessert for making ahead of time. You can prepare the pie crust and filling the day before you want to serve the vegan pumpkin pie. Then simply assemble the pie and bake as usual.

Storing & Freezing the Pie
The vegan pumpkin pie keeps well in the fridge, covered, for up to a week.
You can also freeze it as individual slices for up to 2 months in a freezer-friendly container. When ready to serve, allow to thaw fully in the fridge. If you love all things pumpkin, our vegan pumpkin waffles make a wonderful addition to any fall breakfast spread.

More Vegan Desserts
- If you love pumpkin, you'll love my vegan pumpkin bread.
- Vegan banana chocolate chip muffins are easy to make and super fluffy.
- These vegan pumpkin protein balls are the perfect pick-me-up.
- Vegan granola bars also make a fantastic snack or breakfast!

If you give this vegan pumpkin pie recipe a go, be sure to tag me on Instagram (@veg.kitchen) so I can see your creations, and leave your feedback in the comments below with a star rating.
Also try: our Pumpkin Chocolate Chip Muffins.
Also try: our Vegan Pumpkin Recipes Fall.
Also try: our Pumpkin Seed Butter.
Recipe

Vegan Pumpkin Pie
Equipment
- stand mixer or handheld mixer
- 9" tart pan or pie plate
Ingredients
- 2 ½ cups pumpkin puree
- 2 tablespoon cornstarch
- ½ teaspoon ground cinnamon
- 1 cup brown sugar
- ⅓ cup maple syrup
- ½ cup plant based milk
- 1 cup dairy-free heavy cream substitute or substitute coconut cream
- ½ teaspoon vanilla extract
- 1 vegan pie crust homemade or store bought
Instructions
- Preheat the oven to 350 degrees Fahrenheit (180 Celsius).
- To a large mixing bowl, add the pumpkin purée, cornstarch, cinnamon, brown sugar, maple syrup, plant based milk, soy cream and vanilla extract. Use a handheld mixer to whisk until the mixture is smooth. You can also do this in a food processor or blender.2 ½ cups pumpkin puree, 2 tbsp cornstarch, ½ tsp ground cinnamon, 1 cup brown sugar, ⅓ cup maple syrup, ½ cup plant based milk, 1 cup dairy-free heavy cream substitute, ½ tsp vanilla extract
- Pour the filling into a 9-inch pie tin lined with the vegan pie crust. Bake in the preheated oven for 50-55 minutes.1 vegan pie crust
- Transfer to the fridge and allow to cool for at least an hour before slicing and serving with vegan whipped cream.
Video
Notes
Nutrition (Estimate per Serving)
Oat Flour Banana Bread
Slice and serve up this Oat Flour Banana Bread as a delicious breakfast or dessert. This banana oat bread is easy to throw together and makes your home smell incredible!

If you're craving a big slice of vegan banana bread, this recipe is the answer! It only takes a few simple steps to whip up. Plus, this banana bread is freezer-friendly so you can make a big batch for later too.
I love eating slices of this banana bread covered in nut butter or drizzled with a fresh berry sauce. If you're serving your banana oat bread as a dessert, you could even top it with a scoop of dairy free ice cream!
This Oat Flour Banana Bread recipe is…
- Gluten-free
- Vegan
- Dairy-free
- Freezer-friendly (great for meal prep!)
The oat flour keeps this recipe gluten-free and gives it a wonderful depth of flavor and texture. This has quickly become one of my favorite vegan baking recipes.
Making Oat Flour Banana Bread

- Preheat oven and grease a loaf pan.
- In a bowl, mix together dry ingredients.
- In another bowl, whisk together wet ingredients.
- Mix the dry and wet mixtures together.
- Pour batter into the pan, and bake.
- Let cool, then slice and serve.
Detailed directions and measurements for this Oat Flour Banana Bread are in the printable recipe card below.
Tips & Tricks

Use Ripe Bananas
Like any banana bread recipe, using very ripe bananas is key. You will find using extra-ripe bananas will give your banana bread that rich banana flavor, and the perfect texture.
Lumps Are Okay
When working with bananas, mashing them up is key. It's okay if there are a few smaller lumps of banana in the batter. Just make sure that all the other ingredients are well mixed.
Loaf Pan
I recommend using a loaf pan for this recipe. I used a 9"x5" pan, but you could also make mini loaves for gifting! Just bake the mini loaves for a shorter amount of time.

Variations
Chocolate Chips
Grab some vegan-friendly, dark chocolate chips to stir into your oat flour banana bread. Just fold them into the batter right before baking, and bake as normal.
Nut Butter
You can add a swirl of this vegan Nutella, peanut butter, or any other nut better to your banana bread. Just add around ¼ cup of nut butter to the batter in the loaf pan, then use a knife to swirl in into the batter.
Dried Fruit
Dice up some dried fruit to mix in the batter for added flavor. Dried cranberries would be a really great pairing with this banana bread. You could even try adding some dried blueberries or strawberries!
FAQs

How do you make flax eggs?
To make a flax egg, mix one tablespoon of ground flax seed and two tablespoons of water together and let it sit for 5-10 minutes. During this time, the mixture will thicken, and become a binder for the recipe.
Can you freeze banana bread?
You can freeze any bread you don't plan to eat right away. Place the loaf in a freezer bag or container and store for 2-3 months in the freezer.
When you're ready to eat your bread again, you can thaw it in the fridge or on the counter at room temperature.
Why is my bread brown on top but raw in the center?
Because banana bread is very moist, it may take longer to cook in the middle. If you find the top of your bread is becoming too brown, place a tent of aluminum foil over the top of your loaf pan. This will help prevent the top from burning while the center of your bread continues to cook.
More Recipes
If you love this oat flour banana bread, check out these other delicious recipes:
Also worth trying: our almond flour pancakes.
Recipe

Oat Flour Banana Bread
Ingredients
- 1 ¾ cups oat flour
- 1 cup quick oats
- ⅔ cup almond flour
- 1 tablespoon baking powder
- 1 teaspoon cinnamon
- ½ teaspoon salt
- 2 medium bananas mashed (about 1 cup)
- ½ cup canola oil
- ½ cup brown sugar
- 2 flax eggs 2 tablespoon + 6 tablespoon water
- 1 teaspoon vanilla extract
Instructions
- Preheat oven to 350°F, and grease a 9x5" loaf pan.
- In a large bowl, stir together the oat flour, quick oats, almond flour, baking powder, cinnamon, and salt.

- In a smaller bowl, whisk together the bananas, canola oil, brown sugar, flax eggs, and vanilla until smooth. Some banana lumps are ok.

- Add the banana mixture to the dry ingredients and stir until just combined.

- Pour the banana mixture into the prepared loaf pan, and bake for 60-70 minutes, or until the loaf is a nice golden brown and a toothpick inserted into the center comes out clean.

- Allow to cool completely before slicing and serving.

Nutrition (Estimate per Serving)
Vegan Banana Pudding
With just a few simple ingredients you can serve up this creamy and delicious Vegan Banana Pudding! Full of sweet banana flavor, this pudding is sure to be a hit with the whole family. Add a dollop of creamy vegan whipped cream and dig in!

Craving a little something sweet? Whip up this simple vegan banana pudding in just 15 minutes, then pop it in the fridge to chill. This easy dessert is one of our family favorites!
This Vegan Banana Pudding recipe is...
- Vegan
- Vegetarian
- Dairy-free
- Gluten-free
- Made with real bananas
- Homemade
And while you're here, don't forget to grab a copy of my free vegan cheat sheet. It's packed with all my favorite substitutions to vegan-ize any recipe!
How to Make Vegan Banana Pudding

- In a bowl, mash bananas. Then add them to a saucepan on the stove.
- Add coconut cream, maple syrup, vanilla, salt, and turmeric.
- Mix well and heat over medium low until boiling. Stir often.
- Transfer mixture to heat-proof container, and chill in fridge at least 4 hours.
- Once the banana pudding is set, top with bananas and serve.
Detailed directions and measurements for this Vegan Banana Pudding are in the printable recipe card below.
Tips & Tricks for Perfect Vegan Banana Pudding!

Use Very Ripe Bananas
Make sure to use very ripe bananas for this recipe. In fact, it's best if they are a bit overripe. Then you'll want to mash them up with a fork, working out any large lumps so your pudding has a nice creamy texture.
Stir Frequently
You have to stir the pudding a lot while it is on the stove. If you don't keep stirring, the pudding may burn on the bottom of the pot and ruin your dessert.
Use a Food Processor
If you want a very creamy pudding with no banana chunks at all, you can use a food processor to pulse the banana mixture. The consistency will also be a bit thinner if you use this method.
Banana Pudding Variations

Alternative Sweeteners
I used maple syrup for this recipe. But if you want, you can swap the syrup with an artificial sweetener, like Stevia, to cut out some of the sugar content.
You can also substitute the maple syrup with agave syrup or vegan apple honey for a vegan-friendly sweetener, or regular honey (a non-vegan option) if you prefer.
Add a Dash of Turmeric
The turmeric is completely optional, but it will add a nice vibrant yellow color to your banana pudding.
Make a Parfait
You can use this Vegan Banana Pudding to make some tasty vegan parfaits. Use graham crackers or granola for the first layer of your parfait. Then add a layer of pudding and a layer of vegan whipped cream! This makes a delicious vegan breakfast or dessert.
Add Toppings
Serve the banana pudding cold and top with your favorite garnishes. Vegan whipped cream, cherries, or fresh sliced bananas are all great choices.
FAQs

Is coconut cream the same thing as coconut milk?
Coconut cream and coconut milk are not the same, so make sure you buy canned coconut cream. Coconut cream is ultra thick and gives the banana pudding that rich flavor and creamy texture.
What does the cornstarch do in this recipe?
The cornstarch in this recipe helps to thicken the pudding while it cooks on the stove. Without cornstarch, your pudding would take a lot longer to reach the desired consistency, if it ever did at all.
How can I make this pudding less sweet?
If you want to tone down the sweetness of this pudding, simply use less maple syrup. If you prefer less sweet, start with ¼ cup and add more from there.
How should I store banana pudding?
Banana pudding needs to be stored in an airtight container in the fridge. It can last for up to 5 days in the fridge.
More Vegan Recipes
If you love this vegan banana pudding, be sure to check out these other delicious vegan desserts:
- Vegan Chia Seed Pudding Recipes
- Vegan Chocolate Bread Pudding
- Vegan Coconut Rice Pudding
- Vegan Oat Flour Banana Bread
Recipe

Vegan Banana Pudding
Ingredients
- 2 bananas very ripe, medium
- 1 ½ cups coconut cream
- ½ cup maple syrup
- 1 tablespoon cornstarch
- 1 teaspoon vanilla
- ¼ teaspoon salt
- pinch turmeric optional for color
- sliced bananas optional for garnish
Instructions
- In a small bowl, mash the bananas.

- Add the mashed bananas, coconut cream, maple syrup, cornstarch, vanilla, salt, and turmeric (if using) to a medium saucepan.

- Heat ingredients on medium low until just beginning to boil, stirring frequently.

- Transfer pudding to a heat-proof container and place in refrigerator until chilled and thickened, at least 4 hours.

- Serve pudding with sliced bananas if desired.

Notes
- If you want your pudding to be less sweet, only use half of the maple syrup in the recipe.
- To make the pudding extra thick, double the amount of cornstarch.
- Mashing the bananas with a fork won't get them perfectly smooth, so the pudding will have some minor lumps. For a completely smooth pudding, use a food processor to mash your bananas.
- This recipe calls for coconut cream-not coconut milk. They are not the same thing!
Nutrition (Estimate per Serving)
The Best Vegan Pies

I love pie! There's something about the combination of sweet creamy filling and perfectly flaky crust that just makes my heart sing.
This list of 20+ best vegan pie recipes include fruit pies, chocolate-peanut butter pies, and everything in between! You're sure to find a plant based pie to satisfy your sweet tooth here.
The Best Vegan Pies
Here are the very best vegan pies on the internet - judged by a vegan cookbook author!
Gluten-Free Vegan Peach Pie
The crust on this Gluten-Free Vegan Peach Pie has the exquisite taste of maple syrup in every sweet bite. This pie is filled with pieces of delicious, sweet, juicy peaches.
Easy Rustic Summer Berry Pie
This Easy Rustic Summer Berry Pie is light, refreshing, and juicy! Its vibrant color showcases the delicious berries. This vegan pie is packed with flavor from cinnamon, sugar, and orange zest!
Vegan Pecan Pumpkin Pie
This buttery, nutty Vegan Praline Pumpkin Pie is absolutely divine. It's gluten-free, has a luscious creamy texture, and is the perfect pie for Autumn!
Vegan Sweet Potato Pie
This delightful Vegan Sweet Potato Pie is made with tofu, sweet potato, and flavorful nut butter. Serve this vibrant pie with a dollop of vegan whipped cream for the ultimate holiday dessert.
Chocolate Pudding Pie with Seed Crust
This vegan pie features a wonderful seeded crust. A healthy mix of sunflower seeds, pumpkin seeds, and hemp seeds team up to make this crunchy homemade crust. And it can be stored in the freezer for up to three months!
Apple-Cranberry Pie
This sweet Apple-Cranberry Pie only requires six simple ingredients to make. It's delightfully sweet and topped with a crunchy granola topping! This one makes a wonderful holiday dessert.
Vegan Key-Lime Coconut Creme Pie
This Chocolate-Coated Key-Lime Coconut Creme Pie has the perfect mix of tart lime and sweet creamy filling in every bite. The homemade crust is made with walnuts, hemp seeds, maple syrup, and date puree.
Creamy Vegan Peanut Butter Pie
This wonderful pie is creamy and sweet and can be enjoyed totally guilt-free! The filling is made with tofu, creamy peanut butter, and plant-based milk. Add some banana for a fun and flavorful twist!
Vegan Apple Crumble Pie
This Apple Crumble Pie uses a few healthy swaps to make it a more guilt-free indulgence. Loaded with apple and cinnamon flavor, this classic treat is a surefire crowd pleaser.
Vegan Mud Pie
This Vegan Mud Pie is easy to make and absolutely indulgent. It’s perfect for the novice baker! It's rich in chocolatey goodness and pretty enough to serve to guests.
Vegan Chocolate Mousse Pie
This Vegan Chocolate Mousse and Banana Pie is made with semi-sweet chocolate chips, agave syrup, and fresh banana. It is slightly sweet and perfectly creamy. Yum!
Cashew Chocolate Mousse Pie
This Cashew Chocolate Mousse Pie is totally scrumptious! It is made with cashews, silken tofu, and semi-sweetened chocolate chips. For the perfect presentation, top this pie with a dollop of coconut whipped cream!
Vegan Key Lime Pie
This Vegan Key Lime is tangy, creamy, and delightfully sweet. This no-bake recipe is also dairy-free, egg-free, and gluten-free! It's easy to make and tastes heavenly.
Vegan Pumpkin Pie
This luscious, creamy Vegan Pumpkin Pie is wrapped in a perfectly flaky, crunchy crust. It's sweet, indulgent, and entirely plant based.
Vegan Cherry Pie
This Vegan Cherry Pie is made with fresh cherries and a wonderful homemade pie crust. It's equally tasty served hot and cold. This pie is entirely vegan and can be served with a lattice top or the traditional full-covered crust.
Vegan Banana Cream Pie
This Vegan Banana Cream Pie features a wonderful banana-toffee middle and is topped with dried fruit and nuts. It's very simple to make and will impress even the pickiest of eaters!
Vegan Banoffee Pie
This Vegan Banoffee Pie is sweetened with a delicious date-caramel sauce. And it takes only thirty minutes to bake, so you'll be enjoying this pie in no time!
Raspberry Lemon Mousse Tart
The crust of this delicious vegan pie is made with almonds, macadamia nuts, and shredded coconut - all loaded with a delicious raspberry-lemon mousse. Mmmm....
Vegan Pumpkin Pie Mousse
This one is not quite a pie - but it tastes so much like pumpkin pie that I had to add it to the list. This luscious, creamy Pumpkin Mousse is packed with creamy flavor from banana, pumpkin puree, and maple syrup!
Vanilla Pudding Pie
This Vanilla Pudding Pie Filling is creamy, smooth, and delicious. It can be enjoyed on its own with fresh fruit or baked into your favorite pie crust.
Vegan Buckeye Pie
This delightful Buckeye Pie is topped with a beautiful chocolate crust and filled with a luscious peanut butter mousse. And since this pie is made with tofu, it packs a lot of nutrition too!
More Vegan Desserts
I hope you've found the perfect vegan pie to satisfy your sweet tooth. Be sure to check out these other delicious vegan dessert ideas:
Also try: our Vegan No Bake Chocolate Cookies.
Also try: our Chocolate Raspberry Banana Smoothie.
Vegan Mango Ice Cream
You only need 3 ingredients to make this creamy and delicious real-fruit Vegan Mango Ice Cream! This vegan ice cream is made using coconut milk and organic sugar. A delicious dessert, this mango ice cream is perfect to whip up and enjoy after a long day.

If you are a fan of mangos, consider making yourself a batch of this simple mango dessert. This dessert has such a creamy texture that it literally melts away in your mouth! You can have this ice cream whipped up and in the freezer in 30 minutes, no ice cream churner required.
Top off your fresh mango ice cream with some homemade magic shell or serve it alongside some tasty Vegan Vanilla Cake. If you want to get really creative, you can use it to make some homemade ice cream sandwiches!
How to Make Vegan Mango Ice Cream

- Start by adding your mangos to the food processor. Mix until smooth.
- Add mango and sugar to a pot on the stove and simmer.
- Once a thick jam-like texture, place mixture back into the food processor and blend with coconut milk.
- Pour mixture into freezer-friendly container, and freeze until hardened.
- Scoop and enjoy!
Tips & Tricks for Vegan Mango Ice Cream

Food Processor
I recommend using a food processor to make this ice cream. You can also try using a high powered blender, but it has to be good quality. I prefer using a food processor because it mixes your ingredients to create that ultra creamy ice cream texture!
Stir Frequently
When you are cooking, make sure to stir the mango mixture frequently. Because this mixture has a lot of sugar, it will burn if you let it sit without stirring.
Freezer Container
You can buy special containers for no-churn ice cream. Or you can just use a regular loaf pan! Just cover the pan with two layers of aluminum foil to keep it from getting freezer burned.
Variations to Vegan Mango Ice Cream

Mix-Ins
Consider mixing in some unsweetened coconut flakes, chopped nuts, or even mini pieces of white chocolate! Just add the mix-ins to your ice cream right before you pour the mixture into your freezer container.
Replace Sugar
If you don't want to use organic sugar, you can use agave or maple syrup instead. Either option will still sweeten the ice cream without using classic sugar. No matter what kind of sweetener you use, you will still cook your ice cream the same.
Fresh vs Frozen
You can use fresh or frozen mango for this recipe. You can choose which kind of mango you want to use-this ice cream recipe will work either way!
Other Fruit
Try mixing in some raspberries, strawberries, or other fruit for added flavor. I love a good mango kiwi ice cream!
Vegan Mango Ice Cream FAQs

How long does it take for this ice cream to freeze?
You ice cream will take around 4-6 hours to completely freeze. Or, if you can, just make it the night before you want to eat it! Your ice cream will have a softer texture when you pour it into the pan, but it will firm up in the freezer.
Why is my ice cream hard to scoop?
No-churn ice cream can be harder to scoop than regular ice cream. When you want to eat some no-churn, let it sit on the counter for 5-10 minutes first. This will soften the ice cream enough to make scooping easier.
Alternatively, you can soak your ice cream scoop in really hot water. Then let the excess water drip off and scoop your ice cream!
How long can I store this vegan ice cream?
You can store your ice cream in the freezer for up to 2-3 months. This ice cream is best eaten sooner than later, as ice crystals can begin to form and alter the flavor. You need to keep your ice cream in a really airtight container to prevent too many ice crystals.
Recipe

Vegan Mango Ice Cream
Ingredients
- 2 cups mango cubed, fresh or frozen
- ¼ cup organic sugar optional
- 2 cups coconut milk full fat
Instructions
- Place cubed mangos in a food processor.

- Process the mangos until smooth

- Mix the mango puree and sugar in a small saucepan and simmer for about 10 minutes, or until thickened into a jam-like consistency. Stir frequently.

- Pour the mango mixture back into the food processor (or blender). Add the coconut milk and process until smooth.

- Transfer ice cream mixture into a freezer-safe container and cover.

- Freeze for at least 4 hours before serving.

Notes
- Simmer the mango puree on a low heat to avoid burning.
- Allow the finished ice cream to sit at room temperature for about 10 minutes before trying to scoop. This will help soften the ice cream slightly.
- You can replace the sugar in this recipe with a bit of maple syrup or agave if you prefer.
- You can use fresh or frozen mango chunks.
Nutrition (Estimate per Serving)
35 Vegan Cookie Recipes

It's cookie time! It's no secret that I have a big sweet tooth, and nothing quite hits the spot like a fresh baked cookie.
So I've gathered up all of my most popular vegan cookie recipes right here. From chocolatey crinkle cookies, to fluffy pumpkin cookies, to healthyish granola cookies - there's a vegan cookie here for everyone!
35 Vegan Cookie Recipes
Here are all my favorite vegan cookie recipes - straight from a vegan food blogger and cookbook author!
These Chocolate Crinkle Cookies are both soft and chewy. Dusted with powdered sugar, these cookies are incredibly easy to make, bake, and eat! These small cookies pack a punch with their smooth, sweet chocolate and gluten-free deliciousness!
These Vegan and Gluten-Free Almond Thumbprint Cookies are both delicious and gorgeous! They are sprinkled with confectioners sugar and massively delicious in every bite. Baked for only 15 minutes, these cookies are quick to put together and probably won't stay uneaten very long!
This recipe makes four dozen little Chocolate Nut Cookies, so it’s perfect for large families, classrooms, and BBQs! These cookies are super easy to put together. For extra deliciousness, top them with powdered sugar! Enjoy the delightful combination of chocolate and walnuts with this simple recipe.
This Chewy Chocolate Strawberry Cookies recipe uses dried strawberries, an ingredient found in many health food or bulk stores. You can easily substitute coconut oil or vegan butter for the dairy butter in this recipe to veganize these delicious cookies. There really is no better dessert combo than chocolate and strawberries!
Vegan No-Bake Chocolate Cookies are the perfect cookie for even the beginning baker! These cookies are simple to put together and ready in just minutes. This cookie recipe is simply divine! It's soft, chewy, and delightful.
This summery cookie is a heavenly combination of both blackberry and orange flavors. These Vegan Blackberry Cookies are velvety, fluffy, and perfect for those who have a sweet tooth.
These triangle Vegan Hamantaschen cookies are heavenly. They can be customized with your favorite fillings and flavors. Choose from apricot, peach, and strawberry to create the most quaint little cookies!
Enjoy the comforting taste of peanut butter in this delectable recipe. This Easy Vegan Peanut Butter Cookies recipe is straightforward and easily customizable!
These Vegan Peanut Butter Granola Cookies combine the smooth, nutty flavor of peanuts and the crunchy, sweet, and salty flavor of granola. These cookies are simple to make, sweet, and sure to be finished very quickly!
These Einkorn Cocoa Walnut Cookies are light, fluffy, and high in protein. They're perfect for those of us who enjoy cookies for breakfast!
This recipe makes delicious No-Bake Breakfast Cookies! These cookies are delicious for any time of day. This recipe makes swapping ingredients easy for all types of diets (low sugar, gluten-free, etc.).
This recipe makes a soft, chewy, moist cookie. The perfect amount of cinnamon spice makes these Cinnamon-Tahini Cookies delightful.
Pumpkin is delicious all year round, and it's the shining ingredient in this recipe. These Pumpkin Chocolate Chip Cookies are delicious, soft, and super chewy. The beautiful combination of pumpkin and sweet chocolate in this recipe is divine!
Nutritious and jam-packed with wholesome, healthy ingredients, these Coconut Chocolate Chip Cookies are easy to make and will be quickly enjoyed. This recipe makes a sweet, indulgent cookie that is vegan and delicious!
These Peanut Butter Chocolate Chip Teff Cookies are iron-rich and nutrient-dense. They are also perfect for those who have a sweet tooth! These cookies are delicious, moist, and comforting with the familiar taste of peanut butter.
Free of refined sugar, these Crunchy Almond Cacao Nib Cookies are healthy, light, and boast the perfect texture. Made with nature's chocolate chip (aka cacao nibs), these cookies are delicious and healthy! These cookies only take ten to twelve minutes to bake and probably less to eat!
The combination of coconut, almond, and raspberry jam is hard to beat! These Coconut, Almond, and Raspberry Jam Thumbprint Cookies are moist, flavorful, and the ultimate comfort cookie that you need in your cookie jar.
These rich Chocolate-Flecked Pumpkin Seed Cookies are chewy, moist, and sweet. In addition, pumpkin seeds are high in zinc and protein, making these cookies an excellent choice for any time of the day!
Using only a third of the sugar customarily required, these Low-Fat Vegan Chocolate Chip Cookies are fantastic! The recipe makes approximately sixteen cookies and bakes for only ten minutes. Fast, easy, and mouthwatering, these are sure to be your next favorite cookies!
These Vegan Chocolate Chip Oatmeal Cookies are vegan and delightful for any time of day. Serve them with tea, coffee, or—well—anything! Because what doesn't taste delicious with chocolate chip cookies?
Everyone will love these Vegan Black Bean Double Chocolate Chip Cookies. Soft, moist, and chewy, these cookies are amazing!
Crispy on the outside and perfectly soft and chewy on the inside, these Pecan Shortbread Cookies are going to be your new favorite. This straightforward recipe requires only four ingredients and bakes for only eleven minutes.
These cookies are filled with a rich, luscious buttercream frosting. This recipe makes twenty-four Cream-Filled Maple Leaf Cookies and is made with pure maple syrup!
These delightful Chewy Chocolate Chip Cookies with Dates are full of nutrients and vitamins. This recipe is perfect in every way—and it's gluten-free!
These crunchy little cookies will delight you! Sesame-Crispy Rice Cookies have the perfect amount of sweetness and are a treat for texture lovers. These cookies are light, crispy, and ultimately satisfying!
Full of seeds and packed with flavor, these Seed Jumble Cookies are splendid. Similar to a granola bar, these cookies are crumbly, filled with seeds, and delicious. Enjoy the seeds in these cookies—ground flax, sunflower, sunflower, and pumpkin.
These Graham Thumbprint Cookies are a treat to make and to eat. Fun to make and delicious to eat, these cookies will delight everyone you're serving!
These Vanilla Wafer Cookies have that delicious smooth buttery flavor of animal crackers. Top these cookies with crunchy nuts, vegan chocolate, or fruit jam. The sweet flavors of maple syrup and vanilla extract come together in these cookies. They are soft, moist, and scrumptious!
Cookies don't get cuter than these, that's for sure! Decorated with fondant to look like chic tiny strawberries, these Strawberry-Shaped Vegan Cookies will be a hit with everyone. In addition, these cookies are vegan-friendly, easy to make, and can be made to accommodate a gluten-free diet.
These light, buttery Vegan Shortbread Cookies will be eaten quickly! This recipe requires only three ingredients and is super simple to make.
Enjoy traditional snickerdoodles with a vegan flair! These Vegan Snickerdooles are chewy, soft, and packed with that delicious cinnamon-sugar taste you know and love.
Soft, chewy, and naturally sweet, these Banana Oatmeal Cookies are fantastic any time of the day. Serve them with fruit for breakfast or enjoy them as a healthy snack. They come together in only twenty minutes and are oil-free and vegan!
If you love eating cookie dough, then this is the recipe for you! This Vegan Cookie Dough is sweet, savoury, and loaded with dark chocolate chips. This dough is bake-free, egg-free, and dairy-free.
These Vegan Oatmeal Cookies are bursting with chocolate chips and rolled oats. Made with natural, whole, simple ingredients, these cookies are extra enticing. Add in your favourite nuts and seeds for added flavor and nutrition!
Goey and decadent, these Totally Addictive Vegan Double Chocolate Cookies are going to have everyone begging you to bake more! They are soft, moist, and have the beautiful taste of sea salt and dark chocolate.
If you love these cookie recipe, be sure to check out these other delicious vegan desserts:
Cookies and Cream Vegan Popsicles
I can't rave enough over these vegan popsicles! These Cookies and Cream Vegan Popsicles are creamy, delicious, and the perfect way to cool down on a hot summer day.

You don't have to be a kid to enjoy one of these vegan Oreo popsicles! They're super easy to make, so what are you waiting for?
I love summer, and I love indulging in delicious ice cream on those hot summer days! But if your sweet tooth isn't as big as your children's anymore, you can enjoy some sweet juicy watermelon or fruit salad while your kids munch on these sweet and creamy popsicles.
This Cookies and Cream Vegan Popsicles recipe is...
- Vegan
- Dairy-free
- Easily made gluten-free (use gluten-free cookies)
- Made with 5 ingredients
How to Make Cookies and Cream Vegan Popsicles

- Start by placing your Oreos in a bowl and crushing them up. You want to have around 1 cup of crushed cookies.
- In a separate bowl, combine your coconut cream and yogurt. Then add in the caster sugar and vanilla. Mix well to combine.
- Fold in cookies until incorporated.
- Roughly chop your extra cookies. Place a few large cookie pieces in the bottom of the popsicle molds, then pour in the coconut mixture.
- Place popsicle sticks into the molds, and freeze for at least 4-6 hours or overnight.
Full directions on how to make Cookies and Cream Vegan Popsicles are in the printable recipe card below.
Tips & Tricks for Cookies & Cream Vegan Popsicles

Freezing Time
The freezing time for your popsicles will very depending on the style of popsicle molds you use and how cold your freezer is. Make sure that your popsicles are fully frozen, or else they may break off the sticks and make a mess.
Variations to Cookies and Cream Vegan Popsicles

Choosing a Yogurt
I used a coconut yogurt for my popsicles, but you can use any plant-based, dairy-free yogurt that you prefer. I recommend choosing a plain or vanilla flavored yogurt so the yogurt doesn't overpower the other popsicle ingredients.
Popsicle Molds
Feel free to use any size or style of popsicle molds! You can buy fully washable molds that come with plastic or silicone sticks, or you can go old school and use wooden sticks for your popsicles. It's fully a personal preference!
No Molds, No Problem
Don't have popsicle molds on hand? Go to the store and buy the little paper cups you use for brushing your teeth. Fill your cups with the popsicle mixture, and place plastic wrap or aluminum foil over each cup. Then stick a popsicle stick into the cup-the plastic wrap or aluminum foil will hold the stick in place.
Freeze your popsicles as normal, then peel off the paper cup and enjoy!
Mix Ins
Want to change up your popsicles? Try adding in swirls of nut butter or sprinkling in some chocolate chips. Whatever other ingredients you choose, just mix them into the batter before pouring it into the molds.
Oreo Flavor
Use any flavor of Oreos you want: birthday cake Oreos, mint Oreos, the list goes on. Have fun and create one-of-a-kind popsicles that fit your liking!
Cookies and Cream Vegan Popsicles FAQs

Are coconut cream and coconut milk the same thing?
Coconut cream and coconut milk are not the same thing. Coconut cream is a lot thicker in texture than coconut milk. You are welcome to use either for this recipe, but using cream will give your popsicles a richer and creamier texture than using milk.
Are Oreos vegan?
Oreos are vegan, but they do not say so on the package. However, Oreos are made in a facility where dairy is used. So if you are allergic to dairy products, I would recommend not using Oreos for your popsicles to avoid running the risk of getting sick.
Choose another kind of cookie or candy to crush or chop into your popsicles!
How long do these Oreo popsicles last?
You can store your popsicles in the freezer for up to 2 months. You can store them in the popsicle molds or in a freezer container to prevent ice crystals from forming. For another easy chocolate treat, try these fudgy avocado brownies. And if you're shopping for Halloween treats, don't miss our vegan Halloween candy guide.
Also try: our Vegan Fudgesicles.
Recipe

Cookies and Cream Vegan Popsicles
Ingredients
- 1 cup crushed oreo cookies about 10 cookies + 4-5 extra for garnish
- 1 cup coconut cream
- ¾ cup plain coconut yogurt
- 2 tablespoon caster sugar
- 1 teaspoon vanilla extract
- popsicle sticks
Instructions
- Place approximately 10 Oreo cookies in a small bowl and roughly crush them. You need about 1 cup of crushed cookies.

- In a separate bowl, mix the coconut cream with plain coconut yogurt. Then add the caster sugar and vanilla extract. Stir to combine.

- Add the crushed cookies to the cream mixture, and stir until well combined.

- Take 4-5 extra cookies and chop them into bite-sized pieces. Place them in the base of the popsicle molds. (This step makes your popsicles look very pretty but is optional!)

- Spoon the cookies and cream mixture into the popsicle molds until they are filled. Don't forget to add the popsicle sticks!

- Freeze popsicles for at least 4 hours or until completely frozen.

Notes
- These popsicles last in the freezer for up to 2 months.
- Coconut cream is thicker than coconut milk-they are not the same ingredient. You can use either coconut product for this recipe, but the coconut cream will provide a better texture.
- You can substitute the coconut yogurt for any dairy-free yogurt of your choice.
- Oreos are vegan, but the package does contain a warning that they are prepared in a facility that handles dairy. If this concerns you from an ethical standpoint or you have a dairy allergy, you may wish to replace the Oreos with a suitable alternative.
Nutrition (Estimate per Serving)
Dragon Fruit Smoothie
Whip up this antioxidant-loaded Dragon Fruit Smoothie for breakfast or a snack. This smoothie takes only 5 minutes and 5 ingredients to make!

This smoothie is loaded with dragon fruit, blueberries, and bananas. If you are craving a fruit smoothie, this is a great one to try! Head to the store, grab supplies and get to mixing.
There are so many uses for dragon fruit, but I think my favorite will always be smoothies. (I also love these Strawberry Mango Fizz and Cookie Dough smoothies!)
This Dragon Fruit Smoothie recipe is...
- Ready in 5 minutes or less
- Loaded with fresh fruit
- Naturally gluten-free
- Dairy-free
- Vegan
- Plant-Based
How to Make Dragon Fruit Smoothie

- Toss your ingredients into a blender.
- Blend ingredients until the smoothie is fully blended.
- Pour the smoothie into glasses, then top with fresh fruit and serve.
Full directions and ingredients are in the printable recipe card below.
Tips & Tricks for Dragon Fruit Smoothie

High Speed Blender
I highly recommend using a high-speed blender. Using a high-speed blender will ensure that all your fruit is well blended and that your smoothie has a creamy texture. If your blender isn't fast enough, you will find that the texture of your smoothie is off.
Thickness of the Smoothie
You can adjust the texture of your smoothie by adding certain ingredients! Add extra fruit to make your smoothie nice and thick. You can also add extra plant based milk to help thin out the smoothie.
Variations to Dragon Fruit Smoothie

Added Fruit
Feel free to change up the fruit you add into this smoothie. Any fruit you have on hand will work great. Toss in some frozen pineapple, kiwi, mango, etc. Create whatever flavor combo you prefer!
Flaxseed
Add in a little flaxseed to add in extra nutrients. Sneak in a tablespoon or two for your kids who are going to sip this smoothie-or great nutrients for you!
Plant-Based Yogurt
Instead of milk, you can use a vanilla plant-based yogurt. This will give you a thicker and richer smoothie.
Dragon Fruit Smoothie FAQs

What does dragon fruit taste like?
Dragon fruit is a mild fruit when it comes to flavor. You will find fresh dragon fruit offers the flavor of a pear mixed with a kiwi. Dragon fruit is a delicious fruit that tastes great mixed in with other fruits.
Can you freeze dragon fruit?
You can freeze dragon fruit if you buy some from the store. This is a great way to prep your fruit and keep it ready to toss in smoothies like this.
Dragon fruit can be tricky to find, depending on where you live. So if you find some, go ahead and buy a lot so you can freeze some for later!
How do you store leftover smoothie?
If you don't drink all your smoothie right away, don't worry-you can save it! Store your leftover smoothie in an airtight container for 1-2 days in the refrigerator. When you're ready to eat it, just give the smoothie a stir, pour into a glass, and enjoy.
More Tasty Ideas
If you love this dragon fruit smoothie, check out these other delicious recipes:
Recipe

Dragon Fruit Smoothie
Ingredients
- 1 ½ cups dragon fruit cubed and frozen
- 1 ripe banana
- ½ cup blueberries frozen
- ½-1 cup plant based milk depending on thickness desired
- ½ cup blueberries frozen
Instructions
- In a large high-speed blender, put dragon fruit, banana, blueberries, milk, and chia seeds into the bottom.

- Turn on blender, starting on a low speed, and gradually increasing speed until everything is completely blended and smooth.

- Serve immediately!

Notes
- You can use pink or white dragon fruit.
- To make it extra creamy, add ½ cup of vegan yogurt.
- To make it thicker, use frozen banana and less milk.
- Having a good blender is important to bread down the seeds in the dragon fruit.
Nutrition (Estimate per Serving)
Vegan Strawberry Mango Popsicles
Vegan Strawberry Mango Popsicles are the must-have summer dessert. You only need 3 ingredients to make this chilled dessert to cool you off this summer.

Popsicles are one of my favorite summer treats! But I prefer making my own to buying some from the store. That way, I can control the ingredients-and the flavors! Some of my favorite flavors are Peaches and Cream and Blackberry Watermelon-and, of course, Chocolate Fudge!
But I always come back to fruity, creamy popsicles. In this recipe, coconut yogurt pairs deliciously with strawberry and mango to make these refreshing dairy-free popsicles!
This Vegan Strawberry Mango Popsicle recipe is...
- Made with 3 ingredients
- Prepared in 5 minutes
- Easily stored in the freezer
- Dairy-free
- Naturally gluten-free
How to Make Vegan Strawberry Mango Popsicles

- Start by adding your berries and yogurt to the blender, and mix till combined.
- Once mixed, pour berry mixture into a bowl or cup and set aside.
- Then you will blend together the yogurt and mango.
- Layer the mango and strawberry mixtures into the popsicle molds.
- Freeze for 4 hours or overnight to allow popsicles to freeze.
- Serve and Enjoy.
Tips & Tricks for Vegan Strawberry Mango Popsicles

Layering Flavors
I used a spoon to create layers of flavor in the popsicles. To get the layers, I spooned in a bit of the strawberry popsicle mixture, then a bit of the mango popsicle mixture.
Popsicle Molds
You can use any brand or style of molds you want for the popsicles. I love the ones that let you press the stick into the mold at the end. I find that this keeps the popsicle stick secure since the lid secures onto the popsicle mold.
Creamier Popsicles
Want to make a creamier popsicle? Reach for more yogurt instead of fruit to create a delicious, creamy yogurt popsicle.
Variations to Vegan Strawberry Mango Popsicles

Change Up The Flavors
Feel free to change up the flavors by using different fruit. I like to use whatever is freshest at the store or the farmer market. Try making a kiwi strawberry or mixed berry popsicle! Even a tropical popsicle of pineapple and coconut would be delicious.
Swap Out Yogurt
I used a plain coconut yogurt for this recipe. But you are welcome to reach for an almond milk-based yogurt-or any other variety you would like. It will blend together the same with whatever you choose.
Vegan Strawberry Mango Popsicles FAQs

How do you remove popsicles from molds?
The easiest way to get your popsicles out from the molds is to run them under warm water for a minute-only at the bottom of the mold, though! This will loosen up the popsicle just enough so it slides right out.
How long will these yogurt popsicles last?
You can store your popsicles for 3-4 months in the freezer. Just keep them stored properly, and they will last all summer long.
Are popsicles bad for you?
Remember to keep all things in moderation when it comes to this frozen treat. However, you will gain some nice nutrients from the fresh fruit in these popsicles.
How long do popsicles take to freeze?
Generally you will want to wait a minimum of 4 hours before removing your popsicles from the molds. The freezing time varies depending on the thickness of the popsicle mixture. Smaller and thicker popsicles will freeze faster than larger popsicles with a thinner mixture.
Also worth trying: our vegan fudgesicles.
Recipe

Vegan Strawberry Mango Popsicles
Ingredients
- 1 ½ cup strawberries fresh or frozen
- 1 ½ cup mango chunks fresh or frozen
- ½ cup plain coconut yogurt
Instructions
- Add strawberries and ¼ cup of coconut yogurt to a blender.

- Blend until smooth. Transfer to a small bowl and set aside.

- Repeat the first step but with the mango chunks.

- In the popsicle molds, add a few spoonfuls of the strawberry mixture to one side.

- Then fill the rest of the molds with the mango mixture. And don't forget to place the popsicle sticks inside!

- Freeze popsicles for at least four hours, or until completely frozen.

Notes
- These popsicles will last several months in the freezer-so you can enjoy them all summer long!
- Experiment with flavors by using other fruits that you enjoy such as kiwis, raspberries, or peaches.
- For a creamier texture, reduce the amount of fruit and add more coconut yogurt.
Nutrition (Estimate per Serving)
Vegan Charcuterie Board
This beautiful and delicious Vegan Charcuterie Board is perfect for holiday celebrations, casual entertaining, or just a fun weeknight in. This vegan snack board is loaded with fresh veggies, fruits, nuts, and plenty of yummy dips.

This vegan snack board is loaded with healthy and satisfying snacking options. Crunchy nuts, creamy hummus, fresh veggies, and more.
Want to get a bit fancier than just basic hummus? Try adding this Vegan Jackfruit Crab Dip or this Garlic Cashew Cheese spread to your board.
Or simply spice up your hummus game (literally) with this Grilled Red Pepper Hummus.
Why You Will Love This Vegan Charcuterie Board...
- Simple assembly.
- Homemade hummus,
- Crisp veggies and crunchy nuts!
- Nice variety of snacks,
- Vegan friendly.
- Vegetarian friendly.
- Stunning presentation,
And while you're here, don't forget to grab a copy of my free vegan cheat sheet. It's packed with all my favorite substitutions to vegan-ize any recipe!

How to Make Vegan Charcuterie Board
- Start by adding all the ingredients for your hummus in the blender or food processor. Mix until creamy in texture.
- Pour the hummus into serving bowls, and place on a charcuterie board.
- Assemble all your snacks around it, and get to snacking!
Tips and Tricks for the Perfect Vegan Charcuterie Board

Choosing A Board
Making a charcuterie doesn't mean you have to go out and buy a super expensive board. Just reach for any wooden cutting board or tray that is large enough to hold all you plan to serve.
Even a cookie sheet can be a base for your board in a pinch! Make sure to pick a tray that has enough room for all your snacks to fit, but doesn't leave a lot of empty space. The board needs to look full for the best presentation.
Prepare in Advance
You can prepare your board in advance if you prefer, which is great for entertaining. Just assemble your snack board as you would like, cover it tightly with plastic wrap, and store in the fridge until you are ready to serve.

Add More Dips
I served my vegan charcuterie board with homemade hummus - the recipe is in the recipe card below!
Consider placing several small bowls of hummus around the snack board, rather than one large bowl. The placement can help create balance!
Plus, it's easier for everyone grab a bite when there are several dip bowls strategically placed.
However, serving a few different vegan dips will help balance out your board flavor-wise as well as visually. If you want to add more dips, here are a few of my favorite options:
- Vegan Blue Cheese Dressing, such as this one from Daiya
- Vegan Artichoke Dip (This 5-minute version is a great choice!)
- Vegan Jackfruit "Crab" Dip
- Baba Ghanouj (an eggplant and tahini dip)
- Sun Dried Tomato Dip
- Avocado Edamame Dip
- Olive Oil & Balsamic Vinegar - perfect for dipping bread.
More Snack Board Ingredients
You can change up this grazing board to fit your own tastes and use whatever you have on hand. Some delicious choices for your vegan charcuterie board are:
- Carrot Sticks
- Cucumbers
- Tomatoes
- Artichoke Hearts
- Sun Dried Tomatoes
- Olives - all different varieties!
- Nuts - Cashews and Pecans are a great coice.
- Pita Chips
- Tortilla Chips
- Sliced Whole Grain Bread
- Grapes
- Berries - Strawberries, Raspberries, Blueberries
- Vegan Mozzarella Sticks - a crowd-pleasing hot appetizer that disappears fast.
Include Something Sweet!
I tend to lean towards savory ingredients when it comes to snacking. But it can be nice to include a little something sweet on your board as well.
Grapes and fresh berries are a great option, and they pair well with many of the savory ingredients too.
Or you could get really fancy and serve a chocolate hummus paired with strawberries and melon on one end of the tray. Yum!

Vegan Charcuterie FAQs
How do you say "charcuterie board?"
Not quite sure how to say "charcuterie?" Here is how to pronounce it: "shahr-ku-tuh-ree." Now you know. 😉
How do you build a charcuterie board?
Start by placing dip on both ends of the board. Then begin to add vegetables, nuts, and such on the board. I began by laying items around the bowls, and then worked my way out to the edge of the board, filling in all the empty spaces.
Are a grazing board and a charcuterie the same thing?
Essentially, yes, the two names mean the same thing. Traditionally "charcuterie" includes meat, but today most people use the term "charcuterie board" to refer to any assortment of snacks laid out on a tray.
You will find that - no matter the name - an arrangement of your favorite tasty snacks on a board is a surefire crowd pleaser!
What are items to put on a vegan charcuterie tray?
Vegetables, veggie "meat," vegan cheese, dips, crackers, bread, etc. You might even enjoy adding in some nuts, fresh fruit, and more.
More Recipes to Try
I love serving up one of these snack boards as the start to a delicious Sunday Brunch. And if brunching sounds amazing to you - go check out my Vegan Brunch Book!
If you love this vegan charcuterie board, don't miss these other delicious vegan ideas:
Also worth trying: our olive and sun-dried tomato tapenade.
- Vegan Thanksgiving and Vegan Christmas Cookbooks (new!)
- Easy & Inexpensive Vegan Party Snacks
- 25 Best Vegan Dip Recipes
- The Best Vegan Tailgate Foods
Recipe

Vegan Charcuterie Board
Ingredients
Board
- 2 carrots peeled and sliced into matchsticks
- 1 cucumber sliced
- 3 celery stalks trimmed and cut in half lengthwise
- ½ cup pecans
- 1 cup grapes
- 1 cup cherry tomatoes halved
- ½ cup cashews
- ½ cup sundried tomatoes
- 1 cup corn chips
- ½ cup olives
- baguette sliced
Homemade Hummus
- 15 oz chickpeas canned, drained, and rinsed
- 1 garlic clove
- ¼ cup fresh parsley
- ½ teaspoon salt
- 1 tablespoon olive oil plus extra for drizzling
- 1 tablespoon tahini paste
- ½ teaspoon smoked paprika plus extra for garnish
- juice of ½ lemon
Instructions
- Add all hummus ingredients to the bowl of a food processor. Blend on high speed until it forms a smooth paste.

- Garnish hummus with additional smoked paprika and a drizzle of olive oil.
- Arrange hummus and all remaining ingredients onto a large serving platter to form your charcuterie board.

Nutrition (Estimate per Serving)
No-Bake Vegan Strawberry Shortcakes
These no-bake shortcut vegan strawberry shortcakes are simple to make using rounds of prepared polenta in place of baked biscuits. These sweet treats make a lovely dessert that's easy enough to make for an everyday treat and pretty enough for special occasions.

Nothing says summertime like a strawberry shortcake - bursting with flavor from fresh strawberries and cream. Yum!
So of course I had to try my hand at making a vegan version of this delightful dessert.
These vegan strawberry shortcakes are:
- Easy to make in just 15 minutes!
- Loaded with fresh strawberries
- And topped with creamy dairy-free whipped cream
- 100% dairy-free and egg-free
- A kid-friendly vegan dessert!
So let's get cooking!
Tips & Tricks
Polenta
You might be thinking polenta is a weird ingredient for a dessert recipes, but you'll have to trust me on this one. It's actually an incredibly versatile ingredient - here are some more ways to use polenta!
You'll want to get the kind that comes in a tube - like this. You'll usually find it in the refrigerated section at your grocery store, although some brands can be stored at room temperature.
Vegan Whipped Cream
For these, we used So Delicious Coco Whip, which is surprisingly low in fat and sugar, too. You can also try your hand at making your own vegan whipped cream from coconut milk.
Variations
This vegan shortcake recipe works well with other kinds of fruit as well. Try replacing the strawberries with any of these fruits for a totally new dessert:
- Blueberries
- Blackberries
- Raspberries
- Pomegranate Arils (yes, really!)
And for another fun twist, try adding a layer of this homemade vegan Nutella!
More Recipes
If you love this vegan strawberry shortcake, be sure to check out these amazing strawberry recipes, or these delicious vegan desserts:
- No-Bake Vegan Lemon Bars
- Homemade Chocolates with Apricots
- Cinnamon Apple Chickpea Cake
- Boozy Chocolate Pudding
Recipe

Vegan Strawberry Shortcake
Ingredients
- 1 pint strawberries
- ¼ cup strawberry preserves all-fruit
- 18 ounce polenta tube
- vegan butter such as Earth Balance
- dairy-free whipped cream see note
- mint leaves optional for garnish
Instructions
- Remove hulls from the strawberries and slice very thinly. Cut up any large slices into smaller pieces. Reserve 6 small halves for topping, if desired.
- Combine the strawberries and ¼ cup preserves, more or less to coat, in a small bowl and set aside.
- Remove the polenta from the plastic wrapping. Cut a little of the puckered ends off from the polenta tube, then cut the rest into 12 equal slices. These will be about ½ inch thick.
- Heat enough buttery spread on a wide skillet or griddle. Cook the polenta slices in a single layer, about 5 to 7 minutes on each side, or until golden and starting to get crusty.
- Remove from the skillet to a platter and allow to cool to room temperature, or until ready to serve. If you're impatient and apply the whipped cream to warm polenta, you'll get a runny mess!
- When ready to serve, layer as follows: A slice of polenta, a small dollop of whipped cream, a few slices of strawberry, another slice of polenta, more whipped cream, a half strawberry (or a few more slices if you didn't reserve halves).
- Garnish with mint if desired; pass around any unused strawberries and more whipped cream to spoon onto individual shortcakes.
Notes
Nutrition (Estimate per Serving)
Photos by Hannah Kaminsky.
This recipe was originally published in 2017. It has since been updated.
Vegan Blueberry Muffins (Gluten-free)
These vegan blueberry muffins are soft, fluffy, and bursting with fresh blueberry flavor. They're easy to make in one bowl, in under 30 minutes. Perfect for breakfast or dessert!

Blueberry muffins are a classic and beloved treat for a reason. They're totally delicious! You can enjoy them for breakfast, as a snack, or as a dessert. I personally love starting the morning with them, along with a hot cup of coffee.
These muffins have everything you could want from a sweet treat like this. They are soft and fluffy and filled with juicy blueberry bites.
You only need one bowl and less than 30 minutes to make these blueberry muffins from scratch!
These vegan blueberry muffins are:
- 100% vegan, egg-free, and dairy-free.
- Gluten-free.
- Filled with fresh blueberries.
- Perfect for breakfast or dessert!
Let's get baking!

Ingredients & Substitutions
- Gluten-free oats. These are ideal for creating a crumbly, slightly chewy texture.
- Cornmeal. This works really well with the other flavors and gives a slightly nutty flavor.
- Cinnamon. Guaranteed to make your kitchen smell amazing!
- Rice flour.
- Baking powder.
- Coconut flour. Just a little bit will help make the perfect texture!
- Plant based milk. Soy and almond milk both work great.
- Flax eggs. These are made by stirring together ground flaxseed with twice the amount of water, and setting aside for 10 minutes.
- Maple syrup. You an also substitute agave syrup.
- Coconut oil. Don't worry, this won't make the muffins taste like coconut.
- Fresh blueberries. A key ingredient for making these muffins really stand out!
How to make vegan blueberry muffins
It's super easy! Firstly, preheat the oven to 180 degrees C (350 F) and lightly grease a muffin tin with vegan butter or olive oil.
Now, add the oats, cornmeal, cinnamon, rice flour, baking powder and coconut flour in a mixing bowl. In a different bowl, stir together the plant based milk, flax eggs, maple syrup and coconut oil.

Add the wet ingredients to the dry and stir in the blueberries.
Next, evenly distribute the batter throughout the muffin tin, adding a few extra blueberries on top of each muffin. Bake in the preheated oven for 20 minutes, until golden brown and a toothpick comes out clean.
Allow to cool down for around 10 minutes before serving.

Tips & Tricks
If using measuring cups to weigh out the ingredients, use a spoon to add the flour to the measuring cup, and then use a butter knife to swipe off the excess. I would recommend using a scale to weigh out the ingredients. You can convert to metric in the recipe card below.
Don't overmix the batter, as this will make the blueberry muffins less fluffy.
If you don't like blueberries, you can replace them with any other berries of your choice. Raspberries, for instance, work really well.
If using frozen blueberries, add them to the batter while they are still frozen. It sometimes help to toss them in a little bit of flour first, so they don't sink to the bottom.
Store the muffins on the counter for around 3 days (covered), or for up to 6 days in the fridge. You can also freeze them for up to 2 months. Simply allow to thaw in the fridge overnight before serving.

More Delicious Recipes
If you love these vegan blueberry muffins, be sure to check out these other delicious recipes:
Also try: our Pumpkin Chocolate Chip Muffins.
- Cranberry Orange Muffins
- Lemon Blueberry Bundt Cake
- Healthy Carrot Muffins
- Banana Chocolate Chip Muffins
- Healthy Pumpkin Muffins
Recipe

Vegan Blueberry Muffins (Gluten-free)
Equipment
- Conventional oven
- Muffin tin
- Mixing bowl x 2
Ingredients
- ¾ cup gluten-free oats
- ⅓ cup cornmeal
- ½ tablespoon cinnamon
- 1 cup rice flour
- 1 tablespoon baking powder
- ½ teaspoon salt
- ½ cup coconut flour
- ½ cup plant based milk
- 3 flax eggs 3 tablespoon ground flaxseed + 6 tablespoon water, set aside for 10 minutes
- ½ cup maple syrup
- ¼ cup coconut oil melted
- 1 cup blueberries
Instructions
- Preheat the oven to 180 degrees C (350 F) and lightly grease a muffin tin with vegan butter or olive oil.
- Add the oats, cornmeal, cinnamon, rice flour, baking powder and coconut flour in a mixing bowl.
- In a different bowl, stir together the plant based milk, flax eggs, maple syrup and coconut oil.

- Add the wet ingredients to the dry and mix until well combined.

- Stir in the blueberries.

- Evenly distribute the batter throughout the muffin tin, adding a few extra blueberries on top of each muffin. Bake in the preheated oven for 20 minutes, until golden brown and a toothpick comes out clean.

- Allow to cool down for around 10 minutes before serving.

Nutrition (Estimate per Serving)
Vegan Snickerdoodles
Yummy vegan snickerdoodles! These cookies are soft, chewy, and loaded with cinnamon sugar flavor. Plus, you only need one bowl, a few simple ingredients, and 20 minutes to make them.

No matter how much I love savory food, I definitely have a sweet tooth. I love desserts and sweet snacks, especially homemade. After all, there's nothing quite like enjoying some freshly-baked cookies, straight out the oven.
And these vegan-ized snickerdoodles have quickly become one of my favorite vegan cookie recipes. I can't get enough of that cinnamon-sugar flavor!
These vegan snickerdoodles are:
- Soft and buttery, with the perfect texture.
- Sweetened with cinnamon and coconut sugar.
- Easy to make using just one bowl.
- With just the right amount of chewiness.
- Gluten-free.
- 100% vegan, egg-free, and dairy-free.
So let's get baking!
Ingredients & Substitutions

To make these vegan snickerdoodle cookies, you will need:
- All-purpose gluten-free flour. Most supermarkets/health food stores sell good-quality blends. If you don't need the recipe to be gluten-free, you can use all purpose flour.
- Coconut sugar. I would not recommend using a liquid sweetener, as this may interfere with the texture. You can also use regular granulated sugar, if you prefer.
- Cinnamon. This will make your whole kitchen smell amazing!
- Baking powder.
- Almond flour. This is perfect for creating a good texture. I tried it with coconut flour too, which worked, but they turned out a little bit more crumbly.
- Peanut butter. You can use any nut or seed butter of your choice.
- Plant based milk. Use an unsweetened variety. Soy and almond milk are good choices.
Make the Cookies (Step by Step)
First, preheat the oven to 180 degrees C / 350 degrees F.
To a large mixing bowl, add the all-purpose gluten-free flour, coconut sugar, cinnamon, baking powder and almond flour. Mix together well.

Now add the peanut butter and plant based milk, stirring together well using a spatula or your hands. If necessary, add more plant based milk if the dough looks too crumbly or dry.
Shape the dough into even-sized cookie shapes, flattening them down slightly on a baking tray lined with a sheet of parchment paper.

Bake in the preheated oven for around 12 minutes, until golden brown. Cool for around 5 minutes before serving.

Storing and Freezing
You can store these vegan snickerdoodles on the countertop, covered, for around 3 days, or for 5 days in an airtight container in the fridge. I would not recommend freezing them, as the texture goes crumbly after thawing.

More Vegan Cookies Recipes:
If you love these vegan snickerdoodles, be sure to check out these other delicious vegan cookies:
- Vegan Shortbread Cookies
- Vegan Gluten-Free Chocolate Chip Cookies
- Vegan Sugar Cookies
- Vegan Oatmeal Raisin Cookies
Recipe

Vegan Snickerdoodles
Equipment
- Conventional oven
- Mixing bowl
- Baking tray
Ingredients
- 1 ¾ cup all-purpose gluten-free flour
- ¾ cup coconut sugar
- ½ tablespoon cinnamon
- 1 teaspoon baking powder
- ¼ cup almond flour
- ½ cup peanut butter
- 6 tablespoon plant based milk
Instructions
- Preheat the oven to 180 degrees C (350 F).
- To a large mixing bowl, add the all-purpose gluten-free flour, coconut sugar, cinnamon, baking powder and almond flour. Mix together well.

- Add the peanut butter and plant based milk, stirring together well using a spatula or your hands. If necessary, add more plant based milk if the dough looks too crumbly or dry.

- Shape the dough into even-sized cookie shapes, flattening them down slightly on a baking tray lined with a sheet of parchment paper.

- Bake in the preheated oven for around 12 minutes, until golden brown. Cool for around 5 minutes before serving.

Nutrition (Estimate per Serving)
Vegan Carrot Cake Bliss Balls
These vegan carrot cake bliss balls taste like an indulgent dessert, but are healthier, oil-free, and sweetened with dates. You can expect a perfect flavor and a soft, chewy texture. Serve them as a snack or as a breakfast!

I loooove homemade snacks. As a self-proclaimed snack queen, they're my go-to tool for satisfying peckishness between meals, or fuel after a tough workout. Homemade is often tastier, much cheaper, and you have full control over the ingredients.
Bliss balls have been the rage for quite a while, and I totally get why. They're so easy to throw together and there are countless yummy combos and flavor to try.
My personal favourite? Carrot cake! Let's just say that my days not liking carrot cake and even being skeptical about the concept of putting carrot in sweet things have long passed!

Vegan carrot cake bliss balls
These are just my ideal no-bake snack bites. I'm talking soft, incredibly chewy, nicely sweetened with not too much sweetness either, covered in a thick glaze of chocolate. It just doesn't get much better! Seriously, the batch is lucky to last more than about two days in my kitchen.
Want to skip the chocolate glaze? Opt for desiccated coconut as well, or just eat them as they are! You pretty much can't go wrong regardless of which option you choose.

What's great about these bliss balls is that they're naturally sweetened with dates. Dates make a great alternative to sugars and liquid sweeteners.
Simply soak them in warm water for around 15 minutes to make them blendable, and their natural flavor is perfect for a huge variety of desserts.
Ingredients and Substitutions

- Pitted medjool dates, soaked in warm water for 15 minutes.
- Peeled and grated carrot. Don't worry, these definitely don't taste like vegetables!
- Pecan nuts. Use any nut variety of your choice, or omit/replace with chocolate chips for a nut-free version.
- Coconut flour. Almond flour works well too.
- Peanut butter, or any other nut/seed butter of your choice.
- OPTIONAL: melted dark chocolate and/or desiccated coconut.

That's it! Just a handful of ingredients and you have #snackgoals ready to go.
How to Make Carrot Cake Bliss Balls
STEP 1: Add the dates, carrot, pecan nuts, coconut flour and peanut butter to a blender or food processor. Blend until a thick 'dough' forms. If the dough is too sticky, add more coconut flour.

STEP 2: Shape the dough into even-sized balls.
STEP 3: Roll the dough in the melted dark chocolate and/or desiccated coconut. Leave to chill in the fridge for at least 30 minutes, or overnight.

You will love carrot cake bites!
They are …
- Perfectly chewy and soft.
- Sweetened with dates.
- Gluten-free.
- Oil-free.
- Indulgent.
- Great for a homemade snack option.
- Easy to make.
- Ready in less than 10 minutes (not including time in the fridge).
More Recipes to Try
If you love these vegan carrot cake bliss balls, try these other vegan recipes.

Recipe

Vegan Carrot Cake Bliss Balls (No-bake, Gluten-free)
Equipment
Ingredients
- 1 cup pitted medjool dates soaked in warm water for 15 minutes
- 1 cup carrot grated
- ½ cup pecan nuts
- ⅓ cup coconut flour
- ¼ cup smooth peanut butter
- 2 oz dark chocolate melted
- ¼ cup desiccated coconut
Instructions
- Add the dates, carrot, pecan nuts, coconut flour and peanut butter to a blender or food processor. Blend until a thick 'dough' forms. If the dough is too sticky, add more coconut flour.
- Shape the dough into even-sized balls.
- Roll the dough in the melted dark chocolate and/or desiccated coconut. Leave to chill in the fridge for at least 30 minutes, or overnight.
Nutrition (Estimate per Serving)
Cinnamon Apple Chickpea Cake
Made with chickpeas as the 'secret' ingredient, this Cinnamon Apple Chickpea Cake is fudgy, delicious and healthy at the same time! It's the perfect high protein and dairy-free dessert to enjoy with a cup of tea.

I hope you can sense my excitement through this post, because today we're making cake. And not just any cake - a cinnamon apple chickpea cake.
It's three amazing things in one: cinnamon, apples, and cake. Actually, four amazing things, because chickpeas are pretty incredible too.

A fun fact is that I always struggle with naming my recipes. I didn't know whether to call this a cake or a pie, and went with the former because it doesn't have a crust.
But I don't know, apples are typically used in pies and you don't hear "apple cake" all too often. And I don't think I've ever heard of a "chickpea cake". But let's go with it.
And while you're here, don't forget to grab a copy of my free vegan cheat sheet. It's packed with all my favorite substitutions to vegan-ize any recipe!

Anyway, regardless of the name, the result is absolutely phenomenal. Fudgy, moist, the sort of thing you can eat all by yourself as a meal. I won't tell. 😉
It has just the right level of sweetness and a wonderful soft texture thanks to the chickpeas and the peanut butter.
Plus, there's just something so cozy about baking with apples in Fall. Apples and pumpkin - the two things that make me less sad about short days, colder weather and the end of summer fruit that doesn't cost the equivalent of my weekly grocery budget per pound.
Oh, and this cake just happens to be completely vegan too!
Baking with Chickpeas
If you've never baked with beans of any kind before, fear not. I swear this vegan apple cake doesn't taste like hummus. And as much as we all love hummus, we don't want our sweet treats tasting like it either.
Chickpeas by themselves are pretty neutral in taste. The key is using the right ratio of other ingredients to sweeten them up and create a fudgy, cake-like texture.

Baking with beans (that sounds so catchy it should be a TV show) is cool for many reasons. They're great for adding softness to treats like chocolate cookies, brownies, or blondies.
Plus, they naturally make the treat higher in healthy protein - without your kids ever knowing. I'm a huge believer in creating recipes that are good for both the body and the soul, and this is certainly one of them.

How to Make a Chickpea Cake
As I mentioned, you definitely don't have to be a gifted baker to make this chickpea cake. I'm certainly not - savory recipes are much further into my comfort zone.
Here is a quick summary of the instructions. Scroll down for the detailed, printable recipe card.
Simply start by adding the all of the ingredients to a food processor. Don't worry too much about the order, but I'd recommend starting with the chickpeas and dry ingredients followed by the wet. Blend for 1-2 minutes, until a soft mixture forms (almost like a dense hummus lol).

Then, pour the batter into a lightly greased shallow cake pan. Add a chopped apple on top, and a handful of cashew nuts, if you want. Then, bake in a preheated oven at 400 degrees F for 45-50 minutes. The cake should be golden and crispy around the edges, with still a bit of softness in the center.
Allow the chickpea cake to cool for 15-20 minutes. Then, it's ready to serve with fresh fruit or berries and a drizzle of nut butter.
Keep it in the fridge (covered) for 3-4 days and enjoy the chickpea cake either as a dessert or snack.

Add More Protein to the Cake
To take the protein content of this cake even further (and also add extra flavor), I added a scoop of protein powder.
The one I used in this recipe is Vega Protein Powder in Caramel Toffee. It's my favorite from the ones I've tried, and doesn't have a weird aftertaste.
You can use your own favorite brand and flavor. I recommend using a protein powder that's either a neutral or vanilla flavored so that it doesn't interfere too much with the other ingredients.

Tips & Tricks
If you want to leave out the protein powder, use 2 extra tablespoons of coconut flour.
Add any nuts, seeds or berries of your choice into the batter - chocolate chips would work brilliantly too! I love sprinkling in some goji berries for an extra superfood boost.
For a chocolate chickpea cake, use either chocolate protein powder or 2 tablespoons of extra cacao powder.
If you're leaving out the protein powder or using a neutral-tasting one, use ½ a banana in place of the flax egg for extra sweetness.
Use any nut or seed butter of your choice (either crunchy or smooth).
More Recipes to Try
If you love this Cinnamon Apple Chickpea Cake, be sure to check out these other delicious recipes:
- How to Roast Chickpeas - 4 Ways
- Chunky Applesauce Cake
- Apple Pie Oatmeal
- Almond Butter Protein Balls
- Vegan Cinnamon Roll in a Mug
Recipe

Cinnamon Apple Chickpea Cake
Equipment
Ingredients
- 1.5 cups chickpeas see notes
- 1 scoop protein powder see notes
- ¼ cup coconut flour + 3 tablespoon additional
- 1 tablespoon cacao powder
- 1 teaspoon ground cinnamon
- 1 teaspoon baking powder
- ½ cup peanut butter or any other nut or seed butter of your choice
- ¼ cup maple syrup
- 1 cup almond milk
- 1 large chopped apple for topping
- ¼ cup chopped cashews for topping
- fresh berries and nut butter optional extra toppings
Instructions
- Preheat the oven to 400 degrees Fahrenheit.
- Add the cooked chickpeas, protein powder, coconut flour, cacao powder, cinnamon, baking powder, peanut butter, maple syrup and almond milk to a food processor. Blend until smooth.
- Transfer the batter to a shallow cake tin. Decorate the top with apple slices and chopped cashew nuts, and bake for 45 minutes, until golden and crispy around the edges, but still slightly soft in the centre.
- Allow to cool for 15 minutes before serving with fresh berries and a drizzle of nut butter.
Notes
Nutrition (Estimate per Serving)
Vegan Recipes

explore
30-Minute Dinner Ideas
Need dinner in a hurry? Check out these easy, tasty recipes that are ready in under 30 minutes.
The 10 Most-Loved Recipes
These are the recipes readers can't stop making.
Vegan Main Dishes
- Gnocchi with Vegan Sausage and Gravy
- Bun-Believable: My Favorite Vegan Burger Recipes
- Vegan Quinoa Mushroom Burger
- Easy Vegan Portobella Burgers
Sweet tooth?
From gooey chocolate treats to fruity favorites, these vegan sweets are worth saving room for.

Vegan-ize anything!
Subscribe and get my free vegan substitution cheat sheet, packed with easy ways to make just about any recipe vegan.
Vegan Appetizers
Vegan Easter Desserts and Treats
Planning a vegan-friendly Easter meal? These irresistible vegan Easter desserts and treats are the perfect way to end your Easter dinner or brunch. From No-Bake Strawberry Shortcake to Vegan Marshmallow Peeps, there's a little something for everyone.
Also try: our Vegan Funfetti Cake.
Vegan Easter Desserts
Here are all my favorite vegan-friendly Easter desserts.
No-Bake Vegan Strawberry Shortcakes
Strawberry shortcakes are just perfect for Easter brunch. They're light and fruity and festive - and fun to make too! This no-bake vegan version couldn't be an easier, and it tastes delicious too.
Vegan Carrot Cake
Carrot cake is an Easter classic, and this vegan version will not disappoint. Flavorful carrot cake is topped with a rich and creamy maple cream cheese frosting. You'd never guess it's plant based!
Homemade Vegan Marshmallow Peeps
Marshmallow peeps are an Easter tradition. And now they've been vegan-ized, so we can take part in all the fun!
Vegan Easter Egg Cupcakes
Want all the fun of decorating eggs without the... well.. eggs? Check out these adorable and vegan-friendly Easter cupcakes.
Chocolate-Coated Key Lime-Coconut Creme Pie
With a hint of chocolate, the crunch of the toasted coconut and cacao nibs, and a creamy custard - this refreshing pie is the perfect dessert to finish off your Easter celebration.
Vegan Triple Citrus Cupcakes
These simple cupcakes combine three zesty citrus flavors into one delicious cupcake. The sweet, bright flavor is perfect for a spring celebration.
Vegan Easter Lemon Cupcakes
Another Easter-worthy cupcake recipes - these lemon cupcakes are fresh, fruity, and topped with vegan-friendly jelly beans!
Easter Thumbprint Cookies
Classic thumbprint cookies have been given a vegan makeover in these adorable sweets. They're bright and colorful - and no one would guess they're entirely plant based too.
Carrot Cake Sugar Cookies
Who could resist these carrot-shaped sugar cookies? They're simple, delicious, and completely vegan (and gluten-free too!).
Vegan Dark Chocolate Easter Eggs
Why should vegans miss out on all the Easter fun. Now they don't have to - just whip up a batch of these adorable and delicious dark chocolate Easter eggs. They're rich and chocolatey, and completely plant based too.
Cinnamon Bunny Biscuits
These cinnamon biscuits are fun and tasty - and shaped like little bunny rabbits. How cute is that?
Chocolate Ganache Cake
There's really nothing quite like a chocolate cake to make a meal feel like a celebration, right? I love this vegan friendly chocolate ganache cake for the Easter table. It's rich and delicious, and perfect topped with your favorite berries.
Vegan Easter Egg Cheesecake
I'm a bit of a cheesecake addict, so these vegan-friendly Easter egg shaped cheesecakes are a win in my book. Topped with a chocolate bunny and some vegan-friendly Easter candy, this is just too cute to pass up.
Big Orange Bundt Cake
Another citrusy favorite, this big orange vegan Bundt cake is an Easter favorite. It's simple and delicious and always a hit with the entire family.
Raspberry Lemon Mousse Tart
Fresh berries and a creamy lemon mousse are perfectly paired in this fresh and flavorful dessert. It's the perfect sweet treat to finish off that Easter feast.
Bunny Lollipops
These adorable Easter bunny lollipops taste just like Rice Krispies treats - but are made with vegan friendly marshmallows. So cute and tasty too!
Vegan Apple Strudel
Apple strudel is a classic for good reason. It's warm and comforting and perfectly flaky. And you'd never guess this version is entirely vegan!
Chocolate-Dipped Strawberries
Chocolate dipper strawberries are always a crowd pleaser. Let the kids get in on the action with these simple and tasty treats.
Creamy Peanut Butter Pie
You would never guess this creamy peanut butter pie is 100% plant based. It's rich and chocolatey, and totally addictive. This one is a fan favorite amongst the kids (and big kids) in my family.
Vegan Marshmallow Peeps Cake
This elaborate Easter cake is totally worth the effort. The vegan friendly chocolate marshmallow cake is topped with a rich buttercream frosting. And the decorating can't be beat!

Vegan Easter Recipes
Planning a plant-based Easter feast? You've come to the right place. I've rounded up all my favorite Vegan Easter recipes right here, so you can plan the perfect menu. From easy appetizers, to hearty main dishes, to sweet desserts - there's something for everyone.
Easter is the perfect holiday for putting together a vegan brunch or dinner. With all of the fresh, seasonal product of spring - these recipes are filled with light leafy greens, fresh asparagus, beets, carrots, and bright, citrusy flavors. So much deliciousness!
Use these mix and match vegan menu suggestions to create a memorable Easter feast for your family and friends.
P.S. If you want to make things even easier this Easter, go snag a copy of my new Vegan Brunch Book. It's the perfect way to plan a delicious and simple Easter brunch!
Vegan Easter Appetizers
- Deviled Tomatoes
- Mushroom, Asparagus, and Artichoke Medley
- Beet Muhummara
- Spinach or Arugula Strudel
- Green Pea, Parsley, and Pistachio Dip
- Raw Vegan Cheddar Cheese Spread
- Rosemary Roasted Mushrooms
- Mushroom, Asparagus, and Artichoke Medley
Vegan Easter Soups
- Greek-Flavored Spinach and Orzo Soup
- Vegan Tomato Gazpacho
- Lemony Leek and Mushroom Soup
- Creole Carrot Soup
- Vegan Cream of Broccoli Soup
- Creole Eggplant Soup
- Classic Leek and Potato Soup
Vegan Easter Salads
- Spring Greens Salad with Endive and Oranges
- Mixed Greens Salad with Beets and Walnuts
- Asparagus with Mustard-Dill Sauce
- Beet and Red Cabbage Slaw
- Orange and Cucumber Salad with Spring Greens
- Mixed Greens Salad with Avocado, Apples, and Baked Tofu
- Quinoa and Asparagus Salad
Vegan Easter Main Dishes
- Seitan and Polenta Skillet with Fresh Greens
- Creamy Roasted Red Pepper Pasta
- Roasted Seitan, Peppers, and Portabellas
- Crustless Tofu Quiche with Mushrooms and Herbs
- Orzo-Stuffed Bell Peppers
- Pasta Primavera
- Linguine with Asparagus and Portabella Mushrooms
- Citrus-Roasted Tofu (photo at top)
- Spring Vegetable Tart
- Paella Vegetariana
- Quinoa, Broccoli, and Vegan Cheese Casserole
- Vegetable White Bean Hash
- Baked Chickpea Ratatouille
Vegan Easter Side Dishes
- Roasted Potatoes and Tomatoes with Rosemary
- New Potatoes with Parsley and Almond Pesto
- Vegan Lentil Meatballs
- Hasselback Potatoes
- Sautéed Broccoli or Broccoli Rabe, Baby Carrots, and Yellow SquashCauliflower with Parsley-Pecan Breadcrumbs
- Cauliflower Rice Pilaf
- Contemporary Creamed Spinach
- Simple Sesame-Roasted Asparagus
- Asparagus, Squash, and Red Bell Pepper Sauté
- Orange-Glazed Beets
Vegan Easter Desserts and Treats
- Vegan Rice Pudding
- Carrot-Walnut Muffins
- Triple-Citrus Cupcakes
- Caramel Macchiato "Cheese" Cake
- Big Orange Bundt Cake
- Vegan Apple Strudel
- Cool Season Fruit Bowl
- Creamy Peanut Butter Pie
- Chocolate Ganache Cake
- Chocolate-Coated Key Lime-Coconut Creme Pie
Still craving something sweet? Find even more vegan Easter desserts here.
Also try: our creamy asparagus and pea pasta.
Also try: our vegan chocolate orange cake.
Also try: our cream of asparagus soup.
Also try: our glazed baked onions.
Also try: our Vegan Greek Pasta Salad.
And if you're still searching for the perfect recipes, be sure to check out my new Vegan Brunch Book! It's the easiest way to plan the ultimate vegan friendly Easter Brunch.
Vegan Peanut Butter Cups
These homemade vegan peanut butter cups are made using just 6 ingredients and taste better than store-brought. They are perfect for dessert, or a quick chocolatey snack.

Peanut butter and chocolate is a classic for a reason. Sometimes, if I feel snack-ish and don't know what to eat, I'll grab a jar of PB, some dark chocolate, and simply dip the latter into the former. It never fails to amaze me.
And peanut butter and chocolate are even better in a homemade peanut butter cup form. Set in the fridge, then served with a warm cup of tea, they are what every chocolate lover's dreams are made of.

Hence, I'm very excited to share these vegan peanut butter cups with all of you! As they require just 6 ingredients to make from scratch, I suggest you make these ASAP!

What's to love about these homemade peanut butter cups?
I used to eat store-brought peanut butter cups all the time back in the day. Before my vegan days. I used to pop into the supermarket constantly to stock up on them and enjoy with endless cups of tea. So this recipe feels like a major throwback, just vegan and on the healthier side, too.

And honestly, I think these taste much better than store-bought. The flavour is fresher, they're not extremely sweet, and the fact that they're homemade makes them feel much more special.
What's great about making vegan snacks and desserts at home is that it puts you in control of the ingredients. You have complete oversight. Which means, no hidden ingredients, only the ingredients that you choose to put in. They make an ideal snack whenever you want something quick and super chocolatey!
Ingredients you will need

- Peanut butter. Use smooth peanut butter for this recipe. It will also work with any other nut or seed butter of your choice.
- Cinnamon. This will add a great subtle aftertaste to the nut butter filling.
- Salt. Peanut butter and dark chocolate with a hint of saltiness is obviously a classic mixture of flavours!
- Maple syrup. You can use any other liquid sweetener of your choice, but don't use sugar as this will interfere with the texture.
- Coconut flour. This helps with the texture of the nut butter filling (don't worry - this won't add a coconut flavour).
- Dark chocolate. Use any vegan chocolate of your choice.
How to make homemade peanut butter cups
First, add the peanut butter, cinnamon, salt, maple syrup and coconut flour to a mixing bowl and mix together thoroughly.


Now melt the chocolate. Add the chocolate to a heatproof bowl and place over a saucepan over a low heat. Make sure that the bottom of the bowl doesn't touch the water and bring to a light simmer. Wait for the chocolate to melt, stirring if necessary.
Pour a layer of the chocolate into the bottom of a cupcake mould or case. The thickness can be adjusted according to your preferences, but aim for around 5mm/0.2 inches. Leave in the freezer for 30 minutes.


Now add a layer of the peanut butter filling, followed by another layer of the chocolate. Leave in the fridge for the fridge for 30 minutes more. They are now ready to eat!
Tips for making healthy PB cups
- If the peanut butter you used contains salt already, leave out the extra added salt.
- To replace liquid sweetener, melt a Stevia tablet in an equal amount of water.
- If you want even more chocolate, sprinkle some raw cacao powder into the peanut butter mixture.
- Check out detailed instructions on how to melt chocolate here.
- Switch up the chocolate variety you use! Any vegan chocolate variety works well.
- These can be kept in the fridge in an airtight container for up to 2 weeks.

Other quick vegan snack ideas
- Fudgy Avocado Brownies
- Almond cookies
- No-bake cake pops
- Simple chocolate chip cookies
- Sweet potato brownies
- Four-ingredient fudge

Let me know in the comments: what's your go-to chocolatey snack? If you give these homemade vegan peanut butter cups a go, be sure to tag me on Instagram (@ohmyveggies) so I can see your creations, and leave your feedback in the comments below together with a star rating!
Also worth trying: our vegan sweet potato brownies.
Recipe

Vegan Peanut Butter Cups
Equipment
- Mixing bowl x 2
- Saucepan
- Cupcake moulds/cases
Ingredients
- ½ cup peanut butter
- ½ teaspoon cinnamon
- ½ teaspoon salt
- 2 tablespoon maple syrup
- 2 tablespoon coconut flour
- 5 oz dark chocolate
Instructions
- Add the peanut butter, cinnamon, salt, maple syrup and coconut flour to a mixing bowl and mix together thoroughly.
- Melt the chocolate. Add the chocolate to a heatproof bowl and place over a saucepan over a low heat. Make sure that the bottom of the bowl doesn't touch the water and bring to a light simmer. Wait for the chocolate to melt, stirring if necessary.
- Pour a layer of the chocolate into the bottom of a cupcake mould or case. The thickness can be adjusted according to your preferences, but aim for around 5mm/0.2 inches. Leave in the freezer for 30 minutes.
- Now add a layer of the peanut butter filling, followed by another layer of the chocolate. Leave in the fridge for the fridge for 30 minutes more before serving.
Video
Notes
Nutrition (Estimate per Serving)


Almond Butter Protein Balls
Six ingredients are all you need to make these Almond Butter Protein Balls. These are great pick-me-up snack to fuel your body and curb your sweet tooth cravings. Cocoa, shredded coconut, almond butter, and more make the most incredible bite-size vegan protein balls.

Prep these on Sunday and have these protein balls all week to pack for your lunch, to combat the 2 pm slump, or as an after school treat for the kids. These protein almond balls are even freezer friendly!
These Almond Butter Protein Balls Are...
- Vegan
- Vegetarian
- Gluten-Free
- Dairy-Free
- Great for meal prepping snacks
- Freezer Friendly
How to Make Almond Butter Protein Balls

- Add your activated chia seeds, cocoa powder, almond butter, maple syrup, almond meal, and coconut in a bowl.
- Mix until well combined. Roll into balls.
- Coat each protein ball with the leftover coconut flakes.
Tips and Tricks

Activate chia seeds
To activate chia seeds, they need to be soaked in almond milk. Once they swell up they will resemble tapioca pudding. Combining 2-3 tablespoons of milk with the chia seeds will work. Let them soak for 15-20 minutes. If you find they run out of liquid, add a splash more in.
Texture
You will find that once you roll up the balls, they will be slightly sticky in terms of texture. Roll your balls in the coconut; you may need to gently press to push the coconut flakes into the balls. This coconut coating will help keep the no-bake protein balls from sticking together.
Variations

Chocolate Chips
Stir in some vegan chocolate chips to give these protein balls more chocolate flavor and sweetness. If you are not vegan, any chips will work; for low carb use sugar-free chips.
Maple Syrup Alternative
If you do not want to use maple syrup, you can use agave or even honey, depending on your dietary needs. Any liquid sweetener can work to add texture and sweetness to these bite-size protein balls.
Flaxseeds
You can consider adding a little flaxseed into the mix to add more nutrients to the balls. Flaxseed is full of omega-3 fatty acids, fiber, and more-a great way to add more nutrients into your diet.
Dried Fruit
Another option is to add a few dried cranberries or even blueberries to your protein balls. They would make a delicious addition to the flavor.
Almond Butter Protein Balls FAQs

How should I store almond butter protein balls?
These protein balls can be stored in an airtight container in the fridge for up to two weeks. If you are going to stack the balls within the container, I recommend laying some wax paper between layers to prevent the protein balls from sticking together.
Can you freeze almond butter protein balls?
These no-bake protein balls can be frozen for up to 4 months. Just place them in a freezer bag or container and store them. If you want to meal prep, put a couple in a small bag and then place those smaller bags in a gallon-sized freezer bag. Then you can pull out a snack-size bag when packing lunches or on the go.

Recipe

Almond Butter Protein Balls
Ingredients
- 1 cup shredded coconut
- ½ cup almond butter
- 1 cup almond meal
- ⅓ cup maple syrup
- 2 tablespoon cocoa powder or cocoa protein powder if desired
- 1 tablespoon chia seeds
Instructions
- Place the almond butter, maple syrup, and activated chia seeds in a medium bowl. Mix together well.

- Add the almond flour, cocoa powder, almond meal and coconut (left some for the end!).

- Mix well until you get a smooth dough.

- Roll into 12 balls.

- Lightly roll each ball in shredded coconut.

- Store in the refrigerator for up to 2 weeks or keep in the freezer for 4 months.