
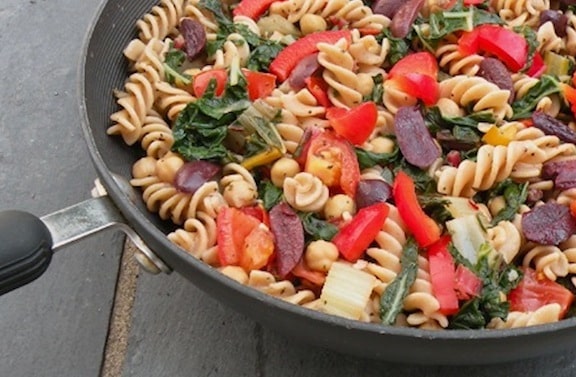
This quick and nourishing pasta recipe combines greens with chickpeas and olives for a tasty, healthy dish. Specifically, this recipe calls for chard, kale, or spinach, but you can use a combination or even substitute broccoli rabe or mustard greens. My personal favorite in this dish is chard, as it's so good in the Italian-style trio of pasta with greens and legumes. Just add a colorful salad and you've got a meal. Recipe from Wild About Greens* by Nava Atlas.
Search Results for: greens
Mixed Greens Salad with Apples, Carrots, and Pickled Beets
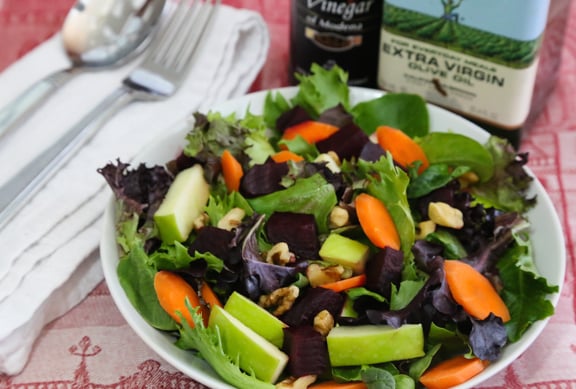
This recipe is for a simple, colorful salad of mixed greens, crunchy carrots, tart apples, and pickled beets that harmonizes well with everyday or holiday meals and adds little hands-on prep time. Photos by Evan Atlas. [Read more...]
Black Rice with Black-Eyed Peas and Greens
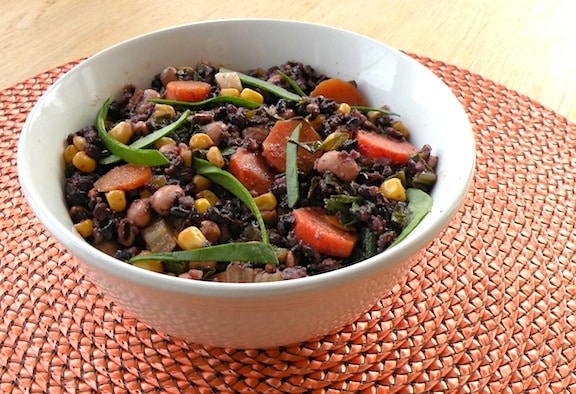
This Black Rice with Black-Eyed Peas and Greens recipe makes an attractive dish to serve hot or cold-an invigorating melange of flavors, textures and colors. I just love the way the corn, black-eyed peas, and greens look against the dark rice, but if brown rice is what you've got on hand, that will work, too. Adapted from Wild About Greens by Nava Atlas. [Read more...]
No-Chop Power Greens Salad
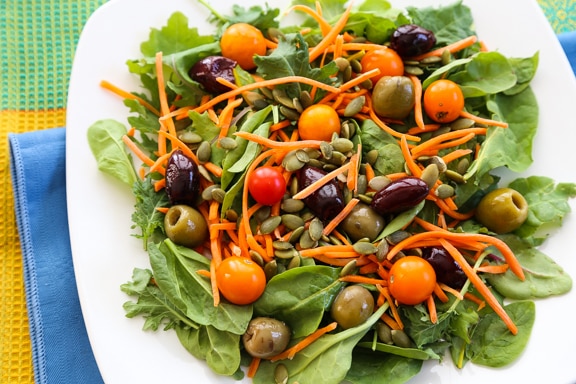
This no-chop power greens salad is the ultimate salad recipe! It's loaded with healthy ingredients and easy to throw together in just 5 minutes. Plus it's vegan and vegetarian friendly too.
Is this you: Are you someone who vows to eat more salad? Are you always promising yourself that you'll do better at eating some fresh raw foods with lunch or dinner?
Making a simple salad isn't a big deal most of the time, but there are times when chopping a bunch of veggies can be less than appealing - whether you're hurrying to pack your lunch or coming home tired after a long day.
Our no-chop power greens salad comes to the rescue!
There's nothing to it other than layering a few veggies (and seeds) that need no prep at all. And it's easy on the eyes, too.
With this salad, there's also no need to measure. Use as much as you need to make one salad or two, or more.
It doesn't get any simpler than that!
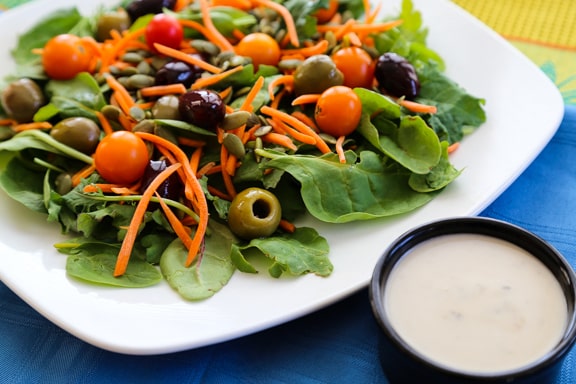
I love to simply drizzle my salad with a bit of extra virgin olive oil and balsamic vinegar. But you can also opt to use your own favorite dressing - this sesame ginger dressing is a great choice!
This no-chop power greens salad is:
- Easy to throw together in just 5 minutes!
- Versatile - use just about any greens, nuts, veggies, or seeds.
It's one of my favorite vegan salads, and also one of my favorite easy-to-pack vegan lunches.
More Vegan Recipes
If you love this power green salad, be sure to check out these other tasty ideas:
- Mango Lentil Salad with Cilantro Lime Dressing
- Mixed Greens Salad with Beets
- 50 Healthy Vegan Dinner Recipes
- Miso Power Bowls
Recipe
No-Chop Power Greens Salad
This no-chop power greens salad is the ultimate salad recipe! It's loaded with healthy ingredients and easy to throw together in just 5 minutes. Plus it's vegan and vegetarian friendly too.
Print
Pin
Save
Servings:
Ingredients
- 2 cups Baby power greens mix see note
- ½ cup carrots pre-grated
- ½ pint cherry tomatoes or grape tomatoes, yellow or red
- ⅓ cup pitted olives black or green
- ¼ cup sunflower or pumpkin seeds
- oil and balsamic vinegar or your favorite salad dressing
Instructions
- For each salad, layer the greens, carrots, tomatoes, olives, and seeds on a plate or in a shallow bowl.
- As mentioned, there is really no need to measure! Just use as much or as little of each ingredient as you'd like.
- Drizzle with olive oil and balsamic vinegar, or top it with your own favorite salad dressing.
Notes
Find baby power greens near the spinach and spring mixes. What's included in power greens mix is baby kale, spinach, chard, and other greens.
Nutrition (Estimate per Serving)
Calories: 165kcalCarbohydrates: 12gProtein: 5gFat: 12gSaturated Fat: 1gPolyunsaturated Fat: 4gMonounsaturated Fat: 6gSodium: 388mgPotassium: 478mgFiber: 4gSugar: 5gVitamin A: 6021IUVitamin C: 29mgCalcium: 48mgIron: 2mg
Vegan-ize any recipe!Grab our free vegan cheat sheet, packed with my favorite easy substitutions to make any recipe vegan.
Quick Gnocchi with Beans and Greens
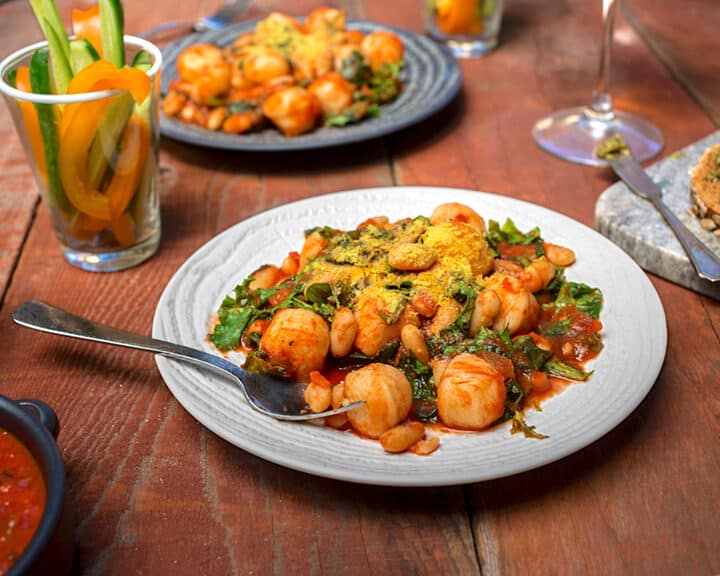
Gnocchi, in case you haven't discovered them, are an Italian specialty that are mainly made of potato flour, with a little wheat flour. In other words, a bit of starchy comfort heaven. You use them the same way you'd use a chunky pasta; they're especially good enveloped in marinara sauce. We like gnocchi with beans and greens - all adding up to a classic Italian trio.
Some cooks like to make their own gnocchi, but no thanks, not us. The project takes a good hour or two and makes a floury mess of the kitchen. There are a number of vegan brands, one of which we depict below, and being the food hackers that we are, we'd prefer just opening the package and letting that be the beginning and end of it. [Read more...]
Savory Breakfast Bowls with Tempeh and Greens
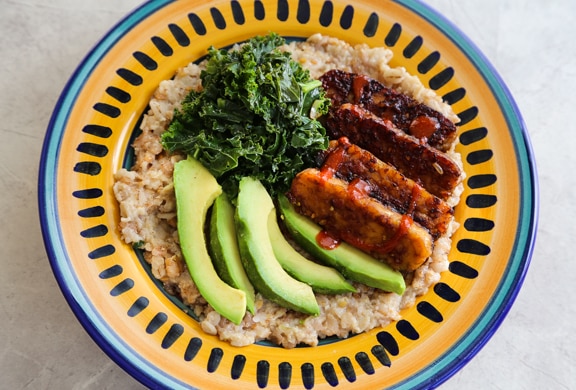
A quick cooked cereal like oatmeal or a multi-grain blend makes a hearty breakfast, but there are some people, yours truly included, that don't enjoy sweet breakfasts. That's where these savory breakfast bowls come in. Topped with tempeh, avocado, and greens, these bountiful bowlfuls will keep you going all day.
Though this doesn't take long to make, it's probably more than what you'd want to do first thing in the early morning before work and school, so try it for a leisurely breakfast or brunch on the weekend. It's a fantastic thing to make if you're going to do any athletic activity! These bowls make an excellent lunch or dinner, too, paired with a simple slaw. [Read more...]
How to Prepare Collard Greens Easily and Quickly
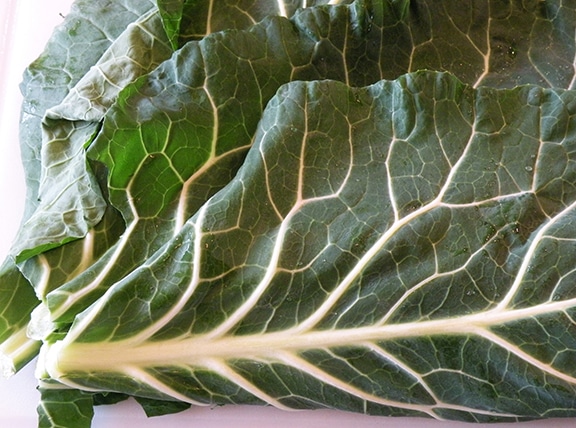
Collard greens can look pretty intimidating — they range from large to gigantic, and look like they'd take hours to prep and even longer to cook. But this is totally not the case. If you know how to tame them, they're easily prepped and very quickly cooked. They're a boon to the plant-based diet, as they're a fantastic source of calcium (better than kale) and rich in vitamins, minerals, and micronutrients. Forget about the old way of cooking them in a bit pot of boiling water. That way, collards lose color, flavor, and nutrients. Prepping them with this easier, more contemporary technique preserves all that is great about collards. [Read more...]
Sesame Soba Noodles with Collard Greens and Tempeh Croutons
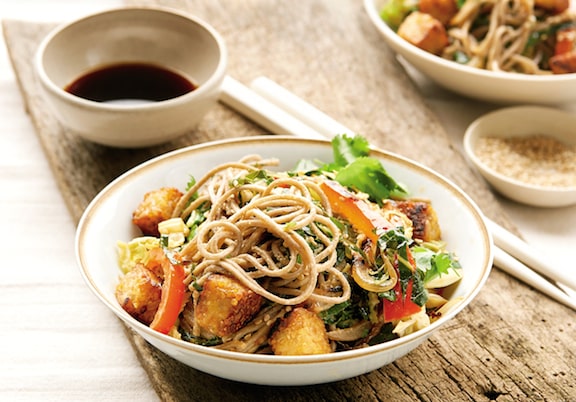
I'm a complete noodle fanatic, but a bowl of pasta with tomato sauce doesn't quite do the trick for me. For me, an ideal noodle dish is one in which veggies have at least equal billing. This Asian-flavored dish of soba noodles and calcium-rich collard greens is flavored with a triple dose of sesame (another great source of calcium): tahini, seeds, and oil. Another bonus - soba noodles made purely of buckwheat are gluten free. If that's not of concern to you, other long noodles - udon or even whole wheat spaghetti - can be substituted. Recipe by Nava Atlas, from Living the Farm Sanctuary Life* by Gene Baur with Gene Stone, © 2015 by Gene Baur. Photographs © 2015 by Rodale Inc. Reprinted by Permission of Rodale Books.
Recipe
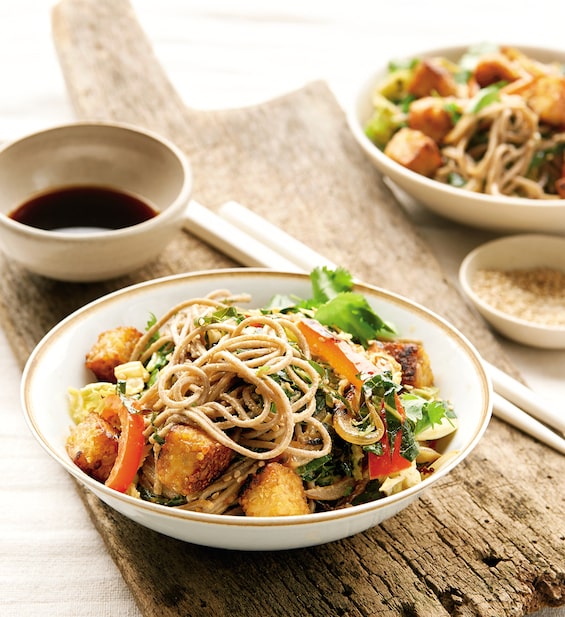
Sesame Soba Noodles with Collard Greens and Tempeh Croutons
This Asian-flavored dish of soba noodles and calcium-rich collard greens is flavored with a triple dose of sesame (another great source of calcium): tahini, seeds, and oil.
Print
Pin
Save
Servings:
Ingredients
Sauce
- ⅓ cup tahini
- ¼ cup lime juice
- 2 tablespoons reduced-sodium natural soy sauce or tamari or more if needed
- 2 tablespoons natural granulated sugar cane, coconut, or date or agave nectar
Tempeh croutons
- 2 teaspoons dark sesame oil
- 1 tablespoon reduced-sodium natural soy sauce or tamari
- 1 package 8 ounces tempeh, any variety, cut into ½" dice
Noodles
- 1 package 8 ounces soba (buckwheat) noodles
- 10 to 12 collard green leaves
- 1 tablespoon dark sesame oil
- 1 large red or yellow onion cut in half and thinly sliced
- ¼ small head green cabbage cut into long, narrow shreds
- 1 medium red bell pepper cut into long, narrow strips
- ½ cup chopped fresh cilantro basil, or Thai basil leaves, or more as desired
- 1 tablespoon black or tan sesame seeds Red-pepper flakes or Sriracha sauce
Instructions
- To make the sauce: In a small bowl, combine the tahini, lime juice, soy sauce or tamari, and sugar or agave nectar.
- To make the croutons: In a large or wide-bottomed skillet, heat the oil and soy sauce or tamari over medium heat. Add the tempeh and stir to coat. Increase the heat to medium-high and cook the tempeh until most sides are golden brown. Remove the tempeh croutons to a plate.
- To make the noodles: Cook the noodles according to package directions. When they're al dente, remove from the heat and drain.
- Meanwhile, cut the stems from the collard leaves with kitchen shears or a sharp knife. Stack 6 or so halves of leaves at a time. Roll the leaves up tightly from one of the narrow ends, almost like a cigar shape, then thinly slice them. Let them unroll to create ribbons of collard greens. Give them a good rinse in a colander.
- In the same skillet used to make the croutons, heat the oil. Add the onion and cook over medium heat until softened and golden. Add the collard ribbons, cover, and cook for 7 to 8 minutes, or until they wilt down a bit. Add the cabbage and bell pepper. Increase the heat and cook for 3 minutes, or just until the veggies are on the other side of raw. Remove the skillet from the heat.
- Add the cooked noodles to the pan and use a large fork to mix the noodles thoroughly with the veggies. Pour the sauce over the mixture. Add the cilantro or basil and sesame seeds. Scatter the croutons on top. Season with the pepper flakes or Sriracha to taste. This can be served warm or at room temperature.
Nutrition (Estimate per Serving)
Calories: 308kcalCarbohydrates: 32gProtein: 9gFat: 18gSaturated Fat: 3gPolyunsaturated Fat: 8gMonounsaturated Fat: 7gSodium: 780mgPotassium: 442mgFiber: 5gSugar: 11gVitamin A: 2398IUVitamin C: 76mgCalcium: 146mgIron: 2mg
Vegan-ize any recipe!Grab our free vegan cheat sheet, packed with my favorite easy substitutions to make any recipe vegan.
- Here are more recipes for enjoying Asian Noodles.
*This post contains affiliate links. If the product is purchased by linking through this review, VegKitchen receives a modest commission, which helps maintain our site and helps it to continue growing!
Coconut Cauliflower Curry with Mustard Greens and Spinach
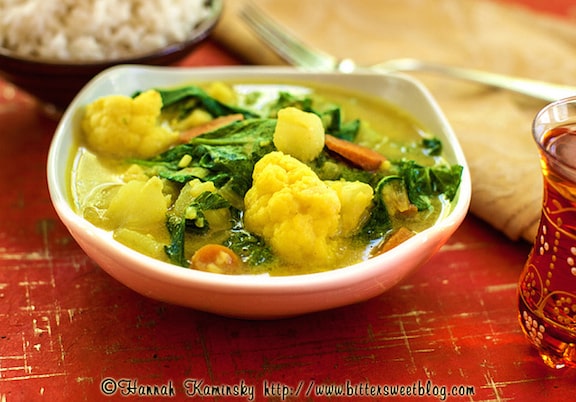
Pungent mustard greens are paired with mild spinach, and with the addition of mellow cauliflower, the result is a gorgeous and satisfying curried stew. Mustard greens, which are in fact a green often used in curries (as is spinach) most often come in really large bunches, so use as much as you'd like; the sharp flavor is well tamed by cooking. If you're not a fan of mustard greens, or just want to use a more familiar type of leafy green veggie, see the variations following the instructions. Recipe from Wild About Greens. Photo by Hannah Kaminsky, from her original review of this this book. [Read more...]
Japanese Soba Noodle Soup with Tofu and Greens
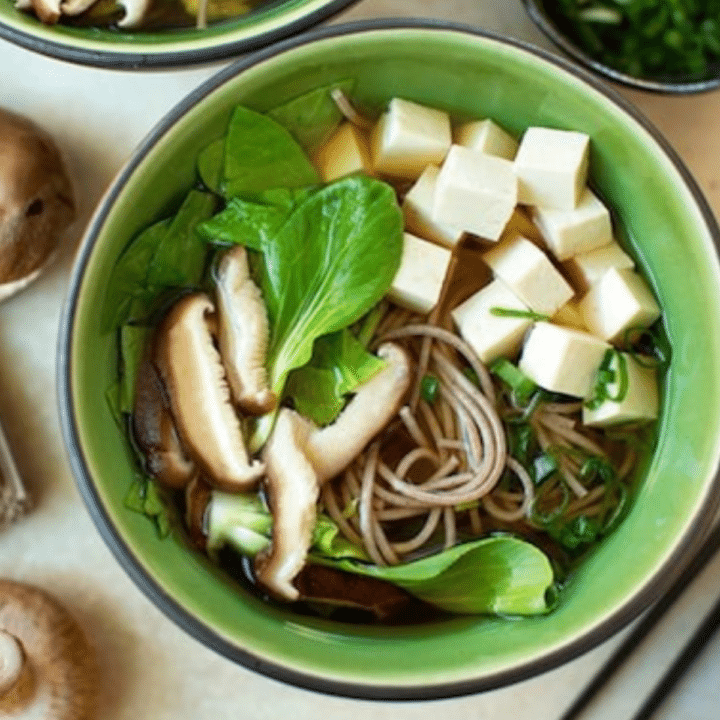
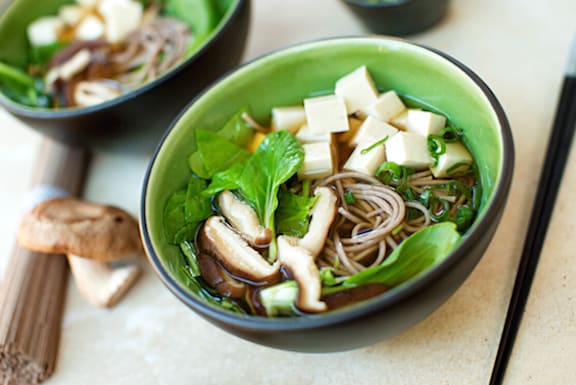
This Japanese soba noodle soup pairs nutty buckwheat noodles with silky tofu, meaty shiitake mushrooms, and tender greens in a light ginger-soy broth. It goes from counter to table in about 25 minutes, and it's the kind of soothing, clean-tasting bowl you'll want on repeat.

Photos by Hannah Kaminsky.
One thing to love about Asian-style soups is that they need very little advance planning. Unlike long-simmered soups that taste even better the next day, this one is at its best the moment it's done. That's especially true of noodle soups: left to sit overnight, the noodles drink up much of the broth, leaving you with more of a noodle dish than a soup. So make it, ladle it, and enjoy it right away. Serve it the traditional way, slurping the noodles from the broth with chopsticks, then using a soup spoon for whatever's left.
Key Ingredients & Substitutions
- Soba noodles. These thin Japanese noodles are made from buckwheat flour, which gives them an earthy, slightly nutty flavor. Many brands also contain wheat flour, so if you need the soup to be gluten-free, look for noodles labeled 100% buckwheat, such as Eden 100% Buckwheat Soba. Udon or thin rice noodles work in a pinch.
- Vegetable broth. A 32-ounce carton is all you need. Choose a low-sodium broth so you can control the saltiness with the soy sauce instead.
- Shiitake mushrooms. Fresh shiitake caps add savory depth to the broth. Remove the tough stems before slicing. Cremini mushrooms are a fine substitute, or use a handful of rehydrated dried shiitake and add a splash of their soaking liquid to the pot.
- Reduced-sodium soy sauce. This seasons the broth. For a gluten-free soup, swap in San-J gluten-free tamari.
- Rice vinegar, sugar, and fresh ginger. A little vinegar and sugar balance the salty soy sauce, and fresh ginger gives the broth its warmth. Use 2 teaspoons of ginger for a gentle bite or 3 if you like it zippy.
- Tofu. Soft tofu melts into the broth for a delicate texture, while firm tofu holds its cubes. Either works, so use what you like.
- Spinach and baby bok choy. Spinach wilts in minutes, and baby bok choy adds a pleasant crunch. Tatsoi or mizuna are lovely alternatives if you find them at a farmers' market.
Helpful Tips
Cook the noodles separately. Soba releases a lot of starch as it cooks. Boiling the noodles in their own pot keeps the broth clear rather than cloudy and gummy, and it lets you control exactly how soft they get.
Rinse the soba after draining. A quick rinse under cool water washes off the surface starch and stops the cooking, so the noodles don't clump together or go mushy by the time they hit the soup. Aim for al dente, since they'll soften a little more in the hot broth.
Keep the simmer gentle. Once the broth comes to a rapid simmer, turn it down and let it bubble quietly. A hard boil can break up the tofu, especially if you're using the soft kind.
Don't overcook the greens. Add the spinach and bok choy near the end and pull the pot off the heat as soon as they wilt. They should stay bright green, which looks better and tastes fresher.
Season at the end. After you add the extra water, taste the broth before serving. A splash more soy sauce or a pinch of sugar can bring it into balance, depending on how salty your broth is.
Variations
- Miso soba soup. Whisk 2 to 3 tablespoons of white miso with a ladle of hot broth, then stir it into the pot after you turn off the heat. For more miso-forward bowls, try this miso-butternut squash soup with soba or udon noodles.
- Spicy version. Add a pinch of red pepper flakes to the broth, or finish each bowl with a few drops of chili oil or a sprinkle of shichimi togarashi.
- Toasted sesame finish. Drizzle each bowl with a few drops of dark sesame oil and scatter toasted sesame seeds on top.
- Extra vegetables. Stir in snow peas, thinly sliced carrots, or bean sprouts along with the greens.
- Crispy tofu topping. Instead of simmering the tofu, pan-fry the cubes until golden and set them on top of each bowl just before serving.
Serving Ideas
With noodles, tofu, and plenty of greens, this soup is filling enough to be a light meal on its own. For a heartier dinner, pair it with a cold noodle salad like this cold soba and cucumber salad, or with some steamed edamame sprinkled with coarse salt.
Smaller portions also make a nice first course before a stir-fry or rice bowl. If you enjoy soba as much as we do, follow up another night with these simple sesame soba noodles.
Storing & Freezing
This soup is best eaten as soon as it's made. If you expect leftovers, store the noodles and broth separately. The broth with its vegetables and tofu keeps in an airtight container in the refrigerator for up to 3 days, and the cooked noodles for 1 to 2 days, tossed with a few drops of oil so they don't stick. Reheat the broth on the stovetop until steaming, then add the noodles just long enough to warm them through. If the noodles and broth were stored together, add a splash of water or broth when reheating to loosen things up.
We don't recommend freezing the finished soup. The soba turns soft and broken, and the tofu and greens get watery after thawing. You can freeze the broth base (broth, mushrooms, and seasonings) for up to 3 months, though. Thaw it overnight in the refrigerator, bring it to a simmer, and add fresh tofu, greens, and freshly cooked noodles.

More Asian-Style Noodle Soups
If you loved this recipe, here are a few more you might enjoy:
- Vegan Ramen Miso Soup
- Easy Tofu Ramen Soup
- 20-Minute Asian Vegetable Noodle Soup
- Rice Noodle Soup with Lettuce and Shiitake Mushrooms
Recipe
Japanese Soba Noodle Soup with Tofu and Greens
A light, soothing Japanese soba noodle soup with silky tofu, shiitake mushrooms, spinach, and baby bok choy in a gingery soy broth. Ready in about 25 minutes.
Print
Pin
Save
Servings: servings
Ingredients
- 8 ounces soba noodles use 100% buckwheat soba for gluten-free
- 4 cups low-sodium vegetable broth one 32-ounce carton
- 6 to 8 medium-sized shiitake mushroom caps stems removed, sliced
- 2 tablespoons reduced-sodium soy sauce or tamari for gluten-free
- 2 teaspoons rice vinegar
- 2 teaspoons natural granulated sugar
- 2 to 3 teaspoons minced fresh ginger to taste
- 3 scallions thinly sliced
- 8 ounces soft or firm tofu cut into ½-inch cubes
- 8 to 10 ounces fresh spinach well washed, stemmed, and chopped
- 1 cup chopped baby bok choy or tatsoi or mizuna, optional
- 2 cups water or as needed
- freshly ground pepper to taste
Instructions
- Bring a large saucepan of water to a boil. Break the soba noodles in half and cook according to package directions until al dente. Drain, then rinse briefly under cool water and set aside.
- Meanwhile, combine the vegetable broth, sliced shiitake mushrooms, soy sauce, rice vinegar, sugar, and ginger in a soup pot over medium-high heat. Bring to a rapid simmer, then lower the heat, cover, and simmer gently for 10 minutes.
- Stir in the scallions, tofu, spinach, and bok choy (if using). Cover and cook over medium-low heat until the spinach is wilted but still bright green, about 3 minutes.
- Stir in the cooked noodles and add the 2 cups of water, or enough to give the soup a dense but not overly crowded consistency. Season with pepper and a little more soy sauce if needed. Heat through for a minute or two and serve at once.
Notes
Gluten-free: use 100% buckwheat soba noodles and tamari in place of the soy sauce.
Leftovers: the noodles soak up the broth as the soup sits, so store noodles and broth separately if you expect leftovers. Refrigerate up to 3 days (noodles 1 to 2 days) and reheat gently on the stovetop.
Photos by Hannah Kaminsky.
Nutrition (Estimate per Serving)
Calories: 198kcalCarbohydrates: 36gProtein: 12gFat: 2gPolyunsaturated Fat: 1gMonounsaturated Fat: 1gSodium: 555mgPotassium: 387mgFiber: 3gSugar: 3gVitamin A: 5359IUVitamin C: 30mgCalcium: 150mgIron: 3mg
Vegan-ize any recipe!Grab our free vegan cheat sheet, packed with my favorite easy substitutions to make any recipe vegan.
Mixed Greens with Pears, Cranberries, and Pecans
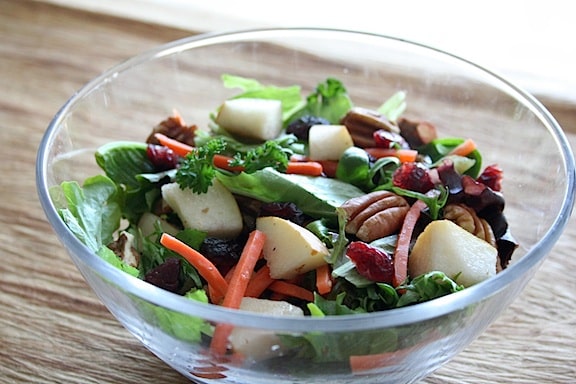
Bosc pears that are just slightly underripe are perfect in this salad that’s simple enough for everyday, yet festive enough for holiday meals. Contrasted with the crunch of pecans and and the sweetness of dried cranberries, this salad is a party for the palate. Photos by Rachael Braun. [Read more...]
Miso Soup with Sweet Potatoes and Greens
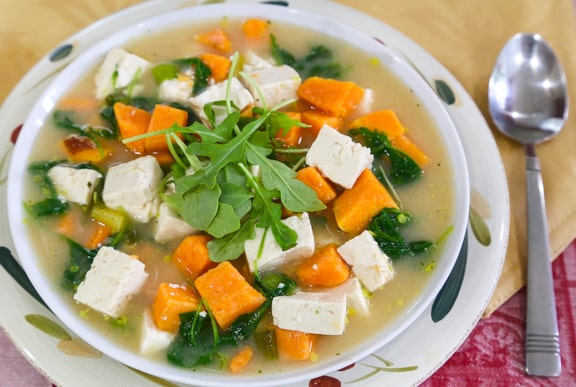
Sweet potato and tender greens (choose from spinach, arugula, watercress, or tatsoi) synergize nicely in this quick miso soup. I prefer mellow white miso as the base for this soup, but use whatever variety of miso you like best, such as dark and hearty hatcho or barley miso. Photos by Evan Atlas. [Read more...]
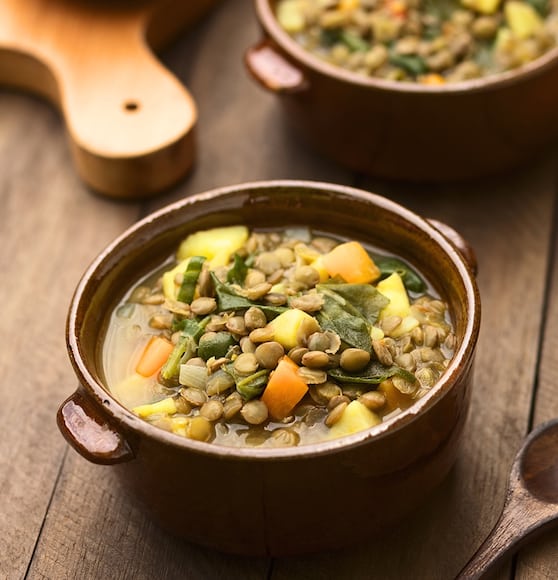
Hearty Lentil and Potato Soup with Leafy Greens
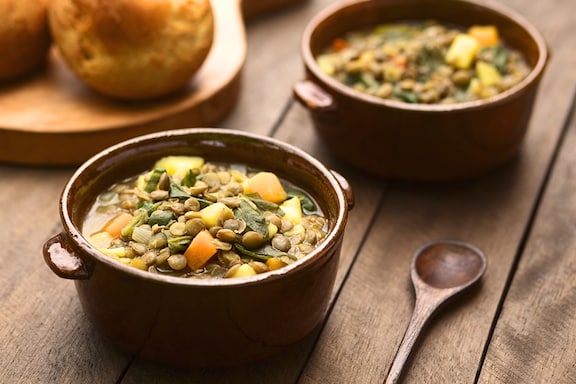
This satisfying soup features lentils, potatoes (and optional sweet potatoes) and greens, a trio of compatible ingredients in a mildly curried broth. This is a wonderful soup to come home to on a cold late fall or winter day, so make it on a quiet Sunday and enjoy it when you come home from work the next day. It’s also a good choice to pack in a Thermos, to take to work or school.
Serves: 6 to 8
- 2 tablespoons olive oil
- 1 large onion, chopped
- 4 to 6 cloves garlic, minced
- 1 cup raw brown or green lentils, rinsed
- 1 large celery stalk, diced
- 6 cups water
- 2 large potatoes, scrubbed and diced (or use 1 large potato and 1 medium-large sweet potato)
- 15- to 16-ounce can diced tomatoes, undrained (try fire-roasted for extra flavor)
- 2 to 3 teaspoons good-quality curry powder, or more, to taste
- 1 tablespoon salt-free seasoning blend (like Frontier or Mrs. Dash)
- 6 to 8 ounces leafy greens, washed, stemmed, and chopped (use chard, kale, collard greens, spinach, or arugula - or a combination of whatever you have on hand)
- ¼ cup chopped fresh cilantro, optional
- Juice of ½ lemon
- Salt and freshly ground pepper to taste
Heat the oil in a soup pot. Add the onion and sauté over medium-low heat until translucent. Add the garlic and continue to sauté until both are golden.
Add the lentils, celery, garlic, and water. Bring to a rapid simmer, then lower the heat. Cover and simmer gently for 10 minutes.
Add the potatoes, tomatoes, and curry powder, and seasoning blend, and simmer gently until the potatoes and lentils are tender, about 20 to 30 minutes longer.
Stir in the greens, cilantro, and lemon juice. Adjust the consistency with more water as needed, then season with salt and pepper. Simmer over very low heat for another 5 minutes. Serve at once or if time allows, let stand off the heat for an hour or so, then heat through before serving.
- Here are more recipes for Lentils and Peas.
- Here are more Warming Winter Soups.
Potatoes and Collard Greens with Vegan Sausage
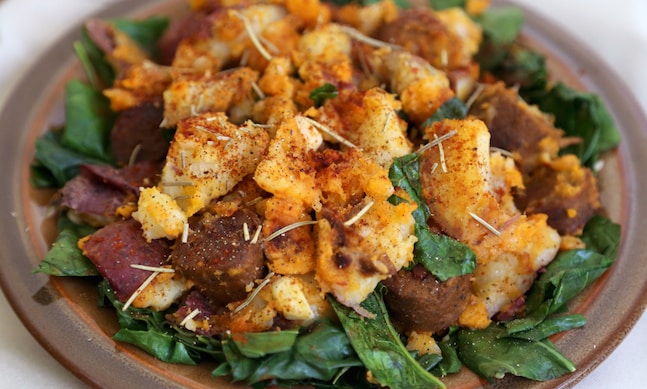
Here's a hearty dish of potatoes and vegan sausage, highlighting calcium-rich collard greens. It's so hardy, that all you need is a simple salad or slaw to complete the meal. Photos by Evan Atlas.
Serves: 4 to 6
- 4 medium-large Yukon gold or red-skinned potatoes
- 1 large sweet potato
- 2 tablespons extra-virgin olive oil
- 3 to 4 cloves garlic, minced
- 1 good-sized bunch collard greens (8 to 10 ounces)
- 2 links Tofurky or Field Roast vegan sausage, cut into ½-inch-thick slices
- ¼ cup white wine, vegetable broth, or water
- Leaves from 2 sprigs fresh rosemary,
or 1 to 2 teaspoons dried rosemary leaves, to taste - 1 teaspoon sweet paprika
- ¼ teaspoon dried hot red pepper flakes, or to taste
- Salt and fresly ground pepper to taste
Cook, bake, or microwave the potatoes and sweet potatoes until they can be pierced with a fork but still firm. When cool enough to handle, cut in half lengthwise, then cut into ½-inch-thick half circles.
Cut away the thick mid-ribs from the collard greens and cut the leaves in half lengthwise. Rinse well, then, stacking several leaves at a time, cut them into thick strips.
Heat the oil in a large skillet or steep-sided stir-fry pan. Add the garlic and sauté over low heat until golden.
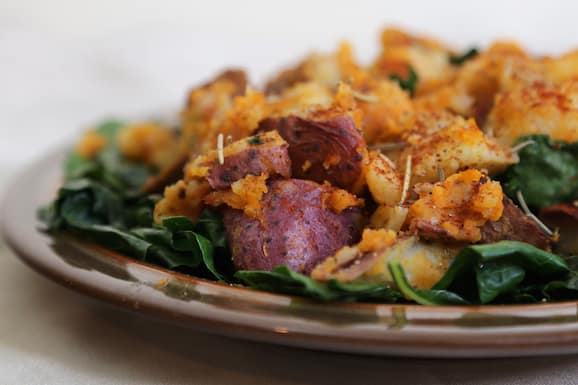
Add the potatoes, collards, sausage, and wine (or broth or water). Turn the heat up to medium high and cook, stirring frequently, until the collards are bright green and tender-crisp and the potatoes and suasage are touched with golden spots here and there.
Sprinkle in the rosemary, paprika, and red pepper flakes and cook for two to three minutes longer, stirring frequently. Season with salt and pepper and serve.
Nutrition Information:
Per Serving (based on 4 servings): 318 calories; 43g carbs; 12g fat; 15g protein; 226mg sodium
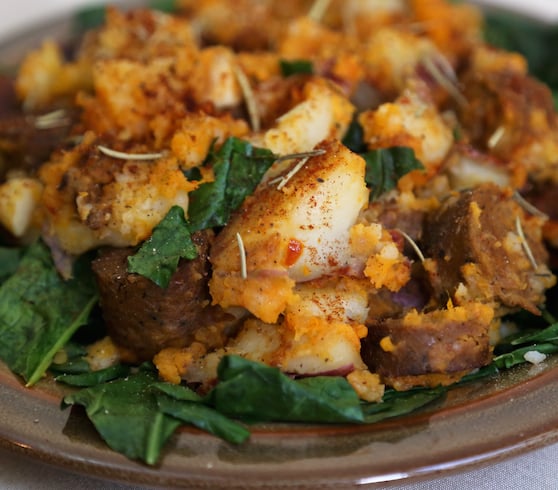
- Find lots more recipes on VegKitchen for kale, collards, and other hardy greens.
- Here are more easy, tasty potato recipes.
- Find more of VegKitchen's Vegan Dinner Recipes and more Tofu, Tempeh and Vegan Sausage Main Dishes.
- Here are more vegan sausage recipes.
How to Make Basic Baked Kale Chips (with a Collard Greens variation)
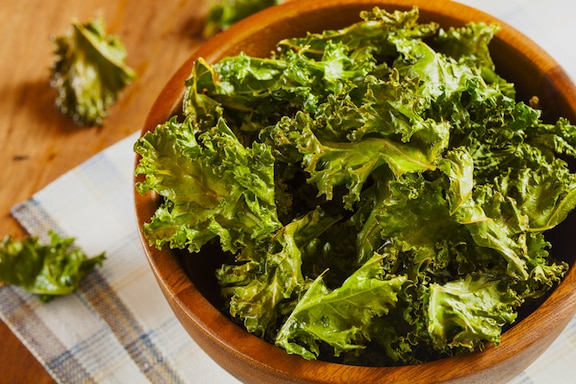
Here's a simple how-to for making kale chips. One of the trendiest and most popular things to do with kale is to transform it into crispy chips for snacking. Though I'm more partial to raw kale salad, kale chips enthusiasts report that once these are out of the oven, they're instantly devoured by snackers of all ages. [Read more...]
Puree of Spring or Summer Greens
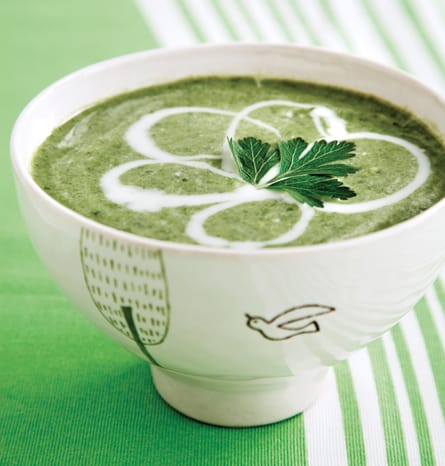
Here’s a soup designed to make the most of kale or chard, spinach, arugula, and lettuces when they become too abundant. When greens threaten to take over the fridge, I turn to this recipe, which has become an annual tradition! If you love greens and have plenty of them, you’ll find this nourishing recipe useful as well as delicious. Make sure all greens are very well washed. Adapted from Vegan Soups and Hearty Stews for All Seasons.
Stir-Fried Tofu with Spring Greens
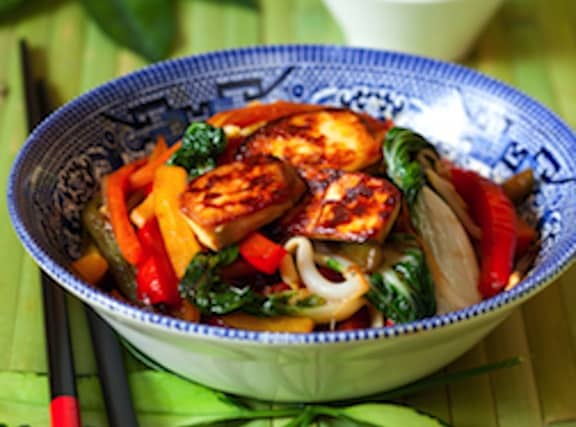
This easy stir-fry highlights fresh, quick-cooking spring greens, combined with tofu. See the note below for suggestions on which leafy greens to use; you can vary it each time. My favorite is baby bok choy! [Read more...]
Cold Sesame-Ginger Soba Noodles and Greens
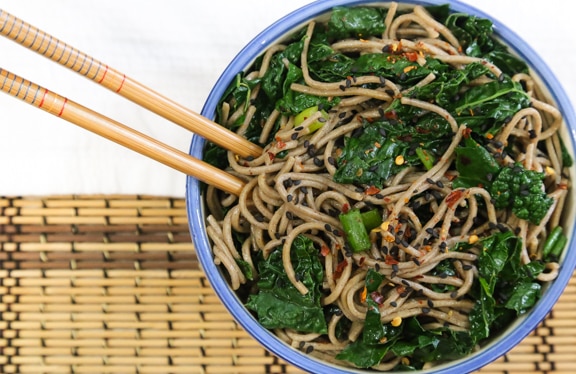
This simple cold soba noodle dish is laced with lots of kale or collard greens and flavored with a piquant ginger dressing. For an easy meal, serve with veggie spring rolls from your natural foods store's frozen foods section, and a platter of slices of baked tofu, tomatoes and cucumbers. Photos by Evan Atlas. [Read more...]
Simple Sautéed Garlicky Greens (Kale, Collards, or Chard)
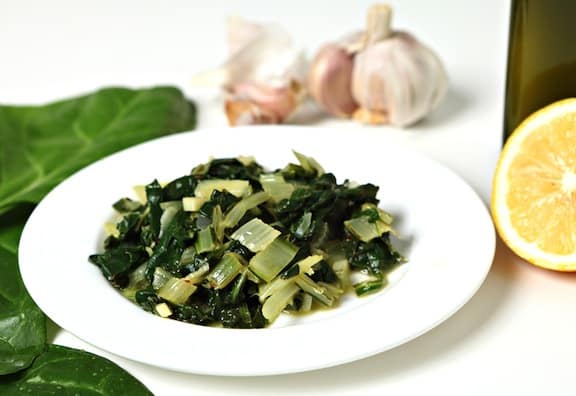
This is a basic way to prepare sautéed chard, kale, or collard greens — the classic olive oil and garlic sauté. Sometimes simple is best; this is definitely true when it comes to something as good as leafy greens! [Read more...]
Seitan and Polenta Skillet with Fresh Greens
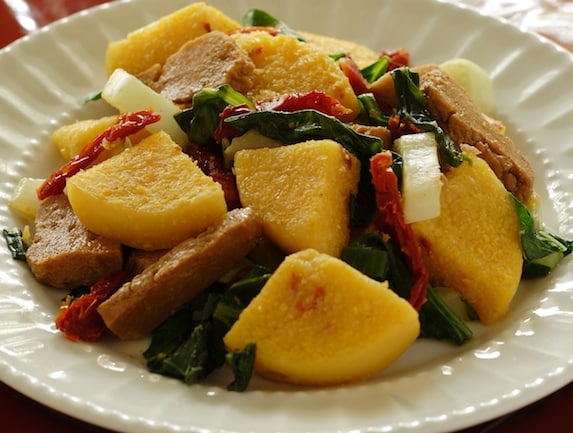
There’s something enticing about the seitan/polenta synergy, and with the addition of greens, results in a great-looking, hearty dish. Serve with a simple potato dish and salad or slaw. Recipe adapted from Vegan Express. Photo by Susan Voisin.
Mixed Greens Salad with Avocado, Apples, and Baked Tofu
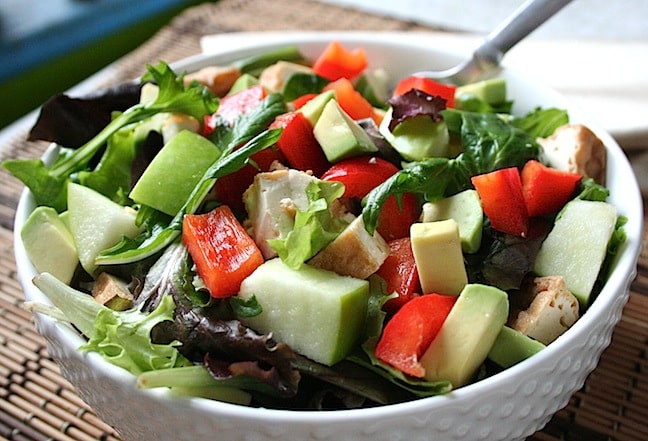
This luscious salad adds substance to a meal when served with light main dishes, and makes a nice at-home lunch on weekends and holidays. This is a tasty salad to stuff into a pita or wrap up. Or, for a light meal, serve with soup and fresh bread. [Read more...]
Curried Red Lentil Soup with Sweet Potatoes and Greens
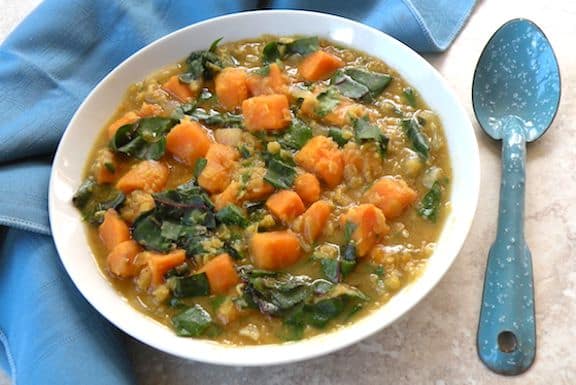
Both nourishing and sublimely satisfying, this thick soup incorporates fall’s first sweet potatoes with seasonal greens. Red lentils, which cook to a warm golden color, are available in natural food stores and ethnic groceries. Adapted from Vegan Soups and Hearty Stews for All Seasons. [Read more...]
Jerusalem Artichoke Salad with Greens and Herbs
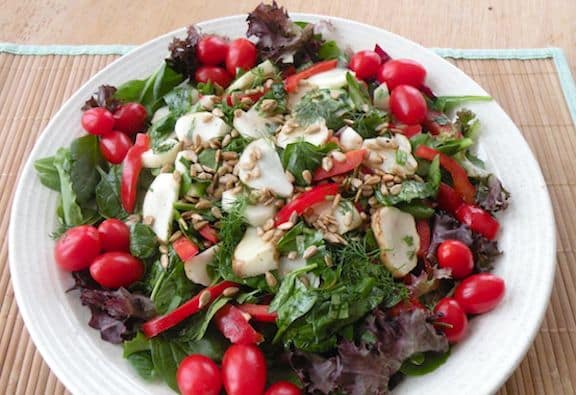
Here's a colorful and crunchy salad featuring Jerusalem artichokes, the misnamed underground tubers of a native American sunflower; they have nothing to do with Jerusalem and aren't related to artichokes. In season in the late fall, they are quite fitting to serve as part of Thanksgiving dinner. Those who haven't had them will find them surprising and exotic, kind of a crunchy cross between water chestnuts and potatoes.
Sweet and White Potato Salad with Mixed Greens
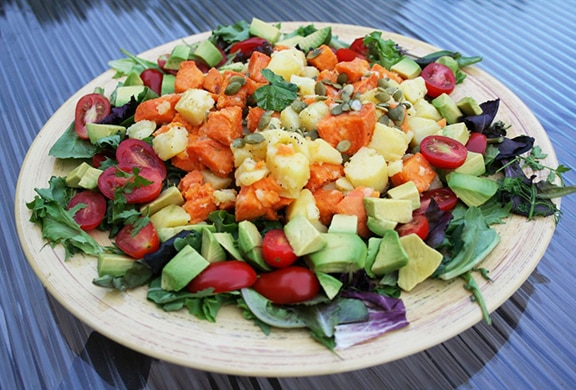
This potato salad, combining white or golden potatoes and sweet potatoes is one I often make for company. It's so pretty, perched on mixed greens and ringed with grape tomatoes and avocado, yet is incredibly easy to prepare. It's wonderful for summer and early fall potlucks and other gatherings. [Read more...]
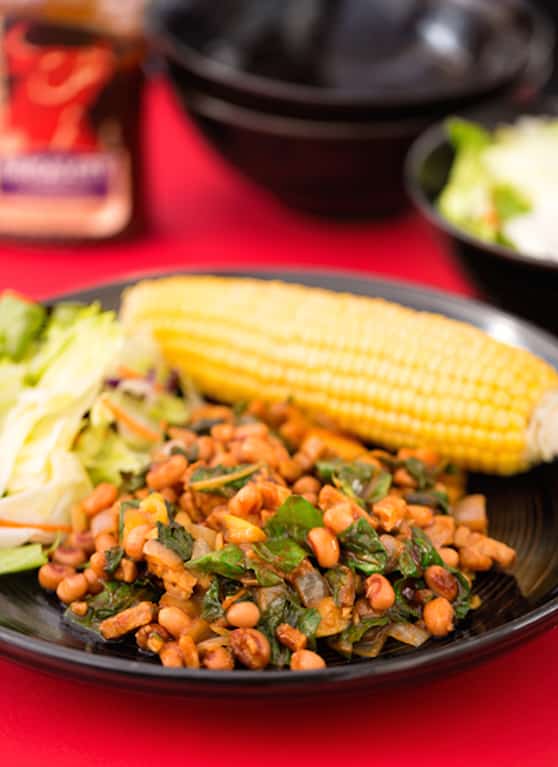
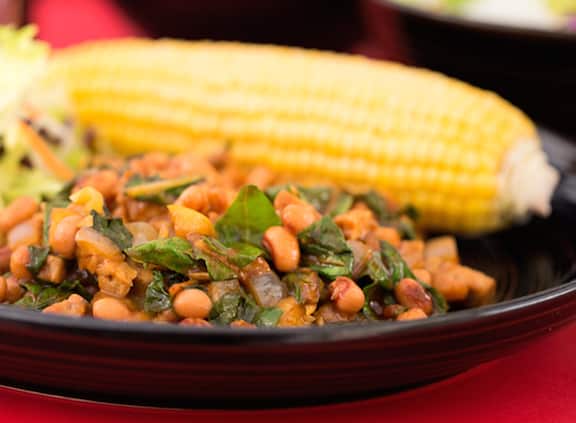
BBQ Tempeh Bacon with Black-Eyed Peas and Greens
Bites of tart apple add a delightful flavor twist to this hearty dish of BBQ tempeh bacon with black-eyed peas and greens. Serve with sweet potatoes or fresh corn and coleslaw for a satisfying meal that comes together in one skillet in well under an hour, with minimal cleanup for a weeknight dinner that still feels like Southern comfort food.
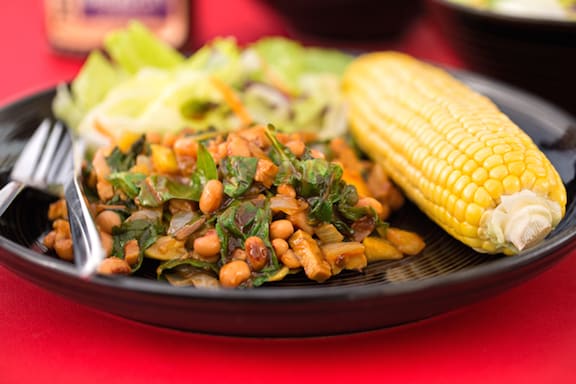
Photos by Hannah Kaminsky.
Key Ingredients & Substitutions
- Smoky tempeh strips. Pre-seasoned smoky/bacon-style tempeh gives this dish its "bacon" flavor without any extra work — finely chop it so it browns quickly and distributes through the dish rather than clumping in large pieces.
- Black-eyed peas. Hearty and slightly earthy; canned works just as well as cooked from dry for a quick weeknight version, and cuts a good chunk of time off the recipe.
- Granny Smith apple. Its tartness cuts through the richness of the tempeh and barbecue sauce — a firm, tart apple works better here than a sweet one, which can make the whole dish taste candy-sweet.
- Vegan barbecue sauce. Our Quick Vegan Barbecue Sauce is a great homemade option, or use your favorite all-natural bottled brand.
- Chard or spinach. Adds a healthy dose of greens right in the pan — chard needs a bit more cooking time than tender spinach, so add it a minute or two earlier.
- Onion and garlic. The aromatic base that builds flavor before the tempeh and sauce go in — don't skip sauteing the onion until it's genuinely translucent.
Variations
- Use kale instead. Kale works wonderfully here too, but needs more cooking time than chard or spinach — start steaming it separately just before starting the dish, then stir it in at the end once it's tender.
- Make it spicier. A dash of hot sauce or a pinch of cayenne in with the barbecue sauce adds some heat.
- Swap the beans. Pinto or kidney beans work in place of black-eyed peas if that's what you have on hand.
- Add sweet potato. Diced and roasted separately, it makes a nice bed to serve this over, echoing the classic Southern pairing.
- Add a splash of apple cider vinegar. A little extra tang at the end brightens the whole dish, especially if your barbecue sauce leans sweet.
Tips for the Best BBQ Tempeh Bacon with Black-Eyed Peas and Greens
- Chop the tempeh finely. Smaller pieces brown more evenly and mimic the texture of bacon bits better than larger chunks.
- Let the sauce reduce. Cooking the barbecue sauce down with the beans and apple for the full 10 minutes concentrates the flavor rather than leaving the dish watery.
- Don't overcook the greens. Spinach only needs a couple of minutes; chard needs a bit longer. Either way, pull them off the heat while they're still bright green.
- Taste before adding extra salt. Between the tempeh seasoning and the barbecue sauce, this dish often needs little to no additional salt.
- Use a wide skillet. This helps the tempeh brown rather than steam, which matters a lot for getting that bacon-like texture.
Make Ahead & Storage
This dish keeps well in the refrigerator for up to 4 days, and like many bean and tempeh dishes, the flavor deepens after a day. Reheat gently on the stovetop, adding a splash of water if the sauce has thickened too much, since it will continue to reduce as it sits and reheats.
How to Serve
Serve at once alongside sweet potatoes, fresh corn, or coleslaw for a well-rounded meal.
Recipe

BBQ Tempeh Bacon with Black-Eyed Peas and Greens
Bites of tart apple add a delightful flavor twist to this hearty dish of BBQ tempeh bacon with black-eyed peas and greens.
Print
Pin
Save
Servings:
Ingredients
- 2 tablespoons olive oil
- 1 medium onion finely chopped
- 2 to 3 cloves garlic minced
- 6 ounce package smoky tempeh strips finely chopped
- 1 ½ to 2 cups cooked black-eyed peas or one 15- to 16-ounce can, drained and rinsed
- 1 medium Granny Smith apple diced
- ⅔ cup vegan barbecue sauce homemade or your favorite all-natural brand
- 10 to 12 ounces chard or spinach well washed, stemmed, and chopped
Instructions
- Heat the oil in a wide skillet. Add the onion and sauté over medium-low heat until translucent.
- Add the garlic and tempeh and sauté, stirring frequently, until golden and just beginning to brown lightly.
- Stir in the black-eyed peas, apple, and barbecue sauce. Cook over medium-high heat for 10 minutes or until the sauce is reduced.
- Add the greens, then cover until wilted. Stir in, then cook for another 2 minutes or so for spinach, or 4 minutes for chard, until tender but still bright green. Serve at once.
Notes
This is also wonderful with kale, but it needs more cooking time than chard or spinach. Start steaming it separately just before starting the dish; once cooked to your liking, stir it in at the end.
Vegan-ize any recipe!Grab our free vegan cheat sheet, packed with my favorite easy substitutions to make any recipe vegan.
- Here are more tempeh recipes.
- Here are more recipes for hardy greens.
- Here are more of VegKitchen's Vegan Dinner Recipes and more Tofu, Tempeh and Vegan Sausage Main Dishes.
Vegan Spring Greens Salad with Endives and Oranges
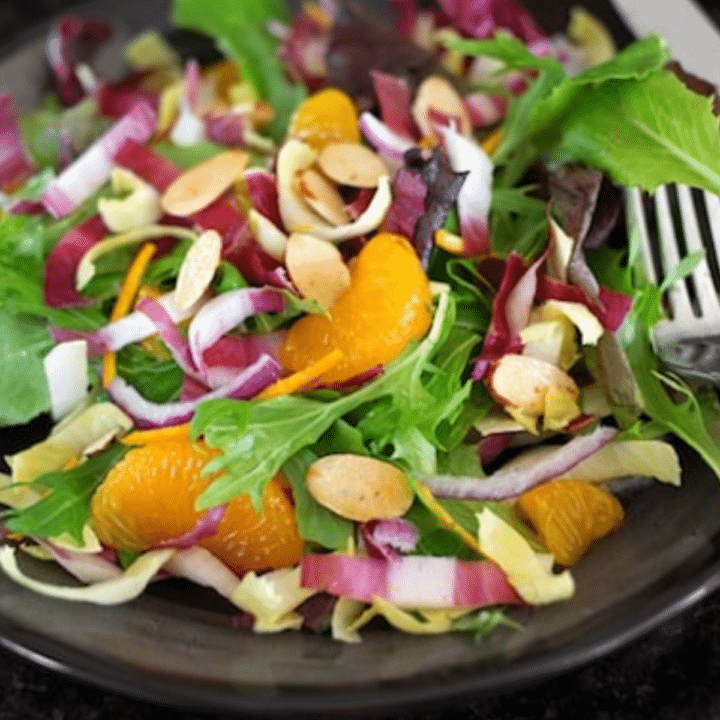
Here's a lovely and refreshing salad with tender greens, Belgian endives, and tiny oranges. A hint of citrus and toasted almonds add to the fresh flavor, making this a nice change of pace from an everyday tossed salad without much extra effort — the kind of salad that looks like it took real work but comes together in about 15 minutes.
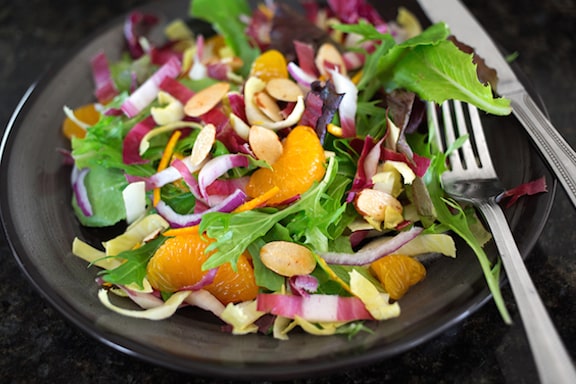
Photos by Hannah Kaminsky.
Key Ingredients & Substitutions
- Mixed greens. Use a mild lettuce such as Boston or butter mixed with any combination of sorrel, arugula, dandelion greens, watercress, and a small amount of tender Asian greens such as mizuna — or simply use a good store-bought mixed baby greens blend.
- Belgian endives. Add a pleasant, slightly bitter crunch that balances the sweet oranges — look for firm, tightly closed heads with pale, almost white leaves for the mildest flavor.
- Seedless oranges. Bring bright citrus sweetness — small varieties like clementines or mandarins work especially well since they section easily.
- Toasted almonds. Add crunch and nutty flavor — toast them first for the best taste, since raw almonds taste flat by comparison.
- Orange zest. A small addition that heightens the citrus flavor throughout the whole salad, not just where the orange segments happen to land.
Variations
- Swap the nuts. Toasted pecans or walnuts work well in place of almonds, or use toasted pepitas for a nut-free option.
- Add cheese. A sprinkle of vegan feta or goat-style cheese adds richness and a nice salty contrast to the sweet oranges.
- Skip the endive. If you can't find it, thinly sliced radicchio makes a good substitute with a similar pleasant bitterness.
- Make it a main. Add some cooked quinoa or chickpeas to turn this side salad into a light lunch.
- Add pomegranate seeds. Their jewel-toned pop adds color and a tart burst that plays well with the sweet orange.
Tips for the Best Spring Greens Salad
- Don't skip the orange zest. It's optional but highly recommended — it heightens the citrus flavor throughout the salad in a way the segments alone can't.
- Toast the almonds. A few minutes in a dry skillet, stirring often, brings out their flavor and adds a warm aroma to the finished salad.
- Slice the endive thinly. This keeps its texture pleasant rather than tough or overly bitter in any one bite.
- Section the oranges over the bowl. This catches any juice that escapes and lets it become part of the dressing instead of going to waste.
- Toss just before serving. This keeps the greens crisp and fresh rather than wilting under the dressing.
Make Ahead & Storage
The greens and endive can be washed and stored in the fridge a day ahead, and the almonds can be toasted in advance and kept in a sealed container at room temperature. Hold off on sectioning the oranges and tossing everything together until just before serving, since the citrus juice will wilt the greens if it sits too long.
How to Serve
Serve at once as a bright, refreshing salad alongside any spring meal, or as a starter course before a heartier main dish.
Recipe

Vegan Spring Greens Salad with Endives and Oranges
A lovely and refreshing salad with tender greens, Belgian endives, and tiny oranges, brightened with a hint of citrus and toasted almonds.
Print
Pin
Save
Servings:
Ingredients
- 6 cups washed and torn mixed greens see note
- 2 Belgian endives thinly sliced
- ¼ cup thinly sliced red onion
- 2 to 3 small seedless oranges peeled and sectioned
- ¼ cup toasted sliced or slivered almonds
- 1 tablespoon extra-virgin olive oil or fragrant nut oil
- 2 tablespoons white balsamic or white wine vinegar
- 2 tablespoons orange juice
- zest of ½ orange optional, but highly recommended
Instructions
- Combine all of the ingredients in a salad bowl and toss together. Serve at once.
Notes
Use a mild lettuce such as Boston or butter mixed with any combination of sorrel, arugula, dandelion greens, watercress, and tender Asian greens such as mizuna in small quantities. Or, just keep it simple and use mixed baby greens.
Vegan-ize any recipe!Grab our free vegan cheat sheet, packed with my favorite easy substitutions to make any recipe vegan.
Here are more recipes for colorful green salads and leafy spring greens.
Pink Beans with Spring Greens
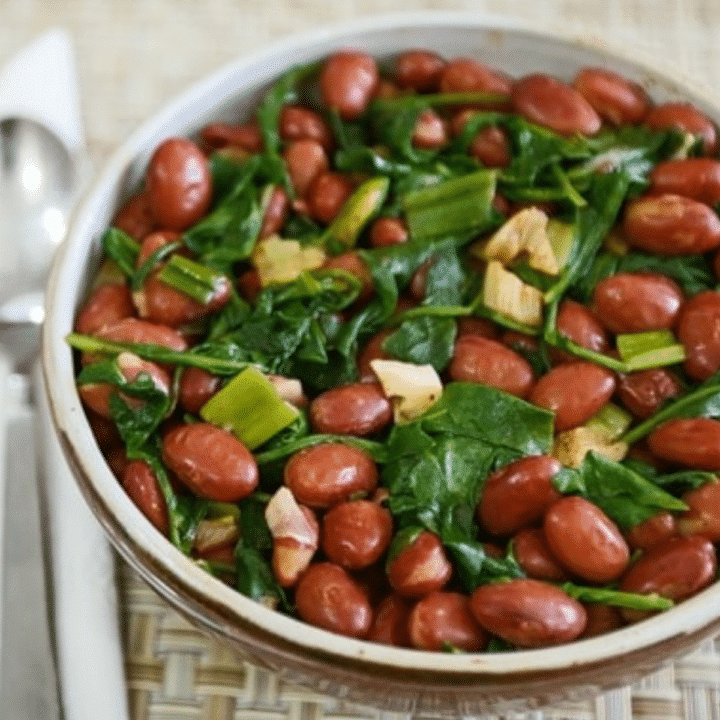
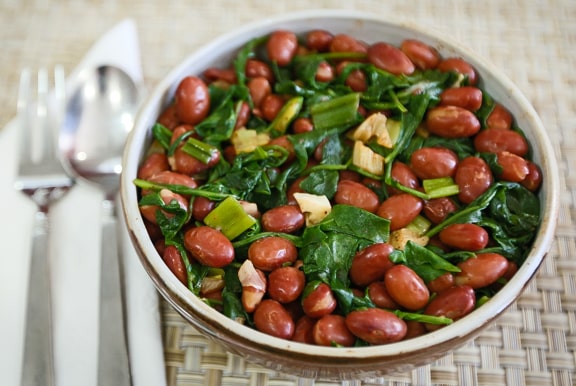
Leafy spring greens like spinach, arugula, or watercress pair beautifully with pink beans in this simple, garlicky skillet dish. It comes together entirely on the stovetop in about 30 minutes, making it an easy weeknight dinner that still feels like it took real effort.
Key Ingredients & Substitutions
- Pink beans. Canned or home-cooked both work well. Pinto beans make a fine substitute if pink beans aren't available, since the two are closely related and similar in texture.
- Spring greens. Baby spinach, arugula, watercress, and tatsoi all work, alone or combined — use whatever looks best at the market, or a mix of two for more complexity.
- Garlic. This dish leans garlicky on purpose — don't be shy with it, since the beans and greens are otherwise fairly mild.
- Chili powder. Adds warmth without heat. A good-quality blend makes a real difference here, since cheaper blends can taste dusty rather than warm.
- Olive oil. Used generously, it carries the garlic flavor through the dish and helps wilt the greens without them tasting steamed.
Variations
- Add protein. A handful of cubed tofu or tempeh turns this into a heartier main dish.
- Make it spicier. A pinch of red pepper flakes or a diced fresh chile adds heat.
- Swap the beans. Pinto, black, or cannellini beans all work in place of pink beans.
- Add citrus. A squeeze of lime brightens the finished dish.
- Make it a bowl. Serve over rice or quinoa for a more substantial meal.
- Add tomatoes. A handful of halved cherry tomatoes stirred in near the end adds juiciness and color.
Tips for the Best Pink Beans with Spring Greens
- Don't rush the garlic. Cooking it low and slow until just golden brings out its sweetness without bitterness.
- Add greens in batches. They cook down a lot, so adding them a bit at a time makes them easier to fit in the pan.
- Rinse canned beans well. This removes excess sodium and helps the sauce stay clean, not starchy.
- Season at the end. Taste and adjust salt and pepper only after everything is combined, since the beans and their liquid both carry some salt already.
- Use a wide skillet. This gives the greens room to wilt down without steaming into a soggy pile in the center of the pan.
Make Ahead & Storage
This dish keeps well in the refrigerator for up to 3 days, though the greens will soften further as they sit. Reheat gently on the stovetop with a splash of water or olive oil to loosen things back up.
How to Serve
Serve warm on its own, over rice, or alongside warm crusty bread. It's a satisfying weeknight dinner that comes together in about 30 minutes, and leftovers reheat well enough to make a quick lunch the next day.
Recipe
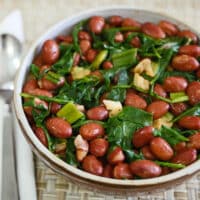
Pink Beans with Spring Greens
Leafy spring greens like spinach, arugula, or watercress pair beautifully with pink beans in this simple, garlicky skillet dish.
Print
Pin
Save
Servings: to 6
Ingredients
- 1 ½ tablespoons extra-virgin olive oil
- 3 to 4 cloves garlic minced
- 3 scallions sliced, or a good-sized bunch garlic chives, minced
- 3 to 3 ½ cups cooked pink beans or two 15- to 16-ounce cans, drained and rinsed
- 1 teaspoon good-quality chili powder
- 6 to 8 ounces small-leaf spring greens baby spinach, baby arugula, watercress, tatsoi, or any combination, rinsed well
- salt and freshly ground pepper to taste
Instructions
- Heat the oil in a large skillet over low heat. Add the garlic and saute until it just begins to turn golden, then add the scallions and saute until they soften slightly.
- Stir in the beans and chili powder and cook over medium heat until heated through.
- Add the greens to the skillet in 2 to 3 batches, covering and cooking down until wilted before adding the next batch, until all the greens fit in the pan.
- Season to taste with salt and pepper and serve at once.
Nutrition (Estimate per Serving)
Calories: 186kcalCarbohydrates: 26gProtein: 9gFat: 6gSaturated Fat: 1gPolyunsaturated Fat: 1gMonounsaturated Fat: 4gSodium: 418mgPotassium: 519mgFiber: 9gSugar: 3gVitamin A: 721IUVitamin C: 14mgCalcium: 63mgIron: 2mg
Vegan-ize any recipe!Grab our free vegan cheat sheet, packed with my favorite easy substitutions to make any recipe vegan.
Garlicky Greens with Seitan and Soy Sausage
Vegan sausage is a fun protein source that provides plenty of flavor and spice to a meal. The bold taste of Tofurky or Field Roast sausage provides a perfect foil for fresh greens, and the seitan adds a meaty, satisfying chew alongside it. This is a hearty, garlicky skillet dish that comes together quickly and makes a satisfying weeknight dinner.
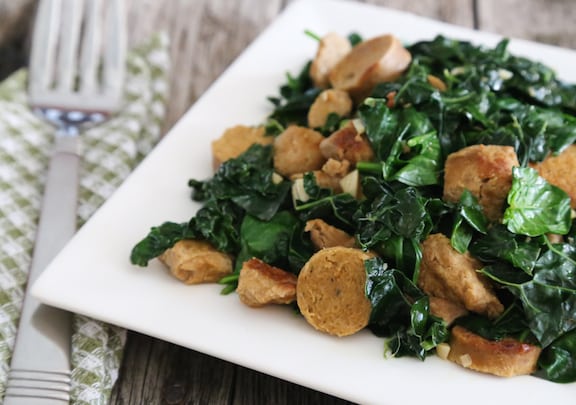
Photos by Evan Atlas.
Key Ingredients & Substitutions
- Seitan. Adds a meaty, chewy texture that holds up well to sauteing — look for it near the tofu in most well-stocked grocery stores.
- Tofurky or Field Roast vegan sausage. These brands are made with tofu and seitan rather than textured soy protein, giving them a more satisfying bite than some other faux sausages — use whatever variety you like best.
- Chard or kale. Green chard or lacinato kale work especially well here, wilting down into a tender, garlicky base for the seitan and sausage.
- Baby spinach. Added at the end for a quick wilt, it rounds out the greens with a milder, more delicate flavor.
- Garlic. This dish leans garlicky on purpose — don't be shy with it, since the greens and proteins are otherwise fairly mild.
Variations
- Add beans. A can of drained, rinsed white beans or chickpeas stirred in with the greens adds extra heartiness.
- Make it spicier. Increase the red pepper flakes, or add a diced fresh chile along with the garlic.
- Swap the greens. Collard greens or mustard greens both work well in place of chard or kale, though they may need a few extra minutes to become tender.
- Add a squeeze of lemon. A little fresh lemon juice stirred in at the end brightens the whole dish.
Tips for the Best Garlicky Greens with Seitan and Sausage
- Brown the seitan and sausage well. Getting good color on most sides before adding the garlic builds a much deeper flavor for the whole dish.
- Don't overcook the greens. Chard and kale should be tender but still have some texture — check them a minute or two before the suggested time and adjust.
- Add the spinach last. It wilts much faster than chard or kale, so stirring it in at the end keeps it from turning mushy.
- Use a wide skillet. This gives the greens room to wilt down evenly without steaming into a soggy pile in the center of the pan.
Make Ahead & Storage
This keeps well in an airtight container in the refrigerator for up to 3 days. Reheat gently on the stovetop over medium-low heat, adding a splash of water or wine if the pan seems dry.
How to Serve
Serve this hearty dish with a simple grain or noodles, and a colorful salad. Explore VegKitchen's Vegan Dinner Recipes, more seitan main dishes, and more vegan sausage recipes.
Recipe

Garlicky Greens with Seitan and Vegan Sausage
Vegan sausage is a fun protein source that provides plenty of flavor and spice to this Garlicky Greens with Seitan and Vegan Sausage.
Print
Pin
Save
Servings: to 6
Ingredients
- 1 ½ tablespoons olive oil
- 8 ounces seitan cut into small bite-sized chunks
- 2 Tofurky or Field Roast vegan sausage links any variety, cut into ¼-inch slices
- 4 to 5 garlic cloves minced
- 1 good-size bunch chard or kale 10 to 12 ounces - especially good with green chard or lacinato kale
- ¼ cup white wine or water
- 3 to 5 ounces baby spinach
- Salt and freshly ground pepper to taste
- Dried hot red pepper flakes to taste
Instructions
- Heat the oil in a wide skillet or stir-fry pan. Add the seitan and sausage and sauté over medium-low heat until golden-brown on most sides, stirring frequently.
- Stir in the garlic and continue to sauté until golden, stirring frequently.
- Meanwhile, trim the stems and midribs from the greens, rinse well, and chop. Add the greens and wine to the skillet (if using kale, add water as needed to keep the skillet moist).
- Cover and cook 5 to 7 minutes for the chard and 6 to 8 minutes for the kale, or until the greens are cooked to your liking. Stir occasionally and don't overcook!
- Add the spinach, cover, and cook briefly until wilted, then uncover and cook for another minute or so. Season with salt, pepper, and red pepper flakes, then serve.
Nutrition (Estimate per Serving)
Calories: 297kcalCarbohydrates: 9gProtein: 31gFat: 15gSaturated Fat: 2gPolyunsaturated Fat: 6gMonounsaturated Fat: 6gSodium: 305mgPotassium: 187mgFiber: 3gSugar: 1gVitamin A: 2728IUVitamin C: 11mgCalcium: 282mgIron: 4mg
Vegan-ize any recipe!Grab our free vegan cheat sheet, packed with my favorite easy substitutions to make any recipe vegan.


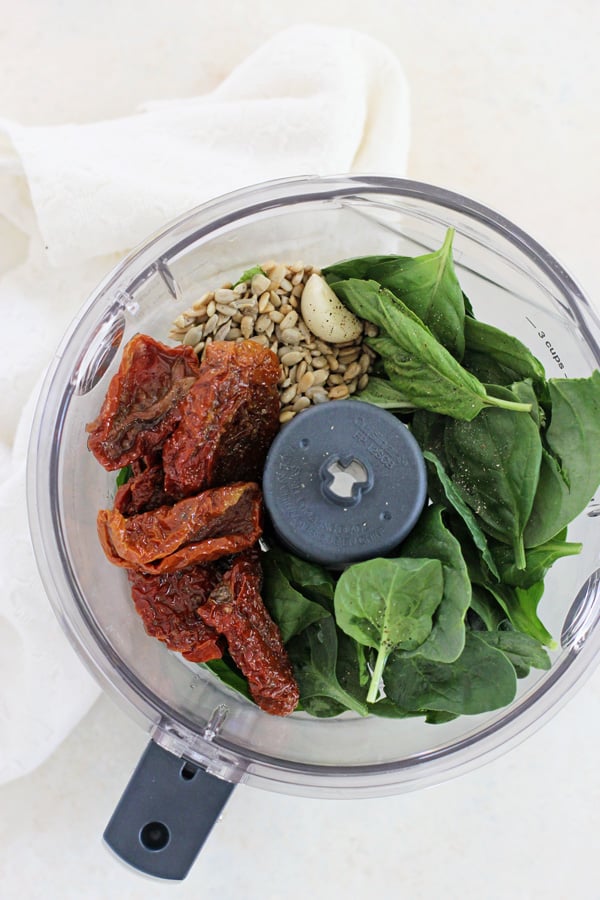
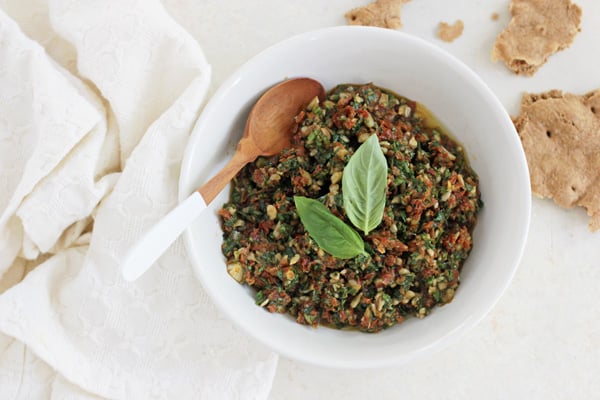
Nut-Free Sun-Dried Tomato Pesto
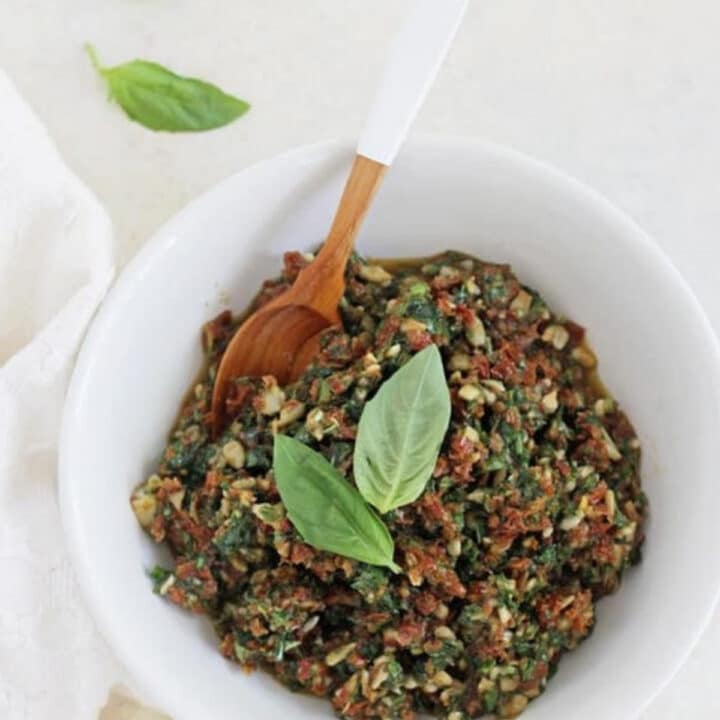
This nut-free sun-dried tomato pesto is bold, tangy, and packed with flavor. Sunflower seeds stand in for the usual nuts, so it works for just about everyone, and it takes only 10 minutes in the food processor.
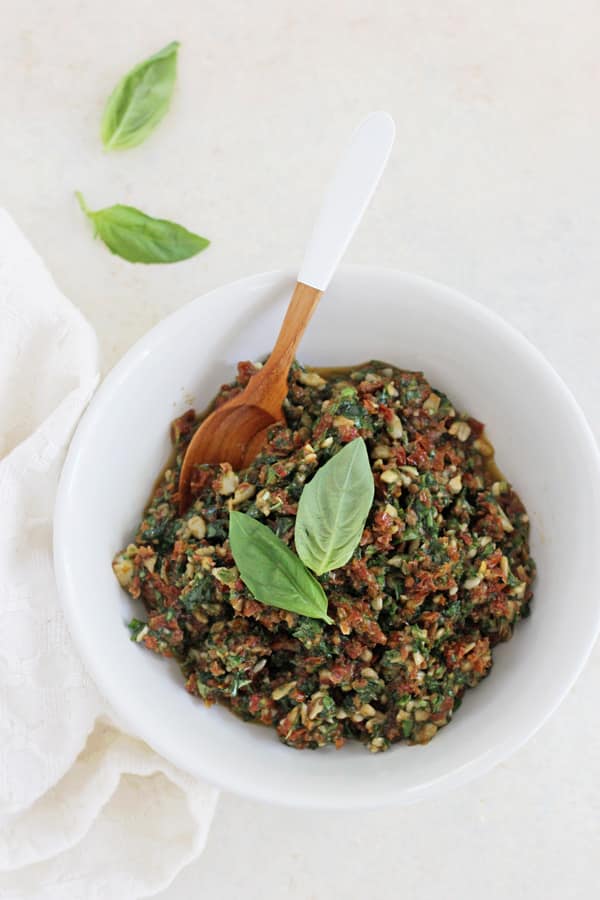
Pesto does not have to start with pine nuts and basil. Here, sun-dried tomatoes bring a concentrated sweetness, spinach and basil add freshness, and a touch of balsamic vinegar ties it all together. It is an easy way to add big flavor to pasta, sandwiches, and more.
Key Ingredients & Substitutions
- Sun-dried tomatoes. Oil-packed tomatoes are the easiest choice, and you can use their oil in the pesto. If yours are dry, soak them in hot water until tender and drain them first.
- Sunflower seeds. These keep the pesto nut-free and add a mild, nutty flavor. Use unsalted seeds, and toast them for a deeper flavor. Pumpkin seeds work too.
- Baby spinach. It adds color and body without overpowering the other ingredients. Arugula is a good swap if you like a peppery bite.
- Fresh basil. A small amount gives the pesto its familiar aroma. Parsley works in a pinch.
- Garlic. One clove is enough here, since the flavor stays strong when raw.
- Olive oil. A good-quality extra virgin olive oil makes a real difference in a simple sauce like this.
- Balsamic vinegar. White balsamic keeps the color bright, but regular balsamic works just as well. Lemon juice is another option.
Helpful Tips
Pulse before you blend. Pulsing the dry ingredients first gets everything evenly chopped before the oil goes in, which gives you more control over the texture.
Choose your texture. Leave the pesto chunky for spreading on bread, or process it longer for a smoother sauce that coats pasta. Add a little more oil if it seems too thick.
Salt at the end. Sun-dried tomatoes are already salty, so you will need less than you would for a typical pesto. Start with a pinch and taste before adding more.
Loosen it for pasta. Stir in a spoonful or two of hot pasta water when tossing the pesto with noodles. It helps the sauce cling to the pasta.
Dry the greens well. Wet spinach and basil can water down the pesto, so pat them dry after washing. Dry greens also help the oil blend in smoothly and keep the flavor concentrated.
Scrape the bowl. Sun-dried tomatoes tend to stick to the sides of the food processor. Stop once or twice to scrape everything down so no large pieces are left behind.
Start with less oil if you like it thick. A thick pesto is best for spreading, while a looser one is better for pasta and salads. You can always add more oil, so stream it in slowly and stop when it looks right.
Variations
- Add a cheesy note. Stir in a tablespoon or two of nutritional yeast.
- Make it spicy. Add a pinch of crushed red pepper flakes.
- Use more basil. Replace the spinach with more basil for a stronger herb flavor.
- Add roasted red peppers. A few jarred peppers make the pesto sweeter and a little thinner.
- Try a different seed. Use pumpkin seeds or hemp seeds in place of the sunflower seeds.
Serving Ideas
Toss this pesto with hot pasta, spread it on sandwiches and wraps, or use it in place of sauce on a homemade pizza made with this basic vegan pizza dough.
It also makes a quick appetizer on toasted baguette slices, or swirl it into vegan white bean dip for extra flavor. For a pesto with a brighter, greener taste, try this spinach and basil pesto.
Storing & Freezing
Keep the pesto in an airtight container in the refrigerator and use it within 4 days. Because it contains raw garlic in oil, don't leave it out at room temperature. Press a little extra olive oil over the top to help keep the color bright.
For longer storage, freeze the pesto in an ice cube tray, then transfer the cubes to a freezer bag. It will keep for up to 3 months. Thaw only what you need in the refrigerator, and use it within a day or two.
More Vegan Sauces and Spreads
If you enjoyed this pesto, here are a few more recipes to try:
- Spinach and Basil Pesto
- Olive and Sun-Dried Tomato Tapenade
- Vegan White Bean Dip
- Green Pea and Arugula Spread
Recipe
Nut-Free Sun-Dried Tomato Pesto
This nut-free sun-dried tomato pesto uses sunflower seeds, spinach, basil, and a touch of balsamic vinegar. It comes together in 10 minutes.
Print
Pin
Save
Servings: servings (2 tablespoon each)
Ingredients
- ¾ cup sun-dried tomatoes see note
- 1 cup baby spinach lightly packed
- ½ cup basil leaves lightly packed
- ¼ cup unsalted sunflower seeds
- 1 clove garlic roughly chopped
- salt and pepper to taste
- ⅓ cup olive oil
- 1 tablespoon white balsamic vinegar or regular balsamic
Instructions
- Add the sun-dried tomatoes, spinach, basil, sunflower seeds, garlic, salt, and pepper to a food processor. Pulse until finely chopped.
- With the food processor running, slowly pour in the olive oil and vinegar. Process until mostly smooth, scraping down the sides as needed.
- Taste and adjust the salt. For a thinner pesto, add a little more olive oil.
Notes
If your sun-dried tomatoes are packed in oil, you can use that oil in place of some or all of the olive oil. If they are dry, soak them in hot water until tender, then drain before using.
To freeze, portion the pesto into an ice cube tray, then move the cubes to a freezer bag for up to 3 months. Thaw what you need in the refrigerator.
Nutrition (Estimate per Serving)
Calories: 134kcalCarbohydrates: 7gProtein: 3gFat: 12gSaturated Fat: 2gPolyunsaturated Fat: 2gMonounsaturated Fat: 7gSodium: 30mgPotassium: 410mgFiber: 2gSugar: 4gVitamin A: 523IUVitamin C: 6mgCalcium: 22mgIron: 1mg
Vegan-ize any recipe!Grab our free vegan cheat sheet, packed with my favorite easy substitutions to make any recipe vegan.
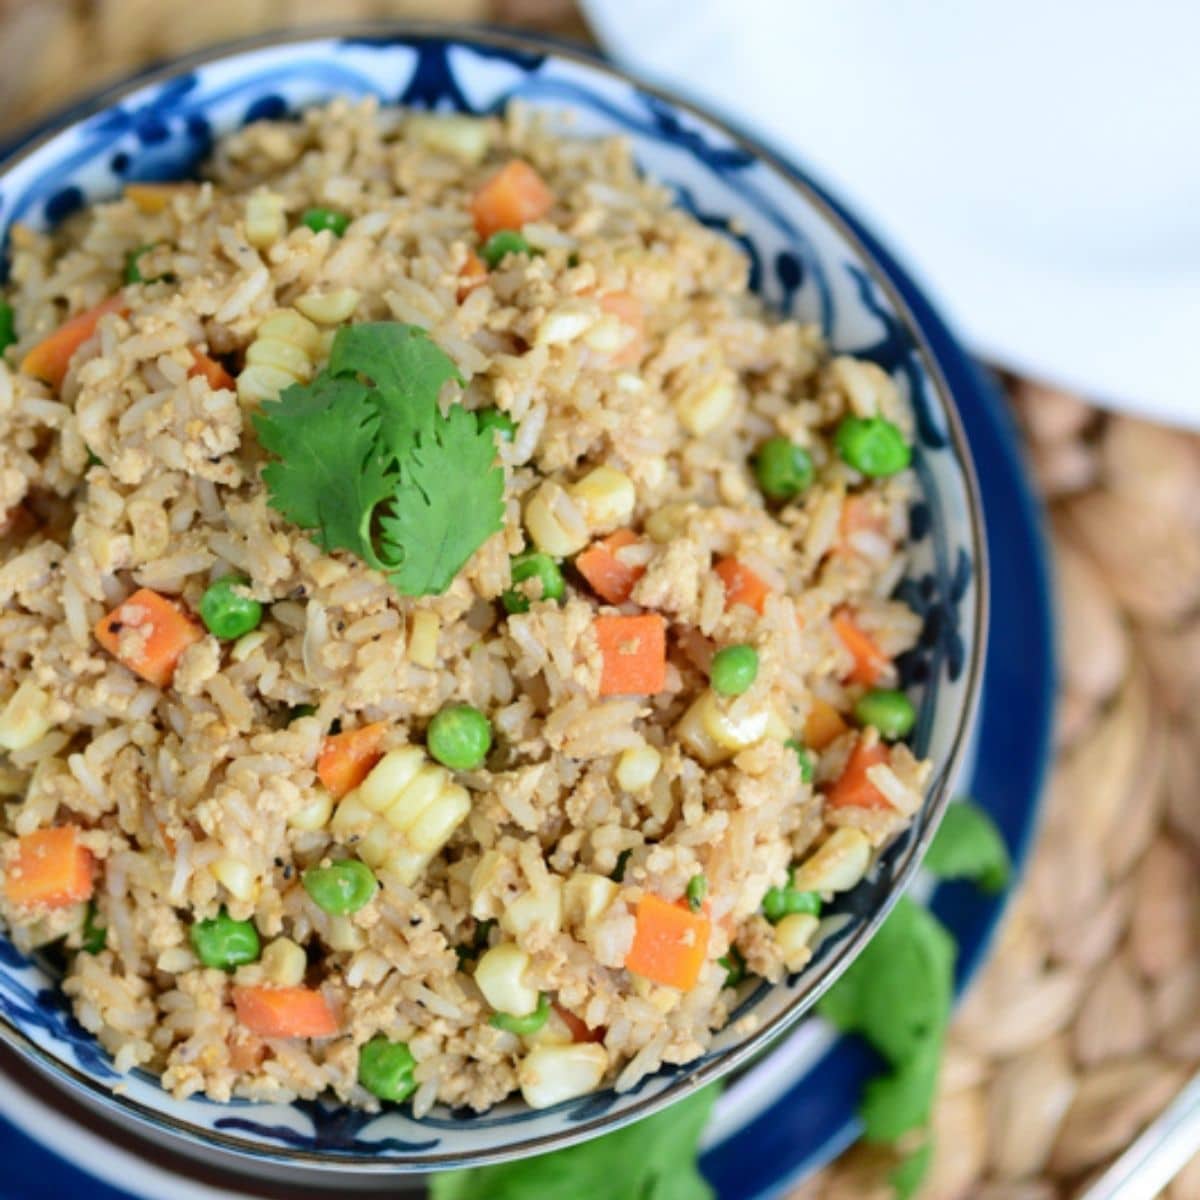
Vegan Fried Rice with Tofu {gluten-free}
This vegan fried rice is a quick, satisfying weeknight dinner: fluffy basmati rice stir-fried with garlic, peas, carrots and sweet corn, plus a savory tofu "egg" scramble, all tossed in a spicy sriracha-tamari sauce. It's naturally gluten-free, and it tastes better than most takeout versions.

Restaurant fried rice is usually made with scrambled egg, and many places cook it with oyster sauce or in the same wok as meat dishes, so a truly vegan order can be hard to find. This homemade veggie fried rice solves that. Crumbled firm tofu seasoned with nutritional yeast and black pepper stands in for the egg, giving you the same soft, savory bites plus a good boost of plant protein.
Key Ingredients & Substitutions
- Basmati rice. Any medium- or long-grain rice works, but basmati cooks up fluffy and separate, which is exactly what you want for frying. White basmati is quickest; brown basmati adds a nuttier flavor and more fiber but takes about twice as long to cook. If you have about 6 cups of leftover cooked rice in the fridge, use that and skip cooking the rice altogether.
- Firm tofu. Firm or extra-firm tofu crumbles into egg-like pieces. Silken tofu is too soft and will turn mushy. If you're not a tofu fan, leave it out (the rice is still delicious) or stir in a cup of shelled edamame instead.
- Nutritional yeast. This gives the tofu its savory, slightly cheesy, eggy flavor and its golden color. We like Bragg nutritional yeast. A pinch of turmeric can stand in for the color if you run out.
- Peas, carrots and corn. The classic fried rice trio. Fresh corn cut from the cob is especially sweet and crisp, but frozen corn, peas and diced carrots work perfectly well, so a bag of frozen mixed vegetables is a handy shortcut.
- Tamari. Tamari is a Japanese-style soy sauce that is usually brewed without wheat, which keeps this dish gluten-free. San-J tamari is labeled gluten-free. Regular soy sauce works if gluten isn't a concern, and a reduced-sodium version is a good idea if you're watching salt.
- Sriracha. Just enough heat to wake up the sauce. Huy Fong sriracha is the classic; use less for a mild version, or swap in chili garlic sauce.
- Olive oil and garlic. Olive oil is what we use, but any neutral oil, peanut oil, or a mix with a little toasted sesame oil for flavor is great here.

How to Make Vegan Fried Rice
Start by cooking the rice, since everything else comes together while it simmers. Rinse it well, cook it, then spread it out on a baking sheet so the steam escapes and the grains dry a little. While the rice cooks, pat the tofu dry and crumble or mash it with the nutritional yeast and black pepper until it looks like scrambled egg. Stir the tamari and sriracha together in a small bowl.

Heat the oil in a large wok or skillet, cook the garlic briefly, then add the vegetables and cook until they're just tender. Stir in the tofu and let it heat through and pick up a little color. Finally add the rice, toss everything together, pour in the sauce, and let it sit undisturbed for a few minutes so the bottom gets lightly crisp. The full measurements and steps are in the recipe card below.

Helpful Tips
Use cold or well-dried rice. Freshly cooked, steamy rice clumps and turns gummy in the pan. Day-old rice from the fridge is ideal. If you're cooking it fresh, spread it on a sheet pan for 10 to 15 minutes, or chill it for 20 minutes, so the surface dries out before frying.
Choose a big pan. Six cups of rice plus vegetables needs room to move, or it steams instead of fries. A wide wok is ideal; we like the T-fal 14-inch nonstick wok, which keeps the rice and tofu from sticking. A 12-inch nonstick skillet works too, or cook in two batches.
Dry the tofu well. Pat it firmly with paper towels, or press it for 10 minutes under a heavy pan. Drier tofu absorbs the nutritional yeast and browns slightly instead of releasing water into the rice.
Don't stir constantly. Once the sauce goes in, spread the rice out and leave it alone for a few minutes over medium-low heat. Those lightly crisp, toasty bits on the bottom are the best part of good fried rice.
Taste before adding more sauce. Tamari brands vary a lot in saltiness. Start with most of the sauce, toss, taste, then add the rest if you want it saltier or spicier.

Variations
- Pineapple fried rice. Add a cup of diced pineapple with the vegetables and finish with cashews, or try our Vegan Thai Pineapple Stir-Fried Rice.
- Extra veggies. Diced red bell pepper, chopped broccoli, shredded cabbage, sliced mushrooms or baby spinach all fit right in. Add firm vegetables with the carrots and tender greens at the very end.
- Lower-carb version. Swap half or all of the rice for riced cauliflower, as in our Cauliflower Fried Rice with Mushrooms & Chickpeas.
- Sesame-ginger. Cook a tablespoon of grated fresh ginger with the garlic, and finish with a drizzle of toasted sesame oil and sesame seeds.
- Green onion finish. Stir in a handful of sliced scallions and chopped cilantro right before serving for freshness and color.

Serving Ideas
With tofu and plenty of vegetables, this vegan fried rice is a full meal on its own. Serve it in bowls with extra sriracha and tamari on the table so everyone can season their own.
For a takeout-style spread, pair it with Tofu Spring Rolls and a little bowl of Easy Vegan Duck Sauce for dipping, or start the meal with a warm bowl of Vegan Wonton Soup. A smaller portion also makes a great side dish next to Vegan Teriyaki Eggplant or a simple vegetable stir-fry.
Storing & Freezing
Let leftovers cool, then refrigerate them in an airtight container for up to 4 days. Cooked rice shouldn't sit at room temperature for long, so get it into the fridge within an hour or two of cooking. Reheat in a hot skillet with a splash of water or oil until steaming, or in the microwave, covered, stirring halfway through. This makes it a handy meal-prep lunch.
Fried rice freezes well. Pack cooled portions into freezer bags, press out the air and freeze flat for up to 3 months. Reheat straight from frozen in a skillet over medium heat with a tablespoon of water, breaking it up as it thaws, or thaw overnight in the fridge first. The tofu gets slightly chewier after freezing, but the texture is still very good.

More Vegan Asian-Inspired Recipes
If you loved this recipe, here are a few more you might enjoy:
- Vegetable Chow Mein
- Vegan Orange Tofu & Broccoli
- Chinese Vegetable Stir Fry (Buddha's Delight)
- 125+ Vegan Stir Fry Recipes
Recipe
Vegan Fried Rice with Tofu
Easy vegan fried rice with fluffy basmati rice, peas, carrots, corn and a savory tofu scramble, tossed in a spicy sriracha-tamari sauce. Naturally gluten-free and full of plant protein.
Print
Pin
Save
Servings: servings
Ingredients
- 1 cup firm tofu about half of a 14-ounce block, patted dry
- 2 tablespoons nutritional yeast
- 1 teaspoon black pepper
- 2 cups basmati rice white or brown, uncooked (or 6 cups cooked, chilled rice)
- 3 cups water for cooking the rice (4 cups for brown basmati)
- 2 tablespoons olive oil
- 1 tablespoon garlic minced (about 3 cloves)
- 1 cup peas frozen
- 1 cup carrots peeled and diced
- 1 cup corn kernels fresh (cut from about 2 ears) or frozen
- ½ cup tamari gluten-free; or soy sauce if gluten isn't a concern
- 2 tablespoons Sriracha or to taste
Instructions
- Cook the rice: rinse the rice in a fine-mesh strainer until the water runs mostly clear. Add it to a medium saucepan with the water and bring to a boil over high heat. Cover, reduce the heat to low and simmer for 15 minutes (40 to 45 minutes for brown basmati), until the water is absorbed. Remove from the heat and let stand, covered, for 5 minutes. Fluff with a fork and spread the rice on a large baking sheet to cool and dry for at least 10 minutes. (Skip this step if you're using leftover cooked rice.)
- While the rice cooks, pat the tofu dry with paper towels. In a medium bowl, crumble the tofu and mash it with the nutritional yeast and black pepper, using a fork, until it looks like scrambled eggs. Set aside.
- In a small bowl, stir together the tamari and sriracha. Set aside.
- Heat the olive oil in a large wok or 12-inch skillet over medium heat. Add the garlic and cook, stirring, for 1 to 2 minutes, until fragrant but not browned. Add the peas, carrots and corn and cook, stirring often, for 5 to 7 minutes, until the carrots are just tender.
- Add the tofu mixture and cook, stirring, for 2 to 3 minutes, until heated through and lightly golden.
- Add the cooked rice and toss well, breaking up any clumps. Pour the sriracha-tamari sauce over the top and toss until the rice is evenly coated.
- Spread the rice out in the pan, reduce the heat to medium-low and cook undisturbed for 4 to 5 minutes, until the bottom is lightly crisp. Stir, taste and add more sriracha or tamari if you like, then serve hot.
Notes
Leftover rice: Day-old rice fries best. If you have about 6 cups of cooked, chilled rice, skip step 1 and leave out the water.
Brown basmati: Use 4 cups of water and simmer for 40 to 45 minutes, which adds about 25 minutes to the total time.
Gluten-free: Use tamari labeled gluten-free and check the labels on your sriracha and nutritional yeast.
Salt: Half a cup of tamari gives a bold, savory flavor. For a milder dish, use reduced-sodium tamari or start with ⅓ cup and add more to taste.
Storage: Refrigerate leftovers in an airtight container for up to 4 days, or freeze for up to 3 months. Reheat in a skillet with a splash of water.
Nutrition (Estimate per Serving)
Calories: 558kcalCarbohydrates: 94gProtein: 20gFat: 11gSaturated Fat: 2gPolyunsaturated Fat: 3gMonounsaturated Fat: 6gSodium: 1916mgPotassium: 512mgFiber: 7gSugar: 6gVitamin A: 5655IUVitamin C: 23mgCalcium: 142mgIron: 3mg
Vegan-ize any recipe!Grab our free vegan cheat sheet, packed with my favorite easy substitutions to make any recipe vegan.
Leek and Potato Soup with Watercress
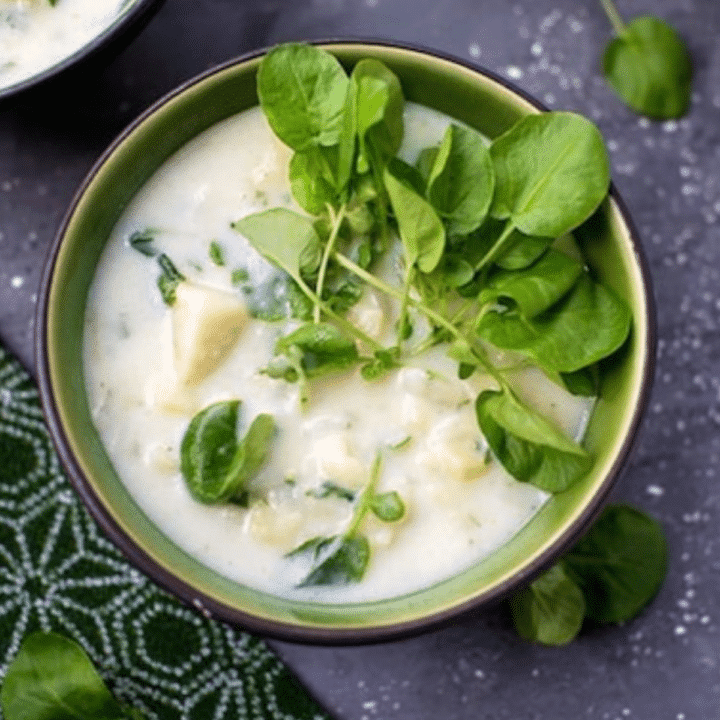
This vegan leek and potato soup is creamy, gently oniony, and finished with a big handful of peppery watercress that brightens every spoonful. It's simple enough for a weeknight, and it tastes even better the day after you make it.

Photos by Hannah Kaminsky.
Classic leek and potato soup usually leans on butter and cream, but you don't need either one here. Mashing some of the potatoes right in the pot thickens the broth naturally, and a splash of unsweetened rice milk makes it silky without weighing it down. The watercress goes in at the end, so it keeps its fresh, slightly spicy bite.
Key Ingredients & Substitutions
- Leeks. Use the white and palest green parts, which are the most tender and the sweetest. The dark green tops are tough, but you can save them for homemade vegetable stock. If you're short on leeks, a large sweet onion will work, though the soup will taste a little less delicate.
- Potatoes. Yukon Gold potatoes give the creamiest, most buttery texture, while russets break down more and make a thicker soup. Either works. Red potatoes hold their shape, so choose them only if you like a chunkier bowl.
- Vegetable bouillon. Bouillon cubes and water keep this recipe budget-friendly. We like Edward & Sons Garden Veggie bouillon cubes, which are vegan and gluten-free. You can also swap the water and cubes for about 5 cups of low-sodium vegetable broth.
- Watercress. Its peppery flavor is what makes this soup special. Baby arugula is the closest substitute; baby spinach works too, but it's much milder.
- Rice milk. Unsweetened rice milk is light and neutral. Unsweetened oat milk, soy milk, or almond milk are all good swaps. Just make sure it's unsweetened and unflavored.
Helpful Tips
Clean the leeks well. Leeks grow in sandy soil, and grit hides between the layers. Slice them first, then swish the slices in a big bowl of cold water. The dirt sinks to the bottom, so lift the leeks out with your hands or a slotted spoon rather than pouring them into a colander.
Cook the leeks low and slow. Keeping the pot covered over medium heat lets the leeks soften and turn sweet before they take on a little golden color. Rushing this step over high heat can scorch them and leave a bitter edge.
Mash only part of the potatoes. A roomy Dutch oven gives you space to press some of the potatoes against the side of the pot with a potato masher. That releases their starch and thickens the soup while leaving tender chunks behind. For a smoother soup, a few quick pulses with an immersion blender do the job; just don't overdo it, or the potatoes can turn gluey.
Keep it below a boil after adding the milk. Nondairy milks can separate if they boil hard. A gentle simmer over very low heat keeps the soup smooth.
Make it a day ahead. Like many soups, this one improves as it rests, because the leeks and potatoes have time to mellow and blend. If you're making it ahead, hold back the watercress and stir it in when you reheat, so it stays bright green.

Variations
- Extra creamy. Blend a quarter cup of soaked raw cashews with the rice milk before adding it for a richer, more velvety soup.
- Garlic and herb. Add 2 or 3 minced garlic cloves with the leeks, and a sprig of fresh thyme along with the bay leaf.
- Spring green. Stir in a cup of frozen peas or a handful of chopped asparagus during the last 5 minutes of simmering.
- Smoky. A half teaspoon of smoked paprika gives the soup a subtle, warming depth, especially nice on colder days.
- Protein boost. Add a can of drained, rinsed white beans with the milk to make the soup more filling.
Serving Ideas
This soup is hearty enough to be a light meal on its own, especially with some good bread for dunking. A slice of Quick Three-Grain Brown Bread or a square of Easy Vegan Cornbread rounds it out nicely.
For a fuller dinner, pair a bowl with a crisp salad. Leftover watercress is perfect in a Jicama Salad with Oranges and Watercress, or simply toss mixed greens with a 5-Minute Vinaigrette. Looking for more ways to cook with spuds? Browse our favorite vegan potato recipes.
Storing & Freezing
Let the soup cool, then refrigerate it in an airtight container for up to 4 days. It thickens as it sits, so add a splash of rice milk or water when you reheat it gently on the stovetop over low heat. Keep the garnish watercress separate and add it just before serving.
You can freeze this soup for up to 3 months, ideally before adding the fresh watercress garnish. Potatoes can turn a little grainy after freezing, so thaw the soup overnight in the fridge, then reheat it slowly and give it a good stir or a quick pulse with an immersion blender to bring back its creamy texture.

More Cozy Vegan Soups
If you loved this recipe, here are a few more you might enjoy:
- Vegan Lemony Leek and Mushroom Soup
- Cream of Corn and Watercress Soup
- Vegan Cream of Asparagus Soup
- Vegan Cream of Broccoli Soup
Recipe
Leek and Potato Soup with Watercress
A cozy, creamy vegan leek and potato soup finished with peppery fresh watercress. It's naturally dairy-free and gluten-free, and it tastes even better the next day.
Print
Pin
Save
Servings: servings
Equipment
- Potato masher
Ingredients
- 1 ½ tablespoons olive oil
- 3 large leeks white and palest green parts only, sliced and rinsed well
- 4 large potatoes about 2 ½ pounds, peeled and diced
- 1 bay leaf
- 2 vegetable bouillon cubes gluten-free if needed
- 5 cups water or just enough to cover the potatoes
- 1 cup packed watercress leaves thick stems removed, roughly chopped
- 1 to 1 ½ cups unsweetened rice milk or other nondairy milk plus more as needed
- Salt and freshly ground pepper to taste
- 2 tablespoons chopped fresh parsley or more, to taste
- Watercress leaves for garnish
Instructions
- Heat the oil in a large soup pot or Dutch oven over medium heat. Add the leeks, cover, and cook for 8 to 10 minutes, stirring occasionally, until they're soft and just beginning to turn golden.
- Add the potatoes, bay leaf, bouillon cubes, and just enough water to cover the potatoes (about 5 cups). Bring to a boil, then reduce the heat to a gentle simmer. Cover and cook for 15 to 20 minutes, until the potatoes are very tender when pierced with a fork.
- Remove and discard the bay leaf. Mash some of the potatoes against the side of the pot with a potato masher or the back of a large spoon (or give the soup a few short pulses with an immersion blender) until it's thick and creamy but still a little chunky.
- Stir in the watercress and 1 cup of the rice milk. Simmer over very low heat, uncovered, for 10 minutes, stirring occasionally; don't let it come to a boil. Season to taste with salt and pepper.
- For the best flavor, let the soup stand off the heat for 1 to 2 hours, or let it cool and refrigerate overnight. Reheat gently over low heat, stir in the parsley, and thin with more rice milk if it's too thick. Taste and adjust the seasoning.
- Ladle into bowls and top each serving with a generous handful of fresh watercress leaves.
Notes
Make ahead: The flavor improves after a night in the fridge. For the brightest green color, hold back the watercress in step 4 and stir it in when you reheat the soup, simmering just until wilted.
Gluten-free: Potatoes, leeks, and watercress are naturally gluten-free, but some bouillon cubes aren't. Check the label if you need the soup to be fully gluten-free.
Storage: Refrigerate in an airtight container for up to 4 days. Freeze (without the garnish) for up to 3 months; thaw overnight and reheat gently, whisking or mashing to smooth out the texture.
Nutrition (Estimate per Serving)
Calories: 239kcalCarbohydrates: 46gProtein: 5gFat: 5gSaturated Fat: 1gPolyunsaturated Fat: 1gMonounsaturated Fat: 3gSodium: 283mgPotassium: 902mgFiber: 5gSugar: 6gVitamin A: 1040IUVitamin C: 47mgCalcium: 70mgIron: 3mg
Vegan-ize any recipe!Grab our free vegan cheat sheet, packed with my favorite easy substitutions to make any recipe vegan.
Vegan Pho Bo (Vietnamese Faux-”Beef” Noodle Soup)

This vegan take on pho bo, the classic Vietnamese beef noodle soup, swaps the beef for thin shreds of seitan and simmers everything in a garlicky, gingery vegetable broth. It's light but deeply warming, loaded with rice noodles, crisp bean sprouts, scallions, and fresh cilantro, and it's on the table in about 35 minutes despite the long-looking ingredient list.

Photos by Hannah Kaminsky.
It makes a welcome change of pace in winter from thick soups and stews, yet it's every bit as comforting. Everyone gets to finish their own bowl at the table with lime, herbs, and a squeeze of hot sauce, which is half the fun of pho.
Key Ingredients & Substitutions
- Rice noodles. Thin, flat rice sticks or Vietnamese rice vermicelli are traditional. Bean-thread (glass) noodles work just as well and give the soup a slippery, translucent look.
- Seitan. The "beef" in this pho. Store-bought seitan is fine; tear or slice it into thin shreds so it soaks up the broth. Thinly sliced baked tofu or pressed extra-firm tofu is a good gluten-free swap.
- Low-sodium vegetable broth. Starting with a low-sodium broth lets you season with soy sauce without the soup getting too salty. A mushroom broth adds extra savory depth.
- Reduced-sodium soy sauce. Adds the salty, umami backbone. Use tamari or coconut aminos if you need the soup to be gluten-free (along with tofu instead of seitan).
- Fresh ginger, garlic, and shallot. These build the aromatic base. Grating the ginger on a microplane releases the most flavor; adjust between 2 and 3 teaspoons to taste.
- Bean sprouts, scallions, cilantro, and lime. The fresh finish that makes pho taste like pho. Thai basil and mint are lovely additions if you can find them.
Helpful Tips
Keep the noodles separate. Rice noodles keep soaking up liquid, so cook them on their own, then divide them among bowls and ladle the hot soup over the top. This keeps the broth clear and the noodles from turning mushy.
Snip the noodles. Long rice noodles are hard to wrangle from a soup bowl. After draining, a few cuts with kitchen scissors makes them much easier to eat.
Take the aromatics to golden. Sauté the garlic and shallot over medium-low heat until they turn golden, not brown. That gentle color adds a toasty sweetness to the broth, while scorched garlic turns it bitter.
Add liquid as needed. Once the seitan and sprouts go in, the pot can look crowded. Add another 1 to 2 cups of broth, or water if you've run out, so every bowl gets plenty of soup.
Crisp the seitan for more texture. Straight from the package is fine, but if you have a few extra minutes, sear the shredded seitan in a little oil over high heat until golden at the edges before adding it to the soup.

Variations
- Spiced broth. For a flavor closer to traditional pho, simmer a star anise pod and a small cinnamon stick in the broth, then remove them before serving.
- Tofu pho. Replace the seitan with cubes of baked or pan-fried tofu, as in this Asian Tofu Vegetable Soup.
- Mushroom pho. Add a cup of sliced shiitake or oyster mushrooms with the broth for a meatier, earthier bowl.
- Extra greens. Stir in baby bok choy or a couple of handfuls of spinach during the last few minutes of simmering.
- Mock duck. Canned mock duck makes a great swap for the seitan; it's also the star of this Lemongrass Noodle Bowl with Mock Duck.
Serving Ideas
Pho is a meal in a bowl, but it's best served with a plate of extra garnishes in the middle of the table: more bean sprouts, lime wedges, cilantro, sliced chiles, and bottles of Sriracha and hoisin sauce so everyone can season to taste.
For a bigger spread, start with fresh Tofu Spring Rolls, or browse our collection of Vegan Asian Noodle Recipes for a cold noodle salad to serve alongside. If you have seitan left over, use it up in a hearty Seitan "Meat and Potatoes" Stew.
Storing & Freezing
Store the broth (with the seitan and vegetables) and the noodles in separate airtight containers in the refrigerator for up to 4 days. Keeping them apart stops the noodles from absorbing all the broth and going soft. The fresh garnishes are best added just before serving.
The broth freezes well for up to 3 months; the noodles and bean sprouts don't, so cook a fresh batch of noodles when you reheat. Thaw the broth overnight in the fridge, then warm it gently on the stovetop until steaming and pour it over the noodles. Finish with fresh lime, scallions, and cilantro.

More Vegan Asian Soups
If you loved this recipe, here are a few more you might enjoy:
- Vegan Ramen Miso Soup
- Vegan Wonton Soup Recipe
- 20-Minute Asian Vegetable Noodle Soup
- Miso-Butternut Squash Soup with Soba or Udon Noodles
Recipe

Vegan Pho Bo (Vietnamese Faux-Beef Noodle Soup)
Vegan pho bo swaps the beef for thin shreds of seitan in a quick, gingery broth with rice noodles, bean sprouts, scallions, and plenty of cilantro and lime. It's ready in about 35 minutes.
Print
Pin
Save
Servings: servings
Equipment
- Saucepan for the noodles
Ingredients
- 3 to 4 ounces thin rice noodles or bean-thread noodles
- 1 tablespoon neutral vegetable oil
- 3 to 4 cloves garlic minced
- 1 shallot minced
- 4 cups low-sodium vegetable broth (one 32-ounce carton), plus 1 to 2 cups more broth or water as needed
- 2 tablespoons reduced-sodium soy sauce plus more to taste
- 2 to 3 teaspoons fresh ginger minced or grated, to taste
- 6 to 8 ounces seitan cut into thin shreds
- 1 cup mung bean sprouts fresh
- 4 scallions thinly sliced, divided
- ¼ cup fresh cilantro minced, or more to taste, divided
- 2 teaspoons lime juice or more to taste
- freshly ground pepper to taste
- 1 lime cut into thin wedges, for garnish
- Sriracha for serving (optional)
- hoisin sauce for serving (optional)
Instructions
- Cook the noodles according to the package directions until just tender (al dente). Drain, rinse briefly with cool water, and snip them into shorter lengths with kitchen scissors so they're easier to eat from a soup bowl. Set aside.
- Meanwhile, heat the oil in a soup pot over medium-low heat. Add the garlic and shallot and sauté, stirring often, until both are golden, 3 to 4 minutes.
- Add the broth, soy sauce, and ginger. Bring to a slow boil, then lower the heat, cover, and simmer gently for 10 minutes.
- Add the seitan, bean sprouts, half of the scallions, and half of the cilantro. Add 1 to 2 cups more broth (or water) so the ingredients aren't crowded. Season with the lime juice, pepper, and a little more soy sauce if you'd like.
- Simmer for 3 minutes longer, then remove from the heat.
- Divide the noodles among 6 bowls and ladle the hot soup over them. Garnish each serving with a lime wedge or two and the remaining scallions and cilantro. Pass Sriracha and hoisin sauce at the table, if you like.
Notes
Seitan: Straight from the package is fine. For more texture, sauté the shredded seitan in a little oil over high heat until golden and crisp at the edges before adding it to the soup.
Deeper broth: Simmer 1 star anise pod and a small cinnamon stick in the broth during the 10-minute simmer, then fish them out before adding the seitan.
Storage: Keep leftover noodles and broth in separate containers so the noodles don't turn soft. The broth keeps for up to 4 days in the fridge or 3 months in the freezer.
Nutrition (Estimate per Serving)
Calories: 141kcalCarbohydrates: 21gProtein: 9gFat: 3gPolyunsaturated Fat: 1gMonounsaturated Fat: 1gSodium: 352mgPotassium: 111mgFiber: 2gSugar: 2gVitamin A: 135IUVitamin C: 9mgCalcium: 21mgIron: 1mg
Vegan-ize any recipe!Grab our free vegan cheat sheet, packed with my favorite easy substitutions to make any recipe vegan.
Edamame Vegetable Soup
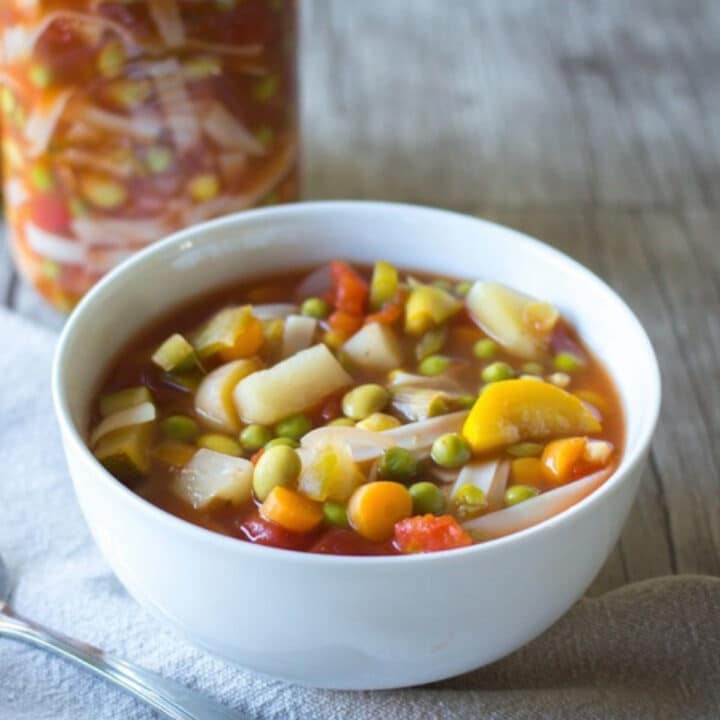
This Edamame Vegetable Soup is a hearty, one-pot bowl of zucchini, yellow squash, carrots, and potatoes simmered in a basil-scented tomato broth, with plenty of edamame for protein and a handful of small pasta to make it a full meal. It's colorful, filling, and completely vegan, and it's just as welcome on a cold winter night as it is at the end of summer when the garden is overflowing with squash.

I love making this soup with whatever seasonal vegetables are on hand, but the edamame is what sets it apart. Those bright green soybeans add a buttery bite and a real boost of plant protein, so a single bowl keeps you satisfied well past lunchtime.
Key Ingredients & Substitutions
- Edamame. Frozen shelled edamame is the easiest option, and it goes straight into the pot without thawing. It brings about 8 grams of protein per half cup. If you can't find it, frozen lima beans or a can of drained cannellini or chickpeas work in the same amount.
- Zucchini and yellow squash. These cook quickly and soak up the tomato broth. Cut them a little larger than the carrots and potatoes so they stay tender rather than mushy. Any summer squash will do, or use two zucchini if that's what you have.
- Carrots and potatoes. They give the soup body and a gentle sweetness. Yukon Gold potatoes hold their shape best; russets will break down more and thicken the broth, which some people prefer. Sweet potato is a nice swap in the fall.
- Diced tomatoes. One can of Del Monte diced tomatoes is all you need for a light tomato broth. Fire-roasted tomatoes add a subtle smoky note, and 2 cups of chopped fresh tomatoes are lovely in late summer.
- Vegetable broth. A low-sodium broth lets you control the salt. Homemade is great here, but any good boxed broth works.
- Small pasta. Tiny shapes like Barilla ditalini, small shells, or broken vermicelli fit on a spoon with the vegetables. For a gluten-free soup, use gluten-free pasta or swap in rice.
- Basil and bay leaf. Fresh basil goes in twice, once to flavor the broth and again at the end for brightness. A single dried bay leaf, such as McCormick Culinary whole bay leaves, adds a quiet savory depth. If you don't have fresh basil, use 1 teaspoon dried basil with the broth.
Helpful Tips
Cut the vegetables to match their cooking times. Carrots and potatoes take the longest, so dice them into ½-inch pieces. Zucchini and yellow squash soften fast, so cut them closer to ¾ inch. Everything then finishes at the same moment instead of the squash turning to mush while the potatoes are still firm.
Use a heavy pot. A large soup pot or a Lodge cast iron Dutch oven holds steady, even heat, so the onions soften without scorching and the soup simmers gently once covered. You'll need at least a 6-quart pot for the full batch.
Add the edamame and pasta at the end. Both go in only for the last 8 to 10 minutes. Edamame stays bright and slightly firm, and the pasta cooks right in the broth without getting bloated. Check your pasta package; thin vermicelli may need only 5 or 6 minutes.
Season in stages. Add a teaspoon of salt with the vegetables, then taste again at the very end. How much more you need depends on your broth, and potatoes and pasta both absorb salt as they cook.
Keep the peas for last. Frozen peas need only a couple of minutes to warm through. Stirring them in just before serving keeps them sweet and vividly green.
Variations
- Greens. Stir in 2 to 3 handfuls of baby spinach or chopped kale with the peas and let them wilt.
- Extra beans. Add a can of drained white beans or chickpeas along with the edamame for an even heartier bowl.
- Grain instead of pasta. Use ½ cup of rice, farro, or pearl barley. Add it with the broth, since grains need longer to cook than small pasta.
- Italian-style. Add a teaspoon of dried oregano and finish each bowl with a spoonful of vegan pesto. If you love that direction, try our Vegan Minestrone Soup too.
- A little heat. A pinch of crushed red pepper flakes with the garlic gives the broth a gentle warmth.
- Creamy squash twist. Blend a cup or two of the finished soup and stir it back in for a thicker texture, or see our velvety Yellow Squash Soup for a fully puréed option.
Serving Ideas
With vegetables, protein, and pasta all in one pot, this soup is a complete meal on its own. Still, a piece of good bread for dipping is hard to beat. Warm slices of homemade Focaccia Bread are perfect for soaking up the tomato broth, and a square of Easy Vegan Cornbread makes it feel extra cozy on a cold night.
For a lighter lunch, serve a smaller bowl alongside a crisp green salad tossed with our 5-Minute Vinaigrette Dressing. A sprinkle of fresh basil, a drizzle of good olive oil, or a spoonful of vegan parmesan on top of each bowl makes it feel a little special.
Storing & Freezing
Let the soup cool, then refrigerate it in an airtight container for up to 4 days. The pasta keeps drinking up broth as it sits, so the soup will be thicker the next day. Add a splash of vegetable broth or water when you reheat it on the stove over medium-low heat or in the microwave.
This soup freezes well for up to 3 months. For the best texture, freeze it before adding the pasta: make the soup through the edamame and peas, cool it completely, and freeze it in portions. When you're ready to eat, thaw it overnight in the fridge, bring it to a simmer, and cook the pasta right in the pot. Potatoes can turn slightly softer after freezing, but the flavor holds up nicely.
It's also a great make-ahead recipe for busy weeks. Chop all the vegetables a day ahead and keep them in the fridge, or cook a full batch on the weekend and portion it into containers for easy lunches.
More Hearty Vegan Soups
If you loved this recipe, here are a few more you might enjoy:
- Vegan Split Pea Soup
- Old-Fashioned Vegan Stew
- Roasted Vegetable Pumpkin Soup
- Cozy Vegan Soups for Fall and Winter
Recipe

Edamame Vegetable Soup
A hearty, protein-packed vegan soup loaded with edamame, zucchini, yellow squash, carrots, and potatoes in a basil-scented tomato broth, with a little pasta to make it a meal. It comes together in one pot in about an hour and freezes well.
Print
Pin
Save
Servings: servings
Ingredients
- 2 tablespoons olive oil
- 1 onion medium, chopped
- 2 cloves garlic minced
- 1 can diced tomatoes 14.5 ounces, with their juices
- 2 carrots peeled and diced
- 2 potatoes medium Yukon Gold, peeled and cut into ½-inch cubes
- 1 zucchini large, diced (about 2 cups)
- 1 yellow squash diced
- ¼ cup fresh basil leaves chopped, divided
- 1 bay leaf
- 7 cups vegetable broth low-sodium recommended
- ¾ cup pasta small soup pasta such as ditalini, or broken vermicelli (about 3 ½ ounces)
- 1 ½ cups edamame frozen shelled (no need to thaw)
- ½ cup frozen peas
- salt and pepper to taste
Instructions
- Prep the vegetables: chop the onion, mince the garlic, and peel and dice the carrots and potatoes into ½-inch pieces. Dice the zucchini and yellow squash into slightly larger pieces (about ¾ inch) so they hold their shape.
- Heat the olive oil in a large soup pot or Dutch oven over medium heat. Add the onion and cook, stirring often, until soft and translucent, about 5 minutes. Add the garlic and cook for 30 seconds more, until fragrant.
- Stir in the diced tomatoes with their juices and simmer for 5 minutes, until they start to break down.
- Add the carrots, potatoes, zucchini, and yellow squash, then half of the chopped basil, the bay leaf, 1 teaspoon salt, and ¼ teaspoon black pepper. Stir to coat the vegetables.
- Pour in the vegetable broth and bring the soup to a boil over high heat. Reduce the heat to low, cover, and simmer for 20 minutes, until the carrots and potatoes are just tender when pierced with a fork.
- Stir in the pasta and the frozen edamame. Simmer uncovered, stirring now and then, until the pasta is al dente, 8 to 10 minutes (check your package time).
- Stir in the frozen peas and the rest of the basil and cook for 2 minutes, just until the peas are bright green and warmed through.
- Remove the bay leaf. Taste and adjust the salt and pepper, then ladle into bowls and serve hot.
Notes
Make it gluten-free: use a gluten-free small pasta or swap the pasta for ½ cup rice (add the rice with the broth).
Storage: Refrigerate leftovers in an airtight container for up to 4 days. The pasta keeps absorbing broth, so add a splash of broth or water when reheating. To freeze, cool completely and freeze for up to 3 months; for the best texture, freeze the soup before adding the pasta and cook fresh pasta when you reheat.
Nutrition (Estimate per Serving)
Calories: 279kcalCarbohydrates: 45gProtein: 11gFat: 7gSaturated Fat: 1gPolyunsaturated Fat: 2gMonounsaturated Fat: 4gSodium: 1214mgPotassium: 1005mgFiber: 8gSugar: 11gVitamin A: 4407IUVitamin C: 42mgCalcium: 88mgIron: 3mg
Vegan-ize any recipe!Grab our free vegan cheat sheet, packed with my favorite easy substitutions to make any recipe vegan.
Za'atar Pumpkin Quinoa Pilaf
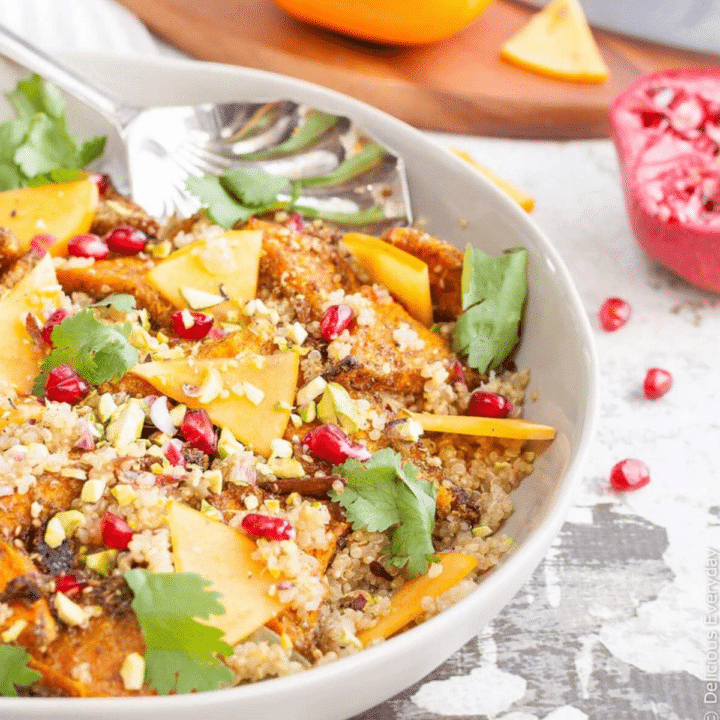
This za'atar pumpkin quinoa pilaf is a jewel-toned fall side dish: fluffy quinoa scented with cinnamon, cardamom and bay, topped with za'atar-roasted squash, sweet persimmon, pomegranate seeds, pistachios and fresh cilantro. It's vegan, naturally gluten-free, and pretty enough for a holiday table.
The magic is in the layers of flavor. Tossing the pumpkin in za'atar, a Middle Eastern blend of thyme, tangy sumac and toasted sesame seeds, before roasting gives it caramelized, herby edges. The quinoa simmers with whole spices so every bite is subtly fragrant, and the fruit, nuts and herbs on top add juicy, crunchy, fresh contrast. Serve it as a side, or as a light main with a scoop of hummus.
Key Ingredients & Substitutions
- Butternut squash. Also called butternut pumpkin, it roasts up sweet and tender. Kabocha, red kuri, sugar pumpkin or even sweet potato all work the same way.
- Za'atar. This tangy, herby spice blend is what makes the dish special. Look for za'atar in the spice aisle or at Middle Eastern grocers. In a pinch, mix dried thyme, a little sumac or lemon zest, and toasted sesame seeds.
- Quinoa. White quinoa cooks up light and fluffy for a pilaf. Red or tricolor quinoa add a nuttier bite and hold their shape a little more. Always rinse it first to remove the bitter coating.
- Whole spices. A cinnamon stick, a few lightly crushed cardamom pods and bay leaves perfume the quinoa as it cooks. If you only have ground spices, use a pinch of cinnamon and ¼ teaspoon of ground cardamom instead.
- Shallot. Sautéed until golden, it gives the pilaf a gentle sweetness. Half a small onion works too.
- Persimmon. Crisp Fuyu persimmons taste like a cross between an apple and a peach, with a hint of spice. They're optional. Swap in sliced pear, apple or dried apricots if you can't find them.
- Pomegranate, pistachios and cilantro. The finishing trio adds juicy pops, crunch and freshness. Toasted almonds or pepitas can replace the pistachios, and parsley or mint can stand in for cilantro.
How to Make Za'atar Pumpkin Quinoa Pilaf
Start by tossing wedges of peeled squash with olive oil, za'atar and a pinch of salt, then roast them on a lined baking sheet until tender and caramelized around the edges.
While the squash roasts, rinse the quinoa well. Sauté the shallot with the cinnamon stick, cardamom pods and bay leaves in a little oil until golden and fragrant, then stir in the quinoa and toast it for a couple of minutes. Add the vegetable stock, bring it to a simmer, cover and cook on low until the quinoa is tender and the liquid is absorbed.
Fluff the quinoa with a fork, remove the whole spices, and stir in the lemon zest. Spoon it onto a platter, then top with the roasted squash, persimmon, pomegranate seeds, pistachios and cilantro.
Helpful Tips
Rinse the quinoa. Quinoa has a natural coating called saponin that can taste soapy or bitter. A good rinse in a fine-mesh strainer takes care of it.
Give the squash space. Spread the pieces in a single layer with a little room between them so they roast and caramelize instead of steaming. Use two trays if needed.
Toast the quinoa. Stirring the rinsed quinoa in the pan with the shallot and spices for a few minutes before adding the stock gives it a nuttier flavor and helps the grains stay separate and fluffy.
Let it rest. Once the liquid is absorbed, turn off the heat and leave the pot covered for 5 minutes. The quinoa finishes steaming and fluffs up beautifully.
Add the toppings just before serving. Scatter the fruit, nuts and herbs on at the last minute so the pistachios stay crunchy and the cilantro stays bright.
Variations
- Add chickpeas. Roast a can of drained chickpeas with the squash for extra protein and turn the pilaf into a hearty main.
- Greens. Stir a couple of handfuls of baby spinach or chopped kale into the hot quinoa so it wilts.
- Different grain. Make it with bulgur, farro, couscous or brown rice, adjusting the liquid and cooking time as needed.
- Sweeter. Add a handful of dried cranberries, golden raisins or chopped dates to the quinoa.
- Tahini drizzle. Whisk tahini with lemon juice, water and a pinch of salt and drizzle it over the top.
- Spicier. Sprinkle the squash with a pinch of Aleppo pepper or chili flakes along with the za'atar.
Serving Ideas
This pilaf is a stunning side for Thanksgiving or any fall dinner. Serve it alongside rice and pecan-stuffed squash, a big green salad, or a bowl of roasted vegetable pumpkin soup.
To make it a main dish, add chickpeas or crispy baked tofu, and serve it with hummus, warm pita and a drizzle of tahini. It's also great packed into lunch containers, since it tastes good warm, at room temperature or even cold.
Storing & Freezing
Store the pilaf and roasted squash in an airtight container in the refrigerator for up to 4 days. For the best texture, keep the pistachios, pomegranate and cilantro separate and add them just before serving. Reheat in the microwave or a covered skillet with a splash of water, or enjoy it cold as a salad.
The quinoa and roasted squash can be frozen (without the fresh toppings) for up to 3 months. Thaw overnight in the fridge and reheat gently, then add fresh fruit, nuts and herbs. Persimmon and pomegranate don't freeze well, so always add them fresh.
More Vegan Grain Dishes
If you loved this recipe, here are a few more you might enjoy:
- Vegan Wild Rice Pilaf with Spinach and Almonds
- Tabbouleh Salad (with Quinoa, Bulgur, or Couscous)
- 25 Vegan Butternut Squash Recipes
- 34 Vegan Mediterranean Diet Recipes
Recipe

Za'atar Pumpkin Quinoa Pilaf
Fluffy quinoa pilaf scented with cinnamon, cardamom and bay, topped with za'atar-roasted squash, persimmon, pomegranate, pistachios and cilantro. A vegan, gluten-free fall side dish.
Print
Pin
Save
Servings: side servings
Equipment
- Medium saucepan with lid
Ingredients
- 1 lb butternut squash peeled, seeded and cut into wedges (about 3 cups)
- 1½ tablespoon za'atar
- 1½ tablespoon olive oil divided
- 1 shallot diced
- 1 cup quinoa rinsed and drained
- 1 cinnamon stick
- 4 cardamom pods lightly crushed
- 3 bay leaves
- 1¼ cups vegetable stock
- zest of ½ lemon
- ½ Fuyu persimmon sliced (optional)
- ¼ cup pomegranate seeds
- ¼ cup pistachios toasted and roughly chopped
- ½ cup fresh cilantro roughly chopped
- salt and pepper to taste
Instructions
- Preheat the oven to 350°F (180°C) and line a baking sheet with parchment paper.
- Toss the squash with half the olive oil, the za'atar and a couple of pinches of salt. Spread in a single layer and roast for 25 to 30 minutes, until tender and lightly caramelized.
- Meanwhile, heat the remaining oil in a medium saucepan over medium-low heat. Add the shallot, cinnamon stick, cardamom pods and bay leaves and cook, stirring, until the shallot is golden, about 5 minutes.
- Add the rinsed quinoa and stir for 2 minutes to toast. Pour in the vegetable stock with a pinch of salt and bring to a simmer.
- Cover, reduce the heat to low and cook for 15 minutes, until the quinoa is tender and the liquid is absorbed. Remove from the heat and let stand, covered, for 5 minutes.
- Remove the whole spices, fluff the quinoa with a fork and stir in the lemon zest. Season with salt and pepper to taste.
- Spoon the pilaf onto a platter and top with the roasted squash, persimmon, pomegranate seeds, pistachios and cilantro. Serve warm or at room temperature.
Notes
Serves 6 as a side or 3 to 4 as a main (add a can of chickpeas to make it heartier).
If you can't find persimmon, leave it out or use sliced pear or apple.
Inspired by Za'atar Roasted Chicken with Pilaf from May 2016 Gourmet Traveller.
Nutrition (Estimate per Serving)
Serving: 1servingCalories: 198kcalCarbohydrates: 34gProtein: 5gFat: 6gSaturated Fat: 1gPolyunsaturated Fat: 1gMonounsaturated Fat: 3gSodium: 202mgPotassium: 506mgFiber: 5gSugar: 5gVitamin A: 8495IUVitamin C: 19mgCalcium: 69mgIron: 2mg
Vegan-ize any recipe!Grab our free vegan cheat sheet, packed with my favorite easy substitutions to make any recipe vegan.
30-Minute Coconut Curry Pumpkin Soup

This coconut curry pumpkin soup is creamy, warmly spiced and ready in about 30 minutes. Canned pumpkin, coconut milk and a spoonful of curry powder come together in one pot for a cozy vegan soup that tastes like it simmered all afternoon.

It's the kind of recipe you can make on a busy weeknight with ingredients that are probably already in your pantry. Sautéed onion and garlic build the base, the spices bloom in the pot for a minute to bring out their flavor, and the coconut milk makes every spoonful velvety smooth without any dairy. It's naturally gluten-free, too.
Key Ingredients & Substitutions
- Pumpkin puree. Two 15-ounce cans of pure pumpkin puree keep this soup quick and easy. Make sure the label says 100% pumpkin, not pumpkin pie filling, which is sweetened and spiced. Homemade puree, butternut squash or sweet potato puree all work too.
- Coconut milk. Full-fat canned coconut milk gives the soup its rich, creamy texture. Light coconut milk works for a lighter bowl, though the soup won't be quite as silky.
- Curry powder. A good curry powder is the star here. Mild or hot both work, depending on how much heat you like. For a Thai-style twist, swap in 2 tablespoons of red curry paste.
- Ground ginger and coriander. These round out the curry flavor with warmth and a hint of citrus. A teaspoon of freshly grated ginger can replace the ground ginger.
- Onion and garlic. A large yellow or white onion and a few garlic cloves form the savory base. Shallots are a nice substitute.
- Soy sauce. Just a couple of teaspoons add depth and savory umami. Use gluten-free tamari to keep the soup gluten-free, or coconut aminos for a soy-free version.
- Vegetable broth. Use a good low-sodium broth, since the soy sauce and salt add plenty of seasoning.
How to Make Coconut Curry Pumpkin Soup
Sauté the aromatics
Heat the olive oil in a large pot or Dutch oven over medium heat. Add the diced onion and cook for 3 to 4 minutes, stirring occasionally, until it's soft and translucent.
Stir in the garlic, curry powder, ginger, coriander and salt, and cook for another minute or two until the spices smell fragrant. This quick toast in the oil wakes up the spices and gives the soup much more flavor.
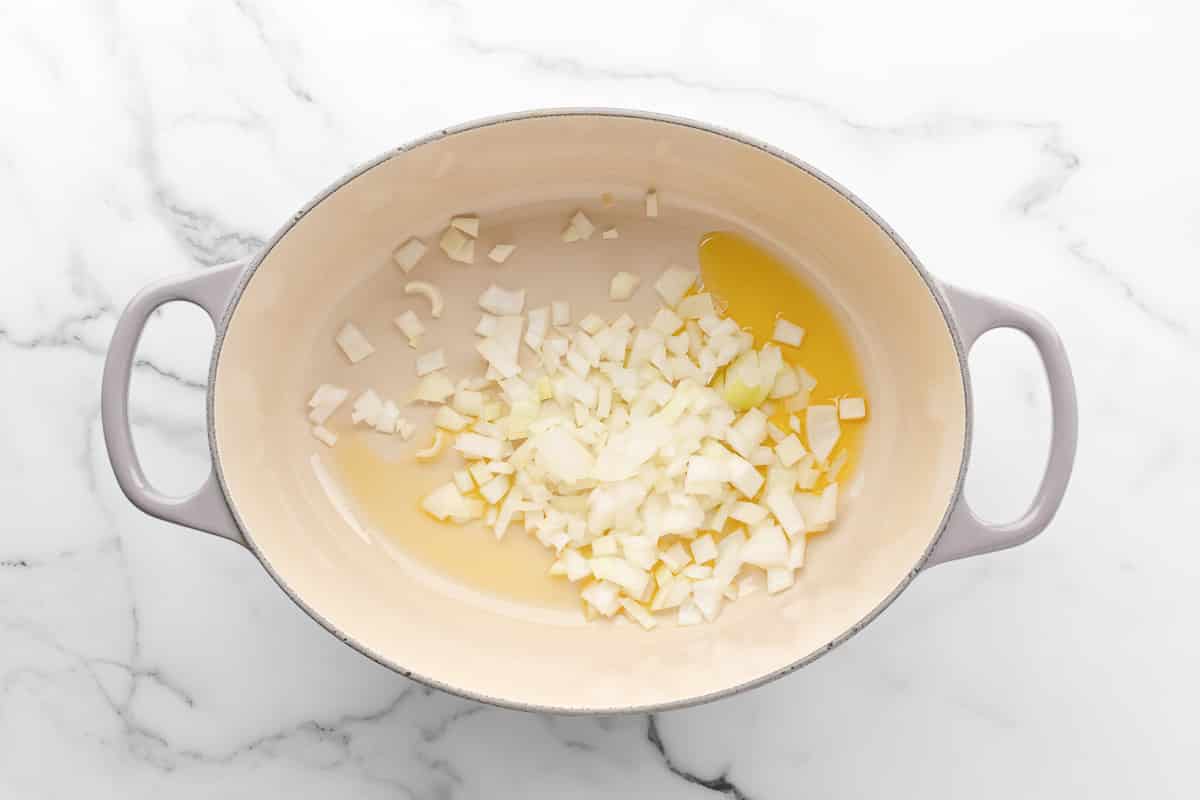
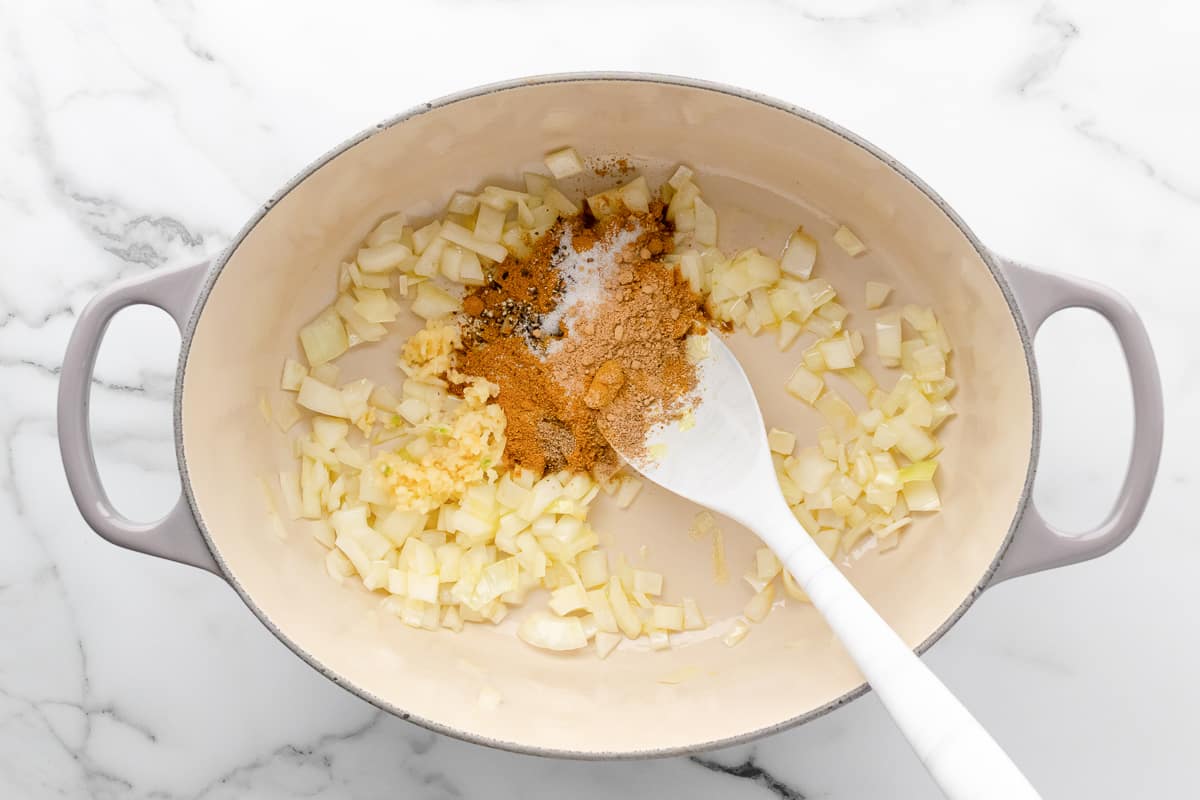
Add the pumpkin and simmer
Add the vegetable broth, pumpkin puree, coconut milk and soy sauce, and stir until everything is smooth. Bring the soup to a boil, then lower the heat, cover and let it simmer for 15 to 20 minutes so the flavors can meld.
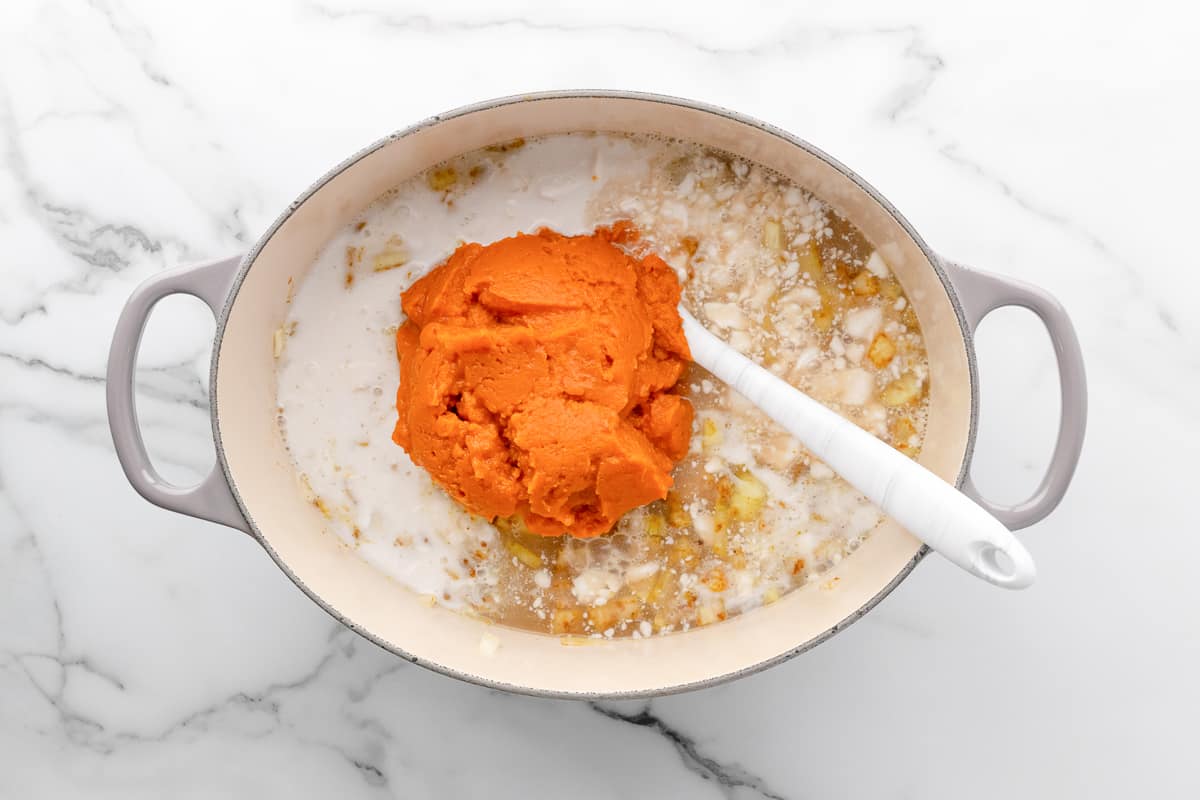
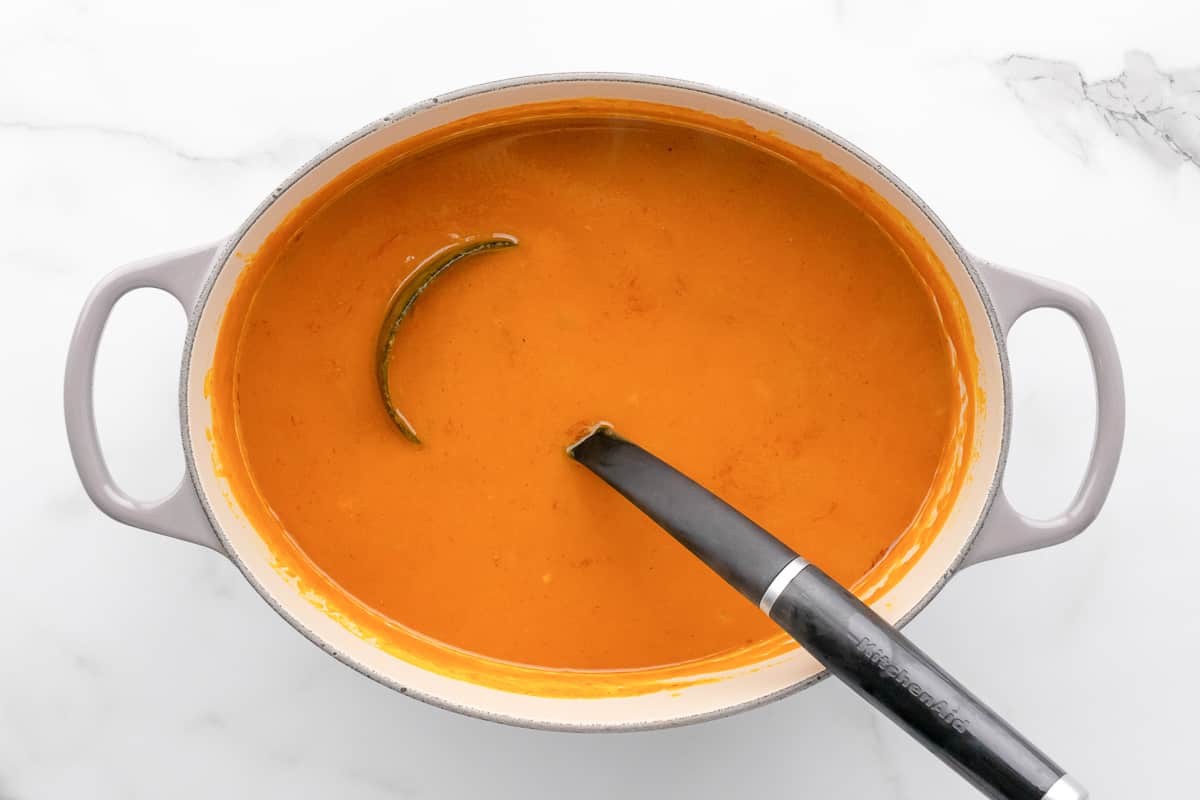
Taste and adjust the seasoning, then ladle into bowls and top with toasted pumpkin seeds.
Helpful Tips
Use a heavy pot. A Dutch oven or other heavy-bottomed pot holds an even temperature without hot spots, which helps keep a thick soup like this from scorching on the bottom.
Don't rush the onions. Taking a few extra minutes to let the onion soften and turn lightly golden adds a subtle sweetness that makes a big difference in the finished soup.
Bloom the spices. Cooking the curry powder and ground spices in the oil for a minute before adding the liquid brings out their full aroma. Just keep stirring so they don't burn.
Blend for extra silkiness. The soup is already smooth thanks to the puree, but a quick buzz with an immersion blender blends in the onion completely for a restaurant-style finish.
Adjust the thickness. For a thinner soup, stir in more broth a little at a time. For a thicker one, simmer uncovered for a few extra minutes.
Variations
- Red curry. Swap the curry powder for 2 tablespoons of red curry paste and finish with a squeeze of lime for a Thai-inspired bowl.
- Spicy. Add a pinch of cayenne or red pepper flakes with the spices, or top individual bowls with sliced red chiles.
- Heartier. Stir in a can of chickpeas or a cup of cooked red lentils for extra protein and fiber.
- Greens. Wilt a few handfuls of baby spinach or chopped kale into the hot soup just before serving.
- Sweet potato. Replace some or all of the pumpkin with mashed sweet potato or butternut squash puree.
- Brighter. Finish each bowl with fresh lime juice and chopped cilantro.
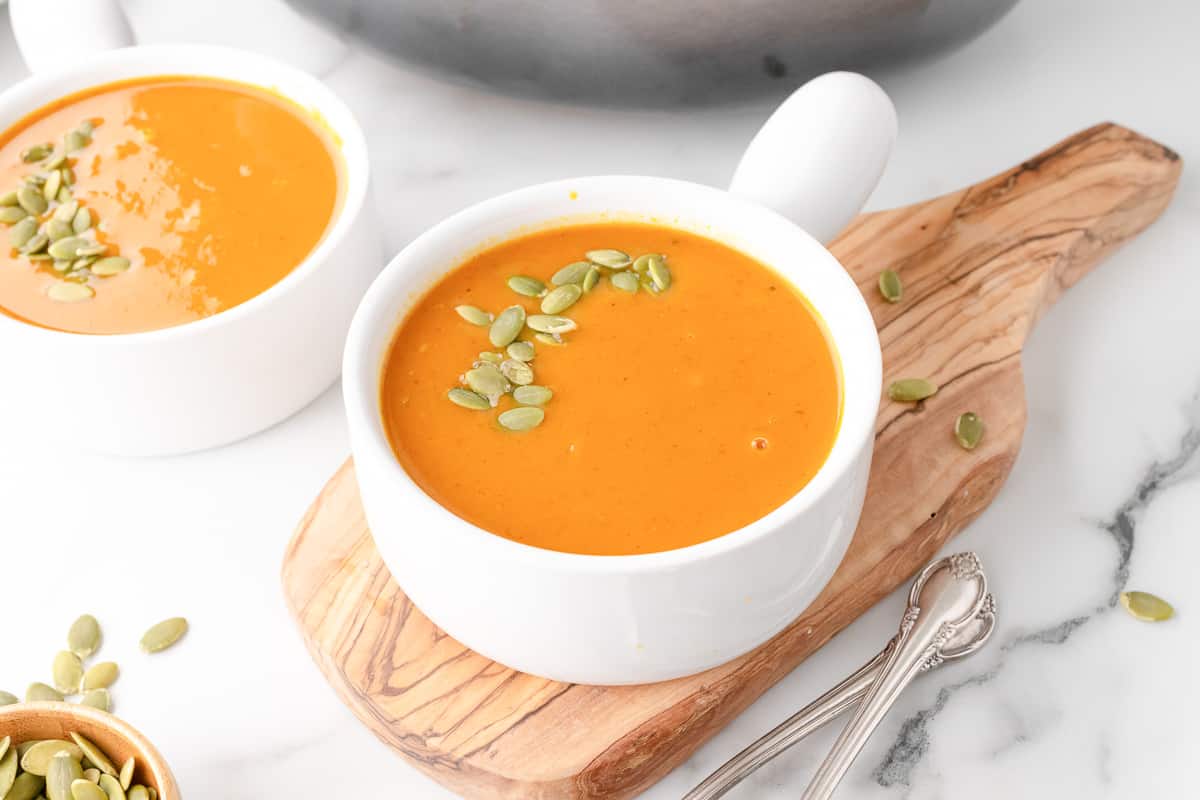
Serving Ideas
Top each bowl with toasted pumpkin seeds, a swirl of coconut milk or dairy-free yogurt, and a little chopped cilantro. A sprinkle of chili flakes adds color and a gentle kick.
For a complete meal, serve the soup with warm naan, crusty bread or a slice of vegan cornbread, or ladle it over a scoop of rice or quinoa. It also pairs nicely with a simple green salad for a light fall lunch.
Storing & Freezing
Let the soup cool, then store it in an airtight container in the refrigerator for up to 5 days. It thickens as it chills, so stir in a splash of broth or water when you reheat it on the stove or in the microwave.
To freeze, portion the cooled soup into freezer-safe containers or bags, leaving some room for it to expand, and freeze for up to 3 months. Thaw overnight in the fridge and reheat gently over medium heat, stirring or whisking if the coconut milk has separated a little.
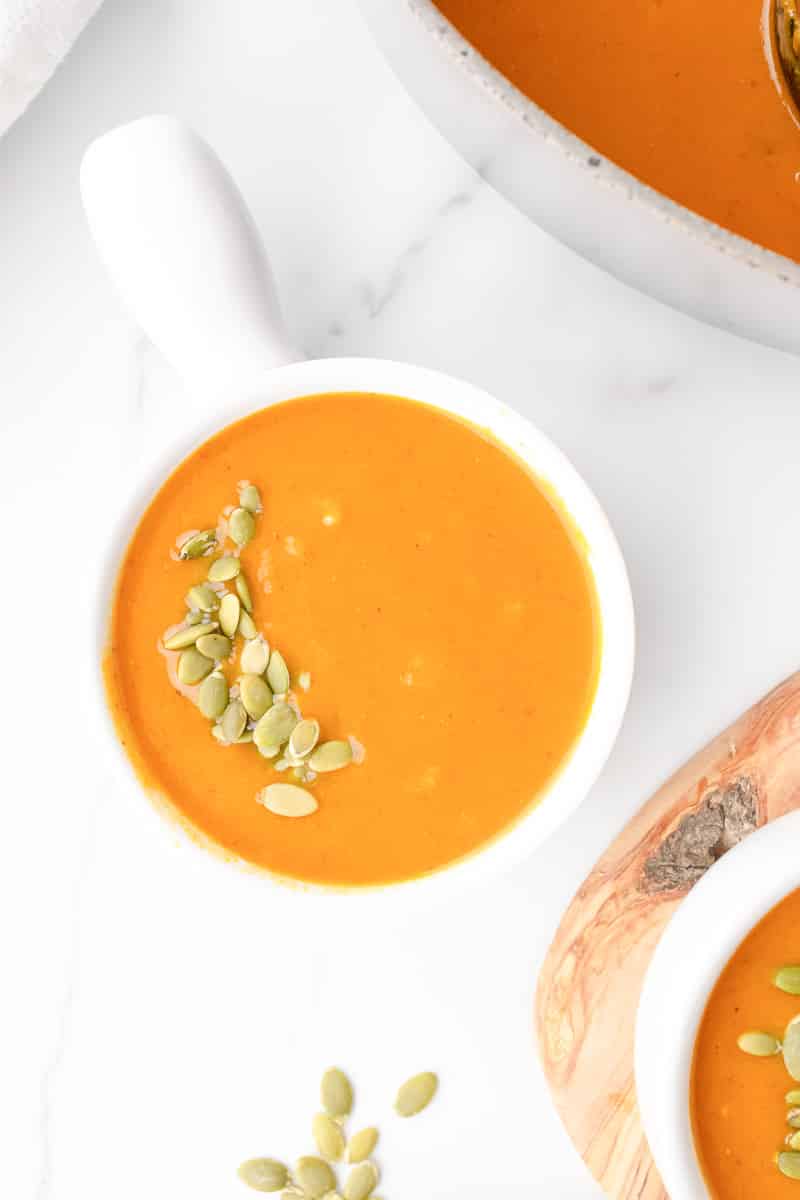
More Cozy Vegan Soups
If you loved this recipe, here are a few more you might enjoy:
- Roasted Vegetable Pumpkin Soup
- Curried Red Lentil, Pumpkin and Cauliflower Soup
- Creamy Thai Carrot Sweet Potato Soup
- Vegan Spicy Pumpkin and Peanut Soup
Recipe

30-Minute Coconut Curry Pumpkin Soup
A creamy vegan pumpkin soup made in one pot with canned pumpkin, coconut milk and warm curry spices. Cozy, naturally gluten-free and ready in about 30 minutes.
Print
Pin
Save
Servings: servings
Ingredients
- 2 tablespoon olive oil
- 1 large onion diced
- 3 cloves garlic minced
- 2 tablespoon curry powder mild or hot
- 1 teaspoon ground ginger
- ½ teaspoon ground coriander
- ½ teaspoon salt
- 4 cups vegetable broth low-sodium
- 2 cans pumpkin puree 15 oz each (about 3½ cups), not pumpkin pie filling
- 1 can coconut milk 13.5 to 14 oz, full-fat
- 2 teaspoon soy sauce or tamari for gluten-free
- toasted pumpkin seeds for serving (optional)
Instructions
- Heat the olive oil in a large pot or Dutch oven over medium heat. Add the onion and cook for 3 to 4 minutes, stirring occasionally, until soft and translucent.
- Add the garlic, curry powder, ginger, coriander and salt. Cook for 1 to 2 minutes, stirring constantly, until fragrant.
- Stir in the vegetable broth, pumpkin puree, coconut milk and soy sauce until smooth.
- Bring to a boil, then reduce the heat to low, cover and simmer for 15 to 20 minutes, stirring occasionally.
- For an extra-silky texture, blend briefly with an immersion blender (optional). Taste and adjust the seasoning.
- Ladle into bowls and top with toasted pumpkin seeds, a swirl of coconut milk and fresh cilantro, if you like.
Notes
Red curry version: replace the curry powder with 2 tablespoon red curry paste and finish with lime juice.
Storage: refrigerate up to 5 days or freeze up to 3 months. Thin with a splash of broth when reheating.
Nutrition (Estimate per Serving)
Serving: 1bowlCalories: 243kcalCarbohydrates: 18gProtein: 4gFat: 19gSaturated Fat: 13gPolyunsaturated Fat: 1gMonounsaturated Fat: 4gSodium: 950mgPotassium: 490mgFiber: 5gSugar: 7gVitamin A: 20944IUVitamin C: 8mgCalcium: 64mgIron: 5mg
Vegan-ize any recipe!Grab our free vegan cheat sheet, packed with my favorite easy substitutions to make any recipe vegan.
5-Minute Vinaigrette Dressing
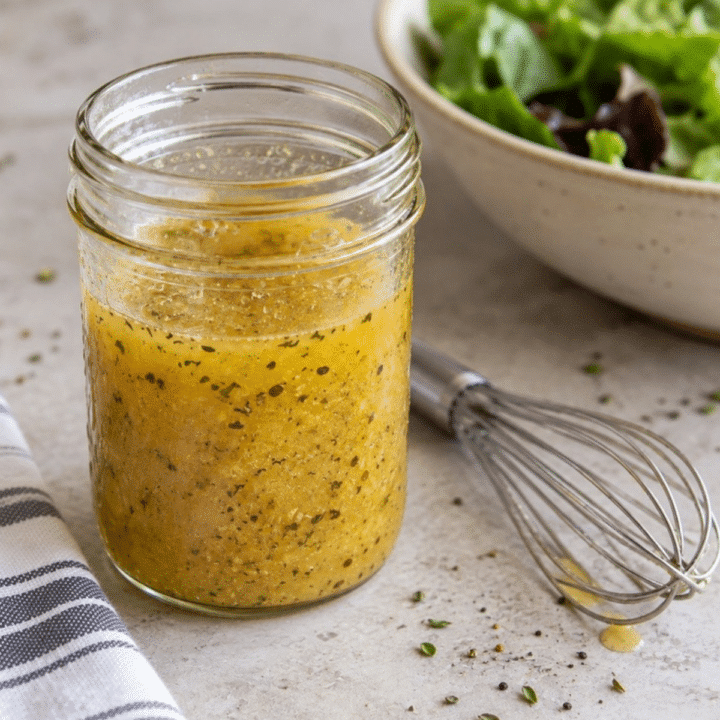
This 5-minute vinaigrette dressing is the only house dressing you really need: bright, tangy, a little sweet, and flecked with herbs, it comes together in one jar with a few quick shakes. Toss it with green salads, grain bowls, and pasta salads, or use it as a fast marinade for vegetables and tofu.
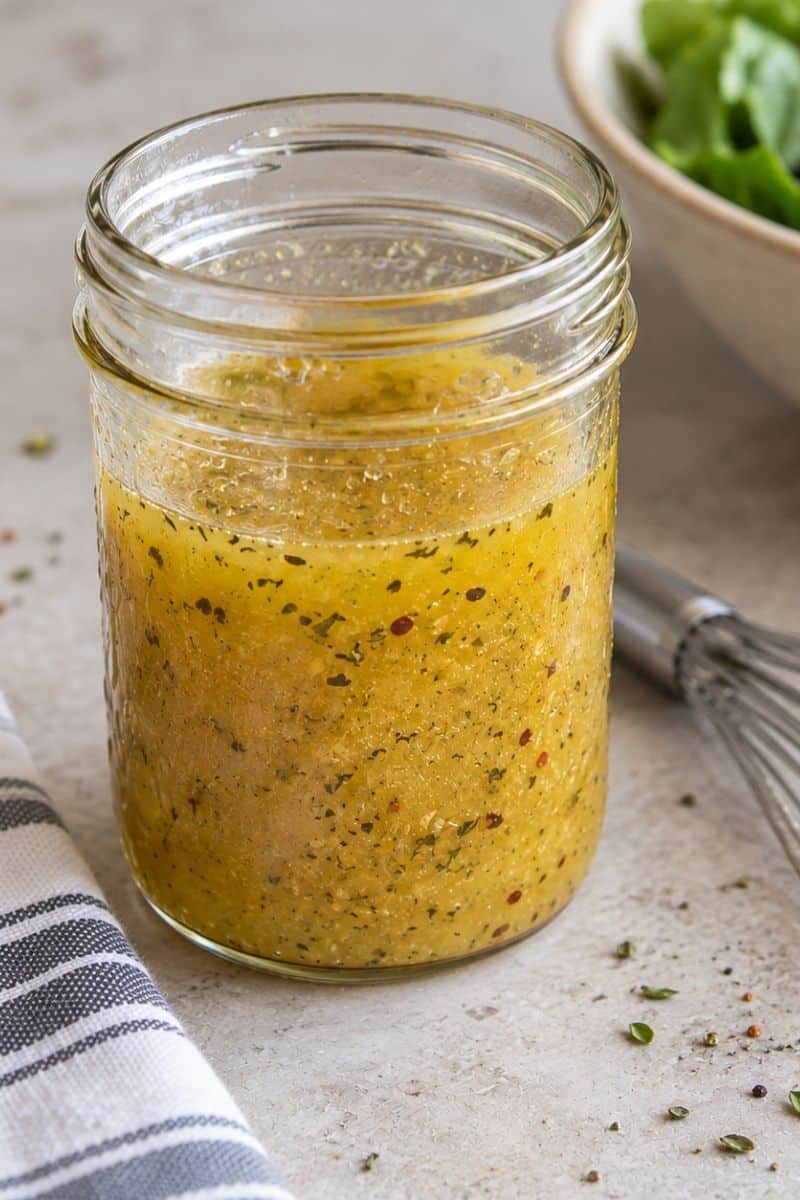
Key Ingredients & Substitutions
- Extra-virgin olive oil. The oil is the backbone of any vinaigrette, so use one you'd happily taste on its own, like this organic extra-virgin olive oil. Flavored oils (garlic, lemon, or basil) are an easy upgrade. For a milder dressing, swap up to half of the olive oil for avocado or sunflower oil.
- Vinegar. Red wine vinegar gives a classic Italian-style dressing, apple cider vinegar is fruity and mellow, white wine vinegar is clean and crisp, and balsamic makes a darker, sweeter dressing. Fresh lemon juice works in place of some or all of the vinegar, too.
- Dijon mustard. Mustard adds a savory kick and, more importantly, acts as an emulsifier that helps the oil and vinegar stay blended instead of separating right away. A smooth Dijon mustard is best; whole-grain mustard works if you like a rustic texture.
- Sugar or agave nectar. Just a tablespoon rounds out the acidity without making the dressing taste sweet. Maple syrup is another good vegan option. If you use granulated sugar, choose organic cane sugar, which isn't processed with bone char.
- Italian seasoning. A dried blend of oregano, basil, thyme, marjoram, and rosemary adds herby flavor with zero chopping. Any Italian seasoning works, or use 1 tablespoon of chopped fresh herbs instead.
- Crushed red pepper flakes (optional). A pinch of crushed red pepper flakes adds gentle warmth and pretty red flecks. Start with ¼ teaspoon and add more if you like heat, or leave them out for a kid-friendly dressing.
- Salt and pepper. A little salt makes every other flavor pop. Add it to taste once everything is mixed.
Helpful Tips
Use a jar with a tight lid. A small wide-mouth mason jar is the fastest way to make this dressing. You measure straight into it, shake, and store the leftovers in the same container, so there's nothing extra to wash.
Mix the vinegar and flavorings first. Shaking the vinegar, mustard, sugar, and seasonings together before adding the oil lets the sugar and salt dissolve. They won't dissolve once they're coated in oil, so this small step gives you a smoother, better-balanced dressing.
Shake harder than you think you need to. Thirty seconds to a minute of vigorous shaking breaks the oil into tiny droplets and creates a creamy, slightly thickened emulsion. If you're working in a bowl, drizzle the oil in slowly while whisking constantly.
Adjust the ratio to your taste. The classic vinaigrette ratio is about three parts oil to one part vinegar, which is what ¼ cup of vinegar gives you here. For a more pungent, tangy dressing, use the full ⅓ cup. Taste it on a leaf of lettuce rather than off a spoon, since that's how you'll actually eat it.
Let it sit for a few minutes if you can. The dressing is ready to use as soon as it's shaken, but if you have an extra 10 minutes, the dried herbs soften and release more flavor into the dressing.
Variations
- Balsamic vinaigrette. Use balsamic vinegar, swap the sugar for maple syrup, and add a small minced garlic clove.
- Lemon herb vinaigrette. Replace half of the vinegar with fresh lemon juice, add 1 teaspoon of lemon zest, and use chopped fresh parsley or basil in place of the dried seasoning.
- Garlic mustard vinaigrette. Double the Dijon, add a pressed garlic clove, and use whole-grain mustard for texture. Our Garlic Mustard Vinaigrette takes this idea even further.
- Spicy red pepper vinaigrette. Use the full ½ teaspoon of red pepper flakes and add a splash of hot sauce for a dressing that stands up to hearty grain and bean salads.
- Greek-style vinaigrette. Use red wine vinegar, swap the Italian seasoning for dried oregano, and add a squeeze of lemon.
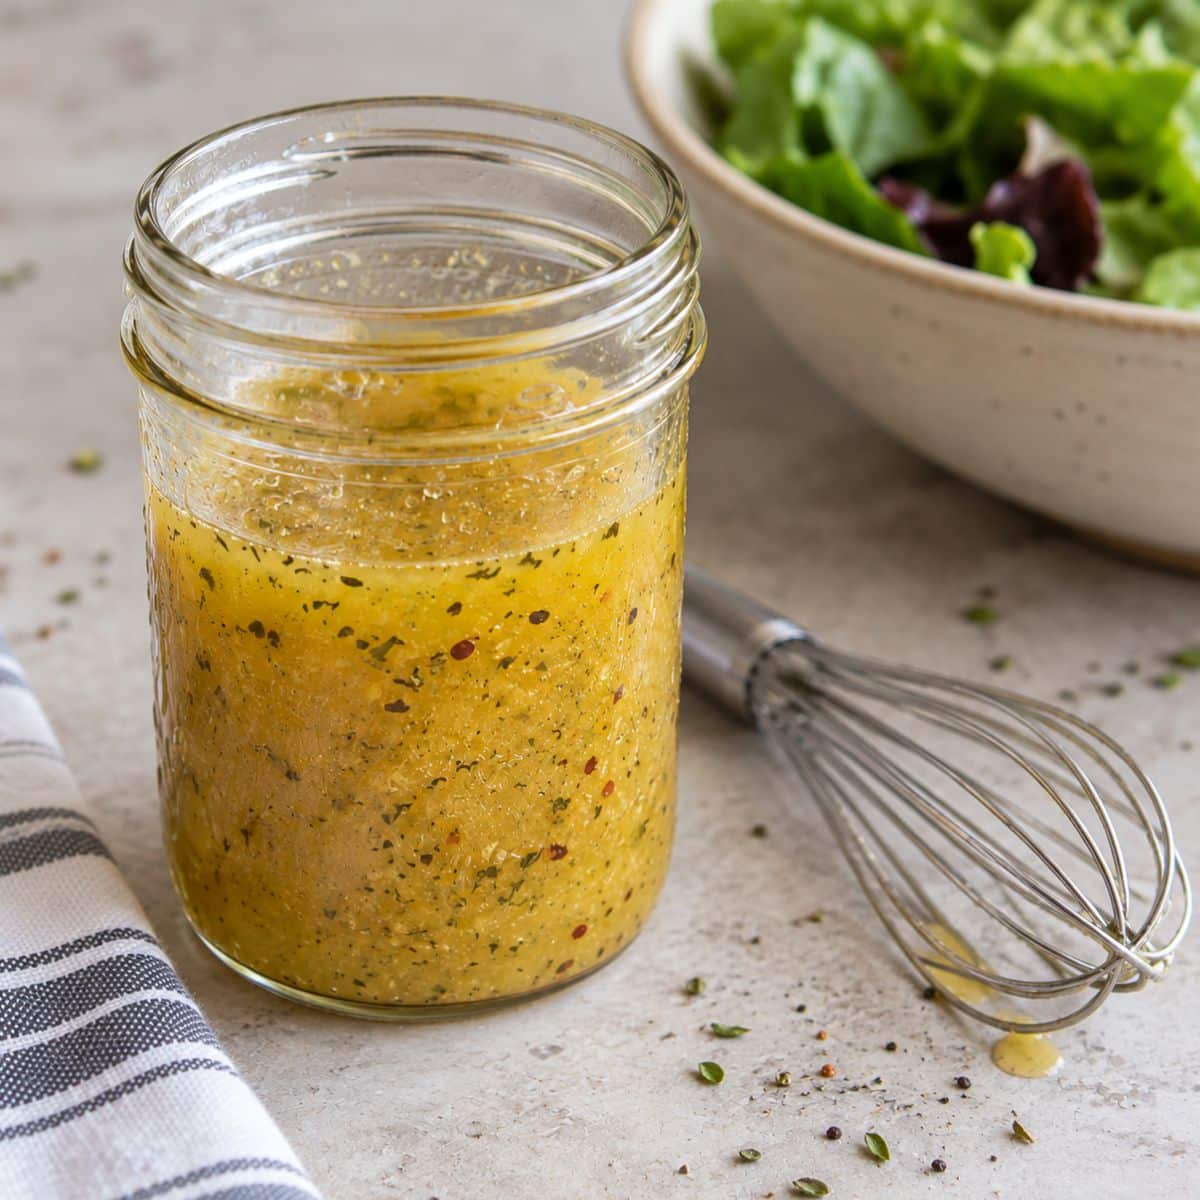
Serving Ideas
This is an all-purpose dressing, so start with the obvious: a simple bowl of mixed greens, cucumber, and cherry tomatoes. It's just as good on heartier salads that hold up to a tangy dressing, like a Vegan Greek Pasta Salad, a Greek-Flavored Lentil Salad with Tofu "Feta", or a grain salad such as Tabbouleh with Quinoa, Bulgur, or Couscous. Bean, corn, and potato salads soak it up nicely too, and sturdy greens like kale (try it on a Massaged Kale Salad) can be dressed an hour ahead.
Beyond salads, use it as a quick marinade. Toss sliced zucchini, bell peppers, mushrooms, or eggplant in a few tablespoons before roasting or grilling, or marinate well-drained, diced extra-firm tofu for 30 minutes to use as a salty, tangy feta substitute. It also makes a fast drizzle over steamed green beans, roasted potatoes, or a grain bowl.
Storing & Freezing
Store the vinaigrette in a sealed jar in the refrigerator for up to 1 week. Olive oil firms up when it's cold, so let the jar sit at room temperature for 10 to 15 minutes (or run it briefly under warm water), then shake well before each use. If you add fresh garlic or fresh herbs, use it within 3 to 4 days.
Freezing isn't recommended. The emulsion breaks and the texture of the oil changes once it thaws, and since a fresh batch only takes five minutes, it's easier to simply make more as you need it.
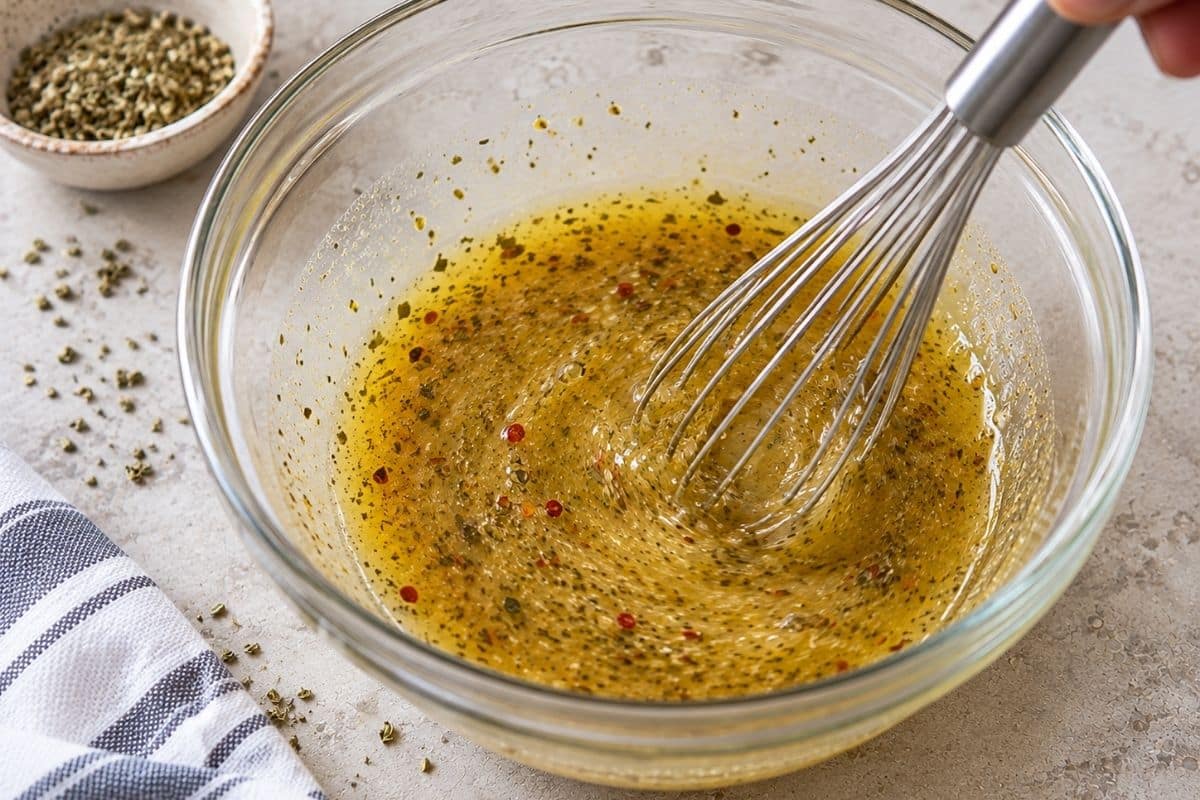
More Vegan Salad Dressings
If you loved this recipe, here are a few more homemade dressings you might enjoy:
- Vegan Green Goddess Dressing
- Vegan Ranch Dressing (or Dip!)
- Garlic Mustard Vinaigrette
- Vegan Salad Dressing Recipes
Recipe
5-Minute Vinaigrette Dressing
This 5-minute vinaigrette dressing is a bright, herby all-purpose dressing made in one jar with olive oil, vinegar, Dijon mustard, and Italian seasoning. Add crushed red pepper flakes for a little heat.
Print
Pin
Save
Servings: servings (about 1 ½ tablespoons each)
Ingredients
- ½ cup extra-virgin olive oil
- ¼ to ⅓ cup vinegar red wine, white wine, apple cider, or balsamic
- 1 tablespoon Dijon mustard
- 1 tablespoon sugar organic cane sugar, or agave nectar or maple syrup
- 1 teaspoon Italian seasoning
- ¼ to ½ teaspoon crushed red pepper flakes optional
- salt to taste
- black pepper to taste
Instructions
- Add the vinegar, Dijon mustard, sugar, Italian seasoning, red pepper flakes (if using), and a pinch each of salt and pepper to a jar with a tight-fitting lid, such as a 1-pint mason jar. Seal and shake for about 30 seconds, until the sugar dissolves.
- Add the olive oil, seal the jar tightly, and shake vigorously for 30 to 60 seconds, until the dressing looks cloudy and slightly thickened. (To make it in a bowl instead, whisk the vinegar mixture, then slowly drizzle in the oil while whisking constantly.)
- Taste (ideally on a piece of lettuce) and adjust: add more vinegar for tang, a pinch more sugar to soften the acidity, or more salt, pepper, or red pepper flakes as desired. Use right away, or refrigerate and shake well before each use.
Notes
Store in a sealed jar in the refrigerator for up to 1 week. The olive oil will firm up when cold, so let it stand at room temperature for 10 to 15 minutes and shake well before using.
For a tangier dressing, use the full ⅓ cup vinegar. Leave out the red pepper flakes for a mild, kid-friendly version.
Nutrition (Estimate per Serving)
Calories: 130kcalCarbohydrates: 2gFat: 14gSaturated Fat: 2gPolyunsaturated Fat: 1gMonounsaturated Fat: 10gSodium: 118mgPotassium: 10mgSugar: 2gCalcium: 5mgIron: 0.2mg
Vegan-ize any recipe!Grab our free vegan cheat sheet, packed with my favorite easy substitutions to make any recipe vegan.
Vegan Spinach Recipes (that you'll actually want to eat!)
Spinach might be the most versatile leafy green in the vegan kitchen - it disappears into a creamy pasta sauce, holds its own in a hearty salad, and sneaks extra nutrition into just about anything you're cooking.
From creamy dips to hearty pastas, soups, and salads, here are all of our favorite vegan spinach recipes in one place.
Vegan Spinach Recipes
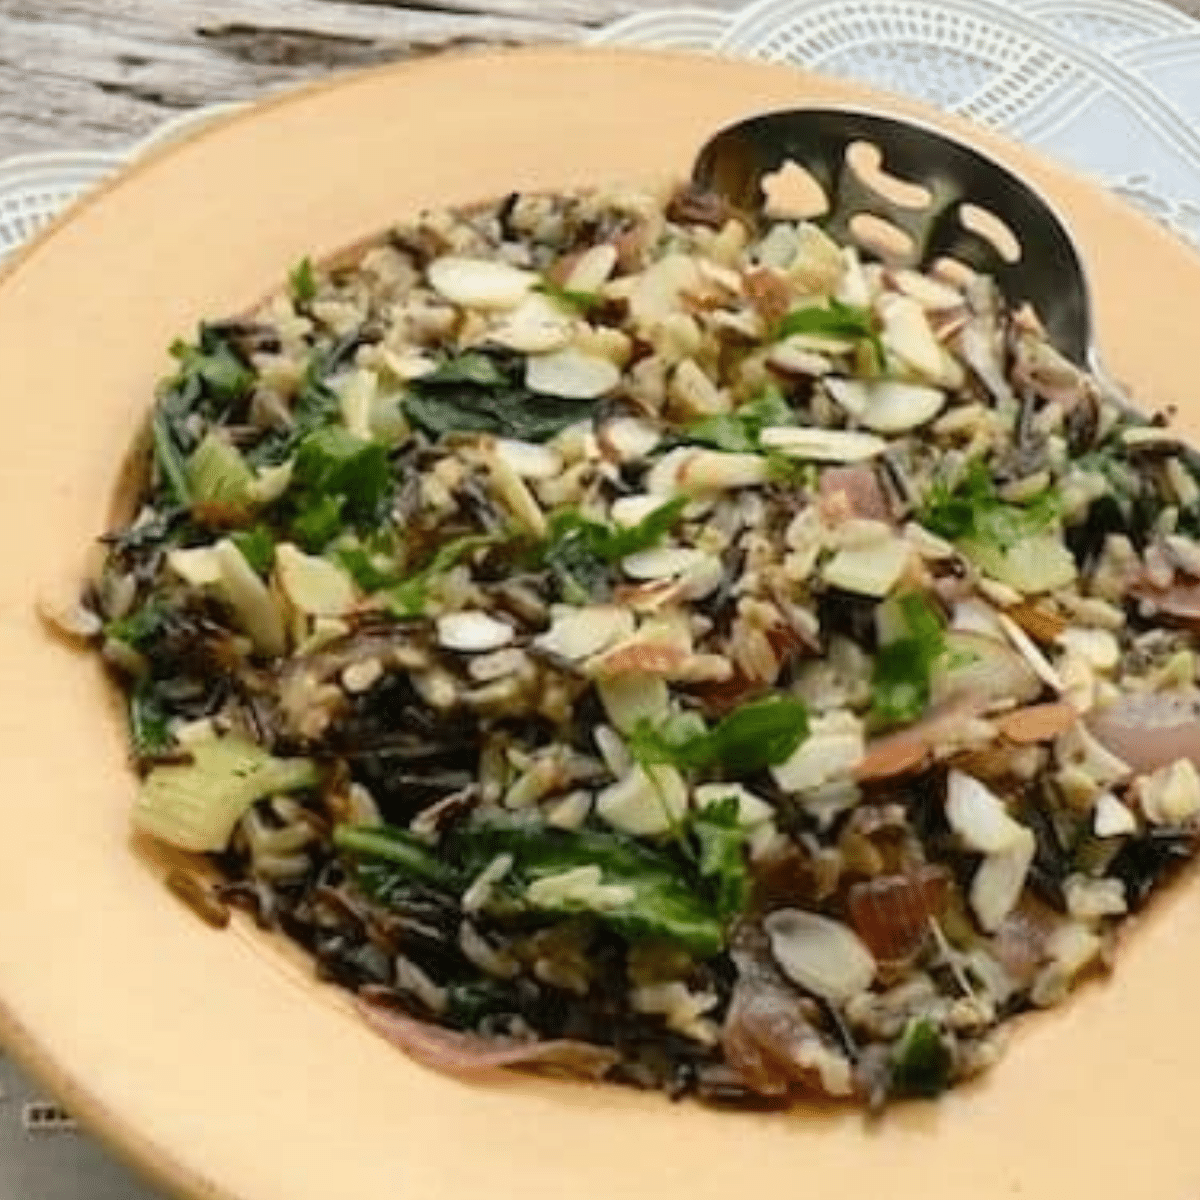
A nutty, chewy wild rice pilaf tossed with wilted spinach and toasted almonds for crunch. It's substantial enough for a main dish but works just as well as a hearty holiday side.

All the creamy, tangy flavor of the classic party dip, made entirely plant-based with a cashew-based base and plenty of artichoke hearts. Bake it bubbly and serve with crusty bread or chips.
Thick, chewy udon noodles get tossed in a savory miso-spinach pesto that's bright, salty, and utterly addictive. It comes together in about the time it takes to boil the noodles.
A classic Mediterranean side dish that balances wilted spinach with sweet golden raisins and toasted pine nuts. Simple, fast, and packed with flavor from just a handful of ingredients.
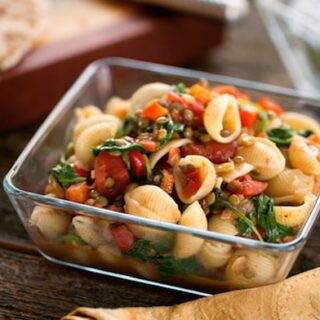
Protein-rich lentils and tender spinach simmer in a fragrant curried tomato sauce, then get tossed with pasta for a warming, one-bowl dinner.
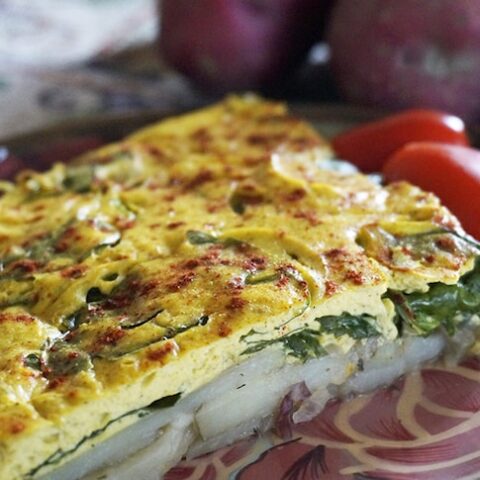
An egg-free take on the Italian classic, built on a creamy potato-onion base with an herby, egg-like filling studded with spinach. Great warm for dinner or cold the next morning.
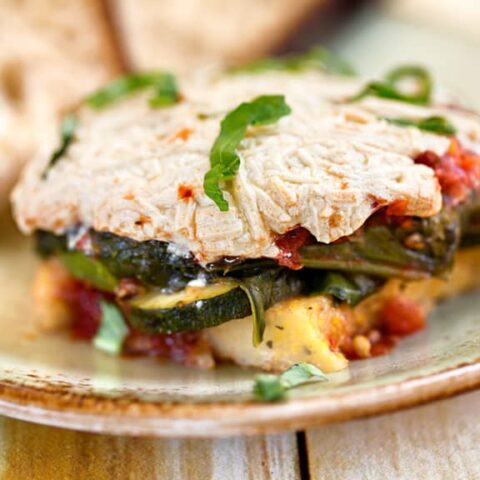
Layers of creamy baked polenta, sauteed zucchini, and spinach come together in a comforting, cheesy-without-the-cheese casserole.

Fluffy couscous studded with chickpeas, wilted spinach, and crunchy cashews for a quick weeknight dinner or make-ahead lunch.

A creamy coconut curry loaded with cauliflower and two kinds of greens for extra nutrition. Serve over rice for a cozy, warming dinner.

A savory tofu scramble studded with wilted spinach or arugula, perfect for a protein-packed vegan breakfast or brunch.

A creamy, protein-packed spread that blends chickpeas, avocado, and spinach into a bright green dip perfect for sandwiches, wraps, or crackers.

A rustic, Sicilian-inspired lentil sauce loaded with spinach makes a hearty, meatless pasta sauce that's just as satisfying as a classic bolognese.

A bright, citrus-dressed salad that pairs tender baby spinach with sweet baby corn for a refreshing side dish.

A hearty, protein-rich soup that combines pink beans, quinoa, and spinach in a comforting broth - perfect for a light but filling dinner.
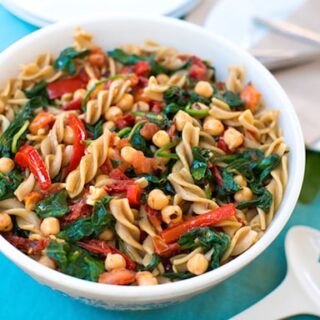
A quick pantry-friendly pasta dinner where spinach, chickpeas, and sun-dried tomatoes come together for big flavor with minimal effort.

Layers of pasta, savory mushrooms, wilted spinach, and creamy tofu ricotta make this lasagna a comforting, crowd-pleasing main dish.
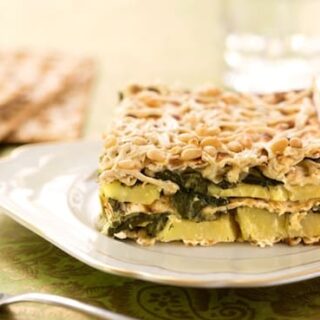
A cozy, layered gratin built with matzo, leeks, potatoes, and spinach - a great Passover-friendly dinner that's comforting any time of year.

Sauteed mushrooms and spinach get rolled up with melty vegan cheddar in a warm tortilla for an easy, satisfying lunch or dinner.
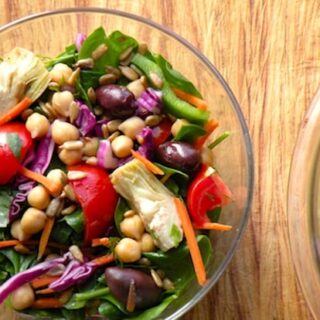
A hearty salad that turns the flavors of spinach artichoke dip into a full meal, with chickpeas added for staying power.
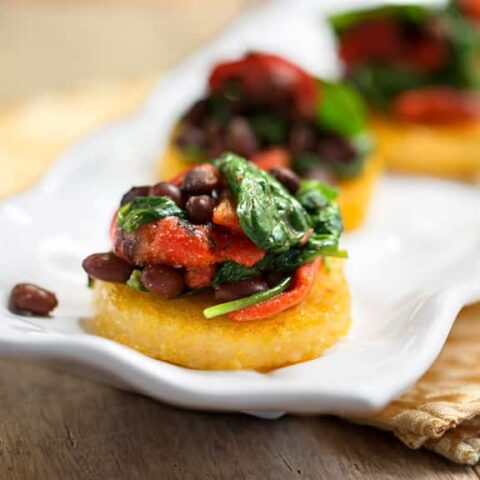
Creamy polenta topped with a savory black bean and spinach mixture for a filling, satisfying dinner that comes together on the stovetop.
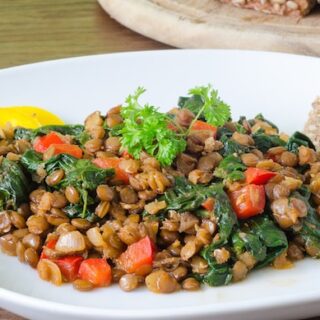
Earthy lentils simmered with spinach and sun-dried tomatoes for a simple, deeply flavorful dinner or side dish.
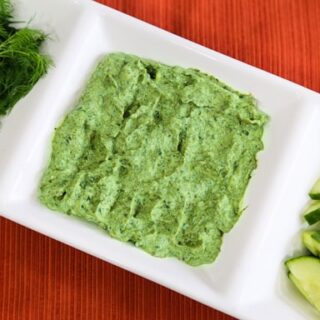
A cool, creamy spread that blends spinach and cucumber for a refreshing dip perfect for crackers or fresh veggies.
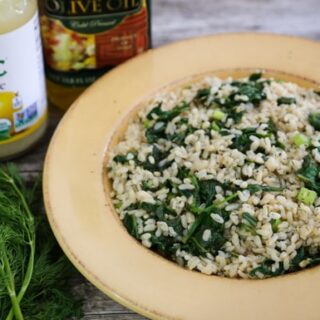
Fluffy rice studded with wilted spinach and fresh dill for a fragrant, easy side dish that pairs with just about anything.

A vibrant, colorful salad that pairs tender spinach with juicy orange segments and crunchy red cabbage for a sweet-and-savory combination.
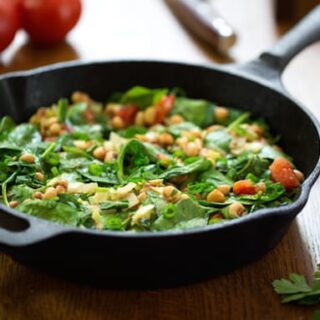
Creamy black-eyed peas simmered with spinach and fresh herbs for a simple, protein-rich Southern-inspired side or main.
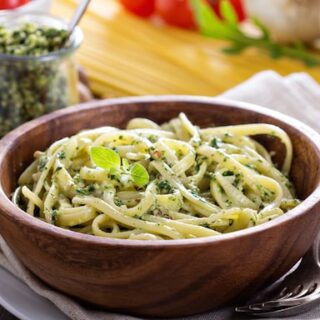
A savory, umami-rich twist on traditional pesto, made with spinach or arugula and a spoonful of miso for extra depth.

Wilted spinach simmered in a spicy, creamy peanut sauce inspired by West African flavors - serve over rice for a satisfying dinner.
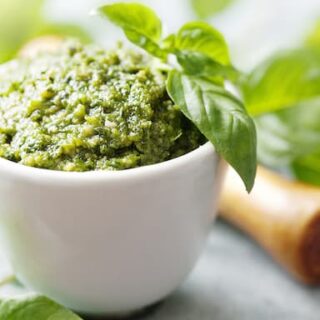
A bright, herby pesto that blends spinach with fresh basil for extra color and nutrition without sacrificing flavor.

A lemony, Greek-inspired soup loaded with spinach and orzo pasta for a comforting, filling meal.

A creamy, cheese-free white pizza topped with tender asparagus and wilted spinach for a fresh spring-inspired dinner.
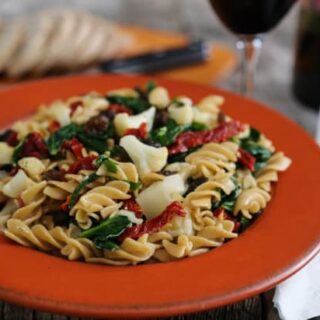
Pasta twists tossed with roasted cauliflower and wilted spinach for a simple, veggie-packed dinner.

Loaded quesadillas stuffed with refried beans, spinach, and avocado for a filling, flavor-packed dinner.
Craving something sweet instead? Don't miss this collection of five energizing spinach smoothies - a delicious way to start your day.
And if you love cooking with vegan staples like these, check out a few more of our favorite themed collections:
Simple Sesame Soba Noodles
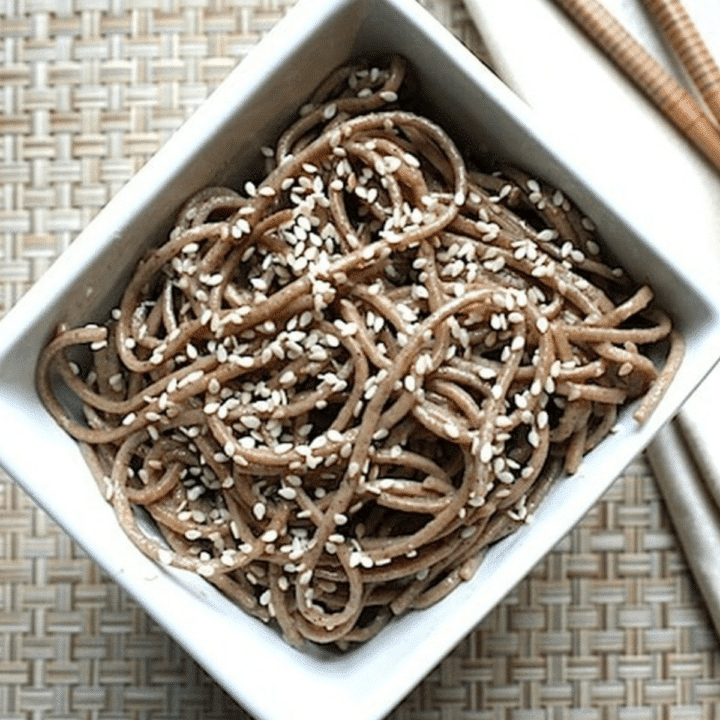
Nutty buckwheat noodles tossed in a quick dressing of toasted sesame oil, soy sauce, fresh ginger, and rice vinegar, these simple sesame soba noodles come together in about 15 minutes. They're just as good warm from the pot as they are cold from the fridge, which makes them an easy vegan side dish, a bed for stir-fries, or a packed lunch.
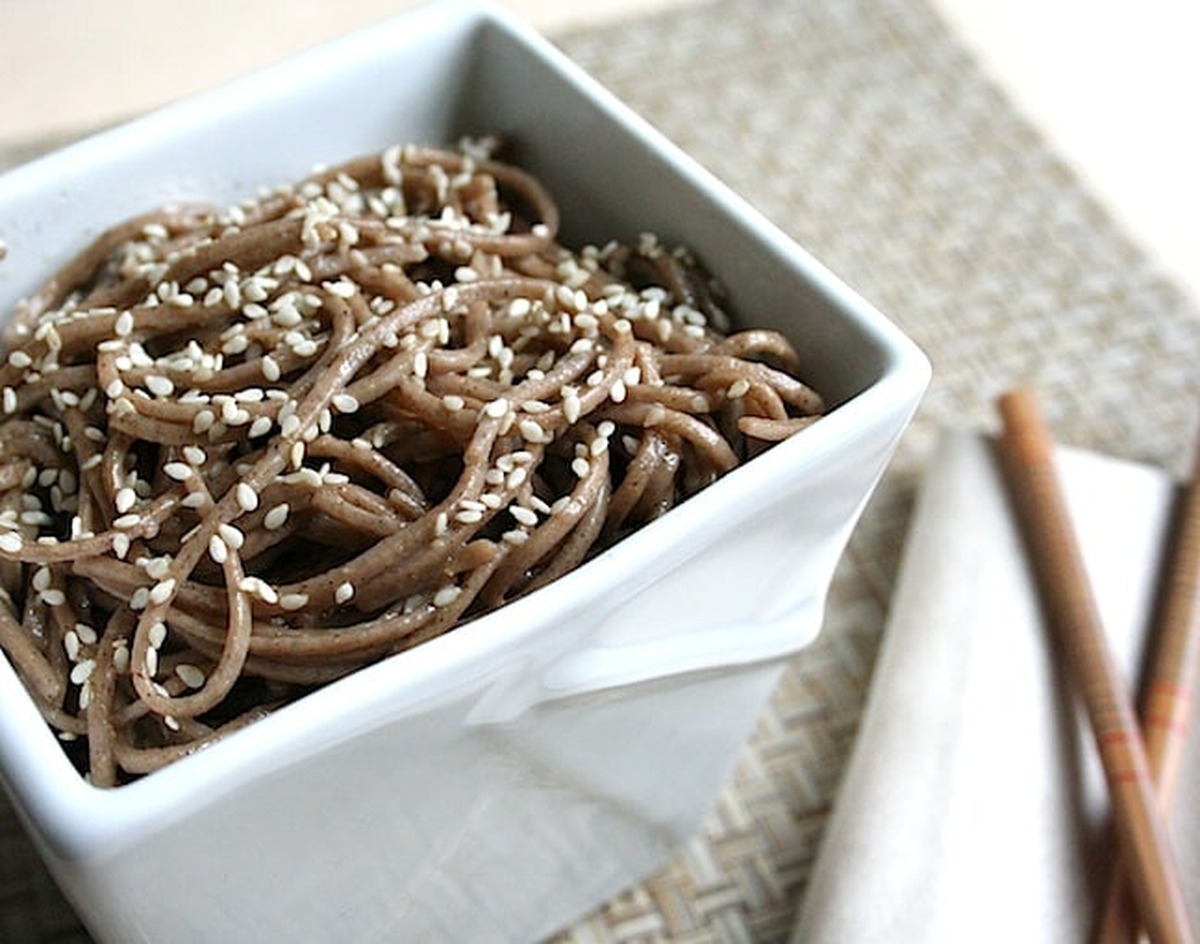
Photos by Rachael Braun.
Key Ingredients & Substitutions
- Soba noodles. These Japanese noodles are made from buckwheat flour, which gives them their earthy, nutty flavor and slightly chewy bite. Look for soba noodles in the international aisle or with the dried pasta. Any variety works, but note that many brands blend in wheat flour, so check the label if you need a gluten-free dish. Udon, somen, or even whole wheat spaghetti can stand in if that's what you have.
- Dark sesame oil. Toasted dark sesame oil is the backbone of the dressing, and its deep, roasted flavor is hard to replace. A little goes a long way. If you're out, use a neutral oil and add an extra tablespoon of sesame seeds to keep some of that toasty taste.
- Soy sauce or tamari. This supplies the salty, savory punch. Choose tamari to keep the dish wheat-free, and start with the smaller amount so you can adjust after tasting.
- Tahini. Optional, but a spoonful of sesame tahini makes the dressing a little creamier and rounder. Smooth peanut butter or almond butter can replace it, though the flavor will shift.
- Agave nectar. Just a touch of agave nectar balances the salt and acid. Maple syrup or a pinch of sugar works equally well.
- Fresh ginger. Grated fresh ginger adds warmth and zing. A microplane makes quick work of it, and jarred grated ginger is a fine shortcut in a pinch.
- Rice vinegar. A splash brightens the whole bowl. White wine vinegar or a squeeze of lime juice are good substitutes.
- Sesame seeds. They go into the dressing and onto the finished noodles for crunch. Black or tri-color sesame seeds look especially pretty against the brown noodles.
Helpful Tips
Don't overcook the noodles. Soba goes from tender to mushy quickly, so start tasting a minute before the package time is up. You want them al dente, with a little chew left, since they'll soften slightly more as they absorb the dressing.
Rinse them for cold or room-temperature serving. Buckwheat noodles release a lot of surface starch, which can make them sticky and gummy as they cool. A quick rinse under cold running water washes it away and stops the cooking. If you're serving the noodles warm, skip the rinse and toss them with the dressing right away.
Make the dressing while the water heats. Whisk everything together in a small bowl before the noodles are done so the flavors have a few minutes to mingle. Taste it on its own and adjust: more soy sauce for salt, a little more vinegar for brightness, or an extra drizzle of agave if it tastes sharp.
Toast the sesame seeds. If your seeds are raw, stir them in a dry skillet over medium heat for two to three minutes, until they're golden and fragrant. Move them to a plate right away so they don't scorch. Toasting makes the sesame flavor in the whole dish noticeably deeper.
Toss while the noodles are still slightly damp. A bit of clinging moisture helps the dressing spread evenly and keeps the noodles from clumping. Use tongs or two forks and lift and turn until every strand is coated.
Variations
- Swap the noodles. This dressing works just as well with udon or somen noodles, or even whole wheat spaghetti.
- Add mushrooms or greens. If you're not using these noodles as a base for a stir-fry, toss in some sautéed mushrooms or a handful of wilted spinach, kale, or bok choy to make it a fuller meal.
- Load up the veggies. Shredded carrots, thin cucumber matchsticks, sliced scallions, steamed broccoli, or edamame add color and crunch. For a heartier version, see our soba noodles with green beans and almonds.
- Make it spicy. Stir in a pinch of red pepper flakes, a spoonful of chili-garlic sauce, or a drizzle of chili oil.
- Go peanutty. Replace the tahini with creamy peanut butter and add a squeeze of lime for a quick Thai-inspired twist.
- Add protein. Top with cubes of baked or pan-seared tofu, or a scoop of shelled edamame.
Serving Ideas
These vegan soba noodles are a natural bed for saucy, Asian-style stir-fries and tofu dishes. Spoon ginger grilled tofu or a simple vegetable stir-fry right over the top, and the noodles will soak up every drop of sauce. They're also lovely alongside a green vegetable side such as sesame kale and broccoli sauté for a quick weeknight dinner.
The leftovers are good served cold, which makes them great for school or brown-bag lunches. Pack a portion in a lidded container with sliced cucumber and a sprinkle of extra sesame seeds, and lunch is done. A handful of chopped scallions on top always brightens things up, too.
Storing & Freezing
Store leftover sesame soba noodles in an airtight container in the refrigerator for up to four days. The noodles will firm up and absorb some of the dressing as they sit, so let them come to room temperature before serving, and toss in a splash of soy sauce, a few drops of sesame oil, or a teaspoon of water to loosen them if they seem dry.
This dish doesn't freeze well. Cooked soba turns soft and crumbly once it's thawed, and the texture of the noodles is a big part of the appeal. It's best to make it fresh, or make it up to a day or two ahead and keep it in the fridge.
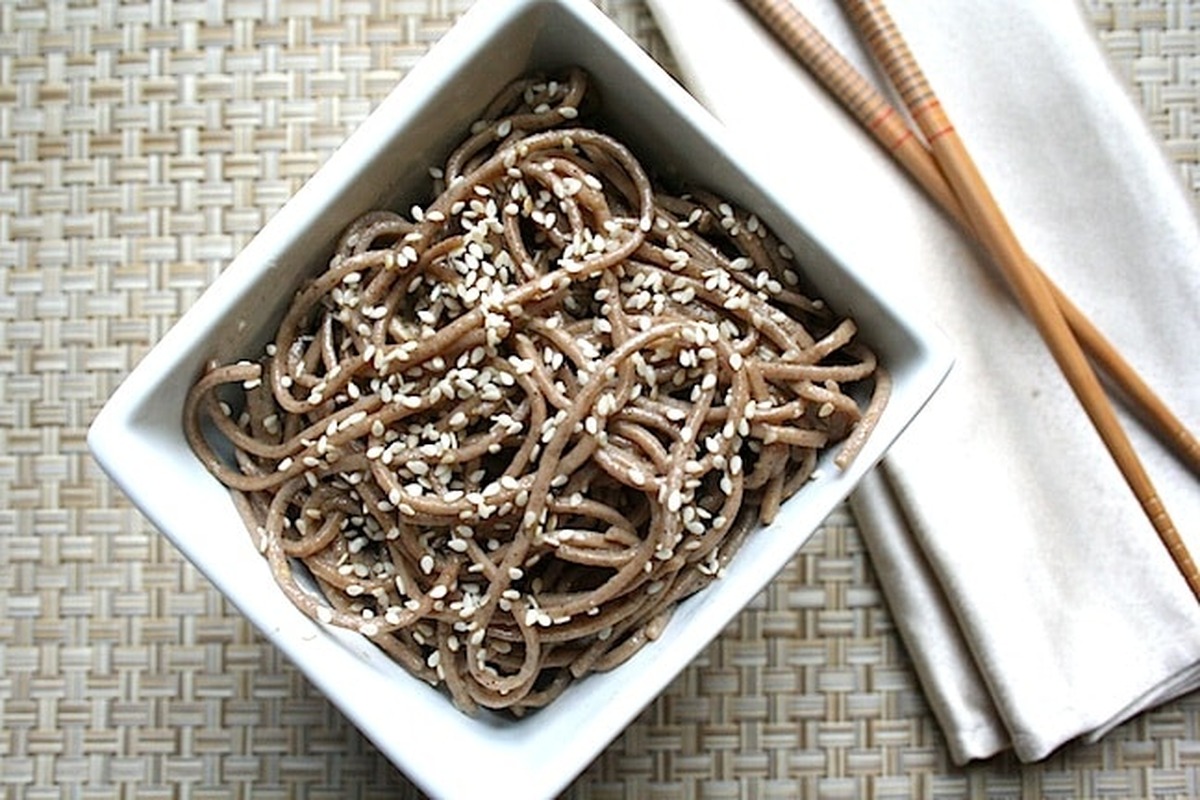
More Vegan Soba and Noodle Ideas
If you loved this recipe, here are a few more noodle dishes you might enjoy:
- Sesame Soba Noodles with Collard Greens and Tempeh Croutons
- Cold Soba (Buckwheat Noodles) and Cucumber Salad
- Sweet-and-Sour Soba Noodles with Asparagus
- Cold Peanut Butter-Sesame Noodles
Recipe
Simple Sesame Soba Noodles
Nutty buckwheat soba noodles tossed with a quick sesame-ginger-soy dressing. These vegan sesame soba noodles are ready in about 15 minutes and taste great warm, at room temperature, or cold.
Print
Pin
Save
Servings: servings
Ingredients
- 8 ounces soba (buckwheat) noodles any variety
- 2 tablespoons dark sesame oil
- 2 to 3 tablespoons soy sauce or tamari to taste
- 1 tablespoon tahini optional
- 1 tablespoon agave nectar
- 1 to 2 teaspoons grated fresh ginger to taste
- 1 tablespoon rice vinegar or white wine vinegar
- 1 tablespoon sesame seeds plus more for topping
Instructions
- Bring a large pot of water to a rapid boil. Add the soba noodles and cook according to the package directions, usually 4 to 6 minutes, stirring once or twice so they don't clump. Start testing a minute early: the noodles are done when they are tender with a slight chew (al dente).
- While the noodles cook, make the sauce. In a small bowl, whisk together the dark sesame oil, 2 tablespoons of the soy sauce or tamari, tahini (if using), agave nectar, ginger, rice vinegar, and sesame seeds until smooth.
- Drain the noodles in a colander. If you plan to serve them cold or at room temperature, rinse them under cold running water and drain well, which removes the surface starch and keeps the noodles from sticking. For a warm dish, simply drain and shake off the excess water. Transfer the noodles to a large serving bowl.
- Drizzle the sauce over the noodles and toss with tongs or two forks until every strand is evenly coated. Taste, and add the remaining tablespoon of soy sauce if you'd like it saltier.
- Serve warm or at room temperature, passing extra sesame seeds at the table for topping individual servings.
Nutrition (Estimate per Serving)
Calories: 310kcalCarbohydrates: 48gProtein: 10gFat: 10gSaturated Fat: 1gPolyunsaturated Fat: 4gMonounsaturated Fat: 4gSodium: 620mgPotassium: 175mgFiber: 3gSugar: 4gCalcium: 55mgIron: 2mg
Vegan-ize any recipe!Grab our free vegan cheat sheet, packed with my favorite easy substitutions to make any recipe vegan.
Easy Vegan Cornbread
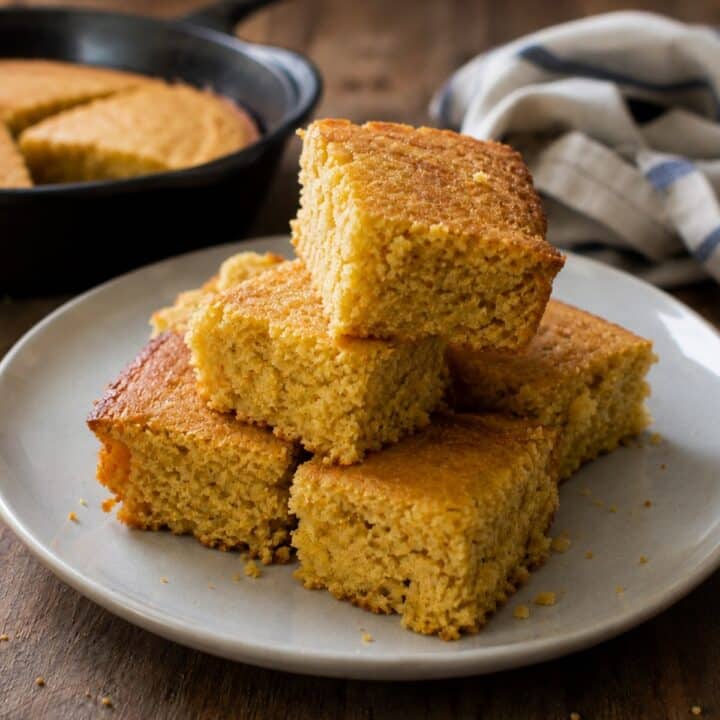
This vegan cornbread comes together in one bowl with pantry staples you probably already have, and it bakes up golden, lightly sweet, and perfectly crumbly — no eggs, buttermilk, or dairy butter required.
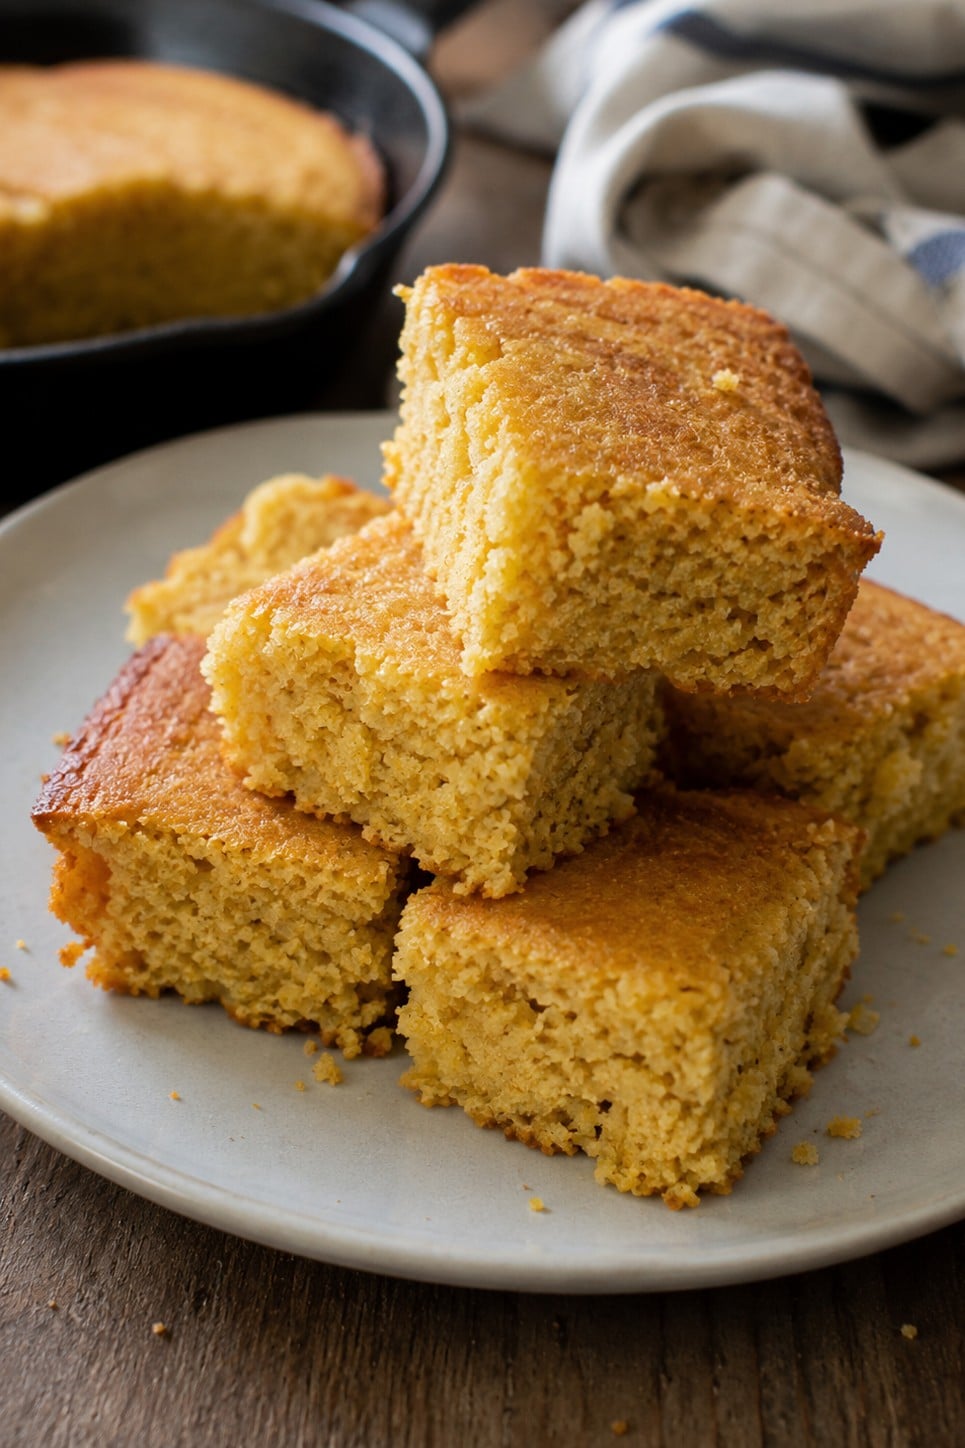
Key Ingredients & Substitutions
- Cornmeal. The backbone of any cornbread — it's what gives this bread its signature texture and corn flavor. Use a medium or fine-grind yellow cornmeal for a classic Southern-style crumb; coarser stone-ground cornmeal works too, but the texture will be a bit more rustic.
- All-purpose flour. Balances the cornmeal so the loaf holds together instead of crumbling apart. A 1:1 gluten-free baking blend can be swapped in if needed.
- Granulated sugar. Just a quarter cup for a hint of sweetness. Cut it back for a more savory, old-fashioned cornbread, or use a little more if you like yours closer to cornbread cake.
- Baking powder. The only leavener here, so make sure yours is fresh — old baking powder is the most common reason cornbread comes out flat and dense.
- Unsweetened plant milk. Almond, soy, or oat milk all work well. Soy milk curdles the most readily when mixed with vinegar, which gives the closest texture to traditional buttermilk cornbread.
- Neutral oil. Vegetable, canola, or melted coconut oil all work for the batter, plus you'll want a little extra for greasing the pan or skillet.
- Apple cider vinegar. Mixed with the plant milk, this creates a quick vegan "buttermilk" that reacts with the baking powder for extra lift and a slightly tangy flavor.
- Ground flaxseed. Mixed with water to make a flax egg, which binds the batter the way an egg would in a traditional recipe. Ground flaxseed meal keeps well in the freezer, so it's worth having on hand for other baking projects too.
Helpful Tips
Make the vegan buttermilk first. Stirring the apple cider vinegar into the plant milk right at the start of the recipe gives it time to curdle slightly while you measure out everything else, so it's ready to go the moment you need it.
Don't skip the flax egg's resting time. Ground flaxseed needs about five minutes in water to turn thick and gel-like. If you rush this step and add it to the batter while it's still watery, the cornbread won't hold together as well once sliced.
Preheat a cast iron skillet for the best crust. If you have a cast iron skillet, heating it in the oven while it preheats means the batter starts sizzling the second it hits the pan, which builds a deeply golden, slightly crisp crust on the bottom and edges. A room-temperature 8x8-inch baking pan works fine too — the crust just won't be quite as crackly.
Stir the batter as little as possible. Once the wet and dry ingredients meet, stir only until you no longer see streaks of flour. A few small lumps are completely normal; overmixing develops the gluten in the flour and makes the finished cornbread noticeably tougher.
Test for doneness with a toothpick, not a timer. Ovens vary, and a hot cast iron skillet bakes faster than a room-temperature pan. Start checking at the 20-minute mark by inserting a toothpick into the center — it's done as soon as it comes out clean or with just a few dry crumbs clinging to it.
Variations
- Jalapeño cornbread. Fold 1 to 2 tablespoons of finely diced jalapeño into the batter for a spicy kick that pairs especially well with a bowl of chili.
- Sweet corn cornbread. Stir in ½ cup of fresh, frozen, or drained canned corn kernels for pops of sweetness and texture in every bite.
- Maple cornbread. Swap the granulated sugar for 3 tablespoons of maple syrup and reduce the plant milk by 2 tablespoons to keep the batter from getting too thin.
- Herb and garlic cornbread. Add a teaspoon of dried thyme or rosemary and a minced garlic clove for a savory, herby loaf that's great alongside soup.
- Cornbread muffins. Divide the batter among a greased 12-cup muffin tin and bake at the same temperature for about 15 minutes, until a toothpick comes out clean.
- Gluten-free cornbread. Substitute a 1:1 gluten-free flour blend for the all-purpose flour; just double-check your baking powder and cornmeal are labeled gluten-free too.
Serving Ideas
Cornbread and chili are a classic pairing for good reason — the slightly sweet crumb is the perfect foil for something rich and spicy. Try a warm square alongside a bowl of A Big Pot of Really Good Chili, Classic Vegetarian Chili, or Sweet Potato Black Bean Chili for a satisfying, stick-to-your-ribs meal.
It's just as at home on a Southern-style spread. Serve it next to a pot of Vegan Hoppin' John and a pile of greens for a comforting New Year's or Sunday dinner, or crumble leftover slices into your favorite stuffing recipe if you want to go the traditional Thanksgiving route.
For breakfast or a snack, simply split a warm piece and add a swipe of vegan butter and a drizzle of maple syrup or a spoonful of jam. Any leftover cornbread also makes a great base for a quick vegan cornbread pudding or savory bread crumbs.
Storing & Freezing
Store leftover cornbread tightly wrapped or in an airtight container at room temperature for up to 2 days, or in the refrigerator for up to 5 days. Cornbread dries out quickly once cut, so keep the container as airtight as possible and bring pieces back to room temperature (or warm them briefly) before serving.
To freeze, let the cornbread cool completely, then wrap individual pieces tightly in plastic wrap and place them in a freezer-safe bag or container for up to 3 months. Thaw at room temperature or in the microwave, then warm briefly in a low oven or toaster oven to refresh the crust before serving.
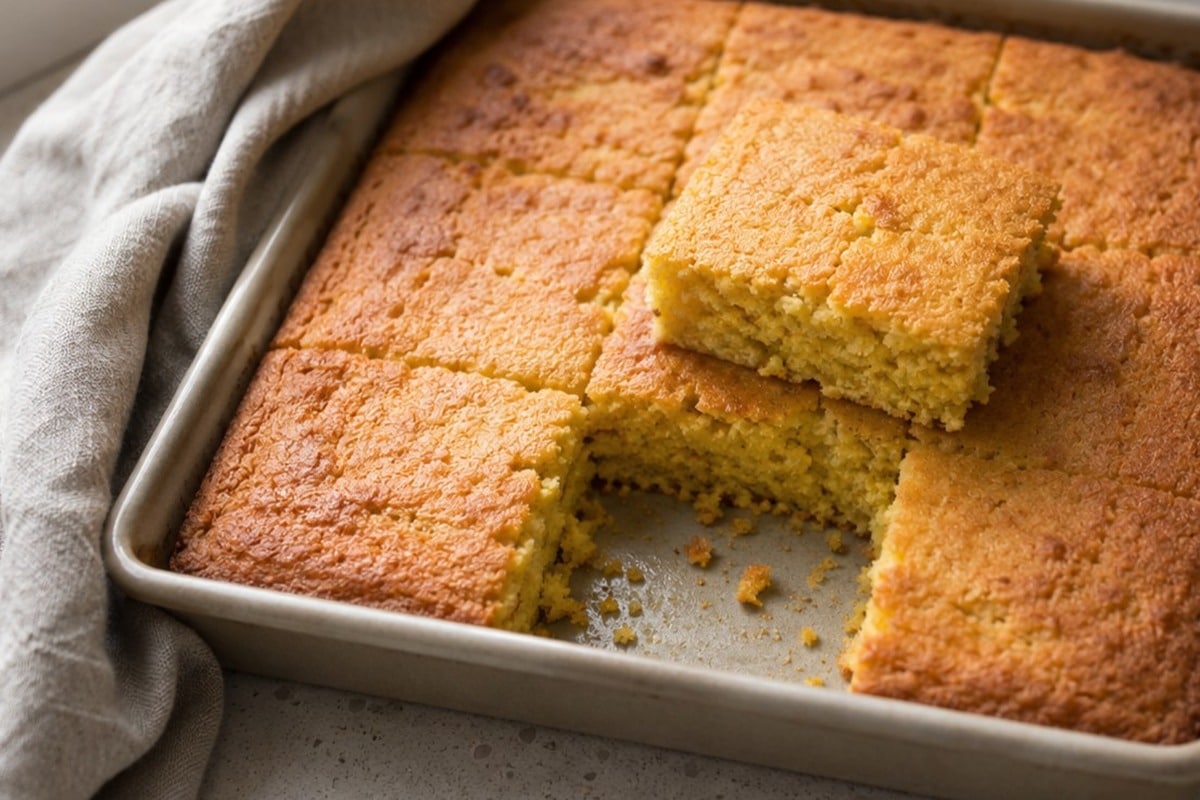
More Southern-Style Vegan Recipes
If you loved this recipe, here are a few more you might enjoy:
- Vegan Cornbread Stuffing
- Vegan Hoppin' John (Rice and Black-Eyed Peas)
- Green Chile Cornbread
- Maple-Baked Beans and Cornbread Casserole
Recipe

Easy Vegan Cornbread
This one-bowl vegan cornbread is golden, lightly sweet, and perfectly crumbly, with a crisp crust if you bake it in a hot cast iron skillet. No eggs, buttermilk, or dairy butter needed.
Print
Pin
Save
Servings: servings
Ingredients
- 1 cup cornmeal (140g)
- 1 cup all-purpose flour (120g)
- ¼ cup granulated sugar adjust to taste — use less for a more savory cornbread (50g)
- 1 tablespoon baking powder (14g)
- ½ teaspoon salt (3g)
- 1 cup unsweetened plant milk almond, soy, or oat all work (240ml)
- ⅓ cup neutral oil vegetable or melted coconut oil, plus extra for greasing (79ml)
- 1 tablespoon apple cider vinegar (15ml)
- 1 tablespoon ground flaxseed for the flax egg (7g)
- 3 tablespoons water for the flax egg (44ml)
Instructions
- Preheat the oven to 400°F (200°C). If you're using a cast iron skillet, place it in the oven while it preheats so it gets nice and hot.
- Make the flax egg by stirring together the ground flaxseed and water in a small bowl. Let it sit for about 5 minutes, until it turns thick and gel-like.
- In a large bowl, whisk together the cornmeal, flour, sugar, baking powder, and salt.
- In a separate bowl, combine the plant milk and apple cider vinegar and let it sit for a minute so it curdles slightly (this creates a simple vegan buttermilk). Whisk in the oil and flax egg.
- Pour the wet ingredients into the dry ingredients and stir just until combined — a few lumps are fine, but don't overmix, or the cornbread will turn out tough.
- Grease an 8x8-inch baking pan, or carefully remove the hot skillet from the oven and add a little oil, swirling to coat the bottom and sides (it should sizzle slightly). Pour in the batter and smooth the top.
- Bake for 20 to 25 minutes, until the top is golden and a toothpick inserted in the center comes out clean.
- Let cool in the pan for 5 to 10 minutes before slicing and serving.
Notes
The hot skillet gives a crispier, slightly caramelized crust on the bottom and edges — if you have the time, that step is worth it, but the baking pan version comes out just as tasty and moist. Makes one 8x8-inch pan or one 10-inch cast iron skillet.
Nutrition (Estimate per Serving)
Calories: 225kcalCarbohydrates: 30gProtein: 3gFat: 10gSaturated Fat: 1gPolyunsaturated Fat: 4gMonounsaturated Fat: 4gSodium: 324mgPotassium: 90mgFiber: 2gSugar: 6gCalcium: 60mgIron: 1mg
Vegan-ize any recipe!Grab our free vegan cheat sheet, packed with my favorite easy substitutions to make any recipe vegan.
Vegan Sephardic Stewed White Beans
This simple stew of white beans in a savory tomato sauce is a common Sephardic dish, served year-round at holidays like Hanukkah and Rosh Hashanah, and everyday meals too. It's the kind of humble, comforting dish that shows up on Sephardic tables generation after generation, and it comes together with pantry staples you likely already have on hand. The dish's roots run deep across the Ladino-speaking Jewish diaspora, with versions of stewed beans in tomato sauce showing up from Turkey to Morocco, each region adding its own touch of spice or herb.

Key Ingredients & Substitutions
- Cannellini or navy beans. Either works beautifully — use canned for convenience or home-cooked if you have some on hand.
- Sweet paprika. A mix of sweet and smoked paprika adds extra depth if you have both on hand.
- Crushed tomatoes. Forms the base of the savory sauce — look for a good-quality brand for the best flavor, since this dish has few ingredients and each one matters.
- Onion and celery. The aromatic base that gives the stew its savory backbone before the tomatoes go in.
- Fresh parsley. A generous garnish brightens the finished dish — don't skip it, since it adds a fresh contrast to the rich sauce.
Variations
- Add greens. Stir in a few handfuls of spinach or chard near the end of cooking for extra nutrition and color.
- Make it spicier. A pinch of red pepper flakes or a dash of harissa adds heat.
- Add garlic. A minced clove or two sauteed with the onion deepens the flavor.
- Swap the beans. Chickpeas or gigante beans both work well in this sauce.
- Add a cinnamon stick. Simmered in with the sauce and removed before serving, it adds a subtle warmth common in Sephardic cooking.
- Make it heartier. Thin the sauce with an extra cup of vegetable broth and stir in cooked orzo or rice for a more soup-like main dish.
Tips for the Best Sephardic Stewed White Beans
- Cook the onion and celery until truly golden. This builds the base flavor for the whole dish — don't rush this step.
- Simmer low and slow. A gentle 30-minute simmer lets the beans soak up the sauce without breaking apart into mush.
- Taste before serving. Adjust the salt, pepper, and sweetness to your liking right at the end, since canned beans and tomatoes vary in seasoning.
- Don't skip the parsley garnish. It adds a fresh contrast to the rich, savory stew.
- Use a wide, shallow pot if possible. This helps the sauce reduce and thicken more quickly than a tall, narrow pot.
Make Ahead & Storage
This stew keeps well in the refrigerator for up to 5 days, and the flavor deepens overnight as the beans continue to absorb the sauce. It also freezes well for up to 3 months, making it a good dish to batch ahead of a holiday.
How to Serve
Serve hot as a main dish with crusty bread for sopping up the sauce, or as a hearty side alongside other holiday dishes like roasted vegetables or a simple green salad. It also makes a satisfying potluck dish, since it holds its heat well and tastes just as good, if not better, reheated the next day.
Recipe

Vegan Sephardic Stewed White Beans
A simple stew of white beans in a savory tomato sauce - a common Sephardic dish served year-round at holidays like Hanukkah and Rosh Hashanah, and everyday meals too.
Print
Pin
Save
Servings:
Ingredients
- 1 tablespoon safflower or other vegetable oil
- 1 cup minced onion
- ½ cup minced celery
- 14 to 16-ounce can crushed tomatoes
- 2 tablespoons natural granulated sugar
- 2 teaspoons sweet paprika or 1 teaspoon sweet and 1 teaspoon smoked
- 3 cups cooked or canned cannellini or navy beans drained and rinsed if canned
- salt and freshly ground pepper to taste
- fresh parsley chopped, for garnish
Instructions
- Heat the oil in a large skillet. Add the onion and celery and saute over medium heat until golden.
- Stir in the crushed tomatoes, sugar, and paprika. Bring to a simmer.
- Stir in the beans, along with a pinch of salt and a grinding of pepper.
- Cover and simmer over very low heat for 30 minutes.
- Taste and adjust the seasonings, then serve hot, garnished with parsley.
Vegan-ize any recipe!Grab our free vegan cheat sheet, packed with my favorite easy substitutions to make any recipe vegan.
Vegan Split Pea Soup
Split pea soup, an American classic, is high on the list of great comfort foods. You can make this one with green or yellow split peas; the vegetables and barley make it even more enticing. A meal in a bowl, you need just add salad and fresh bread and you're all set — the kind of soup that tastes even better the day after you make it.
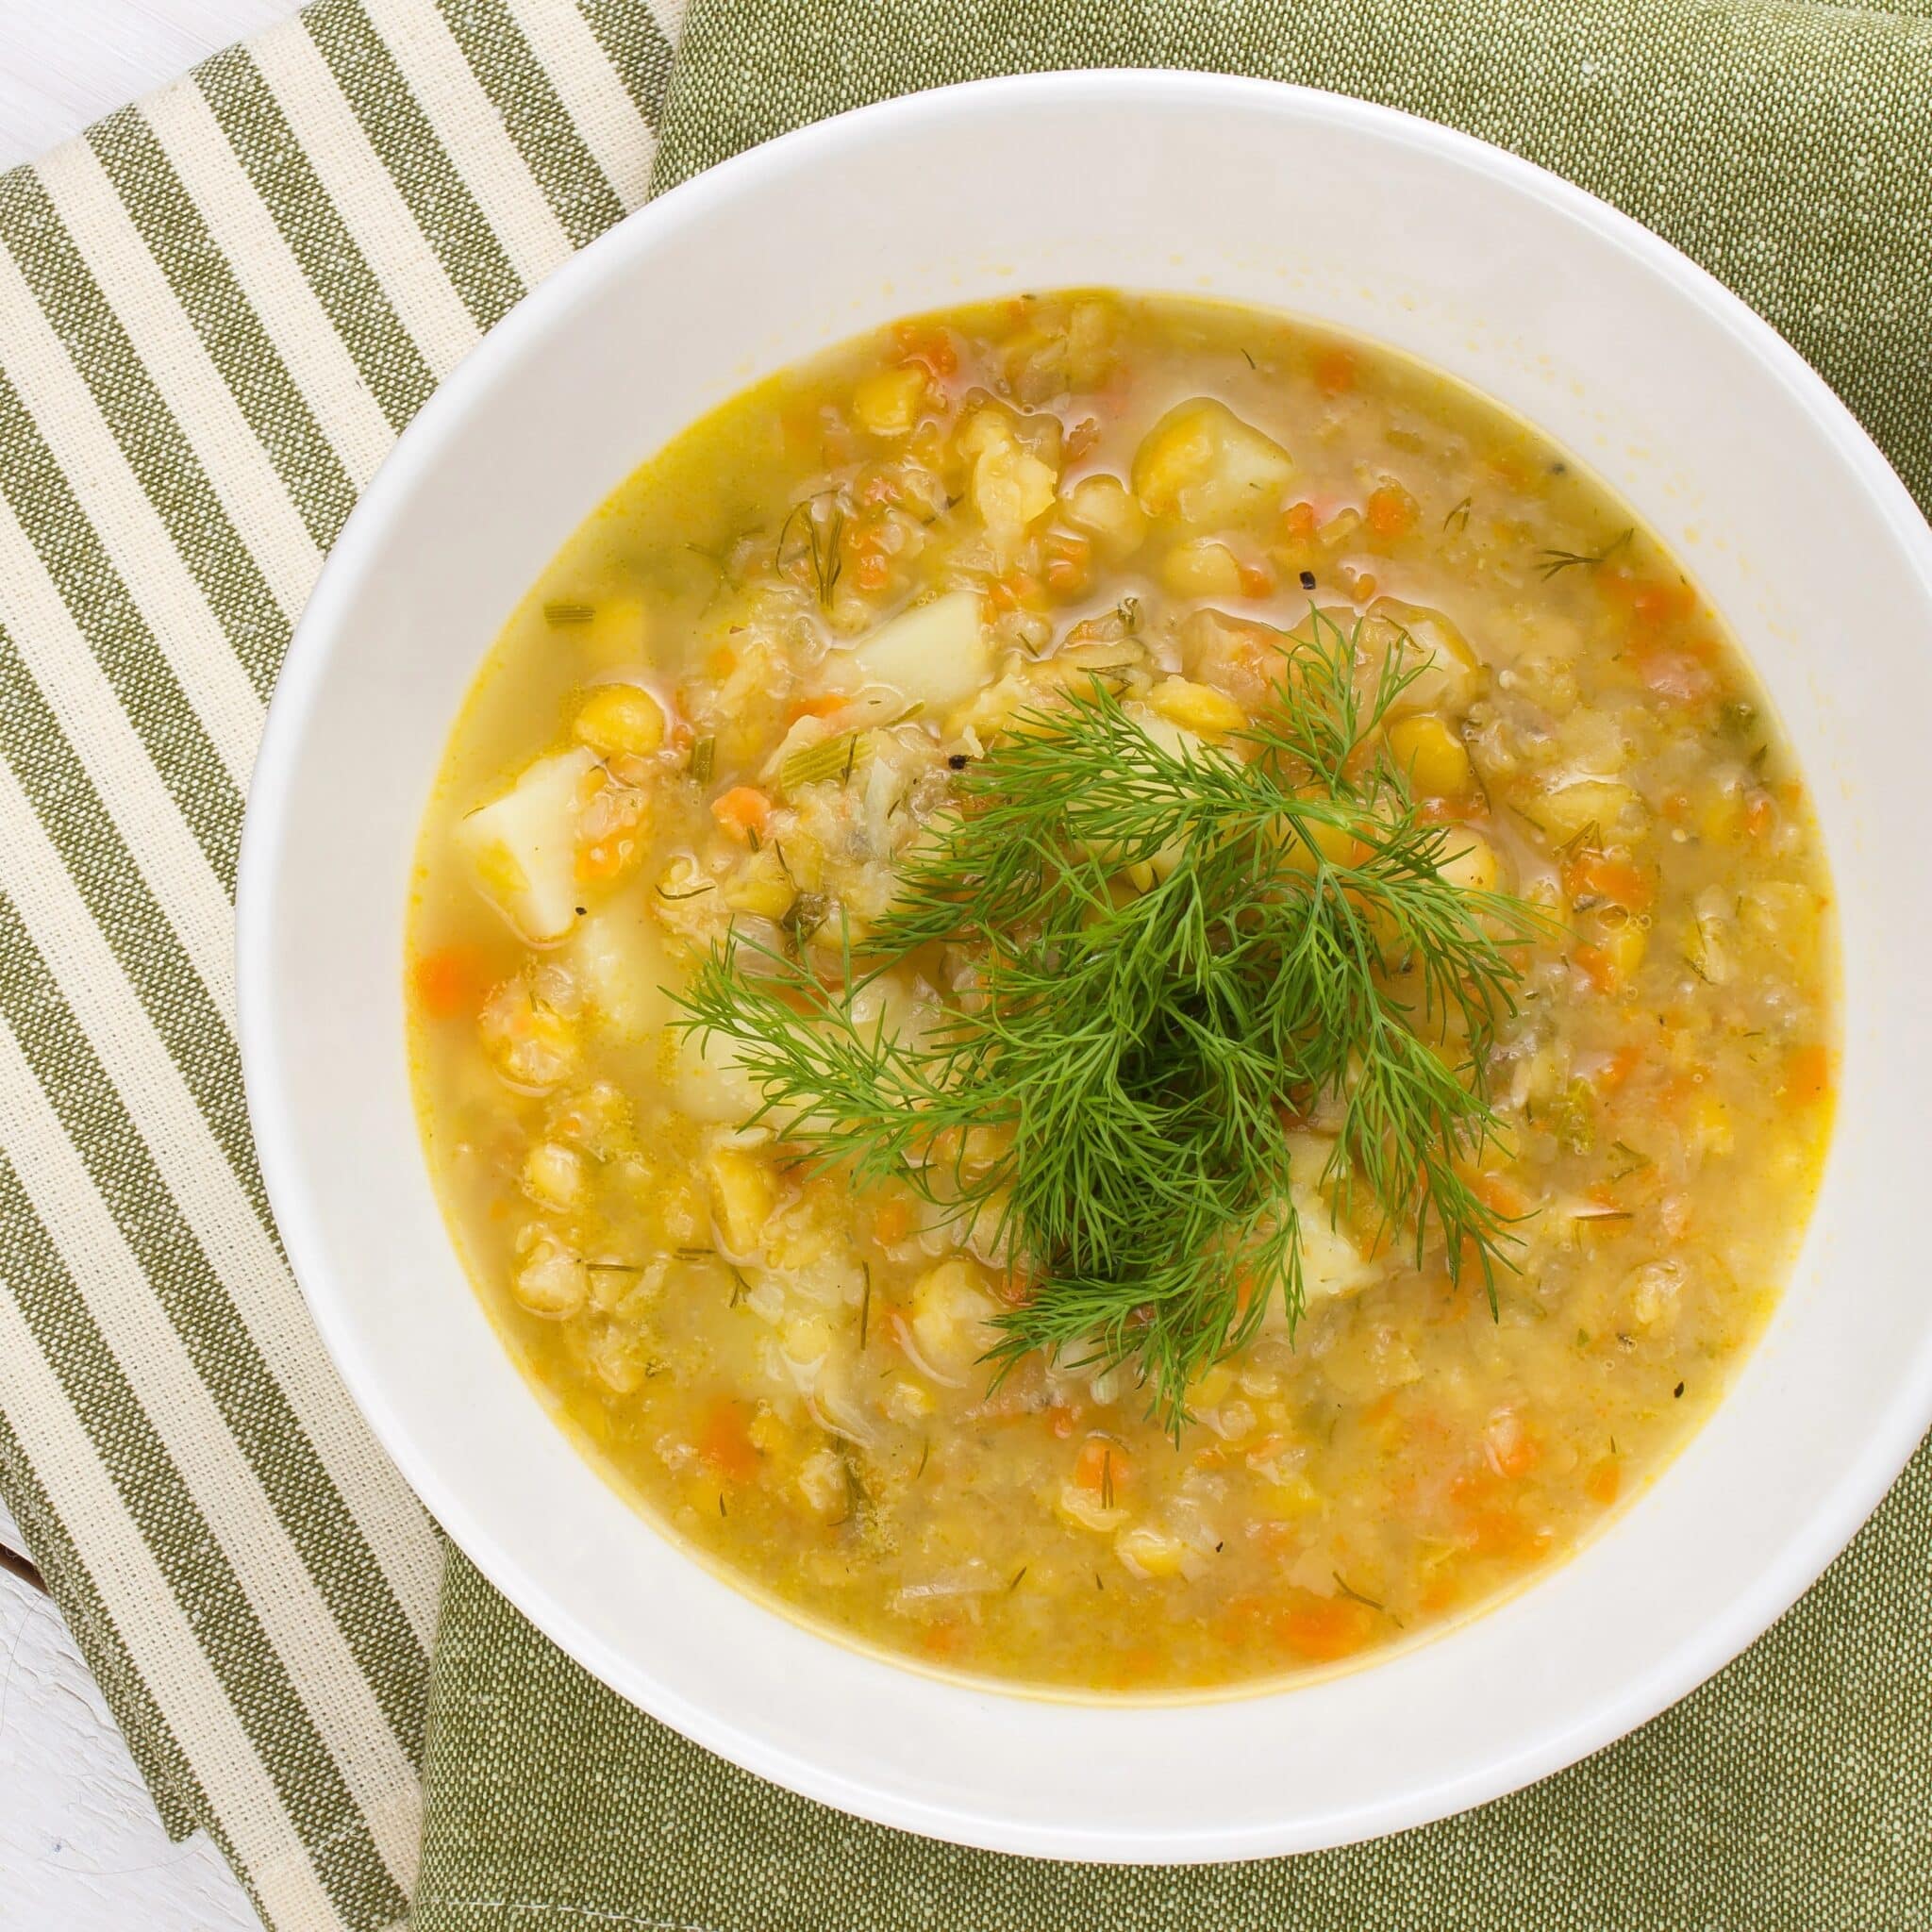
Key Ingredients & Substitutions
- Split peas. Green or yellow both work well — use whichever you have on hand; yellow split peas cook up slightly milder and sweeter.
- Pearl barley. Adds heartiness and a pleasant chew to the soup that keeps it from being just a puree.
- Potatoes or sweet potato. Either works well — sweet potato adds a touch of natural sweetness that plays nicely against the earthy split peas.
- Carrots and celery. The classic aromatic base that gives the soup its savory backbone.
- All-purpose seasoning blend. Something like Spike or Mrs. Dash rounds out the flavor — use your favorite blend, or a simple mix of dried herbs if you don't have one on hand.
Variations
- Add greens. Stir in a few handfuls of chopped kale or spinach near the end of cooking for extra nutrition and color.
- Make it smoky. A pinch of smoked paprika adds depth reminiscent of the ham hock some traditional versions use.
- Skip the barley. For a gluten-free version, simply omit it or substitute rice or an extra potato.
- Blend it smooth. For a creamier, more traditional split pea soup texture, blend part or all of the soup with an immersion blender.
- Add a splash of liquid smoke. A few drops deepen the savory flavor without changing the texture.
Tips for the Best Split Pea Soup
- Rinse and sort the split peas. This removes any debris and helps them cook evenly.
- Add water gradually. The soup thickens considerably as it stands, so add more water as needed and re-taste the seasonings, since diluting the broth also dilutes the flavor.
- Let it rest. The flavors deepen if you let the soup stand for an hour or two before serving, or even better, overnight.
- Garnish with fresh dill. A few sprigs on top add a bright, fresh finish that cuts through the heartiness of the soup.
- Stir occasionally as it simmers. Split peas can settle and stick to the bottom of the pot, especially once they start breaking down.
Make Ahead & Storage
Like most soups, this one is even better the next day once the flavors have had time to meld. It keeps in the refrigerator for up to 5 days, and freezes well for up to 3 months — just know it will thicken considerably once chilled, so plan to thin it with a little water or broth when reheating.
How to Serve
Serve hot, topped with chopped fresh dill if you'd like, alongside a simple salad and fresh bread for a complete meal.
Recipe

Vegan Split Pea Soup
An American classic comfort food, made hearty with barley and vegetables. A meal in a bowl — just add salad and fresh bread and you're all set.
Print
Pin
Save
Servings:
Ingredients
- 1 ½ tablespoons olive oil
- 1 medium onion finely chopped
- 2 to 3 cloves garlic minced
- 2 medium potatoes or 1 medium-large sweet potato scrubbed or peeled, and diced
- 1 large or 2 medium carrots diced
- 1 pound green or yellow split peas rinsed and sorted
- ½ cup pearl barley
- 2 bay leaves
- 1 tablespoon all-purpose seasoning blend such as Spike or Mrs. Dash
- 1 teaspoon ground cumin
- salt and freshly ground pepper to taste
- fresh dill for garnish, optional
Instructions
- Heat the oil in a large soup pot. Add the onion and garlic. Sauté over medium heat for 8 to 10 minutes, or until the onions are soft and golden.
- Add 8 cups of water and all the remaining ingredients except salt and pepper. Bring to a simmer, then simmer gently, covered, for 30 minutes.
- Stir, then add 2 additional cups of water. Simmer for another 40 to 45 minutes, or until the barley is tender and the peas are mushy.
- Serve at once, or let the soup stand for an hour or two, then heat through as needed. Top each serving with chopped fresh dill or a few sprigs, if you'd like.
Notes
The soup thickens considerably as it stands. Add more water as needed, then taste to correct the seasonings.
Vegan-ize any recipe!Grab our free vegan cheat sheet, packed with my favorite easy substitutions to make any recipe vegan.
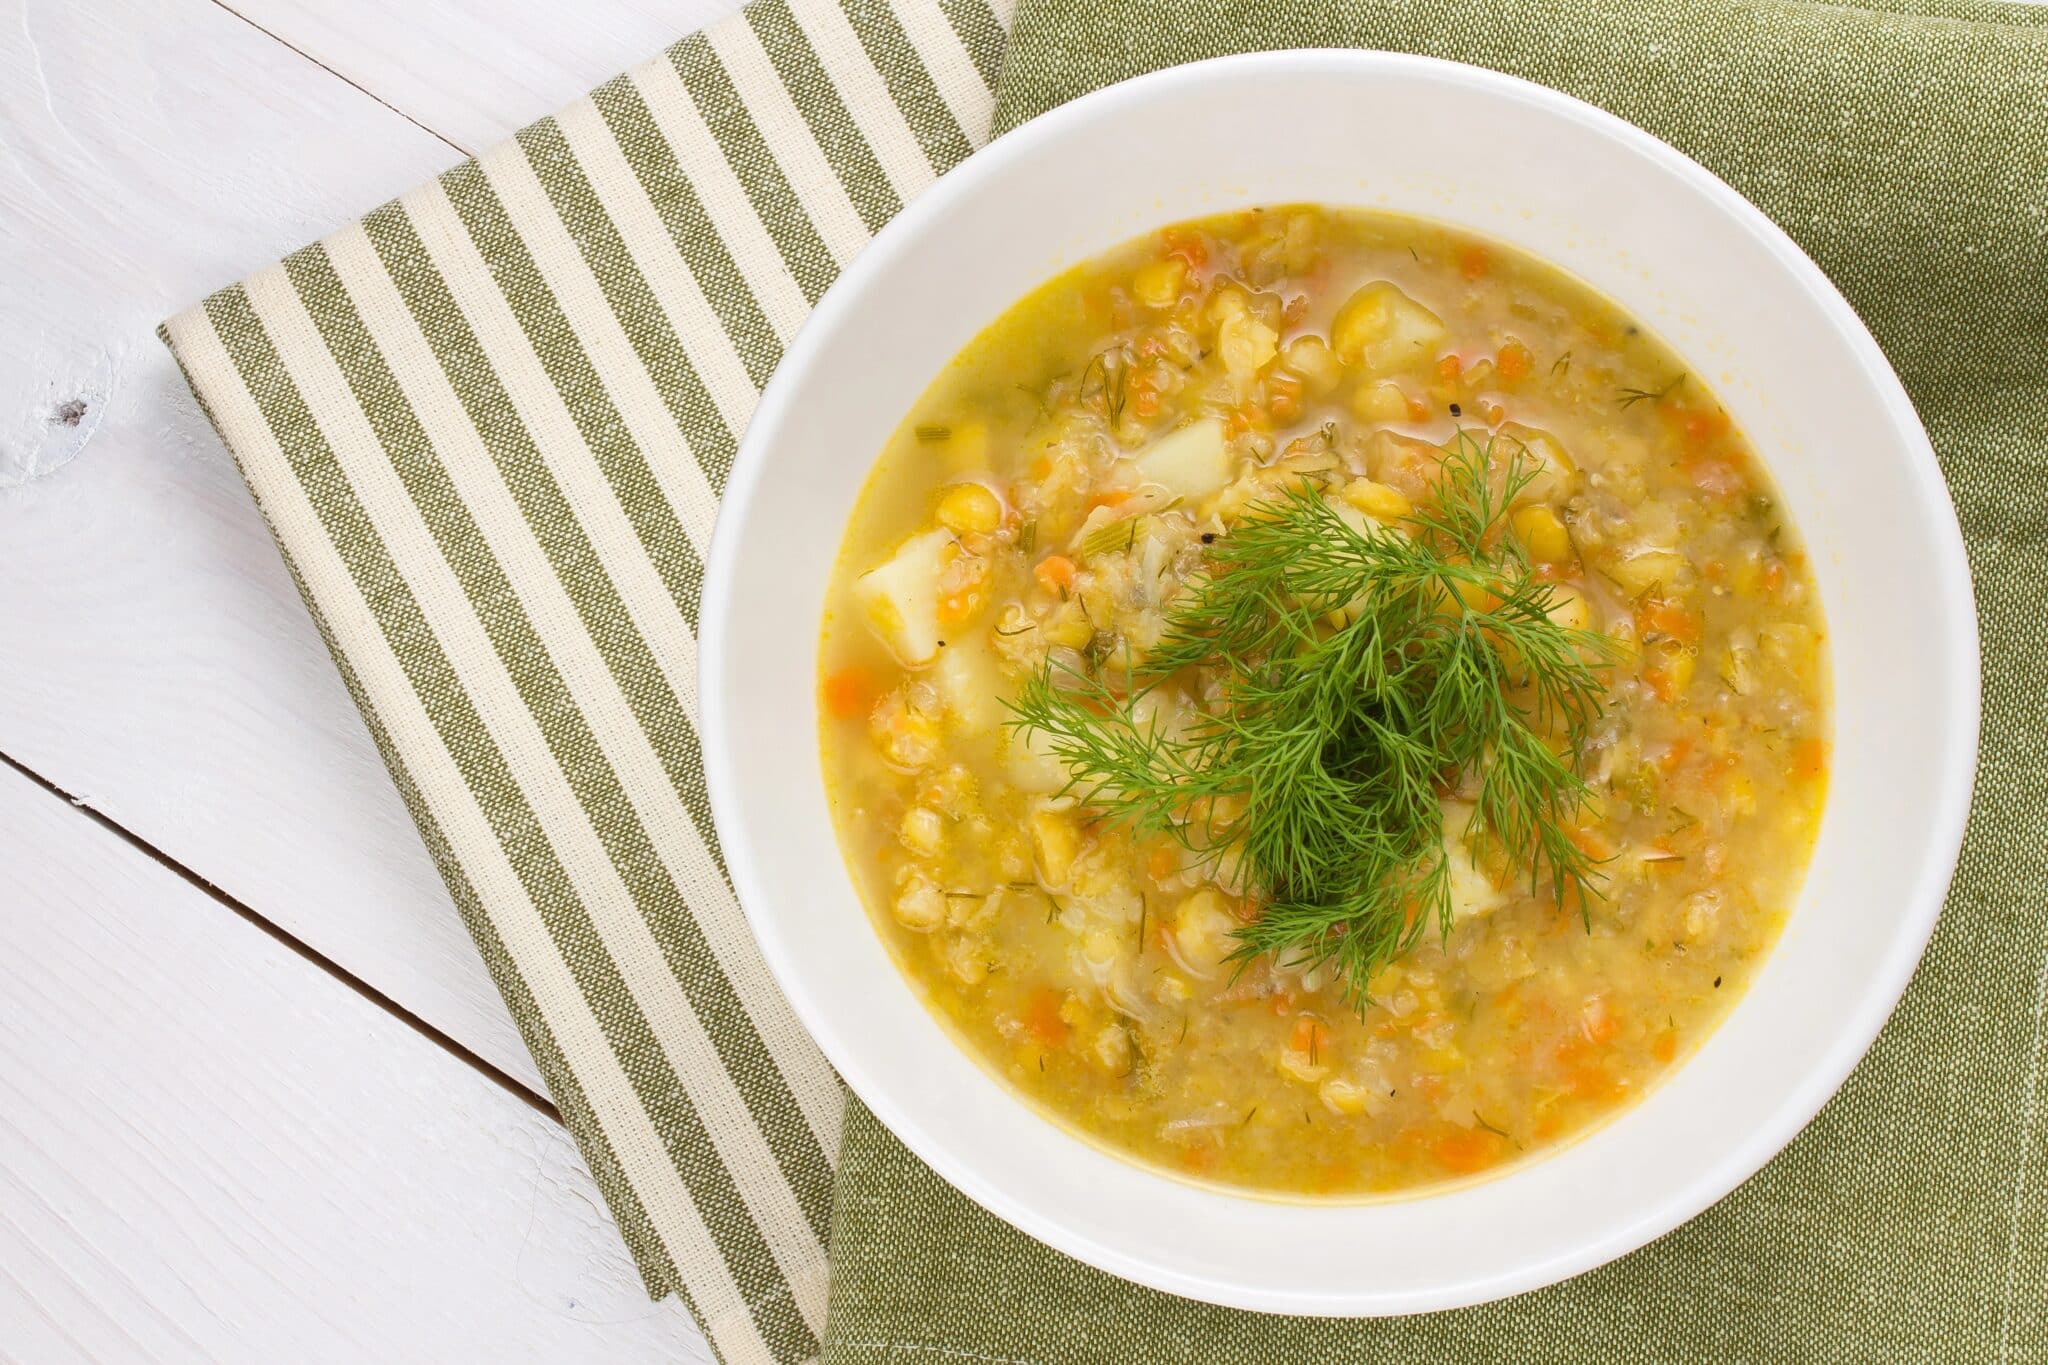
Explore other recipes for hearty winter soups.
Vegan Jicama Salad with Oranges and Watercress
This colorful and crunchy jícama salad is a perfect way to dress up a fall harvest or holiday meal - it's a lovely light salad for a vegan Thanksgiving dinner menu. Jícama (pronounced HIC-uh-ma), once confined to the southwest, has recently become far easier to find in produce sections everywhere, especially in the fall. If you can't find jícama, use a large, crisp turnip - the goal is that same crisp, almost watery crunch that stands up well next to citrus.
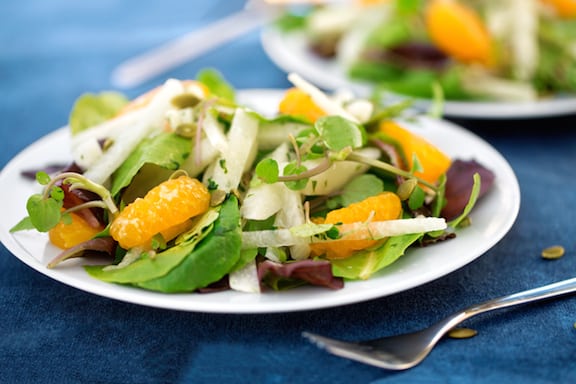
Photos by Hannah Kaminsky.
Key Ingredients & Substitutions
- Jícama. Adds a crisp, refreshing crunch somewhere between an apple and a water chestnut - substitute a large crisp turnip if jícama isn't available, and peel it the same way you would a turnip.
- Clementines or seedless oranges. Bring bright citrus sweetness that balances the peppery watercress and earthy jícama - clementines section more easily and have fewer membranes to deal with.
- Watercress. Adds a peppery bite - mostly leaves, with a bit of stem, is fine to include; arugula makes a good substitute if watercress isn't available, though it's slightly more bitter.
- Toasted pumpkin seeds. Add crunch and nutty flavor - toast them first for the best taste, and they tie in nicely with the fall/harvest theme of the salad.
- Lime juice. Ties the citrus and crunch together into a light, bright dressing - use it in addition to, not instead of, the orange for the best balance.
Variations
- Swap the greens. Baby spinach or arugula work well in place of the mixed baby greens.
- Add avocado. A few slices add richness and creaminess that contrasts nicely with the crunchy jícama.
- Swap the seeds. Toasted sliced almonds or pecans make a nice substitute for pumpkin seeds.
- Add pomegranate seeds. Their tart pop and jewel-toned color make this an especially festive holiday-table salad.
- Add a little heat. A very thin slice of jalapeño, seeds removed, adds an unexpected kick against the sweet citrus.
Tips for the Best Jícama Salad
- Cut the jícama into short, narrow strips. This gives the best texture and makes it easy to eat alongside the other ingredients in one bite.
- Toast the pumpkin seeds. A few minutes in a dry skillet, stirring often, brings out their flavor and adds a warm aroma that raw seeds don't have.
- Add lime juice to taste. Start with less and add more gradually to get the balance right between the citrus and the peppery watercress.
- Toss just before serving. This keeps the greens and watercress crisp rather than wilting under the dressing.
- Section the oranges over the bowl. This catches any juice that escapes and lets it become part of the dressing instead of going to waste on the cutting board.
Make Ahead & Storage
The jicama can be cut into strips and stored in the fridge in water for a day ahead to keep it crisp. Toast the seeds ahead of time too, but hold off on combining everything with the dressing and citrus until just before serving, since the greens and watercress will wilt if dressed too far in advance.
How to Serve
Serve as a bright, crunchy salad alongside a vegan Thanksgiving spread, or any fall harvest meal.
Recipe

Jícama Salad with Oranges and Watercress
This colorful and crunchy salad is a perfect way to dress up a fall harvest or holiday meal. It's the perfect light salad for a lovely vegan Thanksgiving dinner menu!
Print
Pin
Save
Servings: to 8
Ingredients
- 1 medium jícama peeled and cut into short narrow strips
- 3 to 4 clementines or other small seedless oranges sectioned
- 1 bunch watercress mostly leaves, some stem fine to include
- ¼ cup cilantro or parsley leaves
- 4 to 6 ounces mixed baby greens
- Juice of ½ lime to 1 lime to taste
- 2 tablespoons extra-virgin olive oil
- 1 tablespoon agave nectar or maple syrup
- ¼ cup toasted pumpkin seeds
Instructions
- Combine the jicama, orange sections, watercress, cilantro or parsley, and mixed greens in a serving bowl and stir together.
- Drizzle the lime juice, olive oil, and agave over the salad and toss again.
- Let stand for 15 minutes or so for the flavors to meld.
- Scatter the pumpkin seeds over the top and serve.
Nutrition (Estimate per Serving)
Calories: 129kcalCarbohydrates: 18gProtein: 2gFat: 6gSaturated Fat: 1gPolyunsaturated Fat: 1gMonounsaturated Fat: 4gTrans Fat: 1gSodium: 10mgPotassium: 289mgFiber: 6gSugar: 8gVitamin A: 288IUVitamin C: 45mgCalcium: 29mgIron: 1mg
Vegan-ize any recipe!Grab our free vegan cheat sheet, packed with my favorite easy substitutions to make any recipe vegan.
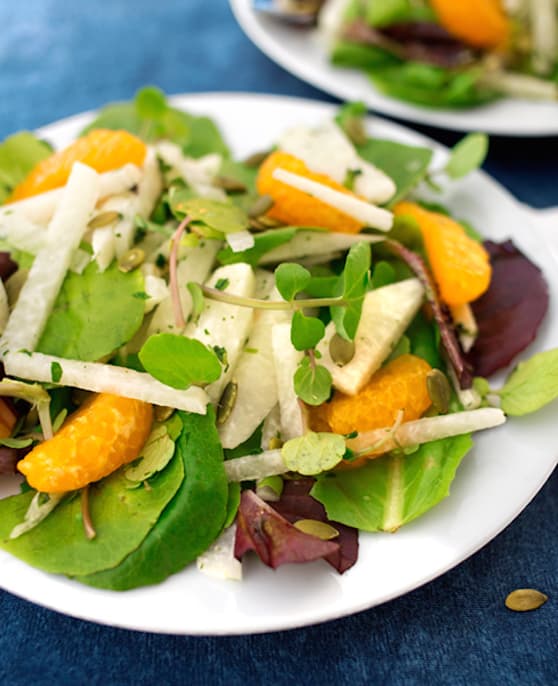
- 1
- 2
- 3
- …
- 6
- Next Page »