
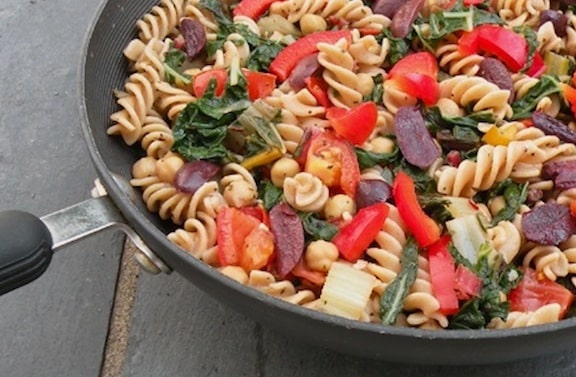
This quick and nourishing pasta recipe combines greens with chickpeas and olives for a tasty, healthy dish. Specifically, this recipe calls for chard, kale, or spinach, but you can use a combination or even substitute broccoli rabe or mustard greens. My personal favorite in this dish is chard, as it's so good in the Italian-style trio of pasta with greens and legumes. Just add a colorful salad and you've got a meal. Recipe from Wild About Greens* by Nava Atlas.
Search Results for: greens
Mixed Greens Salad with Apples, Carrots, and Pickled Beets
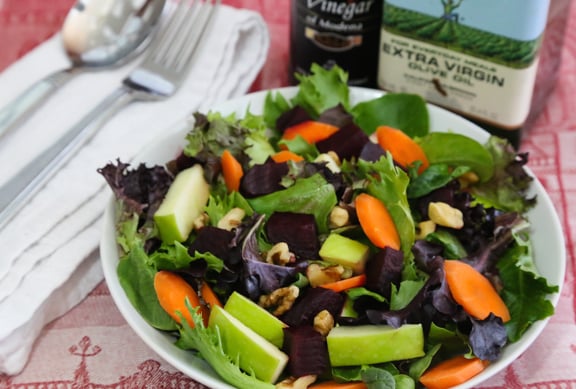
This recipe is for a simple, colorful salad of mixed greens, crunchy carrots, tart apples, and pickled beets that harmonizes well with everyday or holiday meals and adds little hands-on prep time. Photos by Evan Atlas. [Read more...]
Black Rice with Black-Eyed Peas and Greens
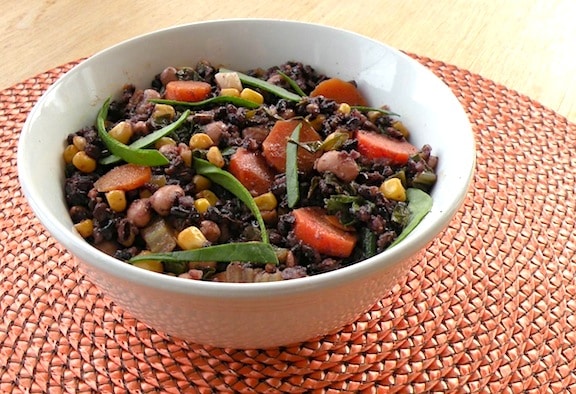
This Black Rice with Black-Eyed Peas and Greens recipe makes an attractive dish to serve hot or cold-an invigorating melange of flavors, textures and colors. I just love the way the corn, black-eyed peas, and greens look against the dark rice, but if brown rice is what you've got on hand, that will work, too. Adapted from Wild About Greens by Nava Atlas. [Read more...]
No-Chop Power Greens Salad
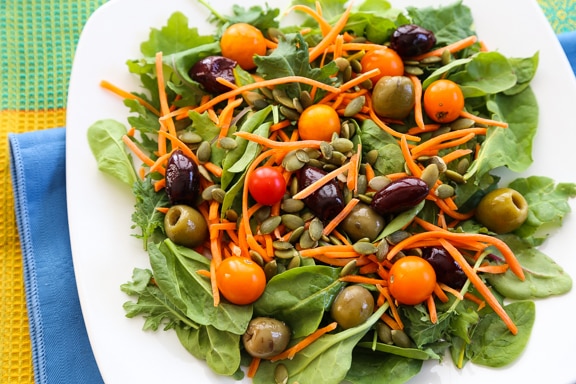
This no-chop power greens salad is the ultimate salad recipe! It's loaded with healthy ingredients and easy to throw together in just 5 minutes. Plus it's vegan and vegetarian friendly too.
Is this you: Are you someone who vows to eat more salad? Are you always promising yourself that you'll do better at eating some fresh raw foods with lunch or dinner?
Making a simple salad isn't a big deal most of the time, but there are times when chopping a bunch of veggies can be less than appealing - whether you're hurrying to pack your lunch or coming home tired after a long day.
Our no-chop power greens salad comes to the rescue!
There's nothing to it other than layering a few veggies (and seeds) that need no prep at all. And it's easy on the eyes, too.
With this salad, there's also no need to measure. Use as much as you need to make one salad or two, or more.
It doesn't get any simpler than that!
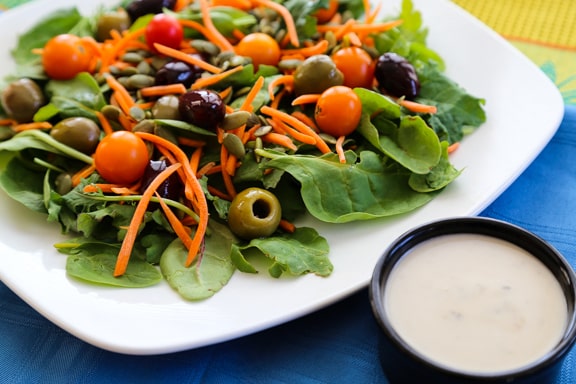
I love to simply drizzle my salad with a bit of extra virgin olive oil and balsamic vinegar. But you can also opt to use your own favorite dressing - this sesame ginger dressing is a great choice!
This no-chop power greens salad is:
- Easy to throw together in just 5 minutes!
- Versatile - use just about any greens, nuts, veggies, or seeds.
It's one of my favorite vegan salads, and also one of my favorite easy-to-pack vegan lunches.
More Vegan Recipes
If you love this power green salad, be sure to check out these other tasty ideas:
- Mango Lentil Salad with Cilantro Lime Dressing
- Mixed Greens Salad with Beets
- 50 Healthy Vegan Dinner Recipes
- Miso Power Bowls
Recipe
No-Chop Power Greens Salad
This no-chop power greens salad is the ultimate salad recipe! It's loaded with healthy ingredients and easy to throw together in just 5 minutes. Plus it's vegan and vegetarian friendly too.
Print
Pin
Save
Servings:
Ingredients
- 2 cups Baby power greens mix see note
- ½ cup carrots pre-grated
- ½ pint cherry tomatoes or grape tomatoes, yellow or red
- ⅓ cup pitted olives black or green
- ¼ cup sunflower or pumpkin seeds
- oil and balsamic vinegar or your favorite salad dressing
Instructions
- For each salad, layer the greens, carrots, tomatoes, olives, and seeds on a plate or in a shallow bowl.
- As mentioned, there is really no need to measure! Just use as much or as little of each ingredient as you'd like.
- Drizzle with olive oil and balsamic vinegar, or top it with your own favorite salad dressing.
Notes
Find baby power greens near the spinach and spring mixes. What's included in power greens mix is baby kale, spinach, chard, and other greens.
Nutrition (Estimate per Serving)
Calories: 165kcalCarbohydrates: 12gProtein: 5gFat: 12gSaturated Fat: 1gPolyunsaturated Fat: 4gMonounsaturated Fat: 6gSodium: 388mgPotassium: 478mgFiber: 4gSugar: 5gVitamin A: 6021IUVitamin C: 29mgCalcium: 48mgIron: 2mg
Vegan-ize any recipe!Grab our free vegan cheat sheet, packed with my favorite easy substitutions to make any recipe vegan.
Quick Gnocchi with Beans and Greens
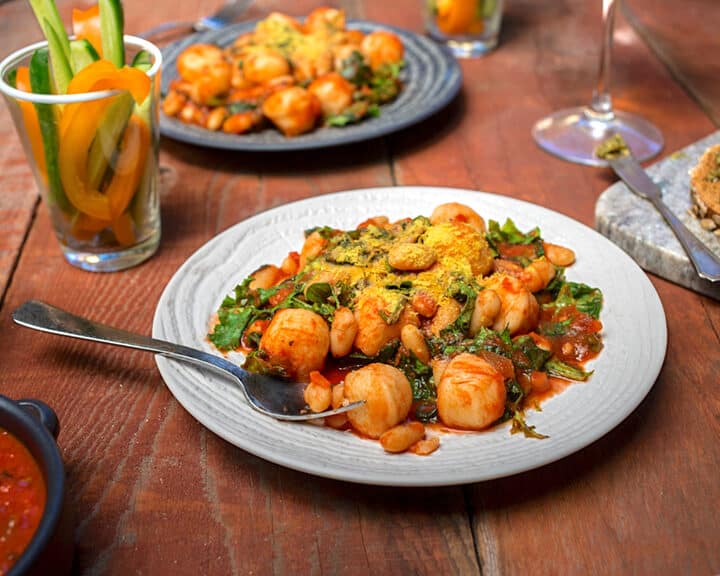
Gnocchi, in case you haven't discovered them, are an Italian specialty that are mainly made of potato flour, with a little wheat flour. In other words, a bit of starchy comfort heaven. You use them the same way you'd use a chunky pasta; they're especially good enveloped in marinara sauce. We like gnocchi with beans and greens - all adding up to a classic Italian trio.
Some cooks like to make their own gnocchi, but no thanks, not us. The project takes a good hour or two and makes a floury mess of the kitchen. There are a number of vegan brands, one of which we depict below, and being the food hackers that we are, we'd prefer just opening the package and letting that be the beginning and end of it. [Read more...]
Savory Breakfast Bowls with Tempeh and Greens
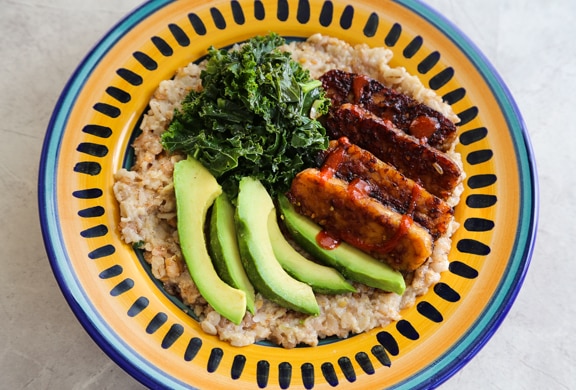
A quick cooked cereal like oatmeal or a multi-grain blend makes a hearty breakfast, but there are some people, yours truly included, that don't enjoy sweet breakfasts. That's where these savory breakfast bowls come in. Topped with tempeh, avocado, and greens, these bountiful bowlfuls will keep you going all day.
Though this doesn't take long to make, it's probably more than what you'd want to do first thing in the early morning before work and school, so try it for a leisurely breakfast or brunch on the weekend. It's a fantastic thing to make if you're going to do any athletic activity! These bowls make an excellent lunch or dinner, too, paired with a simple slaw. [Read more...]
How to Prepare Collard Greens Easily and Quickly
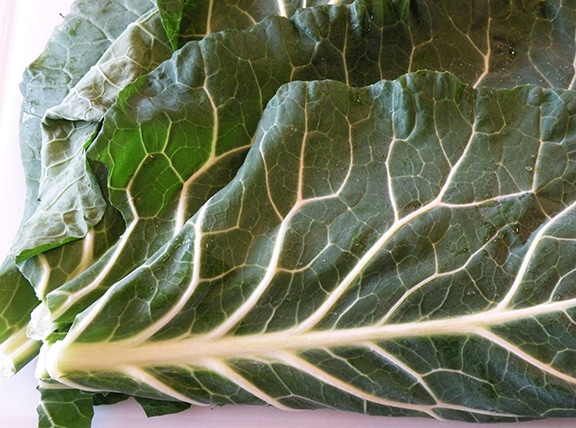
Collard greens can look pretty intimidating — they range from large to gigantic, and look like they'd take hours to prep and even longer to cook. But this is totally not the case. If you know how to tame them, they're easily prepped and very quickly cooked. They're a boon to the plant-based diet, as they're a fantastic source of calcium (better than kale) and rich in vitamins, minerals, and micronutrients. Forget about the old way of cooking them in a bit pot of boiling water. That way, collards lose color, flavor, and nutrients. Prepping them with this easier, more contemporary technique preserves all that is great about collards. [Read more...]
Sesame Soba Noodles with Collard Greens and Tempeh Croutons
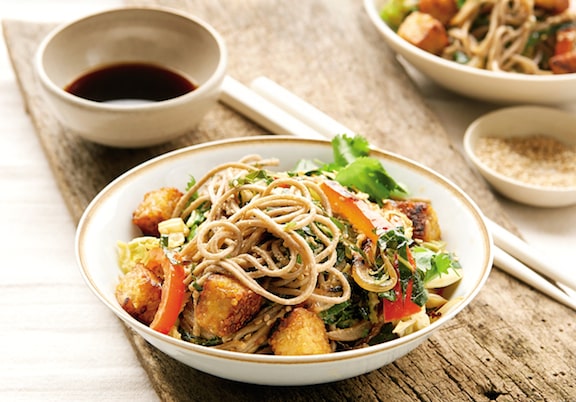
I'm a complete noodle fanatic, but a bowl of pasta with tomato sauce doesn't quite do the trick for me. For me, an ideal noodle dish is one in which veggies have at least equal billing. This Asian-flavored dish of soba noodles and calcium-rich collard greens is flavored with a triple dose of sesame (another great source of calcium): tahini, seeds, and oil. Another bonus - soba noodles made purely of buckwheat are gluten free. If that's not of concern to you, other long noodles - udon or even whole wheat spaghetti - can be substituted. Recipe by Nava Atlas, from Living the Farm Sanctuary Life* by Gene Baur with Gene Stone, © 2015 by Gene Baur. Photographs © 2015 by Rodale Inc. Reprinted by Permission of Rodale Books.
Recipe
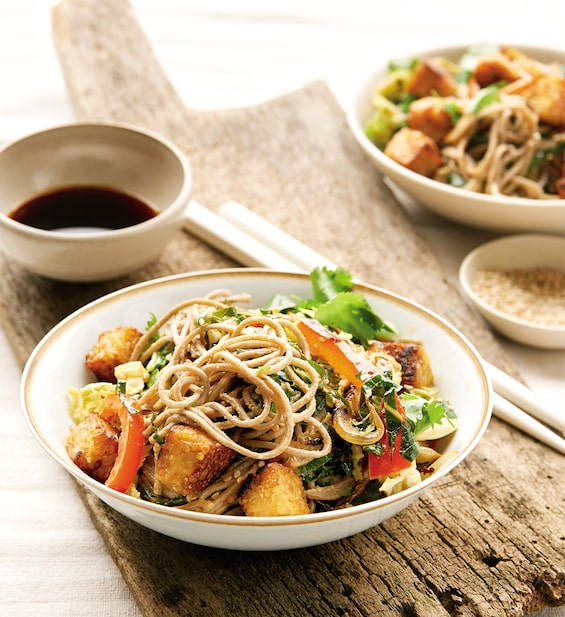
Sesame Soba Noodles with Collard Greens and Tempeh Croutons
This Asian-flavored dish of soba noodles and calcium-rich collard greens is flavored with a triple dose of sesame (another great source of calcium): tahini, seeds, and oil.
Print
Pin
Save
Servings:
Ingredients
Sauce
- ⅓ cup tahini
- ¼ cup lime juice
- 2 tablespoons reduced-sodium natural soy sauce or tamari or more if needed
- 2 tablespoons natural granulated sugar cane, coconut, or date or agave nectar
Tempeh croutons
- 2 teaspoons dark sesame oil
- 1 tablespoon reduced-sodium natural soy sauce or tamari
- 1 package 8 ounces tempeh, any variety, cut into ½" dice
Noodles
- 1 package 8 ounces soba (buckwheat) noodles
- 10 to 12 collard green leaves
- 1 tablespoon dark sesame oil
- 1 large red or yellow onion cut in half and thinly sliced
- ¼ small head green cabbage cut into long, narrow shreds
- 1 medium red bell pepper cut into long, narrow strips
- ½ cup chopped fresh cilantro basil, or Thai basil leaves, or more as desired
- 1 tablespoon black or tan sesame seeds Red-pepper flakes or Sriracha sauce
Instructions
- To make the sauce: In a small bowl, combine the tahini, lime juice, soy sauce or tamari, and sugar or agave nectar.
- To make the croutons: In a large or wide-bottomed skillet, heat the oil and soy sauce or tamari over medium heat. Add the tempeh and stir to coat. Increase the heat to medium-high and cook the tempeh until most sides are golden brown. Remove the tempeh croutons to a plate.
- To make the noodles: Cook the noodles according to package directions. When they're al dente, remove from the heat and drain.
- Meanwhile, cut the stems from the collard leaves with kitchen shears or a sharp knife. Stack 6 or so halves of leaves at a time. Roll the leaves up tightly from one of the narrow ends, almost like a cigar shape, then thinly slice them. Let them unroll to create ribbons of collard greens. Give them a good rinse in a colander.
- In the same skillet used to make the croutons, heat the oil. Add the onion and cook over medium heat until softened and golden. Add the collard ribbons, cover, and cook for 7 to 8 minutes, or until they wilt down a bit. Add the cabbage and bell pepper. Increase the heat and cook for 3 minutes, or just until the veggies are on the other side of raw. Remove the skillet from the heat.
- Add the cooked noodles to the pan and use a large fork to mix the noodles thoroughly with the veggies. Pour the sauce over the mixture. Add the cilantro or basil and sesame seeds. Scatter the croutons on top. Season with the pepper flakes or Sriracha to taste. This can be served warm or at room temperature.
Nutrition (Estimate per Serving)
Calories: 308kcalCarbohydrates: 32gProtein: 9gFat: 18gSaturated Fat: 3gPolyunsaturated Fat: 8gMonounsaturated Fat: 7gSodium: 780mgPotassium: 442mgFiber: 5gSugar: 11gVitamin A: 2398IUVitamin C: 76mgCalcium: 146mgIron: 2mg
Vegan-ize any recipe!Grab our free vegan cheat sheet, packed with my favorite easy substitutions to make any recipe vegan.
- Here are more recipes for enjoying Asian Noodles.
*This post contains affiliate links. If the product is purchased by linking through this review, VegKitchen receives a modest commission, which helps maintain our site and helps it to continue growing!
Coconut Cauliflower Curry with Mustard Greens and Spinach
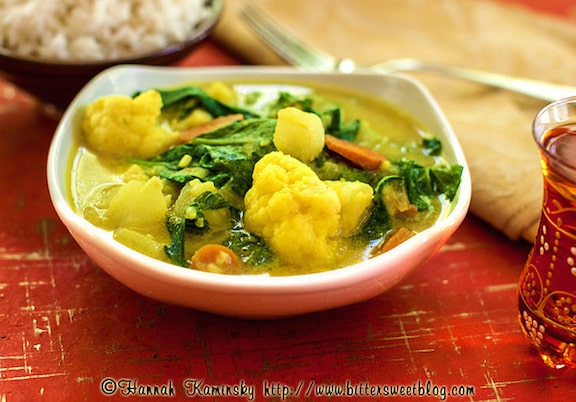
Pungent mustard greens are paired with mild spinach, and with the addition of mellow cauliflower, the result is a gorgeous and satisfying curried stew. Mustard greens, which are in fact a green often used in curries (as is spinach) most often come in really large bunches, so use as much as you'd like; the sharp flavor is well tamed by cooking. If you're not a fan of mustard greens, or just want to use a more familiar type of leafy green veggie, see the variations following the instructions. Recipe from Wild About Greens. Photo by Hannah Kaminsky, from her original review of this this book. [Read more...]
Japanese Soba Noodle Soup with Tofu and Greens
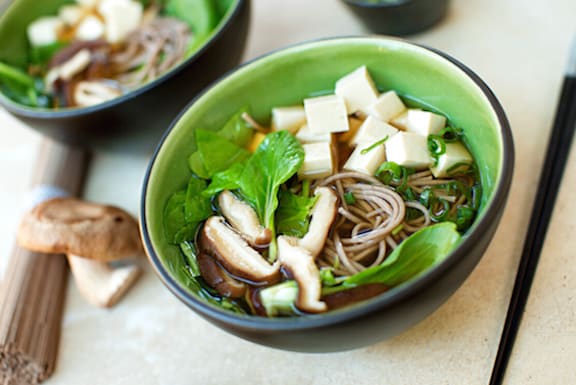
One thing I love about Asian-style soups is that they require little advance planning, and are ready to go from counter to soup pot to table in 30 minutes or less. I do find, though, that unlike other soups that benefit from long simmering and that taste even better after a day or so, Asian soups taste best just done. This is especially true in the case of noodle soups-the noodles absorb much of the broth when refrigerated overnight, leaving you with more of a noodle dish than a soup. [Read more...]
Mixed Greens with Pears, Cranberries, and Pecans
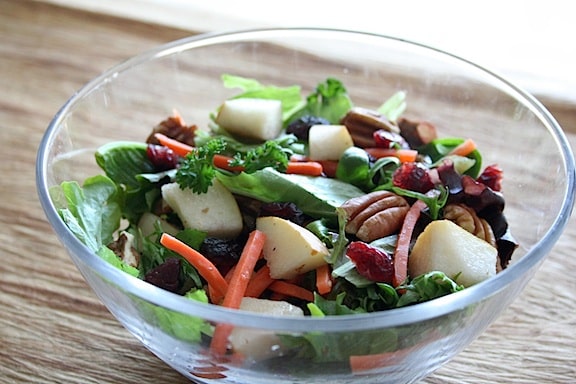
Bosc pears that are just slightly underripe are perfect in this salad that’s simple enough for everyday, yet festive enough for holiday meals. Contrasted with the crunch of pecans and and the sweetness of dried cranberries, this salad is a party for the palate. Photos by Rachael Braun. [Read more...]
Miso Soup with Sweet Potatoes and Greens
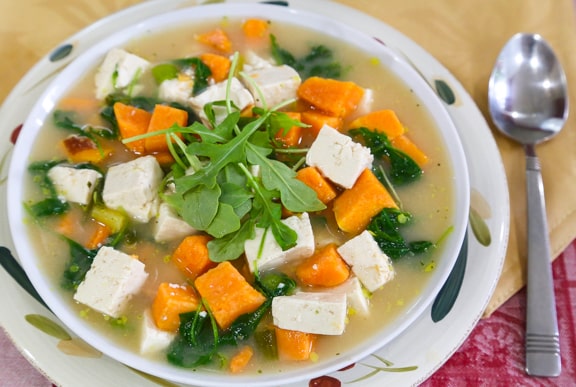
Sweet potato and tender greens (choose from spinach, arugula, watercress, or tatsoi) synergize nicely in this quick miso soup. I prefer mellow white miso as the base for this soup, but use whatever variety of miso you like best, such as dark and hearty hatcho or barley miso. Photos by Evan Atlas. [Read more...]
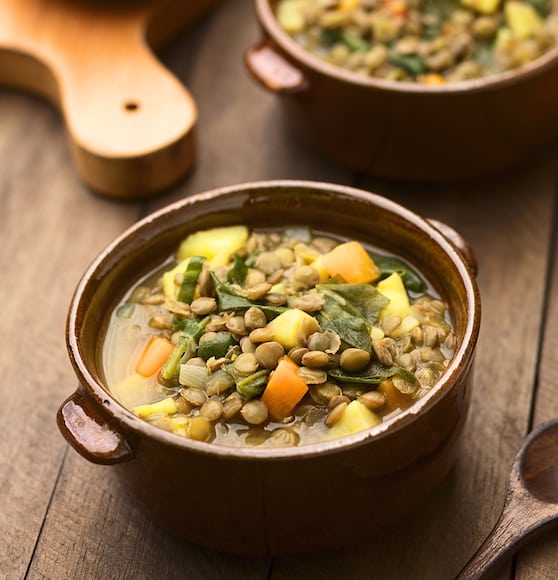
Hearty Lentil and Potato Soup with Leafy Greens
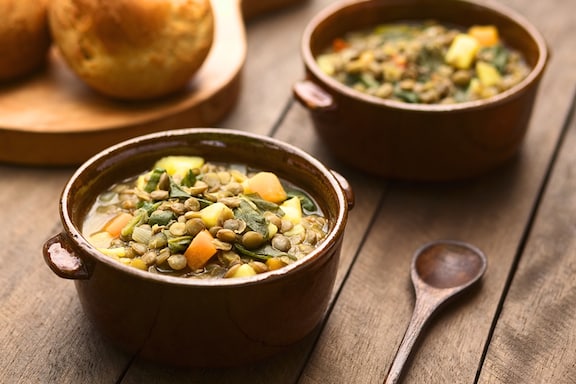
This satisfying soup features lentils, potatoes (and optional sweet potatoes) and greens, a trio of compatible ingredients in a mildly curried broth. This is a wonderful soup to come home to on a cold late fall or winter day, so make it on a quiet Sunday and enjoy it when you come home from work the next day. It’s also a good choice to pack in a Thermos, to take to work or school.
Serves: 6 to 8
- 2 tablespoons olive oil
- 1 large onion, chopped
- 4 to 6 cloves garlic, minced
- 1 cup raw brown or green lentils, rinsed
- 1 large celery stalk, diced
- 6 cups water
- 2 large potatoes, scrubbed and diced (or use 1 large potato and 1 medium-large sweet potato)
- 15- to 16-ounce can diced tomatoes, undrained (try fire-roasted for extra flavor)
- 2 to 3 teaspoons good-quality curry powder, or more, to taste
- 1 tablespoon salt-free seasoning blend (like Frontier or Mrs. Dash)
- 6 to 8 ounces leafy greens, washed, stemmed, and chopped (use chard, kale, collard greens, spinach, or arugula - or a combination of whatever you have on hand)
- ¼ cup chopped fresh cilantro, optional
- Juice of ½ lemon
- Salt and freshly ground pepper to taste
Heat the oil in a soup pot. Add the onion and sauté over medium-low heat until translucent. Add the garlic and continue to sauté until both are golden.
Add the lentils, celery, garlic, and water. Bring to a rapid simmer, then lower the heat. Cover and simmer gently for 10 minutes.
Add the potatoes, tomatoes, and curry powder, and seasoning blend, and simmer gently until the potatoes and lentils are tender, about 20 to 30 minutes longer.
Stir in the greens, cilantro, and lemon juice. Adjust the consistency with more water as needed, then season with salt and pepper. Simmer over very low heat for another 5 minutes. Serve at once or if time allows, let stand off the heat for an hour or so, then heat through before serving.
- Here are more recipes for Lentils and Peas.
- Here are more Warming Winter Soups.
Coconut Butternut Squash Soup with a Garnish of Greens
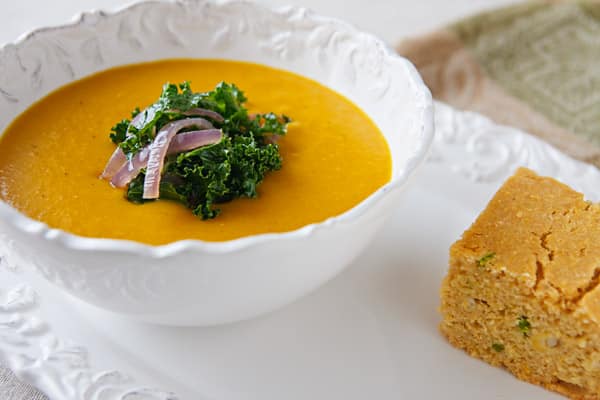
Once you've got the squash baked, this autumnal butternut squash soup comes together quickly. The mellow flavors of coconut milk, kale, and red onions synergize delectably with the squash, and look gorgeous together as well. It's a fantastic first course for a vegan Thanksgiving dinner, but it need not wait for a special occasion to enjoy it. Adapted from Vegan Holiday Kitchen by Nava Atlas. Photos by Susan Voisin. [Read more...]
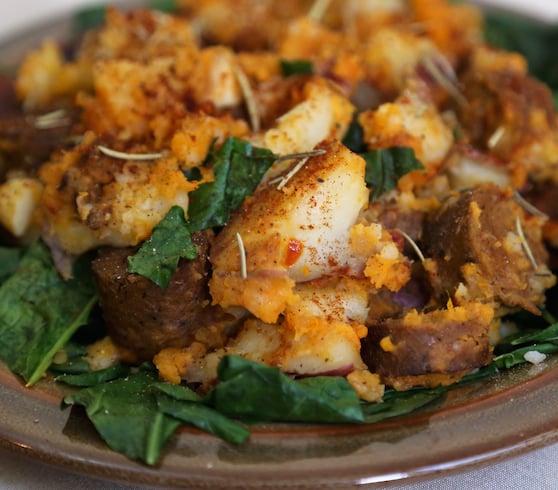
Potatoes and Collard Greens with Vegan Sausage
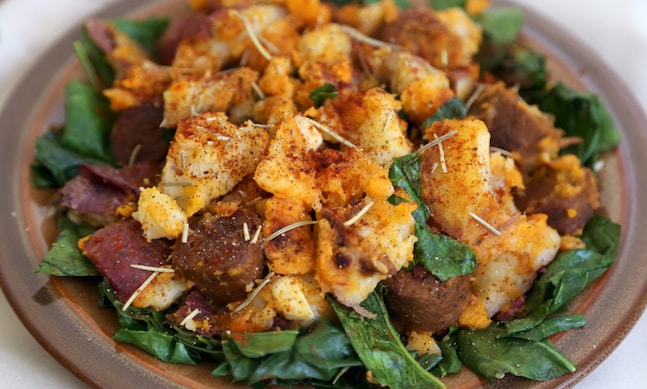
Here's a hearty dish of potatoes and vegan sausage, highlighting calcium-rich collard greens. It's so hardy, that all you need is a simple salad or slaw to complete the meal. Photos by Evan Atlas.
Serves: 4 to 6
- 4 medium-large Yukon gold or red-skinned potatoes
- 1 large sweet potato
- 2 tablespons extra-virgin olive oil
- 3 to 4 cloves garlic, minced
- 1 good-sized bunch collard greens (8 to 10 ounces)
- 2 links Tofurky or Field Roast vegan sausage, cut into ½-inch-thick slices
- ¼ cup white wine, vegetable broth, or water
- Leaves from 2 sprigs fresh rosemary,
or 1 to 2 teaspoons dried rosemary leaves, to taste - 1 teaspoon sweet paprika
- ¼ teaspoon dried hot red pepper flakes, or to taste
- Salt and fresly ground pepper to taste
Cook, bake, or microwave the potatoes and sweet potatoes until they can be pierced with a fork but still firm. When cool enough to handle, cut in half lengthwise, then cut into ½-inch-thick half circles.
Cut away the thick mid-ribs from the collard greens and cut the leaves in half lengthwise. Rinse well, then, stacking several leaves at a time, cut them into thick strips.
Heat the oil in a large skillet or steep-sided stir-fry pan. Add the garlic and sauté over low heat until golden.
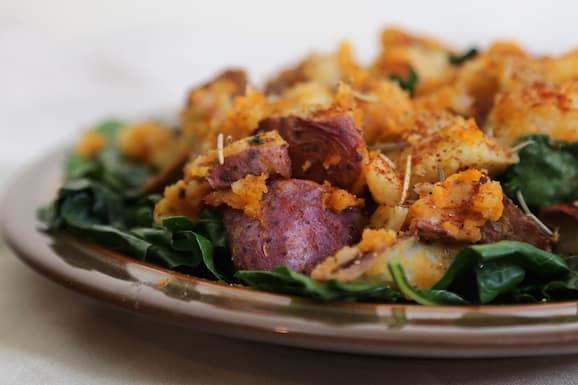
Add the potatoes, collards, sausage, and wine (or broth or water). Turn the heat up to medium high and cook, stirring frequently, until the collards are bright green and tender-crisp and the potatoes and suasage are touched with golden spots here and there.
Sprinkle in the rosemary, paprika, and red pepper flakes and cook for two to three minutes longer, stirring frequently. Season with salt and pepper and serve.
Nutrition Information:
Per Serving (based on 4 servings): 318 calories; 43g carbs; 12g fat; 15g protein; 226mg sodium
- Find lots more recipes on VegKitchen for kale, collards, and other hardy greens.
- Here are more easy, tasty potato recipes.
- Find more of VegKitchen's Vegan Dinner Recipes and more Tofu, Tempeh and Vegan Sausage Main Dishes.
- Here are more vegan sausage recipes.
How to Make Basic Baked Kale Chips (with a Collard Greens variation)
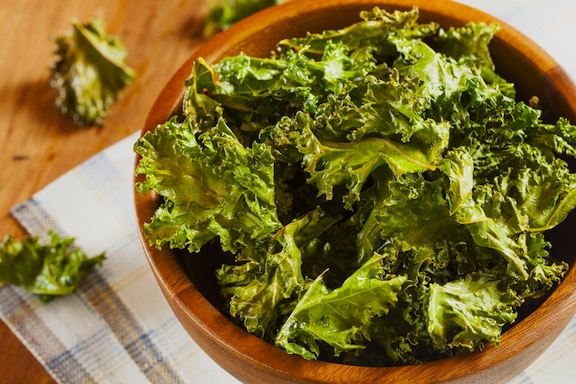
Here's a simple how-to for making kale chips. One of the trendiest and most popular things to do with kale is to transform it into crispy chips for snacking. Though I'm more partial to raw kale salad, kale chips enthusiasts report that once these are out of the oven, they're instantly devoured by snackers of all ages. [Read more...]
Puree of Spring or Summer Greens
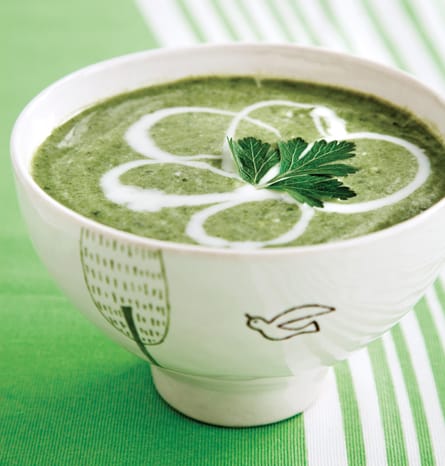
Here’s a soup designed to make the most of kale or chard, spinach, arugula, and lettuces when they become too abundant. When greens threaten to take over the fridge, I turn to this recipe, which has become an annual tradition! If you love greens and have plenty of them, you’ll find this nourishing recipe useful as well as delicious. Make sure all greens are very well washed. Adapted from Vegan Soups and Hearty Stews for All Seasons.
Stir-Fried Tofu with Spring Greens
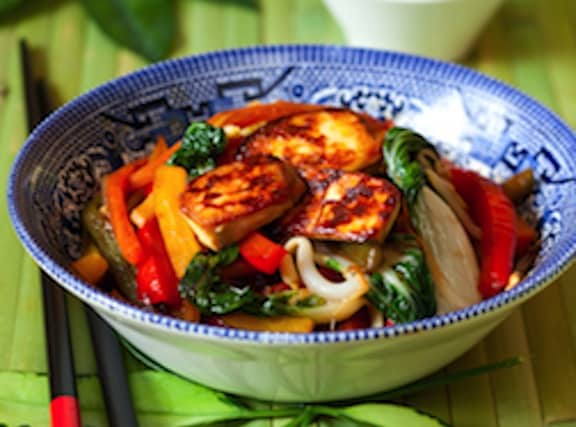
This easy stir-fry highlights fresh, quick-cooking spring greens, combined with tofu. See the note below for suggestions on which leafy greens to use; you can vary it each time. My favorite is baby bok choy! [Read more...]
Cold Sesame-Ginger Soba Noodles and Greens
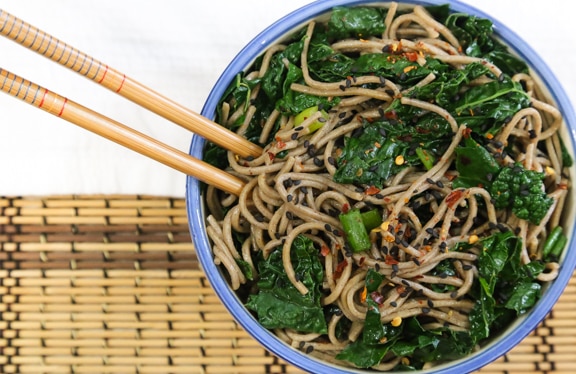
This simple cold soba noodle dish is laced with lots of kale or collard greens and flavored with a piquant ginger dressing. For an easy meal, serve with veggie spring rolls from your natural foods store's frozen foods section, and a platter of slices of baked tofu, tomatoes and cucumbers. Photos by Evan Atlas. [Read more...]
Simple Sautéed Garlicky Greens (Kale, Collards, or Chard)
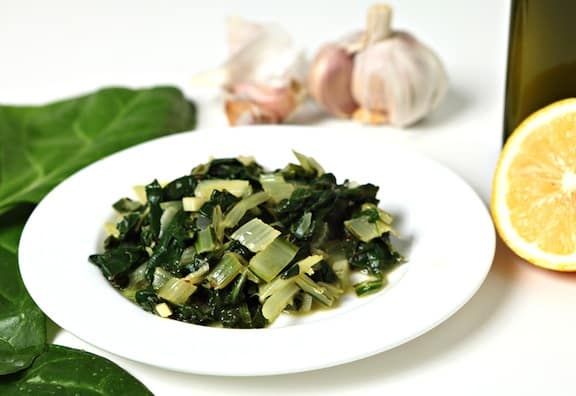
This is a basic way to prepare sautéed chard, kale, or collard greens — the classic olive oil and garlic sauté. Sometimes simple is best; this is definitely true when it comes to something as good as leafy greens! [Read more...]
Seitan and Polenta Skillet with Fresh Greens
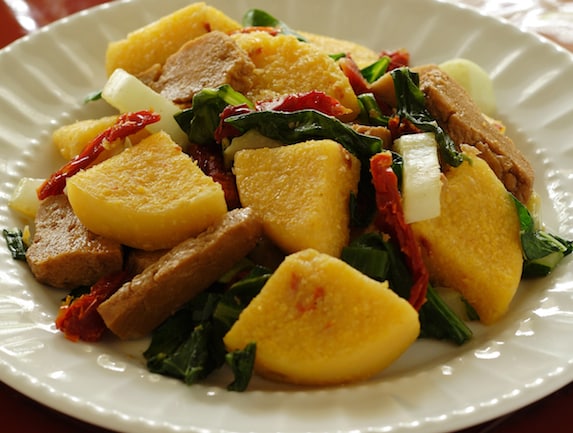
There’s something enticing about the seitan/polenta synergy, and with the addition of greens, results in a great-looking, hearty dish. Serve with a simple potato dish and salad or slaw. Recipe adapted from Vegan Express. Photo by Susan Voisin.
Mixed Greens Salad with Avocado, Apples, and Baked Tofu
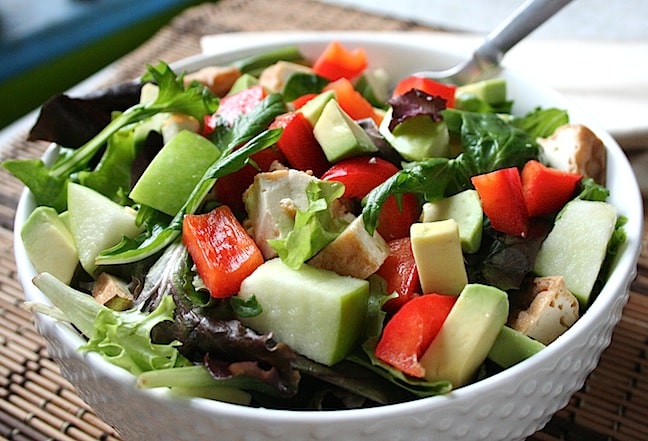
This luscious salad adds substance to a meal when served with light main dishes, and makes a nice at-home lunch on weekends and holidays. This is a tasty salad to stuff into a pita or wrap up. Or, for a light meal, serve with soup and fresh bread. [Read more...]
Curried Red Lentil Soup with Sweet Potatoes and Greens
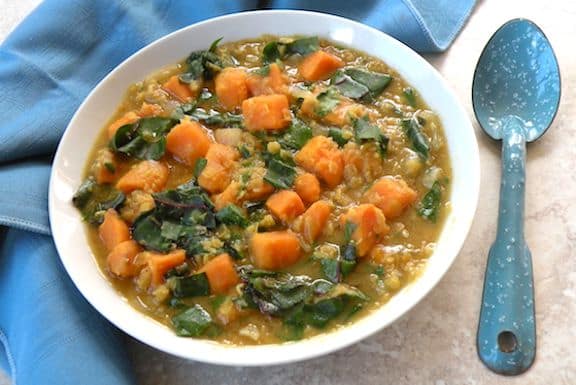
Both nourishing and sublimely satisfying, this thick soup incorporates fall’s first sweet potatoes with seasonal greens. Red lentils, which cook to a warm golden color, are available in natural food stores and ethnic groceries. Adapted from Vegan Soups and Hearty Stews for All Seasons. [Read more...]
Jerusalem Artichoke Salad with Greens and Herbs
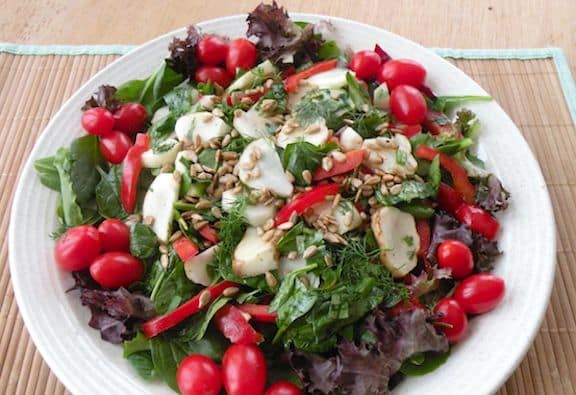
Here's a colorful and crunchy salad featuring Jerusalem artichokes, the misnamed underground tubers of a native American sunflower; they have nothing to do with Jerusalem and aren't related to artichokes. In season in the late fall, they are quite fitting to serve as part of Thanksgiving dinner. Those who haven't had them will find them surprising and exotic, kind of a crunchy cross between water chestnuts and potatoes.
Sweet and White Potato Salad with Mixed Greens
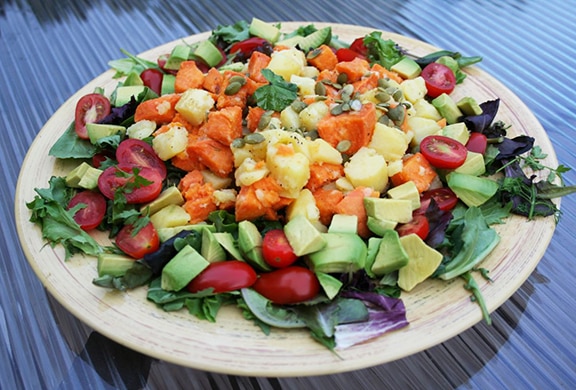
This potato salad, combining white or golden potatoes and sweet potatoes is one I often make for company. It's so pretty, perched on mixed greens and ringed with grape tomatoes and avocado, yet is incredibly easy to prepare. It's wonderful for summer and early fall potlucks and other gatherings. [Read more...]
BBQ Tempeh Bacon with Black-Eyed Peas and Greens
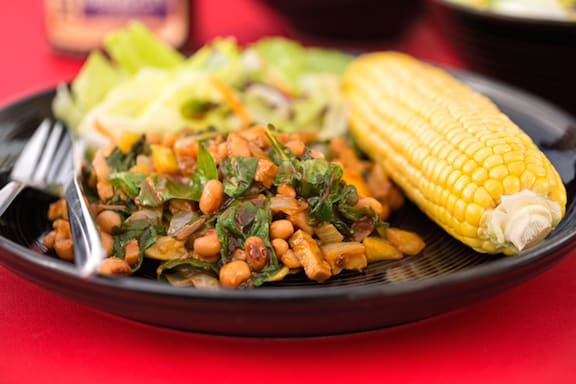
Bites of tart apple add a delightful flavor twist to this hearty dish of BBQ tempeh bacon with black-eyed peas and greens. Serve with sweet potatoes or fresh corn and coleslaw for a satisfying meal. Photos by Hannah Kaminsky.
Tuscan White Beans and Winter Greens Soup
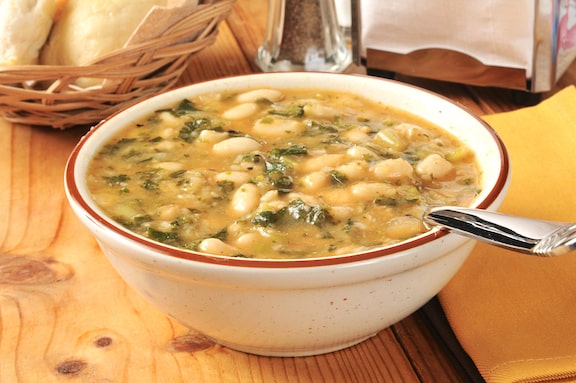
This rustic white bean soup is stockless and gets its goodness and oomph from the beans’ own cooking liquid. Half a dozen sage leaves impart an amazing amount of flavor. It’s just the thing for cooler weather, costs two bucks all told and feeds six. And you’ll have done it yourself. Beans may be cooked a day ahead, if that reduces your anxiety. Plan your life accordingly. [Read more...]
Spring Greens Salad with Endives and Oranges
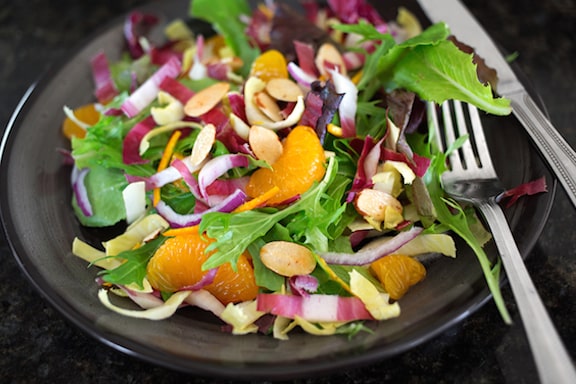
Here's a lovely and refreshing salad with tender greens, Belgian endives, and tiny oranges. A hint of citrus and toasted almonds add to the fresh flavor. Photos by Hannah Kaminsky. [Read more...]
Pink Beans with Spring Greens
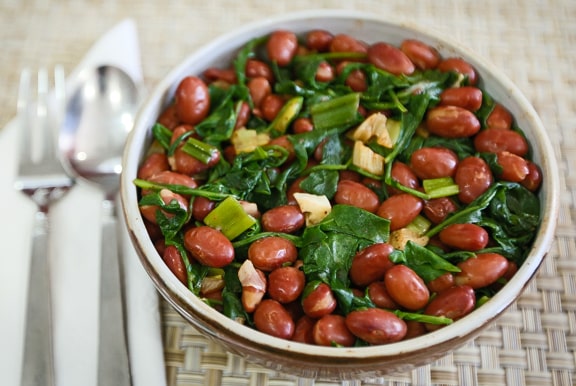
Leafy spring greens like spinach, arugula, or watercress look and taste very appealing with pink beans. The more garlicky you make this simple dish, the better. A perfect choice when you're looking to get more beans and greens in your daily fare! Photos by Evan Atlas. [Read more...]
Garlicky Greens with Seitan and Soy Sausage
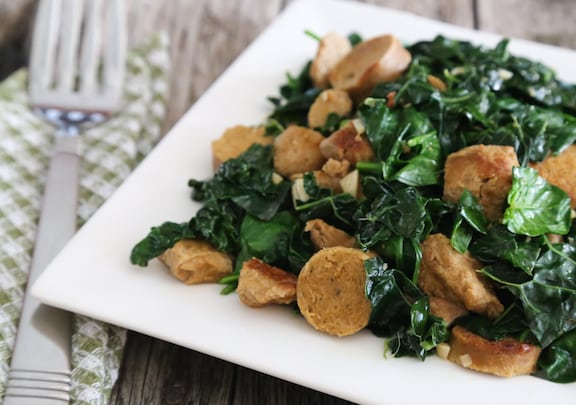
Vegan sausage is a fun protein source that provides plenty of flavor and spice to a meal. The bold taste of Tofurky or Field Roast sausage provides a perfect foil for fresh greens. I prefer these brands to other kinds of faux sausage, because they're made with tofu and seitan rather then textured soy protein. Serve this hearty dish with a simple grain or noodles, and a colorful salad. Photos by Evan Atlas. [Read more...]
Slow-Cooker White Bean and Sweet Potato Stew with Collard Greens
This stew is colorful and full-flavored thanks to a host of vegetables and seasonings. I like to cook the collards separately to avoid any bitter taste in the stew. Since sweet potatoes break down easily, it’s important not to cook this stew too long. For a mild yet still flavorful version, eliminate the hot chile. Serve it accompanied by crusty warm bread. Adapted from Fresh from the Vegetarian Slow Cooker* by Robin Robertson. [Read more...]
Gnocchi with Vegan Sausage and Gravy
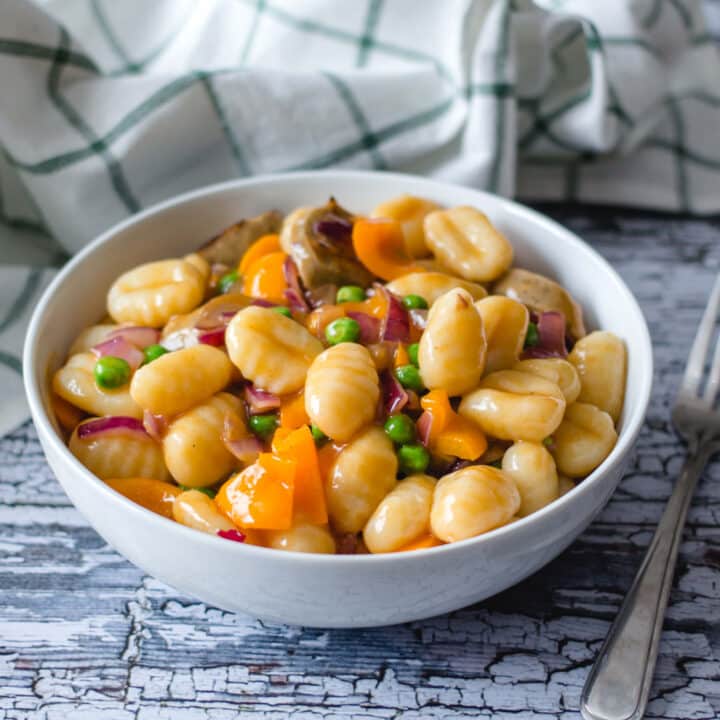
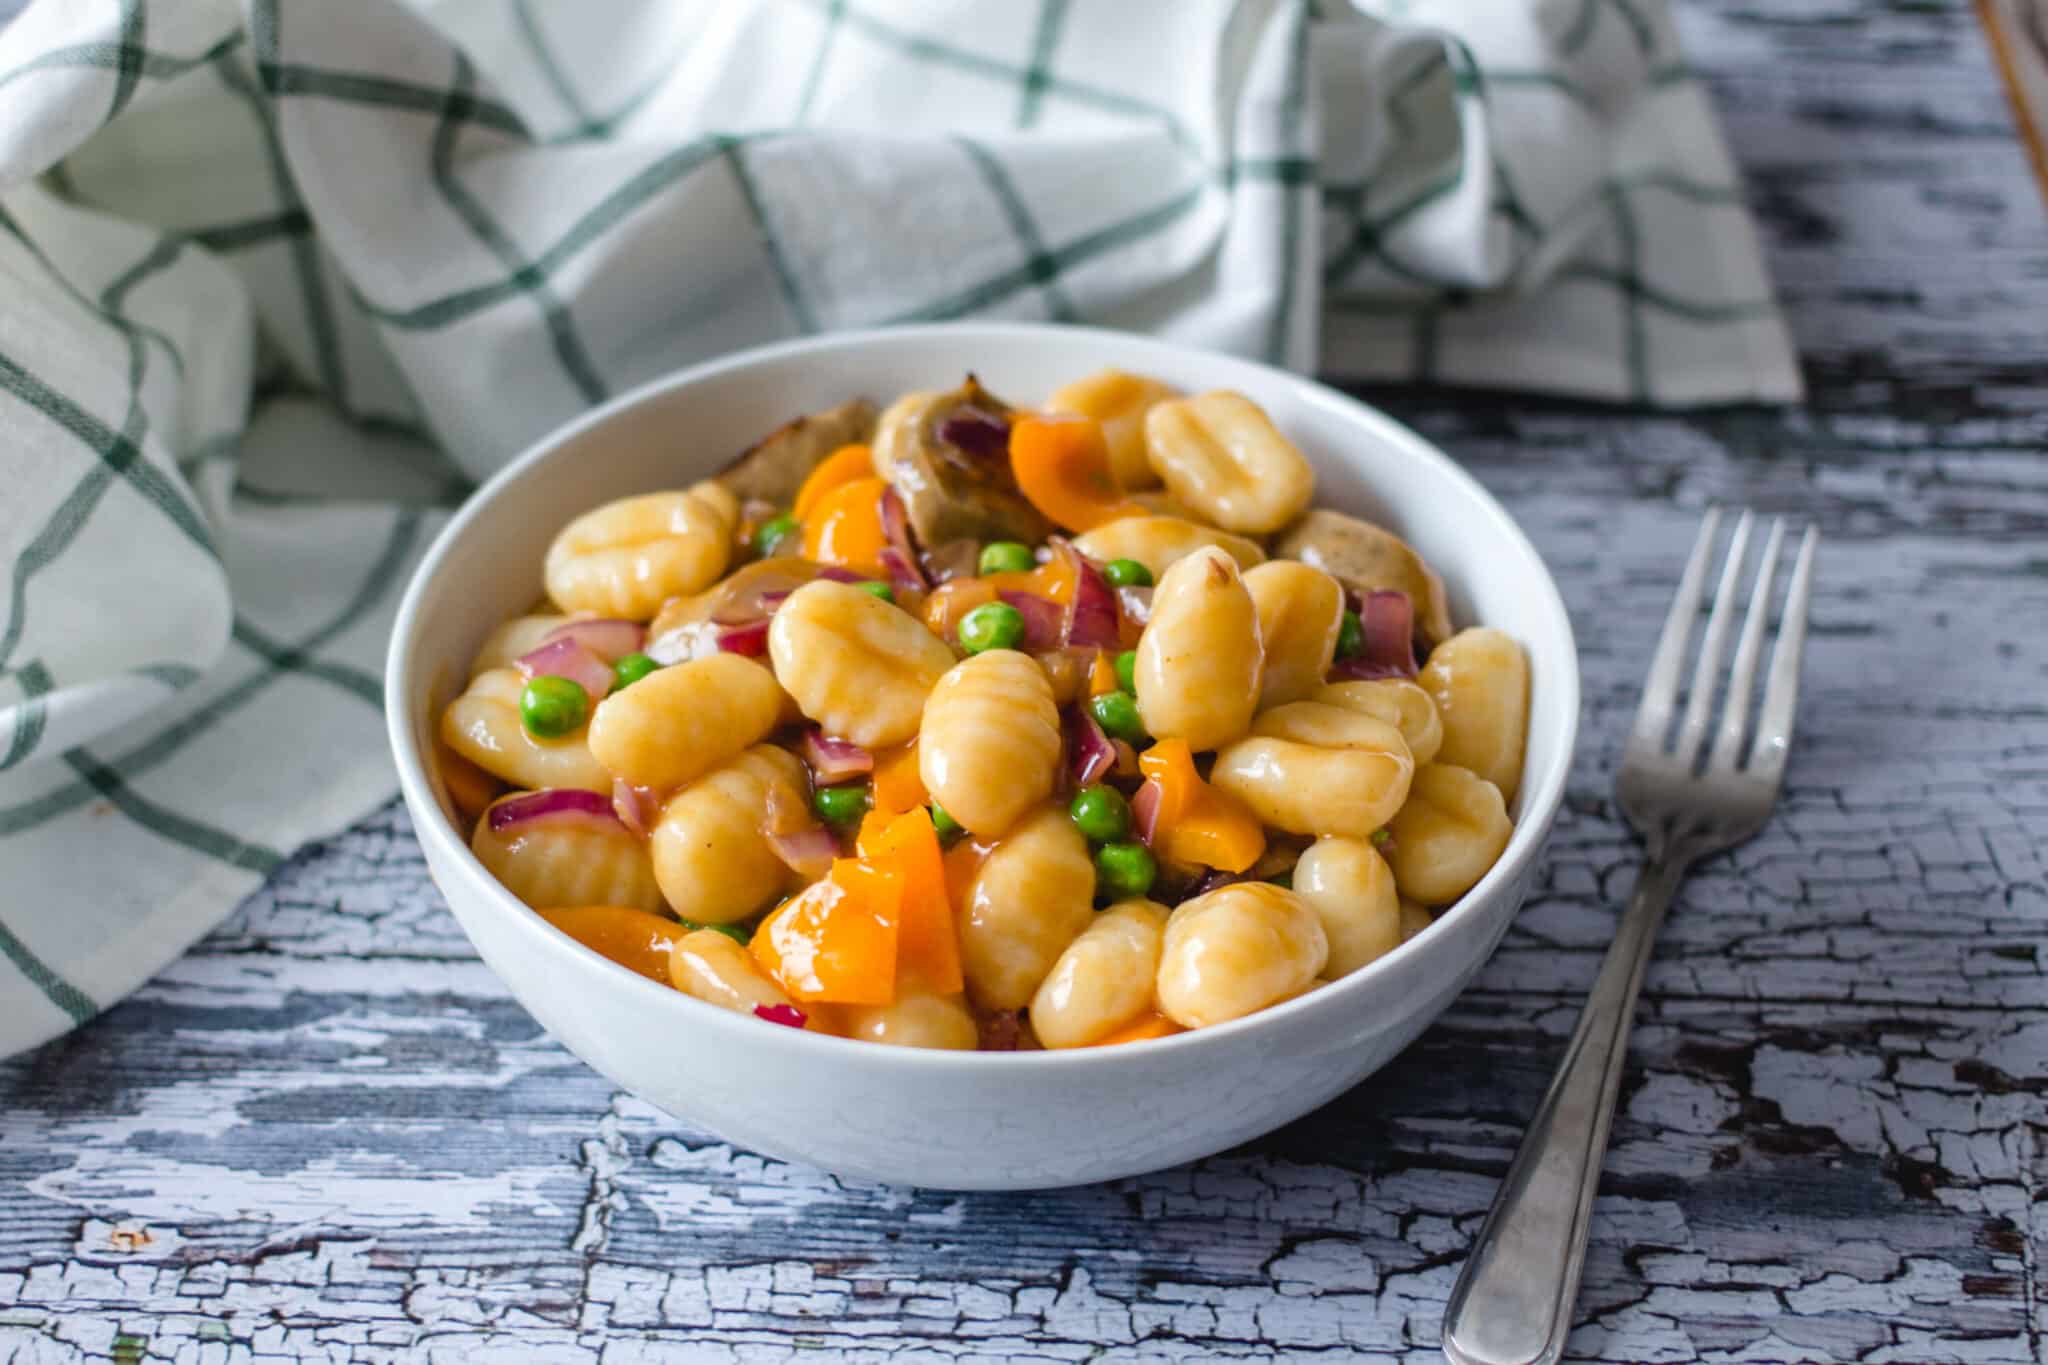
Pillowy gnocchi, savory vegan sausage, and a rich, peppery gravy come together in one skillet for a hearty dinner that feels like pure comfort food.
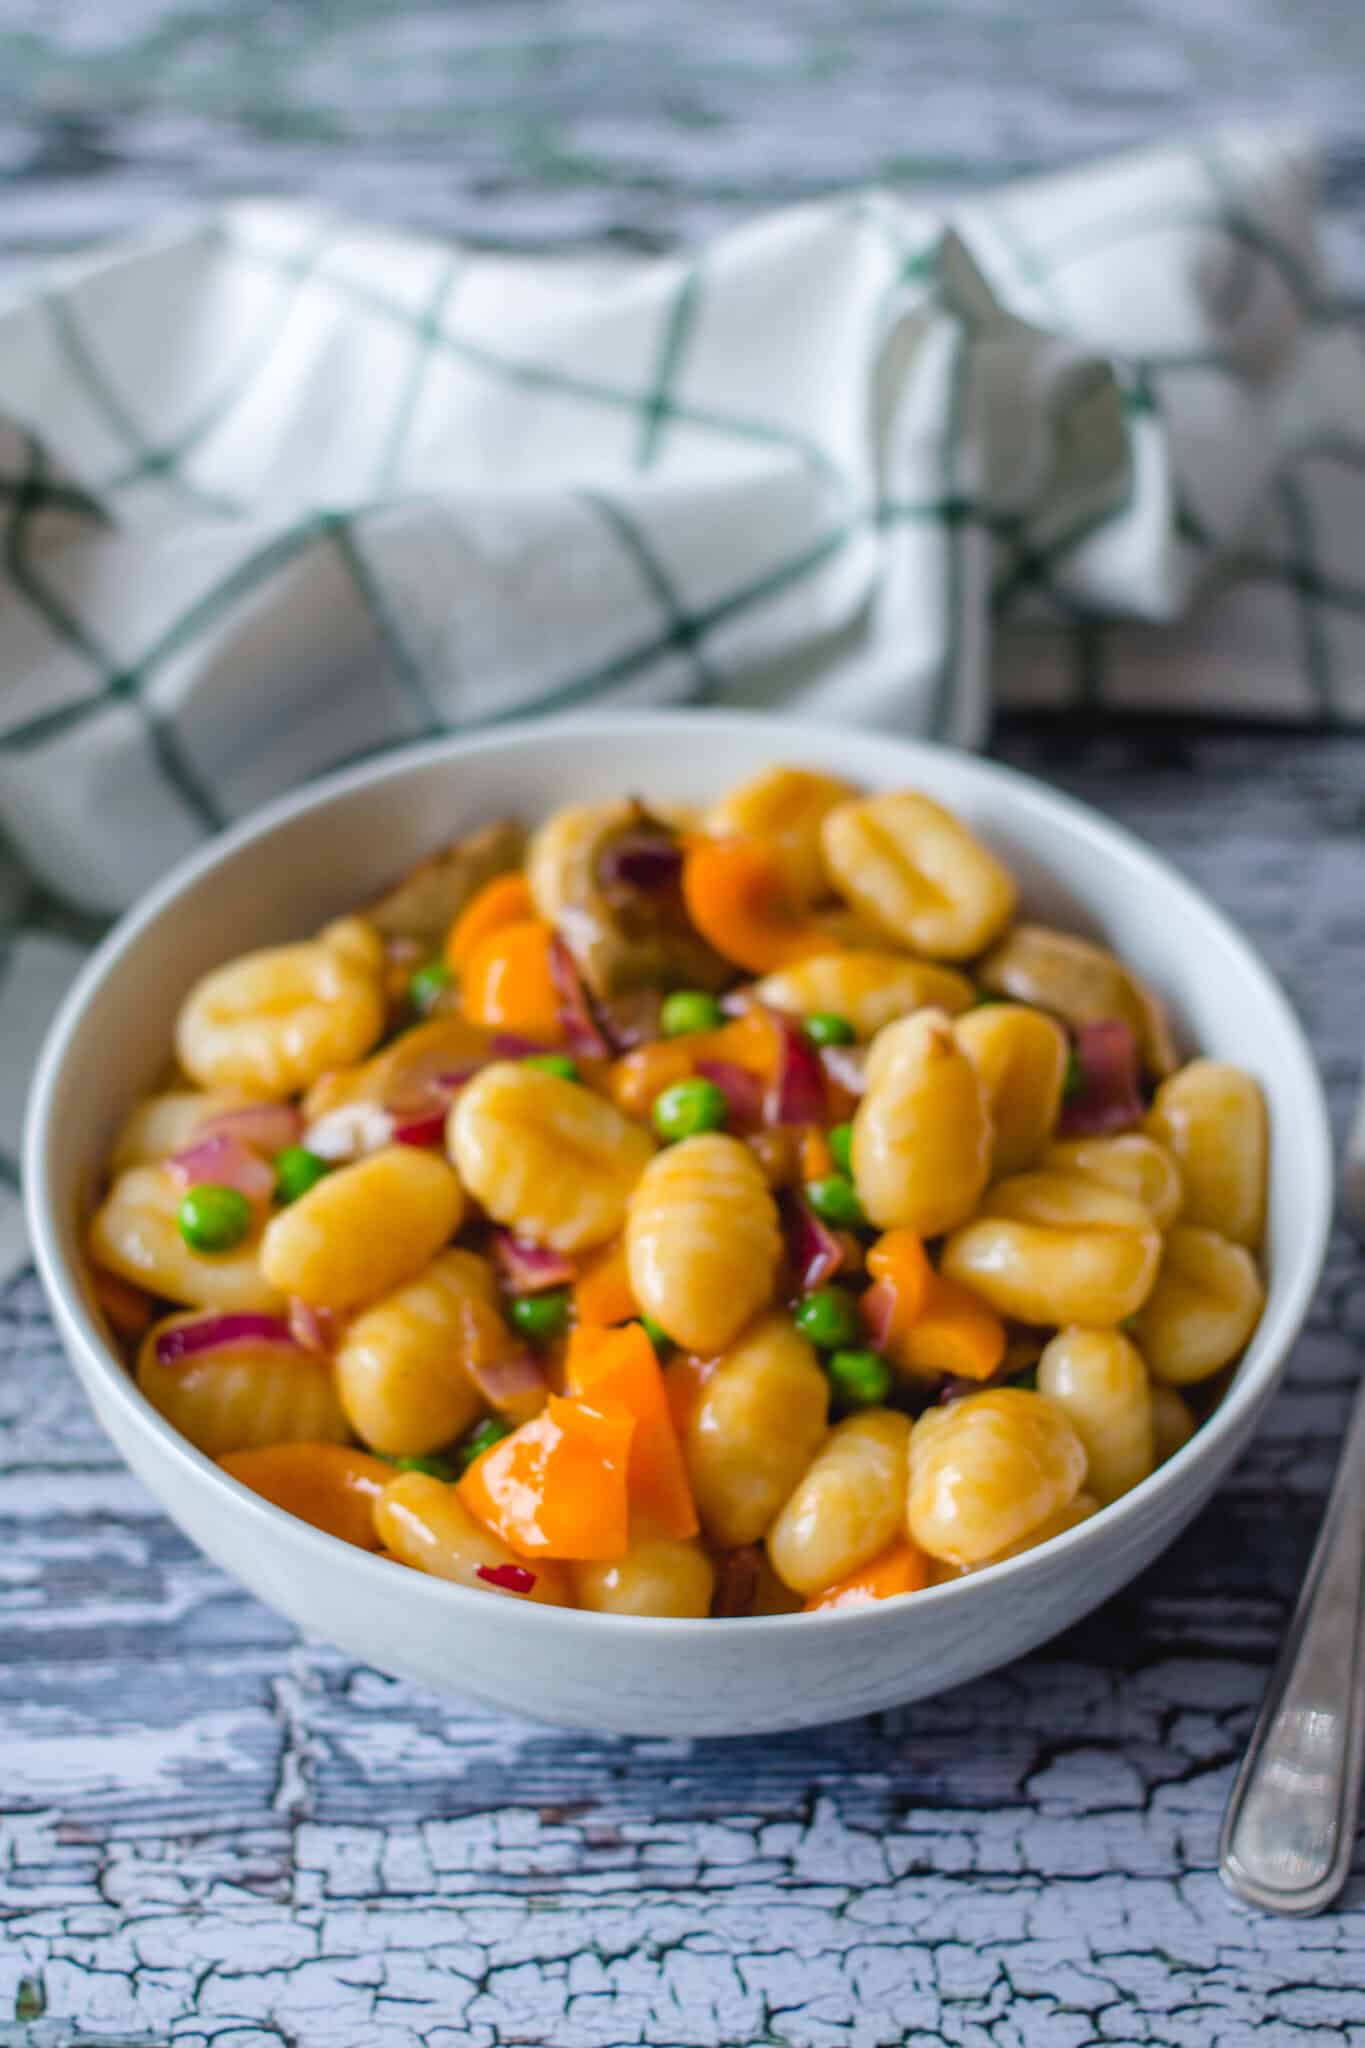
Key Ingredients & Substitutions
- Gnocchi. One package of store-bought potato gnocchi keeps this recipe weeknight-easy. Look for it in the pasta aisle or refrigerated section. For a gluten-free version, use certified GF gnocchi or make your own with rice flour.
- Vegan Italian sausages. Italian-style links (like Field Roast, Beyond Sausage, or Impossible Sausage) give the dish a smoky, fennel-forward flavor. Feel free to swap in any flavor you like - spicy, apple, or even crumbled breakfast-style sausage all work.
- Vegetable broth. This is the base of the gravy, so use a good-quality broth. For a deeper, more umami-rich flavor, homemade broth works beautifully, or look for a dark, roasted vegetable broth at the store.
- Flour. All-purpose flour thickens the gravy into a silky, pourable sauce. For a gluten-free gravy, substitute with a 1:1 GF flour blend or use cornstarch (start with 2 tablespoons).
- Soy sauce. Adds saltiness and a subtle umami punch that makes the gravy taste richer. Tamari is a great gluten-free swap; coconut aminos work too, though the gravy will be slightly lighter in color.
- Bell pepper. One pepper adds a gentle sweetness and color to the sausage mixture. Red or orange peppers are naturally sweeter; green adds a slightly bitter, more savory note.
- Frozen peas. Stirred in at the end, they add a pop of green and a touch of sweetness without any prep. No need to thaw them first - the heat of the pan does the work.
Helpful Tips
Make the gravy first. The gravy comes together quickly and can sit on low heat while you cook the gnocchi and sausage. Having it ready means everything comes together at once at the end, so nothing sits and gets cold.
Whisk constantly once you add the broth. When making the roux-based gravy, add the vegetable broth in a slow, steady stream while whisking continuously. This prevents lumps and gives you a smooth, silky sauce. Pre-measuring your broth before you start makes this step much easier.
Don't overcook the gnocchi. Gnocchi cook fast - they're done as soon as they float to the surface, usually within 2-3 minutes of the water returning to a boil. Drain them promptly to prevent them from becoming mushy or waterlogged.
Brown the sausage well. Slicing the sausages into coins and letting them sear undisturbed in the pan for a couple of minutes per side creates a slightly caramelized crust that adds great texture and flavor. Resist the urge to stir constantly.
Adjust the gravy to your taste. The recipe makes a generous amount of gravy. Start by adding 1 cup to the finished dish and add more from there - some people like it saucy, others prefer just a light coating. Leftover gravy keeps beautifully and pairs well with vegan mashed potatoes or vegan biscuits.
Variations
- Mushroom gravy gnocchi. Swap the sausage for sautéed cremini or shiitake mushrooms. Deglaze the pan with a splash of red wine before adding the gravy for an earthy, deeply savory dish.
- Spicy sausage version. Use hot Italian-style vegan sausage and add a pinch of red pepper flakes to the gravy for a dish with some kick.
- Greens and gnocchi. Stir in a big handful of baby spinach or chopped kale along with the peas at the end. The greens wilt in about a minute and add nutrition and color.
- Baked gnocchi gratin. Transfer the finished gnocchi mixture to a baking dish, top with vegan shredded cheese or breadcrumbs, and broil for 5-7 minutes until golden and bubbling.
- Lighter herb gravy. For a fresher, less heavy version, use only 1½ cups of broth, reduce the flour to 2 tablespoons, and finish the gravy with a generous handful of chopped fresh thyme or rosemary.
- Sweet potato gnocchi. Use sweet potato gnocchi in place of traditional potato gnocchi for a slightly sweeter, more nutritious twist.
Serving Ideas
This dish is hearty enough to serve as a complete meal on its own - the gnocchi, sausage, vegetables, and gravy cover all your bases. Serve it in deep bowls with a slice of crusty bread to mop up the extra gravy.
If you'd like to round out the meal, a simple green salad dressed with lemon vinaigrette cuts through the richness nicely. Roasted broccoli or asparagus also make a great side if you want more vegetables on the table. For an Italian-inspired dinner spread, pair it with a bowl of Italian-style vegan sausage and peppers and some garlic bread.
Storing & Freezing
Store leftovers in an airtight container in the refrigerator for up to 4 days. The gravy thickens as it sits - when reheating on the stovetop over medium-low heat, add a splash of vegetable broth or water and stir to loosen it back up. You can also microwave individual portions in 90-second intervals, stirring between each one.
This dish doesn't freeze particularly well, as gnocchi tend to become mushy once thawed. That said, you can freeze the gravy separately for up to 2 months - just thaw it in the refrigerator overnight and reheat on the stovetop, then cook fresh gnocchi and sausage to serve with it.
More Vegan Pasta and Dinner Ideas
If you loved this recipe, here are a few more cozy vegan dinners you might enjoy:
- Quick Gnocchi with Beans and Greens
- Vegan Creamy Mushroom Pasta
- Vegan Biscuits and Gravy
- Vegan Pot Pie Casserole
Recipe
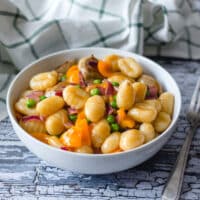
Gnocchi with Vegan Sausage and Gravy
Pillowy potato gnocchi tossed with savory vegan Italian sausage, peppers, and peas in a rich, peppery brown gravy — comfort food that comes together in about 45 minutes.
Print
Pin
Save
Servings: servings
Ingredients
Gravy
- 3 tablespoon olive Oil
- 4 tablespoon flour
- 2 ½ cups vegetable broth
- 2 tablespoon soy sauce
- 1 teaspoon ground black pepper
- 1 ½ teaspoon onion powder
- 1 teaspoon garlic powder
- 2 tablespoon white vinegar
Gnocchi
- 1 package gnocchi
- 1 tablespoon olive oil
- 1 onion chopped
- 2 Italian vegan sausages
- 1 pepper
- ½ cup frozen peas
Instructions
Gravy
- Measure out all your gravy ingredients and keep them within reach before you start — you'll need to add the broth quickly after whisking in the flour.
- Heat a medium saucepan over medium-low heat. Add the olive oil, then whisk in the flour and cook for about 1 minute until lightly golden.
- Pour in the vegetable broth in a slow, steady stream, whisking constantly to prevent lumps. Add the soy sauce, black pepper, onion powder, garlic powder, and white vinegar. Stir to combine.
- Bring to a gentle simmer and cook for 5–7 minutes, stirring occasionally, until the gravy has thickened to a pourable consistency. Reduce heat to low to keep warm.
Gnocchi and Sausage
- Bring a large pot of salted water to a boil. Cook the gnocchi according to package directions — they're ready when they float to the surface, about 2–3 minutes. Drain and set aside.
- While the gnocchi cooks, heat 1 tablespoon of olive oil in a large skillet over medium heat. Add the onion and bell pepper and cook for 3–4 minutes until softened.
- Add the sliced vegan sausages to the skillet and cook for 3–4 minutes, turning occasionally, until lightly browned on the outside. Stir in the frozen peas and cook for 1 more minute.
- Add the drained gnocchi to the skillet and pour in 1 to 2 cups of gravy, depending on how saucy you like it. Gently toss everything together until well coated. Serve immediately.
Nutrition (Estimate per Serving)
Calories: 290kcalCarbohydrates: 22gProtein: 6gFat: 15gSaturated Fat: 2gPolyunsaturated Fat: 5gMonounsaturated Fat: 7gSodium: 662mgPotassium: 110mgFiber: 2gSugar: 1gVitamin A: 143IUVitamin C: 3mgCalcium: 24mgIron: 2mg
Vegan-ize any recipe!Grab our free vegan cheat sheet, packed with my favorite easy substitutions to make any recipe vegan.
Vegan Chipotle Black Bean Burgers
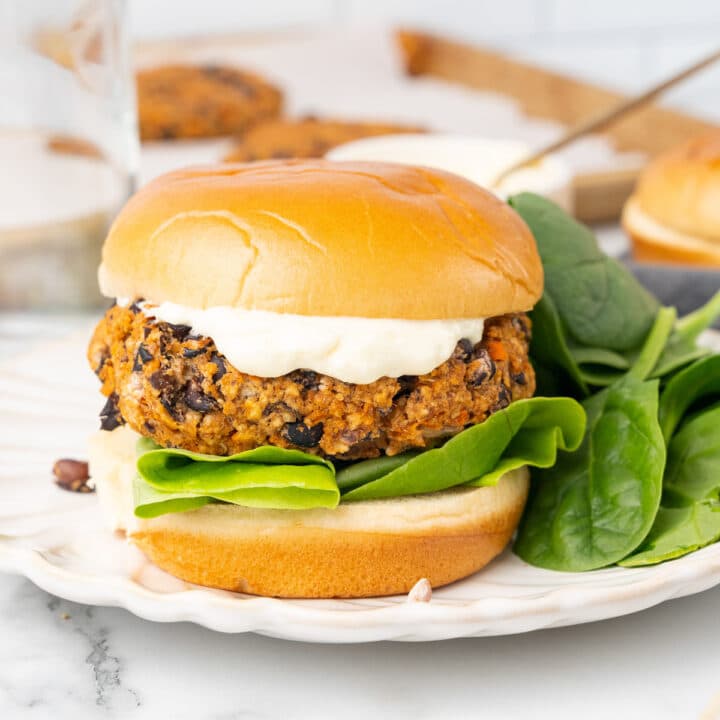
These vegan chipotle black bean burgers are smoky, spicy, and loaded with bold Mexican-inspired flavor - ready in 30 minutes and freezer-friendly too.
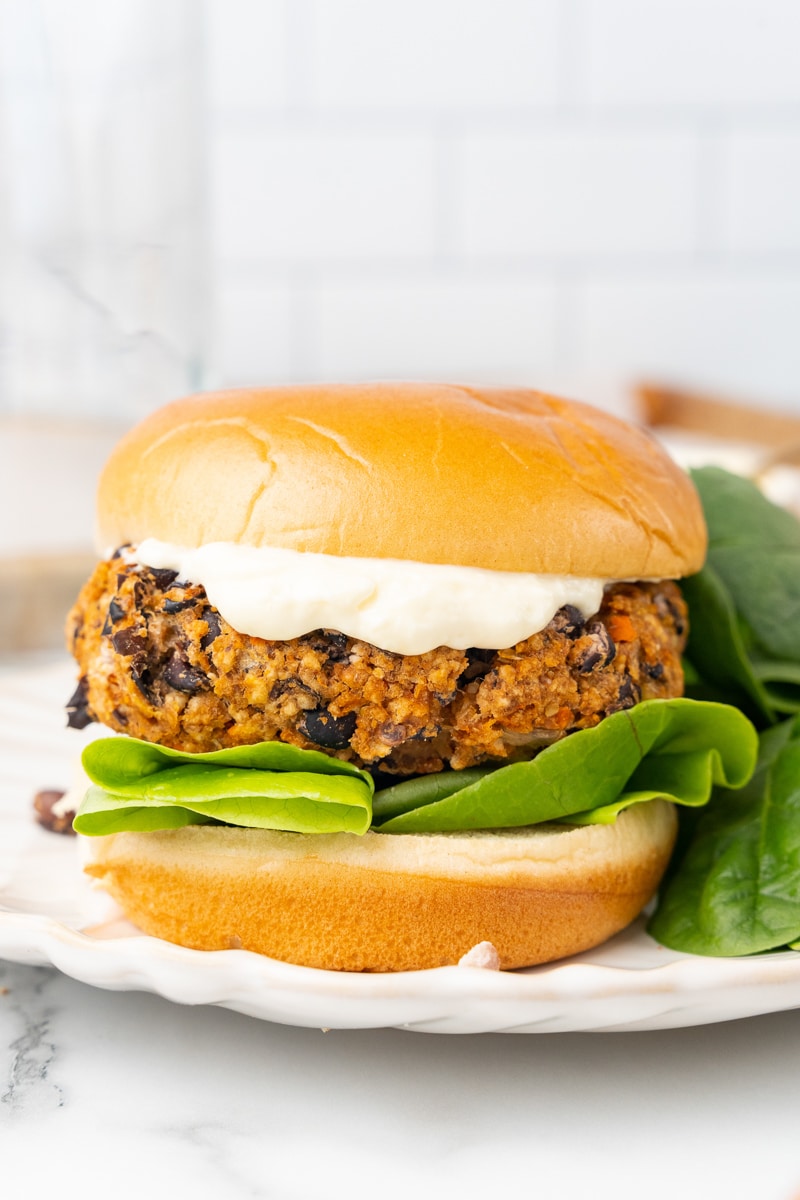
Key Ingredients & Substitutions
- Black beans. The base of the burger - hearty, high in protein, and they mash beautifully. Use canned beans (drained and rinsed) for convenience. Pinto beans or kidney beans can be swapped in if needed.
- Chipotle peppers in adobo. This is the flavor powerhouse of the recipe. Minced chipotle peppers add deep, smoky heat. Start with 2 tablespoons and adjust to your heat tolerance. Chipotle powder alone works as a milder substitute.
- Panko breadcrumbs. Help bind the patties and add a bit of structure. Regular breadcrumbs work fine. For gluten-free, use gluten-free panko or finely ground rolled oats.
- Flax egg. Two tablespoons of ground flaxseed mixed with 3 tablespoons of water creates a binding "egg" that holds the patties together. A chia egg works exactly the same way.
- Vegetables (onion, carrot, celery, garlic). Sautéed aromatics add moisture, sweetness, and body. Feel free to swap in zucchini, bell pepper, or corn.
- Smoked paprika. Layers in more smokiness alongside the chipotle. Regular sweet paprika is a milder option if you're sensitive to heat.
Helpful Tips
Let the flax egg rest. Mix the flaxseed and water before you do anything else - it needs about 5 minutes to gel into an egg-like consistency. Don't skip this step; it's what keeps the patties from falling apart.
Don't over-mash the beans. You want about half the beans mashed to a paste and half left somewhat intact. This gives the patties a great texture - creamy enough to hold, chunky enough to have character. A fork or potato masher works better than a food processor here.
Make evenly sized patties. Divide the mixture into equal portions so all the burgers bake evenly. A ½-cup measure or kitchen scale is helpful. Unevenly shaped patties can end up dry on the edges while underdone in the center.
Chill before baking if possible. If you have 15-20 minutes, refrigerate the shaped patties before baking. This helps them hold their shape better in the oven.
Finish in a skillet for crispier results. After baking, sear each patty in a hot dry skillet for 1-2 minutes per side. It gives them a crispier exterior that holds up beautifully under all your toppings.
Also worth trying: our Italian-style vegan sausage and peppers.
Also worth trying: our vegan sloppy joes.
Also worth trying: our gently curried tofu burgers.
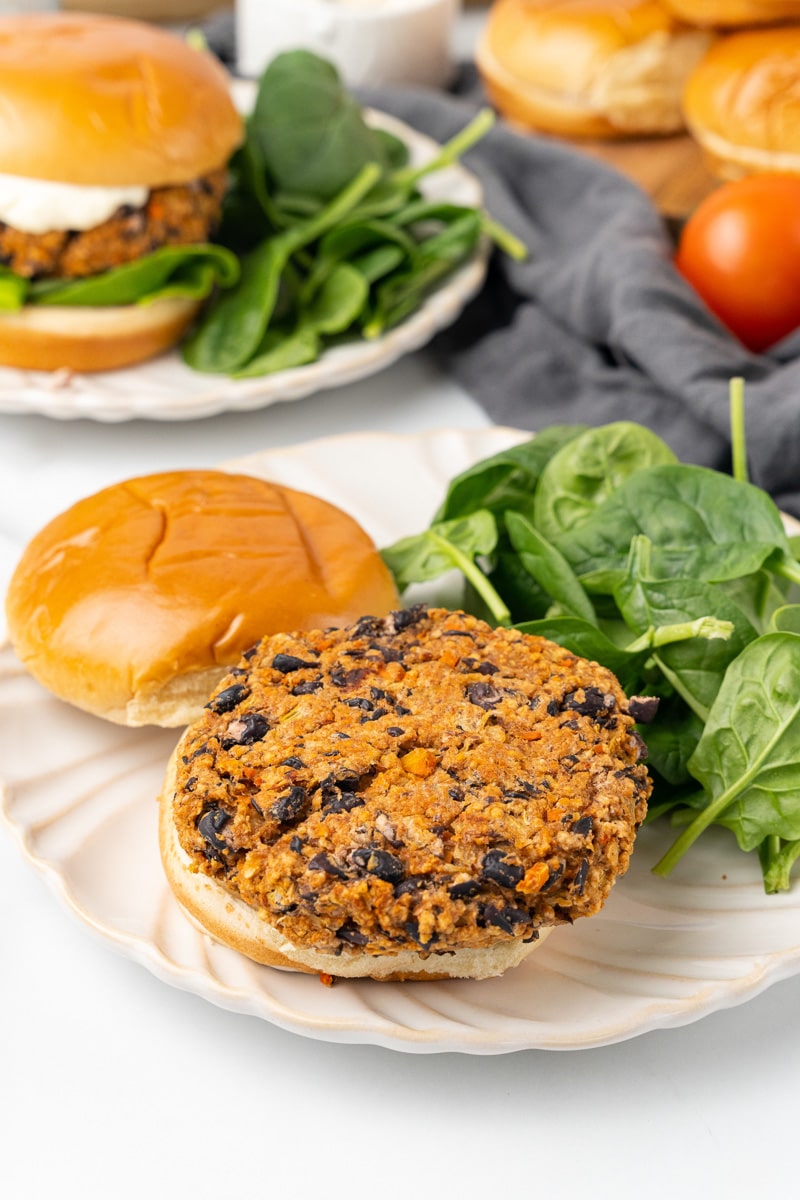
Variations
- Extra smoky. Add a teaspoon of liquid smoke to the mixture along with the chipotle. Intense, campfire-worthy flavor.
- Milder version. Use just one teaspoon of chipotle powder instead of the minced peppers in adobo, and skip the chili powder. Still flavorful, much gentler heat.
- Roasted veggie version. Instead of sautéing, roast the onion, carrot, and garlic at 400°F until caramelized before adding to the mix. Deeper, more complex flavor.
- Loaded with corn and peppers. Stir in ¼ cup of frozen corn and a finely diced roasted red pepper for a Southwestern twist with more color and sweetness.
- Slider size. Use a ¼-cup measure to form smaller patties and reduce baking time to about 15 minutes total. Great for parties.
- Pan-fried. Skip the oven entirely and cook in a thin layer of olive oil over medium heat, about 4 minutes per side, until deeply golden.
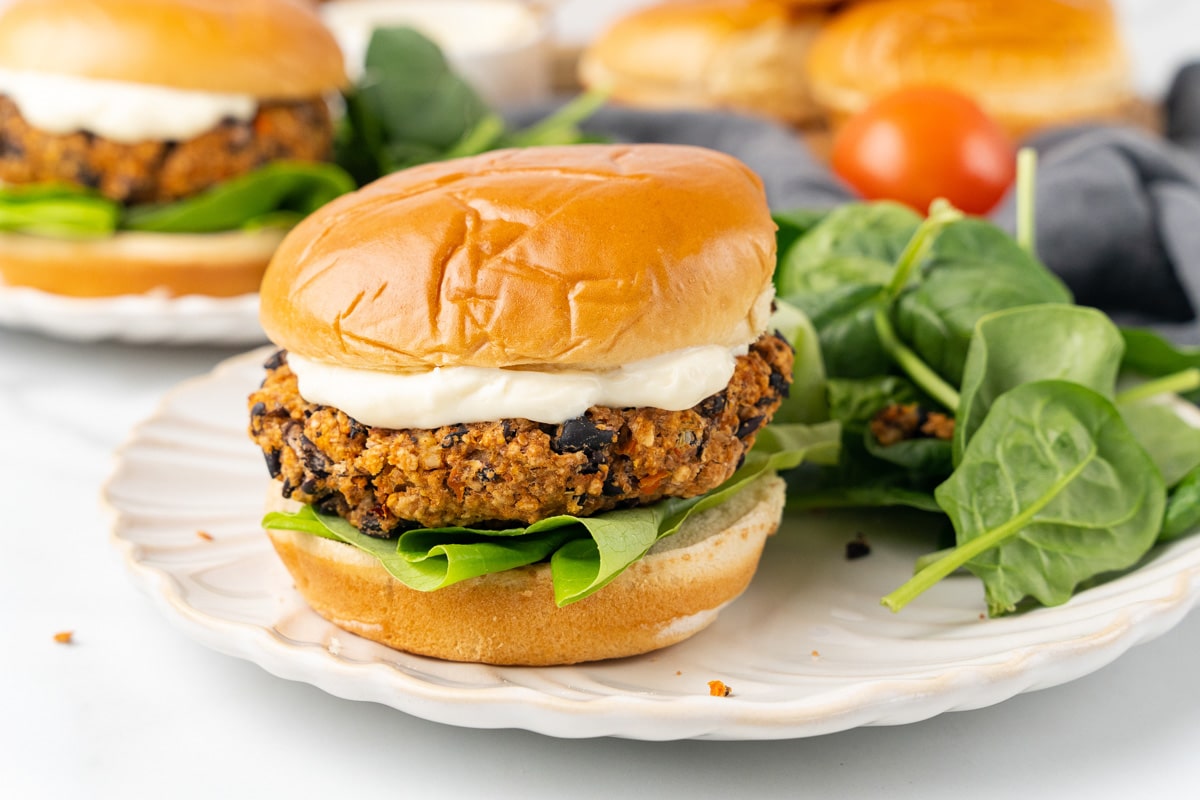
Serving Ideas
Pile these on toasted buns with Copycat Vegan Big Mac Sauce, sliced avocado, pickled jalapeños, and shredded lettuce for a full loaded burger experience. A dollop of vegan sour cream or guacamole on top takes it even further. The smoky chipotle flavor pairs especially well with Easy Vegan Coleslaw served on the side or right on top of the patty.
These also work brilliantly in lettuce wraps for a lower-carb option, crumbled over a taco salad, or sliced and tucked into a pita with salsa and greens. Don't overlook serving them plain alongside roasted sweet potato wedges and a simple salad - they're substantial enough to shine without any bun at all.
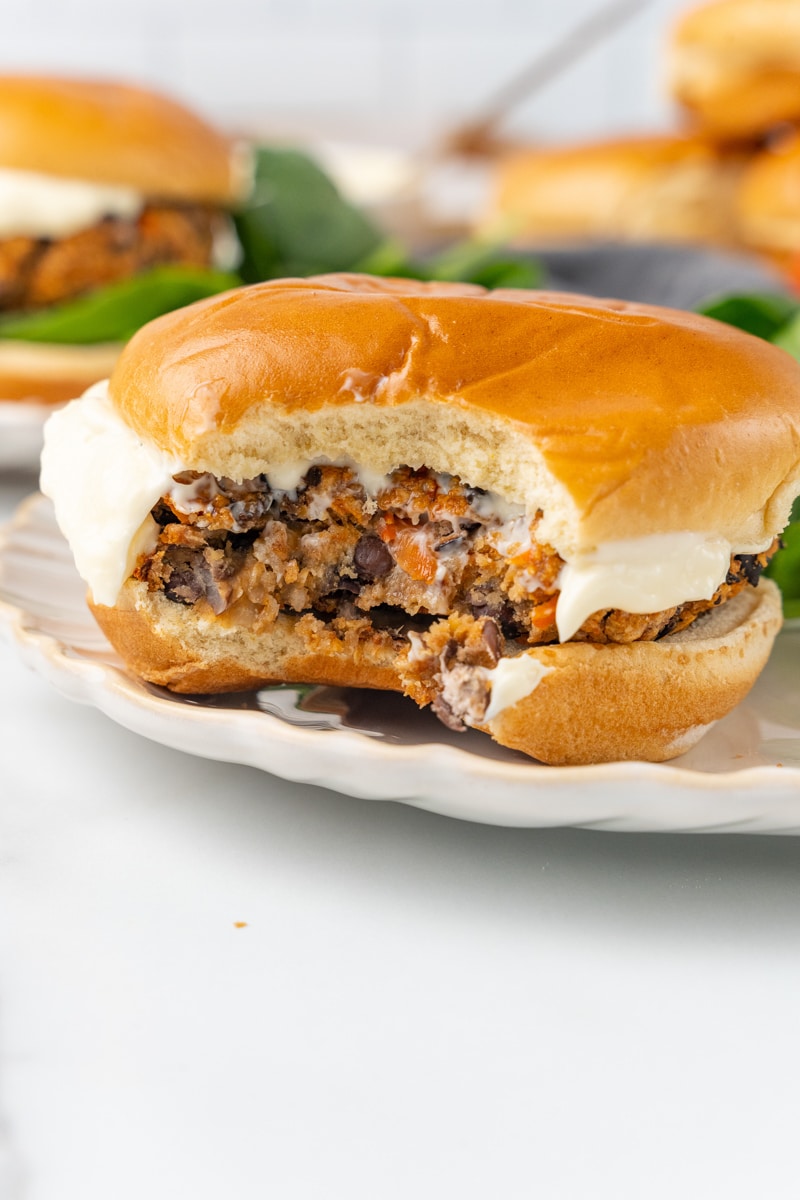
Storing & Freezing
Store cooked patties in an airtight container in the refrigerator for up to 4 days. Reheat in a skillet over medium heat for 2-3 minutes per side, in the oven at 350°F for about 10 minutes, or in the microwave. They stay moist and flavorful reheated any way.
These freeze exceptionally well. Cool completely, then wrap each patty individually in plastic wrap and place in a freezer bag, squeezing out excess air. They'll keep for up to 3 months. Thaw overnight in the fridge, or bake from frozen at 375°F for 12-15 minutes.
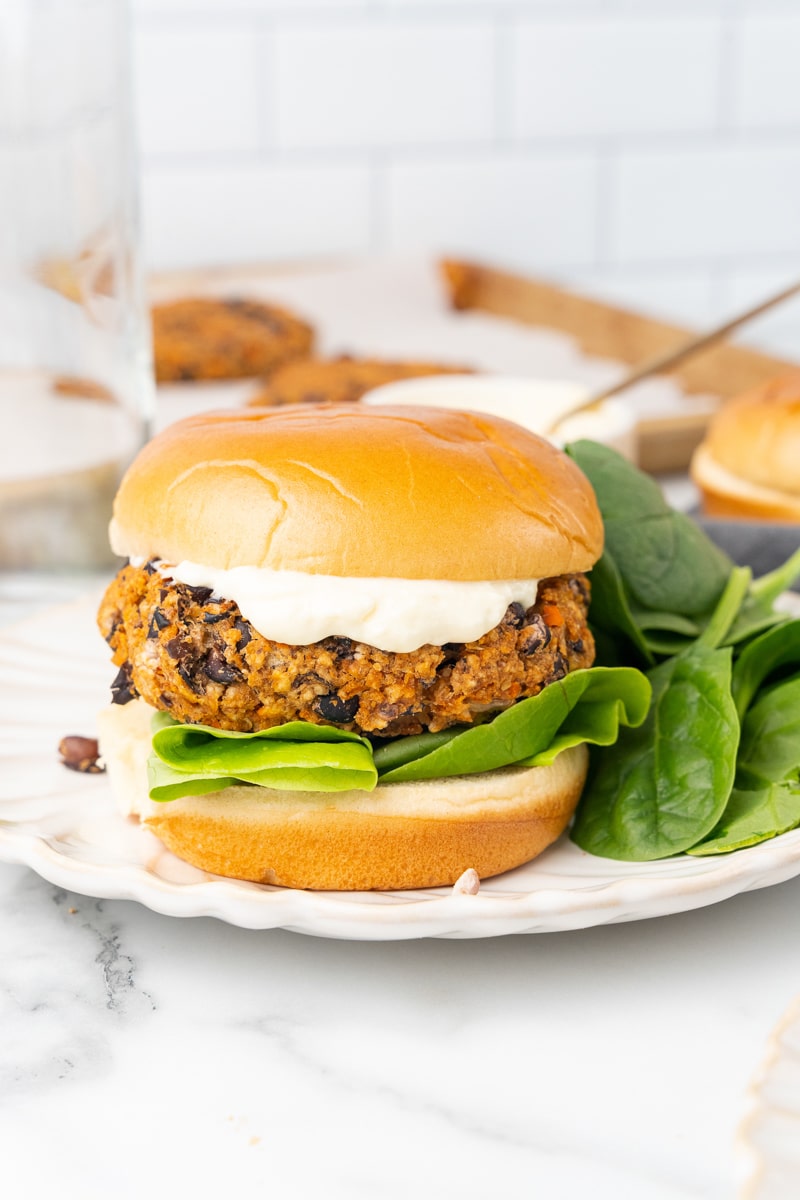
More Vegan Burger Recipes
If you loved this recipe, check out our full collection of the best vegan burger recipes, including our quinoa and wild rice burgers and our vegan beet burgers - or here are a few more individual favorites:
- Vegan Quinoa Mushroom Burger
- Baked Chickpea Burgers
- Easy Vegan Portobella Burgers
- Vegan Chickpea Patties
- Best Vegan Burger Recipes
Recipe
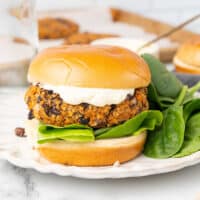
Vegan Chipotle Black Bean Burgers
These smoky vegan chipotle black bean burgers are packed with bold Mexican-inspired flavor, ready in 30 minutes, and completely freezer-friendly.
Print
Pin
Save
Servings: servings
Equipment
- Potato masher optional
- Baking tray
Ingredients
- 1 tablespoon olive oil
- 1 onion finely diced
- 1 carrot finely diced
- 1 stalk celery minced
- 2 cloves garlic minced
- 19 oz black beans canned, rinsed and drained
- 1 cup panko breadcrumbs
- 2 tablespoons ground flaxseed + 3 tablespoons water
- 2 tablespoons chipotle pepper in adobo minced
- 1 teaspoon chipotle chili powder
- 1 teaspoon smoked paprika
For serving (optional)
- vegan mayonnaise
- burger buns
- lettuce
Instructions
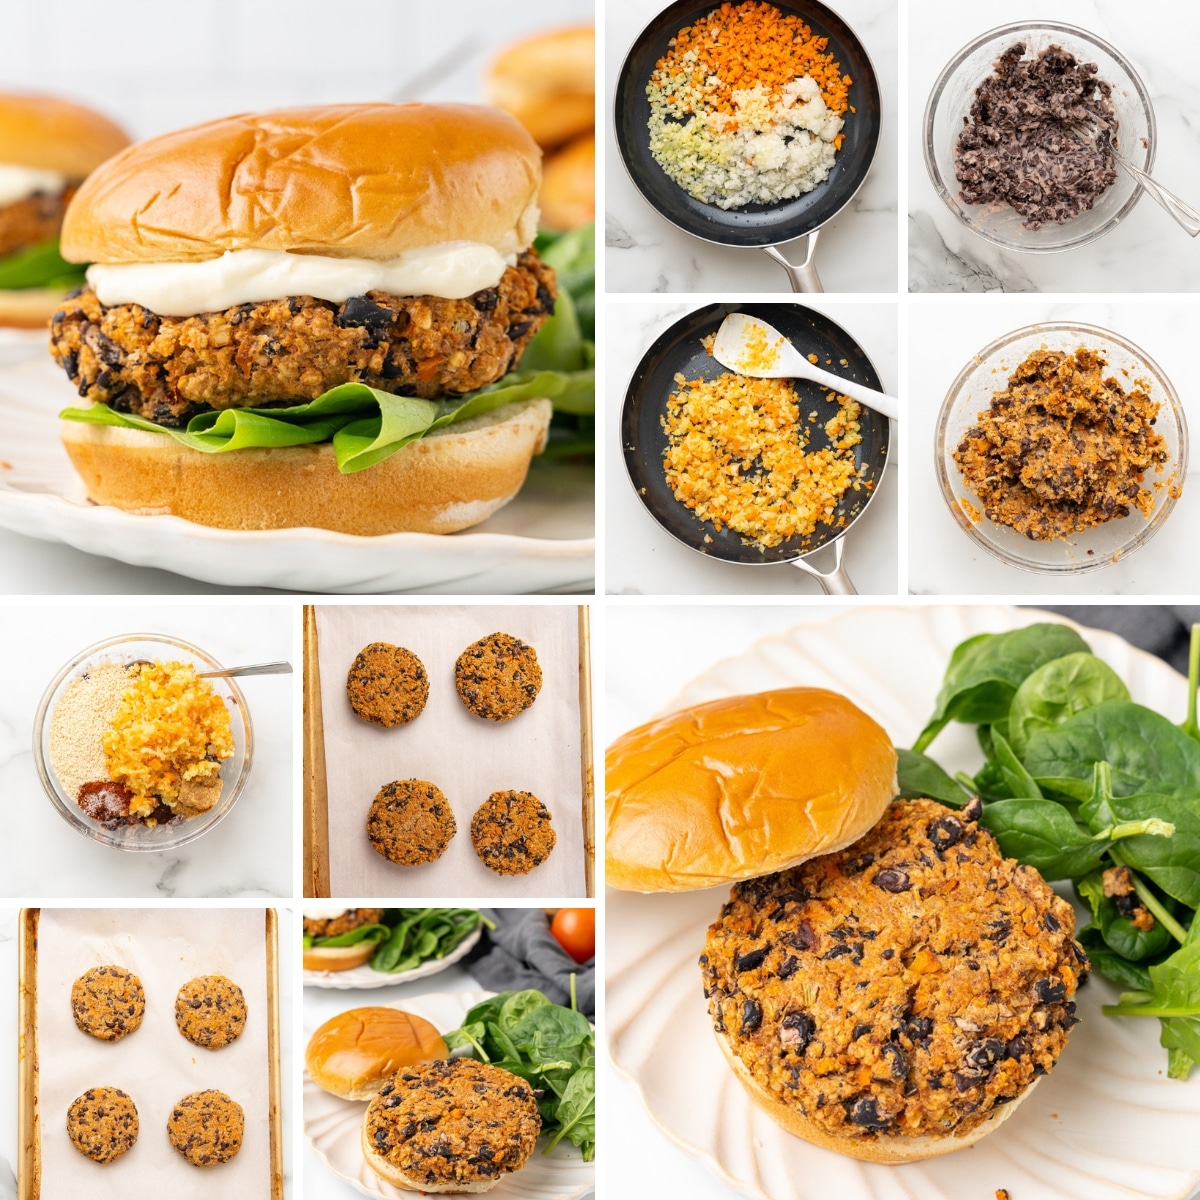
- Preheat oven to 375 F, line a baking sheet with parchment and set aside
- Mix together the flax seed and 3 tablespoon water in a small bowl. Set aside. (This is your "flax egg".)
- In a larger pan over medium heat, heat the olive oil, then add the onion, carrot, celery and garlic.
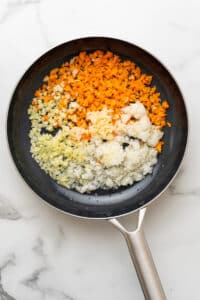
- Cook, stirring frequently, until the vegetables are softened.

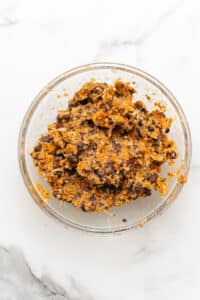
- Mash the black beans in a large bowl
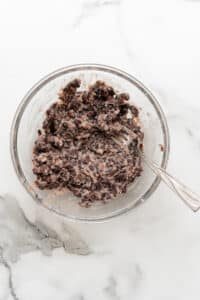
- Then mix in the cooked veggies along with panko, flax egg, chipotles, chili powder and paprika.
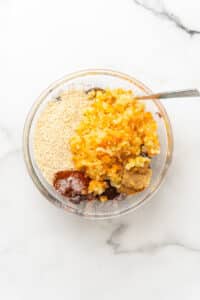
- Mix until fully combined.
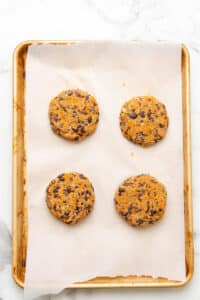
- Form into four large patties and place onto prepared baking sheet.
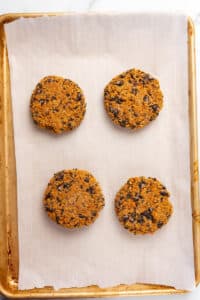
- Bake in preheated oven for 20 minutes, flipping once halfway through.
- Serve warm on buns with vegan mayo, lettuce, and any other toppings desired
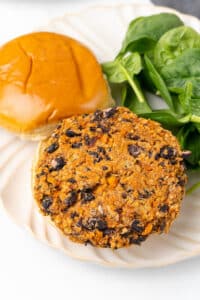
Nutrition (Estimate per Serving)
Calories: 286kcalCarbohydrates: 43gProtein: 13gFat: 8gSaturated Fat: 1gPolyunsaturated Fat: 3gMonounsaturated Fat: 3gSodium: 678mgPotassium: 645mgFiber: 15gSugar: 4gVitamin A: 2953IUVitamin C: 7mgCalcium: 113mgIron: 4mg
Vegan-ize any recipe!Grab our free vegan cheat sheet, packed with my favorite easy substitutions to make any recipe vegan.
Vegan Quinoa Mushroom Burger
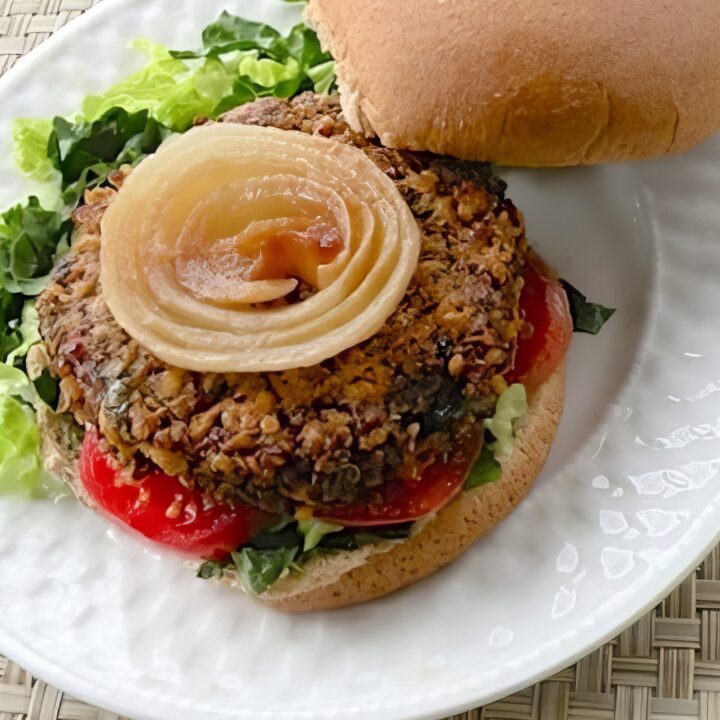
These vegan quinoa mushroom burgers are hearty, protein-packed, and deeply savory - the kind of burger that wins over skeptics without trying to imitate meat.
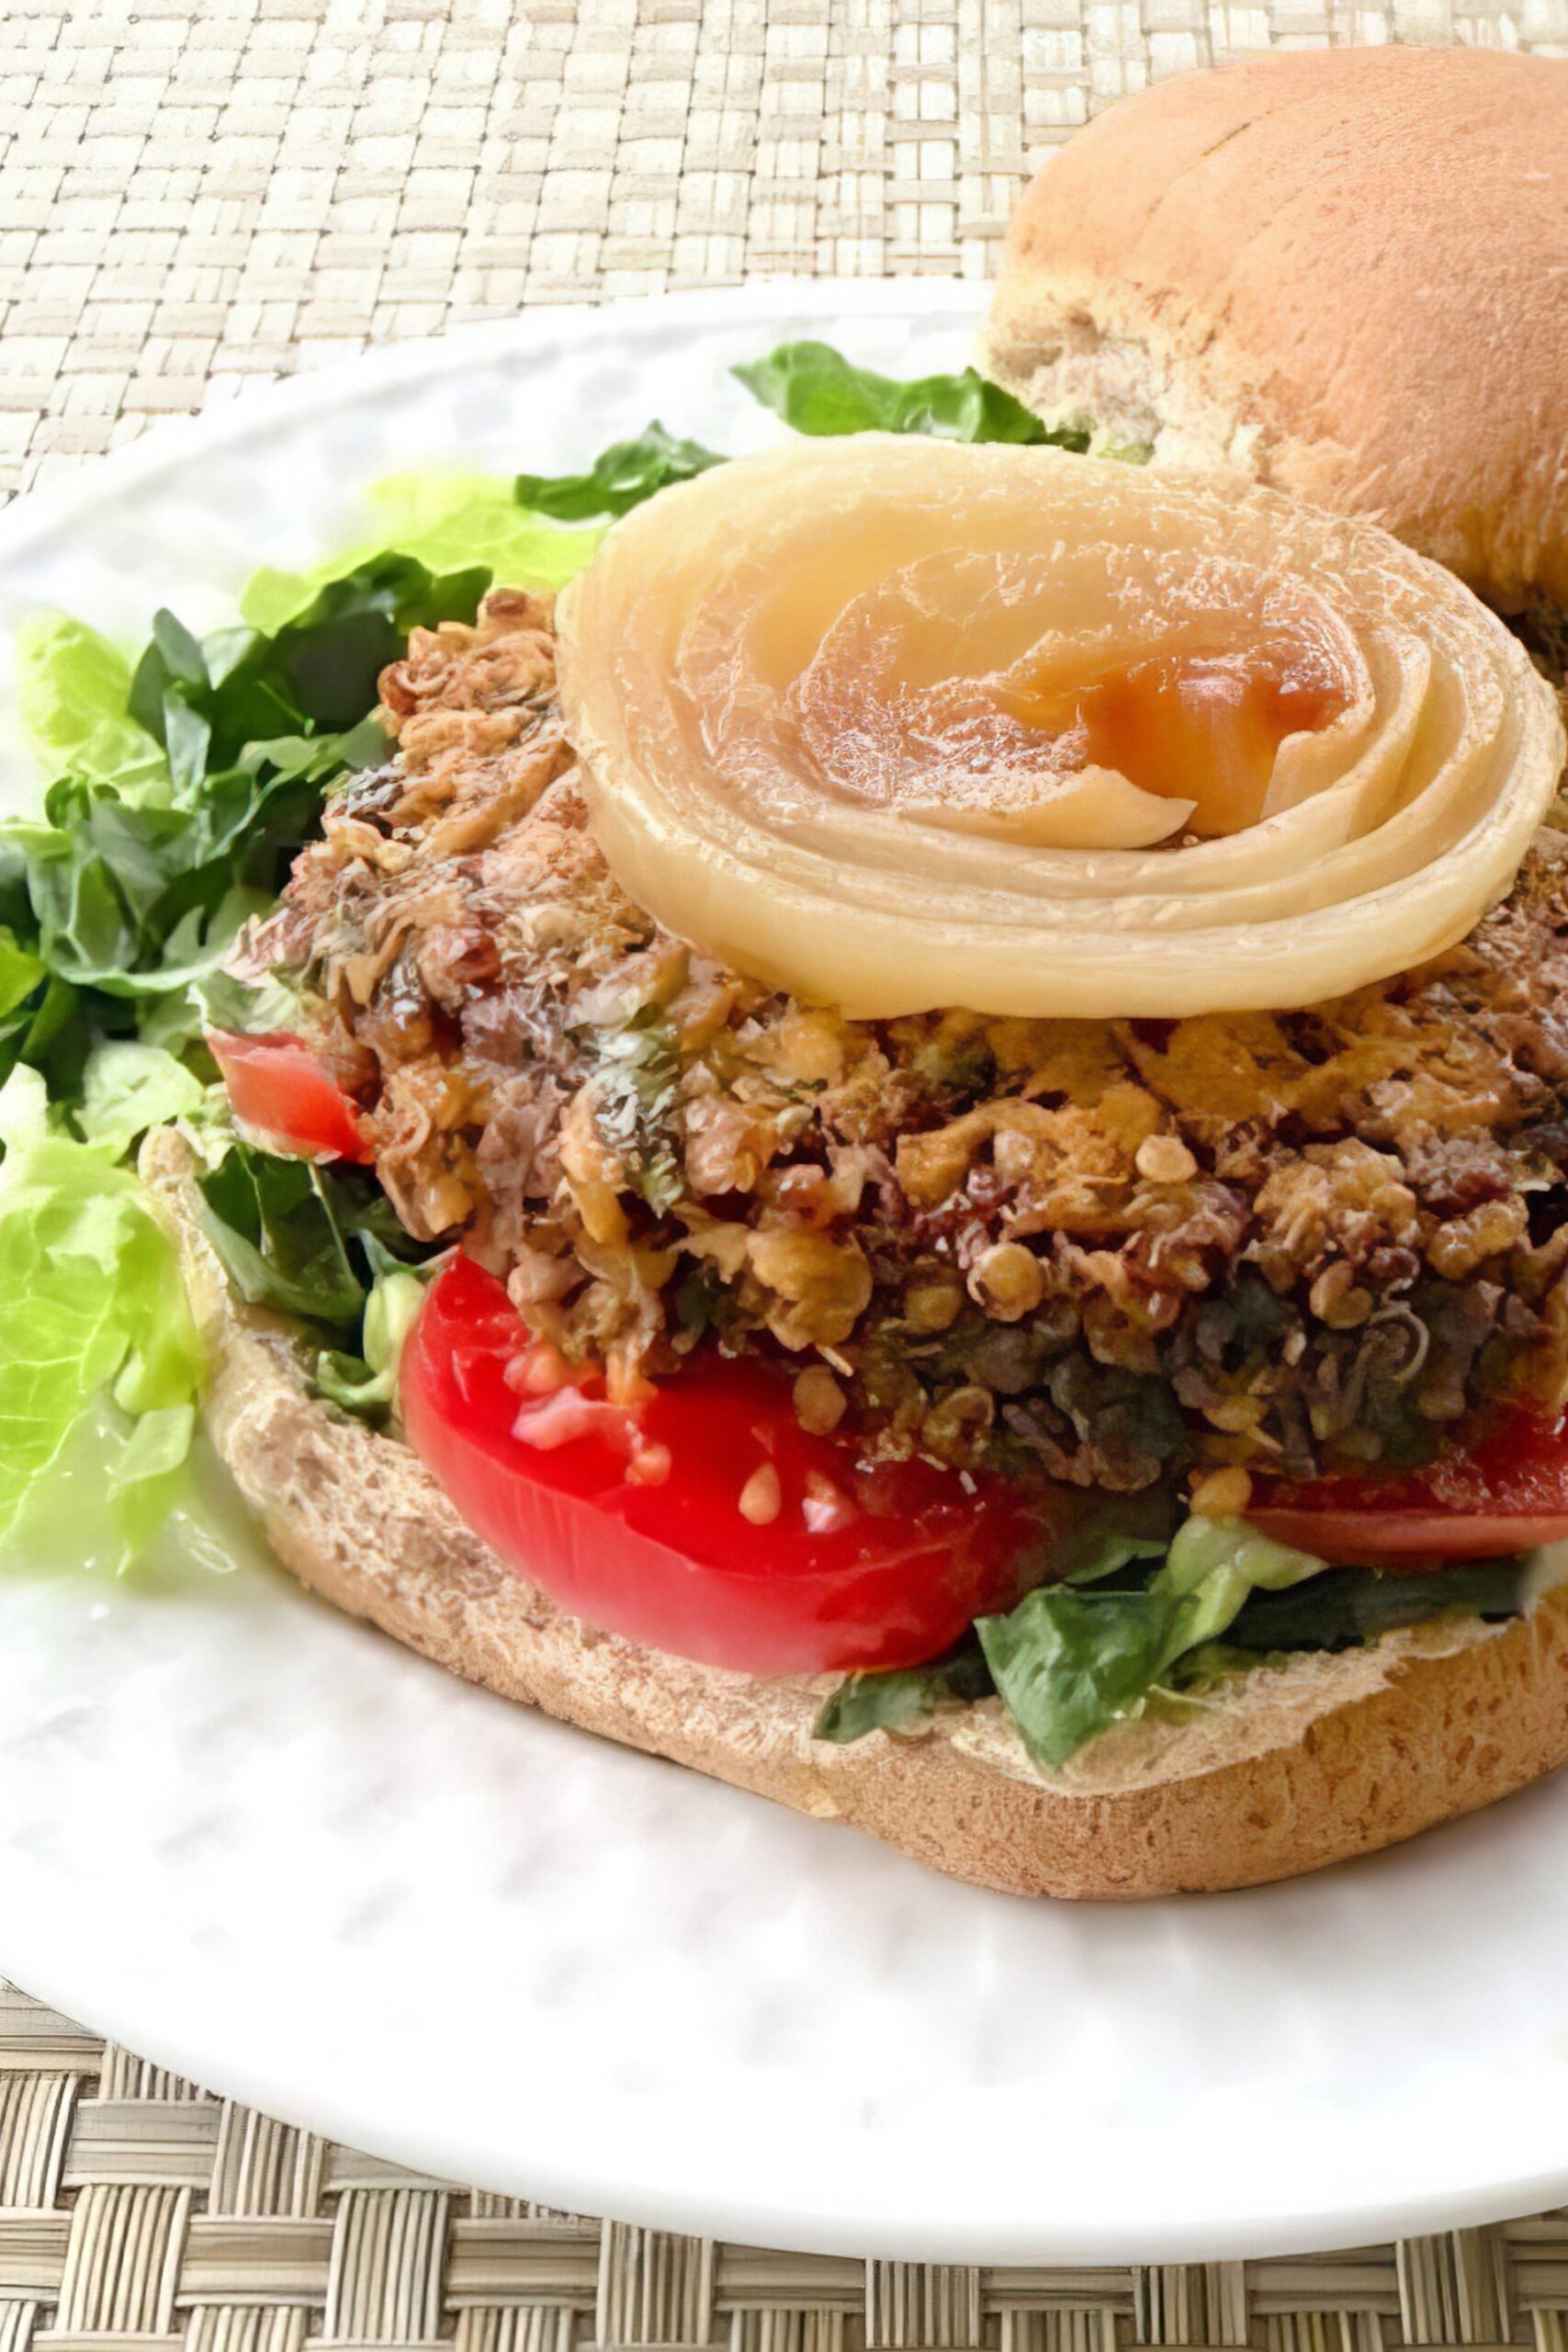
Key Ingredients & Substitutions
- Quinoa. Cooked quinoa gives the burgers structure and a mild, nutty flavor while packing in complete protein. Any color of quinoa works - white, red, or tri-color. Leftover cooked quinoa is perfect here.
- Brown lentils. Lentils add earthiness, protein, and binding power. Use canned lentils (drained and rinsed) to save time, or cook them from dry. Green lentils work equally well.
- White mushrooms. Chopped and sautéed mushrooms add a savory, meaty depth that makes these burgers genuinely satisfying. Cremini or baby bella mushrooms can be swapped in for even more flavor.
- Marinara sauce. Acts as a binder and adds moisture and flavor. Any jarred or homemade marinara works. Tomato paste thinned with a little water is a quick substitute.
- Quick-cooking oats. Help bind everything together and keep the texture cohesive. Quinoa flakes make a great gluten-free swap.
- Mesquite seasoning. This is the secret flavor weapon - smoky, bold, and deeply savory. Any barbecue-style seasoning blend works in its place.
Helpful Tips
Prep grains ahead. The quinoa and lentils can both be cooked a day or two in advance and kept in the fridge. This turns what feels like a project into a quick weeknight dinner - the actual assembly and baking takes under 45 minutes once everything is cooked.
Don't over-process the mushroom-lentil mixture. You want the food processor to chop the mixture finely, not puree it. Pulse in short bursts and stop when it looks coarsely ground. A little texture goes a long way toward a better burger.
Use a measuring cup to shape. A round ½-cup measuring cup coated lightly with cooking spray makes perfectly uniform patties every time. Invert onto parchment and flatten to about ½ inch thick. For sliders, use a ¼-cup measure instead.
Let them cool slightly before serving. These burgers firm up considerably as they cool - they're more cohesive and easier to eat after 5 minutes out of the oven than straight off the sheet pan.
They freeze beautifully. Bake a full batch, cool completely, then freeze in a single layer on a sheet pan before transferring to a zip bag. Reheat from frozen in a 375°F oven for 10-12 minutes, or in a skillet over medium heat.
Also worth trying: our gently curried tofu burgers.
Variations
- Smoky chipotle version. Add 1-2 teaspoons of chipotle powder and swap the marinara for salsa for a spicy Southwestern spin. These pair great with guacamole and lime.
- Italian-style. Season with Italian herbs (oregano, basil, fennel seed) and swap the mesquite for sun-dried tomato paste. Serve with marinara for dipping instead of ketchup.
- Mushroom-walnut burgers. Replace half the lentils with finely chopped toasted walnuts for extra richness and a slightly meatier texture.
- Pan-fried version. Shape into thinner patties and cook in a little olive oil over medium heat for 3-4 minutes per side until golden and crispy on the outside.
- Slider size. Use a ¼-cup measure and reduce the baking time slightly - about 12 minutes per side. Perfect for parties or lunchboxes.
Serving Ideas
Serve on whole-grain buns or toasted English muffins with classic burger fixings - mustard, ketchup, shredded lettuce, sliced tomato, and red onion. A smear of Copycat Vegan Big Mac Sauce takes things to the next level. A dollop of Quick Tartar Sauce also works surprisingly well with the savory mushroom flavor.
These are just as good served without a bun - try them over a bed of greens with a drizzle of your favorite dressing, or alongside Easy Vegan Coleslaw and roasted sweet potatoes for a full plate. Since they hold up at room temperature, they're great for meal prep and pack well for lunch.
Storing & Freezing
Store leftover burgers in an airtight container in the refrigerator for up to 4 days. Reheat in a skillet over medium heat or in a 350°F oven for about 10 minutes. They're also surprisingly good eaten cold or at room temperature straight from the fridge.
These burgers freeze exceptionally well. Cool them completely, then freeze flat on a baking sheet until solid before transferring to a freezer bag or container. They'll keep for up to 3 months. Reheat directly from frozen in the oven at 375°F for 10-12 minutes per side, or thaw overnight in the fridge first.
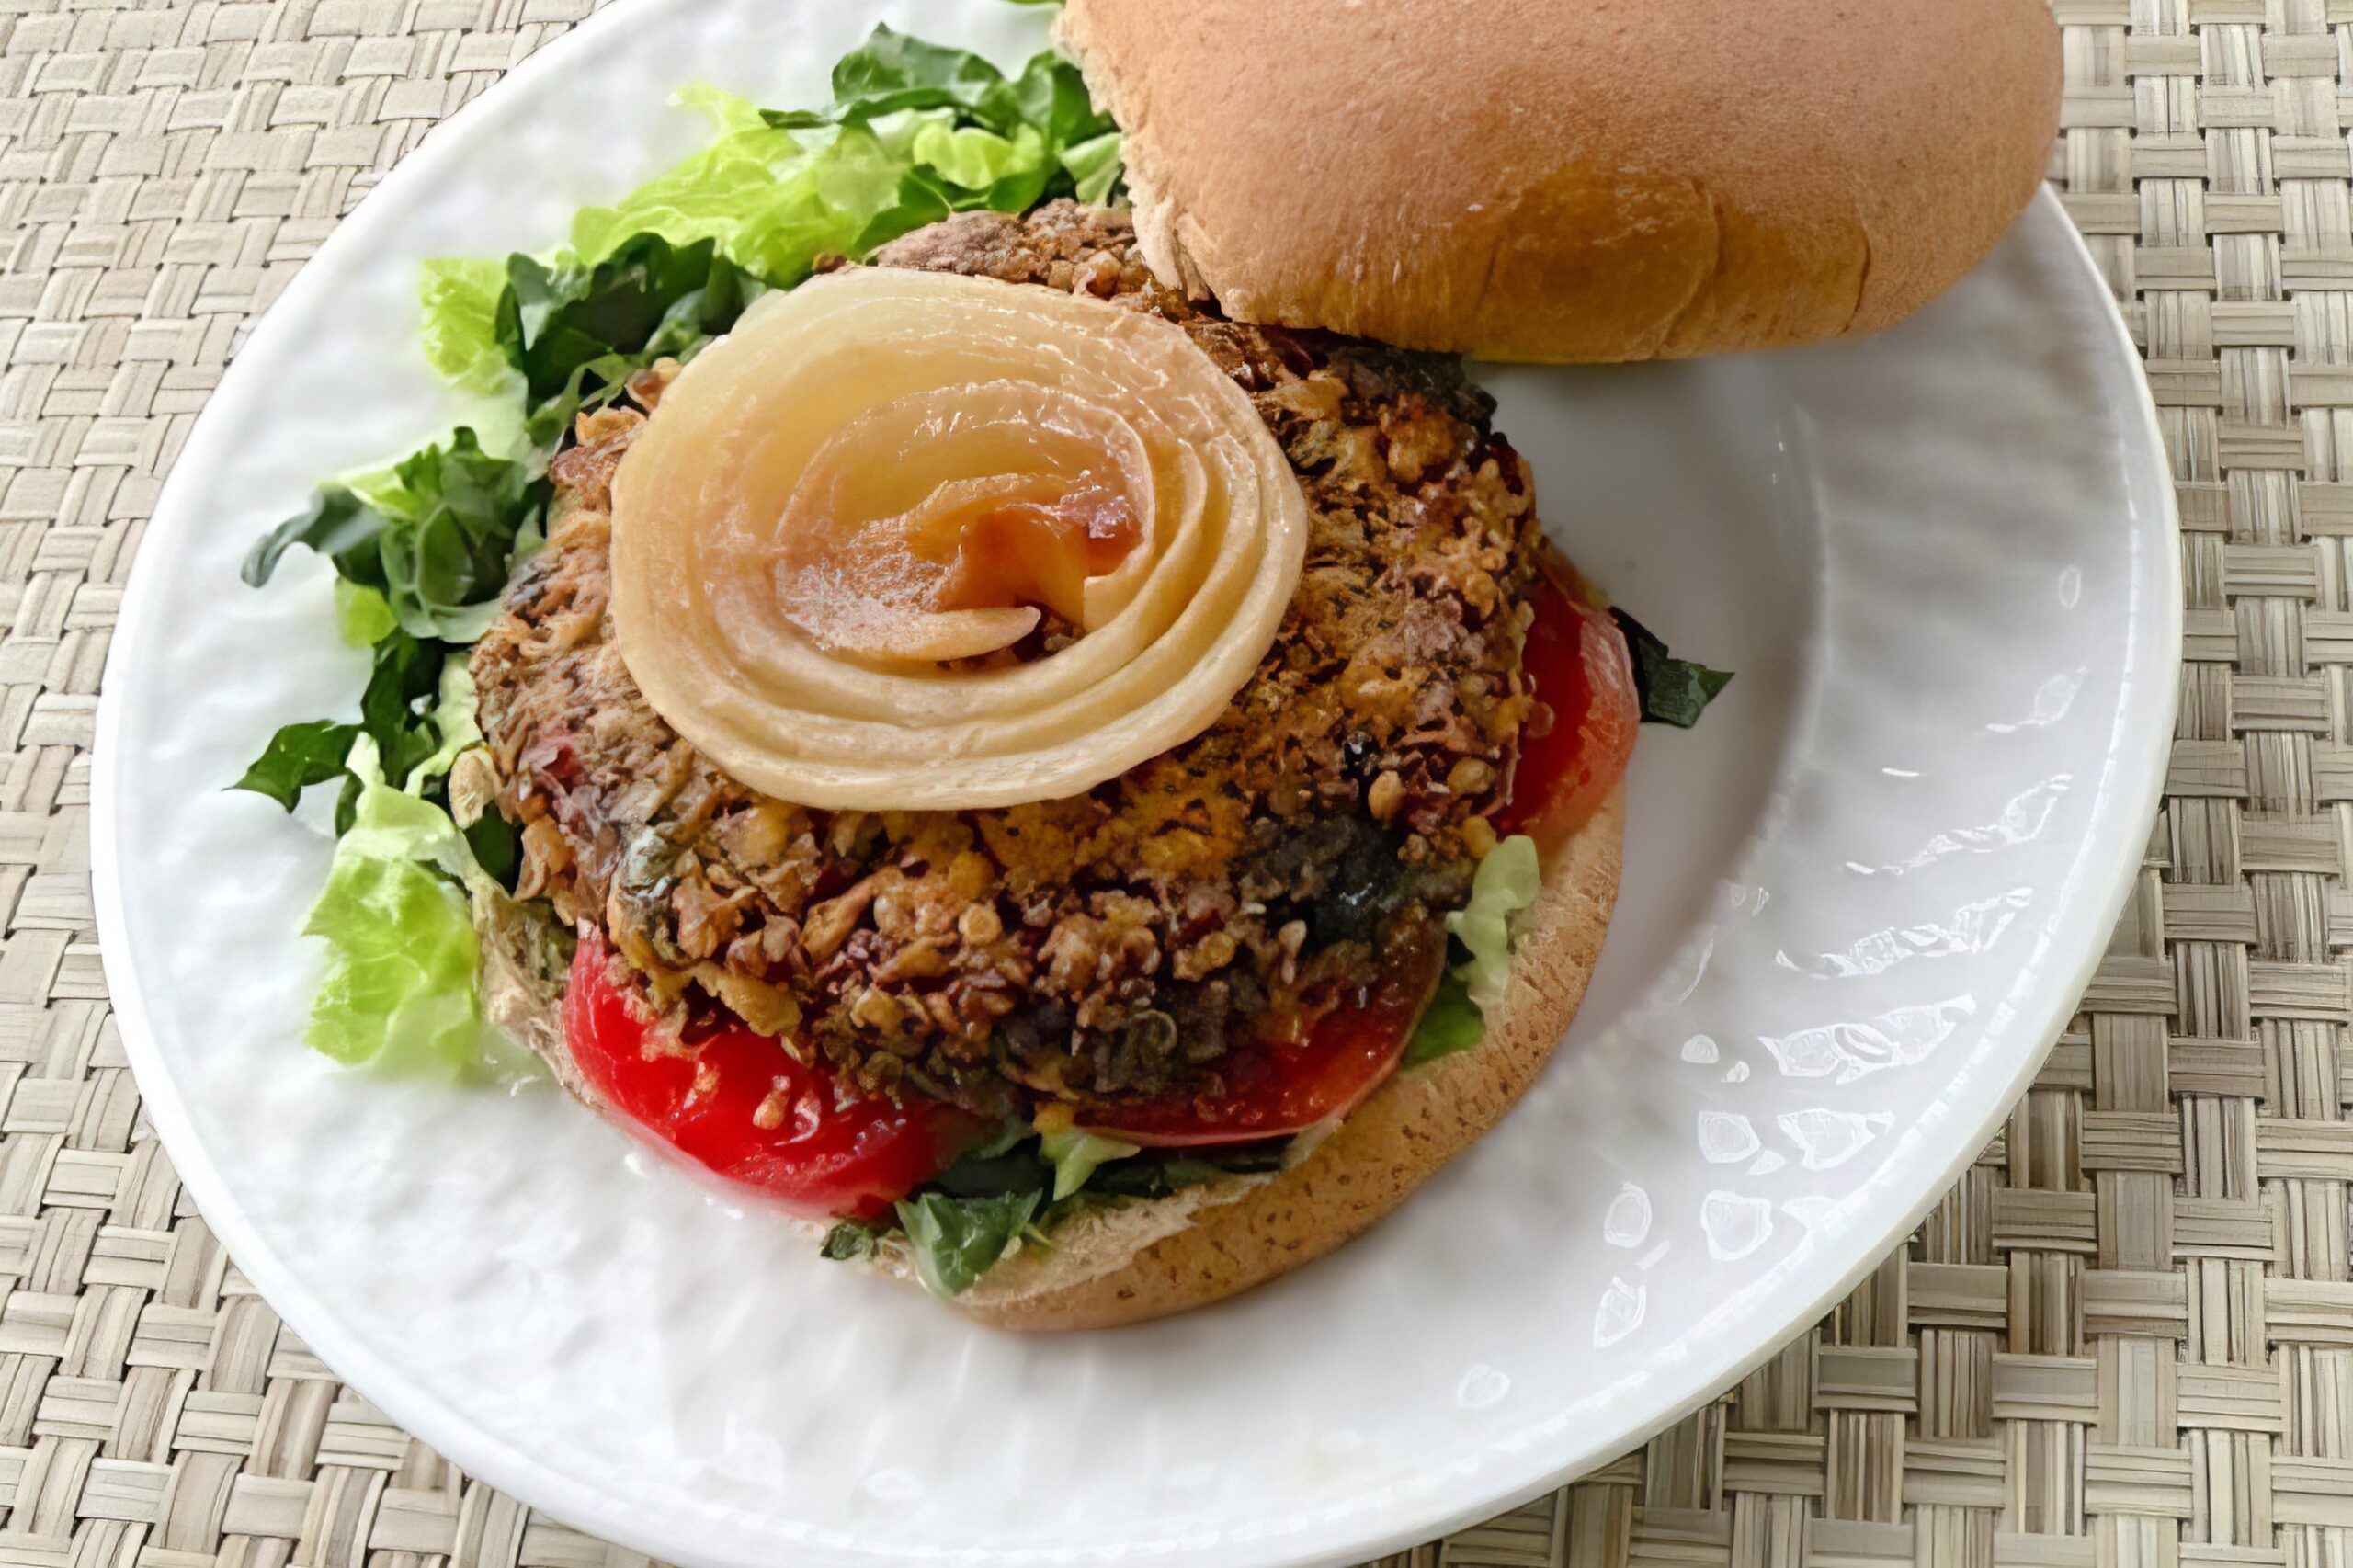
More Vegan Burger Recipes
If you loved this recipe, check out our full collection of the best vegan burger recipes, including our easy portobello burgers and our vegan beet burgers - or here are a few more individual favorites:
- Vegan Chipotle Black Bean Burgers
- Baked Chickpea Burgers
- Vegan Chickpea Patties
- Easy Vegan Portobella Burgers
- Best Vegan Burger Recipes
Recipe
Vegan Quinoa Mushroom Burger
These hearty vegan quinoa mushroom burgers are packed with protein from quinoa and lentils, with savory mushrooms and bold smoky seasonings. Easy to make ahead and freezer-friendly.
Print
Pin
Save
Servings: burgers
Ingredients
- 1 tablespoon olive oil
- 1 onion finely chopped
- 2 cloves garlic minced
- 8 ounces white mushrooms cleaned and coarsely chopped
- 1 ½ cups cooked brown lentils or one 15-oz can, drained and rinsed
- 2 cups cooked quinoa
- ½ cup marinara sauce jarred or homemade
- ⅔ cup quick-cooking oats or quinoa flakes for gluten-free
- 1 teaspoon smoked paprika
- 2 teaspoons mesquite seasoning or other barbecue-style seasoning blend
- 1 teaspoon garlic powder
- 1 teaspoon onion powder
- salt and pepper to taste
Instructions
- Preheat the oven to 425°F. Line a baking sheet with parchment paper.
- Heat the oil in a medium skillet over medium heat. Add the onion and sauté until translucent, about 5 minutes. Add the garlic and continue cooking until the onion is golden, 2–3 minutes more.
- Add the mushrooms to the skillet and cover. Cook until wilted, about 5 minutes. Drain any liquid from the skillet, then transfer the mushroom-onion mixture to a food processor along with the cooked lentils. Pulse on and off until the mixture is finely chopped but not pureed.
- Transfer the mixture to a large bowl. Add the cooked quinoa, marinara sauce, oats, smoked paprika, mesquite seasoning, garlic powder, and onion powder. Season with salt and pepper. Mix until evenly combined.
- Lightly oil a round ½-cup measuring cup. Scoop a level portion of the mixture and invert onto the prepared baking sheet, tapping firmly to release. Flatten to about ½-inch thickness with the bottom of the cup. Repeat with remaining mixture.
- Bake for 15 minutes, then carefully flip each burger and bake for another 10–15 minutes, until golden and firm on each side. Let cool for 5 minutes before serving.
Nutrition (Estimate per Serving)
Calories: 103kcalCarbohydrates: 13gProtein: 3gFat: 3gPolyunsaturated Fat: 1gMonounsaturated Fat: 1gSodium: 18mgPotassium: 208mgFiber: 2gVitamin A: 14IUCalcium: 13mgIron: 1mg
Vegan-ize any recipe!Grab our free vegan cheat sheet, packed with my favorite easy substitutions to make any recipe vegan.
Vegan Beet Burgers
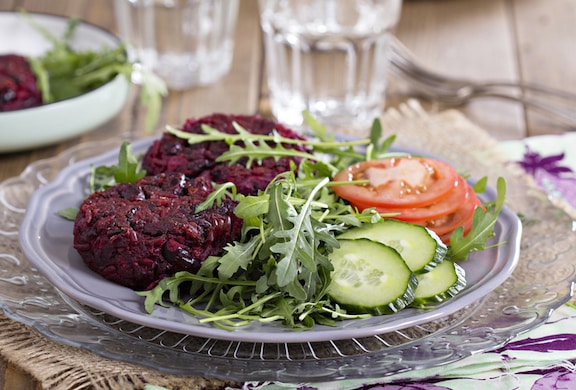
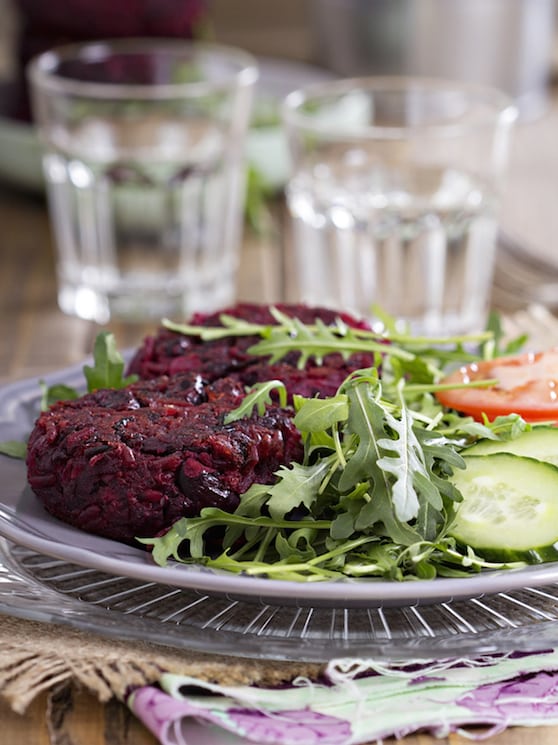
These vegan beet burgers are impossibly vibrant, packed with cumin and smoked paprika, and hearty enough to satisfy even the most skeptical dinner guest at the table.
Key Ingredients & Substitutions
- Fresh beets. The star of the show - cooked and then pulsed in the food processor to create that gorgeous deep-red base. You can microwave, boil, or roast the beets; all methods work, though roasting gives the most concentrated, sweet flavor. No need to peel before cooking - just scrub well and peel after.
- Kidney or red beans. These provide the binding and protein. Red kidney beans blend into the beet color seamlessly. Chickpeas or black beans can be substituted; black beans will give a slightly earthier flavor, while chickpeas yield a firmer, drier texture.
- Quick-cooking oats. Half are soaked in boiling water to act as a binder; the other half go in dry for extra texture. Certified gluten-free oats work for a GF version. Don't use rolled oats - they're too thick and won't blend properly.
- Smoked paprika. This is what takes these burgers from good to memorable. It adds a subtle smokiness that pairs beautifully with the earthy beet. Mesquite seasoning is a direct substitute, or use sweet paprika if smoked isn't available (though you'll lose that depth).
- Ground cumin. Adds warmth and a slightly nutty, savory quality. Don't skip it - it's part of what makes these taste like a real burger rather than just beet patties.
- Scallions. Provide a mild, fresh onion note on top of the sautéed red onion. You can substitute a bit of extra red onion, though scallions give a brighter flavor.
Helpful Tips
Don't over-process in the food processor. Pulse the mixture until finely chopped and combined - you want it cohesive but still with some texture. If you run the machine too long, you'll end up with a smooth paste that makes the patties dense and gummy rather than holding a pleasant, slightly chunky texture.
Pack the measuring cup tightly. The key to a patty that holds its shape is packing the beet mixture firmly into the measuring cup before inverting it onto the baking sheet. Loose packing leads to crumbling. A firm tap to release it, then a gentle press to flatten to about half an inch, and you're set.
Let them get a real crust before flipping. At the 15-minute mark, look for the edges to be visibly browning before you flip. A fully formed bottom crust is what keeps the burger intact through the second side of baking. If it looks pale, give it another 2-3 minutes.
Adjust seasonings before shaping. After mixing everything together, taste the unbaked mixture and bump up the cumin, paprika, or salt as needed. The flavors mellow a bit during baking, so it should taste slightly bold raw.
Pan-fry for an even crispier exterior. These bake beautifully, but for an extra-crisp crust, cook them in a thin layer of olive oil in a skillet over medium-high heat for about 4-5 minutes per side instead. The contact with the hot pan gives a darker, crunchier exterior.
Also worth trying: our garlic mustard vinaigrette.
Variations
- Add walnuts. Pulse ¼ cup of walnuts into the food processor along with the beets. They add healthy fat, a meaty richness, and help the patty hold together even better.
- Make them spicy. Add ¼ teaspoon of cayenne and a pinch of red pepper flakes. Serve with creamy vegan coleslaw to balance the heat.
- Slider version. Use a ¼-cup measure instead of ½-cup to make about 12 slider-sized patties. Great for parties - stack them on small buns with a swipe of hummus and a pickle.
- Mediterranean style. Add 2 tablespoons of chopped kalamata olives and swap the cumin for dried oregano. Serve in pita with tahini sauce and diced cucumber.
- Add quinoa. Replace ¼ cup of the oats with cooked quinoa for extra protein and a slightly nuttier flavor. The patties will be a bit more delicate, so handle carefully.
- Boost with sun-dried tomatoes. Add 2-3 oil-packed sun-dried tomatoes to the food processor. They deepen the umami and add a concentrated, savory richness.
Serving Ideas
These are stunning on a whole-grain bun - the deep red against white vegan mayo and green lettuce looks almost too good to eat. Load them up with classic burger toppings like sliced red onion, pickles, and mustard, or keep it simple with just avocado and a drizzle of copycat vegan burger sauce. A tangy vegan tartar sauce is also a classic pairing that Nicole has always recommended for these.
They work just as well without a bun. Serve them on a bed of mixed greens with beets and walnuts and a light lemon vinaigrette for a complete, restaurant-worthy plate. Or go the grain bowl route - break one patty up over cooked farro or quinoa with roasted vegetables and tahini dressing. The earthy beet flavor ties everything together beautifully.
Storing & Freezing
Store cooled patties in an airtight container in the refrigerator for up to 4 days. Reheat in a dry skillet over medium heat for 2-3 minutes per side, or in a 350°F oven for about 10 minutes. The skillet method gives the best results for reviving the exterior crust.
These freeze very well. Bake them fully and let them cool completely, then freeze on a lined baking sheet until solid before transferring to a zip-close bag. They'll keep for up to 3 months. Reheat from frozen in a 375°F oven for about 18 minutes, flipping once halfway through. No need to thaw first.
More Vegan Burger Recipes
If you loved this recipe, check out our full collection of the best vegan burger recipes or our vegan chickpea patties for a different style of vegan patty - or here are a few more individual favorites:
Also try: our Quinoa And Wild Rice Burgers.
- Vegan Chipotle Black Bean Burgers
- Vegan Beet & Brown Rice Burgers
- Vegan Quinoa Mushroom Burger
- Vegan Chickpea Patties
- Best Vegan Burger Recipes
Recipe
Vegan Beet Burgers
These vegan beet burgers are vibrant, hearty, and packed with flavor - with cumin, smoked paprika, and kidney beans rounding out that gorgeous deep-red beet base.
Print
Pin
Save
Servings: burgers
Ingredients
- 1 to 1¼ pounds beets 3-4 medium, scrubbed
- ½ cup quick-cooking oats divided
- 1 tablespoon olive oil
- 1 medium red onion chopped
- 2 cloves garlic thinly sliced
- 2 scallions chopped
- 15 ounce canned kidney beans drained and rinsed
- 1 teaspoon ground cumin
- 1 teaspoon sweet paprika
- 1 teaspoon smoked paprika or mesquite seasoning
- salt and freshly ground pepper to taste
Instructions
- Cook the beets using any preferred method - microwave, boil, or roast whole - until tender but not overdone. Plunge into cold water to cool, then peel and cut into chunks.
- Preheat the oven to 400°F. Line a baking sheet with parchment paper.
- Place half of the oats in a small bowl and cover with ¼ cup boiling water. Let stand until needed.
- Heat the oil in a small skillet over medium heat. Add the onion and sauté until translucent, about 5 minutes. Add the garlic and scallions and continue to sauté until soft and beginning to turn golden.
- In a food processor, combine the beets, onion mixture, both the soaked and dry oats, beans, cumin, and both kinds of paprika. Pulse until the mixture is evenly and finely chopped, scraping down the sides as needed.
- Transfer the mixture to a bowl. Taste and adjust seasonings, then season with salt and pepper.
- Lightly oil a ½-cup measuring cup and pack it firmly with the beet mixture. Invert onto the baking sheet with a sharp tap and flatten to about ½-inch thickness. Repeat with remaining mixture. (For smaller slider-sized burgers, use a ¼-cup measure.)
- Bake for 15 minutes until the bottom is starting to brown. Carefully flip each burger and bake for another 15 minutes until lightly browned on both sides. Serve hot or warm.
Nutrition (Estimate per Serving)
Calories: 6kcalCarbohydrates: 1gSodium: 1mgPotassium: 20mgSugar: 1gVitamin C: 1mgCalcium: 3mg
Vegan-ize any recipe!Grab our free vegan cheat sheet, packed with my favorite easy substitutions to make any recipe vegan.
Easy Vegan Portobella Burgers
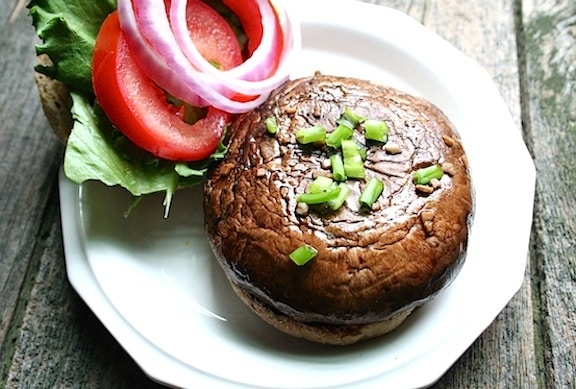
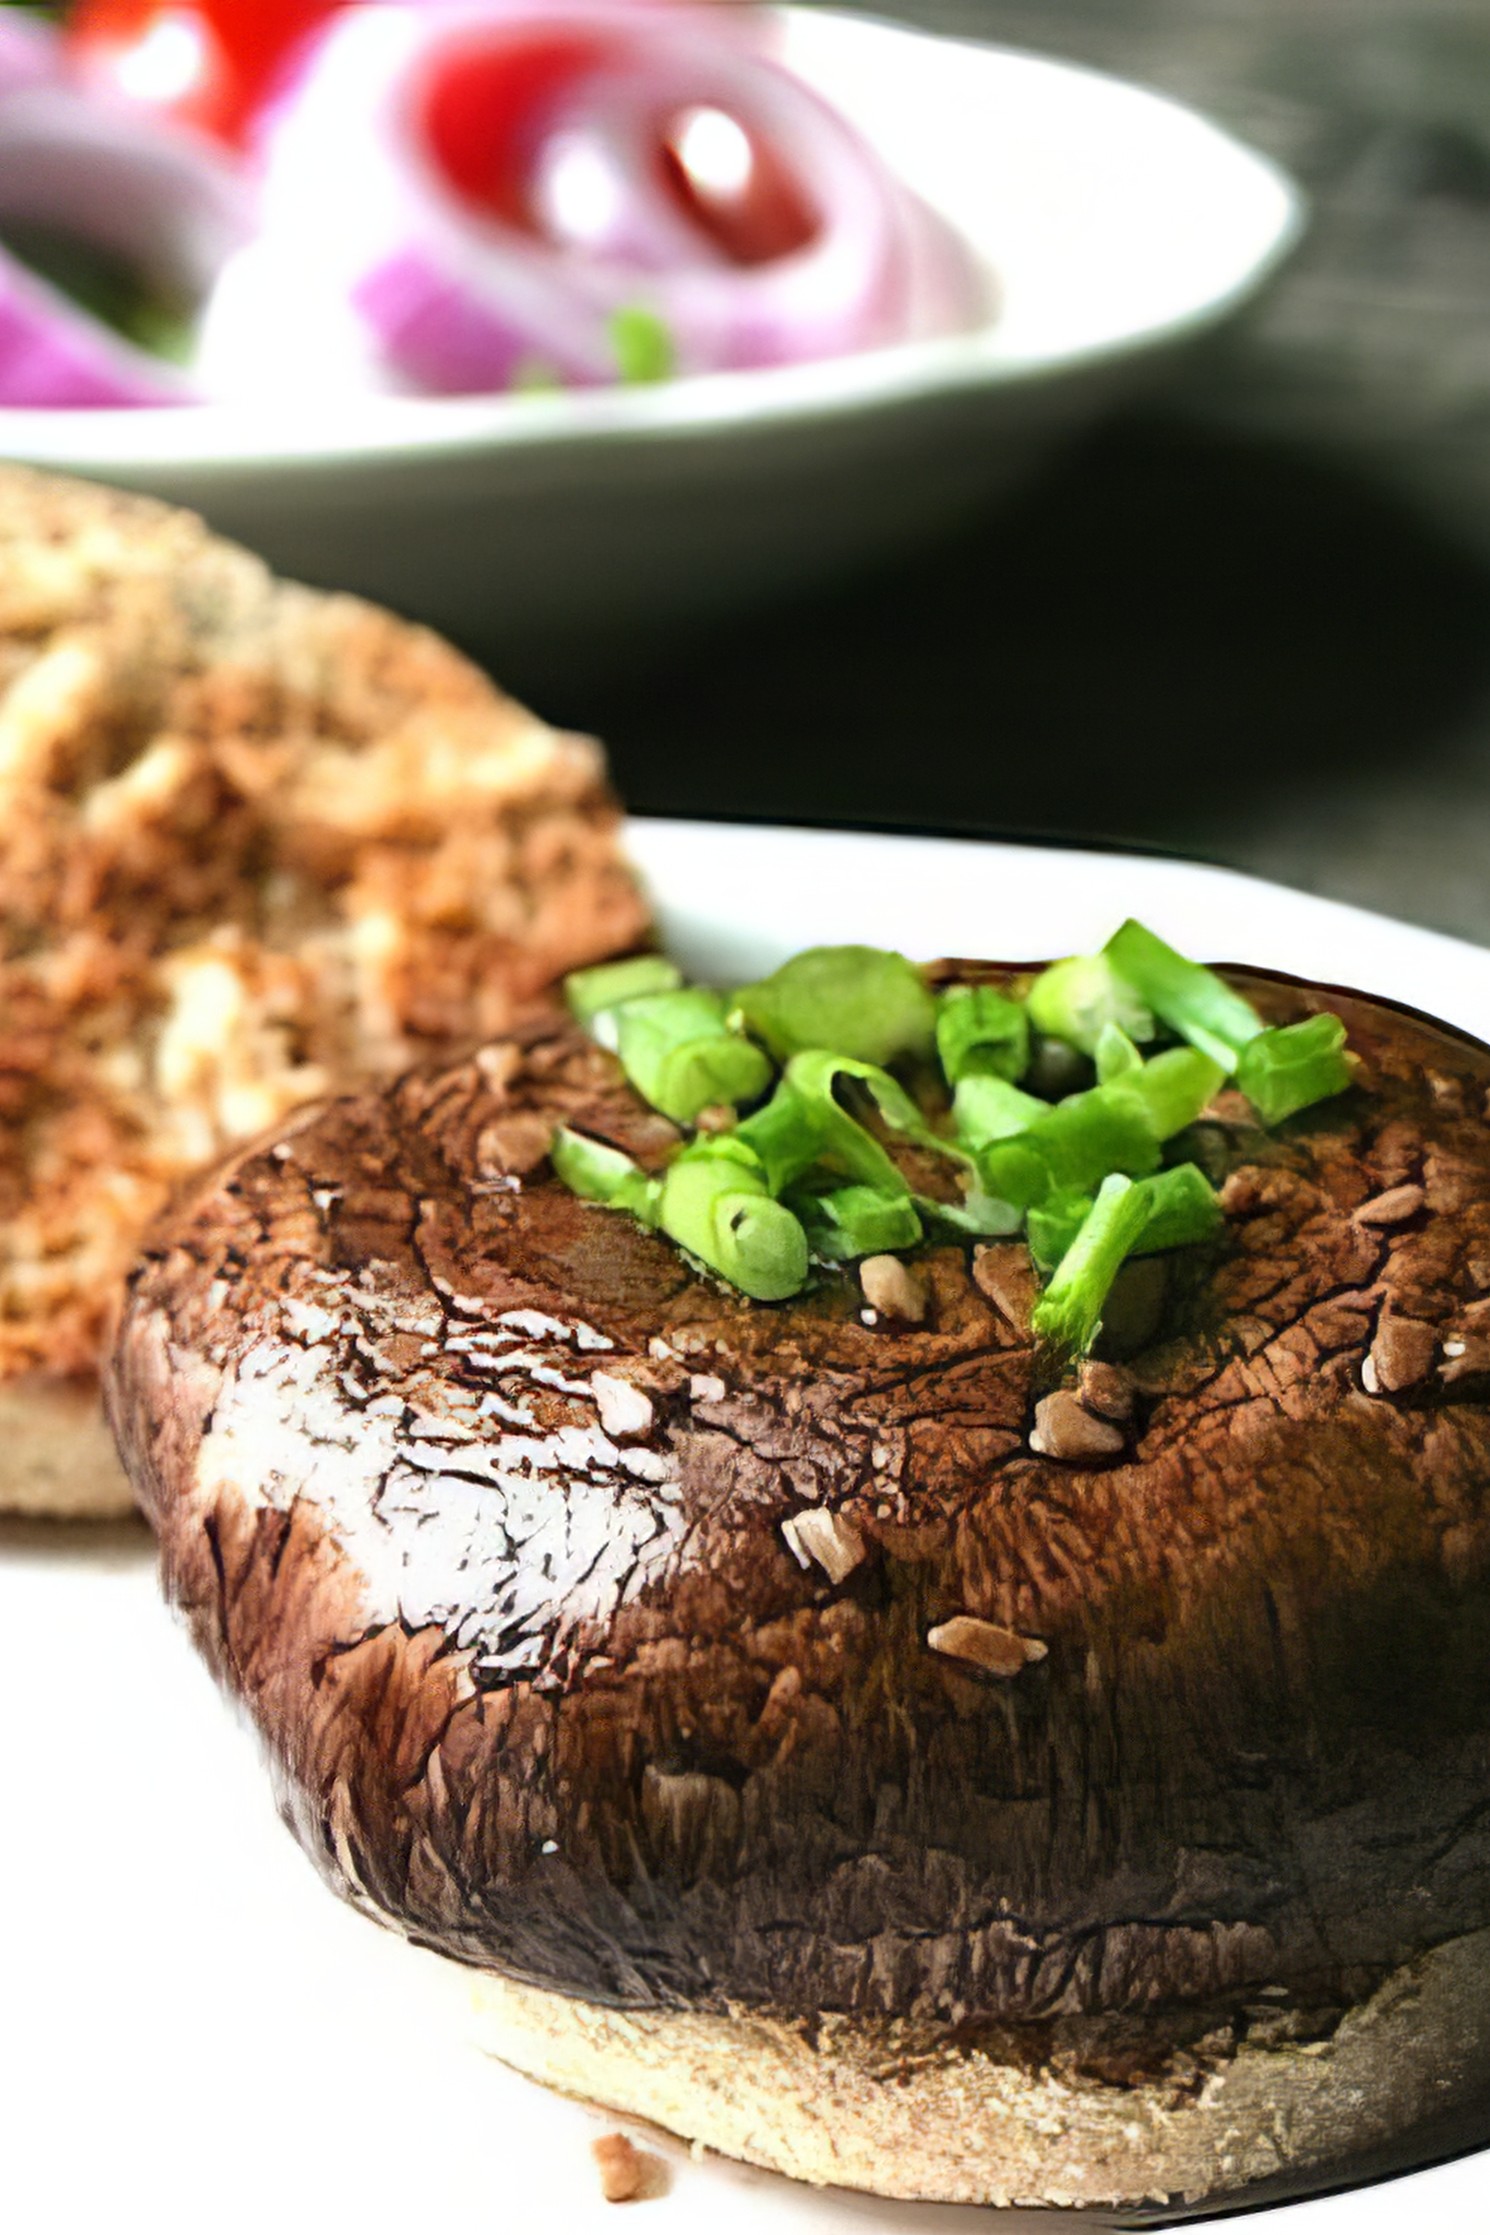
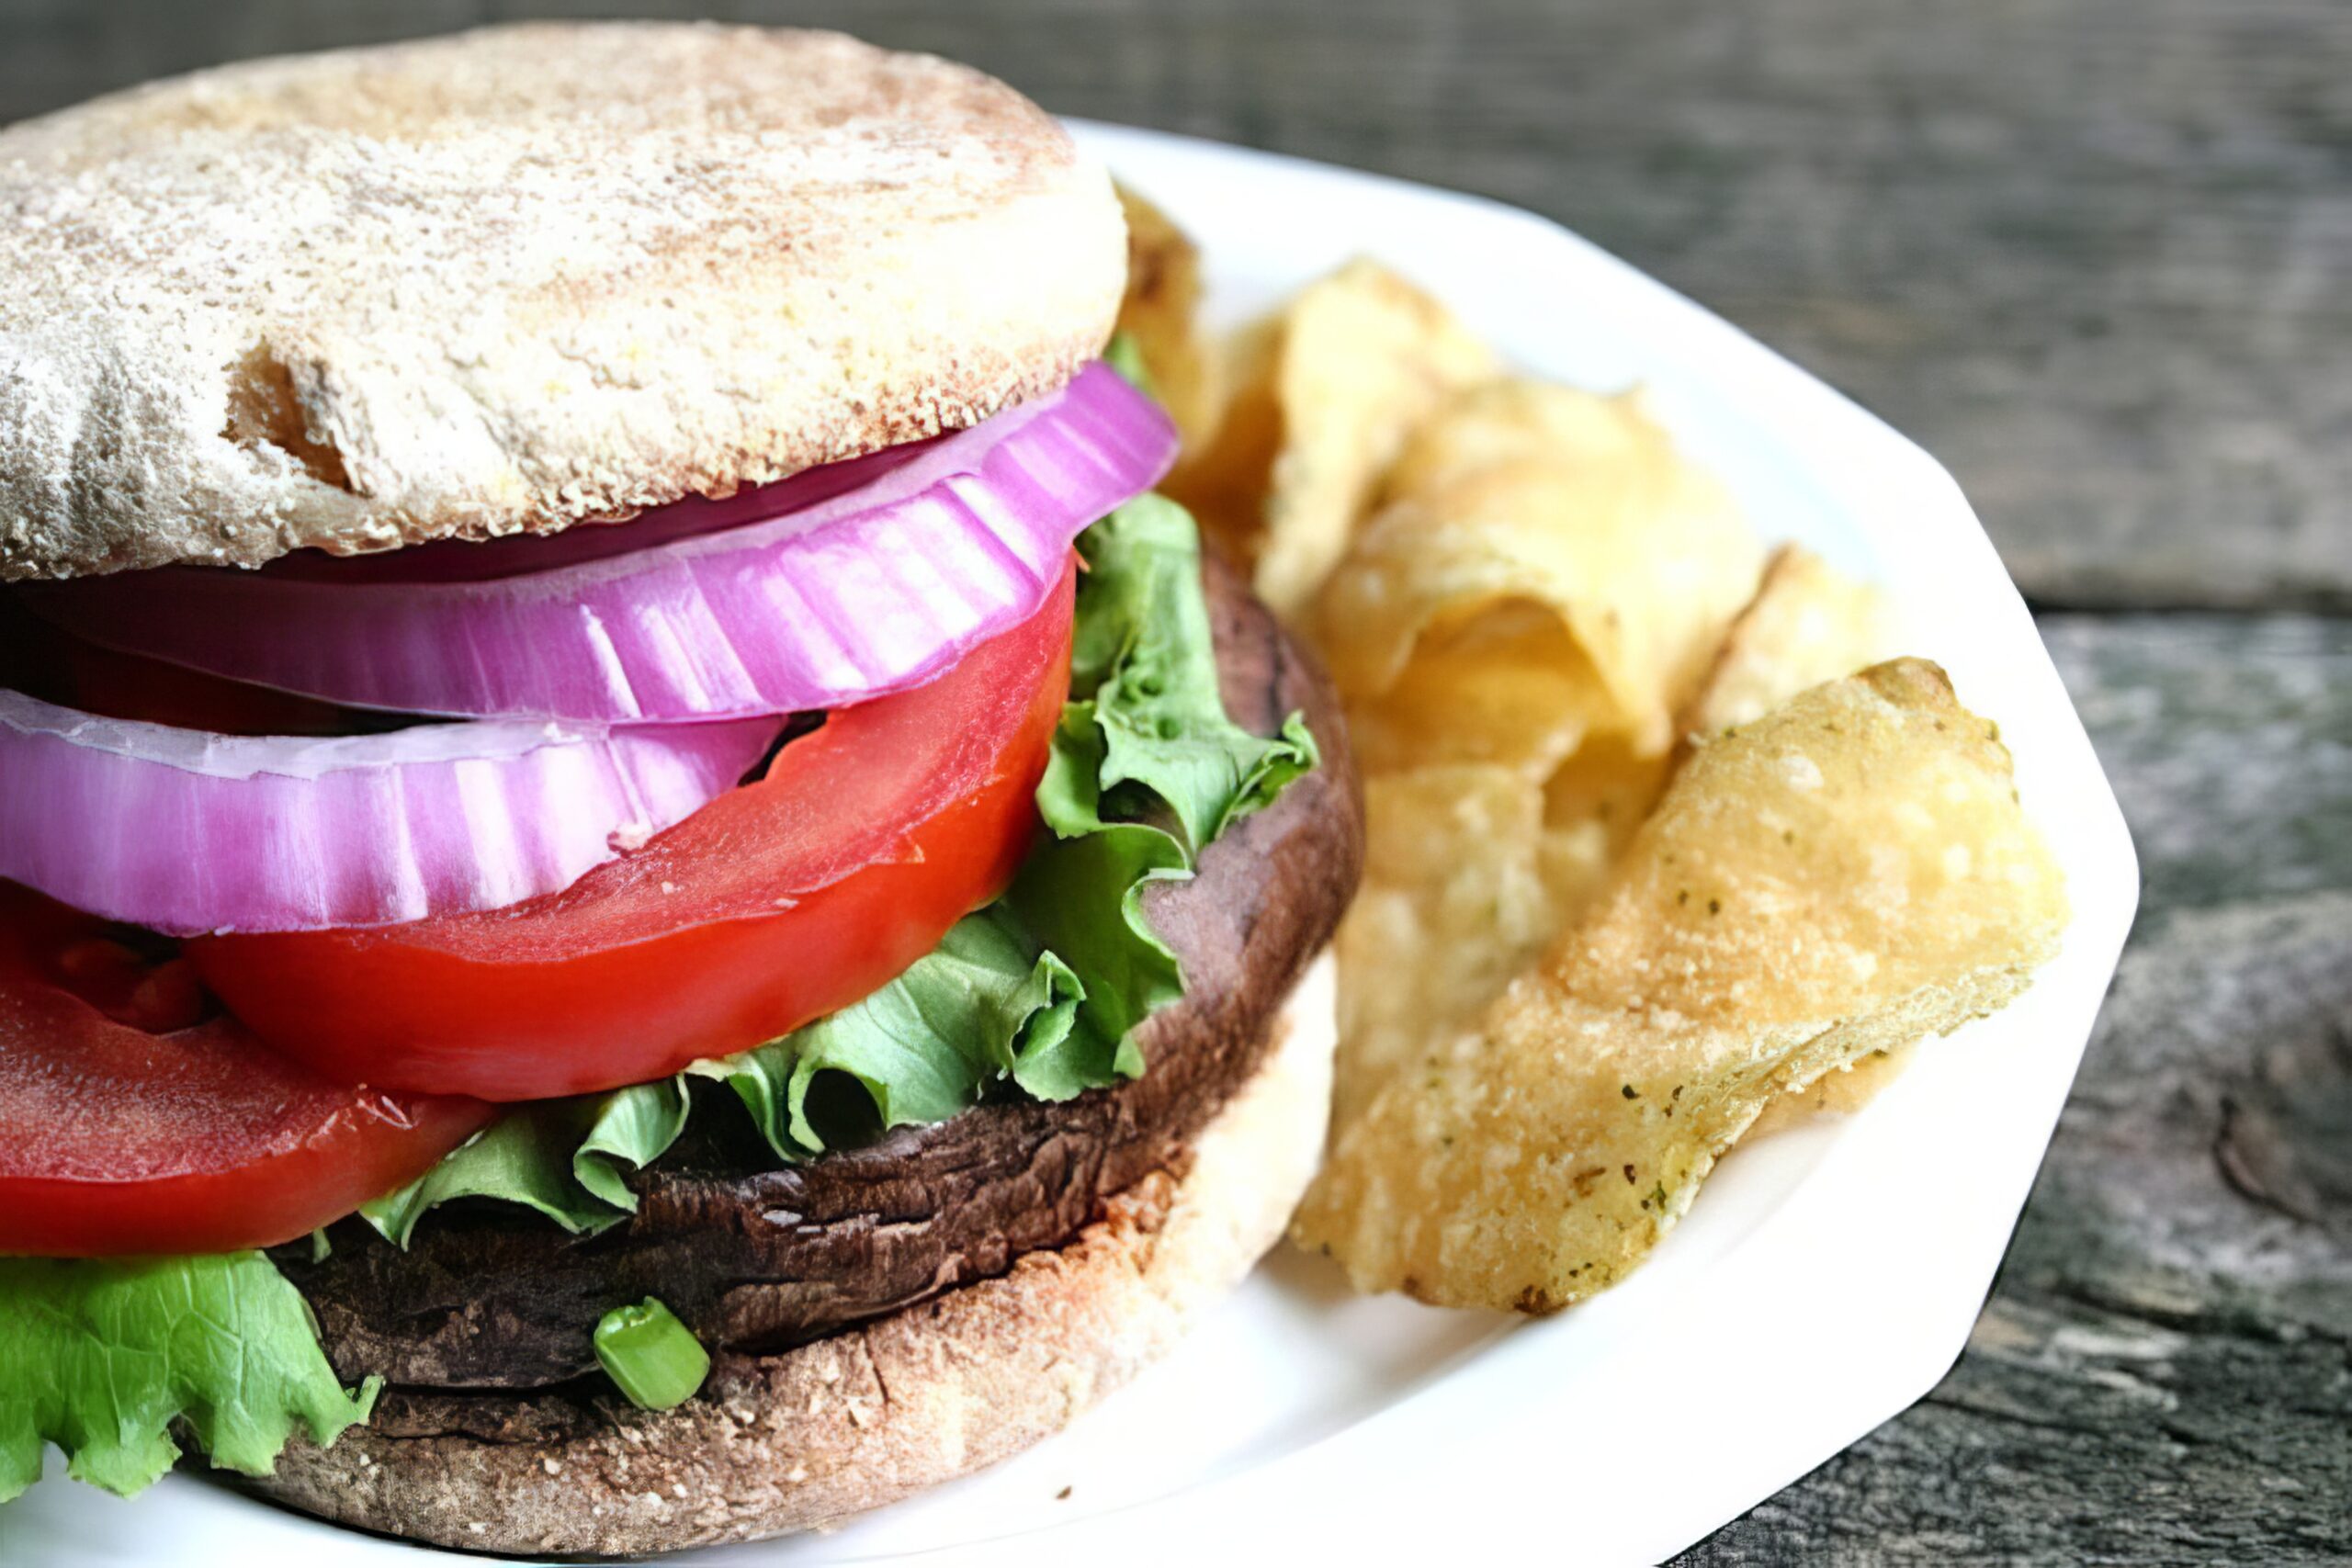
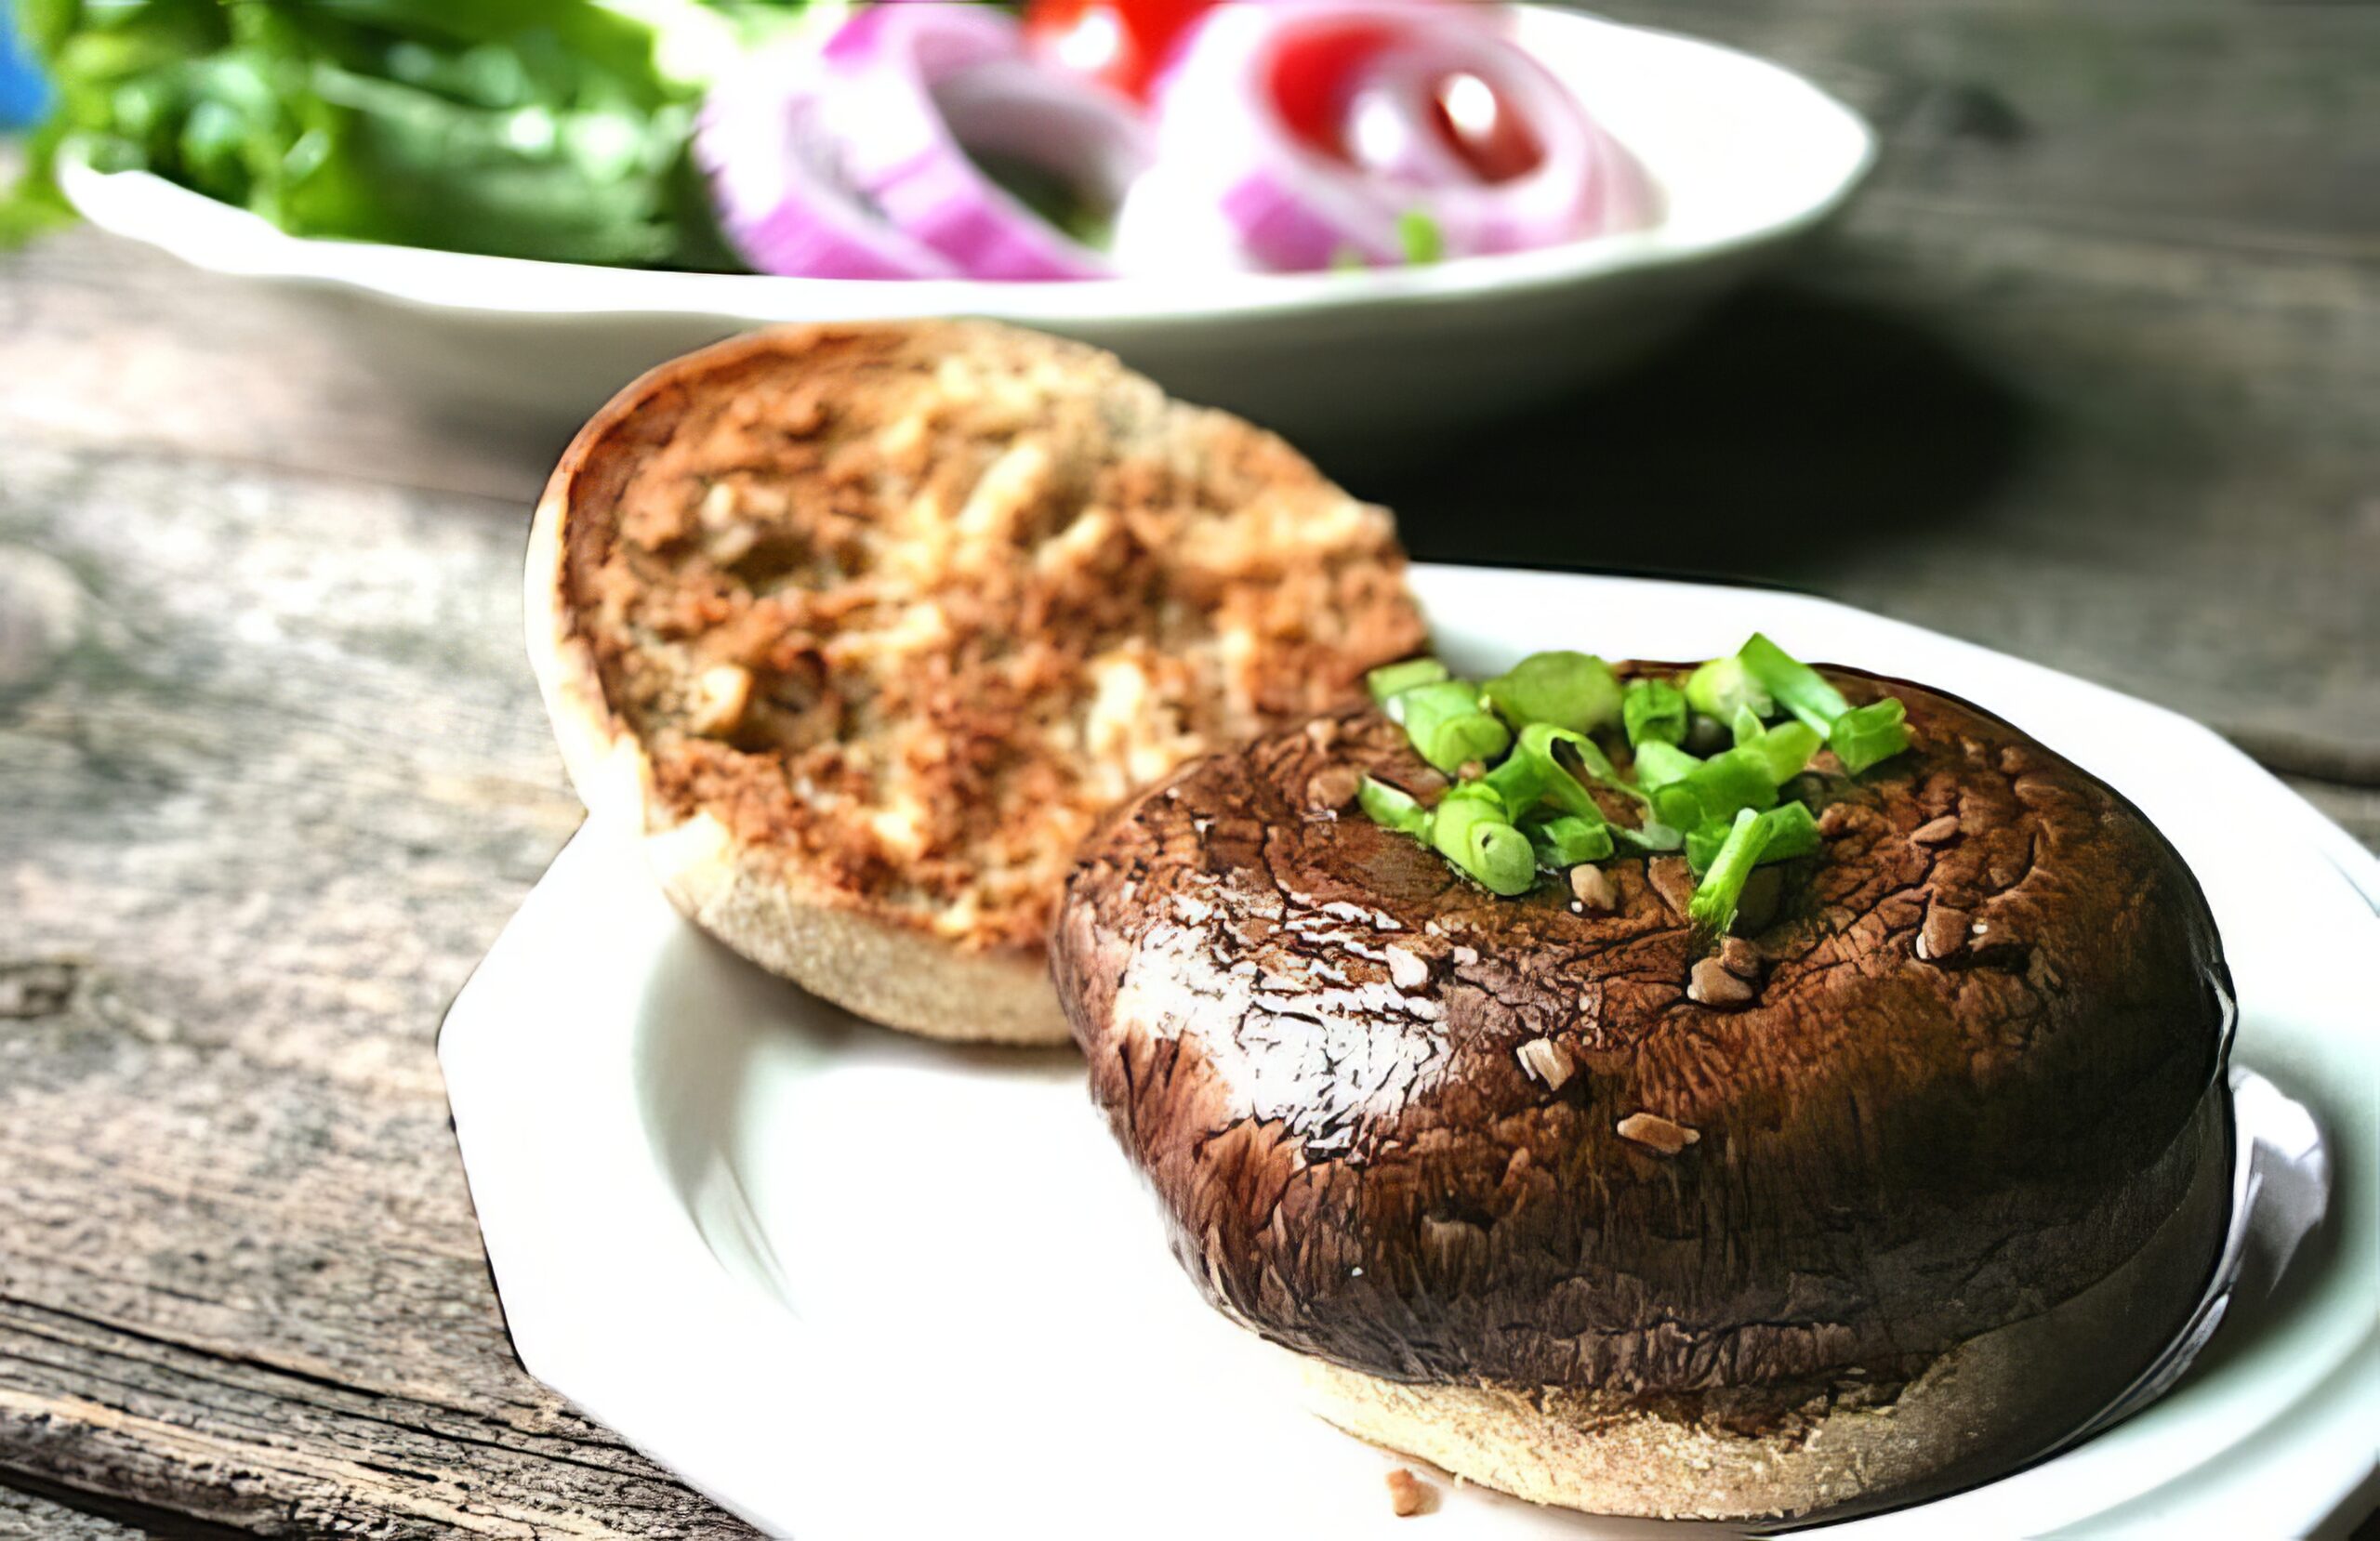
These easy vegan portobella burgers are the simplest path to a seriously satisfying grilled burger - just marinate the caps, hit them with heat, and pile on the toppings.
Key Ingredients & Substitutions
- Portobello mushroom caps. The star - large, meaty caps that absorb marinade beautifully and cook up juicy and satisfying. Look for caps that are firm and dry, without soft spots. Wipe them clean with a damp cloth rather than rinsing, since mushrooms absorb water quickly and you want them to soak up marinade instead.
- Teriyaki marinade. The classic pairing for portobello burgers. Bottled teriyaki sauce is perfectly fine here, or make your own with soy sauce, mirin, a little sesame oil, garlic, and ginger. Other great marinade options: balsamic vinegar with olive oil and herbs, or a simple red wine vinegar and soy sauce combo.
- Whole-grain buns. Sturdy enough to hold a juicy portobello without getting soggy. Toast them on the grill or in a skillet - it makes a real difference. Ciabatta rolls or toasted English muffins are excellent alternatives.
- Toppings. The beauty of these burgers is how customizable they are. Caramelized onions are especially good here - their sweetness complements the savory mushroom. Baby arugula adds a peppery bite; sliced avocado adds creaminess. Have fun with it.
Helpful Tips
Marinate gill-side down first. Place the portobello caps with the gill side facing down in the marinade for the first portion of the marinating time, then flip. This ensures the undersides - which cook first on the grill - are well coated. At least 15 minutes is good; up to an hour is even better.
Don't discard the remaining marinade. Pour any unused marinade back into the bottle and set it aside. You'll want to brush the caps with additional marinade as they cook, which keeps them moist and adds a lacquered, slightly charred glaze that's absolutely delicious.
High heat for grill marks, medium for pan cooking. On a grill, you want high heat to get those gorgeous char marks. In a skillet, medium is better - high heat causes the marinade to burn before the mushroom is cooked through. Either way, don't rush it. The caps need a full 4-5 minutes per side.
Toast your buns. A dry, untoasted bun is the fastest way to make a great portobello burger feel disappointing. Throw the buns on the grill or cut-side-down in a dry skillet for 1-2 minutes. It makes the whole burger better.
Let them rest for a minute before serving. Portobello caps release a lot of moisture as they cool slightly. Give them 60 seconds on a rack or plate before loading onto the bun - this keeps the bottom bun from going soggy immediately.
Variations
- Balsamic marinade. Swap the teriyaki for a mix of 3 tablespoons balsamic vinegar, 2 tablespoons olive oil, 1 teaspoon Dijon mustard, and a pinch of dried thyme. Rich, tangy, and excellent with caramelized onions.
- Smoky chipotle version. Use a marinade of soy sauce, lime juice, 1 teaspoon chipotle powder, and a drizzle of maple syrup. Serve with guacamole and pickled jalapeños for a Tex-Mex twist.
- Italian herb version. Marinate in olive oil with garlic, balsamic, and Italian seasoning. Top with roasted red peppers, vegan mozzarella, and fresh basil - it's essentially a Caprese burger.
- Pan-cooked with wine. For indoor cooking, deglaze the pan with a splash of red wine halfway through cooking. It adds depth and creates a silky pan sauce to drizzle over the finished burger.
- Make it a bowl. Skip the bun entirely and serve the portobello cap over a grain bowl with farro, roasted vegetables, and tahini dressing. The teriyaki flavor works beautifully in this context.
- Add cheese. In the last minute of cooking, place a slice of vegan cheese on the gill side and cover with a lid or dome to melt it slightly. Pepper jack or smoked gouda style vegan cheeses are both fantastic here.
Serving Ideas
The classic approach is on a toasted whole-grain bun with caramelized or raw onion, baby greens, sliced tomato, and a generous schmear of vegan mayo. The portobello is substantial enough to hold its own against bold toppings - sautéed garlic, a drizzle of teriyaki, pickles, and mustard all work beautifully. If you're serving a crowd, set out a spread of condiments and toppings and let everyone build their own. For more inspiration, check out the best portobello mushroom recipes on VegKitchen.
Without a bun, these are just as satisfying. Serve a portobello cap over cooked grains with roasted vegetables and a drizzle of the pan sauce. They're also excellent alongside grilled corn and a bright fresh tomato relish - simple, summery, and effortless.
Storing & Freezing
Cooked portobello caps keep well in an airtight container in the refrigerator for up to 3 days. Reheat in a skillet over medium heat with a splash of marinade or water to prevent sticking, or warm in a 350°F oven for about 8 minutes. They're also surprisingly good cold, sliced thin over a salad.
Portobello burgers don't freeze especially well - the texture becomes quite soft and watery after thawing. They're best made fresh or made a day ahead and refrigerated. If you do freeze them, wrap individually and reheat in the oven rather than the microwave for the best texture.
More Vegan Burger Recipes
If you loved this recipe, check out our full collection of the best vegan burger recipes, including our chipotle black bean burgers and our vegan beet burgers - or here are a few more individual favorites:
- Vegan Chipotle Black Bean Burgers
- Vegan Quinoa Mushroom Burger
- Vegan Beet Burgers
- Vegan Curried Tofu Burgers
- Best Vegan Burger Recipes
Recipe
Easy Vegan Portobella Burgers
These easy vegan portobella burgers are juicy, smoky, and ready in minutes — just marinate, grill or pan-cook, and pile on your favorite toppings.
Print
Pin
Save
Servings: burgers
Ingredients
- portobello caps as many as needed (1 per serving)
- teriyaki marinade homemade or bottled; as needed for marinating
- whole-grain buns or toasted English muffins
Toppings (Optional)
- onions carmelized or raw slices
- garlic sautéed
- scallions thinly sliced
- tomatoes sliced
- baby greens baby spinach or baby arugula
- salsa store bought or homemade
- ketchup
- mustard
- sweet pickle relish
- vegan mayonnaise
Instructions
- Stem the portabellas and wipe them clean. Pour the marinade of choice into a shallow container and arrange the portobello caps, underside down, in a single layer. Let stand for at least 15 minutes and up to an hour. Pour unused marinade back into a bottle for finishing the dish; you'll have enough left over to use for another occasion.
- To grill: Prepare grill. Grill the portobellos, underside down, for 4–5 minutes. Brush generously with more marinade, then flip and grill for 5 minutes longer or until charred to your liking.
- To cook in a skillet: Heat a shallow layer of marinade in the skillet. Cook the portobellos, underside down, for 4–5 minutes. Flip and cook for 5 minutes longer, or until browned to your liking. Add a small amount of additional marinade if needed to keep the skillet moist.
- Serve portobello caps on whole-grain buns with whatever other toppings you'd like. You can place a variety of these toppings and condiments on the table, and let everyone fix their own sandwich!
Nutrition (Estimate per Serving)
Calories: 99kcalCarbohydrates: 17gProtein: 6gFat: 1gSaturated Fat: 1gPolyunsaturated Fat: 1gMonounsaturated Fat: 1gSodium: 2825mgPotassium: 258mgFiber: 1gSugar: 11gVitamin A: 1IUVitamin C: 2mgCalcium: 30mgIron: 2mg
Vegan-ize any recipe!Grab our free vegan cheat sheet, packed with my favorite easy substitutions to make any recipe vegan.
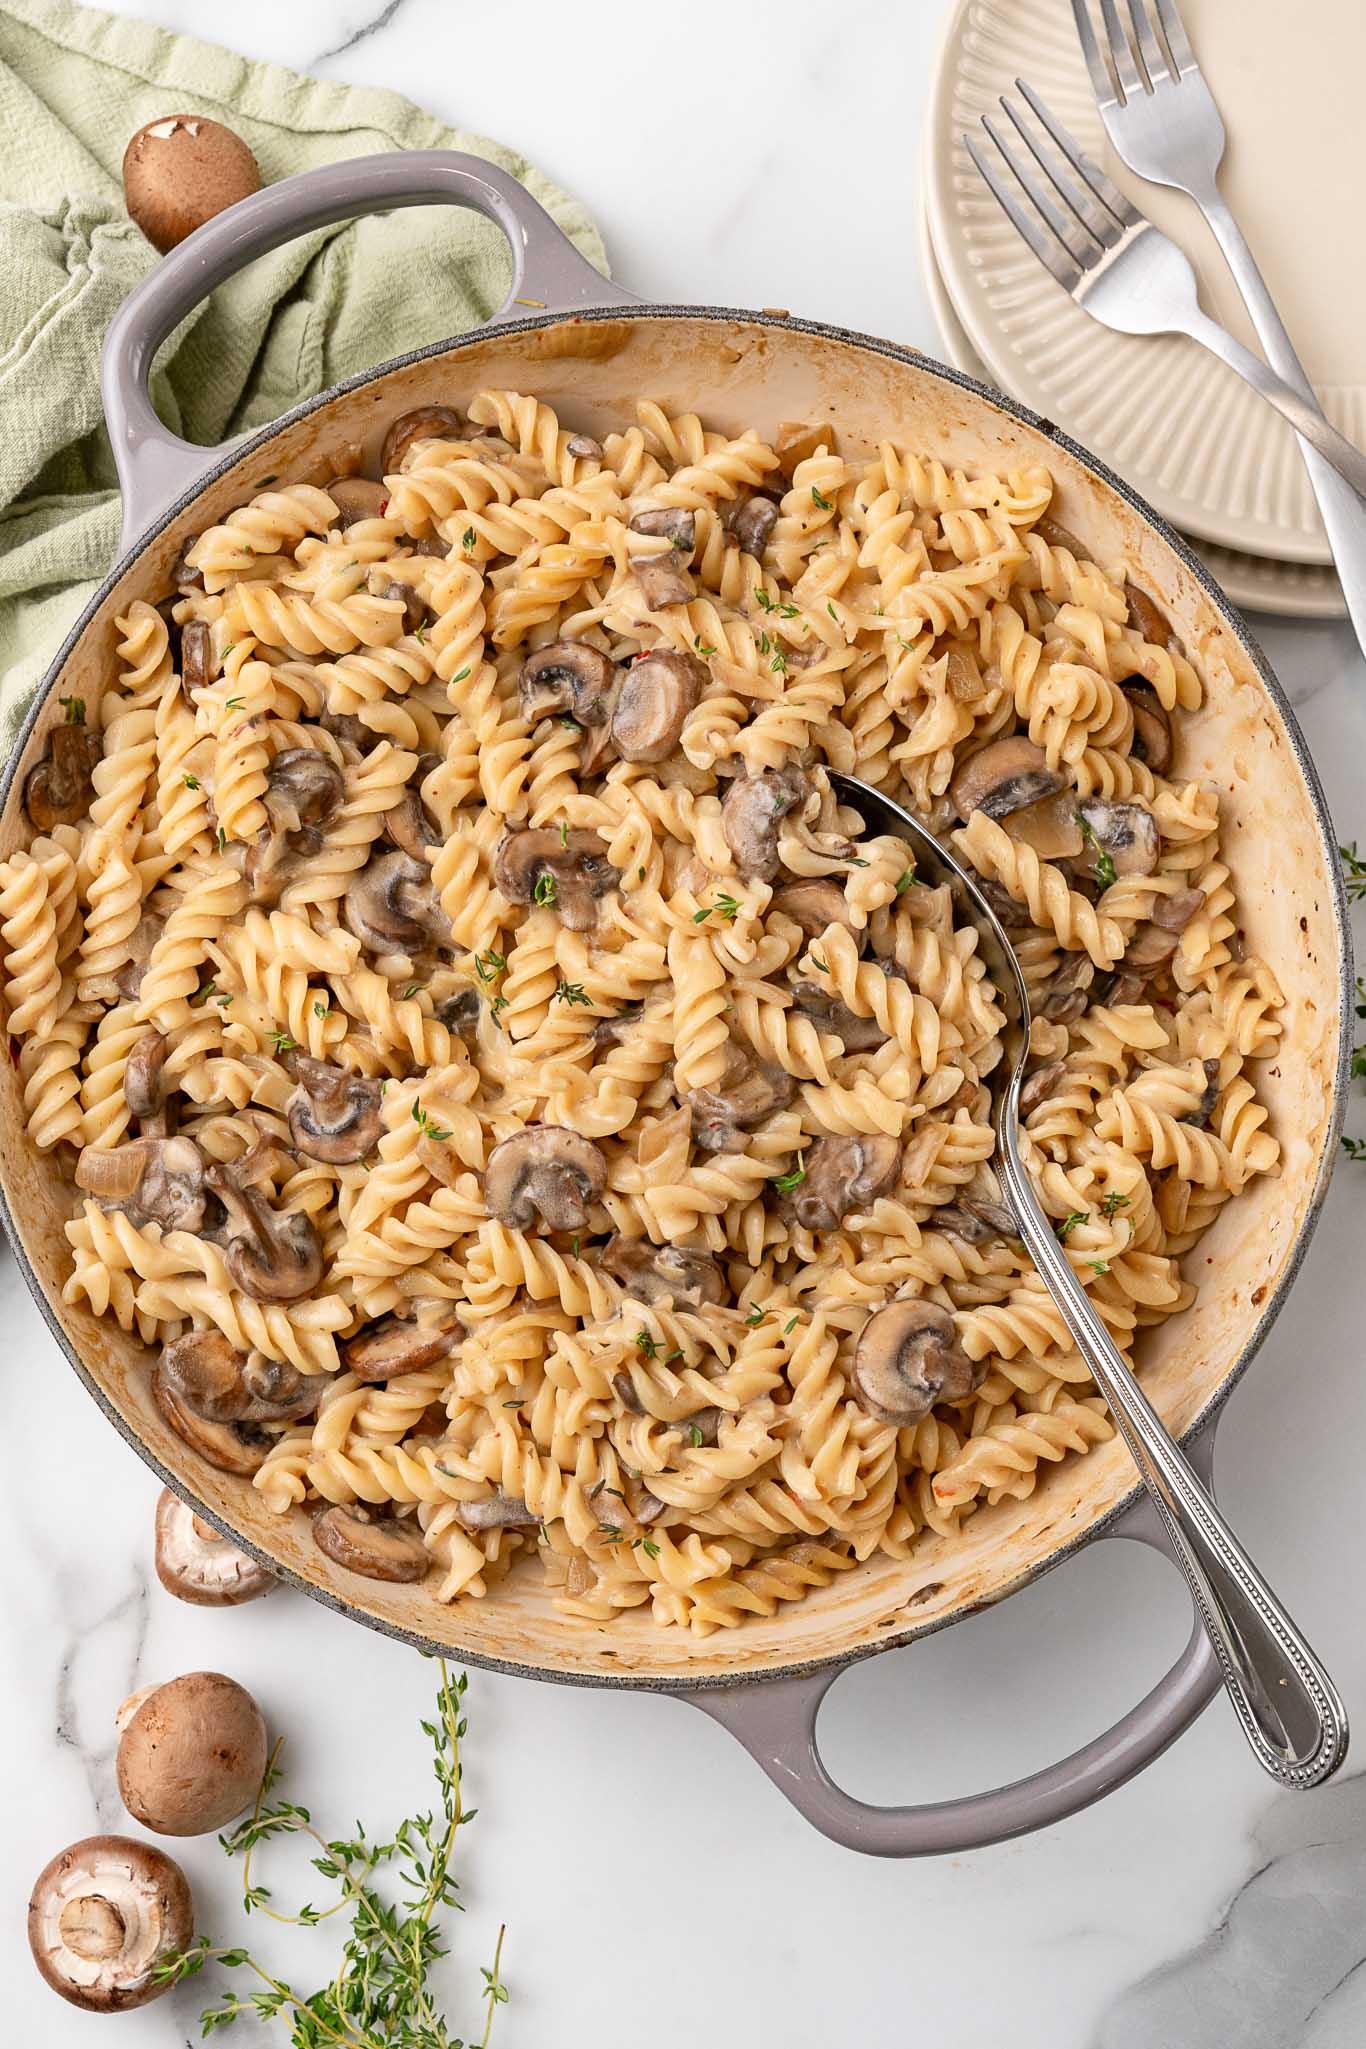
Vegan Creamy Mushroom Pasta
This vegan creamy mushroom pasta delivers everything you want in a comfort food dinner - a velvety, herb-flecked sauce, tender baby bella mushrooms, and hearty pasta, all ready in under 30 minutes.
Key Ingredients & Substitutions
- Pasta. Rotini or penne work beautifully here - their ridges and tubes catch the creamy sauce. Any short pasta shape works; if you use spaghetti or linguine, just be sure to toss well so every strand gets coated.
- Baby bella mushrooms. Also called cremini, these bring a deep, savory flavor and meaty texture. White button mushrooms are the easiest swap, or go more luxurious with shiitakes, oyster mushrooms, or a mix of whatever's at the store.
- Full-fat coconut milk. This is the backbone of the creamy sauce - don't use light coconut milk or the sauce will be thin. Cashew cream (blend 1 cup soaked cashews with ¾ cup water) works beautifully if you want a more neutral flavor.
- Vegan butter. Combined with flour, it forms the roux that thickens the sauce. Olive oil can substitute in a pinch, though the butter adds more richness.
- Vegetable broth. Use a good-quality broth - it forms the other half of the sauce. Low-sodium is fine; just taste and adjust salt at the end.
- Soy sauce. Adds umami depth that makes the sauce complex. Tamari works as a 1:1 swap and keeps the dish gluten-free.
- White wine. A dry white like Chardonnay or Pinot Grigio deglazes the pan and adds brightness. If you'd rather skip it, substitute an equal amount of extra vegetable broth with a small squeeze of lemon juice.
- Fresh thyme. The aromatic that ties everything together. Dried thyme works in a pinch - use about half as much (1 teaspoon dried instead of 2 teaspoons fresh).
Helpful Tips
Don't rush the mushrooms. Give them space in the pan and let them cook undisturbed for a couple of minutes before stirring. They need time to release their liquid and then let that liquid fully evaporate - this is where the deep, savory flavor comes from. If you rush this step by stirring constantly, you'll end up with steamed, waterlogged mushrooms instead of golden, concentrated ones.
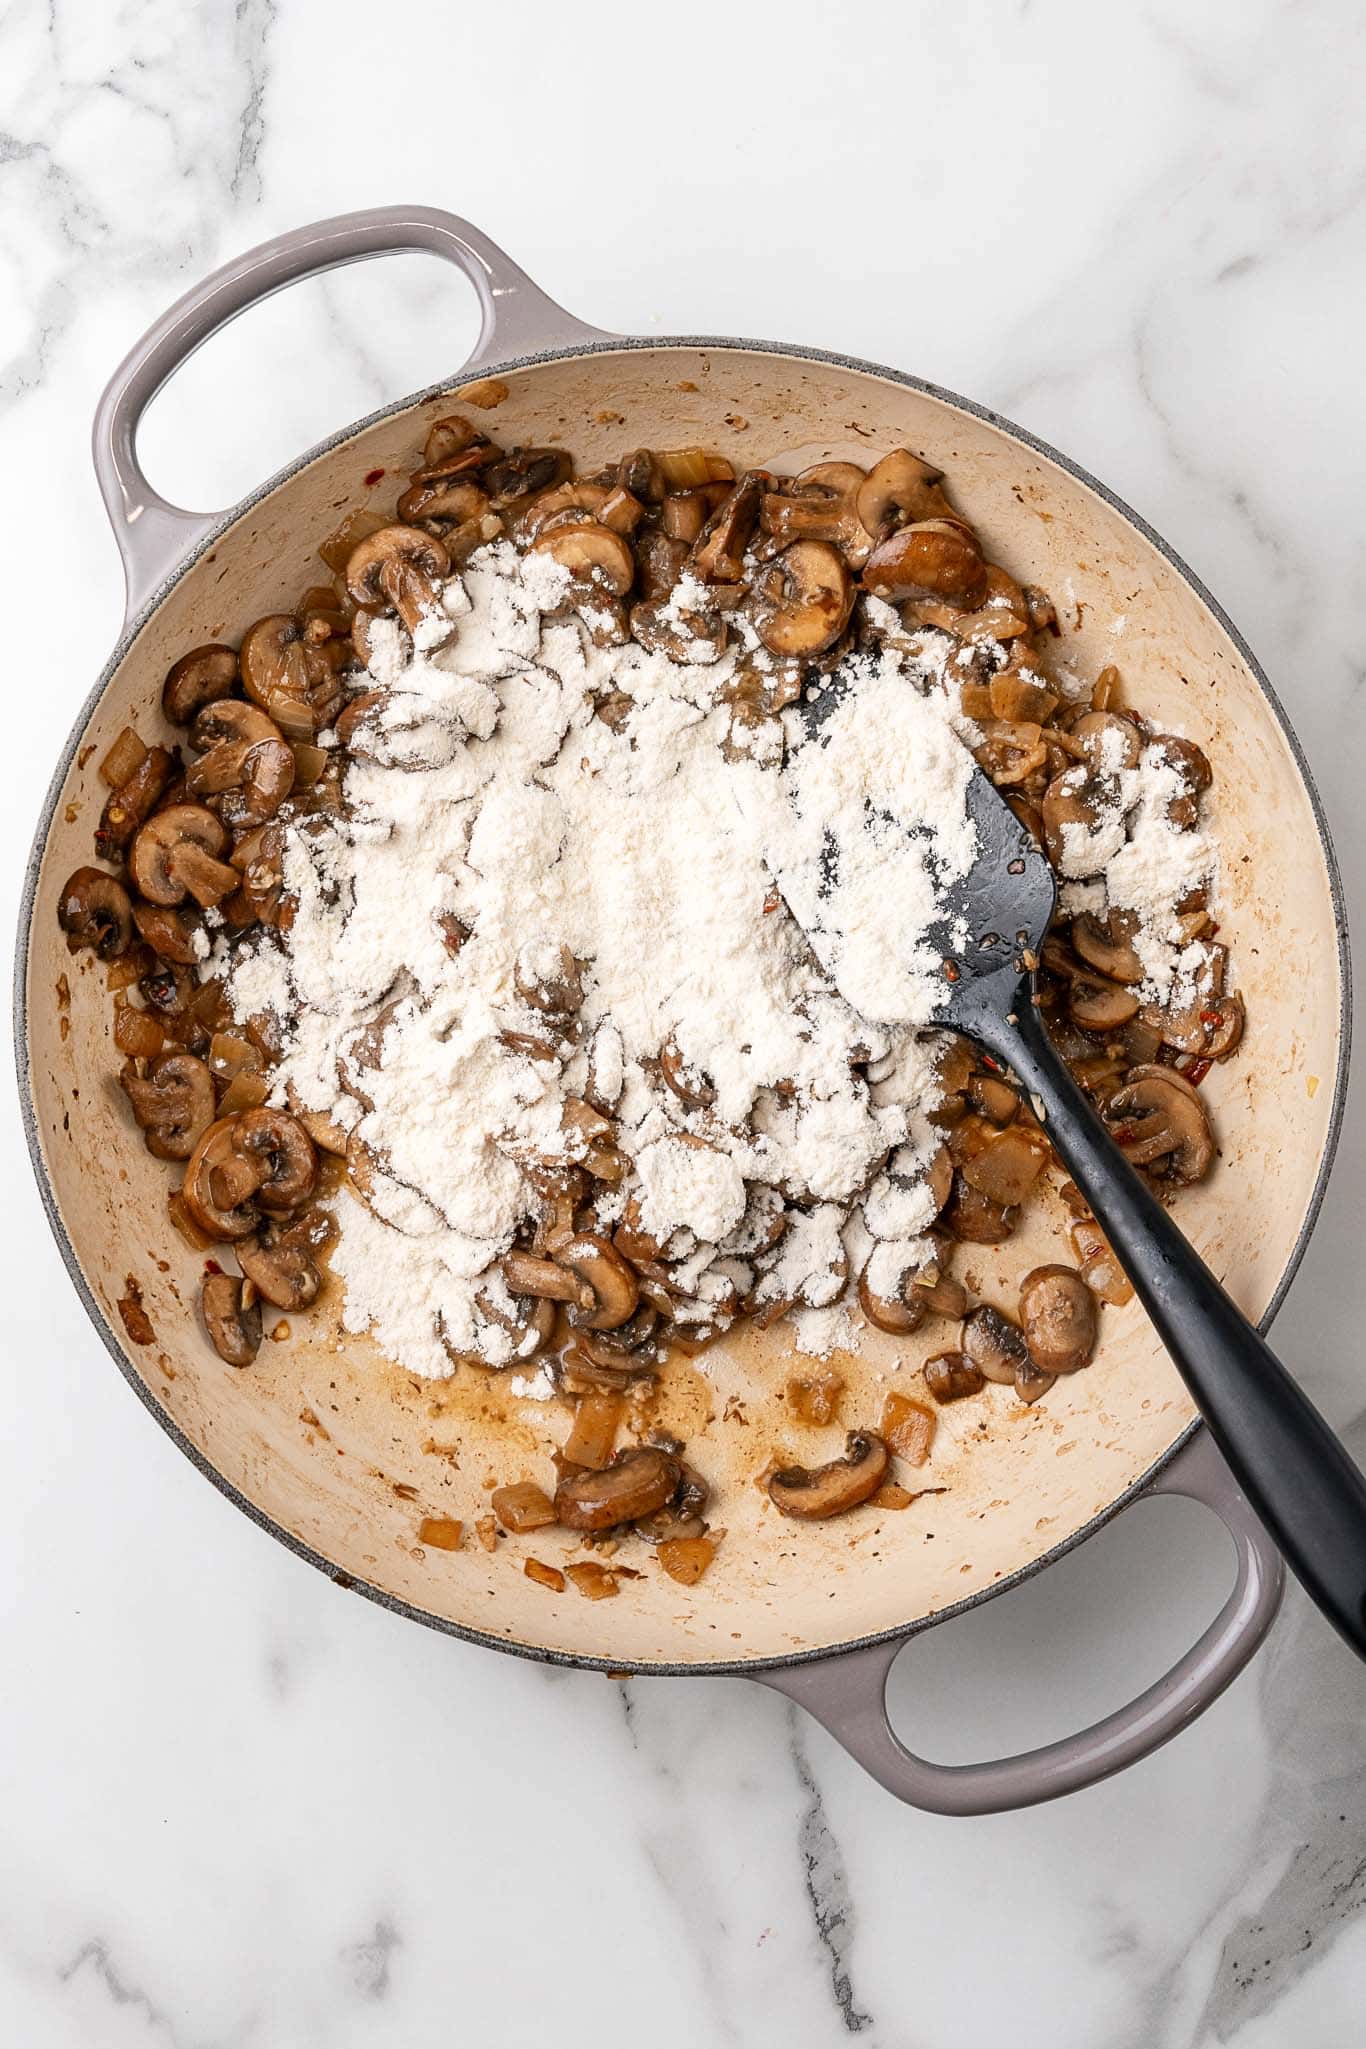
Make a proper roux. After adding the vegan butter to the cooked mushrooms, let it melt fully before sprinkling in the flour. Stir the flour into the butter and vegetables and cook for about a minute - this cooks out the raw flour taste and ensures your sauce won't be starchy. It should look like a pale, sandy paste clinging to the vegetables.
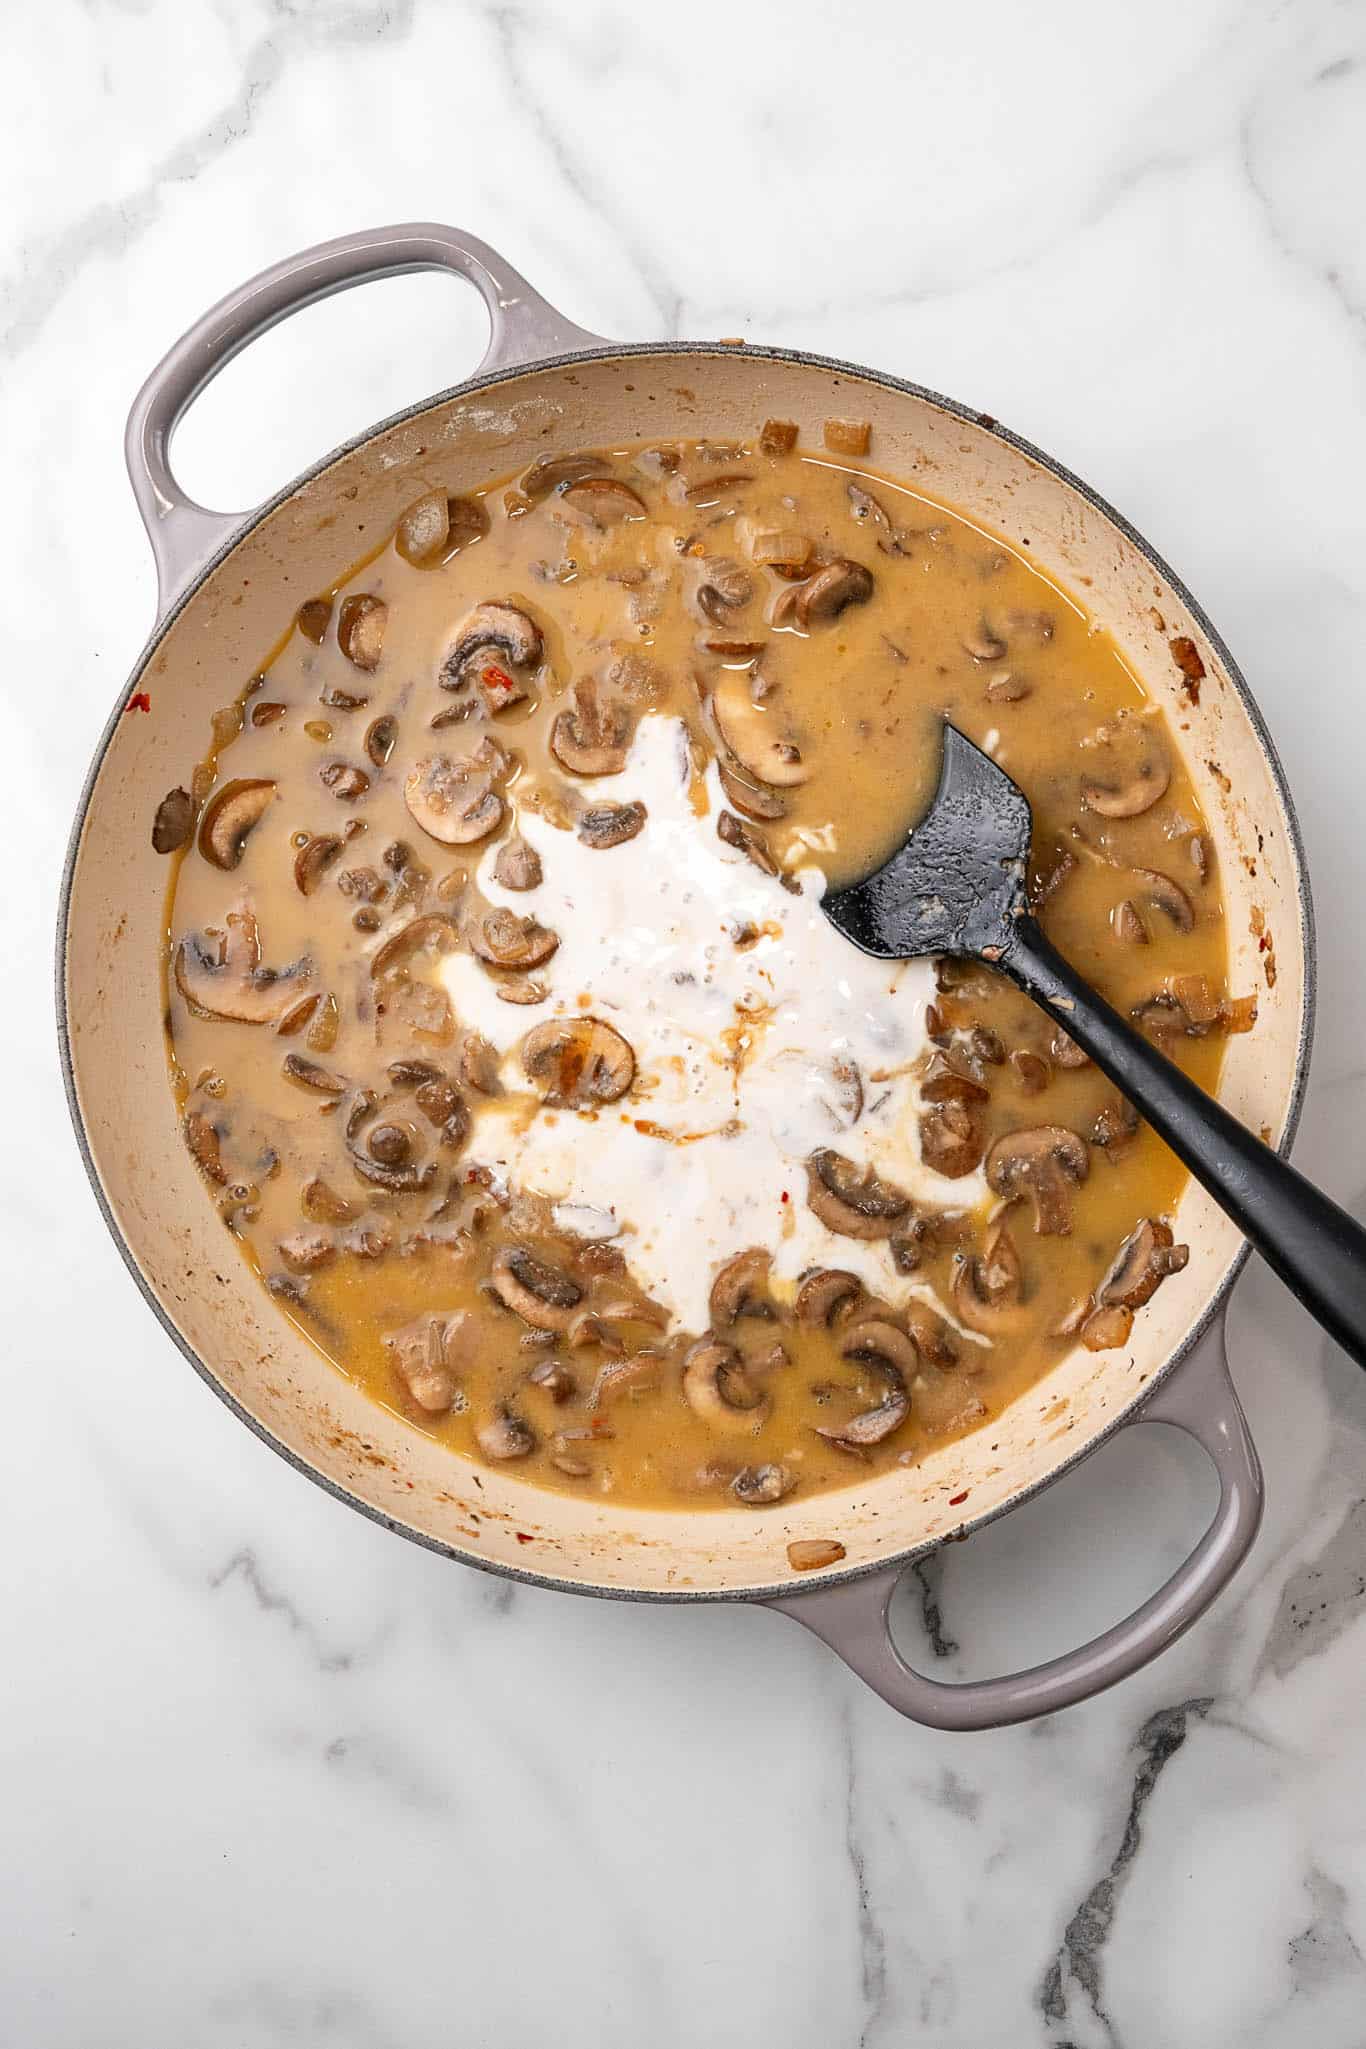
Add the broth slowly. Pour in a splash of vegetable broth, stir vigorously until smooth, then add more. This gradual approach prevents lumps from forming in the sauce. If you do end up with a few lumps, a quick whisk usually smooths everything out.
Use the pasta cooking water. Before you drain the pasta, scoop out a cup of the starchy cooking water. If your sauce turns out thicker than you'd like after adding the pasta, a splash of pasta water loosens it perfectly and helps everything cling together.
Taste before serving. The soy sauce adds salt, and different broths vary in saltiness - so always taste the finished sauce before plating. A pinch of salt, an extra crack of black pepper, or a squeeze of lemon can make a big difference.
Also worth trying: our Italian-style vegan sausage and peppers.
Variations
- Add greens. Stir a few handfuls of fresh spinach or baby kale into the sauce just before adding the pasta - it wilts in about a minute and adds color and nutrients.
- Boost the protein. Fold in crispy baked tofu cubes, white beans, or slices of vegan sausage to make it a heartier meal.
- Make it spicy. Double the red pepper flakes or stir in a teaspoon of sriracha or calabrian chili paste for a sauce with a kick.
- Switch the mushrooms. Shiitakes add a more intense, earthy flavor; oyster mushrooms are silkier and delicate; portobello caps sliced into strips give big, meaty bites. A mix of two or three varieties is especially good.
- Go gluten-free. Use your favorite gluten-free pasta and swap the soy sauce for tamari. The rest of the recipe is naturally gluten-free.
- Add a sun-dried tomato twist. Stir in 2-3 tablespoons of chopped sun-dried tomatoes (oil-packed) with the garlic for a sweet, jammy contrast to the earthy mushrooms.
Serving Ideas
This pasta is a full meal on its own, but a simple side rounds it out nicely. Warm, crusty bread or garlic bread is the obvious choice - you'll want something to swipe up every last bit of sauce from the bowl. A lightly dressed arugula salad with lemon and olive oil cuts through the richness beautifully.
For a bigger spread, roasted broccoli or asparagus alongside this dish is a great pairing - the slight char on the vegetables plays well against the creamy sauce. If you're serving this for guests, pair it with a side of glazed baked onions and pasta dishes like vegan zucchini lasagna or a hearty vegan pot pie casserole or Vegan Pasta Alfredo with Peas & Asparagus for variety.
Storing & Freezing
Leftovers keep well in an airtight container in the refrigerator for up to 4 days. The pasta will absorb some of the sauce as it sits, so when reheating add a splash of vegetable broth or plant milk and stir over medium-low heat until the sauce loosens and everything is warmed through. It reheats beautifully on the stovetop; the microwave works too, just stir halfway through.
This dish doesn't freeze well - the coconut milk sauce tends to separate and become grainy after thawing, and the pasta turns mushy. It's best made fresh or enjoyed within a few days from the fridge. If you want to meal prep ahead, you can make the sauce (without the pasta) and freeze that separately for up to 2 months, then cook fresh pasta to toss with it when ready.
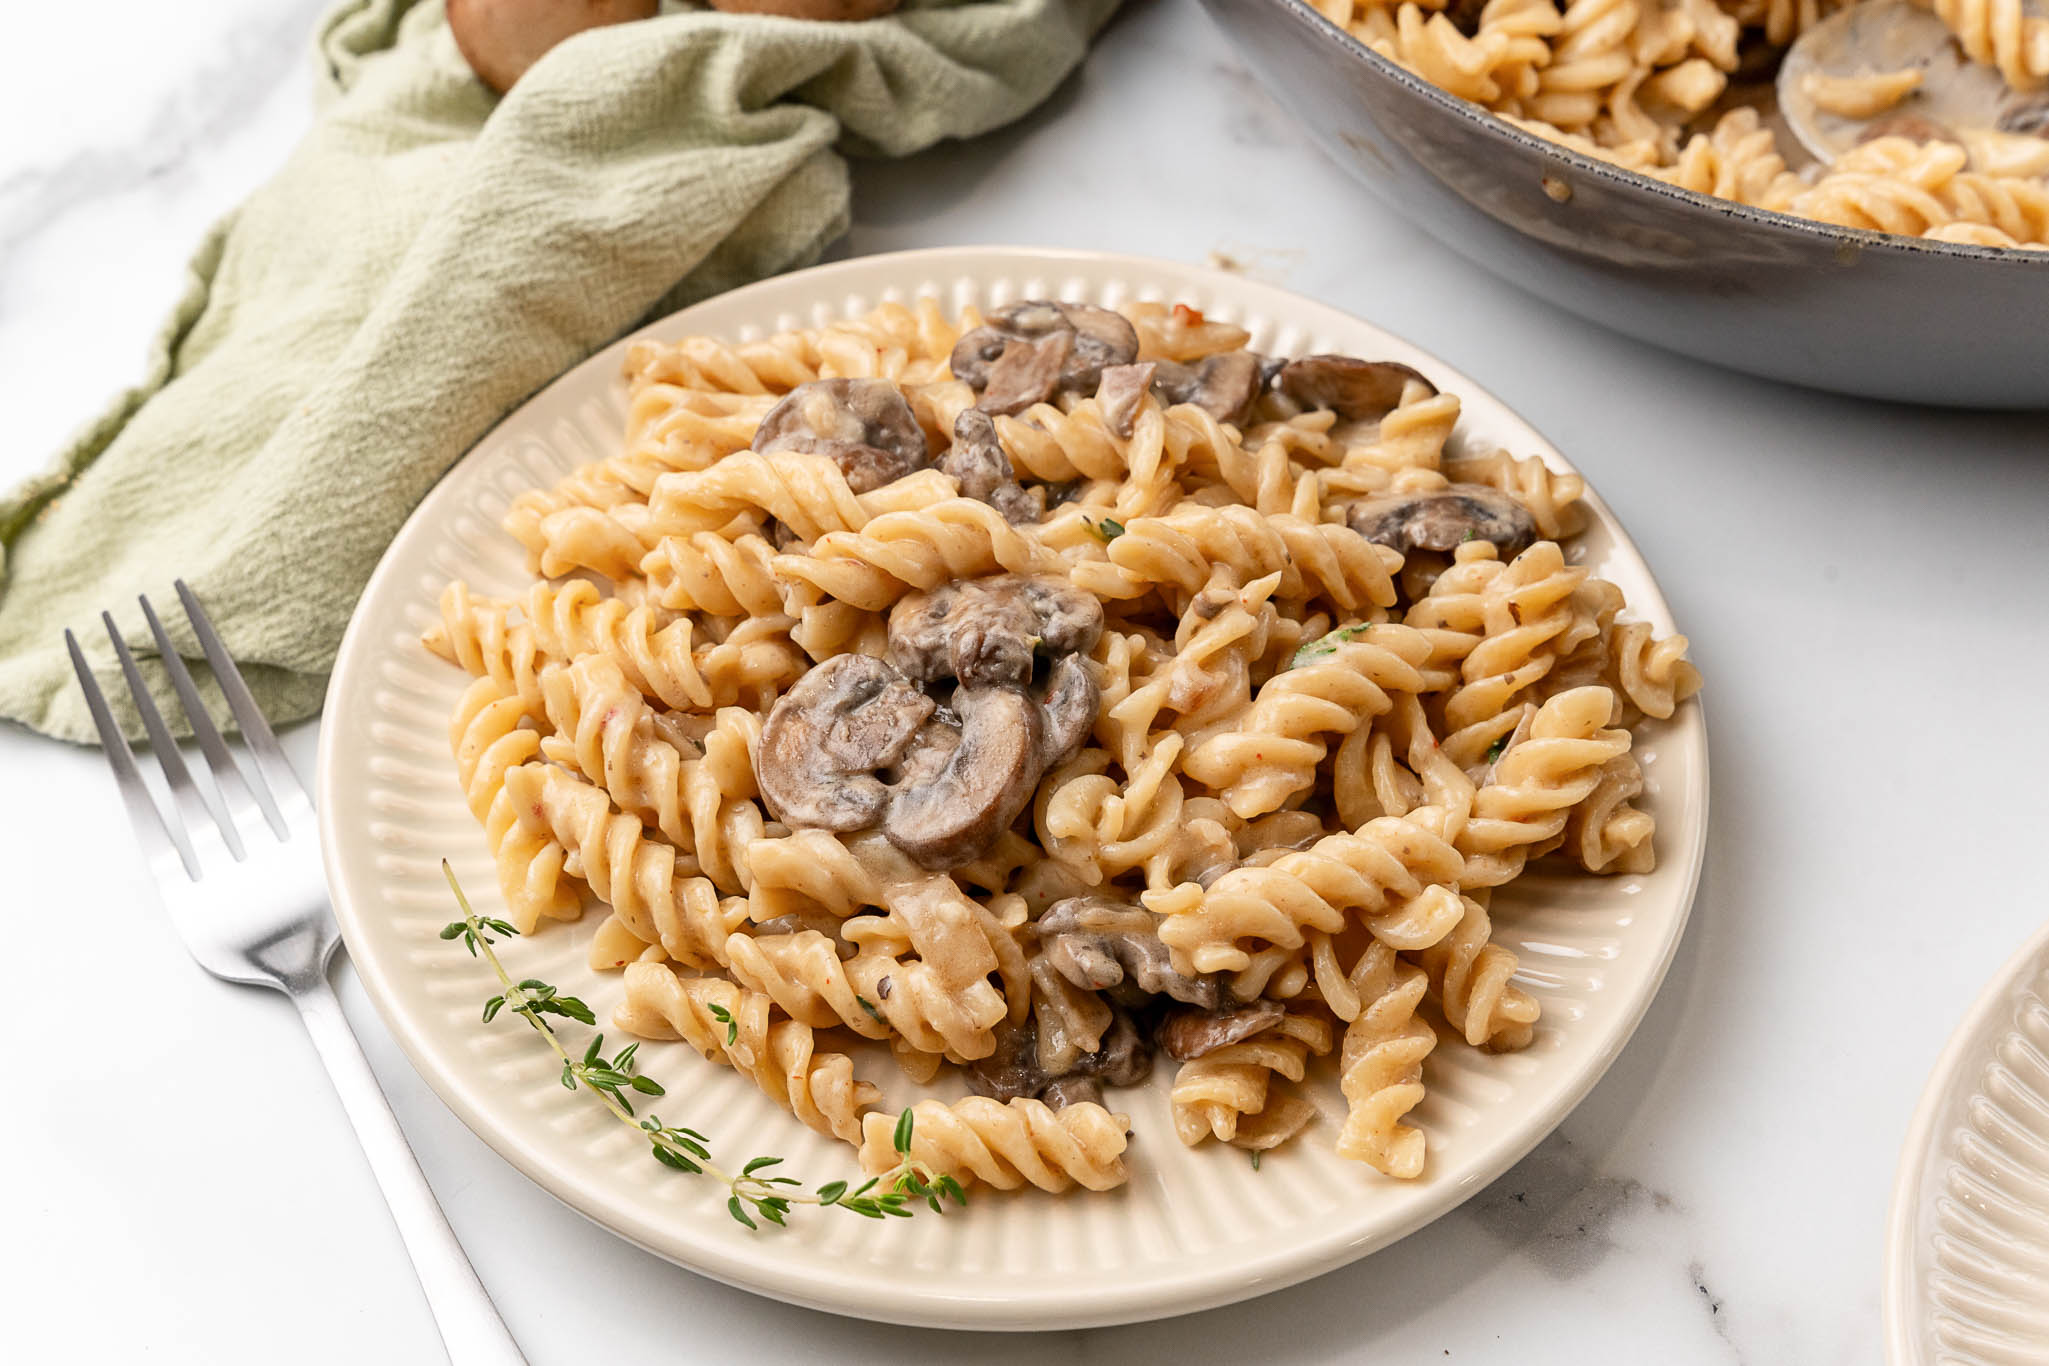
More Vegan Pasta Recipes
If you loved this creamy mushroom pasta, here are a few more vegan pasta dinners to try:
- Vegan Vodka Pasta
- Vegan Spinach Mushroom Lasagna
- Vegan Pasta Alfredo with Peas & Asparagus
- Roasted Butternut Squash and Pasta Casserole
Recipe
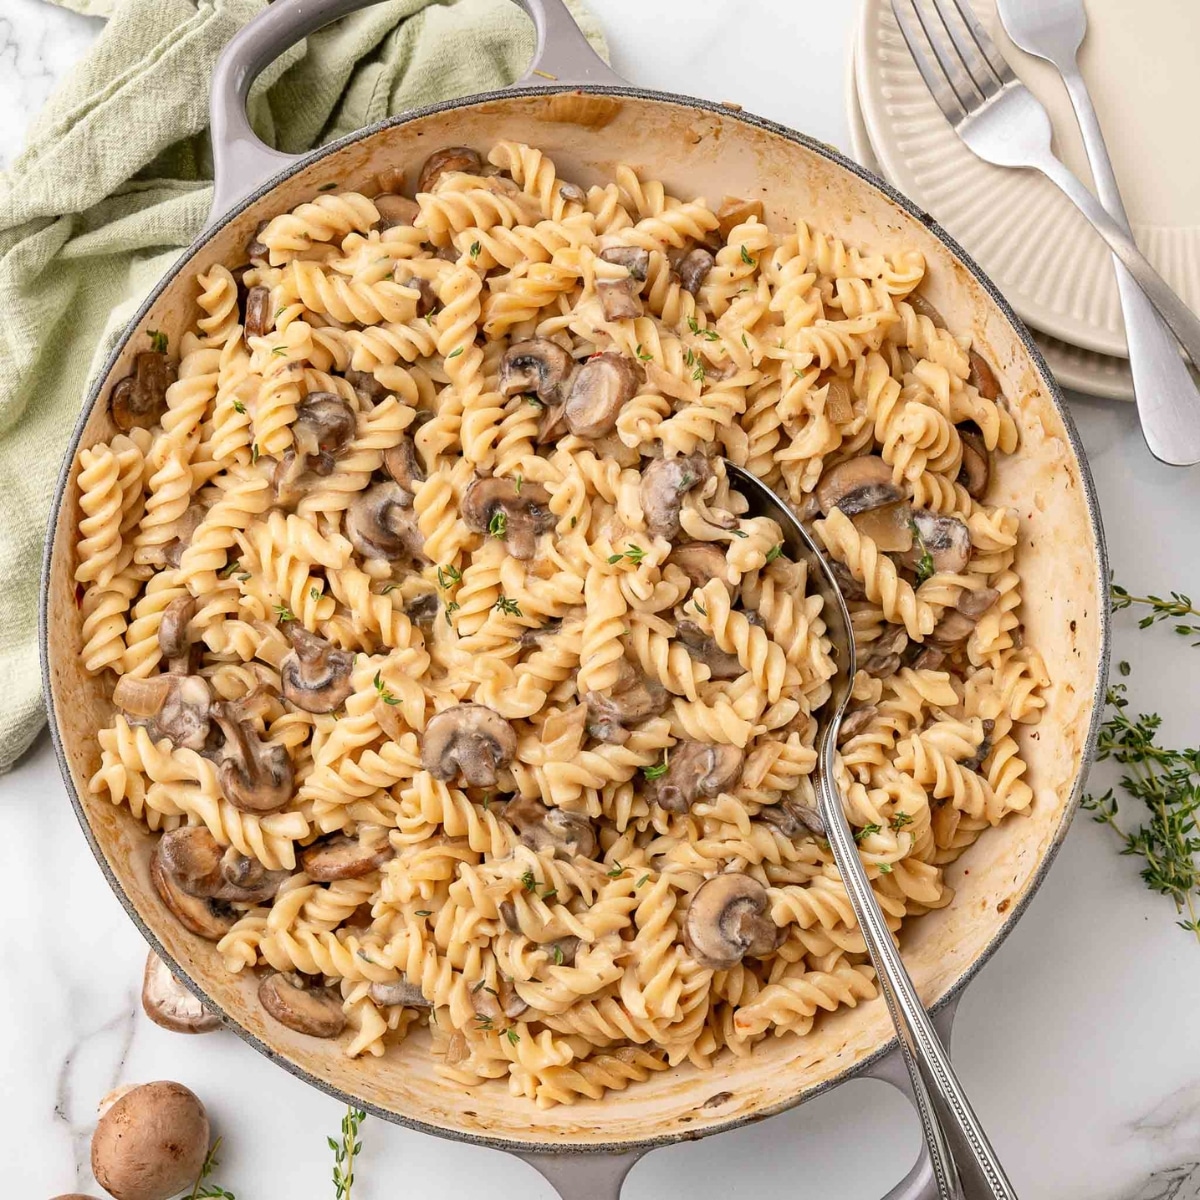
Vegan Creamy Mushroom Pasta
Rich, velvety, and packed with earthy mushroom flavor, this vegan creamy mushroom pasta comes together in under 30 minutes with simple pantry staples — no dairy needed.
Print
Pin
Save
Servings: servings
Ingredients
- 1 lb pasta rotini or penne recommended
- 2 tablespoons olive oil
- 1 medium yellow onion diced
- 16 oz baby bella mushrooms sliced
- 3 cloves garlic minced
- ¼ teaspoon red pepper flakes optional
- 2 tablespoons dry white wine such as Chardonnay or Pinot Grigio; sub extra broth if preferred
- 3 tablespoons vegan butter
- 3 tablespoons all-purpose flour use gluten-free flour blend if needed
- 1 cup vegetable broth
- 1 cup full-fat coconut milk shaken well before opening
- 2 tablespoons soy sauce or tamari for gluten-free
- 2 teaspoons fresh thyme minced, plus more to garnish
Instructions
- Cook the pasta according to package directions until al dente. Reserve a cup of pasta water before draining, then drain and set aside.
- Heat the olive oil in a large skillet over medium heat. Add the diced onion and cook, stirring frequently, until softened and translucent, about 4–5 minutes.
- Add the sliced mushrooms and spread them into a single layer. Cook without stirring for 2 minutes, then stir and continue cooking until the mushrooms have released their liquid and it has fully evaporated, about 8–10 minutes total. Add the minced garlic and red pepper flakes and cook for 1 more minute.
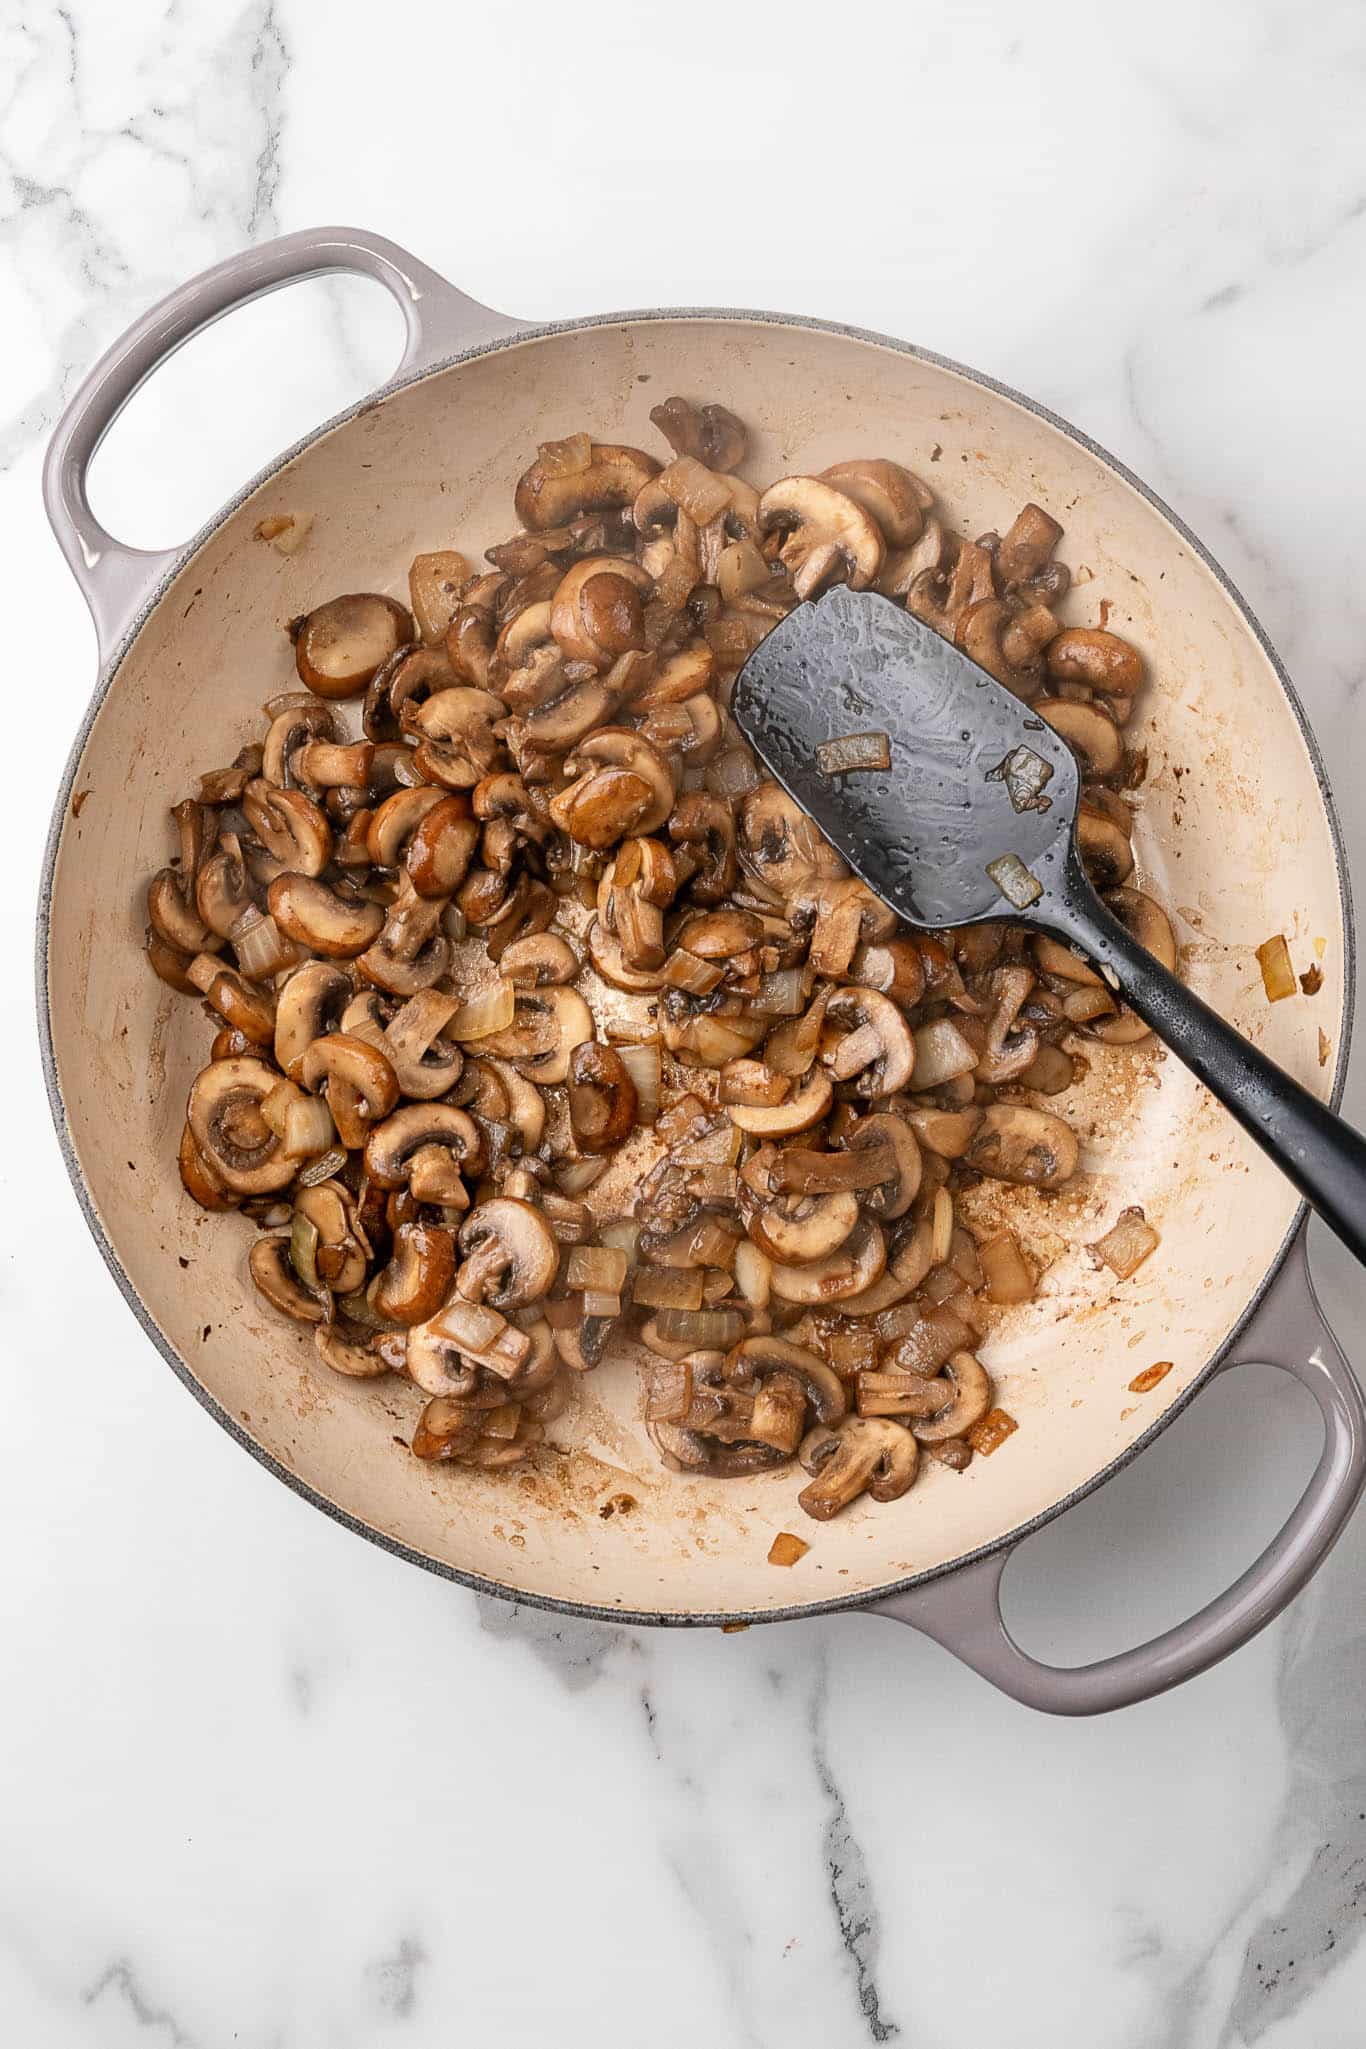
- Pour in the white wine and scrape up any browned bits from the bottom of the pan. Let the liquid reduce by half, about 1 minute. Add the vegan butter and let it melt completely, then sprinkle the flour over the vegetables and stir to coat. Cook for 1 minute to eliminate the raw flour taste.
- Slowly pour in the vegetable broth a little at a time, stirring continuously after each addition to prevent lumps. Once all the broth is incorporated, stir in the coconut milk, soy sauce, and thyme.
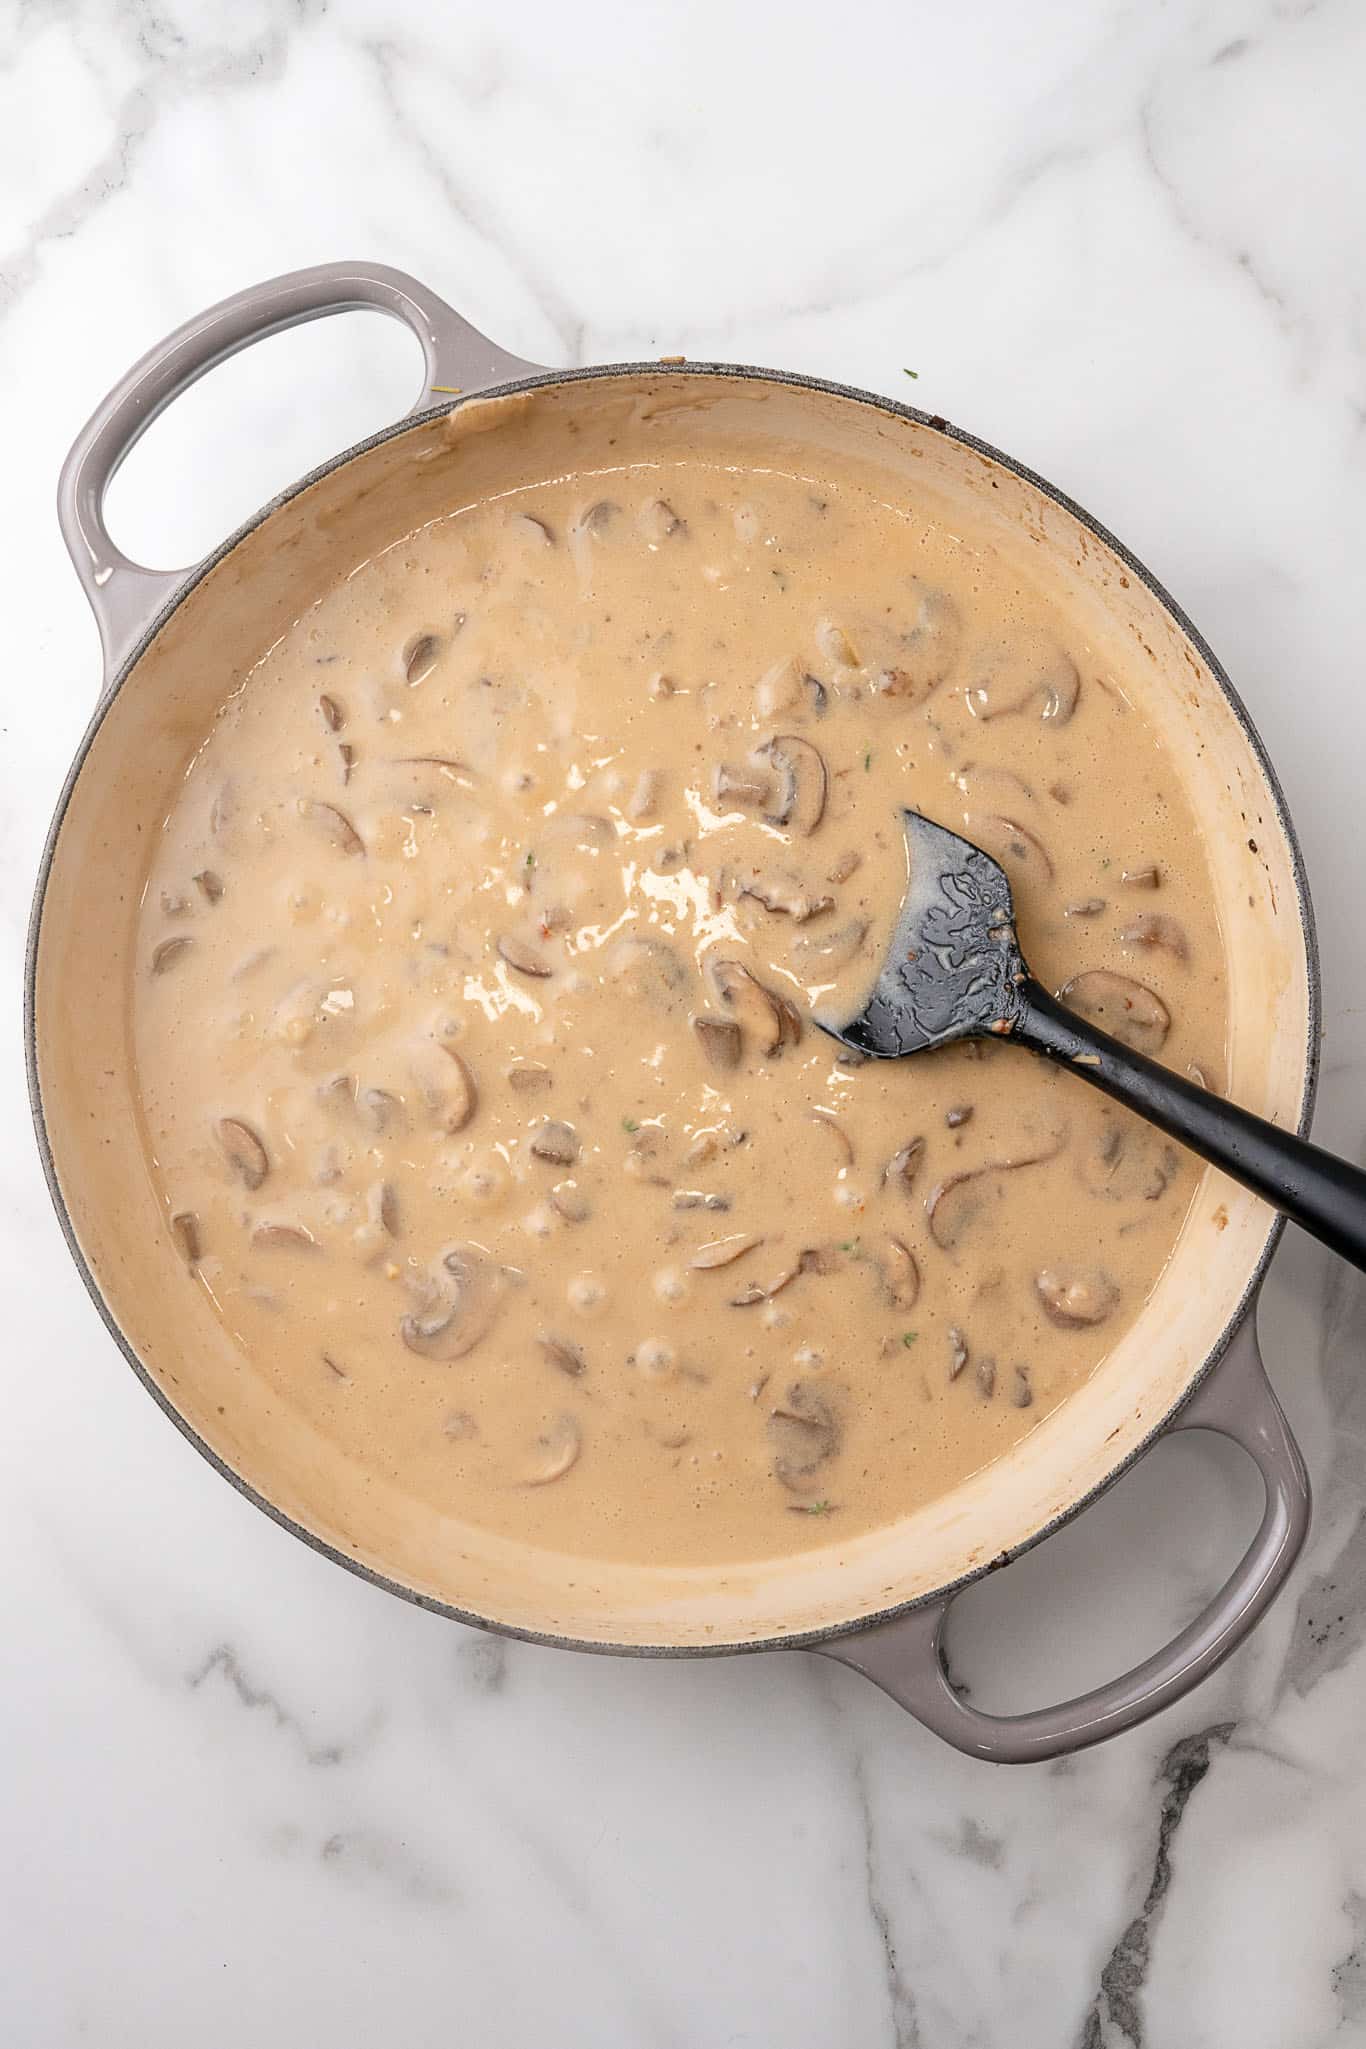
- Bring the sauce to a gentle simmer and cook, stirring occasionally, until thickened to a creamy consistency, about 3–4 minutes. If the sauce becomes too thick, loosen it with a splash of reserved pasta water.
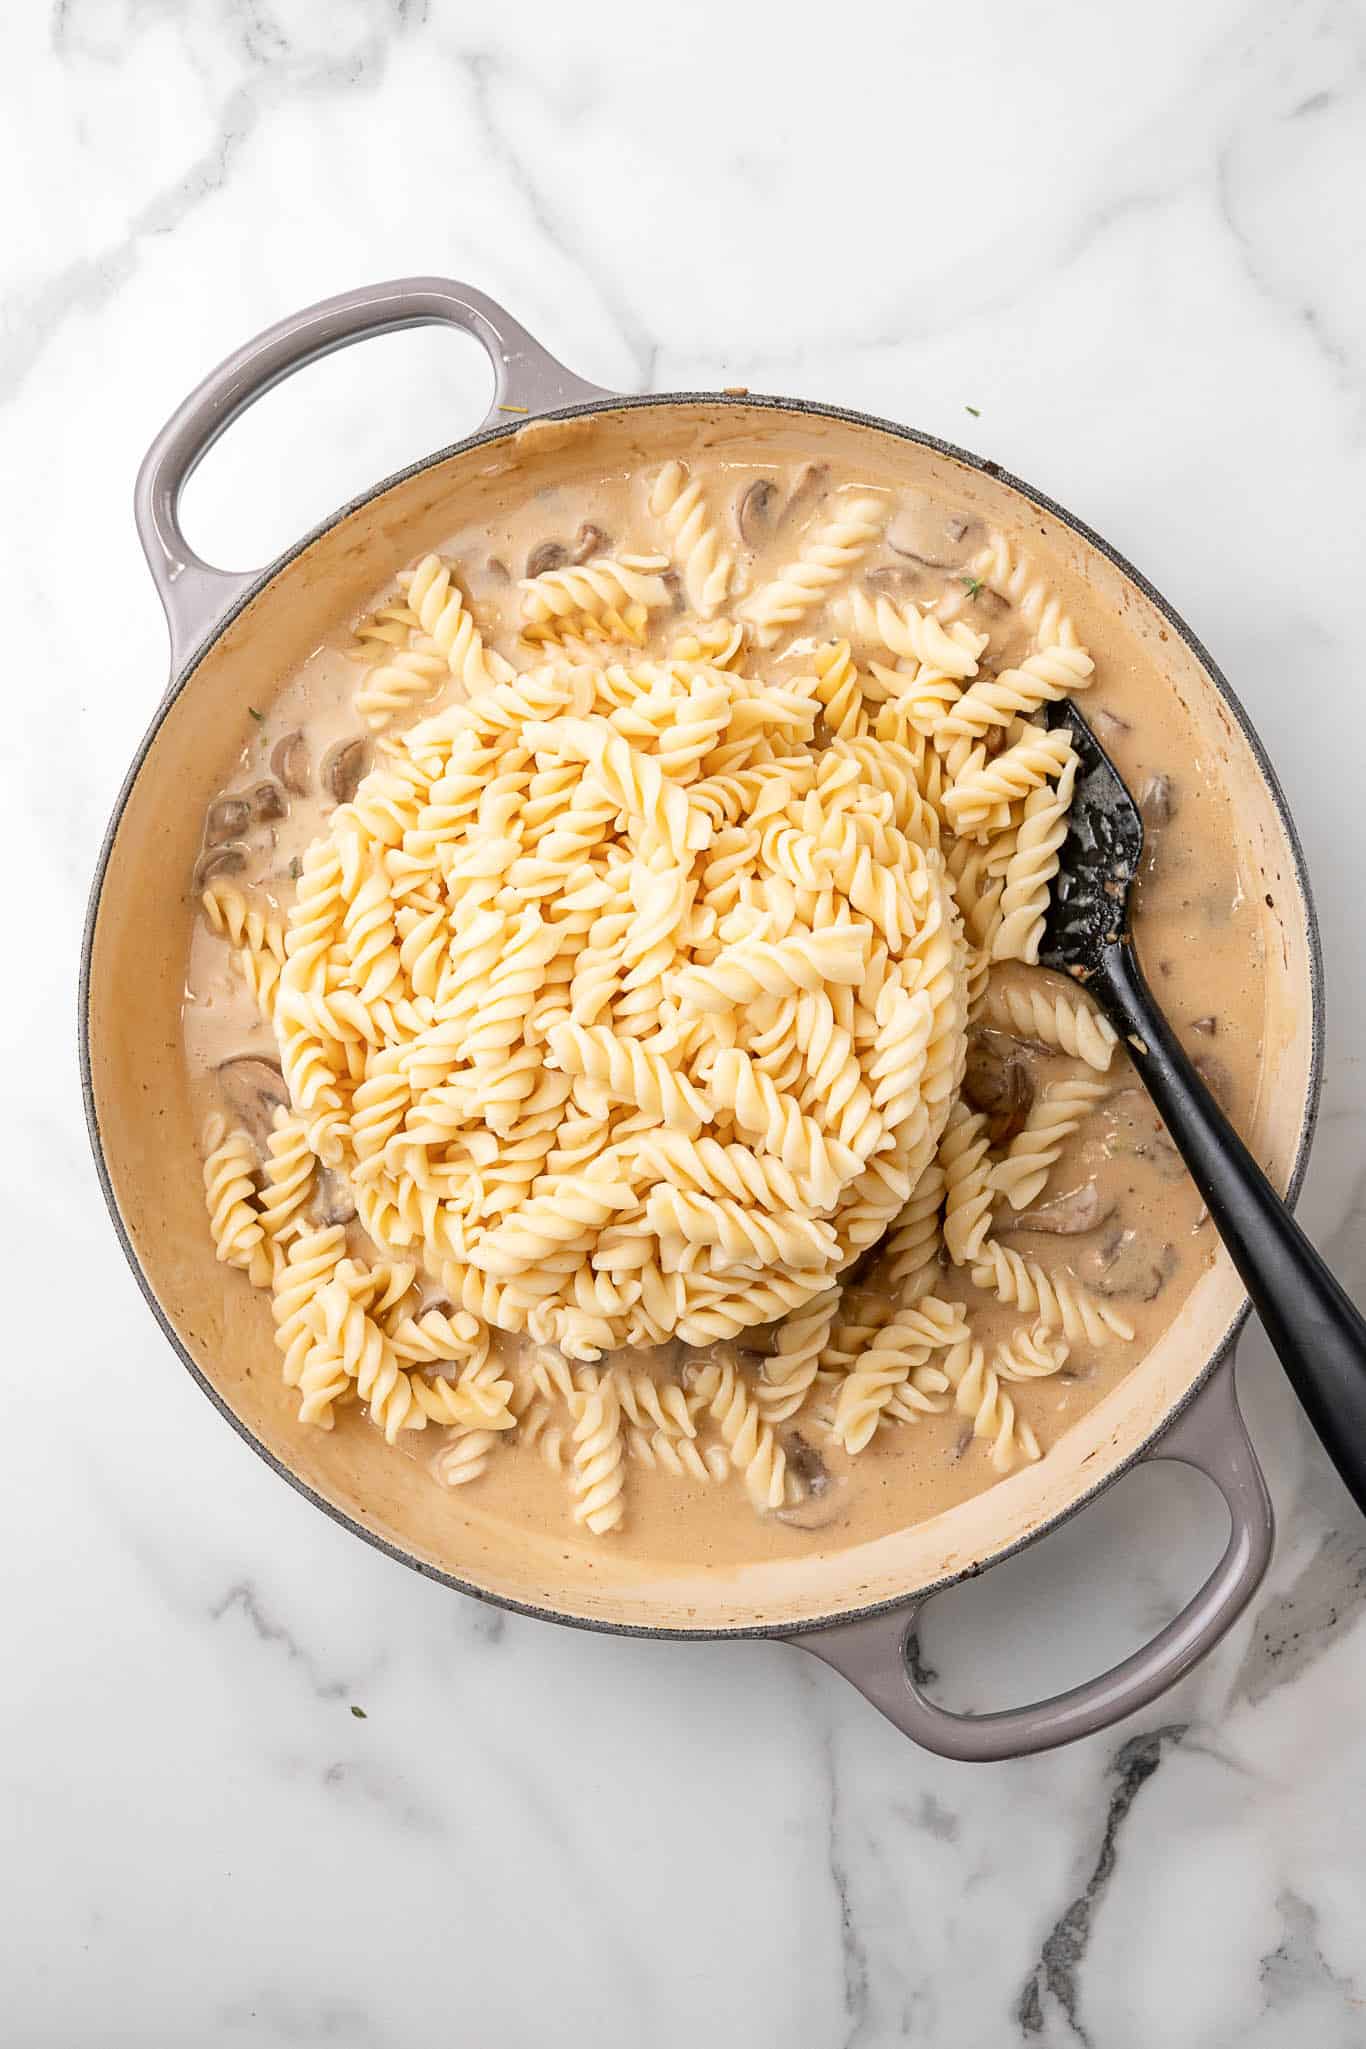
- Add the cooked pasta to the skillet and toss well to coat every piece in the sauce. Taste and adjust salt and pepper as needed.
- Serve immediately, garnished with fresh thyme leaves.
Nutrition (Estimate per Serving)
Calories: 3kcalCarbohydrates: 1gProtein: 14gFat: 19gSaturated Fat: 9gPolyunsaturated Fat: 2gMonounsaturated Fat: 6gTrans Fat: 0.03gSodium: 235mgPotassium: 651mgFiber: 3gSugar: 1gVitamin A: 125IUVitamin C: 3mgCalcium: 48mgIron: 3mg
Vegan-ize any recipe!Grab our free vegan cheat sheet, packed with my favorite easy substitutions to make any recipe vegan.
Vegan Quinoa and Wild Rice Burgers
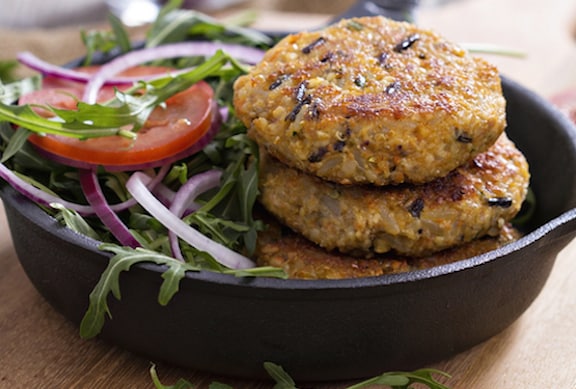
These vegan quinoa and wild rice burgers are hearty, wholesome, and satisfying enough to win over anyone at the table - no meat required.
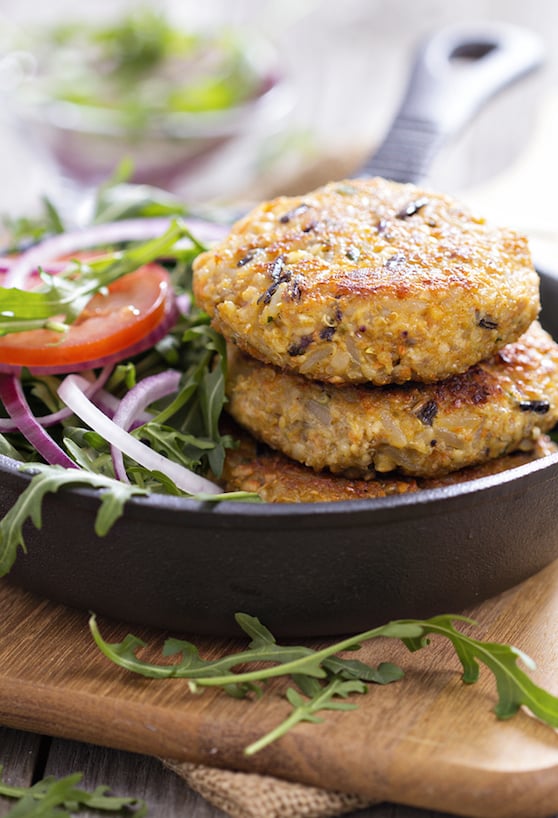
Key Ingredients & Substitutions
- Wild rice. The chewy, nutty backbone of these burgers. Wild rice holds its texture well after cooking and gives the patties a nice hearty bite. You can swap it for brown rice in a pinch, though you'll lose some of that characteristic chewiness.
- Cooked quinoa. Adds protein and helps bind the patties together. Any color of quinoa works - white, red, or tri-color. If you're making this gluten-free, quinoa flakes are a great substitute for the oats as well.
- Quick-cooking oats. Soaked in boiling water, they become the glue that holds the burgers together. For a gluten-free version, swap in certified gluten-free oats or quinoa flakes as noted in the recipe.
- Salt-free all-purpose seasoning blend. This is the workhorse flavor builder - look for blends like Mrs. Dash or make your own. If you don't have one on hand, a mix of garlic powder, onion powder, dried thyme, and dried oregano works well.
- Smoked paprika. Adds depth and a very subtle smokiness. Sweet paprika is a perfectly good substitute, or try a pinch of chipotle powder for a spicier kick.
- Fresh cilantro or parsley. Optional but recommended - fresh herbs brighten the whole patty. Cilantro gives a more vibrant, punchy finish; parsley is milder. Either works, or you can skip them entirely.
Helpful Tips
Cook the wild rice low and slow. Wild rice takes about 35 minutes at a gentle simmer, and rushing it makes it tough. The grains should just start to split and curl before you pull them off the heat. Undercooked wild rice won't blend into the patty mixture well.
Let the oat mixture absorb fully. When you cover the oats with boiling water, give them a full 5 minutes before mixing. If you rush this step, the oats won't fully hydrate and your patties will be crumbly rather than cohesive.
Pack the measuring cup firmly. Scooping loosely will give you fragile patties. Fill the ½-cup measuring cup with the burger mixture and press it down firmly before inverting onto the baking sheet. The more compact the patty going in, the better it holds together coming out.
Don't skip the flip. At the 15-minute mark, turn each patty gently using a thin spatula. This is what gives both sides that golden, slightly crisp exterior. If a patty sticks or starts to crumble, let it bake another 2 minutes before attempting the flip.
Make ahead and freeze. These patties freeze beautifully. Bake them fully, let them cool completely, then freeze in a single layer on a baking sheet before transferring to a bag. Reheat from frozen in a 375°F oven for about 15 minutes, flipping once.
Also worth trying: our gently curried tofu burgers.
Variations
- Add lentils. Stir in ½ cup of cooked brown or green lentils for even more protein and a slightly denser texture - similar to the filling Vegan Quinoa Mushroom Burger.
- Make them spicy. Add ½ teaspoon of cayenne pepper or a tablespoon of your favorite hot sauce to the mixture. A dash of chipotle powder in place of (or alongside) the smoked paprika works especially well.
- Tex-Mex version. Swap the cilantro for parsley, add ¼ cup of corn and ¼ cup of drained black beans. Serve with salsa, sliced avocado, and a squeeze of lime.
- Mushroom boost. Sauté ½ cup of finely diced cremini mushrooms with the onion and garlic. They add umami depth and extra moisture that melds beautifully with the wild rice.
- Herbed version. Use a full ¼ cup of mixed fresh herbs - parsley, chives, and a little tarragon - and add 1 teaspoon of Dijon mustard to the mix. Great with a simple aioli or vegan burger sauce.
- Pan-fried option. If you prefer a crispier exterior, pan-fry in a thin layer of oil over medium heat for about 5 minutes per side rather than baking. The outside crisps up more quickly, so watch the heat carefully.
Serving Ideas
These burgers are sturdy enough to hold up in a bun with all the classic toppings - lettuce, tomato, onion, pickles, and a generous smear of vegan mayo or copycat vegan Big Mac sauce. A toasted brioche-style bun is especially good here since the slight sweetness contrasts nicely with the earthy grains. You can also tuck them into a pita pocket with shredded cabbage and tahini sauce for a more Mediterranean feel.
Serve them alongside a simple green salad, roasted sweet potato wedges, or fresh tomato relish for a complete meal. They also work beautifully on top of a grain bowl - break one apart over quinoa or farro, add a handful of greens and a drizzle of lemon tahini dressing, and you have a satisfying lunch that holds you for hours.
Storing & Freezing
Let leftover patties cool completely, then store them in an airtight container in the refrigerator for up to 4 days. To reheat, warm them in a 350°F oven for 8-10 minutes or in a dry skillet over medium-low heat for a couple minutes per side. Avoid microwaving if you can - it softens the exterior and makes the patties a bit mushy.
These burgers freeze very well. Once fully baked and cooled, freeze in a single layer on a lined baking sheet until solid, then transfer to a zip-close freezer bag. They'll keep for up to 3 months. Reheat straight from frozen in a 375°F oven for 15 minutes, flipping halfway through. The texture holds up remarkably well after freezing.
More Vegan Burger Recipes
If you loved this recipe, check out our full collection of the best vegan burger recipes, including our chipotle black bean burgers for a smoky kick - or here are a few more individual favorites:
- Vegan Chipotle Black Bean Burgers
- Vegan Quinoa Mushroom Burger
- Vegan Chickpea Patties
- Easy Vegan Portobella Burgers
- Best Vegan Burger Recipes
Recipe
Vegan Quinoa and Wild Rice Burgers
These vegan quinoa and wild rice burgers are hearty and satisfying, with two wholesome grains making up the base. Great on buns, in pitas, or on their own with your favorite sauce.
Print
Pin
Save
Servings: burgers
Ingredients
- ½ cup wild rice uncooked
- 1 tablespoon olive oil
- 1 medium-large onion finely chopped
- 2 cloves garlic minced
- ½ cup quick-cooking oats or quinoa flakes for gluten-free
- 2 cups cooked quinoa firmly packed
- 1 tablespoon salt-free all-purpose seasoning blend
- 1 teaspoon ground cumin
- 1 teaspoon smoked paprika or sweet paprika
- ¼ cup fresh cilantro or parsley minced, optional
- salt and pepper to taste
Instructions
- Preheat the oven to 400°F. Line a baking sheet with parchment paper.
- Combine the wild rice with 1 ½ cups water in a small saucepan. Bring to a rapid simmer, then lower the heat, cover, and cook until the water is absorbed, about 35 minutes.
- Heat the oil in a medium saucepan. Add the onion and sauté over medium heat until translucent, about 5 minutes. Add the garlic and continue until golden.
- Place the oats in a large bowl and cover with 1 cup boiling water. Let stand for 5 minutes. Add the sautéed onion and garlic, cooked wild rice, cooked quinoa, seasoning blend, cumin, paprika, and cilantro (if using). Season with salt and pepper. Mix well.
- Lightly oil a round ½-cup measuring cup. Scoop a level portion of the mixture and invert onto the parchment, tapping firmly to release. Flatten to about ½-inch thickness with the bottom of the cup. Repeat with remaining mixture.
- Bake for 15 minutes, then flip each burger carefully and bake for another 15 minutes, until golden and firm on both sides. Serve on their own or with buns and your favorite condiments.
Nutrition (Estimate per Serving)
Calories: 107kcalCarbohydrates: 14gProtein: 3gFat: 3gPolyunsaturated Fat: 1gMonounsaturated Fat: 1gSodium: 6mgPotassium: 153mgFiber: 3gSugar: 1gVitamin A: 42IUVitamin C: 1mgCalcium: 45mgIron: 2mg
Vegan-ize any recipe!Grab our free vegan cheat sheet, packed with my favorite easy substitutions to make any recipe vegan.
Vegan Pasta Alfredo with Peas & Asparagus
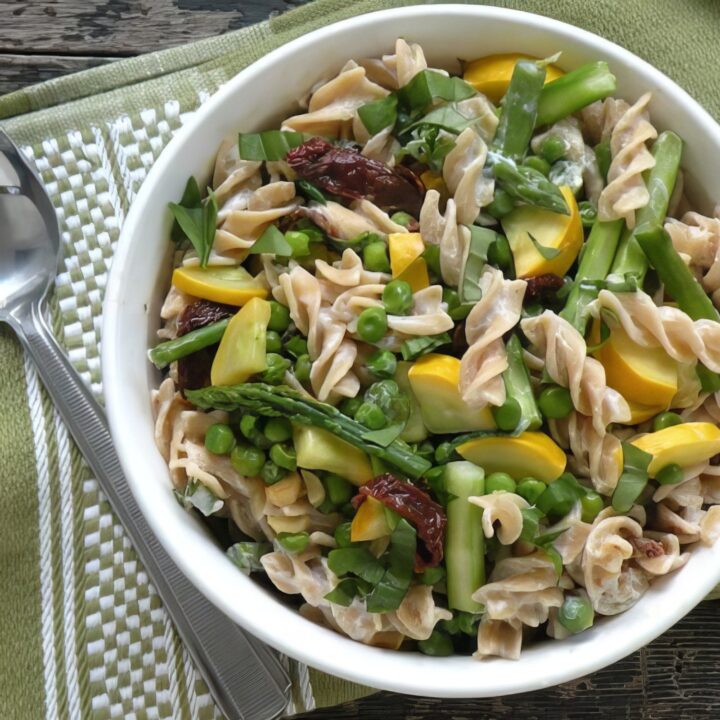
This vegan pasta alfredo with peas and asparagus is spring comfort food at its best - a silky, creamy sauce made entirely from blended silken tofu, tossed with tender spring vegetables and your favorite pasta shape. No dairy, no compromise.
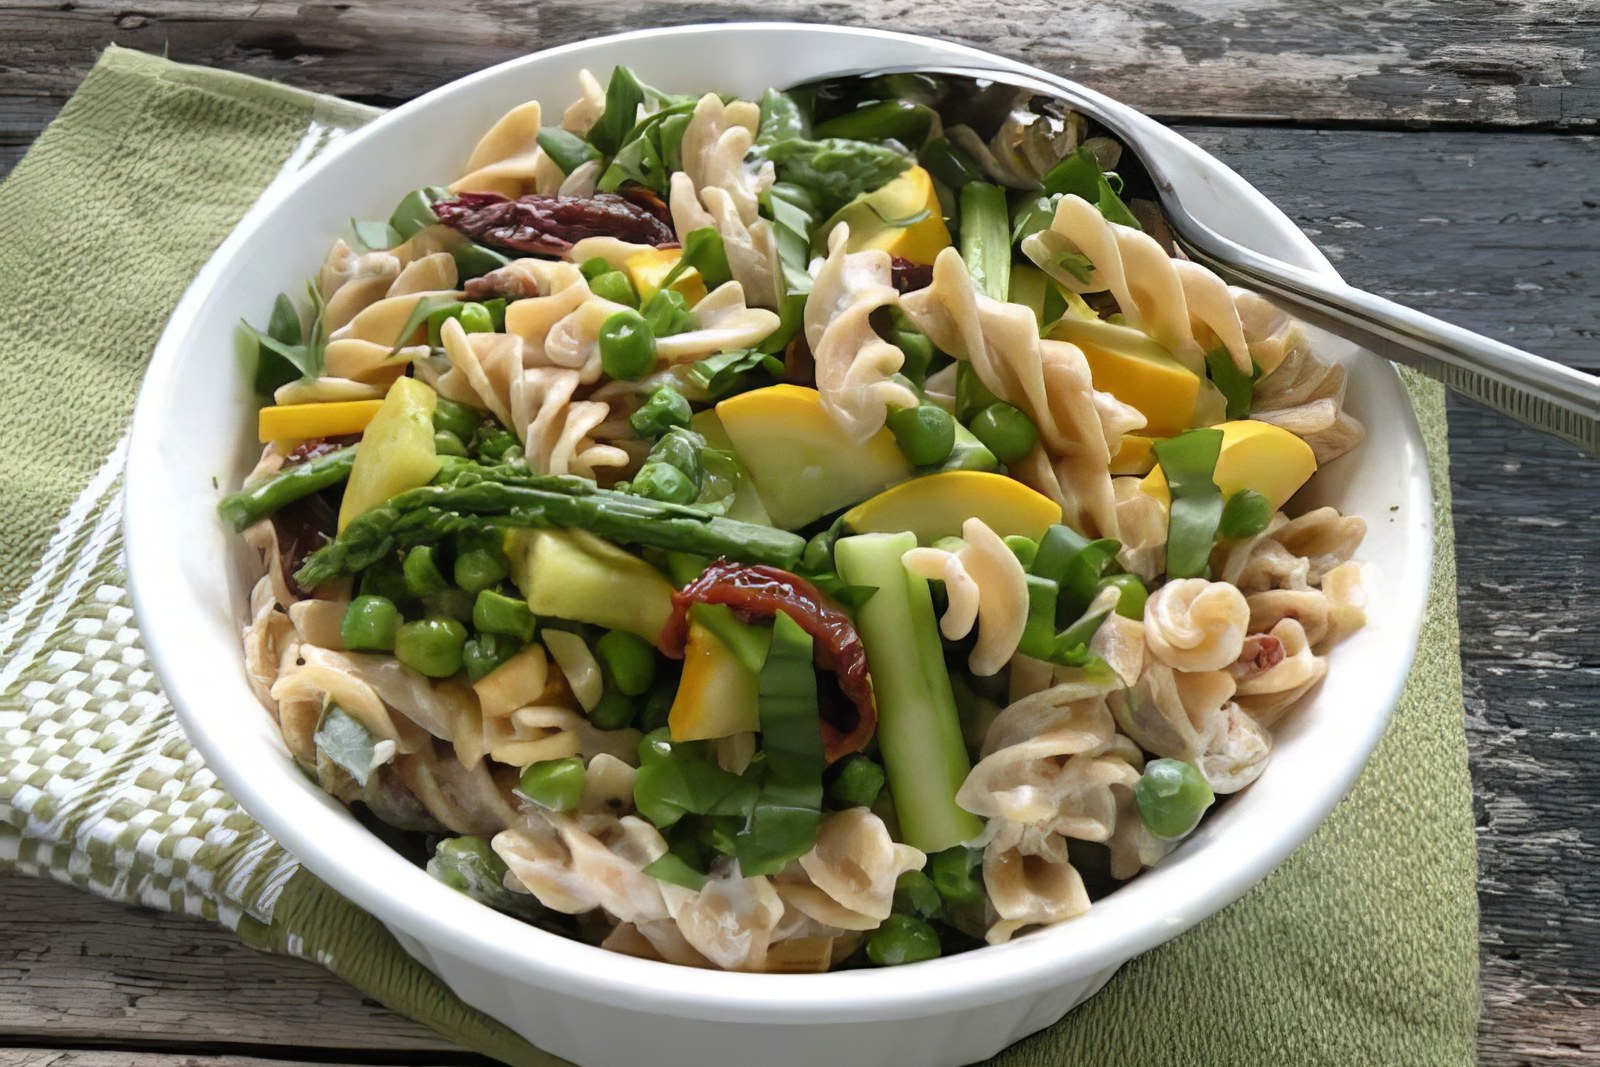
Key Ingredients & Substitutions
- Firm silken tofu. The secret to the dairy-free alfredo sauce - it blends completely smooth and creates a rich, creamy texture without any cream, butter, or cashews. Use firm silken tofu (like Mori-Nu shelf-stable) for the best result. Soft silken tofu works too and gives a slightly thinner sauce. Do not substitute regular firm tofu, which is too grainy to blend smoothly.
- Asparagus. Slender spears are ideal here - they cook quickly and are tender all the way through without peeling. If you can only find thick asparagus, peel the lower third of each stalk. Snap off the woody ends and cut into 1½-inch pieces so they're easy to eat with pasta.
- Yellow summer squash. Adds color and a mild sweetness. Zucchini is a direct swap. You can also skip it and increase the asparagus.
- Frozen peas. Sweet and bright - they thaw almost instantly in the pan. Fresh shelled peas in season are even better if you have them.
- Sun-dried tomatoes. Concentrated, chewy, and deeply savory - they balance the creaminess of the tofu sauce beautifully. Oil-packed or rehydrated dry-packed both work well. Slice them before adding.
- Pasta shape. Use a chunky shape - rotini, fusilli, farfalle, or gemelli - so the sauce and vegetables have something to cling to. Whole-grain pasta adds fiber and a nuttier flavor that plays well with the vegetables.
- Fresh lemon juice. The acid in the tofu sauce is what makes it taste bright and fresh rather than flat. Don't skip it.
Variations
- Add white beans. Stir in a drained 15-ounce can of cannellini or great northern beans for extra protein. For a no-cook pasta option, also try our vegan Greek pasta salad. If you love asparagus, our cream of asparagus soup makes a beautiful spring starter.
- eartiness.
- Make it gluten-free. Use your favorite GF pasta - brown rice pasta, chickpea pasta, or lentil pasta all work well with this sauce.
- Add nutritional yeast. Stir 2 to 3 tablespoons into the tofu sauce before blending for a cheesy, savory depth reminiscent of parmesan.
- Swap the greens. Stir in a few handfuls of baby spinach or arugula with the pasta at the end - they'll wilt just from the heat of the dish.
- Mushroom version. Add 8 ounces of sliced cremini or shiitake mushrooms to the pan with the garlic for an earthier, more substantial dish.
- Lemon herb version. Add the zest of one lemon to the tofu sauce and finish with a generous handful of fresh basil for a brighter, more Italian feel.
Tips for the Best Vegan Pasta Alfredo
- Blend the tofu sauce until completely smooth. Any graininess in the sauce will be noticeable in the final dish. Blend for a full minute, scraping down the sides, until the texture is silky.
- Reserve pasta water. A splash of the starchy cooking water is your best friend for loosening the sauce if it thickens too much when it hits the hot pasta.
- Don't overcook the vegetables. Tender-crisp is what you're after - asparagus and peas should still have a little bite. Five minutes in the covered pan is usually enough.
- Keep the heat low when adding the sauce. Silken tofu can break or become grainy if overheated. Warm it gently over low heat just until it's heated through.
- Serve immediately. Like all creamy pasta dishes, this is best fresh off the stove. The sauce will thicken as it sits - if reheating leftovers, add a splash of water or plant-based milk and warm over low heat.
How to Serve
Serve straight from the pan into wide pasta bowls, topped with extra fresh basil or parsley and a crack of black pepper. This is a complete meal on its own, but it pairs well with a simple green salad, garlic bread, or a wedge of crusty sourdough. For a more elaborate spread, serve alongside a bowl of marinated olives or a light tomato bruschetta. This also pairs beautifully alongside our vegan zucchini lasagna for an Italian dinner spread. Leftovers keep in the fridge for up to 3 days - reheat gently with a splash of water to revive the sauce.
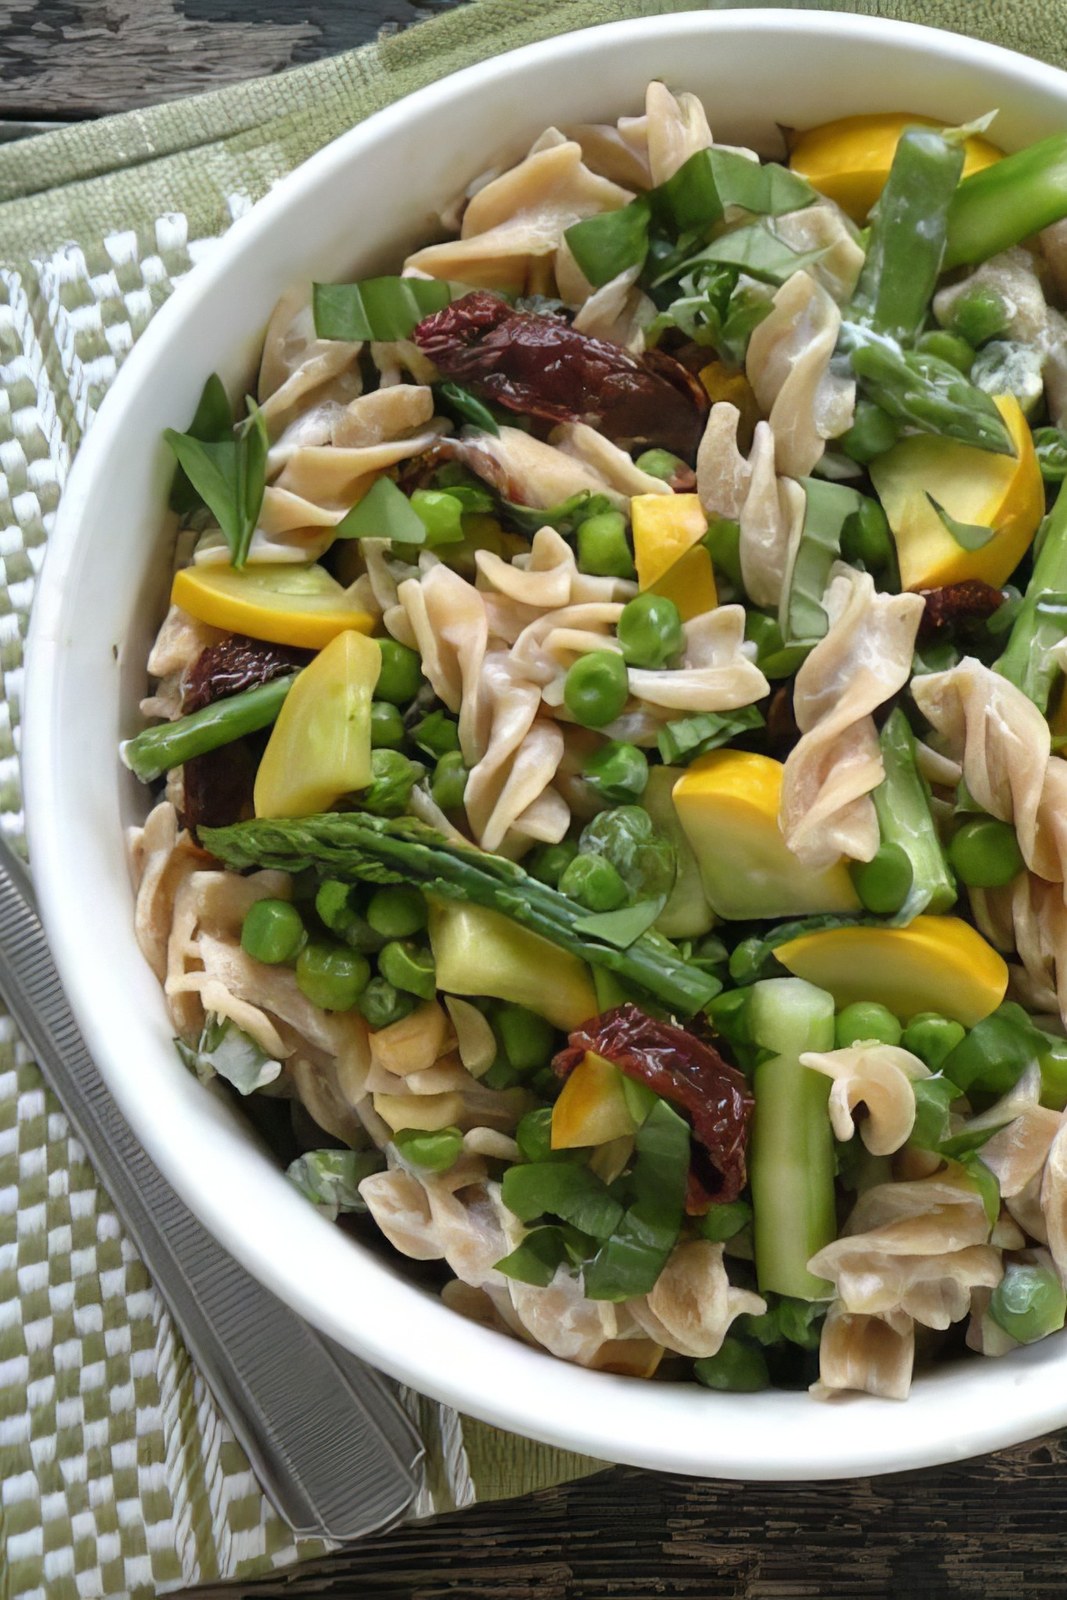
Recipe
Vegan Pasta Alfredo with Peas & Asparagus
A creamy vegan pasta alfredo made with silken tofu instead of dairy — light, luscious, and packed with spring vegetables. Asparagus, sweet peas, yellow squash, and sun-dried tomatoes make every bite colorful and satisfying.
Print
Pin
Save
Servings: servings
Ingredients
Pasta & Vegetables
- 12 ounces rotini, fusilli, farfalle, or other chunky pasta whole-grain preferred
- 1 tablespoon extra-virgin olive oil
- 3 cloves garlic minced
- 10 ounces slender asparagus tough ends snapped off, cut into 1½-inch pieces
- 1 cup frozen green peas or fresh shelled peas
- 1 medium yellow summer squash quartered lengthwise and thinly sliced
- ⅓ cup sun-dried tomatoes sliced (oil-packed or rehydrated)
- ¼ cup fresh parsley or basil minced or thinly sliced
Silken Tofu Alfredo Sauce
- 12.3 ounce package firm silken tofu drained
- 2 tablespoons fresh lemon juice about ½ lemon
- salt and freshly ground black pepper to taste
Instructions
- Cook the pasta in a large pot of well-salted boiling water according to package directions until al dente. Drain and set aside, reserving ¼ cup of the pasta cooking water.
- While the pasta cooks, combine the silken tofu and lemon juice in a blender or food processor. Blend until completely smooth and creamy, about 1 minute. Season with salt and pepper. Set aside.
- Heat the olive oil in a large, wide skillet over medium heat. Add the garlic and sauté for 1 to 2 minutes until fragrant and lightly golden — do not let it brown. Add the asparagus, peas, squash, sun-dried tomatoes, and ¼ cup water. Cover and cook for 4 to 5 minutes, stirring once halfway through, until the vegetables are just tender-crisp.
- Pour the silken tofu sauce over the vegetables and stir to coat. Cook over low heat for 1 to 2 minutes until heated through. If the sauce seems thick, stir in a splash of the reserved pasta water to loosen it.
- Add the drained pasta to the skillet and toss well to combine everything. Stir in the fresh parsley or basil. Taste and adjust salt and pepper. Serve immediately.
Notes
Silken tofu: Firm silken tofu (such as Mori-Nu) blends into a perfectly smooth, dairy-free cream sauce. Do not substitute regular firm tofu — it won't blend smoothly. Soft silken tofu works too and gives a slightly thinner sauce.
Asparagus prep: Use slender asparagus spears — they're tender throughout and don't need peeling. If using thicker spears, peel the lower third of each stalk with a vegetable peeler.
Make it gluten-free: Use your favorite gluten-free pasta. Brown rice pasta or chickpea pasta both hold up well with this sauce.
Add protein: Stir in a drained can of white beans or a handful of shelled edamame with the vegetables for extra plant-based protein.
Nutrition (Estimate per Serving)
Calories: 444kcalCarbohydrates: 23gProtein: 9gFat: 6gSaturated Fat: 2gPolyunsaturated Fat: 1gMonounsaturated Fat: 3gCholesterol: 7mgSodium: 63mgPotassium: 544mgFiber: 3gSugar: 1gVitamin A: 237IUVitamin C: 23mgCalcium: 105mgIron: 3mg
Vegan-ize any recipe!Grab our free vegan cheat sheet, packed with my favorite easy substitutions to make any recipe vegan.
Also try: our vegan creamy mushroom pasta.
Miso-Butternut Squash Soup with Soba or Udon Noodles
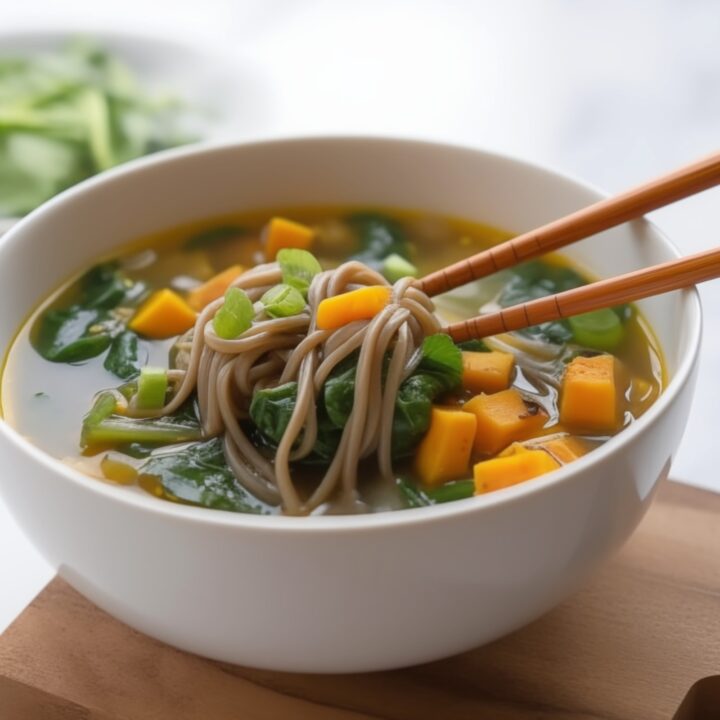
This miso butternut squash soup has been a reader favorite on VegKitchen since 2018 - and it's just as cozy and satisfying as ever. We've given it a fresh update with brand-new photos, but the recipe is the same warming bowl we've always loved: a rich miso-ginger broth, tender squash, soba noodles, and a heap of wilted greens.
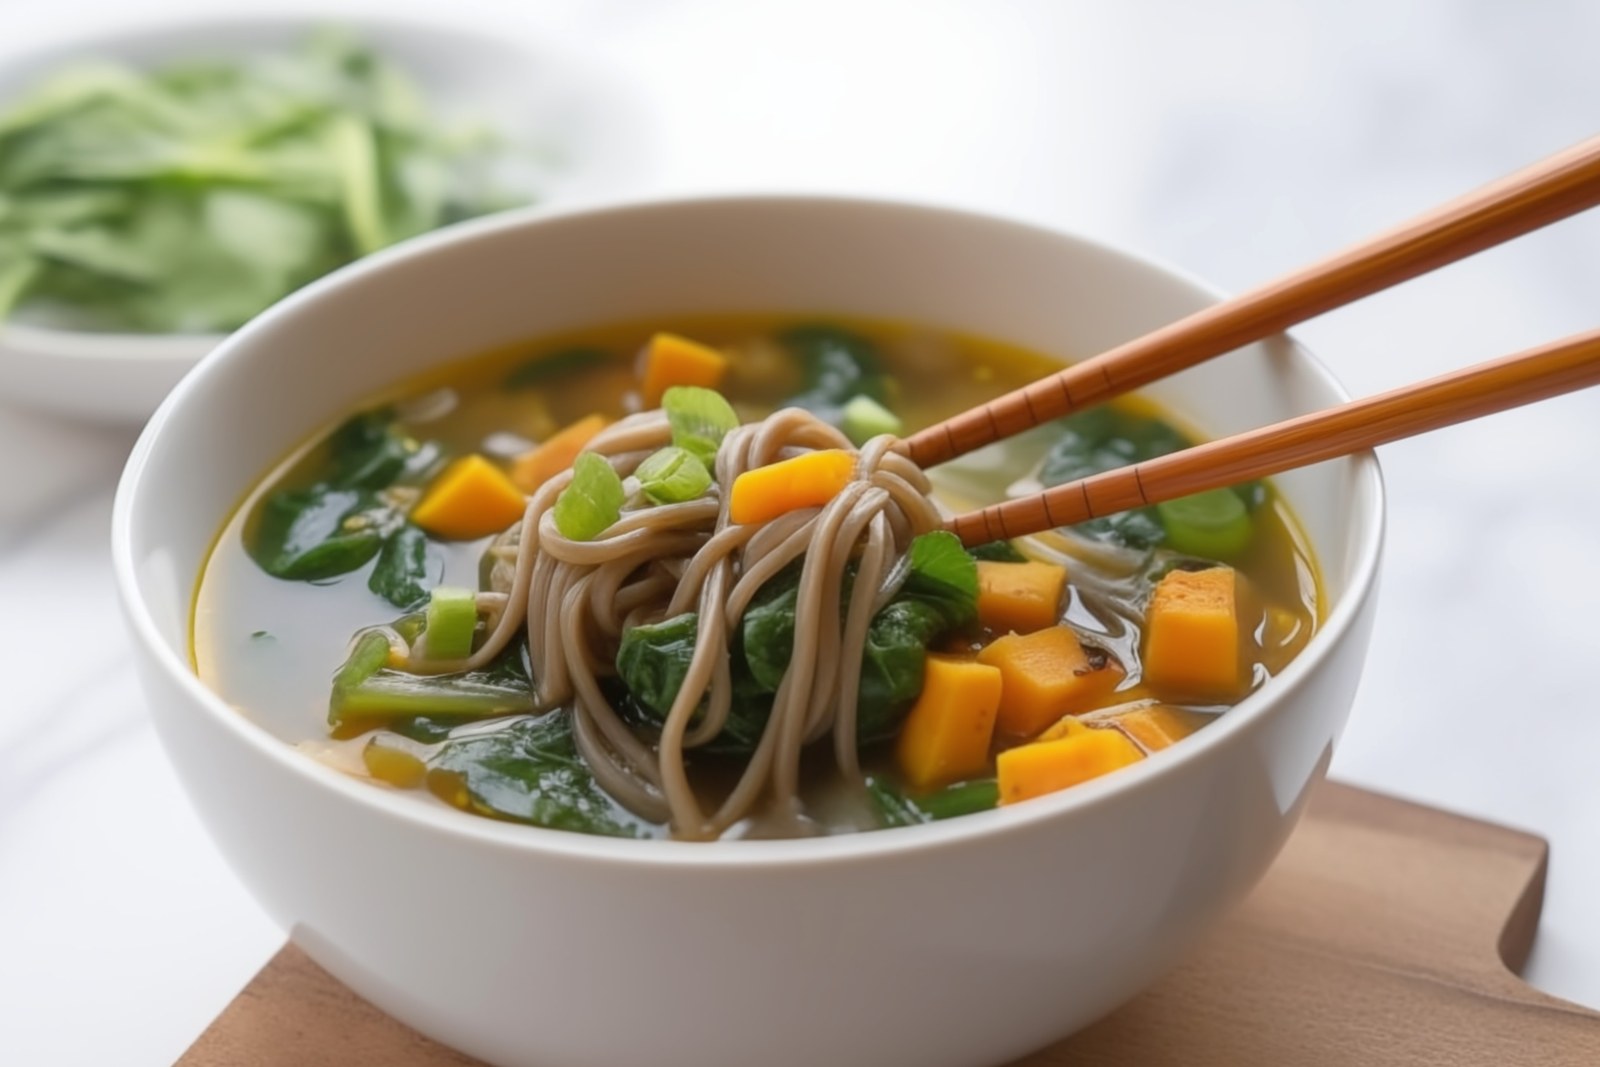
Key Ingredients & Substitutions
- Butternut squash. Roasted or microwaved until just tender - it adds natural sweetness and body to the broth. Kabocha squash or sweet potato work as swaps and cook in roughly the same time.
- Vegan miso paste. The soul of this soup. White (shiro) miso is mild and slightly sweet; yellow miso is a bit more savory; red miso is the boldest and most intense. Any variety works - just make sure it's labeled vegan, as some miso pastes contain dashi (fish stock). Stir it in at the very end, off the heat, to preserve its probiotic benefits.
- Soba noodles. Buckwheat soba gives the soup its earthy, nutty character. Pure buckwheat soba is also gluten-free - just check the label, as many commercial soba blends include wheat flour. Udon noodles work equally well for a thicker, chewier texture.
- Fresh ginger. Grated fresh ginger is essential here - it adds warmth and brightness that ground ginger can't replicate. Use as much as you like.
- Vegan vegetable bouillon cubes. Two cubes give the broth depth and savory umami to complement the miso. Choose a low-sodium, MSG-free brand. Vegetable broth works as a direct substitute - just use it in place of the water.
- Baby spinach. Stirred in at the end, it wilts in about a minute and adds color and nutrition. Watercress, baby arugula, baby bok choy, or any tender Asian green are excellent alternatives.
- Frozen peas. A simple addition that adds sweetness, color, and a little extra protein. Thaw them before adding so they don't drag down the broth temperature.
Variations
- Make it brothier. This soup is fairly thick as written. For a more broth-forward bowl, increase the water to 6 cups and add an extra bouillon cube.
- Add tofu. Cube a block of firm or extra-firm tofu and add it with the squash for extra protein. Press it first so it holds its shape in the soup.
- Spicy miso version. Stir a teaspoon of sriracha or a pinch of red pepper flakes into the broth along with the miso for a warming kick.
- Add edamame. Swap the peas for shelled edamame (thawed from frozen) for higher protein and a slightly nuttier flavor.
- Rice noodle version (gluten-free). Use thin rice noodles in place of soba. Soak them separately according to package directions, then add to bowls when serving to keep them from absorbing all the broth.
- Richer broth. Stir in a tablespoon of tahini or a drizzle of toasted sesame oil just before serving for a creamier, nuttier finish.
Tips for the Best Miso Butternut Squash Soup
- Never boil miso. Always dissolve it in warm (not boiling) water and stir it in at the very end with the heat off or very low. Boiling destroys the beneficial probiotics and dulls the flavor.
- Cook the squash just until tender. You want it to hold its shape in the soup, not turn to mush. Whether you're microwaving or roasting, test it with a knife - it should pierce easily but still feel firm.
- Cook noodles separately if making ahead. Soba absorbs broth quickly as it sits. If you think you'll have leftovers, cook the noodles separately and add them to individual bowls at serving time.
- Taste and adjust the miso at the end. Start with 2 tablespoons, then add more to taste. The amount you need depends on the brand and type of miso - some are much saltier than others.
- Prep the squash ahead. The squash can be cooked, peeled, and cubed up to 2 days in advance and kept in the fridge. It makes this a genuinely quick weeknight soup.
How to Serve
Serve immediately in deep bowls with chopsticks for the noodles and a spoon for the broth. This soup is a complete meal on its own but pairs beautifully with a simple cucumber salad, edamame, or steamed dumplings. For a heartier spread, serve alongside brown rice or a wedge of crusty sourdough bread. Leftovers keep for up to 3 days in the fridge - store the noodles and broth separately if possible, and reheat gently over low heat without boiling. For another light and healthy vegan soup, try our yellow squash soup, our cream of asparagus soup, or our fresh tomato and corn soup. For a hearty butternut squash dinner, our creamy butternut squash pasta casserole is wonderfully satisfying.
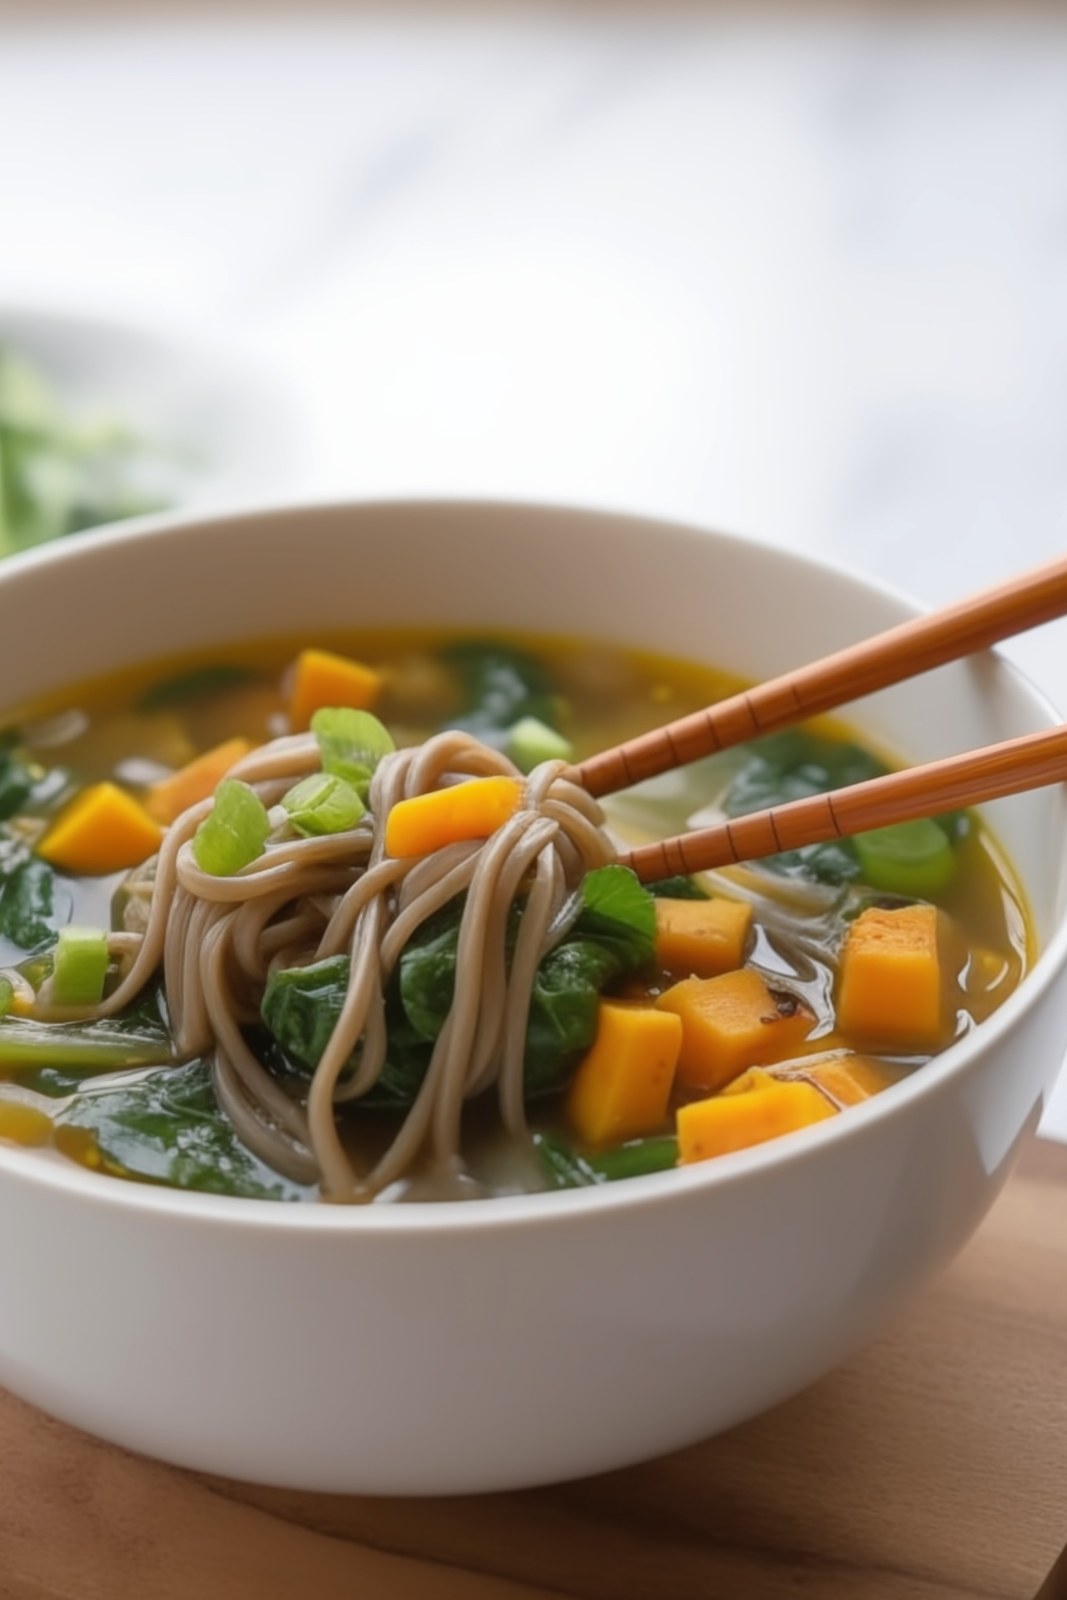
Recipe
Miso Butternut Squash Soup with Soba Noodles
A warming, deeply savory vegan noodle soup built on a miso-ginger broth with tender butternut squash, soba noodles, spinach, and peas. Quick to pull together once the squash is cooked — and beautiful in the bowl.
Print
Pin
Save
Servings: servings
Ingredients
- 1 small butternut squash about 1 pound
- 4 cups water plus more as needed
- 4 ounces soba (buckwheat) or udon noodles broken in half
- 2 teaspoons fresh ginger grated, or more to taste
- 2 vegan vegetable bouillon cubes low-sodium, no MSG
- 4 ounces fresh baby spinach about 4 to 6 cups loosely packed
- 1 cup frozen green peas thawed
- 3 scallions thinly sliced
- 3 tablespoons vegan miso paste white, yellow, or red — see notes
- freshly ground black pepper to taste
Instructions
- Pierce the butternut squash a few times with a knife. Microwave on high for 4 to 6 minutes, adding 1 minute at a time, until it can be pierced easily with a knife but still holds its shape. Alternatively, wrap the whole squash in foil and bake at 375°F for 30 to 40 minutes until just tender. Let cool until easy to handle, then halve, scoop out the seeds, peel, and cut the flesh into bite-sized chunks. Set aside. (This step can be done ahead of time.)
- Bring the 4 cups of water to a rapid simmer in a large soup pot. Add the soba or udon noodles and cook according to package directions until al dente, about 4 to 5 minutes.
- Add the grated ginger, bouillon cubes, thawed peas, and squash chunks to the pot. Stir to dissolve the bouillon and cook for 3 to 4 minutes over medium heat. Add up to 1 cup additional water if the soup seems too thick.
- Stir in the spinach and cook just until wilted, about 1 to 2 minutes. Add the scallions and stir to combine.
- In a small bowl, whisk the miso paste with ⅓ cup warm (not boiling) water until smooth. Stir into the soup. Taste and add more dissolved miso if desired — do not boil the soup after adding miso, as heat destroys the beneficial probiotics. Season with black pepper and serve immediately.
Notes
Choosing miso: Use white (shiro) or yellow miso for a milder, sweeter flavor; red miso for a more intense, earthy broth. Always check the label — some miso pastes contain dashi (fish stock) and are not vegan. Look for miso labeled vegan or check that the ingredients list only soybeans, salt, and grain (rice or barley).
Soba noodles: Pure buckwheat soba is gluten-free, but many commercial soba blends contain wheat flour — check the label if gluten is a concern.
Greens variation: Watercress, baby arugula, chopped baby bok choy, or other Asian greens all work beautifully in place of or alongside the spinach.
Make ahead: Cook the squash up to 2 days in advance and refrigerate. The assembled soup is best eaten fresh — the noodles will absorb the broth on standing.
Vegan-ize any recipe!Grab our free vegan cheat sheet, packed with my favorite easy substitutions to make any recipe vegan.
Also try: our creamy asparagus and pea pasta.
Cauliflower Fried Rice with Mushrooms & Chickpeas
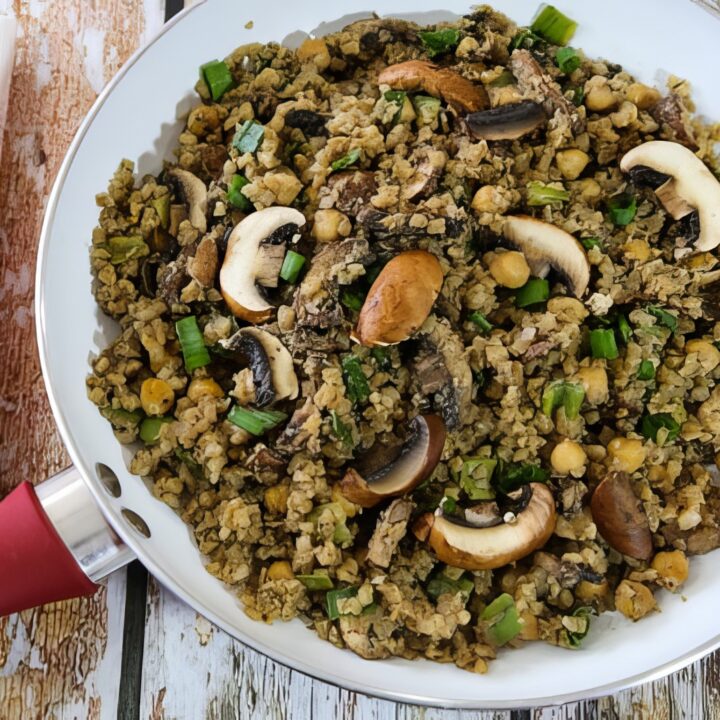
This cauliflower fried rice with mushrooms and chickpeas is a hearty, one-pan vegan dinner that comes together in just 22 minutes - no chopping, no fuss.
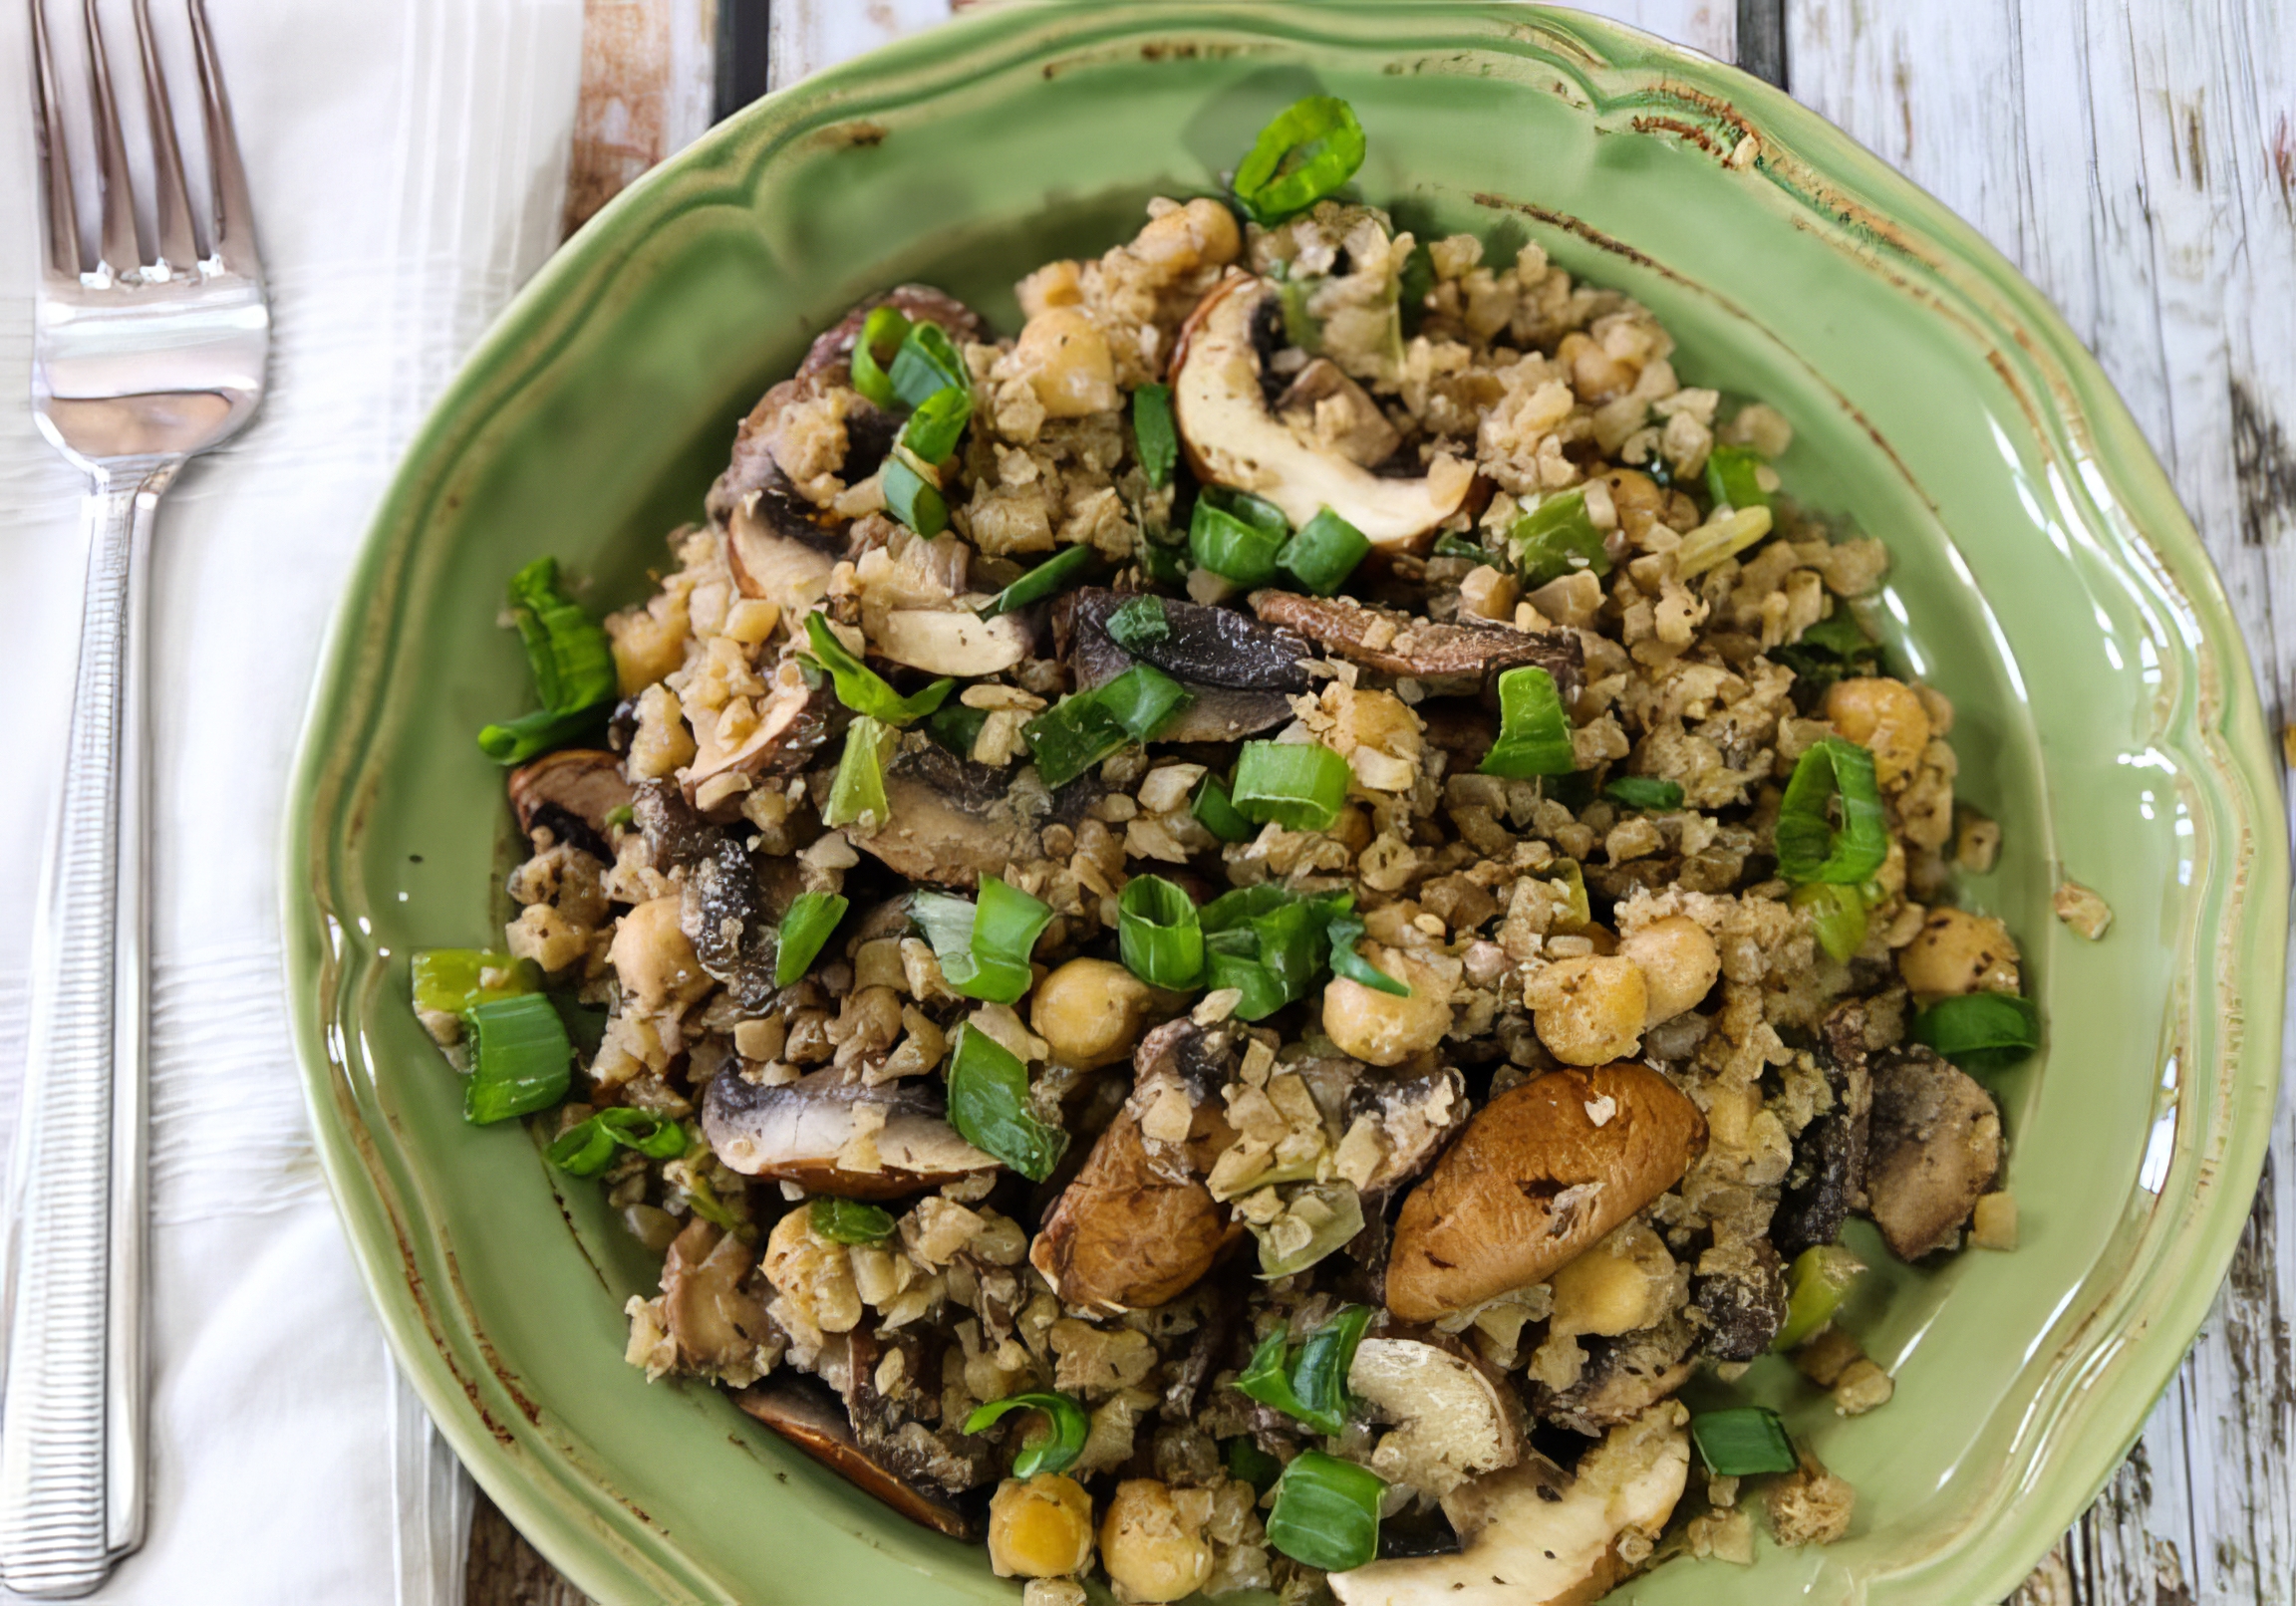
Key Ingredients & Substitutions
- Frozen riced cauliflower. The shortcut that makes this recipe genuinely weeknight-friendly - no head of cauliflower to break down. Green Giant, 365 Organic, and Trader Joe's all work great. Taylor Farms' cauliflower pearls are slightly chunkier if you want more texture. To use fresh, rice it in a food processor and skip the water.
- Mushrooms. Cremini or button mushrooms are the easy default. Shiitake adds a deeper, more savory umami punch that plays especially well with the fried-rice vibe. Pre-sliced is fine - just make sure they look fresh and not dried out.
- Chickpeas. One 15-ounce can (drained and rinsed) adds protein, fiber, and a satisfying heartiness. White beans or black beans swap in easily.
- Scallions. Mild onion flavor and a pop of color. A small shallot or a few tablespoons of diced yellow onion works if you don't have scallions.
- Salt-free seasoning blend. Frontier Co-op or Dash are the go-to brands here. Any all-purpose herb blend works, or use a mix of garlic powder, onion powder, and dried thyme.
- Nutritional yeast. Optional but recommended - 2 tablespoons stirred in at the end adds a subtle cheesy, nutty depth. Skip it if you don't have it.
Variations
- Asian-style fried rice. Stir in 1-2 tablespoons of low-sodium soy sauce (or tamari to keep it gluten-free) and a drizzle of toasted sesame oil at the end.
- Spicy version. Add a pinch of red pepper flakes or a drizzle of sriracha when you add the mushrooms.
- Add more vegetables. Frozen peas, shelled edamame, diced bell pepper, or baby spinach all work well - stir them in with the chickpeas.
- Make it higher protein. Add pan-fried cubed extra-firm tofu or a handful of shelled hemp seeds stirred in at the end.
- Lemon herb version. Swap the seasoning blend for Italian herbs and finish with a squeeze of lemon juice and fresh parsley.
- Grain-free rice bowl. Serve over a bed of mixed greens instead of eating it straight from the pan for a lighter, salad-bowl presentation.
Tips for the Best Cauliflower Fried Rice
- Dry out the cauliflower before adding anything else. Cook the frozen cauliflower with the water over medium heat until the water has fully evaporated - this is what separates fluffy from soggy. Don't rush it.
- Use a large, wide pan. More surface area means more evaporation and more browning. A wok or a 12-inch skillet is ideal. A smaller pan traps steam and makes the whole thing wet.
- Crank the heat at the end. After adding the vegetables and chickpeas, turning the heat up to medium-high for the last few minutes gives the dish its "fried" character - slightly crispy edges and concentrated flavor.
- Don't stir too much at the end. Let the cauliflower sit undisturbed for 30-60 seconds between stirs so it can pick up some color from the pan.
- Season at the end. The seasoning blend goes in with the vegetables, but final salt and pepper adjustments should happen last - after the nutritional yeast - so you can taste accurately.
How to Serve
This works great as a complete main dish on its own - the chickpeas bring enough protein and substance to be satisfying. For a more complete spread, serve it alongside a simple miso soup, a cucumber and rice vinegar salad, our teriyaki eggplant as a side, or drizzle with our easy duck sauce for extra flavor, or our Asian Tofu Salad with Thai Peanut Dressing. Leftovers keep well in the fridge for up to 4 days and reheat best in a skillet over medium heat.
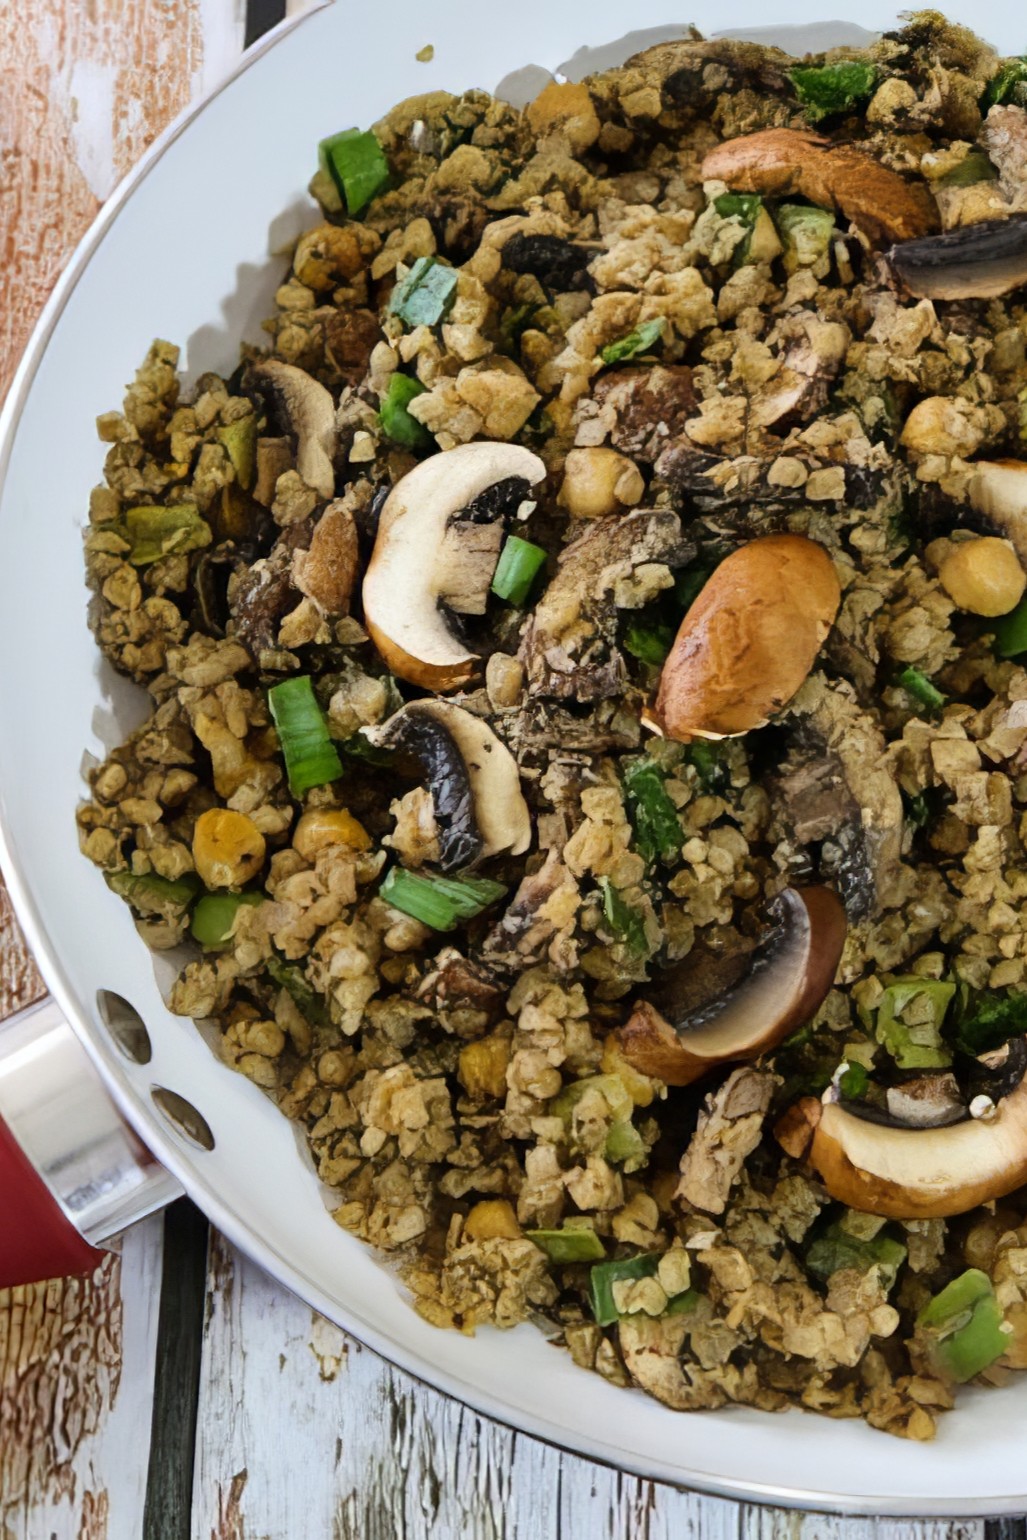
Recipe
Cauliflower Fried Rice with Mushrooms & Chickpeas
A quick, one-pan vegan dinner that uses frozen riced cauliflower as the base — no chopping required. Hearty mushrooms and chickpeas make it filling enough to stand alone as a main dish.
Print
Pin
Save
Servings: to 6
Ingredients
- 16 ounce bag frozen riced cauliflower
- ½ cup water
- 8 ounces mushrooms cleaned, stemmed sliced (see note)
- 3 scallions thinly sliced
- 15 ounce can chickpeas drained and rinsed
- 2 teaspoons salt-free seasoning blend like Frontier or Mrs. Dash
- 2 tablespoons nutritional yeast optional
- Salt and freshly ground pepper to taste
Instructions
- Combine the riced cauliflower and water in a large skillet or wok over medium heat.
- Cook, stirring occasionally, until the cauliflower is fully thawed and the water has evaporated, about 5 minutes.
- Add the mushrooms, scallions, chickpeas, and seasoning blend. Turn the heat up to medium-high and cook for 5 to 7 minutes, stirring often, until the mushrooms are tender and the cauliflower starts to brown at the edges.
- Stir in the nutritional yeast if using, then season with salt and pepper to taste. Serve immediately.
Nutrition (Estimate per Serving)
Calories: 158kcalCarbohydrates: 26gProtein: 11gFat: 3gSaturated Fat: 1gPolyunsaturated Fat: 1gMonounsaturated Fat: 1gSodium: 336mgPotassium: 803mgFiber: 10gSugar: 4gVitamin A: 148IUVitamin C: 58mgCalcium: 111mgIron: 3mg
Vegan-ize any recipe!Grab our free vegan cheat sheet, packed with my favorite easy substitutions to make any recipe vegan.
Italian-Style Vegan Sausage and Peppers
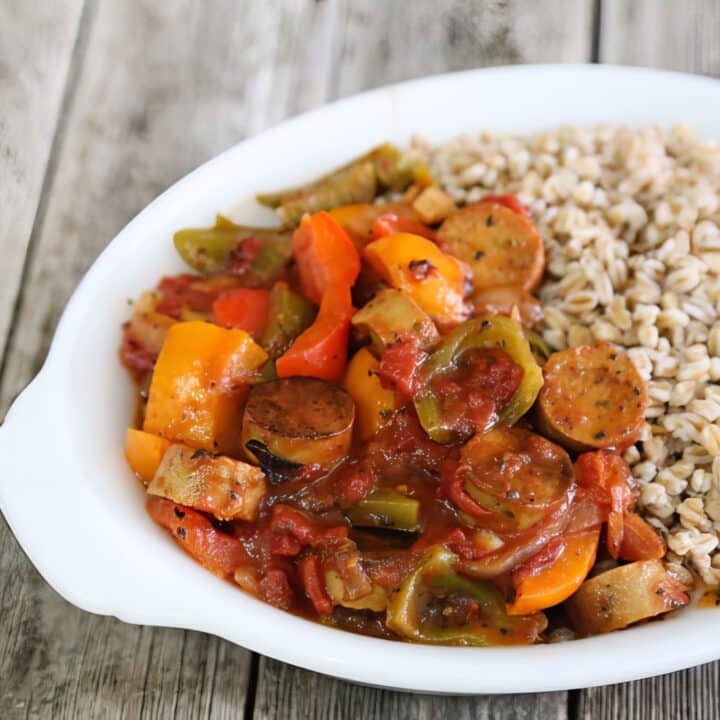
Savory vegan sausage, sweet bell peppers, and tender onions simmered in a garlicky tomato sauce - this Italian classic goes plant-based without losing an ounce of flavor. It's hearty, colorful, and perfect spooned over pasta, grains, or tucked into a crusty roll.
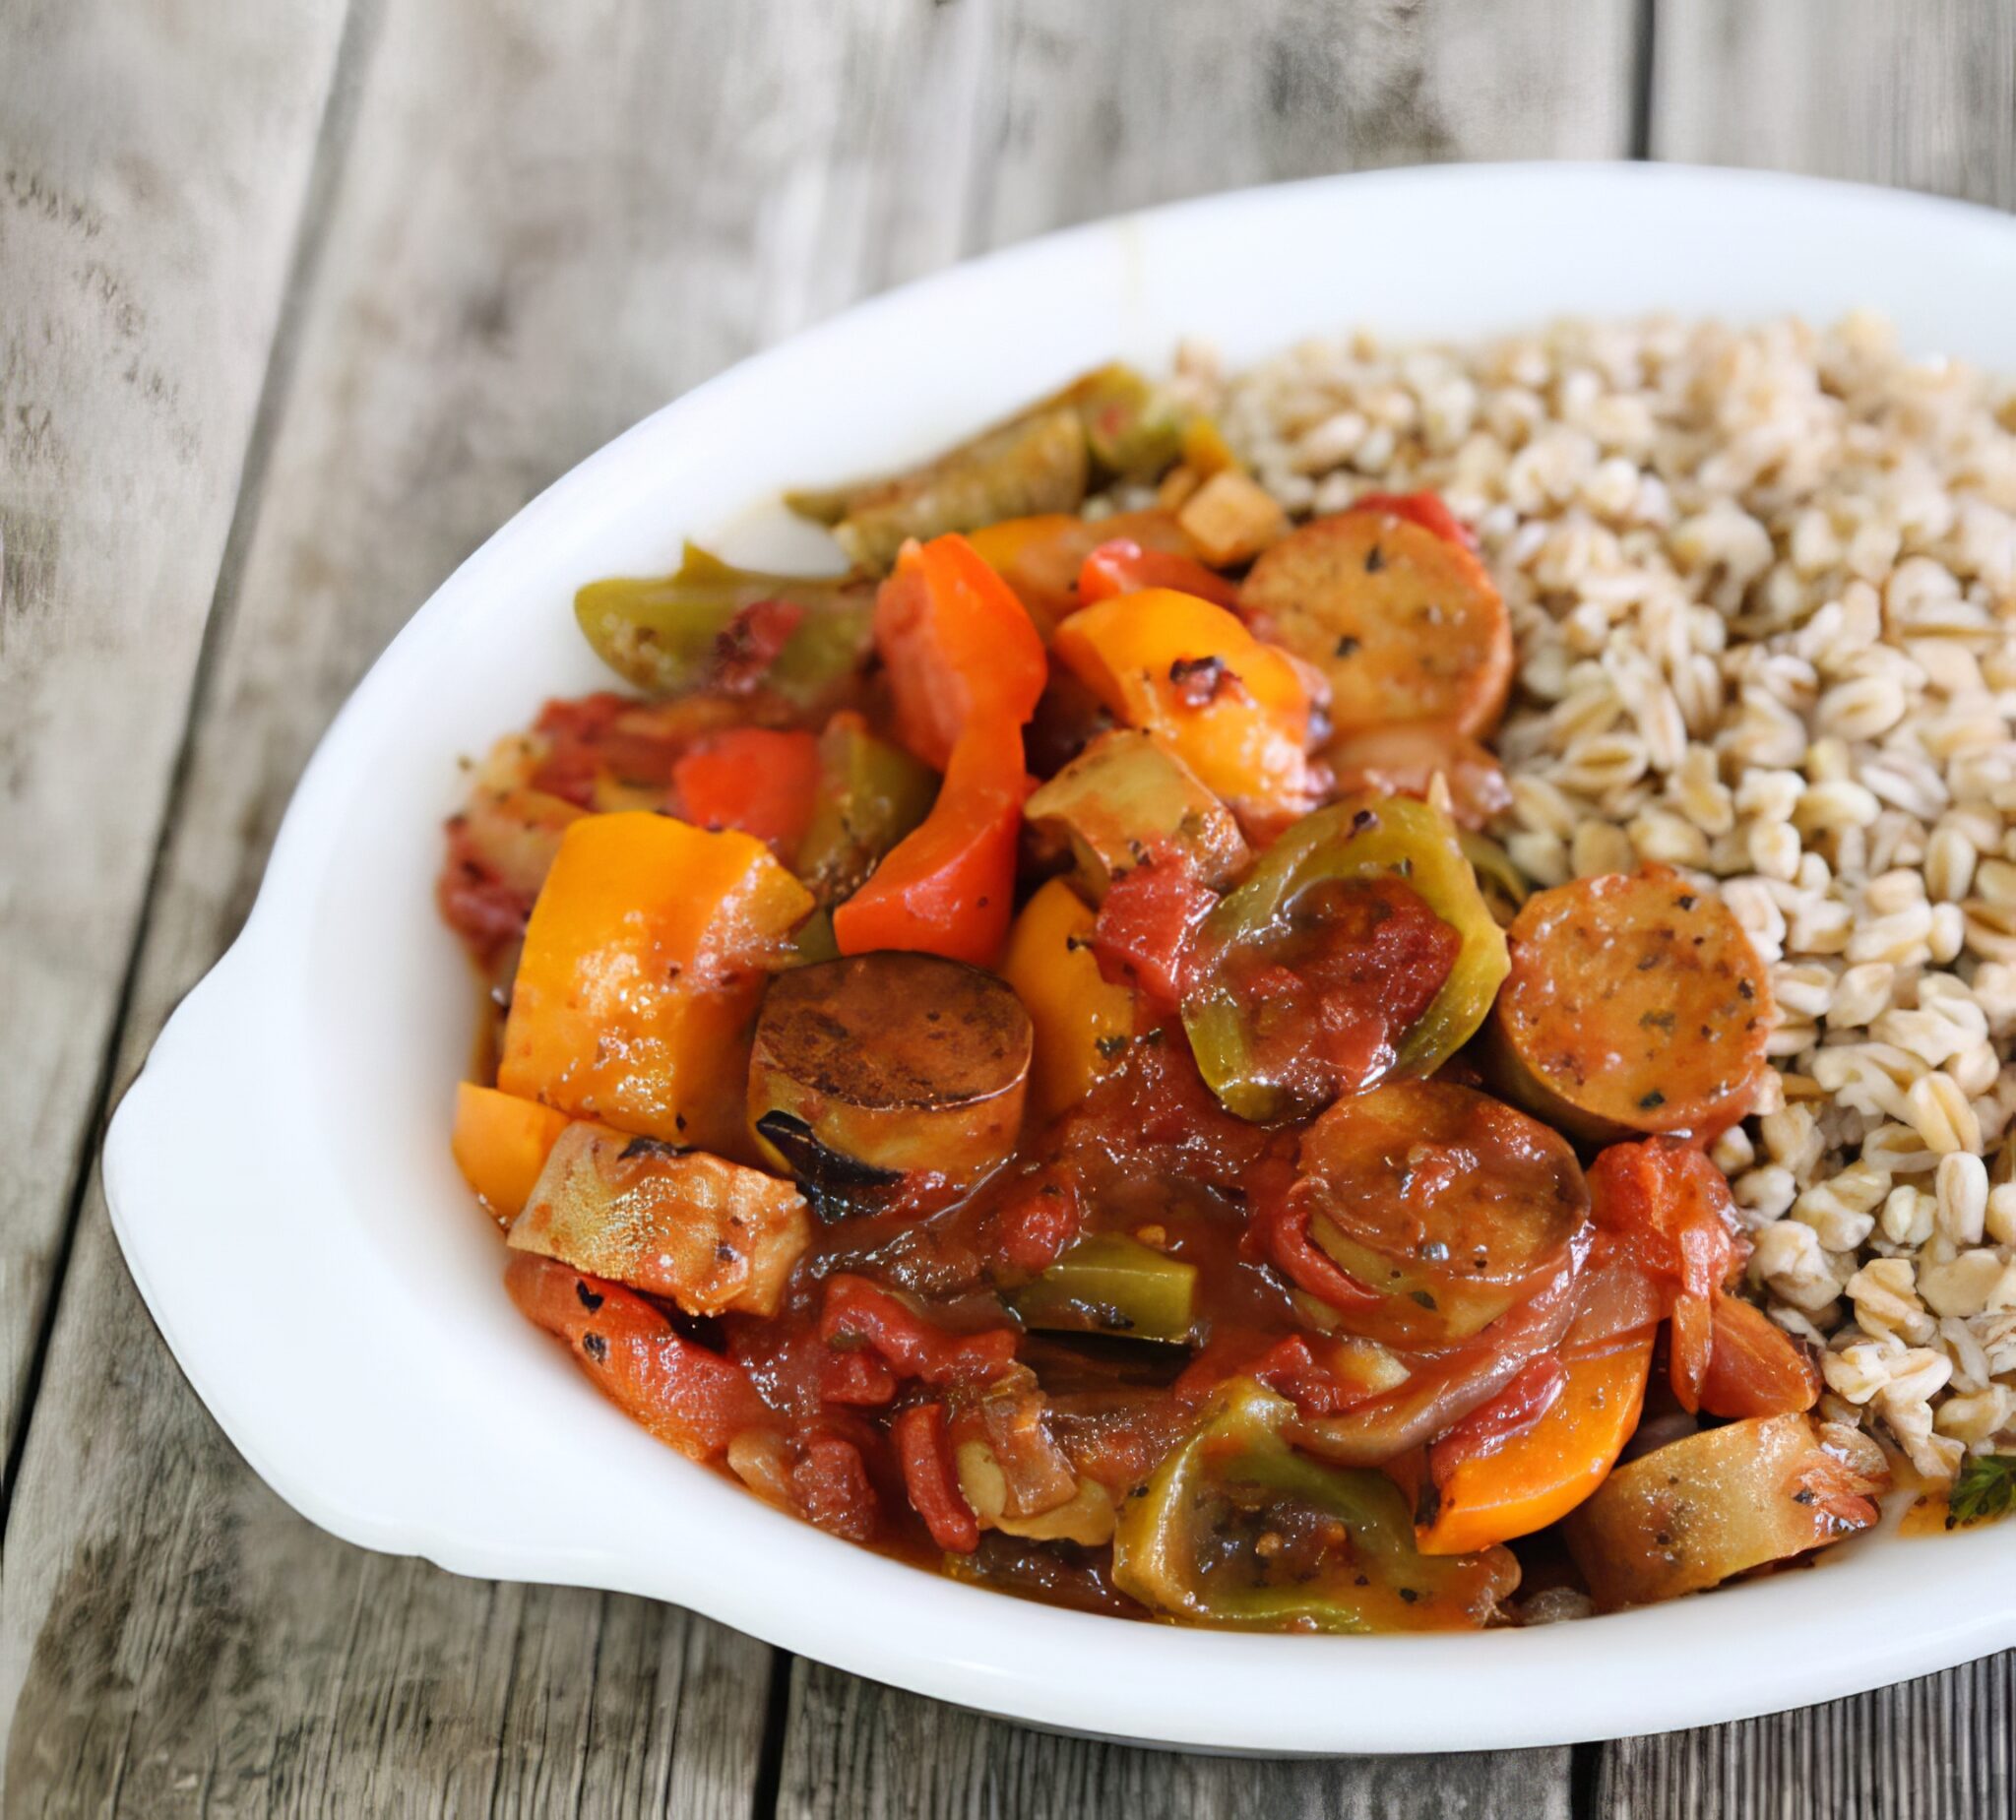
This recipe updates the Italian classic, sausage and peppers, with vegan sausage. What I love most about this recipe is that it delivers big, familiar flavor with very little fuss. It's rustic in the best way. Nothing complicated. Just solid ingredients, cooked well, and layered together until everything tastes like it belongs in the same bowl.
And it's flexible. Serve it over pasta. Serve it with your favorite grains (I like farro!) Spoon it onto creamy polenta. Stuff it into a hoagie roll. Or honestly? Eat it straight from the skillet. I won't judge.
These Italian Vegan Sausage and Peppers are…
- Hearty and satisfying without being heavy
- Weeknight-friendly, ready in about 30 minutes
- Naturally dairy-free and plant-based
- Easy to customize depending on what peppers or sausage you have
- Perfect for meal prep, since the flavors deepen as it sits
Key Ingredients & Substitutions
Vegan Italian Sausage - Choose your favorite plant-based Italian-style links. Slice them into coins or half-moons so they brown nicely. Browning is key here - it builds flavor before the sauce even begins.
Substitution tip: If you can't find Italian-style sausage, use plain vegan sausage and boost the seasoning with extra oregano, fennel seed, and a pinch of red pepper flakes.
Bell Peppers - A mix of red, yellow, and green adds sweetness and color. If you can find Italian frying peppers, even better - but standard bell peppers work beautifully.
Onion and Garlic - These are the aromatic backbone of the dish. Let the onions soften and lightly caramelize before adding garlic!
Crushed or Puréed Tomatoes - This creates the base for the sauce. If you prefer a chunkier texture, use crushed tomatoes. For a smoother finish, go with purée.
Dried Italian Herbs - Oregano is essential. Basil and thyme add balance. A pinch of red pepper flakes gives subtle heat.
Optional White Wine - A splash deglazes the pan and adds brightness. If you skip it, a squeeze of lemon juice at the end can add a similar lift.
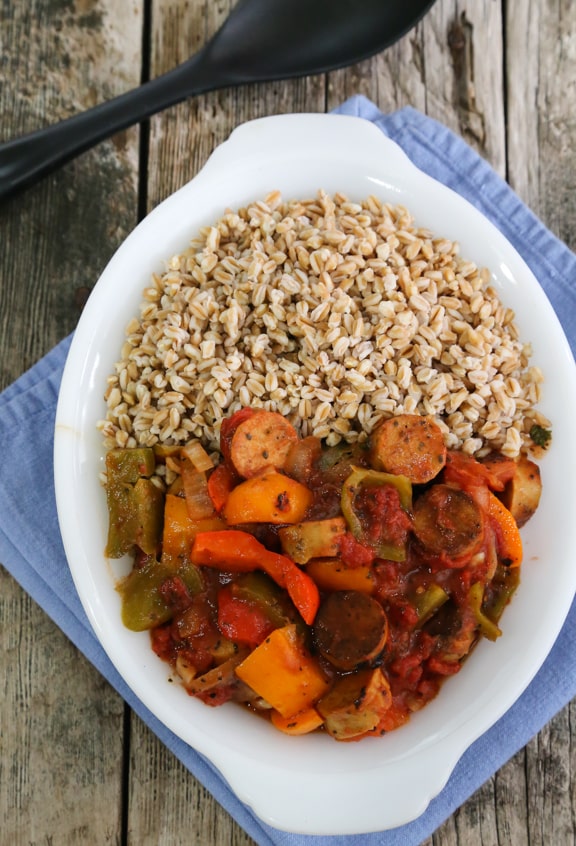
Helpful Tips
- Brown the vegan sausage well. Don't rush this step. A little caramelization goes a long way in boosting flavor.
- Slice peppers evenly. Uniform strips cook at the same rate and give the dish that classic look.
- Simmer gently. Once the tomatoes go in, let everything bubble softly so the flavors meld without over-reducing.
- Taste before serving. A pinch of salt or splash of acidity at the end can make all the difference.
Storing & Freezing
One of the best things about this dish? It might taste even better the next day!
Refrigerator:
Let the vegan sausage and peppers cool completely before transferring to an airtight container. It will keep well in the fridge for up to 4 days. The flavors continue to deepen as it sits, making leftovers ideal for quick lunches or easy dinners.
Reheating:
Warm gently in a skillet over medium-low heat until heated through. If the sauce has thickened in the fridge, add a splash of water or vegetable broth to loosen it. You can also reheat it in the microwave in 30-second intervals, stirring between each.
Freezing:
This recipe freezes beautifully. Store in a freezer-safe container for up to 2 months. For best texture, freeze it without pasta or polenta - just the sausage and pepper mixture.
To reheat from frozen, thaw overnight in the refrigerator, then warm on the stovetop until hot throughout. If reheating straight from frozen, use a covered skillet over low heat and stir occasionally as it thaws and warms.
Also worth trying: our vegan creamy mushroom pasta.
Variations
- Make It Spicy: Use hot Italian-style vegan sausage or increase the red pepper flakes.
- Add Greens: Stir in a handful of baby spinach or chopped kale during the last few minutes of cooking.
- Turn It Into a Sandwich: Pile the mixture into toasted rolls and top with vegan mozzarella for a classic sausage-and-peppers vibe.
- Bulk It Up: Add sautéed mushrooms for extra umami and texture.
- Serve Italian-Style: Round out an Italian dinner night by pairing this with our vegan zucchini lasagna or a simple side of zucchini with mint - a hearty, veggie-forward baked dish that complements these bold flavors perfectly. This mixture also makes a fantastic pizza topping on homemade vegan pizza dough.
Recipe
Italian Style Vegan Sausage & Peppers
Hearty Italian-style vegan sausage and peppers simmered in a rich tomato sauce with sweet bell peppers and onions. An easy, flavorful plant-based dinner perfect for pasta, polenta, or sandwiches.
Print
Pin
Save
Servings: servings
Ingredients
- 2 tablespoon extra-virgin olive oil
- 12 oz Vegan Italian-style Sausage cut into ½-inch slices, see notes
- 1 yellow onion peeled, quartered and thinly sliced
- 3 cloves garlic peeled and minced
- 4 bell peppers seeded and cut into strips
- ¼ cup dry white wine such as Chardonnay, optional
- 28 oz canned crushed tomatoes or tomato puree
- 1 teaspoon dried oregano or fresh oregano to taste
- 1 teaspoon dried basil or fresh basil to taste
- ½ teaspoon dried thyme
- red pepper flakes to taste
- salt and freshly ground pepper to taste
For Serving
- cooked pasta, grains, or polenta optional for serving
Instructions
- Heat just enough of the oil to lightly coat the bottom of a large skillet, reserving the rest. Add the sausage and cook over medium-high heat, stirring frequently until all sides are golden brown. Remove from the skillet and set aside.
- Heat the remaining oil in the same pan. Add the onion and sauté over medium-low heat until translucent. Add the garlic and peppers and sauté until all are soft and golden.
- Stir in the optional wine, pureed tomatoes, and seasonings. Bring to a simmer, then cover and cook over low heat for 10 minutes.
- Stir the reserved vegan sausage into the mixture. Season with salt and pepper. Serve at once, spooning some of the sausage and peppers mixture over individual servings of pasta, grains, or polenta, or on its own if you prefer.
Notes
You can use any brand of vegan sausage you prefer here. I have made this recipe with Field Roast, Tofurkey, and Beyond sausages. All work well.
I served this vegan sausage over top of cooked farro. You may also choose to serve it over rice, pasta, or polenta.
Nutrition (Estimate per Serving)
Calories: 672kcalCarbohydrates: 76gProtein: 37gFat: 27gSaturated Fat: 5gPolyunsaturated Fat: 6gMonounsaturated Fat: 13gCholesterol: 9mgSodium: 1507mgPotassium: 2379mgFiber: 23gSugar: 32gVitamin A: 8364IUVitamin C: 354mgCalcium: 438mgIron: 12mg
Vegan-ize any recipe!Grab our free vegan cheat sheet, packed with my favorite easy substitutions to make any recipe vegan.
- 1
- 2
- 3
- …
- 6
- Next Page »