

Spinach, in combination with basil, makes a less intensely-flavored pesto sauce. Some may enjoy this milder flavor, whether served traditionally on pasta, or as a topping for potatoes or an offbeat dressing for potato salad, on grains, or as a garnish for soup. [Read more...]
Search Results for: fresh veg
Rainbow Peppers and Red Onion

This stir-fry of colorful bell peppers is an especially nice addition to summer meals, but you can make it any time of year. Use it as a side dish, toss it with pasta, or top a pizza with it. Recipe contributed by Susan Jane Cheney. Photos by Evan Atlas. [Read more...]
Greek-Flavored Spinach and Orzo Soup

Here's a lively spinach soup that comes together quickly, with leeks, greens, and tiny orzo pasta in a lemony broth. It's a lovely soup for everyday meals as well as holiday celebrations such as Easter dinner. Photos by Hannah Kaminsky. [Read more...]
Pinto Bean Salad With Watercress or Arugula

This simple salad pairs pinto beans with super-nutritious watercress or baby arugula. It's an easy way to boost the protein content of meals, and is a great choice for the lunch box as well as outdoor meals and picnics. Photos by Evan Atlas. [Read more...]
White Bean Soup with Corn and Red Peppers
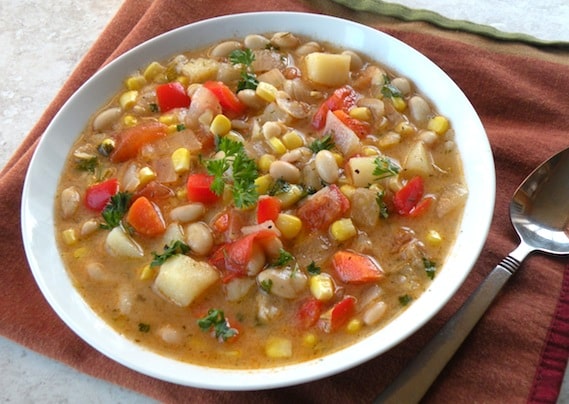
This hearty soup of navy or cannellini beans, corn kernels, and red bell peppers is easy and family-friendly. It can be the be the centerpiece of a meal or an introduction, depending on what else is being served. If you're inclined to bake, Quick Three-Grain Brown Bread goes well with this, and you can pop it into the oven before starting the soup.
Pasta Caponata

Serve this tasty pasta salad all year round. It's flavored with traditional eggplant caponata ingredients (including olives, ripe tomatoes, and fresh herbs), and it's great for an everyday dinner, potluck, or buffet. It's best served at room temperature. Photos by Evan Atlas. [Read more...]
Orzo and Black Bean Salsa Salad

Bursting with Southwestern flavors, this pasta salad, made with tiny rice-shaped orzo, is as flavorful as it is easy to make. It features corn, prepared salsa and lots of cilantro. Serve with vegan quesadillas any time of year, or with grilled vegetables and a simple slaw for a nice summer meal. Photos by Hannah Kaminsky.
Lentil and Conchiglietti (Tiny Shell Pasta) Soup

If you love lentil soup, you're sure to enjoy this one, in which flavorful lentils contrast with tiny shell pasta. Tomatoes, spices, and wine add to the flavor of this hearty meal in a bowl. Serve with a crusty bread and a big green salad. Photos by Hannah Kaminsky. [Read more...]
Sweet and White Potato Salad with Mixed Greens
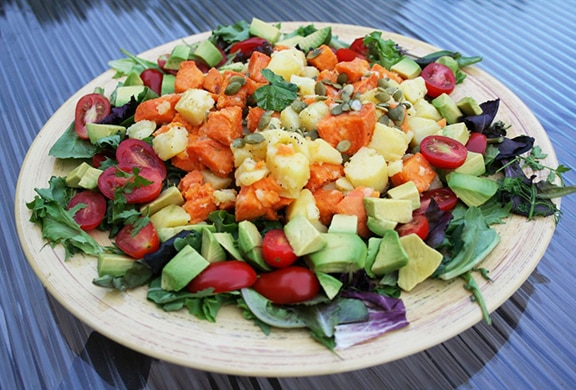
This potato salad, combining white or golden potatoes and sweet potatoes is one I often make for company. It's so pretty, perched on mixed greens and ringed with grape tomatoes and avocado, yet is incredibly easy to prepare. It's wonderful for summer and early fall potlucks and other gatherings. [Read more...]
Zucchini, Tomato, and Red Onion Salad

Here's a tasty salad to make when zucchini and tomatoes are abundant in late summer. Red onions, parsley, and olives add great flavor. I prefer Roma tomatoes in this salad, as their slices match the zucchini and they get less watery when standing, but use any ripe tomatoes you have available. Photos by Evan Atlas. [Read more...]
Passover Quinoa Pilaf

This colorful quinoa pilaf is a great addition to the Passover holiday's festive Seder meal. Contributed to Vegan Holiday Kitchen's Passover chapter by a longtime reader of mine, Barbara Pollak, this pilaf is attractive made with a mix of red and white quinoa, but either color can be used on its own. Photos by Hannah Kaminsky. [Read more...]
Leek and Bell Pepper Hash Brown Potatoes

If you like leeks, you're sure to enjoy this dressed-up version of hash brown potatoes. It's perfect for a vegan brunch, paired with a simple tofu scramble and fresh fruit. Use firm-textured potatoes, rather than mealy ones, for best results. I highly recommend trying this with one sweet potato, as suggested below.
[Read more...]
Couscous Stuffed Eggplant
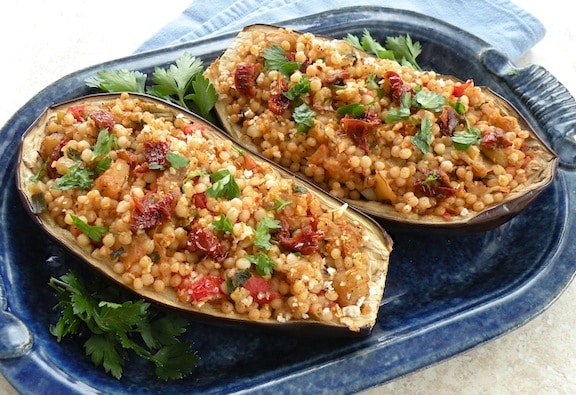
For this delightful couscous stuffed eggplant, you can use regular couscous, or try it with Israeli couscous, as shown in the photo. Regular couscous has more of the look and feel of a grain; Israeli couscous more like a tiny pasta. If you're looking for a gluten-free variation, you can substitute quinoa, which is also excellent in this preparation. [Read more...]
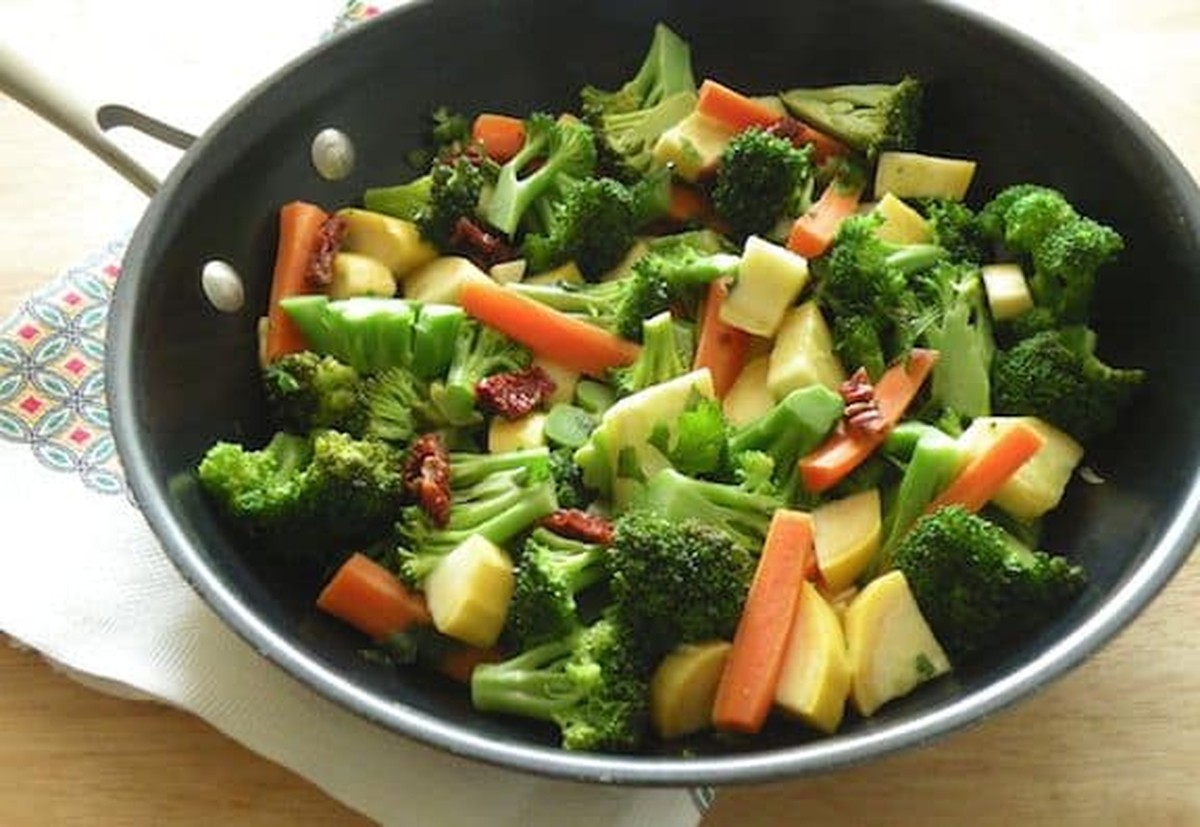
Sautéed Broccoli or Broccoli Rabe, Baby Carrots, and Yellow Squash
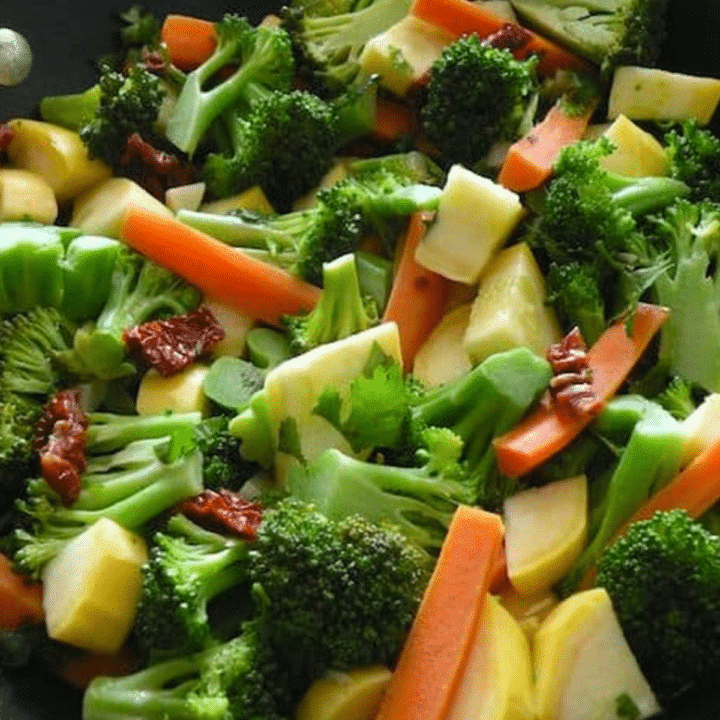
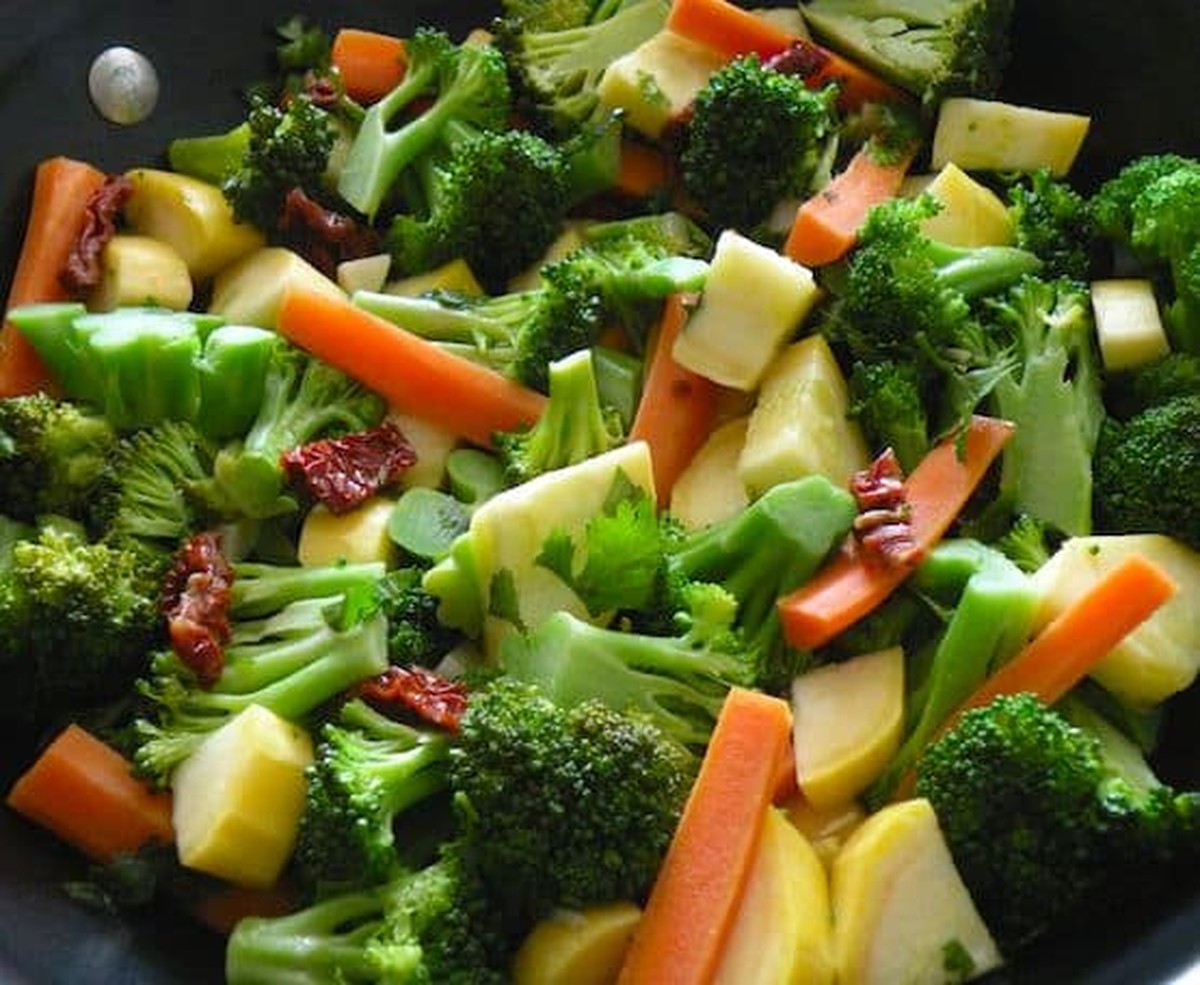
This colorful sauté brings together broccoli (or peppery broccoli rabe, if you'd rather), baby carrots, and yellow summer squash in one skillet, brightened with garlic, sun-dried tomatoes, and a handful of fresh herbs. It comes together in under 30 minutes and pairs with almost anything on your dinner table, from a bowl of pasta to a scoop of rice pilaf.
Key Ingredients & Substitutions
- Broccoli or broccoli rabe. Regular broccoli crowns give you a mellow, familiar flavor, while broccoli rabe (also called rapini) brings a pleasantly bitter, mustardy edge. Either works here - just cut broccoli into bite-sized florets, or chop broccoli rabe into similar-sized pieces so everything cooks evenly.
- Baby carrots. Baby carrots quartered lengthwise cook quickly and add natural sweetness and color. Regular carrots, peeled and sliced on the diagonal, work just as well if that's what you have on hand.
- Yellow summer squash. Look for squash that's firm with smooth, glossy skin. Zucchini is an easy one-for-one swap if yellow squash isn't available.
- Garlic. Fresh cloves, minced, build the aromatic base. Don't let it brown too far past golden or it turns bitter.
- Sun-dried tomatoes or sliced black olives. Either adds a concentrated, salty-savory punch that balances the sweetness of the carrots and squash. Oil-packed sun-dried tomatoes are easiest to work with - just pat off the excess oil before slicing.
- Fresh parsley or cilantro. Stirred in at the end, either herb adds brightness. Use whichever you prefer, or a mix of both.
- Extra-virgin olive oil. Just a tablespoon is enough to sauté the aromatics and start the vegetables cooking.
Helpful Tips
Cut everything roughly the same size. Broccoli florets, carrot sticks, and squash pieces that are all similar in size cook at the same rate, so you don't end up with mushy squash sitting next to still-crunchy broccoli. Aim for bite-sized pieces across the board.
Use a wide, heavy skillet. A wide nonstick skillet gives the vegetables enough surface area to cook in a single layer instead of steaming in a crowded pile, which is what keeps this dish tasting like a sauté instead of a boil.
Don't skip the splash of water. Adding a little water and covering the pan briefly steams the broccoli and carrots just enough to take the raw edge off before the lid comes off and everything finishes sautéing. Watch the clock here - a minute or two too long and the broccoli loses its bright green color.
Add the squash last. Yellow squash cooks much faster than broccoli or carrots and turns watery and soft if it's in the pan too long. Adding it partway through, once the sturdier vegetables have had a head start, keeps it tender-crisp instead of mushy.
Season at the very end. Salt draws moisture out of vegetables, so holding off until the pan comes off the heat helps everything stay crisp-tender rather than watery.
Variations
- Add protein. Toss in cubed baked tofu or a can of drained, rinsed chickpeas along with the squash to turn this side into more of a main dish.
- Make it spicy. A pinch of red pepper flakes added with the garlic gives the whole dish a gentle heat.
- Swap the aromatics. A tablespoon of grated fresh ginger alongside the garlic gives the sauté a different, brighter direction.
- Add a nutty crunch. Toasted slivered almonds or pine nuts scattered on top just before serving add texture and richness.
- Brighten it with citrus. A squeeze of lemon juice over the finished dish wakes up all the other flavors, especially if you've used broccoli rabe.
- Make it cheesy. A sprinkle of vegan parmesan just before serving adds a savory, salty finish.
Serving Ideas
This sauté is easygoing enough to serve alongside just about any main dish. Spoon it over a bowl of wild rice pilaf for a simple, satisfying dinner, or toss it right into pasta the way we do in penne and broccoli with tomatoes, walnuts, and raisins for a heartier meal.
It's also a great partner for roasted or mashed potatoes, a veggie burger, or a simple grain bowl with quinoa or farro. Leftovers make a fast lunch on their own, or stirred into a wrap with hummus.
Storing & Freezing
Leftovers keep well in an airtight container in the refrigerator for up to 4 days. Reheat gently in a skillet over medium heat, or in the microwave, just until warmed through - the vegetables can turn soft if they're overheated.
This dish isn't a great candidate for the freezer. Broccoli, carrots, and squash all hold a lot of water, and freezing and thawing breaks down their texture, leaving the sauté noticeably mushy once reheated. It's best enjoyed fresh or refrigerated for the week ahead.
More Vegan Side Dishes
If you loved this recipe, here are a few more vegetable-forward dishes worth trying:
- Sesame-Ginger Tofu and Broccoli Stir-Fry
- Vegan Cheddar and Broccoli Rice Casserole
- Sesame Kale and Broccoli Sauté
- Yellow Squash Soup
Recipe
Sautéed Broccoli or Broccoli Rabe, Baby Carrots, and Yellow Squash
A quick, colorful skillet sauté of broccoli (or peppery broccoli rabe), baby carrots, and yellow summer squash, brightened with garlic and sun-dried tomatoes.
Print
Pin
Save
Servings: servings
Ingredients
- 1 tablespoon extra-virgin olive oil
- 2 to 3 cloves garlic, minced
- 1 large or 2 medium broccoli crowns, cut into bite-sized florets or 1 good-sized bunch broccoli rabe, chopped into bite-sized pieces
- 1 cup baby carrots, quartered lengthwise or peeled and sliced regular carrots
- 1 medium yellow summer squash, sliced into half-moons
- ¼ cup thinly sliced sun-dried tomatoes or sliced black olives
- ¼ cup minced fresh parsley or cilantro
- Salt and freshly ground black pepper to taste
Instructions
- Heat the olive oil in a wide skillet over medium heat. Add the garlic and sauté for 1 to 2 minutes, until fragrant and just turning golden.
- Add the broccoli (or broccoli rabe), carrots, and ¼ cup water. Cover and cook over medium-high heat for 3 to 4 minutes, until the broccoli turns bright green, lifting the lid to stir occasionally.
- Uncover and add the squash. Continue sautéing over medium heat, stirring frequently, for 4 to 5 minutes, until all the vegetables are tender-crisp.
- Remove the pan from the heat and stir in the parsley or cilantro and the sun-dried tomatoes or olives. Season with salt and pepper, and serve warm.
Nutrition (Estimate per Serving)
Calories: 55kcalCarbohydrates: 7gProtein: 2gFat: 3gMonounsaturated Fat: 2gSodium: 40mgPotassium: 220mgFiber: 2gVitamin C: 15mgCalcium: 30mg
Vegan-ize any recipe!Grab our free vegan cheat sheet, packed with my favorite easy substitutions to make any recipe vegan.
Passover Mock Chopped Liver (Mushroom, Cashew, and Onion)

I don't care for the name of this dish, but it's a Jewish faux classic. It might look a bit like the dish it's intending to imitate, but it tastes nothing like it - thank goodness! Another version is made with green beans (see Green Bean and Cashew Pâté - though Ashkenazik Jews don't use green beans during the Passover week). The essential difference between this and the other recipe on this site is the use of mushrooms; both are simple and tasty. Serve with matzo or matzo crackers or raw veggies. This makes about 2 cups. [Read more...]
Eggplant Matzo Mina

Matzo minas are layered vegetable casseroles traditional to Sephardic Passover Seders. This one can be aptly described as a matzo lasagna. Many variations are made by Sephardic Jews of various cultures. This one is of definite Italian influence, and will certainly remind you of an eggplant lasagna. Photos by Evan Atlas. [Read more...]
Mujaddarah (Middle Eastern Bulgur and Lentil Pilaf)

Mujaddarah, a traditional Middle Eastern dish, is sometimes made with rice, and sometimes with cracked wheat (bulgur). The grain is combined with lentils and lots of onions browned by olive oil. Like many simple classics, it's delicious. Serve with Fattouche Salad and a steamed green vegetable for an easy meal. Though they're the least traditional to use in this (brown lentils are the usual) I like to make this with black beluga lentils for the visual contrast. [Read more...]
Salsa and Olive Oil Salad Dressing

This simple, basil-scented dressing of salsa and olive oil can be made in no time flat and offers an offbeat alternative for jazzing up all kinds of salads. Photos by Evan Atlas. [Read more...]
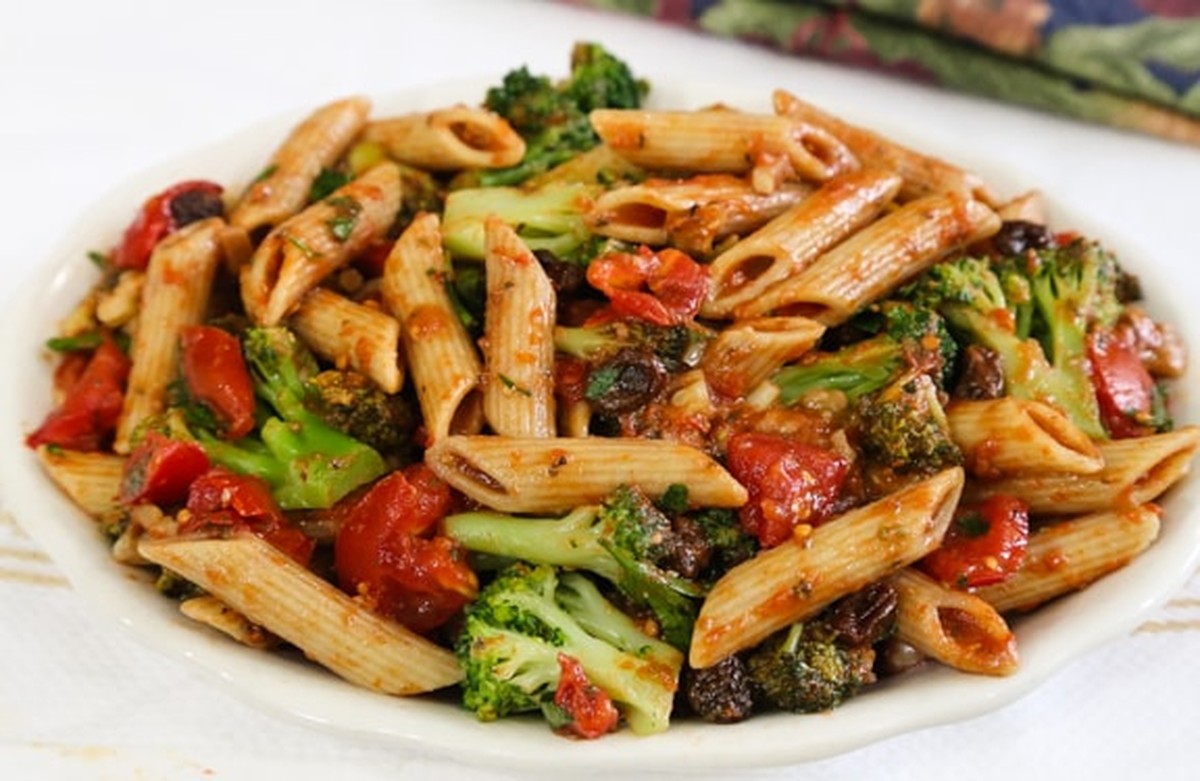
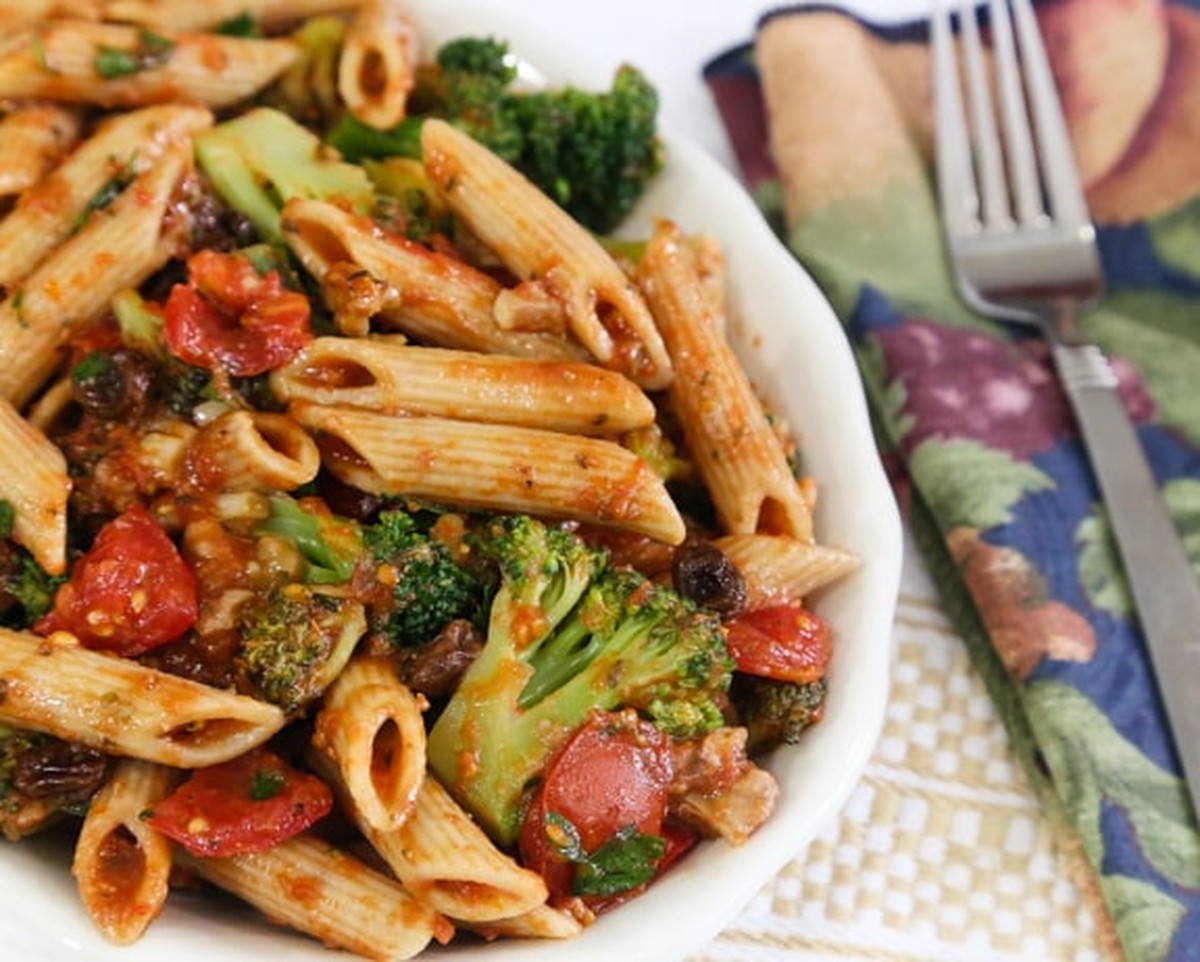
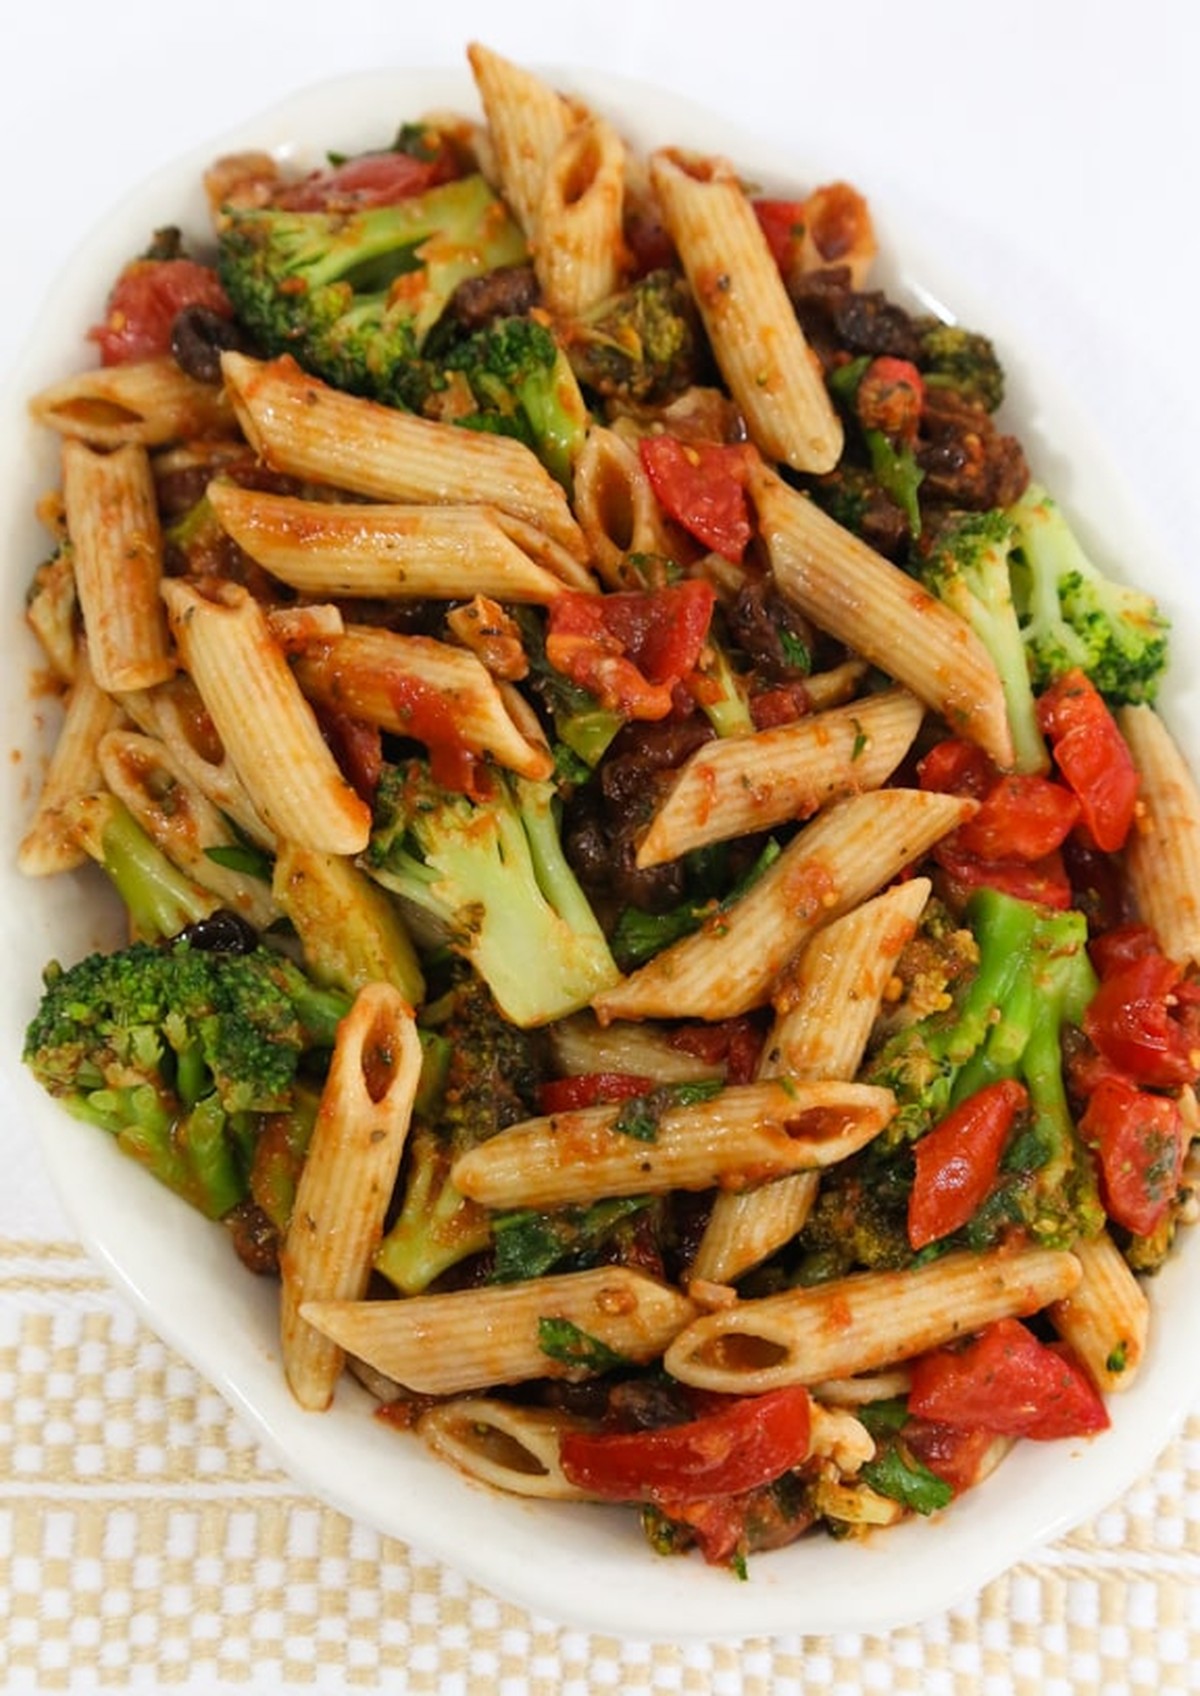
Penne and Broccoli with Tomatoes, Walnuts, and Raisins

This pasta dish is loaded with contrasting flavors and textures - sweet raisins, toasted walnuts, and juicy tomatoes tossed with tender broccoli and whole grain penne. Broccoli brings calcium and vitamin C to the mix, while the walnuts add a good source of alpha-linolenic acid, an essential omega-3 fatty acid. It's a simple weeknight pasta that still feels a little special, especially with that sweet-savory combination of raisins and tomatoes running through it.
Recipe adapted from Vegan on the Cheap* by Robin Robertson © 2011, published by John Wiley & Sons. Reprinted with permission. Photos by Evan Atlas.
Key Ingredients & Substitutions
- Broccoli - cut into bite-sized pieces and florets, then blanched just until tender so it keeps some bite once it's tossed with the hot pasta and sauce.
- Whole grain penne - adds fiber and a nuttier flavor that pairs well with the walnuts, but any short pasta shape works if that's what's in your pantry.
- Walnuts - toasted walnut pieces add crunch and richness. If you're not a fan, the recipe's own suggested variation is to swap in toasted pine nuts instead.
- Raisins - these bring a little natural sweetness that balances the acidity of the tomatoes. Golden raisins or chopped dried figs work as substitutes if you want to change things up.
- Diced and crushed tomatoes - using both a diced tomato base and a can of crushed tomatoes gives the sauce good texture without needing to cook it down for very long.
Helpful Tips
- Blanch the broccoli separately from the pasta and shock it under cold water right away - this stops the cooking and keeps the broccoli bright green instead of turning it olive-drab.
- Toast the walnuts in a dry skillet over medium heat for a few minutes before adding them to the dish. It only takes a couple of minutes and makes a noticeable difference in flavor.
- Don't overcook the sauce once the tomatoes go in - you just want the liquid to reduce slightly so it clings to the pasta rather than pooling in the bowl.
- Save a little pasta cooking water before draining; a splash stirred in at the end can loosen the sauce if it's thickened more than you'd like.
Variations
As the original recipe suggests, toasted pine nuts make a great substitute for the walnuts if you'd like a milder, buttery flavor. You can also stir in a handful of baby spinach or arugula at the very end for extra greens, or add a pinch of red pepper flakes if you like a little heat with the sweetness of the raisins.
Serving Ideas
This pasta is filling enough to serve on its own, but a simple green salad or a slice of crusty bread rounds out the meal nicely. It also makes a great side dish alongside roasted root vegetables if you want to build out a larger spread.
Storing & Freezing
Leftovers keep well in an airtight container in the refrigerator for up to 4 days. Reheat gently on the stovetop or in the microwave, adding a splash of water if the pasta has soaked up most of the sauce. This dish freezes reasonably well for up to 2 months, though the broccoli will soften somewhat upon thawing and reheating.
Recipe
Penne and Broccoli with Tomatoes, Walnuts, and Raisins
A hearty pasta tossing whole grain penne and tender broccoli with a sweet-savory tomato sauce loaded with toasted walnuts and raisins.
Print
Pin
Save
Servings:
Ingredients
- 1 pound broccoli cut into 1-inch pieces and florets
- 8-10 ounces penne pasta preferably whole grain
- 2 tablespoons olive oil
- 4 cloves garlic minced
- ⅓ cup toasted walnut pieces
- ⅓ cup raisins
- ¼ cup fresh minced parsley
- ¼ cup sliced fresh basil leaves or 1 teaspoon dried
- Salt and freshly ground black pepper
- 2 cups diced ripe tomatoes or one 14-ounce can diced tomatoes, undrained
- 14 ounce can crushed tomatoes
- ¼ teaspoon natural granulated sugar
Instructions
- Steam or blanch the broccoli until just tender, 4 to 5 minutes. Drain, run under cold water to stop the cooking process, and set aside.
- In a large pot of boiling salted water, cook the penne over medium-high heat, stirring occasionally, until al dente, about 10 minutes.
- While the pasta is cooking, heat the oil in a large skillet or stir-fry pan over medium heat. Add the garlic and cook until softened and fragrant, about 1 minute.
- Add the walnuts, raisins, parsley, basil, and salt and pepper to taste. Stir in the diced tomatoes, crushed tomatoes, and sugar and simmer until the liquid reduces slightly. Add the reserved broccoli and toss to heat through.
- When the pasta is cooked, drain it well and add to the broccoli mixture in the pan. Toss gently to combine; serve hot.
Vegan-ize any recipe!Grab our free vegan cheat sheet, packed with my favorite easy substitutions to make any recipe vegan.
Frequently Asked Questions
Can I make this ahead of time?
You can make the sauce and blanch the broccoli up to a day ahead, then store them separately in the refrigerator. Cook the pasta fresh and toss everything together just before serving, since pasta dishes like this one are best right after the components are combined.
What can I use instead of raisins?
Golden raisins, currants, or chopped dried apricots all work well if you want to swap out the dark raisins. If you'd rather skip the sweet element entirely, you can leave them out - the dish will simply taste a bit more savory and tomato-forward.
Robin Robertson is the author of numerous cookbooks, including Fresh from the Vegetarian Slow Cooker* and many other titles. Visit Robin at Global Vegan Kitchen.
More Vegan Pasta Recipes
*This post contains affiliate links. If the product is purchased by linking through this review, VegKitchen receives a modest commission, which helps maintain our site and helps it to continue growing!
Heart-Beet Rosti
These Heart-Beet Rosti are colorful and flavorful! Serve them up for a healthy Valentine's Day dinner or any other special occasion.

The rad-pink color of beets is perfect for making hearts! Shredded beets and potato are molded into a heart-shape for Valentines Day and baked until tender on the inside and crisp on the outside.
This rosti makes for a beautiful and delicious side dish for a V-day meal. Serve it alongside a tasty pasta dish or soup. You can also serve this rosti as a light main with a side salad or some homemade bread!
And while you're here, don't forget to grab a copy of my free vegan cheat sheet. It's packed with all my favorite substitutions to vegan-ize any recipe!
How to Make Heart-Beet Rosti
- Preheat oven and grease baking sheet.
- Grate beet and potato using food processor or by hand.
- Toss veggies with dry ingredients to coat.
- Press mixture into heart shapes on baking pans.
- Drizzle with oil, cover with foil, and bake.
- Remove rosti from oven, and carefully flip over.
- Bake rosti again until browned.
- Garnish with parley and serve hot.
Full directions for how to make Heart-Beet Rosti are in the printable recipe card below.
Heart-Beet Rosti FAQs
What is a rosti?
A rosti is an originally Swedish dish that is similar to hashbrowns in a way. Rostis are typically made from sauteed or pan-fried potatoes. What makes them really different from hashbrowns is that they are cooked in a solid mass.
We added beets to our rosti, both for color and flavor! Our rosti is also baked, making it much more hands-free.
How can I remove the beet skin easily?
To remove the skin from the beets, place them in a saucepan of boiling water for about 5 minutes then plunge them into cold water. This should loosen the skins enough to remove easily.
How long does this rosti last?
Although the rosti can be made several hours ahead, they're best if used on the same day they are made. You can, however, store them in the fridge for up to 3 days.
If not serving your rosti right away, allow it to come to room temperature, then cover and refrigerate it until needed. When you're ready to eat it again, simply reheat the rosti!
Here are lots of other recipes using beets. And if you're planning a full Valentine's Day menu, our vegan Valentine's Day desserts roundup has plenty of sweet ideas to finish the meal.
Recipe

Heart-Beet Rosti
These Heart-Beet Rosti are colorful and flavorful! Serve them up for a healthy Valentine's Day dinner or any other special occasion.
Print
Pin
Save
Servings:
Ingredients
- 1 large red beet peeled
- 1 medium white potato peeled
- ¼ cup onion grated
- ¼ teaspoon salt
- ⅛ teaspoon freshly ground pepper
- ¼ cup all-purpose flour
- 2 tablespoon olive oil
- parsley or chives, minced for garnish
Instructions
- Preheat the oven to 375°F, and generously grease a small heart-shaped cake pan or a large baking sheet.
- Grate the beet and potato in a food processor. (You can grate them by hand, but it will be messy.)
- Place the grated beets, potato, and onion in a bowl. Sprinkle with the flour, salt, and pepper, and toss well to coat.
- If using the heart-shaped pan, spread the beet and potato mixture in the pan and press with a spatula to compress evenly.
- If you don't have a heart-shaped pan, transfer the mixture onto the prepared baking sheet and press it together into the shape of a heart. (You can divide the mixture in half and shape it into two smaller hearts, if you prefer.)
- Drizzle with the olive oil, cover tightly with foil, and bake for 20 minutes.
- Carefully remove the rosti from the over and place a plate on top, invert, and slide the rosti (even if baked in the pan) onto the baking sheet. If you've made small hearts, flip them over carefully with a metal spatula.
- Return to the oven to brown the other side, about 20 minutes.
- Garnish with parsley and serve hot.
Nutrition (Estimate per Serving)
Calories: 289kcalCarbohydrates: 36gProtein: 5gFat: 14gSaturated Fat: 2gPolyunsaturated Fat: 2gMonounsaturated Fat: 10gSodium: 330mgPotassium: 629mgFiber: 4gSugar: 4gVitamin A: 17IUVitamin C: 24mgCalcium: 27mgIron: 2mg
Vegan-ize any recipe!Grab our free vegan cheat sheet, packed with my favorite easy substitutions to make any recipe vegan.
This recipe is from Party Vegan: Fabulous, Fun Food for Every Occasion* by Robin Robertson © 2010, published by John Wiley & Sons.
Robin Robertson is the author of numerous cookbooks, including Fresh from the Vegetarian Slow Cooker* and many other titles.* Visit Robin at Global Vegan Kitchen.
*This post contains affiliate links. If the product is purchased by linking through this review, VegKitchen receives a modest commission, which helps maintain our site and helps it to continue growing!
Creating a Plant-Based Pantry
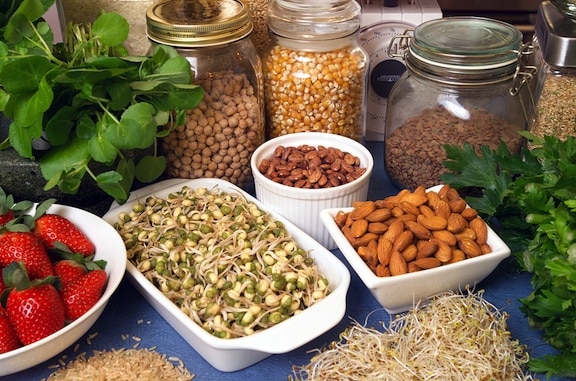
So many people have asked me how to set up a plant-based (vegan) pantry that I decided this subject merits a permanent place on VegKitchen. Whether you are a newcomer to a vegan/vegetarian diet, or someone who wants to have a greater variety of healthy ingredients at hand, this list can serve as your handy guideline. [Read more...]
Raw Organic Lotus Forbidden Black Rice
No need to cook with this Raw Organic Lotus Forbidden Black Rice! This tasty raw dish is flavorful and filled with superfood nutrition.
[feast_advanced_jump_to]Black rice truly is a super food that has as many antioxidants as blueberries and is regarded as a longevity super food in China that can prevent cancer and other diseases! The story goes, in ancient times the Emperor of China discovered this special black rice and it's amazing health benefits. Wanting to keep all the special nutritional powers to himself, the emperor made this black rice "forbidden" for anyone but him. Today, thanks to Lotus Foods, we can all enjoy this once-forbidden black rice in the most organic, all natural, fair-trade and sustainable way possible!
So far, this Lotus rice is the ONLY rice I can soak overnight that will be sprouted & soft and taste cooked & delicious! In the raw food world, there hasn't really been a "raw rice" available-so this Lotus brand rice is very special and unique. Fortunately, it's also affordable at only $3.89-$3.99 a bag at your local Whole Foods Market, your nearest health food store, or online! You can eat a bowl of this raw rice on its own (after soaking it and disposing of the soaking water, of course) or pair it with a tasty curry or stir fry.
How to Make Raw Oranic Lotus Forbidden Black Rice
- Pour entire rice package into bowl.
- Fill bowl with water 1 inch above rice.
- Cover bowl & let rice soak 10-12 hours.
- Drain water, rinse rice, and pat dry.
- Drizzle with olive oil & add seasonings.
- Mix together and serve.
Full directions for how to make Raw Organic Lotus Forbidden Black Rice are in the printable recipe card at the bottom of the post.
Raw Organic Lotus Forbidden Black Rice FAQs
Do I have to soak the rice for 10 hours?
You do need to make sure to let your rice soak for at least 10 hours. Since this rice is not cooked, it takes much longer to soak in the water and become soft. You can do this step during the day, but I like to soak my rice right before I go to sleep at night. Then, when I wake up, my rice is done and ready to eat!
Can I reuse the rice's soaking water?
Do NOT reuse the soaking water from your rice. You can use it to water plants or for a science experiment, but you cannot reuse the water in any kind of food or drink. The raw rice is soaked in water partially to remove any kind of debris or insects that are still stuck to the rice pearls. This means that the soaking water is full of all kinds of dirt and debris that are not edible.
How can I switch up this recipe?
I like to keep my rice simple with chopped cilantro, kelp, cayenne pepper, a squeeze of organic lime, and celtic sea salt. But some of my friends like to add chopped organic jalapeno or raw organic peas to their rice. Or they add mango and avocado, which is really gourmet and delicious-like a Mexican or Spanish Rice. Use your imagination and get creative!
Find more Raw and Almost-Raw Entrees on VegKitchen.
Recipe
Raw Organic Lotus Forbidden Black Rice
No need to cook with this Raw Organic Lotus Forbidden Black Rice! This tasty raw dish is flavorful and filled with superfood nutrition.
Print
Save
Servings:
Ingredients
- 1 bag Lotus Food Organic Forbidden Black Rice
- pure water enough to cover the rice
- herbs and spices I use kelp, cayenne, celtic sea salt, and chopped fresh organic cilantro
- organic extra-virgin olive oil
- organic lime juice to taste
Instructions
- Pour an entire package of Lotus Foods Organic Forbidden Rice into a large glass or ceramic mixing bowl.
- Fill the bowl with pure water until it covers the rice, plus about 1 inch.
- Cover the bowl with a plate or plastic wrap to keep the rice clean and protected as it soaks.
- Let rice soak for 10-12 hours.
- Drain the water. You can use the soaking water to water your plants or reuse it in some way-just DO NOT reuse the water in food or drinks.
- Rinse the rice with a bit of new clean water, then drain again and pat dry with paper towels.
- Drizzle rice with olive oil and sprinkle with your favorite herbs, spices, and seasonings.
- Mix together with a wooden spoon and serve!
Nutrition (Estimate per Serving)
Calories: 559kcalCarbohydrates: 117gProtein: 12gFat: 4gSaturated Fat: 1gPolyunsaturated Fat: 2gMonounsaturated Fat: 2gSodium: 11mgPotassium: 337mgFiber: 5gSugar: 1gCalcium: 35mgIron: 2mg
Vegan-ize any recipe!Grab our free vegan cheat sheet, packed with my favorite easy substitutions to make any recipe vegan.
Contributed by Raw Chef Bryan Au. Raw Chef Bryan Au is the author of Raw Star Recipes. Visit him on the web at Raw in Ten Minutes.
A Big Pot of Really Good Chili
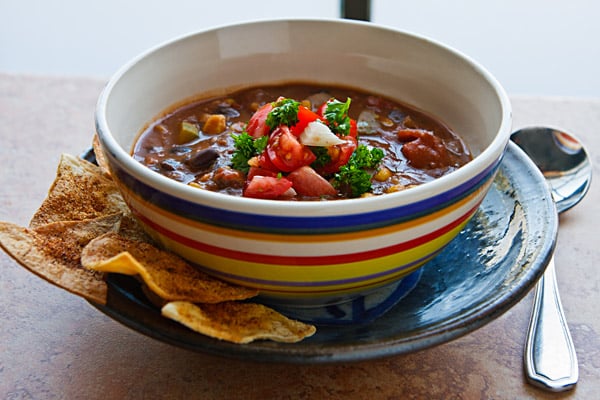
When you need a heaping helping of something fast, inexpensive, and hearty, I can think of few things that fit these criteria better than A Big Pot of Really Good Chili.
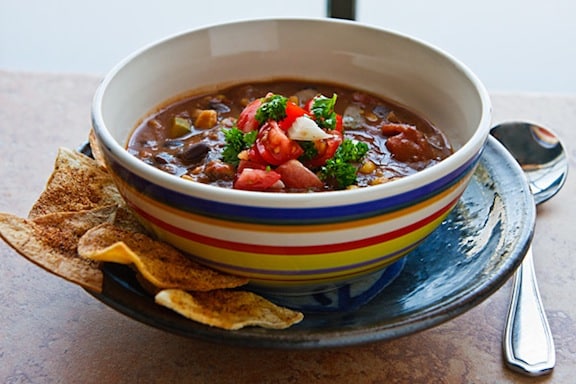
I have been making this chili recipe for years. Simple, hearty, and warming, this chili is a great choice for casual winter parties like Super Bowl Sunday, or for everyday meals.
Chili is one of those foods that, I believe, can never go wrong and is great for any occasion. Depending on the setting, you can serve this chili with some homey cornbread, an elegant salad, or even a decadent chocolate cake (for dessert, of course)!
How to Make A Big Pot of Really Good Chili
- Heat oil in a large pot.
- Saute onion until translucent. Add garlic.
- Add all but last 3 ingredients.
- Simmer, covered, for 30 minutes.
- Season to your liking.
- Let chili sit, off the heat, until ready to serve.
- Serve garnished with cliantro and tomatoes.
Full directions for how to make A Big Pot of Really Good Chili are in the printable recipe card below.
A Big Pot of Really Good Chili FAQs
Why do you let the chili sit after cooking?
If you have time, you can let your chili sit-off the heat-for an hour or so after cooking. This gives the flavors in the chili more time to meld together. I always try to follow this step, but you can totally skip it if you want to!
What is the best way to store leftover chili?
I suggest storing your leftover chili in the fridge. Keep it in an airtight container and eat it within 5 days. You can also freeze your chili (see below).
Can you freeze chili?
Freezing chili is a great way to meal prep! I suggest freezing your chili in serving-size freezer-safe containers or baggies. Then, when you want some chili, simply pull out however many servings you need at a time and reheat them.
You can make an entire batch to freeze, freeze half of the finished chili, or simply freeze whatever leftovers you may have.
Here are more Bean Stews and Chilis.
Recipe
A Big Pot of Really Good Chili
When you need something fast, inexpensive, and hearty, you'll want to make yourself A Big Pot of Really Good Chili.
Print
Pin
Save
Servings:
Ingredients
- 2 tablespoon extra-virgin olive oil
- 2 medium onions finely chopped
- 5 cloves garlic minced
- 1 medium green bell pepper diced
- 1 medium red bell pepper diced
- 84 oz beans of your choice try a combination of pinto, pink, and black beans; drained and rinsed
- 28 oz tomatoes diced, with liquid
- 16 oz tomato sauce
- 1 jalapeño peppers or other hot peppers, seeded and minced OR 8 oz mild or hot green chiles, chopped
- 1 tablespoon good-quality chili powder
- 1 tablespoon unsweetened cocoa powder
- 2 teaspoon dried oregano
- 2 teaspoon ground cumin
- salt and freshly ground pepper to taste
- ripe tomatoes chopped, for garnish
- cilantro or parsley, chopped, for garnish
Instructions
- Heat the oil in a large soup pot.
- Add the onion and sauté over medium-low heat until translucent.
- Add the garlic and sauté until the onion is golden.
- Add the remaining ingredients except the last three.
- Bring to a simmer, then cover. Continue to simmer gently for 30 minutes, stirring occasionally, until the peppers are tender and the flavors meld.
- Season with salt and pepper, and adjust the other seasonings.
- If time allows, let the chili stand for several hours before serving. Heat through as needed. The chili should be nice and thick; if your chili is too thick, stir in a cup of water.
- Serve your chili in individual bowls, garnished with tomatoes and cilantro.
Nutrition (Estimate per Serving)
Calories: 313kcalCarbohydrates: 54gProtein: 19gFat: 4gSaturated Fat: 1gPolyunsaturated Fat: 1gMonounsaturated Fat: 2gSodium: 219mgPotassium: 1184mgFiber: 17gSugar: 6gVitamin A: 1282IUVitamin C: 38mgCalcium: 87mgIron: 7mg
Vegan-ize any recipe!Grab our free vegan cheat sheet, packed with my favorite easy substitutions to make any recipe vegan.
Recipe from Vegan Holiday Kitchen. Photo by Susan Voisin.
Roasted Eggplant Curry
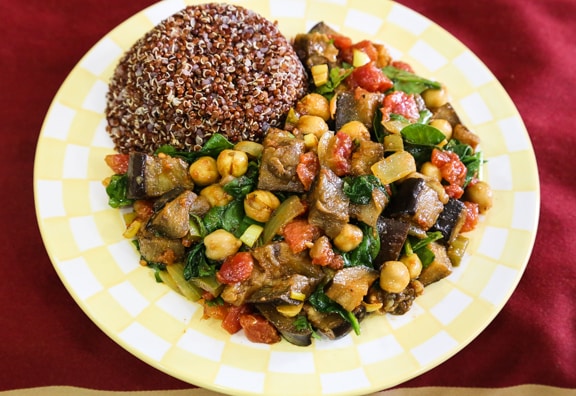
This is a simplified variation of an eggplant dish appears that frequently on Indian restaurant menus as Baingan Bharata. Once the eggplant has been roasted and is cool enough to handle, this dish comes together quickly and easily. Adding some chickpeas makes it a main dish. This is a good make-ahead dish. Make up to the point before adding the greens and cilantro. Let cool and keep covered or refrigerate until needed, then add the greens and cilantro and heat through. Photos by Evan Atlas.
Lemony Couscous with Broccoli
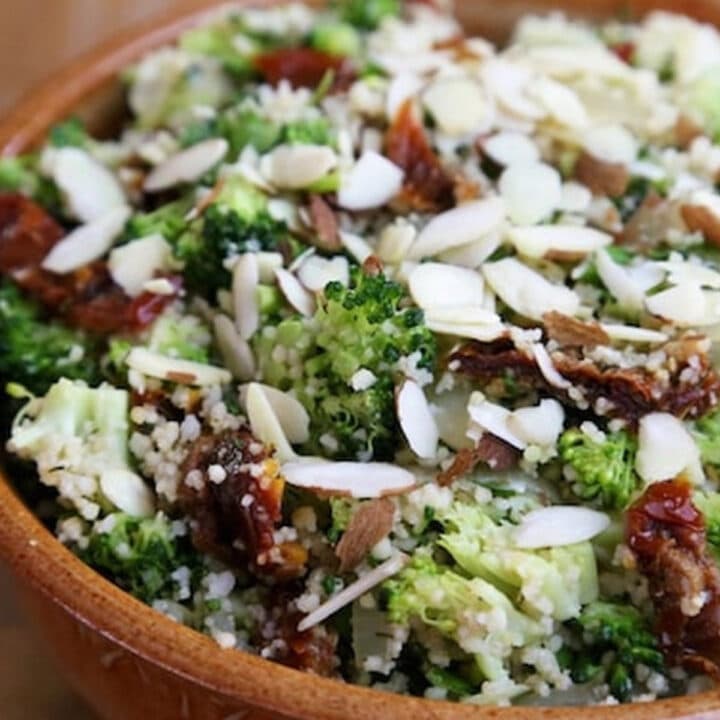
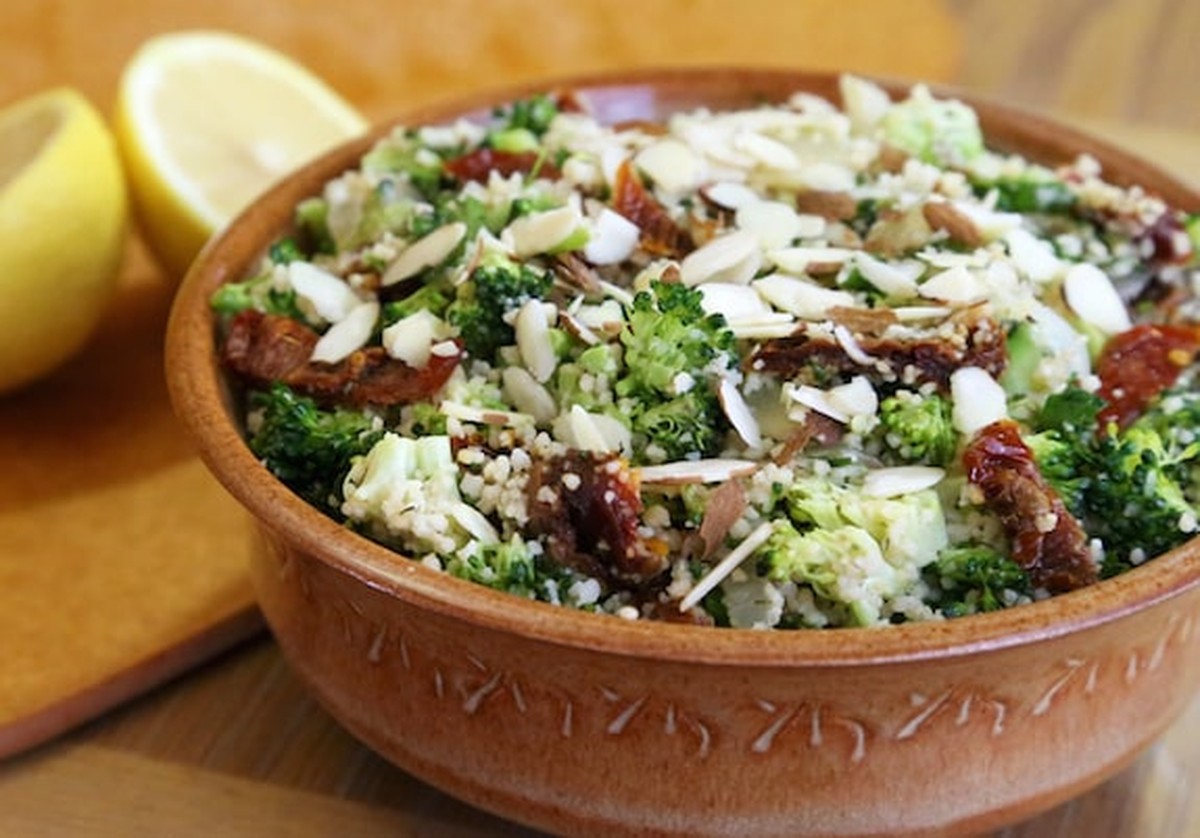
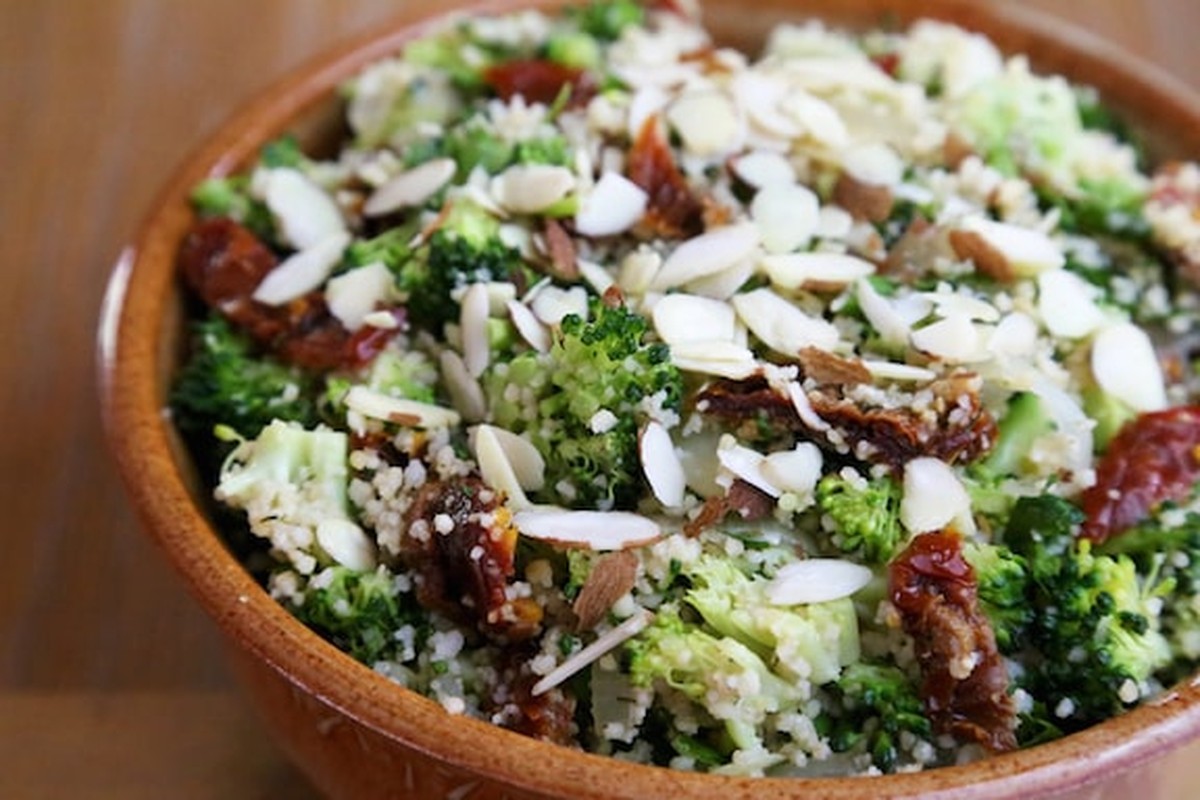
This simple combination of couscous and broccoli, bright with lemony flavor, might be too light to serve as a meal's centerpiece on its own, but it's perfect for pairing with a dish of equal heft, like a bean or legume dish, or a main-dish salad. Leftovers are also great served cold in a wrap with shredded lettuce and sliced tomatoes.
What makes this dish so easy to love is how quickly it comes together - the couscous needs only a quick soak in boiling water, and the broccoli steams right in the same skillet as the onion. A generous squeeze of lemon juice and a handful of fresh herbs turn a simple grain side into something bright and genuinely flavorful.
It's also a wonderfully flexible side dish to keep in your regular rotation. Because it tastes just as good warm, at room temperature, or straight from the fridge, it fits easily into meal prep, potlucks, or a quick weeknight dinner alongside whatever protein-rich dish you're already making.
Photos by Evan Atlas.
Key Ingredients & Substitutions
- Whole grain couscous - this adds fiber and a slightly nuttier flavor than regular couscous, though either works well here.
- Broccoli - finely chopped florets cook quickly and mix evenly through the couscous. A little of the stem is fine too.
- Fresh lemon juice and zest - the zest is optional but adds a real boost of citrus flavor, so it's worth including if you have a lemon on hand.
- Sun-dried tomatoes or black olives - either adds a concentrated, savory-sweet or briny note that balances the bright lemon flavor. Use whichever you have on hand or prefer.
- Fresh parsley and dill - these herbs are what give the dish its fresh, herby character. Dried dill works in a pinch if fresh isn't available.
Helpful Tips
- Let the couscous stand fully covered for the full 10 minutes so it absorbs all the water and fluffs up properly with a fork.
- Add just enough water to the skillet to keep the bottom moist while the broccoli steams - too much and it will simmer rather than steam, turning the broccoli dull and soft.
- Zest the lemon before juicing it; it's much easier to zest a whole lemon than one that's already been cut and squeezed.
- This dish is just as good warm, at room temperature, or cold, so don't worry about the timing - it holds up well made ahead of time.
Variations
Swap in quinoa for the couscous if you'd like a gluten-free version, or add a handful of chickpeas for extra protein and heartiness. A crumble of vegan feta over the top adds a nice tangy finish if you want to dress it up a little. For more crunch, sprinkle on some toasted slivered almonds or pine nuts just before serving.
Serving Ideas
Pair this couscous with a hearty bean or lentil dish, or a main-dish salad, to round out the meal. It also makes a great packed lunch on its own, or rolled into a wrap with shredded lettuce and sliced tomatoes for an easy way to use up leftovers.
Storing & Freezing
Leftovers keep well in an airtight container in the refrigerator for up to 4 days. This dish isn't a great candidate for freezing, since the couscous and broccoli both change texture considerably once thawed, but it's quick enough to make fresh whenever you need it.
Recipe
Lemony Couscous with Broccoli
A simple, bright couscous and broccoli side dish flavored with lemon, fresh herbs, and sun-dried tomatoes or olives.
Print
Pin
Save
Servings:
Ingredients
- ¾ cup couscous preferably whole grain
- 2 tablespoons extra-virgin olive oil
- 1 medium red or yellow onion quartered and thinly sliced
- 3 cups broccoli florets finely chopped
- ¼ to ½ cup fresh parsley minced
- 2 tablespoons fresh dill minced, or 1 teaspoon dried
- juice of 1 lemon plus its zest, optional but highly recommended
- ⅓ cup sliced sun-dried tomatoes or chopped pitted cured black olives oil-cured or not, as preferred
- salt and freshly ground pepper to taste
Instructions
- Combine the couscous with 1 ½ cups boiling water in a heatproof container. Cover and let stand for 10 minutes, then fluff with a fork.
- Meanwhile, heat half of the oil in a large skillet. Add the onion and sauté over medium heat until golden.
- Add the broccoli and just enough water to keep the bottom of the skillet moist, then cover and allow to steam until the broccoli is bright green and tender-crisp, about 4 minutes.
- Add the cooked couscous to the skillet along with the herbs, lemon juice (and optional zest), and dried tomatoes or olives. Stir together well, and cook for 2 or 3 minutes longer.
- Season with salt and pepper and serve hot, warm, or at room temperature.
Nutrition (Estimate per Serving)
Calories: 170kcalCarbohydrates: 24gProtein: 5gFat: 7gSodium: 50mgFiber: 3g
Vegan-ize any recipe!Grab our free vegan cheat sheet, packed with my favorite easy substitutions to make any recipe vegan.
Frequently Asked Questions
Can I make this ahead of time?
Yes - this dish holds up especially well made a day ahead, since it's just as good served cold or at room temperature. Store it covered in the refrigerator and give it a quick taste for seasoning before serving.
Can I use regular couscous instead of whole grain?
Yes - regular couscous works just as well and cooks the same way. Whole grain couscous simply adds a bit more fiber and a slightly nuttier flavor, so use whichever you prefer or have on hand.
What can I use instead of sun-dried tomatoes?
Chopped pitted black olives make a great substitute and bring a similar briny, savory note. You could also leave them out entirely and add a few extra fresh cherry tomatoes, halved, for a lighter, fresher take on the dish.
More Whole Grain Recipes
Pasta Twists with Cauliflower and Spinach

One evening a while back, I had about one hour to make dinner for the family—and eat—between getting home from one activity and going out to another. I improvised based on what was in the fridge rather than following a recipe. This was the result; everyone liked this simple dish so much that I set down a recipe for it, and have followed it many times since. Serve with a salad of fresh greens and tomatoes (toss in some beans and chickpeas for extra protein), fresh bread, and your favorite wine. Photos by Evan Atlas.
Dilled Red Beans with Pickled Beets

This colorful, subtly sweet-sour red bean salad, embellished with the flavor of pickled beets, provides a nice contrast to mild pasta, potato, or grain dishes. It's a nice side dish to serve with grilled vegetables, too. Photos by Evan Atlas.
Pasta Salad with Broccoli, Tomatoes, and Red Beans

This pasta salad with broccoli, tomatoes, and red beans is an easy dish to make when summer tomatoes are at their absolute best. It's loaded with fresh herbs and just enough pasta to hold everything together, so an abundance of vegetables does most of the work. It's also a reliably sturdy vegan option for a potluck, since it holds up well at room temperature and only gets better as it sits.
What makes this salad especially satisfying is how much texture and color it packs into one bowl - tender pasta, bright green broccoli, juicy diced tomatoes, and hearty red beans, all tossed together in a simple oil-and-vinegar dressing. It comes together quickly and travels well, making it a good choice for picnics and cookouts as much as weeknight dinners.

Key Ingredients & Substitutions
- Short, chunky pasta - shapes like bowties or cavatappi hold the dressing and vegetables well. Just 8 ounces is needed since the vegetables make up most of the volume.
- Broccoli - finely chopped florets, blanched briefly right in the pasta water, stay bright green and tender-crisp rather than mushy.
- Ripe, juicy tomatoes - this salad is really built around summer tomatoes at their peak, so use the best ones you can find for the most flavor.
- Small red beans - canned beans keep this quick and add protein and heartiness. Kidney beans or black beans work as substitutes if that's what's in your pantry.
- Sun-dried tomatoes - a small amount adds a concentrated, slightly tangy sweetness that balances the fresh tomatoes. Look for the non-oil-cured kind so they don't add too much extra fat.
Helpful Tips
- Add the broccoli to the pasta water in the last 30 seconds of cooking rather than boiling it separately - it's an easy way to save a pot and get perfectly tender-crisp broccoli.
- Rinse the pasta and broccoli under cold water right after draining to stop the cooking and cool everything down quickly for the salad.
- Let the salad stand for 30 to 60 minutes before serving if you have the time - this gives the flavors a chance to meld and makes a real difference in taste.
- Taste before serving and adjust with extra oil, vinegar, lemon juice, or seasoning, since the pasta tends to soak up some of the dressing as it sits.
Variations
Swap in chickpeas or black beans for the red beans if you'd like a different flavor, or add diced cucumber or bell pepper for even more crunch and color. A handful of Kalamata olives or a sprinkle of vegan feta makes a nice addition if you want to lean into more of a Mediterranean flavor profile. For extra heat, add a pinch of red pepper flakes along with the Italian seasoning.
Serving Ideas
This salad is substantial enough to serve as a light lunch or main dish on its own, but it also makes a great potluck or picnic side since it travels well and doesn't need to be kept warm. Pair it with crusty bread or a simple green salad if you want to round out the meal further.
Storing & Freezing
Leftovers keep well in an airtight container in the refrigerator for up to 4 days, and the flavors often taste even better the next day. This salad isn't a good candidate for freezing, since the fresh tomatoes and blanched broccoli both turn watery and lose their texture once thawed.

Recipe

Pasta Salad with Broccoli, Tomatoes, and Red Beans
An easy summer pasta salad loaded with broccoli, juicy tomatoes, red beans, and fresh herbs in a simple oil and vinegar dressing.
Print
Pin
Save
Servings: to 8
Ingredients
- 8 ounces pasta any short, chunky shape, like bowties or cavatappi
- 4 cups broccoli florets finely chopped
- ¼ cup fresh parsley chopped
- 3 scallions minced
- fresh basil leaves sliced, to taste
- 1 ½ to 2 pounds ripe, juicy tomatoes diced
- 15 to 16 ounce can small red beans drained and rinsed
- ¼ cup sun-dried tomatoes cut into strips (preferably not oil-cured)
- ¼ cup extra-virgin olive oil or as desired
- ¼ cup red wine vinegar or apple cider vinegar
- juice of ½ lemon or lime about 2 tablespoons
- 2 teaspoons italian seasoning blend
- salt and freshly ground pepper to taste
Instructions
- Cook the pasta according to package directions until al dente. Just before it's done, add the broccoli florets and cook until they're bright green, not more than another 30 seconds.
- Drain the pasta and broccoli and rinse until cool.
- Combine the pasta and broccoli in a large serving bowl with the remaining ingredients. Toss well.
- If time allows, let stand for 30 to 60 minutes or so to allow the flavors to blend. Taste, and bring the flavors up to your liking with additional oil, vinegar, lemon juice, seasoning blend, and salt and pepper.
Nutrition (Estimate per Serving)
Calories: 240kcalCarbohydrates: 38gProtein: 9gFat: 7gSaturated Fat: 1gSodium: 210mgFiber: 6gSugar: 5g
Vegan-ize any recipe!Grab our free vegan cheat sheet, packed with my favorite easy substitutions to make any recipe vegan.
Frequently Asked Questions
Can I make this pasta salad ahead of time?
Yes - in fact, it's a great make-ahead dish since the flavors improve as it sits. Prepare it up to a day in advance and store it covered in the refrigerator, then give it a good toss and taste for seasoning before serving.
Can I use frozen broccoli instead of fresh?
Fresh broccoli holds its color and texture better in a cold salad like this one, but thawed and well-drained frozen broccoli can work in a pinch. There's no need to cook it further - just chop and add it straight to the bowl with the rest of the ingredients. Pat it dry with a paper towel first so it doesn't water down the dressing.
More Vegan Pasta Recipes
Creole Corn Maque Choux
Here's a classic combo of corn, bell peppers, and tomatoes, Creole style. This veggie side dish was adapted by Creole cooks from a dish made by the Native Americans who populated southwest Louisiana. Make it when there's a bumper crop of fresh corn — it's also a great choice for a Thanksgiving side dish, bringing a bit of Southern flair to the holiday table.
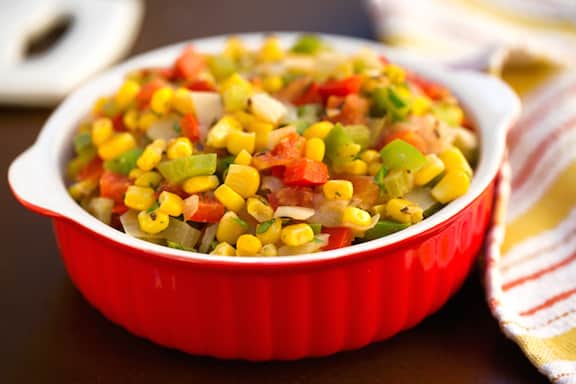
Adapted from Great American Vegetarian by Nava Atlas. Photos by Hannah Kaminsky.
Key Ingredients & Substitutions
- Fresh corn kernels. The star of the dish — fresh corn cut straight off the cob gives the best flavor and texture, though thawed frozen corn works well too, especially outside of peak summer season.
- Bell peppers. A mix of red and green adds color and a slightly different flavor from each — use whatever combination you have on hand.
- Ripe tomatoes. Add juiciness and a touch of acidity that balances the sweetness of the corn.
- Unsweetened nondairy milk. Along with a bit of flour, this creates the light, creamy sauce that coats the vegetables.
- Fresh basil and thyme. These herbs give the dish its herbaceous, Creole character — dried versions work in a pinch.
Variations
- Add heat. For an extra kick, add a seeded and finely chopped fresh hot pepper to the mix at the same time you add the corn.
- Make it a main dish. Stir in a can of drained, rinsed black-eyed peas or red beans for a heartier, more substantial dish.
- Add smoked paprika. A pinch stirred in with the salt and cayenne adds a subtle smoky depth.
- Swap in okra. A handful of sliced fresh or frozen okra added along with the corn is a classic Southern pairing.
Tips for the Best Maque Choux
- Don't rush the onion. Sauteing it until truly golden builds the base flavor for the whole dish.
- Stir the flour in thoroughly. Making sure it fully disappears into the vegetables before adding the liquid helps avoid any raw-flour taste or lumps.
- Use ripe, in-season tomatoes when you can. Their natural sweetness and juiciness make a real difference in the finished dish.
- Serve it right from the skillet. This is a casual, rustic dish that's just as at home served family-style straight from the pan as it is plated.
Make Ahead & Storage
This keeps well in an airtight container in the refrigerator for up to 3 days. Reheat gently on the stovetop over low heat, adding a splash of nondairy milk or water if it's thickened up too much in the fridge.
How to Serve
Serve as a Creole-inspired side dish alongside beans and rice, or as part of a Thanksgiving spread. Explore more of VegKitchen's Creole classics, veg style, and more recipes for using fresh corn.
Recipe

Creole Corn Maque Choux
Here's a classic combo of corn, bell peppers, and tomatoes, Creole style. Make it when there's a bumper crop of fresh corn; and it's also a great choice for a Thanksgiving side dish.
Print
Pin
Save
Servings: to 8
Ingredients
- 1 ½ tablespoons olive oil
- 1 large onion chopped
- 2 medium stalks celery finely diced
- 1 small or ½ medium red bell pepper finely diced
- 1 small or ½ medium green bell pepper diced
- 1 tablespoon unbleached white flour
- 3 to 3 ½ cups cooked fresh or thawed frozen corn kernels
- 2 medium diced ripe tomatoes
- ½ cup unsweetened nondairy milk
- 2 tablespoons finely chopped fresh parsley
- Several leaves fresh basil thinly sliced, or 1 teaspoon dried basil
- 1 teaspoon fresh thyme leaves or ¼ teaspoon dried
- Salt and cayenne pepper to taste
Instructions
- Heat the oil in a large skillet. Add the onion and sauté over medium-low heat until golden.
- Add the celery and bell peppers and continue to sauté until all the vegetables are just tender, stirring occasionally. Sprinkle in the flour, stirring it in until it disappears.
- Add the corn kernels, tomatoes, and nondairy milk to the skillet. Cook uncovered for 5 to 7 minutes, or until everything is well heated through and the tomatoes have softened a bit.
- Dissolve the flour in just enough water to make it smooth and flowing. Stir it into the skillet and stir until the liquid in the skillet thickens.
- Season with salt and cayenne pepper. Remove from the heat and serve straight from the skillet, or transfer to a serving dish for the table.
Nutrition (Estimate per Serving)
Calories: 142kcalCarbohydrates: 24gProtein: 4gFat: 5gSaturated Fat: 1gPolyunsaturated Fat: 1gMonounsaturated Fat: 3gSodium: 221mgPotassium: 378mgFiber: 4gSugar: 6gVitamin A: 1267IUVitamin C: 52mgCalcium: 49mgIron: 1mg
Vegan-ize any recipe!Grab our free vegan cheat sheet, packed with my favorite easy substitutions to make any recipe vegan.
Nutrition information
Per serving: Calories: 167; Total Fat: 3g; Protein: 4g; Carbs: 29g; Sodium: 45 mg


BBQ Tempeh Bacon with Black-Eyed Peas and Greens
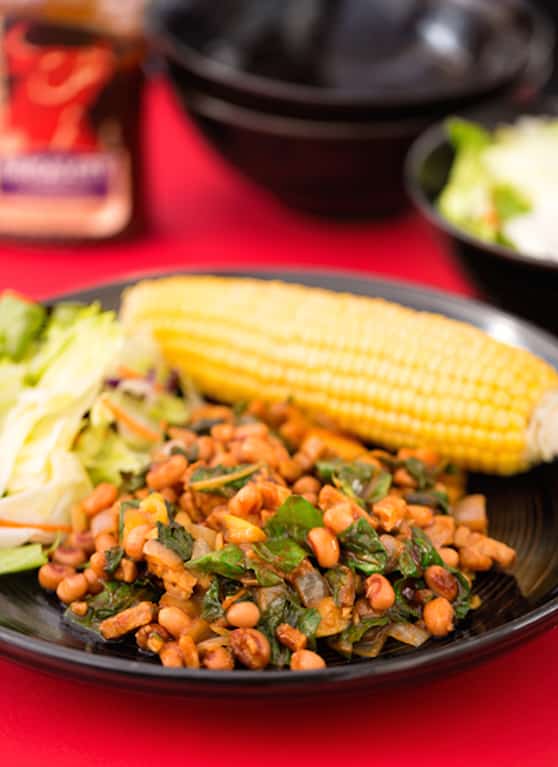
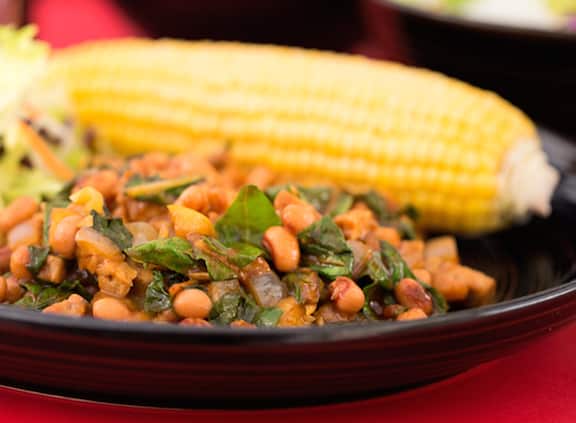
Bites of tart apple add a delightful flavor twist to this hearty dish of BBQ tempeh bacon with black-eyed peas and greens. Serve with sweet potatoes or fresh corn and coleslaw for a satisfying meal that comes together in one skillet in well under an hour, with minimal cleanup for a weeknight dinner that still feels like Southern comfort food.
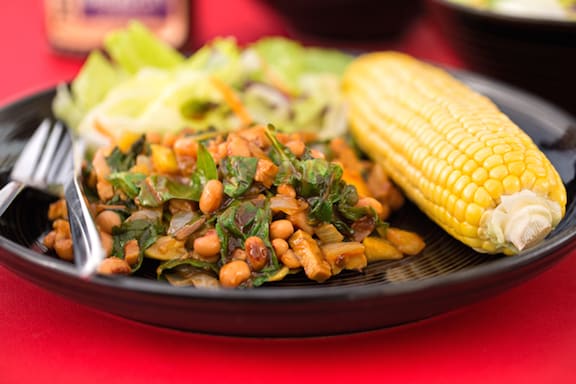
Photos by Hannah Kaminsky.
Key Ingredients & Substitutions
- Smoky tempeh strips. Pre-seasoned smoky/bacon-style tempeh gives this dish its "bacon" flavor without any extra work — finely chop it so it browns quickly and distributes through the dish rather than clumping in large pieces.
- Black-eyed peas. Hearty and slightly earthy; canned works just as well as cooked from dry for a quick weeknight version, and cuts a good chunk of time off the recipe.
- Granny Smith apple. Its tartness cuts through the richness of the tempeh and barbecue sauce — a firm, tart apple works better here than a sweet one, which can make the whole dish taste candy-sweet.
- Vegan barbecue sauce. Our Quick Vegan Barbecue Sauce is a great homemade option, or use your favorite all-natural bottled brand.
- Chard or spinach. Adds a healthy dose of greens right in the pan — chard needs a bit more cooking time than tender spinach, so add it a minute or two earlier.
- Onion and garlic. The aromatic base that builds flavor before the tempeh and sauce go in — don't skip sauteing the onion until it's genuinely translucent.
Variations
- Use kale instead. Kale works wonderfully here too, but needs more cooking time than chard or spinach — start steaming it separately just before starting the dish, then stir it in at the end once it's tender.
- Make it spicier. A dash of hot sauce or a pinch of cayenne in with the barbecue sauce adds some heat.
- Swap the beans. Pinto or kidney beans work in place of black-eyed peas if that's what you have on hand.
- Add sweet potato. Diced and roasted separately, it makes a nice bed to serve this over, echoing the classic Southern pairing.
- Add a splash of apple cider vinegar. A little extra tang at the end brightens the whole dish, especially if your barbecue sauce leans sweet.
Tips for the Best BBQ Tempeh Bacon with Black-Eyed Peas and Greens
- Chop the tempeh finely. Smaller pieces brown more evenly and mimic the texture of bacon bits better than larger chunks.
- Let the sauce reduce. Cooking the barbecue sauce down with the beans and apple for the full 10 minutes concentrates the flavor rather than leaving the dish watery.
- Don't overcook the greens. Spinach only needs a couple of minutes; chard needs a bit longer. Either way, pull them off the heat while they're still bright green.
- Taste before adding extra salt. Between the tempeh seasoning and the barbecue sauce, this dish often needs little to no additional salt.
- Use a wide skillet. This helps the tempeh brown rather than steam, which matters a lot for getting that bacon-like texture.
Make Ahead & Storage
This dish keeps well in the refrigerator for up to 4 days, and like many bean and tempeh dishes, the flavor deepens after a day. Reheat gently on the stovetop, adding a splash of water if the sauce has thickened too much, since it will continue to reduce as it sits and reheats.
How to Serve
Serve at once alongside sweet potatoes, fresh corn, or coleslaw for a well-rounded meal.
Recipe
BBQ Tempeh Bacon with Black-Eyed Peas and Greens
Bites of tart apple add a delightful flavor twist to this hearty dish of BBQ tempeh bacon with black-eyed peas and greens.
Print
Pin
Save
Servings:
Ingredients
- 2 tablespoons olive oil
- 1 medium onion finely chopped
- 2 to 3 cloves garlic minced
- 6 ounce package smoky tempeh strips finely chopped
- 1 ½ to 2 cups cooked black-eyed peas or one 15- to 16-ounce can, drained and rinsed
- 1 medium Granny Smith apple diced
- ⅔ cup vegan barbecue sauce homemade or your favorite all-natural brand
- 10 to 12 ounces chard or spinach well washed, stemmed, and chopped
Instructions
- Heat the oil in a wide skillet. Add the onion and sauté over medium-low heat until translucent.
- Add the garlic and tempeh and sauté, stirring frequently, until golden and just beginning to brown lightly.
- Stir in the black-eyed peas, apple, and barbecue sauce. Cook over medium-high heat for 10 minutes or until the sauce is reduced.
- Add the greens, then cover until wilted. Stir in, then cook for another 2 minutes or so for spinach, or 4 minutes for chard, until tender but still bright green. Serve at once.
Notes
This is also wonderful with kale, but it needs more cooking time than chard or spinach. Start steaming it separately just before starting the dish; once cooked to your liking, stir it in at the end.
Vegan-ize any recipe!Grab our free vegan cheat sheet, packed with my favorite easy substitutions to make any recipe vegan.
- Here are more tempeh recipes.
- Here are more recipes for hardy greens.
- Here are more of VegKitchen's Vegan Dinner Recipes and more Tofu, Tempeh and Vegan Sausage Main Dishes.
Old-Fashioned Potato Bread Stuffing
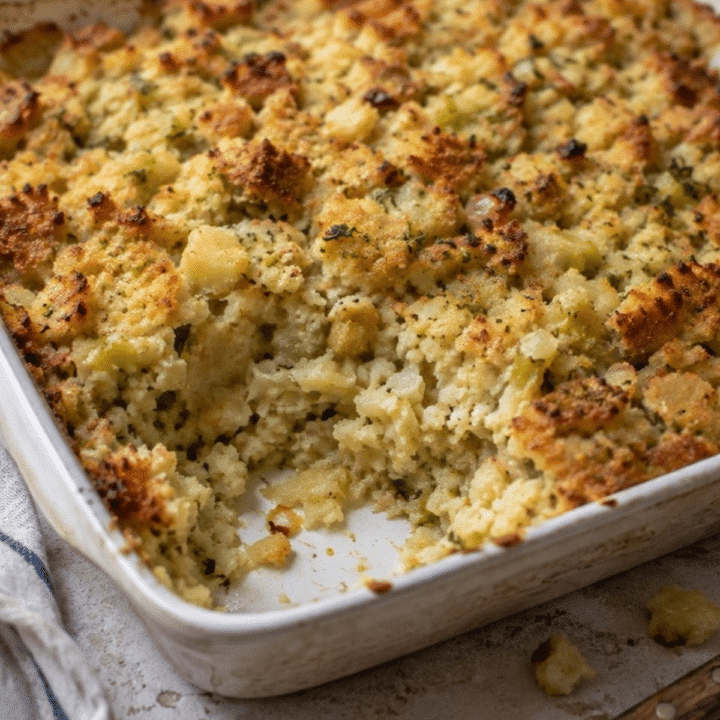
This hearty, casserole-type bread and potato stuffing need not be stuffed into anything - simply enjoy it as a side dish. This is welcome at the Thanksgiving table, but you can surely enjoy it any time you want a comforting casserole or have a bit of bread you'd like to use up, like those end pieces that no one seems to want!
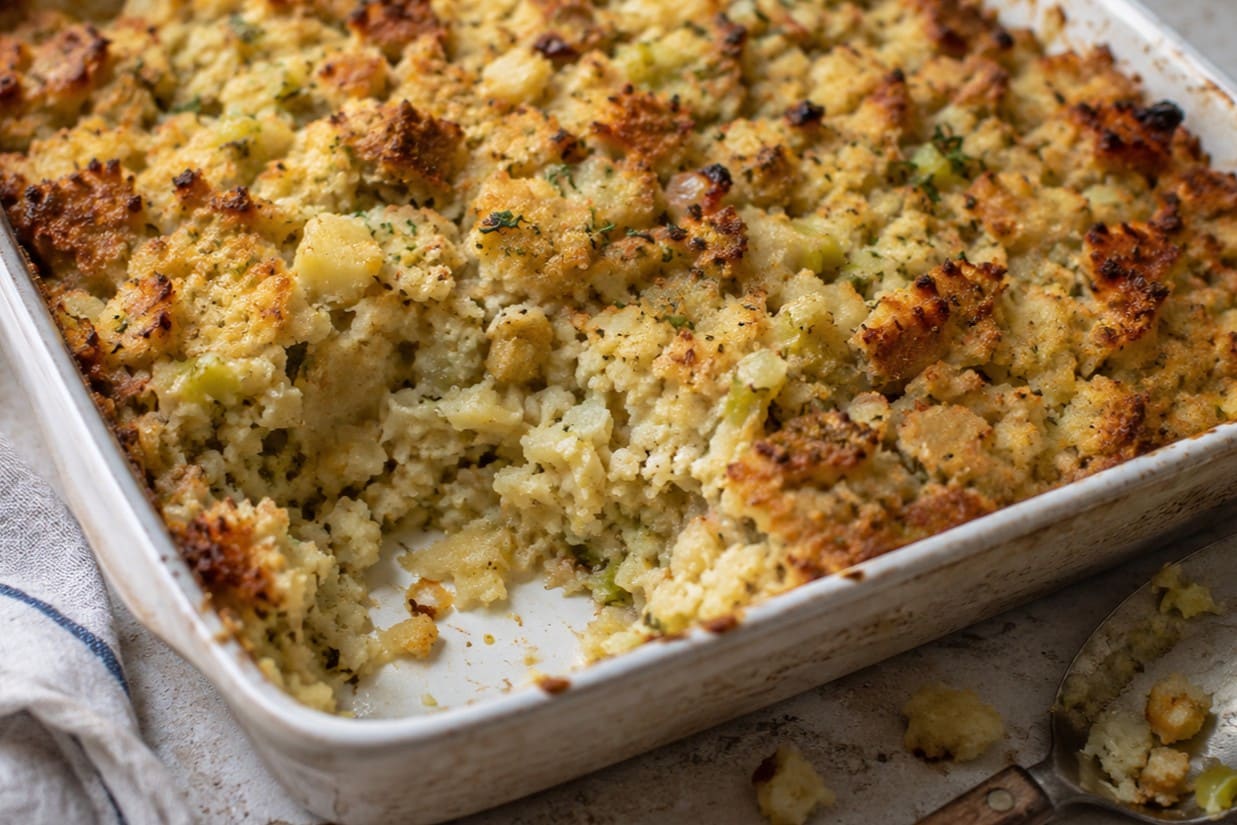
It's just not Thanksgiving without stuffing, right? This totally delicious potato bread stuffing is sure to be your new holiday favorite!
It's loaded with my two favorite carbs - potatoes and bread. Then tossed with onions and herbs and baked to crusty perfection. What's not to love?
Helpful Tips
Roasted Potatoes. For an extra flavor boost, consider roasting your potatoes instead of baking or microwaving them. This gives the potatoes a richer, deeper flavor that will enhance the stuffing. It just takes a bit of extra time.
Use any fresh herbs. Swap dried thyme for fresh if you have it on hand, as this will give more vibrant flavor to your stuffing.
Choosing the Bread. This recipe calls for whole-grain bread, but feel free to experiment with other types such as sourdough, rye, or even a hearty multigrain. Each will lend a unique flavor and texture to your stuffing.
Variations
Mushroom-Potato Bread Stuffing: Sauté button or cremini mushrooms with onion and celery for an earthy flavor. This variation could also benefit from adding a splash of white wine or vegetable broth while sautéing the vegetables.
Sweet Potato-Potato Bread Stuffing: Swap half of the russet potatoes for sweet potatoes for a sweet-savory balance in your stuffing.
Cheesy Potato Bread Stuffing: Add vegan cheese or nutritional yeast to the mashed potatoes to give a cheesy flavor to the stuffing. Some good options are vegan mozzarella or cheddar.
Apple and Sage-Potato Bread Stuffing: Add some diced Granny Smith apples for a sweet-tart crunch in your stuffing. Complement this flavor with the addition of sage instead of thyme.
Mediterranean Potato Bread Stuffing: Incorporate sun-dried tomatoes, olives, and rosemary for a Mediterranean twist.
Make Ahead & Storage
This stuffing is a great make-ahead side for a busy holiday table. Assemble the casserole up to a day ahead, cover, and refrigerate unbaked, then bring it to room temperature before baking as directed. Leftovers keep well in an airtight container in the refrigerator for up to 4 days, and reheat nicely in a covered dish in the oven with a splash of vegetable broth to keep it from drying out.
More Tasty Recipes
This is quickly becoming my favorite stuffing recipe, but be sure to check out these other ideas as well:
And if you're here planning your holiday menu, be sure to check out my Vegan Thanksgiving and Vegan Christmas cookbooks!
Recipe
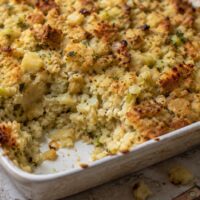
Old-Fashioned Potato-Bread Stuffing
This hearty, casserole-type bread and potato stuffing need not be stuffed into anything; simply enjoy it as a side dish.
Print
Pin
Save
Servings: to 8
Ingredients
- 5 or 6 large baking potatoes such as russet, cooked or microwaved in their skins
- 1 cup unsweetened rice milk or other nondairy milk
- 4 average slices whole-grain bread
- 2 tablespoons olive oil
- 1 cup chopped onion
- 1 cup diced celery
- 1 tablespoon salt-free seasoning blend such as Frontier or Mrs. Dash
- ½ teaspoon dried thyme
- Salt and freshly ground pepper to taste
Instructions
- Preheat the oven to 375 degrees F.
- Once the cooked potatoes are cool enough to handle, peel them and place them in a large mixing bowl. Coarsely mash the potatoes with ½ cup of the rice milk.
- Cut the bread into ½-inch dice. Place them in a small mixing bowl and pour the remaining rice milk over them. Soak for several minutes.
- In the meantime, heat the oil in a medium-sized skillet. Add the onion and celery and sauté over low heat until the onion is lightly browned and the celery is tender.
- Combine the onion and celery mixture with the mashed potatoes in the large mixing bowl. Stir in the soaked bread, and seasoning mix. Season to taste with salt and lots of pepper.
- Pour the mixture into a well-oiled, 2-quart baking dish. Bake for 50 to 60 minutes, or until the top is a crusty golden brown.
Nutrition (Estimate per Serving)
Calories: 220kcalCarbohydrates: 40gProtein: 4gFat: 5gSaturated Fat: 1gPolyunsaturated Fat: 1gMonounsaturated Fat: 3gSodium: 45mgPotassium: 862mgFiber: 6gSugar: 5gVitamin A: 125IUVitamin C: 38mgCalcium: 79mgIron: 3mg
Vegan-ize any recipe!Grab our free vegan cheat sheet, packed with my favorite easy substitutions to make any recipe vegan.
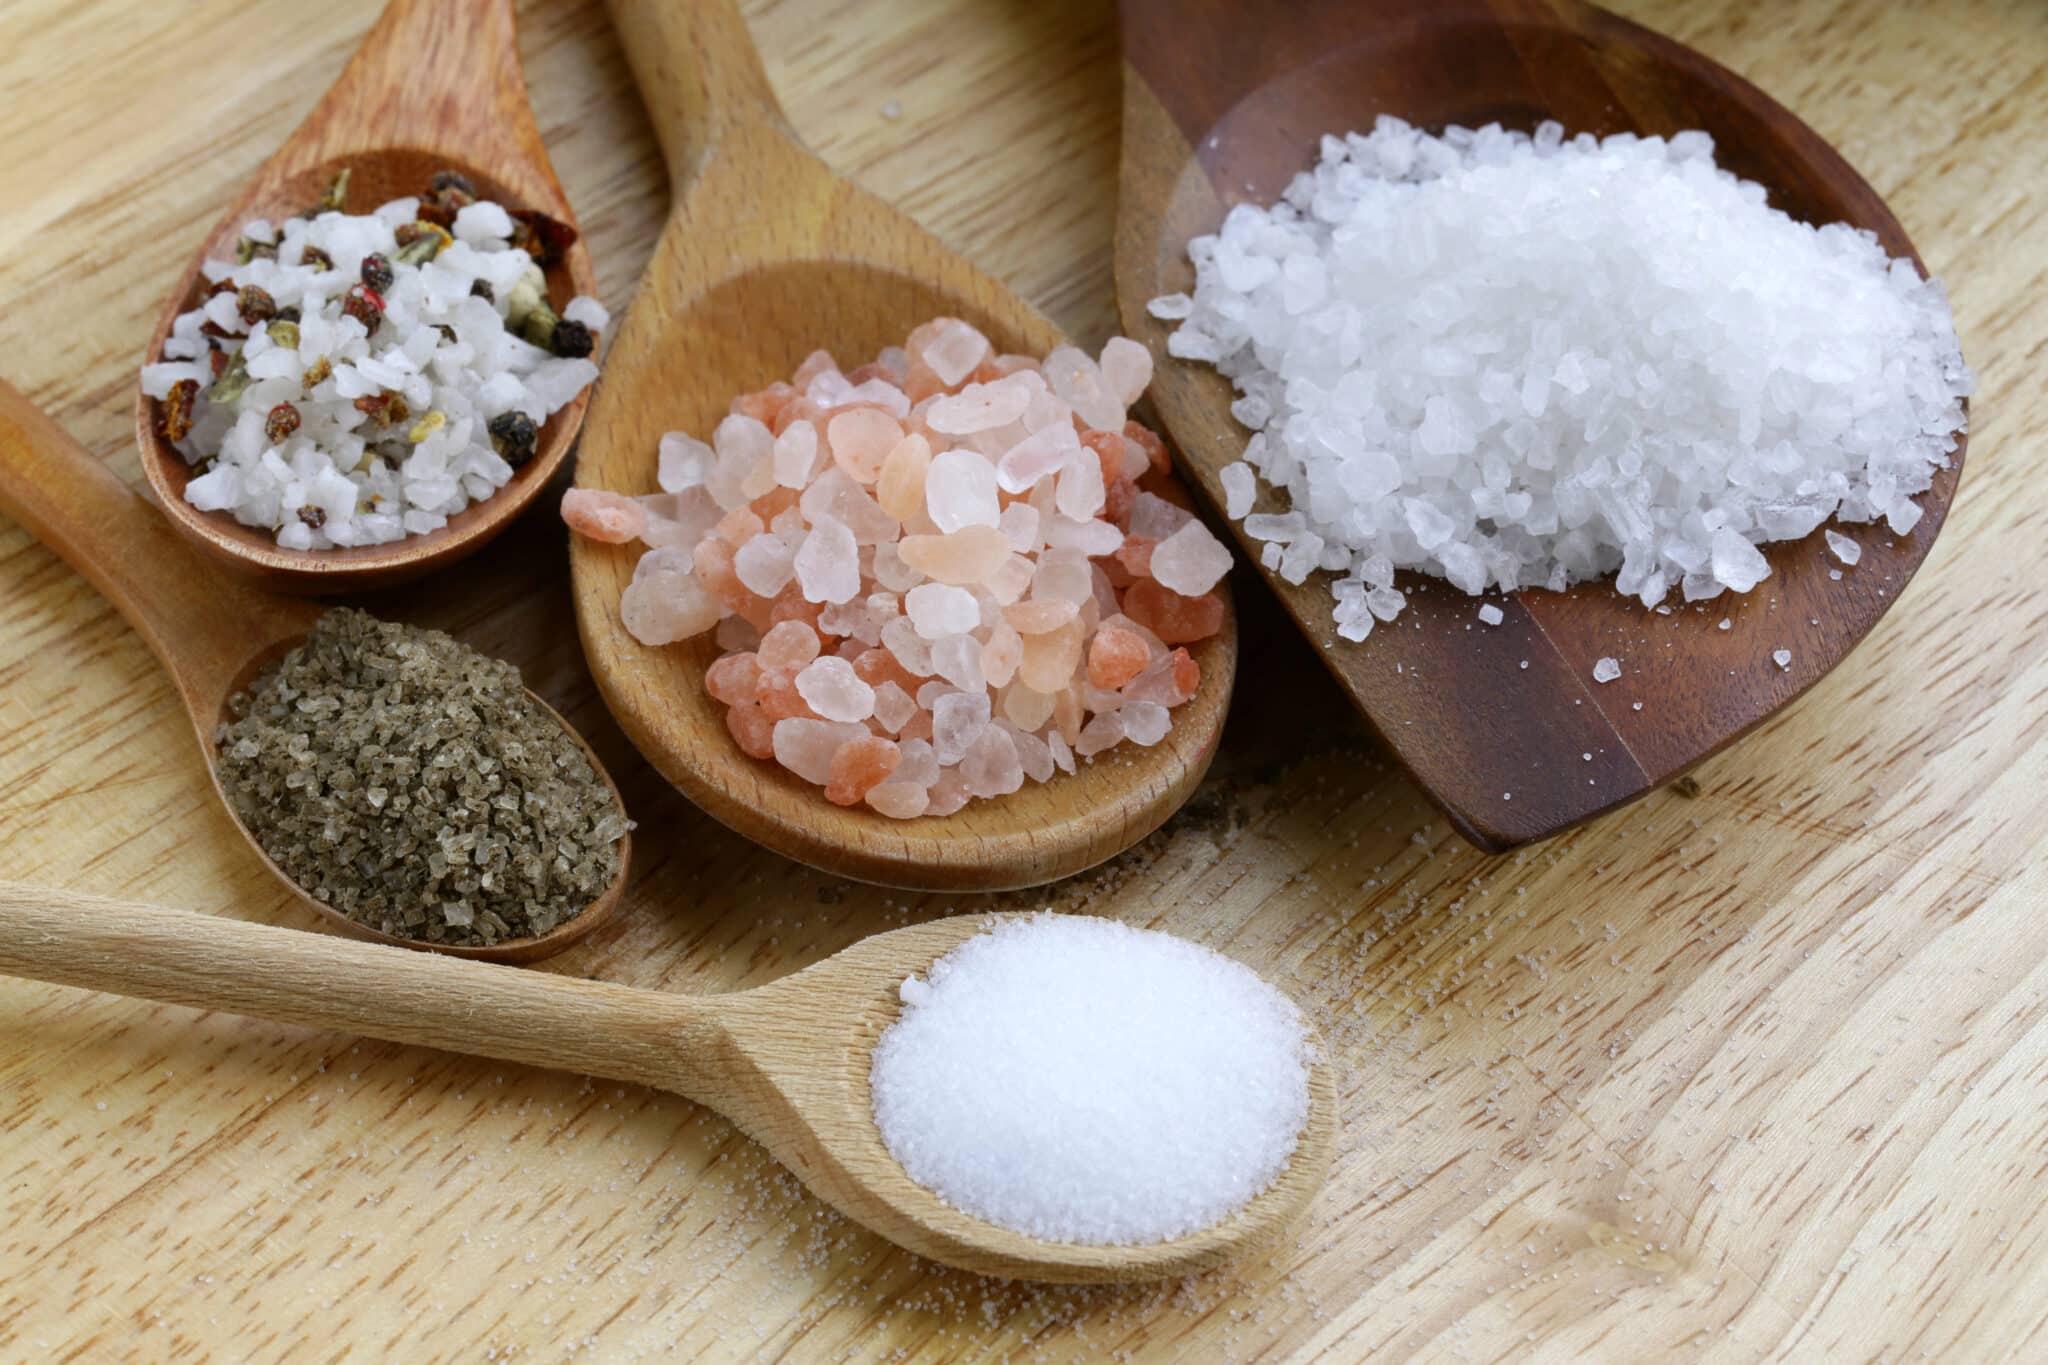
A Guide to Salt Varieties

Salt comes in all colors, shapes and sizes; as well as pure white, salt may be pink, grey, black or green. Salt truly is a rainbow-hued rock. Here's a guide to many of the salt varieties available. You might also enjoy exploring more of our Himalayan salt recipes and tips.
Candied Pumpkin Seeds
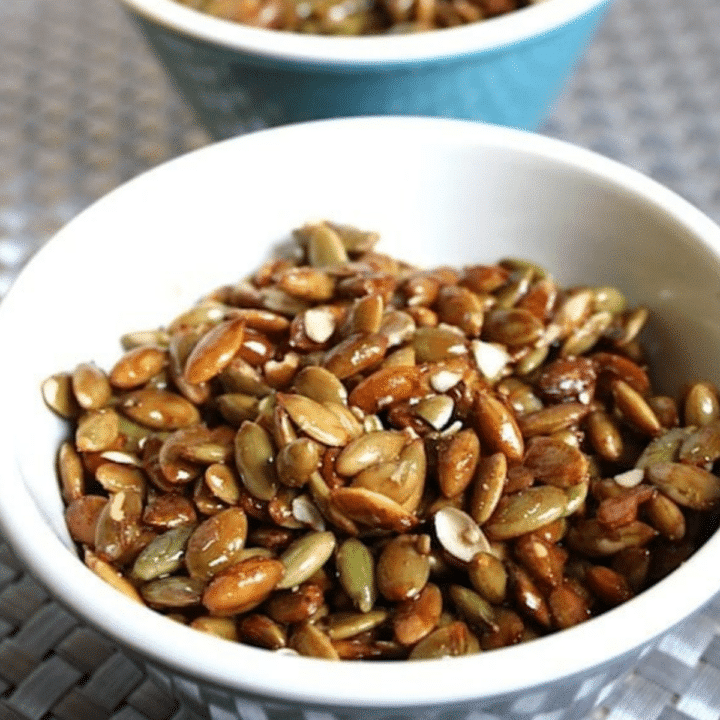
These candied pumpkin seeds (or pepitas) are sweet, salty, and perfectly crunchy! It's the ultimate Fall treat.
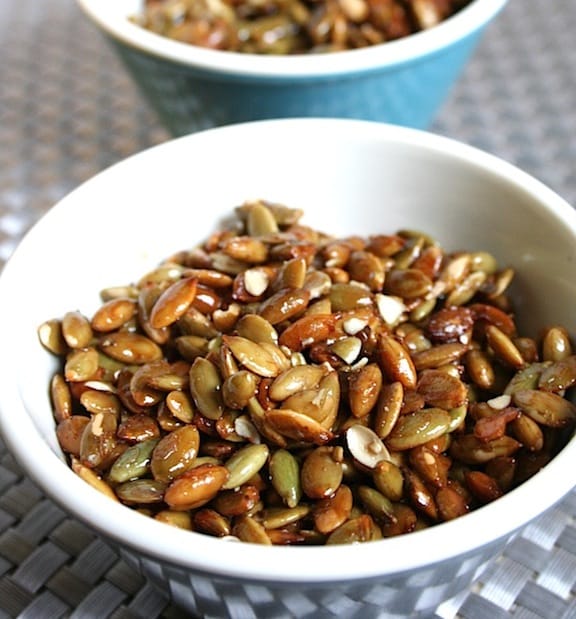
This recipe was contributed by Kim Lutz, author of Welcoming Kitchen: 200 Delicious Allergen- & Gluten-Free Vegan Recipes* (Sterling, ©2011). Photos by Rachael Braun. Published with permission.
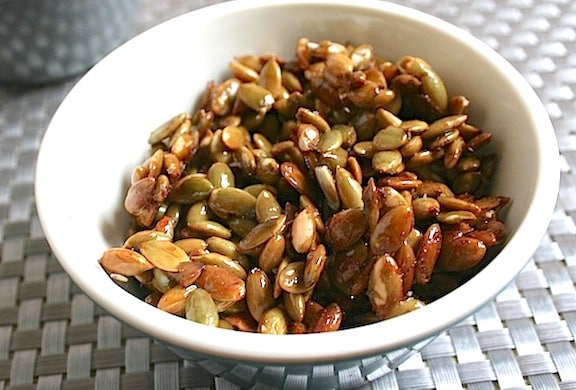
Sweet, salty, and ridiculously snackable - these candied pumpkin seeds are the fall treat you didn't know you needed. They're crunchy, caramelized, and just the right amount of sticky (in the best way).
These homemade candied pumpkin seeds (sometimes called candied pepitas) are so delicious, and couldn't be any easier to make! I dare you not to eat half of it straight off the baking sheet.
They take just three ingredients (I don't count the salt) and less than 30 minutes. And most of that time is just letting them roast in the oven. Easy peasy.
These candied pumpkin seeds also make an awesome vegan-friendly gift idea. Just tie them up in a pretty cellophane bag with ribbon. Because who doesn't like to be gifted delicious food?
Key Ingredients & Substitutions
- Shelled pumpkin seeds (pepitas). The green, hull-free seeds sold in bags are what make candied pepitas so easy: they toast quickly and evenly and soak up the glaze. Buy them raw and unsalted, like these organic shelled pumpkin seeds, so you control the salt. Seeds scooped straight from a carving pumpkin work too; see the tips below.
- Maple syrup. Pure maple syrup gives the coating its warm, toasty flavor and helps it cling to every seed. Skip pancake syrup, which is mostly corn syrup and burns faster. Agave or brown rice syrup can stand in, with a slightly milder taste.
- Brown sugar. Packed brown sugar is what turns the glaze into a crisp, candy-like shell once it cools. Coconut sugar works as a one-to-one swap. Some white sugar is filtered with bone char, so look for organic or certified vegan brown sugar.
- Salt. Just a quarter teaspoon balances the sweetness and makes the maple flavor pop. Fine sea salt blends into the glaze best, and a few flakes of flaky salt on top after baking are a nice finishing touch.
Helpful Tips
Clean fresh seeds well. If you're using seeds from a whole pumpkin, drop them into a big bowl of water and rub them between your fingers. The seeds float and the stringy pulp sinks, so you can skim them off the top. Rinse once more in a colander and pick off any stubborn bits of pulp, which would otherwise scorch in the oven.
Dry them completely. Wet seeds steam instead of toasting, and the glaze slides right off them. Spread cleaned seeds on a clean kitchen towel, pat them dry, and let them air-dry for at least an hour (or overnight). Whole seeds still in their white hulls take a little longer to crisp, so plan on 5 to 10 extra minutes in the oven and keep a close eye on them.
Watch the syrup, not the clock. Heat the maple mixture over medium, not high, and stir constantly. As soon as the sugar has dissolved and the mixture turns foamy, add the seeds. Cooking it longer on the stove makes the sugar darker and more likely to burn in the oven.
Line the pan and spread the seeds thin. A single layer on a sheet lined with parchment paper bakes evenly, and the parchment keeps the sugar from welding the seeds to the pan. Crowded seeds in the middle stay sticky while the edges burn.
Pull them early to avoid burnt sugar. Sugar goes from golden to bitter in a minute or two, and ovens vary. Start checking at 8 minutes. The seeds are done when they're golden and fragrant and the glaze is bubbling; they'll still feel a little soft but will crisp up as they cool. If the edges darken faster than the center, stir the outer seeds inward.
Fun Variations to Try
- Spiced: Add ½ teaspoon cinnamon, or go full fall with pumpkin pie spice.
- Savory-sweet: Add flaky sea salt after baking, or a tiny pinch of cayenne for heat.
- Different sweeteners: Try coconut sugar or agave for a twist.
- Mix-ins: Add toasted coconut flakes or chopped nuts for texture.
- Sweet and spicy: Stir a pinch of chili powder and smoked paprika into the syrup, in the style of these sweet and spicy glazed nuts.
Serving Ideas
These candied pumpkin seeds can be enjoyed so many different ways, all year long. Here are a few of my favorites!
- Sprinkle on smoothie bowls, yogurt, or salads.
- Pack in lunch boxes or use for road trip snacks.
- Gift in jars tied with twine for instant Fall magic!
- Or just snack shamelessly - no judgment here.
They're also a great sweet-salty garnish for savory fall dishes. Scatter a handful over a bowl of coconut curry pumpkin soup or vegan butternut squash soup just before serving, so they stay crunchy.
Storing & Freezing
Let the seeds cool completely, then break up any clumps and store them in an airtight jar or container at room temperature for up to 2 weeks. Humidity is the enemy of anything candied, so keep them away from the stove and dishwasher. If they turn a bit sticky, spread them on a lined baking sheet and re-crisp them at 300°F for 3 to 5 minutes, then let them cool again. The fridge isn't necessary and can actually make the coating tacky.
For longer storage, freeze the cooled candied pepitas in a freezer bag with the air pressed out for up to 3 months. There's no need to thaw them: they're ready to eat almost straight from the freezer, or you can let them sit on the counter for 10 minutes. Give them a quick re-crisp in the oven if any moisture has crept in.
Frequently Asked Questions
Are candied pepitas the same as candied pumpkin seeds? Yes. Pepitas is the Spanish word for pumpkin seeds, and in most stores it refers to the green seeds with the hull already removed. This recipe uses those shelled pepitas, so you can call the result candied pepitas or candied pumpkin seeds.
Why are my candied pepitas sticky instead of crunchy? They usually just need more time to cool, since the sugar hardens as it sets. If they're still sticky once cool, they were a little underbaked or have absorbed moisture; a few minutes back in a 300°F oven will fix it.
Can I make these with seeds from my Halloween pumpkin? Absolutely. Clean and dry them thoroughly first, and expect a chewier, heartier snack since the hulls stay on. Add a few extra minutes of baking time.
More Vegan Snack Recipes
If you love these candied pepitas, be sure to check out these other delicious vegan ideas:
- Sweet and Spicy Glazed Nuts
- Pumpkin Seed Butter
- 7 Ways to Roast Pistachio Seeds
- 30 Homemade Vegan Snacks
- Vegan Pumpkin Pie
Recipe
Candied Pumpkin Seeds
Crunchy candied pumpkin seeds (candied pepitas) coated in a maple and brown sugar glaze with a pinch of salt. Just three ingredients and 20 minutes for a sweet-salty fall snack, salad topper, or edible gift.
Print
Pin
Save
Servings: servings
Ingredients
- 2 tablespoons maple syrup
- 2 tablespoons packed brown sugar
- ¼ teaspoon salt
- 1 cup shelled pumpkin seeds pepitas
Instructions
- Preheat the oven to 375°F. Line a baking sheet with parchment paper (or lightly oil it).
- In a small saucepan, combine the maple syrup, brown sugar, and salt. Heat over medium heat, stirring constantly, until the brown sugar has melted and the mixture is foamy, about 2 to 3 minutes. Remove from the heat.
- Add the pumpkin seeds and stir until they are evenly coated.
- Spread the pumpkin seeds in a single layer on the prepared baking sheet. Bake for about 10 minutes, stirring after 5 minutes, until golden and bubbling. Start checking at 8 minutes so the sugar doesn't burn.
- Remove from the oven and let cool completely, stirring occasionally while cooling to keep the seeds from sticking to the pan. They will crisp up as they cool. Break up any clumps before serving.
Notes
Makes about 1 cup (4 to 6 servings).
Using seeds from a fresh pumpkin? Rinse off all the pulp and let the seeds dry completely first, then add 5 to 10 minutes to the baking time.
Store cooled seeds in an airtight container at room temperature for up to 2 weeks, or freeze for up to 3 months.
Nutrition (Estimate per Serving)
Calories: 154kcalCarbohydrates: 11gProtein: 7gFat: 11gSaturated Fat: 2gPolyunsaturated Fat: 5gMonounsaturated Fat: 4gSodium: 100mgPotassium: 196mgFiber: 1gSugar: 8gVitamin A: 3IUCalcium: 21mgIron: 2mg
Vegan-ize any recipe!Grab our free vegan cheat sheet, packed with my favorite easy substitutions to make any recipe vegan.
Salads Your Kids Just Might Eat!
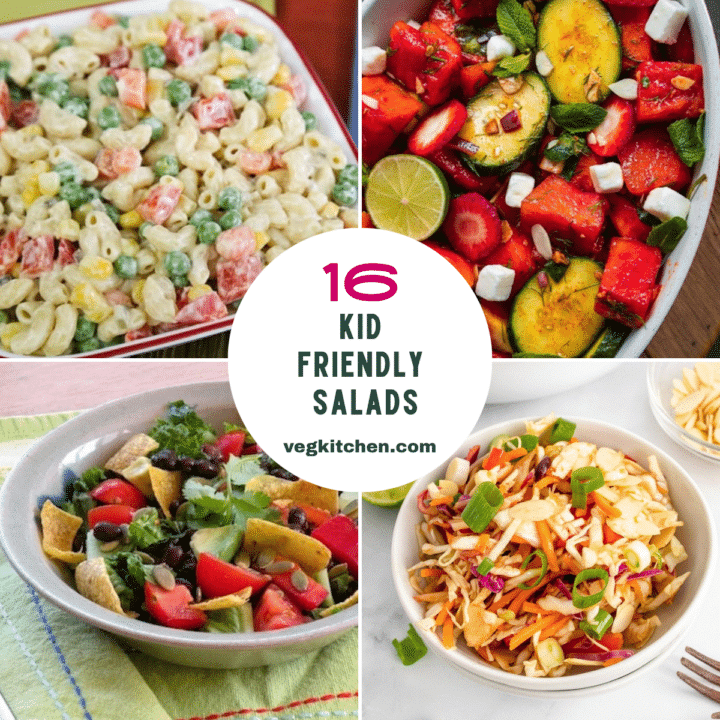
There's just something about salads that (there's no other way to say it) many kids don't particularly enjoy. I found that combining small amounts of raw vegetables with starchy comfort foods like pasta, bread, or potatoes, or adding fresh or dried fruit, helped to entice my kids and their friends to give salads a try. As for tossed green salads, the best way I found to win them over was to offer a very simple homemade Thousand Island dressing with it.
[Read more...]Broccoli & Summer Squash Salad
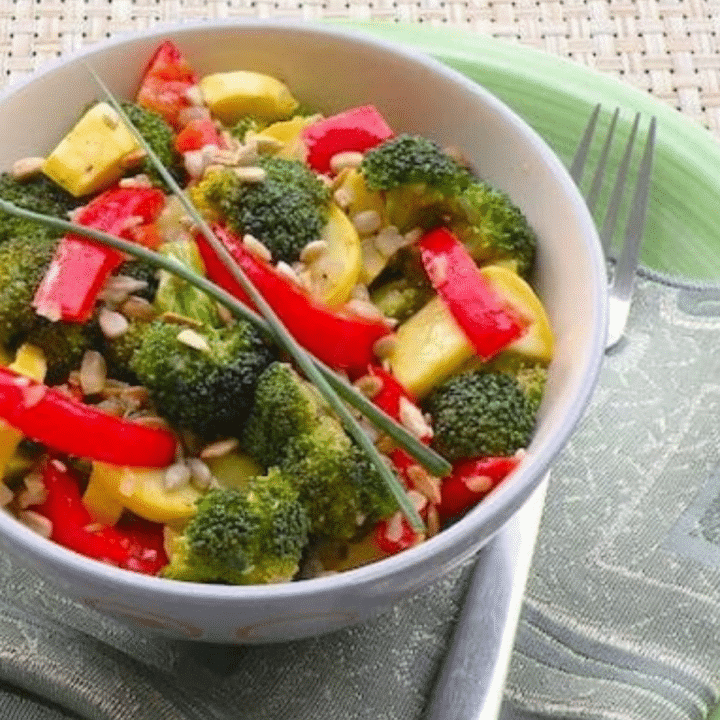
This simple yet tasty salad of yellow summer squash and broccoli goes well with veggie burgers, pasta dishes, and spicy grain or bean dishes. And — dare we say it — this might be just the kind of salad to entice younger eaters, helped along with the hint of sweetness from pickle relish, which turns raw broccoli from a chore into something kids will actually reach for.

Key Ingredients & Substitutions
- Yellow summer squash or zucchini. Either works well — use whichever you have on hand, or a mix of both for color.
- Broccoli florets. Chop them finely for the best texture — steam lightly first if you prefer a softer bite, or leave raw for maximum crunch.
- Sweet pickle relish. Adds a distinctive sweetness that balances the vegetables — a key part of what makes this salad kid-friendly, and not something you'd want to skip or substitute lightly.
- Sesame-Ginger Salad Dressing. Use homemade or your favorite store-bought version — the toasted sesame flavor pairs surprisingly well with the sweet relish.
Variations
- Add crunch. Sunflower seeds or chopped roasted peanuts scattered on top add a nice crunchy finish.
- Swap the dressing. A simple vinaigrette also works well if you don't have sesame-ginger on hand, though it'll shift the flavor profile in a more classic direction.
- Add color. A handful of shredded carrot or diced red bell pepper brightens up the salad visually and adds sweetness.
- Make it a main. Add some cubed baked tofu for extra protein and turn it into a light lunch.
- Add raisins. A classic broccoli salad addition that leans into the sweet side of this dish even further.
Tips for the Best Broccoli & Summer Squash Salad
- Dice the vegetables evenly. This helps the salad hold together and makes each bite balanced rather than all-squash or all-broccoli.
- Let it stand before serving. Giving it 20 to 30 minutes in the fridge lets the flavors meld together and the dressing soften the vegetables slightly.
- Add the sunflower seeds just before serving. This keeps them crunchy rather than soggy from sitting in the dressing.
- Taste and adjust the dressing. Add a little more if the salad seems dry, especially if it's been sitting for a while and the vegetables have absorbed some of it.
- Cut the broccoli small. This is especially helpful if you're trying to win over picky eaters — large florets are easier to pick out and avoid.
Make Ahead & Storage
This salad keeps well in a sealed container in the refrigerator for up to 3 days, which makes it a good make-ahead option for weeknight dinners or a packed lunch. Add any sunflower seeds or other crunchy toppings just before serving rather than storing them mixed in.
How to Serve
Serve alongside veggie burgers, pasta dishes, or spicy grain or bean dishes. It also holds up well for a picnic or potluck since it doesn't wilt the way a leafy green salad would.
Recipe
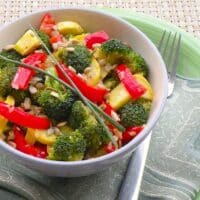
Broccoli & Summer Squash Salad
A simple, tasty salad of yellow summer squash and broccoli with a hint of sweetness from pickle relish — great with veggie burgers, pasta, or grain and bean dishes.
Print
Pin
Save
Servings:
Ingredients
- 1 medium zucchini or yellow summer squash quartered lengthwise and diced
- 2 cups finely chopped broccoli florets lightly steamed if desired
- 1 medium red bell pepper cut into short, narrow strips
- 2 scallions green parts only, thinly sliced, or fresh chives as desired
- ¼ cup sweet pickle relish
- ¼ cup homemade or store-bought Sesame-Ginger Salad Dressing or more, to taste
- salt and freshly ground pepper to taste
- sunflower seeds for topping, optional
Instructions
- Combine all the ingredients except the sunflower seeds in a serving bowl and stir well to mix. Let stand for 20 to 30 minutes.
- Scatter sunflower seeds over the top of the salad, or pass them around, then serve.
Notes
The hint of sweetness from the pickle relish makes this a great salad to entice younger eaters.
Vegan-ize any recipe!Grab our free vegan cheat sheet, packed with my favorite easy substitutions to make any recipe vegan.
Explore other recipes using broccoli and cauliflower. Here are other recipes for Super Savory Salads. Enjoy VegKitchen's selection of recipes for zucchini and other summer squashes.
Raw Sweet Potato and Cabbage Salad with Coconut-Lime Dressing
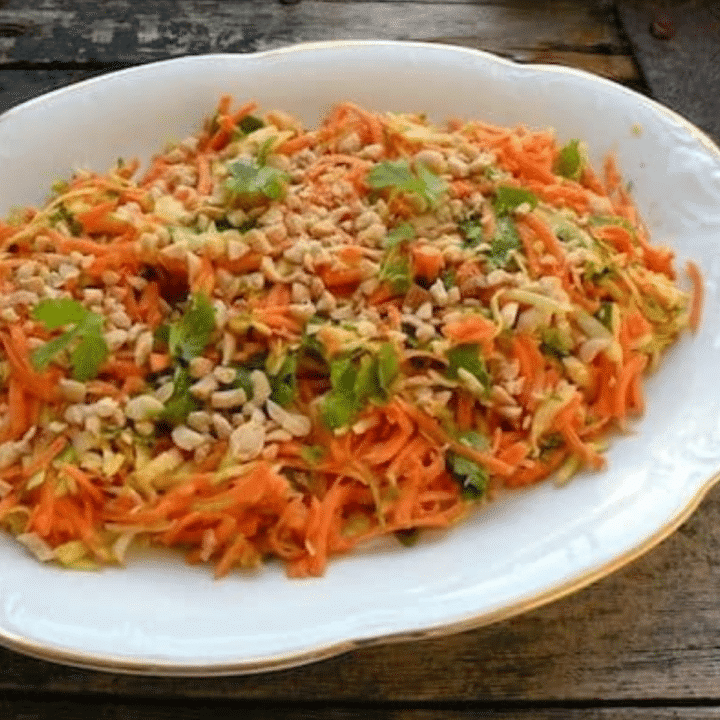
Sweet potato is a veggie that doesn't immediately come to mind as one to use raw, but it's wonderful uncooked! Combined with cabbage and some mildly Thai flavors, this easy (and rather addictive) salad is a treat all year around.

Key Ingredients & Substitutions
- Sweet potato. Grated raw, it takes on a slaw-like texture and a subtle natural sweetness — a garnet yam works just as well.
- Green cabbage. Regular, savoy, or napa cabbage all work — precut coleslaw cabbage is a handy shortcut if you're short on time.
- Coconut oil. Melted and tossed with the lime juice and agave, it gives the dressing its rich, slightly tropical flavor.
- Lime juice. Adds the bright acidity that balances the sweetness of the potato and the richness of the coconut oil.
- Toasted cashews or peanuts. Add crunch and a nutty contrast to the tender shredded vegetables.
Variations
- Swap in kale. This variation was inspired by Ricki Heller, who took this recipe and varied it using raw kale in place of the cabbage, with a small amount of red cabbage added for color and crunch — the combination of raw sweet potato and raw kale is a wonderful pairing if you want to switch things up.
- Add heat. A pinch of dried hot red pepper flakes, or a small minced fresh chile, adds a spicy kick.
- Make it a main. Add cubed baked tofu or a can of drained, rinsed chickpeas for a heartier, more substantial salad.
- Swap the nuts. Toasted pepitas or sunflower seeds work well in place of cashews or peanuts for a nut-free version.
Tips for the Best Raw Sweet Potato and Cabbage Salad
- Grate the sweet potato finely. A food processor's grating blade makes quick work of it and gives the best slaw-like texture; a box grater works well too.
- Slice the cabbage thinly. This helps it soften slightly in the dressing and blend seamlessly with the grated sweet potato.
- Let it rest before serving. The 30-minute stand isn't just for convenience — it genuinely lets the flavors marry and softens the raw vegetables just enough.
- Toast the nuts fresh. A quick toast in a dry skillet brings out much more flavor than pre-toasted nuts from a bag.
Make Ahead & Storage
This salad keeps well in a sealed container in the refrigerator for up to 3 days, and the flavor actually deepens as it sits, making it a great make-ahead side for a potluck or a week of easy lunches. Give it a quick stir before serving, since the dressing tends to settle at the bottom.
How to Serve
Serve as a refreshing side salad alongside grilled or roasted mains, or spoon over greens for a light lunch. Explore more of VegKitchen's creative and colorful slaw-style salads, and more of VegKitchen's Super Savory Salads.
Recipe
Raw Sweet Potato and Cabbage Salad with Coconut-Lime Dressing
A crunchy, mildly Thai-flavored raw salad of shredded sweet potato and cabbage tossed in a coconut-lime dressing — easy, addictive, and ready in under 15 minutes.
Print
Pin
Save
Servings: to 6
Ingredients
- 1 medium sweet potato or ½ large sweet potato (or an average-size garnet yam), peeled and cut into chunks
- 2 cups very thinly sliced green cabbage regular, savoy, or napa, or use precut coleslaw cabbage as a shortcut
- ½ cup minced fresh cilantro
- 2 to 3 scallions thinly sliced
- ¼ cup crushed toasted cashews or peanuts
- 2 tablespoons organic virgin coconut oil melted
- 1 lime juiced, or more to taste
- 1 tablespoon agave nectar or to taste
- salt to taste
- dried hot red pepper flakes to taste, optional
Instructions
- Put the sweet potato chunks through the grating blade of a food processor, or grate by hand with a box grater.
- Combine the sweet potato and cabbage in a serving bowl with the remaining ingredients and stir together.
- Let the salad stand for about 30 minutes to allow the flavors to marry, stirring once or twice during that time.
Vegan-ize any recipe!Grab our free vegan cheat sheet, packed with my favorite easy substitutions to make any recipe vegan.
Sauteed Carrots with Cranberries
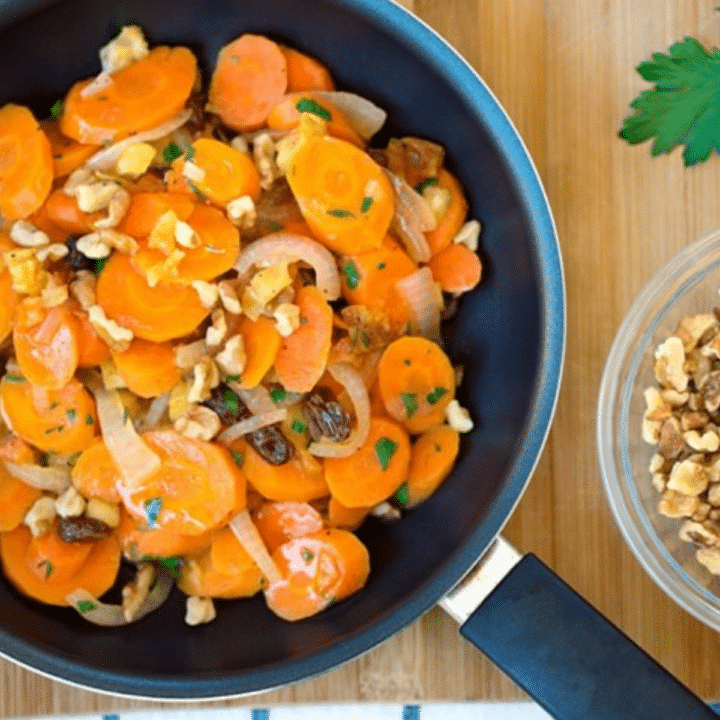
Here's a tasty way to highlight carrots in a lightly cooked side dish. Their natural sweetness is enhanced with dried cranberries and balanced with a bit of lemon. It's a nice everyday side dish and a welcome addition to fall and winter holiday meals, and it comes together quickly enough for a weeknight without feeling like an afterthought — from raw carrots to table in about 20 minutes.

Photos by Hannah Kaminsky.
Key Ingredients & Substitutions
- Carrots. Sliced into coins or on the diagonal, thinly, so they cook quickly and pick up the glaze evenly.
- Dried cranberries. Add sweet-tart bursts of flavor and a festive pop of color that makes this feel like a holiday side even on a Tuesday.
- Red onion. Adds a mild, slightly sweet allium base to the dish without overpowering the carrots.
- Cinnamon and nutmeg. Warm spices that complement the natural sweetness of the carrots and cranberries — use a light hand so the spices support rather than dominate.
- Lemon juice. Cuts through the sweetness and keeps the dish from tasting one-note.
Variations
- Swap the dried fruit. Sliced dried apricots, dates, or raisins all work well in place of cranberries.
- Add crunch. Toasted walnuts or slivered almonds scattered on top add texture and make the dish feel more substantial.
- Add fresh herbs. A little fresh thyme along with the parsley adds another layer of flavor.
- Make it a glaze. A touch of maple syrup added near the end intensifies the sweet side of the dish for a more dessert-adjacent holiday side.
- Add ginger. A little freshly grated ginger stirred in with the spices adds a warm, slightly peppery note.
Tips for the Best Sauteed Carrots with Cranberries
- Slice the carrots thinly and evenly. This helps them cook through quickly and at the same rate, avoiding a mix of crisp and mushy pieces.
- Keep the skillet from drying out. Add a few drops of water as needed while the carrots cook, especially if your pan runs hot.
- Add lemon juice to taste. Start with less and add more gradually to balance the sweetness rather than dumping it all in at once.
- Toast the nuts if using. A few minutes in a dry skillet brings out their flavor before scattering them over the finished dish.
- Don't skip the onion. Even a small amount adds a savory backbone that keeps the dish from tasting purely sweet.
Make Ahead & Storage
This dish keeps well in a sealed container in the refrigerator for up to 4 days, and the flavor actually improves after a day as the spices and cranberries meld with the carrots. Reheat gently on the stovetop or in the microwave, adding a splash of water if it's dried out.
How to Serve
Serve warm as an everyday side dish, or bring it to the table for fall and winter holiday meals, including Jewish New Year (Rosh Hashanah) menus.
Recipe
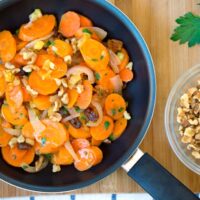
Sauteed Carrots with Cranberries
A tasty way to highlight carrots in a lightly cooked side dish. Their natural sweetness is enhanced with dried cranberries and balanced with a bit of lemon.
Print
Pin
Save
Servings:
Ingredients
- 1 ½ tablespoons olive oil
- 1 medium red onion quartered and sliced
- 1 pound carrots peeled and thinly sliced into coins or on the diagonal
- ⅔ cup dried cranberries
- 1 teaspoon agave nectar
- juice of ½ to 1 lemon to taste
- ¼ cup minced fresh parsley
- ¼ teaspoon cinnamon
- nutmeg a pinch
- salt and freshly ground pepper to taste
- toasted walnuts or slivered almonds for topping, optional
Instructions
- Heat the oil in a large skillet. Add the onion and sauté over medium heat until translucent.
- Add the carrots and sauté for 5 minutes. Add the cranberries, agave, lemon juice, parsley, cinnamon, nutmeg, salt, and pepper, and sauté just until the carrots are tender-crisp. Add drops of water if the skillet gets dry as the carrots cook.
- Transfer to a serving container or serve straight from the skillet, scattering toasted walnuts or almonds over the top if desired.
Notes
A nice everyday side dish and a welcome addition to fall and winter holiday meals.
Vegan-ize any recipe!Grab our free vegan cheat sheet, packed with my favorite easy substitutions to make any recipe vegan.

Here are more recipes for making the most of carrots. Return to Jewish New Year (Rosh Hashanah) recipes and menus.
Spaghetti with Zucchini, Garlic, and Basil
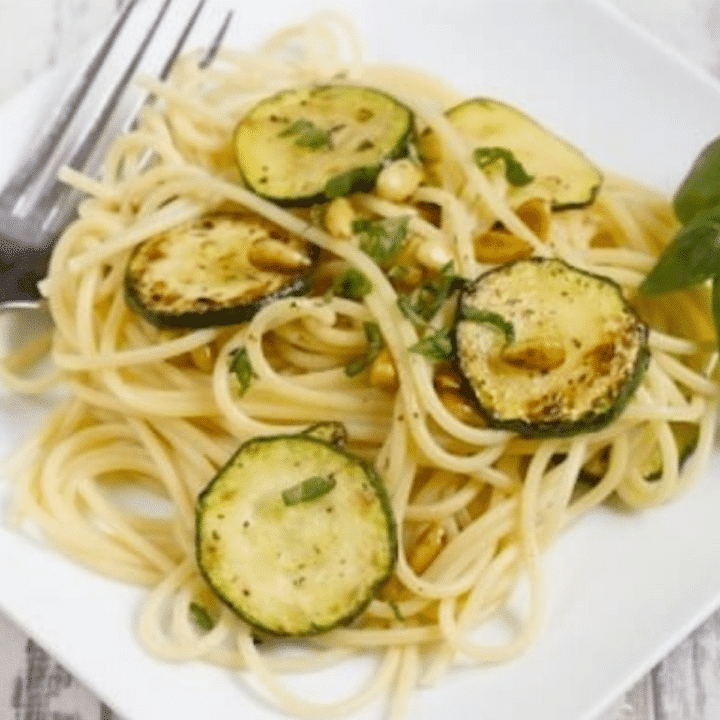
This is an embellished version of pasta aglio e olio (garlic and oil), an Italian classic suitable for warm weather, but welcome any time you crave a light yet satisfying pasta dish. It's especially good when tender small zucchini come to market in midsummer, and it comes together almost as fast as the pasta water boils — a genuine 30-minute dinner with barely any cleanup.

Key Ingredients & Substitutions
- Small zucchini. Tender summer zucchini works best — look for smaller ones with fewer seeds and less water content, which hold their shape better in the pan.
- Garlic and olive oil. The classic aglio e olio base that gives this dish its light, savory flavor — don't rush the garlic, since burnt garlic turns bitter fast and can ruin the whole dish.
- Dry white wine. Adds depth as the zucchini cooks — omit for an alcohol-free version, or substitute a splash of vegetable broth with a squeeze of lemon.
- Fresh basil. Stirred in at the end for bright, fresh flavor; dried basil doesn't work nearly as well here since so much of the dish's brightness depends on it.
- Spaghetti. The classic choice, though any long pasta shape (linguine, bucatini) works just as well.
Variations
- Add sun-dried tomatoes. Their concentrated flavor pairs beautifully with the garlic and basil, and adds a chewy contrast to the tender zucchini.
- Add toasted pine nuts. They bring a pleasant crunch and nutty flavor that complements the olive oil base.
- Top with vegan Parmesan-style cheese. Or fine toasted breadcrumbs, for extra texture and flavor — breadcrumbs are a classic Southern Italian way to add richness without dairy.
- Add red pepper flakes. A pinch brings a gentle heat that balances the richness of the olive oil.
- Add lemon zest. A little grated zest stirred in at the end brightens the whole dish, especially in the height of summer.
Tips for the Best Spaghetti with Zucchini
- Don't overcook the zucchini. Aim for tender-crisp so it keeps some texture and doesn't turn to mush by the time the pasta is ready.
- Cook the pasta al dente. This keeps it from turning mushy once combined with the zucchini and its cooking juices.
- Save some pasta water. A splash added when tossing everything together helps the sauce cling to the noodles.
- Add the basil at the end. Stirring it in just before serving keeps its flavor bright rather than dulled by heat.
- Mix and match embellishments. Choose any 2 or 3 of the optional add-ins to make the dish your own rather than trying to fit everything in at once.
Make Ahead & Storage
This dish is best made fresh and eaten right away, since pasta tends to absorb the sauce and dry out as it sits. If you do have leftovers, they keep in the fridge for a day or two — reheat gently with a splash of water or olive oil to loosen things back up.
How to Serve
Serve warm, passing around vegan Parmesan-style cheese, nutritional yeast, or breadcrumbs for topping individual portions.
Recipe
Spaghetti with Zucchini, Garlic, and Basil
An embellished version of pasta aglio e olio (garlic and oil), an Italian classic suitable for warm weather but welcome any time you crave a light yet satisfying pasta dish.
Print
Pin
Save
Servings:
Ingredients
- 1 pound spaghetti or other long slender pasta
- 4 small zucchini about 1 pound, sliced
- 3 tablespoons extra-virgin olive oil
- 6 cloves garlic minced, or more, to taste
- ¼ cup dry white wine
- ½ cup sliced fresh basil leaves or more, to taste
- salt and freshly ground pepper to taste
- ½ cup sliced sun-dried tomatoes optional embellishment
- ¼ cup chopped fresh parsley optional embellishment
- toasted pine nuts optional embellishment
- vegan Parmesan-style cheese or fine toasted breadcrumbs optional embellishment
Instructions
- Cook the spaghetti in plenty of rapidly simmering water until al dente, then drain.
- Meanwhile, slice the zucchini and set aside.
- Heat half of the oil in a large wide skillet. Add the garlic and sauté over low heat for a minute or two. Stir in the zucchini slices and add the wine. Raise the heat to medium, then cover and cook, lifting the lid to stir occasionally, until the zucchini is tender-crisp. Make sure not to overcook.
- Combine the cooked spaghetti and zucchini in a large pasta bowl. Stir in the remaining oil, followed by the parsley and basil. Season with salt and pepper. If desired, stir in the sun-dried tomatoes or pine nuts.
- If desired, pass around vegan Parmesan-style cheese, nutritional yeast, or breadcrumbs for topping individual portions.
Notes
Especially good when tender small zucchini come to market in midsummer. Use any 2 or 3 of the optional embellishments.
Vegan-ize any recipe!Grab our free vegan cheat sheet, packed with my favorite easy substitutions to make any recipe vegan.

Find more of VegKitchen's Vegan Dinner Recipes and Pasta Entrées. Here are more light, seasonal vegan pasta recipes.
Mushroom, Asparagus, and Artichoke Medley
This tasty cold dish of small mushrooms, slender asparagus, and artichoke hearts is good served as an appetizer or first course with thinly sliced baguette. It's especially nice as a starter for springtime celebrations, when fresh asparagus is at its best, and it comes together with just a quick steam and a gentle toss — no real cooking required.

Photos by Evan Atlas.
Key Ingredients & Substitutions
- Small white or brown mushrooms. Lightly steamed rather than sauteed, they stay tender and mild — halve any that are larger than button size.
- Slender asparagus. Thin stalks cook quickly and stay tender-crisp; thicker asparagus works too, just steam a bit longer.
- Marinated artichoke hearts. Add a tangy, briny note that ties the whole medley together — look for them in a jar near the olives or pickles.
- Half-sour dill pickle. A distinctive, less-vinegary addition that adds crunch and a savory tang — a regular dill pickle works as a substitute.
- Vegan mayonnaise. Binds everything into a creamy dressing — use your favorite brand.
Variations
- Add fresh herbs. A little chopped tarragon or chives alongside the parsley and dill adds another layer of fresh flavor, especially tarragon's subtle anise note against the artichokes.
- Make it a main. Serve over a bed of greens with some cooked white beans or chickpeas for a more substantial salad.
- Add capers. A tablespoon stirred in along with the pickle adds an extra briny punch.
- Swap the zucchini. Thinly sliced yellow summer squash or diced celery both work well in its place.
- Add roasted red peppers. A few strips of jarred roasted red pepper add sweetness and a pop of color against the greens.
Tips for the Best Mushroom, Asparagus, and Artichoke Medley
- Don't overcook the vegetables. Both the mushrooms and asparagus should stay tender-crisp, not soft — a quick 2-minute steam is usually enough.
- Rinse the asparagus with cool water after steaming. This stops the cooking and helps it keep its bright green color.
- Let the flavors meld. A short stint in the refrigerator before serving lets the dressing soak into the vegetables for even better flavor.
- Drain the artichoke hearts well. Excess marinade can water down the dressing, so give them a good shake before quartering.
Make Ahead & Storage
This keeps well in a sealed container in the refrigerator for up to 3 days, making it a great make-ahead appetizer for a dinner party or springtime gathering. In fact, letting it chill for an hour or two before serving only improves the flavor, since the dressing has time to soak into the vegetables.
How to Serve
Serve as an appetizer or first course with thinly sliced baguette, or spoon over a bed of mixed greens for a light lunch. Explore more super savory salads and more asparagus recipes.
Recipe

Mushroom, Asparagus, and Artichoke Medley
This tasty cold dish of small mushrooms, slender asparagus, and artichoke hearts is good served as an appetizer or first course with thinly sliced baguette. It's especially nice as a starter for springtime celebrations.
Print
Pin
Save
Servings:
Ingredients
- 8 ounces small white or brown mushrooms
- 8 to 10 ounces slender asparagus
- 8- ounce jar marinated artichoke hearts drained and quartered
- 1 small zucchini quartered lengthwise and sliced
- 1 large half-sour dill pickle chopped
- ¼ cup chopped fresh parsley
- 1 to 2 tablespoons minced fresh dill or 1 teaspoon dried
- ½ cup vegan mayonnaise
- Juice of ½ lemon
- Salt and freshly ground pepper to taste
Instructions
- Wipe the mushrooms clean and trim the stem bottoms if they look dark or fibrous. If the mushrooms are larger than button size, cut them in half.
- Place the mushrooms in a skillet with just enough water to keep moist; cover and steam over medium heat for two minutes, then drain and let cool.
- Trim the bottoms of the asparagus, then cut the stalks into 1-inch pieces. Using the same skillet, add just enough water to keep the bottom moist, cover, and steam until the asparagus is bright green and tender-crisp. Drain and rinse with cool water.
- Combine the mushrooms and asparagus in a serving container. Add the remaining ingredients and mix gently. Serve at once or refrigerate until needed.
Nutrition (Estimate per Serving)
Calories: 185kcalCarbohydrates: 7gProtein: 3gFat: 16gSaturated Fat: 2gPolyunsaturated Fat: 1gMonounsaturated Fat: 1gSodium: 352mgPotassium: 306mgFiber: 2gSugar: 3gVitamin A: 965IUVitamin C: 20mgCalcium: 31mgIron: 2mg
Vegan-ize any recipe!Grab our free vegan cheat sheet, packed with my favorite easy substitutions to make any recipe vegan.
Nutrition information
Per serving: Calories: 105; Total fat: 4g; Protein: 3g; Carbs: 9g; Sodium: 121mg

Melon Cups with Strawberries and Blueberries
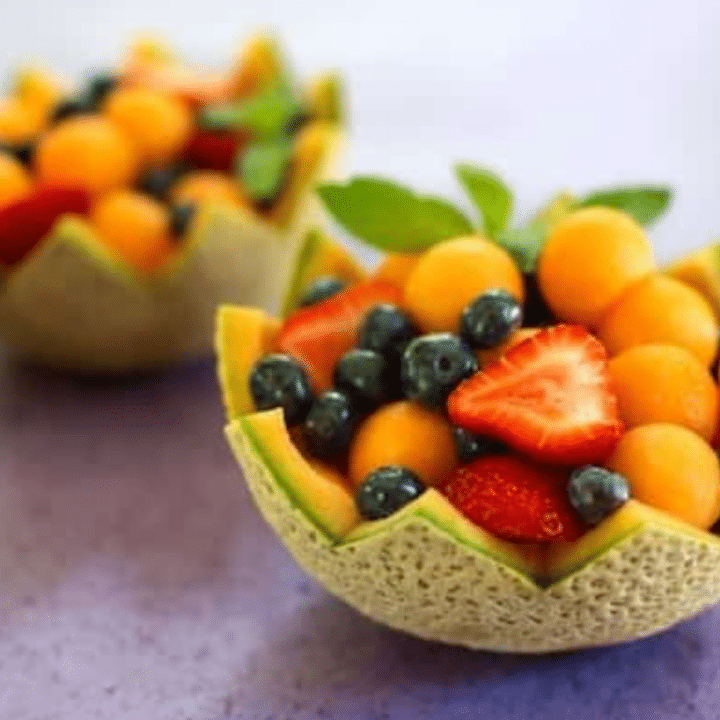
The attractive presentation of this medley of summer fruits — cantaloupe, strawberries, and blueberries — makes it especially appealing. Sometimes all you need is a little creativity to take fruit from so-so to stunning, and this one comes together with nothing more exotic than a melon baller and a bit of patience. It's a favorite for brunch tables and baby or bridal showers alike.
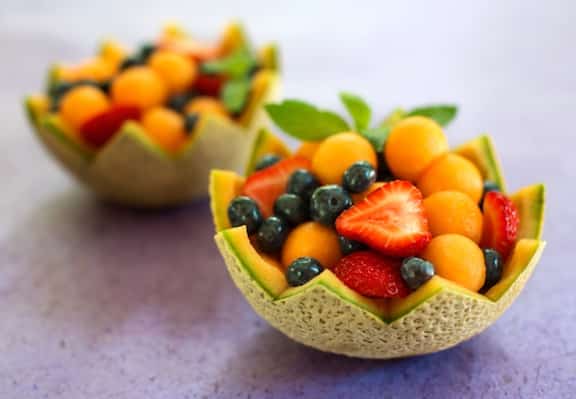
Photos by Hannah Kaminsky at Bittersweet.
Key Ingredients & Substitutions
- Ripe cantaloupes. Their hollowed-out shells become the serving cups — choose melons that feel heavy for their size and smell fragrant at the stem end, both signs of ripeness.
- Strawberries and blueberries. Blackberries make a good substitute for blueberries if you prefer, and raspberries work well folded in too.
- Kirsch or apple juice concentrate. Optional, but a splash adds extra flavor to the fruit as it marinates — kirsch adds a subtle cherry-brandy note, while apple juice concentrate keeps things family-friendly.
- Fresh mint. A simple garnish that adds a fresh, fragrant finish and a pop of green against the fruit.
- A squeeze of lemon. Keeps the fruit tasting bright and can slow browning if any cut fruit sits before serving.
Variations
- Add other fruit. Diced kiwi or seedless grapes make a nice addition to the mix, both for flavor and color.
- Make it a dessert. Add a small scoop of vegan vanilla ice cream or coconut whipped cream on top just before serving.
- Skip the shells. Simply serve the fruit mixture in small bowls or stemmed glasses if you'd rather not hollow out the melons — it's just as tasty, if less dramatic.
- Add a squeeze of lime. A little citrus brightens the whole mix, especially if the fruit isn't at peak ripeness.
- Make mini portions. Use smaller melons and halve them for individual single-serving cups at a party.
Tips for the Best Melon Cups
- Leave a sturdy shell. About ¼ inch of flesh keeps the melon cup from falling apart or cracking once filled.
- Let the fruit marinate. Refrigerating it for 30 minutes to an hour lets the flavors meld together before serving.
- Trim the base. A thin slice off the bottom of each shell helps it stand securely on the plate instead of wobbling.
- Garnish just before serving. Fresh mint added at the last minute keeps its color and aroma bright rather than wilting.
- Chill the shells too. A cold melon cup keeps the fruit inside fresher longer, especially if serving outdoors in warm weather.
Make Ahead & Storage
The fruit mixture can be prepared and refrigerated up to a day ahead, covered tightly so it doesn't pick up other flavors from the fridge. Hollow out the melon shells and fill them closer to serving time, since they can weep liquid the longer they sit filled.
How to Serve
Serve chilled as a light, refreshing dessert or a beautiful addition to a summer brunch spread.
Recipe

Melon Cups with Strawberries and Blueberries
A pretty medley of summer fruits — cantaloupe, strawberries, and blueberries — served in scooped-out melon shells. A little creativity takes fruit from so-so to stunning.
Print
Pin
Save
Servings:
Ingredients
- 2 ripe cantaloupes halved and seeded
- 1 cup strawberries hulled, halved if small, quartered if large
- ¾ cup blueberries or blackberries
- 1 to 2 tablespoons kirsch or apple juice concentrate optional
- mint leaves for garnish, optional
Instructions
- Scoop the flesh out of the cantaloupes, using the small end of a melon baller; leave a shell about ¼ inch thick.
- Combine the melon balls with the remaining fruit and the optional kirsch or apple juice concentrate in a shallow bowl and let stand, refrigerated, for 30 minutes to an hour, stirring occasionally. Cover and refrigerate the melon shells until needed.
- Before serving, cut a thin slice from the bottom of each melon shell so that it will stand securely. Divide the fruit mixture among the shells. Garnish with mint leaves and serve.
Notes
The attractive presentation of this medley of summer fruits makes it especially appealing — sometimes all you need is a little creativity to take fruit from so-so to stunning.
Vegan-ize any recipe!Grab our free vegan cheat sheet, packed with my favorite easy substitutions to make any recipe vegan.
Explore more recipes for strawberries, blueberries, and other berries.
Miso: What It Is and How to Use It

A ubiquitous staple in Japanese and Chinese cuisine, miso, or fermented soybean paste, is a powerhouse of concentrated flavor and nutrition. But what exactly is it, and what can you make with it? I've pulled together this quick guide to cover all things miso.

Three types of miso are commonly available in the West: soybean miso, rice miso, and barley miso. Rice and barley misos actually combine soybeans with the grain. Within each category of miso exists a range of earthy hues and subtle flavor variations, all more or less in the realm of a pungent saltiness. The texture resembles that of peanut butter. Miso is best known as the base for simple, broth-type soups, although it is equally useful as a basis for sauces, dressings, and dips.
How to Store Miso
Miso is commonly sold in either plastic packages or tubs. Once the tubs are opened, it's best to reseal them tightly and refrigerate. Once the plastic packages are opened, they should be additionally protected by placing them inside another container, such as a tightly lidded glass jar or plastic container.
Refrigerated miso keeps very well for several months. After some time, a white mold may develop around the edges. Although this may be scraped off and the rest of the miso used, it's your warning signal that the freshness is waning.
Recipes Using Miso
Here are a few of my favorite vegan recipes that feature miso.
- Miso-Butternut Squash Soup with Soba or Udon Noodles
- Miso Soup with Winter Vegetables
- Udon Noodles with Spinach-Miso Pesto
- Dilled Miso-Tahini Dip
How Miso Is Made
Miso has been produced throughout Asia for several centuries, and the methods used today are just a little different from the ancient ones. The important first step in making miso is to prepare the mold culture, called koji, which will ferment the soybeans or the soy and grain combination, depending on what type of miso is being made.
For soybean-only miso, cooked soybeans rest for 2 to 3 days in a special room, called the koji-room, during which a mold called Aspergillus hatcho develops on them. For soybean and rice miso or soybean and barley miso, cooked grain is similarly put in a koji-room, and a mold called Aspergillus orizae grows on the grain.
To make soybean miso, or, as it's commonly called, hatcho miso, the soy koji is combined with cooked soybeans, salt, and water. To make rice or barley miso, the grain koji is combined with cooked soybeans, cooked rice or barley, salt, and water. These ingredients are then stored in large cedar kegs.
The mold cultures release beneficial enzymes that stimulate the fermentation process. These enzymes assist in breaking down the starches in the soybeans and grains into simple sugars and cause the protein to break down into separate amino acids. Miso is aged for periods of 1 to 3 years, depending on the type being made. The length of time, the temperature at which the fermentation process takes place, and the proportions of the ingredients used all contribute to the final result and are responsible for the differences between the various types of miso. Miso packaged for exportation is required to be pasteurized as an extra safety measure.
"Quick" misos are also common, and are a modern innovation for convenience. Through temperature control, the fermentation process can be sped up to happen within just a few weeks. Often, flavorings, additives, and preservatives are added to quick misos, and they don't taste as complex as traditionally aged misos. There's no real advantage to buying quick miso, except sometimes the price. If in doubt as to what you're getting, read the ingredients. Natural, aged miso contains only soybeans (and grain, in the case of rice or barley miso), salt, and water.
Miso's Nutrition and Flavor
The protein content of miso ranges from about 13 percent in rice miso and about 18 percent in barley miso to about 20 percent in soybean miso. One tablespoon of miso provides an average of 2.5 grams of protein and contains only 27 calories. All misos are excellent sources of iron, calcium, phosphorus, and the B vitamin range, including vitamin B12, which is rarely found in vegetable sources. Fermentation makes miso very easily digestible, and the live lactic-acid bacteria and enzymes it contains aid in general digestion.
Miso serves as a substitute for both salt and soy sauce, in that you'd be unlikely to use them in tandem in any given dish. Even the sweetest rice misos are salty (miso contains an average of 12 percent salt, which acts as a preservative, preventing harmful bacterial growth).
The concentrated flavor of miso goes a long way. Rarely will you see more than 2 or 3 tablespoons called for in a recipe that serves 4 to 6 people. Miso is easier to use if it's diluted in a small amount of warm water and stirred until smooth. When cooking with miso, don't boil it, because boiling destroys the beneficial enzymes.
Types of Miso
The essential differences between soybean, barley, and rice misos are outlined below, along with some basic ways to use miso in general.
Soybean (Hatcho) Miso
Hatcho (or hacho) miso is named for the Chinese city of the same name, where it originated. The darkest, firmest, most intensely flavored of misos, hatcho resembles a thick chocolate fudge. Its fermentation process is a long one, optimally between 2 and 3 years. Because its flavor is exceptionally strong, soybean miso is often mixed with other misos.
Made with soybeans, soybean koji, salt, and water, hatcho miso has the highest protein content among misos at about 20 percent, as well as the highest fat content at about 10 percent. It's richest in calcium, phosphorus, and iron and is comparable to the other misos in its content of B-complex vitamins.
The robust flavor of hatcho makes it a favorite winter miso, most appropriate for use with cold-weather foods such as root vegetables and in hearty dishes such as stews. You can find hacho miso online here.
Barley (Mugi) Miso
Barley, or mugi, miso is made by mixing barley, soybeans, barley koji, salt, and water. The fermentation period is shorter than for soybean miso, the optimal time being between 18 months and 2 years.
Barley miso has become the most widely accepted by Westerners and is also very popular in Japan. Its not-too-sweet, not-too-overpowering flavor makes it appropriate for both summer and winter use.
It's an ideal base for almost all miso soups, sauces, and spreads. In Japan, mugi miso is considered a "country-style" food. It's available in smooth and chunky textures. You can find mugi miso online here.
Rice Miso
Rice miso is made from a combination of rice, soybeans, rice koji, salt, and water. This type of miso has the shortest fermentation period, since the starches in the rice are rapidly converted to sugars. Rice miso tends to have a somewhat sweet flavor, which mellows its salty taste. It's considered most appropriate for summer cooking since it's the lightest in flavor.
Several varieties of rice miso are marketed through natural-food outlets, with colors ranging from brown to red to creamy white.
The most common of these is kome miso (also known as sendai, or red miso), made from white rice. This miso is quite popular in Japan, where it has been made using a time-honored formula since the seventeenth century.
A more recent innovation is genmai miso, made from brown rice instead of white. Unpolished rice was once considered too resistant to fermentation, but a method was developed that resulted in genmai miso, which has proven to be very pleasing to the Western palate.
Shiro miso is a variety of the very mild, white sweet misos, which age relatively quickly. Shiro miso uses sweet rice and less salt. A related product made in North America is labeled "mellow white miso." These white misos are the lightest in flavor and so are ideal for using in nontraditional ways, such as blending into salad dressings, where they'll add zest but never overpower.
I am a fan of this reduced sodium rice miso when I need a lighter flavor without adding a lot of salt to a dish.
More Vegan Resources
Curious about other pantry staples and plant-based ingredients? Check out these guides and roundups:
Pasta with Red Beans and Broccoli

Broccoli and red beans in a miso-thickened sauce turn this pasta dish into a sturdy weeknight dinner that fuses Italian and Asian flavors in a way that shouldn't work quite as well as it does. It comes together entirely in one skillet while the pasta water is boiling in a separate pot.

Key Ingredients & Substitutions
- Small red beans. Kidney beans work well, but adzuki beans are especially good here if you can find them — they cook faster than most other beans and have a naturally sweet, mild flavor.
- Miso. Mellow white miso keeps the sauce light, but any miso you have on hand will work — just adjust the amount to taste, since darker misos are considerably more assertive.
- Broccoli. Cut into bite-sized pieces so it cooks evenly and stays bright green and tender-crisp.
- Fresh ginger. Adds warmth that ties the Italian and Asian flavors together — freshly grated makes a real difference over the dried version, which tastes flatter and more one-dimensional.
- Garlic. Rounds out the savory base of the sauce alongside the miso and ginger.
Variations
- Add tofu. Cubed baked or pan-fried tofu makes this even more filling and adds another layer of texture.
- Swap the vegetable. Cauliflower or green beans work well in place of broccoli.
- Make it spicier. Add extra red pepper flakes or a drizzle of chili oil at the end.
- Try a different bean. Black beans or chickpeas both work nicely in this sauce.
- Add a splash of rice vinegar. A little acidity at the end brightens the whole dish and balances the richness of the miso.
Tips for the Best Pasta with Red Beans and Broccoli
- Don't overcook the broccoli. It should stay tender-crisp and bright green — keep an eye on it once it hits the pan, since it can go from perfect to mushy quickly.
- Whisk the miso mixture smooth first. This prevents lumps and helps the sauce thicken evenly rather than leaving little pockets of concentrated miso.
- Cook the pasta just to al dente. It will finish absorbing a little sauce once stirred in, so slightly underdone is safer than overdone.
- Taste before adding more miso. Miso brands vary quite a bit in saltiness and intensity, so start conservative.
- Save a little pasta water. A splash helps loosen the sauce if it thickens too much before everything is combined.
Make Ahead & Storage
This dish is best fresh, since the pasta continues to absorb the sauce as it sits. Leftovers keep for about 2 days in the fridge — reheat gently with a splash of water to loosen the sauce back up.
How to Serve
Serve hot, straight from the skillet, with extra red pepper flakes on the side for anyone who likes more heat.
Recipe
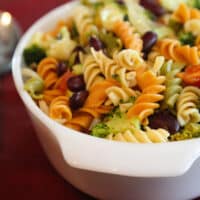
Pasta with Red Beans and Broccoli
A hearty pasta dish featuring broccoli and red beans in a miso-thickened sauce, fusing Italian and Asian flavors into a sturdy, everyday dinner.
Print
Pin
Save
Servings:
Ingredients
- 8 ounces spiral pasta rotini or rotelle
- 2 tablespoons extra-virgin olive oil
- 1 large onion quartered and thinly sliced
- 2 cloves garlic minced
- 2 good-sized broccoli crowns cut into bite-sized pieces
- 2 large ripe tomatoes diced
- 1 ½ to 2 cups cooked small red or kidney beans or one 15- to 16-ounce can, drained and rinsed
- 1 to 2 teaspoons fresh ginger grated
- 2 to 3 tablespoons miso or to taste; mellow white miso works well
- 1 ½ tablespoons arrowroot or organic cornstarch
- 1 cup warm water
- 1 teaspoon dark sesame oil
- freshly ground pepper and/or dried hot red pepper flakes to taste
Instructions
- Cook the pasta in plenty of rapidly simmering water until al dente, then drain.
- Meanwhile, heat the oil in a large skillet and saute the onion over medium heat until golden.
- Add the garlic and broccoli. Saute, covered, until the broccoli turns bright green, about 2 minutes.
- Add the tomatoes, beans, and ginger. Simmer over low heat for 10 minutes, or until the broccoli is tender-crisp. Don't let it overcook.
- In a small bowl, whisk together the miso, arrowroot or cornstarch, and warm water until smooth. Pour into the skillet along with the sesame oil.
- Simmer gently until the miso mixture has thickened, about 1 to 2 minutes longer.
- Stir in the pasta, season with pepper and/or red pepper flakes to taste, and serve.
Notes
You can use any kind of small red bean here, but adzuki beans are especially good. They're less common canned, but cook faster than most other bean varieties.
Vegan-ize any recipe!Grab our free vegan cheat sheet, packed with my favorite easy substitutions to make any recipe vegan.