
VegKitchen

  • Vegan Recipes
    • Appetizers
    • Breakfast
    • Main Dishes
    • Pasta and Noodles
    • Salads
    • Sandwiches and Wraps
    • Sauces, Dressings, and Condiments
    • Side Dishes
    • Soups, Stews, and Chilis
    • Snacks and Dips
    • Desserts
    • Drinks
    • Cheese-y Delights
    • Raw Vegan
    • Slow-Cooker
  • Vegan Living
    • Vegan Substitutions Guide
    • Kid Friendly
    • More Vegan Living
  • About
  • Shop Cookbooks
menu icon
go to homepage
  • Recipes
  • Vegan Life
  • Cookbooks
  • Freebie!
search icon
Homepage link
  • Recipes
  • Vegan Life
  • Cookbooks
  • Freebie!
×
Home » You searched for smoothie

Search Results for: smoothie

How to Eat Dragon Fruit? There Are More Ways Than You Might Imagine

September 11, 2018 by Nicole @ VegKitchen 2 Comments

how to eat dragon fruit

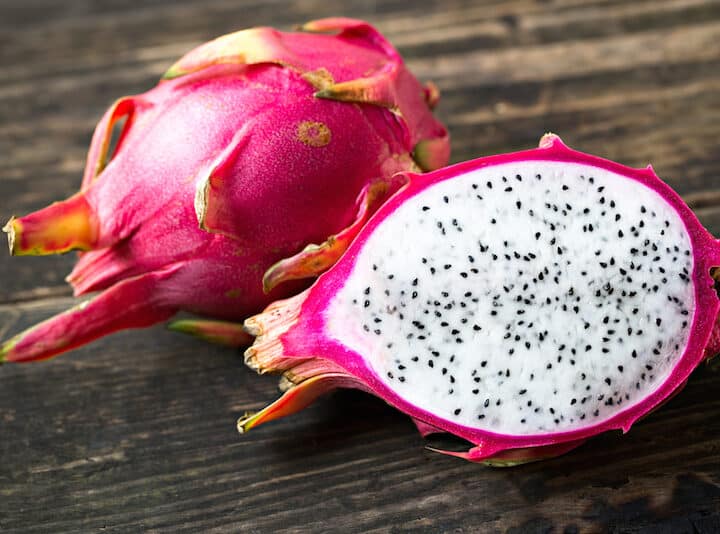
Pitaya, better known as dragon fruit, is probably the most unique-looking edible fruit on the planet. The fruit itself has a bright pink outer skin with a kiwi-like inside. The taste is vaguely similar to kiwi, though it is more like a crossover between a kiwi and a pear. Pitaya is actually a cactus fruit, and the cactus stem gives it plenty of moisture and a very specific succulent taste.

Apart from the exotic look and taste, dragon fruit is also packed with immune-boosting nutrients like manganese, minerals, and vitamins. However, you might be wondering-how do you eat it?

Well, you shouldn't be intimidated by the unusual look of this plant because it is surprisingly simple to eat. But before you actually eat one, you should know how to pick up the best dragon fruit.

Selecting the Best Dragon Fruit

Chances are that a well-stocked supermarket in your neighborhood will offer dragon fruit all year round. To get the best pitayas, you should aim for the period when the fruit is in season. Peak dragon fruit season begins in the summer and lasts until early autumn.

Generally, you should go for a pitaya that has a uniform bright pink color. It is OK to get a fruit with some blemishes. However, if there are a bunch of blotches on the skin, it indicates that the fruit is too ripe. You should also squeeze the fruit a little to make sure that it is neither too soft nor too firm.

It is also worth mentioning that dragon fruit is native to both Asia and Central America and that there are some small differences between these two fruits. Namely, the Asian pitaya is not as sweet as the Central American. Also, the kiwi-like flesh is red in the Central American fruit.

How to Eat Dragon Fruit Raw

Similar to most other exotic fruits, pitaya is best when eaten raw, though it can also be a great addition to smoothies, fruit salads, and even fruit kebabs. First, you should know how to properly extract the succulent flesh in order to avoid the bitter dragon fruit skin.

You need to do the following:

  1. Put your dragon fruit on a clean flat surface or a cutting board and cut it into two halves. It is quite easy to cut the fruit, but you should make sure to get a sharp knife for an even cut. Hold the fruit with your other hand so it doesn't budge.
  2. After you cut it, you need to remove the skin from the fruit. If you've ever skinned an avocado, removing the pitaya skin should be plain sailing. Use a tablespoon to carefully get the flesh out and go around each dragon fruit half until you completely remove the flesh.
  3. Once you get the flesh out, you should check if there is any skin left on it. Peel or cut the leftover skin because it is not suitable for eating. Now you can cut the dragon fruit flesh any way you want and enjoy the specific taste of this exotic plant.

Some Extra Tips

If you have a melon baller, you can scoop out the pitaya flesh to create bite-sized balls. There is no reason not to eat the dragon fruit straight from the skin in a similar way you would eat an avocado. Just avoid digging in too deep because the skin might add some unpleasant bitterness.

There is also a way to filet the flesh out of the dragon fruit. Cut it into halves and then quarters and run your knife from to bottom between the skin and flesh.

Other Ways to Eat Dragon Fruit

At this point, you should have a perfect understanding of how to eat dragon fruit raw. However, there are some other ways to consume this healthy exotic treat.

Blending the dragon fruit into a mouth-watering smoothie might be the most common, but did you know that you can also grill it?

Here is how to eat dragon fruit on a kebab or as part of a smoothie.

Chili Powder Dragon Fruit Kebab

This recipe provides you with a taste few other kebabs can match. The sweet dragon fruit complements the pineapple, and both fruits are well-rounded with a chili powder seasoning on top.

Ingredients:

  • 1 dragon fruit
  • 1 pineapple
  • Some extra virgin olive oil
  • 1 teaspoon of chili powder
  • A light pinch of salt

Preparation:

  1. Remove the skin from the pineapple and dragon fruit, then cut them into bite-sized cubes. Once you've finished cutting, put the cubes into a bowl and add the chili powder and salt. Toss the bowl a few times so you get an even seasoning all around.
  2. After you've seasoned the cubes, thread them onto a skewer. Each skewer should have an equal amount of pineapple and dragon fruit. Make sure to leave enough space at the bottom of the skewer so you can turn them on the grill.
  3. Put the fruit kebabs on a grill and turn until each side becomes light brown. You should brush the kebabs with the olive oil every so often so they do not stick to the grill. In about 10 minutes, your dragon fruit kebabs will be ready for serving.

Simple Dragon Fruit Smoothie

Dragon fruit mixes really well with most fruits and other vegan ingredients. This recipe gives you an idea of how to prepare a healthy and tasty smoothie quickly and easily.

Ingredients:

  • 1 dragon fruit
  • 1 banana
  • A cup of blueberries
  • A cup of soy milk
  • Sweeteners to taste

Preparation

  1. Cut the dragon fruit and the banana into chunks, put them in a blender together with the blueberries, and add a spoonful of your favorite sweetener.
  2. Pour a cup of soy milk and blend the fruits until you get the desired smoothness. You can add some extra soy milk to thin the smoothie.
  3. Once you are happy with the thickness, pour the dragon fruit into glasses and enjoy.

Endnote

These tips on how to eat dragon fruit are simple and very easy to follow. This special fruit works really well with a bunch of other fruits, nuts, and veggie ingredients, so you shouldn't hesitate to experiment. And if you want the ultimate exotic vegan taste, you should give the chili powder dragon fruit kebabs a try.
Hash Brown Waffles

March 29, 2018 by Nicole @ VegKitchen 1 Comment

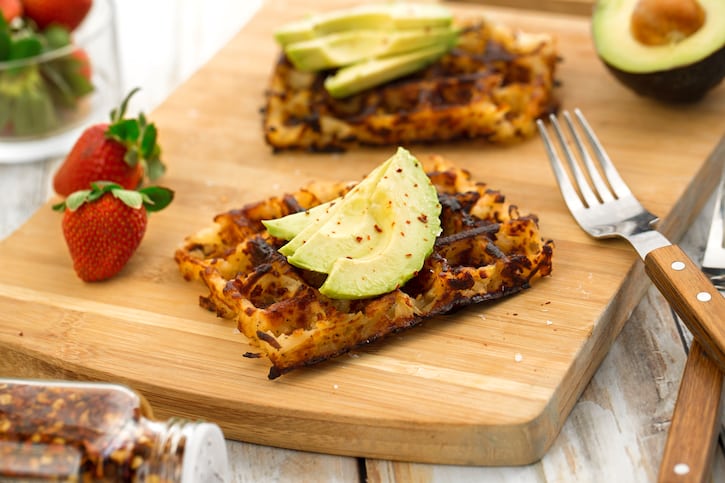
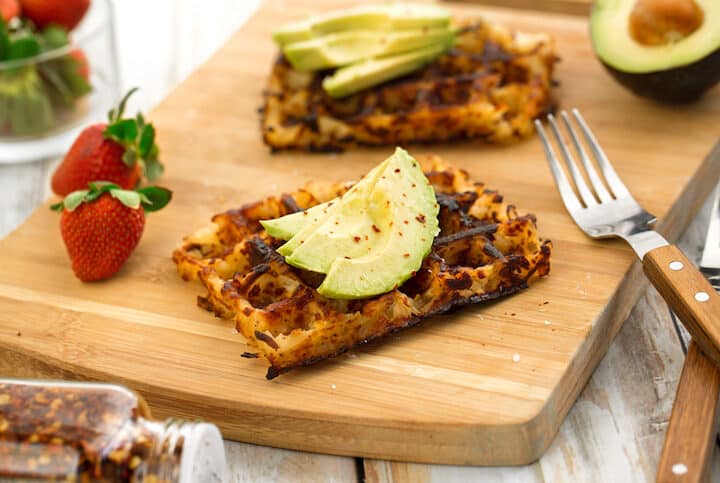
Hashbrown Waffles by Hannah Kaminsky

If you've never heard of hash brown waffles, you're in a for a real treat! This magical breakfast treat is a perfect blend of your two favorite breakfast foods - waffles and hash browns! And it's 100% vegan too!

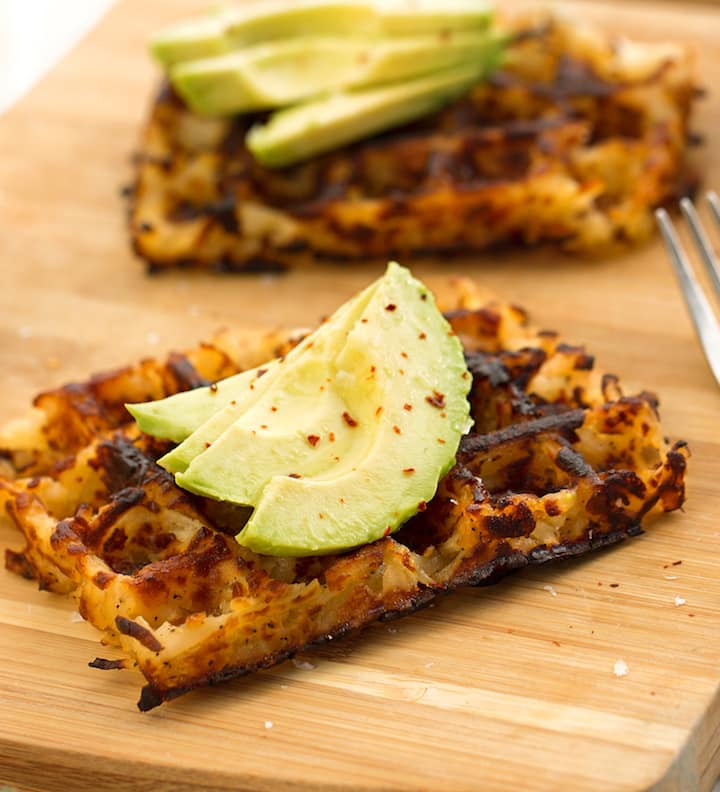
vegan hash brown waffles made with shredded potatoes
[feast_advanced_jump_to]

I love hash browns. No, seriously. I'm a bit of a hash brown connoisseur. So these potato waffles from the Real Food, Really Fast cookbook are right up my alley.

What separates award-winning hash browns from merely adequate hash browns all comes down to texture. They should be perfectly crisp on the outside, yet tender and creamy on the inside.

And that's exactly why these hash brown waffles are so perfect. Using a waffle iron instead of a traditional frying pan, gives a far more satisfying crunchy crust, while keep the potatoes in the center nice and creamy.

Yum!

These hash brown waffles are:

  • A delicious savory breakfast recipe!
  • Super fun to make and eat.
  • Kid-Friendly
  • 100% Vegan
  • Vegetarian
  • Dairy Free
  • Gluten-Free

This is one vegan breakfast that's sure to be a hit with the whole family!

hash brown waffles being served on a cutting board

Tips & Tricks

Squeeze any excess water from the shredded potatoes before mixing them with the other ingredients. This helps ensure a nice crispy potato waffle!

Preheat the waffle iron so it's nice and hot before you begin. All waffle irons are a little different in terms of time needed to heat up, so consult your manual if you are unsure. It needs to be fully heated to get a crispy potato waffle.

Work in batches if you need to. I used a four-waffle iron, but yours may make just one or two waffles at a time. That's fine, just work in batches.

The vegan butter can be substituted with coconut oil, if you prefer. It will lend a little bit of coconut flavor to the hash brown waffles.

Top your waffles with your favorite vegan-friendly garnishes. I like to serve them with sliced avocado and a sprinkle of crushed red pepper. Other great options are salsa, dairy free sour cream, or melted dairy free cheese shreds.

More Vegan Breakfast Recipes

If you love these vegan hash brown waffles, be sure to check out these other delicious breakfast ideas:

  • Reader-Favorite Vegan Pancake Recipes
  • 50+ Vegan Smoothies
  • Savory Vegan Breakfast Recipes
  • Vegan Pumpkin Waffles

Recipe and photos for these Hash Brown Waffles are reprinted with permission from Real Food, Really Fast by Hannah Kaminsky © 2018 by Skyhorse Publishing.

Recipe

Hashbrown Waffles by Hannah Kaminsky

Hash Brown Waffles

No ratings yet
If you've never heard of hash brown waffles, you're in a for a real treat! This magical breakfast treat is a perfect blend of your two favorite breakfast foods - waffles and hash browns! And it's 100% vegan too!
Print Pin Save Saved!
Prep Time: 5 minutes minutes
Cook Time: 10 minutes minutes
Total Time: 15 minutes minutes
Servings: 4 waffles
Prevent your screen from going dark

Equipment

  • Waffle Iron

Ingredients

  • 1 pound frozen shredded potatoes thawed
  • 1 ½ tablespoons vegan butter or coconut oil, melted
  • ½ teaspoon salt
  • ¼ teaspoon black pepper
US Customary - Metric

Instructions

  • Preheat the waffle iron.
  • Squeeze any excess water out of the shredded potatoes, if necessary, before tossing them into a large bowl.
  • Mix in the melted vegan butter, salt, and pepper, stirring thoroughly to incorporate. Make sure that the potato shreds are all evenly coated before proceeding.
  • Lightly grease the waffle maker. Distribute the potato mixture equally between four waffle squares, covering the surface as evenly as possible while packing it in firmly. (If your waffle iron makes a single waffle, work in batches.)
  • Close the lid and make sure that it locks to ensure full contact with the hash browns. Cook on medium-high for 5 to 8 minutes, until golden brown all over. Serve right away, while still hot and crisp!

Notes

You can also find ready-to-cook shredded potatoes in the refrigerated sections of some grocery stores, alongside prepared and packaged side dishes.

Nutrition (Estimate per Serving)

Calories: 118kcalCarbohydrates: 20gProtein: 2gFat: 4gSaturated Fat: 1gPolyunsaturated Fat: 1gMonounsaturated Fat: 1gTrans Fat: 1gSodium: 331mgPotassium: 481mgFiber: 3gSugar: 1gVitamin A: 203IUVitamin C: 22mgCalcium: 14mgIron: 1mg
Vegan-ize any recipe!Grab our free vegan cheat sheet, packed with my favorite easy substitutions to make any recipe vegan.

Vanilla and Raspberry Vegan Cheesecake

March 23, 2018 by Nicole @ VegKitchen 1 Comment

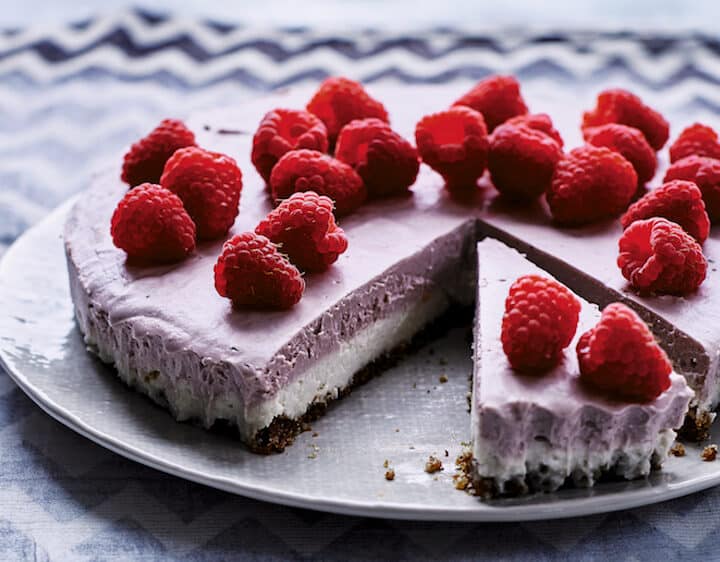
Vanilla Raspberry Vegan Cheesecake

This raw cheesecake is much lighter and fresher-tasting than a dairy cheesecake and the cashew topping is such a good medium for color and decoration. Even though it looks stunning as a whole cake, we sometimes make individual ones in a silicone muffin tray.

It makes a fantastic light dessert, or, with a bit of imaginative decoration it makes a tastefully subtle celebration cake too-with a bit of planning needed for the freezing time. Freeze-dried raspberry powder may seem like a futuristic ingredient, but it is well worth having in your pantry as it has so many uses. Try stirring it into oatmeal and adding to your smoothies.

Recipe and photos from Super Loaves and Simple Treats: Modern Baking for Healthier Living by Melissa Sharp © 2018, Avery Publishing. Reprinted by permission.

[Read more...]

Vegan Gluten Free Recipes from VegKitchen

May 12, 2017 by Nicole @ VegKitchen 3 Comments

Vegan Gluten Free

[three_fourth]It can be challenging to be either vegan or gluten free, but when you're both, it's doubly tricky to find suitable vegan gluten free recipes. VegKitchen offers lots of vegan gluten free recipes for every meal of the day. Use this list as a great resource for easy, everyday recipes to suit both dietary needs.

For all recipes that contain products that have both GF and non-GF versions, (like soy or teriyaki sauces, broth, and tortilla products), read labels carefully to be sure you're using GF versions. Please contact us (form is above right) if we've gotten anything wrong here as far as GF and we will make the correction post haste!

[Read more...]

Raw Vegan Orange Creamsicle Ice Cream Cake

April 18, 2017 by Nicole @ VegKitchen 2 Comments

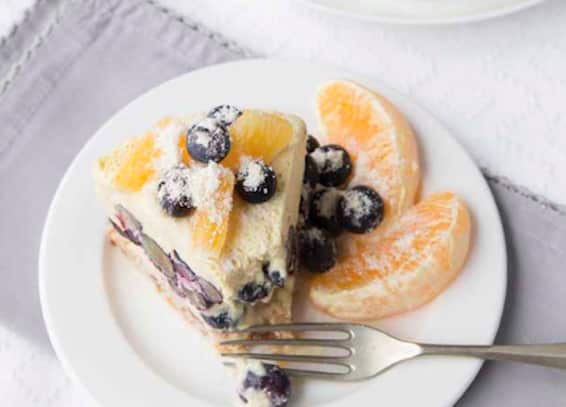
Vegan and raw orange creamsicle cake

This summery dessert has everything you love about Creamsicles, but in cake form! While the presentation makes it look like you've been working on this dessert for days, it actually requires very little effort. Best of all, this orange creamsicle ice cream cake is vegan and raw.

This frozen cake is designed to be made in a springform pan so that the sides can be removed. Much like any ice cream cake, this recipe will melt when removed from the freezer. [Read more...]

8 Vegan Frozen Treats You Can Make Without an Ice Cream Machine

September 1, 2016 by Nicole @ VegKitchen 1 Comment

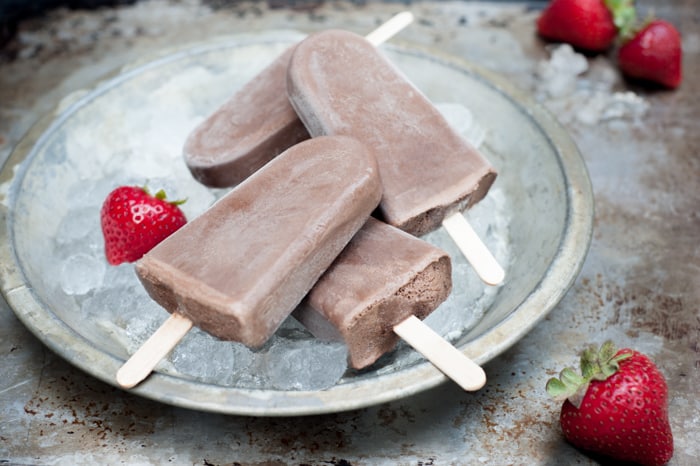
Cashew Coconut Fudgicles from leslie Cerier

Whether you're in the dog days of summer or in the midst of a heat wave lingering into September, a frozen treat is always welcome.

You don't need any kind of special machine to make these all-natural, delicious vegan ice creams and ice pops, most made with fresh fruit and all made with other wholesome ingredients.

Some of these do require popsicle molds, which are inexpensive. I have this cheap set from Amazon.

Cashew Coconut Fudgicles from leslie Cerier

Let's start with Leslie Cerier's Cocoa Cashew Coconut Ice Pops. The perfect summer popsicle for kids of all ages, these feature cashews, coconut milk, and cocoa. 

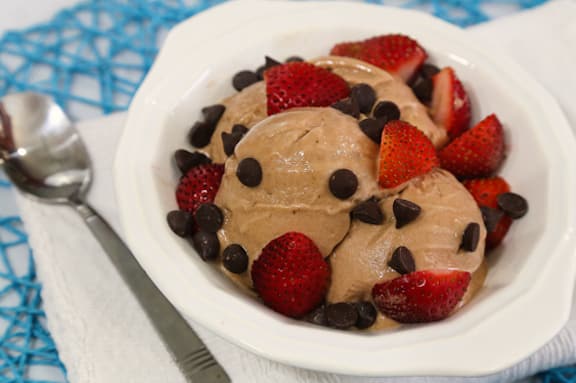
Chocolate Banana Soft Serve

Chocolate Banana Frozen Soft Serve is another chocolate-y treat. Your taste buds won't believe that this frozen treat is made almost purely of banana. The velvety texture and mild chocolate flavor will have you hooked. Freezing bananas that are getting almost too ripe is perfect for making treats like this, or for using in smoothies.

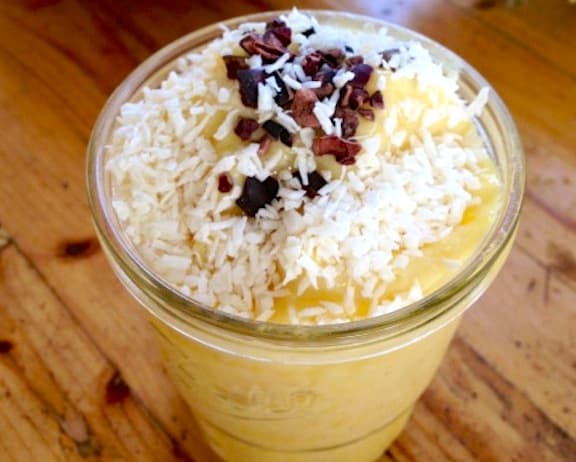
Frozen vegan pineapple crush

Creamy Pineapple Crush with a dusting of shredded coconut and cacao nibs satisfies any sweet tooth … without the fat and processed sugar. Three basic ingredients, all pure foods, whipped up into a creamy frozen dessert that couldn't be easier to make.

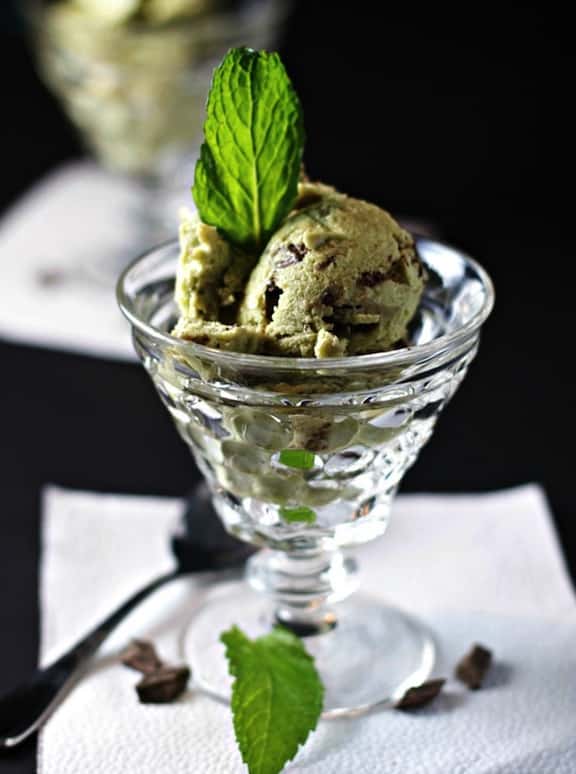
Raw Mint chocolate chip ice cream

Mint Chocolate-Chip Ice Cream is so delicious, it's hard to believe that it's made from bananas and avocados. Avocados power up the nutrition in this dessert and gives it that beautiful green hue. Add a few drops of mint extract, chocolate chips and enjoy!

Mango and blueberry ice pops

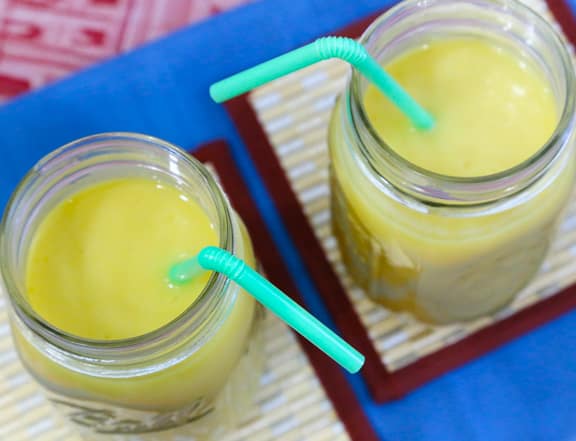
Fresh Mango or Nectarine and Blueberry Ice Pops prove that all you need are ice pop molds and fresh summer fruits to create easy, refreshing, and healthy frozen treats. Make sure your fruit is lush and ripe or these won't have optimal flavor.

carrot and spinach ice pops

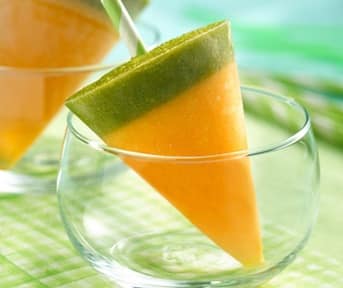
Crazy Carrot Pops are ice pops made from real fruits and veggies - lots of fun for kids to eat, and reassuring for parents to know they're giving their children a wholesome treat.

Frozen Banana Soft Serve Ice Cream

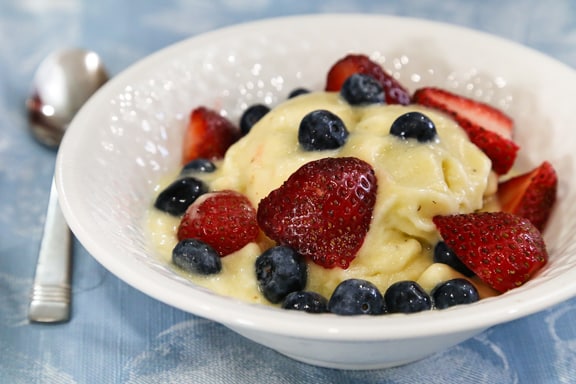
To make Vegan Banana Ice Cream, frozen bananas blend up and become just like soft-serve ice cream. Use a food processor, not a blender for this. Depending on the size of the food processor, you may have to make this in two batches.

Also try: our vegan fudgesicles.

blackberry watermelon ice pops

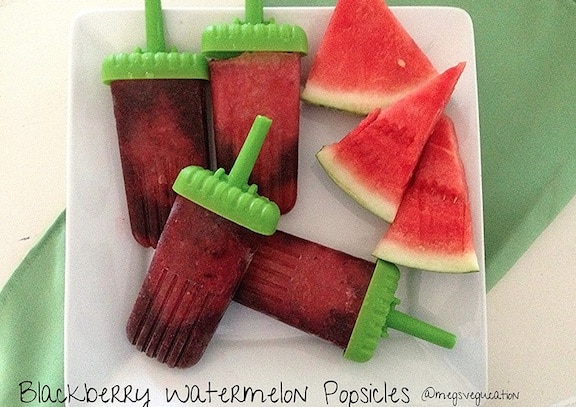
You'll be surprised at how quick Blackberry Watermelon Popsicles are to make, and how delicious the outcome is. You can can also vary these these with any kind of fruit you can blend!

Hope you found something to make your summer a little bit sweeter. For more ideas, check out all of our vegan ice cream recipes or other delicious vegan desserts.

Soft Serve Mocha Banana Ice Cream

August 17, 2015 by Nicole @ VegKitchen 7 Comments

Chocolate Banana Soft Serve Ice cream

You won't believe that this soft serve mocha banana ice cream is made almost entirely of frozen banana. Of course, this recipe is also vegan. The velvety texture and coffee-chocolate flavor will have you hooked. Best of all, you don't need an ice cream machine to make it, though a food processor is a must! A powerful blender works, too. Freezing bananas that are getting almost too ripe is perfect for making treats like this, or for using in smoothies. Photos by Evan Atlas.

[Read more...]

Dairy-Free Mango Lassi

July 28, 2015 by Nicole @ VegKitchen Leave a Comment

Dairy-Free Mango Lassi

Mango lassi is a simple and tasty beverage from Indian cuisine that's usually made with yogurt and/or milk. Substitute coconut yogurt and your favorite non-dairy milk and you've got a fantastic non-dairy version. Lush, ripe seasonal mango is best for this, but canned mango works as well. Photos by Evan Atlas.  [Read more...]

Best Vegan Milk (Non-Dairy) Alternatives

April 22, 2015 by Nicole @ VegKitchen 12 Comments

Walk down the refrigerated or shelf-stable aisle at almost any grocery store and you will find a dozen or more non-dairy milks, which makes picking the best vegan milk feel harder than it should. This guide covers every major option, including soy, almond, oat, rice, coconut, cashew, hazelnut, hemp, pea, and macadamia milk, with what each one is made from, its pros and drawbacks, the jobs it does best in the kitchen, and a few brands worth trying.

There is no single winner. The best nondairy milk for your morning latte is not necessarily the best one for a creamy soup or a batch of muffins, so use the comparison table and the use-case guide below to match the milk to the job.

Best Vegan Milk at a Glance

Protein is the biggest nutritional difference between these milks. One published review of commercial products measured about 8 grams of protein per cup of cow's milk, compared with roughly 6 grams for soy milk, 7.5 for pea milk, 2.7 for oat milk, and just 1 for almond milk (Dairy and Plant-Based Milks: Implications for Nutrition and Planetary Health). Brands vary, so always check the label. The table below gives a rough picture for plain, unsweetened versions.

MilkFlavor and textureProtein per cup (approx.)Best for
SoyCreamy, mild, slightly beany6 to 9 gEverything: drinking, baking, coffee, sauces
PeaNeutral, fairly creamy7 to 8 gSmoothies, cereal, nut-free and soy-free households
OatNaturally sweet, thick, mellow2 to 4 gLattes, baking, creamy soups and sauces
AlmondLight, subtly nutty, thin1 gSmoothies, cereal, pancakes, low-calorie drinking
CashewMild, smooth, a little buttery1 to 4 g, varies by brandCreamy sauces, soups, coffee
Coconut (carton)Light, distinctly coconutty0 to 1 gCereal, smoothies, tropical flavors
Coconut (canned)Very rich and thickLow per servingCurries, soups, desserts, whipped cream
RiceThin, sweet, wateryAbout 1 gAllergy-friendly drinking, thinning sauces and dips
HazelnutToasty, nutty, richAbout 1 gCoffee, hot chocolate, chocolate desserts
HempEarthy, slightly grassy2 to 4 gSmoothies, oatmeal
MacadamiaButtery, smooth, rich1 gCoffee, drinking straight

A quick note on shopping. Choose unsweetened and unflavored versions as your everyday default, since plain plant milks labeled "original" often contain added sugar, and the Harvard T.H. Chan School of Public Health suggests keeping flavored versions under about 10 grams of sugar per serving. Look for a milk fortified with calcium and vitamin D, and vitamin B12 as well if plant milk is a major part of your diet.

Soy Milk

What it is. Soy milk is made by soaking and grinding soybeans with water and straining out the pulp. It has been made for centuries and remains the most nutritionally complete of the plant milks.

Benefits. Soy milk has the most protein of the traditional plant milks, roughly matching cow's milk, and it is mostly unsaturated fat. It is also the only plant milk that the USDA's MyPlate guidance counts as part of the Dairy Group, as long as it is fortified with calcium and vitamins A and D.

Drawbacks. Soy is a common allergen, and some people notice a slightly beany flavor, especially in plain versions. Brands differ a lot in taste, so if you did not like the first one you tried, try another.

Best uses. Soy milk is the most versatile all-rounder. It froths well for lattes, works one-to-one in baking, and thickens sauces and soups nicely. It also curdles most readily when mixed with lemon juice or vinegar, which makes it the best choice for vegan "buttermilk" in recipes like Vegan Biscuits and Easy Vegan Cornbread. It also works beautifully in Vegan Butternut Squash Soup and Vegan Cinnamon Roll in a Mug.

Brands to try. Pacific Foods Organic Unsweetened Soy and Silk Organic Unsweetened Shelf-Stable Soy Milk are both widely available and made with simple ingredients.

Almond Milk

What it is. Almond milk is made by grinding almonds with water and straining the mixture. Commercial versions are mostly water, typically with a small percentage of almonds, plus added calcium and vitamins.

Benefits. Unsweetened almond milk is one of the lowest-calorie options, often around 30 to 40 calories per cup, and it is free of lactose and cholesterol. Its light, subtly nutty flavor disappears easily into recipes.

Drawbacks. It is very low in protein, about 1 gram per cup, so it is not a nutritional stand-in for dairy on its own. It is a tree nut, so it is off the table for anyone with a nut allergy. On the environmental side, almond milk generally has a lower carbon and land footprint than dairy, but it uses more water than some other plant milks (see the note on sustainability below).

Best uses. Almond milk shines in smoothies, over cereal, and in pancakes, muffins, and other baked goods where its mild flavor stays out of the way. Try it in Vegan Gluten-Free Pancakes, Vegan Blueberry Pancakes, Vegan French Toast, or the Vegan Chocolate Raspberry Banana Smoothie. It is thinner than soy or oat, so it is less suited to creamy soups and sauces.

Brands to try. Silk Shelf-Stable Unsweetened Almond Milk and Califia Farms Unsweetened Almond Milk are dependable everyday choices. You can also make your own with our Homemade Almond Milk.
Oat Milk

What it is. Oat milk is made from oats blended with water, and most commercial versions use enzymes to break some of the oat starch into simple sugars. That is why oat milk tastes naturally sweet, even without added sugar, and why the sugars can show up as "added sugars" on the label.

Benefits. It is creamy and mellow, and it is typically nut-free and soy-free, which makes it a friendly choice for many households. It has more protein than almond or rice milk, usually a few grams per cup, and it contains some oat fiber.

Drawbacks. Oat milk is higher in carbohydrates and calories than almond milk, and it is lower in protein than soy or pea milk. Oats are naturally gluten-free but are often processed alongside wheat, so anyone avoiding gluten should look for a certified gluten-free label.

Best uses. Oat milk is a favorite for coffee because it steams and foams well, especially in "barista" versions, so it is the go-to for an Oat Milk Latte. Its body also makes it a good pick for waffles and other baked goods, like our Vegan Pumpkin Waffles, and it adds silkiness to soups such as Vegan Cream of Asparagus Soup.

Brands to try. Oatly Original Oatmilk is the brand that made oat milk a household name, and Pacific Foods Organic Original Oat Milk is another good shelf-stable option.

Rice Milk

What it is. Rice milk is made from milled rice, usually brown rice, and water, often with a little oil and salt. It is the thinnest and most watery of the common plant milks, with a naturally sweet, mild taste.

Benefits. Rice milk contains no nuts, soy, or dairy, so it is often the choice for people who cannot tolerate other plant milks (check the label if you also avoid gluten). It is also inexpensive.

Drawbacks. It is low in protein and higher in carbohydrates than most other options, and it does not add much richness to recipes. Rice and rice products also tend to contain more inorganic arsenic than many other foods, and the FDA notes that infants and children can be more susceptible to arsenic exposure (FDA arsenic in rice risk assessment). It is best enjoyed as one of several options rather than the main drink for young children.

Best uses. Because it is thin and lightly sweet, rice milk is handy for thinning sauces and dips, as in our silken-tofu-based Vegan Sour Cream, and as one of the options in Vegan Butternut Squash Soup. Our Vegan Substitutions Guide covers how to swap it in for dairy milk measure for measure.

Brands to try. Dream Organic Rice Milk (Classic Original) is a long-running shelf-stable option.

Coconut Milk

What it is. There are really two products under this name. Canned coconut milk is made by simmering grated coconut flesh with water and straining it, which gives a thick, rich liquid used as a cooking ingredient. Carton coconut milk is a much thinner drinking beverage made from coconut cream diluted with water and usually fortified.

Benefits. Canned coconut milk brings unmatched richness and body to vegan cooking without any nuts or soy. The carton kind is light and pleasant, with a clear coconut flavor.

Drawbacks. Full-fat canned coconut milk is high in saturated fat, so it is best treated as a special-occasion cooking ingredient rather than an everyday drink, and neither type offers much protein. Coconut flavor is also hard to hide, so it will show up in whatever you use it in.

Best uses. Reach for canned full-fat coconut milk for curries, soups, and creamy sauces, as in our 15-Minute Vegetable Curry and Vegan Creamy Mushroom Pasta. It is also the secret behind creamy desserts, like Vegan Fudgesicles, Baked Coconut Rice Pudding, and Homemade Vegan Eggnog, and it even works in Vegan Banana Oat Pancakes. Chilled canned coconut cream can be whipped into a dairy-free whipped topping. The carton version is best for cereal and smoothies.

Brands to try. For canned, Thai Kitchen Organic Unsweetened Coconut Milk is easy to find. For a drinkable carton, try So Delicious Shelf-Stable Unsweetened Coconutmilk.

Cashew Milk

What it is. Cashew milk is made by blending cashews with water. Because cashews are soft, it turns out smooth and creamy, with a mild, slightly sweet, buttery taste.

Benefits. It is one of the creamiest plant milks for its calorie count and blends into coffee and sauces without a strong flavor of its own. It is also easy to make at home with a blender.

Drawbacks. Many store-bought cashew milks are mostly water with a small amount of cashews, so they are low in protein and other nutrients. Like all tree nut milks, they are not suitable for anyone with a nut allergy.

Best uses. Cashew milk is excellent in creamy soups and sauces, in coffee, and in smoothies. If you want real thickness, blend whole soaked cashews right into the dish, the way we do in our Vegan Cream of Broccoli Soup. Our Homemade Vegan Eggnog also relies on blended raw cashews for its creamy body, and you can find the milk itself in How to Make Cashew Milk in Just a Few Easy Steps.

Brands to try. Elmhurst 1925 Unsweetened Cashew Milk is made with just cashews and water, without gums.

Hazelnut Milk

What it is. Hazelnut milk is made from ground, often roasted, hazelnuts and water. It has a toasty, rich, distinctly nutty flavor.

Benefits. The flavor is the main draw, since a little goes a long way in coffee and chocolate drinks. Like other nut milks, it is free of lactose and cholesterol.

Drawbacks. It is usually low in protein, it can be pricier and harder to find than almond or oat milk, and the pronounced flavor will not suit every recipe. It is also off-limits for anyone with a tree nut allergy.

Best uses. Use hazelnut milk in coffee, hot chocolate, and chocolate desserts, or swap it for the milk in a chocolate cake or muffins when you want a nutty note. If you like the flavor, our Vegan Nutella is a natural companion.

Brands to try. Pacific Foods Unsweetened Hazelnut Milk is one of the more widely available choices.

Hemp Milk

What it is. Hemp milk is made from hulled hemp seeds blended with water. It has an earthy, slightly nutty and grassy flavor, and its color is a creamy off-white.

Benefits. Hemp seeds are a plant source of omega-3 fatty acids, and many hemp milks list omega-3 (ALA) on the label. Hemp milk is nut-free and soy-free, and it offers a modest amount of protein.

Drawbacks. The earthy taste is not for everyone, and it can be thinner than oat or soy milk.

Best uses. Hemp milk is at its best in smoothies, oatmeal, and granola, where fruit and spices balance its flavor. It is one of the easiest plant milks to make at home, since hemp seeds do not need soaking, so see our How to Make Homemade Hemp Milk.

Brands to try. Pacific Foods Unsweetened Hemp Milk is a good place to start.

Pea Milk

What it is. Pea milk is made from pea protein blended with water and a small amount of oil, plus added nutrients. It does not taste like peas, and the flavor is neutral and lightly creamy.

Benefits. It is the plant milk that comes closest to soy for protein, at around 8 grams per cup for some brands, and it is free of nuts, soy, and gluten, which makes it useful for allergy-conscious families.

Drawbacks. It is newer than the other options, so there are fewer brands to choose from, and it can cost more than soy or oat milk.

Best uses. Try pea milk in smoothies, cereal, and baking, where its protein helps and the neutral taste stays out of the way. It also works in coffee, though the foam is not always as good as with oat or soy.

Brands to try. Ripple Unsweetened Original Plant Based Milk is the best-known pea milk on the market.

Macadamia Milk

What it is. Macadamia milk is made from macadamia nuts and water. It is rich and buttery, and it is one of the smoothest-tasting plant milks.

Benefits and drawbacks. It has a luxurious mouthfeel and is high in monounsaturated fat, but it is low in protein and generally costs more than other plant milks. As with other nut milks, it is not suitable for people with a tree nut allergy.

Best uses. It is lovely on its own, in coffee, and in smoothies. Milkadamia Unsweetened Macadamia Milk is the brand to look for.

Other options. You may also come across flax, pistachio, walnut, quinoa, and banana milks. They tend to be more specialized and harder to find, but they follow the same rules: check the label for protein, fortification, and added sugar.

Choosing the Best Non-Dairy Milk for the Job

Because these milks behave so differently, it helps to pick by use rather than looking for a single "best." Here is a quick cheat sheet.

  • For drinking straight and for cereal. Soy, pea, and oat milk taste the most like dairy milk, while almond and cashew milk are lighter. Rice milk is sweet and thin.
  • For coffee and lattes. Barista-style oat milk, soy milk, and pea milk tend to foam and steam best. Almond and soy can separate in very hot, acidic coffee, so pour the coffee in slowly or warm the milk first.
  • For baking. Soy, oat, and almond milk all swap one-to-one for dairy milk in cakes, muffins, pancakes, and quick breads. For vegan buttermilk, stir 1 tablespoon of lemon juice or vinegar into 1 cup of plant milk and let it sit for 5 minutes, as in our Vegan Red Velvet Cake.
  • For thickening soups and sauces. Oat milk, soy milk, cashew milk, and canned coconut milk add the most body. For extra creaminess, blend in soaked cashews or a little white beans.
  • For desserts, ice cream, and whipped toppings. Full-fat canned coconut milk and cashew cream give the richest, creamiest results, as in Vegan Banana Pudding (made with canned coconut cream) and Vegan Tiramisu.
  • For smoothies and chia pudding. Almond, oat, soy, and coconut milk all work well. Try our Chia Breakfast Bowl or Raspberry Chia Pudding.
  • For allergies. Nut-free choices include soy, oat, rice, pea, and hemp milk, and soy-free choices include almond, oat, rice, pea, and coconut milk. Always check the label for allergen statements.

Which Plant Milks Are Best for the Planet?

If sustainability is a factor in your decision, all of these plant milks have a smaller footprint than dairy. According to Our World in Data, using data from a major 2018 analysis of food production, cow's milk causes about three times as many greenhouse gas emissions and uses about ten times as much land as plant milks, and it uses two to twenty times as much freshwater (Dairy vs. plant-based milk: what are the environmental impacts?). Among the plant milks, there is no clear winner on every measure. Almond milk, for example, has lower emissions and land use than soy milk, but it needs more water. If you are aiming for the lightest footprint, oat and soy milk are both strong choices.

Make Your Own Non-Dairy Milk

Most plant milks are simple to make at home with a blender, water, and a strainer or nut milk bag, and homemade versions skip the gums, oils, and added sugars found in some cartons. They do not come fortified with calcium or vitamin D, however, and they generally keep only a few days in the refrigerator, so make small batches. Start with our Homemade Almond Milk, Homemade Hemp Milk (no soaking or straining required with a high-speed blender), or Cashew Milk.

Storing Plant Milks

Shelf-stable cartons can be kept in the pantry until you open them, which makes them handy for stocking up and for recipes that only need a cup. Once opened, store them in the refrigerator and use them within about a week to ten days, or by the date on the carton. Always shake well before pouring, since natural separation is normal, especially in versions without gums.

Frequently Asked Questions About Vegan Milk

What is the best vegan milk overall? It depends on how you plan to use it. Unsweetened soy milk is the most versatile and the highest in protein of the traditional options, oat milk is a favorite for coffee and creamy cooking, and almond milk is the lightest. If you need to avoid nuts and soy, pea milk and oat milk are good alternatives.

What is the best nondairy milk for baking? Soy, oat, and almond milk all work well in baking. Soy milk is the best for vegan buttermilk because it curdles most readily with an acid, and the rest can be swapped in one-to-one for regular milk.

Which non-dairy milk is closest to cow's milk? Soy milk is closest nutritionally, with similar protein, and pea milk is a close second. Oat milk is closest in creaminess and mild flavor.

Can I substitute vegan milk one-to-one for regular milk? In most recipes, yes. Use plain, unsweetened milk for savory dishes, and keep in mind that thinner milks like almond and rice will give a slightly lighter result than oat, soy, or coconut milk.

Are plant milks a good choice for young children? Not all plant milks are nutritionally equivalent to cow's milk, and low-protein options like almond and rice milk are not a full substitute. Check with your child's pediatrician before making plant milk a young child's main drink, and if you do, fortified soy milk is generally the closest match.

More Dairy-Free Swaps and Recipes

If you are building a dairy-free kitchen, these guides and recipes are a good next stop:

  • Vegan Substitutions Guide
  • Vegan Sour Cream
  • 21 Vegan Hot Beverages for Cold Weather
  • The Best Vegan Pancake Recipes!

How to Eat Dragon Fruit

March 19, 2015 by Nicole @ VegKitchen 1 Comment

Dragon fruit

Dragon fruit is probably one of the weirdest fruits you’ll come across at the store. From the outside it looks bright pink and green and irregular. When you cut into it, it looks like peppered ice cream. You may even be wondering how to eat dragon fruit.

But dragon fruit is a delicious addition to any vegan diet, as it’s high in vitamin C, good fatty acids, B vitamins, carotene and even packs in some protein. Meet your new favorite superfood. Here's some background on the fruit and, of course, how to eat dragon fruit.

Some background

Dragon fruit comes from Central America and is also called the pitya. It’s also grown in Southeast Asian countries like Thailand and Vietnam. It grows off a cactus-like plant. It’s crunchy and has a mild sweet taste like a more muted kiwi. The little black seeds in the fruit are totally edible, again, like the kiwi.

For the basics of how to eat dragon fruit, you just cut into it, right down the middle. Then you scoop out the white fruit, which comes out very easily. It’s commonly served up in its own skin as a bowl, since the bright pink makes a great presentation. You can also quarter it and peel off the pink skin, since the skin will taste bitter. From there you can cube it, slice it or ball it. Then add it to your favorite fruit salads or just eat it by itself plain. Many people eat dragon fruit chilled, as that’s said to bring out the flavor better.

If you’re in the store looking for a dragon fruit, the fruit should feel slightly soft as you press your fingers into it. (Like a mango.) Just make sure it doesn’t feel mushy. The fruit itself should look bright pink, and make sure there are no dark spots or bruises.

Creative ways to eat dragon fruit

Once you’re familiar with the basic fruit itself, you may be wondering what else you can do with it. There are several great uses for dragon fruit. For instance, a popular use for dragon fruit is to add it to a tropical fruit salad. You merely cube the dragon fruit, along with pineapple, mango and banana.

A neat idea for parties is to make a tropical fruit kabob with cubed dragon fruit and kiwi on a skewer. Then you simply stick the skewers on the grill until there is a nice little browning of the fruit where the grill grates were. You can end by sprinkling them with sugar.

It also makes a sweet addition to any fruit smoothie or smoothie bowl. You can blend it up with soy or almond milk. You can also optionally add anything else you’d like, such as berries, sugar, juice or even nut butters. Melon-balled bits of dragon fruit make a wonderful garnish on top, too.

Dragon fruit even makes a wonderful frozen treat. You can juice or blend the fruit alone or with other fruits, and then add it to a popsicle mold. A neat idea is also serving a basic vegan sorbet scooped into a halved, frozen dragon fruit that has a little bit a dip cut into the middle. Than you can eat the sorbet with the frozen fruit for a refreshing treat.

Health Benefits of Chia, Flax, and Hemp Seeds

May 10, 2014 by Nicole @ VegKitchen 49 Comments

Chia seeds - varieties

Chia, hemp, and flaxseeds seem to be everywhere these days! This trio of tiny seeds offers an abundance of health benefits, not the least of which are the valuable Omega-3 fatty acids. These seeds aren’t just for those following plant-based diets, but anyone who wants to boost their intake of nutrients. Read on for a brief introduction to these small but mighty super foods, their comparative benefits, and some ways to use them in your daily fare. [Read more...]

Chia Seeds: Frequently Asked Questions

August 30, 2012 by Nicole @ VegKitchen 157 Comments

Flaxseeds

Chia seeds are known as a great plant-based source of omega-3 fatty acids, in addition to a host of other nutrients, and an abundance of calcium, protein, and fiber.  These frequently asked questions are excerpted from Chia: The Complete Guide to the Ultimate Superfood* by Wayne Coates, PhD.

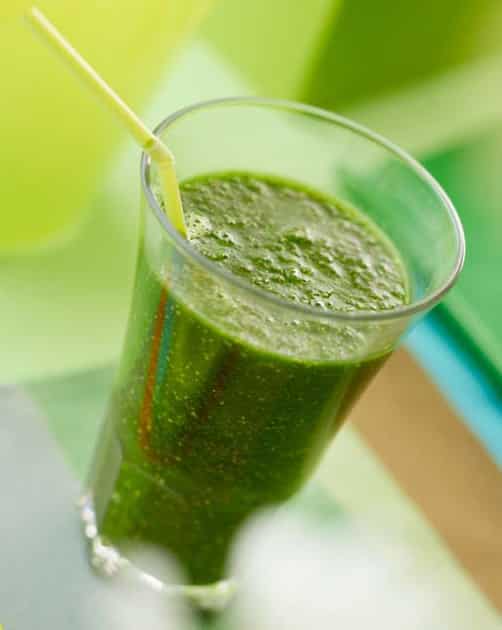
Chia Green SmoothieIf you like chia seeds, you'll love 6 Fabulous Recipes for Chia Seeds here on VegKitchen.

Q. Can I eat too much chia?

A. Not really. If you eat more than your body can handle, you may find yourself feeling a bit bloated, or you may experience mild diarrhea, though this is rare.

Q. Is it possible to be allergic to chia?

A. It is very rare, but the possibility does exist. Those most likely to have a reaction to chia are individuals who areallergic to sesame or mustard seed, or to other members of the salvia family, such as sage.

Q. What else does chia contain?

A. The main vitamins are: A, B1 (Thiamin), B2 (Riboflavin), C (ascorbic acid), E, choline, and Folate (folic acid). Chia also contains vitamins B3, B5, B6, B15, B17, D, K, inositol and PABA. The main Minerals are Boron, calcium, copper, iodine, iron, magnesium, manganese, phosphorous, potassium, silicon, sodium, strontium, sulfur, and zinc. It also has amylose and plenty of electrolytes. And they also contain 18 of the 22 amino acids, including all nine essential amino acids.


Q. I’m on medication. Can I take chia?

A. It depends on the medication. Your best bet is to talk with your healthcare provider before taking chia.

Q. My personal trainer said I should have chia daily between weight lifting workouts. Why?

A. Chia is believed to decrease recovery time and fatigue in cardiovascular workouts by encouraging muscle tissue repair.

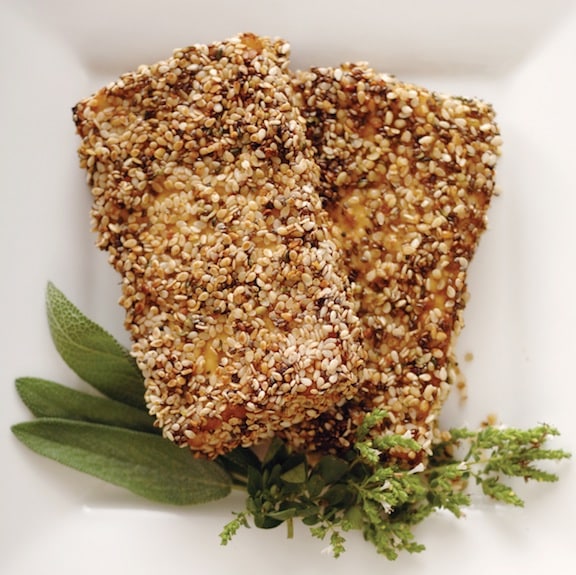
Chia-Crusted Tofu CutletsQ. What happens after I’ve swallowed chia?

A. When chia reaches the digestive liquids of your stomach, it swells and forms a gel. This gel slows down the rate at which digestive enzymes turn carbohydrates into sugar.

Q. I understand I should drink plenty of liquids when eating chia. Why?

A. Since chia absorbs a lot of liquid, it can lead to stomach cramps. Hence the need to consume sufficient liquid when consuming chia.

Q. I’ve heard chia can make my nails healthier and grow faster. Is it true?

A. Chia is rich in omega-3, as well as calcium, boron, and many antioxidants that help create healthy, moist, disease-free skin.

Q. Is it necessary to grind the seed?

A. Chia seeds do not need to be ground for absorption, unlike flax, which must be ground before eating it.

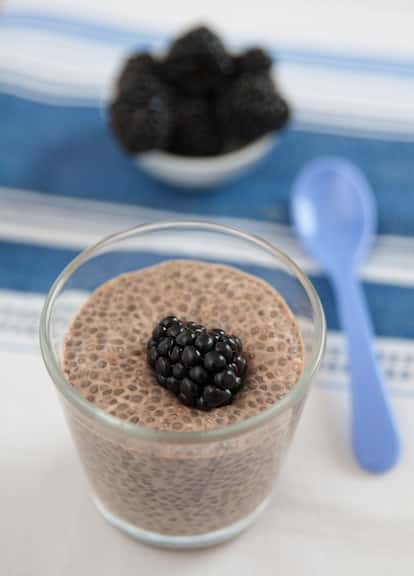
Chia Pudding with blackberriesQ. Should chia seeds be washed?

A. Chia seeds do not need to be washed.

Q. How should chia seeds be stored?

A. Whole chia seeds will stay in good condition at room temperature for several years. There is no need to keep the seeds in the refrigerator, whether it’s kept in sealed bags or not. The seed’s natural antioxidants provide this stability. Storing chia in a closed container will help extend its shelf life.

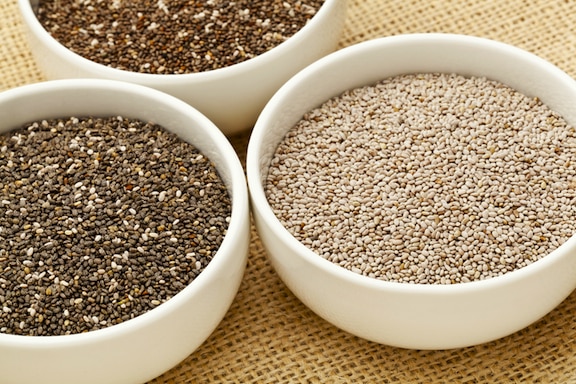
Q. What’s the difference between the colors of chia seed.

A. There are two chia seed colors, white and black. The difference between the two colors, however, is negligible. Both contain essentially the same amount of omega-3, protein, fiber, and other nutrients.

Here are two recipes from Chia: The Complete Guide to the Ultimate Superfood:

  • Chia Green Super Smoothie
  • Chia Almond Delight

*This post contains affiliate links. If the product is purchased by linking through this review, VegKitchen receives a modest commission, which helps maintain our site and helps it to continue growing!

Candied Pumpkin Seeds

September 20, 2011 by Nicole @ VegKitchen Leave a Comment

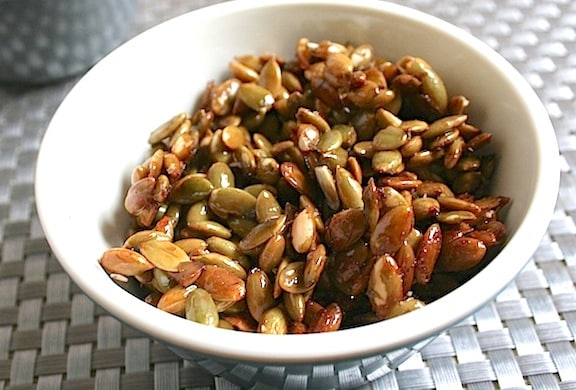
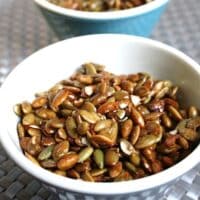
Candied Pumpkin Seeds

These candied pumpkin seeds (or pepitas) are sweet, salty, and perfectly crunchy! It's the ultimate Fall treat.

Candied Pumpkin Seeds recipe

Sweet, salty, and ridiculously snackable - these candied pumpkin seeds are the fall treat you didn't know you needed. They're crunchy, caramelized, and just the right amount of sticky (in the best way).

These homemade candied pumpkin seeds (sometimes called pepitas) are so delicious, and couldn't be any easier to make! I dare you not to eat half of it straight off the baking sheet.

They take just three ingredients (I don't count the salt) and less than 30 minutes. And most of that time if just letting them roast in the oven. Easy peasy.

These candied pumpkin seeds also make an awesome vegan-friendly gift idea. Just tie them up in a pretty cellophane bag with ribbon. Because who doesn't like to be gifted delicious food?

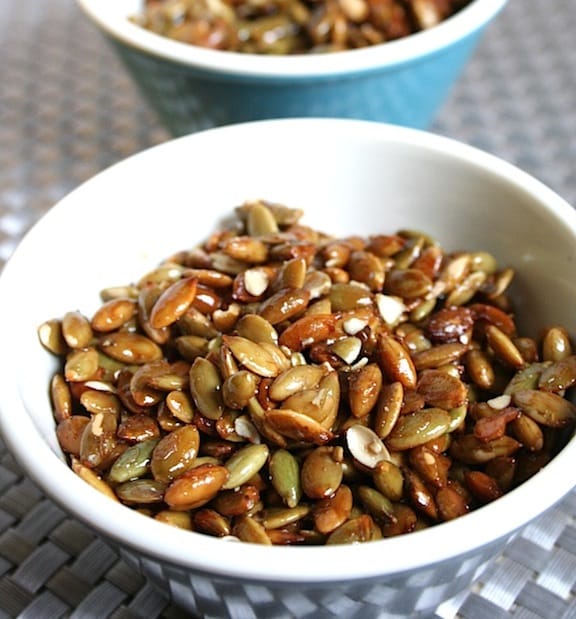
Candied Pumpkin Seeds being served

Fun Variations to Try

  • Spiced: Add ½ teaspoon cinnamon, or go full fall with pumpkin pie spice.
  • Savory-sweet: Add flaky sea salt after baking, or a tiny pinch of cayenne for heat.
  • Different sweeteners: Try coconut sugar or agave for a twist.
  • Mix-ins: Add toasted coconut flakes or chopped nuts for texture.

Serving Ideas

These candied pumpkin seeds can be enjoyed so many different ways, all year long. Here are a few of my favorites!

  • Sprinkle on smoothie bowls, yogurt, or salads.
  • Pack in lunch boxes or use for road trip snacks.
  • Gift in jars tied with twine for instant Fall magic!
  • Or just snack shamelessly - no judgment here.

This recipe was contributed by Kim Lutz, author of Welcoming Kitchen: 200 Delicious Allergen- & Gluten-Free Vegan Recipes* (Sterling, ©2011). Photos by Rachael Braun. Published with permission.

More Recipes

If you love these candied pepitas, be sure to check out these other delicious vegan ideas:

  • 7 Ways to Roast Pistachio Seeds
  • 30 Homemade Vegan Snacks
  • Vegan Pumpkin Pie

Recipe

Candied Pumpkin Seeds recipe

Candied Pumpkin Seeds

4.95 from 22 votes
These candied pumpkin seeds (or pepitas) are sweet, salty, and perfectly crunchy! It's the ultimate Fall treat.
Print Pin Save Saved!
Prep Time: 5 minutes minutes
Cook Time: 20 minutes minutes
Total Time: 25 minutes minutes
Servings: 6
Prevent your screen from going dark

Ingredients

  • 2 tablespoons maple syrup
  • 2 tablespoons packed brown sugar
  • ¼ teaspoon salt
  • 1 cup shelled pumpkin seeds pepitas

Instructions

  • Preheat oven to 375° F.
  • In a small saucepan, combine maple syrup, brown sugar, and salt. Heat over medium heat. Stir constantly until brown sugar is melted and mixture is foamy.
  • Add pumpkin seeds and stir until coated.
  • Spread pumpkin seeds on oiled cookie sheet. Bake for 10 minutes, stirring after 5 minutes. Remove from oven and cool completely; stir occasionally while cooling to prevent pumpkin seeds from sticking to pan.

Notes

Makes 1 cup (4 to 6 servings)

Nutrition (Estimate per Serving)

Calories: 93kcalCarbohydrates: 10gProtein: 3gFat: 5gSaturated Fat: 1gPolyunsaturated Fat: 2gMonounsaturated Fat: 2gTrans Fat: 0.01gSodium: 99mgPotassium: 107mgFiber: 1gSugar: 8gVitamin A: 2IUVitamin C: 0.2mgCalcium: 16mgIron: 1mg
Vegan-ize any recipe!Grab our free vegan cheat sheet, packed with my favorite easy substitutions to make any recipe vegan.

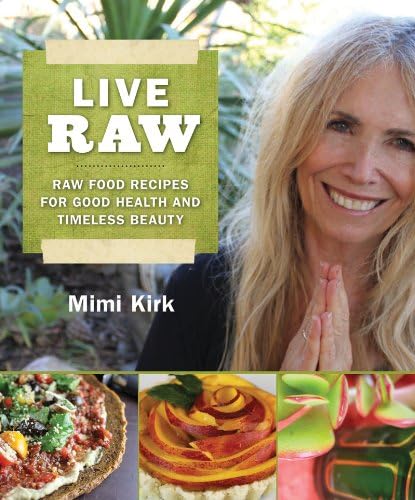
Live Raw by Mimi Kirk

August 28, 2011 by Nicole @ VegKitchen 1 Comment

I first found out about Mimi Kirk when she won PETA's "Sexiest Vegetarian Over 50" competition in 2009. She's stunning, all right, and the fact that she won this contest when she was not merely "over 50" but nearly 71 made it all the more remarkable. In this instance, Mimi can be completely forgiven for trading on her looks, as she put to rest any stereotypes about aging, and set a new bar for the vitality and beauty that women of a certain age can possess.

Live Raw by Mimi Kirk cookbook cover
[Read more...]

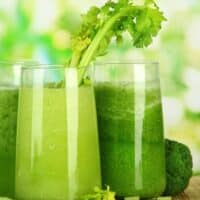
Apple, Celery, Lemon, Aloe, Cucumber Juice

April 19, 2011 by Nicole @ VegKitchen Leave a Comment

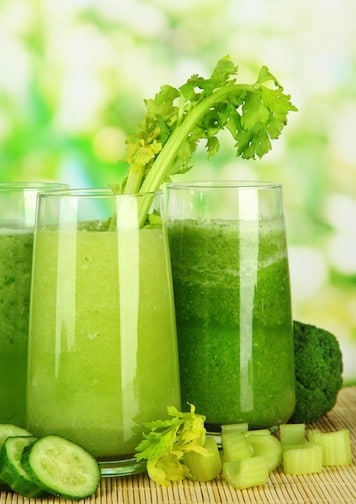
This bright, refreshing green juice combines apples, celery, cucumber, and kale with a splash of aloe juice — ready in minutes with a juicer or blender, and a great way to work a serious amount of vegetables into one glass without much effort.

Glass of apple celery cucumber juice

Key Ingredients & Substitutions

  • Tart apples. Granny Smith apples add brightness and natural sweetness without overpowering the greens — a sweeter apple works too if you prefer a milder juice.
  • Celery. Adds a savory, slightly salty note and a good amount of juice volume — use the whole stalk, leaves included.
  • Cucumber. Adds hydration and a mellow, cooling flavor. Leave the peel on for extra nutrients if it's not waxed.
  • Kale. Any hearty leafy green works here — try spinach or chard if that's what you have on hand.
  • Aloe juice. Adds a subtle, soothing quality. Look for it near the coconut water or in the health food aisle — choose a plain, unsweetened variety if you can find one.
  • Fresh lemon. Brightens the whole glass and balances the earthiness of the kale and celery.

Variations

  • Add ginger. A small knob of fresh ginger adds a spicy kick and a little extra digestive support.
  • Swap the greens. Spinach, romaine, or chard all work in place of kale, each giving a slightly milder flavor.
  • Make it sweeter. Add a second apple or a few seedless grapes if you like your green juice a little more forgiving.
  • Add citrus punch. A little extra lemon or a splash of lime brightens the flavor further.
  • Add mint. A few fresh mint leaves blended or juiced in add a cooling, herbal note.

Tips for the Best Green Juice

  • No juicer? No problem. Blend everything with just enough water to cover, then strain through a fine-mesh sieve or nut milk bag if you prefer a smooth juice rather than a thick smoothie.
  • Wash produce well. Especially the kale and celery, since they can hold onto grit in their ridges and folds.
  • Drink it fresh. This juice is best enjoyed right after making it, while the nutrients and flavor are at their peak — it separates and loses some brightness the longer it sits.
  • Whisk in the aloe last. Adding it at the end keeps its texture from getting lost or overly diluted in the juicing process.
  • Juice the celery and cucumber first. Their high water content helps push the denser kale and apple through more easily if you're using a juicer.

Make Ahead & Storage

Fresh juice is always best consumed right away, but if needed, this will keep in a sealed jar in the refrigerator for up to 24 hours. Fill the jar as full as possible to limit air exposure, and give it a good shake before drinking since it will separate.

How to Serve

Pour over ice and enjoy immediately as a refreshing morning pick-me-up or a light afternoon boost.

Recipe

Celery and cucumber juice

Apple, Celery, Lemon, Aloe, and Cucumber Juice

5 from 4 votes
A bright, refreshing green juice made from apples, celery, cucumber, kale, and a splash of aloe juice - ready in minutes with a juicer or blender.
Print Pin Save Saved!
Prep Time: 10 minutes minutes
Total Time: 10 minutes minutes
Servings: 2
Prevent your screen from going dark

Ingredients

  • 2 large tart apples washed and sliced
  • 2 stalks celery washed
  • 1 lemon yellow peel removed, cut into quarters
  • 1 large cucumber peeled and sliced into spears
  • 4 leaves kale washed
  • 1 tablespoon aloe juice

Instructions

  • Press the apple, celery, lemon, cucumber, and kale through a juicer.
  • If you don't have a juicer, combine the ingredients with just enough water to cover in a countertop blender and blend until smooth.
  • Whisk in the aloe juice and serve immediately.

Notes

Contributed by Alexandra Jamieson, from Vegan Cooking for Dummies.
Vegan-ize any recipe!Grab our free vegan cheat sheet, packed with my favorite easy substitutions to make any recipe vegan.

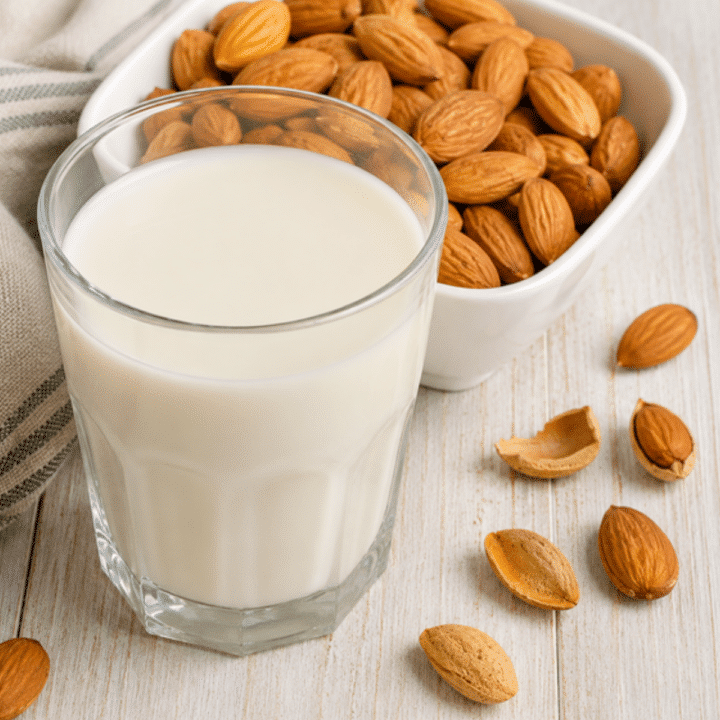
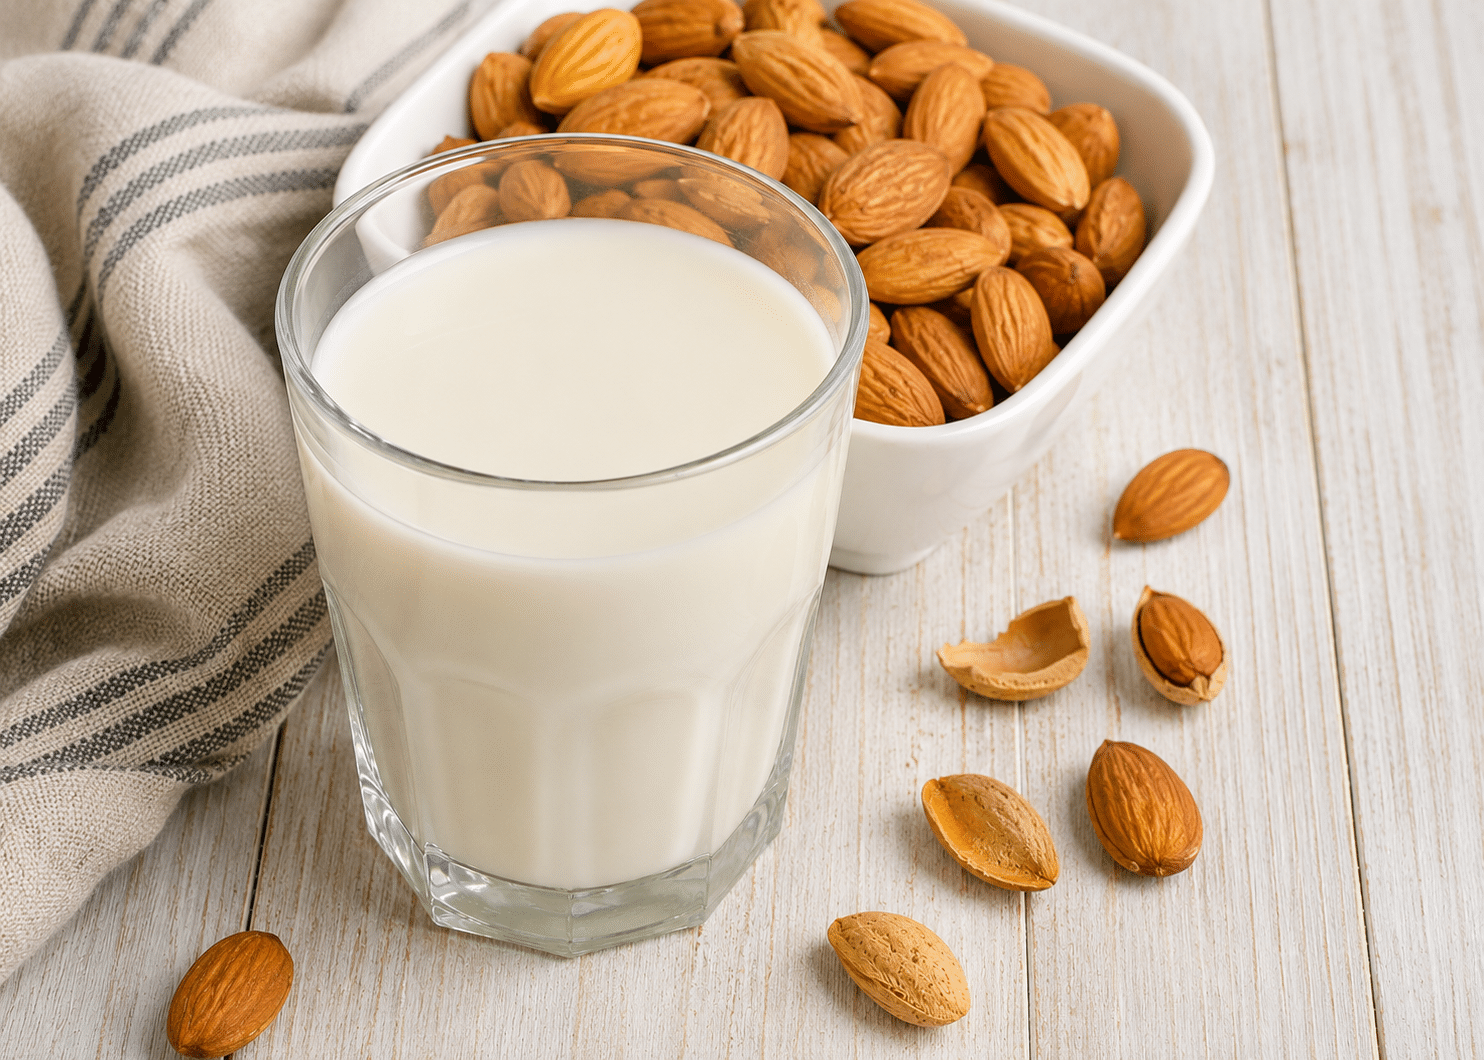
Homemade Almond Milk

April 19, 2011 by Nicole @ VegKitchen 3 Comments

This homemade almond milk is richer and more nutritious than boxed nondairy milk, and it comes together in just minutes with a blender and a strainer. Once you taste the difference, it's hard to go back to the boxed stuff, and you control exactly what goes into it — no gums, stabilizers, or added oils, just almonds, water, and whatever sweetness you choose to add.

Glass of homemade almond milk

Recipe adapted from Raw Food Made Easy for 1 or 2 People by Jennifer Cornbleet, reprinted by permission of The Book Publishing Company.

Key Ingredients & Substitutions

  • Raw almonds. Look for raw, unsalted almonds — roasted or salted almonds will throw off both the flavor and the soaking process, and can leave the milk tasting oddly savory.
  • Soaked almonds. Soaking softens the almonds so they blend into a smooth, creamy milk instead of a gritty one — don't skip this step, even though it adds time upfront.
  • Medjool dates. These add natural sweetness and body. Regular dates work too, just soak them a little longer since they're firmer and won't blend as smoothly straight from the package.
  • Vanilla extract. Optional, but it rounds out the flavor nicely. Leave it out for a neutral milk to use in savory recipes like soups or sauces.
  • Filtered water. The ratio of water to almonds determines how rich or light the milk turns out — adjust to taste, using less water for a creamier, more concentrated milk.

Variations

  • Make it chocolate. Blend in a tablespoon of cocoa powder for chocolate almond milk, sweetened to taste.
  • Add spice. A pinch of cinnamon or a dash of salt brightens the flavor and makes it taste more finished.
  • Skip the dates. For an unsweetened version, simply omit the dates — useful for coffee or savory cooking.
  • Try other nuts. This same method works well with cashews or a mix of almonds and cashews, which blend even more smoothly since cashews don't need straining.
  • Add a banana. Half a ripe banana blended in makes the milk noticeably creamier without tasting overtly like banana.
  • Make it a smoothie base. Skip straining and blend the whole mixture with fruit for a fiber-rich smoothie instead of a strained milk.

Tips for the Best Almond Milk

  • Soak the almonds fully. A full 8 to 12 hours softens them enough for a smooth blend — don't rush this step, and plan ahead by soaking them the night before.
  • Remove the skins for extra creaminess. It takes a few extra minutes, but skinned almonds make a noticeably smoother milk with less grit — the skins slip off easily after soaking.
  • Strain thoroughly. Press the pulp well with a spatula, or use a nut milk bag, to extract as much milk as possible — a nut milk bag gives the cleanest, smoothest result.
  • Shake before using. Homemade almond milk separates in the fridge since it has no stabilizers — just give it a good shake before pouring.
  • Use the leftover pulp. Save it for baking, smoothies, or homemade granola instead of tossing it — it's still full of fiber and nutrients and can be dried in a low oven for almond flour.

Make Ahead & Storage

This almond milk keeps in the refrigerator for about 5 days in a sealed container. It will separate as it sits since it has no stabilizers or emulsifiers, so a good shake before each use brings it back together. It doesn't freeze particularly well, since the texture changes once thawed, so plan to make only what you'll use within the week.

How to Serve

Enjoy this almond milk cold over cereal, stirred into coffee or tea, or blended into smoothies.

Recipe

Glass of homemade almond milk

Homemade Almond Milk

5 from 4 votes
Rich, naturally sweet almond milk made from just soaked almonds, dates, and water - more nutritious than boxed nondairy milk and ready in minutes.
Print Pin Save Saved!
Prep Time: 15 minutes minutes
Total Time: 15 minutes minutes
Servings: 2
Prevent your screen from going dark

Ingredients

  • 1 ½ cups soaked almonds see note
  • 2 ½ cups water divided
  • 3 pitted medjool dates soaked
  • ½ teaspoon vanilla extract optional

Instructions

  • Place 1 ½ cups of the water and the almonds, dates, and optional vanilla in a blender. Blend on high speed until very smooth. Add the remaining 1 cup of water and blend until smooth.
  • Place a fine-mesh strainer over a medium bowl and pour the almond mixture through it. Using a rubber spatula, stir and press the pulp caught in the strainer to extract as much milk as possible. Alternatively, use a nut milk bag to strain.
  • Discard the pulp left in the strainer, or save it for another purpose.
  • Transfer the almond milk to a sealed container and refrigerate. It will keep for about 5 days and will separate as it sits, so shake well before using.

Notes

To arrive at 1 ½ cups soaked almonds: put 1 cup raw almonds in a jar, cover with cool water, and let soak for 8 to 12 hours at room temperature. Drain well before using.
Vegan-ize any recipe!Grab our free vegan cheat sheet, packed with my favorite easy substitutions to make any recipe vegan.

Maple Glazed Pineapple

February 6, 2011 by Nicole @ VegKitchen 4 Comments

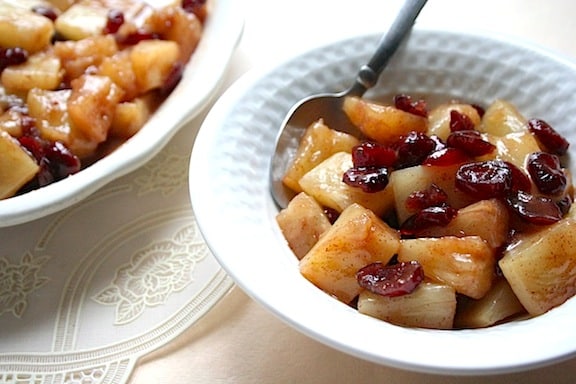
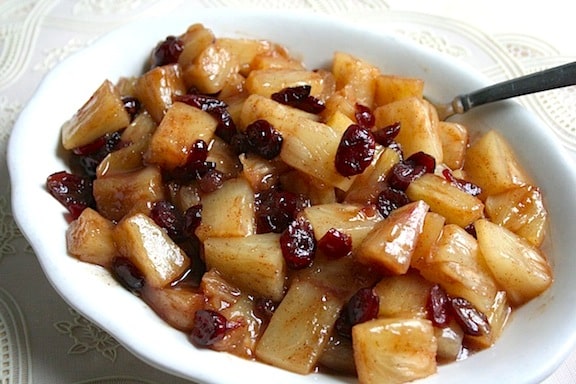
Maple Glazed Pineapple recipe

This Maple Glazed Pineapple will really sweeten up your summer. Serve it up for dessert or as a side for your next meal. The flavor of maple syrup marries well with pineapple, especially glazed right into the surface. If you like pineapple, you're sure to enjoy this nearly instant dessert! It's particularly appealing when made with canned organic pineapple mini-rings, and it comes together in under 10 minutes with just a handful of ingredients.

Maple glazed pineapple in a skillet

Key Ingredients & Substitutions

  • Fresh pineapple. Canned pineapple chunks or slices (drained) work just as well and make this even quicker to throw together.
  • Maple syrup. The glaze's backbone — agave syrup works well as a substitute, or melt some sugar in the pan for a slightly different caramelized flavor.
  • Vegan buttery spread. Earth Balance or a similar plant-based butter carries the glaze and helps it coat the pineapple evenly.
  • Cinnamon. A warm background note that plays beautifully against the sweet, caramelized pineapple.
  • Dried fruit. Cranberries, cherries, blueberries, or raisins all add little bursts of chewy sweetness stirred in at the end.

Variations

  • Add a splash of rum. A tablespoon of dark rum added along with the maple syrup gives this a grown-up, tropical twist.
  • Add nuts. Toasted chopped pecans or macadamia nuts sprinkled on top add crunch and a nice contrast to the soft, glazed fruit.
  • Make it spicier. A pinch of ground ginger or a small pinch of cayenne alongside the cinnamon adds unexpected warmth.
  • Grill it instead. Brush pineapple rings with the maple mixture and grill for a few minutes per side for a smoky variation.

Tips for the Best Maple Glazed Pineapple

  • Drain the pineapple well. Excess liquid will thin out the glaze and keep it from properly coating the fruit — save the drained juice for smoothies or popsicles.
  • Don't rush the glazing. Letting the pineapple cook undisturbed for a minute or two at a time helps it caramelize rather than just steam in the glaze.
  • Use any shape or size of pineapple you like. Just make sure to get all the sides coated with maple syrup before it goes into the pan — pineapple rings and cubes both work beautifully.
  • Let it cool slightly before serving. The glaze thickens a bit as it cools, giving it a stickier, more caramel-like coating.

Make Ahead & Storage

This keeps well in a sealed container in the refrigerator for up to 3 days. Reheat gently in a skillet over low heat, or serve straight from the fridge for a cool, refreshing treat.

How to Serve

Pair this tasty treat with some vanilla ice cream or a warm and gooey chocolate chip cookie. If you're serving it as a side dish, these pineapples pair really well with green beans and salads. Top each serving with vanilla coconut yogurt, granola, and/or toasted chopped nuts if you like.

Maple Glazed Pineapple FAQs

Can I use a sweetener other than maple syrup?

You can use any kind of sweetener that you prefer! Agave syrup works well, and you can also melt some sugar in the pan and use that.

Does it matter what shape the pineapple is in?

You can use any shape and size of pineapple that you would like! Just make sure to get all the sides coated with maple syrup before you put the pineapple in the pan to glaze. I love using pineapple rings, but cubes are also nice.

Recipe

Maple Glazed Pineapple recipe

Maple Glazed Pineapple

4.67 from 3 votes
This Maple Glazed Pineapple will really sweeten up your summer. Serve it up for dessert or as a side for your next meal.
Print Pin Save Saved!
Servings: 4
Prevent your screen from going dark

Ingredients

  • 1 tablespoon Earth Balance or other vegan buttery spread
  • ¼ cup maple syrup
  • ¼ teaspoon cinnamon or to taste
  • 3–3 ½ cups diced fresh pineapple or two 15oz cans pineapple chunks or slices, drained
  • ¼ cup dried fruit cranberries, cherries, blueberries, raisins, etc.
  • optional toppings vanilla coconut yogurt, granola, and/or toasted chopped nuts

Instructions

  • Heat the Earth Balance in a medium skillet until melted, then stir in the maple syrup and cinnamon.
  • Drain the pineapple well (save the juice for another recipe—smoothies, popsicles, etc.) and add to the skillet.
  • Cook over medium-high heat, stirring often, until the pineapple is nicely glazed and golden, 6 to 8 minutes.
  • Stir in the dried fruit of your choice and remove from the heat. Transfer the mixture to a serving dish. Allow to cool.
  • Serve fruit mixture warm or at room temperature. Top each serving with any or all of the optional toppings as desired.

Nutrition (Estimate per Serving)

Calories: 1281kcalCarbohydrates: 324gProtein: 10gFat: 6gSaturated Fat: 1gPolyunsaturated Fat: 1gMonounsaturated Fat: 3gSodium: 22mgPotassium: 2520mgFiber: 26gSugar: 296gVitamin A: 991IUVitamin C: 186mgCalcium: 344mgIron: 6mg
Vegan-ize any recipe!Grab our free vegan cheat sheet, packed with my favorite easy substitutions to make any recipe vegan.

Photos by Rachael Braun.

How to Cook Beets (or use them raw)

March 29, 2010 by Nicole @ VegKitchen 75 Comments

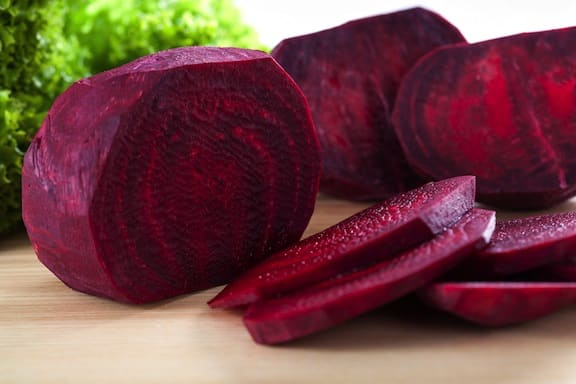
Fresh sliced beets

Beets inspire strong opinions—you either love them or you don't. If you're in the "love them" camp (or want to be), here's everything you need to know about how to cook beets, plus how to use them raw.

Beet Varieties

Beyond the common red beet, look for golden beets, which are sweeter and less messy. Chioggia beets are an Italian heirloom variety with red-and-white stripes, as pretty as they are sweet. Formanova beets have a long, cylindrical shape that's great for uniform slices. Look for unusual varieties at farmers markets, or grow your own.

If your beets come with the greens attached, save them—they cook up much like chard.

How to Cook Beets in the Microwave

This is the fastest way to cook beets. Rinse the beets and trim the stalks to about an inch. Place them in a deep microwave-safe container with about a half-inch of water in the bottom. Cover tightly and microwave for 2 to 4 minutes per beet (2 minutes for small beets, 4 for medium-large). Times vary by microwave, so start with less time and check for doneness.

Don't add too much water or it will boil over. If the beets aren't done, turn them over and microwave for another minute per beet. They're done when a knife slides in easily—try not to overcook them.

How to Cook Beets on the Stovetop

Stick with small or medium beets for stovetop cooking, since larger ones take forever. Rinse the beets and trim the stalks to about an inch. Combine in a large saucepan with water to cover, bring to a boil, then simmer until just tender. Timing depends on size, so start checking around 20 minutes—but don't poke too many test holes, or they'll bleed everywhere. Drain when done.

However you cook them, plunge the beets into a bowl of ice water once tender to stop the cooking. Once cool enough to handle, peel over the trash or compost bin, then slice or dice as needed. A sheet of wax paper on your cutting board will keep it from staining.

How to Roast Beets

Roasted beets are delicious, but the prep is messier since it's best to peel and slice them raw. If you partially microwave or boil them first (and let them cool), they'll be easier to peel and chop, and roasting time will be shorter.

Either way, peel over the trash or compost bin and slice on a wax-paper-lined cutting board. Place the sliced beets in a foil-lined baking dish, drizzle with olive oil, and roast at 400 to 425°F for 20 to 30 minutes, until tender, stirring once or twice. Beets roast beautifully alongside other root vegetables like carrots and sweet potatoes.

How to Use Beets Raw

Peel and cut into small pieces or grate them into salads. Or peel and chunk them for the juicer or a high-powered blender for smoothies.

Simple Ways to Serve Beets

  • In late summer, when beets are at their most flavorful, serve them plain—sliced on a plate or tossed into a salad.
  • Dress warm sliced beets with a little lemon juice and agave nectar.
  • Grate raw beets into salads or combine with other grated roots, as in Beet and Red Cabbage Slaw.

More Ways to Cook Beets

For the full collection, see Beet Recipes: Easy, Vegan, and Delicious. A few favorites to start with:

  • Vegan Beet Burgers
  • Orange-Glazed Beets
  • Raw or Nearly Raw Cold Beet Borscht
  • Mixed Greens with Beets and Walnuts
  • Hot Beet and Potato Borscht
  • Beet and Red Cabbage Slaw
  • Beet, Cucumber, and Orange Salad
  • Roasted Beet Salad with Chili-Lime Vinaigrette
  • Grated Beet and Carrot Salad
  • Acai (with Beet) Smoothie
  • Russian Beet and Potato Salad
  • See more of VegKitchen's Seasonal Produce Guides.
  • For more healthy lifestyle features, explore VegKitchen's Healthy Vegan Kitchen page.
  • « Previous Page
  • 1
  • 2

Welcome!

Hi, I'm Nicole. I'm the creator behind VegKitchen, and the author of the popular cookbook, Weeknight One Pot Vegan Cooking.

About Me
vegan substitution chart

Featured Recipes

  • vegan lentil soup
    Sweet Potato Lentil Soup (Vegan & Vegetarian)
  • vegan hummingbird cake
    Vegan Hummingbird Cake
  • vegan jalapeno poppers
    Vegan Jalapeno Poppers
  • Sticky Sesame Cauliflower
  • vegan irish stew
    Old-Fashioned Vegan Stew
  • vegan birthday cake
    Vegan Funfetti Cake

Footer

  • Shop Cookbooks
  • Free Vegan Cheat Sheet
  • About Us
  • Work with Me
  • Contact
  • Privacy Policy
  • Terms of Use

As an Amazon Associate I earn from qualifying purchases.

Copyright © 2026 VegKitchen.com

Rate This Recipe

Your vote:


A rating is required
A name is required
An email is required