
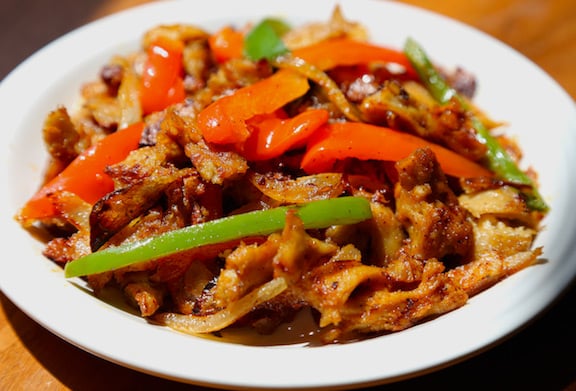
I had always wanted a luscious, reliable (and of course, easy) jerk seitan recipe, with lots of bell peppers and onions, but all the recipes I'd found rely on lengthy lists of spices, Scotch Bonnet peppers, and substantial time for marinating the seitan. After a couple of attempts to follow authentic-style recipes, with so-so results, I decided to throw authenticity to the wind, and take the easy route. This recipe may not be the genuine article, but its bold flavors never disappoint. Photos by Evan Atlas. [Read more...]
Search Results for: apple
Sautéed Red Cabbage
This wine-scented Sautéed Red Cabbage is a cheering winter recipe and a simple side dish for everyday and holiday meals. You can also make this recipe without the alcohol.
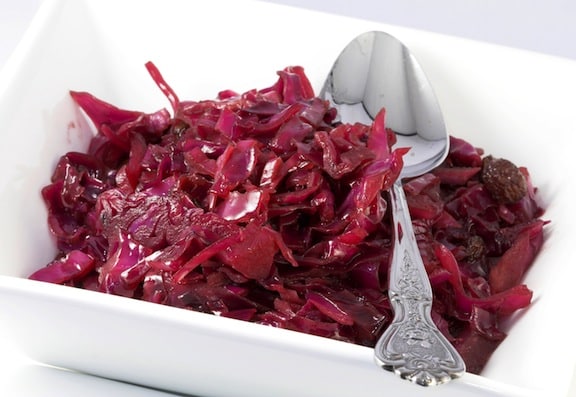
Red cabbage is a traditional dish in many cultures. It's simple, yet tastes absolutely delicious! It's a dish that's perfect for winter holidays and goes great as a side dish to most mains.
How to Make Sautéed Red Cabbage
- Heat oil in a saucepan and sauté onion until golden.
- Add cabbage, wine, and vinegar; sauté covered until tender-crisp.
- Stir in maple syrup and sauté a bit longer.
- Season with salt and pepper. Keep warm until serving.
Full directions for how to make Sautéed Red Cabbage are in the printable recipe card at the bottom of the post.
Sautéed Red Cabbage FAQs
Do I have to use wine?
You don't have to use wine for this recipe. Use pomegranate, cranberry, or grape juice in its place for an easy swap. You can also replace the red wine in the recipe with red wine vinegar, but you may want to dilute it a bit with water if the flavor is too acidic.
How long can I store leftover red cabbage?
You can store your leftover red cabbage for up to 1 week. Just make sure to keep it in an airtight container in the fridge until you are ready to eat the cabbage again.
Recipe
Sautéed Red Cabbage
This wine-scented Sautéed Red Cabbage is a cheering winter recipe and a simple side dish for everyday and holiday meals.
Print
Pin
Save
Servings:
Ingredients
- 2 tablespoon olive oil
- 1 large red onion quartered and sliced
- 6 cups red cabbage thinly shredded
- ¼ cup dry red wine
- 4 tablespoon apple cider vinegar to taste
- 3 tablespoon maple syrup or agave nectar
- salt and freshly ground pepper to taste
Instructions
- Heat the oil in a large skillet or 3-quart saucepan. Add the onion and sauté until golden.
- Add the cabbage, wine, and vinegar. Cover and sauté until tender-crisp, about 12 minutes, lifting the lid to stir occasionally.
- Stir in the maple syrup and sauté over very low heat, stirring occasionally, another 8 to 10 minutes.
- Season with salt and pepper, then transfer to a serving container. Cover and keep warm until serving.
Nutrition (Estimate per Serving)
Calories: 85kcalCarbohydrates: 12gProtein: 1gFat: 4gSaturated Fat: 1gPolyunsaturated Fat: 1gMonounsaturated Fat: 3gSodium: 20mgPotassium: 205mgFiber: 2gSugar: 8gVitamin A: 745IUVitamin C: 39mgCalcium: 42mgIron: 1mg
Vegan-ize any recipe!Grab our free vegan cheat sheet, packed with my favorite easy substitutions to make any recipe vegan.
Fingerling Potato Fries
These Fingerling Potato Fries are quick to make and super versatile. Once you make your own homemade fries, you'll never look back!
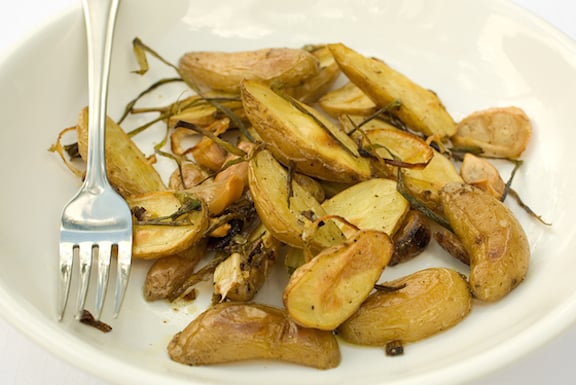
Here's a quick and clever way to make potato fries without a lot of peeling and cutting. Fingerling potatoes, if you are not familiar with them, are small potatoes with a long, narrow shape-hence their name. They come in several varieties; I like to use organic golden fingerlings like Russian Banana. These fries are ready, from start to finish, in about 20 minutes.
These fries are great served alonside almost anything! Serve them alongside your favorite vegan burgers, some vegan nuggets, or even a nice salad.
How to Make Fingerling Potato Fries
- Clean potatoes and cut into fries.
- Simmer potato fries in water in a pan until soft.
- Drain water from skillet.
- Drizzle oil into the skillet.
- Cook potatoes on all sides until golden brown.
- Stir in seasonings.
Full directions for how to make Fingerling Potato Fries are in the printable recipe card below.
Fingerling Potato Fries FAQs
Can you change the seasoning for these fries?
You can easily change the seasonings for your homemade fries. Just add in whatever flavor of spices you want at the end of cooking. Try some paprika, Italian seasoning mix, or even rach dressing powder!
How long do these fries last?
You can store your leftover fries in the fridge for up to 1 week. However, these fries taste best when they are fresh. The longer you store your fries, the less crisp they will be.
Here are more easy, tasty potato recipes.
Recipe
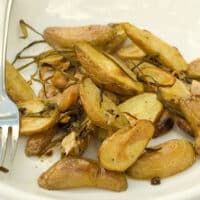
Fingerling Potato Fries
These Fingerling Potato Fries are quick to make and super versatile. Once you make your own homemade fries, you'll never look back!
Print
Pin
Save
Servings:
Ingredients
- 1 ½ lbs fingerling potatoes
- 2 tablespoon safflower oil or other high heat oil
- scallions thinly sliced or cut into long ribbons, optional
- salt to taste
- paprika to taste (see note)
Instructions
- Scrub the potatoes well. No need to peel them, but do peel away any overly dark or knobby spots, of which there should be few.
- Cut each potato in half lengthwise, which results in a short, chunky fry shape.
- Place the cut potatoes in a nonstick skillet with ½ cup water. Bring to a simmer, then lower the heat and cover. Simmer steadily for 5-8 minutes or until the potatoes can be pierced with a knife but are still quite firm, stirring occasionally.
- Drain any excess water from the skillet.
- Set the skillet back on the heat and drizzle in the olive oil.
- Turn the heat up to medium-high and cook the potatoes, stirring frequently, until touched with golden brown on most sides, about 5-8 minutes.
- Stir in the optional scallions. Remove from the heat and season with salt and paprika.
Notes
If you'd like a spicier flavor, try Spanish paprika, which has a smoky and more intense flavor than sweet paprika.
Nutrition (Estimate per Serving)
Calories: 193kcalCarbohydrates: 30gProtein: 3gFat: 7gSaturated Fat: 1gPolyunsaturated Fat: 1gMonounsaturated Fat: 5gTrans Fat: 1gSodium: 10mgPotassium: 716mgFiber: 4gSugar: 1gVitamin A: 3IUVitamin C: 34mgCalcium: 20mgIron: 1mg
Vegan-ize any recipe!Grab our free vegan cheat sheet, packed with my favorite easy substitutions to make any recipe vegan.
Vegan Spicy Pumpkin and Peanut Soup
This hearty soup is packed with flavor from sugar pumpkin, fresh veggies, and protein-packed beans. It's delicious, warm, comforting, and perfect for Fall!
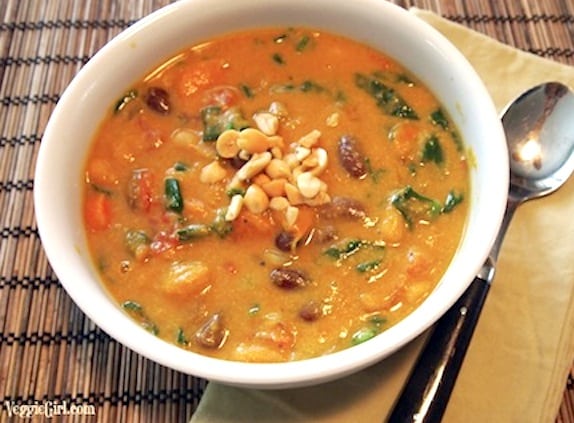
Recipe and photos were contributed by Dianne Wenz of VeggieGirl.
This pumpkin packed soup can be served as a starter for festive occasions like Thanksgiving. But it's also filling enough to be a one-pot dinner all on its own!
This pumpkin and peanut soup is:
- Hearty & filling.
- Totally delicious.
- Easy to make in just 1 hour.
- Vegan & Vegetarian.
It's a perfect meatless meal for those chilly fall and winter nights!
Tip: If you don't have sharp enough knives to cut a thick-skinned pumpkin or squash, wrap the whole thing in foil, set in a casserole dish, and bake 375º F. for 30 to 45 minutes, or until you can pierce through the skin, with some resistance. When cool enough to handle, it will cut more easily!
You can also see a quick how-to in our video on How to Cut Butternut Squash Easily, which applies to other large squashes as well.
And if you love this recipe, be sure to check out these other vegan ideas:
Recipe

Vegan Spicy Pumpkin and Peanut Soup
This hearty soup is packed with flavor from sugar pumpkin, fresh veggies, and protein-packed beans. It's delicious, warm, comforting, and perfect for Fall!
Print
Pin
Save
Servings:
Ingredients
- 4 cups sugar pumpkin or substitute kabocha squash or butternut squash; peeled, seeds removed, and diced
- 2½ cups vegetable broth
- 1 onion large, diced
- 1 tablespoon ginger fresh grated
- 2 carrots sliced
- 14 ounces canned diced tomatoes
- 3 cups canned kidney beans drained and rinsed, can use a mix of white and red if desired
- ⅔ cup natural creamy peanut butter
- 2 teaspoons curry powder
- 1 teaspoon chili powder adjust up or down for preferred spice level
- ½ teaspoon sea salt
- 2 ½ cups plain unsweetened nondairy milk
- 4 cups fresh spinach chopped
- ¼ cup roasted peanuts chopped
Instructions
- Preheat oven to 400º F. Line a baking sheet with parchment paper and roast the pumpkin for 20 minutes, until fork tender. Let cool slightly.
- While the pumpkin is roasting, combine the broth, onion, ginger, carrots, tomatoes, and kidney beans in a large pot over medium heat and cook for about 30 minutes, until the vegetables have softened.
- Add the curry powder, chili powder, and peanut butter and mix to incorporate.
- Place the roasted pumpkin and nondairy milk in a food processor or blender and process until smooth, stopping to scrape down the sides if necessary.
- Add the pureed pumpkin to the pot with the vegetables and stir to combine. Stir in the salt. Cook for several more minutes, until heated throughout. Add more broth or non-dairy milk if the consistency seems too thick.
- Stir in the spinach and cook until it's just wilted. Transfer to bowls and top with chopped peanuts
Nutrition (Estimate per Serving)
Calories: 357kcalCarbohydrates: 35gProtein: 16gFat: 20gSaturated Fat: 4gPolyunsaturated Fat: 6gMonounsaturated Fat: 9gSodium: 1236mgPotassium: 927mgFiber: 10gSugar: 11gVitamin A: 12435IUVitamin C: 17mgCalcium: 242mgIron: 4mg
Vegan-ize any recipe!Grab our free vegan cheat sheet, packed with my favorite easy substitutions to make any recipe vegan.
Tomato-Barley Vegetable Soup
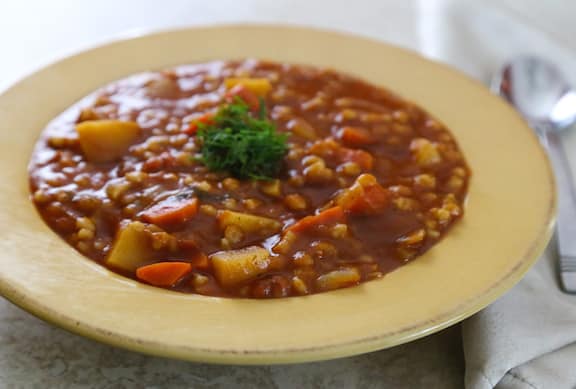
Here's a hearty, full-flavored tomato-barley soup featuring vegetables readily available in the winter. A one-dish meal, serve this with a simple salad. Try one with mixed greens, apples or oranges, and toasted walnuts. For added protein, serve with hummus and fresh whole-grain bread or pita. Photos by Evan Atlas.
Bulgur Salad with Fruits and Nuts
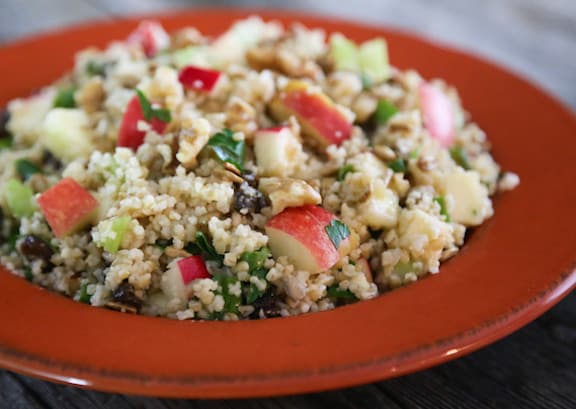
An invigorating melange of textures and flavors, this bulgur salad is also quite adaptable. Add various other fruits or veggies to it; substitute other dried or fresh fruits; or use another grain altogether, like couscous or quinoa. Photos by Evan Atlas. [Read more...]
Vegan Pumpkin Bread
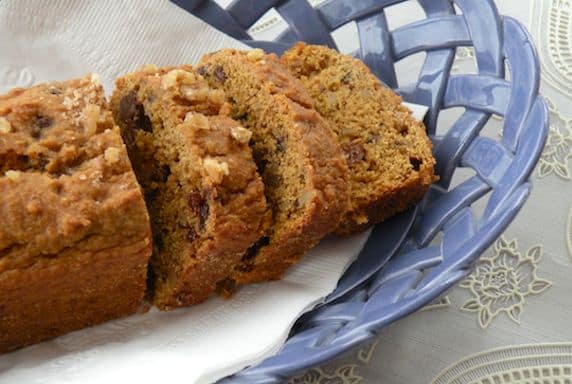
This Vegan Pumpkin Bread is perfect for Fall! Packed with delicious pumpkin spice flavor, it makes a tasty snack or a fantastic holiday gift.
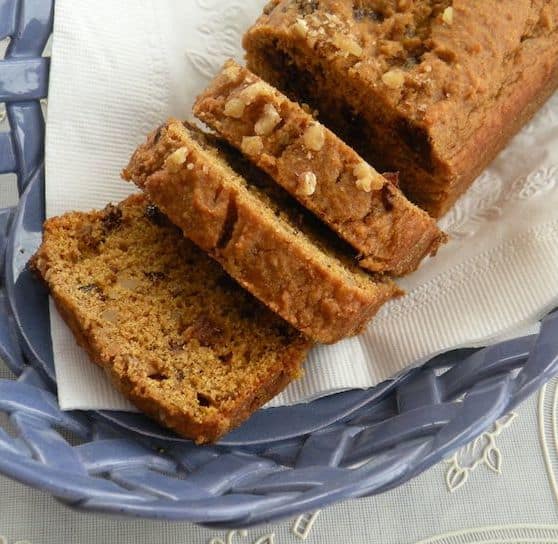
This vegan pumpkin bread is one of my all time favorite Fall treats. It's so simple to make, totally delicious, and I usually have all the ingredients on hand to start with.
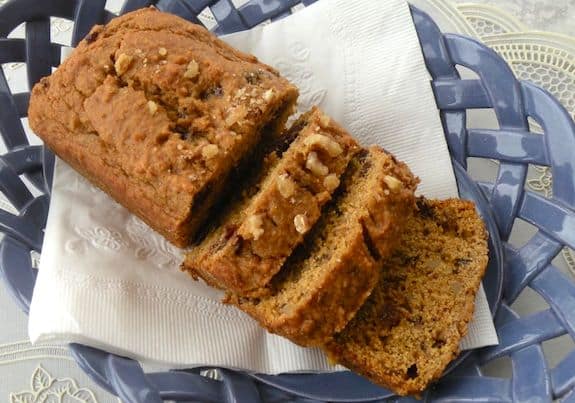
I typically bake this recipe in three mini loaf pans (like these), so I can keep one for my family and gift the others to friends. They make a nice gift to bring when visiting friends and relatives over the winter holidays.
These pumpkin breads are also a great family-friendly treat, full of nutritious ingredients, to make and enjoy at home. A mug of hot cocoa is the very best companion for this pumpkin bread, but tea will work too.
If you love this vegan pumpkin bread, be sure to check out these other tasty ideas:
Recipe

Vegan Pumpkin Bread (Mini Loaves!)
This Vegan Pumpkin Bread is perfect for Fall! Packed with delicious pumpkin spice flavor, it makes a tasty snack or a fantastic holiday gift.
Print
Pin
Save
Servings: slices
Equipment
Ingredients
- 1 ½ cups whole wheat pastry flour
- ½ cup sugar
- 2 teaspoon ground ginger
- 2 teaspoon ground cinnamon
- 2 teaspoon baking powder
- ½ teaspoon baking soda
- 1 cup pumpkin puree fresh or canned
- 2 tablespoon maple syrup
- 2 tablespoon safflower oil
- 2 tablespoon orange juice or apple juice, more or less as needed
- ⅔ cup raisins or currants
- ⅓ cup finely chopped walnuts or pecans
- ½ cup vegan chocolate chips optional
Instructions
- Preheat the oven to 350°F.
- Combine the first 6 (dry) ingredients in a mixing bowl and stir together.
- In another bowl, combine the pumpkin puree, syrup, and oil and whisk together until smooth. Make a well in the center of the dry ingredients and pour in the wet mixture. Stir together until completely mixed. If the batter is too stiff to mix, add a very small amount of juice to loosen it a bit, but let it should remain thick.
- Stir in the raisins or currants, walnuts or pecans, and optional chocolate chips.
- Divide the batter between 3 lightly oiled mini loaf pans (mine are 6 by 3 inches).
- Bake for 25 to 30 minutes, or until a knife inserted into the center of one tests clean.
Nutrition (Estimate per Serving)
Calories: 69kcalCarbohydrates: 12gProtein: 1gFat: 2gSaturated Fat: 1gPolyunsaturated Fat: 1gMonounsaturated Fat: 1gTrans Fat: 0.001gSodium: 40mgPotassium: 66mgFiber: 1gSugar: 5gVitamin A: 1062IUVitamin C: 1mgCalcium: 24mgIron: 1mg
Vegan-ize any recipe!Grab our free vegan cheat sheet, packed with my favorite easy substitutions to make any recipe vegan.
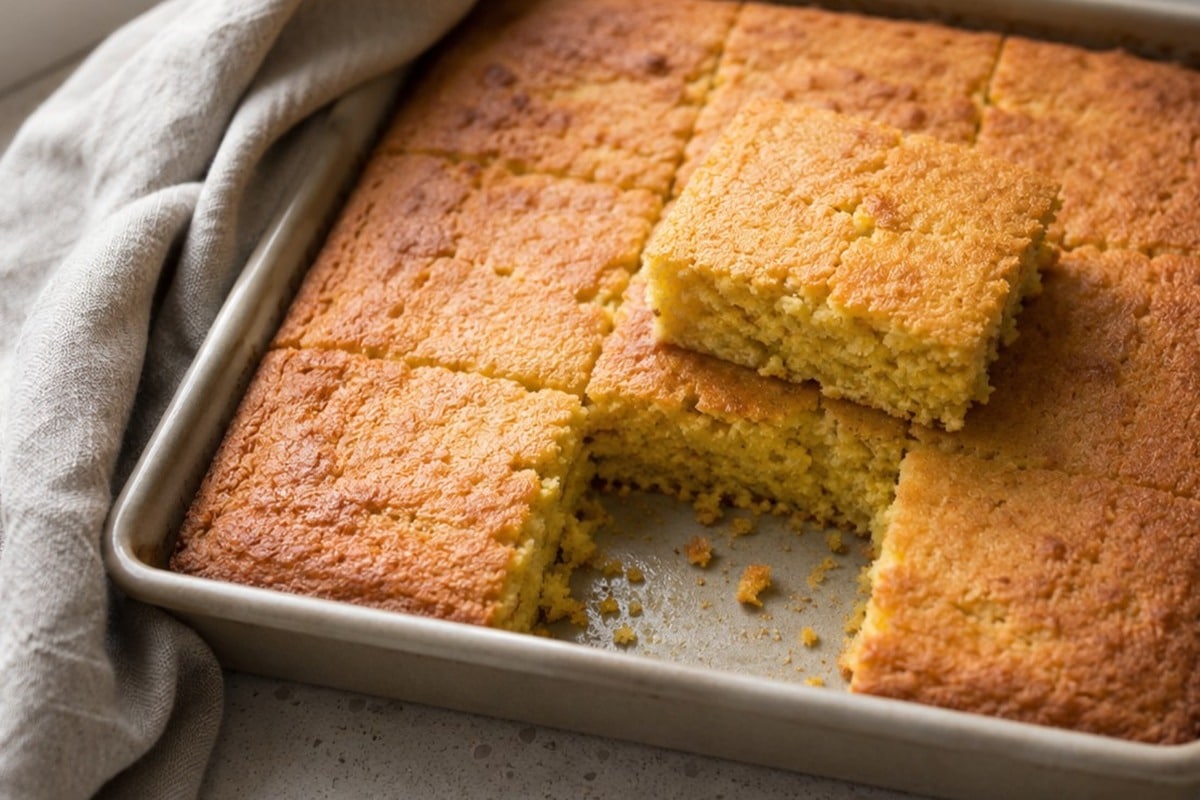
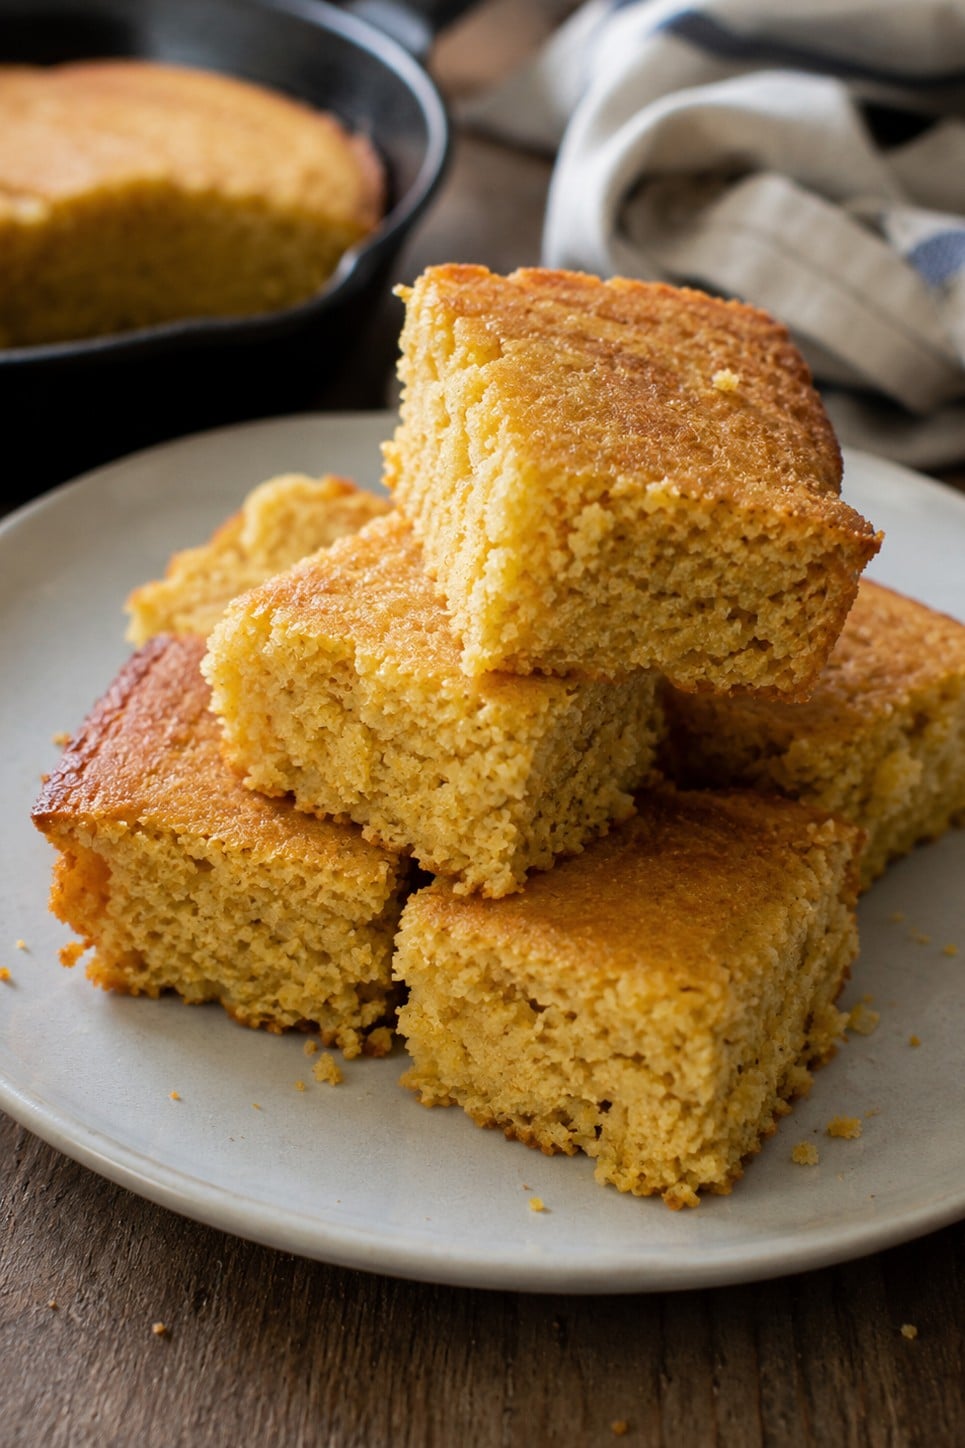
Vegan Green Chile Cornbread
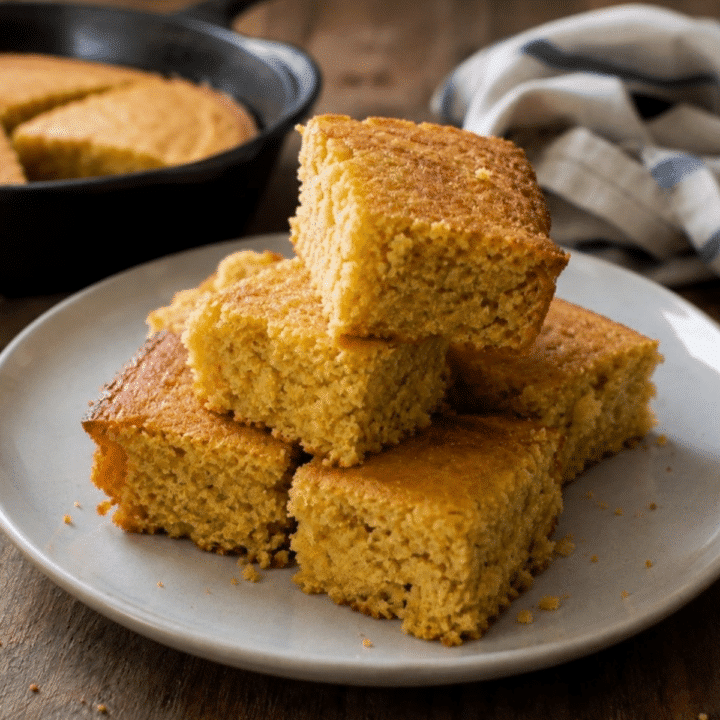
This moist vegan cornbread gets a spicy kick from green chiles and little pops of sweetness from whole corn kernels — it’s the perfect savory side for a bowl of chili, a pot of beans, or any hearty stew on your table this season.
Key Ingredients & Substitutions
- Cornmeal. The backbone of any good cornbread — it’s what gives this recipe its color, crunch, and true corn flavor. Stone-ground cornmeal has more texture than the finely milled kind, but standard yellow cornmeal works fine too if that’s what’s in your pantry.
- Whole wheat pastry flour or spelt flour. Both are lighter and less dense than regular whole wheat flour, which keeps this cornbread tender instead of gummy. Whole wheat pastry flour is the easier find; spelt flour gives a slightly nuttier flavor if you have it on hand.
- Baking soda and baking powder. This recipe leans on both leaveners together, since baking soda alone doesn’t give a batter this thick and moist enough lift on its own.
- Plain coconut yogurt or applesauce. Either one adds moisture and a little richness without any dairy. Coconut yogurt keeps the flavor closer to savory; applesauce nudges it slightly sweeter.
- Olive oil. Keeps the crumb tender and moist. Melted vegan butter is a good substitute if you want a richer, more buttery flavor.
- Unsweetened nondairy milk. Thins the batter to the right pourable-but-thick consistency. Almond, soy, or oat milk all work equally well here.
- Fresh hot chile peppers or canned diced green chiles. This is where the recipe gets its name and its kick. Fresh jalapeños or serranos bring real heat; a can of mild diced green chiles keeps things gentler if you’re serving a crowd, or kids.
- Frozen corn kernels. Adds little pops of sweetness and texture throughout the bread. Thaw them first so they don’t add extra moisture to the batter.
- Vegan cheddar cheese (optional). Melts into little pockets as it bakes, adding a savory, cheesy richness. Leave it out if you’d rather keep things simple — the cornbread is still good without it.
Helpful Tips
Don’t overmix the batter. Stir just until the dry and wet ingredients come together. Overmixing develops the gluten in the flour and can leave you with a tough, dense cornbread instead of a tender one.
Taste-test your chiles before you commit to the amount. Fresh hot peppers vary a lot in heat from one to the next. If you’re not sure how spicy yours are, start with the smaller amount, and add more next time if you want it hotter.
Use a well-oiled pan — or better yet, cast iron. A hot, oiled cast iron skillet gives cornbread a crisp, golden crust that a regular baking pan can’t quite match. If you only have a metal or glass baking pan, grease it generously so the edges release cleanly.
Check doneness with a toothpick, not just the clock. Ovens vary, and this batter is thick. Insert a toothpick or thin knife into the center; it should come out clean or with just a few moist crumbs clinging to it, not wet batter.
Let it cool for a few minutes before cutting. Slicing straight out of the oven can cause the squares to crumble. A five-minute rest firms up the crumb enough for clean cuts, while it’s still warm enough to serve.
Variations
- Smoky chipotle cornbread. Swap the fresh chiles for a minced chipotle pepper in adobo sauce for a deeper, smokier heat.
- Extra-cheesy double-corn cornbread. Stir in an extra ¼ cup of vegan cheddar and a handful of extra corn kernels for a heartier, more indulgent version.
- Herb and scallion cornbread. Add a couple tablespoons of chopped fresh cilantro and a sliced scallion or two along with the chiles for a brighter, herbier bite.
- Slightly sweet cornbread. Stir 2 tablespoons of maple syrup into the wet ingredients for a cornbread that leans a little sweeter, which pairs especially well with a smoky bowl of chili.
- Cornbread muffins. Divide the batter among a lightly oiled 12-cup muffin tin and bake for about 15 to 18 minutes, checking early since muffins bake faster than a full pan.
- Skillet cornbread. Bake the batter in a well-oiled, oven-safe cast iron skillet instead of a square pan for a rustic presentation and extra-crisp edges.
Serving Ideas
This cornbread was made for scooping up a bowl of something hearty. Serve warm squares alongside Sweet Potato Black Bean Chili or Smoky Lentil and Sweet Potato Chili — the slightly spicy bread and a smoky bowl of chili are a natural match. It’s just as good next to a bowl of Potato, Corn, and Green Chile Soup, which doubles down on that same chile flavor.
For a simple lunch or snack, split a warm square and top it with a little vegan butter and a drizzle of maple syrup, or serve it as part of a Southwestern-inspired spread with beans, rice, and a simple slaw.
Storing & Freezing
Store leftover cornbread in an airtight container at room temperature for a day, or in the refrigerator for up to 4 days — the corn, yogurt, and oil keep it more moist than a typical quick bread, so it holds up well.
This cornbread also freezes well. Wrap individual squares tightly in plastic wrap, then place them in a freezer bag or airtight container, and freeze for up to 3 months. Thaw at room temperature, or reheat wrapped in foil in a 300°F oven for 10 to 15 minutes, or in the microwave for 20 to 30 seconds.
More Vegan Bread and Side Dish Recipes
If you loved this recipe, here are a few more you might enjoy:
Recipe
Green Chile Cornbread
This moist vegan cornbread gets a kick of heat from green chiles and pops of sweetness from corn kernels — a perfect savory side for chili, beans, or any hearty stew.
Print
Pin
Save
Servings:
Ingredients
- 1 cup cornmeal preferably stone ground
- 1 cup whole wheat pastry flour or spelt flour
- 1 teaspoon baking soda
- ½ teaspoon baking powder
- 1 teaspoon salt
- 6- ounce container plain coconut yogurt or ¾ cup applesauce
- ¼ cup olive oil
- ⅓ cup unsweetened nondairy milk or more as needed
- 1 to 2 small fresh hot chile peppers seeded and minced, or one 4-ounce can chopped mild green chilies
- ½ cup frozen corn kernels thawed
- ¾ cup grated vegan cheddar cheese optional (but highly recommended!)
Instructions
- Preheat the oven to 400 degrees F.
- Combine the first 6 (dry) ingredients in a mixing bowl and stir together.
- Make a well in the center of the dry ingredients. Pour in the yogurt or applesauce, oil, and half of the rice milk. Stir until well combined, adding just a bit more nondairy milk if needed to make a smooth, slightly stiff batter, but don't let the batter be too wet.
- Stir in the chilies and corn kernels.
- Pour the mixture into an oiled 9-inch-square baking pan. Bake for 20 to 25 minutes, or until the top is golden and a knife inserted in the center tests clean.
- Let cool slightly; cut into 3 sections in one direction and 4 in the other to create 12 squares. Serve warm.
Nutrition (Estimate per Serving)
Calories: 166kcalCarbohydrates: 22gProtein: 3gFat: 7gSaturated Fat: 1gPolyunsaturated Fat: 1gMonounsaturated Fat: 4gCholesterol: 1mgSodium: 396mgPotassium: 63mgFiber: 3gSugar: 2gVitamin A: 18IUVitamin C: 1mgCalcium: 25mgIron: 1mg
Vegan-ize any recipe!Grab our free vegan cheat sheet, packed with my favorite easy substitutions to make any recipe vegan.
Vegan Boursin®-Style Spread
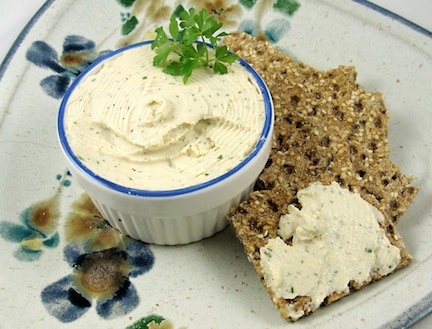
This creamy vegan cheese spread is absolutely addictive and delicious on your favorite crackers, rye crisp, or crusty bread. Recipe from World Vegan Feast* (©2011, Vegan Heritage Press) by Bryanna Clark Grogan.
Easy Vegan Chocolate Cake

This totally delectable, moist vegan chocolate cake is our extended family’s favorite for birthdays and other special occasions. It demands just minutes of hands-on time. An easy frosting made with chocolate chips and a hint of nut butter is the icing on the (vegan) cake! To make this a layer cake as shown above, see note following recipeAdapted from Vegan Express. [Read more...]
Cuban-Inspired Black Beans and Rice
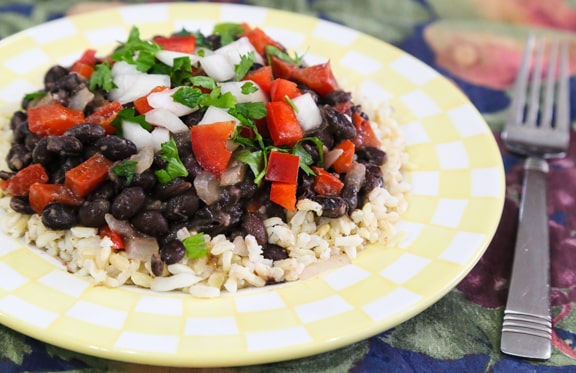
This Vegan Black Beans and Rice is loaded with Cuban-inspired flavors and packed with hearty plant-based protein and healthy brown rice. And it's easy to make in just 30 minutes!
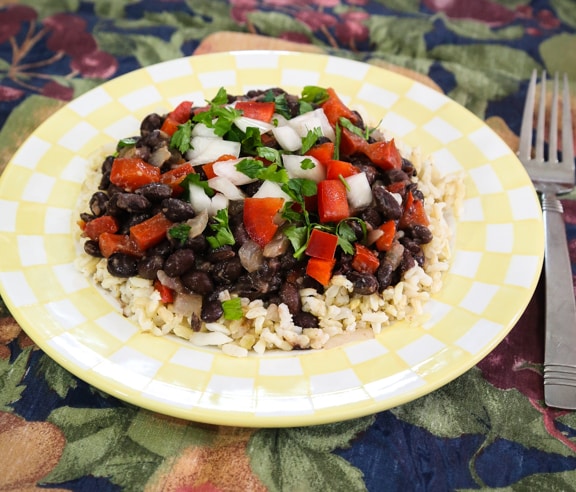
Growing up in Florida, you get a chance to experience a lot of Cuban (or Cuban inspired) foods, thanks to the large Cuban-American community.
And black beans and rice are one of the classics! (In fact, beans and rice are two of my favorite plant based ingredients.) This vegan-friendly version is loaded with healthy protein and lots of flavor.
Plus, it's so simple to make that you can throw it together for a weeknight dinner.
Tips & Tricks
I used canned black beans for this recipe, but you can also use dried beans if you prefer. You'll need to soak and cook approximately 1 ⅔ cups dried beans to make enough for the recipe.
The apple cider vinegar gives a nice flavor, but you can substitute white wine vinegar if that's what you have on hand.
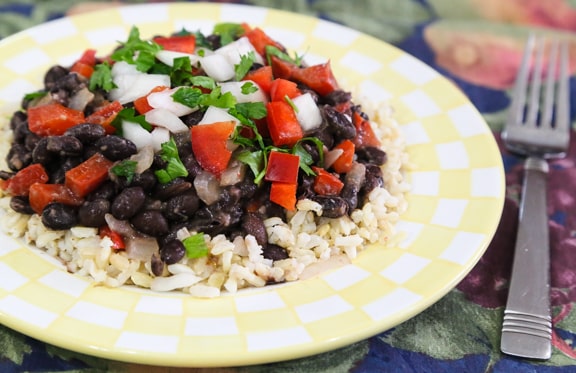
I served the black beans with brown rice, because I prefer to use whole grains when possible. But it would be equally delicious with white rice or even couscous.
More Tasty Vegan Recipes
If you love this recipe, be sure to check out these other delicious plant-based ideas:
- Cuban Plantain and Rice Bowls
- Jamaican Red Beans and Rice
- New Orleans Red Beans and Rice
- Spanish-Style Rice and Red Beans
Recipe
Cuban-Inspired Black Beans and Rice
This Vegan Black Beans and Rice is loaded with Cuban-inspired flavors and packed with hearty plant-based protein. And it's easy to make in just 30 minutes!
Print
Pin
Save
Servings: servings
Ingredients
- 1 onion large, finely chopped
- 1 bell pepper red or green, finely diced
- 2 tablespoon olive oil
- 3 cloves garlic minced
- 3 ½ cups black beans canned, drained and rinsed
- 2 tablespoon apple cider vinegar
- salt and pepper to taste
- 1 dash cayenne pepper or to taste
- ½ cup water
- cooked brown rice for serving
- 1 small onion finely chopped, for optional garnish
Instructions
- Heat 1 ½ tablespoons of the oil in a large skillet. Add the onion and sauté over medium-low heat until it is translucent. Add the bell pepper and garlic and continue to sauté until the onion is golden.
- Add the beans, vinegar, and seasonings (be generous with the black pepper) along with the water or cooking liquid. Simmer over very low heat, covered, for 10 minutes.
- With the back of a wooden spoon or a mashing implement, mash about ½ cup of the beans in the skillet, or enough to thicken the base. Make sure there is enough liquid to keep everything nice and moist but not soupy. Simmer for 5 minutes longer.
- Serve the black beans over the cooked rice, topping each serving with a sprinkling of the chopped raw onion, if desired.
Notes
Serves 6 as a side dish, or 3-4 as a main course.
Nutrition (Estimate per Serving)
Calories: 191kcalCarbohydrates: 27gProtein: 9gFat: 5gSaturated Fat: 1gPolyunsaturated Fat: 1gMonounsaturated Fat: 3gSodium: 4mgPotassium: 435mgFiber: 9gSugar: 2gVitamin A: 634IUVitamin C: 27mgCalcium: 36mgIron: 2mg
Vegan-ize any recipe!Grab our free vegan cheat sheet, packed with my favorite easy substitutions to make any recipe vegan.
Magic Vegan Muffins, with Variations
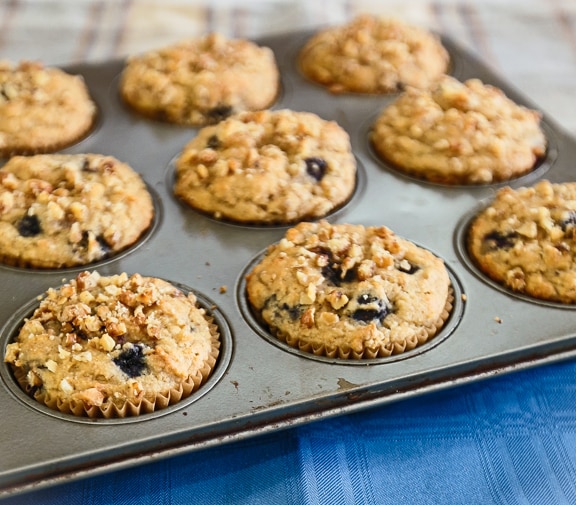
The magic in these vegan muffin recipes is that they use no eggs or dairy, but instead use applesauce as a binding and fat substitute. It's a great healthy baking technique, making the muffins amazingly moist while greatly reducing the need for added fat. Kids love muffins, and by using wholesome ingredients, they become a great substitute for sandwiches for school lunches, as well as serving as any time snacks. [Read more...]
Carrot Tomato Garden Veggie Tempeh Soup

This Carrot Tomato Garden Veggie Tempeh Soup is tasty and filling. The tempeh adds a nice crunch, and the soup tastes even better paired with a grilled cheese sandwich as well.

One of the easiest hot meals you can make is a great grilled cheese served with tomato soup. Try something new with your own homemade carrot tomato garden veggie tempeh soup. Not only does it have more than just tomatoes, but it's packed with tempeh protein.
How to Make Carrot Tomato Garden Veggie Tempeh Soup
- Heat oil in a large pot.
- Add onion and salt and cook until soft.
- Add broth, boil, then simmer for 30 minutes.
- Use a blender to puree soup, add lemon and tomato.
- In a saucepan, cook tempeh with oil and dill.
- Serve soup with tempeh and grilled cheese sandwiches.
Full directions for how to make Carrot Tomato Garden Veggie Tempeh Soup are in the printable recipe card below.
Carrot Tomato Garden Veggie Tempeh Soup FAQs
How long does this soup last?
This soup will last for up to one week in the fridge. You can also store it in the freezer for up to 3 months. If you choose to freeze it, I recommend doing so in single serving sizes. That way you can easily thaw the amount of soup you need at a time.
What are some grilled cheese recipes to sere with this soup?
- Vegan Grilled Cheese-5 Ways
- Drunken Grilled Cheese Sandwiches
- Pear and Sharp Cheddar Grilled Cheese Sandwich
- 21 Mind-Blowing Grilled Cheese Sandwiches
- Spinach, Roasted Garlic, and Butternut Squash Grilled Cheese Sandwiches
- Duxelles Grilled Cheese
- Maple Sage Apple and Cheddar Grilled Cheese Sandwiches
Here are more tempeh recipes.
Recipe

Carrot Tomato Garden Veggie Tempeh Soup
This Carrot Tomato Garden Veggie Tempeh Soup is tasty and filling. The tempeh adds a nice crunch and tastes great with a grilled cheese.
Print
Pin
Save
Ingredients
- ¼ cup extra virgin olive oil divided
- 1 large onion cut into medium dice
- ½ teaspoon salt
- 2 lbs carrots peeled and cut into ½-inch rounds
- 4 ½ cups vegetable broth
- ¼ cup tomato paste
- 1 teaspoon lemon juice
- 8 oz Organic Garden Veggie Tempeh cut into ½-inch cubes
- 1 tablespoon chopped dill
Instructions
- In a large pot, heat 2 tablespoons oil over medium heat.
- Add onion and salt; cook, stirring frequently, for 6-8 minutes or until onion is soft.
- Add carrots, cover and reduce heat to low. Cook, stirring frequently, about 5 minutes.
- Add broth and bring to a boil over high heat. Reduce heat and simmer, covered, for 30 minutes.
- In a blender, purée soup in batches until creamy. Add tomato paste and lemon juice and blend for a few seconds.
- In a skillet, heat 2 remaining tablespoons oil over medium-high heat. Add tempeh and cook for 3 minutes, stirring frequently. Add dill and cook for 30 seconds.
- Ladle soup into six bowls and top each bowl with tempeh. Serve with your favorite grilled cheese sandwiches-I like mine with Smart Bacon.
Nutrition (Estimate per Serving)
Calories: 1439kcalCarbohydrates: 145gProtein: 55gFat: 81gSaturated Fat: 13gPolyunsaturated Fat: 16gMonounsaturated Fat: 46gSodium: 6562mgPotassium: 4668mgFiber: 30gSugar: 65gVitamin A: 154808IUVitamin C: 78mgCalcium: 602mgIron: 11mg
Vegan-ize any recipe!Grab our free vegan cheat sheet, packed with my favorite easy substitutions to make any recipe vegan.
This recipe is from Lightlife, a company that creates delicious vegetarian and vegan products that even meat-eaters enjoy. Lightlife also contributes 5% of their profits to causes that work to protect children, the environment, and human rights. Visit Lightlife to find veggie goodness for you and the planet!
Sesame-Ginger Salad Dressing
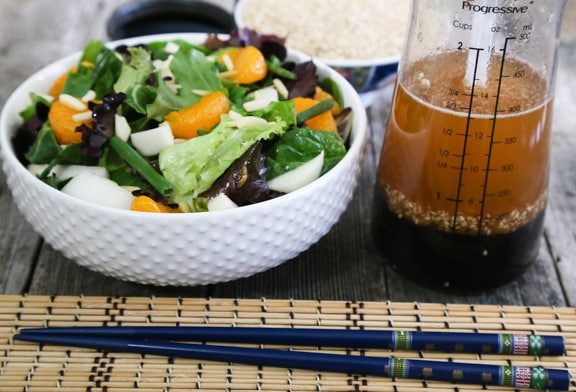
Savory and tangy, this sesame-ginger dressing is perfect for salads served with Asian-style meals. It's also good on wilted greens and on cold noodle dishes. Thanks to Progressive International for providing the salad dressing shaker shown in these photos by Evan Atlas. [Read more...]
Basic Vinaigrette
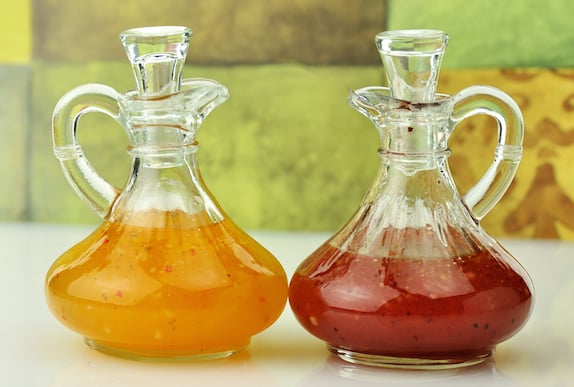
This basic vinaigrette dressing is a wonderful all-purpose dressing for salads, slaws, and marinating. Mix it up with your favorite flavored vinegars and fresh herbs for an endless combination of flavors.
Tips & Tricks
This basic salad dressing recipe is perfect for serving with green salads, grain and/or bean salads, pasta salads, lentil salads, corn salads and more.
You can also use it for marinating vegetables before roasting or grilling, or for marinating tofu that has been very well drained, blotted and diced to use as a feta cheese substitute.
Mix up the flavor by using your favorite flavored olive oils and vinegars. Some of my personal favorites and garlic olive oil and blood orange vinegar.
Increase the amount of vinegar if your prefer a more pungent and tangy taste.
Don't forget to check out these other delicious vegan salad dressing ideas while you are here.
Also try: our Garlicky Grainy Mustard Vinaigrette.
Recipe

Basic Vinaigrette Recipe
This basic vinaigrette dressing is a wonderful all-purpose dressing for salads, slaws, and marinating. Mix it up with your favorite flavored vinegars and fresh herbs for an endless combination of flavors.
Print
Pin
Save
Servings:
Ingredients
- ½ cup extra-virgin olive oil
- ¼ to /1/3 cup vinegar good quality - balsamic, apple cider, white or red wine
- 1 tablespoon Dijon mustard
- 1 tablespoon sugar or agave nectar
- 1 teaspoon Italian seasoning
Instructions
- Combine all ingredients in a tightly lidded bottle and shake thoroughly.
- Shake well before each use.
Nutrition (Estimate per Serving)
Calories: 128kcalCarbohydrates: 2gProtein: 1gFat: 14gSaturated Fat: 2gSodium: 22mgPotassium: 6mgFiber: 1gSugar: 2gVitamin A: 6IUVitamin C: 1mgCalcium: 6mgIron: 1mg
Vegan-ize any recipe!Grab our free vegan cheat sheet, packed with my favorite easy substitutions to make any recipe vegan.
Orange-Glazed Beets
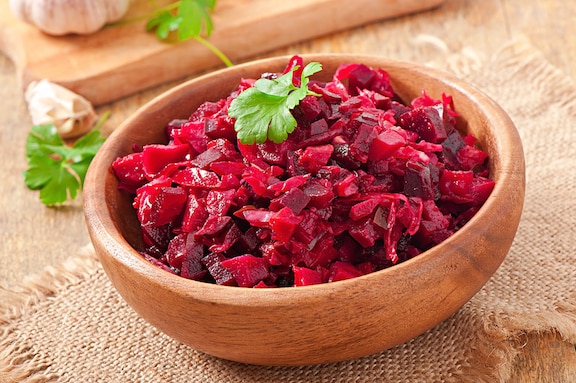
A citrus glaze is a great way to enhance the natural flavor of beets. This is a great way to use beets when they're plentiful at the farm market or from your home garden. They're great in the winter, too. Serve this simple preparation warm or at room temperature. [Read more...]
Vegan Cinco de Mayo Recipes
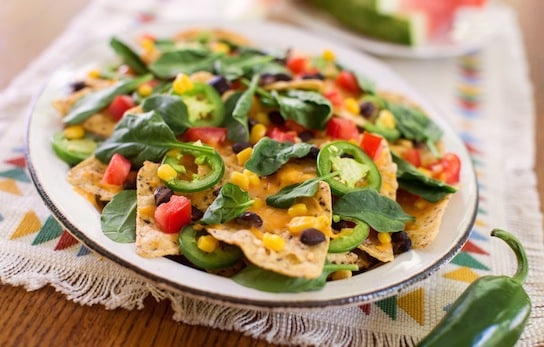
Cinco de Mayo has become a day to celebrate Mexican heritage and pride (contrary to popular belief, it isn’t Mexico’s independence day) —and a delicious way to celebrate is with easy vegan south-of-border and Southwestern-style dishes. VegKitchen has plenty of festive appetizers and main dishes to choose from! Shown above, Fully Loaded Vegan Nachos. [Read more...]
Vegan Appetizer Recipes
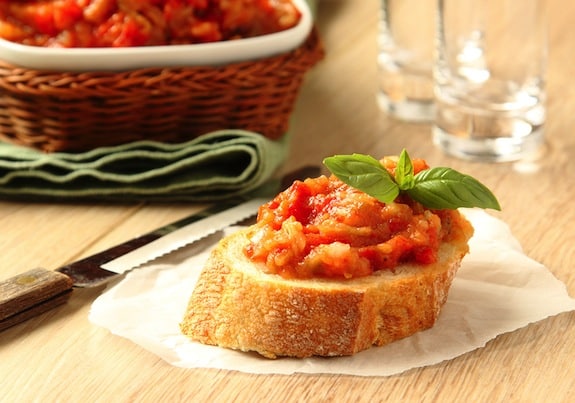
Not sure why, but vegan and vegetarian cookbooks rarely present many appetizer recipes to speak of, so hopefully you’ll find the wide array of choices here useful and appealing. A nice idea for entertaining (for the winter holidays or any casual occasion) is to offer a spread of hot and cold appetizers (instead of the usual sit-down dinner) with wine or cocktails, followed by a dessert buffet. If you need ideas for a vegan dessert buffet, we’ve got you covered there as well, of course, on the Vegan Dessert Recipes page. Shown above, Eggplant and Tomato Spread. [Read more...]
The Sexy Vegan Cookbook

Reviewed by Rachael Braun. Looking for easy, down-to-earth vegan recipes that are delicious and fun to make? Look no further then The Sexy Vegan Cookbook: Extraordinary Food from an Ordinary Dude* (New World Library, 2012) by Brian L. Patton. It is filled with 100 recipes that will please anyone’s palate, vegan or not. Photo above courtesy of VegNews.
This cookbook is entertaining and useful, with original names for all the recipes and tips, definitions and facts scattered throughout. And if you ever think you need a little extra help with a recipe, Patton has provided QR codes that you can scan with your phone to see a video of The Sexy Vegan himself demonstrating the recipe for you. [Read more...]
Sesame-Crispy Rice Cookies

If you like tahini and sesame seeds, this crunchy cookie is sure to please. It's one of those neat, not-too-sweet treats that's perfect for an evening snack or for the lunchbox. The recipe doubles easily for those occasions, such as holidays, when you need more or would like to share. This recipe makes 16 to 20 cookies, depending on how much you drop onto the baking sheet each time. For a larger batch, this doubles easily. Photos by Evan Atlas. [Read more...]
Creating a Plant-Based Pantry
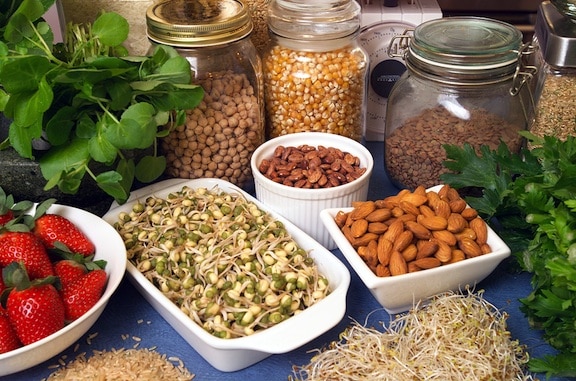
So many people have asked me how to set up a plant-based (vegan) pantry that I decided this subject merits a permanent place on VegKitchen. Whether you are a newcomer to a vegan/vegetarian diet, or someone who wants to have a greater variety of healthy ingredients at hand, this list can serve as your handy guideline. [Read more...]
Dilled Red Beans with Pickled Beets

This colorful, subtly sweet-sour red bean salad, embellished with the flavor of pickled beets, provides a nice contrast to mild pasta, potato, or grain dishes. It's a nice side dish to serve with grilled vegetables, too. Photos by Evan Atlas.
Pasta Salad with Broccoli, Tomatoes, and Red Beans

This pasta salad with broccoli, tomatoes, and red beans is an easy dish to make when summer tomatoes are at their absolute best. It's loaded with fresh herbs and just enough pasta to hold everything together, so an abundance of vegetables does most of the work. It's also a reliably sturdy vegan option for a potluck, since it holds up well at room temperature and only gets better as it sits.
What makes this salad especially satisfying is how much texture and color it packs into one bowl - tender pasta, bright green broccoli, juicy diced tomatoes, and hearty red beans, all tossed together in a simple oil-and-vinegar dressing. It comes together quickly and travels well, making it a good choice for picnics and cookouts as much as weeknight dinners.

Key Ingredients & Substitutions
- Short, chunky pasta - shapes like bowties or cavatappi hold the dressing and vegetables well. Just 8 ounces is needed since the vegetables make up most of the volume.
- Broccoli - finely chopped florets, blanched briefly right in the pasta water, stay bright green and tender-crisp rather than mushy.
- Ripe, juicy tomatoes - this salad is really built around summer tomatoes at their peak, so use the best ones you can find for the most flavor.
- Small red beans - canned beans keep this quick and add protein and heartiness. Kidney beans or black beans work as substitutes if that's what's in your pantry.
- Sun-dried tomatoes - a small amount adds a concentrated, slightly tangy sweetness that balances the fresh tomatoes. Look for the non-oil-cured kind so they don't add too much extra fat.
Helpful Tips
- Add the broccoli to the pasta water in the last 30 seconds of cooking rather than boiling it separately - it's an easy way to save a pot and get perfectly tender-crisp broccoli.
- Rinse the pasta and broccoli under cold water right after draining to stop the cooking and cool everything down quickly for the salad.
- Let the salad stand for 30 to 60 minutes before serving if you have the time - this gives the flavors a chance to meld and makes a real difference in taste.
- Taste before serving and adjust with extra oil, vinegar, lemon juice, or seasoning, since the pasta tends to soak up some of the dressing as it sits.
Variations
Swap in chickpeas or black beans for the red beans if you'd like a different flavor, or add diced cucumber or bell pepper for even more crunch and color. A handful of Kalamata olives or a sprinkle of vegan feta makes a nice addition if you want to lean into more of a Mediterranean flavor profile. For extra heat, add a pinch of red pepper flakes along with the Italian seasoning.
Serving Ideas
This salad is substantial enough to serve as a light lunch or main dish on its own, but it also makes a great potluck or picnic side since it travels well and doesn't need to be kept warm. Pair it with crusty bread or a simple green salad if you want to round out the meal further.
Storing & Freezing
Leftovers keep well in an airtight container in the refrigerator for up to 4 days, and the flavors often taste even better the next day. This salad isn't a good candidate for freezing, since the fresh tomatoes and blanched broccoli both turn watery and lose their texture once thawed.

Recipe

Pasta Salad with Broccoli, Tomatoes, and Red Beans
An easy summer pasta salad loaded with broccoli, juicy tomatoes, red beans, and fresh herbs in a simple oil and vinegar dressing.
Print
Pin
Save
Servings: to 8
Ingredients
- 8 ounces pasta any short, chunky shape, like bowties or cavatappi
- 4 cups broccoli florets finely chopped
- ¼ cup fresh parsley chopped
- 3 scallions minced
- fresh basil leaves sliced, to taste
- 1 ½ to 2 pounds ripe, juicy tomatoes diced
- 15 to 16 ounce can small red beans drained and rinsed
- ¼ cup sun-dried tomatoes cut into strips (preferably not oil-cured)
- ¼ cup extra-virgin olive oil or as desired
- ¼ cup red wine vinegar or apple cider vinegar
- juice of ½ lemon or lime about 2 tablespoons
- 2 teaspoons italian seasoning blend
- salt and freshly ground pepper to taste
Instructions
- Cook the pasta according to package directions until al dente. Just before it's done, add the broccoli florets and cook until they're bright green, not more than another 30 seconds.
- Drain the pasta and broccoli and rinse until cool.
- Combine the pasta and broccoli in a large serving bowl with the remaining ingredients. Toss well.
- If time allows, let stand for 30 to 60 minutes or so to allow the flavors to blend. Taste, and bring the flavors up to your liking with additional oil, vinegar, lemon juice, seasoning blend, and salt and pepper.
Nutrition (Estimate per Serving)
Calories: 240kcalCarbohydrates: 38gProtein: 9gFat: 7gSaturated Fat: 1gSodium: 210mgFiber: 6gSugar: 5g
Vegan-ize any recipe!Grab our free vegan cheat sheet, packed with my favorite easy substitutions to make any recipe vegan.
Frequently Asked Questions
Can I make this pasta salad ahead of time?
Yes - in fact, it's a great make-ahead dish since the flavors improve as it sits. Prepare it up to a day in advance and store it covered in the refrigerator, then give it a good toss and taste for seasoning before serving.
Can I use frozen broccoli instead of fresh?
Fresh broccoli holds its color and texture better in a cold salad like this one, but thawed and well-drained frozen broccoli can work in a pinch. There's no need to cook it further - just chop and add it straight to the bowl with the rest of the ingredients. Pat it dry with a paper towel first so it doesn't water down the dressing.
More Vegan Pasta Recipes
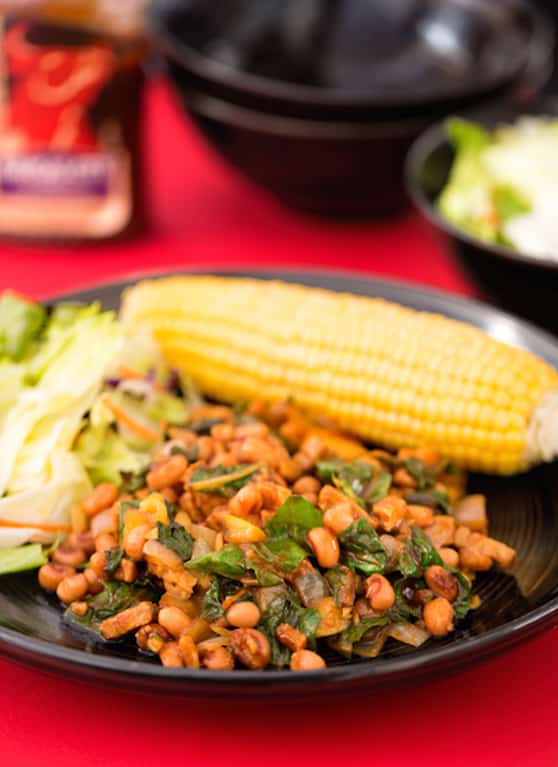
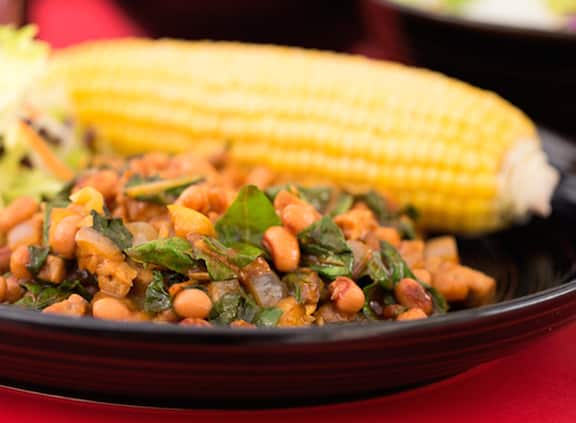
BBQ Tempeh Bacon with Black-Eyed Peas and Greens
Bites of tart apple add a delightful flavor twist to this hearty dish of BBQ tempeh bacon with black-eyed peas and greens. Serve with sweet potatoes or fresh corn and coleslaw for a satisfying meal that comes together in one skillet in well under an hour, with minimal cleanup for a weeknight dinner that still feels like Southern comfort food.
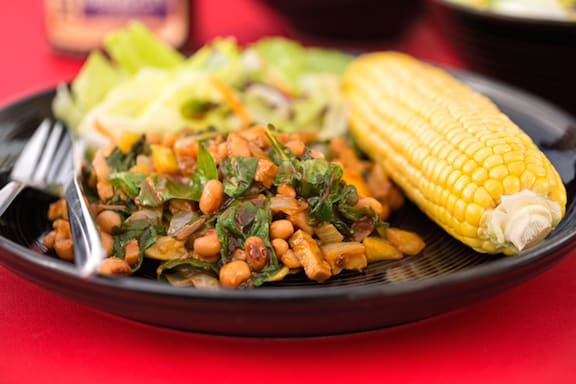
Photos by Hannah Kaminsky.
Key Ingredients & Substitutions
- Smoky tempeh strips. Pre-seasoned smoky/bacon-style tempeh gives this dish its "bacon" flavor without any extra work — finely chop it so it browns quickly and distributes through the dish rather than clumping in large pieces.
- Black-eyed peas. Hearty and slightly earthy; canned works just as well as cooked from dry for a quick weeknight version, and cuts a good chunk of time off the recipe.
- Granny Smith apple. Its tartness cuts through the richness of the tempeh and barbecue sauce — a firm, tart apple works better here than a sweet one, which can make the whole dish taste candy-sweet.
- Vegan barbecue sauce. Our Quick Vegan Barbecue Sauce is a great homemade option, or use your favorite all-natural bottled brand.
- Chard or spinach. Adds a healthy dose of greens right in the pan — chard needs a bit more cooking time than tender spinach, so add it a minute or two earlier.
- Onion and garlic. The aromatic base that builds flavor before the tempeh and sauce go in — don't skip sauteing the onion until it's genuinely translucent.
Variations
- Use kale instead. Kale works wonderfully here too, but needs more cooking time than chard or spinach — start steaming it separately just before starting the dish, then stir it in at the end once it's tender.
- Make it spicier. A dash of hot sauce or a pinch of cayenne in with the barbecue sauce adds some heat.
- Swap the beans. Pinto or kidney beans work in place of black-eyed peas if that's what you have on hand.
- Add sweet potato. Diced and roasted separately, it makes a nice bed to serve this over, echoing the classic Southern pairing.
- Add a splash of apple cider vinegar. A little extra tang at the end brightens the whole dish, especially if your barbecue sauce leans sweet.
Tips for the Best BBQ Tempeh Bacon with Black-Eyed Peas and Greens
- Chop the tempeh finely. Smaller pieces brown more evenly and mimic the texture of bacon bits better than larger chunks.
- Let the sauce reduce. Cooking the barbecue sauce down with the beans and apple for the full 10 minutes concentrates the flavor rather than leaving the dish watery.
- Don't overcook the greens. Spinach only needs a couple of minutes; chard needs a bit longer. Either way, pull them off the heat while they're still bright green.
- Taste before adding extra salt. Between the tempeh seasoning and the barbecue sauce, this dish often needs little to no additional salt.
- Use a wide skillet. This helps the tempeh brown rather than steam, which matters a lot for getting that bacon-like texture.
Make Ahead & Storage
This dish keeps well in the refrigerator for up to 4 days, and like many bean and tempeh dishes, the flavor deepens after a day. Reheat gently on the stovetop, adding a splash of water if the sauce has thickened too much, since it will continue to reduce as it sits and reheats.
How to Serve
Serve at once alongside sweet potatoes, fresh corn, or coleslaw for a well-rounded meal.
Recipe
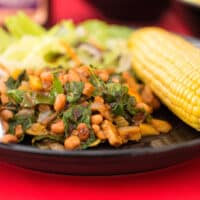
BBQ Tempeh Bacon with Black-Eyed Peas and Greens
Bites of tart apple add a delightful flavor twist to this hearty dish of BBQ tempeh bacon with black-eyed peas and greens.
Print
Pin
Save
Servings:
Ingredients
- 2 tablespoons olive oil
- 1 medium onion finely chopped
- 2 to 3 cloves garlic minced
- 6 ounce package smoky tempeh strips finely chopped
- 1 ½ to 2 cups cooked black-eyed peas or one 15- to 16-ounce can, drained and rinsed
- 1 medium Granny Smith apple diced
- ⅔ cup vegan barbecue sauce homemade or your favorite all-natural brand
- 10 to 12 ounces chard or spinach well washed, stemmed, and chopped
Instructions
- Heat the oil in a wide skillet. Add the onion and sauté over medium-low heat until translucent.
- Add the garlic and tempeh and sauté, stirring frequently, until golden and just beginning to brown lightly.
- Stir in the black-eyed peas, apple, and barbecue sauce. Cook over medium-high heat for 10 minutes or until the sauce is reduced.
- Add the greens, then cover until wilted. Stir in, then cook for another 2 minutes or so for spinach, or 4 minutes for chard, until tender but still bright green. Serve at once.
Notes
This is also wonderful with kale, but it needs more cooking time than chard or spinach. Start steaming it separately just before starting the dish; once cooked to your liking, stir it in at the end.
Vegan-ize any recipe!Grab our free vegan cheat sheet, packed with my favorite easy substitutions to make any recipe vegan.
- Here are more tempeh recipes.
- Here are more recipes for hardy greens.
- Here are more of VegKitchen's Vegan Dinner Recipes and more Tofu, Tempeh and Vegan Sausage Main Dishes.
Old-Fashioned Potato Bread Stuffing
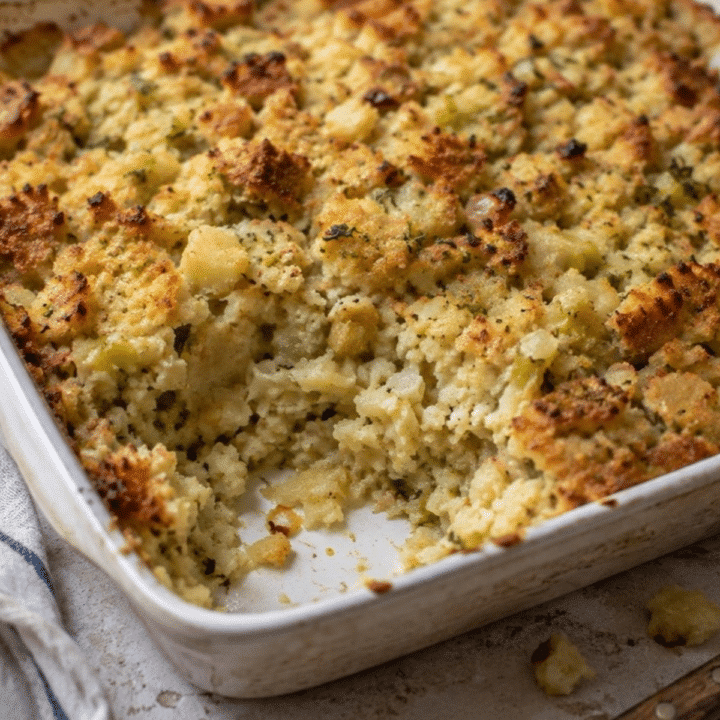
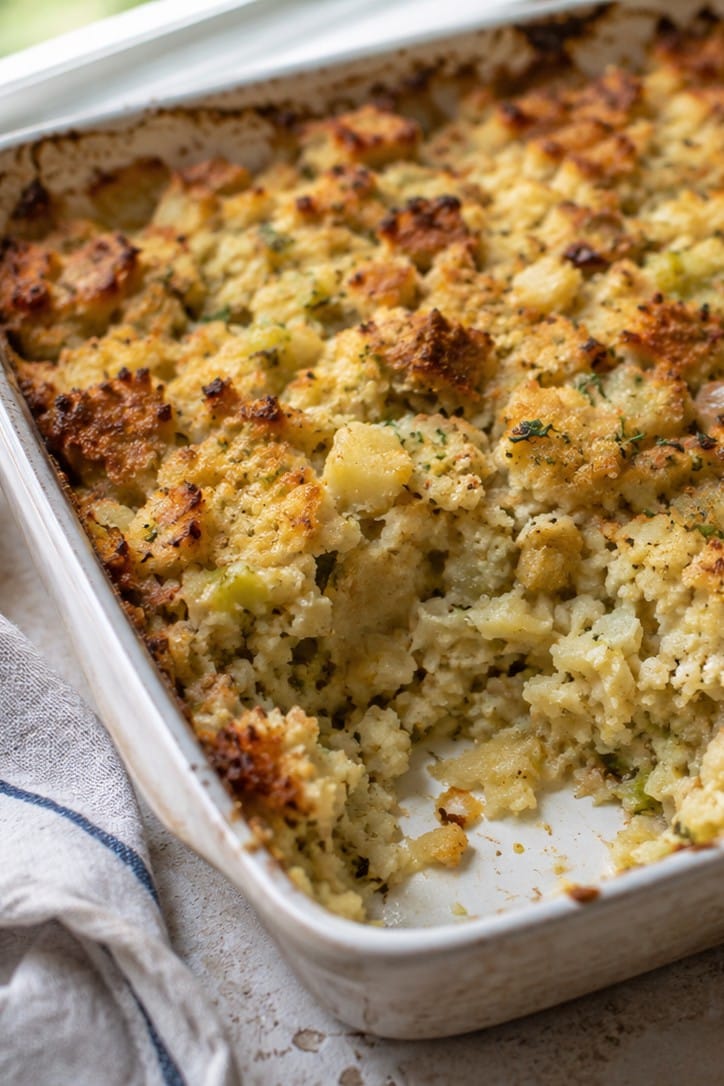
This hearty, casserole-type bread and potato stuffing need not be stuffed into anything - simply enjoy it as a side dish. This is welcome at the Thanksgiving table, but you can surely enjoy it any time you want a comforting casserole or have a bit of bread you'd like to use up, like those end pieces that no one seems to want!
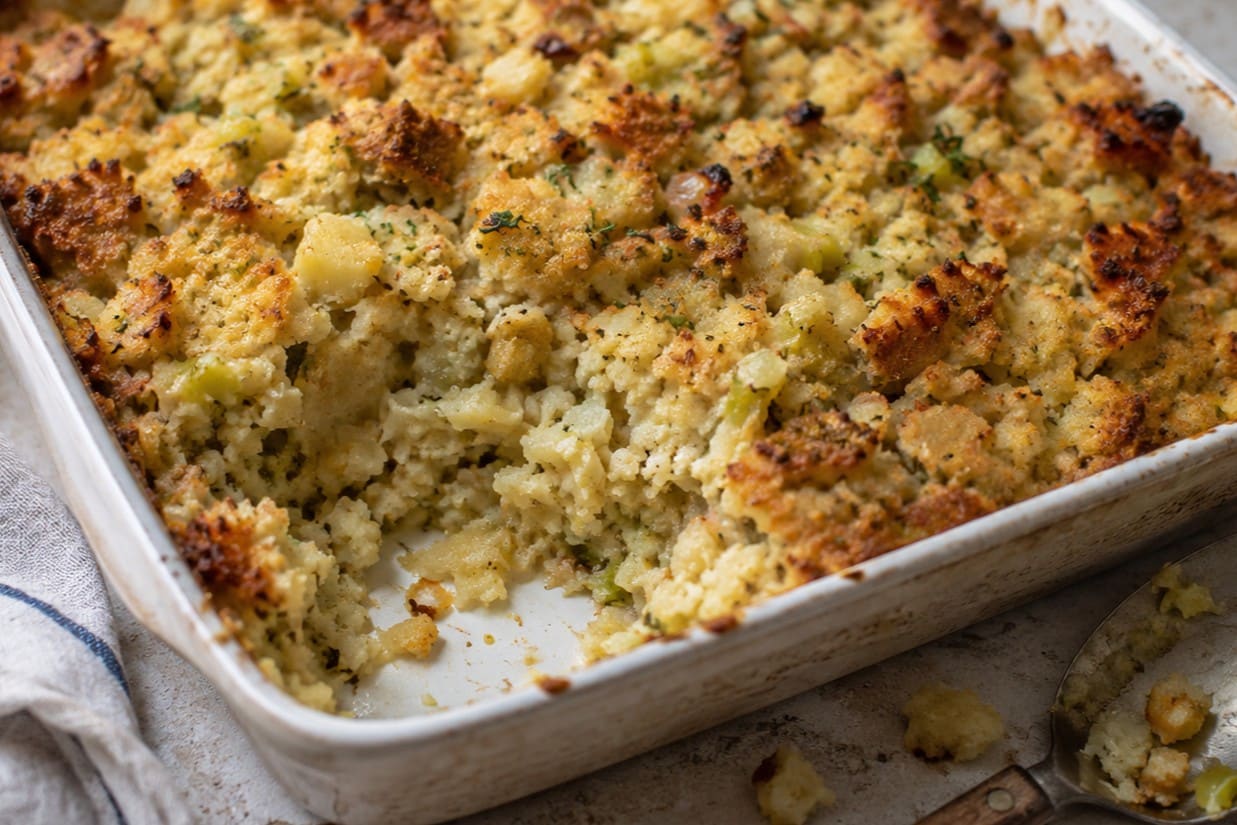
It's just not Thanksgiving without stuffing, right? This totally delicious potato bread stuffing is sure to be your new holiday favorite!
It's loaded with my two favorite carbs - potatoes and bread. Then tossed with onions and herbs and baked to crusty perfection. What's not to love?
Helpful Tips
Roasted Potatoes. For an extra flavor boost, consider roasting your potatoes instead of baking or microwaving them. This gives the potatoes a richer, deeper flavor that will enhance the stuffing. It just takes a bit of extra time.
Use any fresh herbs. Swap dried thyme for fresh if you have it on hand, as this will give more vibrant flavor to your stuffing.
Choosing the Bread. This recipe calls for whole-grain bread, but feel free to experiment with other types such as sourdough, rye, or even a hearty multigrain. Each will lend a unique flavor and texture to your stuffing.
Variations
Mushroom-Potato Bread Stuffing: Sauté button or cremini mushrooms with onion and celery for an earthy flavor. This variation could also benefit from adding a splash of white wine or vegetable broth while sautéing the vegetables.
Sweet Potato-Potato Bread Stuffing: Swap half of the russet potatoes for sweet potatoes for a sweet-savory balance in your stuffing.
Cheesy Potato Bread Stuffing: Add vegan cheese or nutritional yeast to the mashed potatoes to give a cheesy flavor to the stuffing. Some good options are vegan mozzarella or cheddar.
Apple and Sage-Potato Bread Stuffing: Add some diced Granny Smith apples for a sweet-tart crunch in your stuffing. Complement this flavor with the addition of sage instead of thyme.
Mediterranean Potato Bread Stuffing: Incorporate sun-dried tomatoes, olives, and rosemary for a Mediterranean twist.
Make Ahead & Storage
This stuffing is a great make-ahead side for a busy holiday table. Assemble the casserole up to a day ahead, cover, and refrigerate unbaked, then bring it to room temperature before baking as directed. Leftovers keep well in an airtight container in the refrigerator for up to 4 days, and reheat nicely in a covered dish in the oven with a splash of vegetable broth to keep it from drying out.
More Tasty Recipes
This is quickly becoming my favorite stuffing recipe, but be sure to check out these other ideas as well:
And if you're here planning your holiday menu, be sure to check out my Vegan Thanksgiving and Vegan Christmas cookbooks!
Recipe
Old-Fashioned Potato-Bread Stuffing
This hearty, casserole-type bread and potato stuffing need not be stuffed into anything; simply enjoy it as a side dish.
Print
Pin
Save
Servings: to 8
Ingredients
- 5 or 6 large baking potatoes such as russet, cooked or microwaved in their skins
- 1 cup unsweetened rice milk or other nondairy milk
- 4 average slices whole-grain bread
- 2 tablespoons olive oil
- 1 cup chopped onion
- 1 cup diced celery
- 1 tablespoon salt-free seasoning blend such as Frontier or Mrs. Dash
- ½ teaspoon dried thyme
- Salt and freshly ground pepper to taste
Instructions
- Preheat the oven to 375 degrees F.
- Once the cooked potatoes are cool enough to handle, peel them and place them in a large mixing bowl. Coarsely mash the potatoes with ½ cup of the rice milk.
- Cut the bread into ½-inch dice. Place them in a small mixing bowl and pour the remaining rice milk over them. Soak for several minutes.
- In the meantime, heat the oil in a medium-sized skillet. Add the onion and celery and sauté over low heat until the onion is lightly browned and the celery is tender.
- Combine the onion and celery mixture with the mashed potatoes in the large mixing bowl. Stir in the soaked bread, and seasoning mix. Season to taste with salt and lots of pepper.
- Pour the mixture into a well-oiled, 2-quart baking dish. Bake for 50 to 60 minutes, or until the top is a crusty golden brown.
Nutrition (Estimate per Serving)
Calories: 220kcalCarbohydrates: 40gProtein: 4gFat: 5gSaturated Fat: 1gPolyunsaturated Fat: 1gMonounsaturated Fat: 3gSodium: 45mgPotassium: 862mgFiber: 6gSugar: 5gVitamin A: 125IUVitamin C: 38mgCalcium: 79mgIron: 3mg
Vegan-ize any recipe!Grab our free vegan cheat sheet, packed with my favorite easy substitutions to make any recipe vegan.
Vegan Jicama Coleslaw
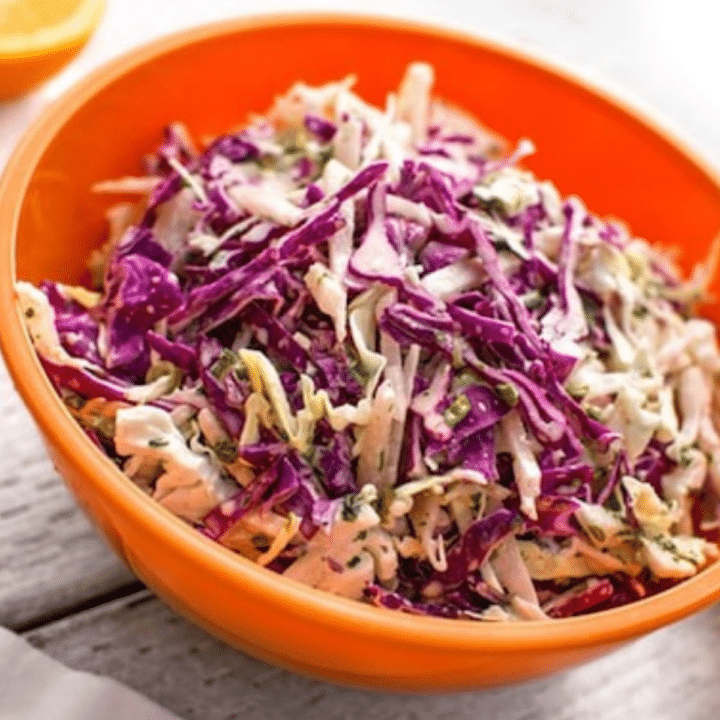
Jicama slaw is made with the slightly sweet, crunchy root vegetable best known in the cuisines of the Southwestern U.S. Combined with red and white cabbage, it's a lovely addition to everyday meals as well as fall and winter holiday meals. If your local stores don't carry jicama, ask them to — and if you still can't find it, substitute crisp white turnip; either way, the goal is that same watery, refreshing crunch.
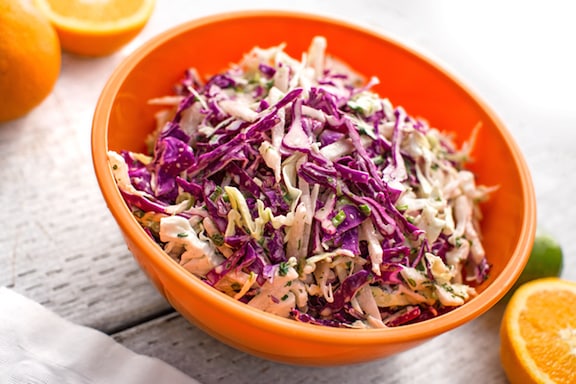
Photos by Hannah Kaminsky.
Key Ingredients & Substitutions
- Jicama. Adds a sweet, crisp crunch somewhere between an apple and a water chestnut — if you can't find it, substitute crisp white turnip or daikon radish, both of which have a similar watery bite.
- Red and white cabbage. The combination adds nice color contrast to the slaw; using only one color works fine too if that's what's available.
- Orange and lime juice. Bring bright citrus flavor that balances the mayonnaise-based dressing and keeps the slaw from feeling heavy.
- Vegan mayonnaise. Forms the creamy base of the dressing — any neutral-flavored brand works well here, since the citrus does most of the flavor work.
- Cilantro. Adds a distinctly Southwestern flavor that pairs naturally with the jicama and citrus — use parsley if you're in the cilantro-tastes-like-soap camp.
Variations
- Add crunch. A handful of toasted pepitas or sunflower seeds adds texture on top of the already-crunchy jicama.
- Add heat. A pinch of cayenne or a finely diced jalapeño gives the slaw a kick that plays well against the sweet citrus.
- Swap the herbs. Cilantro adds a Southwestern flair; parsley keeps it milder for those who find cilantro too assertive.
- Add fruit. A handful of diced mango or orange segments leans into the slaw's sweeter side.
- Make it a taco topping. This slaw is excellent piled onto tacos or alongside grilled tofu for a full Southwestern-style meal.
Tips for the Best Jicama Coleslaw
- Shred everything thinly. This helps the slaw absorb the dressing evenly and makes each bite easier to eat.
- Balance the citrus. Add the orange and lime juice gradually and taste as you go, since jicama's sweetness varies from one root to the next.
- Let it chill. An hour in the refrigerator lets the flavors meld together before serving.
- Stir before serving. The slaw can release liquid as it sits, so give it a good stir and drain off any excess if needed.
- Cut the jicama into matchsticks, not shreds, if you want more crunch. A julienne gives a sturdier bite than a fine shred and holds up better against the dressing.
Make Ahead & Storage
This slaw keeps well in the refrigerator for up to 3 days, and the flavor deepens as it sits, though the cabbage will soften somewhat over time. Give it a good stir before serving leftovers, since the dressing tends to settle at the bottom of the container.
How to Serve
Serve chilled as a bright, crunchy side for everyday meals, or bring it to the table for Thanksgiving and other fall or winter holiday meals.
Recipe
Jicama Coleslaw
Jicama is a slightly sweet crunchy root vegetable and adds a great flavor to autumn coleslaws. It's a lovely addition to the vegan Thanksgiving table.
Print
Pin
Save
Servings: to 8
Ingredients
- 3 cups red cabbage thinly shredded
- 3 cups white cabbage thinly shredded
- 1 cup peeled thinly shredded jicama
- 2 scallions sliced
- ¼ cup chopped fresh parsley or cilantro
Dressing[/i]
- ½ cup vegan mayonnaise
- 2 teaspoons prepared mustard
- 1 tablespoon agave nectar or maple syrup
- Juice of ½ orange
- Juice of ½ lime
- Salt and freshly ground pepper to taste
Instructions
- Combine the cabbages, jicama, scallions, and parsley in a serving bowl and toss together.
- Combine the dressing ingredients in a small bowl and whisk until well blended. Pour over the cabbage mixture and toss well.
- Cover and let stand for 30 minutes or so before serving, or refrigerate until needed.
Nutrition (Estimate per Serving)
Calories: 164kcalCarbohydrates: 11gProtein: 2gFat: 12gSaturated Fat: 1gPolyunsaturated Fat: 1gMonounsaturated Fat: 1gSodium: 203mgPotassium: 270mgFiber: 2gSugar: 6gVitamin A: 829IUVitamin C: 46mgCalcium: 54mgIron: 1mg
Vegan-ize any recipe!Grab our free vegan cheat sheet, packed with my favorite easy substitutions to make any recipe vegan.
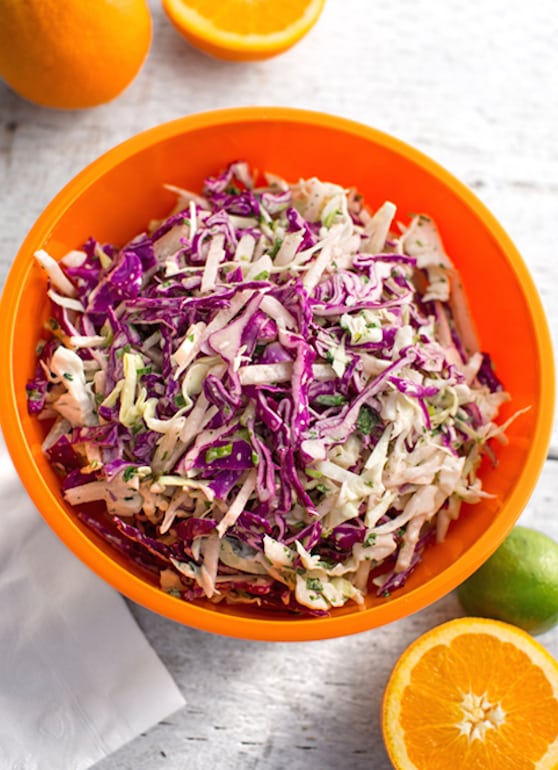
Here are lots more creative and colorful slaw-style salads. Find more ways to make Special Occasions and Entertaining easier and healthier.
Vegan Fig and Walnut Bread
This quick bread comes together fast and easy, studded with chopped dried figs and toasted walnuts and brightened with fresh orange juice and zest. It's awesome on its own or with a schmear of nut butter for extra protein, fiber, and fun — no yeast, no rising time, just mix and bake, making it one of the easiest homemade breads to pull off on a weekday morning.
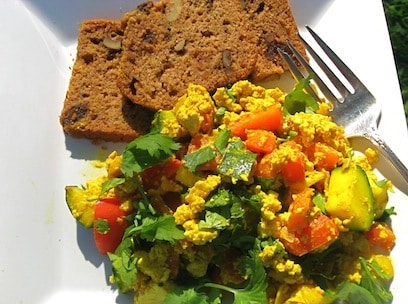
Recipe and photo by Ellen Kanner of Soulful Vegan.
Key Ingredients & Substitutions
- Dried figs. Feel free to substitute other dried fruit like raisins, apricots, or dates for the chopped figs — just chop larger pieces down to a similar size so they distribute evenly through the batter.
- Whole wheat pastry flour. Combined with regular whole wheat flour, this keeps the loaf tender rather than dense; pastry flour has a lower protein content that produces less gluten and a lighter crumb.
- Fresh orange juice and zest. Adds bright citrus flavor throughout the crumb — freshly squeezed and zested makes a noticeable difference over bottled juice, which tends to taste flatter.
- Walnuts. Toasting them first brings out a deeper, buttery flavor that plain raw walnuts don't have, and keeps them from tasting bland once baked into the loaf.
- Cinnamon and nutmeg. Warm background spices that round out the sweetness of the figs and orange without overpowering them.
Variations
- Swap the nuts. Pecans or almonds work well in place of walnuts.
- Add warm spices. A pinch of ground cloves or ginger pairs nicely with the cinnamon and nutmeg for a more assertively spiced loaf.
- Make it nut-free. Simply omit the walnuts, or replace with sunflower seeds for crunch without the allergen concern.
- Add a glaze. A simple orange juice and powdered sugar glaze drizzled over the cooled loaf dresses it up for company or a holiday brunch.
- Make it muffins. Divide the batter into a muffin tin and reduce the baking time to about 20 minutes for individual portions.
Tips for the Best Fig and Walnut Bread
- Don't overmix the batter. Stir just until the dry and wet ingredients are combined for a tender crumb — a few lumps are fine and will bake out.
- Toast the walnuts first. A few minutes in the oven makes a big difference in flavor compared to adding them raw, and only takes a few extra minutes.
- Test for doneness. The bread is done when the top is golden and puffed and a tester inserted in the center comes out clean, usually 45 to 55 minutes depending on your oven.
- Let it cool before slicing. This helps the loaf hold together and slice cleanly instead of crumbling — it's worth the wait, even though it smells amazing straight out of the oven.
Make Ahead & Storage
This bread keeps well wrapped at room temperature for about 3 days, or in the refrigerator for up to a week. It also freezes well, sliced or whole, for up to 3 months — a great make-ahead option for busy mornings, since a slice thaws quickly at room temperature or in the toaster.
How to Serve
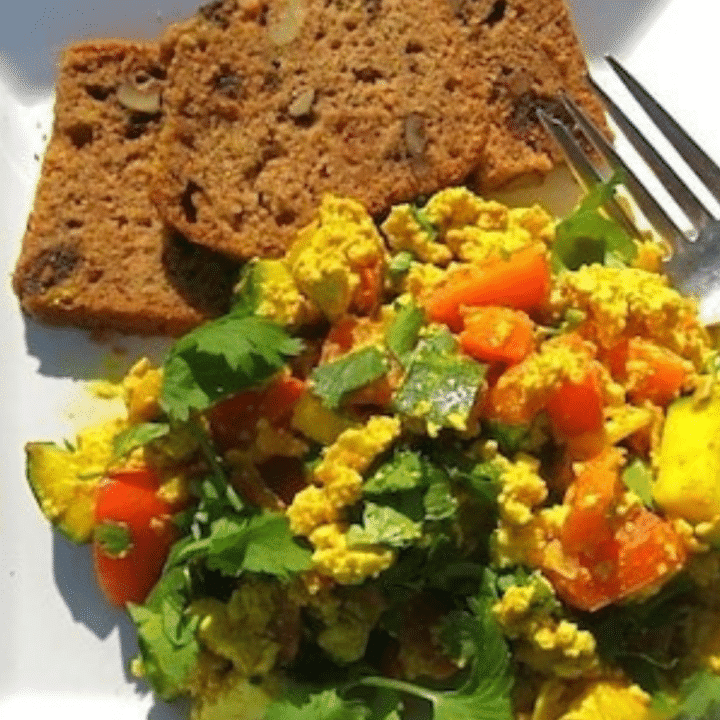
Enjoy a slice on its own or with a schmear of nut butter. It's also delicious alongside Tofu Scramble with Jalapeño and Cilantro for a hearty vegan brunch.
Recipe

Vegan Fig and Walnut Bread
A fast, easy quick bread studded with chopped dried figs and toasted walnuts, brightened with fresh orange juice and zest.
Print
Pin
Save
Servings: loaf
Ingredients
- 1 cup water or tea black, green, herbal, whatever you like
- ½ cup dried figs chopped, tough stems discarded
- 1 cup whole wheat flour
- 1 cup whole wheat pastry flour
- 1 teaspoon baking soda
- 2 teaspoons ground cinnamon
- ¼ teaspoon nutmeg
- ⅓ cup canola oil
- ¼ cup brown sugar or Sucanat, or other natural cane sugar
- ⅔ cup fresh orange juice from 2 to 3 oranges
- 1 orange zest grated
- ½ cup unsweetened applesauce
- ½ cup walnuts chopped
Instructions
- Preheat oven to 350ºF. Lightly oil a 9 x 5 inch loaf pan.
- In a small saucepan, heat the water or tea over medium-high heat. When it just starts to bubble, turn off the heat and, leaving the pot on the burner, add the chopped dried figs. Leave them to soften while you continue with the recipe.
- Pour the chopped walnuts into a shallow baking pan and toast in the oven for 8 to 10 minutes, or until brown and buttery-smelling. Remove from the oven and set aside.
- Meanwhile, in a large bowl, sift together the whole wheat flour, whole wheat pastry flour, baking soda, orange zest, cinnamon, and nutmeg.
- In a separate bowl, combine the orange juice, oil, and brown sugar. Whisk together until the sugar dissolves.
- Add the wet ingredients to the dry ones. Stir in the applesauce.
- Drain the figs and add to the batter. Gently fold in the walnuts and stir just until combined. Pour into the prepared loaf pan.
- Bake for 50 minutes to 1 hour, or until the top is golden and puffed and an inserted tester comes out clean.
Notes
Wrapped well, the bread freezes well or keeps in the refrigerator for several days.
Vegan-ize any recipe!Grab our free vegan cheat sheet, packed with my favorite easy substitutions to make any recipe vegan.
Here are more Vegan Quick Breads and Scones, or if your sweet tooth is still craving more, browse all our Vegan Baking and Sweets.
Salads Your Kids Just Might Eat!
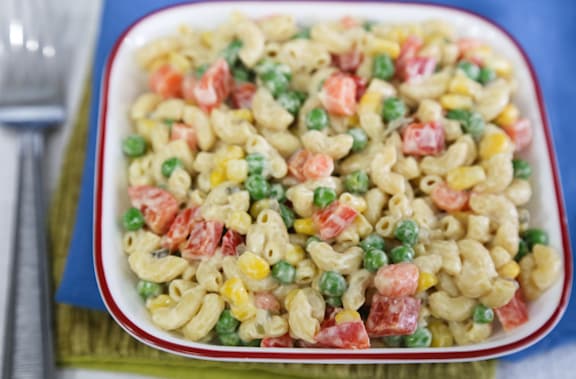
There’s just something about salads that — there’s no other way to say it — many kids don’t particularly enjoy. I found that combining small amounts of raw vegetables with starchy comfort foods like pasta, bread, or potatoes, or adding fresh or dried fruit, helped to entice my kids and their friends to give salads a try. As far as tossed green salads, the best way I found to entice them was to offer a very simple homemade Thousand Island dressing with it. [Read more...]
Vegan Jewish New Year Recipes
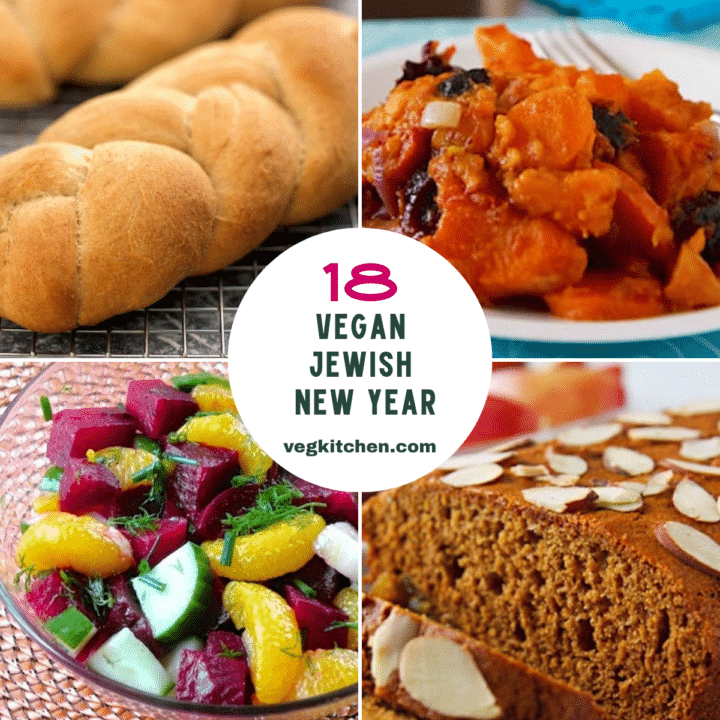
For Jews around the world, early fall is the beginning of a new year, marking Rosh Hashana, the Jewish New Year. Here are vegan Jewish New Year recipes and menus for the vegan and vegetarian dinner table. Rosh Hashana is more than a New Year's celebration — the holiday's ancient roots are as a harvest festival, and enjoyment of the abundant produce of early autumn remains central to the celebration. The foods served emphasize this holiday's optimistic spirit, and naturally sweet foods are favored at the dinner table.
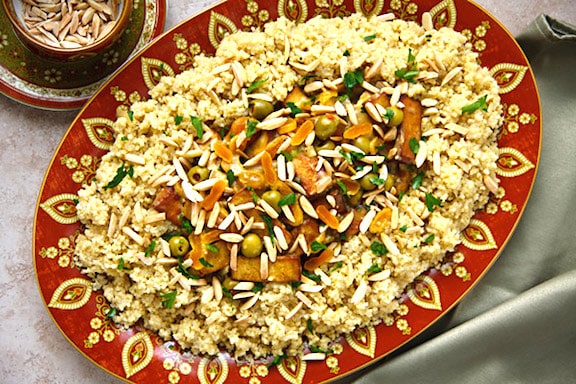
Shown above, Moroccan-Flavored Tofu with Apricots, Almonds, and Olives; photo by Susan Voisin.
It's hard to imagine a Rosh Hashana celebration without challah bread. For vegans, the challenge becomes making this moist bread without its characteristic ingredient — eggs. Egg-free vegan challah is the result of much experimentation by Rachel Orenstein Packer, a guest contributor to VegKitchen. Then there's the ritual of spreading chunks of this tender bread with honey, as well as dipping apple slices in honey, which, for the strictest of vegans can simply be replaced with agave nectar.
The choice of produce used for a Jewish New Year meal will differ somewhat depending on whether the meal has an Ashkenazi (Eastern European) or Sephardic (Mediterranean and Middle Eastern) theme. Ashkenazi dishes feature apples, sweet potatoes, beets, and other foods native to Eastern Europe. Sephardic dishes feature such foods as apricots, dates, pumpkins, and turnips. Both traditions make liberal use of leeks, squash, carrots, and other produce that is plentiful in early fall; these vegetables symbolize abundance and prosperity. Mix and match from the recipes below to create an abundant, festive meal for your family and friends.
Vegan Jewish New Year Recipes
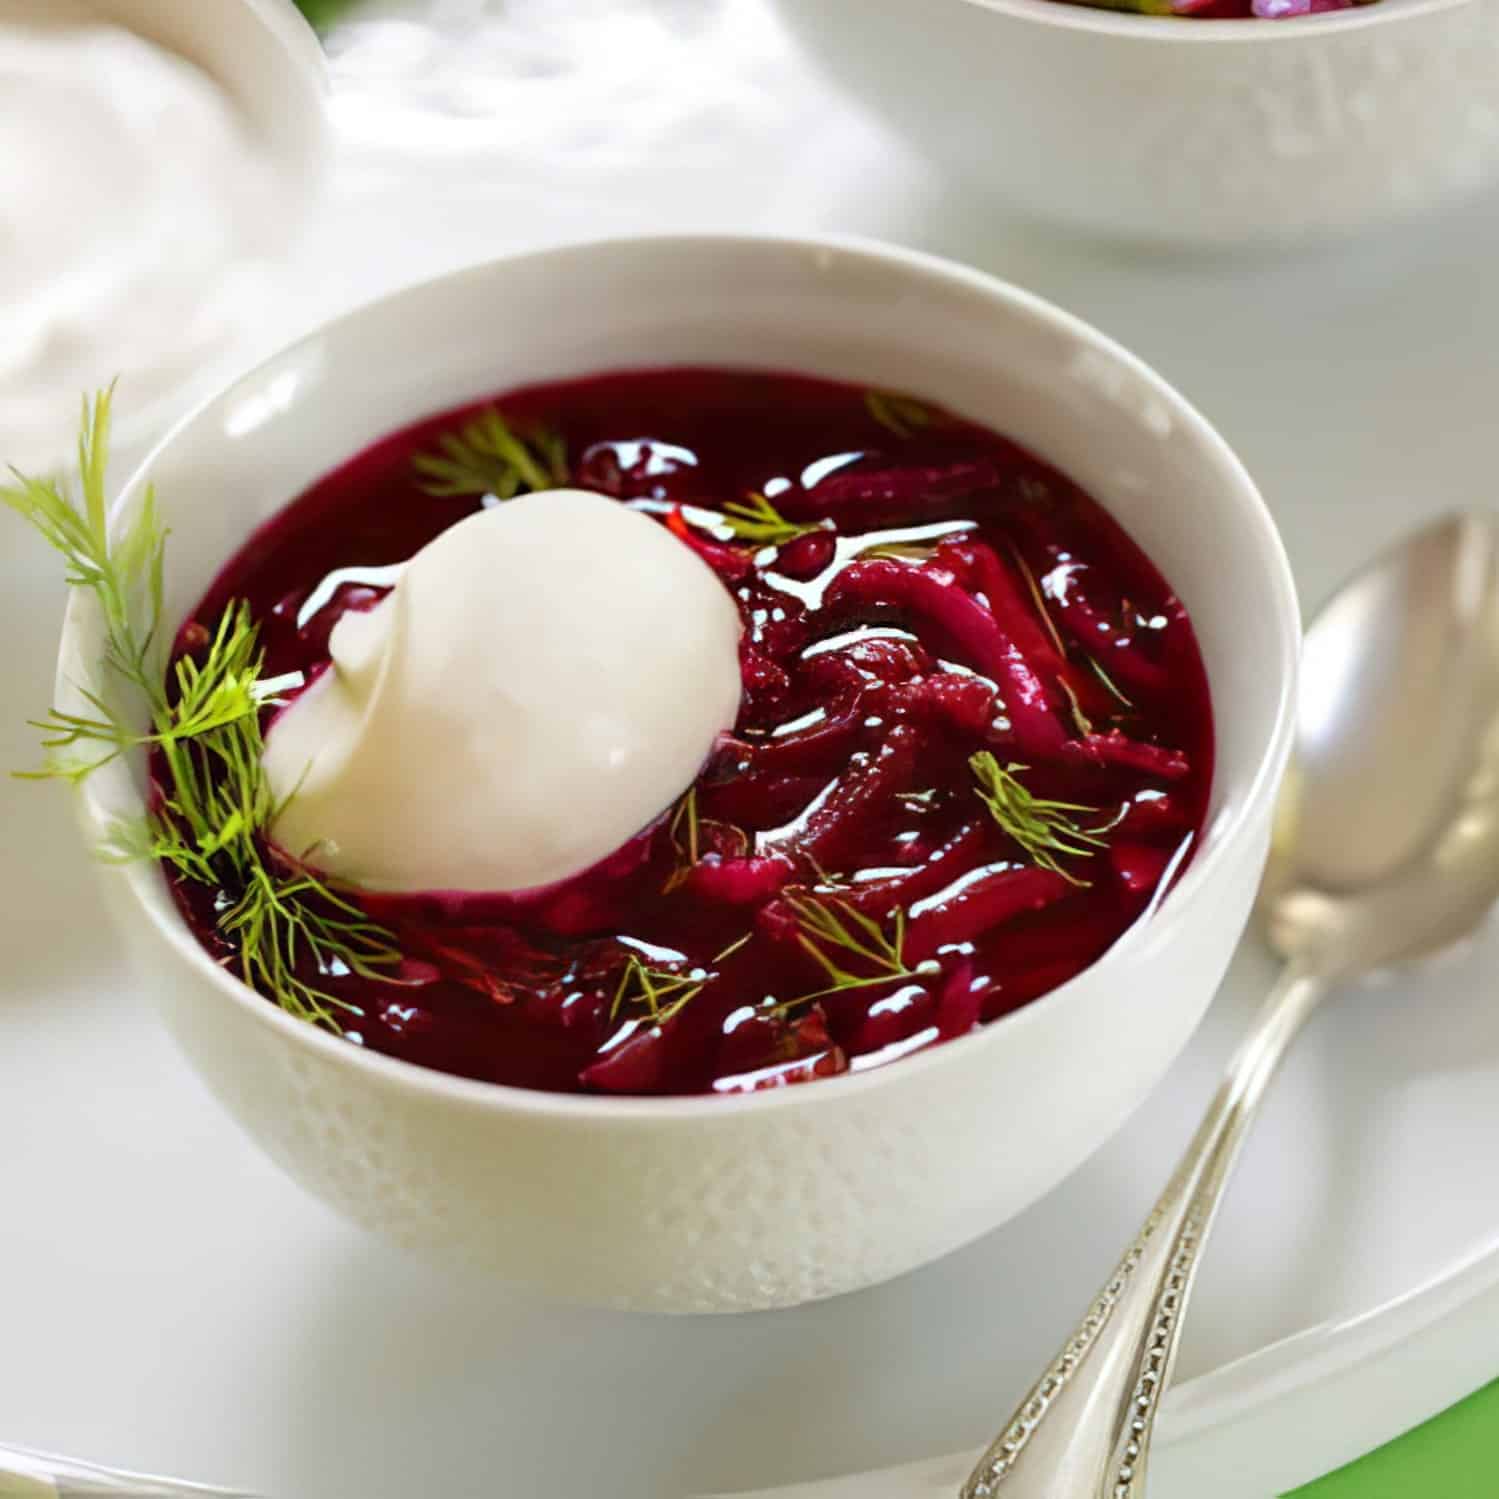
A refreshing, mostly-raw beet borscht — a cool, colorful way to start the meal if the weather's still warm.

A comforting, hearty soup with mushrooms and barley, perfect if the weather has turned cool.

A silky soup blending butternut squash and apples, capturing the sweetness of the early fall harvest.
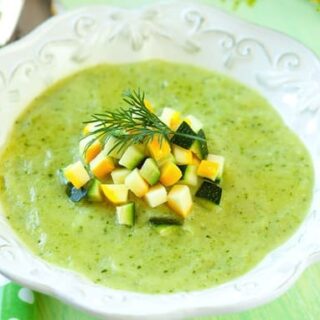
A light, creamy zucchini soup that works as a warm or cool starter.
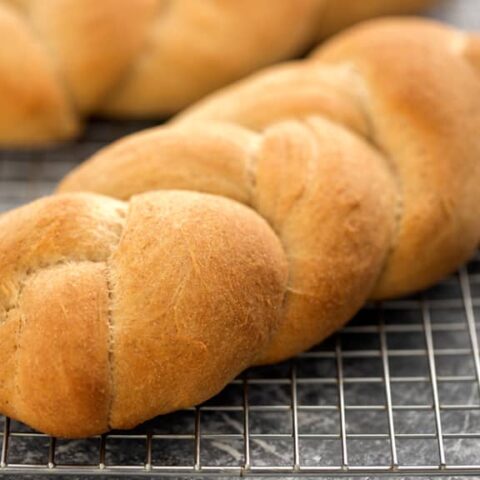
A moist, egg-free challah — no Rosh Hashana table is complete without it.
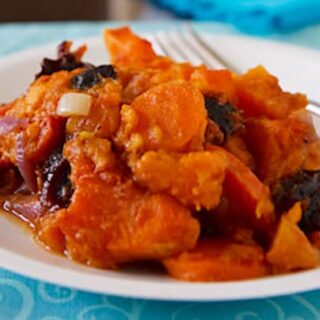
Sweet potatoes stewed with dried fruit, a classic Ashkenazi holiday side.
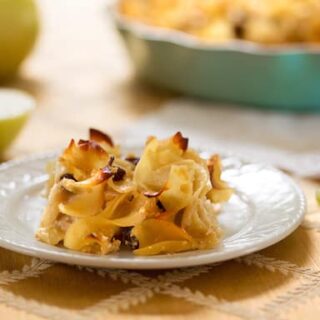
A comforting vegan take on the classic Jewish noodle casserole.
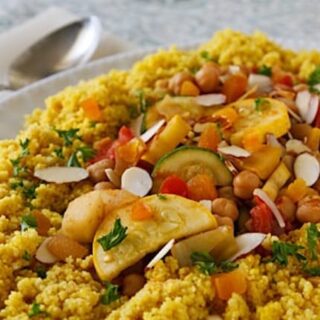
A fragrant, Sephardic-style couscous loaded with seven kinds of vegetables.
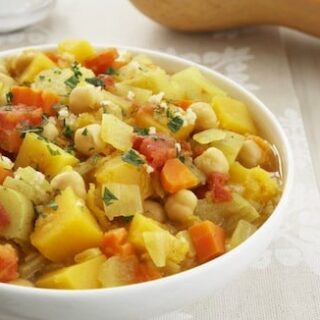
A warmly spiced Moroccan-style stew loaded with fall vegetables.
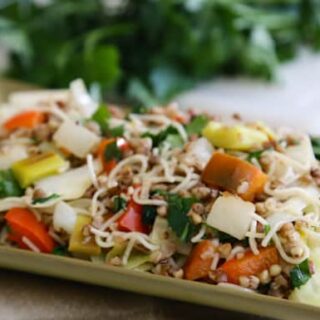
Buckwheat groats tossed with fine noodles and vegetables, a comforting Ashkenazi classic.
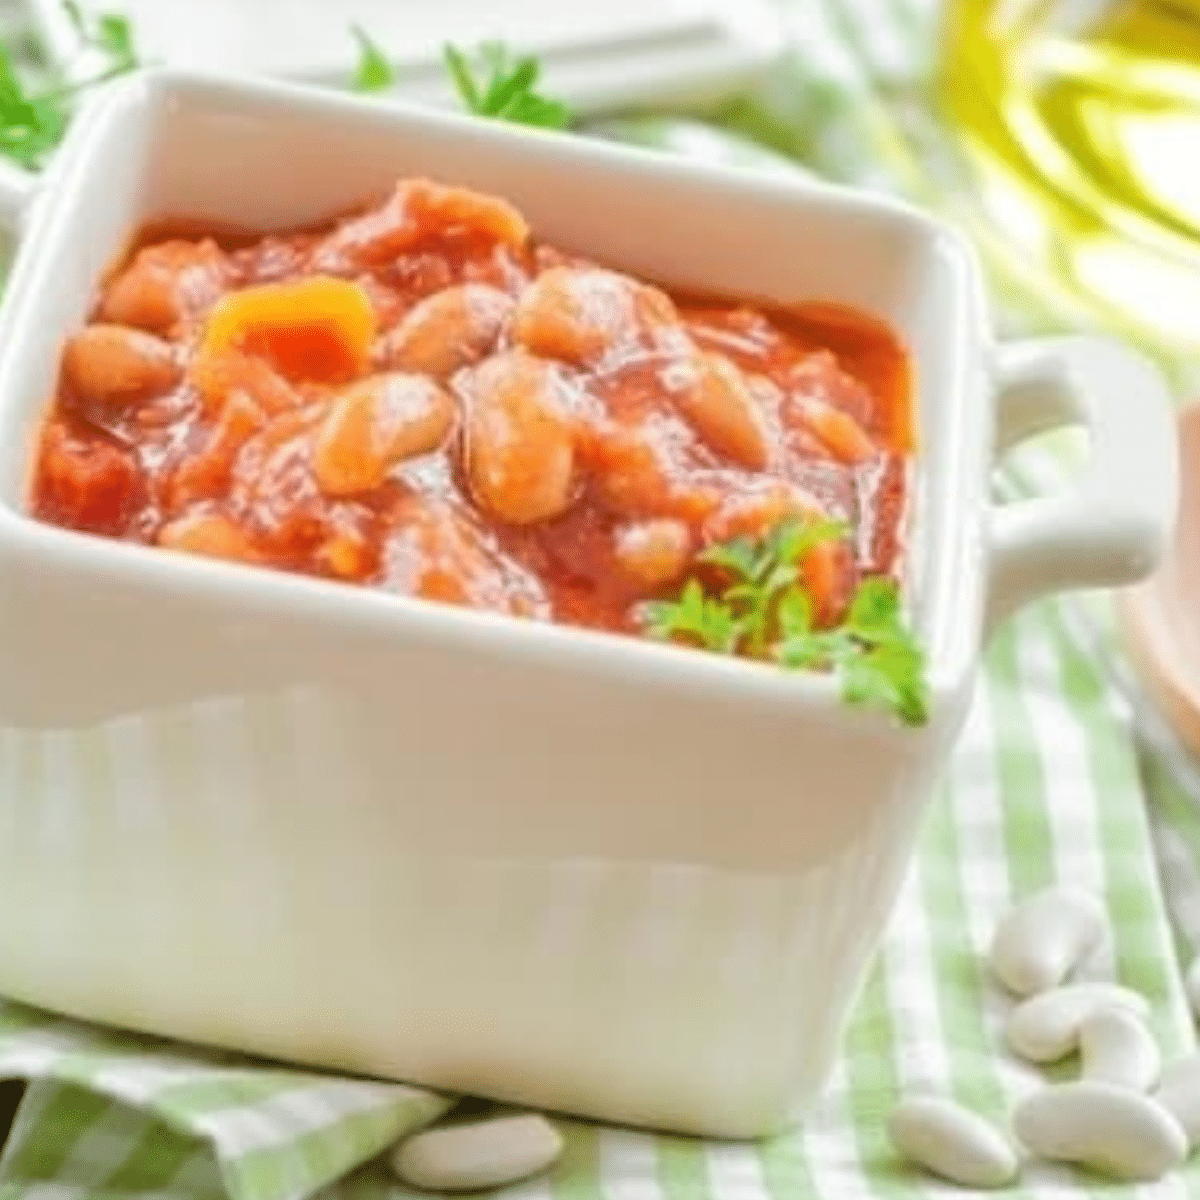
Tender white beans stewed Sephardic-style with warm spices.
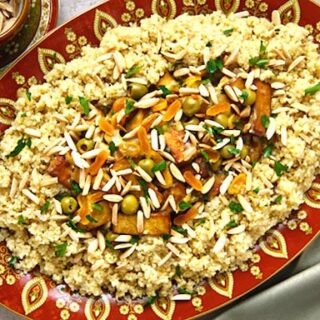
Tofu simmered with apricots, olives, and almonds for a sweet-savory Moroccan-inspired main.
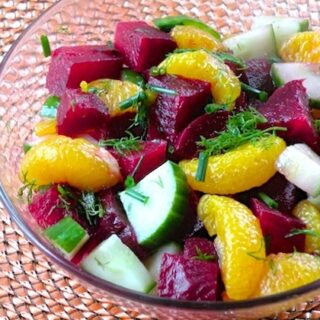
A colorful salad of beets, cucumber, and orange, bright with early-fall produce.
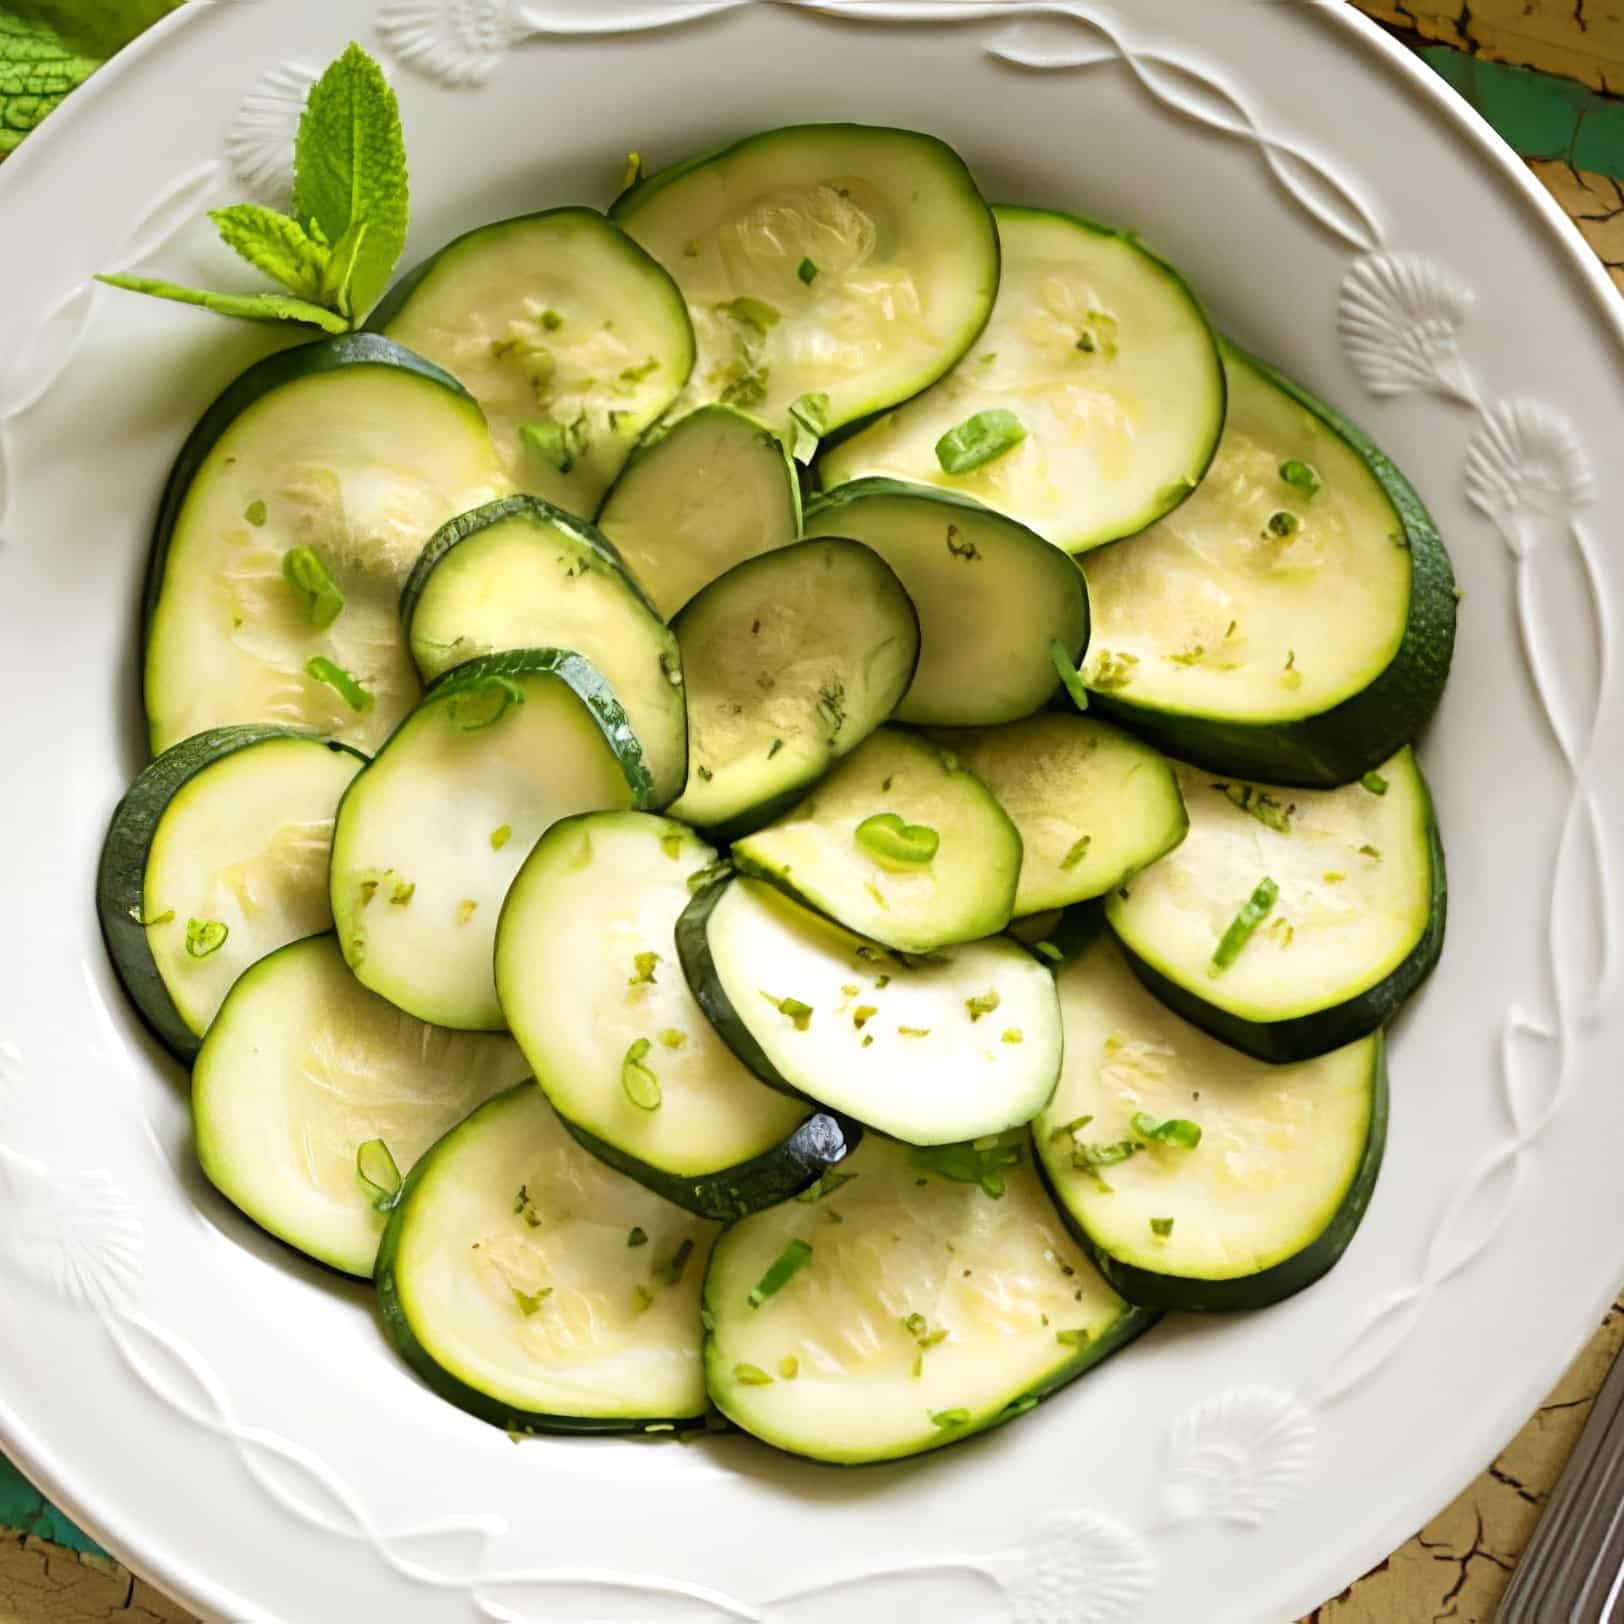
A simple, refreshing zucchini salad brightened with fresh mint.
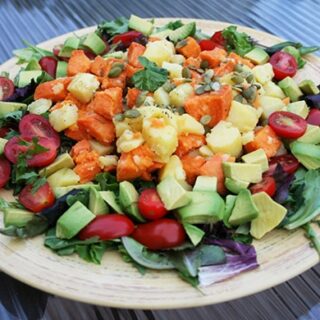
Sweet and white potatoes tossed with mixed greens for a hearty, colorful salad.
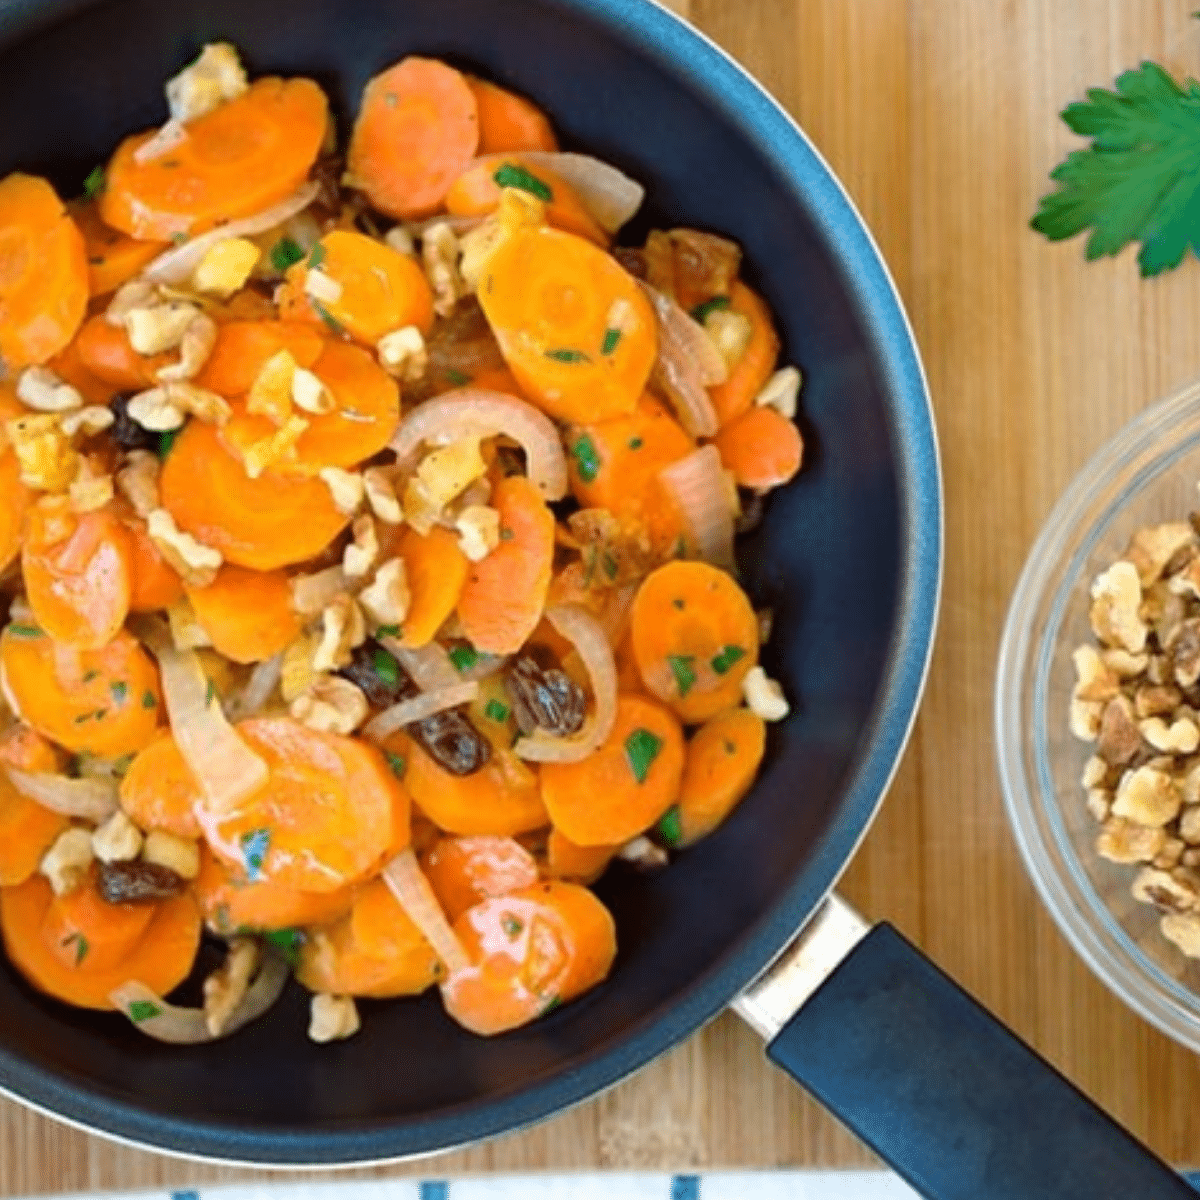
Sauteed carrots with dried cranberries, a naturally sweet holiday side.
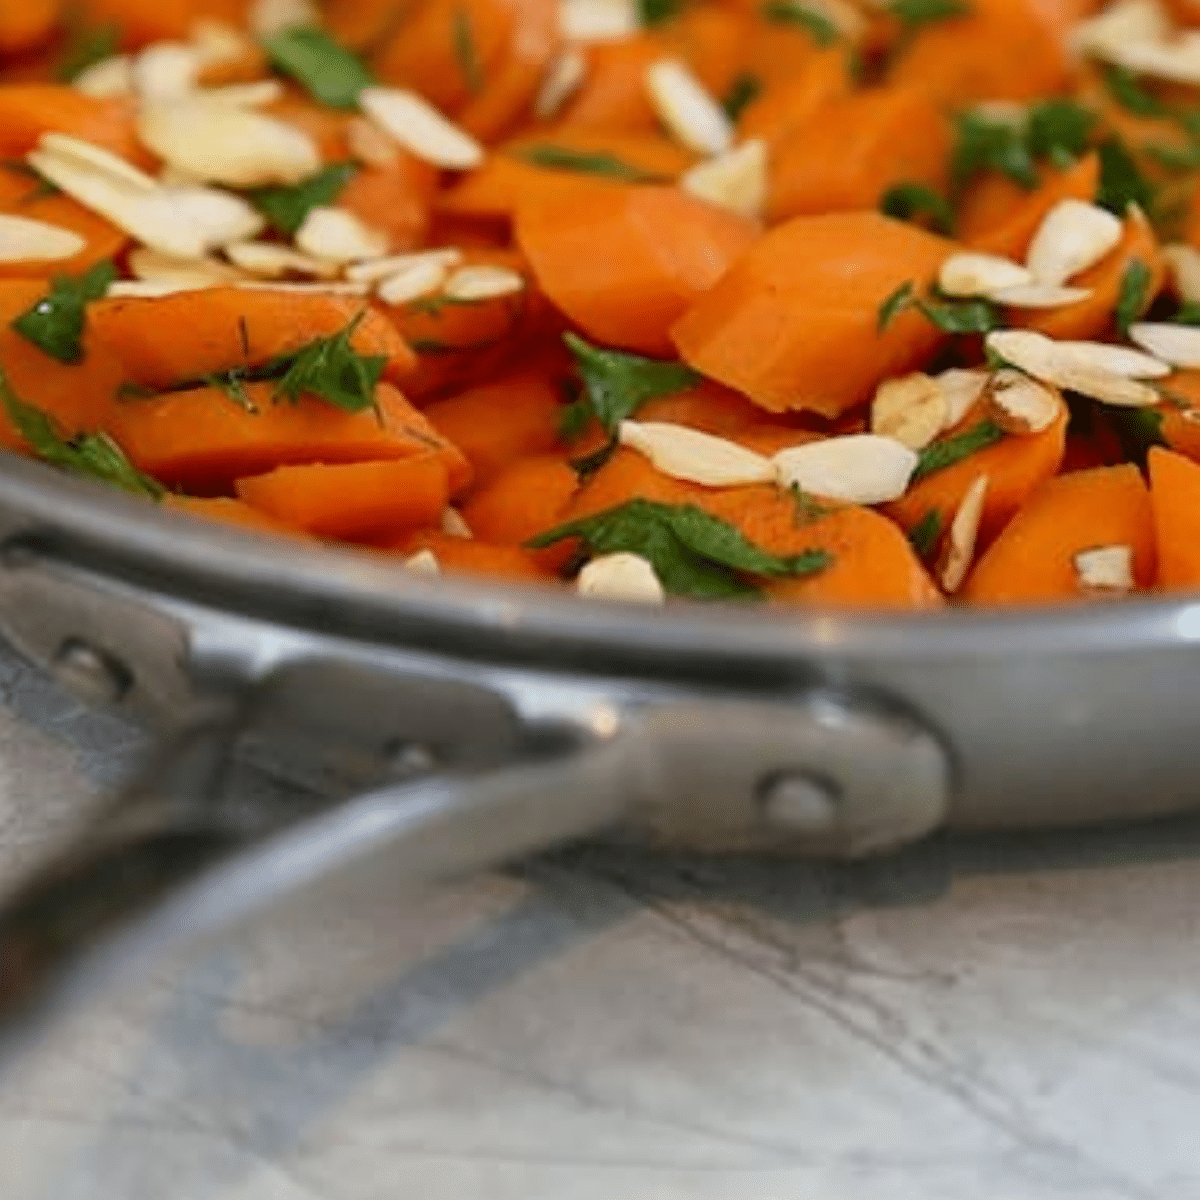
Sautéed carrots with toasted almonds, a quick and colorful side dish.
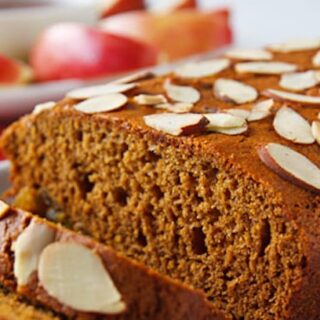
A naturally sweet honey-style cake, made without any actual honey — perfect for a sweet new year.
A soup course is optional, but if you'd like to serve one, go for a cold soup if the weather's still warm where you are, or a hot one if it's turned cooler.
Here are more tips for keeping the Holidays and Special Occasions healthy! For lots more features on healthy lifestyle, explore VegKitchen's Healthy Vegan Kitchen page.
Melon Cups with Strawberries and Blueberries
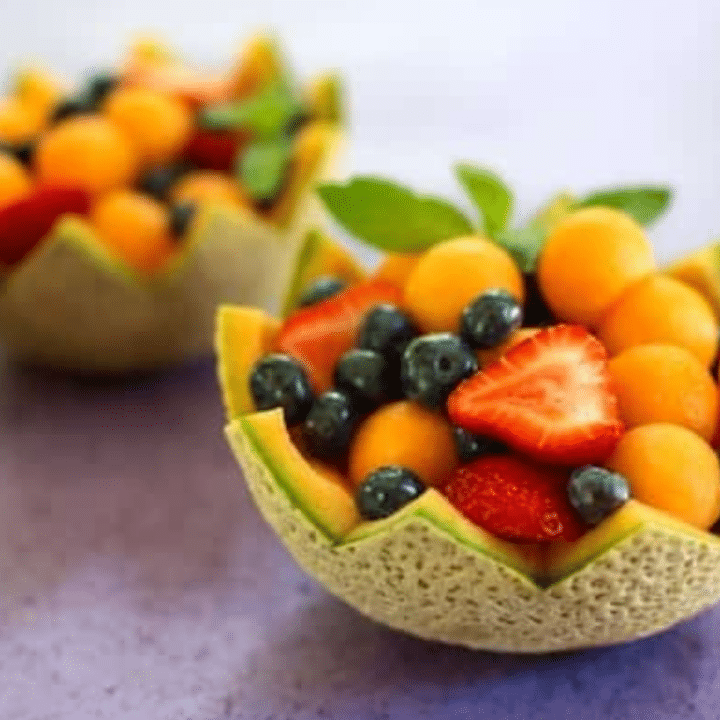
The attractive presentation of this medley of summer fruits — cantaloupe, strawberries, and blueberries — makes it especially appealing. Sometimes all you need is a little creativity to take fruit from so-so to stunning, and this one comes together with nothing more exotic than a melon baller and a bit of patience. It's a favorite for brunch tables and baby or bridal showers alike.
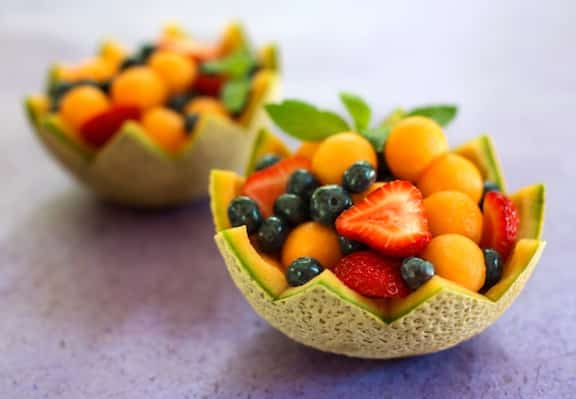
Photos by Hannah Kaminsky at Bittersweet.
Key Ingredients & Substitutions
- Ripe cantaloupes. Their hollowed-out shells become the serving cups — choose melons that feel heavy for their size and smell fragrant at the stem end, both signs of ripeness.
- Strawberries and blueberries. Blackberries make a good substitute for blueberries if you prefer, and raspberries work well folded in too.
- Kirsch or apple juice concentrate. Optional, but a splash adds extra flavor to the fruit as it marinates — kirsch adds a subtle cherry-brandy note, while apple juice concentrate keeps things family-friendly.
- Fresh mint. A simple garnish that adds a fresh, fragrant finish and a pop of green against the fruit.
- A squeeze of lemon. Keeps the fruit tasting bright and can slow browning if any cut fruit sits before serving.
Variations
- Add other fruit. Diced kiwi or seedless grapes make a nice addition to the mix, both for flavor and color.
- Make it a dessert. Add a small scoop of vegan vanilla ice cream or coconut whipped cream on top just before serving.
- Skip the shells. Simply serve the fruit mixture in small bowls or stemmed glasses if you'd rather not hollow out the melons — it's just as tasty, if less dramatic.
- Add a squeeze of lime. A little citrus brightens the whole mix, especially if the fruit isn't at peak ripeness.
- Make mini portions. Use smaller melons and halve them for individual single-serving cups at a party.
Tips for the Best Melon Cups
- Leave a sturdy shell. About ¼ inch of flesh keeps the melon cup from falling apart or cracking once filled.
- Let the fruit marinate. Refrigerating it for 30 minutes to an hour lets the flavors meld together before serving.
- Trim the base. A thin slice off the bottom of each shell helps it stand securely on the plate instead of wobbling.
- Garnish just before serving. Fresh mint added at the last minute keeps its color and aroma bright rather than wilting.
- Chill the shells too. A cold melon cup keeps the fruit inside fresher longer, especially if serving outdoors in warm weather.
Make Ahead & Storage
The fruit mixture can be prepared and refrigerated up to a day ahead, covered tightly so it doesn't pick up other flavors from the fridge. Hollow out the melon shells and fill them closer to serving time, since they can weep liquid the longer they sit filled.
How to Serve
Serve chilled as a light, refreshing dessert or a beautiful addition to a summer brunch spread.
Recipe

Melon Cups with Strawberries and Blueberries
A pretty medley of summer fruits — cantaloupe, strawberries, and blueberries — served in scooped-out melon shells. A little creativity takes fruit from so-so to stunning.
Print
Pin
Save
Servings:
Ingredients
- 2 ripe cantaloupes halved and seeded
- 1 cup strawberries hulled, halved if small, quartered if large
- ¾ cup blueberries or blackberries
- 1 to 2 tablespoons kirsch or apple juice concentrate optional
- mint leaves for garnish, optional
Instructions
- Scoop the flesh out of the cantaloupes, using the small end of a melon baller; leave a shell about ¼ inch thick.
- Combine the melon balls with the remaining fruit and the optional kirsch or apple juice concentrate in a shallow bowl and let stand, refrigerated, for 30 minutes to an hour, stirring occasionally. Cover and refrigerate the melon shells until needed.
- Before serving, cut a thin slice from the bottom of each melon shell so that it will stand securely. Divide the fruit mixture among the shells. Garnish with mint leaves and serve.
Notes
The attractive presentation of this medley of summer fruits makes it especially appealing — sometimes all you need is a little creativity to take fruit from so-so to stunning.
Vegan-ize any recipe!Grab our free vegan cheat sheet, packed with my favorite easy substitutions to make any recipe vegan.
Explore more recipes for strawberries, blueberries, and other berries.
Vegan Dinner Recipes
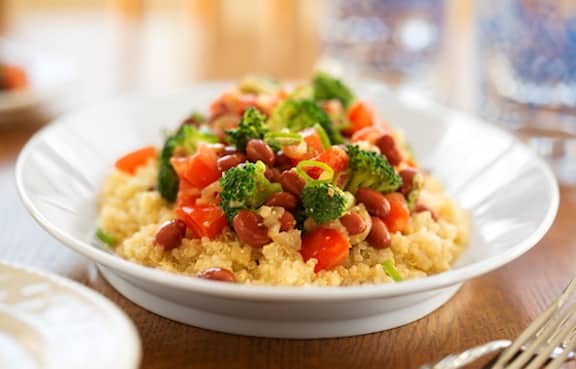
To help you answer the question “what’s for dinner?” here’s a selection of easy vegan main dish recipes you’ll find here on VegKitchen. Great vegan dinners, many of which are quick and easy—can be on the table in 30 minutes or so.
Though this isn't an exhaustive listing of all the possible dinner fare here on VegKitchen (after all, you can serve brunch dishes for dinner, or combine soups and sandwiches or salads—make sure to explore other recipes and categories on the Recipes Galore page), you’ll find plenty to choose from in this at-a-glance listing. Pictured at top, Miso Ginger Red Beans with Quinoa and Broccoli.
To help you answer the question “what’s for dinner?” here’s a selection of easy vegan dinner recipes (suitable for vegetarian diets as well, of course!) you’ll find here on VegKitchen. If you're more of a book person, please also explore some of Nava's cookbooks for fast dinner recipes, including Vegan Express, Vegetarian 5-Ingredient Gourmet and Vegetarian Family Cookbook.
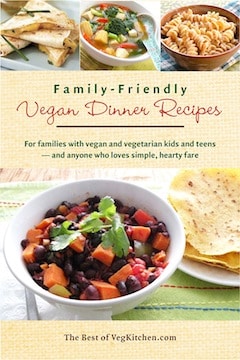
If you're part of a plant-strong family, you might enjoy one of the titles in VegKitchen’s pdf e-book series. This compact, affordable 48-page pdf e-book collects VegKitchen’s most popular family-friendly recipes. No more poring through recipes on the web (or even just this site, of which there are hundreds! For more information, go to Family-Friendly Vegan Dinner Recipes: For families with vegan and vegetarian kids and teens — and anyone who loves simple, hearty fare.
Vegan Dinner Recipes
Asian Noodle Dishes
- Vegetable Lo Mein
- Hoisin-Glazed Bok Choy with Tofu and Soba Noodles
- Pineapple Coconut Noodles
- Easy Vegan Pad Thai
- Pad Thai with Spicy Peanut Sauce
- Orange Sesame Noodles
- Asian Noodle Platter with Crisp Veggies and Peanut Sauce
- Fresh Chinese Noodles with Mixed Mushrooms and Spinach
- Pan-Fried Sesame Noodles and Broccoli
- Noodles with Peanut Sauce, Broiled Kale, and Butternut Squash
- Japanese Noodles with Tempeh and Vegetables
- Soba Noodles with Tofu, Tomatoes, and Basil
- Vegetable Chow Mein
- Szechuan-Style Eggplant with Noodles
- Asian Noodles with Napa Cabbage, Mushrooms, and Tofu
- Asian Noodles with Spicy Stir-Fried Corn and Cabbage

Burritos, Enchiladas, and Other Tortilla Dishes
- Basic Bean Burritos
- Mashed Potato Burritos
- Big Quesadillas with Black Beans, Broccoli, and Portabellas
- Cauliflower Power Tacos
- Quinoa Tacos
- Super Easy Tortilla Casserole
- Black Bean Tostadas
- Quesadillas with Sweet Potatoes, Zucchini, and Corn
- Big Quesadillas with Refried Beans, Spinach, and Avocado
- Avocado Quesadillas
- Yellow Rice and Black Bean Burritos
- Pinto Bean and Corn Soft Tacos
- Bountiful Vegetable Burritos

Casseroles and Other Comfort Foods
- Vegan Macaroni and Cheese
- Hearty Vegetable Pot Pie
- Quinoa, Broccoli, and Vegan Cheese Casserole
- Baked Risotto
- Classic Veggie Shepherd's Pie
- Butternut Squash and Mixed Mushroom Lasagna
- Sweet and White Potato Casserole with Apples
- Mozzarella Mashed Potato Pie
- Mom's "Tuna"-Noodle Casserole
- Black Bean and Zucchini Tortilla Casserole
Quinoa, Broccoli, and Vegan Cheese Casserole; photo by Rachael Braun
Main Dishes Featuring Grains and/or Beans
- Savory Stuffed Winter Squash
- Jamaican-Style Spicy Beans
- Quinoa with Cauliflower, Cranberries, and Nuts
- Valencian-Style Rice and Red Beans
- Tropical Quinoa and Black Beans
- Quinoa and Mushroom Stuffed Peppers
- Pink Bean, Quinoa, and Spinach Soup
- Miso-Ginger Red Beans with Quinoa and Broccoli
- Pinto Bean and Quinoa Sloppy Joes
- Quinoa with Edamame and Oranges
- Black Bean Hemp Protein Patties
- Polenta with Black Beans and Spinach
- Hummus and Quinoa Wraps
- Skillet Black Beans with Potatoes and Tortillas
- Thai Chickpea Almond Curry
- Quinoa Paella
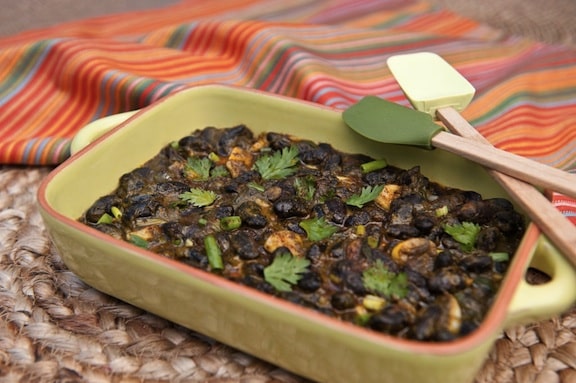
Pasta Entrées
- Pasta Puttanesca (Pasta with Olive Sauce)
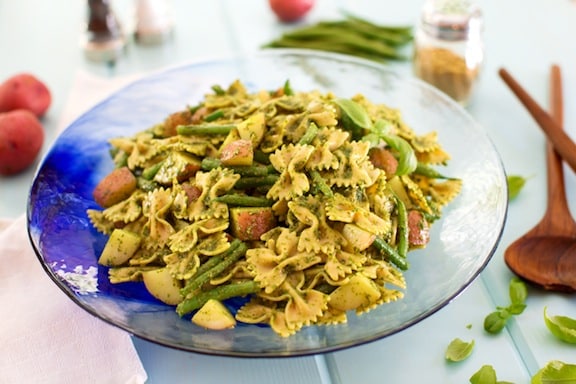
- Pasta with Pesto, Potatoes, and Green Beans
- Vegan Spinach-Mushroom Lasagna
- Pasta, Beans, and Greens with Creamy Cashew Sauce
- Pasta Arabiatta
- Pasta Curry with Cauliflower and Chickpeas
- Penne with Chard and Beans
- Pasta with Roasted Vegetables and Olives
- Mixed Vegetable Lasagna
- Cincinnati "Chili Mac"
- Tortellini or Ravioli in Sweet Potato Sauce
- Pasta, Greens, and Beans in Creamy Cashew Sauce
Pizzas
- Verdant Veggie Pesto Pizza
- Roasted Veggie Pizza
- Garlicky Fresh Tomato and Basil Pizza
- Pizza with Onions, Peppers, and Artichokes
- Mixed Olives and Spinach Pizza
- White Pizza with Asparagus and Spinach
- Artichoke, Green Pea, and Vegan Cheddar Pizza
- Two-Onion Pizza
- White Pizza with Sweet Potato and Carmelized Onions
- Mexican Pizza
- Fresh Tomato, Eggplant, and Olive Pizza

Seitan Recipes
- Dilip's Lime Jerk Seitan with Kale
- Seitan and Polenta Skillet with Fresh Greens
- "Buddhist's Delight" (Seitan and Vegetable Stew)
- Cornmeal-Crusted Seitan
- Seitan and Mushrooms in Paprika Cream
- Tofu and Seitan Sauté with Easy Gravy
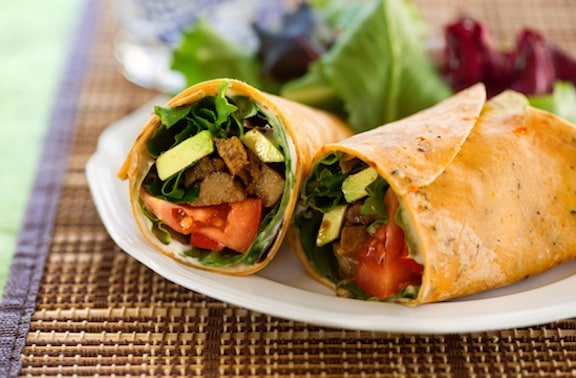
- BBQ-Flavored Seitan and Avocado Wraps
- Seitan "Peppersteak" with Bean Thread Noodles
- Seitan Chow Fun
- Seitan Gyros
- Sweet-and-Sour Seitan and Vegetables
- Seitan, Mushroom and Onion Stir-Fry
- Seitan Peppersteak
- Seitan "Meat and Potatoes" Stew
- Seitan and Broccoli Stir-Fry
Stews & Chilis
- Classic Vegetarian Chili
- Moroccan-Style Vegetable Stew
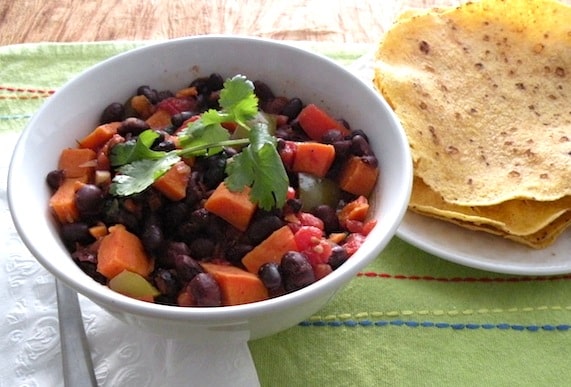
- Quick Black Bean and Sweet Potato Chili
- Curried Sweet Potatoes with Chard and Chickpeas
- Italian Vegetable Ragout with Chard
- Brazilian-Inspired Black Bean Stew
- Golden Hominy Chili
- Curried Mixed Vegetable Stew
- South American Harvest Stew
Tofu, Tempeh, and Vegan Sausage Main Dishes
- Spinach, Broccoli, and Tomato Scrambled Tofu
- Stir-Fried Tofu with Spring Greens
- Classic Tofu Quiche
- Citrus Roasted Tofu
- Tempeh Tamale Pie
- Kung Pao Broccoli and Tofu
- Thai Coconut Tempeh with Pineapple Salsa
- Barbecued-Flavored Roasted Tempeh and Vegetables
- BBQ-Flavored White Beans with Sausage and Spinach
- Easy Curried Sweet Potato and Tofu Stew
- Broccoli Frittata
- Tempeh, Kale, and Sweet Potato Skillet
- Tangy Tempeh with Portabella Mushrooms
- Gently Curried Tofu Burgers
- Potatoes and Collard Greens with Vegan Sausage
- Tofu Rancheros
- Tofu with Balsamic-Roasted Italian Vegetables
- Mediterranean Tofu
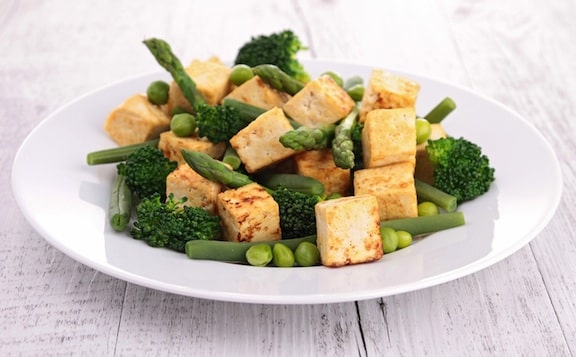
- Sautéed Tofu with Green Veggies
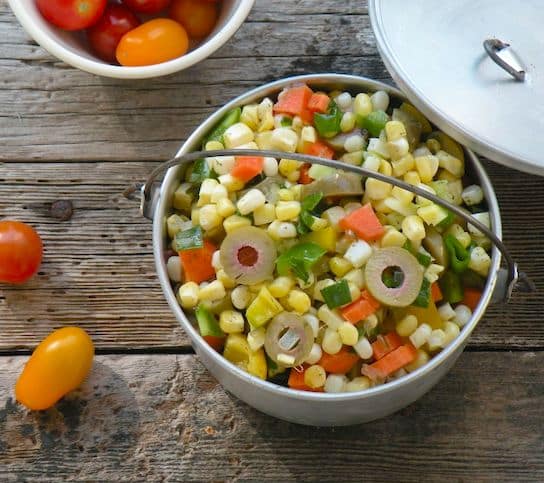
Corn Relish Salad
This corn relish salad is loaded with fresh veggies, pimiento olives, and flavorful herbs. It's the perfect summer side for burgers, wraps, and more! If you're looking for the perfect summery side dish, you've come to the right place — this simple corn relish salad is perfect paired with veggie burgers, grilled veggie kebabs, or your favorite vegan sandwiches and wraps. It's loaded with fresh flavors and nutritious veggies, and best of all, it's easy to make in just 10 minutes.
Key Ingredients & Substitutions
- Corn kernels. Fresh or frozen both work well. If using frozen, defrost and let the kernels dry out well before mixing them in, so you don't end up with a soggy salad.
- Pimiento olives. Add a briny, colorful pop — any olive you like works here, including something fancier like garlic-stuffed olives for a fun twist.
- Bell pepper, celery, and carrot. The crunchy base of the relish — dice them finely so every bite gets a bit of everything.
- Sweet pickle relish and apple cider vinegar. Together they build the tangy-sweet dressing that ties the whole salad together.
- Fresh parsley and dill. Add a bright, herbal note — dried dill works in a pinch if fresh isn't on hand.
Tips & Tricks
For the corn, you can use fresh or frozen corn kernels. Fresh always tastes best of course, but frozen kernels work just fine to save time. I suggest defrosting the corn and then letting it dry out well before mixing it in, so you don't get a soggy salad.
Feel free to use any type of olives that you prefer. I think these pimiento olives* work really well, but something fancy like garlic-stuffed olives would also be a fun twist.
For more spice, add a second jalapeno pepper or swap it for a spicier red chili pepper instead.
Variations
- Add beans. A can of drained, rinsed black beans turns this into a heartier side or even a light main.
- Make it a salsa. Chop the vegetables a little finer and serve alongside tortilla chips instead of as a side salad.
- Add avocado. Diced avocado stirred in right before serving adds creaminess that plays well against the tangy dressing.
- Swap the herbs. Fresh cilantro in place of parsley gives the relish a completely different, Southwestern-leaning character.
- Add corn char. Grilling the corn before cutting it off the cob adds a smoky depth that plain fresh or frozen kernels won't have.
Make Ahead & Storage
This relish keeps well in a sealed container in the refrigerator for up to 4 days, and the flavor actually improves after an hour or two as the vegetables soak up the dressing, making it an easy make-ahead side for a cookout or potluck.
How to Serve
Serve alongside veggie burgers, grilled veggie kebabs, or your favorite sandwiches and wraps.
Recipe
Corn Relish Salad
This corn relish salad is loaded with fresh veggies, pimiento olives, and flavorful herbs. It's the perfect summer side for burgers, wraps, and more!
Print
Pin
Save
Servings:
Ingredients
- 3 cups corn kernels from about 4 medium ears, fresh or frozen
- ½ medium bell pepper finely diced, any color
- 1 stalk celery finely diced
- 1 carrot peeled and finely diced
- ½ cup pimiento olives halved or sliced
- 2 scallions thinly sliced
- ¼ cup fresh parsley minced
- 1 tablespoon fresh dill minced, or ½ teaspoon dried
- 1 hot chili pepper fresh, such as jalapeño, seeded and minced, optional
- 1 tablespoon olive oil
- 3 tablespoons sweet pickle relish or more, to taste
- 3 tablespoons apple cider vinegar or more, to taste
- Salt and pepper to taste
Instructions
- Combine the salad ingredients in a serving bowl and stir together.
- If time allows, cover and let stand for an hour or two before. Stir occasionally to distribute the dressing. Taste to adjust the various flavors — more pickle relish, cider vinegar, salt and pepper, then serve.
Vegan-ize any recipe!Grab our free vegan cheat sheet, packed with my favorite easy substitutions to make any recipe vegan.
More Vegan Recipes
If you love this corn relish salad, be sure to check out these other delicious vegan ideas:
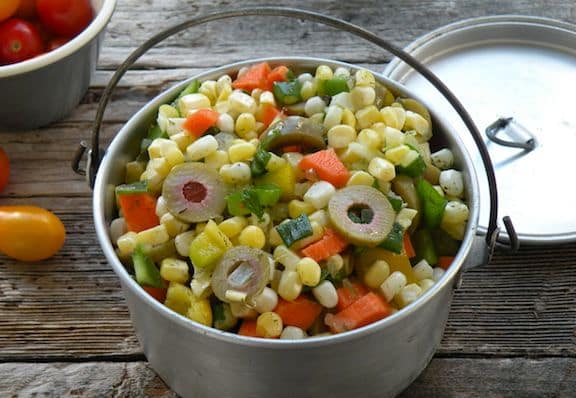
*This post contains affiliate links. If the product is purchased by linking through this review, VegKitchen receives a modest commission, which helps maintain our site and helps it to continue growing!
Vegan Matzo Brei
Matzo brei — a kind of flat omelet made from crushed matzo — is a beloved Passover-week breakfast. Quinoa flakes stand in for the traditional egg, acting as the "glue" that holds it together while adding a surprising amount of flavor to this comforting classic. It comes together in one skillet, one serving at a time, in well under 15 minutes.
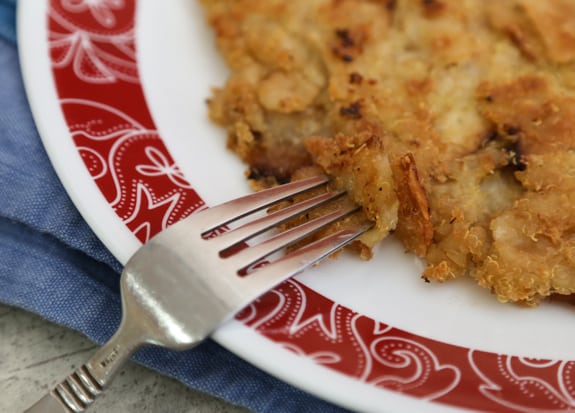
Photos by Evan Atlas.
Key Ingredients & Substitutions
- Matzo. The star of the dish — crumble it into small, irregular pieces so it soaks up the water evenly and gives the finished dish its characteristic texture.
- Quinoa flakes. These give the matzo brei its structure in place of egg. Look for them near the hot cereals or in the gluten-free aisle — they're worth seeking out for this recipe specifically, since few other pantry staples do the same binding job.
- Vegan buttery spread. Use a Kosher for Passover margarine if you're keeping strictly kosher for the holiday.
- Maple syrup. Optional, but a classic sweet topping if you like your matzo brei on the sweeter side.
- Salt. Essential even in the sweet version — it balances the maple syrup and keeps the dish from tasting flat.
Variations
- Make it savory. Skip the maple syrup and top with extra salt, or a spoonful of applesauce on the side.
- Add cinnamon. A pinch stirred into the matzo mixture adds warmth, especially if serving it sweet.
- Double the batch. This recipe is easiest to make one serving at a time in a small skillet — simply repeat for more servings rather than trying to cook a large batch in one pan.
- Add fried onions. A classic savory variation — sauté some onion in the skillet before adding the matzo mixture.
Tips for the Best Vegan Matzo Brei
- Get the skillet very hot first. This is what gives the matzo brei its crisp, golden crust rather than a soft, steamed texture.
- Let the matzo mixture stand. A few minutes of soaking is what lets the quinoa flakes do their binding work — don't rush straight into the pan.
- Flip confidently. Use a plate the same size as your skillet, and flip in one quick, decisive motion rather than hesitating halfway through.
- Serve immediately. Matzo brei is best hot and crisp, right out of the pan — it loses its crunch quickly as it cools.
- Don't over-soak the matzo. A few minutes is plenty; too long and it turns mushy instead of holding some texture.
Make Ahead & Storage
Matzo brei is really at its best made fresh and eaten immediately, since it loses its crisp texture as it sits. If you do have leftovers, reheat in a hot dry skillet rather than the microwave to bring back some crispness.
How to Serve
Serve hot with maple syrup for a sweet breakfast, or simply sprinkle with extra salt for a savory take.
Recipe
Vegan Matzo Brei
As in our recipe for Vegan Matzo Balls, quinoa flakes provide the Passover-appropriate “glue” that holds the matzo brei together. They also add a surprising amount of flavor to this bland yet comforting classic.
Print
Pin
Save
Servings:
Ingredients
- 1 ½ matzos crumbled
- ¼ cup quinoa flakes
- 1 tablespoon vegan buttery spread like Earth Balance, or use a Kosher for Passover margarine if you adhere strictly
- Pinch of salt plus more for serving, to taste
- Maple syrup optional
Instructions
- Start heating a 7- or 8-inch nonstick skillet before starting, as it’s best for it to be very hot when the pouring in the matzo brei batter.
- Combine the crumbled matzos and quinoa flakes in a heatproof bowl. Pour 1 cup boiling water over them and stir together. Let stand for 2 to 3 minutes as the skillet heats up.
- Melt the buttery spread or margarine in the skillet. Once it’s sizzling, pour in the matzo mixture and pat in evenly. Cover and cook over medium-high until the bottom is golden brown and crisp.
- Slide the matzo brei out onto a plate about the same size as the skillet. Holding the bottom of the plate with one hand, invert the skillet over the plate with the other and then flip right side up quickly. Cook the other side of the matzo brei until golden brown.
- Slide onto a a serving plate. Serve with the optional maple syrup, or sprinkle additional salt over the top.
Nutrition (Estimate per Serving)
Calories: 346kcalCarbohydrates: 52gProtein: 7gFat: 11gSaturated Fat: 2gPolyunsaturated Fat: 3gMonounsaturated Fat: 4gTrans Fat: 1gSodium: 92mgPotassium: 51mgFiber: 3gSugar: 2gVitamin A: 535IUCalcium: 5mgIron: 2mg
Vegan-ize any recipe!Grab our free vegan cheat sheet, packed with my favorite easy substitutions to make any recipe vegan.
Country Captain Stew
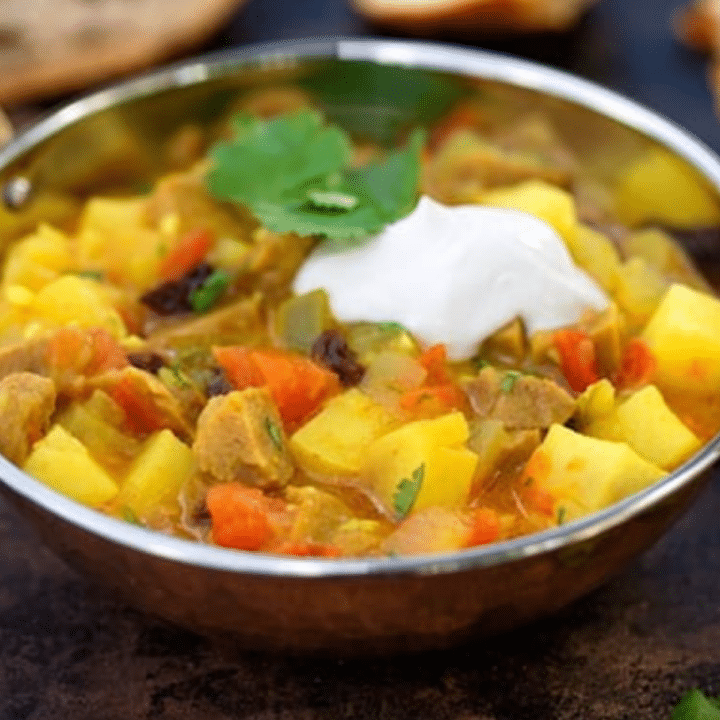
This tasty Country Captain Stew bears a passing resemblance to classic East Indian mulligatawny, with an unusual and appealing combo of potatoes, tofu or seitan, and tart apples. The curry spices and sweet raisins against the tart apple make this stew taste more complex than its short ingredient list would suggest.
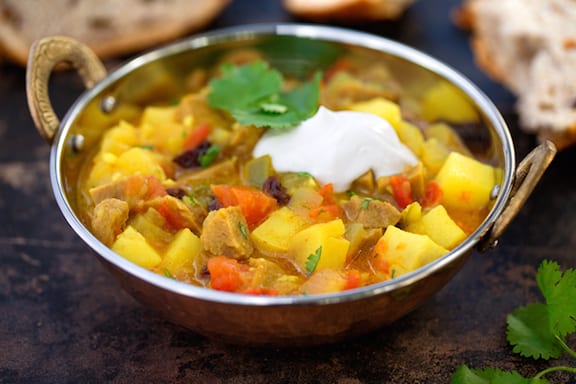
Photos by Hannah Kaminsky.
Key Ingredients & Substitutions
- Tofu or seitan. Either works well here — tofu gives a milder, softer bite, while seitan adds a chewier, more substantial texture closer to the dish's traditional chicken.
- Granny Smith apples. Their tartness balances the sweetness of the raisins and curry — don't swap in a sweeter apple variety, since it changes the balance of the whole dish.
- Curry powder. A good-quality blend makes a real difference in flavor depth — a stale or cheap curry powder can taste dusty rather than warm and aromatic.
- Raisins. Add little bursts of sweetness throughout the stew — dried cranberries or currants work as a substitute.
- Potatoes. Give the stew its heartiness — a waxy variety holds its shape better through the simmer than a starchy russet.
Variations
- Add more vegetables. Diced carrots or cauliflower florets work well simmered in with the potatoes.
- Make it spicier. Add extra red pepper flakes or a pinch of cayenne along with the curry powder.
- Swap the protein. Chickpeas make a good no-fry alternative to tofu or seitan.
- Add coconut milk. A splash stirred in near the end makes the stew extra creamy and mellows the curry spice.
- Add toasted almonds. Scattered on top just before serving, they add crunch and echo the dish's East Indian roots.
Tips for the Best Country Captain Stew
- Blot the tofu well. This helps it brown properly instead of steaming in the pan, which matters a lot for texture.
- Don't rush the onions. Cooking them until truly golden builds a deeper flavor base for the stew rather than a raw, sharp one.
- Add the herbs in two additions. Stirring in half the cilantro or parsley early and the rest at the end gives the best fresh flavor throughout.
- Top with vegan yogurt. A cool, tangy dollop balances the warm curry spices beautifully.
- Let the curry powder bloom. Cooking it briefly in oil before adding liquid wakes up its flavor far more than stirring it straight into the broth.
Make Ahead & Storage
Like most stews, this one is even better the next day once the flavors have had time to meld. It keeps in the refrigerator for up to 4 days and freezes well for up to 3 months.
How to Serve
Serve hot over rice, with a scoop of vegan yogurt or sour cream on top if desired, and a crusty piece of bread on the side.
Recipe

Country Captain Stew
This tasty Country Captain Stew bears a passing resemblance to classic East Indian mulligatawny, with an unusual and appealing combo of potatoes, tofu or seitan, and tart apples.
Print
Pin
Save
Servings: to 8
Ingredients
- 14 to 16-ounce tub firm tofu or 12 to 16 ounces seitan
- 3 tablespoons olive oil
- 2 medium onions chopped
- 3 to 4 cloves garlic minced
- 1 large green bell pepper cut into strips
- 3 medium potatoes scrubbed and cut into ½-inch dice
- 14 to 16-ounce can diced tomatoes undrained
- 2 medium Granny Smith apples peeled, cored, and diced
- 2 teaspoons good-quality curry powder or more, to taste
- 2 teaspoons fresh ginger grated, or more to taste
- ½ cup dark raisins
- ½ cup fresh cilantro or parsley chopped
- salt and freshly ground pepper to taste
- dried hot red pepper flakes to taste, optional
- plain non-dairy yogurt or vegan sour cream for topping, optional
Instructions
- If using tofu, cut it crosswise into ½-inch-thick slices and blot between clean tea towels or paper towels. If using seitan, drain and cut into small bite-sized chunks.
- Heat half of the oil in a soup pot. Add the tofu or seitan and saute over medium-high heat, stirring frequently, until golden on both sides. Remove to a plate and set aside.
- Heat the remaining oil in the soup pot. Add the onion and garlic and saute over medium heat, stirring occasionally, until the onion is golden, about 10 to 12 minutes.
- Add the bell pepper, potatoes, tomatoes, apples, curry powder, ginger, and 3 cups water. Bring to a simmer, then cover and simmer gently for about 20 minutes, or until the potatoes are done.
- Stir in the tofu or seitan, raisins, and half of the cilantro or parsley.
- Season with salt, pepper, and the optional red pepper flakes. Cook over low heat for 10 to 15 minutes longer.
- Stir in the remaining cilantro or parsley. Top each serving with a scoop of vegan yogurt or sour cream, if desired.
Nutrition (Estimate per Serving)
Calories: 302kcalCarbohydrates: 46gProtein: 10gFat: 10gSaturated Fat: 1gPolyunsaturated Fat: 3gMonounsaturated Fat: 6gSodium: 111mgPotassium: 852mgFiber: 7gSugar: 11gVitamin A: 283IUVitamin C: 50mgCalcium: 140mgIron: 3mg
Vegan-ize any recipe!Grab our free vegan cheat sheet, packed with my favorite easy substitutions to make any recipe vegan.
Passover Haroset
Eastern European-style haroset (sometimes spelled charoset) is a sweet condiment served as part of the Passover Seder served with matzo. It's made essentially of apples, walnuts, and wine. One of the important symbolic dishes of Passover, it represents the bricks used by the Jewish slaves to build Pharaoh's cities.
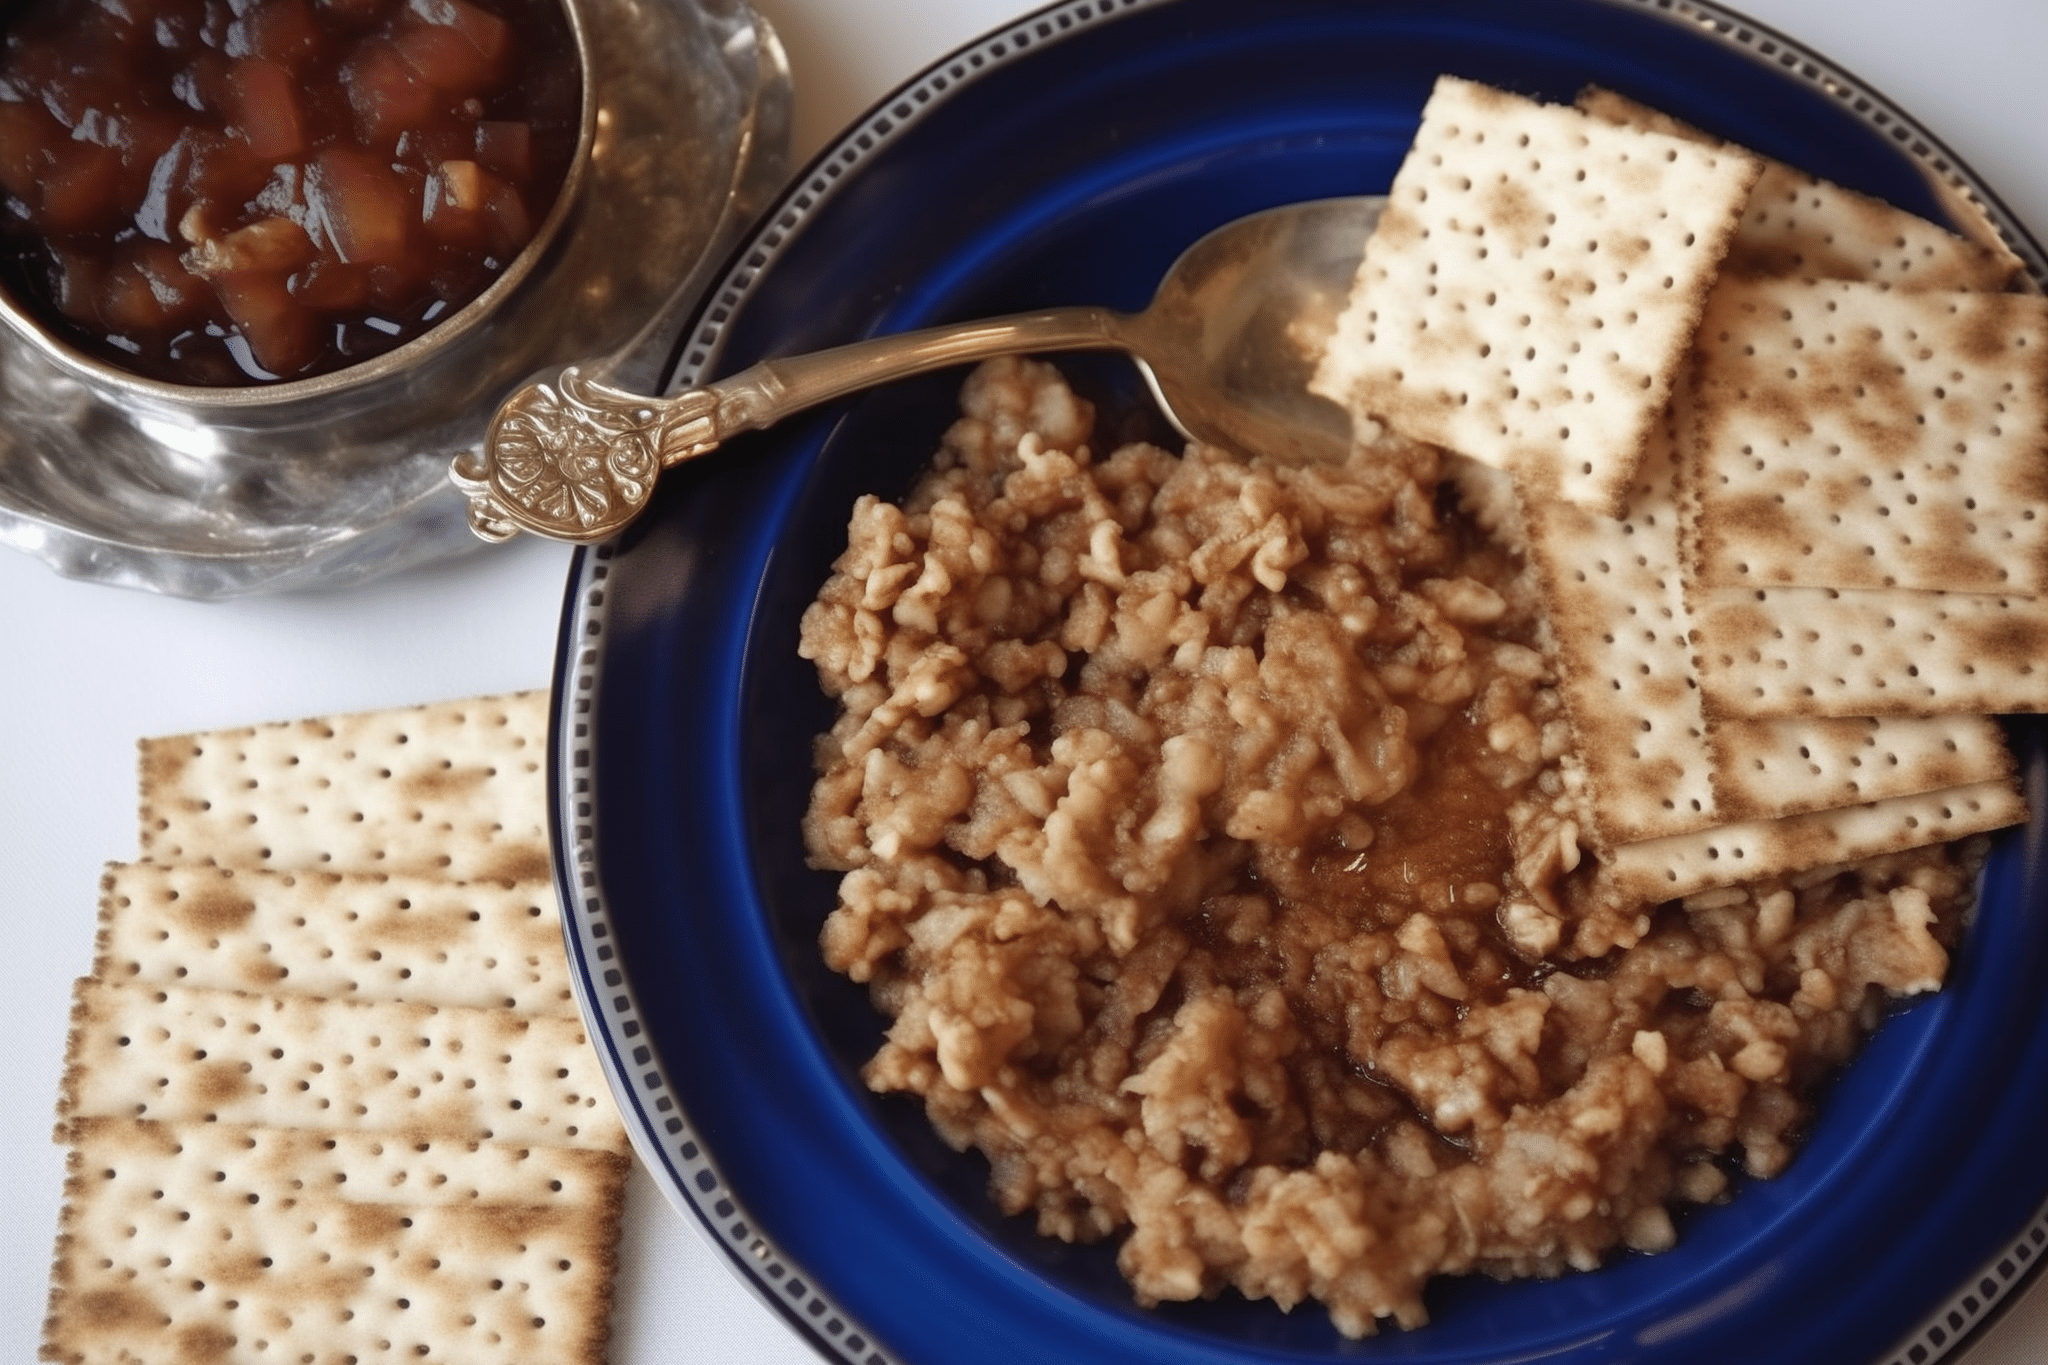
Growing up, haroset may have been that thing you politely took a teaspoon of during the Seder and then forgot about. But once you make it yourself, you'll realize it's basically Jewish apple salsa - sweet, tart, a little nutty, and oddly addictive.
It's good on matzo, obviously, but also sneakily perfect stirred into oatmeal or dolloped over yogurt the next morning. The leftovers (if there are any) never go to waste.
This version is made with apples, walnuts, cinnamon, and sweet wine. It comes together in minutes, no cooking required. Just chop, stir, and try not to eat half of it before the Seder starts.
This Haroset Recipe Is:
- Perfectly sweet and spiced - apples, cinnamon, and a splash of wine make magic.
- Super quick to throw together - like, 15 minutes tops.
- Traditional with room to play - you can keep it classic or dress it up.
- Make-ahead friendly - the flavors only get better as it sits.
Key Ingredients & Substitutions
- Apples: Go for sweet-tart ones like Fuji, Gala, or Honeycrisp. You can peel them or not - your call.
- Walnuts: The OG nut for haroset, but pecans or even almonds work if that's what you have.
- Sweet Passover wine: Manischewitz is classic (and nostalgic), but any kosher sweet red wine will do. Grape juice also works if you're avoiding alcohol.
- Agave nectar: A touch of added sweetness-optional if your apples are already sugar bombs. You can swap in honey or maple syrup too.
- Cinnamon, nutmeg, allspice: The spice trio that brings warmth. Adjust to taste.
Helpful Tips
- Texture matters: Chop everything by hand for a chunkier, more rustic feel, or pulse it all in a food processor for a smoother spread.
- Make it ahead: Haroset is one of those magical things that tastes better the next day. Let it chill overnight so the flavors meld.
- Taste and tweak: Everyone likes their haroset a little different. Too tart? Add more agave. Too thick? A splash more wine.
Variations
- Sephardic-style: Swap the apples for dates, figs, and raisins. (Or try this version with dates.) Add almonds and maybe a pinch of cardamom for a totally different (but still amazing) vibe.
- Nut-free: Use sunflower or pumpkin seeds instead of nuts, or skip them entirely and boost the texture with extra apples or raisins.
- Boozy twist: Add a splash of brandy or cognac for a grown-up version with a little extra warmth.
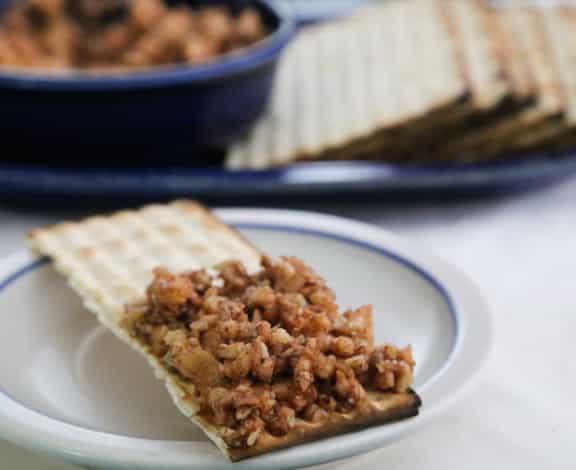
More Passover Recipes
If you love this haroset, be sure to check out these other tasty ideas:
Recipe
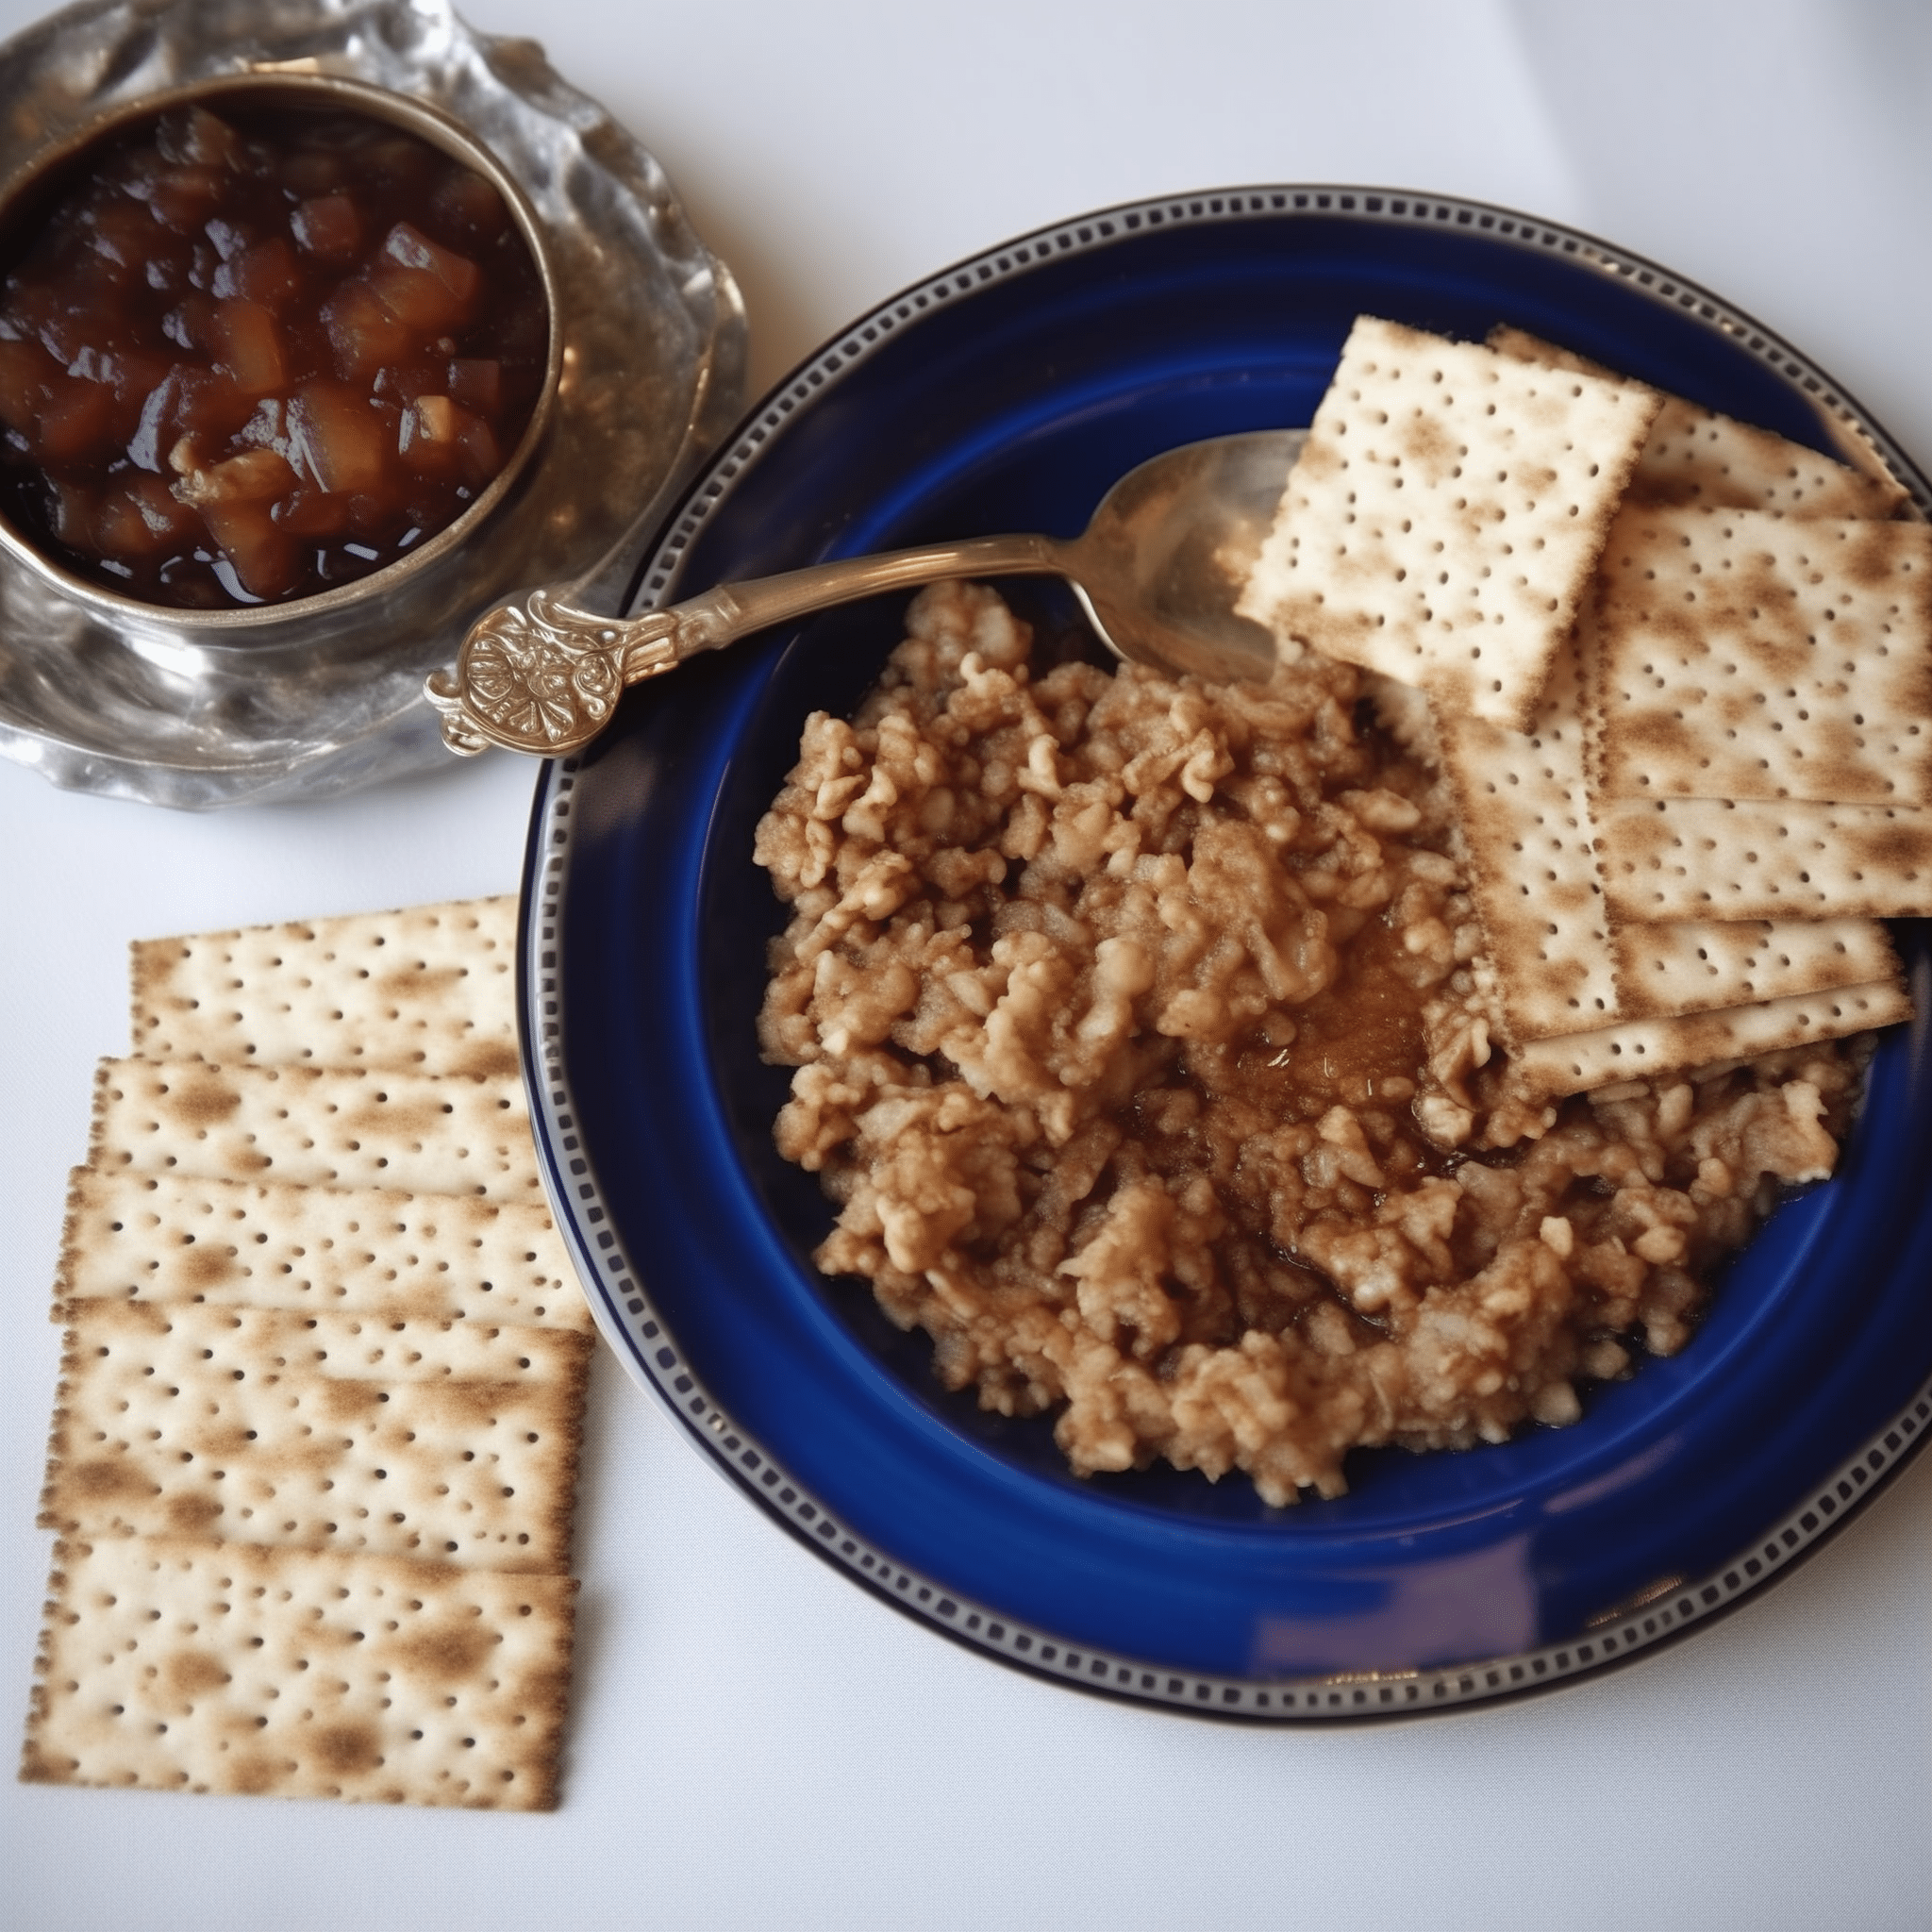
Passover Haroset
Eastern European-style haroset (sometimes spelled charoset) is a sweet condiment served as part of the Passover Seder served with matzo. It's made essentially of apples, walnuts, and wine
Print
Pin
Save
Servings:
Ingredients
- 2 large sweet apples peeled, cored, and diced
- ⅔ cup walnuts
- ¼ cup sweet Passover wine
- 1 to 2 teaspoons agave nectar to taste
- 1 teaspoon ground cinnamon
- pinch ground nutmeg
- pinch ground allspice
Instructions
- Toss everything into a food processor and pulse until it's chunky but spreadable. Or chop and mix by hand if you're going for a more rustic look.
- Taste and adjust the sweetness or spices as you like.
- Serve right away or cover and refrigerate for a few hours-or overnight-for deeper flavor.
Notes
Makes approximately 2 cups of haroset.
Suggest serving with matzo!
Nutrition (Estimate per Serving)
Calories: 65kcalCarbohydrates: 6gProtein: 1gFat: 4gSaturated Fat: 1gPolyunsaturated Fat: 3gMonounsaturated Fat: 1gSodium: 1mgPotassium: 67mgFiber: 1gSugar: 4gVitamin A: 18IUVitamin C: 1mgCalcium: 10mgIron: 1mg
Vegan-ize any recipe!Grab our free vegan cheat sheet, packed with my favorite easy substitutions to make any recipe vegan.
Find more at VegKitchen's Passover: Ashkenazic-Style Seder page.
Find more ways to make Special Occasions and Entertaining easier and healthier.
Vegan Passover Seder Recipes
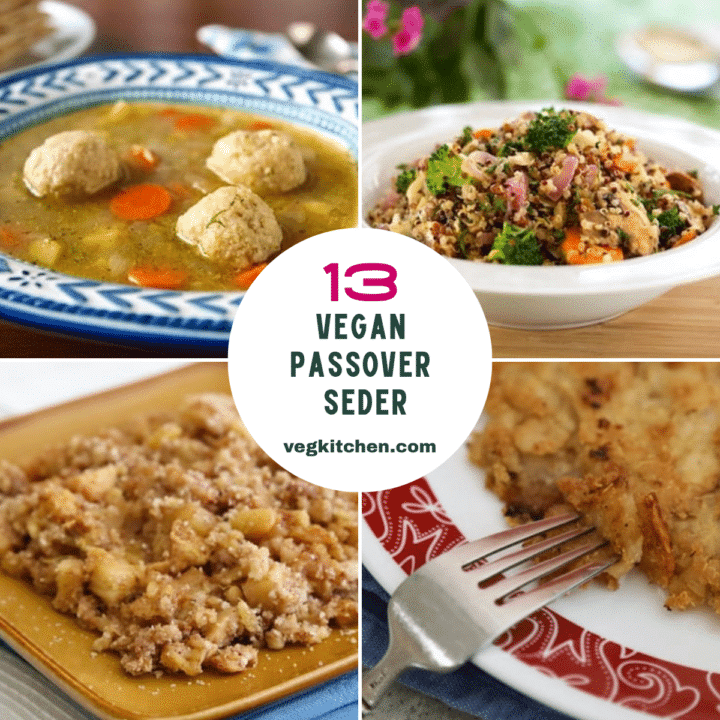
These vegan Passover Seder recipes and menus (great for vegetarians too) focus on the fresh produce of early spring — very fitting, as the holiday has connotations of renewal and rebirth. Though there's flexibility in what may be served for the meal itself, there are also many restrictions. Ashkenazic Jews avoid, aside from bread-related products, many other grains and legumes. Sephardic Jews avoid leavened wheat products, but can use rice and other grains, as well as legumes.
The biggest challenge for vegans is how to create eggless versions of egg-y classics like matzo balls — no worries, the recipes below include vegan matzo balls (with a gluten-free variation) that are awesome. Both traditions have lately embraced the use of quinoa during Passover week, and since Passover once had a strong seasonal festival aspect, spring's bountiful produce is most welcome.
Vegan Passover Seder Recipes
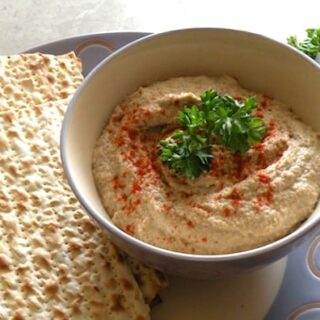
A rich, savory mock chopped liver made from mushrooms, cashews, and onions — a classic Seder appetizer with no eggs required.
The traditional Ashkenazic haroset, a sweet mixture of apples, nuts, and wine that symbolizes the mortar used by enslaved Jews in Egypt.
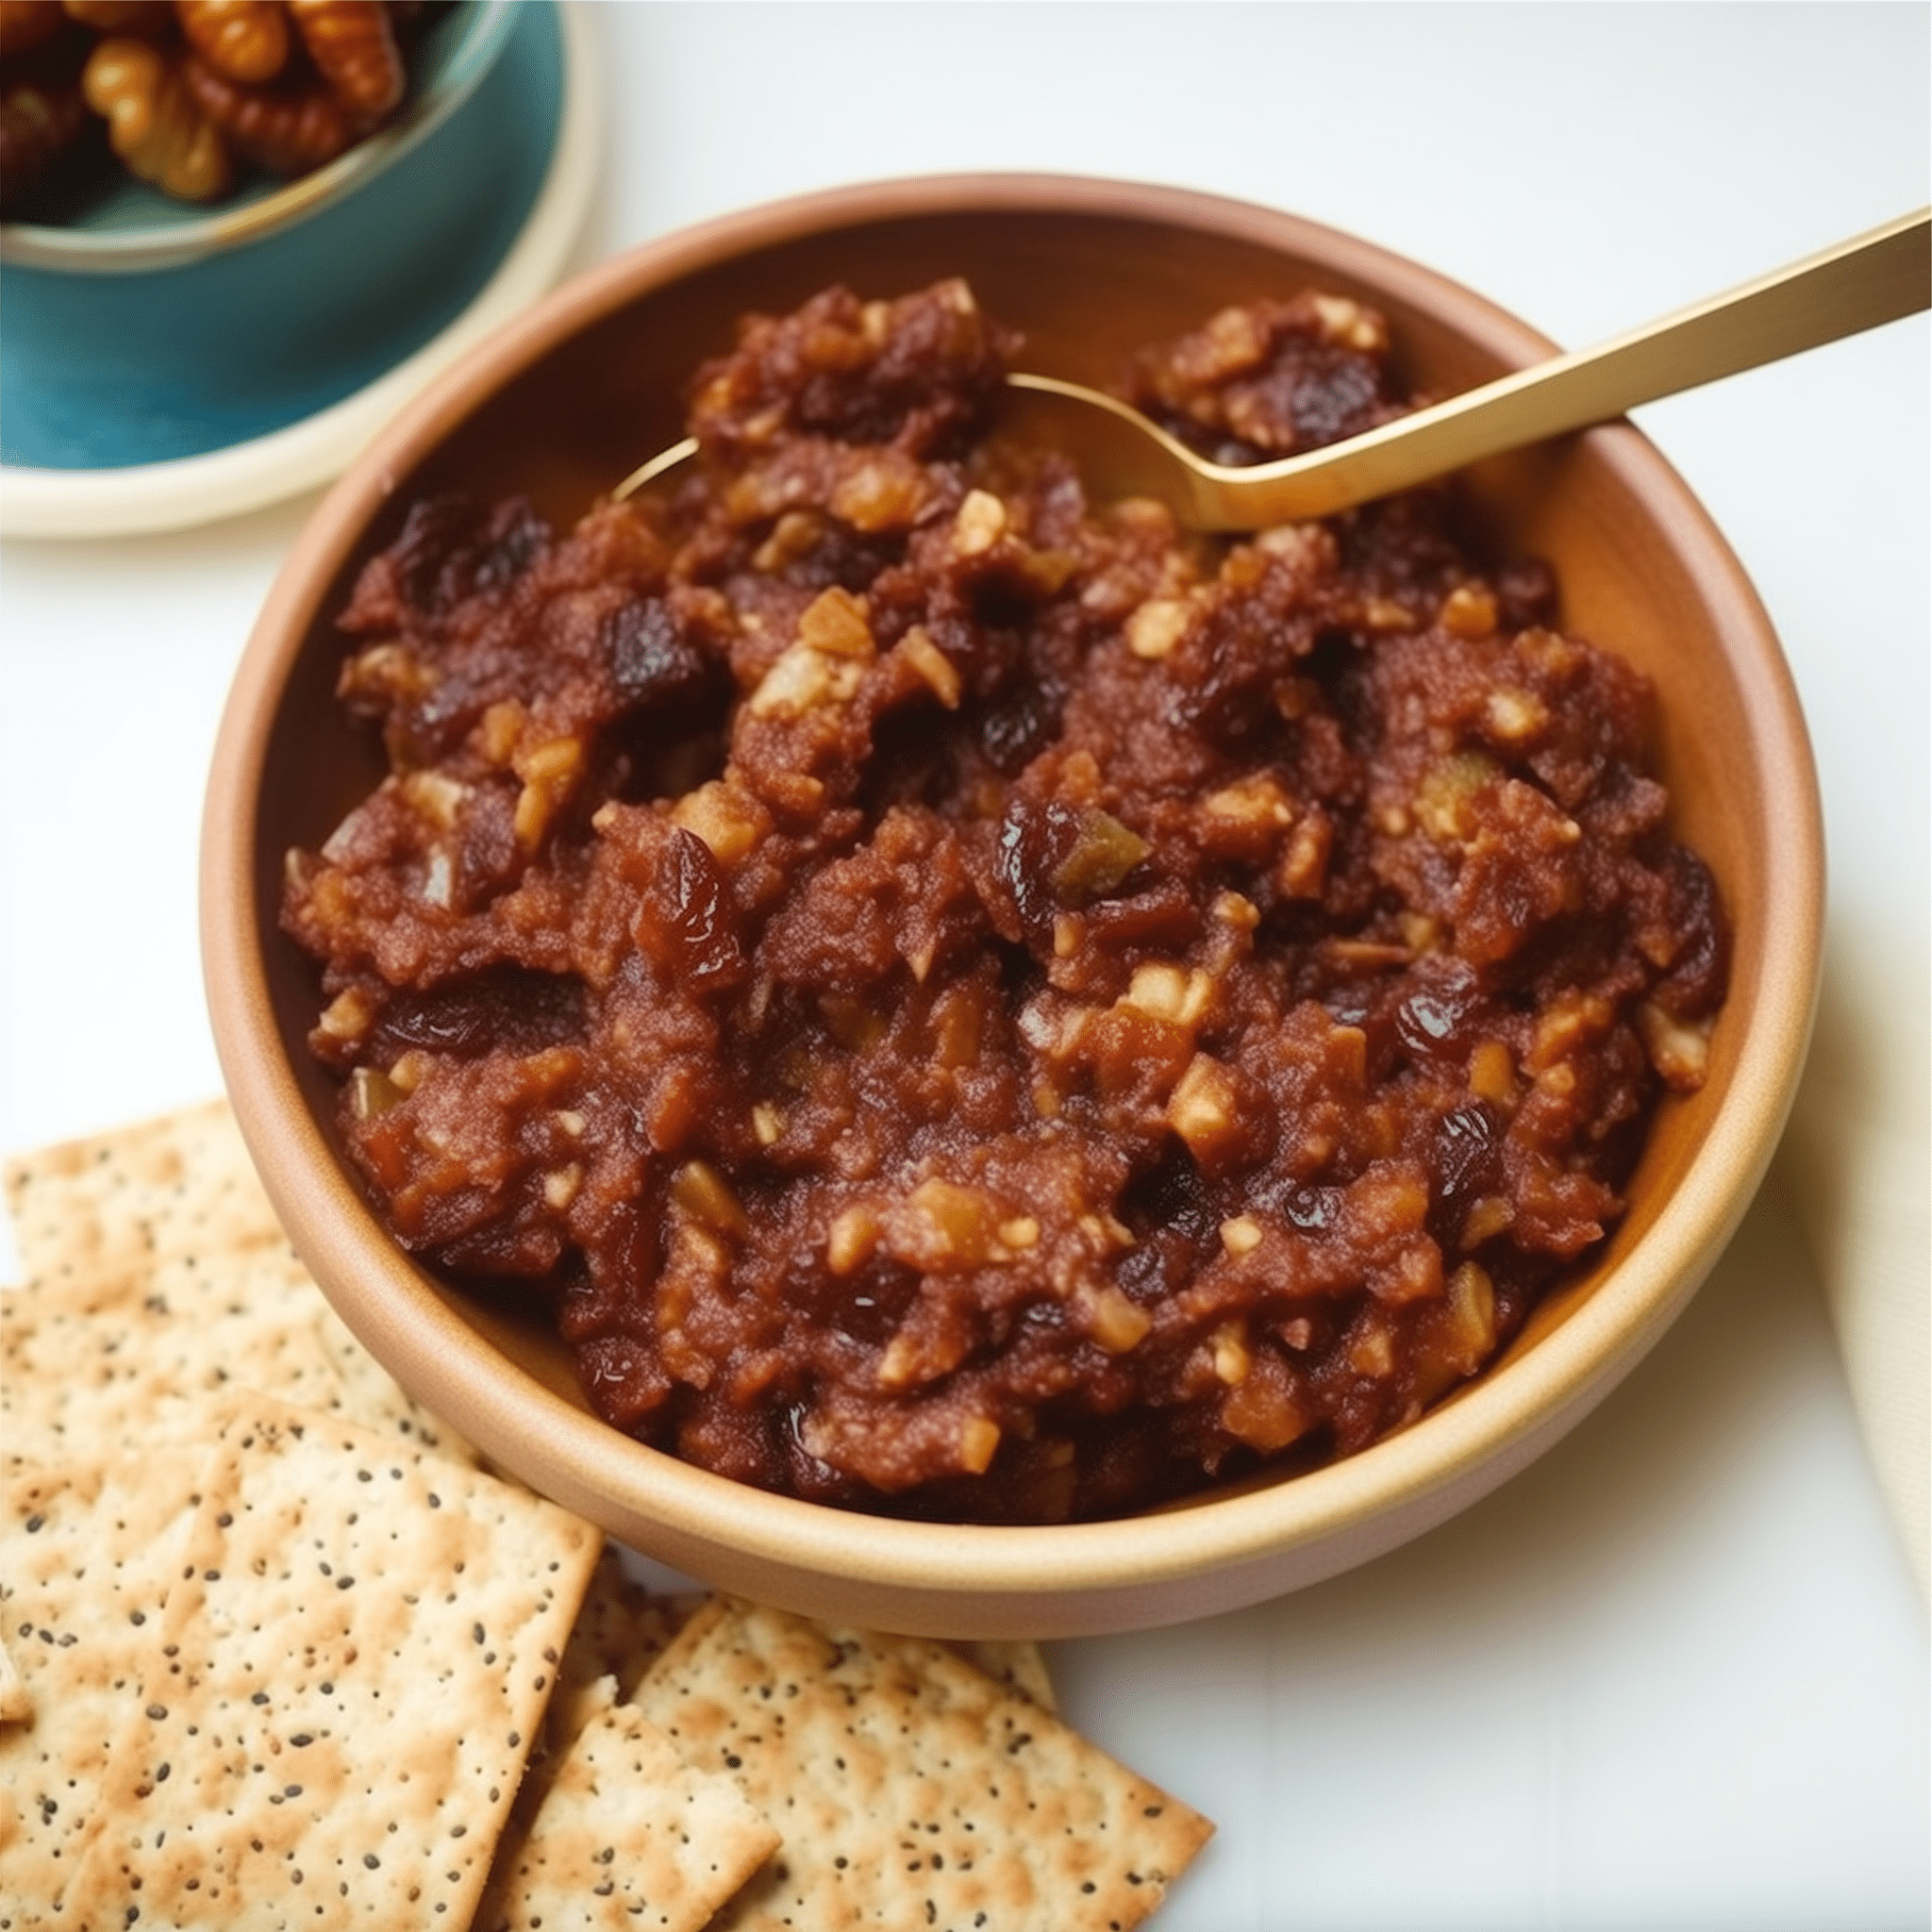
A Sephardic take on haroset, made with dates and dried fruits for a deeply sweet, brick-colored spread.

A comforting spring vegetable soup with fluffy, eggless matzo balls — the vegan answer to a Seder classic.

A Sephardic-style vegan matzo ball soup with warm, fragrant spices.
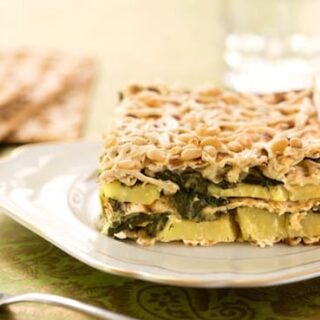
Layers of spinach, leek, and potato baked with matzo for a comforting Passover gratin.

A Sephardic-style matzo mina layered with eggplant, a hearty Passover main.
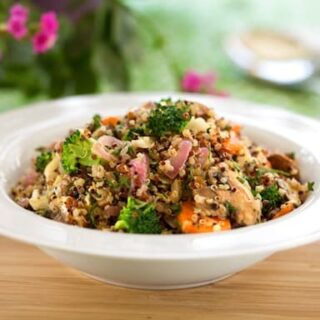
A light, fluffy quinoa pilaf that's Passover-friendly and full of spring flavor.
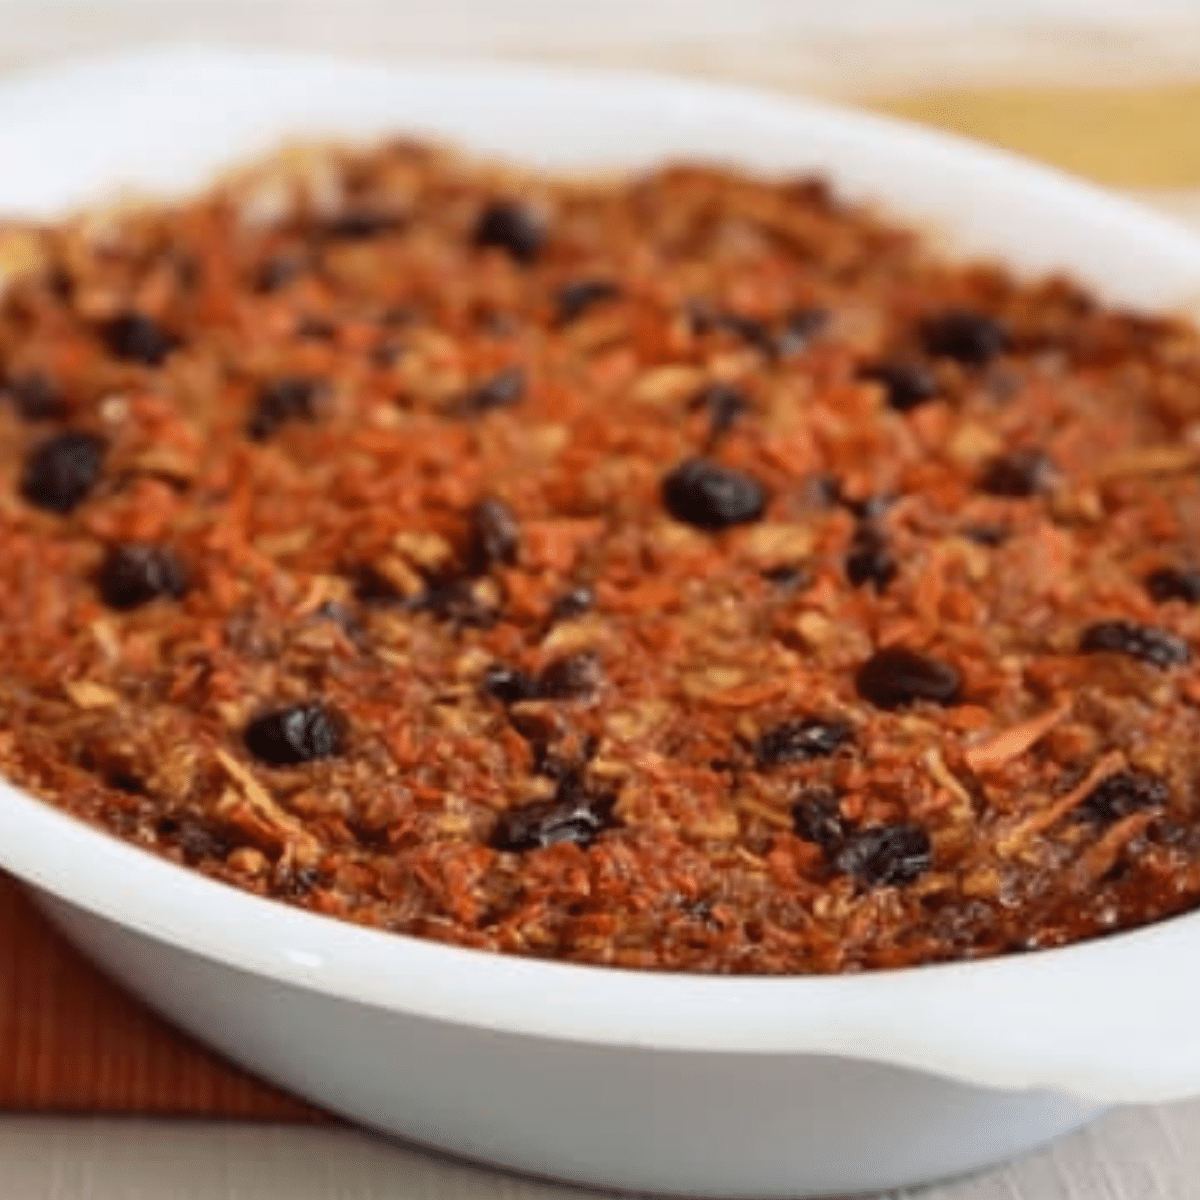
A naturally sweet carrot and apple pudding, a Passover-friendly side or dessert.
Simple sautéed carrots with toasted almonds, a quick and colorful Seder side.
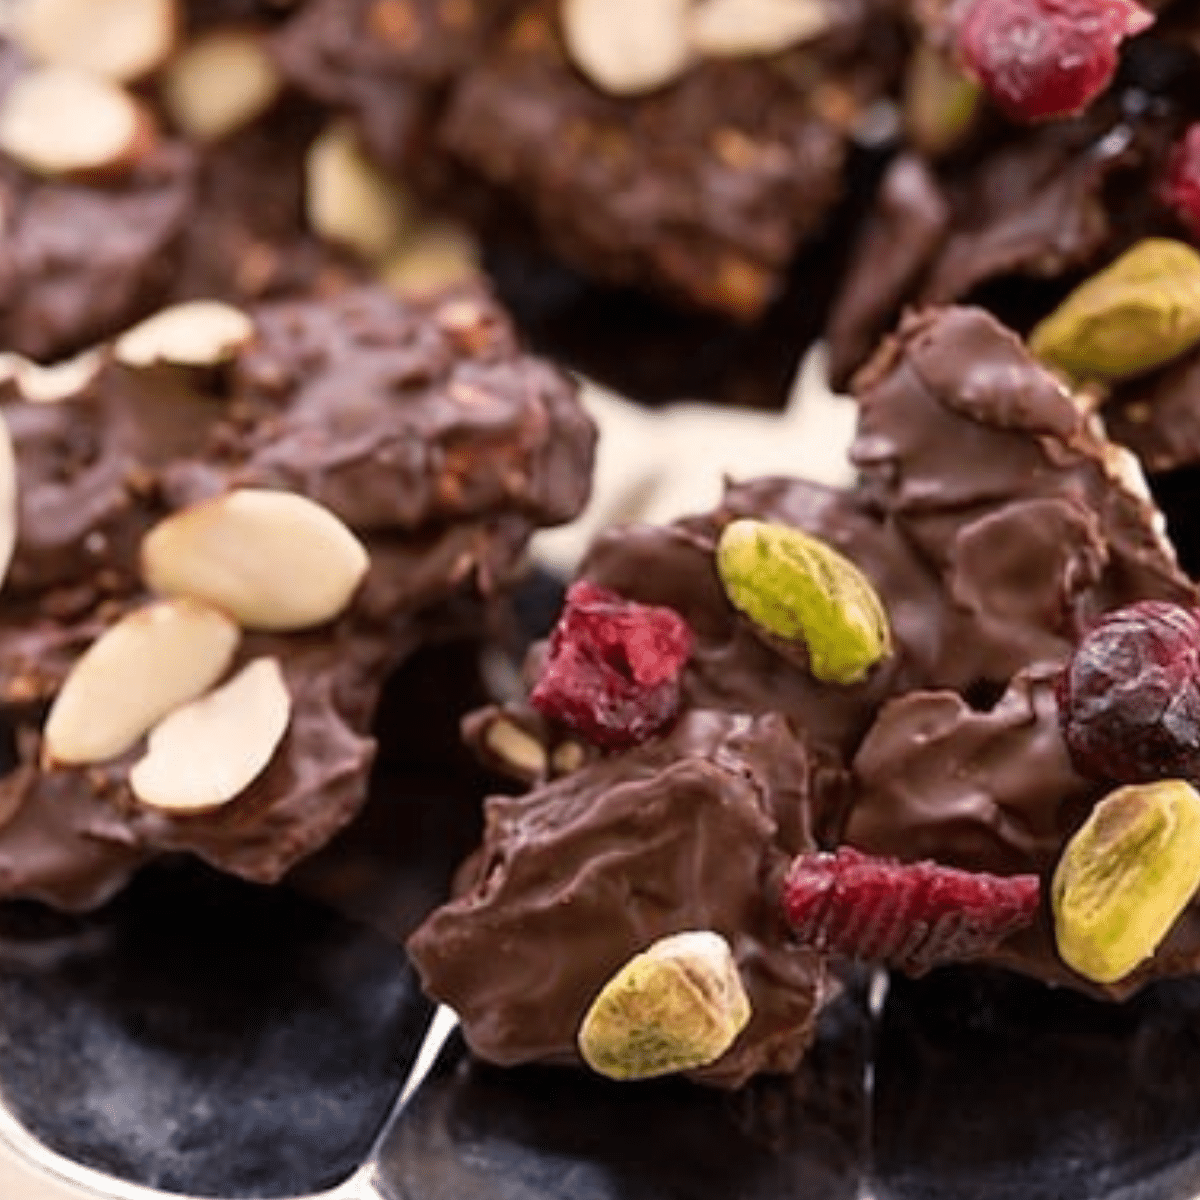
A rich, crunchy chocolate matzo brittle studded with toasted nuts and dried fruit — a great way to use leftover matzo.
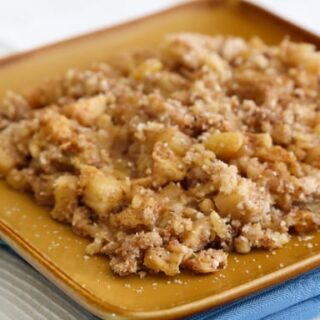
A juicy pineapple crumble made Passover-friendly, with a crisp, nutty topping.
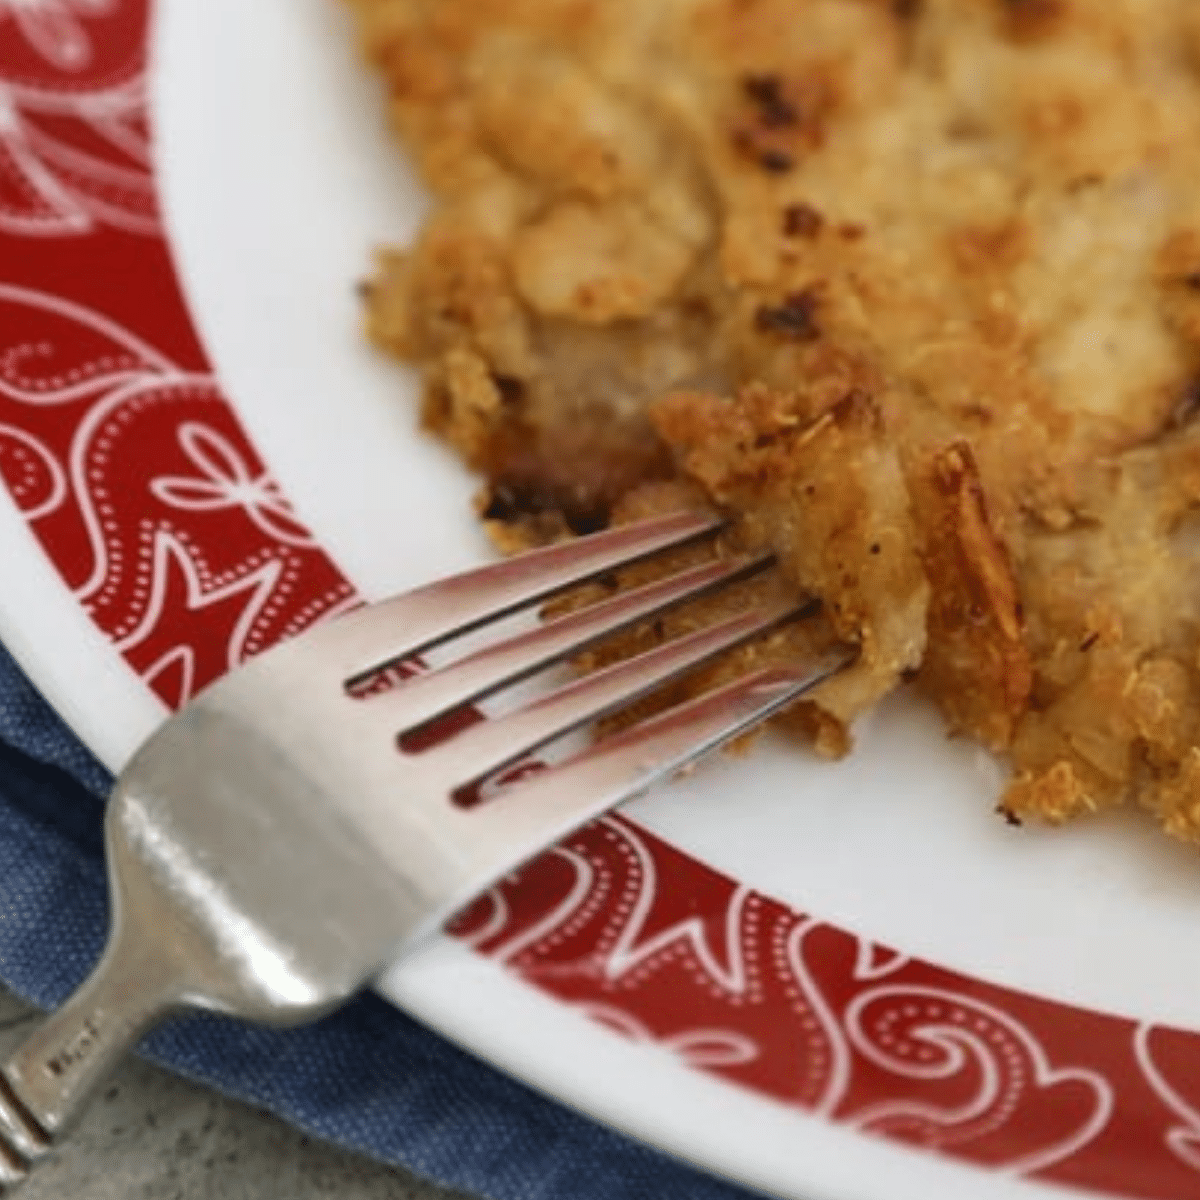
The classic Passover breakfast of fried matzo and vegan egg, made dairy- and egg-free.
Rounding out the menu: Serve plenty of matzo throughout the meal. Though this is an abundant menu, you may also wish to add a seasonal green salad and a simply prepared green vegetable such as asparagus or broccoli.
The Seder Plate, Vegan Version
During the course of the Seder and the meal that follows the reading of the Haggadah, a plate of matzos is served, as is plenty of Passover wine. Central to the table is the Seder plate, a round dish with designated spots for placement of the symbolic foods to be sampled during the reading of the Haggadah. The foods are not eaten from this plate, but everyone gets a sampling of the foods to be tasted from separate platters.
Karpas: A mild green vegetable or herb, such as celery or parsley. This symbolizes the new growth of spring. A small leaf of romaine lettuce or other mild green might be used. It's sometimes dipped into salt water or vinegar as a reminder of the tears shed by enslaved Jews.
Maror: A bitter herb, usually horseradish for Ashkenazic Jews or a bitter green such as escarole or endive for Sephardic Jews. This represents the bitterness of slavery suffered by the Jews in Egypt.
Haroset: This mixture of nuts, wine, and apples, as Ashkenazic Jews make it, or nuts, wine, and dried fruits, as Sephardic Jews make it, has a brick-like color to symbolize the bricks used by the Jewish slaves to build Pharaoh's cities.
Hazeret: Another bitter herb or green, such as watercress or chicory. Some believe that two bitter herbs should be tasted, though this component of the Seder plate is optional. Two components of the Seder plate that vegans obviously skip or replace: zoreah, the shank bone, and beytzah, a hard-boiled egg. To fill all the spots in the vegan Passover plate, the former is sometimes replaced with a roasted beet, and the latter, a boiled potato (more for its shape than any symbolic similarity).
Here are more tips for keeping the Holidays and Special Occasions healthy! For lots more features on healthy lifestyle, please explore VegKitchen's Healthy Vegan Kitchen page.
Sautéed Carrots with Almonds
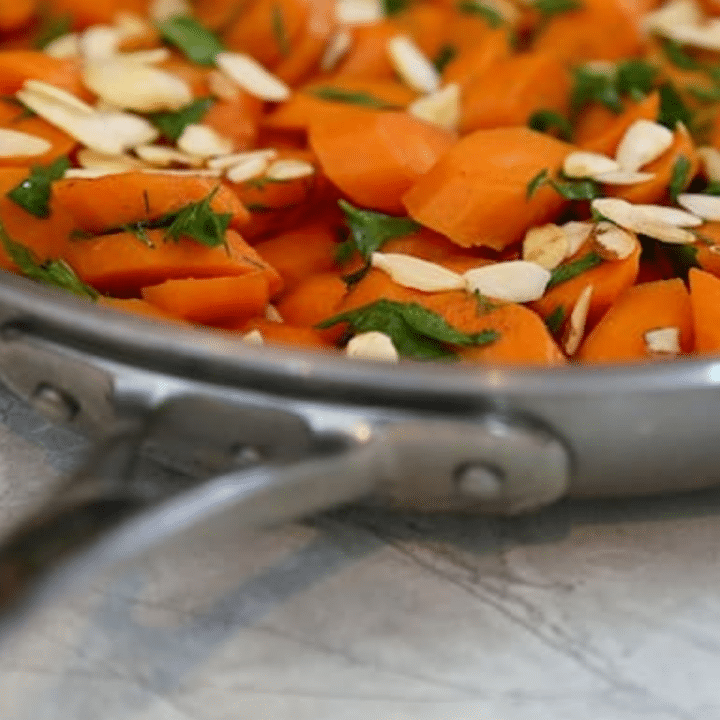
This simple side dish of carrots embellished with almonds and herbs brings color and natural sweetness to the dinner plate. It's a favorite vegetable dish to serve with a Passover or Jewish New Year dinner, but simple enough to make any night of the week when you want something quick, colorful, and a little bit special.
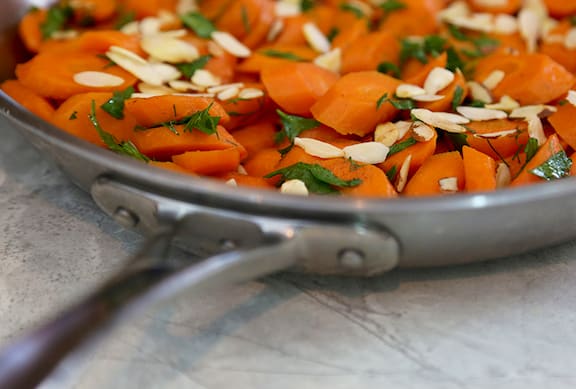
Photos by Evan Atlas.
Key Ingredients & Substitutions
- Carrots. Sliced thinly, on the diagonal or into coins, so they cook quickly and evenly without needing to be blanched first.
- Almonds. Toasting them first brings out a deeper, nuttier flavor than raw almonds would give — a few minutes in a dry skillet is all it takes.
- Apple juice. Adds natural sweetness and moisture as the carrots cook — any fruit juice works well, including orange juice for a brighter citrus note.
- Agave nectar or maple syrup. Balances the lemon juice for a sweet-tart finish that keeps the dish from tasting one-note.
- Fresh dill or chives. A finishing herb that adds a fresh, slightly grassy contrast to the sweet glaze.
Variations
- Swap the nuts. Toasted pecans or pistachios work well in place of almonds, or use pepitas for a nut-free option.
- Add warm spice. A pinch of cinnamon or ginger pairs nicely with the sweet glaze, especially for a holiday table.
- Change the herbs. Fresh mint is a nice substitute for dill or chives, and pairs particularly well with the orange juice variation.
- Add dried fruit. A handful of raisins or chopped dried apricots stirred in near the end adds extra sweetness and chew.
- Roast instead of sauté. For a deeper caramelized flavor, roast the carrot coins at 425°F until tender, then toss with the same glaze ingredients.
Tips for the Best Sauteed Carrots with Almonds
- Toast the almonds first. A few minutes in a dry skillet, stirring frequently so they don't scorch, makes a big difference in flavor compared to raw almonds.
- Slice the carrots thinly and evenly. Uniform pieces cook through at the same rate, so you don't end up with a mix of crisp and mushy carrots.
- Add juice as needed. If the skillet starts to dry out while the carrots cook, sprinkle in a little more juice rather than letting them scorch.
- Taste and adjust before serving. Balance the lemon juice and agave to your preference — the right ratio depends a lot on how sweet your carrots and juice are.
- Add the almonds last. Stirring them in just before serving keeps them crunchy instead of softening in the sauce.
Make Ahead & Storage
These carrots keep well in a sealed container in the refrigerator for up to 3 days — the flavor actually deepens overnight, though the almonds soften somewhat. Reheat gently in a skillet, and add a fresh sprinkle of toasted almonds just before serving to bring back the crunch.
How to Serve
Serve warm as a colorful side dish, especially welcome at a Passover or Jewish New Year dinner, or alongside any weeknight meal that could use a pop of color.
Recipe

Sautéed Carrots with Almonds
A simple side dish of carrots embellished with toasted almonds and fresh herbs, bringing color and natural sweetness to the dinner plate.
Print
Pin
Save
Servings:
Ingredients
- ⅓ cup sliced or slivered almonds
- 1 tablespoon olive oil or fragrant nut oil
- ⅓ cup apple juice or other fruit juice or as needed
- 2 pounds carrots peeled and thinly sliced
- 1 tablespoon lemon juice or more, to taste
- 2 tablespoons agave nectar or maple syrup
- ¼ cup minced fresh parsley
- 2 tablespoons minced fresh dill or chives
- salt and freshly ground pepper to taste
Instructions
- Heat a large skillet. Toast the almonds over medium-low heat until fragrant and just starting to turn golden. Remove from the skillet to a plate or bowl and set aside.
- Heat the oil and juice in the same skillet. Add the carrots and cook over medium heat, stirring frequently, until tender-crisp and beginning to turn golden, about 10 to 15 minutes. If the skillet begins to turn dry, sprinkle in additional juice while cooking.
- Continue to cook, stirring frequently, until the carrots are just tender. Stir in the remaining ingredients, and continue to cook, stirring, for just another minute or so.
- Taste to adjust the lemon/agave balance, then sprinkle with the almonds. Transfer to a serving container or serve straight from the skillet.
Notes
A favorite vegetable dish to serve with a Passover or Jewish New Year dinner.
Vegan-ize any recipe!Grab our free vegan cheat sheet, packed with my favorite easy substitutions to make any recipe vegan.
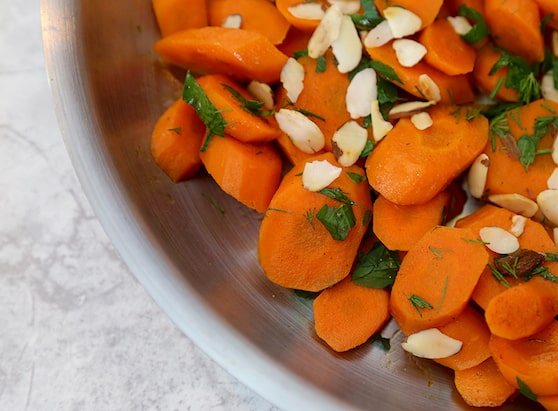
Here are more recipes for making the most of carrots. Find more ways to make Special Occasions and Entertaining easier and healthier.
Hearty Recipes for Hungry Teens (Vegan and Vegetarian)
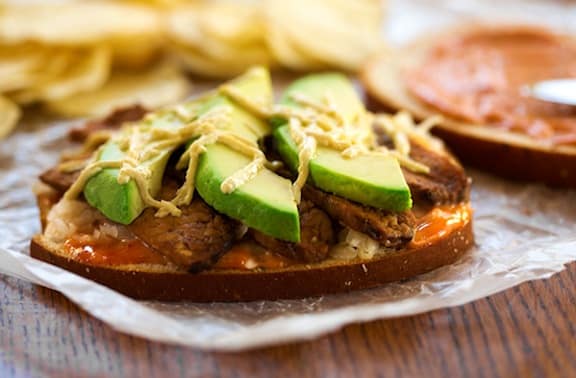
If you’re feeding teenagers, especially the male variety, you know that they go through mountains of food, and your grocery bill mounts alarmingly. Here are a handful of hearty, filling dishes that won’t break the bank. Now I'm not saying that young women won't like these hearty dishes, but in my experience, at least, they don't eat in nearly the quantity of their male counterparts. [Read more...]
Vegan Orange Bundt Cake
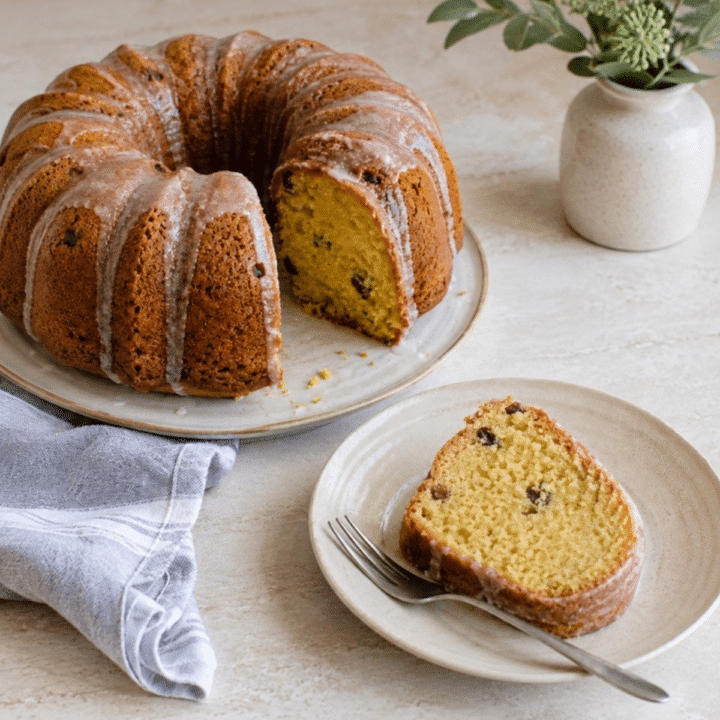
What's big, orange, and full of delicious citrus flavor? This Vegan Orange Bundt Cake, studded with raisins and finished with a sweet Orange Cream Glaze! This colossal cake elicits oohs and ahs when set out for serving, but the proof is in the tasting — and this cake goes to the head of its class. It tastes fabulous on its own, but you can also serve it with dairy-free ice cream or a fresh fruit salad.
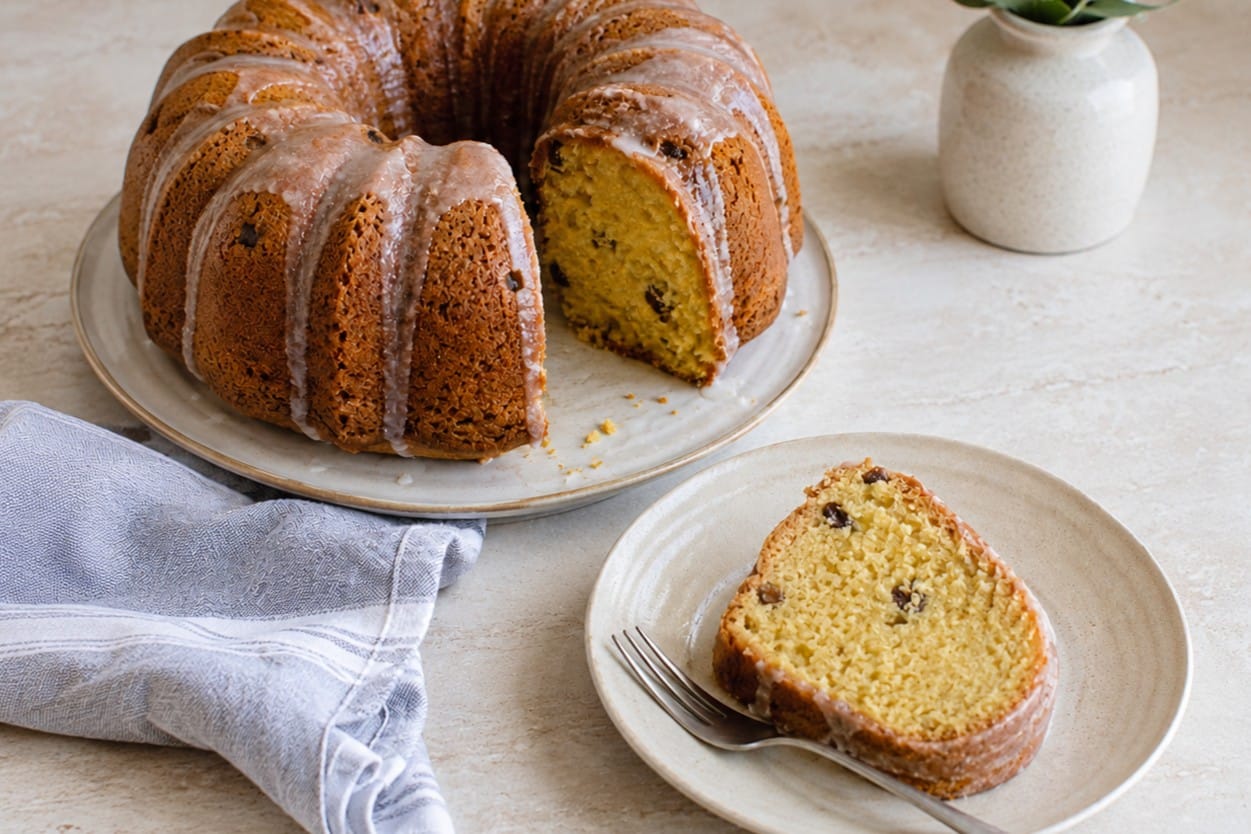
Key Ingredients & Substitutions
- Orange zest and juice. Both go into the batter for maximum citrus flavor — seek out organic, unwaxed oranges since you're using the peel, and be sure to zest only the bright orange layer, not the bitter white pith underneath.
- Raisins. Folded into the batter right before it goes into the pan, they add little pockets of sweetness throughout the cake and a bit of chew against the tender crumb.
- Whole wheat pastry flour and unbleached white flour. The combination keeps the cake tender while adding a little more substance than an all-white-flour cake.
- Dark whole cane sugar. Sucanat or Rapadura both work well here, and add a subtle molasses note alongside the organic sugar.
- Silken tofu. The base of the Orange Cream Glaze — it blends completely smooth and gives the glaze a rich, creamy texture without any dairy.
Variations
- Extra orange. To make your cake extra orange, both in color and flavor, simply eliminate the soymilk and use 2 cups of orange juice instead. This is also a great option for those with nut or soy allergies, or who prefer not to use plant-based milks.
- Extra sweet. If you want to make your cake extra sweet, or you just prefer organic, swap the dark whole cane sugar for organic sugar. This will give you a total of 1 ¼ cups organic sugar in your cake, making it slightly sweeter.
- Extra sauce. After pouring the Orange Cream Glaze over your cake, make a yummy sauce with the leftovers. Stir some dried cranberries into the remaining glaze and serve alongside the cake.
- Extra chocolate. Instead of the Orange Cream Glaze, use a chocolate ganache. Simply pour the ganache over the cooled cake in place of the glaze. The flavor combination of orange and chocolate is one of our favorites, and you can really emphasize it by using orange-flavored chocolate.
- Swap the mix-ins. Dried cranberries or chopped dried apricots both work well in place of raisins. Toasted chopped walnuts or pecans folded in alongside the raisins add a nice crunch.
- Add spice. A pinch of cinnamon or cardamom in the dry ingredients adds a warm background note that pairs nicely with the orange.
Tips for the Best Orange Bundt Cake
- Don't overfill the pan. To ensure the finest crumb and texture, vegan cake batter shouldn't fill the baking pan more than a scant half full. Measure carefully using the proper measuring tools for dry and liquid ingredients, and use an oven thermometer if you have one.
- Toss the raisins in a little flour first. A light coating of flour before folding them into the batter helps keep the raisins suspended throughout the cake instead of all sinking to the bottom.
- Let the cake cool completely before glazing. You'll need to allow at least 40 minutes for this big cake to cool — glazing it too early will just melt the glaze right off.
- Having trouble de-panning your cake? If the cake sticks to the pan even when inverted, wet a kitchen towel in hot water, wring it out, and place it over the inverted pan for a few minutes. Then shake the pan gently to release the cake.
Make Ahead & Storage
This cake keeps well at room temperature, covered, for up to 3 days, or in the refrigerator for up to a week once glazed. It also freezes beautifully unglazed — wrap it tightly and freeze for up to 2 months, then thaw and glaze just before serving. The Orange Cream Glaze itself keeps in a sealed container in the refrigerator for up to 2 days.
How to Serve
Serve on its own with a cup of tea or coffee, or dress it up with dairy-free ice cream or a fresh fruit salad for dessert. Leftover glaze is delicious spooned over fruit salads, other cakes, or baked desserts like cobblers and pies.
Recipe

Vegan Orange Bundt Cake
A big, beautifully glazed orange bundt cake studded with raisins — bright with citrus and finished with a sweet Orange Cream Glaze.
Print
Pin
Save
Servings:
Ingredients
- 1 ½ cups whole wheat pastry flour
- 1 ½ cups unbleached white flour
- 2 teaspoon baking soda
- 1 teaspoon fine sea salt
- ½ teaspoon aluminum-free baking powder
- 1 cup organic sugar
- ¼ cup organic dark whole cane sugar such as Sucanat or Rapadura, finely ground
- ⅔ cup organic canola oil or a mild extra virgin olive oil such as arbequina
- 1 cup orange juice
- 1 cup soymilk or another non dairy milk
- 2 tablespoon apple cider vinegar
- 2 teaspoon pure vanilla extract
- 2 organic oranges zested and finely grated
- ¾ cup raisins
Orange Cream Glaze
- 1 box firm organic silken tofu 12.3 oz, drained
- 5 tablespoon organic cane sugar or to taste
- 5 tablespoon organic orange juice concentrate thawed
- 1 tablespoon organic canola oil or another neutral oil
- 2 teaspoon pure vanilla extract
- ¼ teaspoon orange extract or ⅛ teaspoon pure orange oil
- 1 tablespoon Grand Marnier or another orange flavored liquor; optional
Instructions
- Position a rack in the middle of the oven and preheat to 350°F. Oil a 10- to 12-cup bundt pan thoroughly.
- Place a wire mesh strainer over a medium bowl.
- Add the pastry flour, white flour, baking soda, salt, baking powder, and both of the sugars to the strainer and sift the ingredients into the bowl.
- Stir with a wire whisk to distribute and aerate the ingredients.
- In a separate bowl, combine oil, orange juice, soymilk, vinegar, vanilla extract, and orange zest. Whisk until thoroughly emulsified.
- Pour wet mixture into the dry mixture and whisk until the batter is smooth.
- Gently fold the raisins into the batter.
- Pour the batter into the prepared bundt pan. Rotate the pan to level the batter, and tap it lightly on the counter to eliminate some of the air bubbles.
- Bake for 45 to 55 minutes or until the cake is golden and firm at the center when very lightly touched. A toothpick inserted in a few spots near the center of the cake should come out clean or with only a few moist crumbs.
- Remove the bundt from the oven and cool on a rack for 10 minutes.
- Place another wire rack on top of the cake and turn the pan upside down. Tap the pan gently and the cake should release. Make sure cake is completely cool before glazing or serving. You’ll need to allow at least 40 minutes for this big cake to cool.
Orange Cream Glaze
- Combine all the ingredients for the cream in a blender or food processor, and process 2 to 3 minutes or until thoroughly mixed and creamy.
- Taste the cream and add more sugar if you want a sweeter whip.
- Pour orange cream over your cake. The cream will soak into the cake a bit, so only pour enough cream to flavor, not drench, your cake.
- Spoon the leftover cream into a container. Refrigerate for up to two days.
Nutrition (Estimate per Serving)
Calories: 370kcalCarbohydrates: 57gProtein: 5gFat: 15gSaturated Fat: 1gPolyunsaturated Fat: 4gMonounsaturated Fat: 9gTrans Fat: 1gSodium: 401mgPotassium: 229mgFiber: 3gSugar: 33gVitamin A: 192IUVitamin C: 32mgCalcium: 61mgIron: 1mg
Vegan-ize any recipe!Grab our free vegan cheat sheet, packed with my favorite easy substitutions to make any recipe vegan.
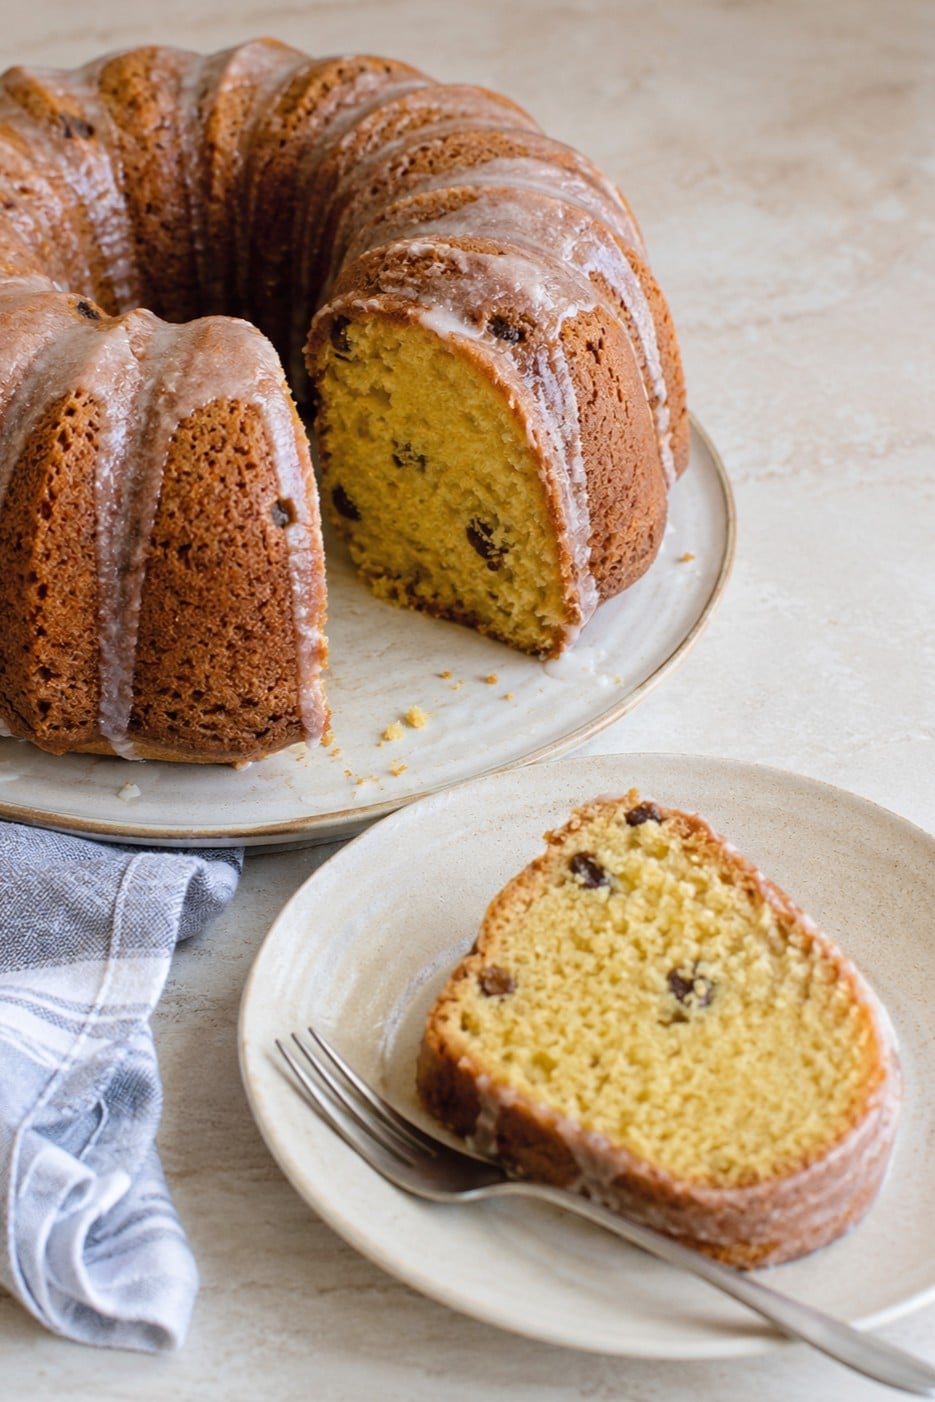
Vegan Orange Bundt Cake FAQs
Can I make this as a layer or sheet cake instead?
You can easily make this orange cake into a layer or sheet cake instead of a bundt cake. For a layer cake, you'll need two 9x3-inch round pans, and for a sheet cake, one 9x13-inch pan. Reduce the baking time to 25–35 minutes, checking regularly for doneness.
How can I use my leftover Orange Cream Glaze?
Use your leftover glaze to transform simple fruit salads into special treats, dress up plain cakes, or complement other baked desserts like cobblers and pies. Simply serve your favorite treats with a dollop of glaze.
Sweet tooth still craving? Here are more Vegan Baking and Sweets. Also worth trying: our vegan chocolate orange cake.
From More Great Good Dairy Free Desserts Naturally* by Fran Costigan. For more about Fran's amazing pastries, visit FranCostigan.com.
*This post contains affiliate links. If the product is purchased by linking through this review, VegKitchen receives a modest commission, which helps maintain our site and helps it to continue growing!
Quick Vegan Barbecue Sauce
This easy, no-cook vegan barbecue sauce takes almost no time to make and tastes better than most store-bought options — especially good with grilled tofu, tempeh, or seitan. Since it's no-cook, you can taste and adjust as you go until it's exactly the balance of sweet, smoky, and tangy you want, and it's ready before the grill even heats up.
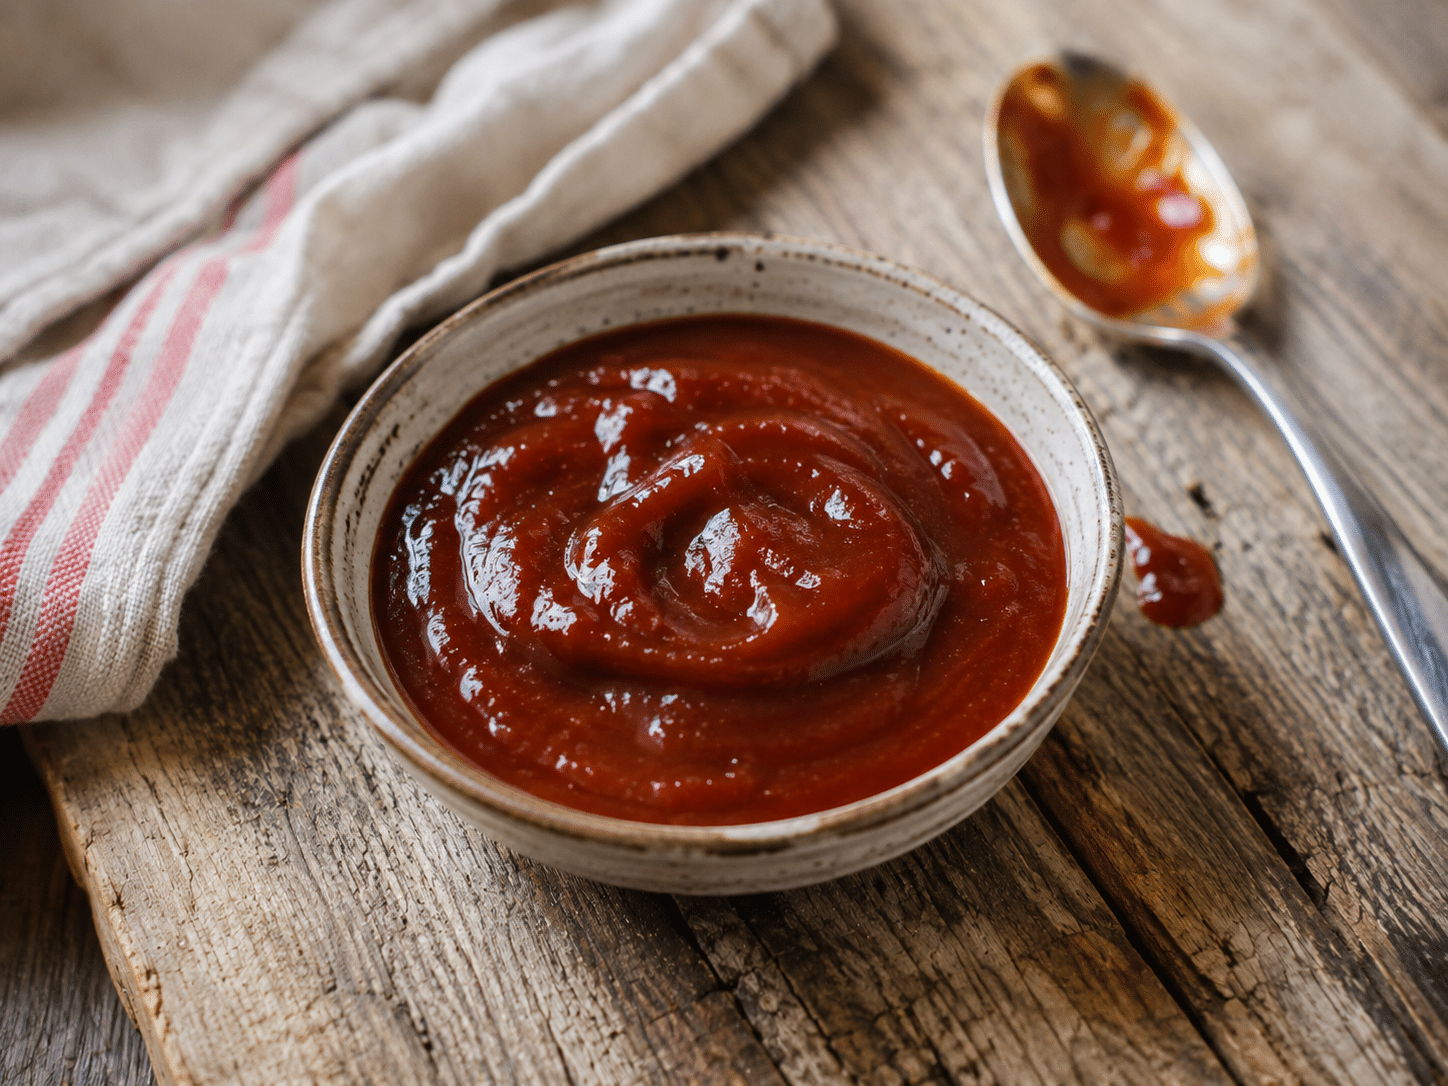
Key Ingredients & Substitutions
- Tomato sauce. Forms the base of the sauce — use a plain, unsweetened variety for the best control over flavor, since many canned tomato sauces already have added sugar and salt.
- Agave nectar or maple syrup. Either works well for sweetness; use whichever you have on hand — maple syrup adds a slightly more distinct flavor.
- Molasses. Adds depth and a hint of smokiness. Skip it and add an extra tablespoon of agave or maple syrup if you don't have any, though the flavor will be a touch less complex.
- Smoked paprika. Swap in for the sweet paprika if you want a smokier flavor from the start — it's one of the easiest ways to add depth to a no-cook sauce.
- Apple cider vinegar. Provides the tang that balances all the sweetness — don't skip it, or the sauce will taste flat and one-dimensional.
Variations
- Make it spicier. Add a few drops of hot sauce or Sriracha, or a pinch of cayenne for dry heat.
- Make it smoky. Stir in a teaspoon of liquid smoke or 1 to 2 teaspoons mesquite seasoning for a more pronounced barbecue flavor.
- Make it tangier. Add an extra splash of apple cider vinegar to taste, especially if using it as a dipping sauce rather than a glaze.
- Make it bourbon-style. A splash of bourbon whisked in gives the sauce a warm, boozy depth for grown-up gatherings.
- Add fresh garlic. A small clove, minced or grated, deepens the savory side of the sauce.
Tips for the Best Vegan Barbecue Sauce
- Let it rest if you can. An hour of resting time lets the flavors meld and deepen — though it's still good used right away if you're in a hurry.
- Taste and adjust. Soy sauce brands vary in saltiness, so taste before adding the full amount, and adjust the sweetener and vinegar to your preference.
- Store it well. Keeps in a sealed container in the fridge for up to two weeks, making it worth batching up.
- Double the batch. This sauce keeps well, so it's worth making extra for future grilling — it also makes a great gift in a mason jar.
- Whisk, don't blend. A simple whisk gives the right texture — a blender can make the sauce too smooth and lose the slight body that makes it feel homemade.
Make Ahead & Storage
Since this sauce is no-cook, it comes together in minutes and is meant to be made ahead — in fact, it tastes better after an hour or more in the fridge, once the flavors have had a chance to meld. It keeps for up to two weeks refrigerated in a sealed jar.
How to Serve
Brush generously over grilled tofu, tempeh, or seitan, or use as a dipping sauce on the side. It's also delicious swirled into baked beans or brushed onto veggie burgers.
Recipe
Quick Vegan Barbecue Sauce
This easy, no-cook vegan barbecue sauce takes almost no time to make and tastes better than most store-bought options - especially good with grilled tofu, tempeh, or seitan.
Print
Pin
Save
Servings: (makes about 2 ½ cups)
Ingredients
- 15 to 16-ounce can tomato sauce
- 3 tablespoons agave nectar or maple syrup
- 1 tablespoon molasses or substitute an extra tablespoon of agave or maple syrup
- 2 tablespoons apple cider vinegar
- 2 to 3 tablespoons reduced-sodium soy sauce or tamari or to taste
- 1 teaspoon sweet or smoked paprika
- 1 teaspoon chili powder
- 1 teaspoon dried oregano or basil
Instructions
- Combine all the ingredients in a mixing bowl and whisk together.
- If time allows, cover and let stand for an hour or so to let the flavors combine more fully. If you need to use it right away, it will still be quite good.
Notes
For a spicier sauce, add a few drops of hot sauce or Sriracha. For a smoky flavor, add a teaspoon of liquid smoke or 1 to 2 teaspoons mesquite seasoning.
Vegan-ize any recipe!Grab our free vegan cheat sheet, packed with my favorite easy substitutions to make any recipe vegan.
- « Previous Page
- 1
- …
- 5
- 6
- 7