VegKitchen

  • Vegan Recipes
    • Appetizers
    • Breakfast
    • Main Dishes
    • Pasta and Noodles
    • Salads
    • Sandwiches and Wraps
    • Sauces, Dressings, and Condiments
    • Side Dishes
    • Soups, Stews, and Chilis
    • Snacks and Dips
    • Desserts
    • Drinks
    • Cheese-y Delights
    • Raw Vegan
    • Slow-Cooker
  • Vegan Living
    • Vegan Substitutions Guide
    • Kid Friendly
    • More Vegan Living
  • About
  • Shop Cookbooks
menu icon
go to homepage
  • Recipes
  • Vegan Life
  • Cookbooks
  • Freebie!
search icon
Homepage link
  • Recipes
  • Vegan Life
  • Cookbooks
  • Freebie!
×
Home

Search Results for: apple

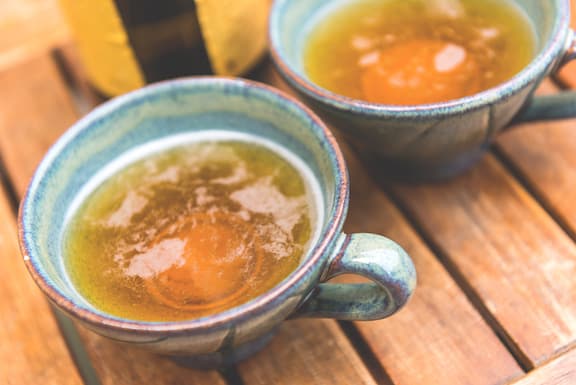
Vegan Apple Honey

April 26, 2023 by Nicole @ VegKitchen 1 Comment

vegan honey recipe

Get ready to experience the magic of vegan apple honey! It's a vegan friendly alternative to traditional honey that's simple, delicious, and easy to make with just a few ingredients. 
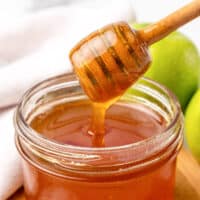
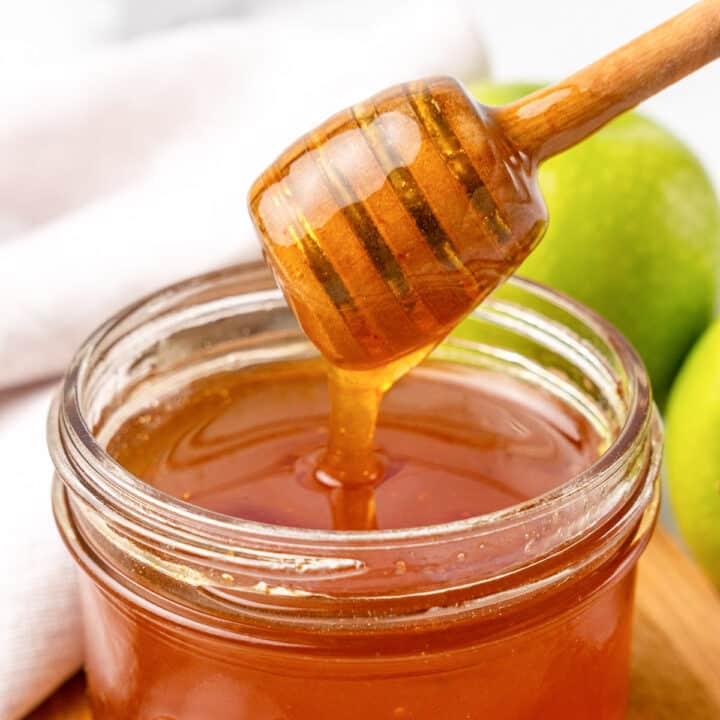
vegan honey made from apples in a jar

As a vegan, it can be a challenge to find substitutes for some of our favorite non-vegan ingredients. And for me, one of those ingredients is honey. So I tried my hand at making my own vegan honey - and I have to say that it is pretty fantastic! 

This apple honey is an easy alternative to traditional honey. This vegan version is not only cruelty-free, but it's also super delicious.

How to Make Vegan Apple Honey

First things first, let's talk about the ingredients. You'll need apple juice, sugar, one chamomile tea bag, and lemon juice. That's it! It's a simple recipe. But the end result is a thick, syrupy concoction that tastes just like honey (or at least close enough for me). 
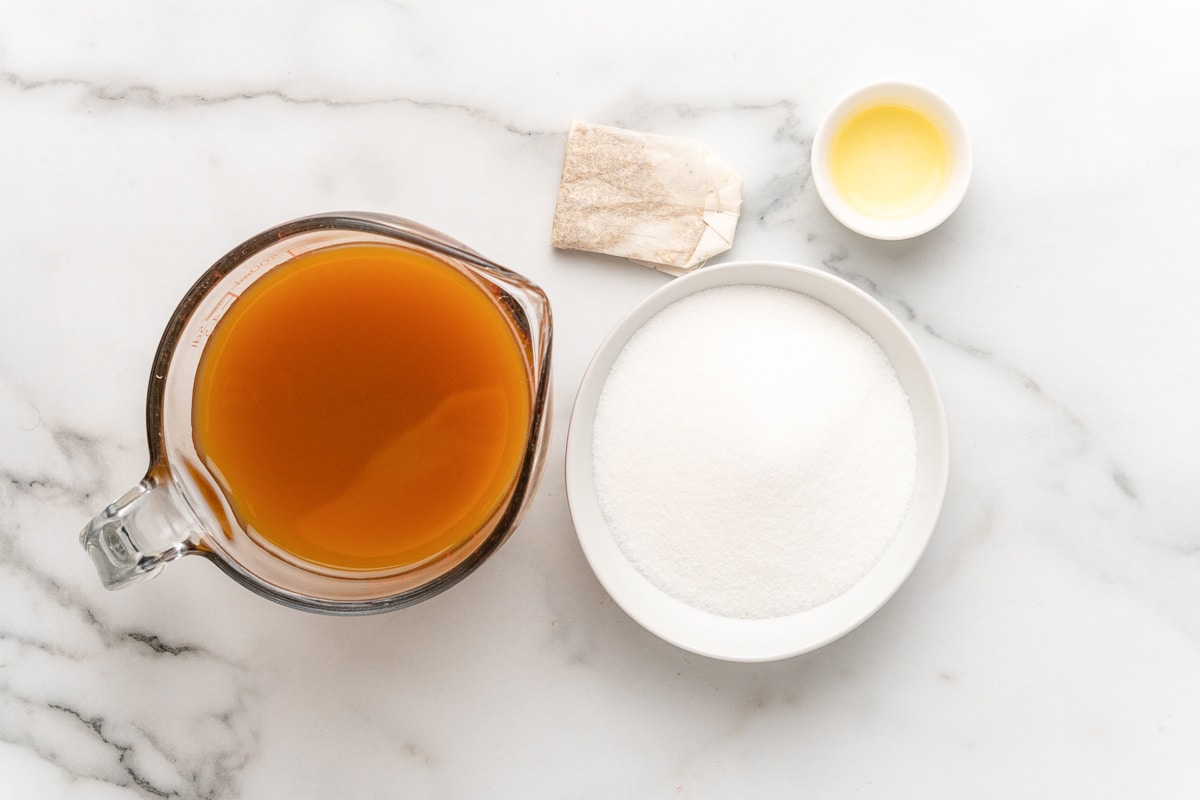
ingredients for the vegan apple honey

To make the vegan apple honey, you simply toss all four ingredients into a large saucepan. Bring the mixture to a boil, then reduce the heat and let it simmer for about 40 minutes.

You can remove the tea bag after the first ten minutes. You'll want to stir frequently to make sure everything is well combined and doesn't scald on the bottom.
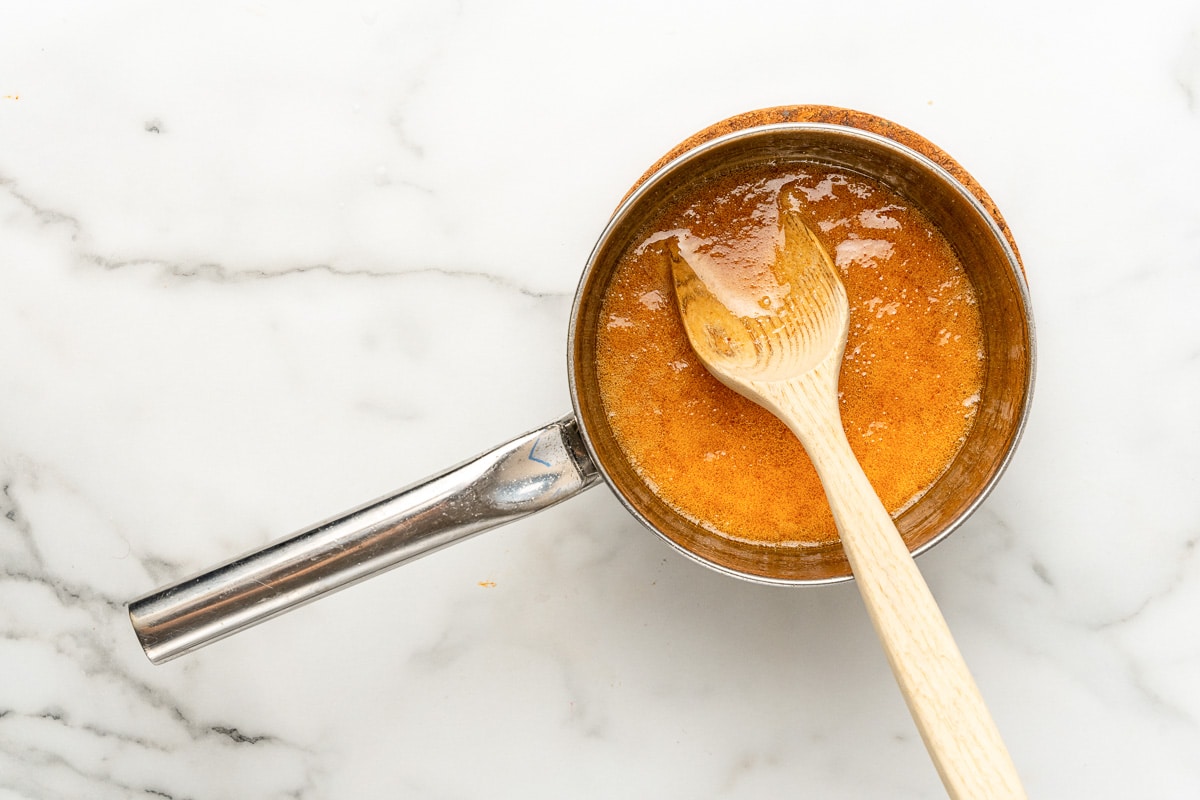
cooking the vegan honey in a saucepan

The longer you let it simmer, the thicker it will become. Just be sure to keep an eye on it so it doesn't burn.

And that's it! You now have your very own vegan apple honey. It's perfect for drizzling over vegan pancakes or adding to your morning oatmeal or granola. It's also great for baking or as a sweetener in your tea or coffee.
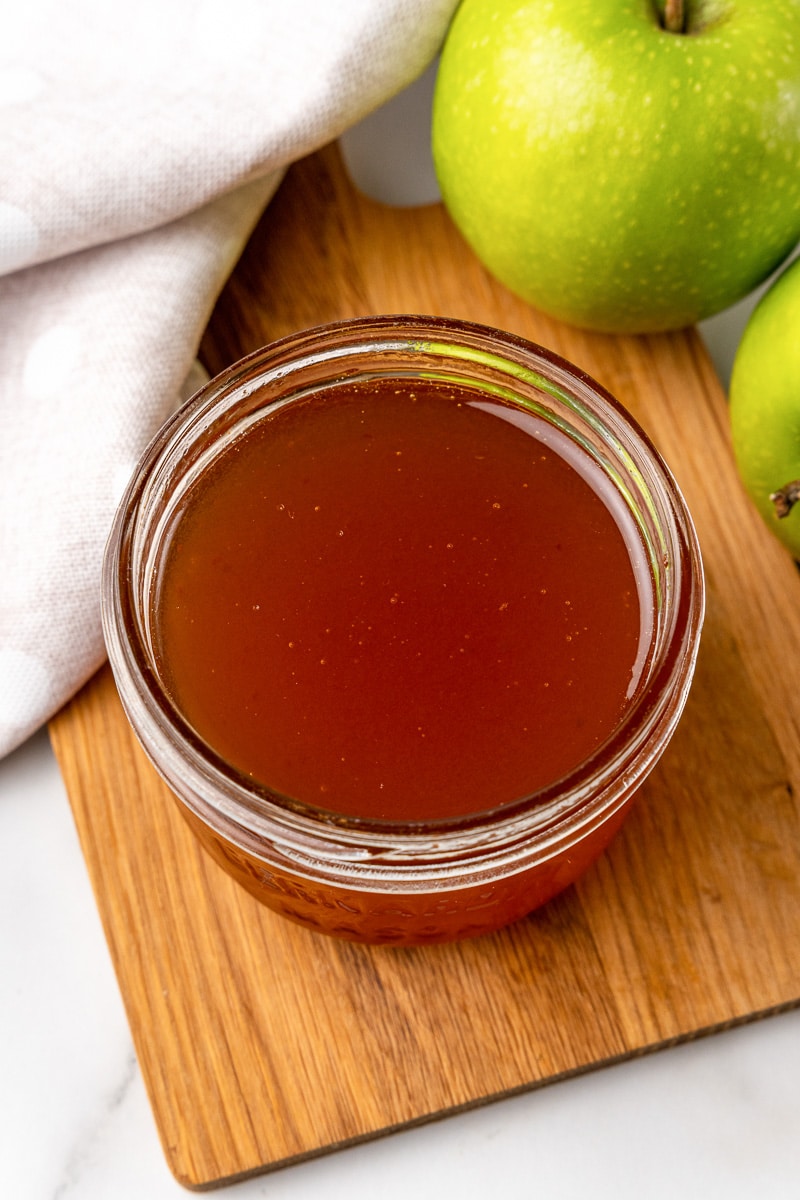
apple honey being served in a jar

Tips & Variations

Add more flavor. For a little extra flavor, try adding a teaspoon of ground cinnamon, nutmeg, or ginger to the mixture before simmering. This honey is also wonderful drizzled over vegan lemon ginger scones!

Make it sweeter. If the vegan honey isn't sweet enough for you, you can add a bit more sugar to the mixture. 
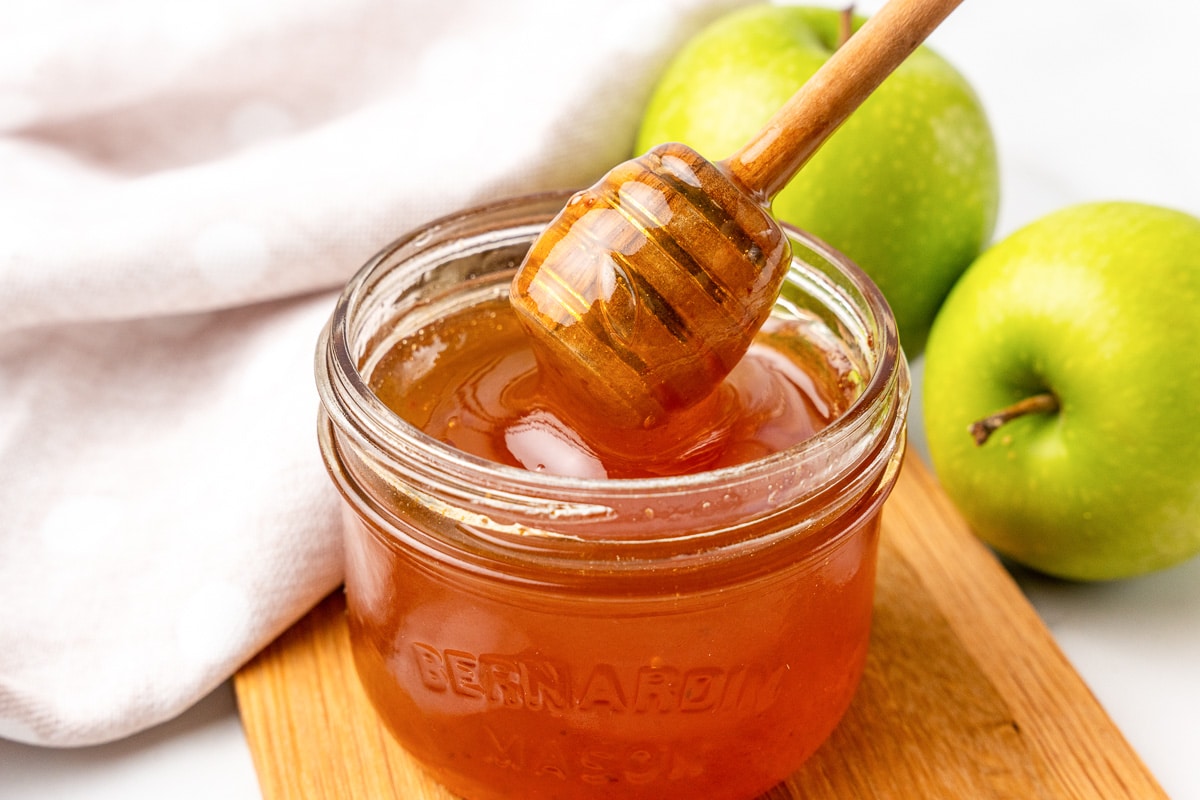
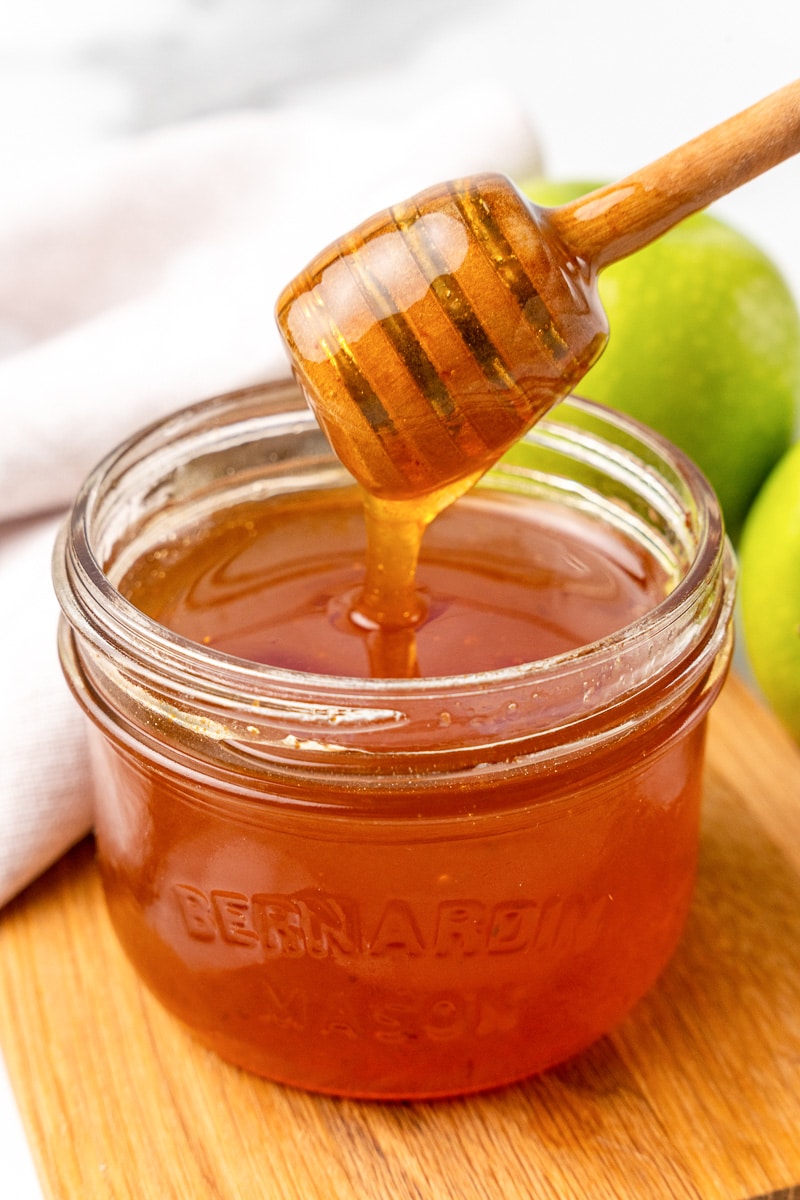
vegan honey being dripped with a honey stirrer

Storing the apple honey: Store in an airtight container in the fridge for up to a month. I have heard of people storing it as long as 6 months, but I have not tested it for that long because we always finish it up! 

I hope you enjoy making and using this vegan apple honey as much as I do. It's a great alternative to traditional honey and is sure to satisfy your sweet tooth. Happy cooking!
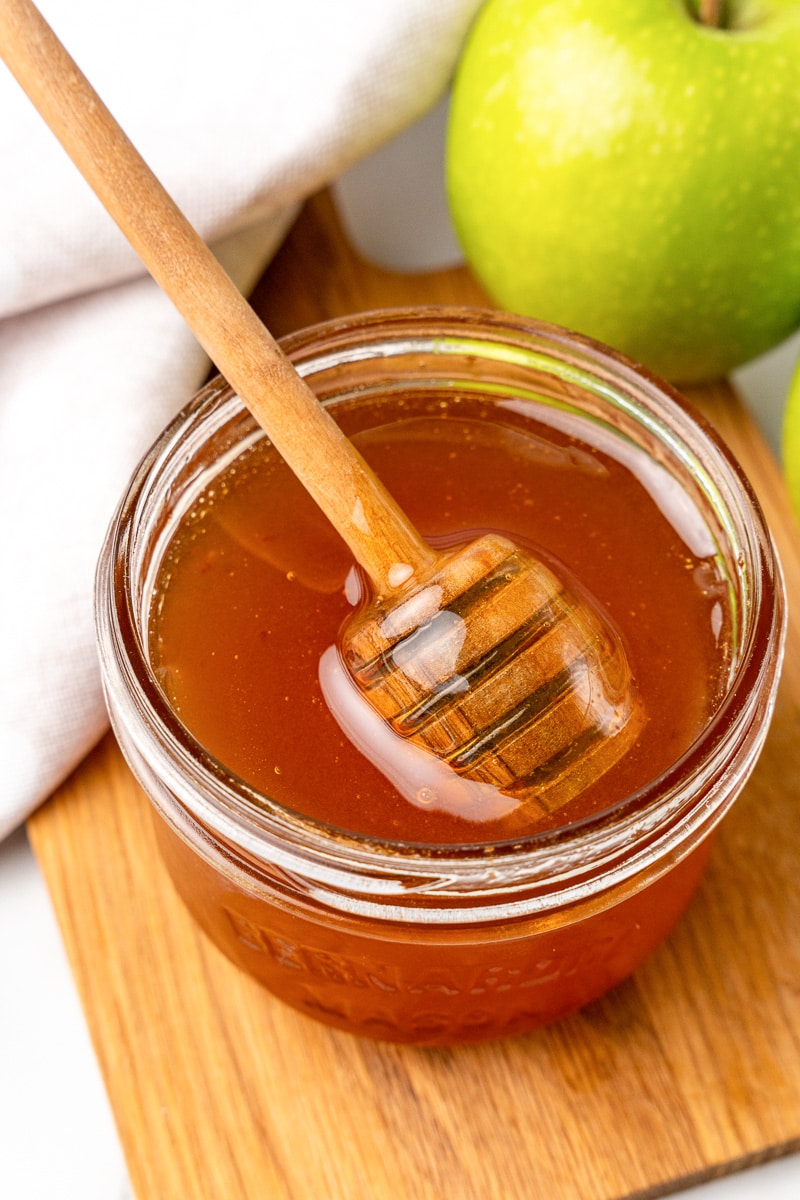
apple honey with a wooden stick

More Tasty Vegan Recipes

If you love this vegan apple honey, be sure to check out these other delicious ideas: 

  • Vegan Substitutions Guide
  • Homemade Vegan Nutella
  • Easy Vegan Cheese Sauce
  • Vegan Cream Cheese

Recipe

vegan honey recipe

Vegan Apple Honey

4.84 from 6 votes
This recipe for vegan apple honey is so simple, delicious, and easy to make with just a few ingredients. It's a perfect alternative to traditional honey!
Print Pin Save Saved!
Prep Time: 10 minutes minutes
Cook Time: 45 minutes minutes
Total Time: 55 minutes minutes
Servings: 16 tablespoons
Prevent your screen from going dark

Ingredients

  • 2 cups fresh apple juice unsweetened
  • ¾ cup sugar organic
  • 1 chamomile tea bag
  • 1 teaspoon lemon juice
US Customary - Metric

Instructions

  • Combine all ingredients in a large saucepan and bring to a boil.

    vegan honey recipe
  • Reduce heat to a gentle simmer and allow to cook for 10 minutes.
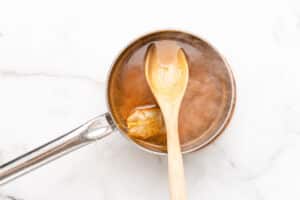
    vegan honey recipe
  • Then remove the tea bag and continue simmering an additional 30 minutes, stirring frequently.
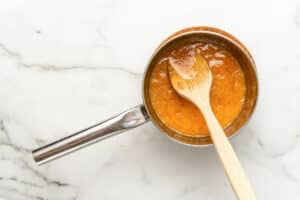
    vegan honey recipe
  • Allow to cool completely before serving.
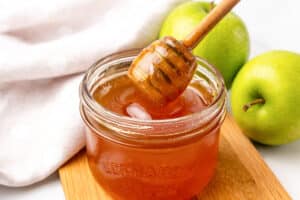
    vegan honey recipe

Nutrition (Estimate per Serving)

Calories: 50kcalCarbohydrates: 13gProtein: 0.03gFat: 0.1gSaturated Fat: 0.01gPolyunsaturated Fat: 0.01gMonounsaturated Fat: 0.002gSodium: 1mgPotassium: 32mgFiber: 0.1gSugar: 12gVitamin A: 0.3IUVitamin C: 0.4mgCalcium: 3mgIron: 0.04mg
Vegan-ize any recipe!Grab our free vegan cheat sheet, packed with my favorite easy substitutions to make any recipe vegan.

Cinnamon Apple Chickpea Cake

April 19, 2021 by Nicole @ VegKitchen 1 Comment

vegan apple cake

Made with chickpeas as the 'secret' ingredient, this Cinnamon Apple Chickpea Cake is fudgy, delicious and healthy at the same time! It's the perfect high protein and dairy-free dessert to enjoy with a cup of tea. 

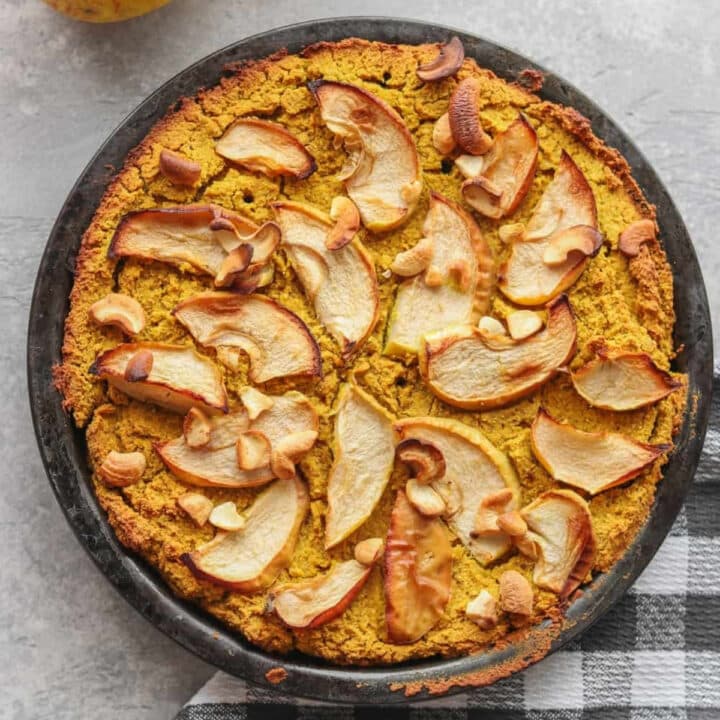
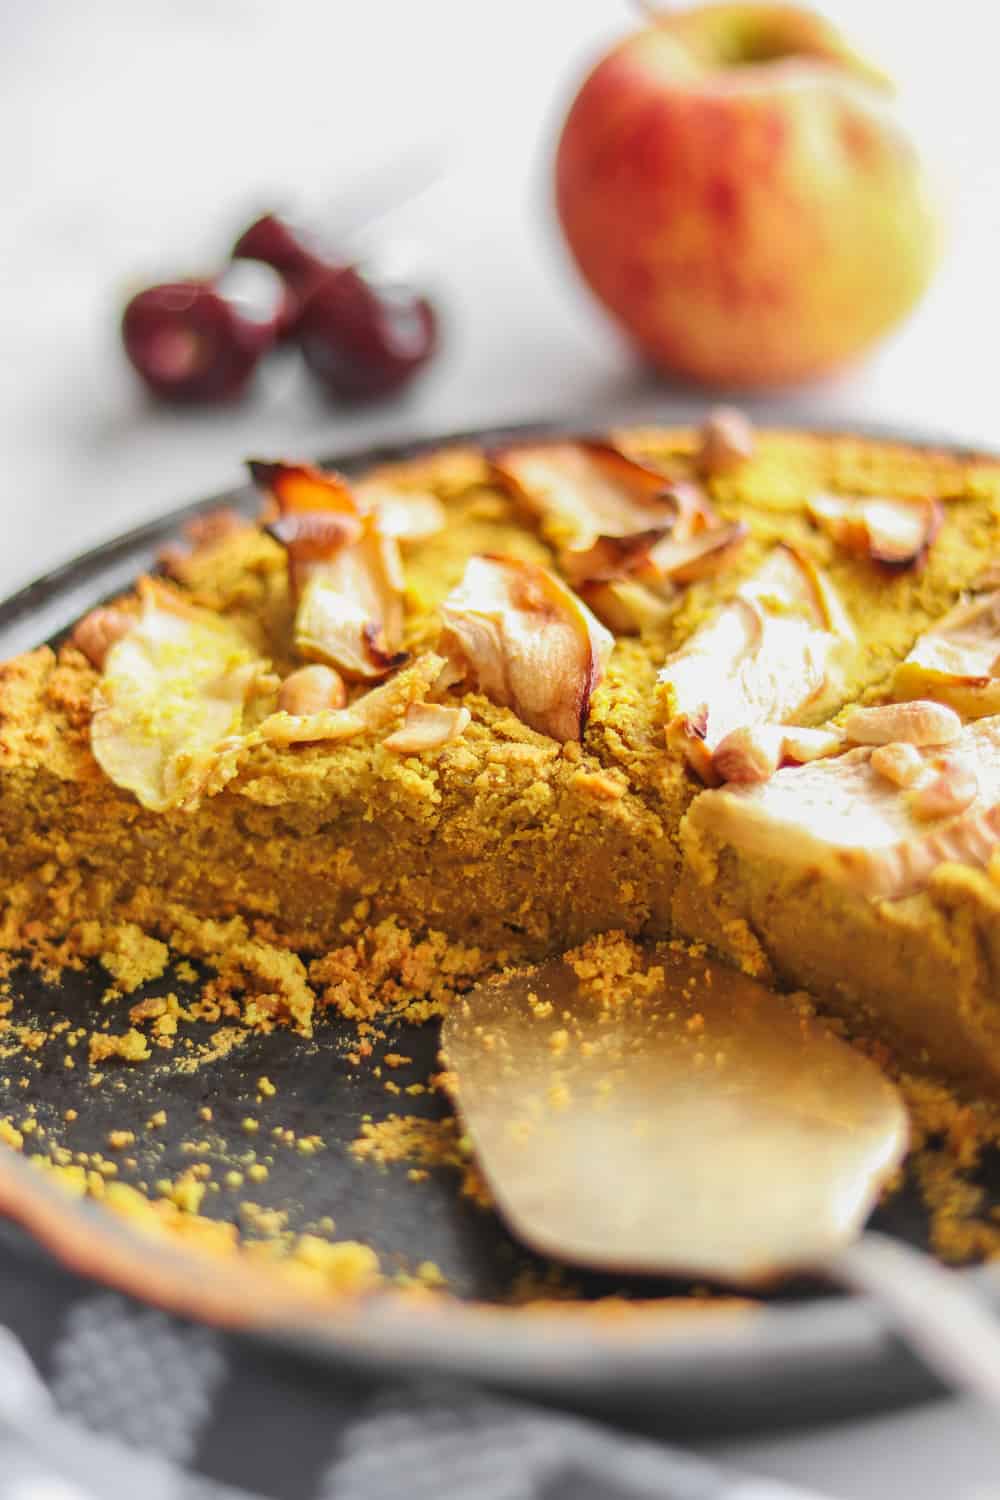
chickpea cake being served from a black dish
[feast_advanced_jump_to]

I hope you can sense my excitement through this post, because today we're making cake. And not just any cake - a cinnamon apple chickpea cake.

It's three amazing things in one: cinnamon, apples, and cake. Actually, four amazing things, because chickpeas are pretty incredible too.

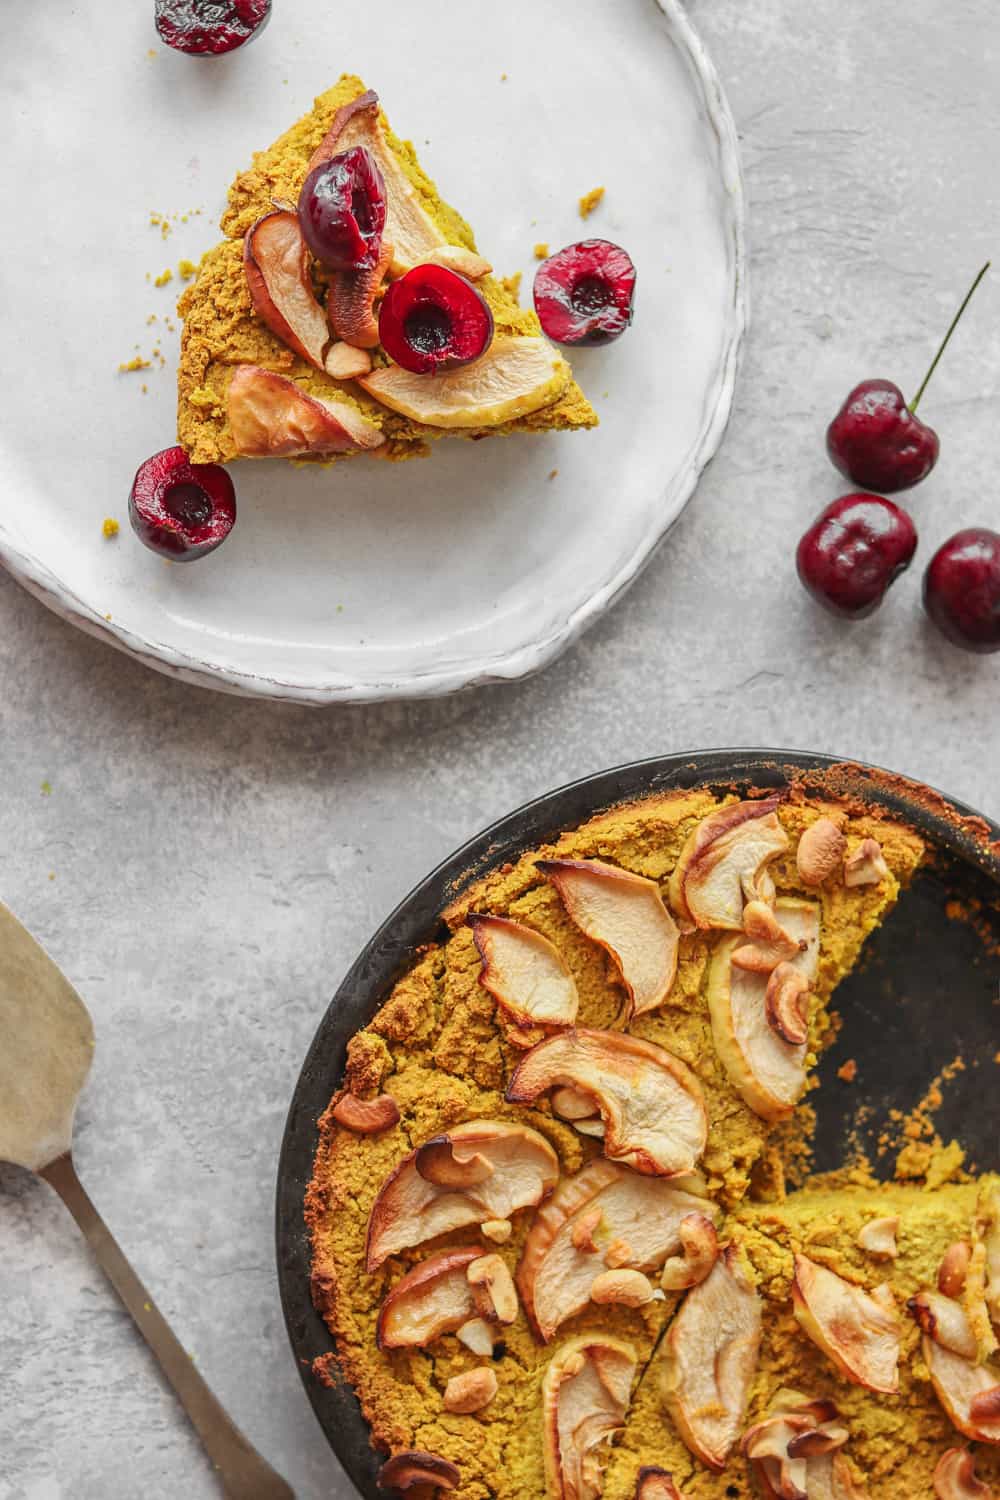
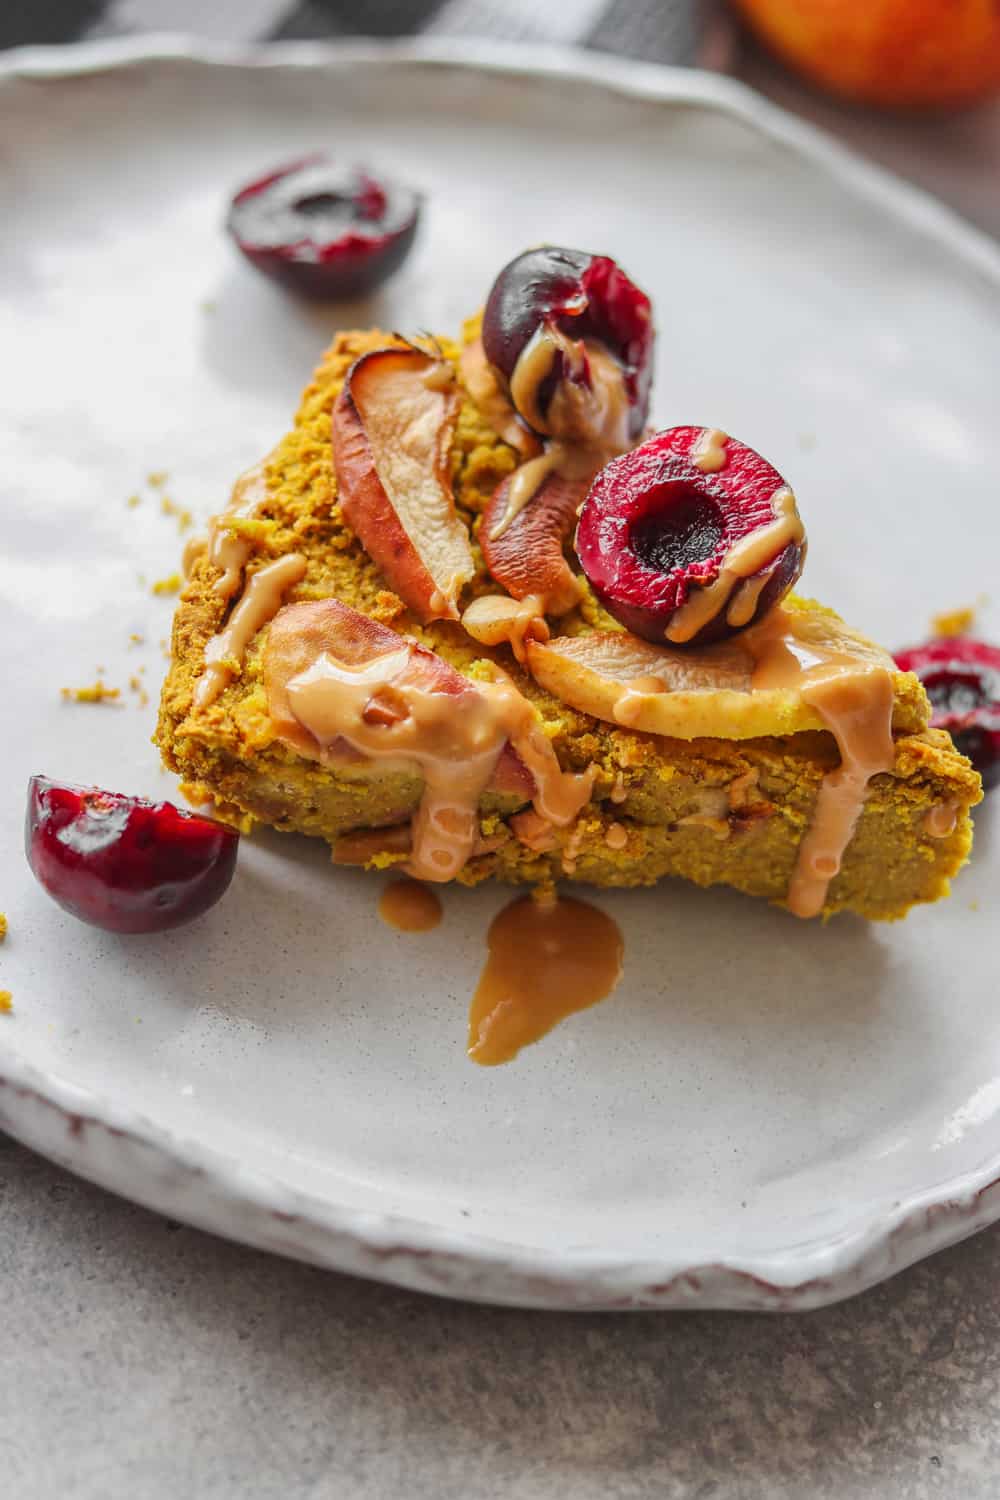
chickpea cake topped with apple and berries

A fun fact is that I always struggle with naming my recipes. I didn't know whether to call this a cake or a pie, and went with the former because it doesn't have a crust.

But I don't know, apples are typically used in pies and you don't hear "apple cake" all too often. And I don't think I've ever heard of a "chickpea cake". But let's go with it.

And while you're here, don't forget to grab a copy of my free vegan cheat sheet. It's packed with all my favorite substitutions to vegan-ize any recipe!

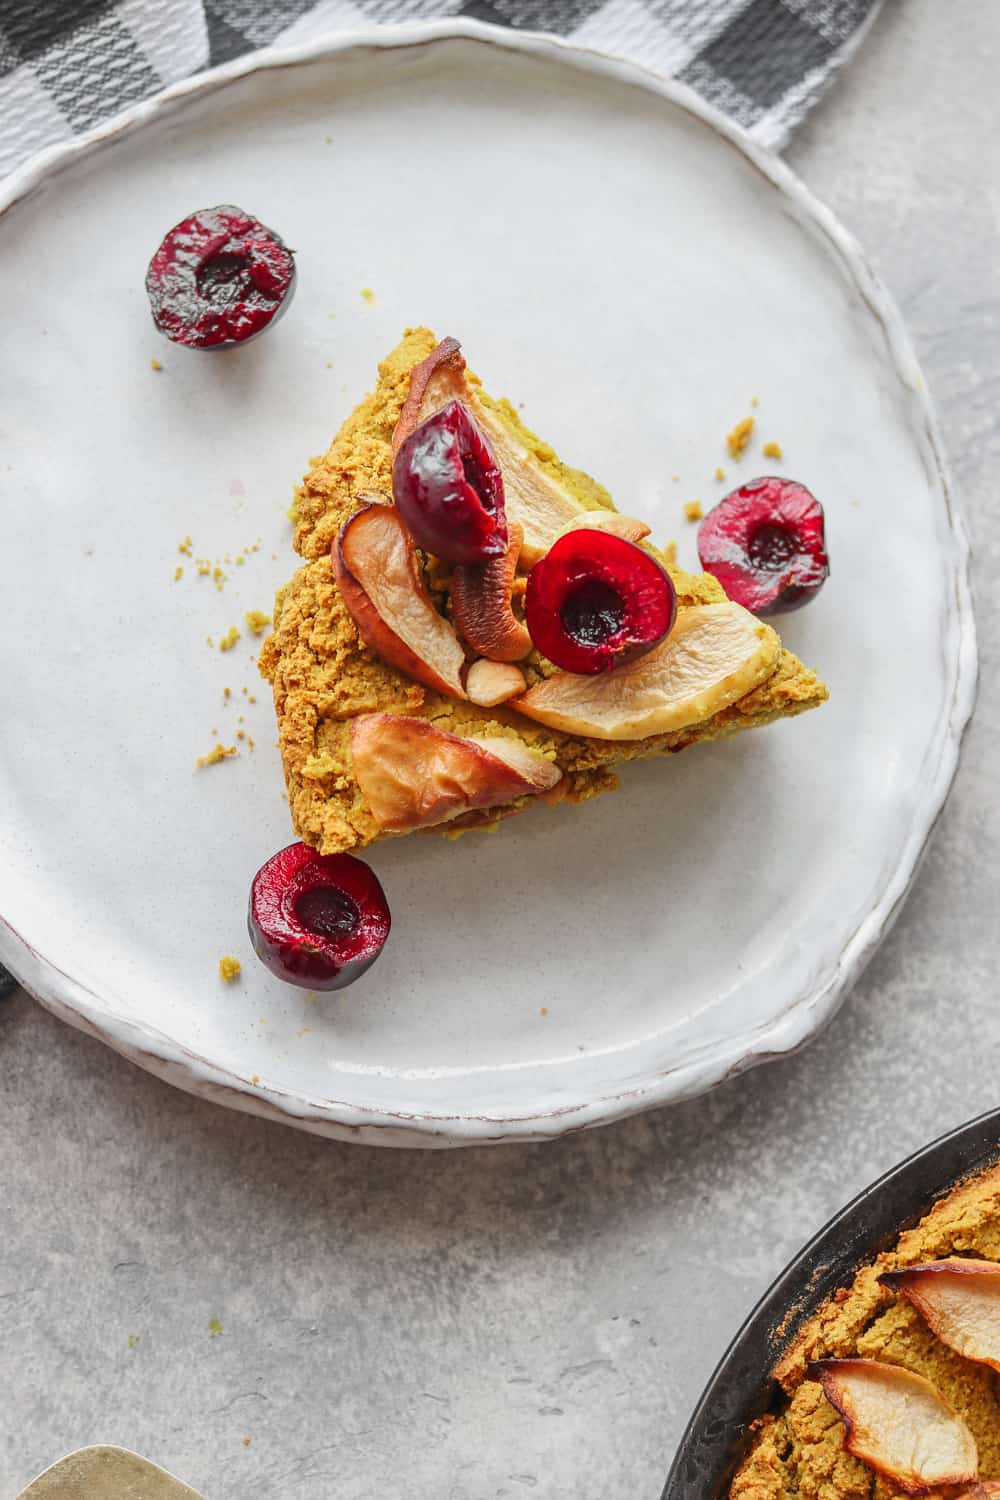
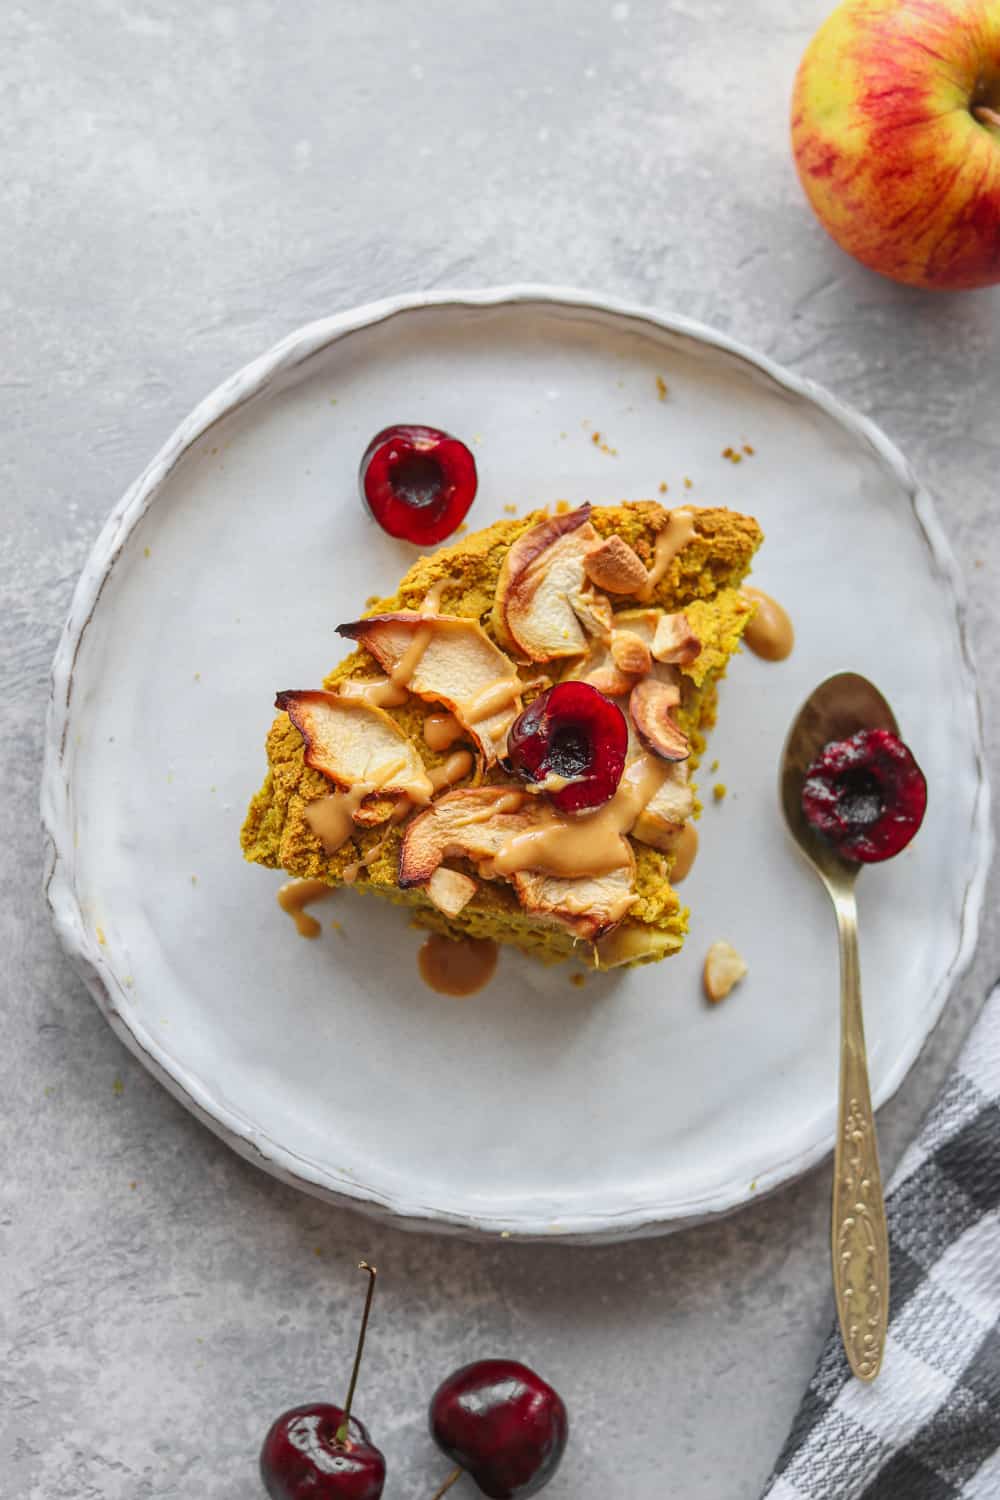
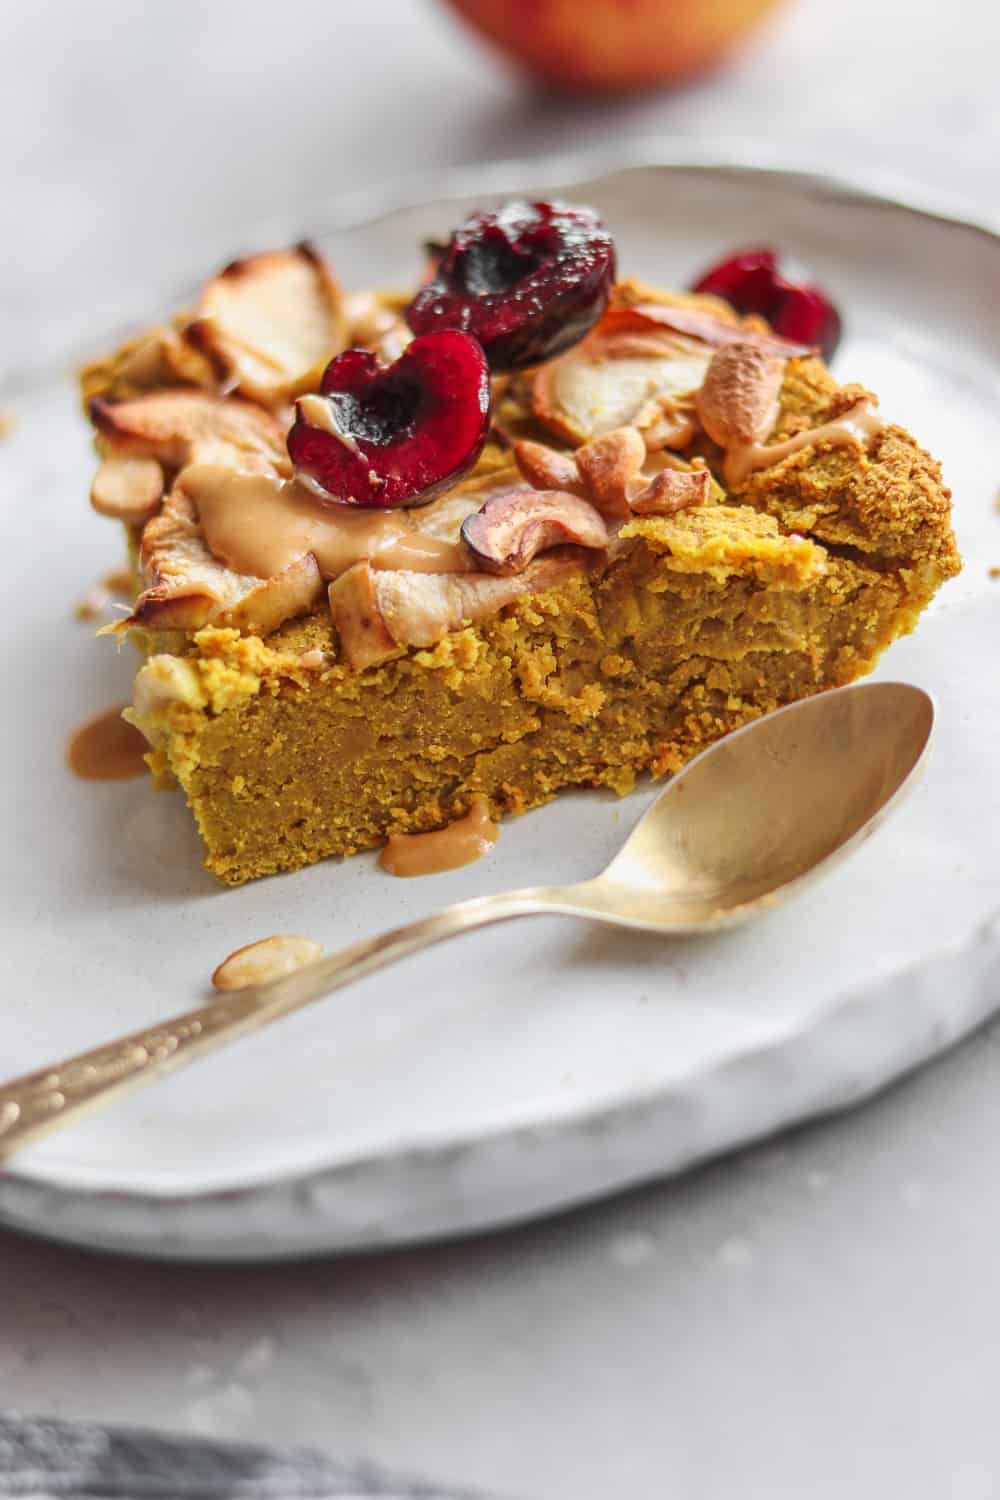
slice of chickpea cake being served on a white plate

Anyway, regardless of the name, the result is absolutely phenomenal. Fudgy, moist, the sort of thing you can eat all by yourself as a meal. I won't tell. 😉

It has just the right level of sweetness and a wonderful soft texture thanks to the chickpeas and the peanut butter.

Plus, there's just something so cozy about baking with apples in Fall. Apples and pumpkin - the two things that make me less sad about short days, colder weather and the end of summer fruit that doesn't cost the equivalent of my weekly grocery budget per pound.

Oh, and this cake just happens to be completely vegan too!

Baking with Chickpeas

If you've never baked with beans of any kind before, fear not. I swear this vegan apple cake doesn't taste like hummus. And as much as we all love hummus, we don't want our sweet treats tasting like it either.

Chickpeas by themselves are pretty neutral in taste. The key is using the right ratio of other ingredients to sweeten them up and create a fudgy, cake-like texture.

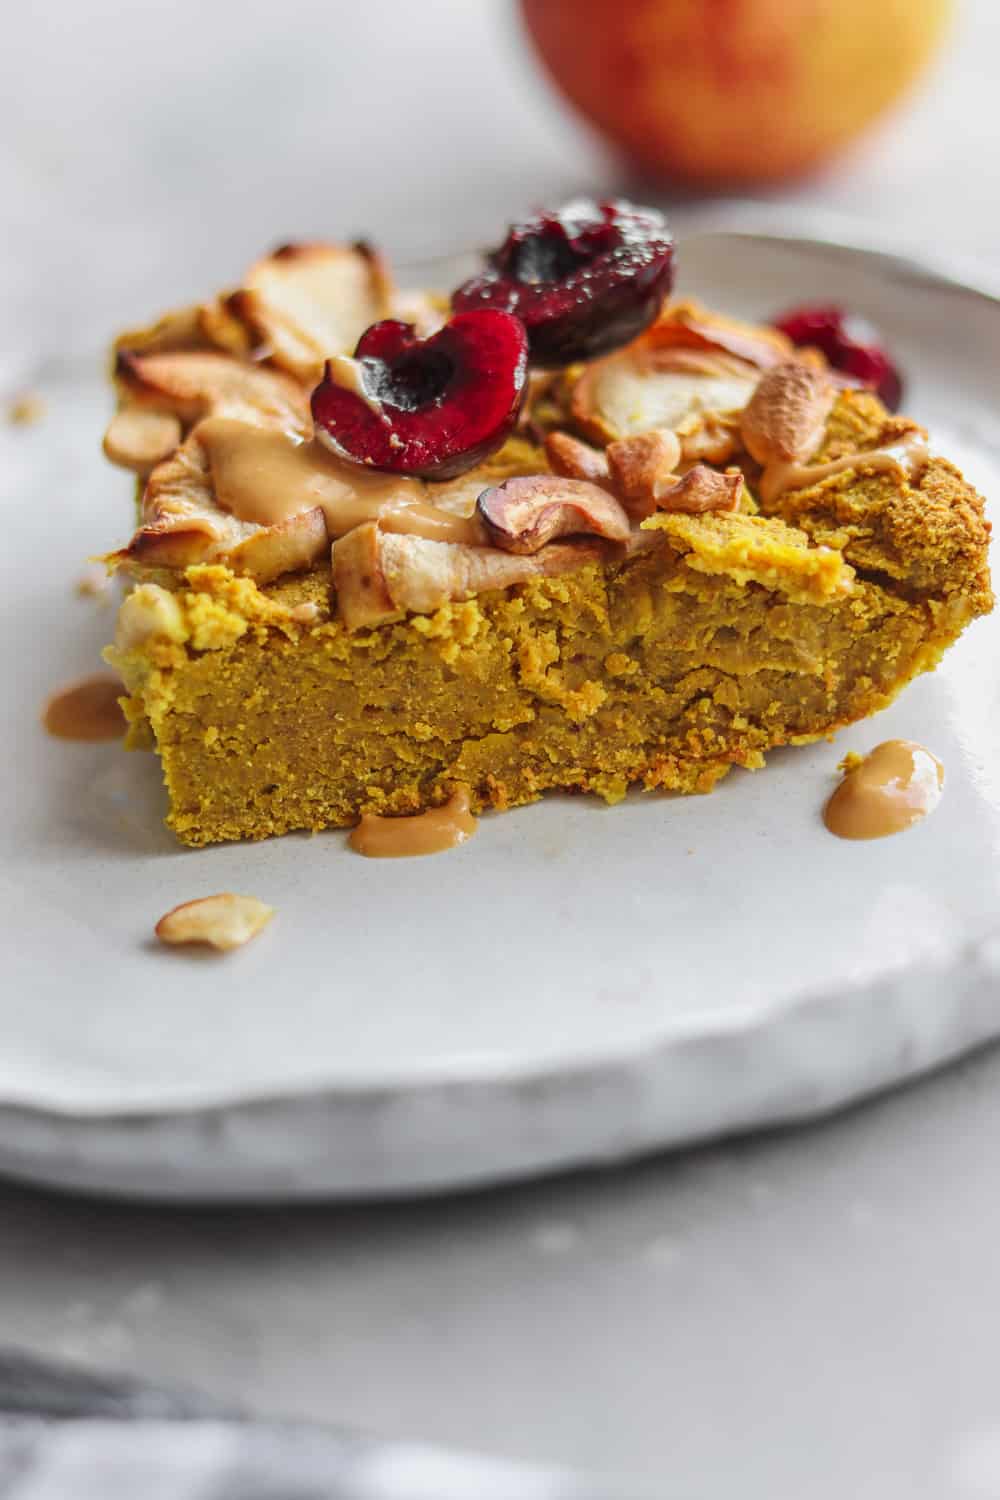
slice of chickpea cake topped with fruit and nuts

Baking with beans (that sounds so catchy it should be a TV show) is cool for many reasons. They're great for adding softness to treats like chocolate cookies, brownies, or blondies.

Plus, they naturally make the treat higher in healthy protein - without your kids ever knowing. I'm a huge believer in creating recipes that are good for both the body and the soul, and this is certainly one of them.

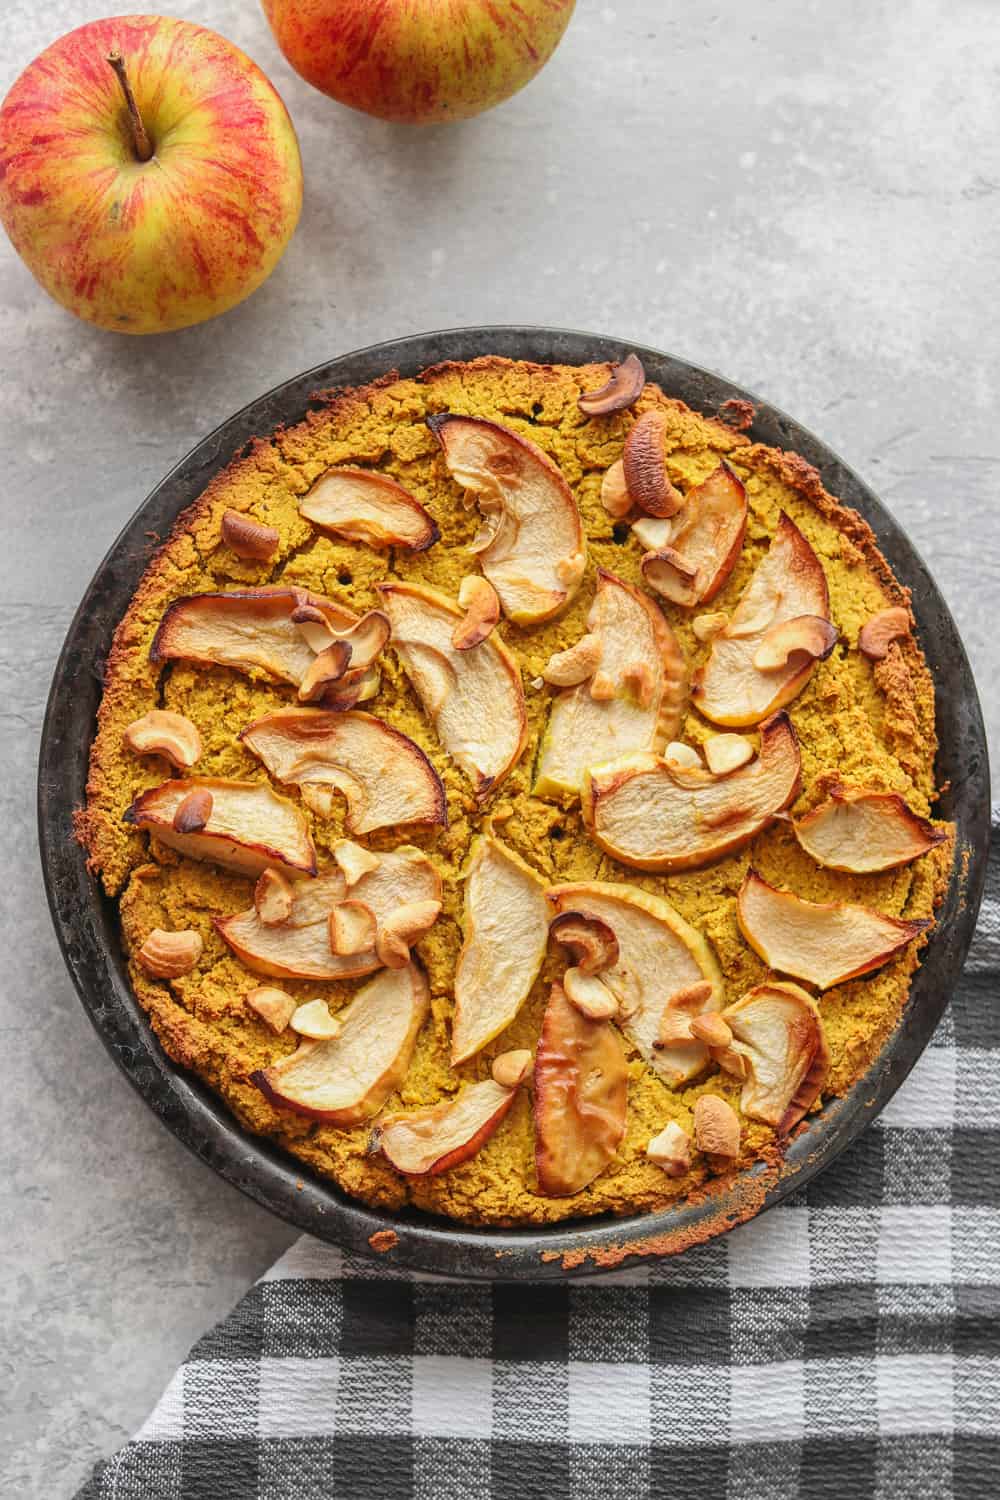
vegan chickpea cake topped with apples in a baking dish

How to Make a Chickpea Cake

As I mentioned, you definitely don't have to be a gifted baker to make this chickpea cake. I'm certainly not - savory recipes are much further into my comfort zone.

Here is a quick summary of the instructions. Scroll down for the detailed, printable recipe card.

Simply start by adding the all of the ingredients to a food processor. Don't worry too much about the order, but I'd recommend starting with the chickpeas and dry ingredients followed by the wet. Blend for 1-2 minutes, until a soft mixture forms (almost like a dense hummus lol).

slice of chickpea cake with a spoon

Then, pour the batter into a lightly greased shallow cake pan. Add a chopped apple on top, and a handful of cashew nuts, if you want. Then, bake in a preheated oven at 400 degrees F for 45-50 minutes. The cake should be golden and crispy around the edges, with still a bit of softness in the center.

Allow the chickpea cake to cool for 15-20 minutes. Then, it's ready to serve with fresh fruit or berries and a drizzle of nut butter.

Keep it in the fridge (covered) for 3-4 days and enjoy the chickpea cake either as a dessert or snack.

chickpea cake with a spatula serving slices

Add More Protein to the Cake

To take the protein content of this cake even further (and also add extra flavor), I added a scoop of protein powder.

The one I used in this recipe is Vega Protein Powder in Caramel Toffee. It's my favorite from the ones I've tried, and doesn't have a weird aftertaste.

You can use your own favorite brand and flavor. I recommend using a protein powder that's either a neutral or vanilla flavored so that it doesn't interfere too much with the other ingredients.

vegan chickpea cake being served on a white dish

Tips & Tricks

If you want to leave out the protein powder, use 2 extra tablespoons of coconut flour.

Add any nuts, seeds or berries of your choice into the batter - chocolate chips would work brilliantly too! I love sprinkling in some goji berries for an extra superfood boost.

For a chocolate chickpea cake, use either chocolate protein powder or 2 tablespoons of extra cacao powder.

If you're leaving out the protein powder or using a neutral-tasting one, use ½ a banana in place of the flax egg for extra sweetness.

Use any nut or seed butter of your choice (either crunchy or smooth).

More Recipes to Try

If you love this Cinnamon Apple Chickpea Cake, be sure to check out these other delicious recipes:

  • Chunky Applesauce Cake
  • Apple Pie Oatmeal
  • Almond Butter Protein Balls
  • Vegan Cinnamon Roll in a Mug

Recipe

vegan apple cake

Cinnamon Apple Chickpea Cake

4.71 from 27 votes
Made with chickpeas as the 'secret' ingredient, this Cinnamon Apple Chickpea Cake is fudgy, delicious and healthy at the same time! It's the perfect high protein and dairy-free dessert to enjoy with a cup of tea. 
Print Pin Save Saved!
Prep Time: 10 minutes minutes
Cook Time: 45 minutes minutes
Resting Time: 15 minutes minutes
Total Time: 1 hour hour 10 minutes minutes
Servings: 8 slices
Prevent your screen from going dark

Equipment

  • 9" cake pan

Ingredients

  • 1.5 cups chickpeas see notes
  • 1 scoop protein powder see notes
  • ¼ cup coconut flour + 3 tablespoon additional
  • 1 tablespoon cacao powder
  • 1 teaspoon ground cinnamon
  • 1 teaspoon baking powder
  • ½ cup peanut butter or any other nut or seed butter of your choice
  • ¼ cup maple syrup
  • 1 cup almond milk
  • 1 large chopped apple for topping
  • ¼ cup chopped cashews for topping
  • fresh berries and nut butter optional extra toppings
US Customary - Metric

Instructions

  • Preheat the oven to 400 degrees Fahrenheit.
  • Add the cooked chickpeas, protein powder, coconut flour, cacao powder, cinnamon, baking powder, peanut butter, maple syrup and almond milk to a food processor. Blend until smooth.
  • Transfer the batter to a shallow cake tin. Decorate the top with apple slices and chopped cashew nuts, and bake for 45 minutes, until golden and crispy around the edges, but still slightly soft in the centre.
  • Allow to cool for 15 minutes before serving with fresh berries and a drizzle of nut butter.

Notes

For the chickpeas, you can opt to use canned or cooked. If using canned chickpeas, drain and rinse before using in the recipe. 
If you want to leave out the protein powder, replace it with 2 tablespoon extra coconut flour and ½ a banana instead of the flax egg for extra sweetness.
This cake can be stored in the fridge for 3-4 days.

Nutrition (Estimate per Serving)

Calories: 207kcalCarbohydrates: 24gProtein: 8gFat: 10gSaturated Fat: 2gSodium: 180mgPotassium: 252mgFiber: 6gSugar: 12gVitamin A: 21IUVitamin C: 1mgCalcium: 105mgIron: 2mg
Vegan-ize any recipe!Grab our free vegan cheat sheet, packed with my favorite easy substitutions to make any recipe vegan.

Vegan Thai Pineapple Stir-Fried Rice

June 1, 2020 by Nicole @ VegKitchen 15 Comments

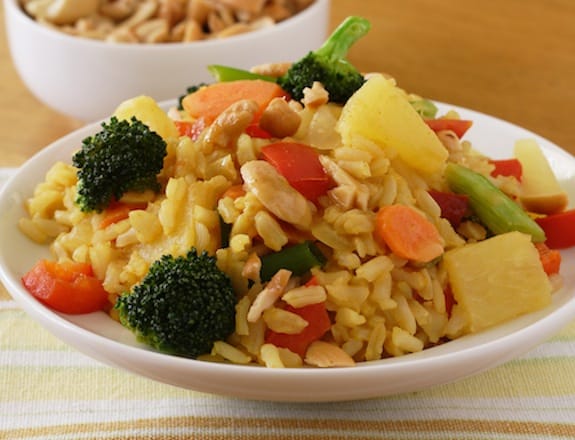
Thai pineapple rice

Colorful and luscious, this Thai restaurant classic can be made easily at home, using brown rice, pineapple, and veggies like broccoli, bell peppers, and carrots. When fresh pineapple is in season and reasonably priced, try this stir-fried rice recipe with the fresh fruit! Adapted from Vegan Express. Photo by Susan Voisin. [Read more...]

Apple Pie Oatmeal

May 22, 2020 by Nicole @ VegKitchen 5 Comments

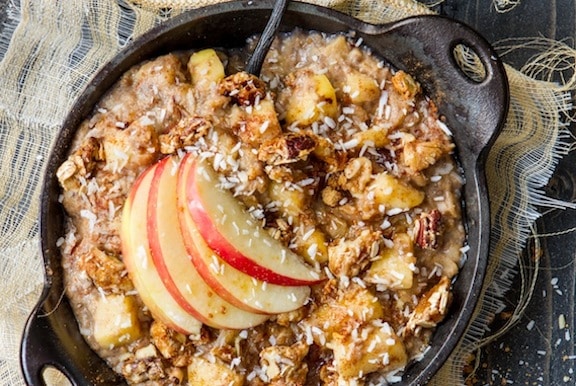
Apple pie oatmeal from the oh she glows cookbook by angela lid don

This voluminous Apple Pie Oatmeal will remind you of delicious apple pie but will leave you feeling energized and ready to tackle the day ahead. I like to use Gala apples in this recipe, but feel free to use any variety that you wish. This recipe is gluten-free, oil-free, refined sugar-free, and soy-free! Recipe and photo from The Oh She Glows Cookbook* by Angela Liddon. [Read more...]

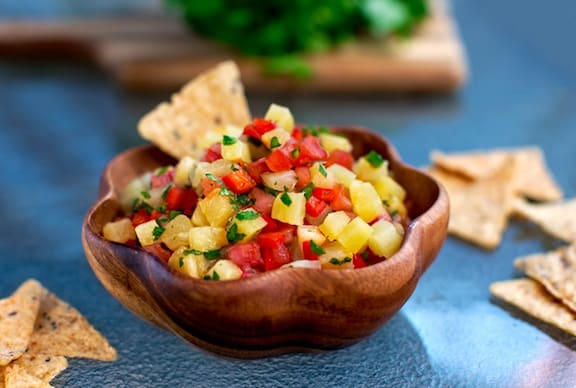
Pineapple and Tomato Salsa

March 23, 2020 by Nicole @ VegKitchen Leave a Comment

Pineapple salsa recipe

Easy to make and deliciously different, this lively pineapple and tomato salsa can be served as an accompaniment to a Southwestern-style meal (to top vegan quesadillas and the like), or as a snack served with stone-ground tortilla chips. Photos by Hannah Kaminsky. Recipe adapted from Vegan Express. [Read more...]

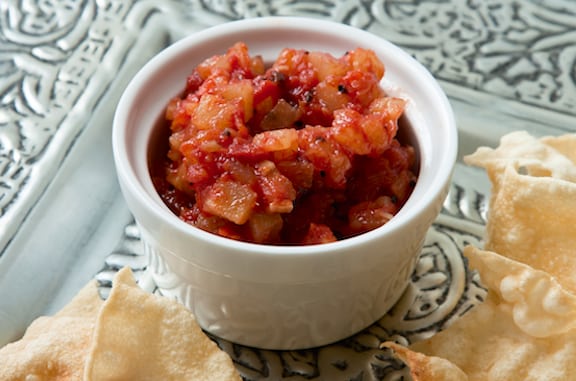
Minty Apple-Apricot Chutney

March 6, 2020 by Nicole @ VegKitchen Leave a Comment

Apricot chutney recipe

A spoonful of this sweet-tart minty apricot chutney, made with fresh apple and dried apricots, adds a graceful note both to spicy curries as well as mild grain and bean dishes. Fresh mint gives it a nice flavor, so add as much as you'd like to the recipe. [Read more...]

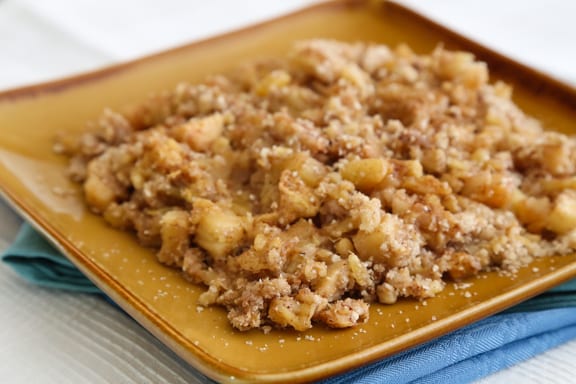
Vegan Passover Pineapple Crumble

February 3, 2020 by Nicole @ VegKitchen 5 Comments

Passover Pineapple Crumble

Matzo meal makes a perfect crumble topping for a fruity dessert made with pineapple, pears, and apples to round out the Passover meal. Serve it warm with a dollop of nondairy ice cream if you'd like to dress it up, and don't be surprised if it becomes a requested repeat every year once your family tries it.

Passover Pineapple Crumble

Photos by Evan Atlas.

Key Ingredients & Substitutions

  • Pineapple. Fresh is best if you have the patience to core and cube it, but well-drained canned pineapple chunks work fine and save time — just pat them dry so the filling isn't watery.
  • Pears and apples. The combination adds more textural variety than pineapple alone; firmer varieties like Bosc pears and Granny Smith apples hold their shape best during baking.
  • Matzo meal. Stands in for flour in the crumble topping, giving it a slightly coarser, nuttier texture than a traditional oat or flour crumble — this is what makes the dish Passover-friendly.
  • Margarine or oil. Cut into the matzo meal and sugar to form the crumble; a vegan stick margarine gives the closest texture to a classic buttery crumble, though a neutral oil works in a pinch.
  • Sugar. Sweetens both the fruit filling and the crumble topping — brown sugar in the topping adds a deeper, more caramel-like flavor if your Passover observance allows it.

Variations

  • Add warm spices. A pinch of cinnamon or nutmeg in the fruit filling plays well with the pears and apples.
  • Swap the fruit. Peaches or plums can stand in for the pineapple when they're in season and Passover falls later in spring.
  • Add nuts. Chopped walnuts or pecans mixed into the crumble topping add crunch and richness.
  • Make it citrusy. A little orange or lemon zest in the fruit filling brightens the whole dish.
  • Make individual portions. Divide the filling and topping among ramekins for a more elegant presentation at a seder.

Tips for the Best Pineapple Crumble

  • Cut the fruit evenly. Uniform pieces cook at the same rate, so the pears and apples don't turn to mush while the pineapple is still firm.
  • Don't overwork the topping. Cut the margarine or oil into the matzo meal just until it looks like coarse crumbs — overmixing makes for a denser, less crumbly topping.
  • Let it rest before serving. A few minutes out of the oven lets the filling set slightly, so it doesn't run when scooped.
  • Serve it warm. This crumble is best fresh from the oven, ideally with a scoop of nondairy vanilla ice cream melting into the fruit.
  • Watch the topping toward the end of baking. Matzo meal can brown faster than oats, so check a few minutes early to avoid over-darkening.

Make Ahead & Storage

This crumble can be assembled up to a day ahead and refrigerated unbaked — add a few extra minutes to the baking time if going in cold from the fridge. Leftovers keep for about 3 days and reheat well in a low oven, which helps the topping stay crisper than a microwave would.

How to Serve

Serve warm as the finale to a Passover seder, with or without nondairy ice cream. It travels well to a potluck seder too, since it reheats nicely in a low oven.

Recipe

Passover Pineapple Crumble

Vegan Passover Pineapple Crumble

5 from 4 votes
Matzo meal makes a perfect crumble topping for a fruity dessert made with pineapple and pears or apples to round out the Passover meal.
Print Pin Save Saved!
Prep Time: 20 minutes minutes
Cook Time: 30 minutes minutes
Total Time: 50 minutes minutes
Servings: 8
Prevent your screen from going dark

Ingredients

  • 1 20 oz can unsweetened pineapple tidbits, drained (or 1 ½ to 2 cups fresh pineapple, finely chopped)
  • 2 medium pears or apples peeled, cored, and finely diced
  • 1 teaspoon vanilla extract
  • ½ teaspoon cinnamon
  • pinch of nutmeg

Crumb topping!

  • 2 tablespoon vegan buttery spread such as Earth Balance
  • ½ cup matzo meal
  • ⅓ cup walnuts finely ground
  • ¼ cup natural granulated sugar
  • ½ teaspoon cinnamon

To serve!

  • vanilla nondairy ice cream optional
US Customary - Metric

Instructions

  • Preheat the oven to 350°F.
  • Combine the first 5 ingredients in a mixing bowl, then pat into a 9-inch square baking pan.
  • Melt the buttery spread in a skillet, then remove from the heat. Stir in the remaining topping ingredients until everything is evenly coated.
  • Remove from the heat and pour over crust in the baking pan. Sprinkle the crumble topping evenly over the top of the pineapple mixture.
  • Bake for 25 to 30 minutes, or until the crumb topping is lightly golden. Serve warm on its own or with nondairy ice cream.

Nutrition (Estimate per Serving)

Calories: 139kcalCarbohydrates: 21gProtein: 2gFat: 6gSaturated Fat: 1gPolyunsaturated Fat: 3gMonounsaturated Fat: 1gTrans Fat: 1gSodium: 23mgPotassium: 86mgFiber: 2gSugar: 11gVitamin A: 147IUVitamin C: 2mgCalcium: 13mgIron: 1mg
Vegan-ize any recipe!Grab our free vegan cheat sheet, packed with my favorite easy substitutions to make any recipe vegan.
Passover Pineapple Crumble recipe
  • Find more at VegKitchen's Passover: Ashkenazic-Style Seder page.
  • Find more ways to make Special Occasions and Entertaining easier and healthier.

Cranberry-Apple Relish

November 29, 2019 by Nicole @ VegKitchen 1 Comment

Fresh Cranberry apple Sauce

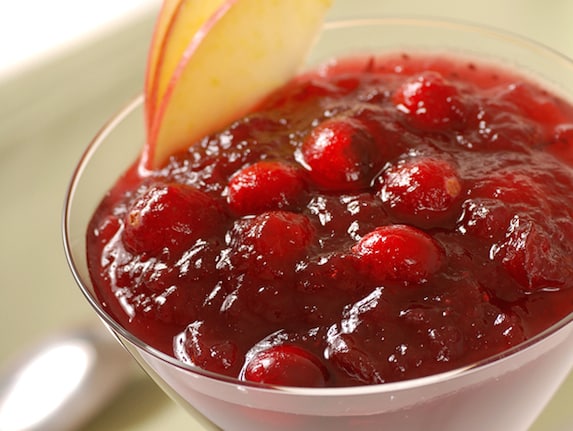
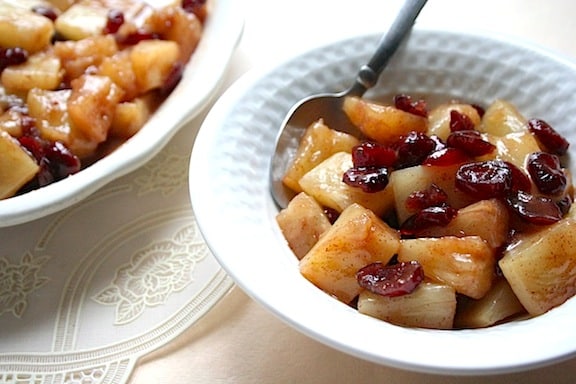
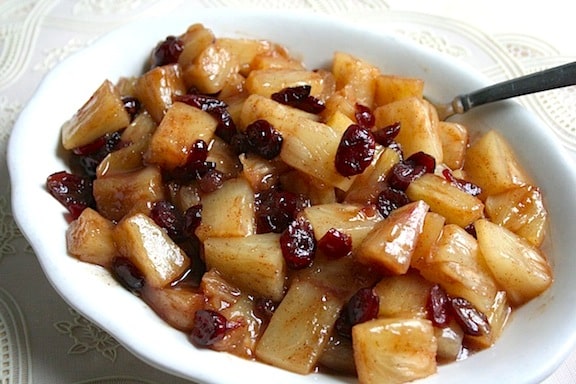
This Cranberry-Apple Relish adds vivid color to fall harvest meals. Make this recipe for a change of pace from jellied sauces at Thanksgiving or Christmas.
[Read more...]

Mixed Greens Salad with Apples, Carrots, and Pickled Beets

October 18, 2019 by Nicole @ VegKitchen Leave a Comment

Mixed greens salad with apple and pickled beets

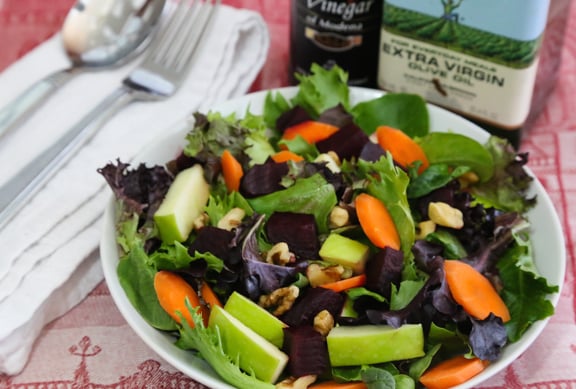
This recipe is for a simple, colorful salad of mixed greens, crunchy carrots, tart apples, and pickled beets that harmonizes well with everyday or holiday meals and adds little hands-on prep time. Photos by Evan Atlas. [Read more...]

Chocolate-Drizzled Apples or Pears with Date Caramel

September 30, 2019 by Nicole @ VegKitchen 1 Comment

Chocolate drizzled apples or pears

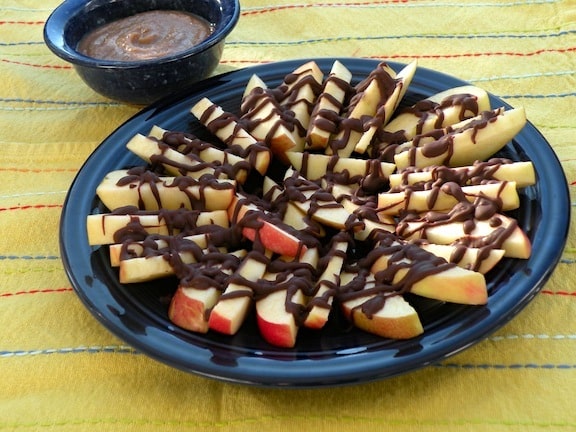
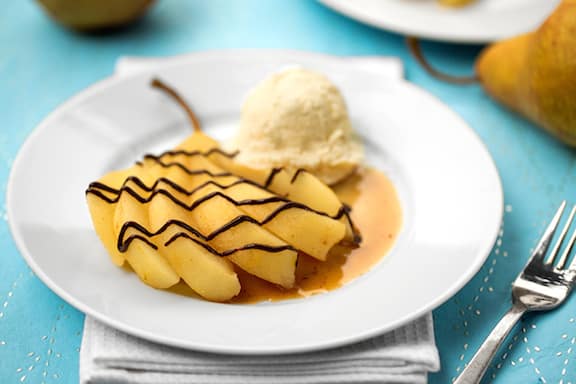
Two or three crisp apples or firm pears plus vegan chocolate chips add up to a seriously good dessert recipe. And if you have a few dates on hand (and a machine to blend them up) you can make a caramel-y sauce to dip them into, though this is entirely optional.
[Read more...]

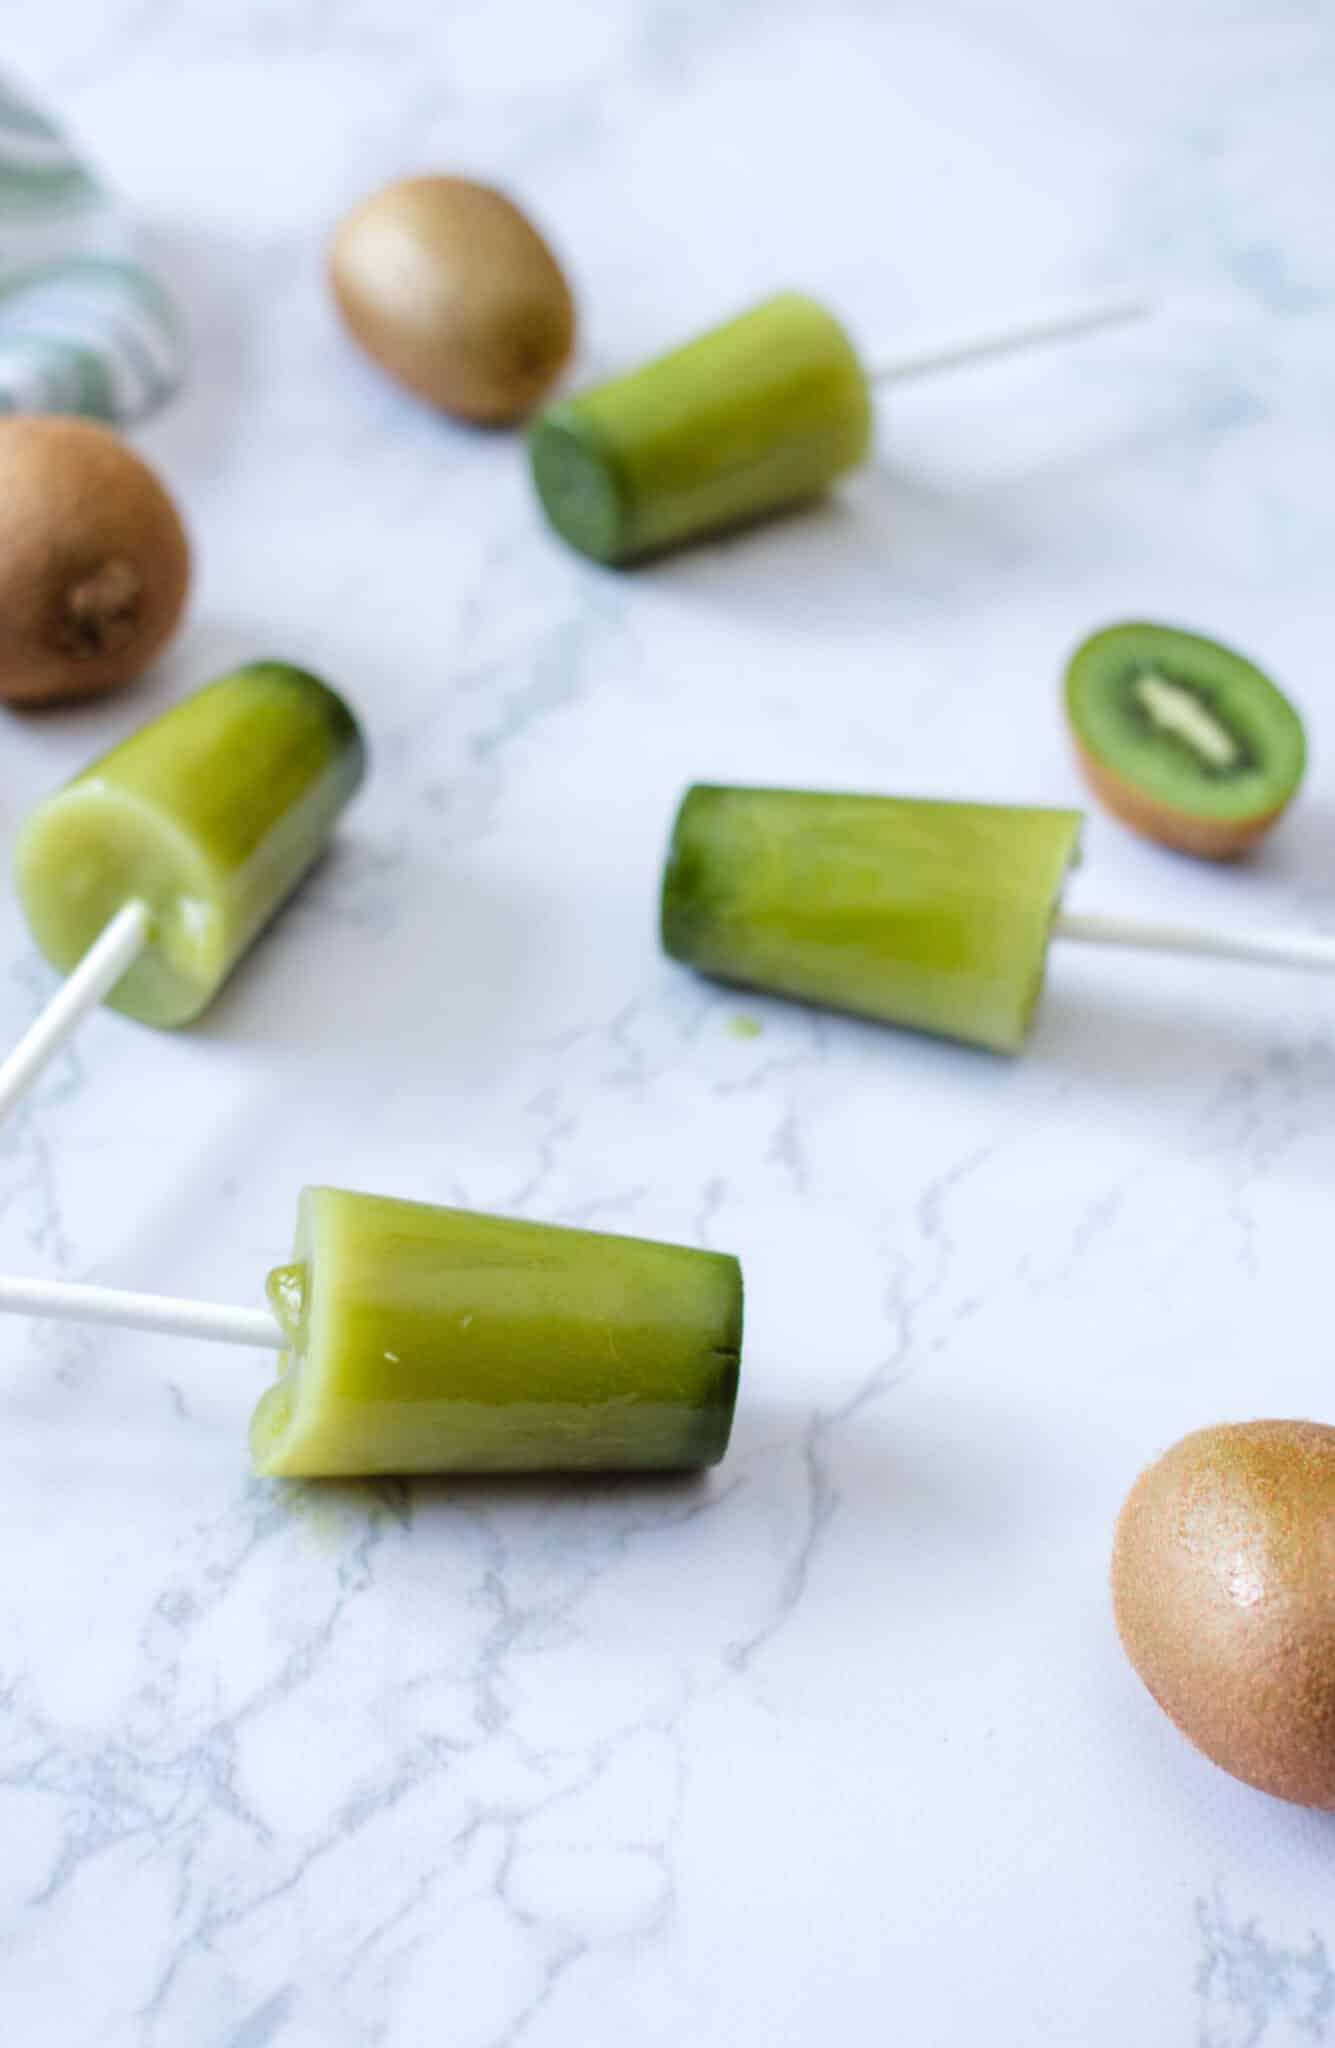
Vegan Kiwi and Apple Popsicles

August 14, 2019 by Nicole @ VegKitchen Leave a Comment

Kiwi and Apple Popsicles

These fruity popsicles are a delicious mix of kiwi, apple, and fresh mint-a perfect recipe to make ahead for hot summer days!

kiwi and apple popsicles
[feast_advanced_jump_to]

These Kiwi and Apple Popsicles are like a spa day for your taste buds-zingy, minty, and just the right amount of sweet. They're what I reach for when the heat is unbearable and I want something that feels healthy and indulgent. Bonus: they're ridiculously easy to make. 

These Kiwi & Apple Popsicles are:

  • A chill vegan treat that's free of refined sugar
  • Just five ingredients and five minutes of prep
  • Naturally sweet and ultra-refreshing
  • The kind of popsicle adults and kids will fight over (true story)!

Key Ingredients & Substitutions

  • Kiwi: Provides a tart and tangy flavor. Ensure they're ripe for the best taste.
  • Apple Juice: Adds sweetness and balances the tartness of the kiwi. Opt for raw or unsweetened juice. You can substitute other juices, such as orange juice, for a new flavor.
  • Mint Leaves: Infuses a refreshing flavor. Fresh mint is best, but a drop of mint extract can be used in a pinch.
  • Maple Syrup: Natural sweetener that complements the fruit flavors. Agave nectar can be substituted.
  • Water: Used to create the mint syrup base.

Helpful Tips

Making the Mint Syrup: Allow the mint to steep in the hot water and maple syrup mixture for at least 15 minutes to extract maximum flavor.

Blending: Blend the kiwi and apple juice until it's completely smooth for a consistent texture.

Freezing: Ensure the popsicles freeze for at least 6 hours, preferably overnight, for the best results.

Mold Removal: To easily remove popsicles from their molds, run a bit of warm water over the outside of the mold for a few seconds. They will release and slide right out.

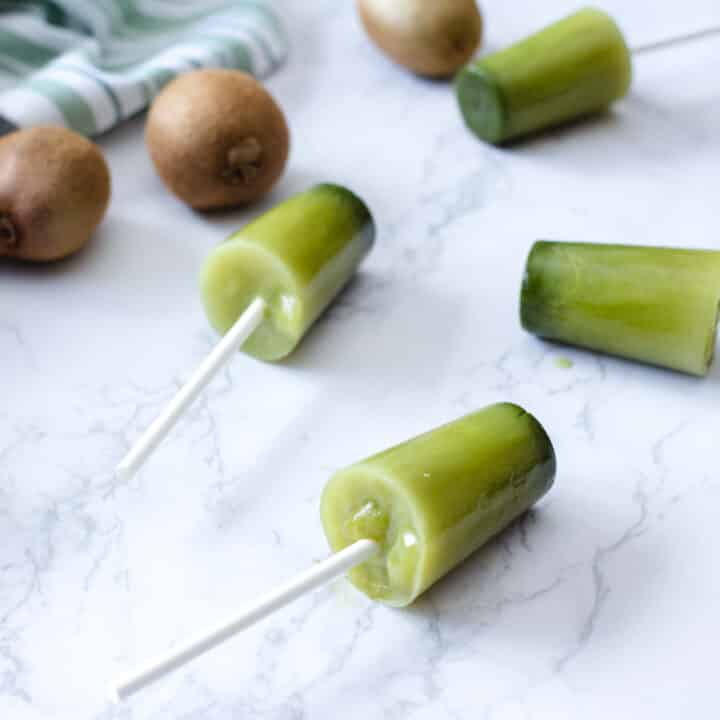
vegan popsicles with kiwi and apple juice

Variations

Berry Twist: Add a handful of strawberries or blueberries to the blend for a mixed fruit flavor.

Citrus Zing: Incorporate a splash of lemon or lime juice for added tanginess.

Herbal Infusion: Experiment with other herbs like basil or lemon balm for a unique flavor profile.

Creamy Delight: Add a bit of coconut milk for a creamier texture.

More Vegan Treats

If you love these Kiwi Apple Popsicles, be sure to check out these other delicious frozen treats:

  • Strawberry Mango Vegan Popsicles
  • Vegan Fudgesicles
  • Vegan Cookies & Cream Popsicles


Recipe

Kiwi and Apple Popsicles

Kiwi and Apple Popsicles (Vegan)

5 from 2 votes
These fruity popsicles are a delicious mix of kiwi, apple, and fresh mint-a perfect recipe to make ahead for hot summer days!
Print Pin Save Saved!
Cook Time: 15 minutes minutes
Freezing Time: 8 hours hours
Total Time: 8 hours hours 15 minutes minutes
Servings: 8
Prevent your screen from going dark

Equipment

  • popsicle molds

Ingredients

  • ¼ cup maple syrup
  • ½ cup water
  • 12 mint leaves crushed
  • 1 cup raw apple juice
  • 3 kiwis large, ripe, peeled
US Customary - Metric

Instructions

  • Put the water with the mint and maple syrup in a saucepan over medium heat.
  • Remove mint syrup from heat and let stand for 15 minutes.
  • Meanwhile, place the apple juice and kiwi fruit in a blender. Grind to obtain a smooth puree.
  • When the brewing time is over, add ¾ cup mint syrup and stir well.
  • Place the mixture in popsicle molds and freeze for at least 6 hours.

Notes

The number of popsicles made will depend on the size of your molds. I made 8 popsicles with this recipe.

Nutrition (Estimate per Serving)

Calories: 62kcalCarbohydrates: 15gProtein: 0.4gFat: 0.2gSaturated Fat: 0.02gPolyunsaturated Fat: 0.1gMonounsaturated Fat: 0.02gSodium: 5mgPotassium: 130mgFiber: 1gSugar: 12gVitamin A: 94IUVitamin C: 26mgCalcium: 29mgIron: 0.2mg
Vegan-ize any recipe!Grab our free vegan cheat sheet, packed with my favorite easy substitutions to make any recipe vegan.


Vegan Cinnamon-Apple Pancakes

June 17, 2019 by Nicole @ VegKitchen 4 Comments

Cinnamon Apple Vegan Pancakes

Apples and cinnamon folded into vegan pancakes—what can you say but "Yum"? This recipe makes a lovely weekend breakfast or brunch, especially in the fall, when apples are abundant. Photos by Evan Atlas.

[Read more...]

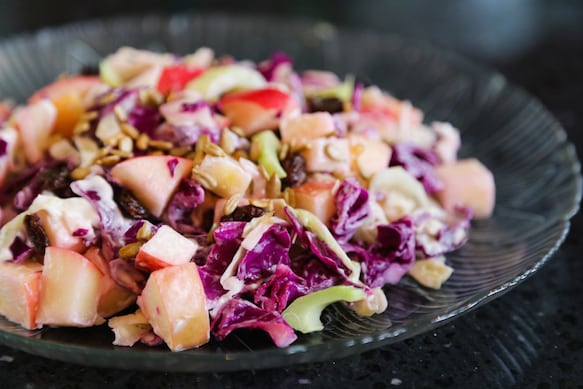
Festive Cabbage, Apple, and Raisin Slaw

May 17, 2019 by Nicole @ VegKitchen Leave a Comment

Cabbage, apple, and raisin slaw

This colorful and naturally sweet slaw is a medley of cabbage, apples, and raisins with an appealing crunch. Make this recipe for everyday as well as holiday meals. Photos by Evan Atlas. Adapted from The Vegetarian Family Cookbook. [Read more...]

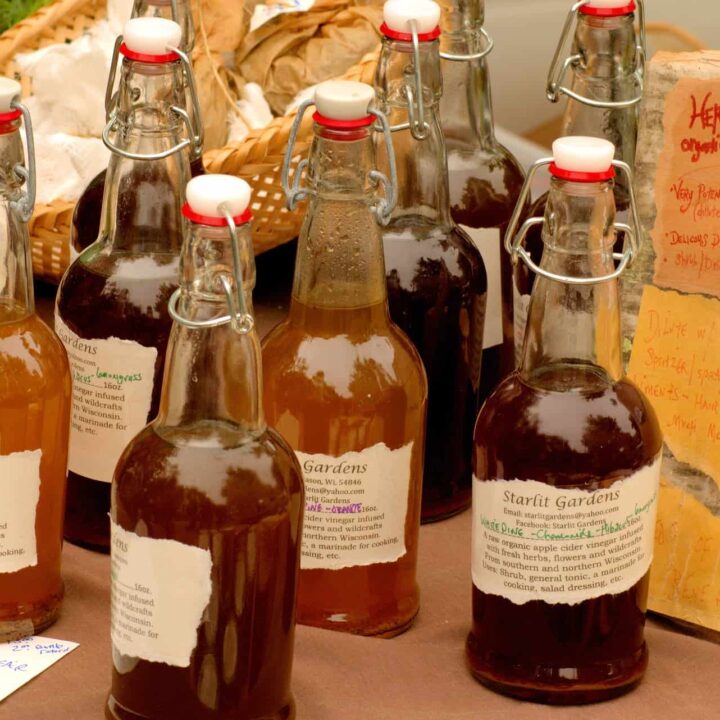
Can The Apple Cider Vinegar Diet Help You Lose Weight?

December 31, 2018 by Nicole @ VegKitchen 1,743 Comments

Apple Cider Vinegar Diet: Bottles of ACV

Many of you have already heard that raw, organic, and unfiltered apple cider vinegar can assist in weight loss and overall well-being. The apple cider vinegar diet is probiotic, and has many additional health benefits. Here we explore how the apple cider vinegar diet as part of a healthy lifestyle can help you lose weight while at the same time, acting as a tonic for the body.

Although many fad diets that create rapid weight loss have come and gone over the years, it is encouraging to note that the apple cider vinegar diet leads to gradual weight loss. It would be nice if we could shed pounds quickly and never see them again, but experience has shown that weight that leaves easily comes back easily.

The Apple Cider Vinegar Diet

If you lose weight quickly, your body will oblige you by kicking in mechanisms to make it more likely this weight will slip back on in no time. But if you can be patient and do not expect instant results, your fat cells will adjust to their new size more willingly and not insist on contributing on your waistline. The apple cider vinegar diet is perfect for this.

Great ways to learn to love ACV: The Apple Cider Vinegar Diet!

  • Explore 100 tasty apple cider drinks in this book!
  • You might also like: 12 Apple Cider Vinegar Recipes
  • ACV has other great health benefits in addition to weight loss. See 6 Health Benefits of Apple Cider Vinegar
  • More reasons to use ACV: 23 Research-Backed Benefits of Apple Cider Vinegar.
  • The post popular brand is Bragg Apple Cider Vinegar, which is organic, raw, and naturally fermented, though if you find those qualities in other brands, they're fine, too.

Apple Cider Vinegar is best taken before meals

When you give it some thought, it makes good sense that drinking apple cider vinegar before meals would help with weight loss. Apples are a good source of pectin, and including pectin in your diet can make you feel fuller and more satisfied. Since apple cider vinegar contains the same amount of pectin as apples (one apple has about 1.5 grams pectin), it can suppress your appetite in a similar way.

There is also good science behind why apple cider vinegar would encourage weight loss even more effectively than eating raw apples. In general, acids help with the digestion of protein, the building blocks for some of our hormones, especially growth hormone.

We've seen how this hormone is instrumental in breaking down fat cells. By increasing the acid present in your stomach before a meal, you'll ensure the chances for thorough digestion and increase the availability of protein for hormone synthesis.

Apple Cider Vinegar assists protein utilization

Greater protein utilization helps the formation of growth hormone, the substance that keeps the body's metabolism going while we're at rest. This is why it is important to drink apple cider vinegar before or with your evening meal.

Apple Cider Vinegar stimulates digestion

Because apple cider vinegar stimulates digestion, it also reduces the amount of time that fats remains in the digestive tract. It's important that your body gets a chance to remove key nutrients from your food, and conditions that contribute to diarrhea can be life-threatening.

At the same time, it can be unhealthful to have food remain in the intestines for too long. If fats present longer than necessary during digestion, more fats will be absorbed.

Apple cider vinegar works at the very beginning of the digestive process to stimulate your appetite and increase your interest in food. Normally, you wouldn't think of this as being the direction you want to go in if you're trying to lose weight. But apple cider vinegar works positively to support your efforts by increasing your interest in whole foods.

Apple Cider Vinegar assists in utilization of iron

ACV can improve the body's utilization of iron, a nutrient that acts like fire-starter for fuel. Iron is a key component in substances that carry oxygen to the cells and hold it there. It's the ability of apple cider vinegar to increase iron utilization and energy consumption in the body that makes it such a supportive food for weight loss.

Apple Cider Vinegar is great source of potassium

Apples are a great source of potassium, and likewise, apple cider vinegar, taken on a regular basis, will contribute the potassium you need to help balance the sodium in your diet. In fact, try replacing salt in your diet with apple cider vinegar. Use it to top foods you might be tempted to salt, such as vegetables or protein foods. A little vinegar over a plate of beans is a regional favorite in many parts of America.

Recommendation for losing weight with the apple cider vinegar diet:

Here is my recommendation for using the apple cider vinegar diet to lose weight, based on the work of Dr. Jarvis and others:

  • 1 to 2 teaspoons apple cider vinegar + 8 ounces water *
  • Drink before meals 3 times a day

* Though this author recommends 1 to 2 teaspoons of ACV per cup of water, other sources call for 1 tablespoon per cup of water or other liquid, and that seems to be what VegKitchen readers have found most effective.

Excerpted from Apple Cider Vinegar for Weight Loss & Good Health* by Cynthia Holzapfel (Book Publishing Co.), reprinted by permission.

Read Next: Apple Cider Vinegar Drink Recipes, 23 Research-Backed Benefits of Apple Cider Vinegar

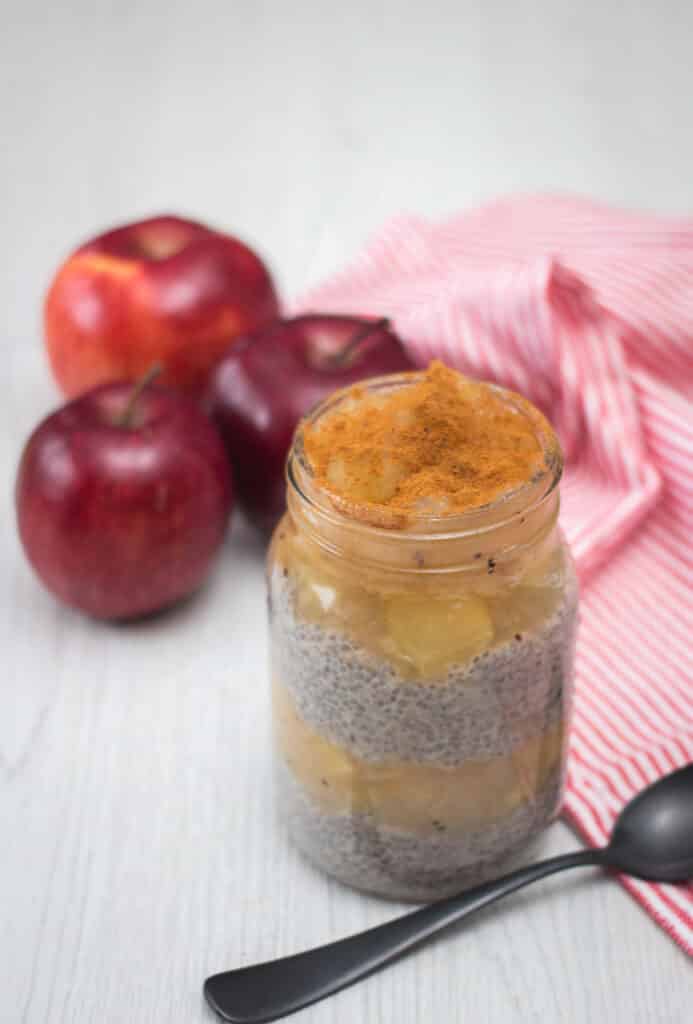
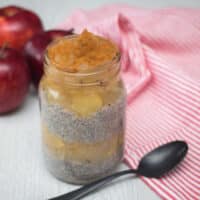
Apples and Cinnamon Chia Pudding

November 7, 2018 by Nicole @ VegKitchen 1 Comment

The taste of the Chia Seeds is neutral-no particular taste-which makes the recipe possibilities infinite! Chia can also be used to thicken a drink, a smoothie, or a dessert. Here, I propose a kind of chia pudding-very interesting for breakfast or a snack.  It's a raw and healthy recipe with a touch of the season from the apples and cinnamon.

Recipe

Apples and Cinnamon Chia Pudding

5 from 2 votes
This chia pudding recipe makes for a very interesting breakfast or snack. It’s a raw and healthy recipe with a touch of the season from the apples and cinnamon.
Print Pin Save Saved!
Total Time: 30 minutes minutes
Servings: 1 -2
Prevent your screen from going dark

Ingredients

  • 1 cup of coconut milk
  • 5 tablespoons chia seeds
  • 1 cup apples diced
  • Juice and grated rind of a lemon
  • 1 tablespoon agave syrup
  • 1 teaspoon cinnamon
US Customary - Metric

Instructions

  • The day before, mix the chia seeds, coconut milk, agave syrup, and lemon juice in a container.
  • Cover the container and store in the refrigerator.
  • The next day, peel and cut apples into small cubes.
  • Cook the apples with ¼ cup water for 10 minutes, until you obtain a sauce.
  • Add chia-coconut milk preparation to a small container.
  • Place the apples sauce on top of the mixture.
  • Sprinkle with cinnamon and grated lemon zest.

Nutrition (Estimate per Serving)

Calories: 872kcalCarbohydrates: 67gProtein: 15gFat: 67gSaturated Fat: 45gPolyunsaturated Fat: 15gMonounsaturated Fat: 3gTrans Fat: 1gSodium: 41mgPotassium: 885mgFiber: 25gSugar: 27gVitamin A: 106IUVitamin C: 9mgCalcium: 447mgIron: 12mg
Vegan-ize any recipe!Grab our free vegan cheat sheet, packed with my favorite easy substitutions to make any recipe vegan.


Pineapple Rice Pudding

October 26, 2018 by Nicole @ VegKitchen 1 Comment

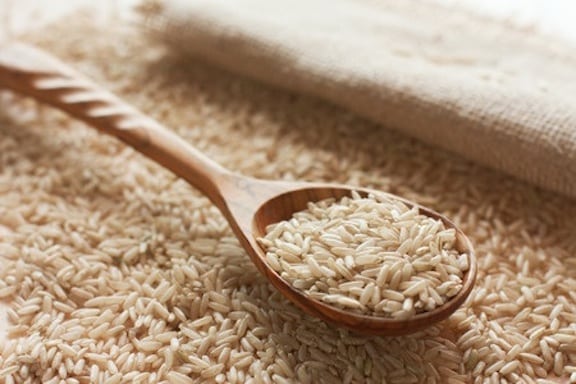
Brown rice in spoon

Rice pudding is a comforting dessert that has been around since ancient times. But this Pineapple Rice Pudding recipe gives the classic treat a new life with some tangy fruit!

Brown rice in spoon

Kids of all ages can enjoy this updated comfort food as a snack or dessert. You can even serve this pudding packed in a thermos in your lunch box! This rice pudding is made with brown rice, almond milk, and-for extra fruity flavor-crushed pineapple.

When I want to get cozy, I prefer rice pudding over pretty much any other dessert. But I can also go for a decadent bread pudding, too, like this extra sweet and creamy Chocolate Chunk Banana Bread Pudding.

Scones are another great, old-fashioned treat. These Peanut Butter and Jam Scones aren't quite as sweet as pudding, but they still make for a great treat. Alternatively, a cup of delicious Vegan Gingerbread Hot Chocolate can keep you warm and comfy, too!

How to Make Pineapple Rice Pudding

  1. Combine rice with water in a saucepan.
  2. Bring to a boil, then simmer until the water is absorbed.
  3. When water is evaporated, add almond milk and simmer until absorbed.
  4. Remove from heat and allow to cool for 5 minutes.
  5. Stir in the remaining ingredients.
  6. Serve pudding warm or at room temperature.

Full directions for how to make Pineapple Rice Pudding are in the printable recipe card below.

Recipe

Brown rice in spoon

Pineapple Rice Pudding

5 from 1 vote
Rice pudding is a comforting dessert that has been around since ancient times. But this Pineapple Rice Pudding recipe gives the classic treat a new life with some tangy fruit!
Print Pin Save Saved!
Prep Time: 10 minutes minutes
Cook Time: 30 minutes minutes
Total Time: 40 minutes minutes
Servings: 6 servings
Prevent your screen from going dark

Ingredients

  • ¾ cup brown rice short- or medium-grain
  • ¾ cup vanilla almond milk
  • ½ cup raisins dark or golden
  • ¼ cup maple syrup
  • 1 cup crushed pineapple well-drained
  • 1 teaspoon vanilla extract
  • ½ teaspoon cinnamon plus more for topping
  • pinch of nutmeg
US Customary - Metric

Instructions

  • Combine the rice with 2 ½ cups water in a medium saucepan.
  • Bring to a boil, then cover and simmer gently until the water is absorbed, about 30 minutes.
  • When all water is evaporated, stir in the almond milk, and simmer until absorbed.
  • Remove rice from the heat and allow to cool for 5 minutes, then stir in the remaining ingredients.
  • Divide the rice pudding among 4 serving dishes. Sprinkle each with a little extra cinnamon and serve warm or at room temperature.

Nutrition (Estimate per Serving)

Calories: 188kcalCarbohydrates: 43gProtein: 2gFat: 1gSaturated Fat: 1gPolyunsaturated Fat: 1gMonounsaturated Fat: 1gSodium: 47mgPotassium: 244mgFiber: 2gSugar: 14gVitamin A: 20IUVitamin C: 4mgCalcium: 71mgIron: 1mg
Vegan-ize any recipe!Grab our free vegan cheat sheet, packed with my favorite easy substitutions to make any recipe vegan.

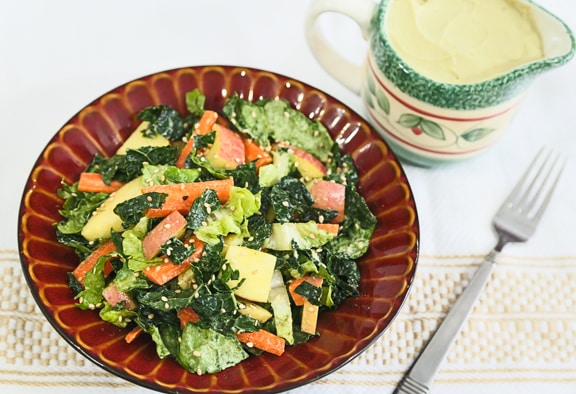
Kale, Romaine, and Apple Salad with Sesame-Avocado Dressing

January 19, 2018 by Nicole @ VegKitchen Leave a Comment

Kale, Romaine, and Apple Salad

Here's a fresh and crunchy kale salad with a double dose of sesame (tahini and seeds). Did you know that sesame seeds are a good source of calcium? This salad goes with just about any kind of meal - bean and grain dishes, stews, chilies, veggie burgers. Photos by Evan Atlas. [Read more...]

Apple Cider “Ginger Ale”

October 6, 2016 by Nicole @ VegKitchen Leave a Comment

Apple Cider beverage

This bracing apple cider ginger ale beverage has lots of good things in it - ginger, apple cider vinegar, and lemon juice. This just might become your go-to tonic! You can drink it straight, without the seltzer, if you don't want the fizz. And you can warm it gently (don't boil) if you want to drink it hot. Make sure to see the variations below the recipe box.

[Read more...]

Fresh Chunky Applesauce Cake

October 6, 2015 by Nicole @ VegKitchen 2 Comments

Fresh Chunky Applesauce Cake

Your own homemade chunky applesauce is the key to this flavorful cake. That way, the cake is just as much (if not more) about the fruit than the batter. It's a healthy cake to snack on and to add to portable lunches, as well as to serve to fall and winter company. Photos by Evan Atlas. [Read more...]

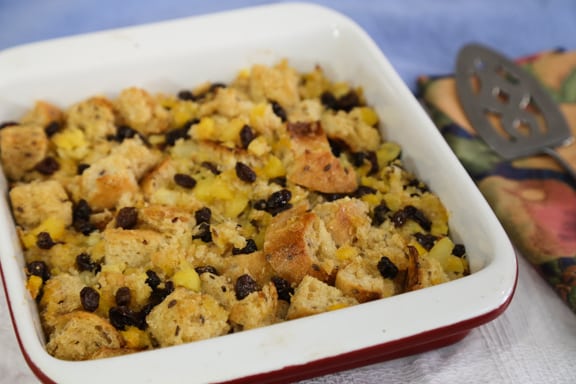
Pineapple Raisin Bread Pudding

January 1, 2015 by Nicole @ VegKitchen Leave a Comment

Pineapple Raisin Bread Pudding

Bread pudding made with pineapple and raisins, and fragrant with vanilla, makes a warm, satisfying dessert after a cool-weather meal, or a comforting treat to have with tea. Leftovers are great to pack into a small container to take to work or school the next day. Photos by Evan Atlas. [Read more...]

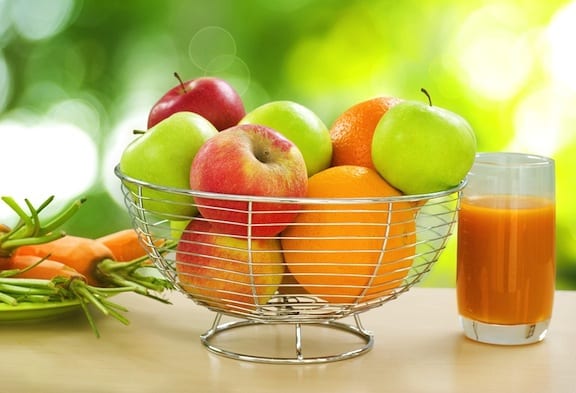
Carrot, Apple, and Orange Juice

September 9, 2014 by Nicole @ VegKitchen Leave a Comment

Oranges

A classic combination, juicing fresh carrots, apples, and oranges will give you a great boost of energy and nutrition.  [Read more...]

Apple Crumble Pie

December 3, 2013 by Nicole @ VegKitchen 1 Comment

apple pie leslie cerier

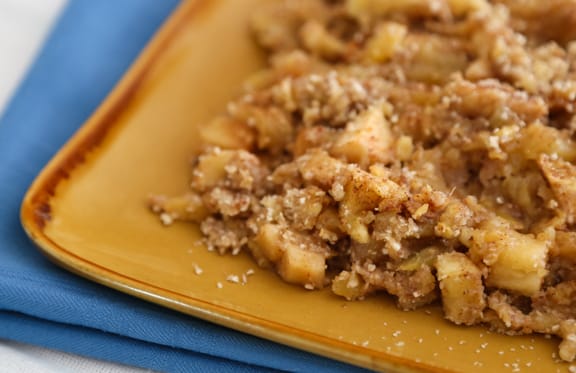
Apples scented with cinnamon — YUM! When I created this pie crust recipe, I imagined an oatmeal cookie crust. Most oatmeal cookies have eggs, butter and sugar. Not this one! Here, I subbed chia seeds and water for eggs; coconut sugar and coconut oil for a super delicious, healthy twist. And, it's vegan! Photos by Tracey Eller. [Read more...]

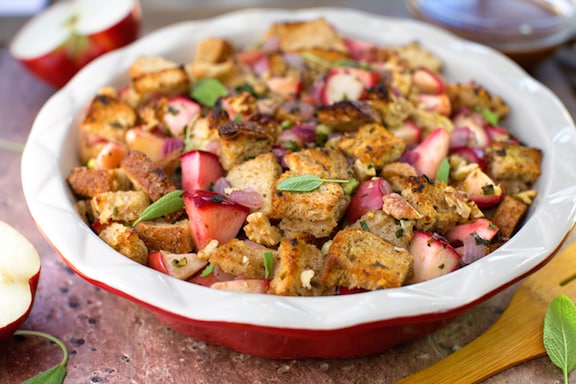
Walnut-Apple Stuffing

October 29, 2013 by Nicole @ VegKitchen 5 Comments

Apple walnut stuffing

If your Thanksgiving company includes eaters of mixed persuasions, vegetarians and vegan guests won't want to eat stuffing that's been cooked in the bird. Of course, you need not wait for special occasions to make this. Everyone loves stuffing! Of course, you can use a gluten-free bread if need be. The sweet apple and red onion contrast nicely with the herbal notes. Photos by Hannah Kaminsky.

[Read more...]

Spinach Apple Smoothie

September 3, 2013 by Nicole @ VegKitchen 44 Comments

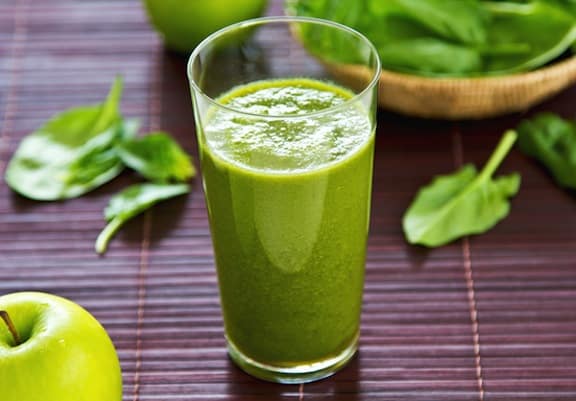
Spinach and apple smoothie recipe

This refreshing green spinach apple smoothie is among my favorites - and you'll love it too if you prefer smoothies that are juicy and not too thick.

Spinach and apple smoothie

The cucumber adds a deliciously refreshing flavor and definitely adds to the juiciness of this Spinach Apple Smoothie!

Tips, Tricks, & Variations

This recipe will make two 12-ounce or three 8-oz servings.

I used fresh spinach in this green smoothie. But you could also substitute kale if you prefer. I have also had readers report success with frozen spinach, but I would suggest defrosting and writing out the extra moisture before using it.

Any type of nondairy milk will work fine in this smoothie. I prefer almond milk but soy or cashew milk are also great choices. For a thicker smoothie, try substituting a dairy free yogurt instead.

The hemp or chia seeds are totally optional, but highly recommended. They add a nice punch of protein, and also help thicken up the smoothie.

If you like this Spinach-Apple Smoothie, you may enjoy learning about the top 10 benefits of green smoothies, as well as trying these other delicious and simple smoothie recipes:

  • Piña Colada Green Smoothie
  • Spinach, Sprouts, and Pineapple Smoothie
  • Chia Green Super Smoothie.

Explore more recipes for Green Smoothies on VegKitchen!

Recipe

Spinach and apple smoothie recipe

Spinach and Apple Smoothie

4.34 from 12 votes
This refreshing smoothie of spinach, apple, and cucumber is among my favorites, as I like smoothies that are more juicy and not too thick.
Print Pin Save Saved!
Prep Time: 8 minutes minutes
Total Time: 8 minutes minutes
Servings: 2 to 3
Prevent your screen from going dark

Ingredients

  • 2 big handfuls baby spinach
  • 1 medium apple cored and cut into large chunks
  • 3- to 4- inch piece cucumber preferably peeled, cut into chunks
  • 1 cup unsweetened vanilla nondairy milk or water or half of each
  • 1 to 2 tablespoons hemp seeds or chia seeds optional
  • 2 teaspoons agave nectar or other liquid sweetener optional
  • 1 to 2 tablespoons lemon juice to taste
  • A few ice cubes optional
US Customary - Metric

Instructions

  • Combine all the ingredients in a blender. Process until completely smooth. Divide between 2 or 3 glasses and serve at once.

Nutrition (Estimate per Serving)

Calories: 177kcalCarbohydrates: 25gProtein: 7gFat: 6gSaturated Fat: 1gPolyunsaturated Fat: 4gMonounsaturated Fat: 1gSodium: 61mgPotassium: 283mgFiber: 3gSugar: 19gVitamin A: 649IUVitamin C: 16mgCalcium: 183mgIron: 2mg
Vegan-ize any recipe!Grab our free vegan cheat sheet, packed with my favorite easy substitutions to make any recipe vegan.

Skillet Berry-Apple Crumble

July 18, 2013 by Nicole @ VegKitchen 2 Comments

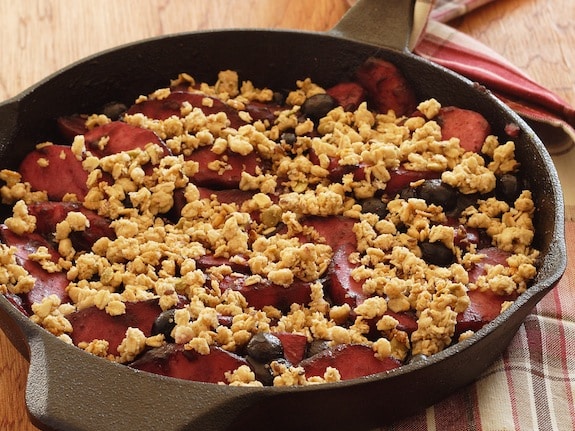
Skillet apple-berry crumble

Berries and apples are my favorite fruit combination in crumbles and cobblers. I try to have blueberries and cranberries as often as possible for their powerful antioxidant goodness. Here's a way to enjoy a delectable crumble, minus the 30 minute baking time usually required. The twist here is that it's made on the stovetop rather than baked in the oven. This recipe originally appeared in Vegan Express. Photo by Susan Voisin. [Read more...]

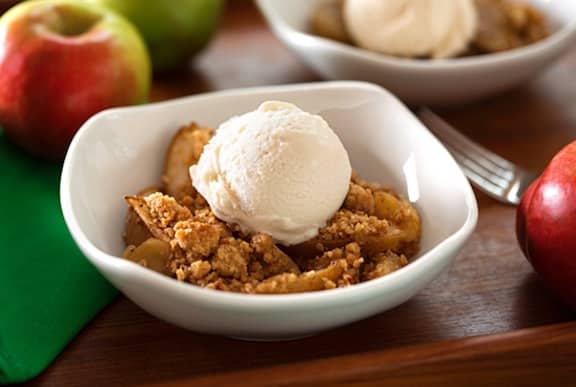
Pear and Apple Crumble

May 29, 2013 by Nicole @ VegKitchen 7 Comments

Apple pear crumble recipe

If you'd like an alternative to pumpkin pie for fall celebrations like Thanksgiving, or everyday meals, this pear and apple crumble is a welcome dessert. It's especially tasty served warm over vanilla nondairy ice cream. Photos by Hannah Kaminsky. [Read more...]

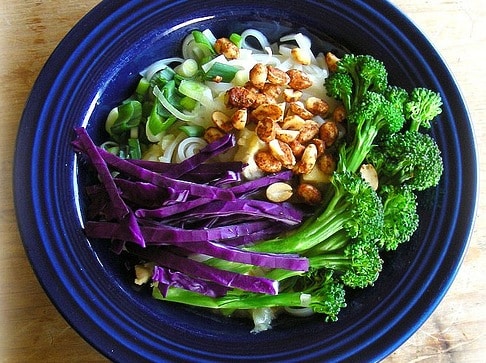
Pineapple Coconut Noodles

May 28, 2013 by Nicole @ VegKitchen 8 Comments

Pineapple coconut noodles

You can get all the ingredients for this fast, fresh-tasting noodle dish in the Asian foods section of any well-stocked supermarket or natural foods store. Photo courtesy of the blog My Electric Ride. You can serve this as suggested in the photo with steamed broccolini or broccoli, and thinly sliced red cabbage for a dazzling effect. [Read more...]

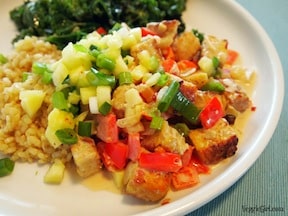
Thai Coconut Tempeh with Pineapple Salsa

May 2, 2013 by Nicole @ VegKitchen Leave a Comment

Thai Coconut tempeh

This Thai Coconut Tempeh dish was inspired by a chicken recipe in a recent issue of Martha Stewart Living. I was lured in by the words “coconut” and “pineapple,” and the recipe was easily veganized by swapping out chicken for tempeh and fish sauce for tamari. I also added some vegetables to the dish to give it a nutrient boost, and served it with a side of sautéed kale, because every meal should contain some greens. Contributed by Dianne Wenz of VeggieGirl.

[Read more...]

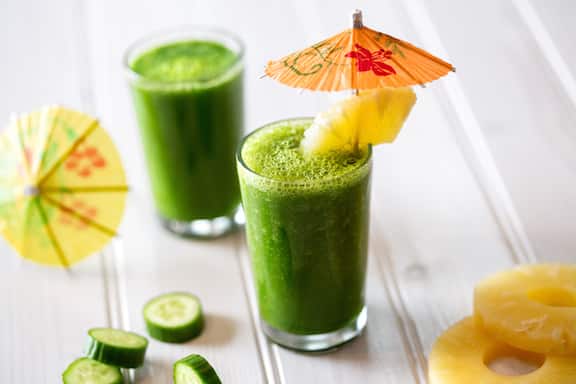
Kale, Cucumber, and Pineapple Smoothie

April 3, 2013 by Nicole @ VegKitchen 2 Comments

Kale, cucumber, and pineapple smoothie

Here's a pleasing combination for a green smoothie - kale and pineapple, with the added cleansing benefit of cucumber. Prepare to be refreshed and hydrated! This makes about two 12-ounce servings. Photos by Hannah Kaminsky. [Read more...]

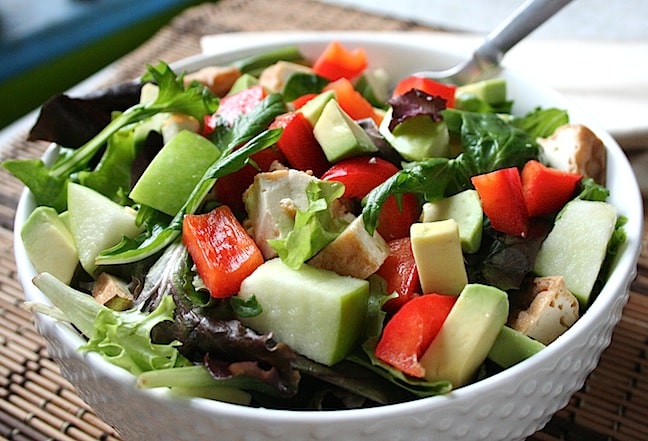
Mixed Greens Salad with Avocado, Apples, and Baked Tofu

March 5, 2013 by Nicole @ VegKitchen 2 Comments

mixed greens, avocado, apple, and tofu salad

This luscious salad adds substance to a meal when served with light main dishes, and makes a nice at-home lunch on weekends and holidays. This is a tasty salad to stuff into a pita or wrap up. Or, for a light meal, serve with soup and fresh bread. [Read more...]

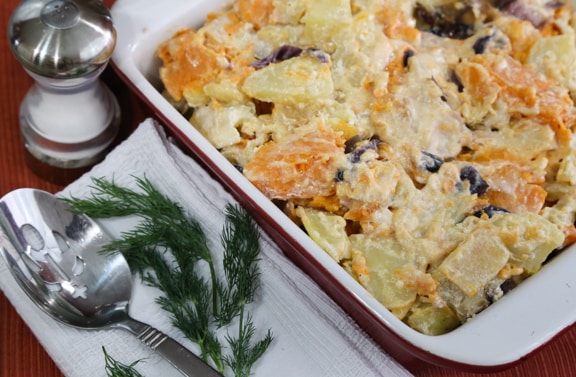
Sweet and White Potato Casserole with Apples

December 23, 2012 by Nicole @ VegKitchen 2 Comments

Sweet and White Potato casserole with apples

This rich combination of white and sweet potatoes, subtly sweetened with apple, is perfectly suited your major comfort food cravings of the cool season. This is one of my favorite comfort food recipes (which was titled Les Trois Pommes), updated, from Vegetariana. Photos by Evan Atlas. [Read more...]

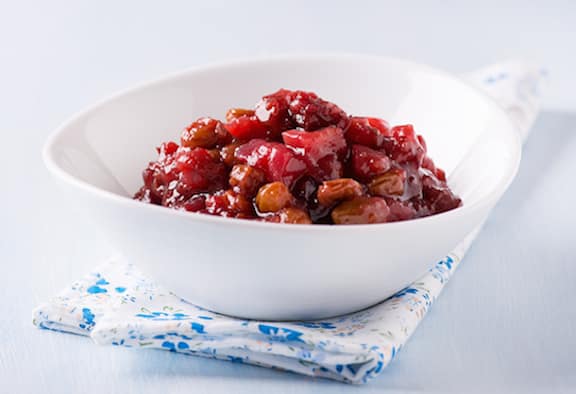
Cranberry-Apple Chutney

November 29, 2012 by Nicole @ VegKitchen 8 Comments

Apple Cranberry Chutney

If your only experience with cranberries has been in sweet, jelled sauces, this spicy cranberry and apple chutney will provide a welcome change of pace for your grown-up palate! It's a great choice for Thanksgiving dinner. [Read more...]

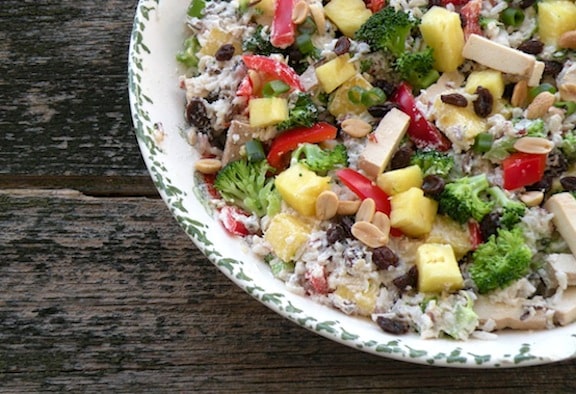
Pineapple Rice Salad

September 15, 2012 by Nicole @ VegKitchen 1 Comment

Pineapple Rice salad

This luscious main-dish salad is a crowd-pleaser — it makes a generous portion, and so is a good potluck dish. Brown rice mingles with chewy baked tofu, pineapple chunks, broccoli and bell peppers. Leftovers are great in for portable lunches, packed in a container. Adapted from The Vegetarian Family Cookbook. [Read more...]

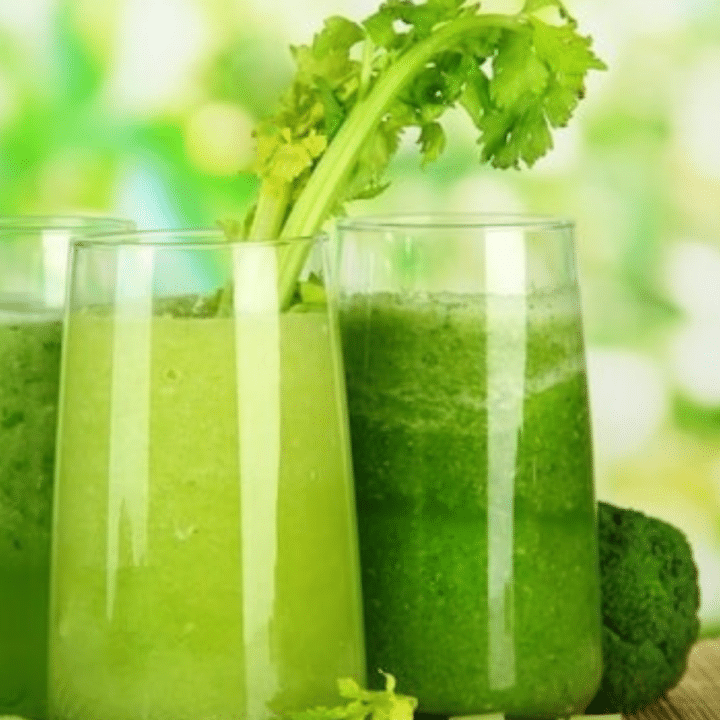
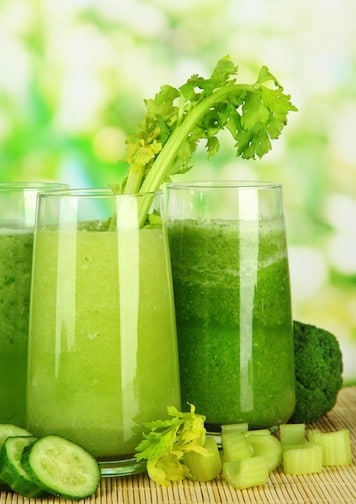
Apple, Celery, Lemon, Aloe, Cucumber Juice

April 19, 2011 by Nicole @ VegKitchen Leave a Comment

This bright, refreshing green juice combines apples, celery, cucumber, and kale with a splash of aloe juice — ready in minutes with a juicer or blender, and a great way to work a serious amount of vegetables into one glass without much effort.

Glass of apple celery cucumber juice

Key Ingredients & Substitutions

  • Tart apples. Granny Smith apples add brightness and natural sweetness without overpowering the greens — a sweeter apple works too if you prefer a milder juice.
  • Celery. Adds a savory, slightly salty note and a good amount of juice volume — use the whole stalk, leaves included.
  • Cucumber. Adds hydration and a mellow, cooling flavor. Leave the peel on for extra nutrients if it's not waxed.
  • Kale. Any hearty leafy green works here — try spinach or chard if that's what you have on hand.
  • Aloe juice. Adds a subtle, soothing quality. Look for it near the coconut water or in the health food aisle — choose a plain, unsweetened variety if you can find one.
  • Fresh lemon. Brightens the whole glass and balances the earthiness of the kale and celery.

Variations

  • Add ginger. A small knob of fresh ginger adds a spicy kick and a little extra digestive support.
  • Swap the greens. Spinach, romaine, or chard all work in place of kale, each giving a slightly milder flavor.
  • Make it sweeter. Add a second apple or a few seedless grapes if you like your green juice a little more forgiving.
  • Add citrus punch. A little extra lemon or a splash of lime brightens the flavor further.
  • Add mint. A few fresh mint leaves blended or juiced in add a cooling, herbal note.

Tips for the Best Green Juice

  • No juicer? No problem. Blend everything with just enough water to cover, then strain through a fine-mesh sieve or nut milk bag if you prefer a smooth juice rather than a thick smoothie.
  • Wash produce well. Especially the kale and celery, since they can hold onto grit in their ridges and folds.
  • Drink it fresh. This juice is best enjoyed right after making it, while the nutrients and flavor are at their peak — it separates and loses some brightness the longer it sits.
  • Whisk in the aloe last. Adding it at the end keeps its texture from getting lost or overly diluted in the juicing process.
  • Juice the celery and cucumber first. Their high water content helps push the denser kale and apple through more easily if you're using a juicer.

Make Ahead & Storage

Fresh juice is always best consumed right away, but if needed, this will keep in a sealed jar in the refrigerator for up to 24 hours. Fill the jar as full as possible to limit air exposure, and give it a good shake before drinking since it will separate.

How to Serve

Pour over ice and enjoy immediately as a refreshing morning pick-me-up or a light afternoon boost.

Recipe

Celery and cucumber juice

Apple, Celery, Lemon, Aloe, and Cucumber Juice

5 from 4 votes
A bright, refreshing green juice made from apples, celery, cucumber, kale, and a splash of aloe juice - ready in minutes with a juicer or blender.
Print Pin Save Saved!
Prep Time: 10 minutes minutes
Total Time: 10 minutes minutes
Servings: 2
Prevent your screen from going dark

Ingredients

  • 2 large tart apples washed and sliced
  • 2 stalks celery washed
  • 1 lemon yellow peel removed, cut into quarters
  • 1 large cucumber peeled and sliced into spears
  • 4 leaves kale washed
  • 1 tablespoon aloe juice

Instructions

  • Press the apple, celery, lemon, cucumber, and kale through a juicer.
  • If you don't have a juicer, combine the ingredients with just enough water to cover in a countertop blender and blend until smooth.
  • Whisk in the aloe juice and serve immediately.

Notes

Contributed by Alexandra Jamieson, from Vegan Cooking for Dummies.
Vegan-ize any recipe!Grab our free vegan cheat sheet, packed with my favorite easy substitutions to make any recipe vegan.

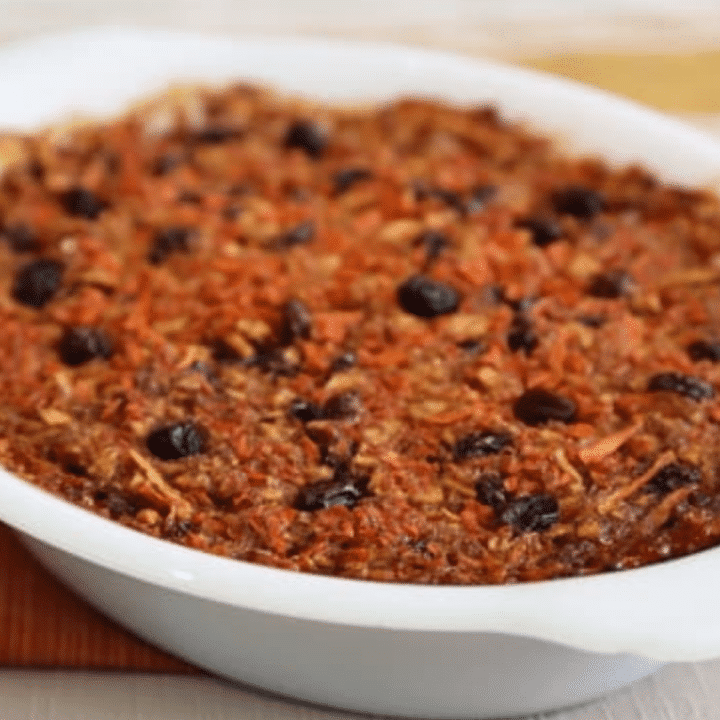
Passover Carrot-Apple Pudding

March 8, 2011 by Nicole @ VegKitchen 11 Comments

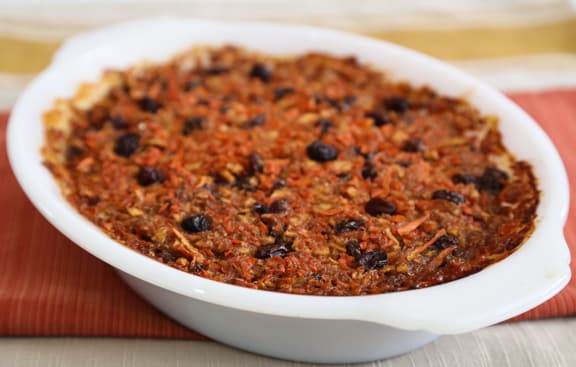
This sweet side dish of spiced carrots and apples brightens the Passover dinner plate. Baked until crusty on top and tender within, it's also yummy enough to be an everyday dessert with a dollop of coconut yogurt, and it holds together well enough to slice into neat squares.

Slice of carrot apple pudding

Key Ingredients & Substitutions

  • Quinoa flakes. These act as the Passover-friendly binder, similar to how oats work in a crumble. Look for them near the hot cereals or in the gluten-free aisle.
  • Carrots and apples. Grate them by hand or with a food processor's grating disc to save time — a coarser grate gives more texture, while a fine grate makes for a smoother pudding.
  • Sweet Passover wine. Adds warmth and depth. Pomegranate juice or another no-sugar-added dark red juice works well as a substitute.
  • Warm spices. Cinnamon, ginger, and allspice or nutmeg give this pudding its cozy, holiday flavor — don't be shy with them, since the carrots and apples can otherwise taste one-note.
  • Raisins. Add pockets of concentrated sweetness throughout — golden raisins work just as well as dark ones.

Variations

  • Add nuts. A handful of chopped walnuts or pecans adds crunch, especially nice scattered over the top before baking.
  • Swap the dried fruit. Chopped dates or dried apricots work well in place of raisins.
  • Make it a dessert. Serve warm with a dollop of coconut yogurt or a drizzle of maple syrup.
  • Add citrus zest. A little orange or lemon zest brightens the flavor and cuts through the sweetness.
  • Add a touch more spice. A pinch of ground cloves alongside the other warm spices deepens the holiday flavor further.

Tips for the Best Carrot-Apple Pudding

  • Grate the carrots and apples finely. This helps the pudding hold together and bake evenly, rather than leaving large chunks that bake unevenly.
  • Let the quinoa flakes soak fully. Giving them time in the boiling water softens them so they blend seamlessly into the batter instead of staying gritty.
  • Cover for the first half of baking. This keeps the top from browning too quickly before the inside is set.
  • Let it cool before slicing. This helps the pudding hold its shape for clean slices instead of falling apart.
  • Grease the baking dish well. This pudding can stick as it bakes, so a generous coating of oil or margarine makes cleanup and serving much easier.

Make Ahead & Storage

This pudding keeps well in the refrigerator for up to 4 days, tightly covered, and can be served cold, at room temperature, or gently reheated. It's a good make-ahead dish for a Seder, since it actually slices more cleanly once fully chilled.

How to Serve

Slice and serve warm or at room temperature as a sweet side dish for a Passover Seder, or enjoy leftovers as a simple dessert with a dollop of coconut yogurt.

Recipe

Passover Carrot Apple Raisin Pudding

Passover Carrot-Apple Pudding

5 from 4 votes
This sweet side dish of spiced carrots and apples brightens the Passover dinner plate. Baked until crusty, it's also yummy enough to be an everyday dessert with a dollop of coconut yogurt.
Print Pin Save Saved!
Prep Time: 25 minutes minutes
Cook Time: 40 minutes minutes
Total Time: 1 hour hour 5 minutes minutes
Servings: 6 to 8
Prevent your screen from going dark

Ingredients

  • ⅓ cup quinoa flakes
  • 5 large carrots grated
  • 2 medium apples peeled, cored, and grated
  • ⅓ cup raisins
  • 2 tablespoons safflower or other neutral vegetable oil
  • ¼ cup sweet Passover wine or substitute pomegranate juice, or similar no-sugar dark red juice
  • ¼ cup natural granulated sugar
  • 1 teaspoon cinnamon
  • ½ teaspoon ground ginger
  • ¼ teaspoon ground allspice or nutmeg
US Customary - Metric

Instructions

  • Preheat the oven to 350º F.
  • Combine the quinoa flakes with ⅔ cup boiling water in a heatproof bowl. Let stand while the other ingredients are being prepared.
  • Combine all the ingredients in a mixing bowl. Pour in the quinoa flakes and mix well.
  • Pour into an oiled 9- by 5- by 3-inch loaf pan. Cover and bake for 40 minutes. Uncover and bake another 30 to 40 minutes, or until the top is nicely browned and crusty.
  • Let cool. Slice and serve warm or at room temperature.

Nutrition (Estimate per Serving)

Calories: 181kcalCarbohydrates: 32gProtein: 2gFat: 5gSaturated Fat: 1gPolyunsaturated Fat: 1gMonounsaturated Fat: 4gTrans Fat: 1gSodium: 39mgPotassium: 309mgFiber: 4gSugar: 17gVitamin A: 8526IUVitamin C: 6mgCalcium: 28mgIron: 1mg
Vegan-ize any recipe!Grab our free vegan cheat sheet, packed with my favorite easy substitutions to make any recipe vegan.

Maple Glazed Pineapple

February 6, 2011 by Nicole @ VegKitchen 4 Comments

Maple Glazed Pineapple recipe

This Maple Glazed Pineapple will really sweeten up your summer. Serve it up for dessert or as a side for your next meal. The flavor of maple syrup marries well with pineapple, especially glazed right into the surface. If you like pineapple, you're sure to enjoy this nearly instant dessert! It's particularly appealing when made with canned organic pineapple mini-rings, and it comes together in under 10 minutes with just a handful of ingredients.

Maple glazed pineapple in a skillet

Key Ingredients & Substitutions

  • Fresh pineapple. Canned pineapple chunks or slices (drained) work just as well and make this even quicker to throw together.
  • Maple syrup. The glaze's backbone — agave syrup works well as a substitute, or melt some sugar in the pan for a slightly different caramelized flavor.
  • Vegan buttery spread. Earth Balance or a similar plant-based butter carries the glaze and helps it coat the pineapple evenly.
  • Cinnamon. A warm background note that plays beautifully against the sweet, caramelized pineapple.
  • Dried fruit. Cranberries, cherries, blueberries, or raisins all add little bursts of chewy sweetness stirred in at the end.

Variations

  • Add a splash of rum. A tablespoon of dark rum added along with the maple syrup gives this a grown-up, tropical twist.
  • Add nuts. Toasted chopped pecans or macadamia nuts sprinkled on top add crunch and a nice contrast to the soft, glazed fruit.
  • Make it spicier. A pinch of ground ginger or a small pinch of cayenne alongside the cinnamon adds unexpected warmth.
  • Grill it instead. Brush pineapple rings with the maple mixture and grill for a few minutes per side for a smoky variation.

Tips for the Best Maple Glazed Pineapple

  • Drain the pineapple well. Excess liquid will thin out the glaze and keep it from properly coating the fruit — save the drained juice for smoothies or popsicles.
  • Don't rush the glazing. Letting the pineapple cook undisturbed for a minute or two at a time helps it caramelize rather than just steam in the glaze.
  • Use any shape or size of pineapple you like. Just make sure to get all the sides coated with maple syrup before it goes into the pan — pineapple rings and cubes both work beautifully.
  • Let it cool slightly before serving. The glaze thickens a bit as it cools, giving it a stickier, more caramel-like coating.
Make Ahead & Storage

This keeps well in a sealed container in the refrigerator for up to 3 days. Reheat gently in a skillet over low heat, or serve straight from the fridge for a cool, refreshing treat.

How to Serve

Pair this tasty treat with some vanilla ice cream or a warm and gooey chocolate chip cookie. If you're serving it as a side dish, these pineapples pair really well with green beans and salads. Top each serving with vanilla coconut yogurt, granola, and/or toasted chopped nuts if you like.

Maple Glazed Pineapple FAQs

Can I use a sweetener other than maple syrup?

You can use any kind of sweetener that you prefer! Agave syrup works well, and you can also melt some sugar in the pan and use that.

Does it matter what shape the pineapple is in?

You can use any shape and size of pineapple that you would like! Just make sure to get all the sides coated with maple syrup before you put the pineapple in the pan to glaze. I love using pineapple rings, but cubes are also nice.

Recipe

Maple Glazed Pineapple recipe

Maple Glazed Pineapple

4.67 from 3 votes
This Maple Glazed Pineapple will really sweeten up your summer. Serve it up for dessert or as a side for your next meal.
Print Pin Save Saved!
Servings: 4
Prevent your screen from going dark

Ingredients

  • 1 tablespoon Earth Balance or other vegan buttery spread
  • ¼ cup maple syrup
  • ¼ teaspoon cinnamon or to taste
  • 3–3 ½ cups diced fresh pineapple or two 15oz cans pineapple chunks or slices, drained
  • ¼ cup dried fruit cranberries, cherries, blueberries, raisins, etc.
  • optional toppings vanilla coconut yogurt, granola, and/or toasted chopped nuts

Instructions

  • Heat the Earth Balance in a medium skillet until melted, then stir in the maple syrup and cinnamon.
  • Drain the pineapple well (save the juice for another recipe—smoothies, popsicles, etc.) and add to the skillet.
  • Cook over medium-high heat, stirring often, until the pineapple is nicely glazed and golden, 6 to 8 minutes.
  • Stir in the dried fruit of your choice and remove from the heat. Transfer the mixture to a serving dish. Allow to cool.
  • Serve fruit mixture warm or at room temperature. Top each serving with any or all of the optional toppings as desired.

Nutrition (Estimate per Serving)

Calories: 1281kcalCarbohydrates: 324gProtein: 10gFat: 6gSaturated Fat: 1gPolyunsaturated Fat: 1gMonounsaturated Fat: 3gSodium: 22mgPotassium: 2520mgFiber: 26gSugar: 296gVitamin A: 991IUVitamin C: 186mgCalcium: 344mgIron: 6mg
Vegan-ize any recipe!Grab our free vegan cheat sheet, packed with my favorite easy substitutions to make any recipe vegan.

Photos by Rachael Braun.

Vegan Biscuits Recipe

September 4, 2026 by Nicole @ VegKitchen Leave a Comment

vegan biscuits

These vegan biscuits are soft, flaky, and tall, with a buttery flavor you'd swear came from real butter and buttermilk. One bite and no one will guess they're entirely plant-based.

vegan biscuits being served

Get ready to find your new favorite vegan biscuit recipe. I've made batch after batch of these dairy-free buttermilk biscuits over the past few weeks, and I'm yet to end up with a single leftover! They disappear within hours, every time.

It's easy to see why. These vegan biscuits are flaky and soft with a real melt-in-your-mouth quality, plus a distinctive buttery flavor and a beautiful rise. There's nothing quite like a fluffy biscuit served warm with a cup of tea and some jam.

Best of all, you need just 7 simple ingredients you probably already have on hand, and about 30 minutes start to finish. Serve them as a snack or a side with any meal. Or, my personal favorite, as the base for vegan biscuits and gravy at breakfast or brunch.

vegan biscuits being served

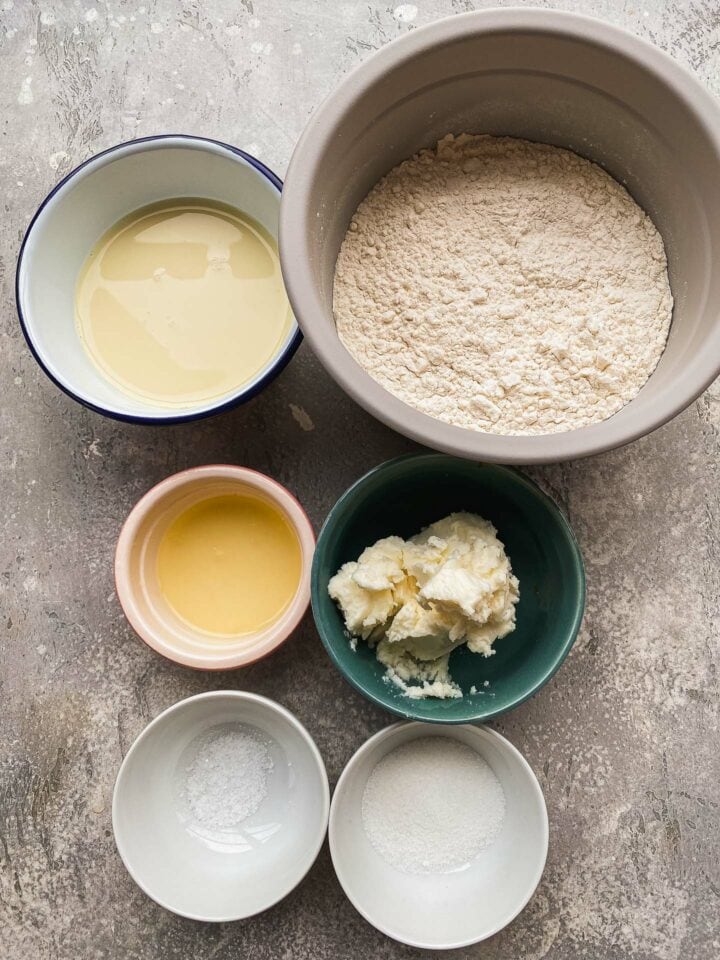
Ingredients you'll need

Ingredients for vegan biscuits
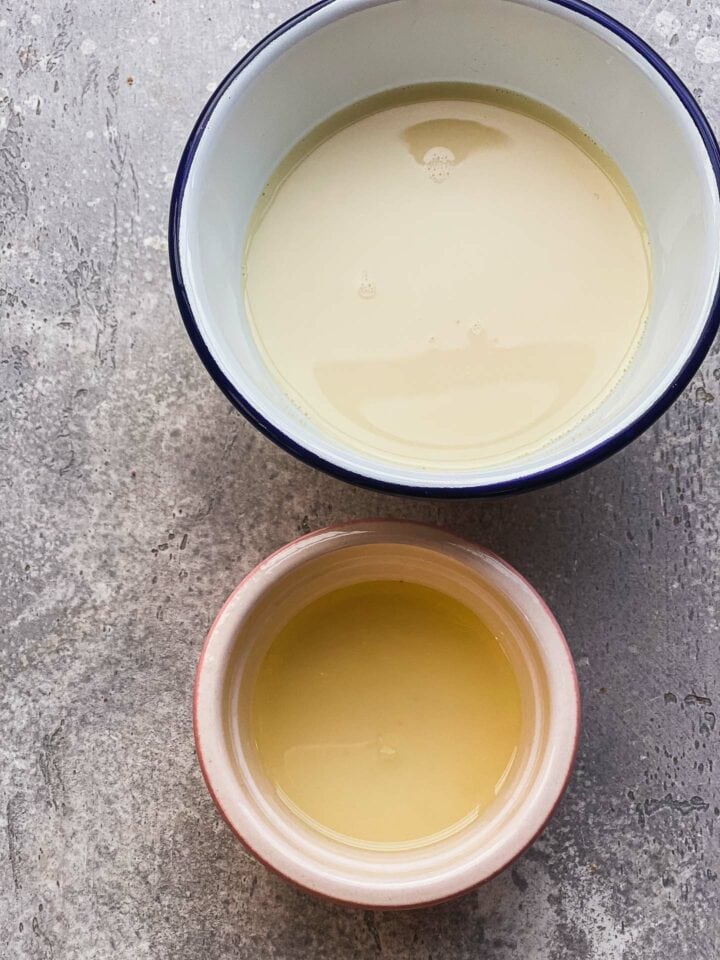
Ingredients for vegan buttermilk
  • Plant based milk and lemon juice to make the vegan "buttermilk". The dairy-free buttermilk is a key ingredient for giving the biscuits a great rise, while the lemon juice gives the flavors a subtle tanginess. You can also use apple cider vinegar.
  • All-purpose flour.
  • Sugar. You can use either brown or white sugar for this recipe.
  • A pinch of good quality sea salt.
  • Baking powder. Together with the vegan buttermilk, this helps to make the biscuits taller and fluffier.
  • Vegan butter or margarine. Make sure to use the form that comes in a stick rather than a tub, as the latter version has a too high water content. Also ensure that it's not warm or softened - it should be cold, straight out of the fridge

How to Make Vegan Biscuits

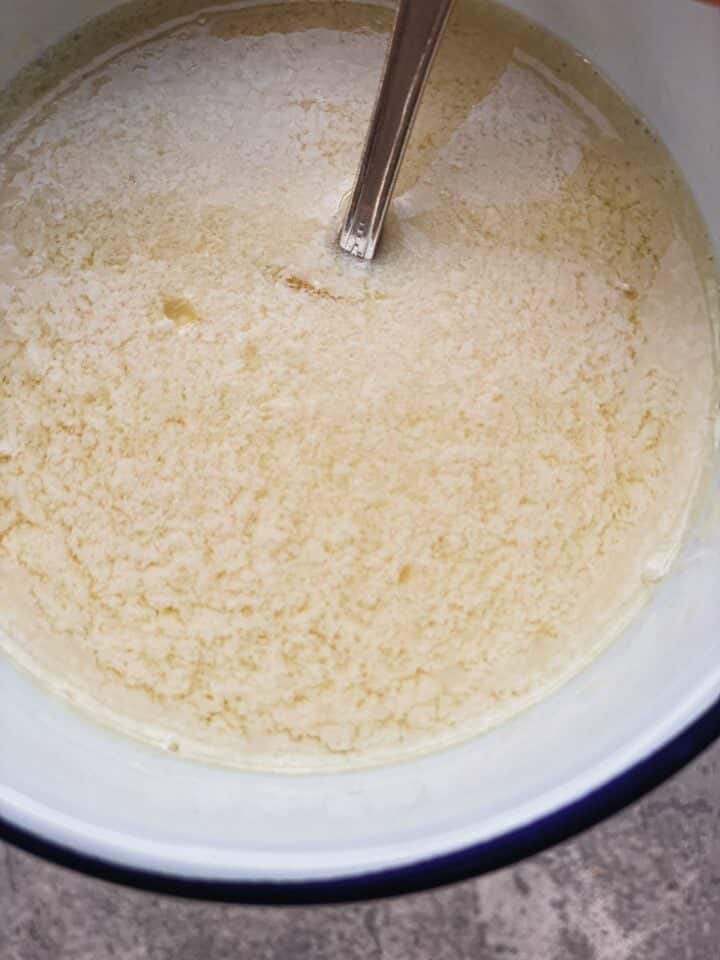
Firstly, make the vegan buttermilk. Mix together the plant based milk and lemon juice, and set aside to curdle for one minute.

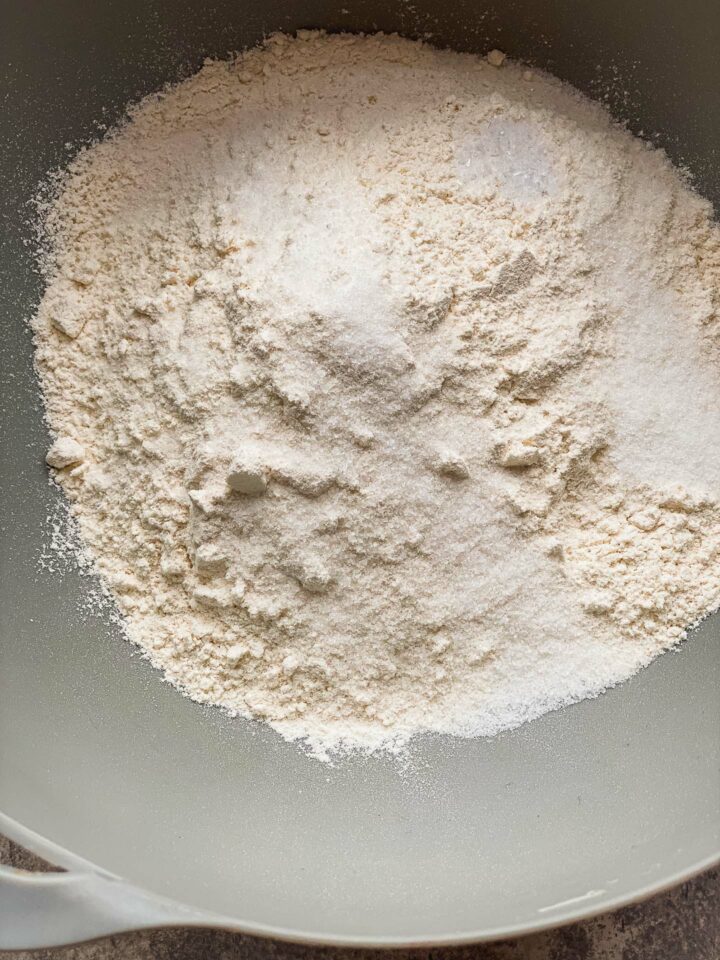
Flour in a bowl
Flour and vegan margarine in a bowl
Vegan biscuit dough being mixed with vegan buttermilk

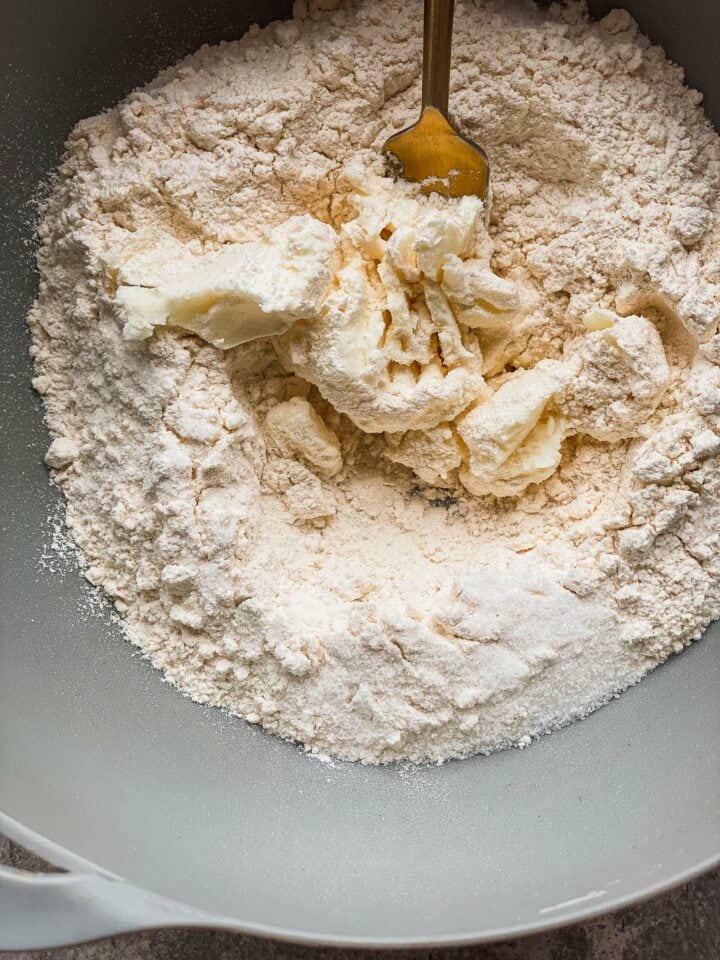
Meanwhile, mix together the flour, sugar, salt, and baking powder. Then, add the vegan butter/margarine, and mix together using a fork until a fine crumb forms.

Vegan buttermilk
Dairy-free buttermilk biscuit dough
Vegan biscuit dough in a bowl

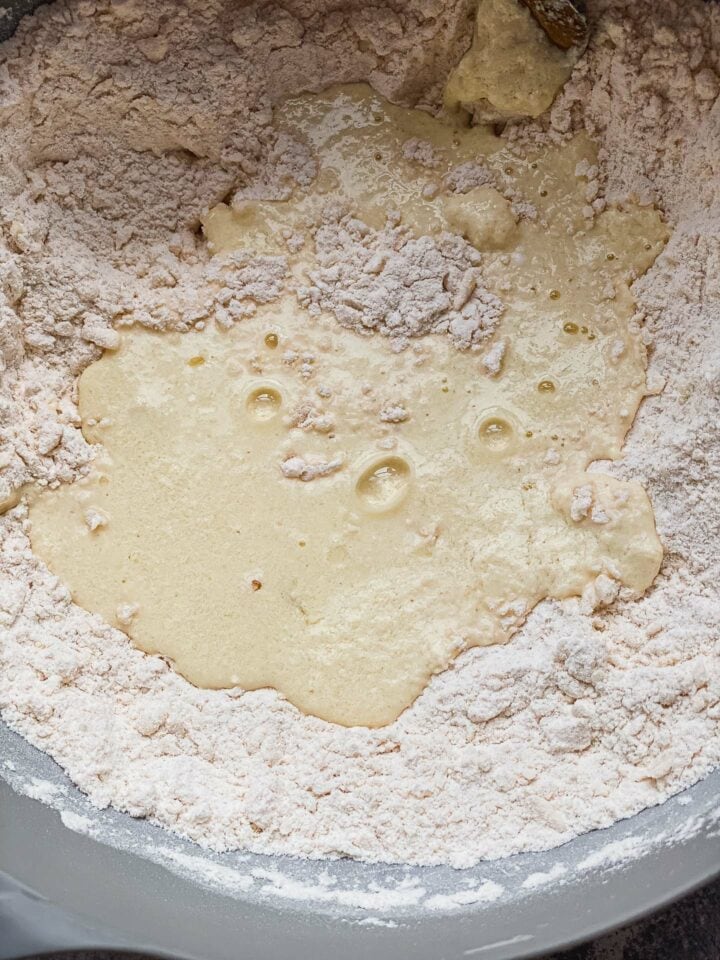
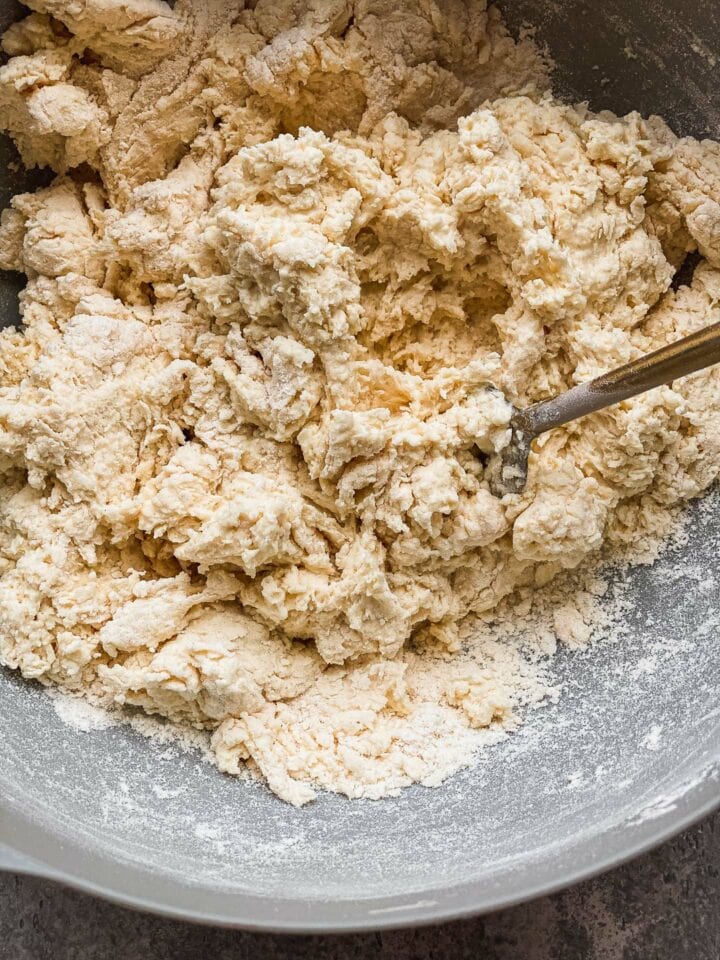
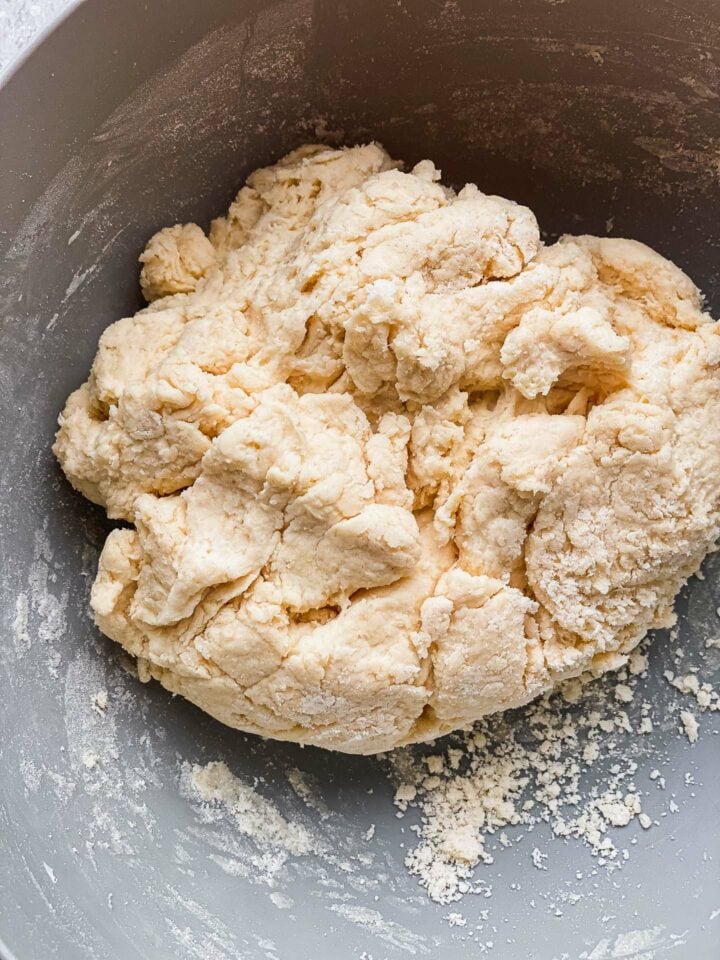
Now add the buttermilk, and continue mixing using either a fork or a wooden spoon until a shaggy dough forms.

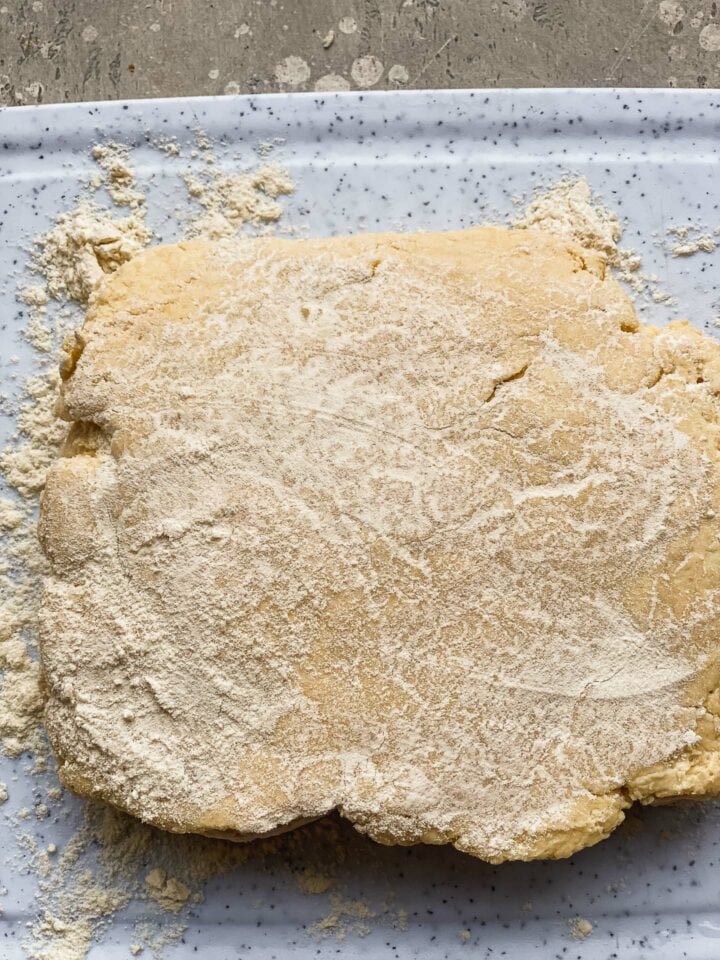
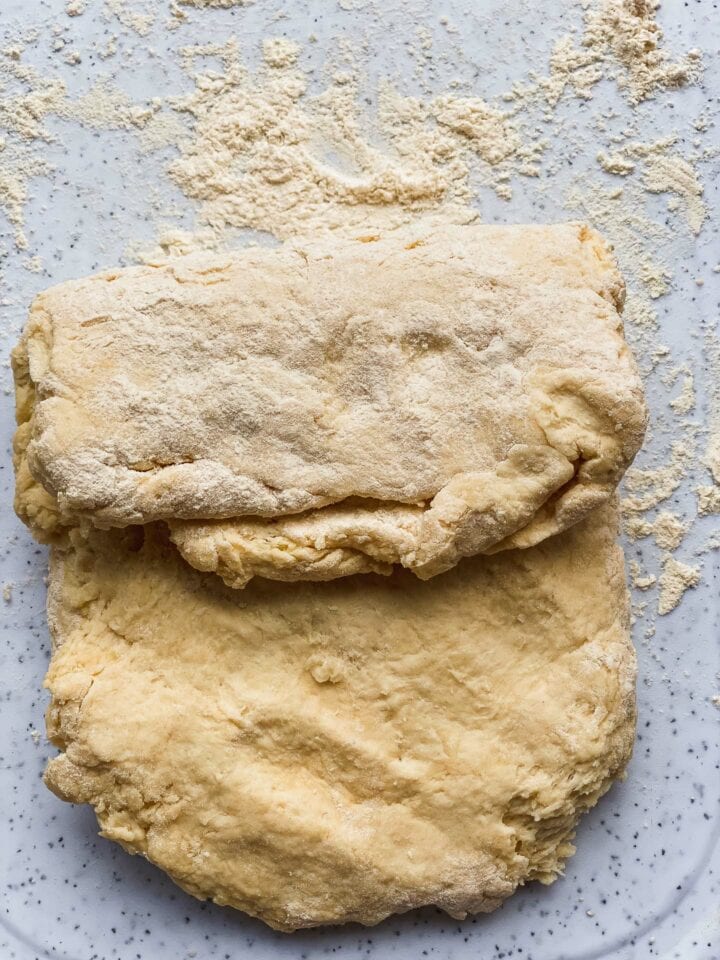
Preheat the oven to 350 degrees F/180 degrees C. Transfer the dough to a lightly-floured surface and roll out into a rectangle around an inch in thickness. Then, fold in the upper and lower edge, and roll it out once again.

Vegan biscuit dough on a board
Dough being folded
Flaky biscuit dough

Use a cookie cutter to cut out circles around 3 inches in diameter and transfer them to the baking tray. Brush with some melted vegan butter if desired, then bake in the preheated oven for 18-20 minutes, until lightly golden brown on top.

Vegan dough for biscuits
Vegan biscuits on a baking tray
Biscuit with butter on a baking tray

Allow to cool down for 5 minutes before serving!

Helpful Tips

  • As for all baking recipes, I would recommend weighing the ingredients for the most accurate results.
  • Make sure that all of the ingredients are as cold as possible before using them. The vegan butter/margarine in particular needs to be solid, because if it's softened the biscuits won't have a soft and light texture.
  • Don't overwork the dough, because this will also cause the biscuits to acquire a tough texture.
  • Don't leave them in the oven for too long, especially as they will continue cooking from the heat of the baking tray when you take them out.
vegan biscuits slathered with vegan butter

Storage & Freezing

Biscuits are at their most delicious when eaten shortly after baking. You can, however, keep them at room temperature on the counter covered with a dish cloth for up to 2 days. Or, you can keep them in the fridge in an airtight container for up to 5 days.

To freeze the vegan biscuits, wrap them up individually in cling film and transfer to a freezer-friendly container. Keep them frozen for up to 2 months. Allow to thaw fully at room temperature for a couple of hours before reheating and serving. I would recommend reheating the biscuits either in the microwave or in the toaster.

Dairy-free biscuits

Serving Ideas

The great thing about vegan biscuits is that they're super versatile! Here are a few of my favorite ways to serve them up.

  • Eat them all by themselves with vegan butter, jam, or both.
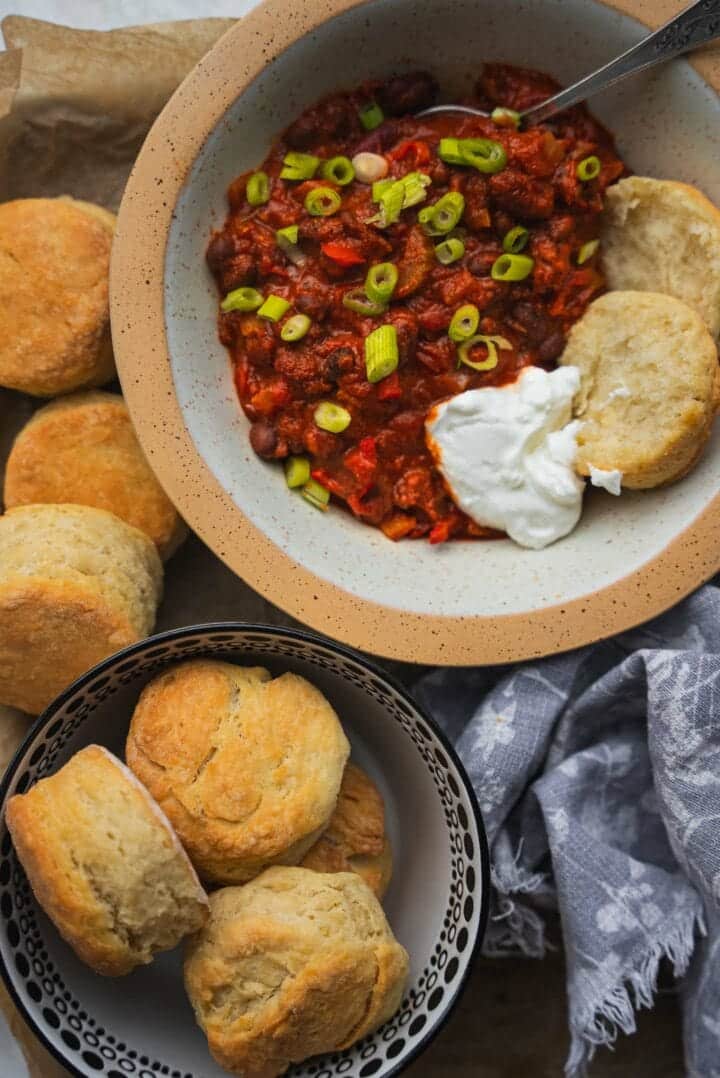
  • Serve them as a side dish for a classic vegan chili, or a white bean vegan chili.
  • Pair them with a soup such as my vegan tomato soup or butternut squash soup.
  • Serve them with a flavorful spinach artichoke dip.
  • Use garlic confit as a spread.
Vegan chili with biscuits

More Vegan Side Dishes

If you love these vegan biscuits, be sure to check out these other delicious plant based ideas too:

  • My vegan dinner rolls go well with any dish of your choice.
  • Vegan cornbread pairs super well with a variety of dishes.
  • Focaccia is a perfect beginner-friendly bread.
  • For a lighter, sweeter option alongside your brunch spread, try these vegan lemon ginger scones.

Recipe

vegan biscuits

Vegan Biscuits (Perfect every time!)

4.79 from 14 votes
Soft, flaky, and impossibly buttery, these vegan biscuits prove dairy-free doesn't mean flavor-free!
Print Pin Save Saved!
Prep Time: 10 minutes minutes
Cook Time: 20 minutes minutes
Total Time: 30 minutes minutes
Servings: 12 biscuits
Prevent your screen from going dark

Equipment

  • Small mixing bowl
  • Large mixing bowl
  • Conventional oven
  • Rolling Pin
  • Baking tray

Ingredients

  • 1 cup plant based milk
  • 1 tablespoon lemon juice
  • 3 ¼ cups all-purpose flour
  • ½ tablespoon sugar
  • 1 teaspoon salt
  • 1 tablespoon baking powder
  • 2.8 oz vegan butter or margarine
US Customary - Metric

Instructions

  • Make the vegan buttermilk. Mix together the plant based milk and lemon juice, and set aside to curdle for one minute.
    1 cup plant based milk, 1 tbsp lemon juice
  • Mix together the flour, sugar, salt, and baking powder. Then, add the vegan butter/margarine, and mix together using a fork until a fine crumb forms.
    ½ tbsp sugar, 1 tsp salt, 1 tbsp baking powder, 2.8 oz vegan butter, 3 ¼ cups all-purpose flour
  • Add the buttermilk, and continue mixing using either a fork or a wooden spoon until a shaggy dough forms.
  • Preheat the oven to 350 degrees F/180 degrees C.
  • Transfer the dough to a lightly-floured surface and roll out into a rectangle around an inch in thickness. Then, fold in the upper and lower edge, and roll it out once again.
  • Use a cookie cutter to cut out circles around 3 inches in diameter and transfer them to a baking tray lined with parchment paper.
  • Brush with some melted vegan butter if desired, then bake in the preheated oven for 18-20 minutes, until lightly golden brown on top.
  • Allow to cool down for 5 minutes before serving!

Video

Nutrition (Estimate per Serving)

Calories: 168kcalCarbohydrates: 27gProtein: 4gFat: 5gSaturated Fat: 1gPolyunsaturated Fat: 1gMonounsaturated Fat: 2gTrans Fat: 1gSodium: 265mgPotassium: 140mgFiber: 1gSugar: 1gVitamin A: 253IUVitamin C: 1mgCalcium: 74mgIron: 2mg
Vegan-ize any recipe!Grab our free vegan cheat sheet, packed with my favorite easy substitutions to make any recipe vegan.

Vegan Butternut Squash Soup

September 3, 2026 by Nicole @ VegKitchen 4 Comments

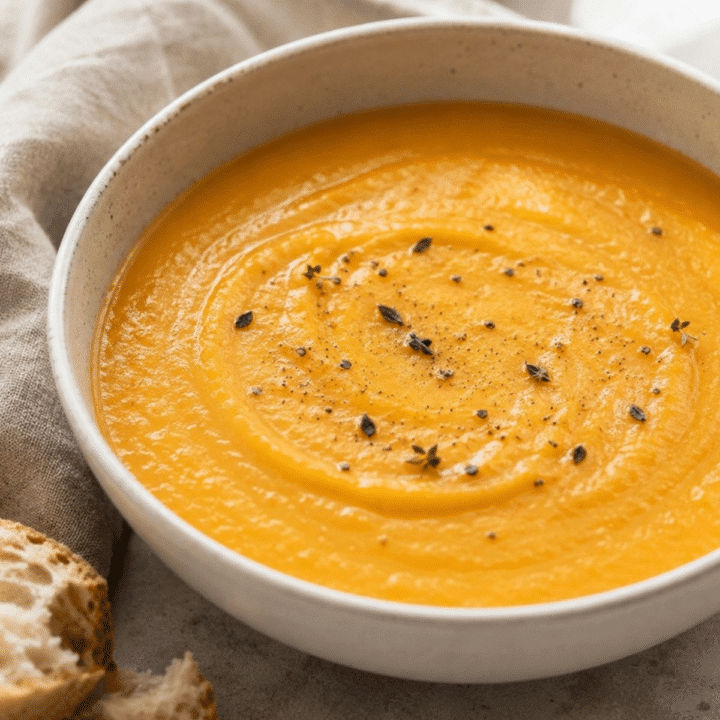
Vegan Butternut Squash Soup featured image - creamy golden soup in a white bowl with bread on the side

This vegan butternut squash soup gets extra depth from sweet-tart apples, warm curry spices, and a splash of creamy non-dairy milk. It's a hearty, one-pot soup that tastes like fall in a bowl.

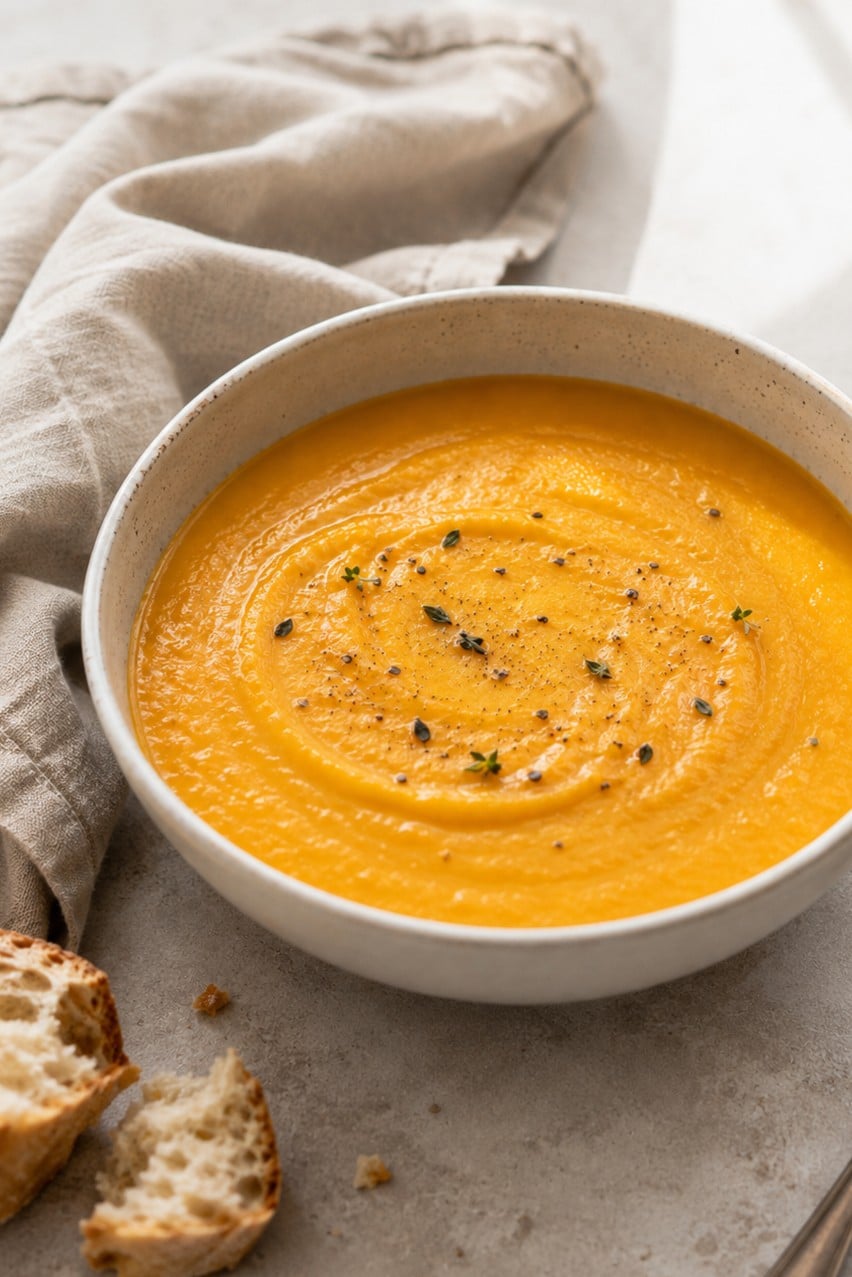
Vertical shot of vegan butternut squash and apple soup in a speckled white bowl on a linen napkin, topped with thyme leaves and black pepper

Key Ingredients & Substitutions

  • Butternut squash. The base of the soup gives it natural sweetness and that gorgeous golden color. Kabocha or acorn squash both work as substitutes if butternut isn't available.
  • Apples. A crisp, slightly tart variety like Honeycrisp, Gala, or Granny Smith balances the sweetness of the squash. Pears make a nice swap if you want a softer, mellower flavor.
  • Vegetable broth. Use a good low-sodium broth so you can control the seasoning at the end. Homemade or store-bought both work fine.
  • Curry powder and cumin. These warm spices give the soup depth without making it taste overtly "curried." A good-quality curry powder makes a noticeable difference here.
  • Fresh ginger. Adds a little brightness and warmth that cuts through the sweetness. Ground ginger (about ½ teaspoon) works in a pinch.
  • Unsweetened non-dairy milk. Oat milk, soy milk, or rice milk all work - just make sure it's unsweetened and unflavored so it doesn't compete with the savory spices.

Helpful Tips

Roast the squash cut-side down. Placing the squash halves face-down on the baking sheet traps steam and helps them cook faster and more evenly than wrapping the whole squash in foil.

Use an immersion blender for easy cleanup. Pureeing the soup directly in the pot with an immersion blender means fewer dishes and no risk of hot soup splattering out of a blender jar. If you only have a stand blender, work in small batches and vent the lid to let steam escape.

Add the non-dairy milk at the end. Stirring it in after pureeing, rather than simmering it the whole time, keeps the soup's flavor bright and helps prevent it from separating or scorching.

Taste and adjust the seasoning last. Squash and apples vary in sweetness, so always taste the soup after pureeing and add salt, pepper, or a squeeze of lemon juice to balance the flavors.

Roast the squash a day ahead. The soup comes together much faster on a busy weeknight if the squash is already roasted and cooled in the fridge.

Variations

  • Make it spicy. Add a pinch of cayenne or a diced jalapeño with the onion for a subtle kick.
  • Swap the squash. Try this same method with kabocha, acorn, or even sugar pumpkin - or check out our Miso Butternut Squash Soup with Soba Noodles for a completely different take on butternut squash soup.
  • Add coconut milk. Replace half of the non-dairy milk with full-fat coconut milk for an even richer, silkier soup.
  • Stir in fresh herbs. A handful of chopped sage or thyme added with the apples brings an earthy, savory note.
  • Make it a meal. Top with roasted chickpeas or toasted pepitas for crunch and extra protein.
  • Go smoky. A pinch of smoked paprika added with the cumin gives the soup a subtle smokiness that pairs beautifully with the apple's sweetness.

Serving Ideas

This soup is filling enough to serve as a light main dish, especially alongside something to dip or nibble on. A slice of crusty bread or a batch of warm Vegan Biscuits is perfect for scooping up every last bit.

For a heartier meal, pair it with a simple green salad - the Vegan Jícama Salad with Oranges and Watercress is a nice contrast to the soup's warm spices. It also makes a lovely starter course for a fall dinner or Rosh Hashanah menu, served in small cups before the main course.

Storing & Freezing

Store leftover soup in an airtight container in the refrigerator for up to 4 days. Reheat gently on the stovetop over low heat, stirring occasionally, or in the microwave in 1-minute intervals.

This soup freezes beautifully for up to 3 months - freeze it in individual portions for easy weeknight meals. Thaw overnight in the refrigerator, then reheat on the stovetop, adding a splash of extra broth or non-dairy milk if it has thickened up too much.

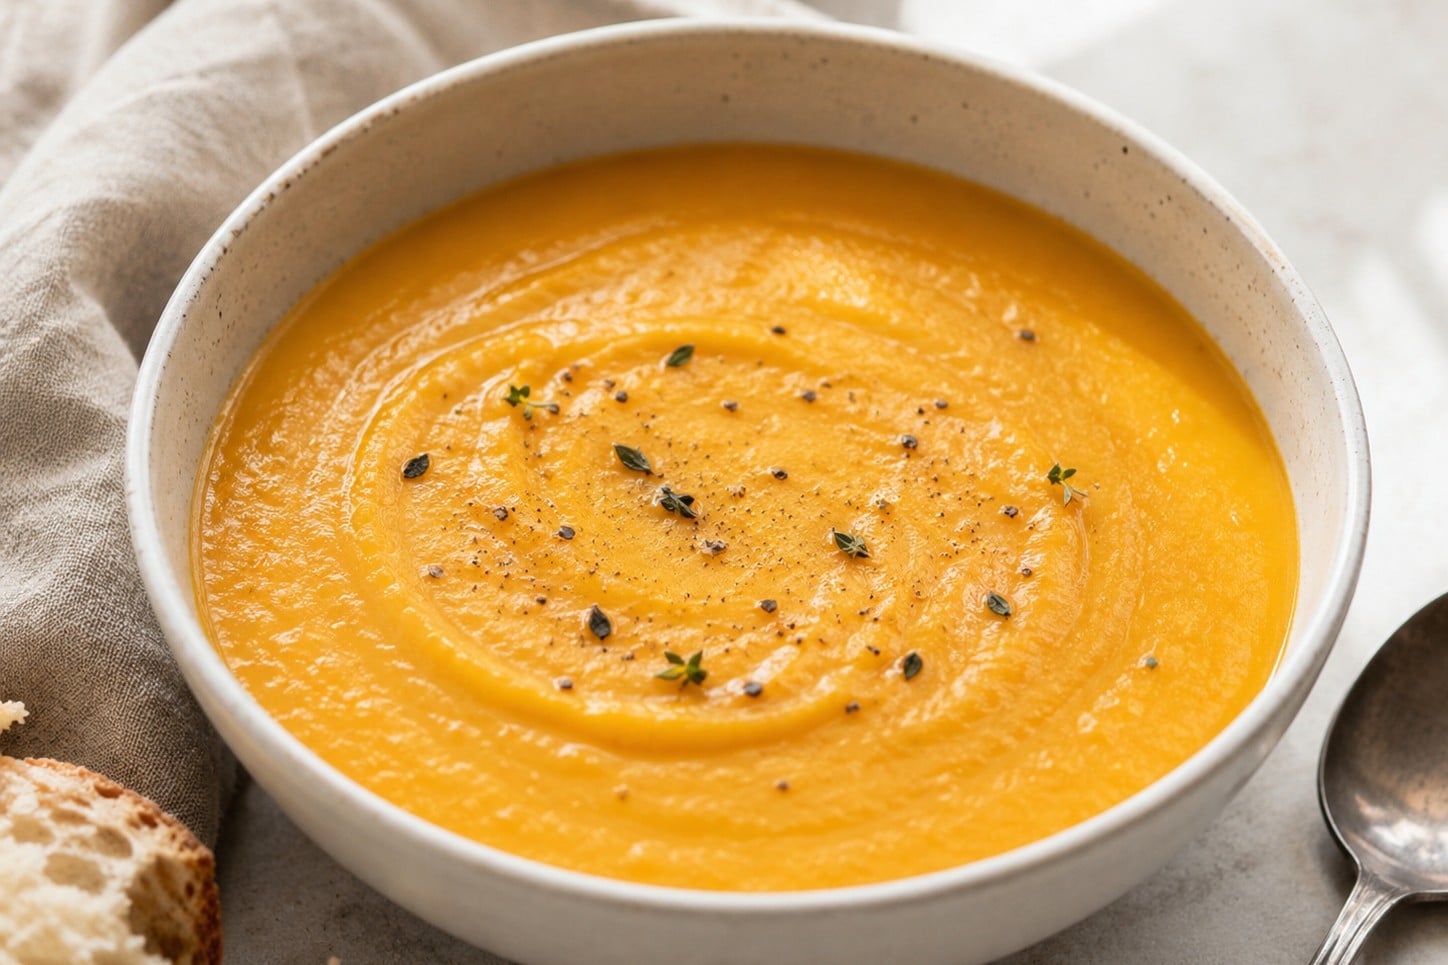
Bowl of golden vegan butternut squash and apple soup garnished with thyme and pepper, served with crusty bread and a spoon on the side

More Vegan Soup Recipes

If you loved this recipe, here are a few more cozy vegan soups you might enjoy:

  • Miso Butternut Squash Soup with Soba Noodles
  • Yellow Squash Soup
  • Vegan Split Pea Soup
  • Vegan Lemony Leek and Mushroom Soup

Recipe

Overhead close-up of creamy vegan butternut squash and apple soup in a white bowl, garnished with fresh thyme and cracked pepper, with slices of crusty bread alongside

Vegan Butternut Squash Soup

4.80 from 10 votes
A hearty, one-pot vegan butternut squash soup sweetened with apples and warmed with curry, cumin, and fresh ginger. Comforting, dairy-free, and ready in under an hour.
Print Pin Save Saved!
Prep Time: 20 minutes minutes
Cook Time: 1 hour hour
Servings: 6 servings
Prevent your screen from going dark

Ingredients

  • 1 large butternut squash (about 2 pounds/900g), or 2 smaller ones
  • 2 tablespoons olive oil (about 30ml)
  • 1 large red onion chopped
  • 2 cloves garlic minced
  • 4 cups apple about 3 to 4 medium apples, any sweet-tart variety, peeled and diced (about 500g)
  • 4 cups vegetable broth (about 946ml)
  • 2 teaspoons fresh ginger grated; or more, to taste (about 4g)
  • 1 teaspoon cumin ground (about 2g)
  • 1 teaspoon curry powder good-quality, or to taste (about 2g)
  • ¼ teaspoon nutmeg ground (about 0.5g)
  • 2 cups non-dairy milk unsweetened; oat, soy, or rice milk, or more as needed (about 473ml)
  • Salt and freshly ground black pepper to taste
  • Fresh thyme leaves and crusty bread or croutons for garnish, optional
US Customary - Metric

Instructions

  • Preheat the oven to 400 degrees F. Halve the squash lengthwise and scoop out the seeds. Place the halves cut-side down on a parchment-lined baking sheet and roast for 40 to 45 minutes, until a knife slides easily into the thickest part. Let cool until easy to handle, then scoop the flesh into a bowl and discard the skin.
  • Heat the olive oil in a large soup pot or Dutch oven over medium heat. Add the onion and saute for 8 to 10 minutes, stirring occasionally, until softened and golden. Add the garlic and cook for 1 minute, until fragrant.
  • Add the roasted squash, diced apple, vegetable broth, ginger, cumin, curry powder, and nutmeg. Bring to a simmer, then cook uncovered for 15 to 20 minutes, until the apples are very soft.
  • Puree the soup directly in the pot with an immersion blender until completely smooth. (No immersion blender? Carefully transfer the soup to a stand blender in batches, venting the lid to let steam escape, then return it to the pot.)
  • Stir in the non-dairy milk, adding a bit more if the soup is thicker than you would like. Warm through over low heat for about 5 minutes, then season with salt and pepper to taste.
  • Ladle into bowls and garnish with fresh thyme leaves and a side of crusty bread or croutons. Serve hot.

Nutrition (Estimate per Serving)

Calories: 181kcalCarbohydrates: 28gProtein: 4gFat: 6gSaturated Fat: 1gPolyunsaturated Fat: 1gMonounsaturated Fat: 4gSodium: 220mgPotassium: 775mgFiber: 4gSugar: 12gVitamin A: 9000IUVitamin C: 23mgCalcium: 147mgIron: 1mg
Vegan-ize any recipe!Grab our free vegan cheat sheet, packed with my favorite easy substitutions to make any recipe vegan.

Easy Vegan Cornbread

September 3, 2026 by Nicole @ VegKitchen Leave a Comment

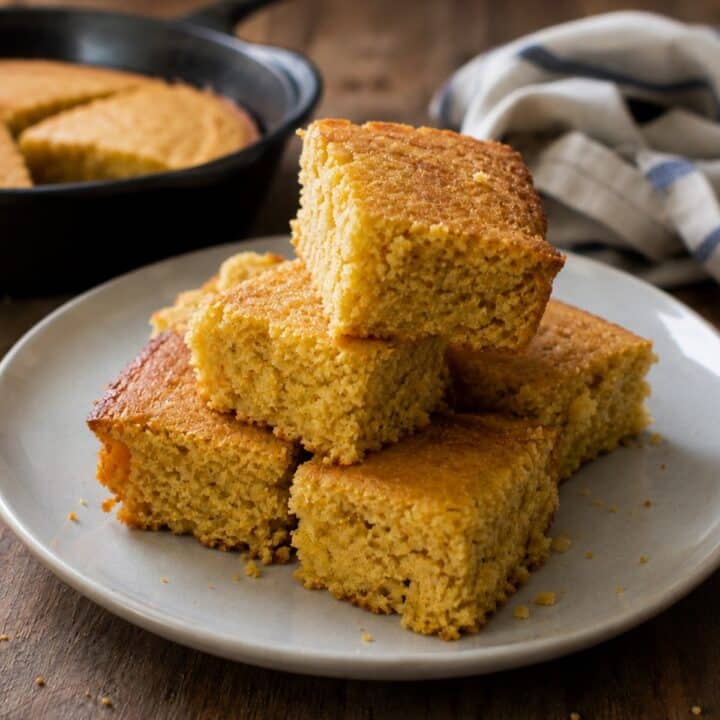
Stacked squares of golden vegan cornbread on a plate with a cast iron skillet of cornbread in the background

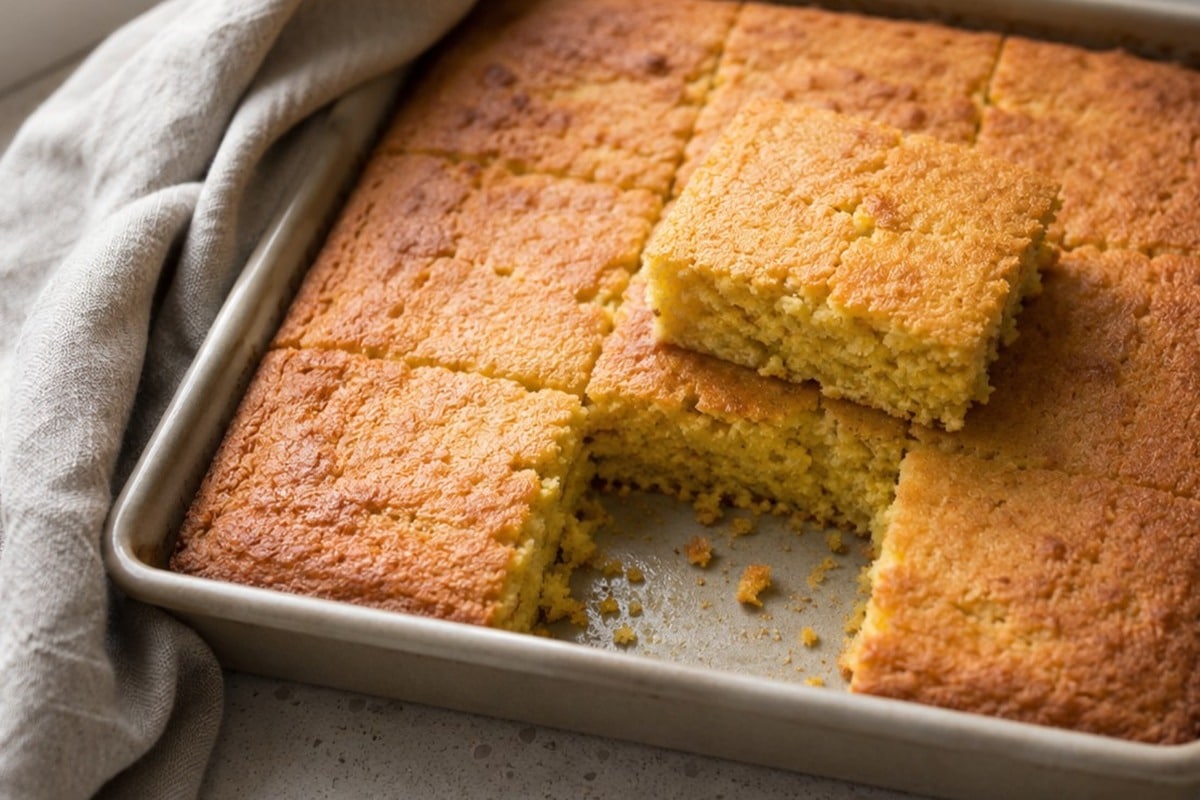
This vegan cornbread comes together in one bowl with pantry staples you probably already have, and it bakes up golden, lightly sweet, and perfectly crumbly — no eggs, buttermilk, or dairy butter required.

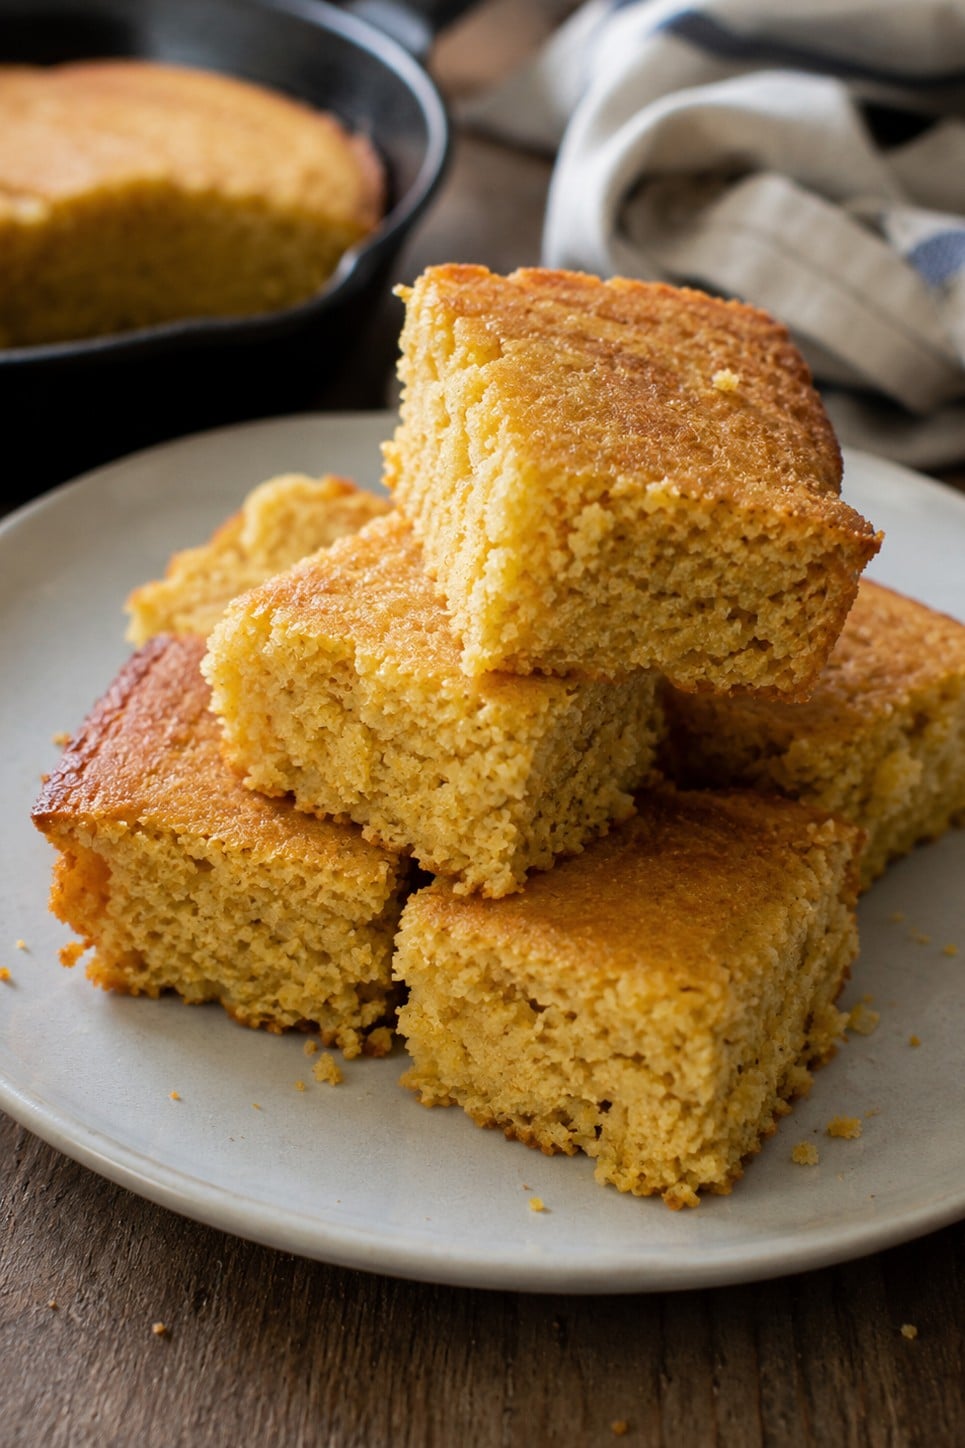
Tall stack of vegan cornbread squares on a plate with a skillet of cornbread and a striped napkin behind it

Key Ingredients & Substitutions

  • Cornmeal. The backbone of any cornbread — it's what gives this bread its signature texture and corn flavor. Use a medium or fine-grind yellow cornmeal for a classic Southern-style crumb; coarser stone-ground cornmeal works too, but the texture will be a bit more rustic.
  • All-purpose flour. Balances the cornmeal so the loaf holds together instead of crumbling apart. A 1:1 gluten-free baking blend can be swapped in if needed.
  • Granulated sugar. Just a quarter cup for a hint of sweetness. Cut it back for a more savory, old-fashioned cornbread, or use a little more if you like yours closer to cornbread cake.
  • Baking powder. The only leavener here, so make sure yours is fresh — old baking powder is the most common reason cornbread comes out flat and dense.
  • Unsweetened plant milk. Almond, soy, or oat milk all work well. Soy milk curdles the most readily when mixed with vinegar, which gives the closest texture to traditional buttermilk cornbread.
  • Neutral oil. Vegetable, canola, or melted coconut oil all work for the batter, plus you'll want a little extra for greasing the pan or skillet.
  • Apple cider vinegar. Mixed with the plant milk, this creates a quick vegan "buttermilk" that reacts with the baking powder for extra lift and a slightly tangy flavor.
  • Ground flaxseed. Mixed with water to make a flax egg, which binds the batter the way an egg would in a traditional recipe. Ground flaxseed meal keeps well in the freezer, so it's worth having on hand for other baking projects too.

Helpful Tips

Make the vegan buttermilk first. Stirring the apple cider vinegar into the plant milk right at the start of the recipe gives it time to curdle slightly while you measure out everything else, so it's ready to go the moment you need it.

Don't skip the flax egg's resting time. Ground flaxseed needs about five minutes in water to turn thick and gel-like. If you rush this step and add it to the batter while it's still watery, the cornbread won't hold together as well once sliced.

Preheat a cast iron skillet for the best crust. If you have a cast iron skillet, heating it in the oven while it preheats means the batter starts sizzling the second it hits the pan, which builds a deeply golden, slightly crisp crust on the bottom and edges. A room-temperature 8x8-inch baking pan works fine too — the crust just won't be quite as crackly.

Stir the batter as little as possible. Once the wet and dry ingredients meet, stir only until you no longer see streaks of flour. A few small lumps are completely normal; overmixing develops the gluten in the flour and makes the finished cornbread noticeably tougher.

Test for doneness with a toothpick, not a timer. Ovens vary, and a hot cast iron skillet bakes faster than a room-temperature pan. Start checking at the 20-minute mark by inserting a toothpick into the center — it's done as soon as it comes out clean or with just a few dry crumbs clinging to it.

Variations

  • Jalapeño cornbread. Fold 1 to 2 tablespoons of finely diced jalapeño into the batter for a spicy kick that pairs especially well with a bowl of chili.
  • Sweet corn cornbread. Stir in ½ cup of fresh, frozen, or drained canned corn kernels for pops of sweetness and texture in every bite.
  • Maple cornbread. Swap the granulated sugar for 3 tablespoons of maple syrup and reduce the plant milk by 2 tablespoons to keep the batter from getting too thin.
  • Herb and garlic cornbread. Add a teaspoon of dried thyme or rosemary and a minced garlic clove for a savory, herby loaf that's great alongside soup.
  • Cornbread muffins. Divide the batter among a greased 12-cup muffin tin and bake at the same temperature for about 15 minutes, until a toothpick comes out clean.
  • Gluten-free cornbread. Substitute a 1:1 gluten-free flour blend for the all-purpose flour; just double-check your baking powder and cornmeal are labeled gluten-free too.

Serving Ideas

Cornbread and chili are a classic pairing for good reason — the slightly sweet crumb is the perfect foil for something rich and spicy. Try a warm square alongside a bowl of A Big Pot of Really Good Chili, Classic Vegetarian Chili, or Sweet Potato Black Bean Chili for a satisfying, stick-to-your-ribs meal.

It's just as at home on a Southern-style spread. Serve it next to a pot of Vegan Hoppin' John and a pile of greens for a comforting New Year's or Sunday dinner, or crumble leftover slices into your favorite stuffing recipe if you want to go the traditional Thanksgiving route.

For breakfast or a snack, simply split a warm piece and add a swipe of vegan butter and a drizzle of maple syrup or a spoonful of jam. Any leftover cornbread also makes a great base for a quick vegan cornbread pudding or savory bread crumbs.

Storing & Freezing

Store leftover cornbread tightly wrapped or in an airtight container at room temperature for up to 2 days, or in the refrigerator for up to 5 days. Cornbread dries out quickly once cut, so keep the container as airtight as possible and bring pieces back to room temperature (or warm them briefly) before serving.
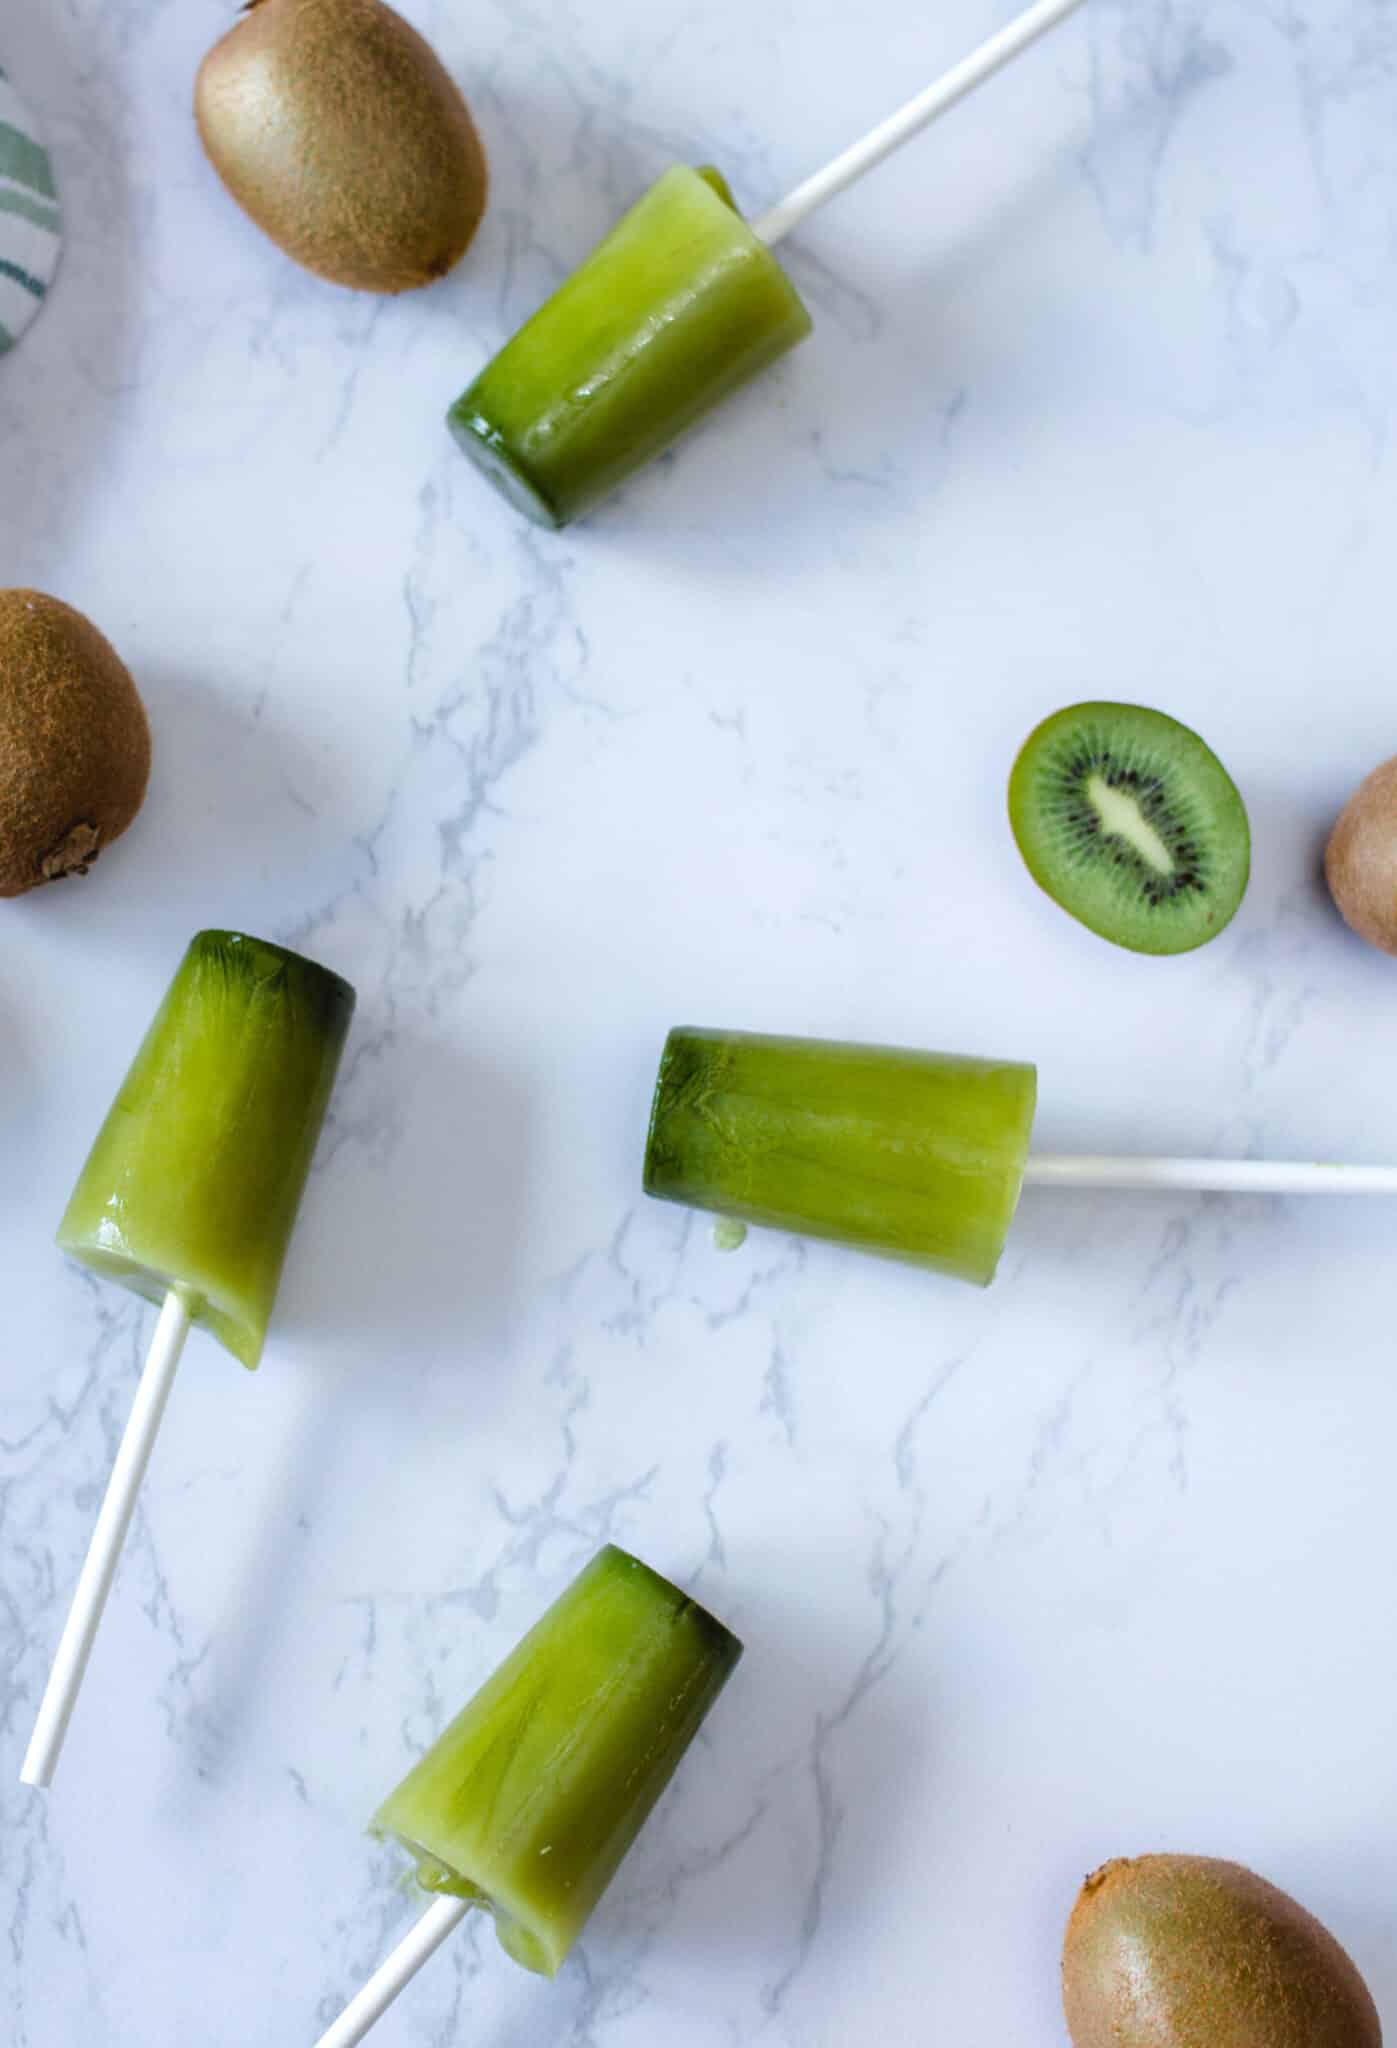
To freeze, let the cornbread cool completely, then wrap individual pieces tightly in plastic wrap and place them in a freezer-safe bag or container for up to 3 months. Thaw at room temperature or in the microwave, then warm briefly in a low oven or toaster oven to refresh the crust before serving.
Square pan of vegan cornbread cut into pieces with one slice lifted out

More Southern-Style Vegan Recipes

If you loved this recipe, here are a few more you might enjoy:

  • Vegan Cornbread Stuffing
  • Vegan Hoppin' John (Rice and Black-Eyed Peas)
  • Green Chile Cornbread
  • Maple-Baked Beans and Cornbread Casserole

Recipe

Stacked squares of golden vegan cornbread on a plate with a cast iron skillet of cornbread in the background

Easy Vegan Cornbread

4.78 from 18 votes
This one-bowl vegan cornbread is golden, lightly sweet, and perfectly crumbly, with a crisp crust if you bake it in a hot cast iron skillet. No eggs, buttermilk, or dairy butter needed.
Print Pin Save Saved!
Prep Time: 10 minutes minutes
Cook Time: 22 minutes minutes
Servings: 8 servings
Prevent your screen from going dark

Ingredients

  • 1 cup cornmeal (140g)
  • 1 cup all-purpose flour (120g)
  • ¼ cup granulated sugar adjust to taste — use less for a more savory cornbread (50g)
  • 1 tablespoon baking powder (14g)
  • ½ teaspoon salt (3g)
  • 1 cup unsweetened plant milk almond, soy, or oat all work (240ml)
  • ⅓ cup neutral oil vegetable or melted coconut oil, plus extra for greasing (79ml)
  • 1 tablespoon apple cider vinegar (15ml)
  • 1 tablespoon ground flaxseed for the flax egg (7g)
  • 3 tablespoons water for the flax egg (44ml)

Instructions

  • Preheat the oven to 400°F (200°C). If you're using a cast iron skillet, place it in the oven while it preheats so it gets nice and hot.
  • Make the flax egg by stirring together the ground flaxseed and water in a small bowl. Let it sit for about 5 minutes, until it turns thick and gel-like.
  • In a large bowl, whisk together the cornmeal, flour, sugar, baking powder, and salt.
  • In a separate bowl, combine the plant milk and apple cider vinegar and let it sit for a minute so it curdles slightly (this creates a simple vegan buttermilk). Whisk in the oil and flax egg.
  • Pour the wet ingredients into the dry ingredients and stir just until combined — a few lumps are fine, but don't overmix, or the cornbread will turn out tough.
  • Grease an 8x8-inch baking pan, or carefully remove the hot skillet from the oven and add a little oil, swirling to coat the bottom and sides (it should sizzle slightly). Pour in the batter and smooth the top.
  • Bake for 20 to 25 minutes, until the top is golden and a toothpick inserted in the center comes out clean.
  • Let cool in the pan for 5 to 10 minutes before slicing and serving.

Notes

The hot skillet gives a crispier, slightly caramelized crust on the bottom and edges — if you have the time, that step is worth it, but the baking pan version comes out just as tasty and moist. Makes one 8x8-inch pan or one 10-inch cast iron skillet.

Nutrition (Estimate per Serving)

Calories: 225kcalCarbohydrates: 30gProtein: 3gFat: 10gSaturated Fat: 1gPolyunsaturated Fat: 4gMonounsaturated Fat: 4gSodium: 324mgPotassium: 90mgFiber: 2gSugar: 6gCalcium: 60mgIron: 1mg
Vegan-ize any recipe!Grab our free vegan cheat sheet, packed with my favorite easy substitutions to make any recipe vegan.

Vegan Ranch Dressing (or Dip!)

September 3, 2026 by Nicole @ VegKitchen 7 Comments

Vegan ranch dressing with fresh herbs in a glass jar, top-down view

Nothing beats a really good ranch, and this vegan version gets there with a base of soaked cashews and a generous handful of fresh dill, parsley, and chives. It works equally well as a dip for raw veggies or spooned over a big green salad.

Jar of vegan ranch dressing with a spoonful in a white bowl, surrounded by fresh dill and parsley

Key Ingredients & Substitutions

  • Raw cashews. Soaked and blended, cashews are what give this dressing its rich, creamy body without a drop of dairy. If you're nut-free, raw sunflower seeds soak and blend the same way, though the flavor will be slightly earthier. Cashews show up in a lot of our vegan sauces for exactly this reason—see our Cashew Cream (Vegan Sour Cream) for another example.
  • Unsweetened almond milk. This thins the cashews into a pourable base. Any unsweetened plant milk works here—oat, soy, or cashew milk are all fine substitutes. Just avoid vanilla or sweetened versions, which will throw off the savory flavor.
  • Fresh lemon juice. Brings the tang that a good ranch needs. White wine vinegar or apple cider vinegar can stand in if you're out of lemons.
  • Dijon mustard. A small amount adds depth and a little extra tang without tasting overtly mustardy. In a pinch, yellow mustard works, though the flavor will be milder.
  • Garlic powder and onion powder. This is the flavor backbone of classic ranch, and it's worth using the powdered versions rather than fresh garlic and onion—fresh aromatics will taste bright and oniony rather than like the ranch flavor you're going for.
  • Fresh parsley, dill, and chives. The herby flecks that make ranch look and taste like ranch. Fresh is best here; if you only have dried on hand, use about a teaspoon of each, keeping in mind the flavor will be milder and less vibrant.
Ingredients for vegan ranch dressing including raw cashews, almond milk, lemon, garlic powder, onion powder, Dijon mustard, and fresh herbs

Helpful Tips

Use a high-speed blender if you have one. Cashews blend into a silky, completely smooth base much more easily in a high-powered blender. A standard blender will still work, but plan on blending a bit longer and scraping down the sides a few times to make sure no bits of cashew are left behind.

No time to soak overnight? Do a quick soak instead. Cover the cashews with boiling water and let them sit, uncovered, for 15 to 20 minutes. They won't be quite as soft as an overnight soak, but they'll blend smooth enough for this recipe.

Pulse the herbs in at the end, don't puree them. A few short pulses distributes the parsley, dill, and chives evenly while leaving visible flecks of green throughout. Over-blending turns the whole dressing a uniform pale green, which looks more like a green goddess dressing than a ranch.

Adjust the thickness to match how you're using it. For a pourable salad dressing, thin it with an extra tablespoon or two of almond milk or water. For a scoopable dip, leave it as is, or even cut back the liquid slightly for something thicker.

Short on time? Keep a good store-bought vegan ranch on hand as a cheat. Follow Your Heart Vegan Ranch Dressing and Hidden Valley Plant Powered Ranch are both dairy-free versions worth keeping in the fridge for nights when homemade isn't in the cards.

Vegan ranch dressing ingredients being blended with garlic powder and black pepper visible

Variations

  • Spicy ranch. Blend in a teaspoon of hot sauce or a pinch of cayenne for a dressing with some kick.
  • Avocado ranch. Add half a ripe avocado to the blender for an even creamier, greener dip.
  • Smoky chipotle ranch. Stir in a minced chipotle pepper in adobo sauce for a smoky, slightly spicy twist that's especially good on tacos or burrito bowls.
  • Herb swap. Try tarragon or basil in place of one of the herbs for a different flavor angle.
  • Extra tangy. Increase the lemon juice by a tablespoon, or add a small splash of vinegar, if you like your dressing on the sharper side.
  • Garlicky ranch. Add a small fresh garlic clove along with the garlic powder for a punchier, more assertive garlic flavor. If you'd rather keep things milder, a Garlic Mustard Vinaigrette is a good lighter alternative to serve alongside this ranch on a mixed salad.
Close-up of vegan ranch dressing in an open glass jar with fresh dill and parsley in the background

Serving Ideas

This is one of those dressings that earns a permanent spot in the fridge. Use it as a dip for a platter of raw veggies like carrots, celery, bell peppers, and broccoli. Or spoon it over a simple green salad in place of a bottled dressing. It's also the ideal finishing sauce for Vegan Buffalo Cauliflower, cooling down the heat from the buffalo sauce the same way ranch always does.

For a bigger spread, add a small bowl of this dressing to a Vegan Charcuterie Board alongside crackers, olives, and marinated veggies. It's also great drizzled over baked potatoes, tucked into a wrap with roasted vegetables, or served as a dipper for pizza crusts, which is a way underrated way to eat it.

Storing & Freezing

Store the dressing in an airtight container (a jar with a tight lid works great) in the refrigerator for up to 5 days. It will thicken slightly as it chills, so give it a good stir, or add a splash of almond milk, before serving if you'd like it thinner again.

This dressing doesn't freeze well. The cashew base tends to separate and turn grainy once thawed, so it's best to make only as much as you'll use within the week rather than trying to freeze leftovers.

Open jar of creamy vegan ranch dressing with fresh herbs and a mustard yellow napkin

More Vegan Salad Dressings & Dips

If you loved this recipe, here are a few more you might enjoy:

  • Green Goddess Dressing
  • French Dressing
  • Parsley Salad Dressing
  • Basic Vinaigrette

Recipe

Vegan ranch dressing with fresh herbs in a glass jar, top-down view

Vegan Ranch Dressing (or Dip!)

4.80 from 20 votes
This vegan ranch dressing is rich and creamy thanks to a base of soaked cashews, with fresh dill, parsley, and chives for that classic herby ranch flavor. Use it as a dressing, a veggie dip, or a topping for just about anything.
Print Pin Save Saved!
Prep Time: 15 minutes minutes
Soak Time: 8 hours hours
Total Time: 8 hours hours 15 minutes minutes
Servings: 12 servings
Prevent your screen from going dark

Ingredients

  • 1 cup raw cashews soaked overnight
  • ½ cup + 2 tbsp almond milk or other unflavored non-dairy milk
  • 2 tablespoon fresh lemon juice
  • 1 tablespoon Dijon mustard
  • 1 ½ teaspoon garlic powder
  • 1 teaspoon onion powder
  • 1 teaspoon salt
  • ½ teaspoon ground black pepper
  • 2 tablespoon fresh parsley finely chopped
  • 2 tablespoon fresh dill finely chopped
  • 2 tablespoon fresh chives finely chopped
US Customary - Metric

Instructions

  • Place the cashews in a bowl, cover with a few inches of water, and soak in the refrigerator for at least 8 hours or overnight. (Short on time? Cover the cashews with boiling water instead and let them soak, uncovered, for 15 to 20 minutes, then drain.)
  • Drain the cashews and add them to a blender along with the almond milk. Blend on high for 1 to 2 minutes, until completely smooth with no visible cashew bits (a high-speed blender will get there faster; a standard blender may need a bit longer and a scrape-down or two).
  • Add the Dijon mustard, lemon juice, garlic powder, onion powder, salt, and pepper. Blend again on high for 30 to 60 seconds, until fully smooth and creamy.
  • Taste and adjust the seasoning, adding more salt or lemon juice as needed. More lemon juice will make the dressing tangier.
  • Add the parsley, dill, and chives. Pulse the blender 4 to 5 times, just until the herbs are evenly distributed. Don't over-blend, or the dressing will turn a uniform green instead of showing flecks of fresh herbs.
  • Transfer the dressing to a covered container, such as a jar with a tight lid, and refrigerate for at least 1 hour before serving to let the flavors meld. Thin with a little extra almond milk or water for a pourable dressing, or leave as is for a thicker dip.

Notes

The dressing can be stored in an airtight container in the fridge for up to 5 days.
If you prefer a slightly sweeter dressing, try adding a small pinch of sugar.

Nutrition (Estimate per Serving)

Calories: 68kcalCarbohydrates: 4gProtein: 2gFat: 5gSaturated Fat: 1gPolyunsaturated Fat: 1gMonounsaturated Fat: 3gSodium: 230mgPotassium: 60mgSugar: 1gVitamin A: 34IUVitamin C: 1mgCalcium: 1mgIron: 3mg
Vegan-ize any recipe!Grab our free vegan cheat sheet, packed with my favorite easy substitutions to make any recipe vegan.

Easy Vegan Enchilada Sauce

September 1, 2026 by Nicole @ VegKitchen Leave a Comment

vegan enchilada sauce

This smoky, slightly sweet enchilada sauce comes together in a single pan and is made with simple pantry staples. Just 15 minutes stand between you and better-than-canned enchilada sauce!

vegan enchilada sauce

Key Ingredients & Substitutions

  • Chili powder. The backbone of the sauce's flavor - use a good-quality blend, since a stale one will taste flat no matter what else you add.
  • Smoked paprika. Adds a deep, campfire-like smokiness that stands in for the toasted-chile flavor without the extra step. Regular paprika works in a pinch but the sauce will taste milder.
  • Chipotle pepper in adobo. The main heat source. One pepper gives moderate heat; use less for a milder sauce or add a second for real spice.
  • Unsweetened cocoa powder. The secret ingredient - just a teaspoon rounds out the chile flavor with a subtle richness, similar to what cocoa does in mole. It won't taste chocolatey.
  • Vegetable broth. Use a low-sodium version if you're watching salt, since the chili powder and adobo sauce both add sodium too.
  • All-purpose flour. Thickens the sauce and gives it body. Swap in masa harina for a more traditional, slightly corn-forward flavor, or use a gluten-free flour blend to make the recipe GF.
  • Maple syrup. Balances the acidity and heat with a touch of sweetness. Agave works as a substitute.
  • Orange zest. A finishing touch that brightens the whole sauce - don't skip it, even though it seems small.

Helpful Tips

Toast the spices before adding liquid. Cooking the chili powder and other spices in the oil and flour for a full minute wakes up their flavor and gets rid of any raw, dusty taste. This step matters more than it seems like it should.

Add the broth slowly. Whisking in the broth a little at a time, rather than all at once, keeps the flour from clumping and gives you a silky, lump-free sauce.

Taste before you season with salt. Chili powder, adobo sauce, and broth all bring their own sodium, so it's easy to over-salt if you add it too early. Season at the very end instead.

Adjust the heat to your crowd. The minced chipotle is where all the heat lives. Start with half a pepper if you're serving spice-sensitive eaters, or add a second pepper plus extra adobo sauce if you like it fiery.

Blend it if you want it silky. This sauce is smooth as written, but if you want a completely restaurant-style texture, an immersion blender run through it for a few seconds will erase any last bit of texture from the onion.

Variations

  • Extra smoky. Double the smoked paprika and add a pinch of chipotle powder for a deeper, more barbecue-like flavor.
  • Mild and kid-friendly. Skip the chipotle pepper entirely and use just the adobo sauce for a whisper of smokiness without the heat.
  • Mole-inspired. Double the cocoa powder and add a pinch of cinnamon for a sauce that leans into mole territory.
  • Green enchilada version. Swap the tomato sauce and chili powder base for blended tomatillos and green chiles, keeping the cumin, garlic, and onion the same.
  • Extra citrusy. Add the zest and a squeeze of juice from a whole orange instead of just the zest from half, plus a squeeze of lime at the end.
  • Chunkier, rustic style. Dice the onion a little larger and skip blending - the sauce will have more texture, closer to a chili than a smooth enchilada sauce.

Serving Ideas

This sauce is built for classic enchiladas - pour it over rolled tortillas stuffed with black beans, sweet potato, or your favorite vegan filling before baking. It also holds up well as a simmer sauce: pour it over roasted cauliflower or crispy tofu and let everything simmer together for a few minutes before serving over rice.

Beyond enchiladas, this is a great base for a quick weeknight taco sauce, a topping for a Southwestern-style rice bowl, or a smoky finish drizzled over a tofu scramble at brunch.

Storing & Freezing

Let the sauce cool completely, then store it in an airtight container in the refrigerator for up to 5 days. It will thicken slightly as it chills - a splash of broth or water when reheating brings it back to pourable consistency.

To freeze, cool the sauce fully and transfer it to a freezer-safe container or bag, leaving room for expansion, for up to 3 months. Thaw overnight in the refrigerator and whisk well while reheating on the stovetop, since flour-thickened sauces can separate slightly in the freezer - a good whisk brings it right back together.

More Vegan Recipes

If you love this vegan enchilada sauce, be sure to check out these other delicious plant-based recipes:

  • Creamy Vegan Enchilada Casserole
  • Super-Easy Vegan Tortilla Casserole
  • Homemade Vegan Tortillas
  • Vegan Cinco de Mayo Recipes

Recipe

vegan enchilada sauce

Vegan Enchilada Sauce

4.71 from 7 votes
A good Enchilada Sauce is essential for almost any Southwestern-inspired meal. And this delicious vegan version is sure to hit the spot!
Print Pin Save Saved!
Prep Time: 5 minutes minutes
Cook Time: 15 minutes minutes
Total Time: 20 minutes minutes
Servings: 12 servings
Prevent your screen from going dark

Ingredients

  • 2 tablespoon olive oil
  • 1 onion small, finely chopped
  • 3 cloves garlic peeled and minced
  • 3 tablespoon all-purpose flour or use masa harina for gluten-free
  • 3 tablespoon chili powder
  • 1 teaspoon smoked paprika
  • 1 teaspoon ground cumin
  • 1 tsp dried oregano
  • 1 teaspoon unsweetened cocoa powder
  • ½ teaspoon fine sea salt plus more to taste
  • 2 ½ cups vegetable broth
  • 8 oz canned tomato sauce
  • 1 chipotle pepper in adobo sauce minced, plus 1 teaspoon of the adobo sauce
  • 1 teaspoon apple cider vinegar
  • 1 teaspoon maple syrup or agave syrup
  • zest of ½ an orange optional
US Customary - Metric

Instructions

  • Heat the olive oil in a saucepan over medium heat. Add the onion and cook for 4-5 minutes until translucent. Add the garlic and cook 1 minute more, until fragrant.
  • Stir in the flour, chili powder, smoked paprika, cumin, oregano, cocoa powder, and salt. Cook for 1 minute, stirring constantly, to toast the spices and cook off the raw flour taste.
  • Slowly whisk in the vegetable broth, a little at a time, to keep the mixture smooth. Whisk in the tomato sauce, minced chipotle, and adobo sauce.
  • Bring to a gentle simmer and cook uncovered for 10-12 minutes, stirring occasionally, until thickened enough to coat the back of a spoon.
  • Remove from heat and stir in the apple cider vinegar, maple syrup, and orange zest. Taste and adjust salt as needed.
  • Use immediately over enchiladas, or cool and store in an airtight container in the refrigerator for up to 5 days, or freeze for up to 3 months.

Notes

Yields approximately 3 cups of sauce. Serving size is ~¼ cup. 

Nutrition (Estimate per Serving)

Calories: 48kcalCarbohydrates: 6gProtein: 1gFat: 3gSaturated Fat: 0.4gPolyunsaturated Fat: 0.5gMonounsaturated Fat: 2gSodium: 416mgPotassium: 125mgFiber: 1gSugar: 2gVitamin A: 866IUVitamin C: 2mgCalcium: 18mgIron: 1mg
Vegan-ize any recipe!Grab our free vegan cheat sheet, packed with my favorite easy substitutions to make any recipe vegan.

Poached Pears with Chocolate Drizzle

August 31, 2026 by Nicole @ VegKitchen Leave a Comment

Chocolate is most compatible with pears as a winter treat — the fruit's soft sweetness and the chocolate's richness balance each other perfectly. Enjoy these chocolate-drizzled poached pears as a light, elegant dessert that looks far more impressive than the effort it actually takes, and comes together mostly hands-off while the pears simmer.

Poached Pear with Chocolate Drizzle

Photos by Hannah Kaminsky.

Key Ingredients & Substitutions

  • Bosc pears. Their firm texture and dense flesh hold up well to poaching without turning mushy — look for pears that are ripe but still firm to the touch. Anjou pears are a reasonable substitute.
  • White wine. Adds depth and a subtle acidity to the poaching liquid that balances the sweetness — substitute more pear nectar or apple juice for an alcohol-free version.
  • Warm spices. Cinnamon, allspice, and nutmeg give the poaching liquid a cozy, winter flavor that perfumes the pears as they cook.
  • Arrowroot or cornstarch. Thickens the poaching liquid into a glossy sauce that clings to the pears rather than pooling on the plate.
  • Semisweet chocolate chips. Melted and drizzled over the top, they add richness that pairs beautifully with the soft, spiced pears.

Variations

  • Add citrus. A strip of orange or lemon zest in the poaching liquid adds brightness that cuts through the richness of the chocolate.
  • Swap the chocolate. Dark chocolate makes a richer, less sweet drizzle; white chocolate makes for a prettier contrast against the spiced pears.
  • Add crunch. A sprinkle of chopped toasted hazelnuts or pistachios over the chocolate adds texture and visual appeal.
  • Make it boozy. A splash of brandy or amaretto in the poaching liquid adds a warm, adult note.
  • Stuff them. A small spoonful of vegan mascarpone or coconut whipped cream tucked into the core cavity dresses this up further.

Tips for the Best Poached Pears

  • Choose firm pears. They hold their shape better during poaching than very ripe, soft ones, which can fall apart in the simmering liquid.
  • Baste as they cook. Spooning the poaching liquid over the pears every few minutes helps them cook evenly and pick up more of the spiced flavor, since they're rarely fully submerged.
  • Don't rush the simmer. A gentle simmer rather than a hard boil keeps the pears intact and lets the spices infuse slowly.
  • Thicken the sauce after removing the pears. The arrowroot or cornstarch gives the poaching liquid a glossy, spoonable finish once whisked in and briefly reheated.
  • Drizzle just before serving. This keeps the chocolate glossy and prevents it from seizing or dulling as it sits.
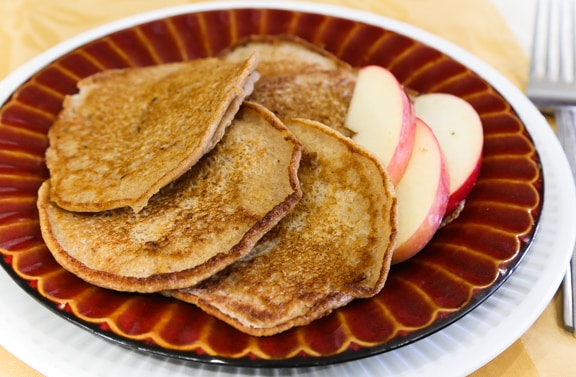
Make Ahead & Storage

The pears can be poached up to 2 days ahead and refrigerated in their poaching liquid, which actually deepens the flavor. Reheat gently before serving, and drizzle with freshly melted chocolate right before bringing to the table.

How to Serve

Serve warm or at room temperature as a light dessert, especially welcome in the cooler months. A small scoop of dairy-free vanilla ice cream alongside makes it extra special for a holiday table.

Recipe

Poached pear with chocolate drizzle

Poached Pears with Chocolate Drizzle

4.75 from 4 votes
Chocolate is most compatible with pears as a winter treat. Enjoy these chocolate-drizzled poached pears as a light dessert.
Print Pin Save Saved!
Prep Time: 15 minutes minutes
Cook Time: 15 minutes minutes
Total Time: 30 minutes minutes
Servings: 3 to 4
Prevent your screen from going dark

Ingredients

  • 2 large firm bosc pears
  • ¼ cup white wine
  • ¼ cup pear nectar or apple juice
  • ½ teaspoon vanilla extract
  • ¼ teaspoon cinnamon dash each: allspice nutmeg
  • 1 teaspoon arrowroot or cornstarch
  • ¼ cup semisweet chocolate chips
US Customary - Metric

Instructions

  • Core the pears and cut each into eight sections lengthwise. Combine the wine, nectar or juice, vanilla, and spices in a saucepan.
  • Put in the pears and bring to a simmer. Cover and simmer over low heat until the pears are just done—fork-tender but still firm. This will take from 10 to 20 minutes, depending on how firm the pears are in the first place.
  • Combine the arrowroot or cornstarch with just enough water to dissolve it. Stir into the liquid in the saucepan and simmer, uncovered, until thickened. Remove from the heat and cover.
  • Just before serving, combine the chocolate chips and about 1 tablespoon of water in the top of a double boiler or a small aluminum bowl perched atop a saucepan filled with a small amount of water. Heat until smoothly melted. You can also do this in a microwave — combine the chocolate and water in a heatproof bowl and start with 40 seconds. Add a bit more time if need be, stirring each time until the chips are smoothly melted.
  • Arrange the pear slices in 3 to 4 dessert bowls, depending on how many you're serving. Divide the cooking liquid between them.
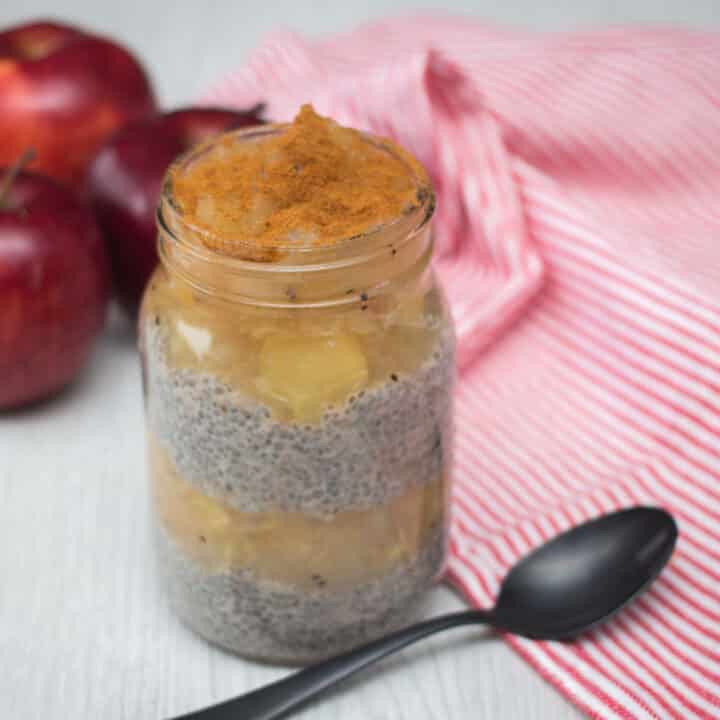
  • Dip a teaspoon into the melted chocolate and drizzle over the pears in a zigzag pattern, repeating until the chocolate is used up. To make a neater drizzle pour it into a small zip top plastic bag, make a tiny snip in the corner, and use like a piping bag to do the drizzle. Serve at once.

Nutrition (Estimate per Serving)

Calories: 143kcalCarbohydrates: 17gProtein: 2gFat: 6gSaturated Fat: 3gPolyunsaturated Fat: 1gMonounsaturated Fat: 2gTrans Fat: 1gCholesterol: 1mgSodium: 4mgPotassium: 116mgFiber: 2gSugar: 9gVitamin A: 8IUVitamin C: 1mgCalcium: 16mgIron: 1mg
Vegan-ize any recipe!Grab our free vegan cheat sheet, packed with my favorite easy substitutions to make any recipe vegan.
Close up of Poached Pear with Chocolate Drizzle

Here are more recipes for using pears.

  • 1
  • 2
  • 3
  • …
  • 7
  • Next Page »

Welcome!

Hi, I'm Nicole. I'm the creator behind VegKitchen, and the author of the popular cookbook, Weeknight One Pot Vegan Cooking.
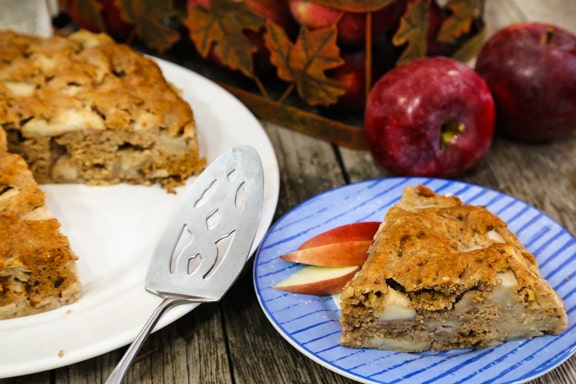
About Me
vegan substitution chart

Featured Recipes

  • vegan lentil soup
    Sweet Potato Lentil Soup (Vegan & Vegetarian)
  • vegan hummingbird cake
    Vegan Hummingbird Cake
  • vegan jalapeno poppers
    Vegan Jalapeno Poppers
  • Sticky Sesame Cauliflower
  • vegan irish stew
    Old-Fashioned Vegan Stew
  • vegan birthday cake
    Vegan Funfetti Cake

Footer

  • Shop Cookbooks
  • Free Vegan Cheat Sheet
  • About Us
  • Work with Me
  • Contact
  • Privacy Policy
  • Terms of Use

As an Amazon Associate I earn from qualifying purchases.
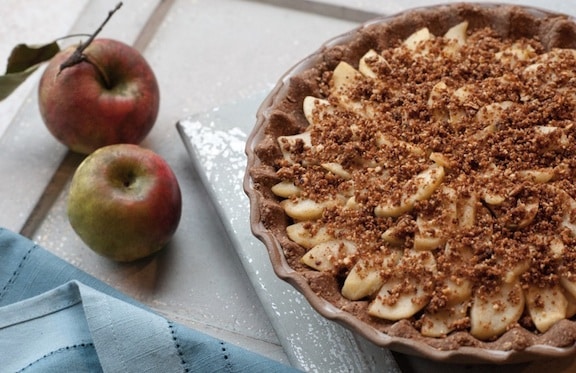
Copyright © 2026 VegKitchen.com

Rate This Recipe

Your vote:


A rating is required
A name is required
An email is required