VegKitchen

  • Vegan Recipes
    • Appetizers
    • Breakfast
    • Main Dishes
    • Pasta and Noodles
    • Salads
    • Sandwiches and Wraps
    • Sauces, Dressings, and Condiments
    • Side Dishes
    • Soups, Stews, and Chilis
    • Snacks and Dips
    • Desserts
    • Drinks
    • Cheese-y Delights
    • Raw Vegan
    • Slow-Cooker
  • Vegan Living
    • Vegan Substitutions Guide
    • Kid Friendly
    • More Vegan Living
  • About
  • Shop Cookbooks
menu icon
go to homepage
  • Recipes
  • Vegan Life
  • Cookbooks
  • Freebie!
search icon
Homepage link
  • Recipes
  • Vegan Life
  • Cookbooks
  • Freebie!
×
Home » You searched for apple

Search Results for: apple

Gingery Vegan Peach Muffins

August 31, 2026 by Nicole @ VegKitchen Leave a Comment

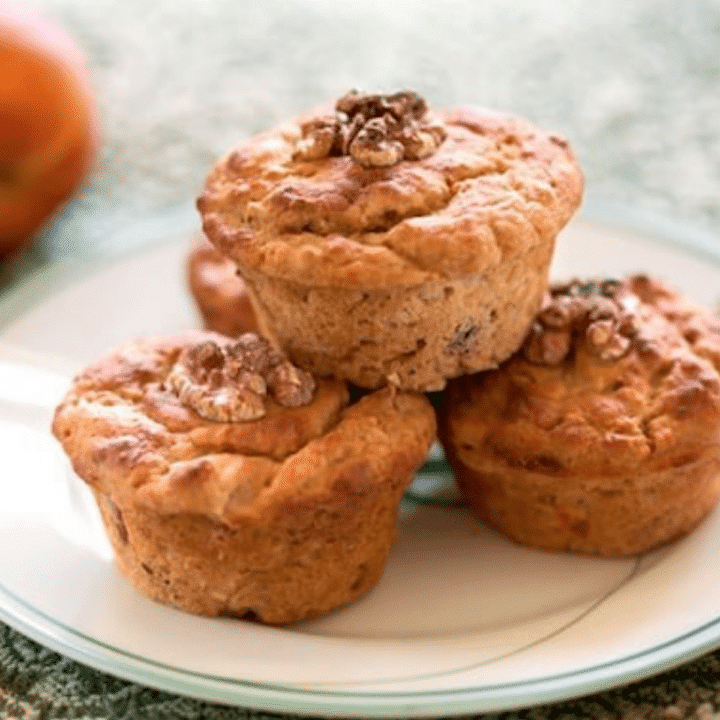
Use perfectly ripe fruit — lush and sweet, but not too soft — for these late-summer vegan peach muffins that have more than a hint of ginger. The combination of fresh fruit, sweet-hot crystallized ginger, and a swirl of peach preserves makes these feel more special than a standard muffin without any extra effort.
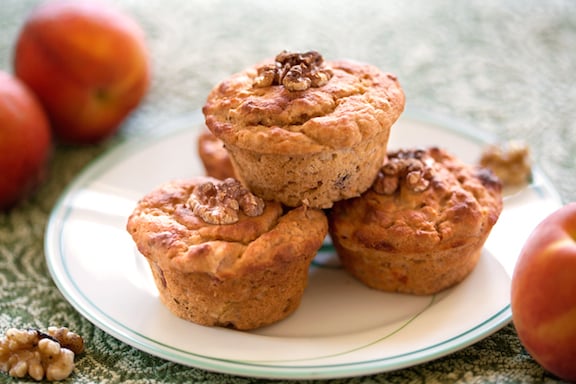
Plate of Gingery Vegan Peach Muffins

Photos by Hannah Kaminsky.

Key Ingredients & Substitutions

  • Ripe peaches or nectarines. Use lush, sweet fruit that isn't too soft — overly ripe peaches turn mushy and release too much liquid into the batter. Off-season, well-drained canned or frozen (thawed) peaches work too, just pat them dry first.
  • Crystallized ginger. Finely diced, it adds little bursts of sweet-spicy heat throughout the muffins that ground ginger alone can't replicate — look for it near the baking spices or in the bulk section.
  • Peach all-fruit preserves. Coats the diced fruit and adds extra peach flavor and moisture without adding much extra sugar — apricot preserves work as a close substitute.
  • Whole wheat pastry flour. A finer grind than regular whole wheat flour, which keeps the muffins tender rather than dense; a 50/50 mix of all-purpose and regular whole wheat flour is a reasonable substitute if pastry flour isn't available.
  • Ground ginger. Works alongside the crystallized ginger to give the muffins a warm background spice throughout, not just in the occasional bite.

Variations

  • Swap the fruit. Nectarines work just as well as peaches and don't need peeling, which saves a step.
  • Change the add-in. Wheat germ, quick-cooking oats, or hemp seeds all work well stirred into the dry mix for extra texture and nutrition.
  • Swap the nuts. Pecans make a nice substitute for walnuts, or leave nuts out entirely for a nut-free version.
  • Make it a streusel-top muffin. A simple mix of flour, brown sugar, and margarine sprinkled over the batter before baking adds a crunchy top.
  • Add a citrus note. A little lemon or orange zest in the batter brightens the peach flavor nicely.

Tips for the Best Gingery Peach Muffins

  • Use ripe, flavorful fruit. This makes the biggest difference in the finished muffins — a bland peach makes a bland muffin, no matter how well the rest of the recipe is executed.
  • Don't overmix the batter. Stir just until the dry ingredients disappear into the wet — overmixing develops gluten and makes for a tough, dense muffin instead of a tender one.
  • Dice the peaches small. Roughly ¼-inch pieces distribute evenly through the batter instead of sinking to the bottom or clumping in one spot.
  • Top with a walnut half. This adds a nice crunch and a pretty finish to each muffin before baking.
  • Cool before serving. Let the muffins cool on a rack until just warm or room temperature — cutting into them too hot can make them seem gummy even when they're fully baked.

Make Ahead & Storage

These muffins keep well at room temperature in a sealed container for about 2 days, or in the refrigerator for up to 5. They also freeze well for up to 3 months — wrap individually and thaw at room temperature or warm briefly in the oven or microwave.

How to Serve

Enjoy warm or at room temperature, with iced coffee or tea, for breakfast or as an afternoon treat.

Recipe

Gingery Peach or Nectarine muffins - vegan

Gingery Vegan Peach Muffins

4.75 from 4 votes
Late-summer vegan peach muffins with more than a hint of ginger, made with perfectly ripe fruit. Nectarines work just as well.
Print Pin Save Saved!
Prep Time: 15 minutes minutes
Cook Time: 25 minutes minutes
Total Time: 40 minutes minutes
Servings: 12 muffins
Prevent your screen from going dark

Ingredients

  • 2 cups whole wheat pastry flour
  • ¼ cup wheat germ, quick-cooking oats, or hemp seeds
  • 2 teaspoons baking powder
  • 1 teaspoon baking soda
  • ¾ cup applesauce
  • ½ cup fresh orange juice
  • 2 tablespoons safflower oil
  • 1 ½ cups finely diced ripe peaches or nectarines off-season, use organic canned peaches
  • ½ cup peach all-fruit preserves
  • ¼ cup finely diced crystallized ginger
  • ¼ cup finely chopped walnuts plus walnut halves for topping

Instructions

  • Preheat the oven to 350°F.
  • In a mixing bowl, combine the flour, wheat germ (or oats or hemp seeds), baking powder, and baking soda, and stir together.
  • Make a well in the center of the dry ingredients and pour in the applesauce, orange juice, and oil. Stir together until thoroughly combined.
  • Mix the diced fruit with the fruit preserves until evenly coated, then gently stir into the batter along with the walnuts.
  • Divide the batter evenly among 12 foil-lined muffin tins. Top each muffin with a walnut half.
  • Bake for 25 minutes, or until a small knife inserted into the center of a muffin tests clean.
  • When cool enough to handle, transfer the muffins to a plate or rack to cool. Serve warm or at room temperature.

Notes

Use perfectly ripe fruit — lush and sweet, but not too soft — for the best flavor. Nectarines work just as well as peaches.
Vegan-ize any recipe!Grab our free vegan cheat sheet, packed with my favorite easy substitutions to make any recipe vegan.

Find lots more muffin recipes in Muffin Mania. Sweet tooth still craving? Here are more Vegan Baking and Sweets.
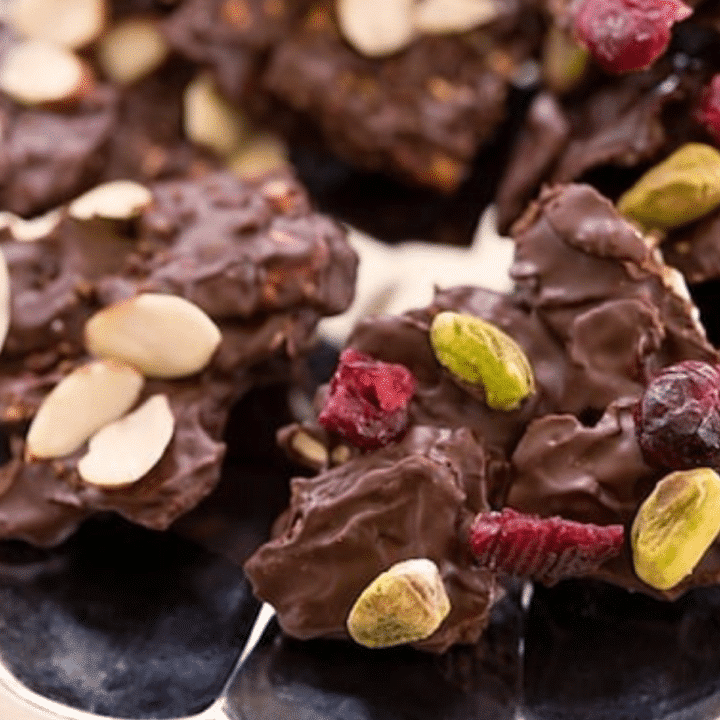
Vegan Chocolate Matzo Brittle

August 31, 2026 by Nicole @ VegKitchen 3 Comments

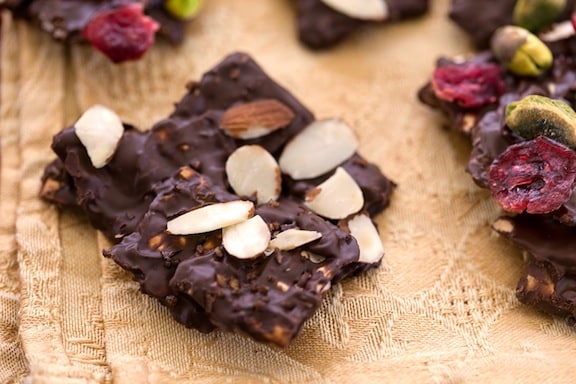
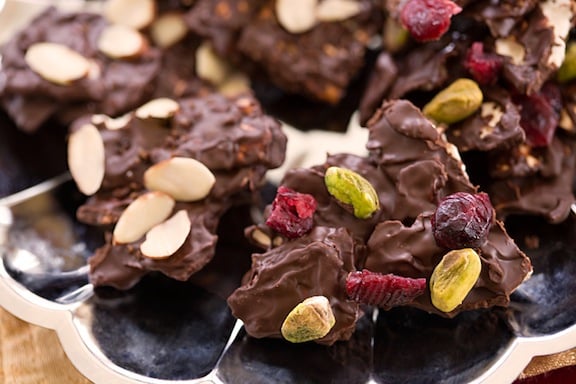
This chocolate matzo brittle is rich, but an excellent way to use your surplus of matzo. A little goes a long way as a dessert after the Passover Seder, and it comes together with barely any active cooking — just melting, spreading, and topping, which makes it a good one to enlist kids to help decorate.

Pieces of Vegan Chocolate Matzo Brittle

Photos by Hannah Kaminsky.

Key Ingredients & Substitutions

  • Vegan chocolate chips. Semi-sweet chocolate chips or chocolate buttons both work well as the coating — dark chocolate makes for a less sweet, more grown-up version.
  • Matzo. Break it into pieces slightly larger than bite-sized before topping with the chocolate mixture, so the pieces hold together once broken apart later.
  • Toasted nuts. Use sliced or slivered almonds, or chopped walnuts, pecans, or pistachios. If you like "salty sweets," try chopped salted pistachios. You can use two different types of nuts, of course.
  • Dried fruit. Dark or golden raisins and dried cranberries both work well — or try dried sliced apricot, mango, or finely chopped dried pineapple.
  • Flaky sea salt. A light sprinkle before the chocolate sets adds a sweet-salty contrast that keeps the brittle from tasting one-note.

Variations

  • Mix up the nuts. Try two different types of nuts together for extra texture and flavor.
  • Change the dried fruit. Dried sliced apricot, mango, or finely chopped dried pineapple all make great swaps for raisins or cranberries.
  • Add a pinch of sea salt. A light sprinkle on top before the chocolate sets adds a nice sweet-salty contrast.
  • Make it two-toned. Melt white and dark chocolate separately and swirl them together before the toppings go on for a marbled look.
  • Add citrus zest. A little orange or lemon zest sprinkled into the chocolate before it sets adds a bright, unexpected note.

Tips for the Best Chocolate Matzo Brittle

  • Break the matzo evenly. Pieces slightly larger than bite-sized are easiest to coat and break apart later into brittle-sized shards.
  • Let it set fully before breaking it up. Give the chocolate plenty of time to firm up, ideally in the refrigerator, before breaking the brittle into pieces — rushing this step makes for a messy, smudged result.
  • Store in a cool place. This keeps the chocolate from softening or blooming (turning a dull, grayish color) too much.
  • A little goes a long way. This dessert is rich, so small pieces are plenty satisfying — cut or break it smaller than you might expect.
  • Spread the chocolate evenly. An offset spatula helps get a thin, even layer that sets and breaks more predictably than a thick, uneven one.

Make Ahead & Storage

This brittle keeps well in a sealed container at cool room temperature for about a week, or in the refrigerator for up to 2 weeks. It's a great make-ahead treat for a holiday table since it only gets easier to portion out once fully set and chilled.

How to Serve

Serve in small pieces as a dessert after the Passover Seder, or any time you're craving a rich, crunchy chocolate treat.

Recipe

Chocolate Matzo brittle

Chocolate Matzo Brittle

4.75 from 4 votes
This recipe for chocolate matzo brittle is rich, but an excellent way to use your surplus of matzo. A little goes a long way as a dessert after the Passover Seder.
Print Pin Save Saved!
Prep Time: 15 minutes minutes
Cook Time: 5 minutes minutes
Total Time: 20 minutes minutes
Servings: 8 to 10
Prevent your screen from going dark

Ingredients

  • 1 cup vegan semi-sweet chocolate chips or chocolate buttons
  • 1 tablespoon agave nectar or maple syrup
  • Pinch of cinnamon
  • 2 matzos broken into pieces slightly larger than bite-sized
  • ⅓ to ½ cup lightly toasted nuts see variations
  • ½ cup dark or golden raisins dried cranberries, or chopped dried fruit (see variations), or any combination
US Customary - Metric

Instructions

  • Line two large plates with wax paper or parchment.
  • Combine the chocolate chips, agave nectar, and cinnamon in a medium saucepan. Cook over low heat until smoothly melted. Remove from the heat.
  • Add the broken matzo; stir to coat evenly with the chocolate. Spread in a more or less single layer onto two parchment- or wax paper-lined plates.
  • Sprinkle the nuts and raisins over the top.
  • Refrigerate for at least an hour before serving.
  • Just before serving, break up into large chunks and transfer to a serving platter.

Nutrition (Estimate per Serving)

Calories: 212kcalCarbohydrates: 30gProtein: 4gFat: 11gSaturated Fat: 5gPolyunsaturated Fat: 1gMonounsaturated Fat: 2gSodium: 2mgPotassium: 111mgFiber: 3gSugar: 18gVitamin A: 1IUVitamin C: 1mgCalcium: 39mgIron: 2mg
Vegan-ize any recipe!Grab our free vegan cheat sheet, packed with my favorite easy substitutions to make any recipe vegan.
Close up of Vegan Chocolate Matzo Brittle

Find more at VegKitchen's Passover: Ashkenazic-Style Seder page, or Passover: Sephardic-Style Seder page. Find more ways to make Special Occasions and Entertaining easier and healthier.

Vegan Jicama Salad with Oranges and Watercress

August 31, 2026 by Nicole @ VegKitchen 2 Comments

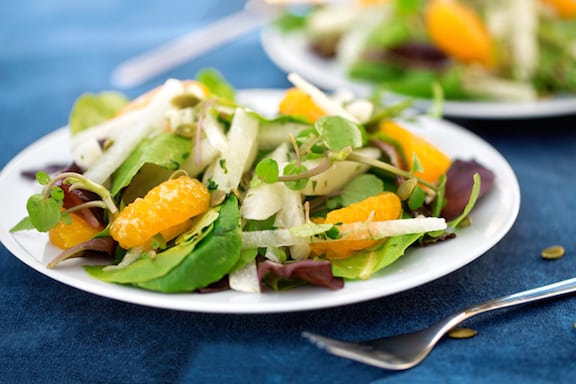
This colorful and crunchy jícama salad is a perfect way to dress up a fall harvest or holiday meal - it's a lovely light salad for a vegan Thanksgiving dinner menu. Jícama (pronounced HIC-uh-ma), once confined to the southwest, has recently become far easier to find in produce sections everywhere, especially in the fall. If you can't find jícama, use a large, crisp turnip - the goal is that same crisp, almost watery crunch that stands up well next to citrus.

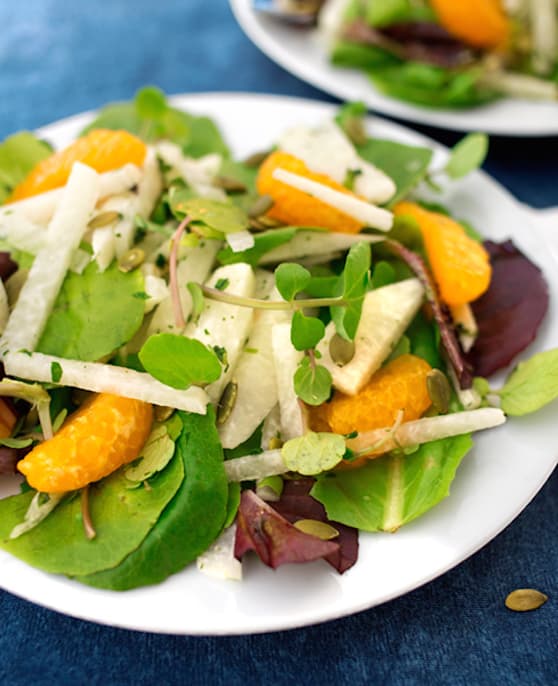
Bowl of Vegan Jícama Salad with Oranges and Watercress

Photos by Hannah Kaminsky.

Key Ingredients & Substitutions

  • Jícama. Adds a crisp, refreshing crunch somewhere between an apple and a water chestnut - substitute a large crisp turnip if jícama isn't available, and peel it the same way you would a turnip.
  • Clementines or seedless oranges. Bring bright citrus sweetness that balances the peppery watercress and earthy jícama - clementines section more easily and have fewer membranes to deal with.
  • Watercress. Adds a peppery bite - mostly leaves, with a bit of stem, is fine to include; arugula makes a good substitute if watercress isn't available, though it's slightly more bitter.
  • Toasted pumpkin seeds. Add crunch and nutty flavor - toast them first for the best taste, and they tie in nicely with the fall/harvest theme of the salad.
  • Lime juice. Ties the citrus and crunch together into a light, bright dressing - use it in addition to, not instead of, the orange for the best balance.

Variations

  • Swap the greens. Baby spinach or arugula work well in place of the mixed baby greens.
  • Add avocado. A few slices add richness and creaminess that contrasts nicely with the crunchy jícama.
  • Swap the seeds. Toasted sliced almonds or pecans make a nice substitute for pumpkin seeds.
  • Add pomegranate seeds. Their tart pop and jewel-toned color make this an especially festive holiday-table salad.
  • Add a little heat. A very thin slice of jalapeño, seeds removed, adds an unexpected kick against the sweet citrus.

Tips for the Best Jícama Salad

  • Cut the jícama into short, narrow strips. This gives the best texture and makes it easy to eat alongside the other ingredients in one bite.
  • Toast the pumpkin seeds. A few minutes in a dry skillet, stirring often, brings out their flavor and adds a warm aroma that raw seeds don't have.
  • Add lime juice to taste. Start with less and add more gradually to get the balance right between the citrus and the peppery watercress.
  • Toss just before serving. This keeps the greens and watercress crisp rather than wilting under the dressing.
  • Section the oranges over the bowl. This catches any juice that escapes and lets it become part of the dressing instead of going to waste on the cutting board.

Make Ahead & Storage

The jicama can be cut into strips and stored in the fridge in water for a day ahead to keep it crisp. Toast the seeds ahead of time too, but hold off on combining everything with the dressing and citrus until just before serving, since the greens and watercress will wilt if dressed too far in advance.

How to Serve

Serve as a bright, crunchy salad alongside a vegan Thanksgiving spread, or any fall harvest meal.

Recipe

Jicama salad with oranges and watercress

Jícama Salad with Oranges and Watercress

4.75 from 4 votes
This colorful and crunchy salad is a perfect way to dress up a fall harvest or holiday meal. It's the perfect light salad for a lovely vegan Thanksgiving dinner menu!
Print Pin Save Saved!
Prep Time: 15 minutes minutes
Total Time: 15 minutes minutes
Servings: 6 to 8
Prevent your screen from going dark

Ingredients

  • 1 medium jícama peeled and cut into short narrow strips
  • 3 to 4 clementines or other small seedless oranges sectioned
  • 1 bunch watercress mostly leaves, some stem fine to include
  • ¼ cup cilantro or parsley leaves
  • 4 to 6 ounces mixed baby greens
  • Juice of ½ lime to 1 lime to taste
  • 2 tablespoons extra-virgin olive oil
  • 1 tablespoon agave nectar or maple syrup
  • ¼ cup toasted pumpkin seeds
US Customary - Metric

Instructions

  • Combine the jicama, orange sections, watercress, cilantro or parsley, and mixed greens in a serving bowl and stir together.
  • Drizzle the lime juice, olive oil, and agave over the salad and toss again.
  • Let stand for 15 minutes or so for the flavors to meld.
  • Scatter the pumpkin seeds over the top and serve.

Nutrition (Estimate per Serving)

Calories: 129kcalCarbohydrates: 18gProtein: 2gFat: 6gSaturated Fat: 1gPolyunsaturated Fat: 1gMonounsaturated Fat: 4gTrans Fat: 1gSodium: 10mgPotassium: 289mgFiber: 6gSugar: 8gVitamin A: 288IUVitamin C: 45mgCalcium: 29mgIron: 1mg
Vegan-ize any recipe!Grab our free vegan cheat sheet, packed with my favorite easy substitutions to make any recipe vegan.
Close up of Vegan Jícama Salad with Oranges and Watercress

Rice and Pecan-Stuffed Squash

August 25, 2026 by Nicole @ VegKitchen Leave a Comment

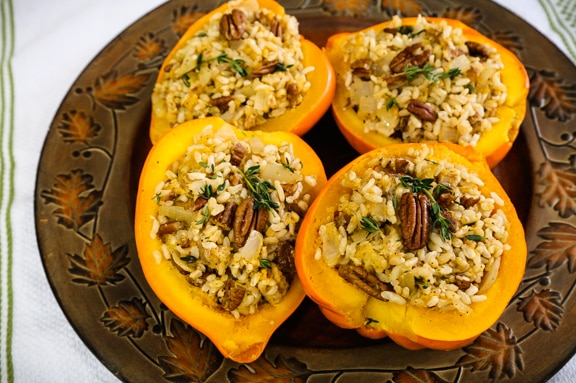
Rice and Pecan Stuffed Acorn Squash

Thyme-scented brown rice, toasted pecans, and a hearty bread stuffing turn humble acorn squash into a showstopping vegan main or side dish for the holiday table.

Rice and pecan-stuffed acorn squash halves on a platter

Key Ingredients & Substitutions

  • Acorn squash. Its natural sweetness balances the savory stuffing, and the halves make perfect edible bowls. Golden acorn squash works just as well, or swap in delicata or small butternut squash.
  • Brown rice. Adds hearty texture and a nutty flavor. Cooked wild rice or a wild rice blend is a great substitute for extra color and chew.
  • Pecans. Bring crunch and buttery richness. Walnuts or toasted almonds work well in a pinch, or leave the nuts out entirely for a nut-free version.
  • Whole-grain bread. Torn into small pieces, it helps bind the stuffing. Use gluten-free bread to make the dish gluten-free, or swap in cooked quinoa for a grain-only stuffing.
  • Onion and celery. The aromatic base of the stuffing. Diced fennel or leek can stand in for either.
  • Orange juice. Adds a bright, subtle sweetness that plays off the thyme and squash. Apple cider or vegetable broth work well if you'd like it less sweet.
  • Fresh thyme. Gives the stuffing its signature herbal note. Fresh rosemary or sage can be used instead, in smaller amounts since they're more assertive.

Variations

  • Add dried fruit. Stir in a handful of dried cranberries or chopped dried apricots for pops of tart sweetness.
  • Make it spicier. Add a pinch of cayenne or smoked paprika to the stuffing for warmth.
  • Swap the grain. Try wild rice, farro, or quinoa in place of brown rice for a different texture.
  • Go apple-forward. Fold in a diced apple with the celery and onion for extra fall flavor.
  • Try a different squash. Delicata, sweet dumpling, or small butternut squash halves all work beautifully in place of acorn squash.
  • Add greens. Stir a couple of handfuls of chopped kale or spinach into the stuffing before baking for extra color and nutrients.

Tips for the Best Rice and Pecan-Stuffed Squash

  • Choose evenly sized squash. Similar-sized halves bake at the same rate, so nothing is over- or under-done.
  • Don't skip the foil-wrapped bake. Baking the squash whole in foil keeps it moist while it steams tender inside its skin.
  • Check doneness with a skewer. The squash should pierce easily but still hold its shape - overbaked squash will collapse once stuffed.
  • Toast extra pecans for topping. Reserving some pecans to sprinkle on top before the final bake adds crunch and looks beautiful.
  • Reheat covered. If making the squash ahead, cover it loosely with foil while reheating so the topping doesn't dry out before the filling is hot.

How to Serve

Serve rice and pecan-stuffed squash halves as a plant-based centerpiece for Thanksgiving or Christmas dinner, alongside cranberry sauce, roasted Brussels sprouts, and a crisp green salad. It's just as good as a hearty side dish next to a vegan roast or lentil loaf, or as a satisfying weeknight dinner any time in fall or winter - one squash half makes a generous individual portion.

Recipe

Rice and Pecan Stuffed Acorn Squash

Rice and Pecan-Stuffed Squash

5 from 4 votes
Thyme-scented brown rice and pecans meet a savory bread stuffing in this vegan rice and pecan-stuffed acorn squash — a beautiful holiday main or side dish for Thanksgiving and Christmas.
Print Pin Save Saved!
Prep Time: 30 minutes minutes
Cook Time: 1 hour hour
Total Time: 1 hour hour 30 minutes minutes
Servings: 8
Prevent your screen from going dark

Ingredients

  • 4 medium acorn or golden acorn squashes
  • 1 tablespoon olive oil
  • 1 large onion finely chopped
  • 1 large celery stalk finely diced
  • 2 slices whole-grain bread torn into tiny pieces
  • 2 cups cooked brown rice
  • ⅔ cup finely chopped pecans
  • ⅔ cup orange juice preferably fresh
  • 1 tablespoon salt-free all-purpose seasoning blend such as frontier or Mrs. Dash
  • 2 teaspoons fresh thyme leaves plus more for topping
  • Salt and freshly ground pepper to taste
  • Sprigs of fresh thyme for garnish
US Customary - Metric

Instructions

  • Preheat the oven to 375°F.
  • Wrap the squash halves whole in foil. Place in a casserole dish and bake until you can pierce through with a small knife or skewer, 30 to 45 minutes (this varies with the size and variety of squash). Check every 5 minutes after the 30-minute mark — the squash should be tender enough to pierce but still hold its shape.
  • While the squash bakes, heat the olive oil in a large skillet over medium heat on the stovetop. Add the onion and sauté until translucent, about 5 minutes. Add the celery and continue sautéing until the onion turns golden brown, about 5 more minutes.
  • Add the torn bread, cooked rice, and half of the pecans to the skillet and stir together.
  • Stir in the orange juice, seasoning blend, and thyme leaves. Season with salt and pepper to taste.
  • Once the squash is cool enough to handle, slice each one in half lengthwise. Scoop out and discard the seeds and stringy pulp, then scoop out a bit more of the flesh, leaving a sturdy ¼- to ½-inch shell all around. Chop the scooped-out flesh (there won't be much) and stir it into the rice mixture.
  • Divide the rice mixture evenly among the squash halves. Sprinkle with the remaining pecans and a few more thyme leaves, then top each half with a sprig of fresh thyme.
  • Just before serving, return the stuffed squash to the 375°F oven for about 15 minutes, or until heated through.

Nutrition (Estimate per Serving)

Calories: 234kcalCarbohydrates: 40gProtein: 4gFat: 8gSaturated Fat: 1gPolyunsaturated Fat: 2gMonounsaturated Fat: 5gSodium: 10mgPotassium: 909mgFiber: 6gSugar: 3gVitamin A: 895IUVitamin C: 36mgCalcium: 119mgIron: 3mg
Vegan-ize any recipe!Grab our free vegan cheat sheet, packed with my favorite easy substitutions to make any recipe vegan.

Gnocchi with Vegan Sausage and Gravy

May 6, 2026 by Nicole @ VegKitchen Leave a Comment

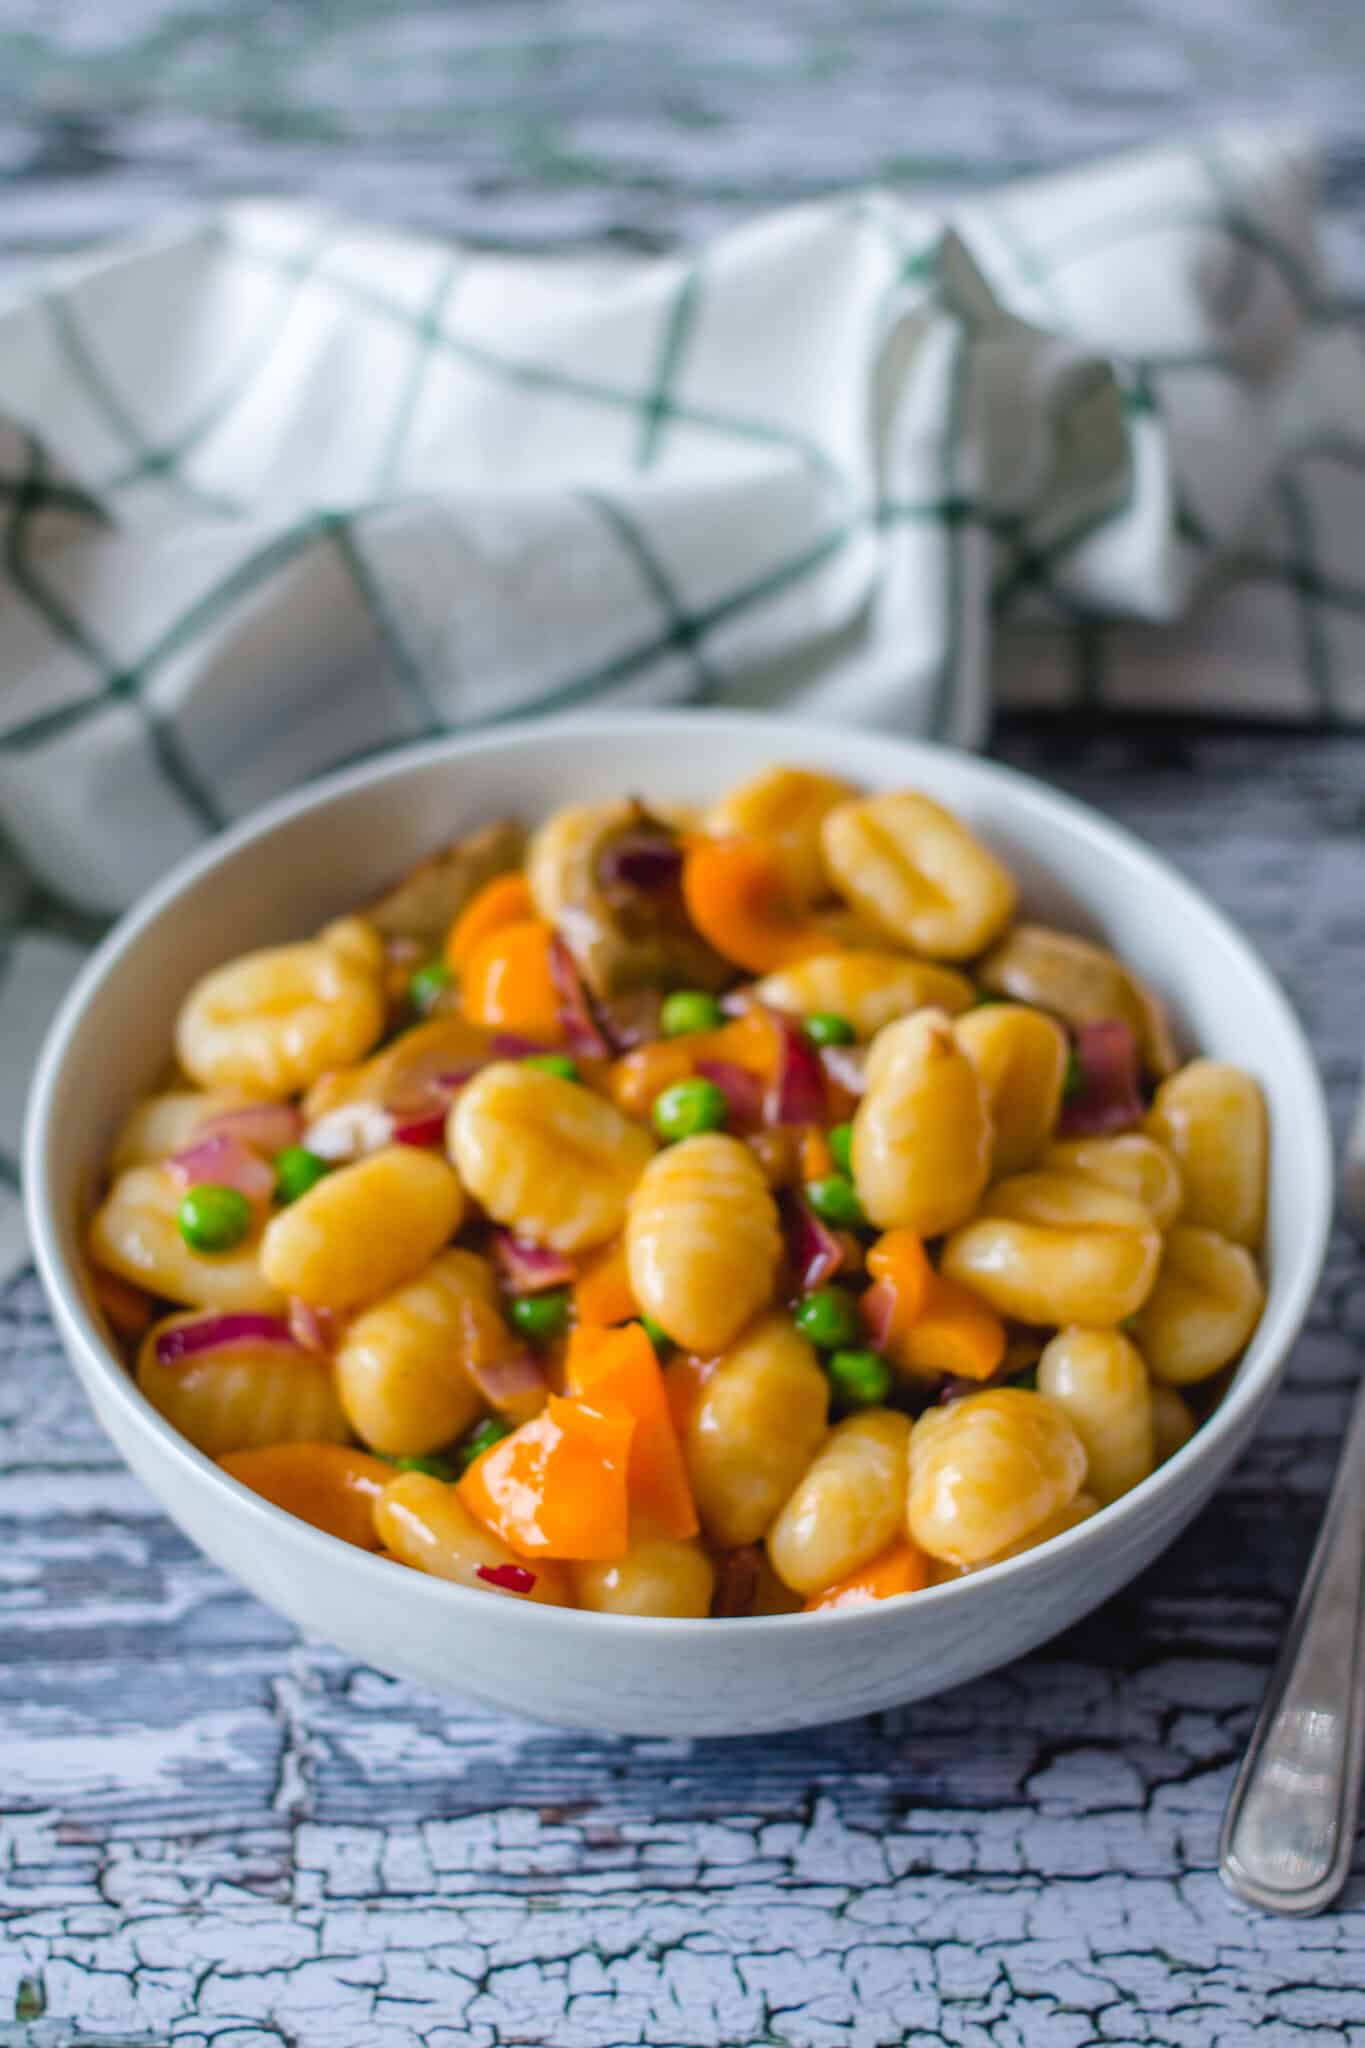
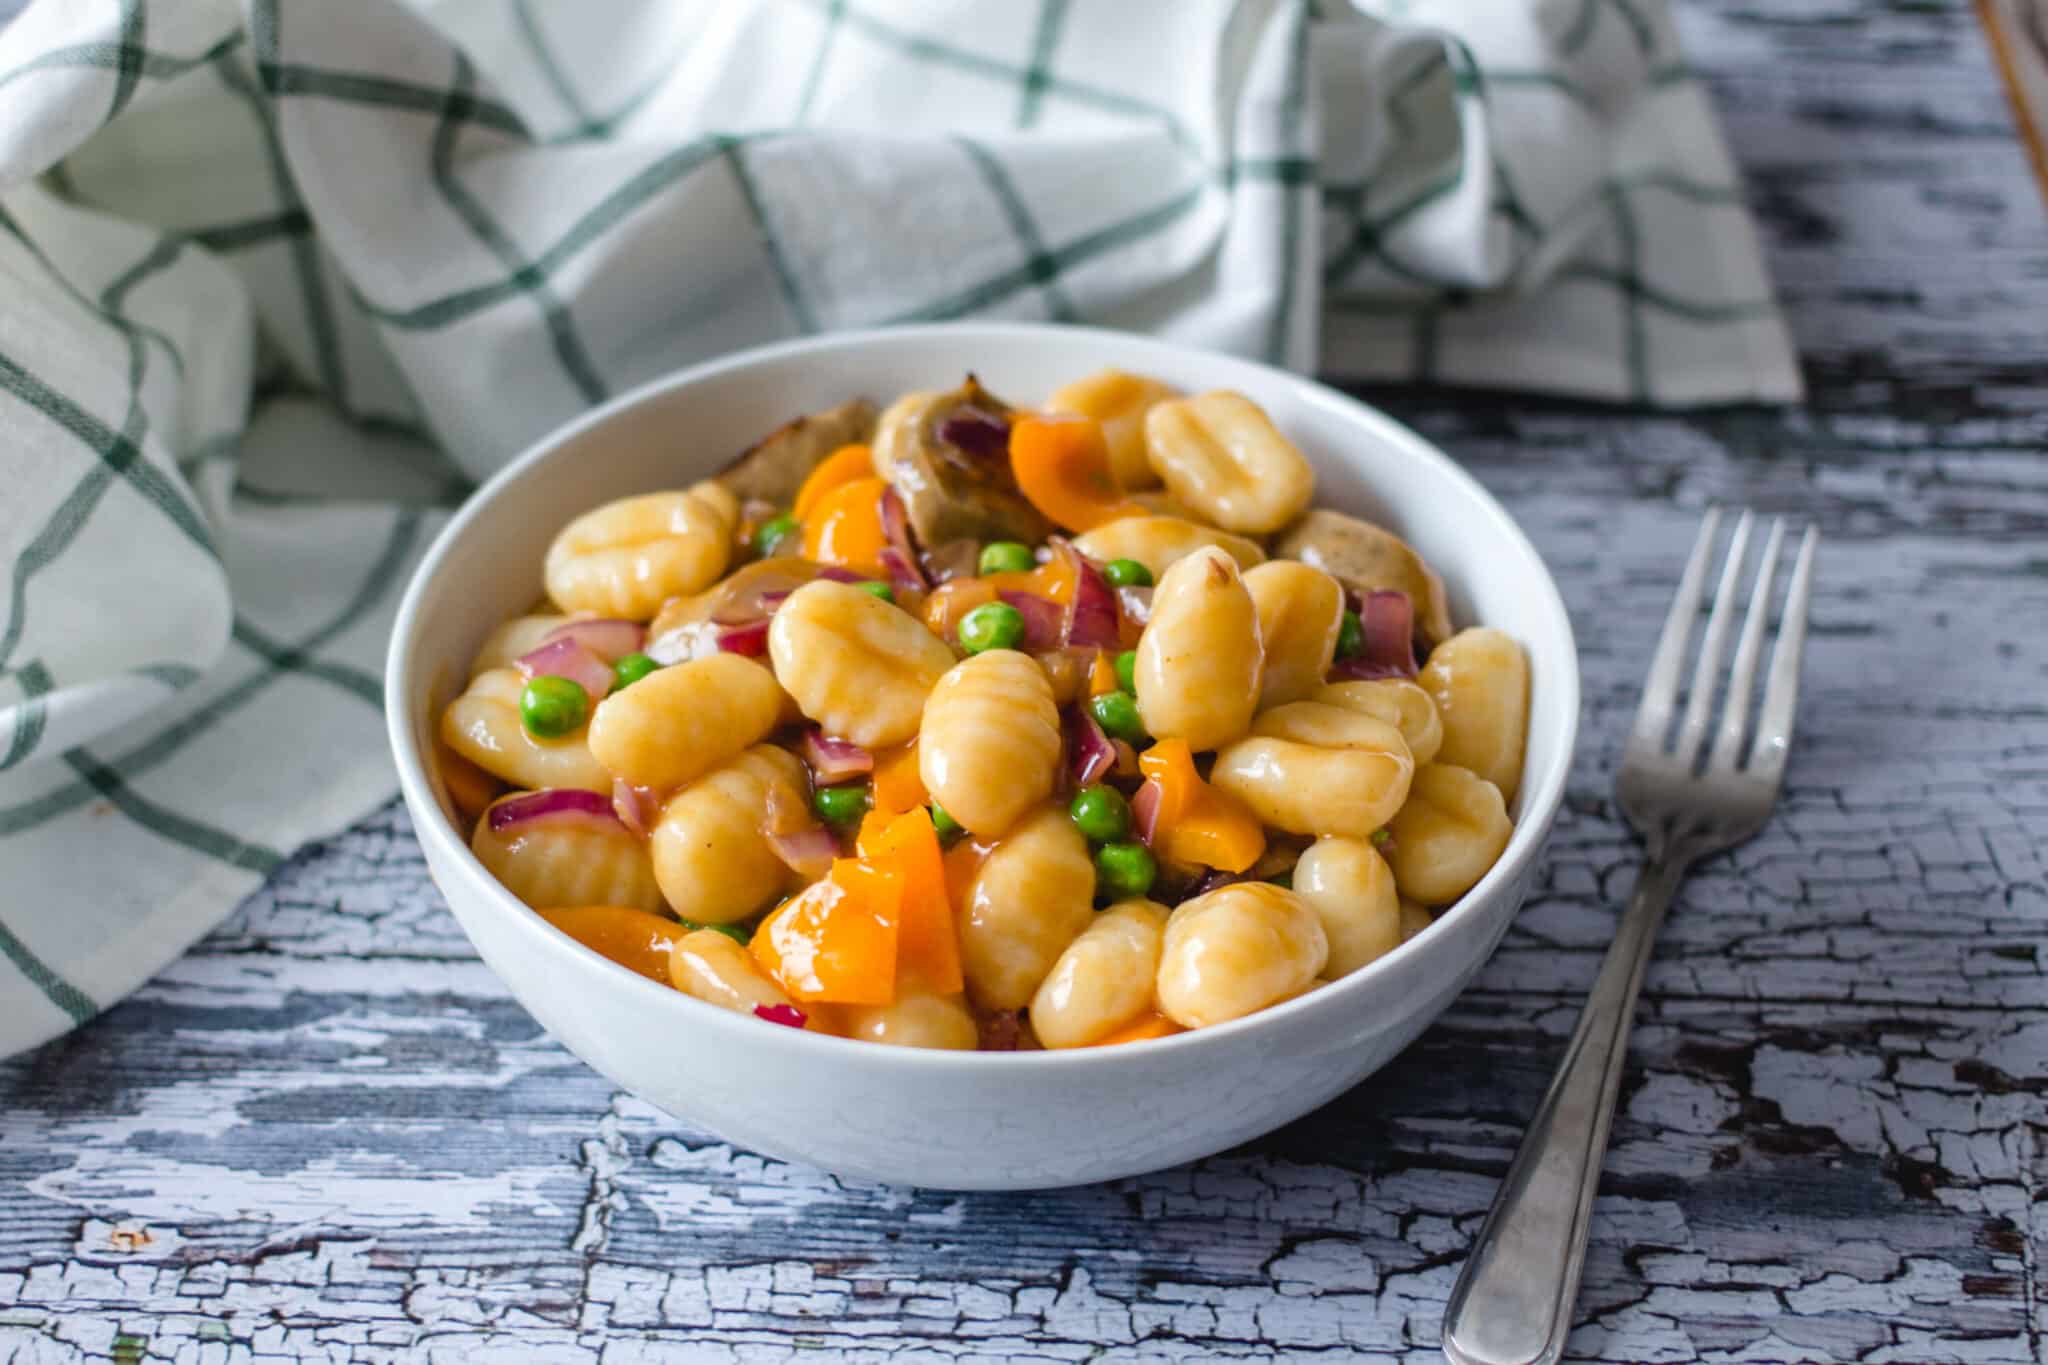
Gnocchi with Vegan Sausage and Gravy

Pillowy gnocchi, savory vegan sausage, and a rich, peppery gravy come together in one skillet for a hearty dinner that feels like pure comfort food.

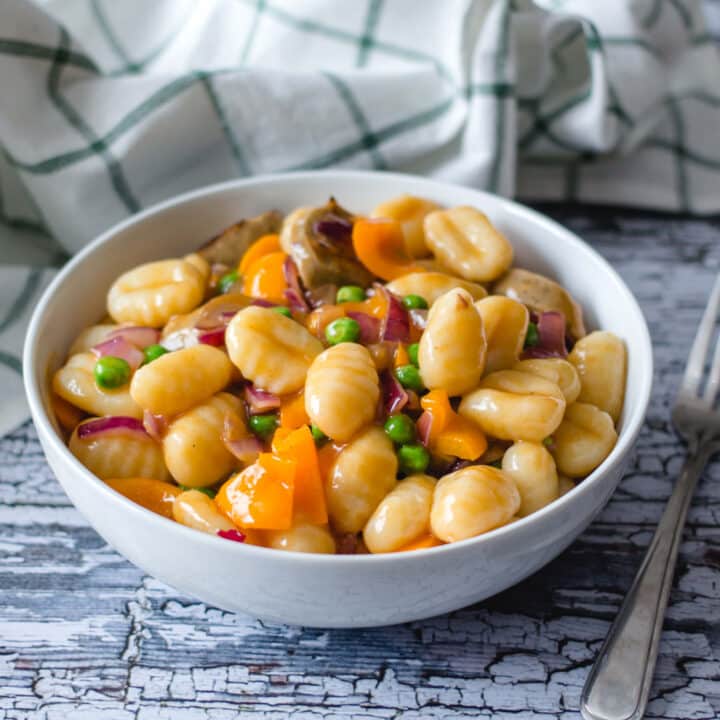
Gnocchi with vegan sausage and gravy served in a bowl

Key Ingredients & Substitutions

  • Gnocchi. One package of store-bought potato gnocchi keeps this recipe weeknight-easy. Look for it in the pasta aisle or refrigerated section. For a gluten-free version, use certified GF gnocchi or make your own with rice flour.
  • Vegan Italian sausages. Italian-style links (like Field Roast, Beyond Sausage, or Impossible Sausage) give the dish a smoky, fennel-forward flavor. Feel free to swap in any flavor you like - spicy, apple, or even crumbled breakfast-style sausage all work.
  • Vegetable broth. This is the base of the gravy, so use a good-quality broth. For a deeper, more umami-rich flavor, homemade broth works beautifully, or look for a dark, roasted vegetable broth at the store.
  • Flour. All-purpose flour thickens the gravy into a silky, pourable sauce. For a gluten-free gravy, substitute with a 1:1 GF flour blend or use cornstarch (start with 2 tablespoons).
  • Soy sauce. Adds saltiness and a subtle umami punch that makes the gravy taste richer. Tamari is a great gluten-free swap; coconut aminos work too, though the gravy will be slightly lighter in color.
  • Bell pepper. One pepper adds a gentle sweetness and color to the sausage mixture. Red or orange peppers are naturally sweeter; green adds a slightly bitter, more savory note.
  • Frozen peas. Stirred in at the end, they add a pop of green and a touch of sweetness without any prep. No need to thaw them first - the heat of the pan does the work.

Helpful Tips

Make the gravy first. The gravy comes together quickly and can sit on low heat while you cook the gnocchi and sausage. Having it ready means everything comes together at once at the end, so nothing sits and gets cold.

Whisk constantly once you add the broth. When making the roux-based gravy, add the vegetable broth in a slow, steady stream while whisking continuously. This prevents lumps and gives you a smooth, silky sauce. Pre-measuring your broth before you start makes this step much easier.

Don't overcook the gnocchi. Gnocchi cook fast - they're done as soon as they float to the surface, usually within 2-3 minutes of the water returning to a boil. Drain them promptly to prevent them from becoming mushy or waterlogged.

Brown the sausage well. Slicing the sausages into coins and letting them sear undisturbed in the pan for a couple of minutes per side creates a slightly caramelized crust that adds great texture and flavor. Resist the urge to stir constantly.

Adjust the gravy to your taste. The recipe makes a generous amount of gravy. Start by adding 1 cup to the finished dish and add more from there - some people like it saucy, others prefer just a light coating. Leftover gravy keeps beautifully and pairs well with vegan mashed potatoes or vegan biscuits.

Variations

  • Mushroom gravy gnocchi. Swap the sausage for sautéed cremini or shiitake mushrooms. Deglaze the pan with a splash of red wine before adding the gravy for an earthy, deeply savory dish.
  • Spicy sausage version. Use hot Italian-style vegan sausage and add a pinch of red pepper flakes to the gravy for a dish with some kick.
  • Greens and gnocchi. Stir in a big handful of baby spinach or chopped kale along with the peas at the end. The greens wilt in about a minute and add nutrition and color.
  • Baked gnocchi gratin. Transfer the finished gnocchi mixture to a baking dish, top with vegan shredded cheese or breadcrumbs, and broil for 5-7 minutes until golden and bubbling.
  • Lighter herb gravy. For a fresher, less heavy version, use only 1½ cups of broth, reduce the flour to 2 tablespoons, and finish the gravy with a generous handful of chopped fresh thyme or rosemary.
  • Sweet potato gnocchi. Use sweet potato gnocchi in place of traditional potato gnocchi for a slightly sweeter, more nutritious twist.

Serving Ideas

This dish is hearty enough to serve as a complete meal on its own - the gnocchi, sausage, vegetables, and gravy cover all your bases. Serve it in deep bowls with a slice of crusty bread to mop up the extra gravy.

If you'd like to round out the meal, a simple green salad dressed with lemon vinaigrette cuts through the richness nicely. Roasted broccoli or asparagus also make a great side if you want more vegetables on the table. For an Italian-inspired dinner spread, pair it with a bowl of Italian-style vegan sausage and peppers and some garlic bread.

Storing & Freezing

Store leftovers in an airtight container in the refrigerator for up to 4 days. The gravy thickens as it sits - when reheating on the stovetop over medium-low heat, add a splash of vegetable broth or water and stir to loosen it back up. You can also microwave individual portions in 90-second intervals, stirring between each one.

This dish doesn't freeze particularly well, as gnocchi tend to become mushy once thawed. That said, you can freeze the gravy separately for up to 2 months - just thaw it in the refrigerator overnight and reheat on the stovetop, then cook fresh gnocchi and sausage to serve with it.

Gnocchi with Vegan Sausage and Gravy

More Vegan Pasta and Dinner Ideas

If you loved this recipe, here are a few more cozy vegan dinners you might enjoy:

  • Quick Gnocchi with Beans and Greens
  • Vegan Creamy Mushroom Pasta
  • Vegan Biscuits and Gravy
  • Vegan Pot Pie Casserole

Recipe

Gnocchi with Vegan Sausage and Gravy

Gnocchi with Vegan Sausage and Gravy

4.79 from 19 votes
Pillowy potato gnocchi tossed with savory vegan Italian sausage, peppers, and peas in a rich, peppery brown gravy — comfort food that comes together in about 45 minutes.
Print Pin Save Saved!
Prep Time: 10 minutes minutes
Cook Time: 35 minutes minutes
Total Time: 45 minutes minutes
Servings: 4 servings
Prevent your screen from going dark

Ingredients

Gravy

  • 3 tablespoon olive Oil
  • 4 tablespoon flour
  • 2 ½ cups vegetable broth
  • 2 tablespoon soy sauce
  • 1 teaspoon ground black pepper
  • 1 ½ teaspoon onion powder
  • 1 teaspoon garlic powder
  • 2 tablespoon white vinegar

Gnocchi

  • 1 package gnocchi
  • 1 tablespoon olive oil
  • 1 onion chopped
  • 2 Italian vegan sausages
  • 1 pepper
  • ½ cup frozen peas
US Customary - Metric

Instructions

Gravy

  • Measure out all your gravy ingredients and keep them within reach before you start — you'll need to add the broth quickly after whisking in the flour.
  • Heat a medium saucepan over medium-low heat. Add the olive oil, then whisk in the flour and cook for about 1 minute until lightly golden.
  • Pour in the vegetable broth in a slow, steady stream, whisking constantly to prevent lumps. Add the soy sauce, black pepper, onion powder, garlic powder, and white vinegar. Stir to combine.
  • Bring to a gentle simmer and cook for 5–7 minutes, stirring occasionally, until the gravy has thickened to a pourable consistency. Reduce heat to low to keep warm.

Gnocchi and Sausage

  • Bring a large pot of salted water to a boil. Cook the gnocchi according to package directions — they're ready when they float to the surface, about 2–3 minutes. Drain and set aside.
  • While the gnocchi cooks, heat 1 tablespoon of olive oil in a large skillet over medium heat. Add the onion and bell pepper and cook for 3–4 minutes until softened.
  • Add the sliced vegan sausages to the skillet and cook for 3–4 minutes, turning occasionally, until lightly browned on the outside. Stir in the frozen peas and cook for 1 more minute.
  • Add the drained gnocchi to the skillet and pour in 1 to 2 cups of gravy, depending on how saucy you like it. Gently toss everything together until well coated. Serve immediately.

Nutrition (Estimate per Serving)

Calories: 290kcalCarbohydrates: 22gProtein: 6gFat: 15gSaturated Fat: 2gPolyunsaturated Fat: 5gMonounsaturated Fat: 7gSodium: 662mgPotassium: 110mgFiber: 2gSugar: 1gVitamin A: 143IUVitamin C: 3mgCalcium: 24mgIron: 2mg
Vegan-ize any recipe!Grab our free vegan cheat sheet, packed with my favorite easy substitutions to make any recipe vegan.

Easy Vegan Duck Sauce

May 4, 2026 by Nicole @ VegKitchen Leave a Comment

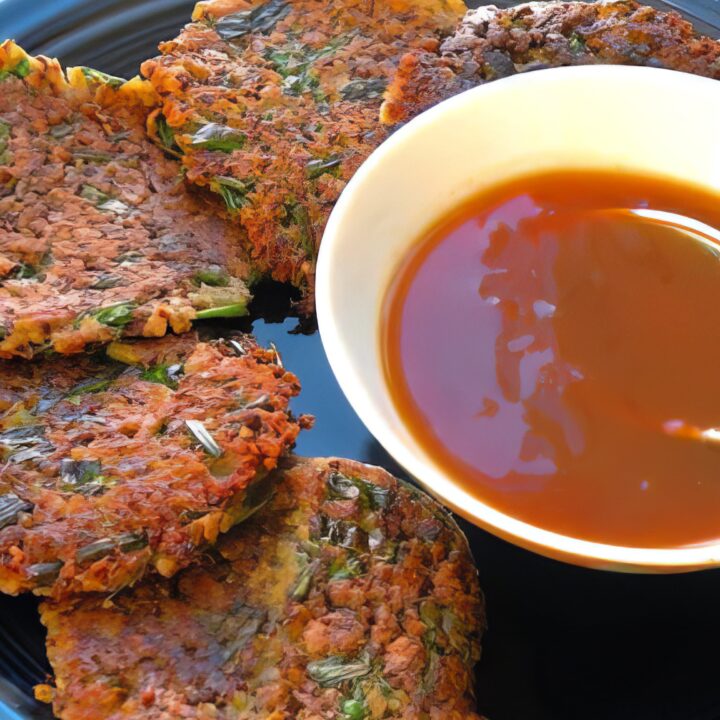
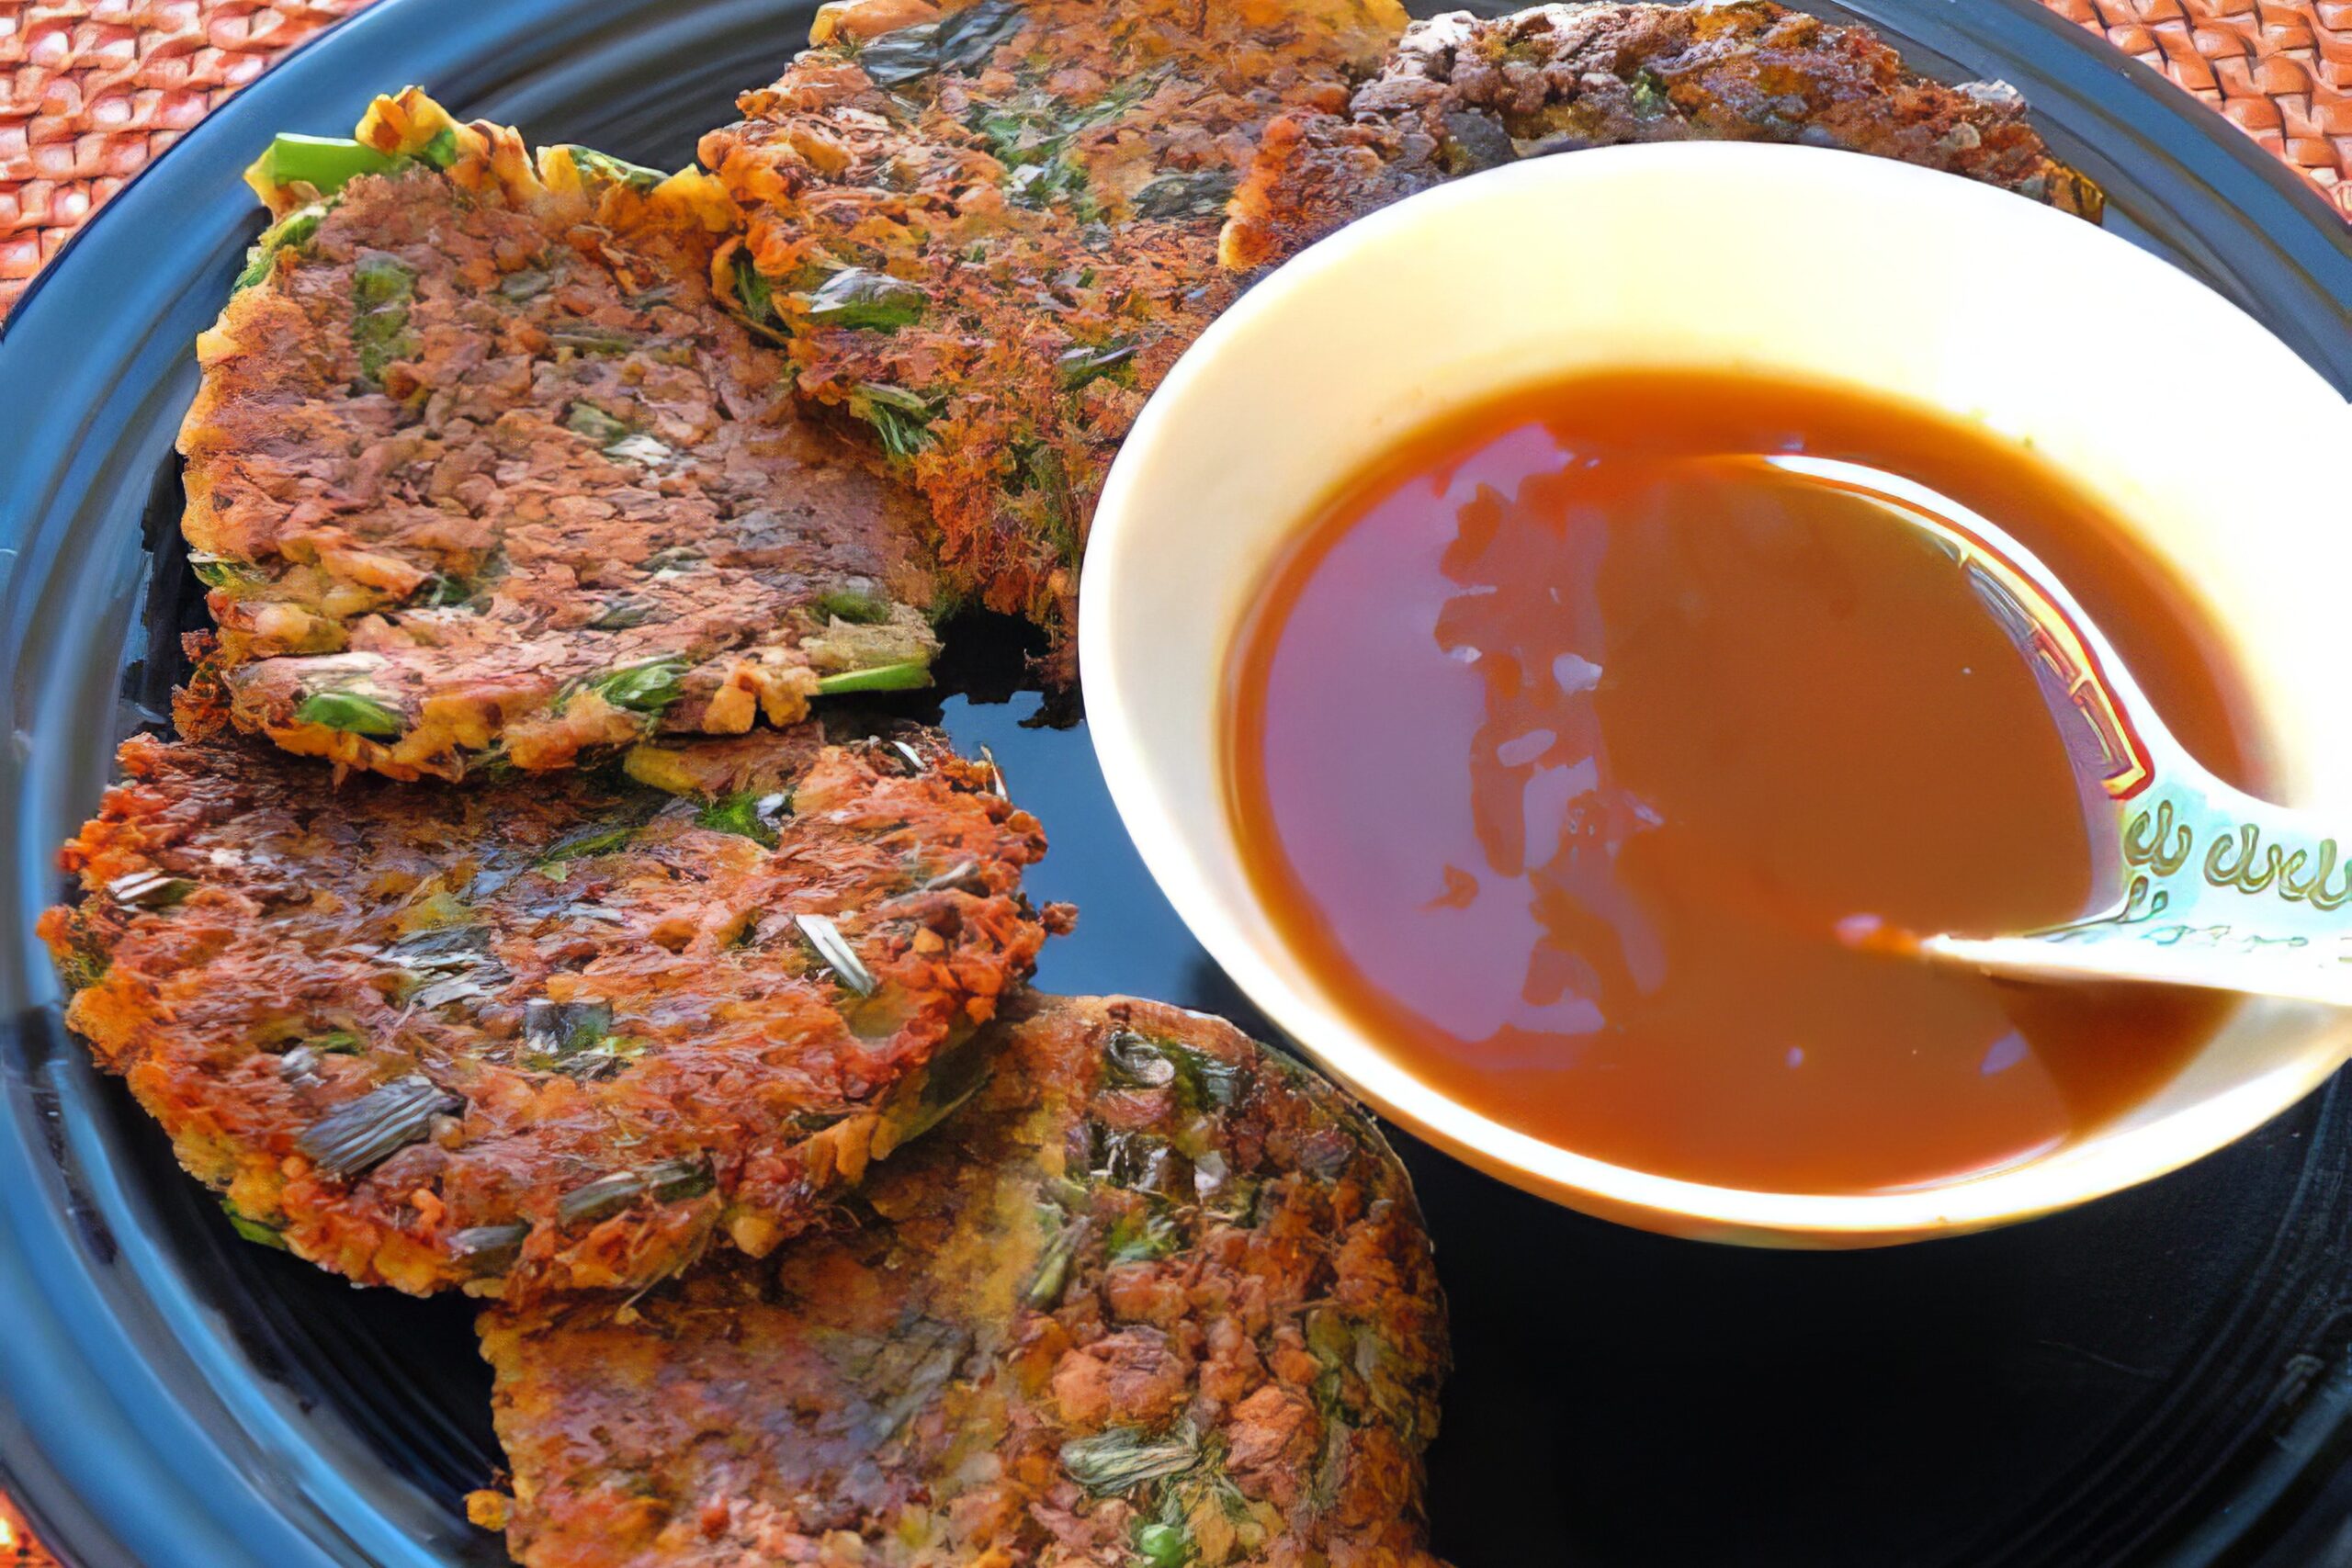
Homemade vegan duck sauce in a small bowl with a spoon

This homemade vegan duck sauce comes together in five minutes flat - sweet, tangy, and way better than the packets at the bottom of your takeout bag.

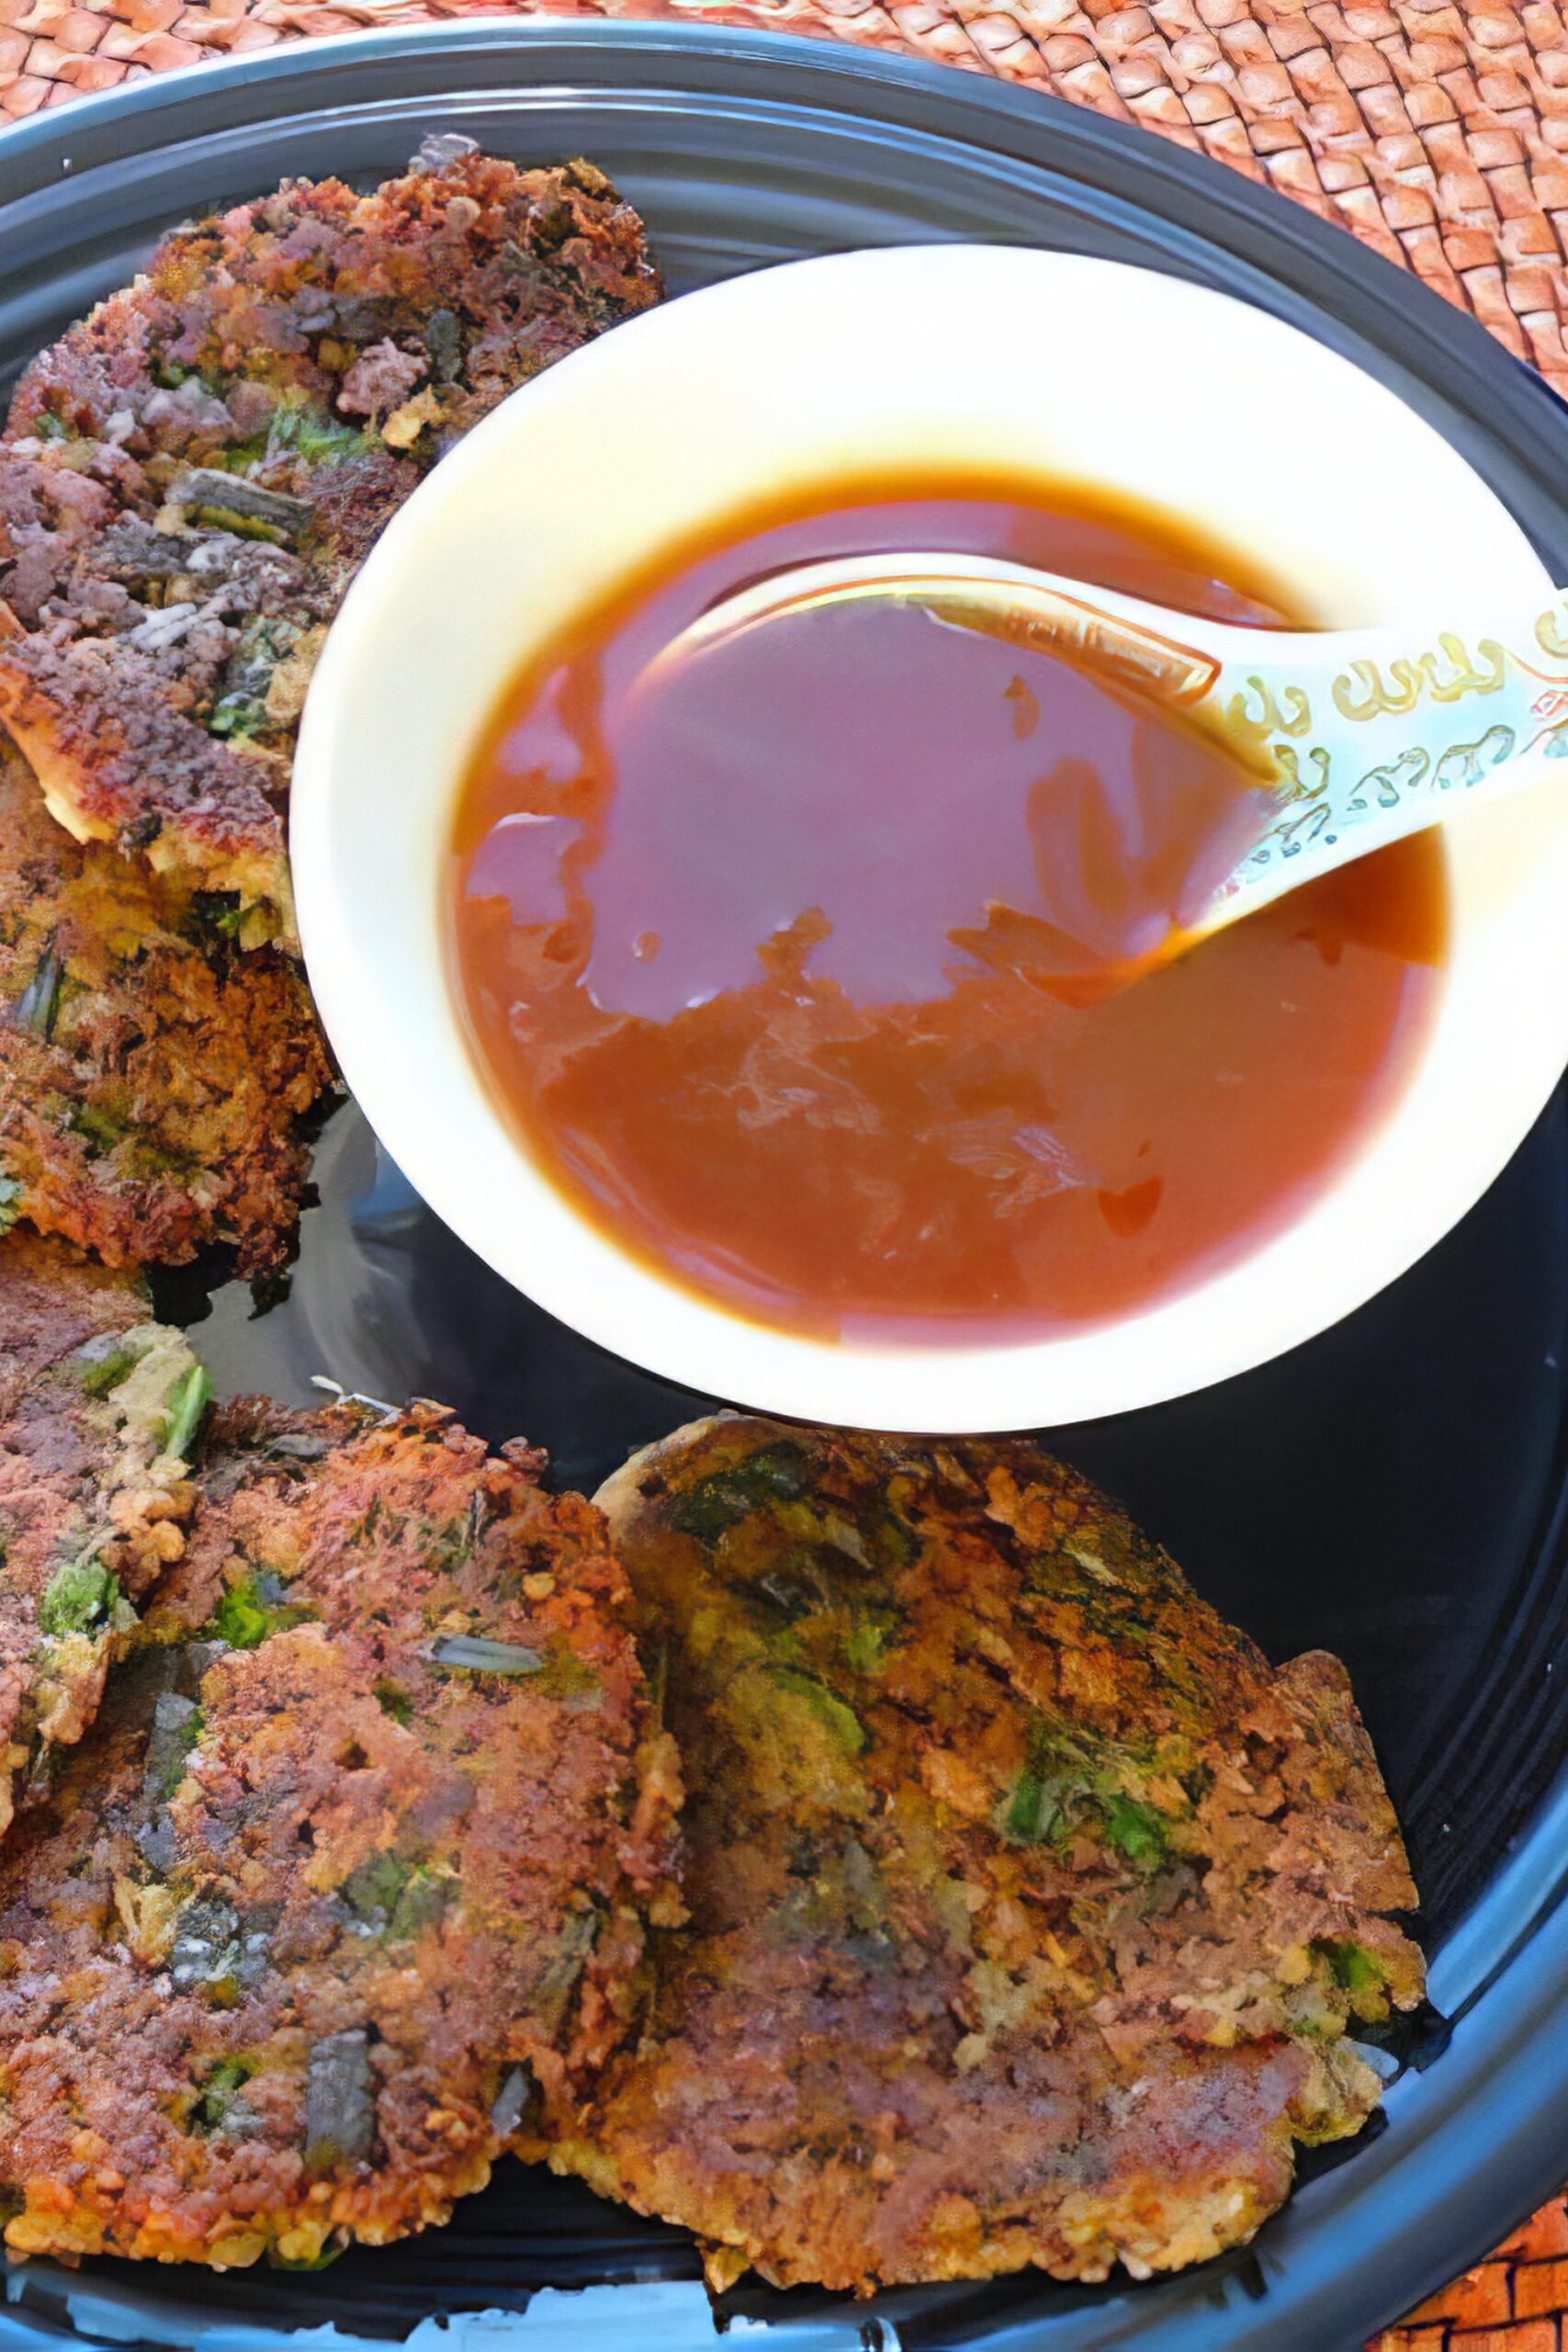
Vegan duck sauce in a small dish next to spring rolls

Key Ingredients & Substitutions

  • Apricot preserves. The fruity, jammy backbone of the sauce. Use all-fruit or low-sugar preserves for the cleanest flavor. Peach preserves work beautifully as a swap, and mango jam adds a fun tropical twist.
  • Orange juice. Freshly squeezed is best, but carton OJ is totally fine. You can also sub mango nectar for a sweeter, more tropical profile.
  • Soy sauce. Adds that salty, savory depth that keeps this sauce from being one-dimensional. Reduced-sodium soy sauce is a good call here since the sauce is already concentrated. Tamari works if you're keeping it gluten-free.
  • Rice vinegar. The tangy element that makes duck sauce taste like duck sauce. White vinegar is an easy substitute, though it's a little sharper - use slightly less if you go that route.
  • Fresh ginger. Freshly grated ginger gives the best zing, but jarred minced ginger is a perfectly acceptable shortcut. Ground ginger can work in a pinch - use about half the amount.

Helpful Tips

Stir, don't heat. This sauce comes together without any cooking at all - just whisk everything in a bowl until the preserves are fully incorporated. If your preserves are very stiff or chunky, microwave the jar for 15-20 seconds to loosen them up before measuring.

Blend for a silkier texture. If you prefer a completely smooth sauce without any fruit chunks, transfer everything to a small blender or use an immersion blender. A quick 10-second blitz is all it takes.

Taste as you go. Duck sauce is very easy to adjust. Want it sweeter? Add a tiny bit more preserves. Too sweet? A splash more rice vinegar will balance it right out. Prefer more savory depth? Another half teaspoon of soy sauce does the trick.

Make it spicy. A pinch of red pepper flakes, a dash of sriracha, or a small amount of chili garlic sauce stirred in at the end turns this into a sweet-heat dipping sauce that's hard to stop eating.

Double or triple the batch. This recipe makes about ½ cup, which is plenty for two to four people as a dipping sauce. Going to a party or feeding a crowd? It scales up perfectly - just multiply each ingredient and store the extra in a jar in the fridge.

Variations

  • Peach duck sauce. Swap the apricot preserves for peach preserves for a slightly milder, honeyed sweetness. This version pairs especially well with tofu spring rolls.
  • Mango duck sauce. Use mango jam or chutney in place of apricot, and sub mango nectar for the orange juice. It's a bolder, more tropical take.
  • Spicy ginger duck sauce. Double the ginger and add ½ teaspoon of chili garlic sauce. Great as a drizzle over noodle bowls or vegan pad thai.
  • Plum sauce variation. Replace the apricot preserves with plum jam and add a small clove of garlic, minced fine. This leans more traditional Chinese-American in flavor.
  • Low-sugar version. Use a no-sugar-added fruit spread and skip the orange juice in favor of a tablespoon of water. The sauce will be less sweet but still deeply flavorful.
  • Garlic duck sauce. Stir in one small garlic clove, finely grated, for a savory kick that makes this sauce even more addictive.

Serving Ideas

Duck sauce is the classic companion for anything crispy or doughy coming out of a hot pan or oven. Serve it alongside tofu spring rolls, steamed dumplings, or scallion pancakes - it's a natural fit for all of them. Even plain rice crackers or wonton chips benefit hugely from a little bowl of this on the side.

It also works beautifully as a glaze or drizzle. Brush it over baked tofu or tempeh in the last five minutes of cooking for a sweet, lacquered finish, or spoon it over a bowl of cauliflower fried rice in place of soy sauce. A thin drizzle over a veggie wrap adds a sweet-tangy layer that makes everything taste more pulled-together.

Storing & Freezing

Transfer any leftover duck sauce to a small airtight jar or container and refrigerate it. It keeps well for up to two weeks. Give it a quick stir before serving since the ingredients can settle slightly. If it thickens too much in the fridge, a tiny splash of orange juice stirred in will bring it right back.

Duck sauce freezes reasonably well - spoon it into an ice cube tray, freeze until solid, then transfer the cubes to a zip-close bag. They'll keep for up to three months. Thaw overnight in the fridge or for a few minutes at room temperature. The texture may be very slightly looser after freezing, but the flavor holds up well.

Homemade vegan duck sauce in a small bowl with a spoon

More Vegan Sauces & Condiments

If you loved this recipe, here are a few more you might enjoy:

  • Vegan Green Goddess Dressing
  • Easy Roasted Red Pepper Sauce
  • Vegan Cheese Sauce (No Nuts)
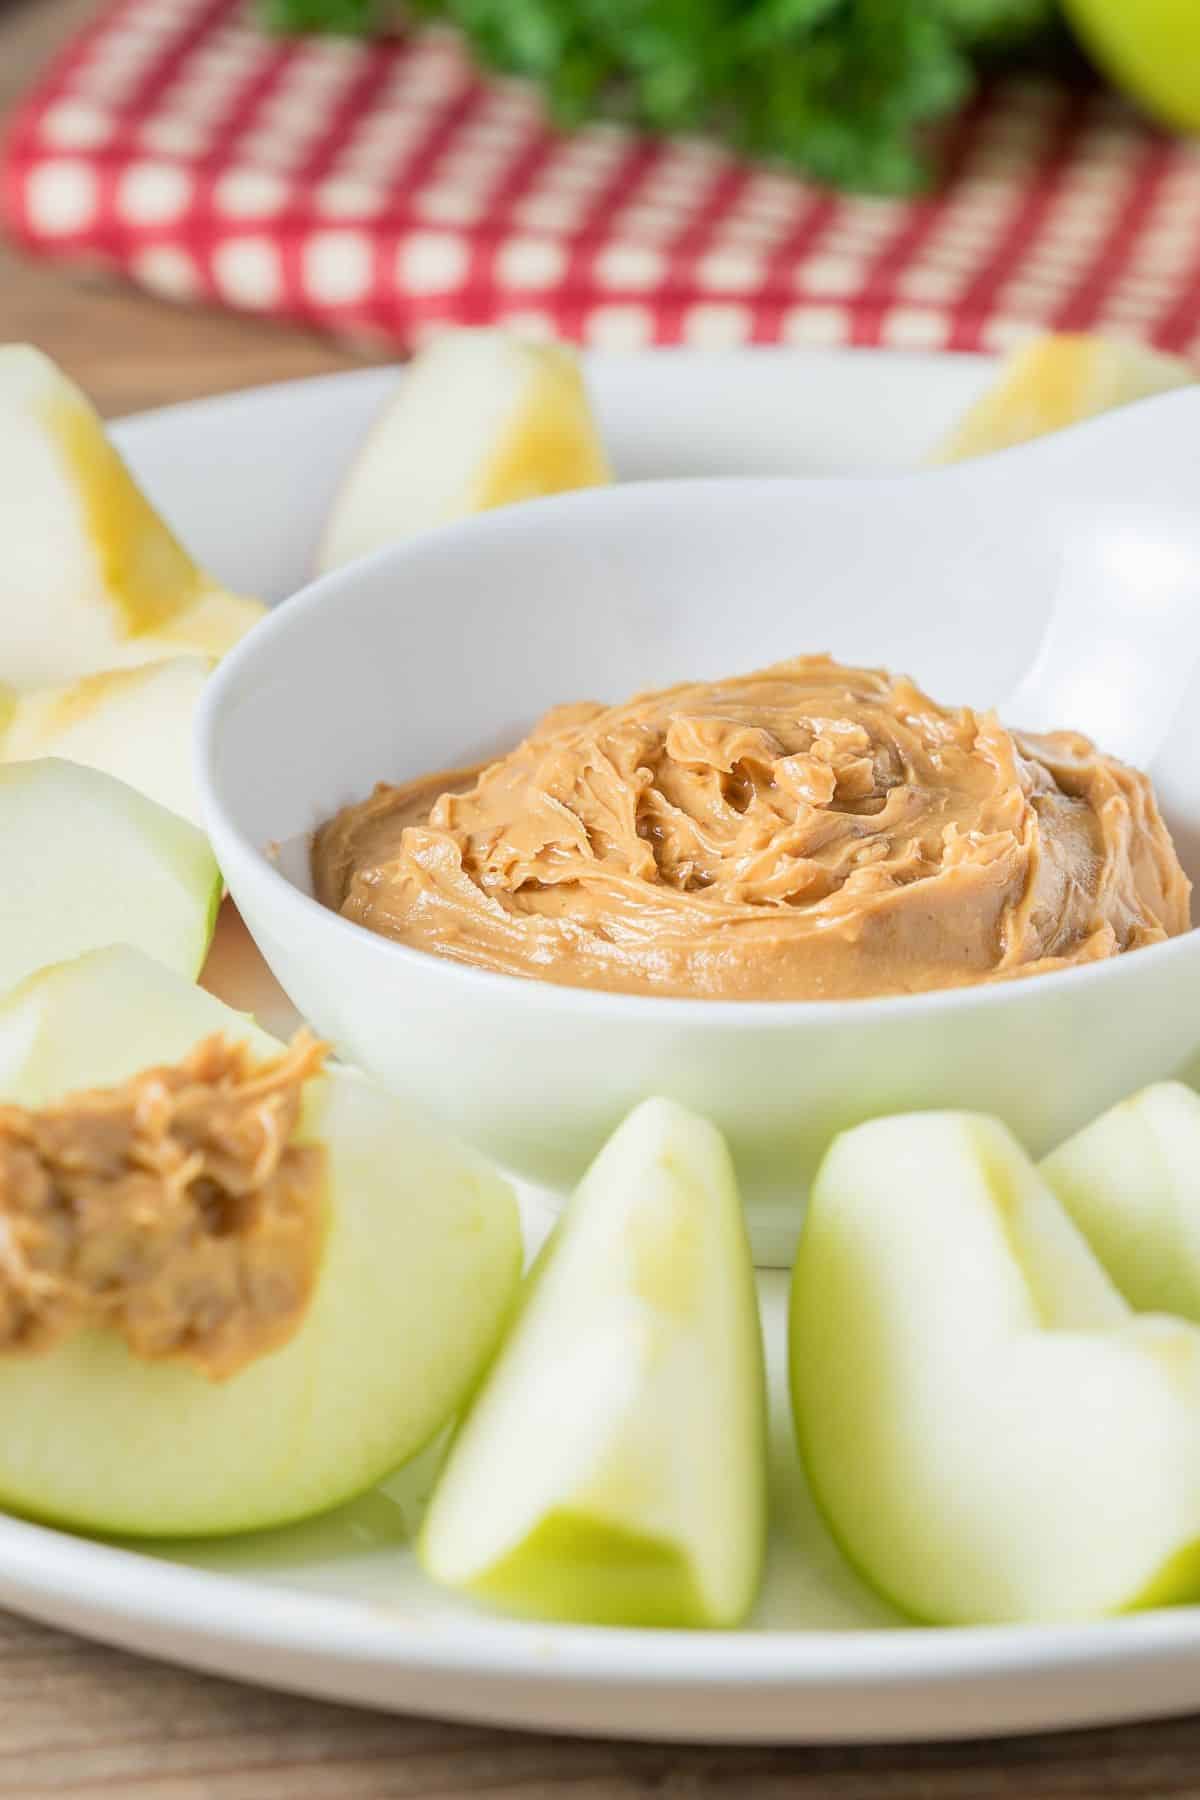
  • 5-Minute Vegan Peanut Butter Dip

Recipe

Easy vegan duck sauce in a bowl ready to serve

Easy Vegan Duck Sauce

4.79 from 19 votes
This easy homemade vegan duck sauce is sweet, tangy, and ready in five minutes. Made with apricot preserves, soy sauce, rice vinegar, and fresh ginger, it’s perfect for dipping spring rolls, dumplings, and scallion pancakes.
Print Pin Save Saved!
Prep Time: 5 minutes minutes
Total Time: 5 minutes minutes
Servings: 4 servings
Prevent your screen from going dark

Ingredients

  • ⅓ cup all-fruit apricot preserves or peach preserves
  • 2 tablespoons orange juice freshly squeezed or carton; or sub mango nectar
  • 1 tablespoon soy sauce reduced-sodium preferred; use tamari for gluten-free
  • 1 tablespoon rice vinegar or substitute white vinegar
  • 1 ½ teaspoons fresh ginger grated fresh or jarred minced ginger

Instructions

  • Add the apricot preserves, orange juice, soy sauce, rice vinegar, and ginger to a small bowl.
  • Stir everything together until the preserves are fully incorporated and the sauce is smooth. For a completely lump-free texture, blend briefly with an immersion blender.
  • Taste and adjust: add a splash more rice vinegar for tang, a little more soy sauce for savory depth, or a pinch of red pepper flakes for heat. Serve immediately or refrigerate in a sealed jar for up to 2 weeks.

Notes

Makes about ½ cup of sauce.

Nutrition (Estimate per Serving)

Calories: 24kcalCarbohydrates: 1gProtein: 1gFat: 0.1gSaturated Fat: 0.01gPolyunsaturated Fat: 0.01gMonounsaturated Fat: 0.01gSodium: 210mgPotassium: 22mgFiber: 0.1gSugar: 2gVitamin A: 34IUVitamin C: 5mgCalcium: 2mgIron: 0.3mg
Vegan-ize any recipe!Grab our free vegan cheat sheet, packed with my favorite easy substitutions to make any recipe vegan.

Vegan Gluten-Free Pancakes (made with almond flour!)

March 5, 2026 by Nicole @ VegKitchen 3 Comments

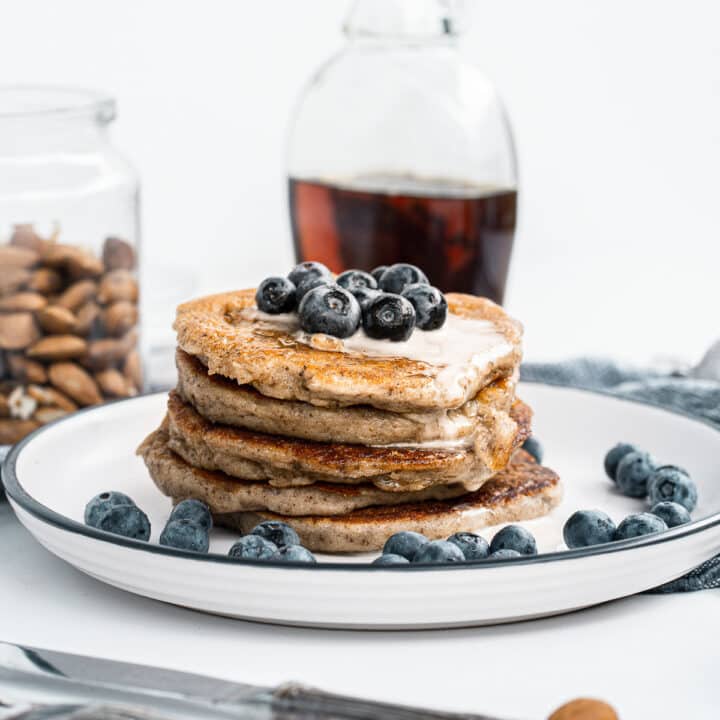
vegan almond flour pancakes

These almond flour pancakes are light, fluffy, and naturally vegan and gluten-free, with a deliciously nutty flavor. An easy vegan breakfast that's perfect with maple syrup, fresh fruit, or your favorite pancake toppings.

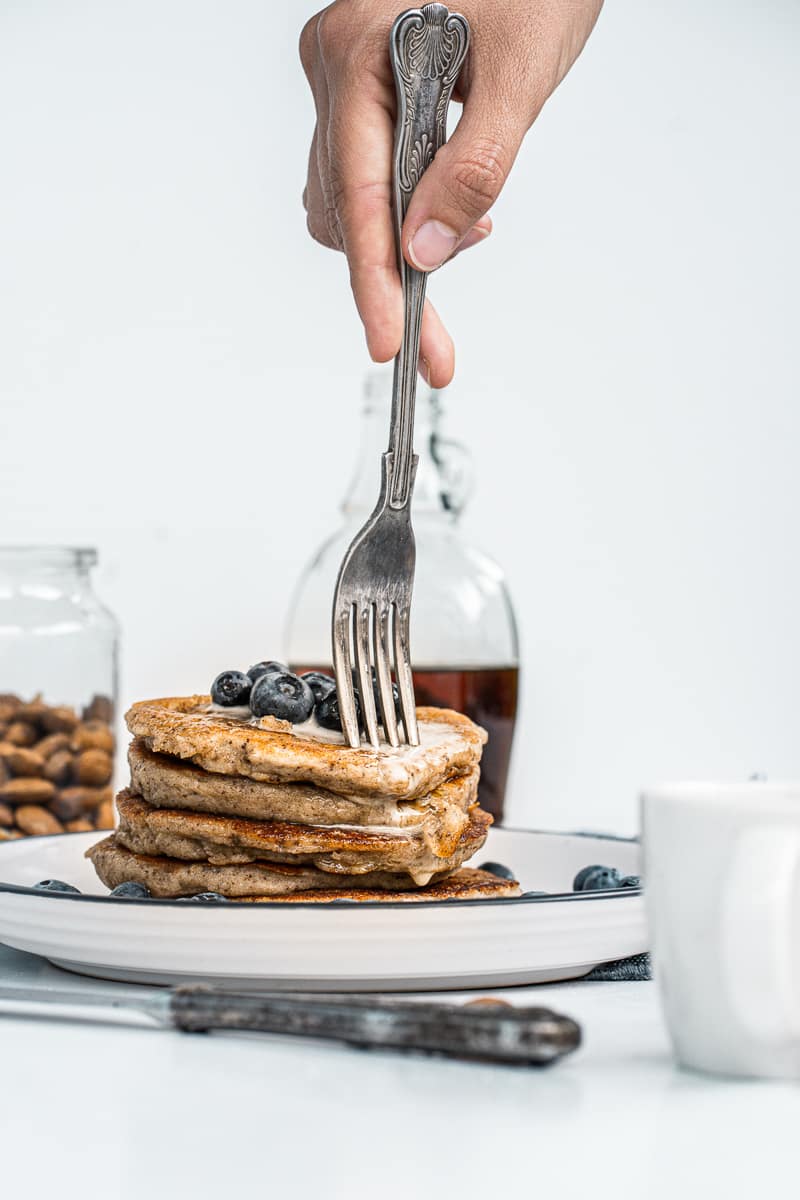
my fork digging into a atack of vegan gluten-free almond flour pancakes

If you're looking for pancakes that feel a little wholesome but still taste like a treat, these almond flour pancakes deliver in the best way. They're fluffy, lightly nutty, and naturally gluten-free, with a soft texture that's perfect for soaking up maple syrup.

I'll admit, I was skeptical the first time I made pancakes with almond flour. I've had my share of dense, crumbly "healthy" pancakes that were more disappointing than satisfying. But these? Total game changer.

These pancakes cook up tender with slightly crisp edges, and the flavor pairs beautifully with classic pancake toppings like berries, yogurt, or a generous drizzle of maple syrup.

This Almond Flour Pancake Recipe Is…

  • Naturally gluten-free
  • Freezer-friendly
  • Light, fluffy, and tender
  • Simple to make with a few ingredients
  • Perfect for weekend brunch

Drizzle on some syrup, dust with powdered sugar, or add on some fresh berries. No matter how you serve up these homemade vegan pancakes, they are a hit. 

And while you're here, don't forget to grab a copy of my free vegan cheat sheet. It's packed with all my favorite substitutions to vegan-ize any recipe!

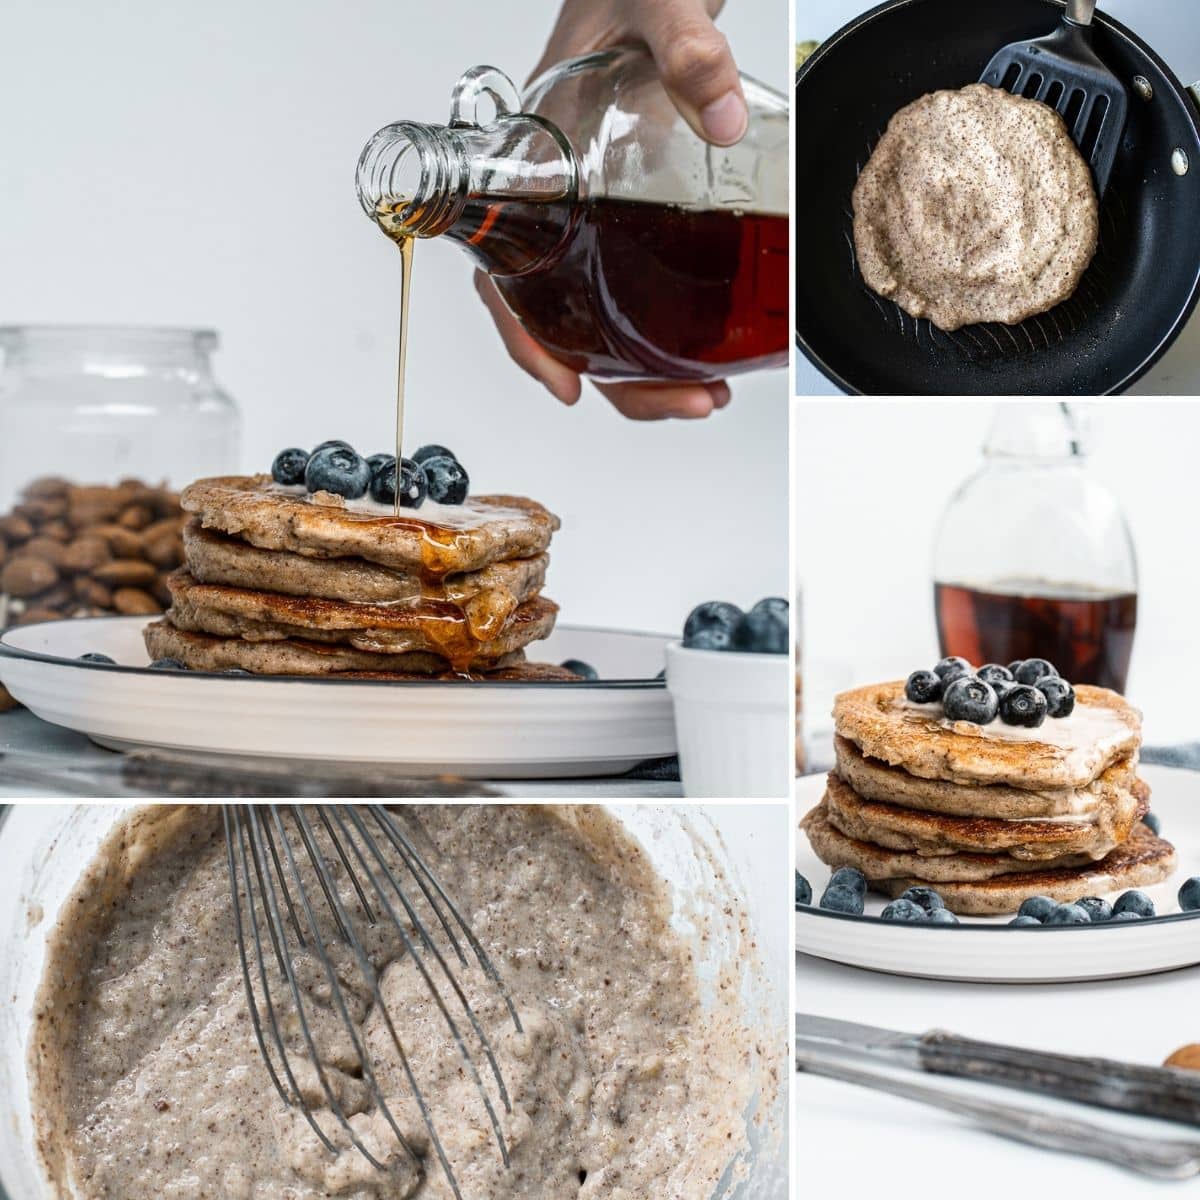
collage showing the vegan gluten-free pancakes being made and served

Helpful Tips

Use medium heat: The pancakes can brown very quickly, so cooking them over medium heat helps them cook evenly without scorching the outside.

Let the batter rest: Giving the batter a few minutes to sit before starting to scoop your pancakes helps it thicken slightly.

Grab a pancake flipper! Basically a really large spatula. For just a few bucks, I have found this to be a handy tool to keep in my kitchen.

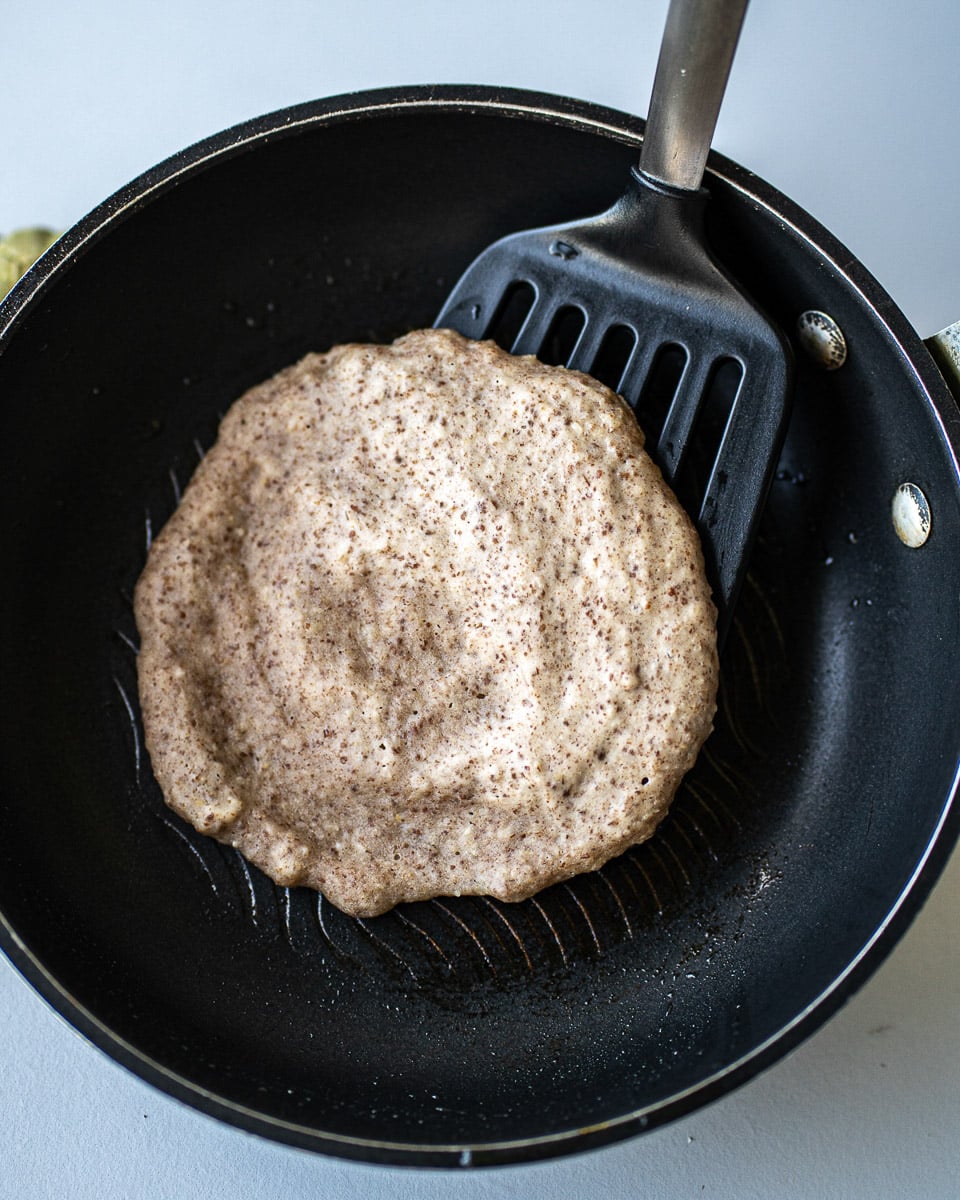
me flipping the almond flour pancake in a pan

Fun Variations

  • Berry pancakes: Fold some blueberries or chopped strawberries into the batter.
  • Banana almond pancakes: Mash a ripe banana into the batter for natural sweetness and extra moisture.
  • Chocolate chip pancakes: Add a handful of dairy-free chocolate chips for a breakfast that feels like dessert.
  • Cinnamon Spice pancakes: Mix in a pinch of cinnamon or nutmeg for warm, cozy flavor.
  • Almond pancakes: Swap the vanilla extract for almond extract, to go all-in on the almond flavor.
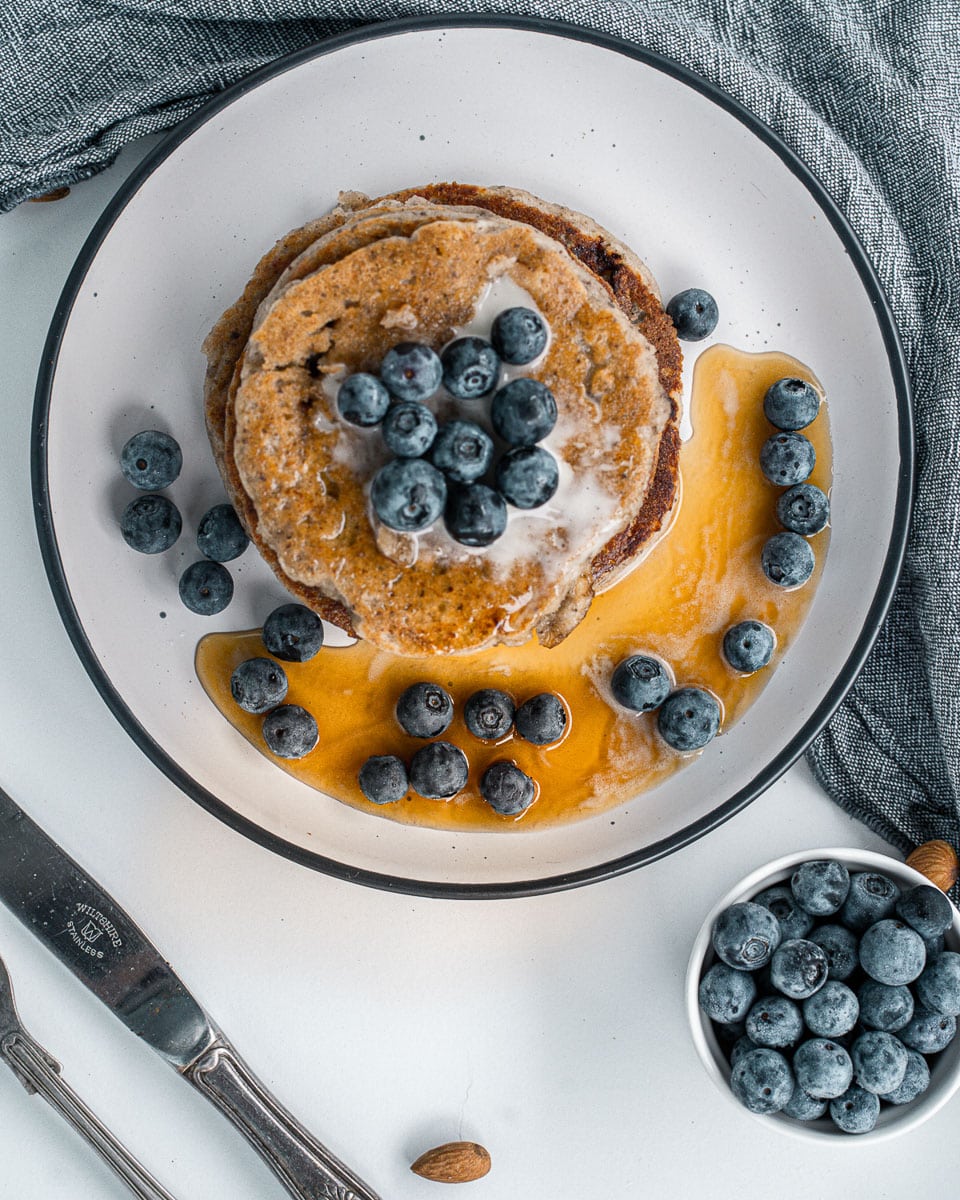
vegan almond flour pancakes on a plate with syrup and blueberries

Serving Ideas

These almond flour pancakes are delicious straight off the skillet, but the toppings are where the fun really begins.

  • Classic maple syrup and vegan butter for a simple, traditional pancake stack.
  • Fresh berries and coconut yogurt for a bright, brunch-worthy plate.
  • Nut butter drizzle like almond or peanut butter for extra richness. My personal favorite is this homemade vegan nutella! or a drizzle of vegan apple honey for a naturally sweet finish.
  • Sliced bananas and chopped nuts for added texture and flavor.
  • A dusting of powdered sugar when you want them to feel a little extra special.

If you love quick, single-serve vegan treats, you might also enjoy our vegan cinnamon roll in a mug - a warm, gooey cinnamon bun ready in minutes.

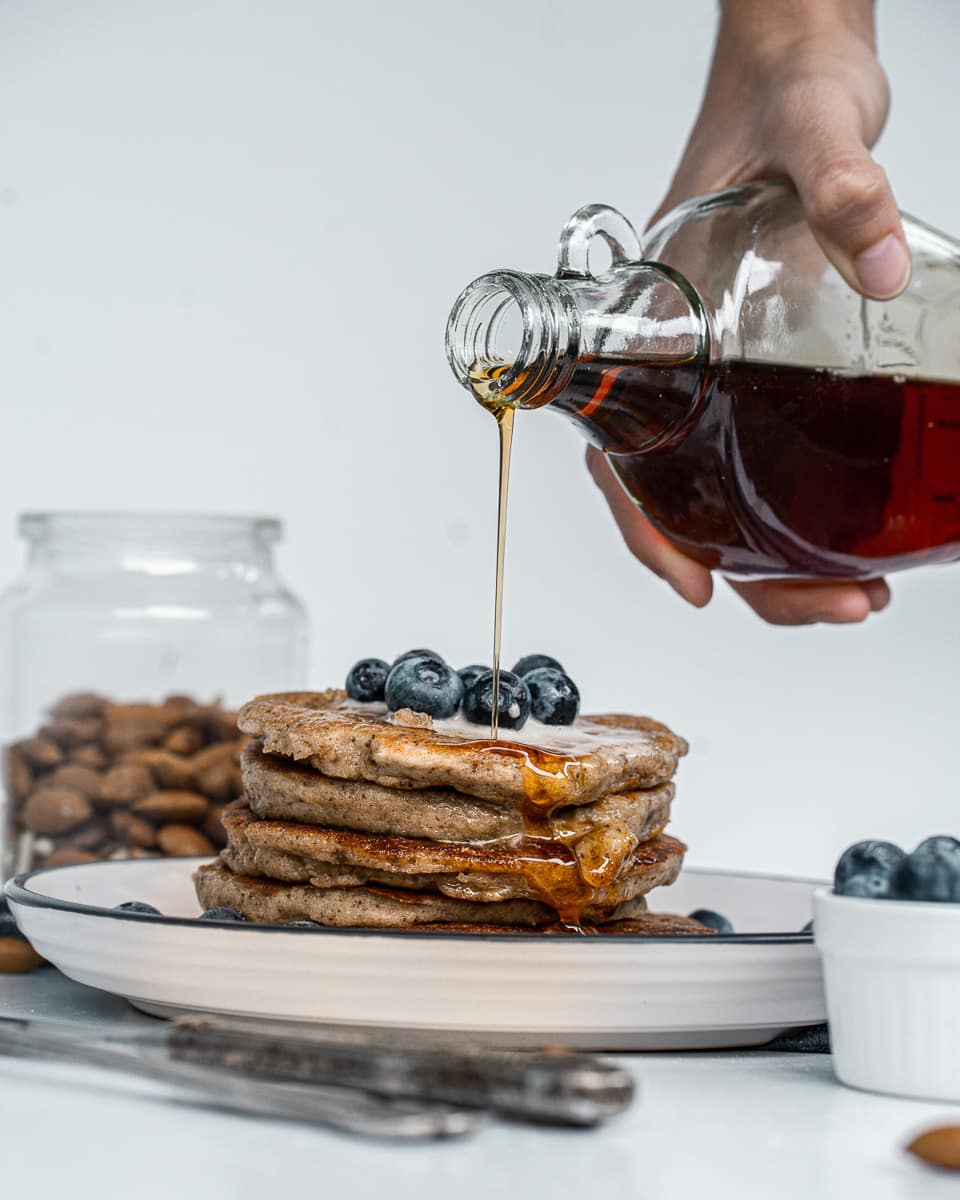
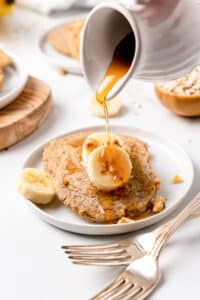
pouring syrup over vegan almond flour pancakes, which are topped with blueberries

Recipe FAQs

What does flaxseed do in vegan pancakes? 

The ground flaxseed is used to create what we call "flax eggs". Adding water to the flaxseed creates a egg-like liquid that makes a great egg replacement in a traditional pancake recipe. (For more easy vegan substitutions, grab my free vegan cheat sheet!)

How do I store leftover pancakes? 

If you do not eat all the pancakes, go ahead and refrigerate them. They will last 2-3 days in the fridge. You can eat these refrigerated pancakes cold or warm them up in the microwave or toaster oven.

Pro Tip: If you choose to reheat using the microwave, place a small cup of water in the microwave along with the pancakes. This will help keep the pancakes moist!

Can you freeze almond flour pancakes? 

Go right ahead and freeze any vegan pancakes you don't want to eat right away. Just lay out the pancakes in a single layer and flash freeze them. Once the pancakes are frozen, transfer them to an airtight container or freezer bag. Then freeze the for up to 3 months. 

More Vegan Breakfast Recipes

If you love a big breakfast spread, be sure to check out my new Vegan Brunch Book. It's loaded with all my favorite brunch-worthy vegan recipes!

And for more creative vegan breakfast ideas, check out these recipes:

  • Vegan Blueberry Pancakes
  • 35+ Healthy Vegan Breakfast Recipes
  • 20 Savory Vegan Breakfast Ideas
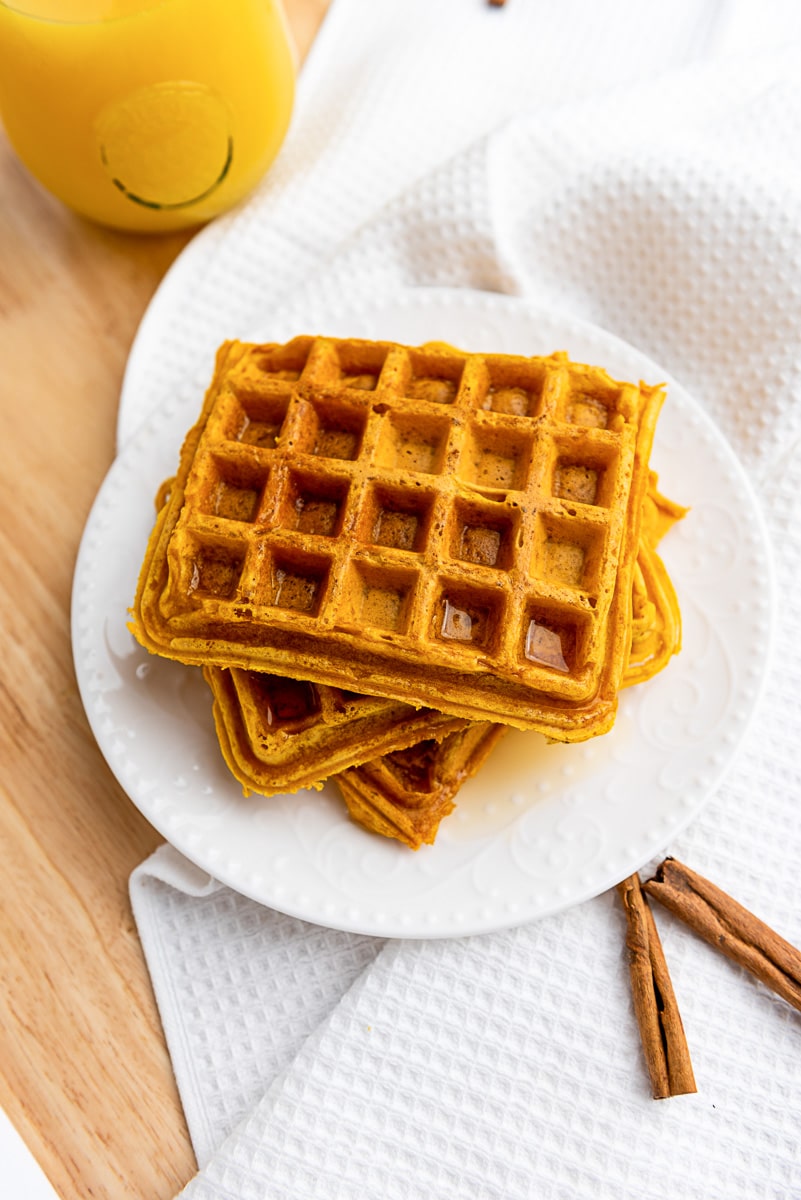
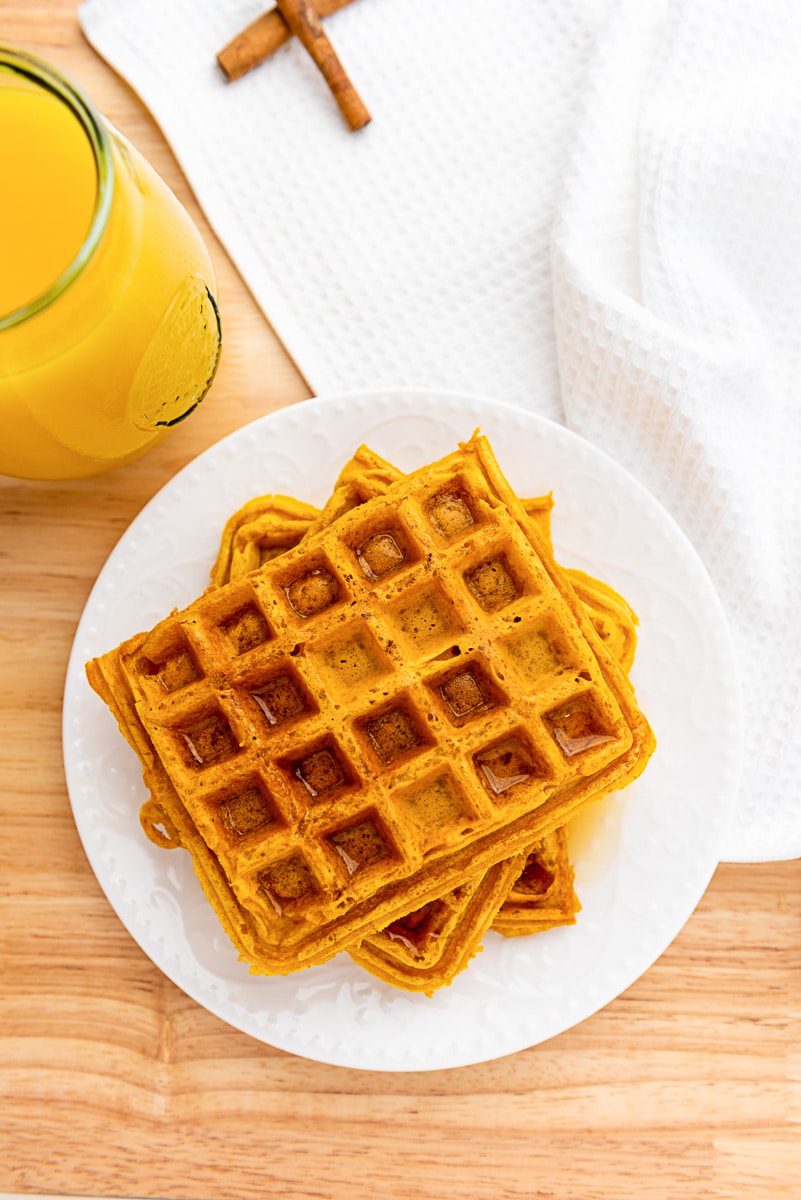
  • Vegan Pumpkin Waffles

Recipe

vegan almond flour pancakes

Vegan Almond Flour Pancakes

4.64 from 11 votes
These almond flour pancakes are light, fluffy, and naturally vegan and gluten-free, with a deliciously nutty flavor. An easy vegan breakfast that's perfect with maple syrup, fresh fruit, or your favorite pancake toppings.
Print Pin Save Saved!
Prep Time: 10 minutes minutes
Cook Time: 5 minutes minutes
Total Time: 15 minutes minutes
Servings: 6 pancakes
Prevent your screen from going dark

Ingredients

  • 1 cup almond flour
  • ½ cup gluten-free baking flour
  • 1 teaspoon vanilla extract
  • 1 teaspoon baking powder
  • ¼ teaspoon salt
  • 1 banana mashed, overripe is best
  • ½ cup almond milk add additional up to ¾ cup, as needed
  • 1 tablespoon ground flaxseed
  • 3 tablespoon warm water
  • ½ teaspoon ground cinnamon optional
  • fruit and maple syrup optional toppings
US Customary - Metric

Instructions

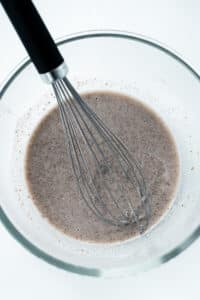
  • In a small bowl, whisk together the ground flaxseed and warm water. Let it sit for five minutes to thicken before proceeding. This is your "flax egg".
  • In a medium bowl mix vanilla extract, almond milk, and the "flax egg". Stir well to combine.
    vegan almond flour pancakes
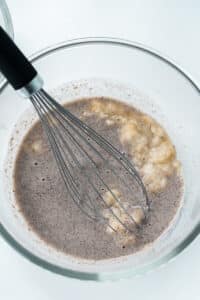
  • Add mashed banana and stir again until the batter is smooth.
    vegan almond flour pancakes
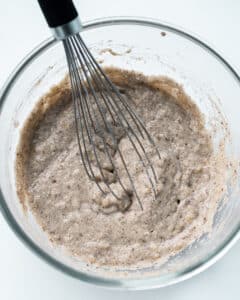
  • Add both almond and gluten-free flour, ground cinnamon, and salt. Mix until combined. Batter should be thicker now.
    vegan almond flour pancakes
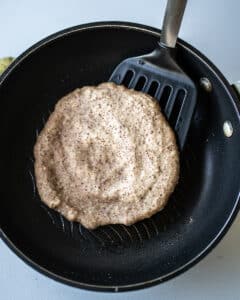
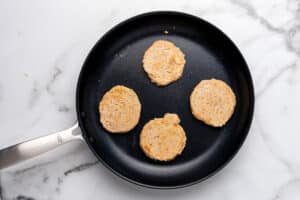
  • Heat a thin layer of oil in a nonstick skillet. Then pour in 2 tablespoon of the batter for each pancake. Cook on low heat about 2-3 minutes for each side.
    vegan almond flour pancakes
  • Serve immediately. Garnish with maple syrup, fruits, or nuts.
    vegan almond flour pancakes

Nutrition (Estimate per Serving)

Calories: 168kcalCarbohydrates: 17gProtein: 6gFat: 10gSaturated Fat: 1gPolyunsaturated Fat: 1gMonounsaturated Fat: 0.3gSodium: 196mgPotassium: 82mgFiber: 4gSugar: 4gVitamin A: 13IUVitamin C: 2mgCalcium: 116mgIron: 1mg
Vegan-ize any recipe!Grab our free vegan cheat sheet, packed with my favorite easy substitutions to make any recipe vegan.

Pumpkin Chocolate Chip Muffins

September 24, 2025 by Nicole @ VegKitchen 3 Comments

vegan pumpkin chocolate chip muffins

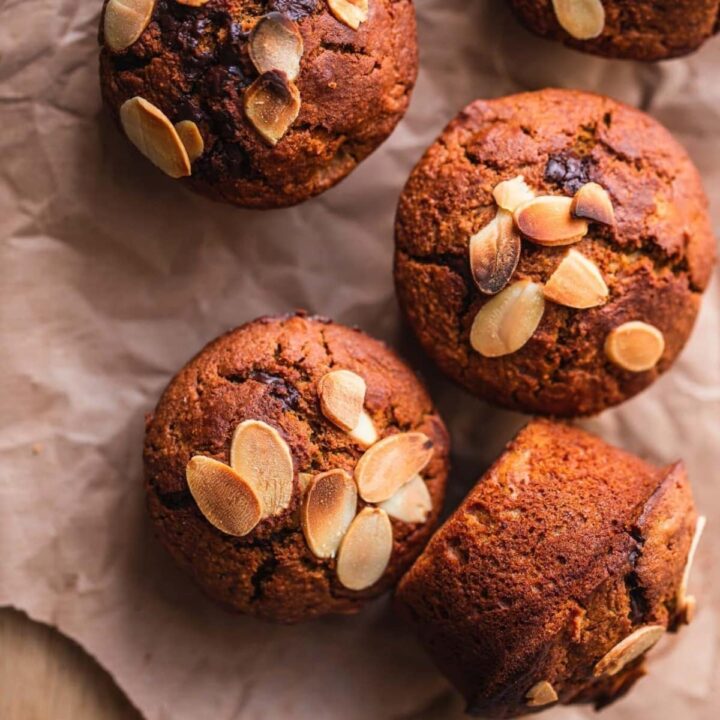
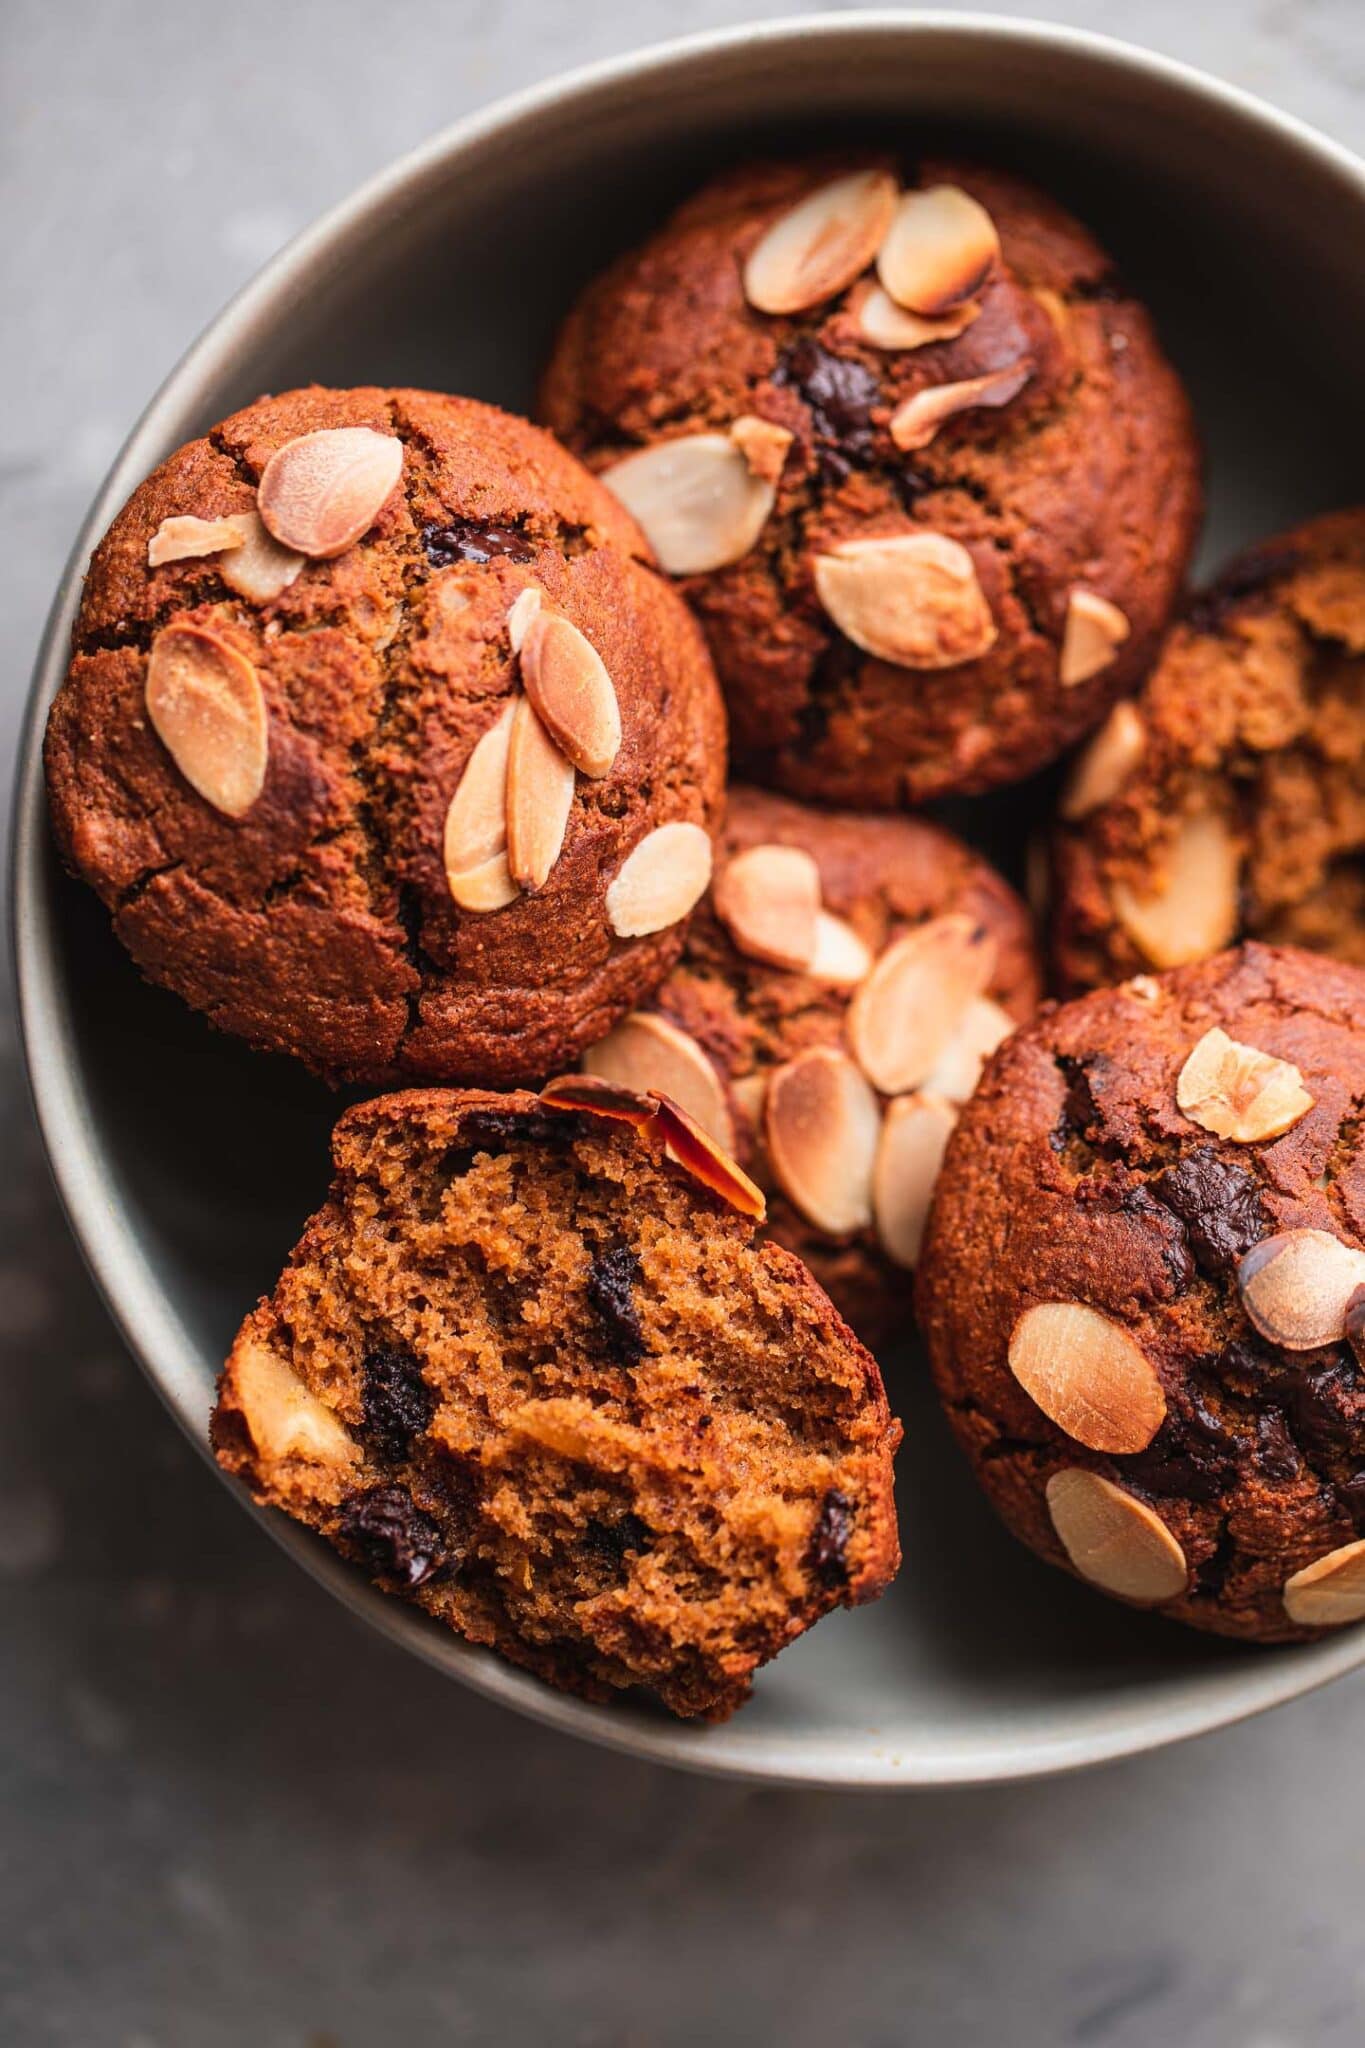
These yummy vegan pumpkin chocolate chip muffins are loaded with healthy ingredients like fresh pumpkin puree, oat flour, and flaked almonds. Plus, this one bowl recipe takes just 30 minutes to make!

vegan pumpkin chocolate chip muffins in a bowl

I'm obsessed with putting pumpkin in everything in the Fall, but especially muffins and cookies. So it should be no surprise to see these pumpkin muffins hit the blog!

These vegan muffins are ridiculously easy. You need just one bowl, a muffin tray and an oven to make them. And even better yet - they're the healthiest pumpkin muffins you'll ever find too!

These vegan pumpkin muffins are:

  • Vegan.
  • Gluten-Free.
  • Refined sugar free.
  • Packed with fiber and other nutrients.
  • Healthy!
  • And totally delicious.

As a chocolate lover, I added dark chocolate chips to mine. But I've also tried them with blueberries, which also made a great addition.

The almonds add a nice crunch, while the peanut butter gives them a great creamy texture. They taste so indulgent, you can even get away with serving them for dessert.

Making the Vegan Pumpkin Muffins (Step by Step)

It really is unbelievably easy. First, preheat the oven to 350 degrees Fahrenheit / 180 degrees Celsius, and lightly grease a muffin tray.

vegan pumpkin chocolate chip muffins

If you want to keep this recipe completely oil-free and still prevent sticking, you can use silicone muffin cups instead.

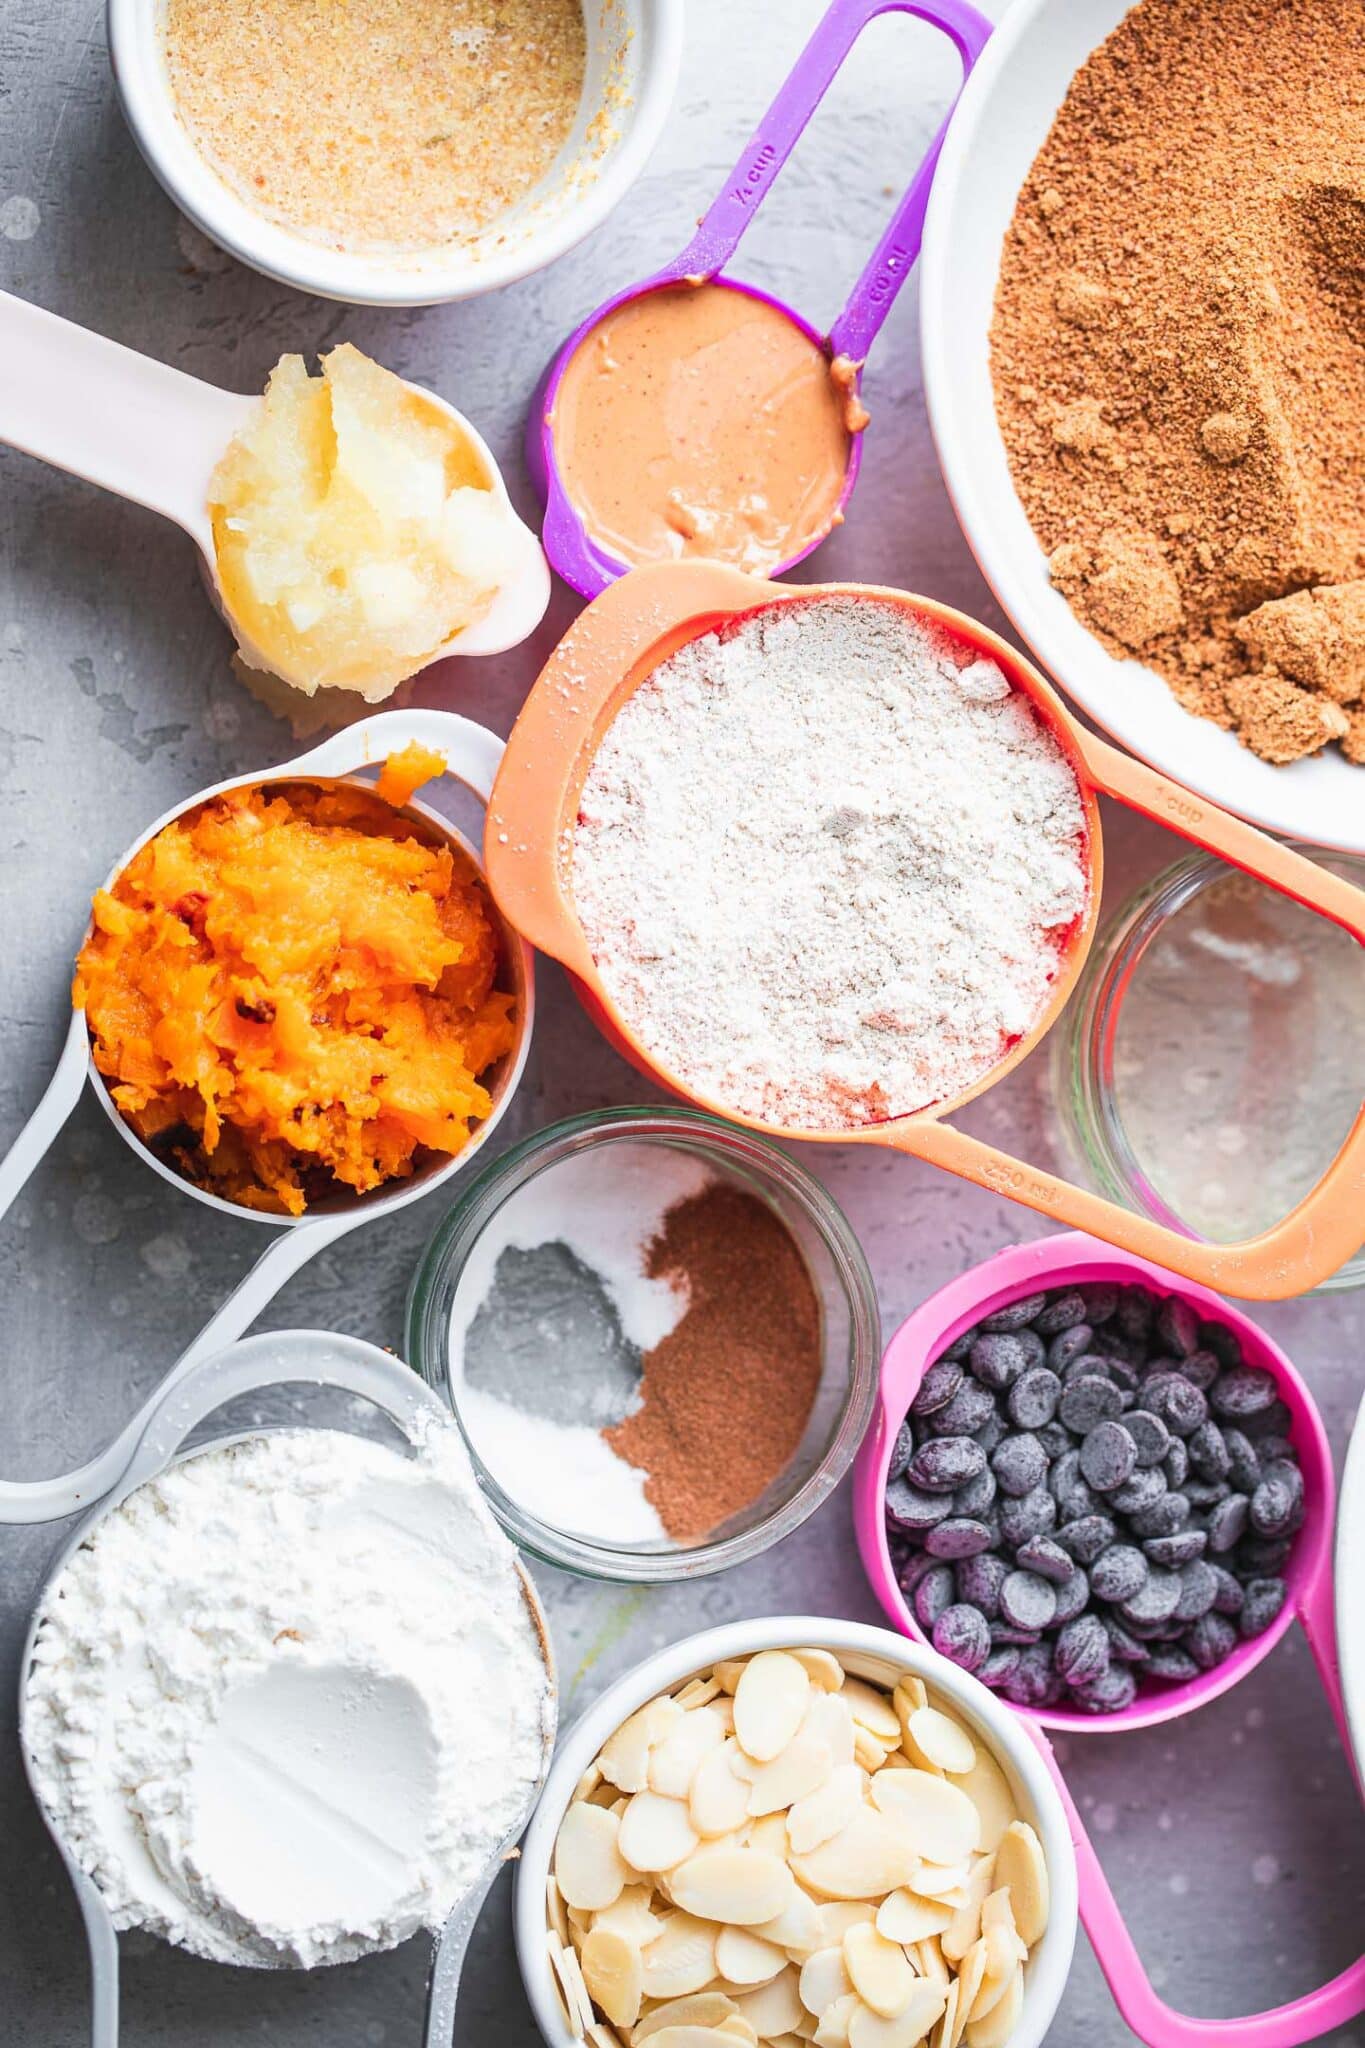
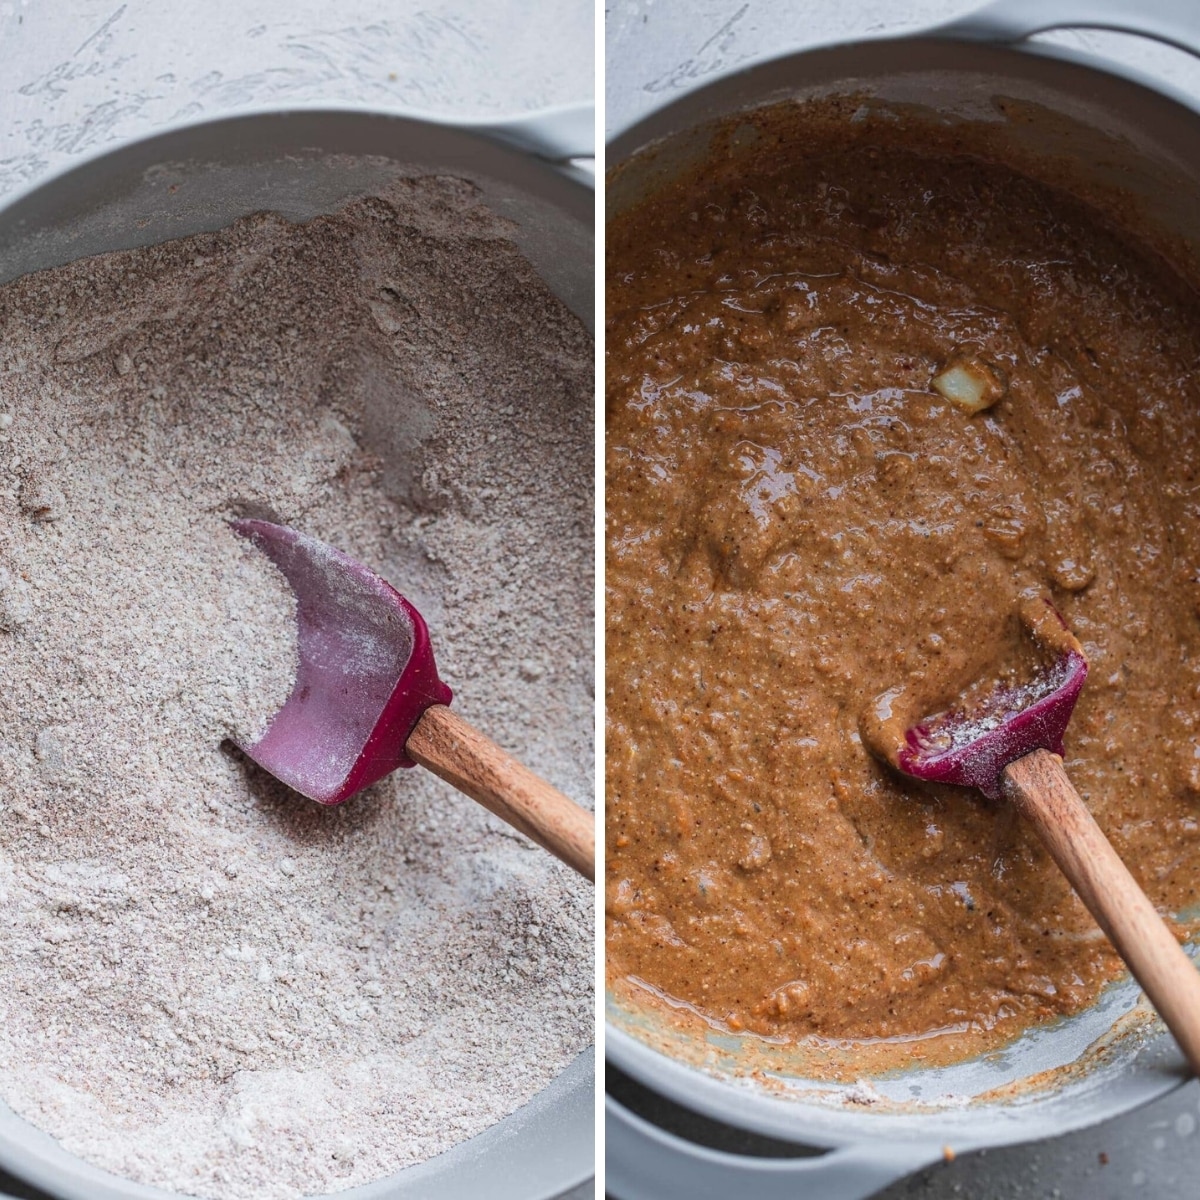
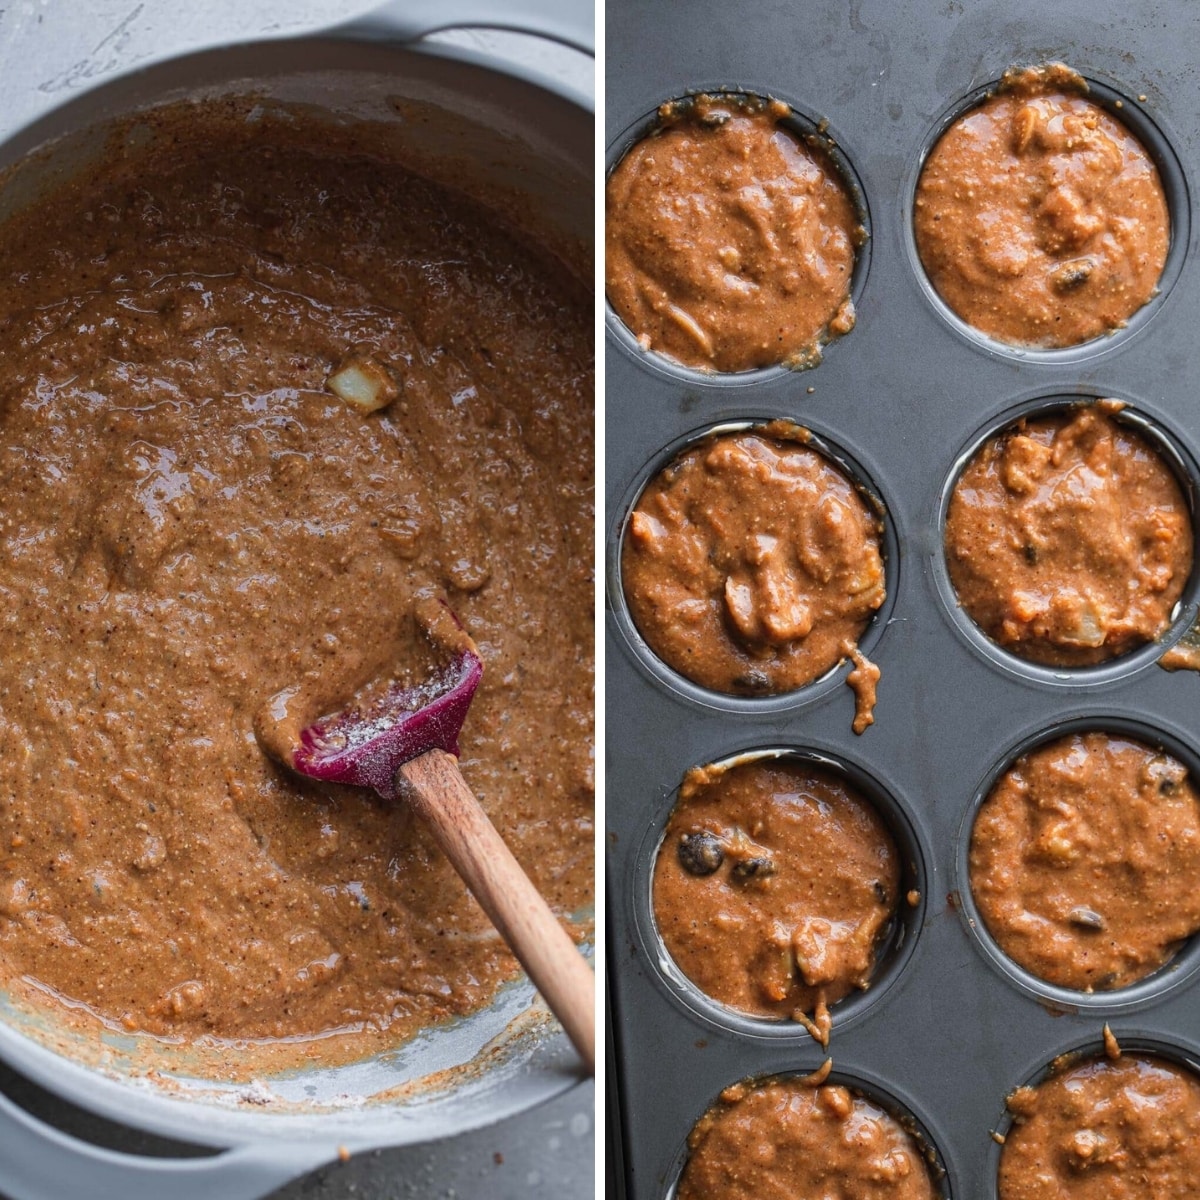
Add the dry ingredients (gluten-free oat flour, gluten-free self-raising flour, baking soda, cinnamon and coconut sugar) to a large mixing bowl. Mix together well.

mixing the batter for the vegan pumpkin chocolate chip muffins

Now add the plant based milk, apple cider vinegar, pumpkin purée, flax eggs, peanut butter and apple purée.

Mix together once again, then finally mix in the dairy-free chocolate chips and flaked almonds.

vegan pumpkin chocolate chip muffin batter in the muffin tin

Divide the batter evenly across the muffin tray, filling the divisions almost all the way to the top (or around ¾, if using muffin cases).

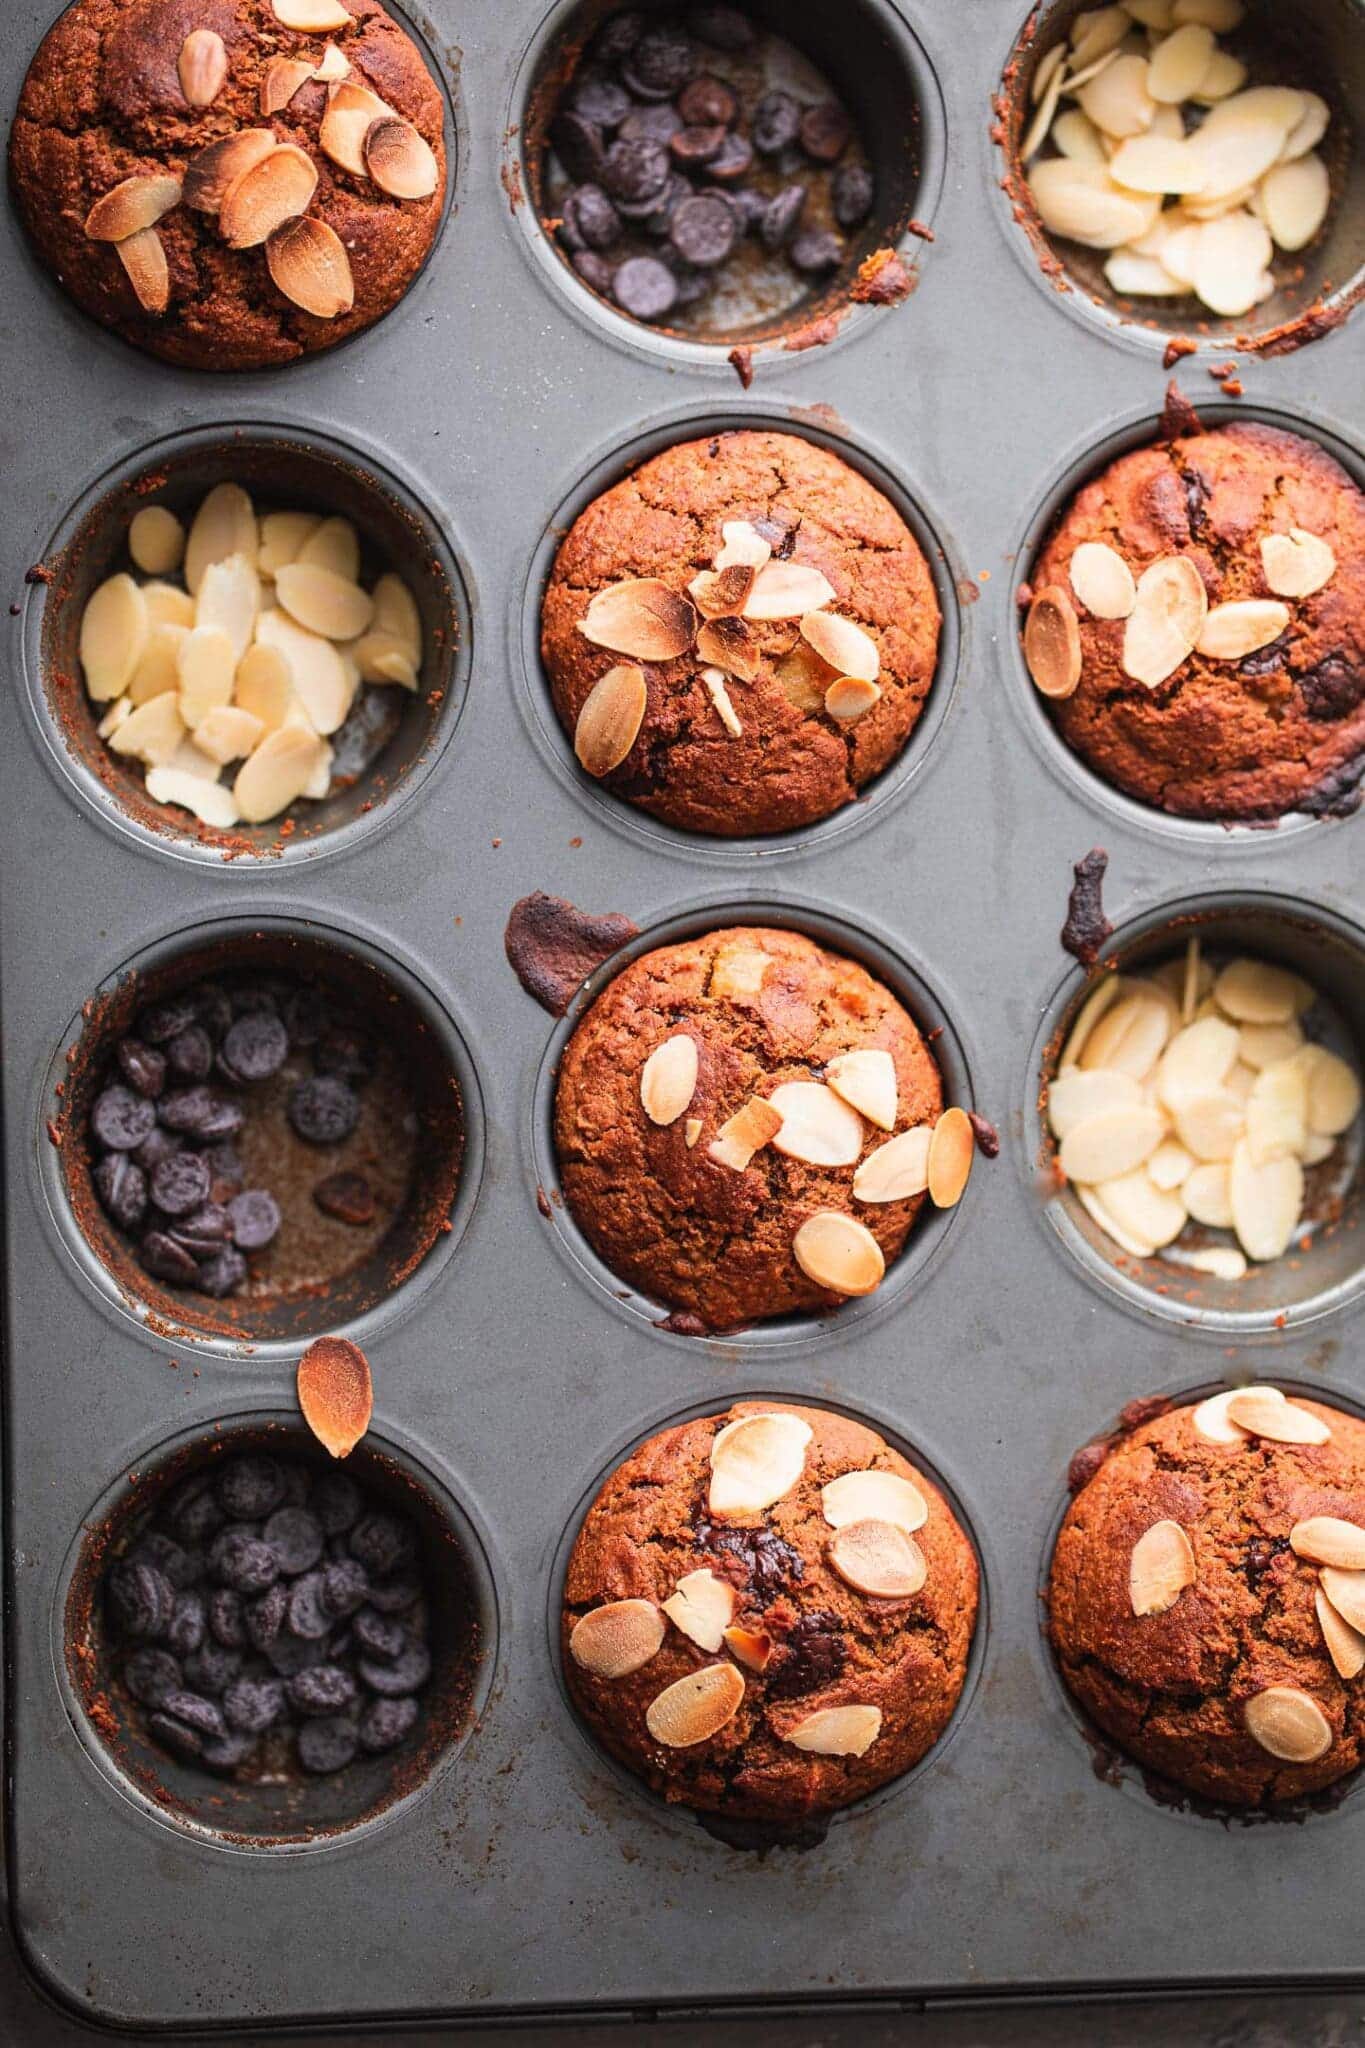
Bake in the preheated oven for around 18-20 minutes, until golden brown and a toothpick comes out clean from the centre.

Allow the pumpkin muffins to cool for around 10 minutes before removing from the muffin tray and serving.

Homemade Pumpkin Puree

You can, of course, use canned pumpkin for this recipe. But in an effort to keep things as healthy and natural as possible, I do like to make my own.

Simply peel and chop a sweet pumpkin variety, spread across a sheet of parchment paper on a baking tray and bake at 400 degrees F for 20-25 minutes, until soft and golden brown.

You can then mash the pumpkin with a potato masher, or add it to a blender or food processor to make pumpkin purée.

Storing and Freezing the Muffins

You can keep these pumpkin muffins in the fridge, covered or in an airtight container, for 5-6 days.

They are also freezer-friendly. Store them in a freezer-friendly container for up to around 2 months, leaving to thaw fully in the fridge or on the counter before serving. For a festive celebration cake, our vegan funfetti cake is another great option. For a no-bake pumpkin snack, try our pumpkin protein balls. If you love pumpkin baked treats, our vegan pumpkin waffles are another cozy fall favorite worth trying.

Tips & Substitutions

If you are not using self-raising flour, add ½ teaspoon more baking soda.

The peanut butter can be replaced with any other nut or seed butter of your choice. Alternatively, you can take it out and replace with an equal amount of apple sauce.

Feel free to replace the flaked almonds with any other nuts or seeds of your choice. For instance, I love adding pecans and/or pumpkin seeds to muffins.

Fresh berries also make a great addition.

Do not overmix the batter because if you do, the texture won't be as fluffy.

Make sure not to leave them in the oven for too long as they can burn quite easily. It's best to stick more to the 18-minute mark, as they do firm up a bit more while cooling.

vegan pumpkin chocolate chip muffins in a muffin tray

More Recipes to Try

If you love these vegan pumpkin muffins, be sure to try these other delicious treats.

Also worth trying: our pumpkin seed butter.

  • Vegan Blueberry Muffins
  • Healthy Carrot Muffins
  • Pumpkin Protein Balls
  • Vegan Pumpkin Pie

Recipe

vegan pumpkin chocolate chip muffins

Vegan Pumpkin Chocolate Chip Muffins

5 from 1 vote
These fluffy vegan muffins are packed with pumpkin flavor, crunchy pecans, and sweet dark chocolate chips. Yum!
Print Pin Save Saved!
Prep Time: 10 minutes minutes
Cook Time: 20 minutes minutes
Total Time: 30 minutes minutes
Servings: 12 muffins
Prevent your screen from going dark

Equipment

  • muffin pan

Ingredients

  • 1 cup oat flour gluten-free if desired
  • 1 cup self raising flour gluten-free if desired
  • 1 teaspoon baking soda
  • 1 teaspoon ground cinnamon
  • 1 ½ cups coconut sugar
  • 1 cup plant based milk
  • 1 tablespoon apple cider vinegar
  • ⅔ cup pumpkin puree
  • 2 tablespoon ground flaxseed
  • ¼ cup water
  • ¼ cup peanut butter creamy
  • ¼ cup apple sauce
  • ½ cup vegan chocolate chips
  • ⅓ cup sliced almonds plus extra for garnish

Instructions

  • Make the "flax eggs", which will be our egg substitute. In a small bowl, whisk together the ground flaxseed and water. Set aside for 10-15 minutes to thicken.
  • Preheat the oven to 350 degrees Fahrenheit (180 degrees Celsius ) and lightly grease a muffin tray.
  • Add the oat flour, self-raising flour, baking soda, cinnamon and coconut sugar to a large mixing bowl. Mix together well.
  • Now add plant based milk, apple cider vinegar, pumpkin purée, flax eggs, peanut butter and apple sauce. Mix together once again, then finally fold in the dairy-free chocolate chips and flaked almonds.
  • Divide the batter evenly across the muffin tray, filling the divisions almost all the way to the top (or around ¾, if using muffin liners).
  • Bake in the preheated oven for around 18-20 minutes, until golden brown and a toothpick inserted comes out clean from the center. (You can optionally sprinkle some extra flaked almonds on top of the muffins in the last 5 minutes of baking.)
  • Allow to cool for around 10 minutes before removing from the muffin tray and serving.

Notes

If you want to keep this recipe completely oil-free and still prevent sticking, you can use muffin cases instead.
If not using self-raising flour, add ½ teaspoon more baking soda.
These pumpkin muffins keep in the fridge, covered or in an airtight container, for 5-6 days. You can also freeze them in a freezer-friendly container for around 2 months.

Nutrition (Estimate per Serving)

Calories: 244kcalCarbohydrates: 40gProtein: 5gFat: 8gSaturated Fat: 2gPolyunsaturated Fat: 2gMonounsaturated Fat: 3gTrans Fat: 0.001gSodium: 184mgPotassium: 139mgFiber: 3gSugar: 18gVitamin A: 2120IUVitamin C: 1mgCalcium: 60mgIron: 2mg
Vegan-ize any recipe!Grab our free vegan cheat sheet, packed with my favorite easy substitutions to make any recipe vegan.

Fresh Tomato Corn Gazpacho

January 3, 2025 by Nicole @ VegKitchen 1 Comment

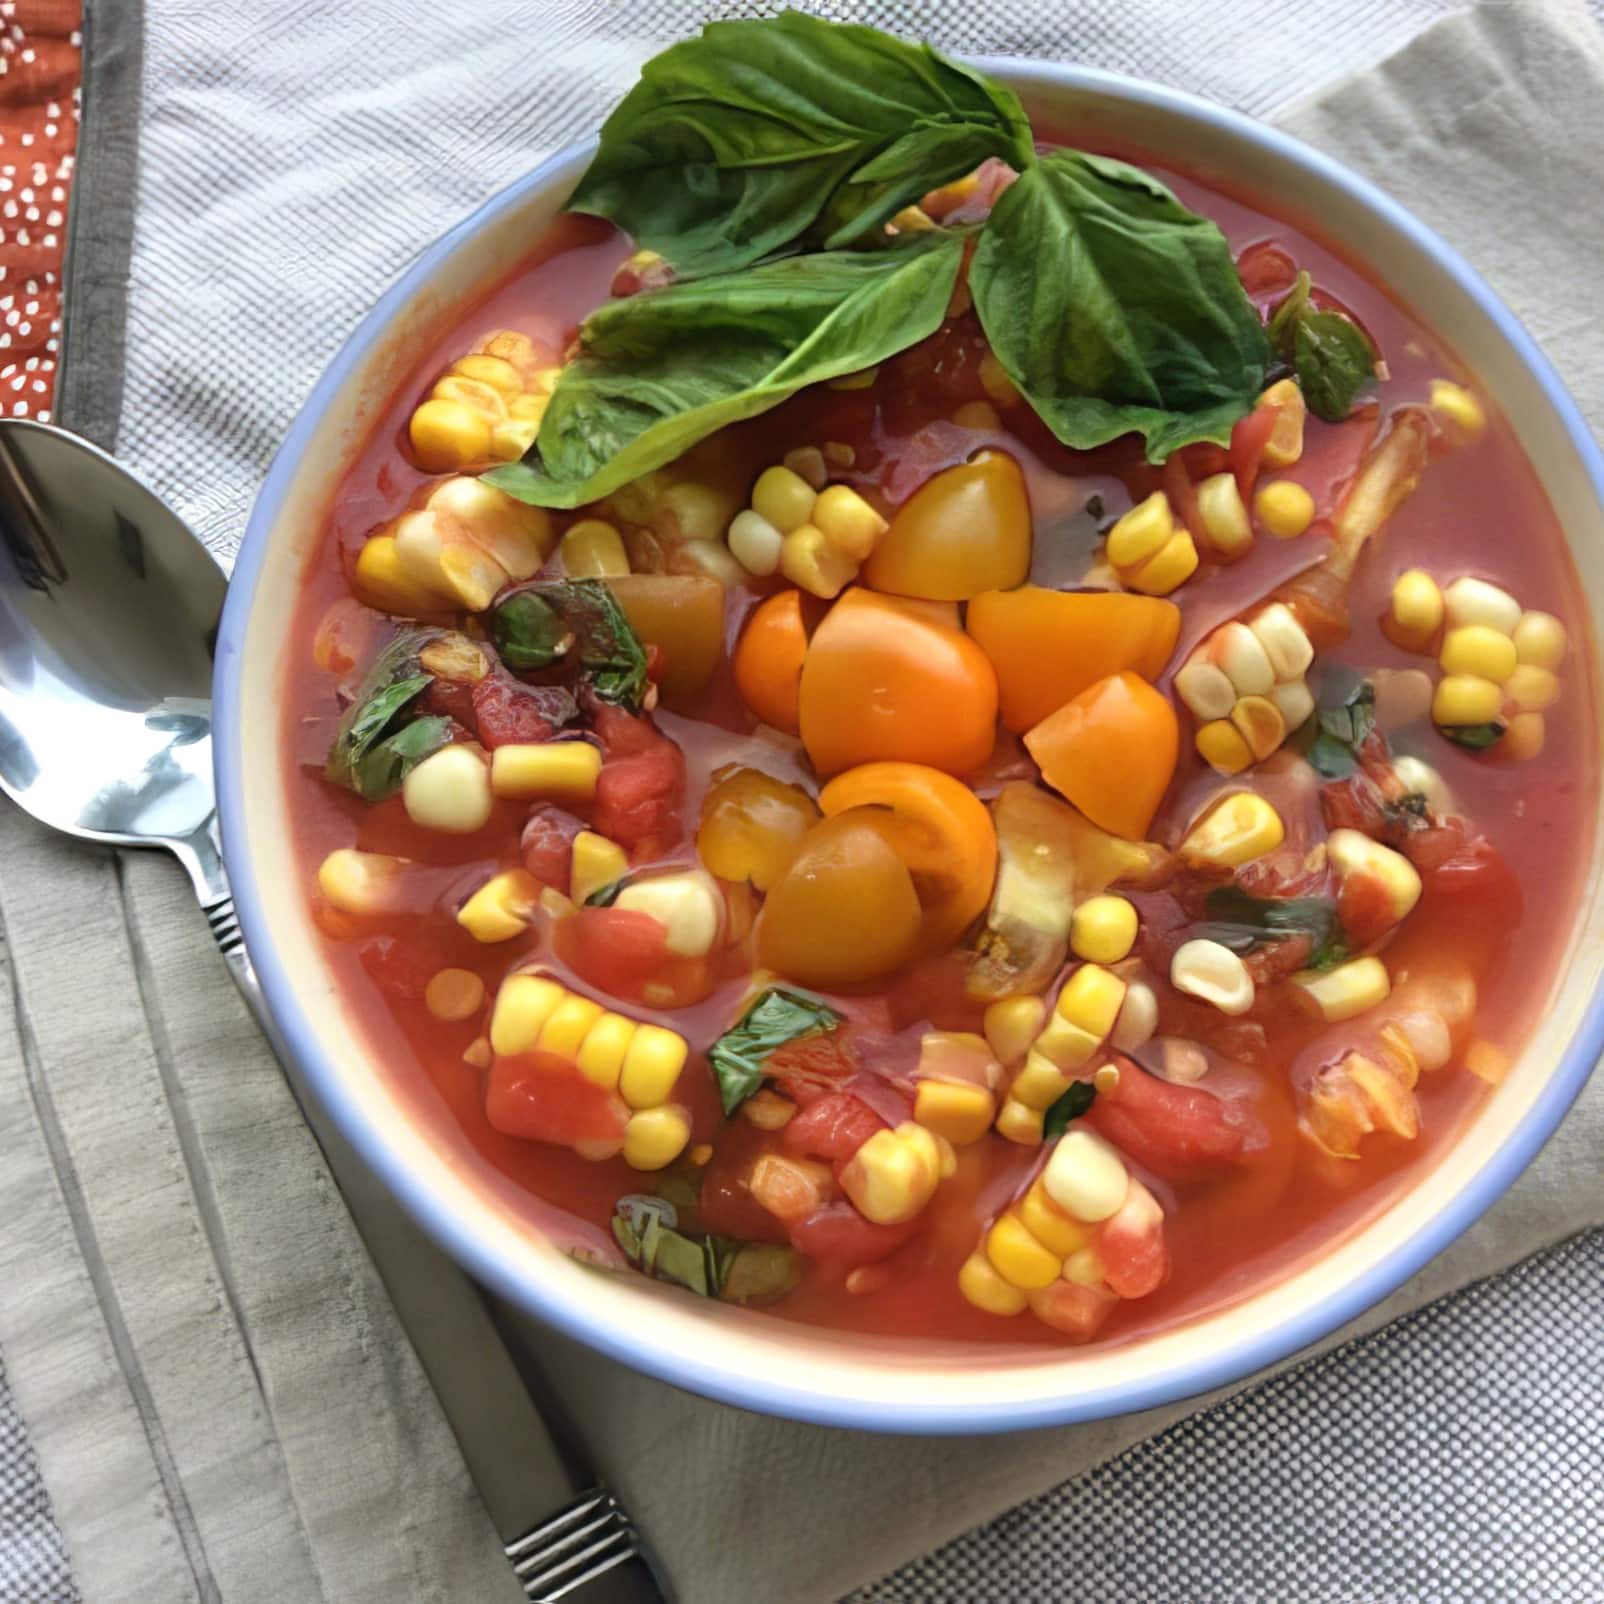
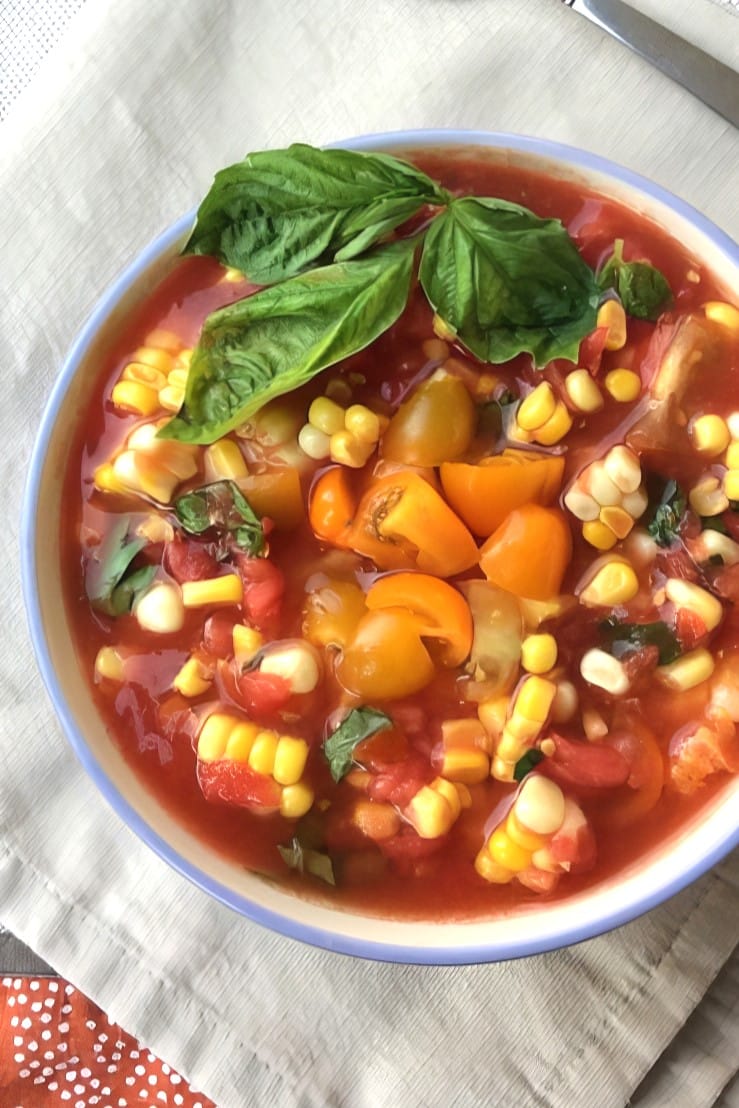
tomato corn gazpacho

This Vegan Tomato Corn Gazpacho is like summer in a bowl. A vibrant, chilled soup that combines the sweetness of fresh corn with the tanginess of ripe tomatoes. It's a refreshing dish, perfect for hot days!

tomato corn gazpacho
[feast_advanced_jump_to]

When the sun is blazing and turning on the stove feels like a chore, this Tomato Corn Gazpacho comes to the rescue. It's a no-cook, flavor-packed soup that brings together two of summer's superstars: juicy tomatoes and sweet corn.

The addition of fresh herbs and a hint of spice elevates this dish, making it a standout at any gathering or a simple weeknight meal.

This Tomato Corn Gazpacho Is...

  • Quick and Easy: Ready in just 20 minutes, plus chilling time.
  • No-Cook: Perfect for keeping the kitchen cool during hot days.
  • Vegan and Gluten-Free!
  • Flavorful: A delightful blend of sweet, tangy, and spicy notes.
  • Make-Ahead Friendly: Flavors deepen as it chills, making it ideal for meal prep.

Helpful Tips for the Best Gazpacho

Use Peak-Season Produce: The quality of the tomatoes and corn directly impacts the flavor. Opt for the freshest available.

Use Fresh Corn: The fresh corn give the soup a natural sweetness and crunch. If fresh corn isn't available, you can use frozen corn that has been thawed. But the texture may not be as pleasing.

Chill Thoroughly: Allowing the gazpacho to chill for at least an hour enhances the flavors and provides a refreshing experience.

Variations to Try

Add a Spicy Kick: Add a diced jalapeño or a dash of hot sauce for heat.

Creamy Version: Stir in a dollop of vegan yogurt or cashew cream for a richer texture.

Tropical Twist: Incorporate diced mango or pineapple for a sweet contrast.

Herb Infusion: Experiment with different herbs like cilantro or mint for a unique flavor profile.

Crunchy Toppings: Top with toasted pumpkin seeds or croutons for added texture.

More Vegan Recipes

If you love this vegan gazpacho, be sure to check out these other delicious recipes:

Also worth trying: our miso butternut squash soup.

Also worth trying: our yellow squash soup.

  • Vegan Tomato Soup
  • Watermelon and Peach Gazpacho
  • 25+ Vegan Recipes for Summer

Recipe

Fresh tomato and corn soup1

Vegan Tomato Corn Gazpacho

5 from 1 vote
This chilled vegan gazpacho is packed with fresh summer flavors!
Print Pin Save Saved!
Prep Time: 5 minutes minutes
Cook Time: 15 minutes minutes
Chill Time: 1 hour hour
Total Time: 1 hour hour 20 minutes minutes
Servings: 6
Prevent your screen from going dark

Ingredients

  • 4 cups ripe tomatoes diced, heirloom variety preferred
  • 2 ears fresh corn kernels removed (or 1½ cups thawed frozen corn)
  • 4 scallions thinly sliced
  • 3 ½ cups tomato juice adjust for desired thickness
  • ¼ cup fresh parsley chopped, or basil
  • 2 tablespoons fresh dill chopped, optional
  • salt and freshly ground black pepper to taste
  • yellow cherry tomatoes halved (for garnish, optional)
US Customary - Metric

Instructions

  • Prepare the Base: In a large bowl, combine the diced tomatoes, corn kernels, scallions, and fresh herbs.
  • Add Tomato Juice: Stir in the tomato juice, starting with 3 cups, and adjust to reach your preferred soup consistency.
  • Season: Add salt and pepper to taste. Mix well.
  • Chill: Cover the bowl and refrigerate for at least 1 hour to let the flavors meld.
  • Serve: Ladle the chilled soup into bowls. Garnish with halved cherry tomatoes or additional fresh herbs, if desired. Enjoy!

Nutrition (Estimate per Serving)

Calories: 46kcalCarbohydrates: 11gProtein: 2gFat: 0.3gSaturated Fat: 0.05gPolyunsaturated Fat: 0.1gMonounsaturated Fat: 0.1gSodium: 22mgPotassium: 598mgFiber: 2gSugar: 8gVitamin A: 1767IUVitamin C: 45mgCalcium: 34mgIron: 1mg
Vegan-ize any recipe!Grab our free vegan cheat sheet, packed with my favorite easy substitutions to make any recipe vegan.

Vegan Greek Pasta Salad

December 23, 2024 by Nicole @ VegKitchen 3 Comments

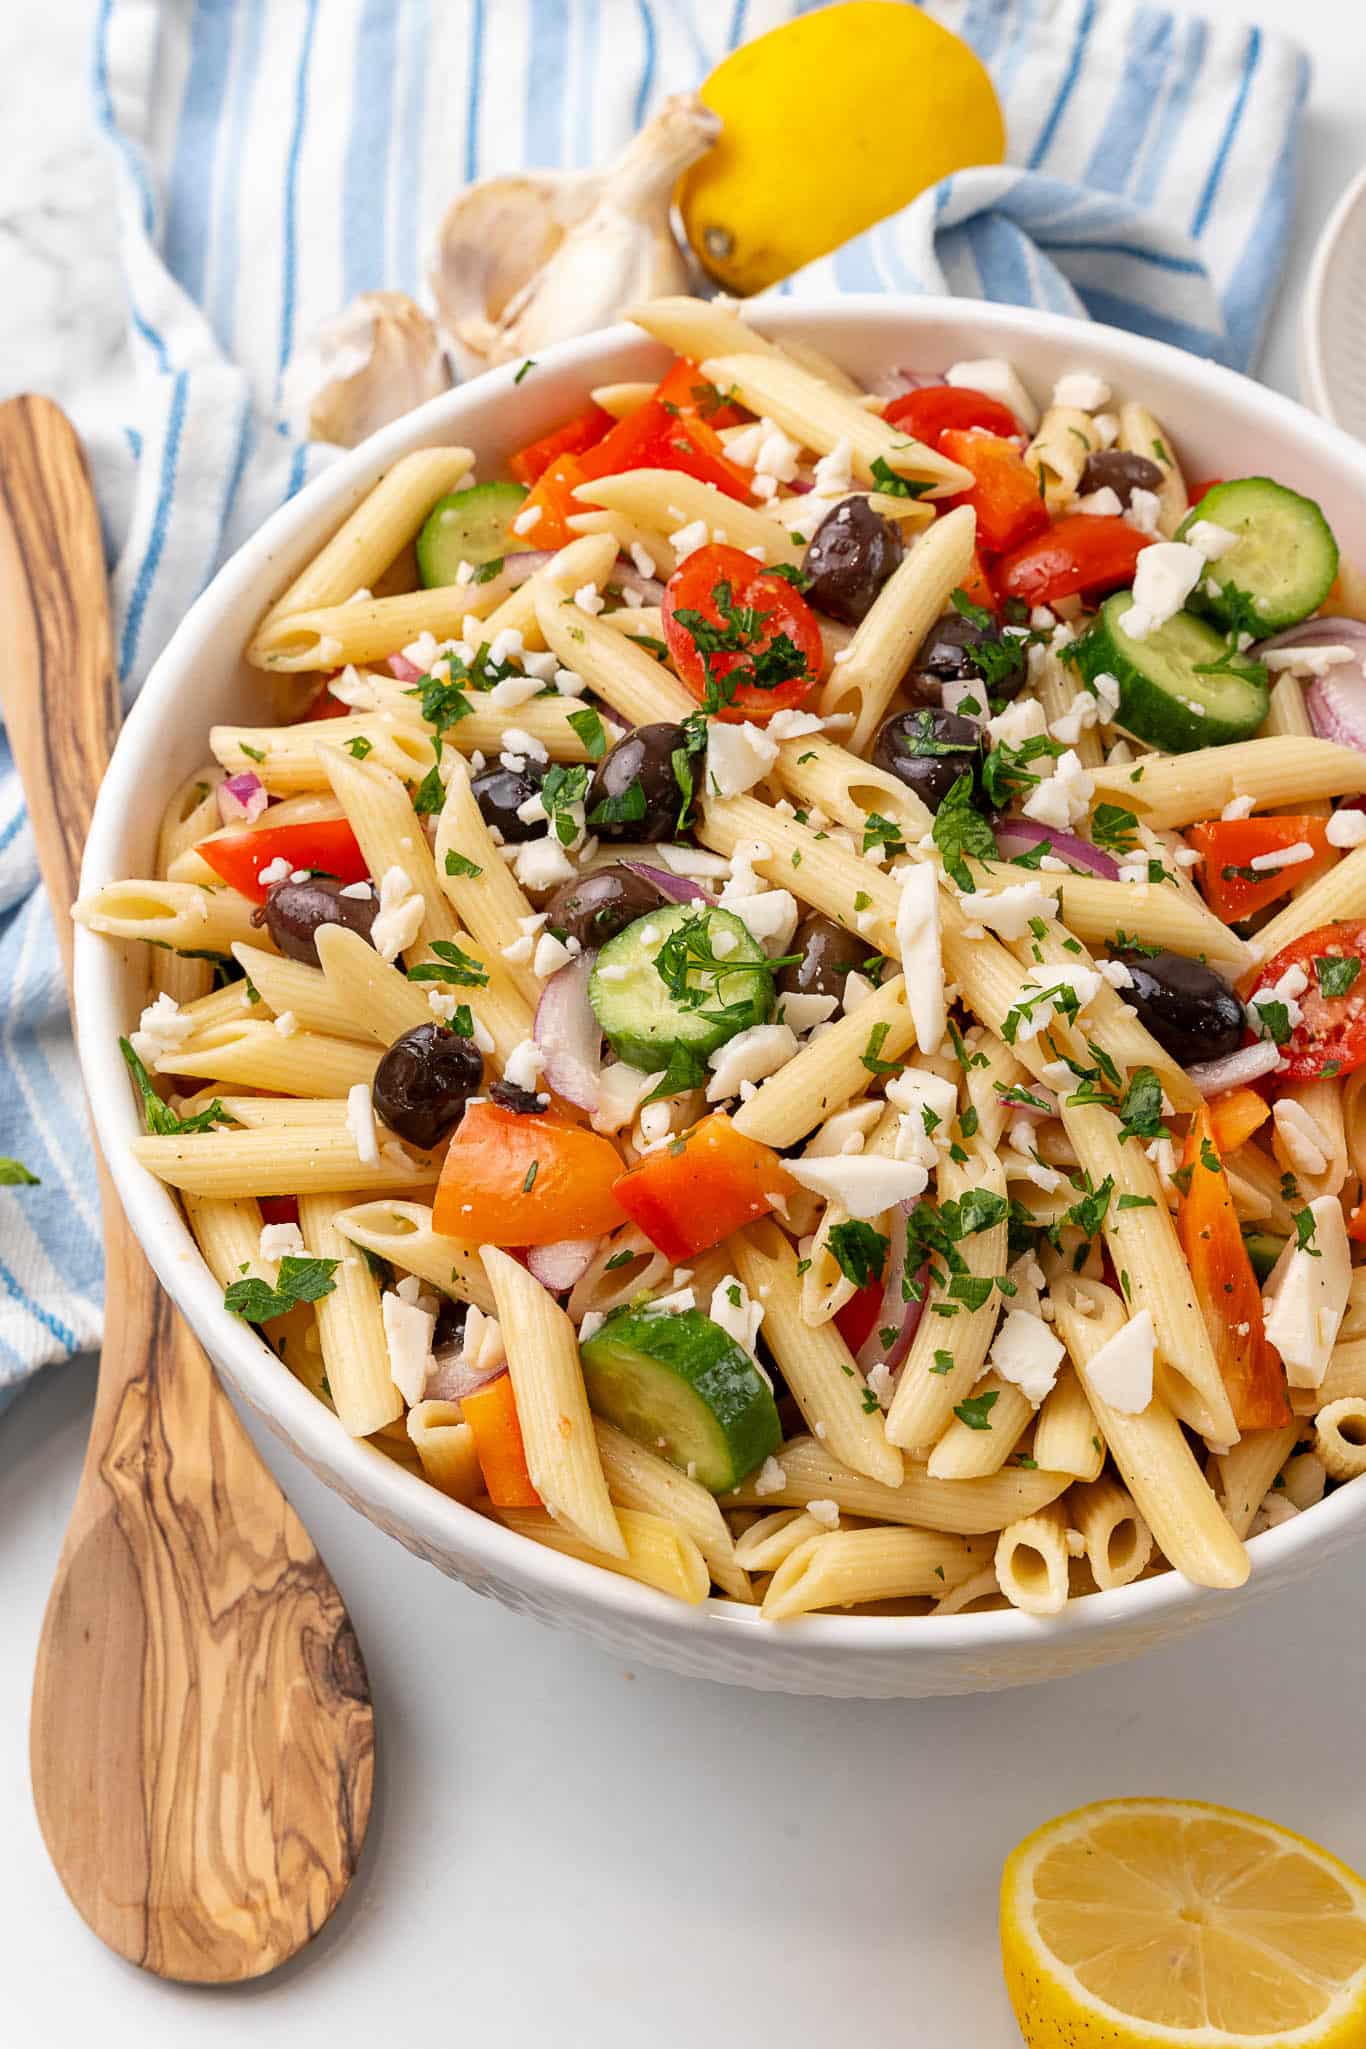
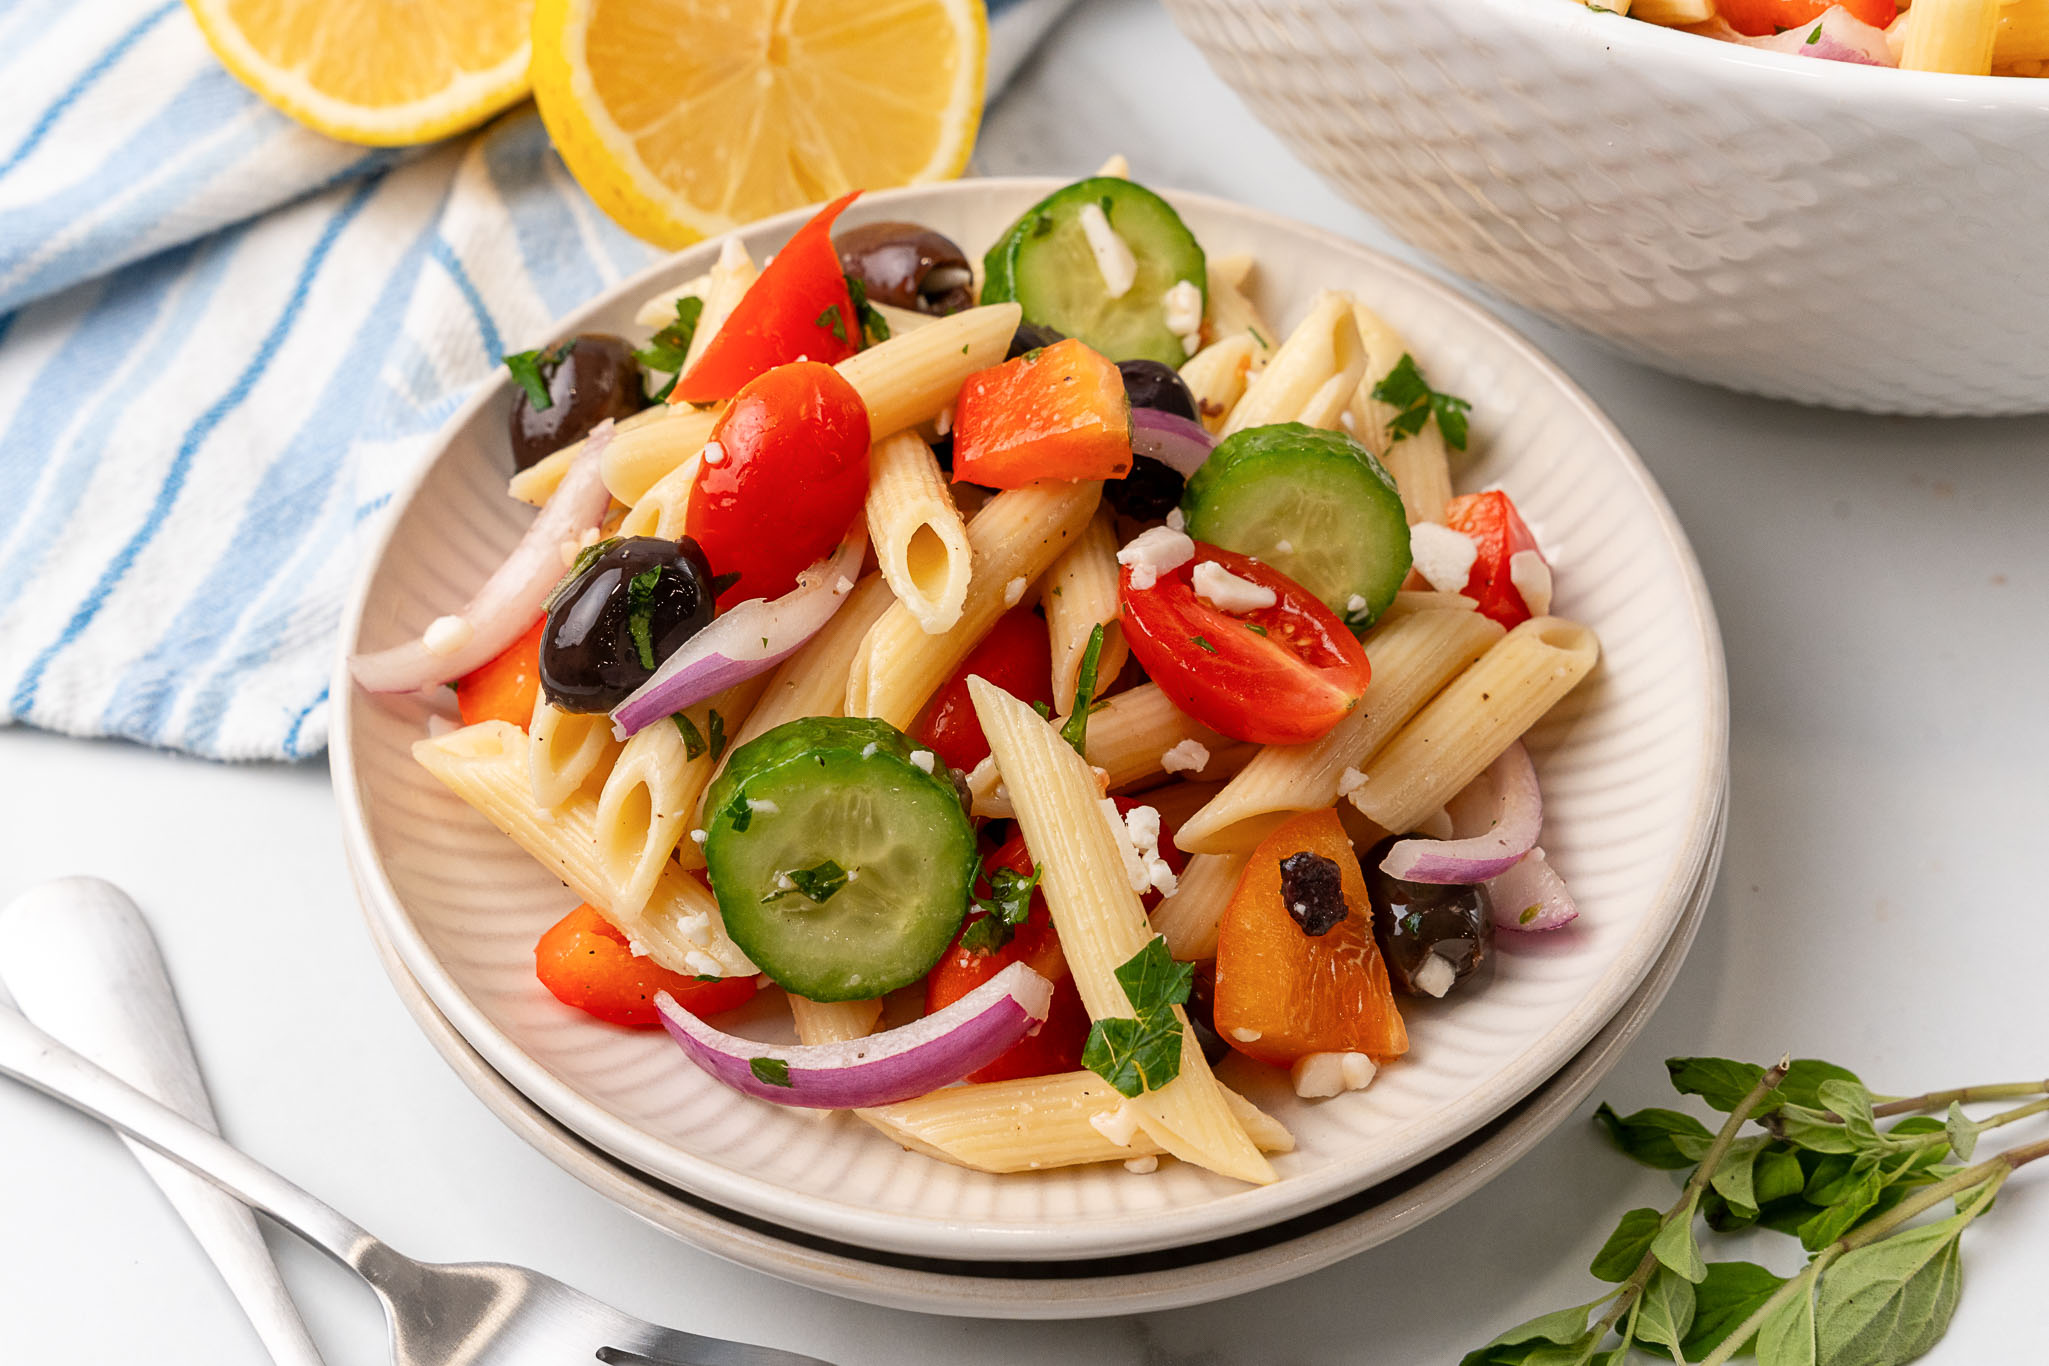
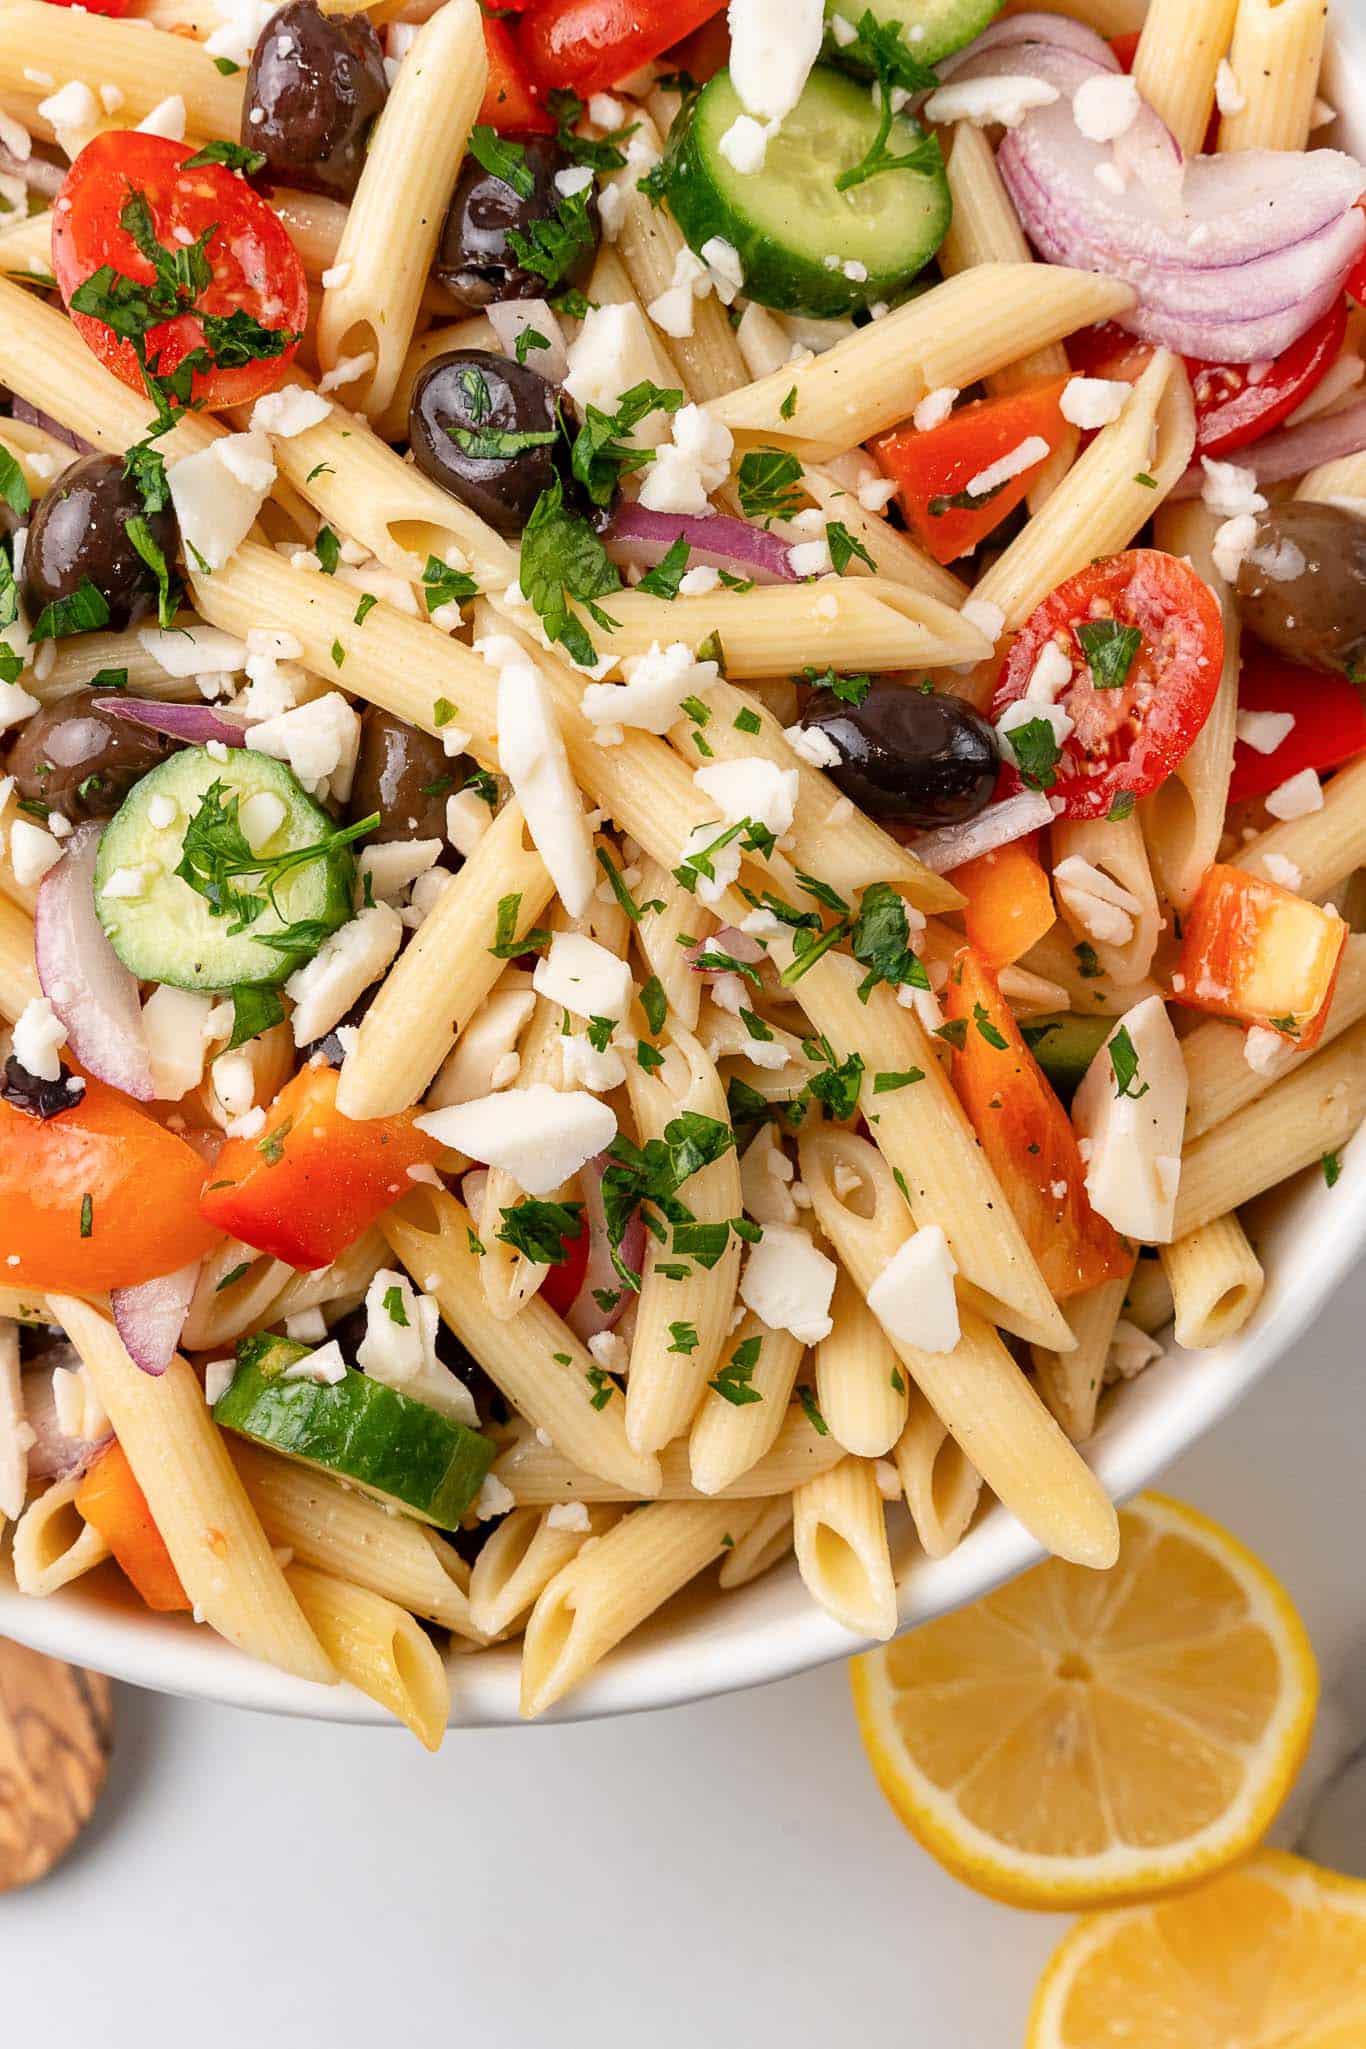
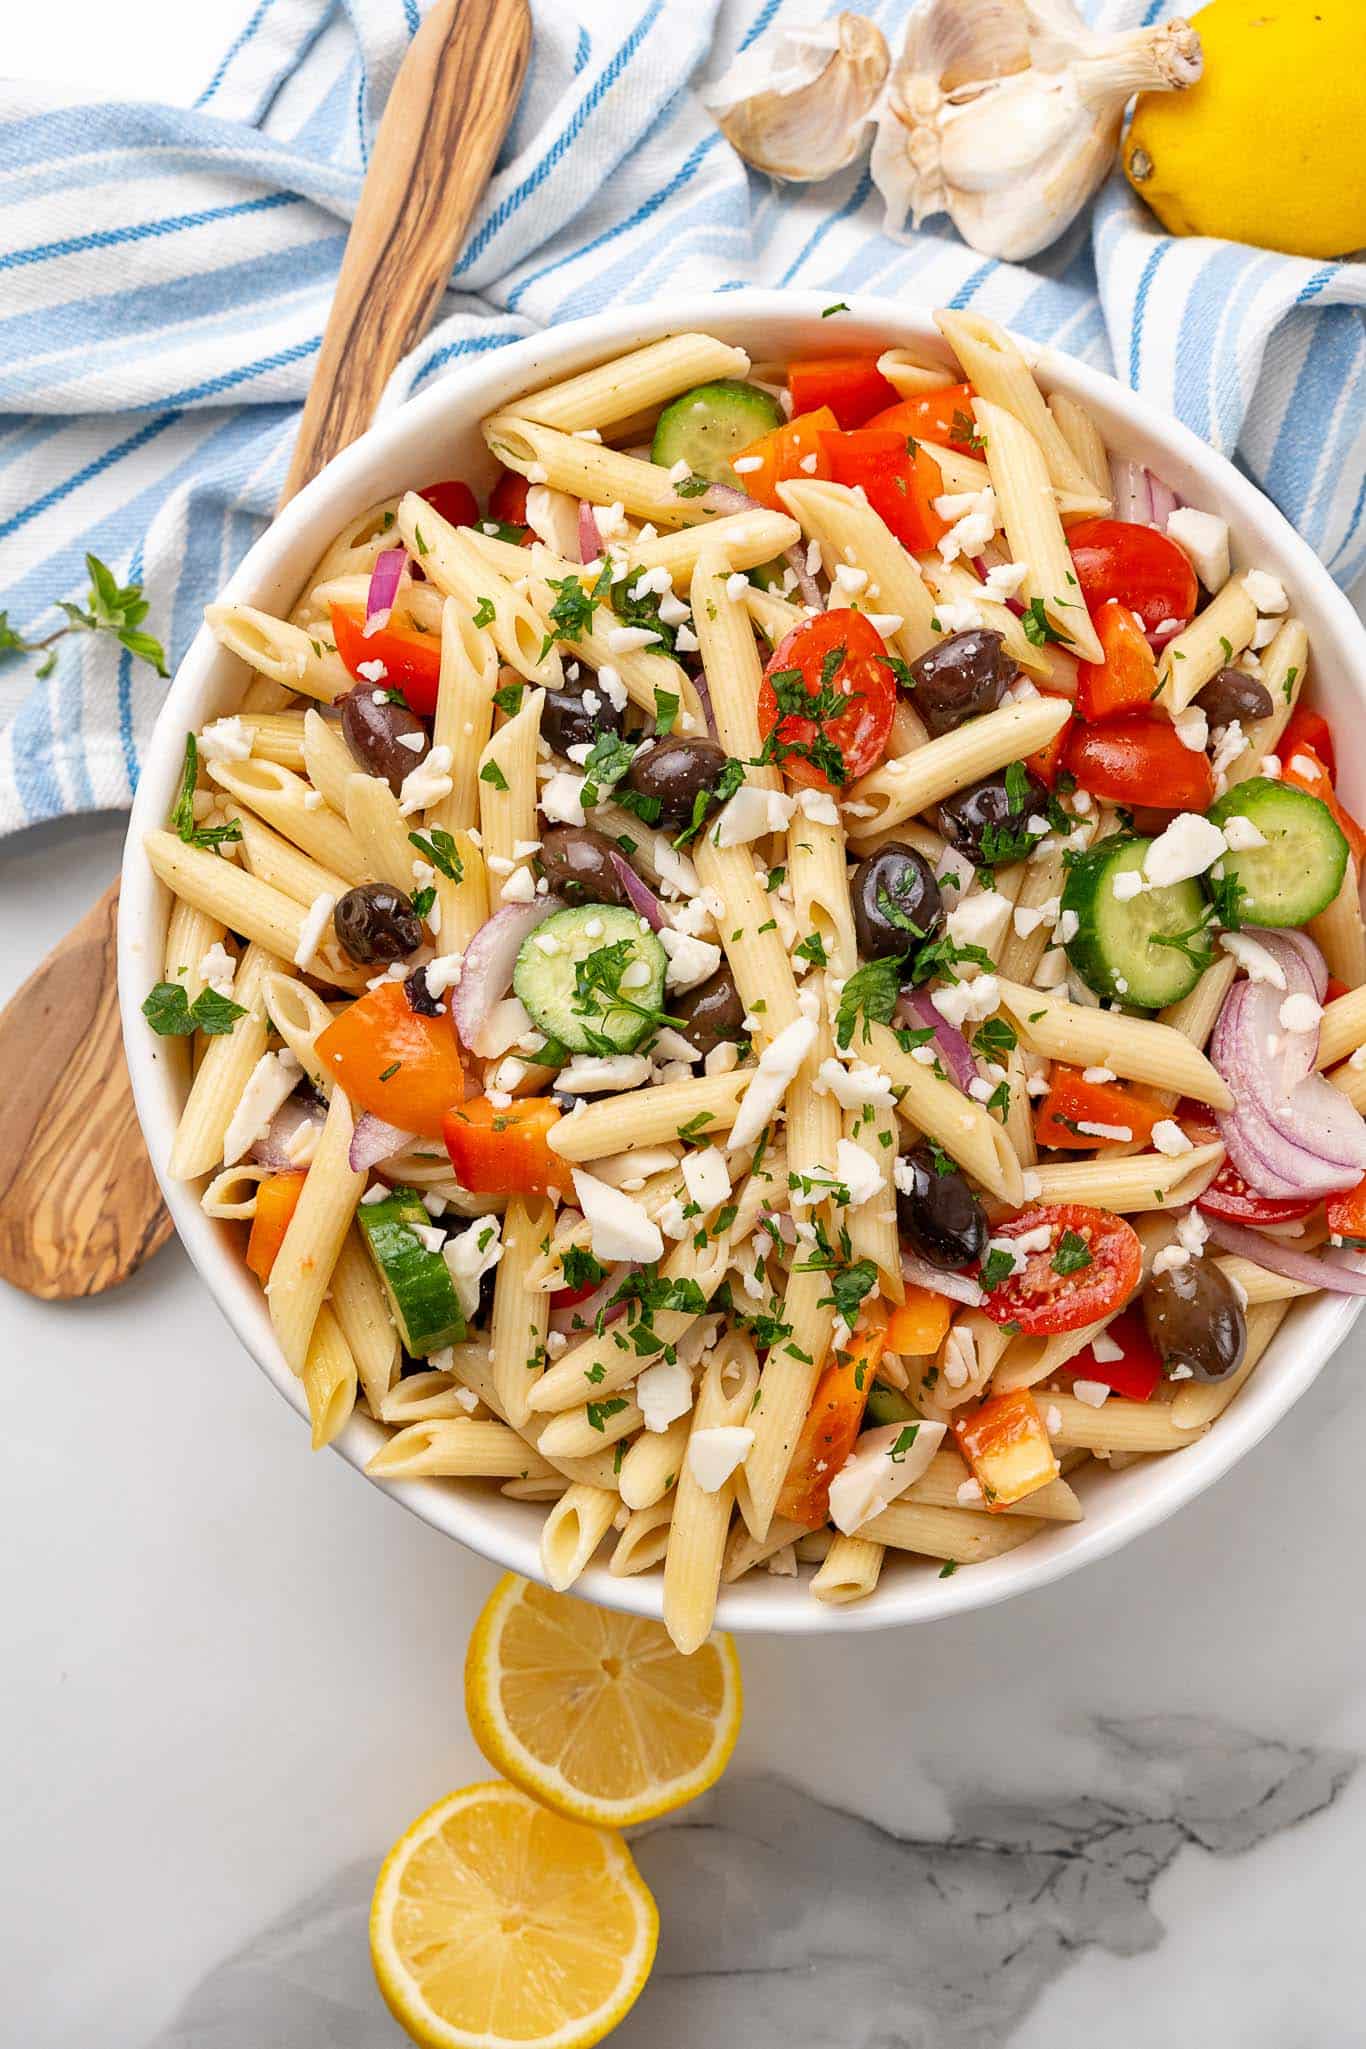
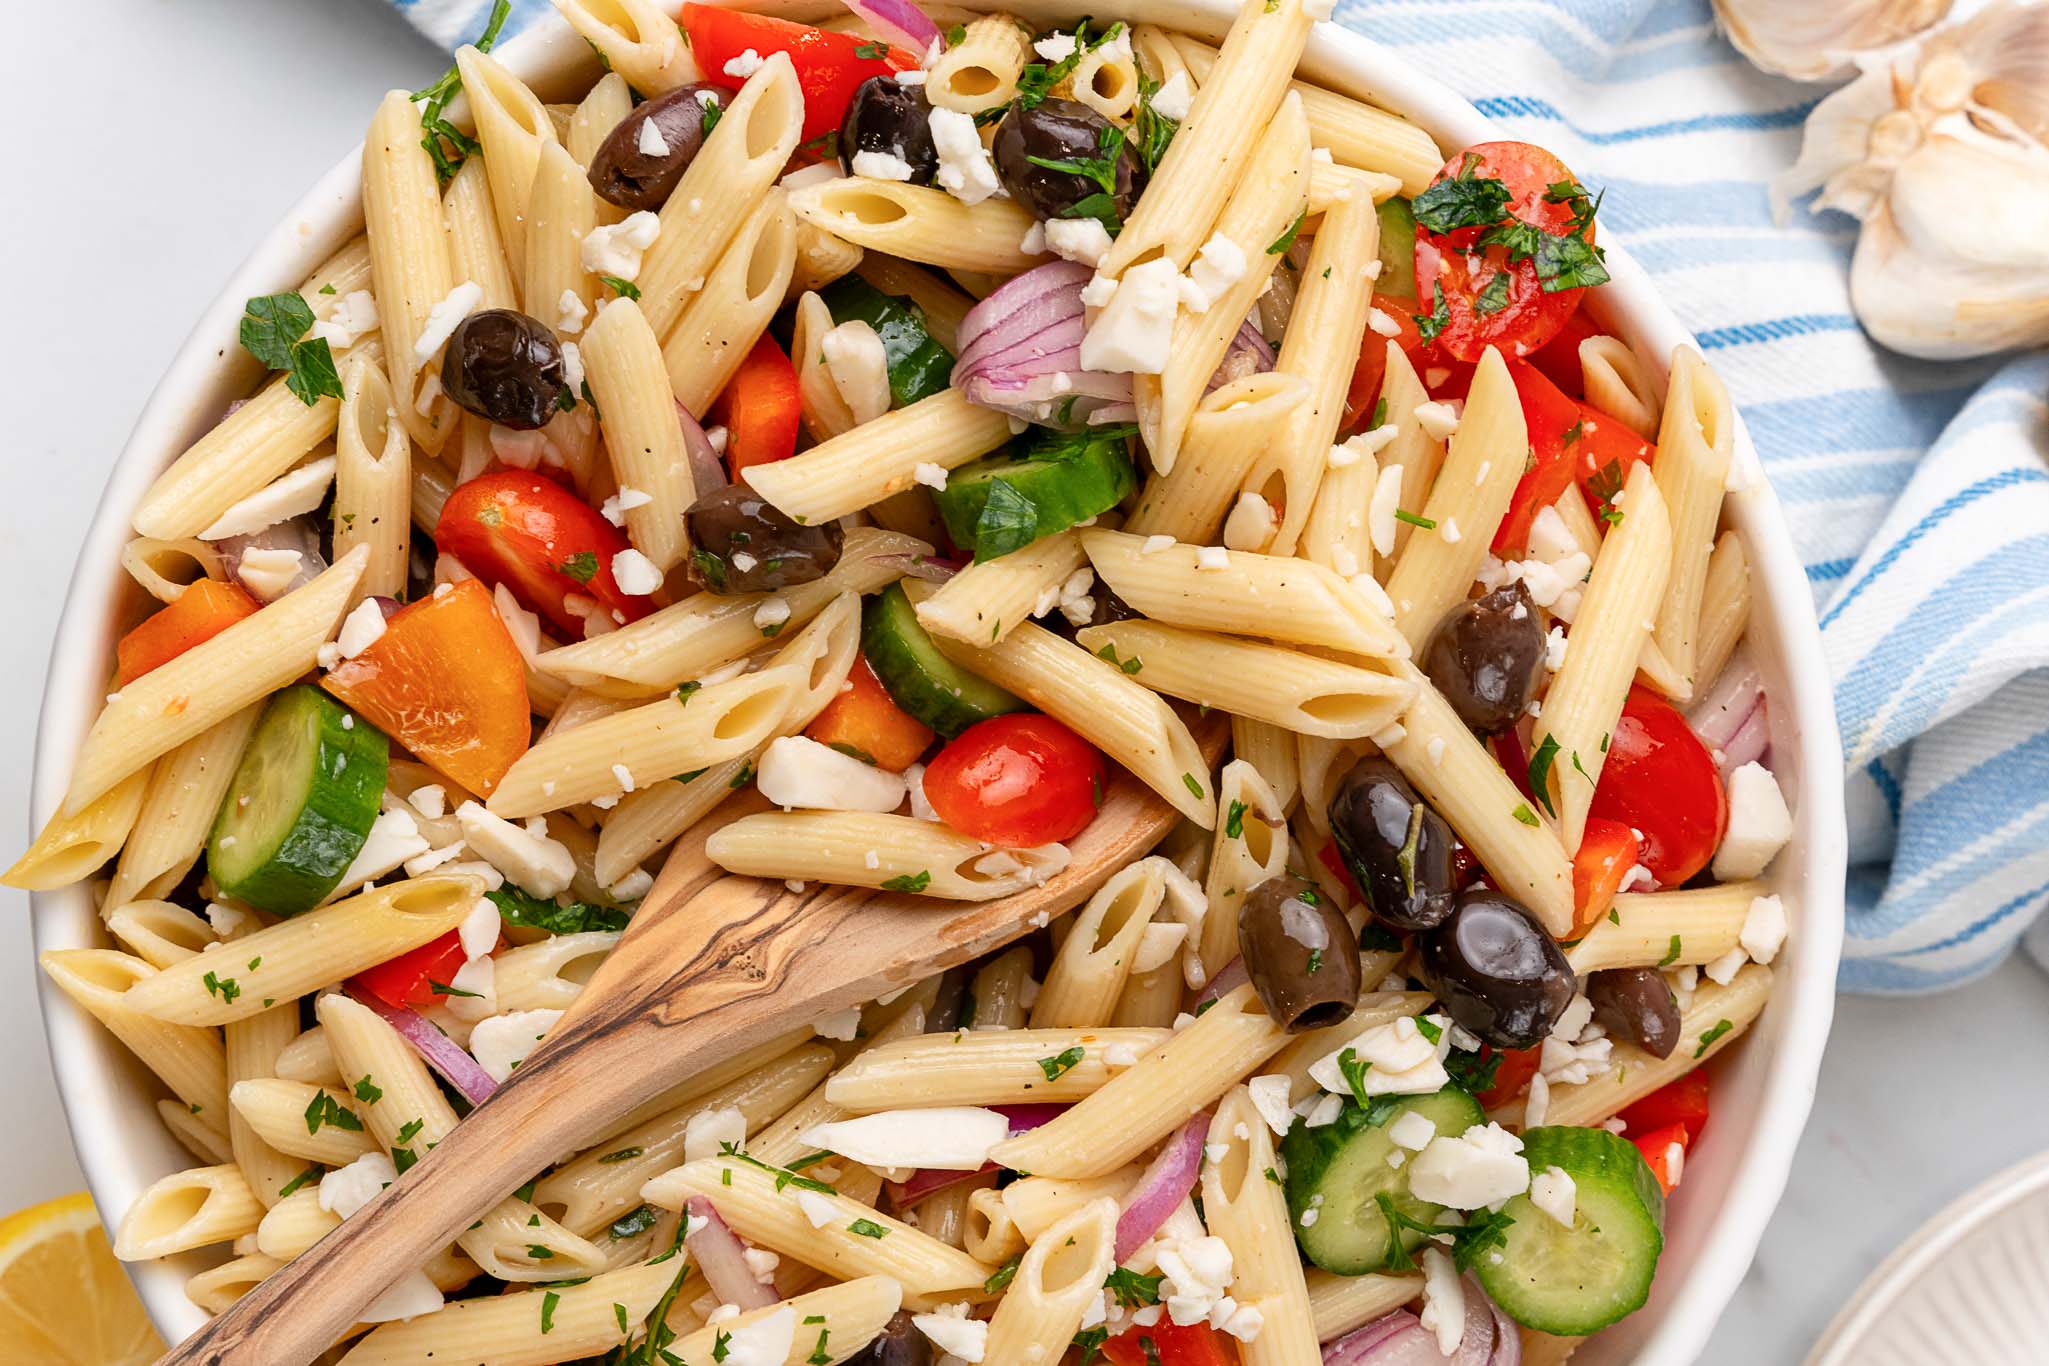
vegan greek pasta salad

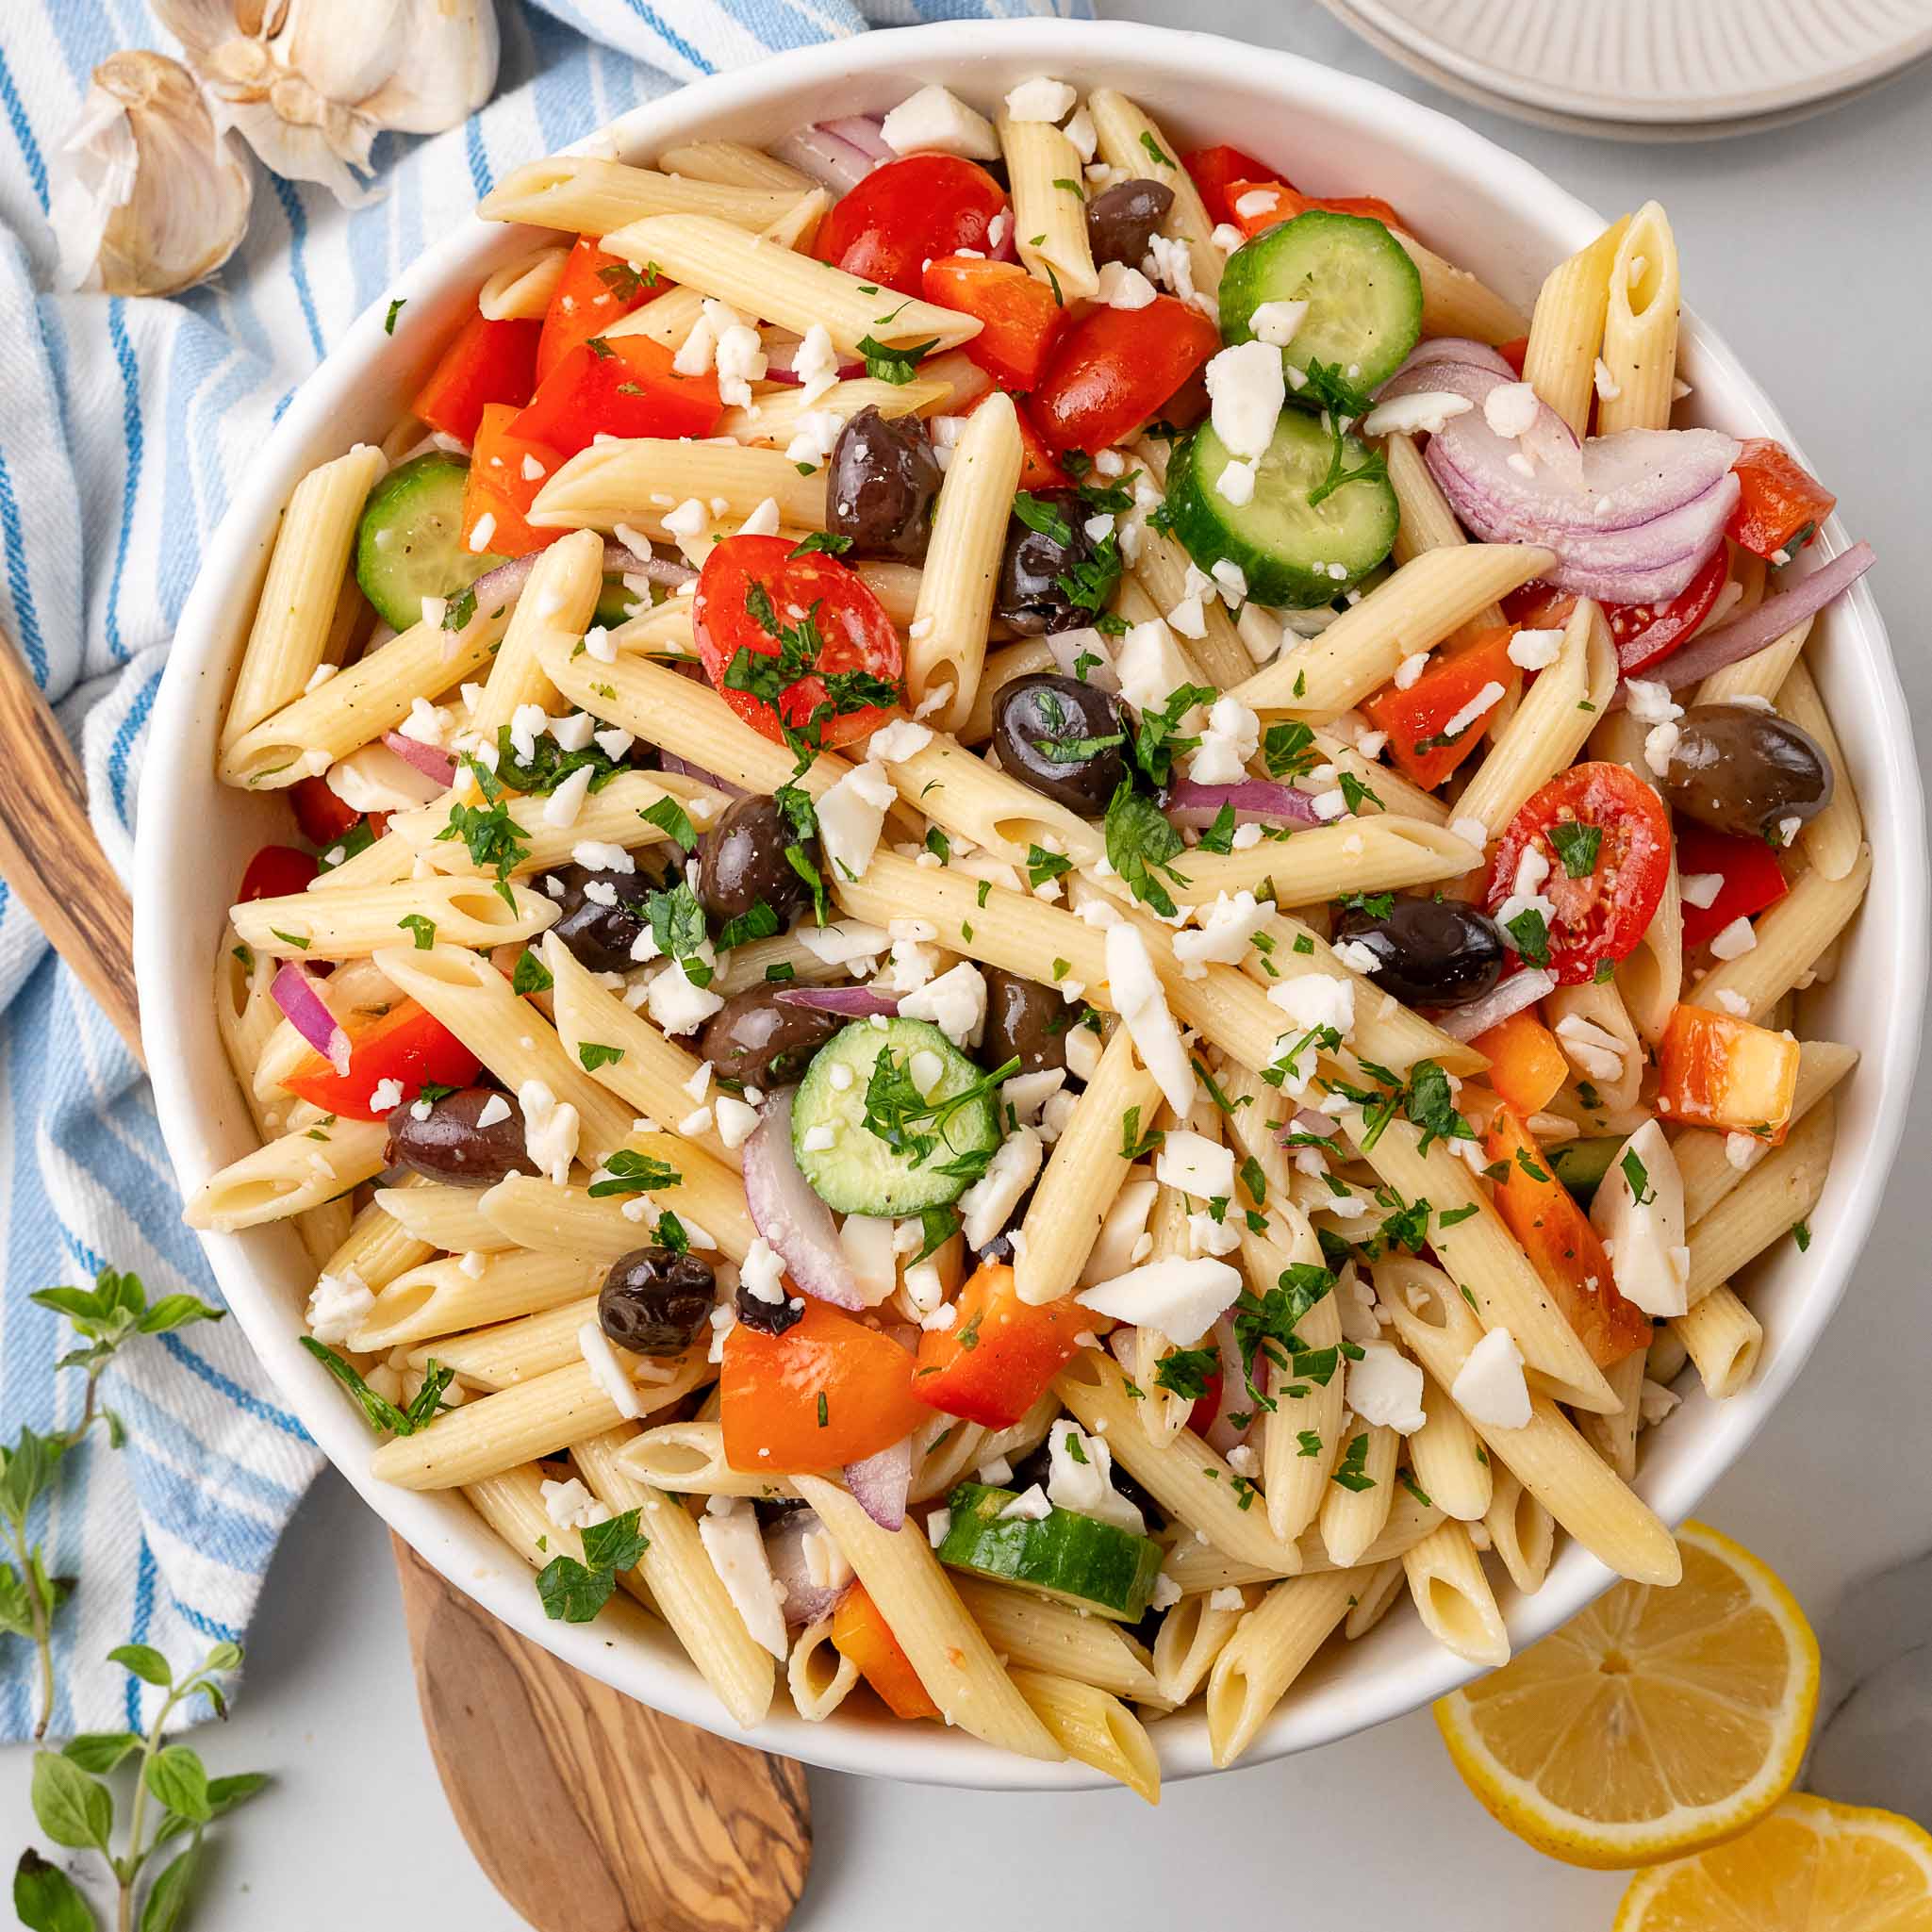
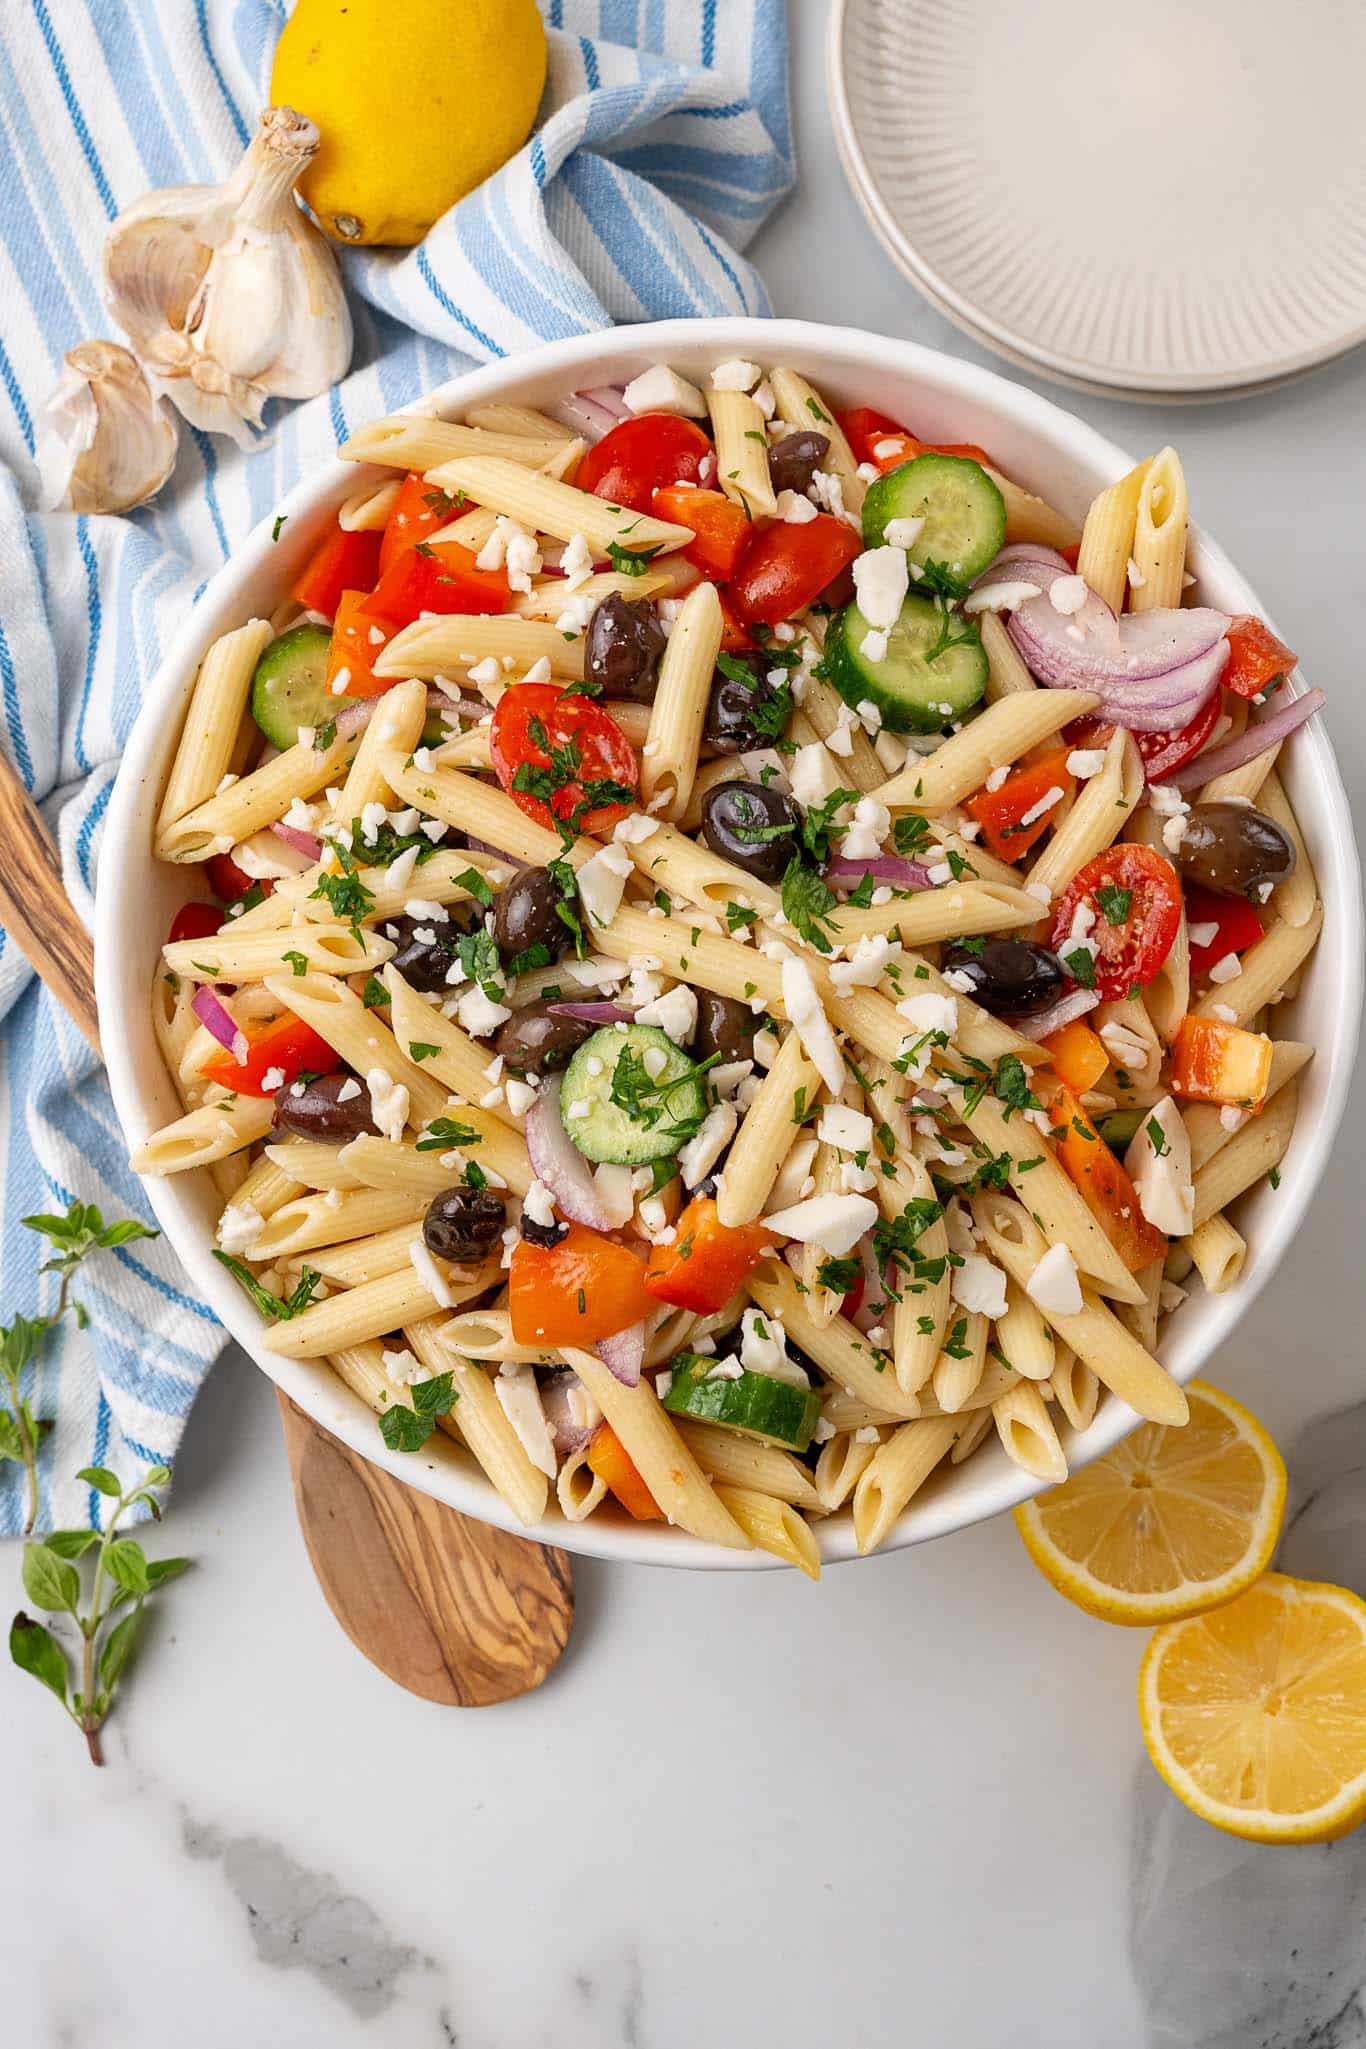
Looking for a simple dish that's light, refreshing, and packed with flavor? This Vegan Greek Pasta Salad ticks all the boxes. Loaded with crisp veggies, tangy olives, and an herby homemade dressing, it's the perfect go-to recipe for potlucks, meal prep, or quick lunches. 

vegan greek pasta salad

Bonus? It's super easy to make and totally customizable, so you can tweak it to suit your taste or what you have in your fridge.

The lemony dressing is zippy and bright, the olives and vegan feta (if you're using it) bring the perfect amount of saltiness, and the fresh veggies add crunch and color. Toss all that with tender pasta, and you've got yourself a dish that's satisfying without being heavy.

It's perfect for warm weather gatherings, but honestly, I'd eat this year-round. Plus, it gets better as it sits, which means leftovers are absolutely something to look forward to.

vegan greek pasta salad

This Vegan Greek Pasta Salad Is:

  • Light and refreshing: Thanks to the lemony vinaigrette and fresh veggies.
  • Perfect for sharing: Ideal for BBQs, picnics, or weeknight dinners.
  • Easy to make ahead: The flavors deepen over time, so it's meal-prep friendly.
  • Customizable: Mix in extra veggies, switch up the pasta, or skip the vegan feta-it's all good.
vegan greek pasta salad

Substitutions

Make it gluten free. Just use your favorite gluten free pasta brand - the rest of the ingredients are naturally gluten free. 

Kalamata Olives are essential for that briny flavor. But if olives aren't your thing, try substituting capers.

Vegan Feta: Totally optional, but if you can find it, it's worth it for that tangy creaminess. Or make your own vegan feta with tofu!

Red Wine Vinegar: Brings the perfect amount of tang to the dressing. Apple cider vinegar can pinch-hit if needed.

vegan pasta salad recipe

Helpful Tips

Let it sit before serving: If you have time, let the salad chill in the fridge for at least 30 minutes before serving. The flavors meld together beautifully.

Customize the dressing: Taste and adjust-need more tang? Add a splash of vinegar or lemon. Want it a little sweeter? A tiny drizzle of maple syrup does the trick.

Keep it fresh: If making ahead, reserve some dressing and add it just before serving to keep everything tasting fresh.

vegan pasta salad recipe

Variations to Try

Add protein: Toss in some chickpeas or roasted tofu for a heartier salad.

Go extra green: Add spinach, arugula, or kale for more veggies.

Make it spicy: Throw in a pinch of chili flakes or a drizzle of hot sauce.

Change the pasta: Try orzo or bowtie pasta for a fun twist.

Herb swap: Basil or dill can replace or complement the oregano and parsley.

vegan pasta salad recipe

More Vegan Recipes

If you love this vegan pasta salad, be sure to check out these other vegan ideas: 

Also try: our Tomato Relish Salad With Oregano And Thyme.

  • Vegan Souvlaki Tofu Skewers 
  • Best Vegan Pasta Salads
  • Vegan Vodka Pasta

Recipe

vegan greek pasta salad

Vegan Greek Pasta Salad

4.67 from 3 votes
This Vegan Greek Pasta Salad is light, refreshing, and packed with flavor. It's the perfect go-to recipe for potlucks, meal prep, or quick lunches.
Print Pin Save Saved!
Prep Time: 15 minutes minutes
Cook Time: 10 minutes minutes
Total Time: 25 minutes minutes
Servings: 8 servings
Prevent your screen from going dark

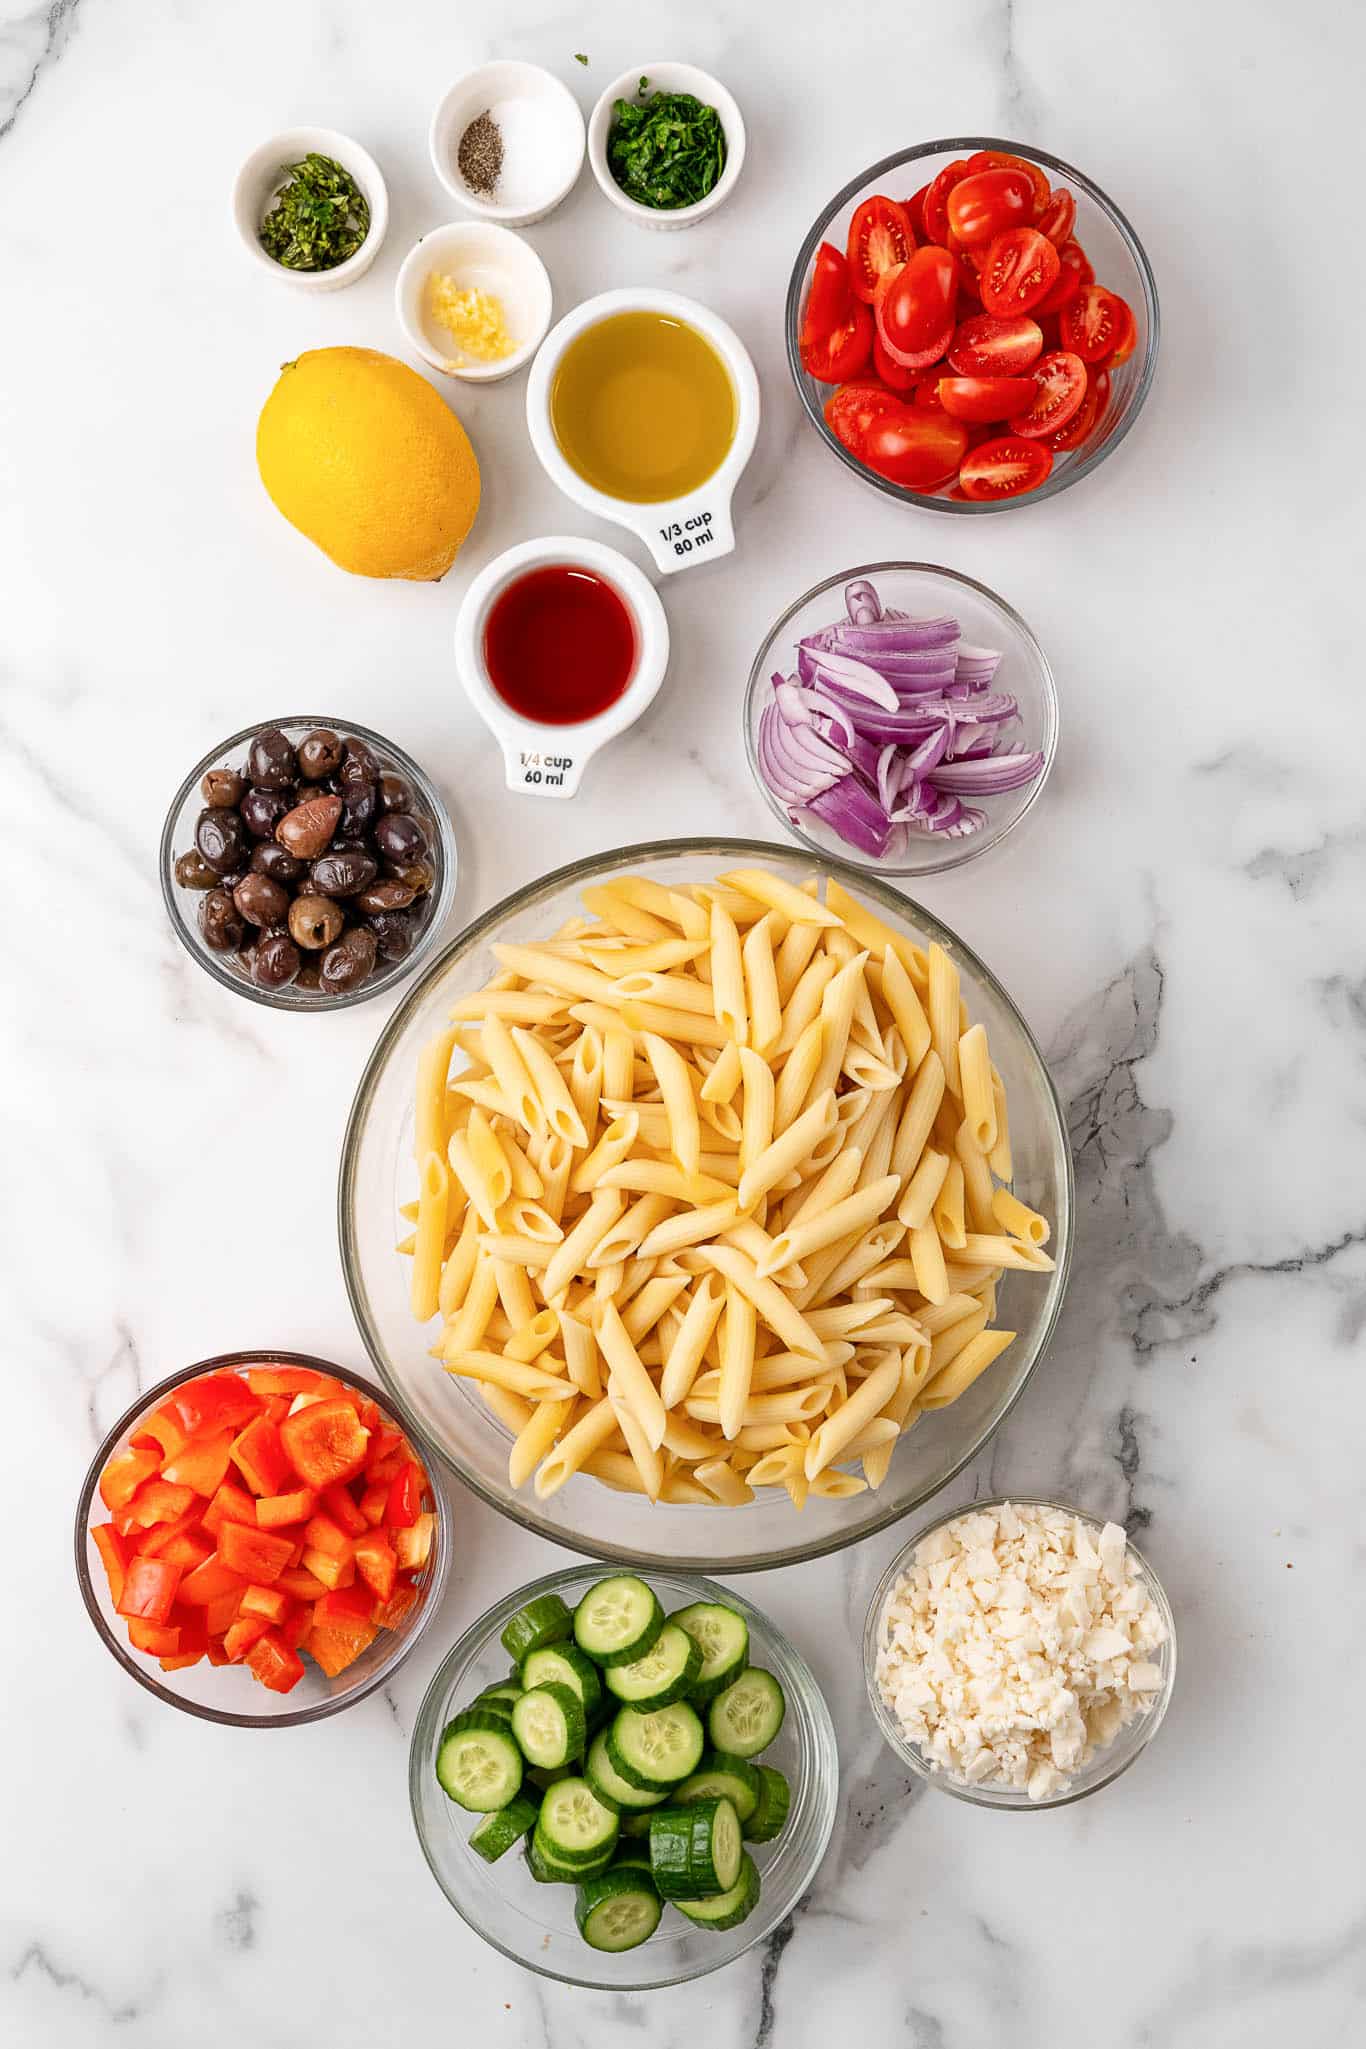
Ingredients

Dressing:

  • ⅓ cup olive oil
  • ¼ cup red wine vinegar
  • 1 lemon juiced
  • 1 clove garlic minced
  • 1 tablespoon minced fresh oregano
  • 1 tablespoon minced fresh parsley
  • Salt and pepper to taste

Pasta salad:

  • 16 oz dry pasta rotini or penne
  • 4-5 mini cucumbers sliced
  • 1 pint grape tomatoes halved
  • 1 bell pepper seeded and diced
  • 1 cup vegan feta optional
  • 1 cup kalamata olives pitted
  • ½ small red onion sliced
US Customary - Metric

Instructions

Dressing:

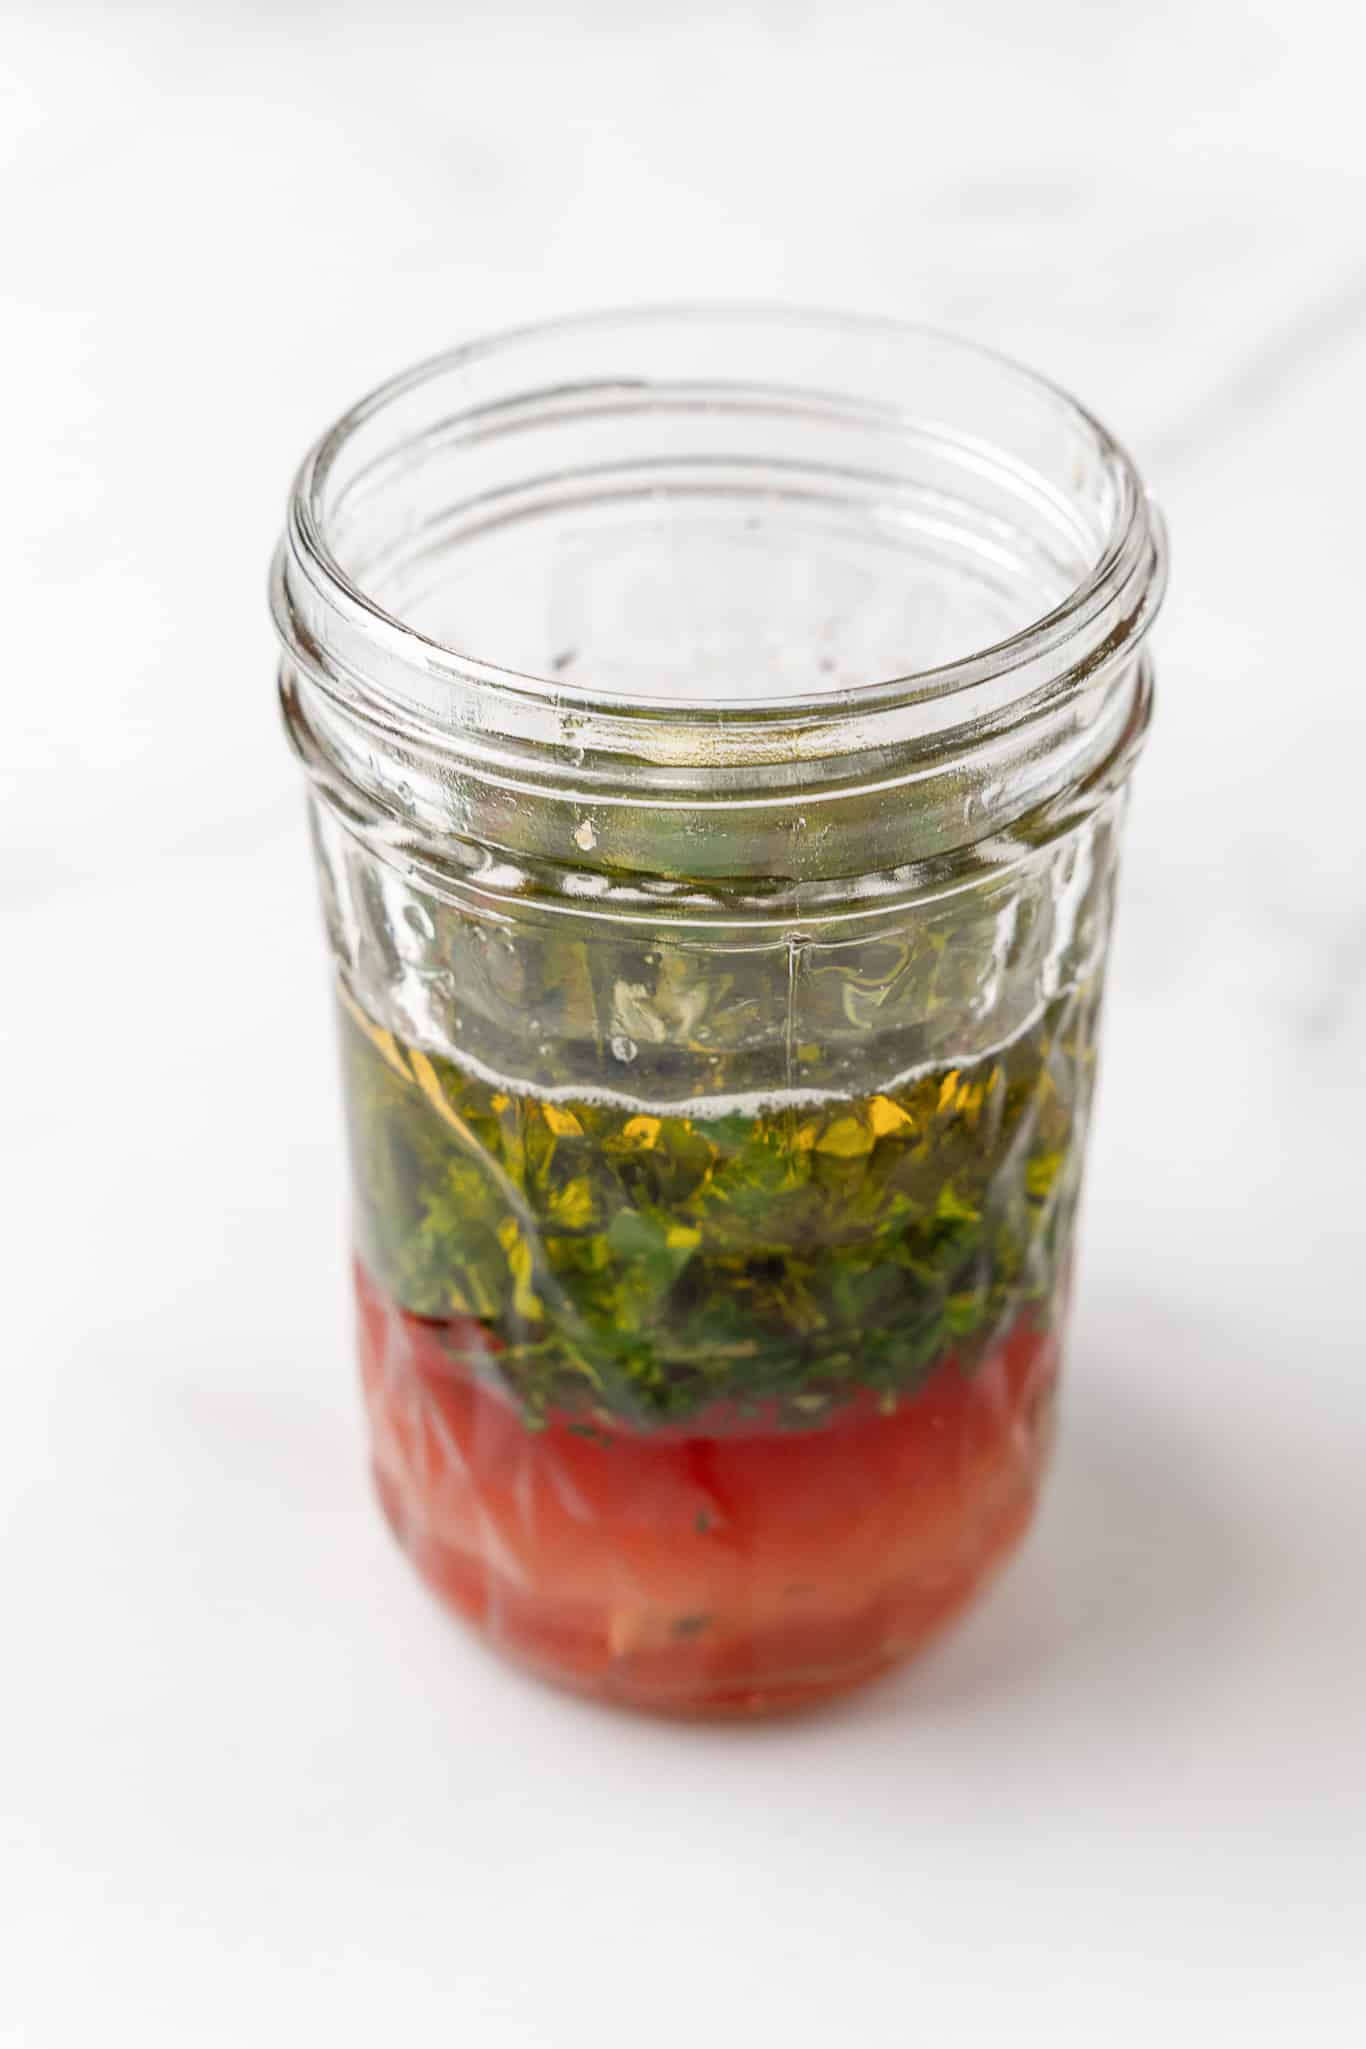
  • In a small jar with a lid, add the olive oil, red wine vinegar, lemon juice, garlic, oregano, parsley and salt and pepper.
    vegan greek pasta salad
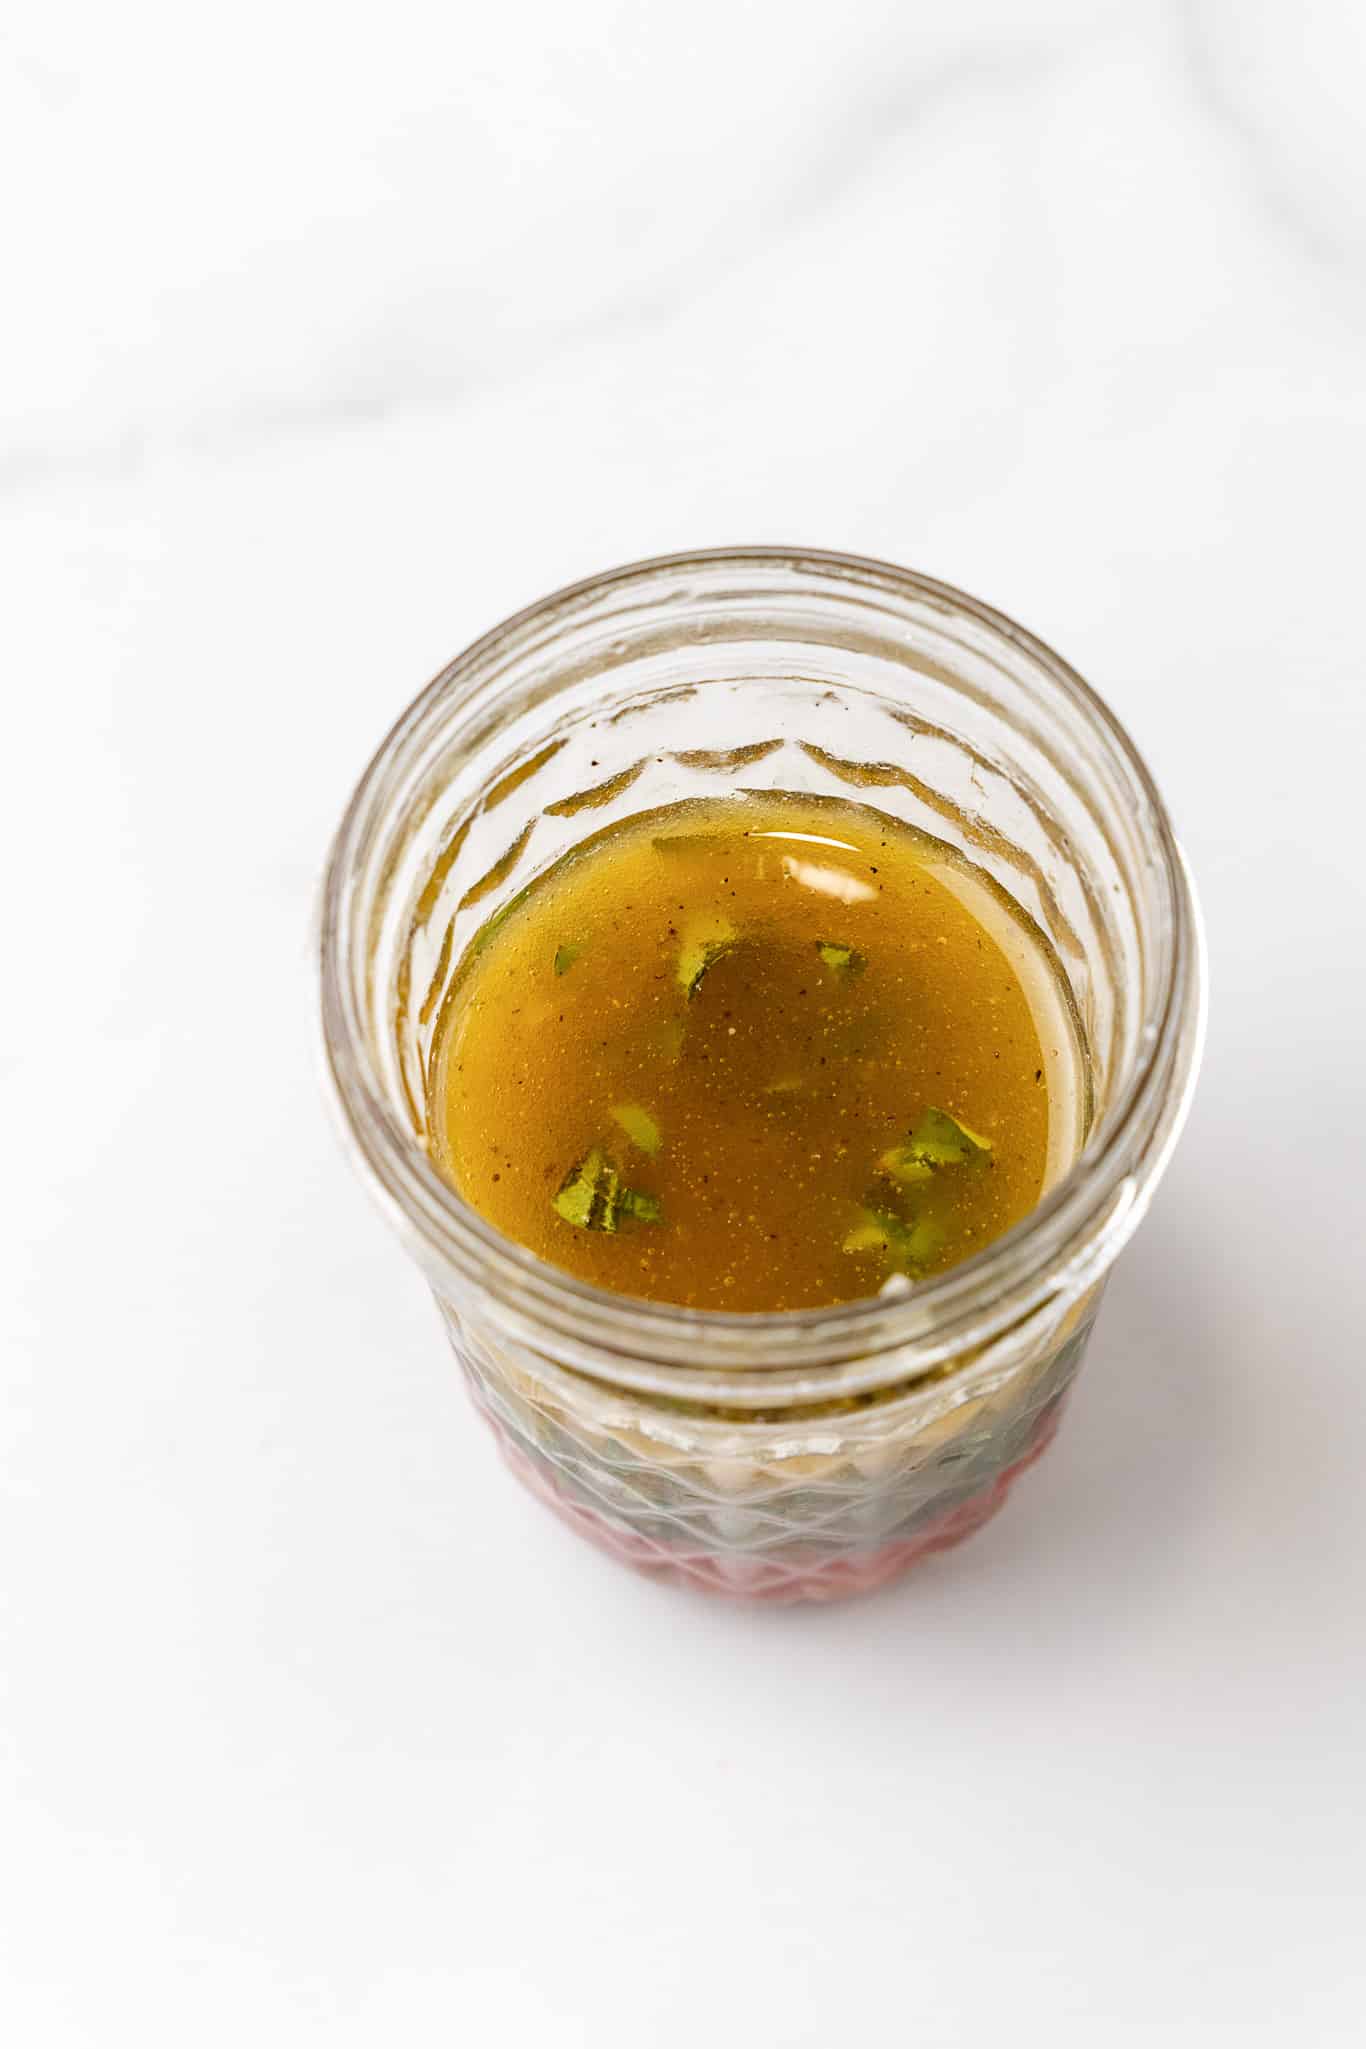
  • Close the lid and shake until homogenous. Set aside until needed.
    vegan greek pasta salad

Salad:

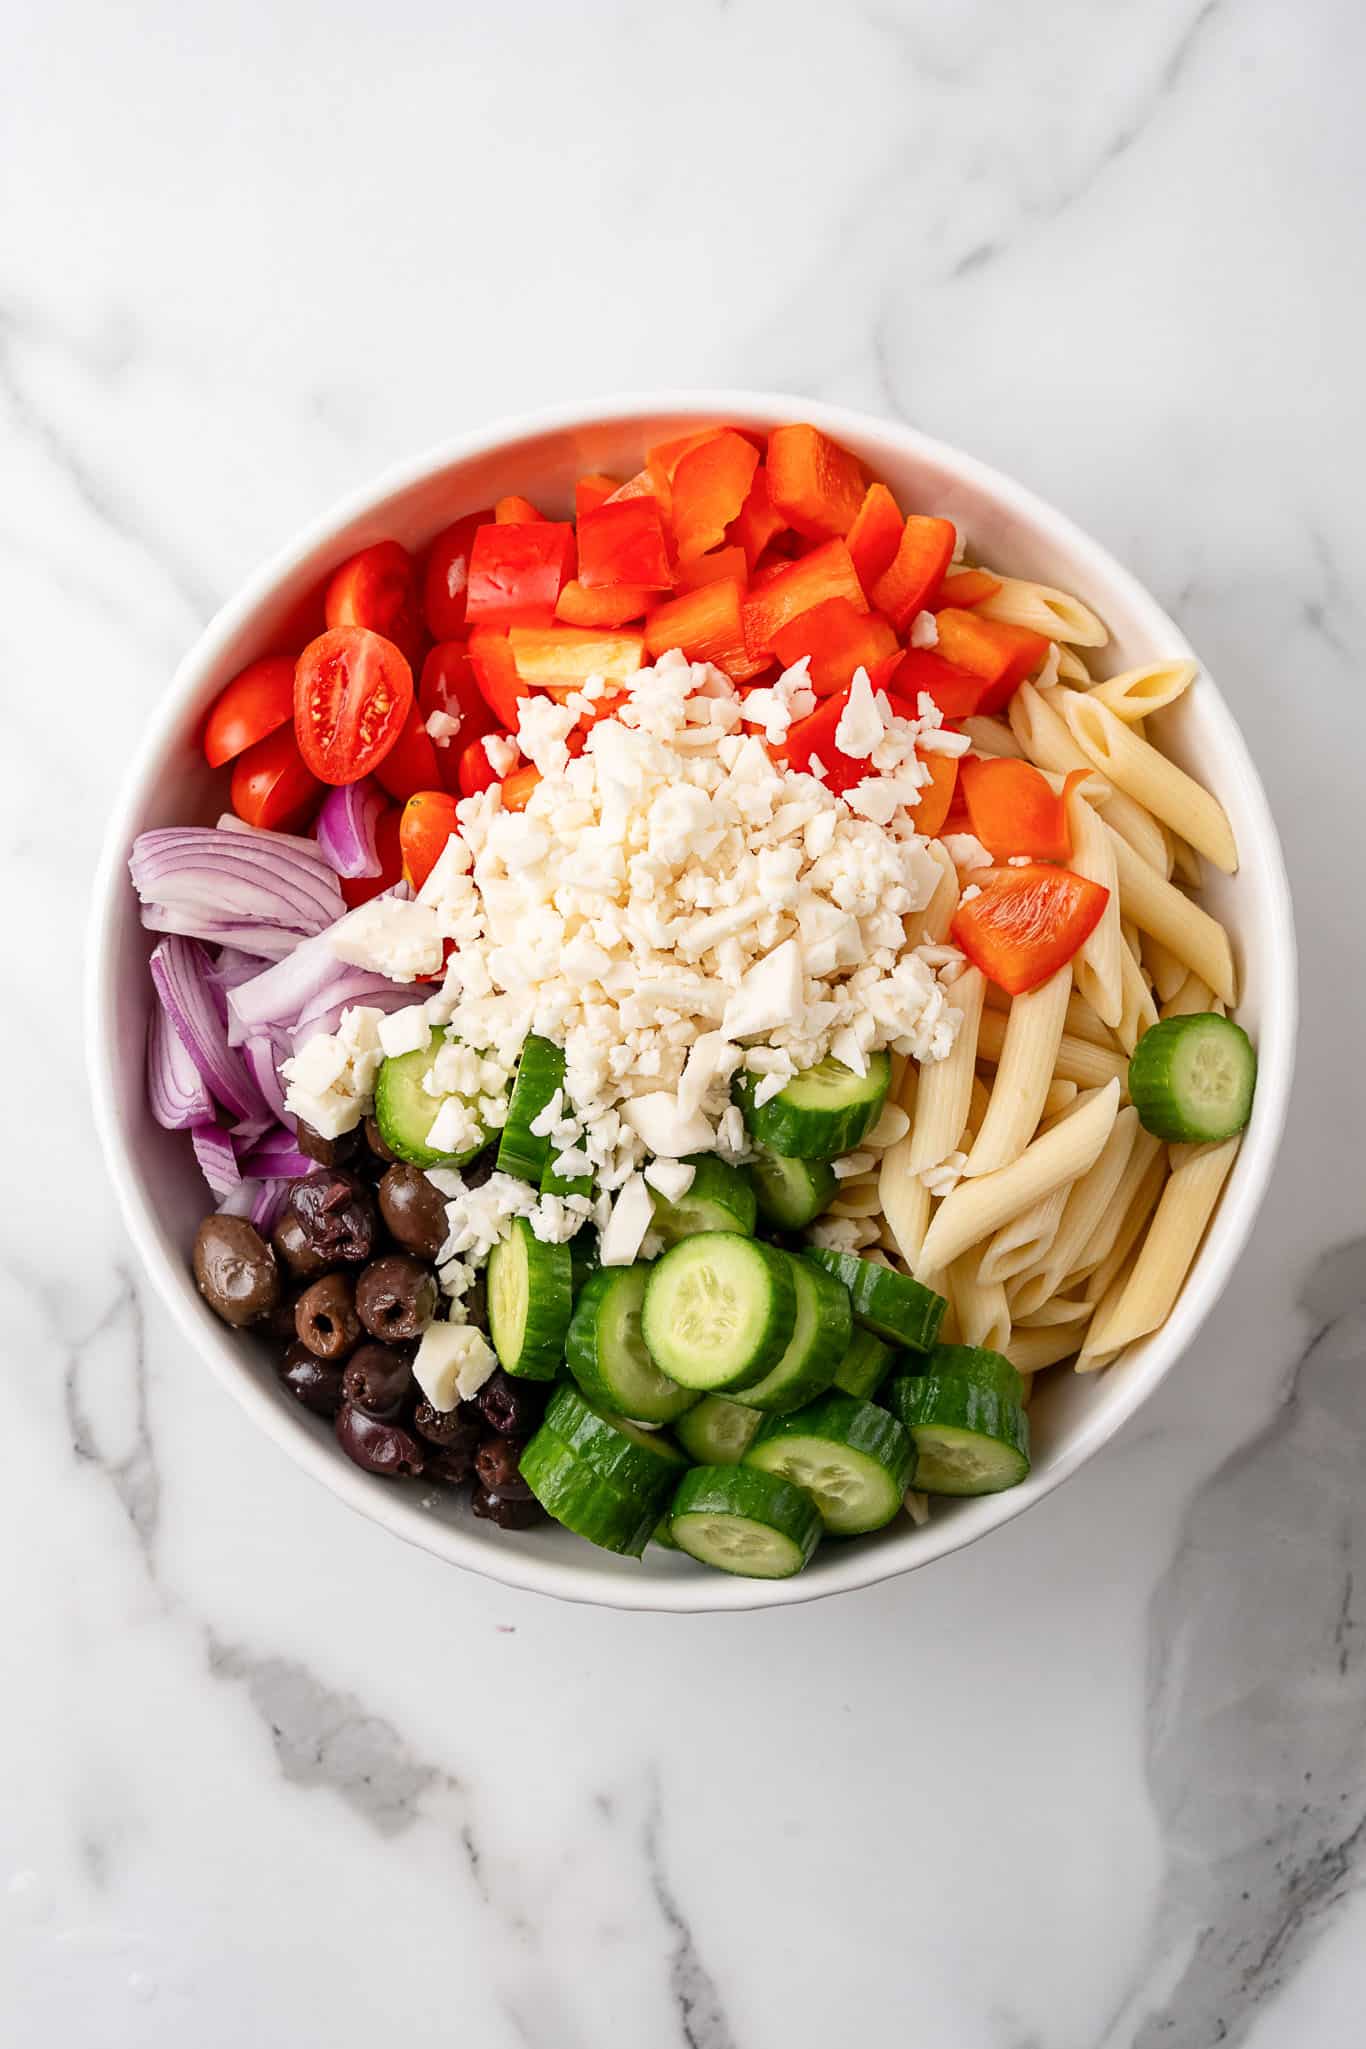
  • To a large bowl, add the pasta, cucumbers, grape tomatoes, bell pepper, vegan feta, kalamata olives, and red onion.
    vegan greek pasta salad
  • Toss all the ingredients together. Drizzle the dressing over the salad and toss again
    vegan greek pasta salad

Nutrition (Estimate per Serving)

Calories: 381kcalCarbohydrates: 53gProtein: 14gFat: 13gSaturated Fat: 2gPolyunsaturated Fat: 2gMonounsaturated Fat: 9gCholesterol: 3mgSodium: 449mgPotassium: 553mgFiber: 5gSugar: 7gVitamin A: 1189IUVitamin C: 40mgCalcium: 66mgIron: 2mg
Vegan-ize any recipe!Grab our free vegan cheat sheet, packed with my favorite easy substitutions to make any recipe vegan.

Pumpkin Seed Butter

October 8, 2024 by Nicole @ VegKitchen 1 Comment

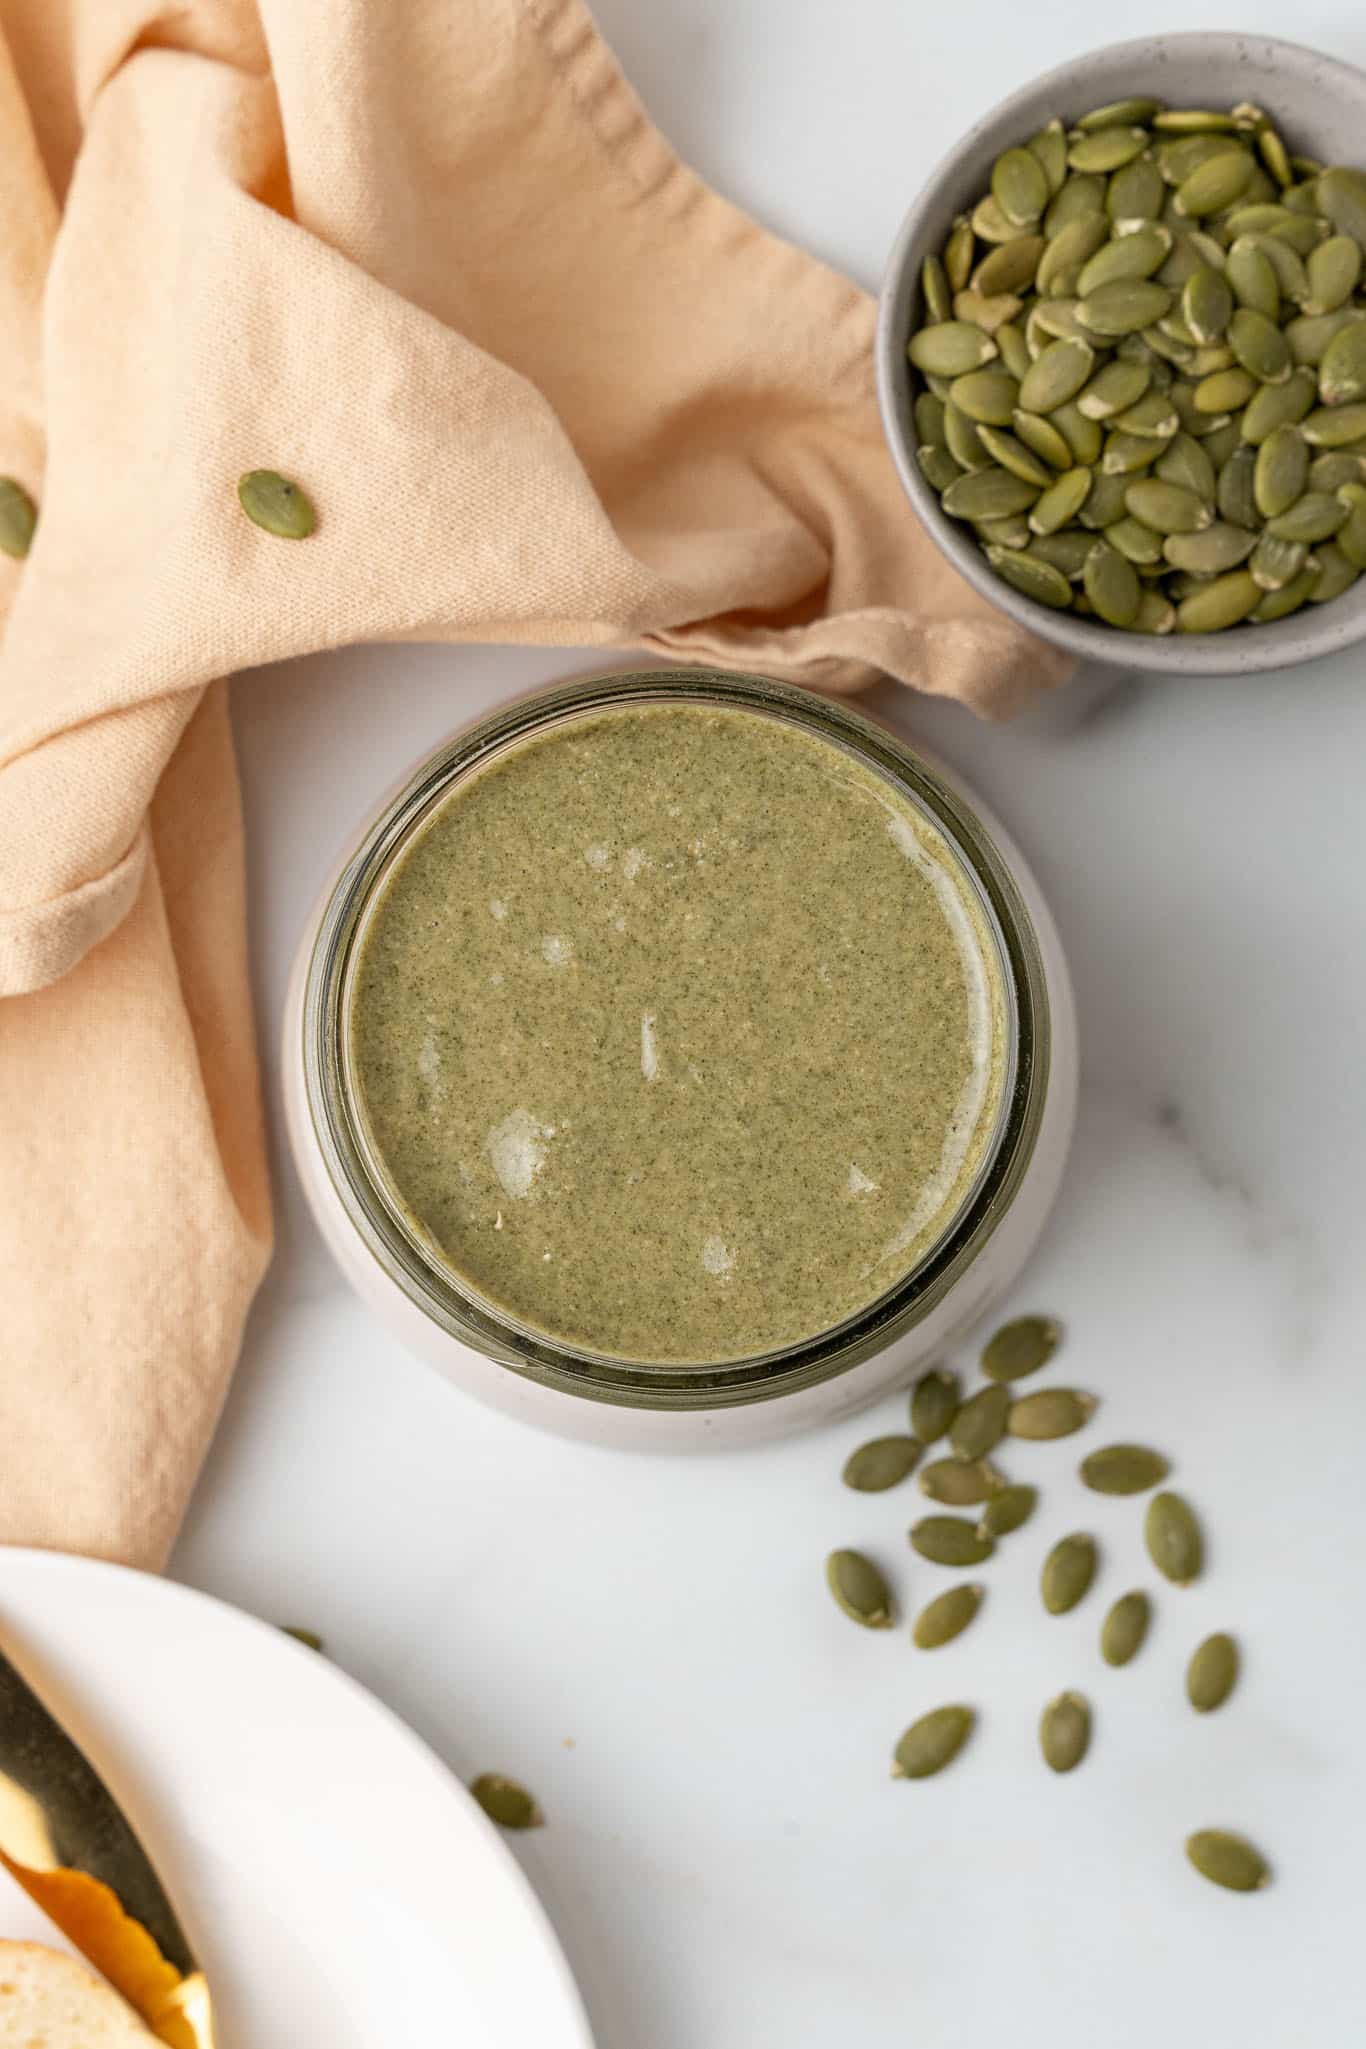
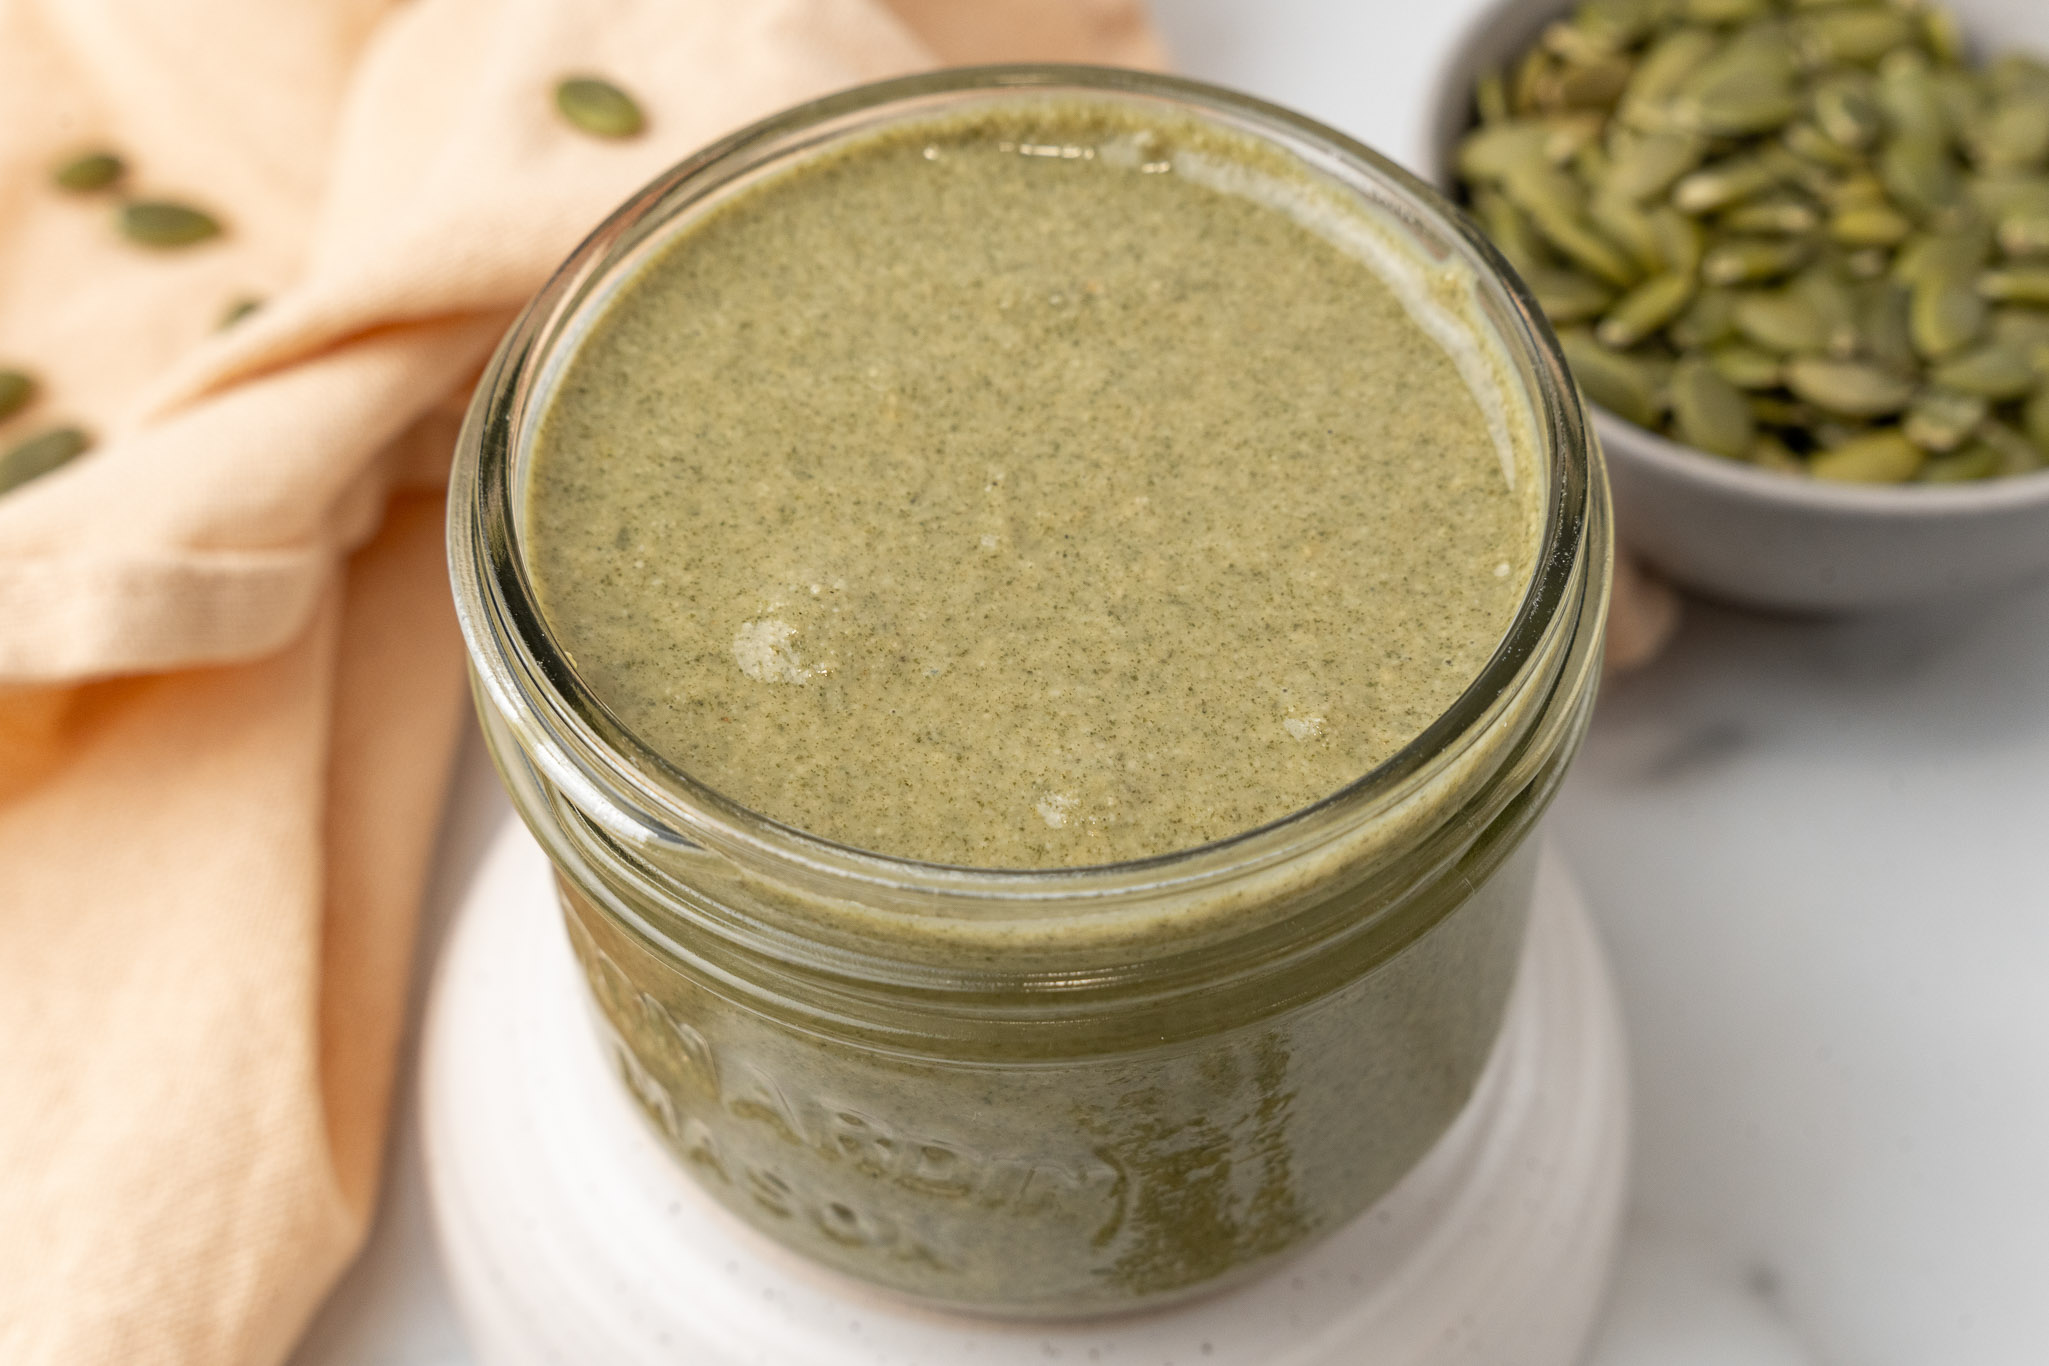
pumpkin seed butter

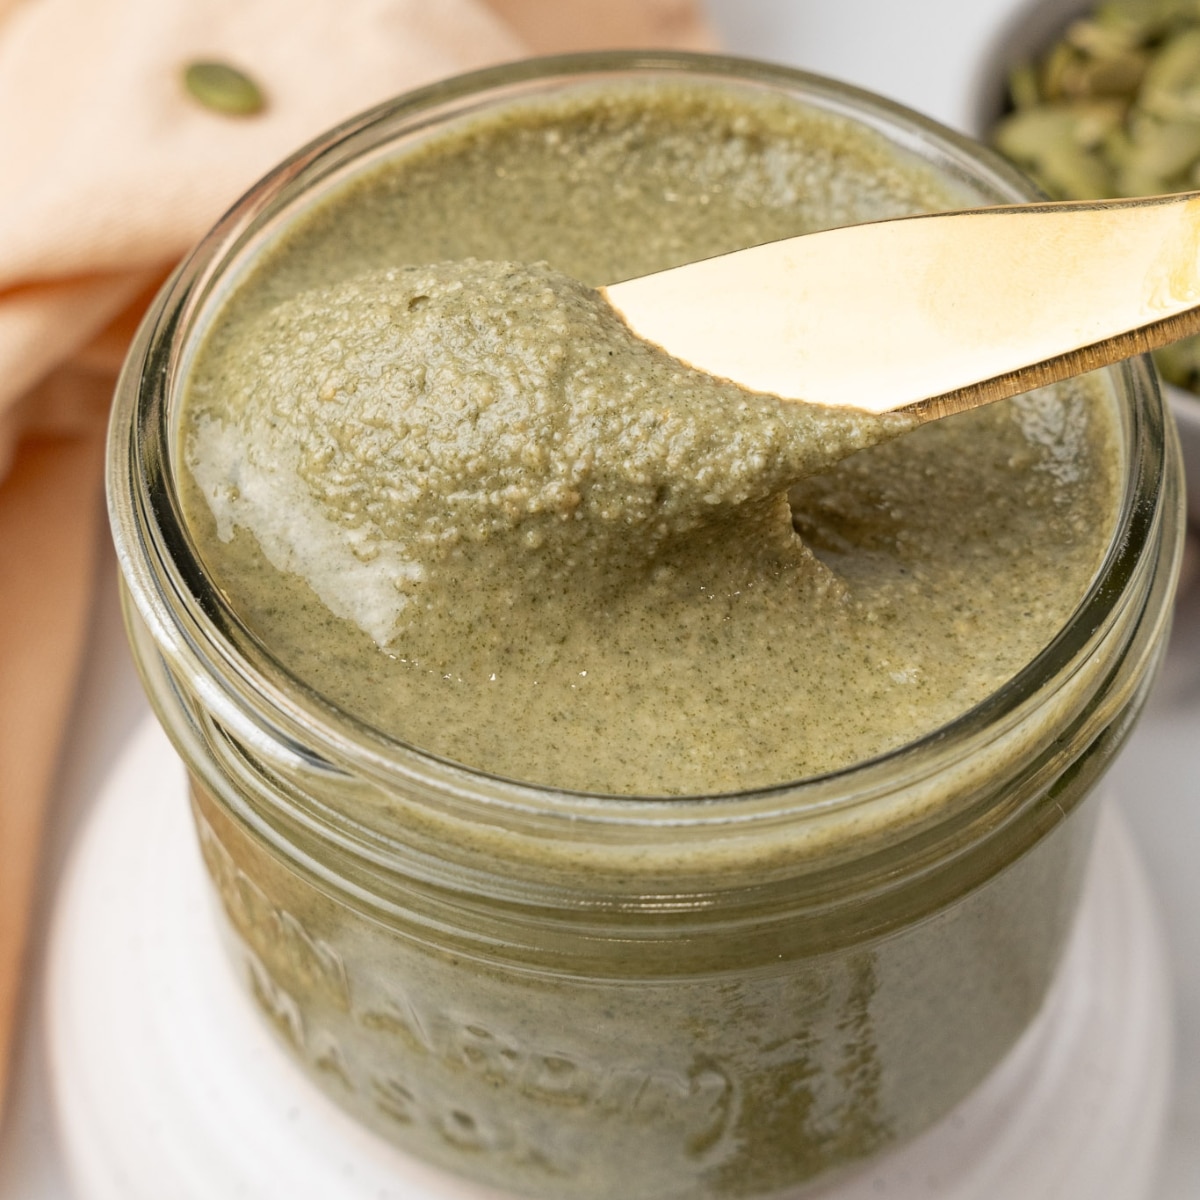
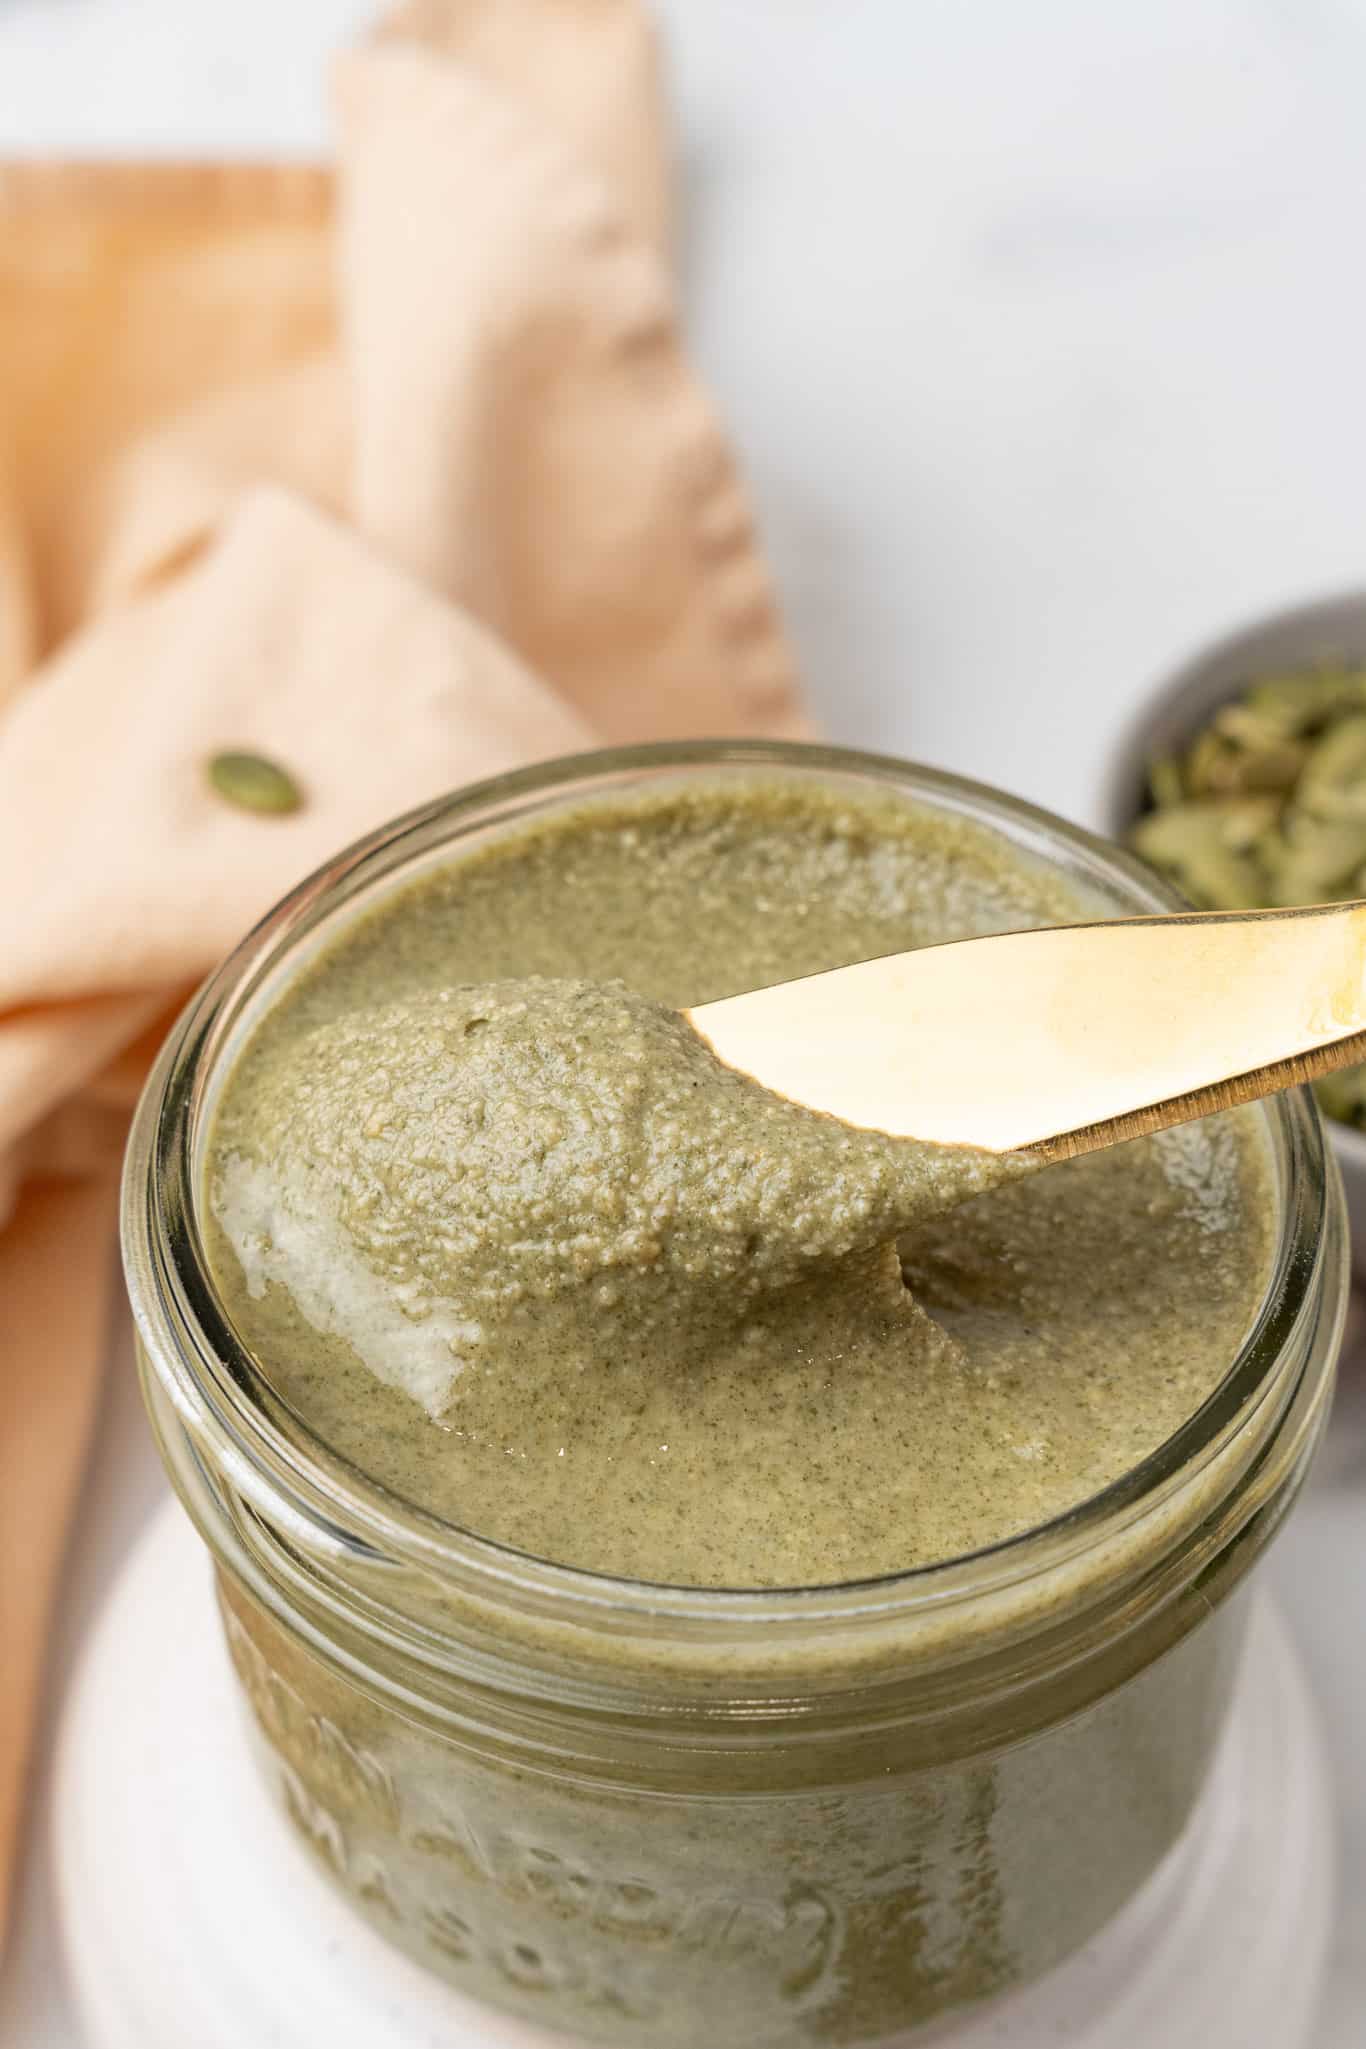
If you're looking for a creamy, nut-free alternative to traditional nut butters, you've got to try this homemade Pumpkin Seed Butter!

With just a few simple ingredients - pumpkin seeds, oil, and a pinch of salt - you can whip up a batch of this rich, green-hued spread. It's a delicious vegan alternative to traditional nut butters.

pumpkin seed butter

Not only is it super easy to make, but pumpkin seed butter is also loaded with nutrients like healthy fats, protein, and magnesium.

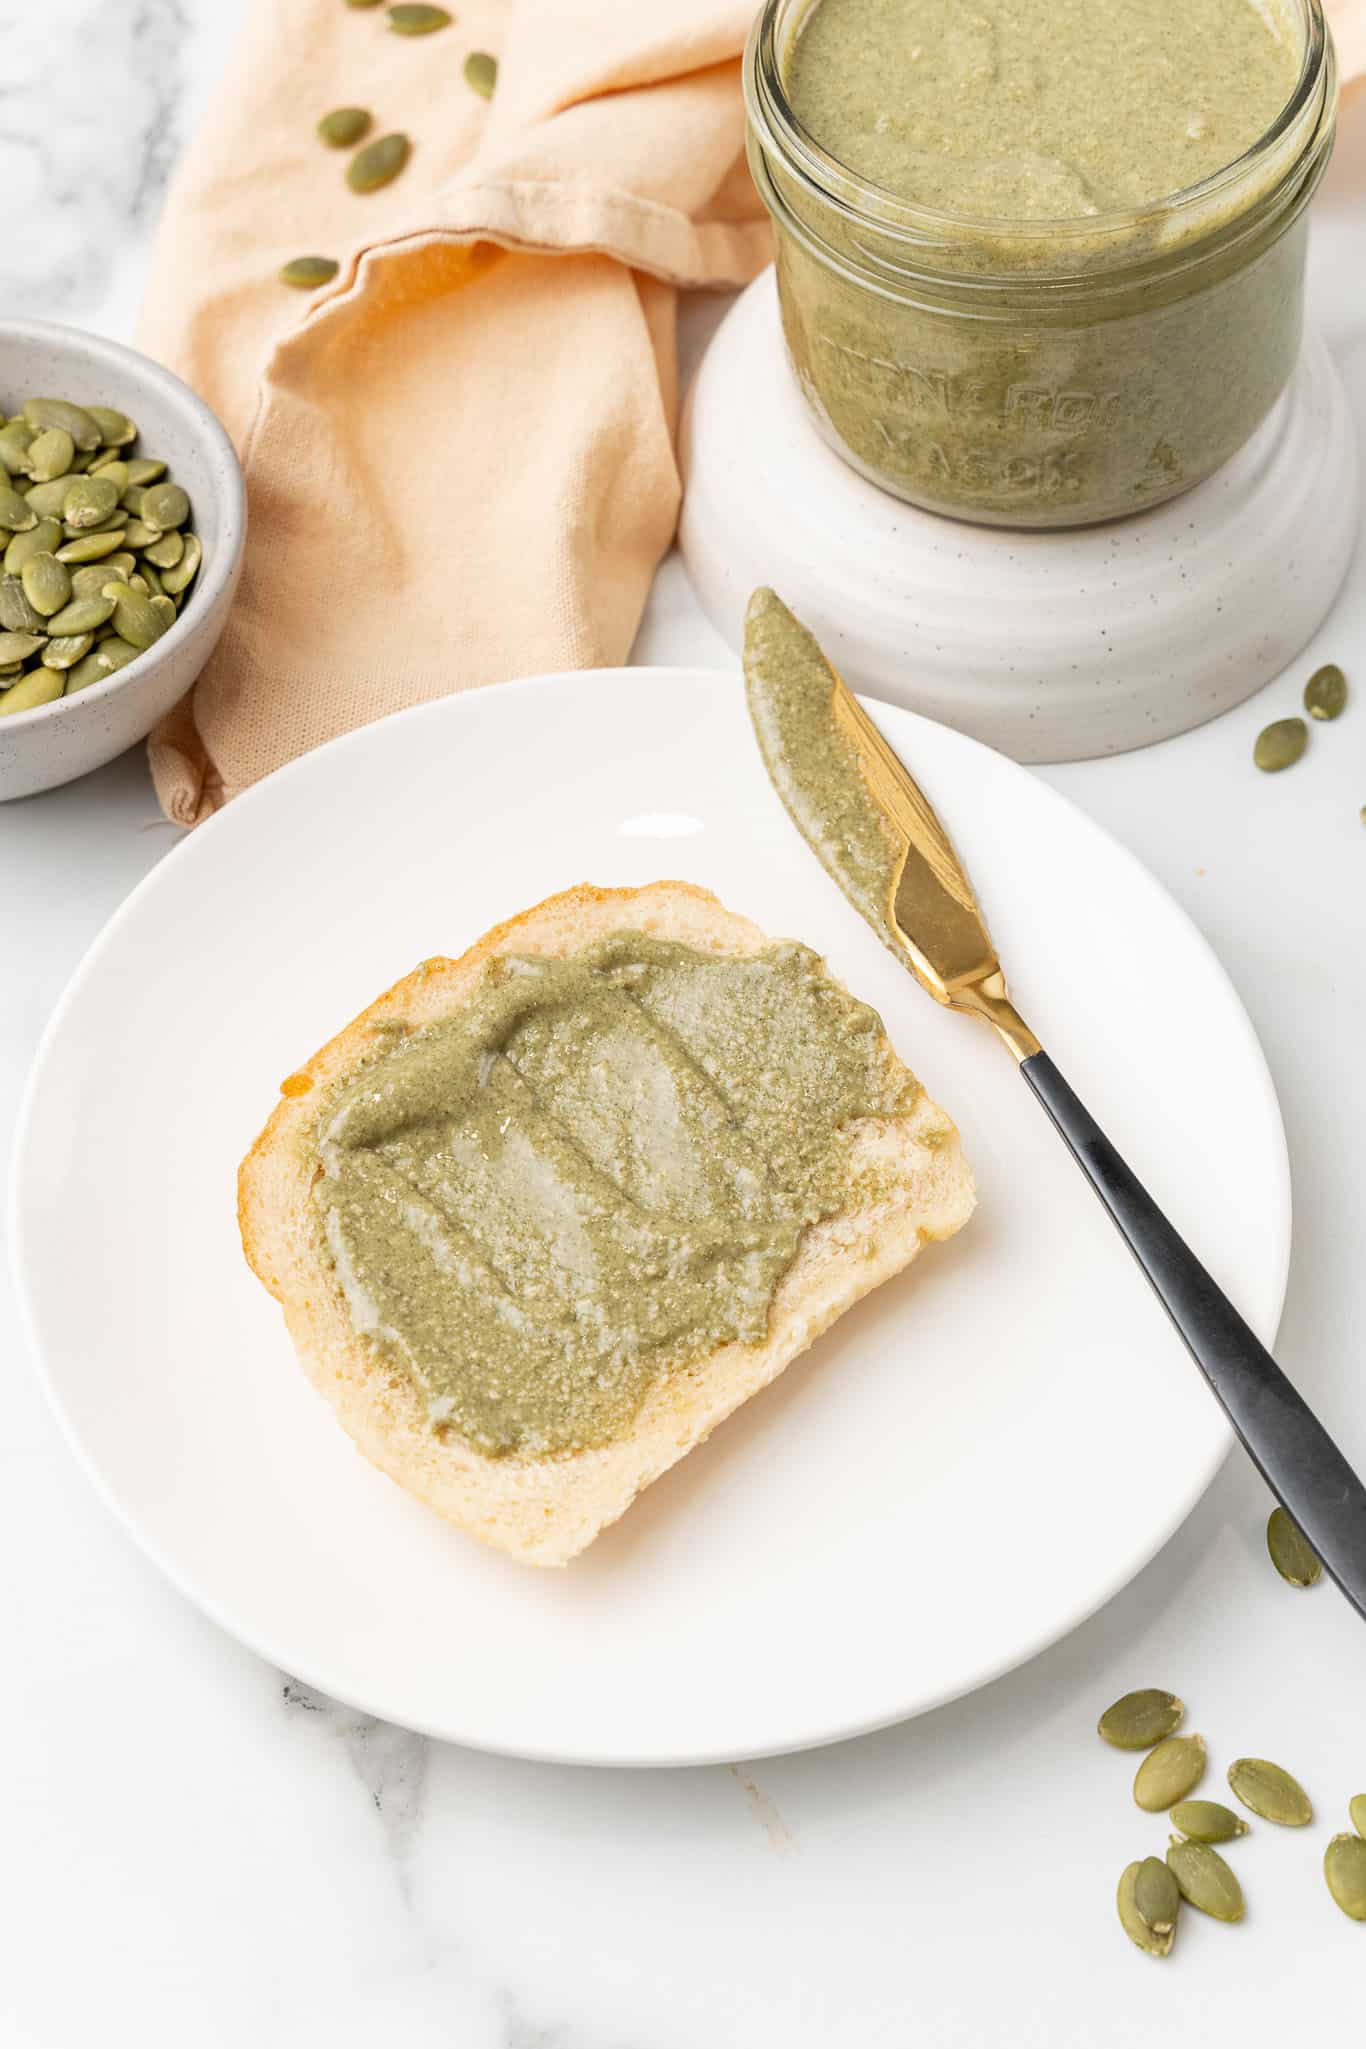
Plus, it's wonderfully versatile. Spread it on toast, drizzle it over oatmeal, or add a spoonful to your smoothies for an extra boost of flavor and nutrition. And did I mention it's ridiculously easy to make? Let's dive in!

pumpkin seed butter

Why I Love Pumpkin Seed Butter

There's something satisfying about transforming a handful of raw pumpkin seeds into a smooth, creamy butter with just a little time and patience. It makes me feel like some kind of homesteading rockstar.

I love that it's a great alternative for those with nut allergies or for when I want to switch up my usual peanut butter or almond butter routine.

And let's not forget - it's green, which makes it visually fun and unique! Every time I spread this pumpkin butter on toast or stir it into a recipe, it's a conversation starter.

pumpkin seed butter

This Pumpkin Seed Butter Recipe is...

  • Vegan: As always, 100% plant based.
  • Nut-Free: Perfect for anyone with allergies or sensitivities to nuts.
  • Versatile: Spread it, drizzle it, or use it as a dip.
  • Nutrient-Dense: Packed with healthy fats, protein, and essential minerals like magnesium and zinc.
  • Easy to Make: With just three simple ingredients and a food processor, you'll have a creamy, homemade spread in no time.
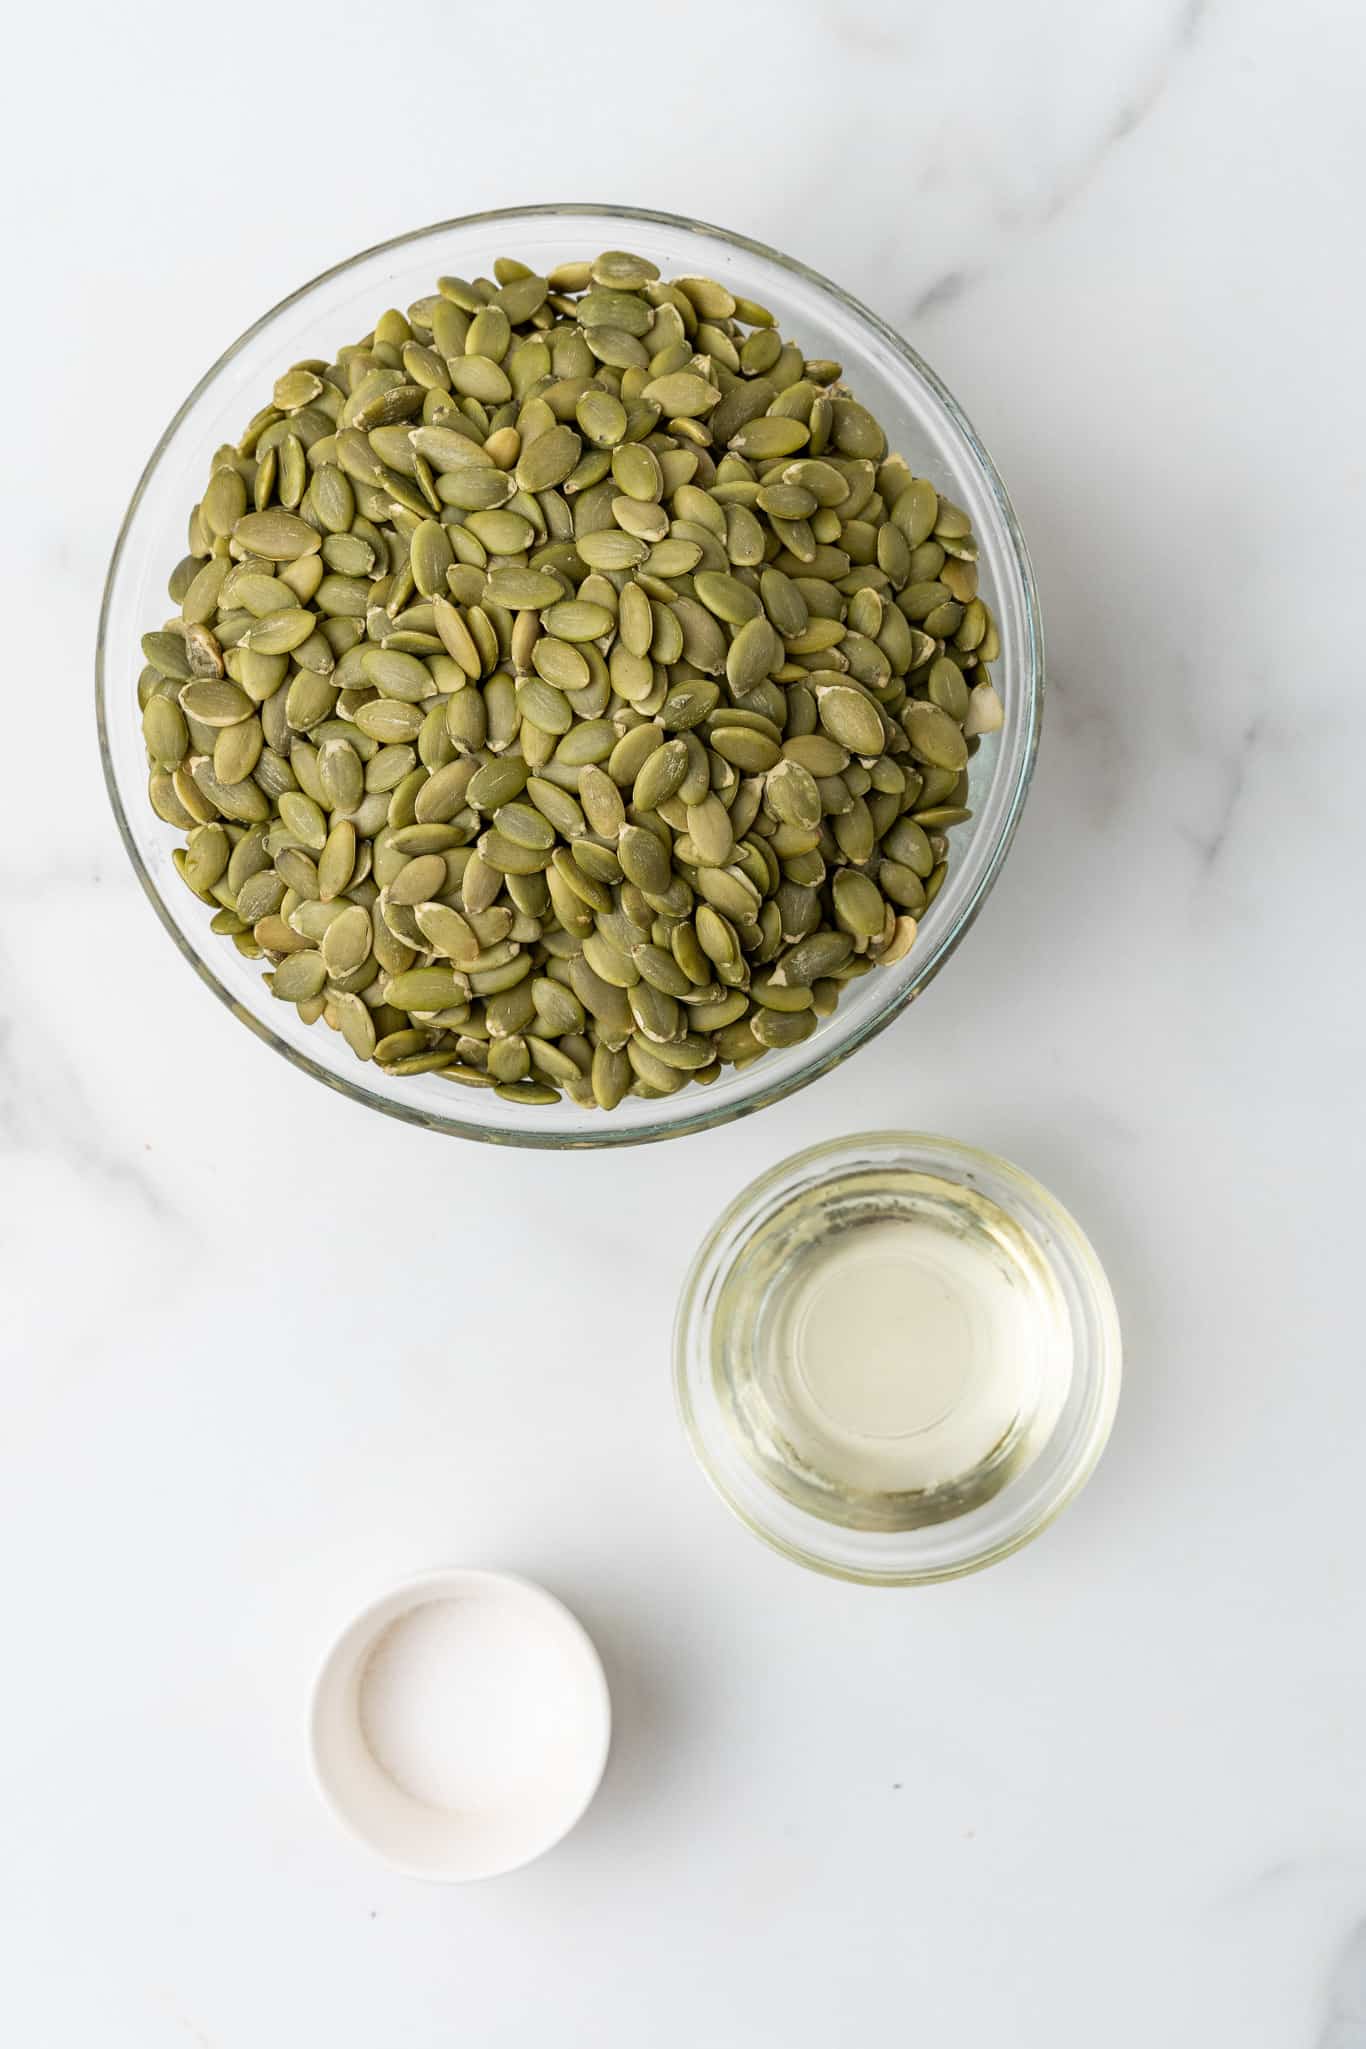
pumpkin seed butter ingredients on the counter

Key Ingredients & Substitutions

Pumpkin Seeds: I started with raw, unsalted pumpkin seeds (also known as pepitas) for this recipe.

Oil: A little oil helps smooth out the texture. I like using neutral oils like avocado oil or grapeseed oil, but you can also use olive oil for a richer flavor. Just add it slowly to get the perfect consistency.

Salt: A touch of salt brings out the natural flavors of the pumpkin seeds. You can adjust the amount to your taste preference or omit it entirely if you're watching your sodium intake.

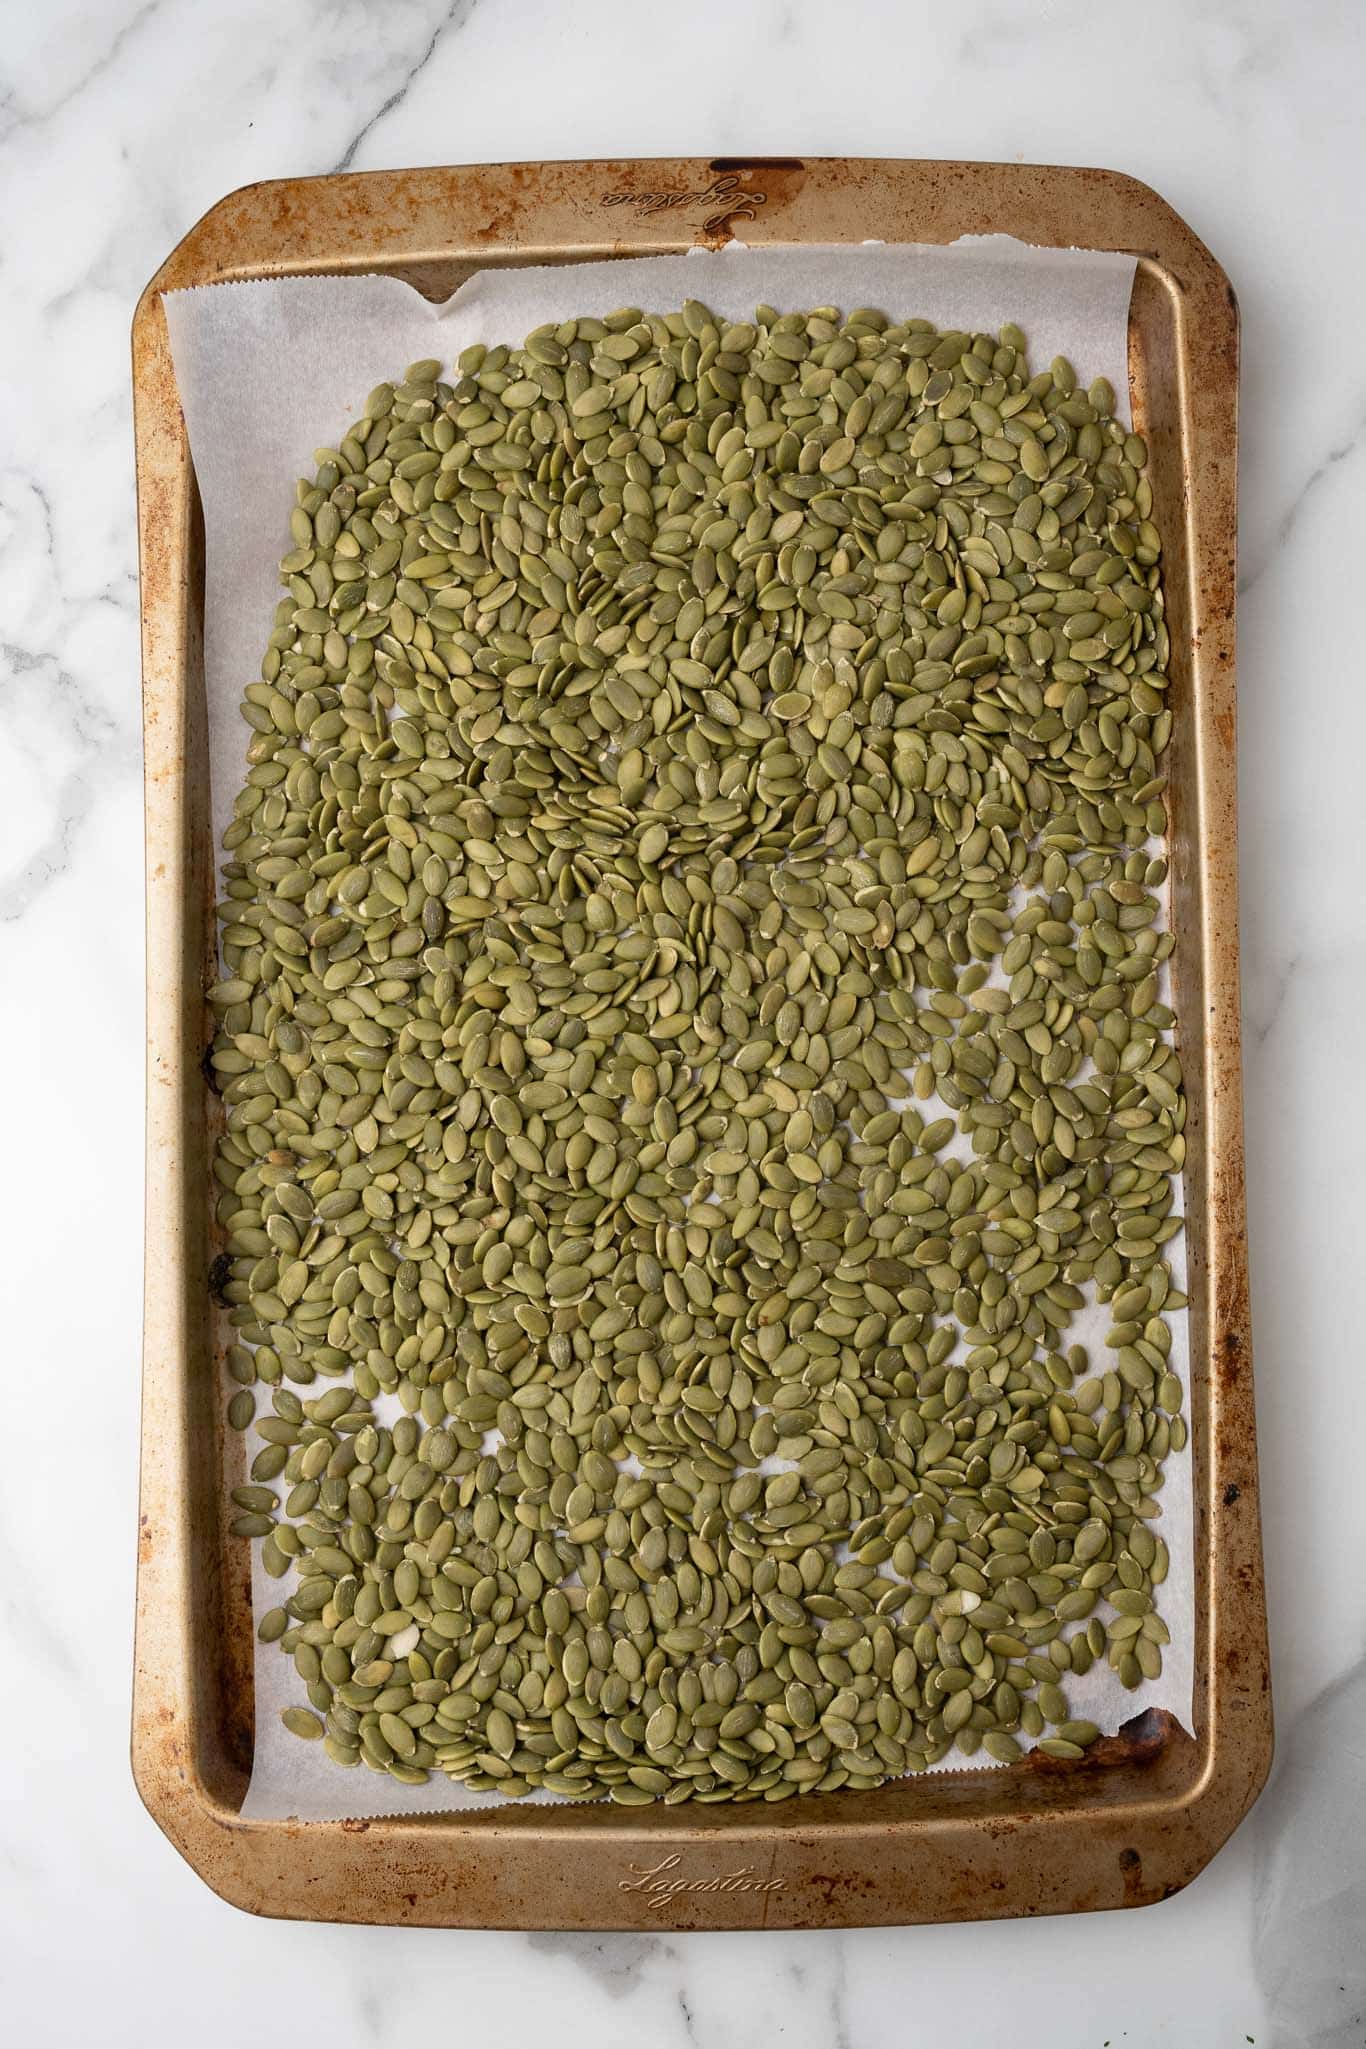
pumpkin seeds on a baking tray

Helpful Tips

Toasting the Seeds for Flavor: Toasting the pumpkin seeds before processing helps release their natural oils and enhances the flavor, making the butter richer and nuttier. Just be sure to let them cool completely before processing to avoid heating your food processor too much.

Patience is Key: The transformation from whole seeds to smooth butter takes time - about 15 minutes of processing. Be patient, and make sure to stop and scrape down the sides of your food processor occasionally. The seeds will first turn into a crumbly texture before becoming smooth and creamy.

Add Oil Slowly: Start with 1 tablespoon of oil, and only add more if necessary. You want a smooth, spreadable consistency, but not too runny. The natural oils from the pumpkin seeds will help create the butter, so you may not need much extra oil.

Also worth trying: our chocolate avocado cookies.

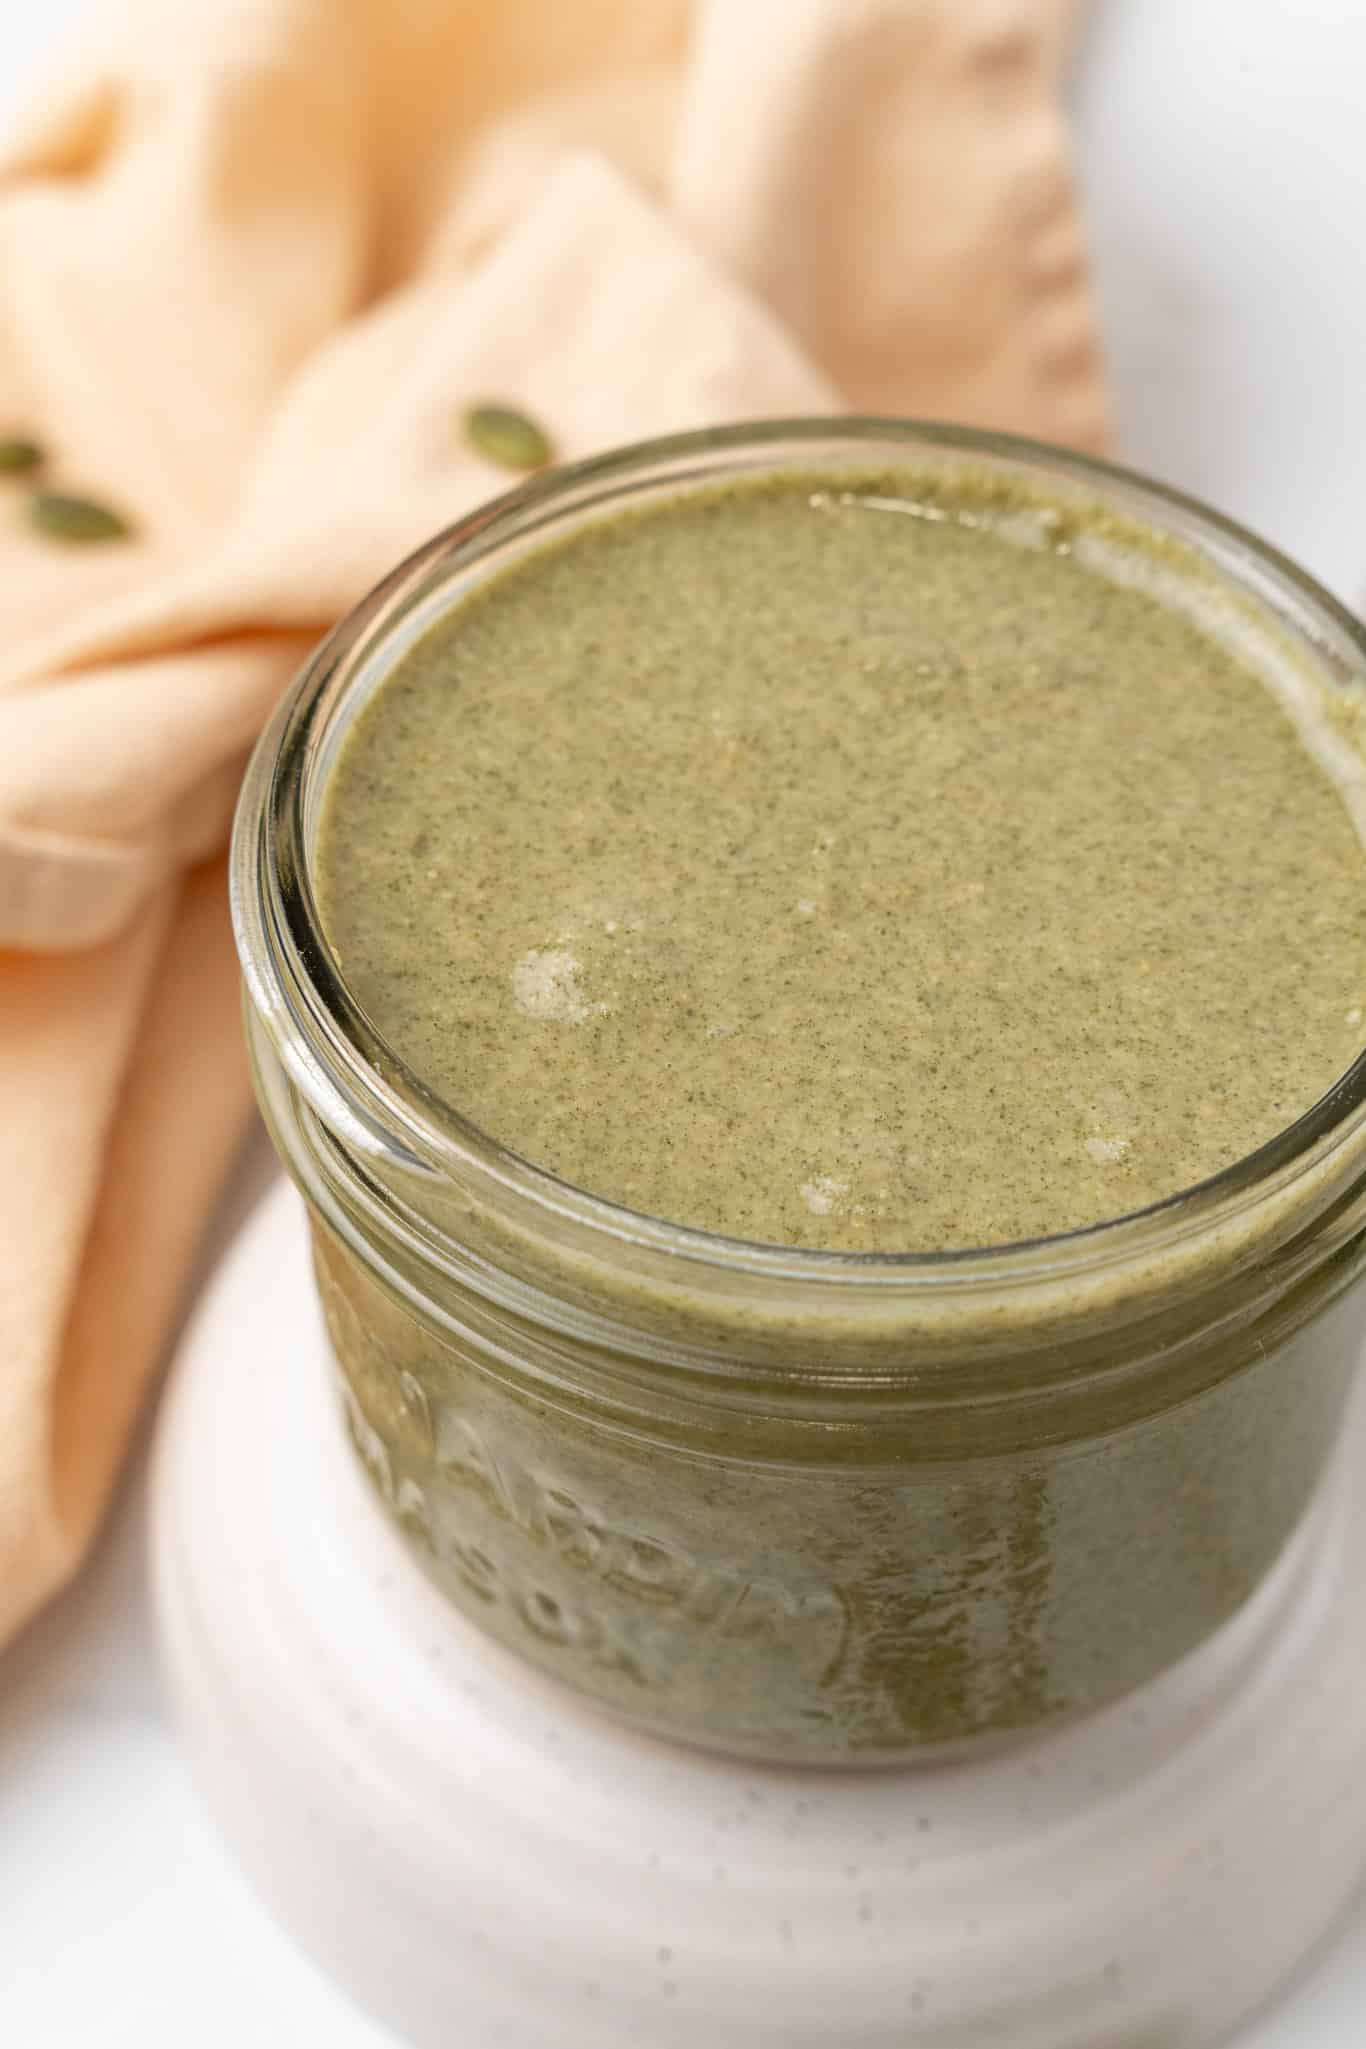
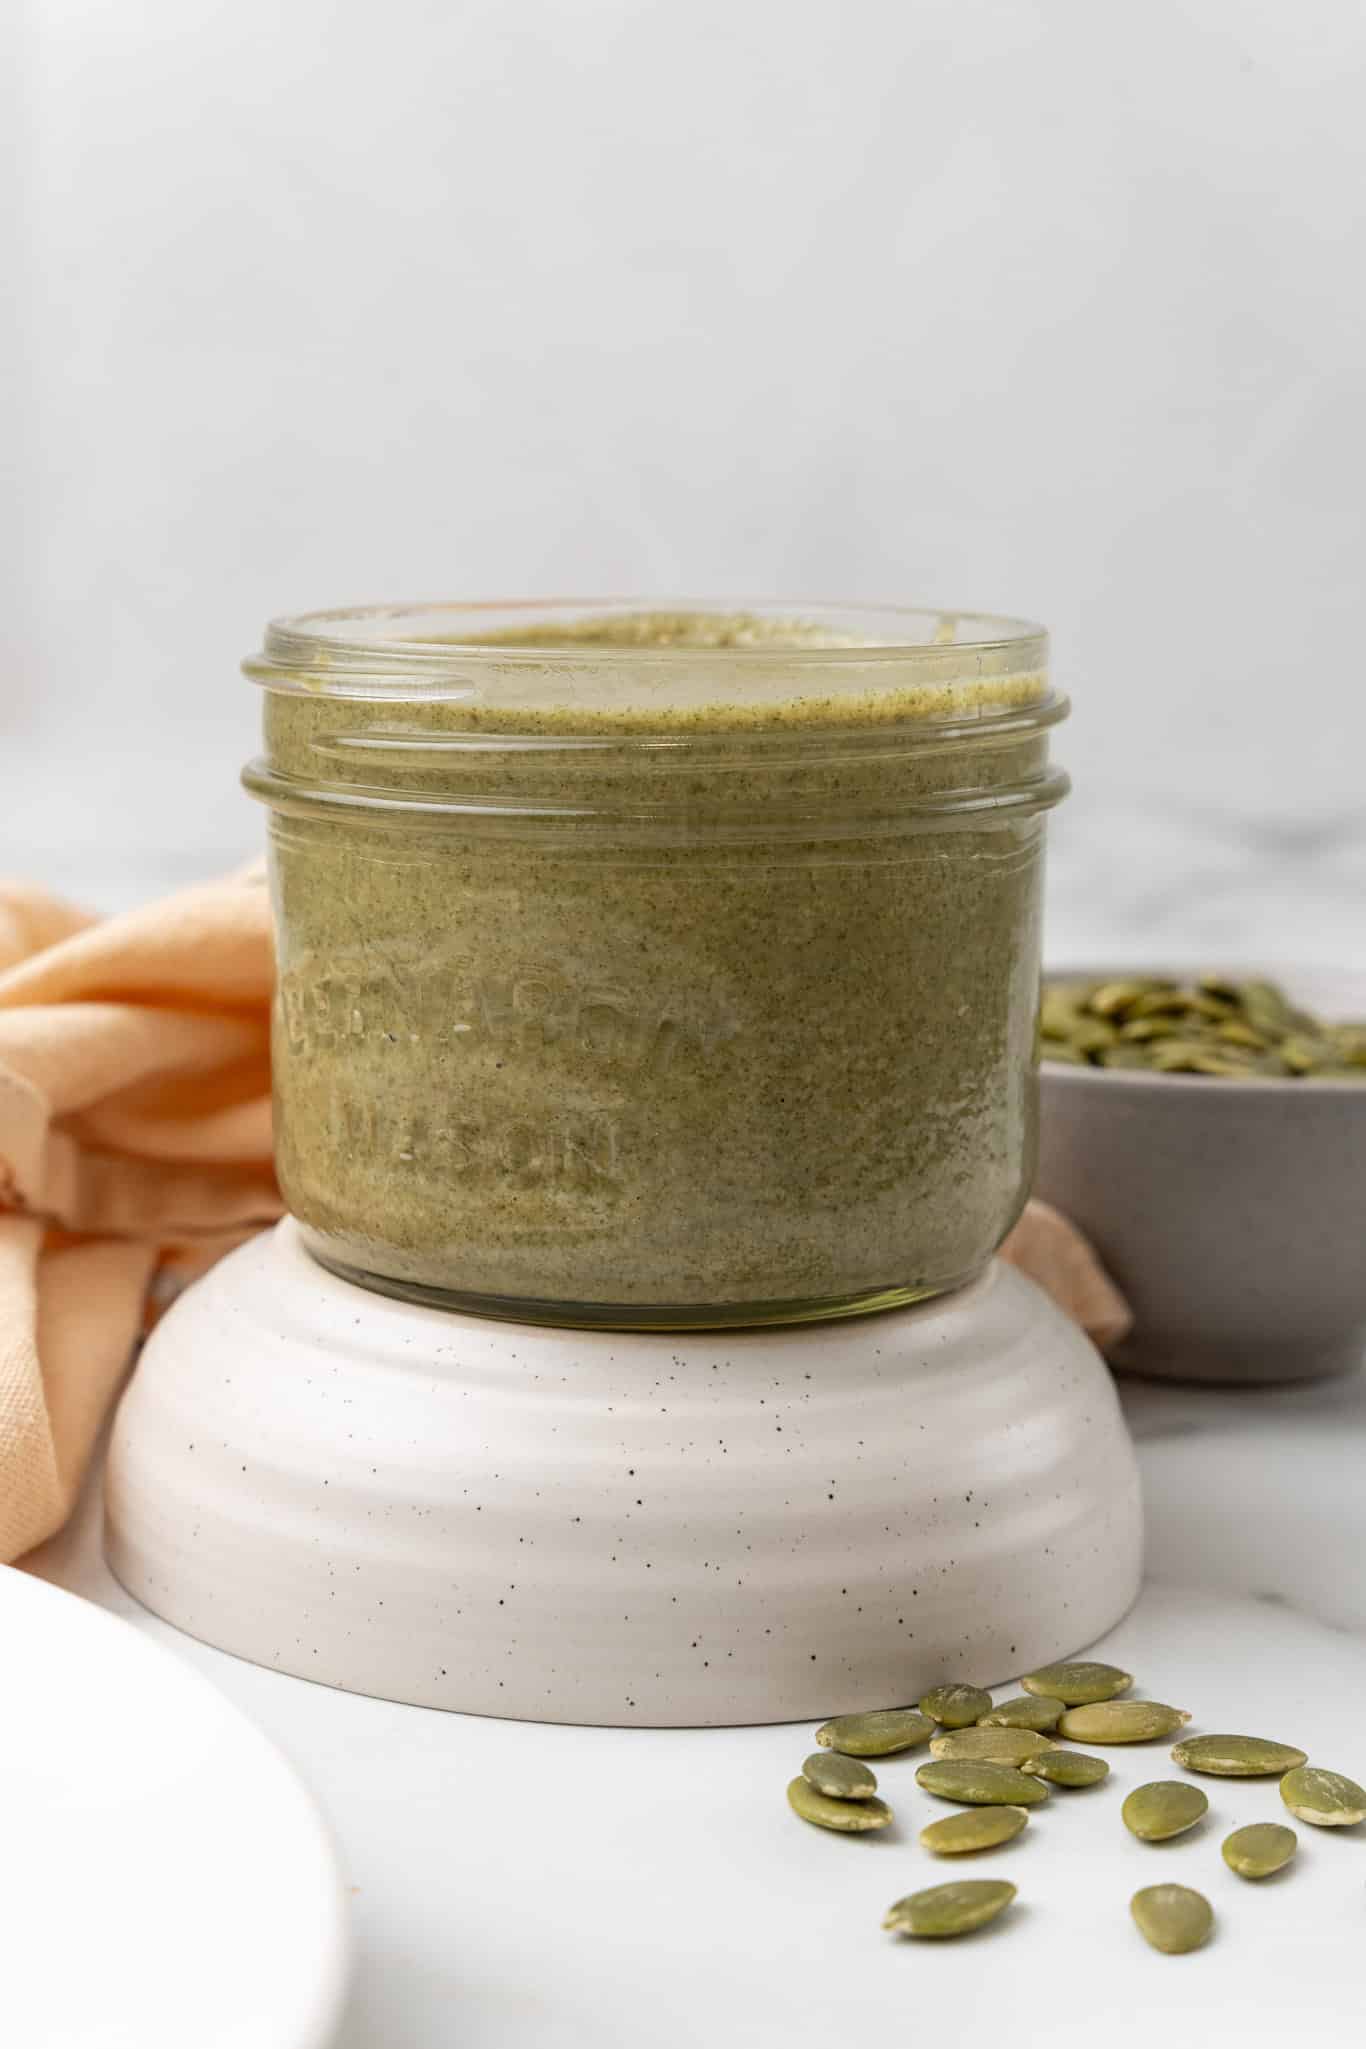
pumpkin seed butter in a jar

Variations to Try

Sweet Pumpkin Seed Butter: Add a teaspoon of maple syrup or agave syrup along with a dash of cinnamon for a naturally sweetened, fall-flavored spread.

Spicy Pumpkin Seed Butter: If you like a bit of heat, add a pinch of chili powder or cayenne to the mixture for a spicy kick. Perfect for dipping veggies or crackers.

Chocolate Pumpkin Seed Butter: Stir in a tablespoon of unsweetened cocoa powder and a bit of sweetener (like maple syrup) for a chocolatey version that's perfect for spreading on toast or eating straight off the spoon!

pumpkin seed butter being made in the blender

How to Use Pumpkin Seed Butter

  • On Toast: Spread it on toast or rice cakes for a simple, nutritious snack.
  • In Smoothies: Add a spoonful to your vegan smoothies for a boost of healthy fats and flavor.
  • Drizzle over Oatmeal or Yogurt: For a creamy, nutty addition to your morning bowl.
  • As a Dip: Pair it with apple slices, celery sticks, or crackers for a wholesome snack. It's a great alternative to traditional peanut butter dip.
  • In Baking: Use it in place of other nut butters in cookies, energy balls, or even homemade vegan granola bars.
  • On Waffles: Drizzle it over vegan pumpkin waffles for a fall-flavored breakfast that's packed with nutrition.
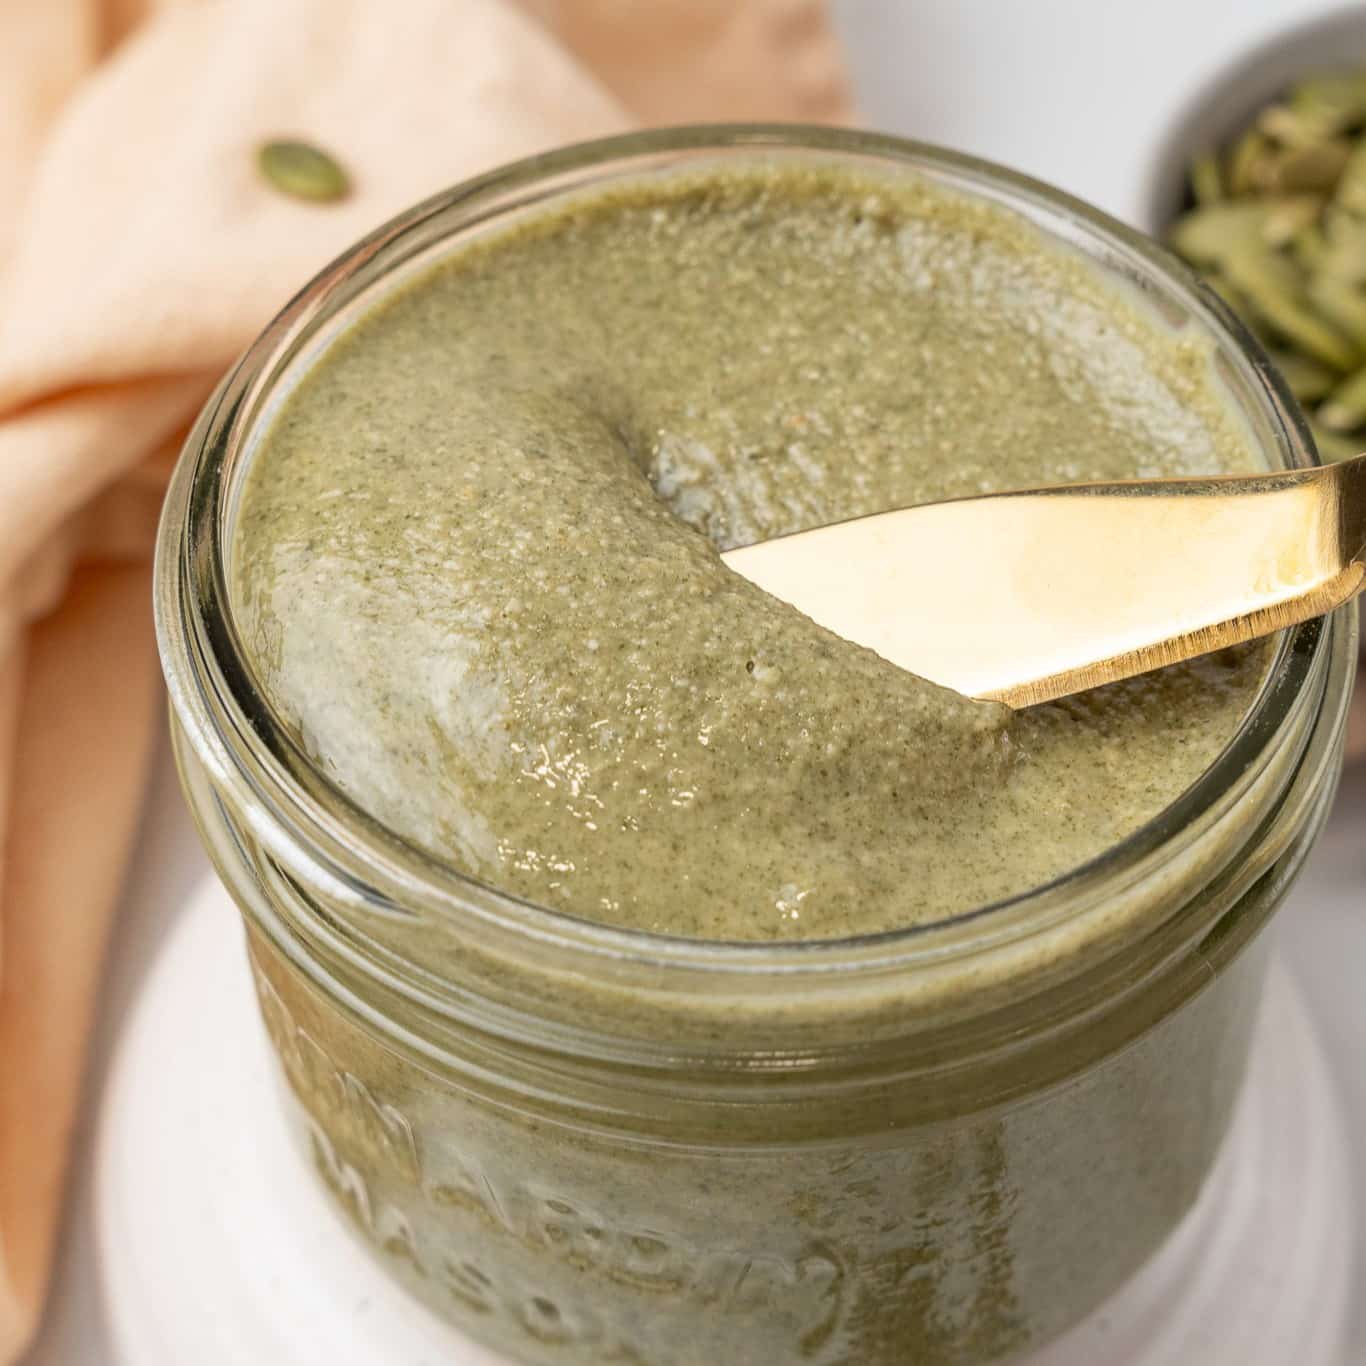
pumpkin seed butter being served

Storing Pumpkin Seed Butter

Once you've made your pumpkin seed butter, store it in an airtight jar in the refrigerator. It will keep for up to 2 weeks (though it usually disappears much faster in my house!).

Because it's made without preservatives, refrigeration helps keep it fresh and prevents separation. If the butter starts to separate over time, just give it a good stir, and it's ready to go again!

pumpkin seed butter

More Vegan Treats

If you love this pumpkin seed butter, be sure to check out these other tasty ideas: 

  • 5-Minute Vegan Peanut Butter Dip
  • Candied Pumpkin Seeds
  • Vegan Apple Honey

Recipe

pumpkin seed butter

Pumpkin Seed Butter

5 from 1 vote
This homemade Pumpkin Seed Butter is a creamy, nut-free alternative to traditional nut butters. Plus it's so easy to make with just a few simple ingredients!
Print Pin Save Saved!
Prep Time: 20 minutes minutes
Cook Time: 10 minutes minutes
Total Time: 30 minutes minutes
Servings: 12 servings
Prevent your screen from going dark

Equipment

  • Blender or food processor

Ingredients

  • 2 ½ - 3 cups raw pumpkin seeds
  • 1 teaspoon salt
  • 1-2 tablespoons avocado oil or other neutral oil, as needed
US Customary - Metric

Instructions

  • Preheat the oven to 300F. Line a baking sheet with parchment paper and set aside.
  • Spread the pumpkin seeds alone the baking sheet in an even layer, then toast in the preheated oven for 10 minutes, stirring halfway through.
    pumpkin seed butter
  • Allow the seeds to cool completely.
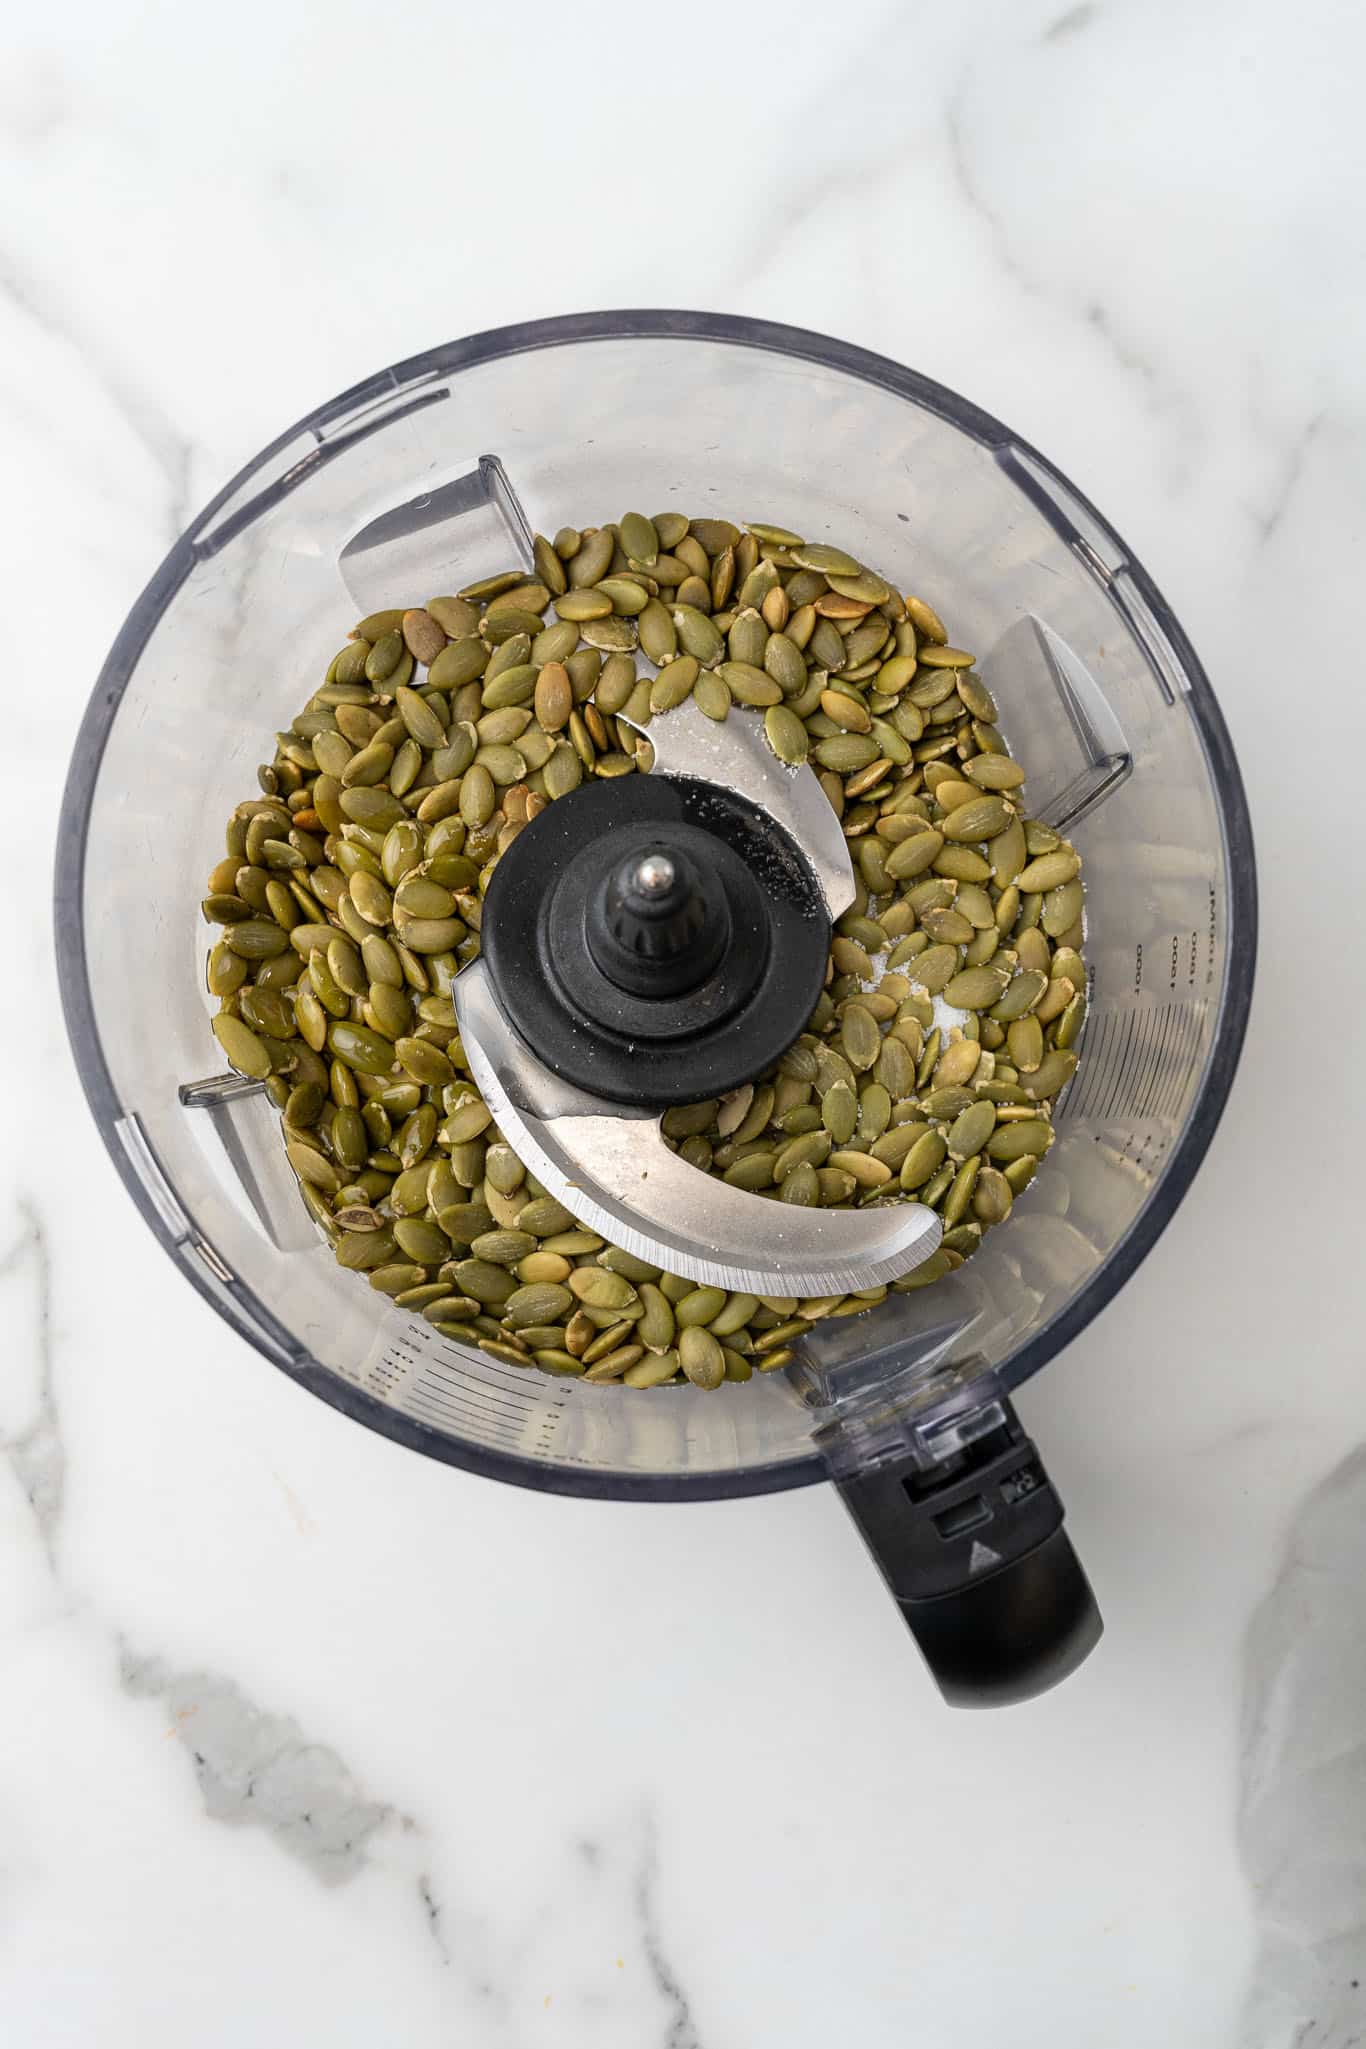
  • Add the seeds, salt, and 1 tablespoon of oil to a high speed food processor.
    pumpkin seed butter
  • Process until smooth, stopping to scrape the sides as needed. Add additional oil if required to get the right consistency.
    pumpkin seed butter
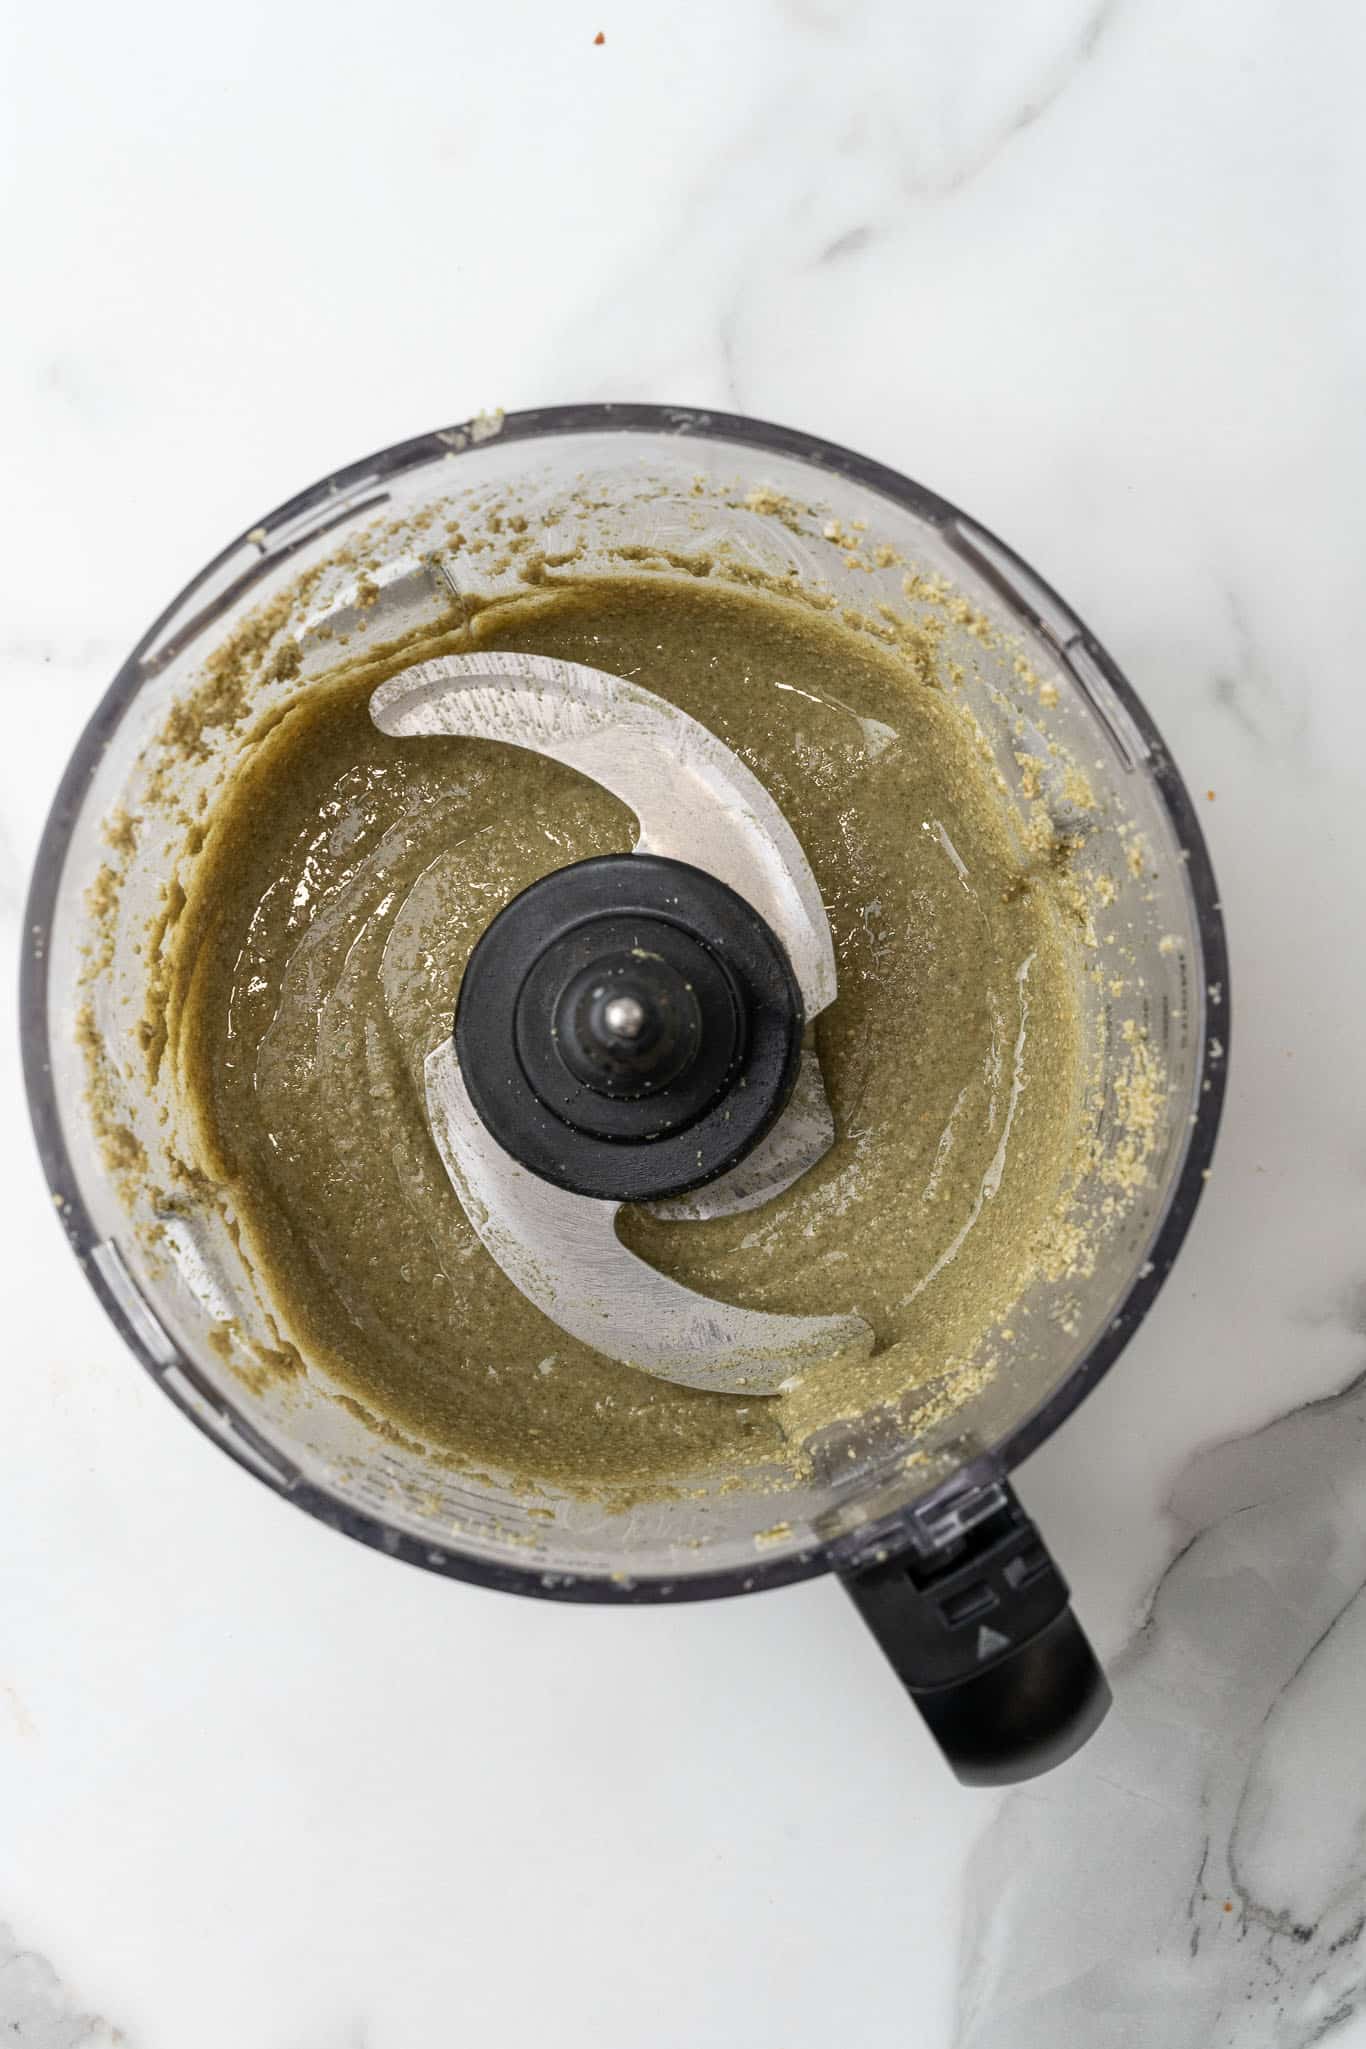
  • After about 15 minutes, you should have processed the seeds enough that they become the consistency of natural peanut butter.
    pumpkin seed butter

Nutrition (Estimate per Serving)

Calories: 85kcalCarbohydrates: 1gProtein: 4gFat: 8gSaturated Fat: 1gPolyunsaturated Fat: 3gMonounsaturated Fat: 3gTrans Fat: 0.01gSodium: 195mgPotassium: 108mgFiber: 1gSugar: 0.2gVitamin A: 2IUVitamin C: 0.3mgCalcium: 6mgIron: 1mg
Vegan-ize any recipe!Grab our free vegan cheat sheet, packed with my favorite easy substitutions to make any recipe vegan.

Vegan Halloween Cupcakes

September 23, 2024 by Nicole @ VegKitchen Leave a Comment

vegan halloween recipes

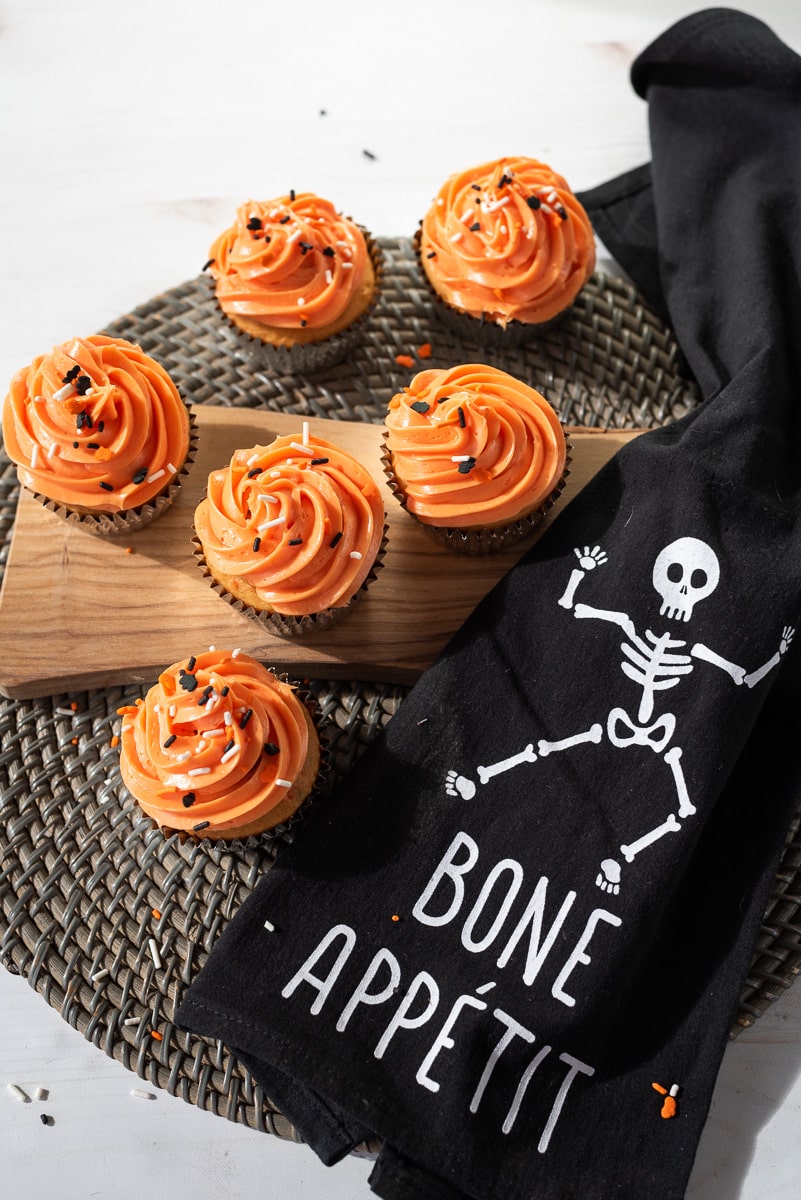
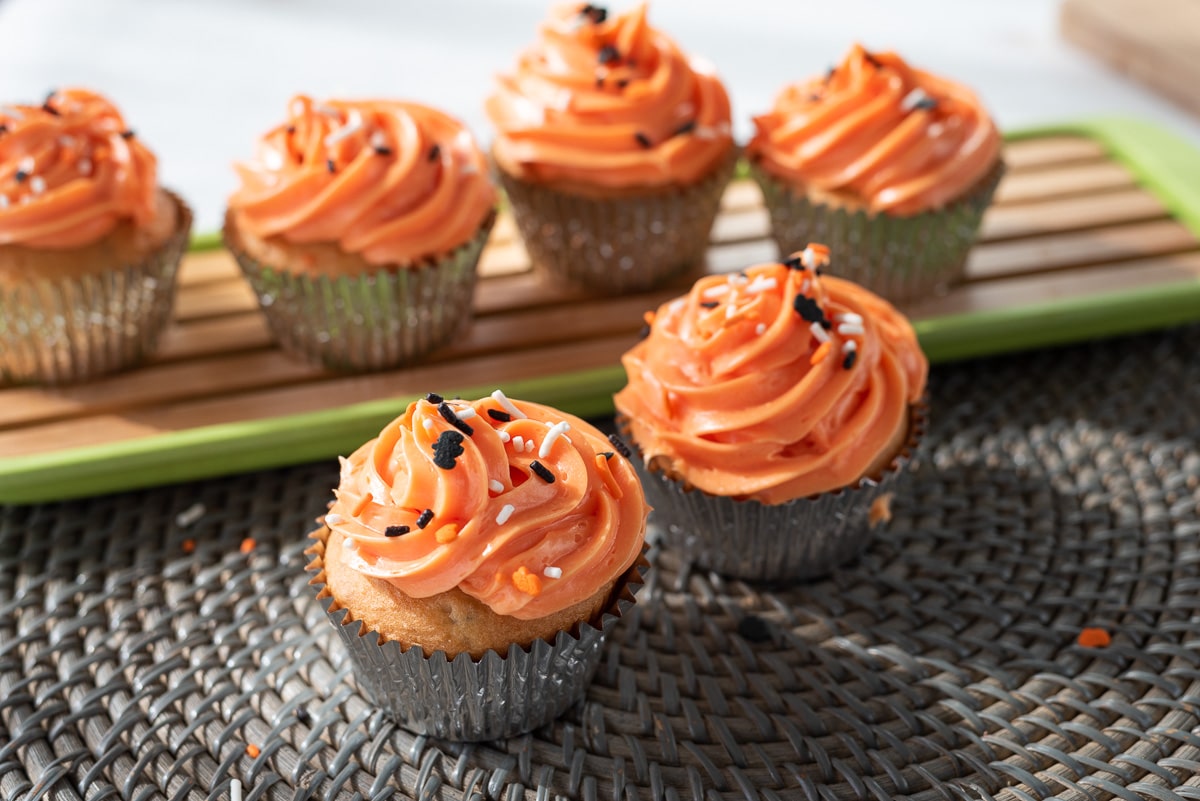
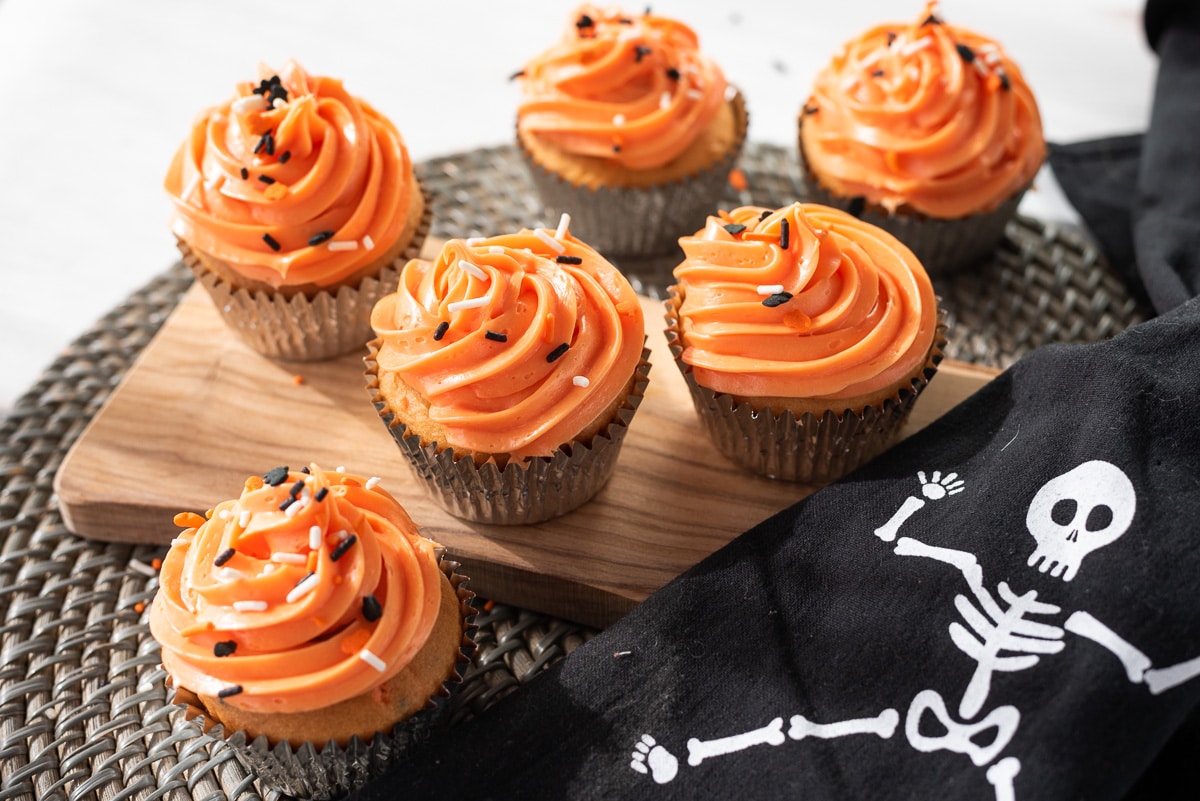
Add a dash of spookiness to your Halloween spread with these fang-tastic Vegan Halloween Cupcakes! Bursting with sweet flavor, these creepy-cute treats not only look good but taste amazing, and they're 100% vegan-friendly. 

vegan halloween recipes

Halloween is one of my all time favorite holidays! Our decorations go up on October 1st without fail, and we love getting into the spirit of the season with Fall festivals and pumpkin themed everything. 

vegan halloween recipes

But somehow I have failed to keep up with the Halloween themed recipes around here. So let me make that up to you with these simple and delicious Vegan Halloween Cupcakes. 

These cupcakes are: 

  • Spooky and sweet. 
  • An easy, family friendly Halloween treat. 
  • Ready in just about 30 minutes.
  • 100% vegan!
vegan halloween recipes

Helpful Tips

Get creative with the decorations! 

You can use any Halloween themed sprinkles or candies of your choice - just be sure to check the label to make sure they are really vegan. Halloween cupcake liners are a fun touch too! 

Cool before frosting

Cool the cupcakes completely before applying the frosting, so it doesn't melt!

Coloring the frosting

Start with a small amount of food coloring and gradually add more until the desired shade of orange is achieved. I like these Americolor gel food colorings, which are vegan friendly. For a more professional look, use a piping set to apply the frosting in big swirls!

vegan halloween recipes

Variations

Gluten-Free Vegan Cupcakes: Replace the all-purpose flour with a 1:1 gluten-free baking flour blend.

Chocolate Vegan Halloween Cupcakes: Add ½ cup of unsweetened cocoa powder to your dry ingredients for a chocolate version.

Pumpkin Spice Cupcakes: Add a teaspoon of pumpkin spice to the dry ingredients and top the frosting with crushed vegan ginger snap cookies.

Coffee Flavored Cupcakes: Replace half of the almond milk with strong brewed coffee and decorate the cupcakes with dark chocolate shavings along with Halloween sprinkles. Yum! For more easy chocolate treats, try our chocolate avocado cookies or our vegan no-bake chocolate cookies. Planning a Halloween party? Check out our vegan Halloween candy guide.

Also worth trying: our vegan funfetti cake.

vegan halloween recipes

More Tasty Vegan Ideas

If you love these Vegan Halloween Cupcakes, be sure to check out these other delicious ideas: 

  • Pumpkin Juice (a Halloween Treat!)
  • Best Vegan Halloween Treats 
  • Vegan Pumpkin Bars
  • Vegan Cinnamon Roll in a Mug

Recipe

vegan halloween recipes

Vegan Halloween Cupcakes

5 from 2 votes
These creepy-cute Vegan Halloween Cupcakes are bursting with sweet flavor, taste amazing, and they're 100% vegan-friendly.
Print Pin Save Saved!
Prep Time: 15 minutes minutes
Cook Time: 25 minutes minutes
Total Time: 40 minutes minutes
Servings: 12 cupcakes
Prevent your screen from going dark

Equipment

  • Halloween cupcake liners
  • piping set optional

Ingredients

For the Cupcakes:

  • 1 ½ cups all-purpose flour
  • 1 cup sugar organic
  • 1 teaspoon baking soda
  • ½ teaspoon salt
  • 1 cup almond milk or any other plant-based milk
  • ½ cup vegetable oil or other neutral oil
  • 2 teaspoon vanilla extract
  • 1 tablespoon apple cider vinegar

For the Orange Vegan Frosting:

  • ½ cup vegan butter softened to room temperature, such as Earth's Balance Buttery Sticks
  • 4 cups powdered sugar ensure it's bone-char free
  • ¼ cup almond milk or any other plant-based milk
  • 2 teaspoon vanilla extract
  • orange food coloring adjust amount to achieve desired shade

For Decoration:

  • Halloween-themed sprinkles vegan friendly brand
US Customary - Metric

Instructions

Cupcakes:

  • Preheat the oven to 350°F (175°C) and line a cupcake tin with cupcake liners.
  • In a large bowl, whisk together the flour, sugar, baking soda, and salt.
  • In another bowl, combine the almond milk, oil, vanilla extract, and apple cider vinegar.
  • Slowly pour the wet mixture into the dry mixture and stir until just combined. Do not overmix.
  • Evenly divide the batter into the cupcake liners.
  • Bake for 18-22 minutes or until a toothpick inserted into the center of a cupcake comes out clean.
  • Let the cupcakes cool completely before frosting.

Orange Frosting:

  • In a large mixing bowl, beat the vegan butter until creamy and smooth.
  • Gradually add the powdered sugar, almond milk, and vanilla extract. Beat until light and fluffy.
  • Add vegan orange food coloring a little at a time until you achieve your desired shade.
  • Once the cupcakes are cooled, pipe or spread the frosting onto the cupcakes using a knife or a piping bag.
  • Top each frosted cupcake with vegan-friendly Halloween-themed sprinkles.
  • Serve and enjoy your spooky Vegan Halloween Cupcakes!

Nutrition (Estimate per Serving)

Calories: 422kcalCarbohydrates: 69gProtein: 2gFat: 16gSaturated Fat: 2gPolyunsaturated Fat: 5gMonounsaturated Fat: 9gTrans Fat: 0.1gSodium: 284mgPotassium: 23mgFiber: 1gSugar: 56gVitamin A: 360IUCalcium: 34mgIron: 1mg
Vegan-ize any recipe!Grab our free vegan cheat sheet, packed with my favorite easy substitutions to make any recipe vegan.

Yellow Squash Soup

September 6, 2024 by Nicole @ VegKitchen Leave a Comment

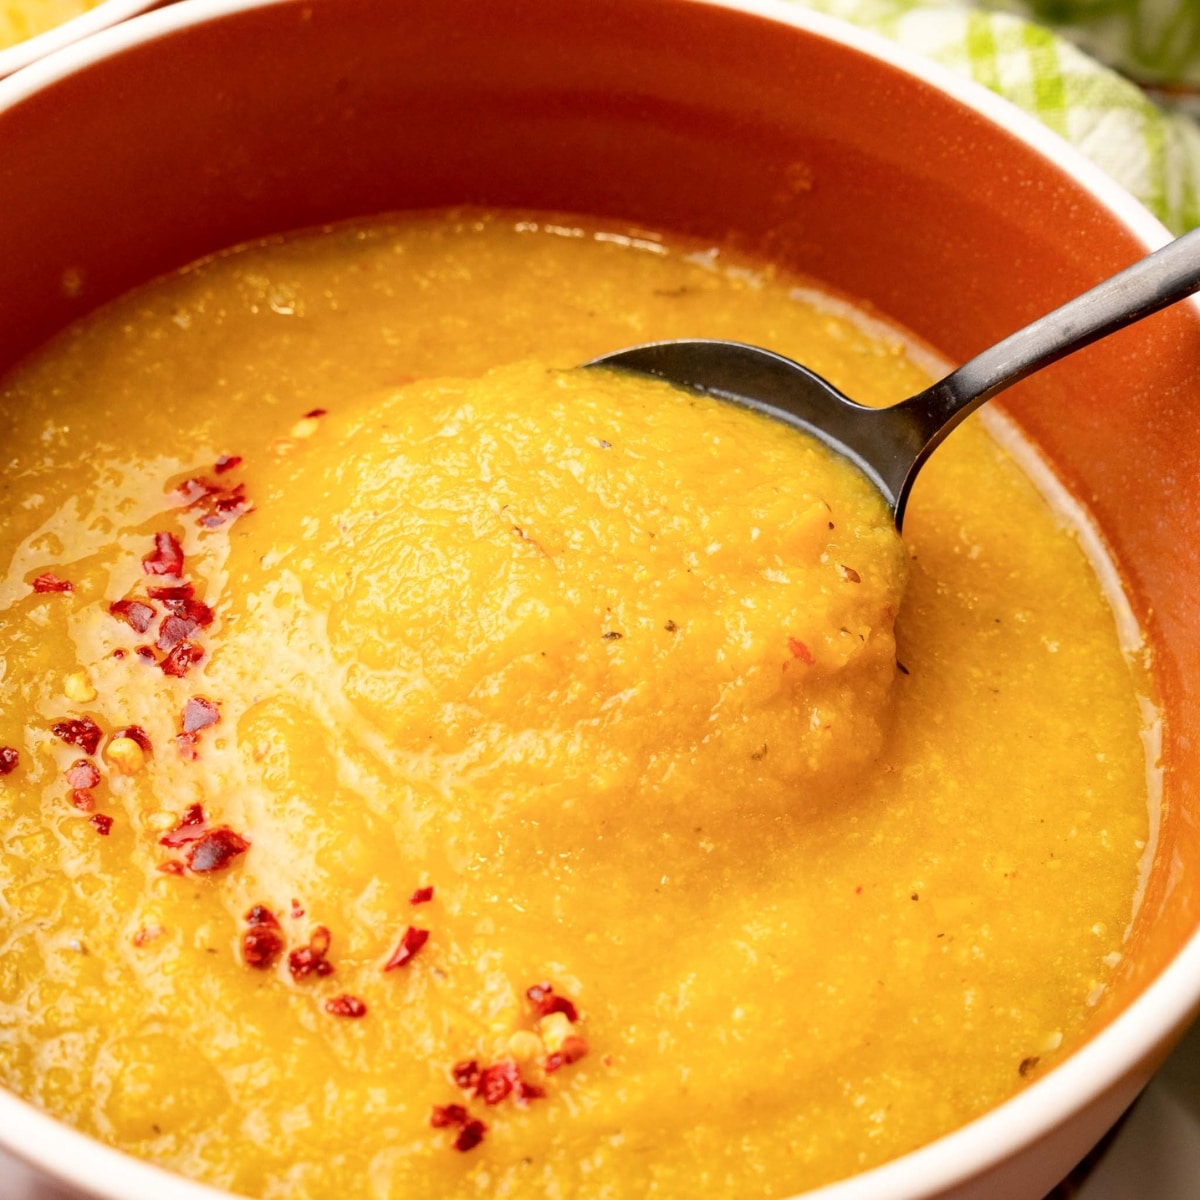
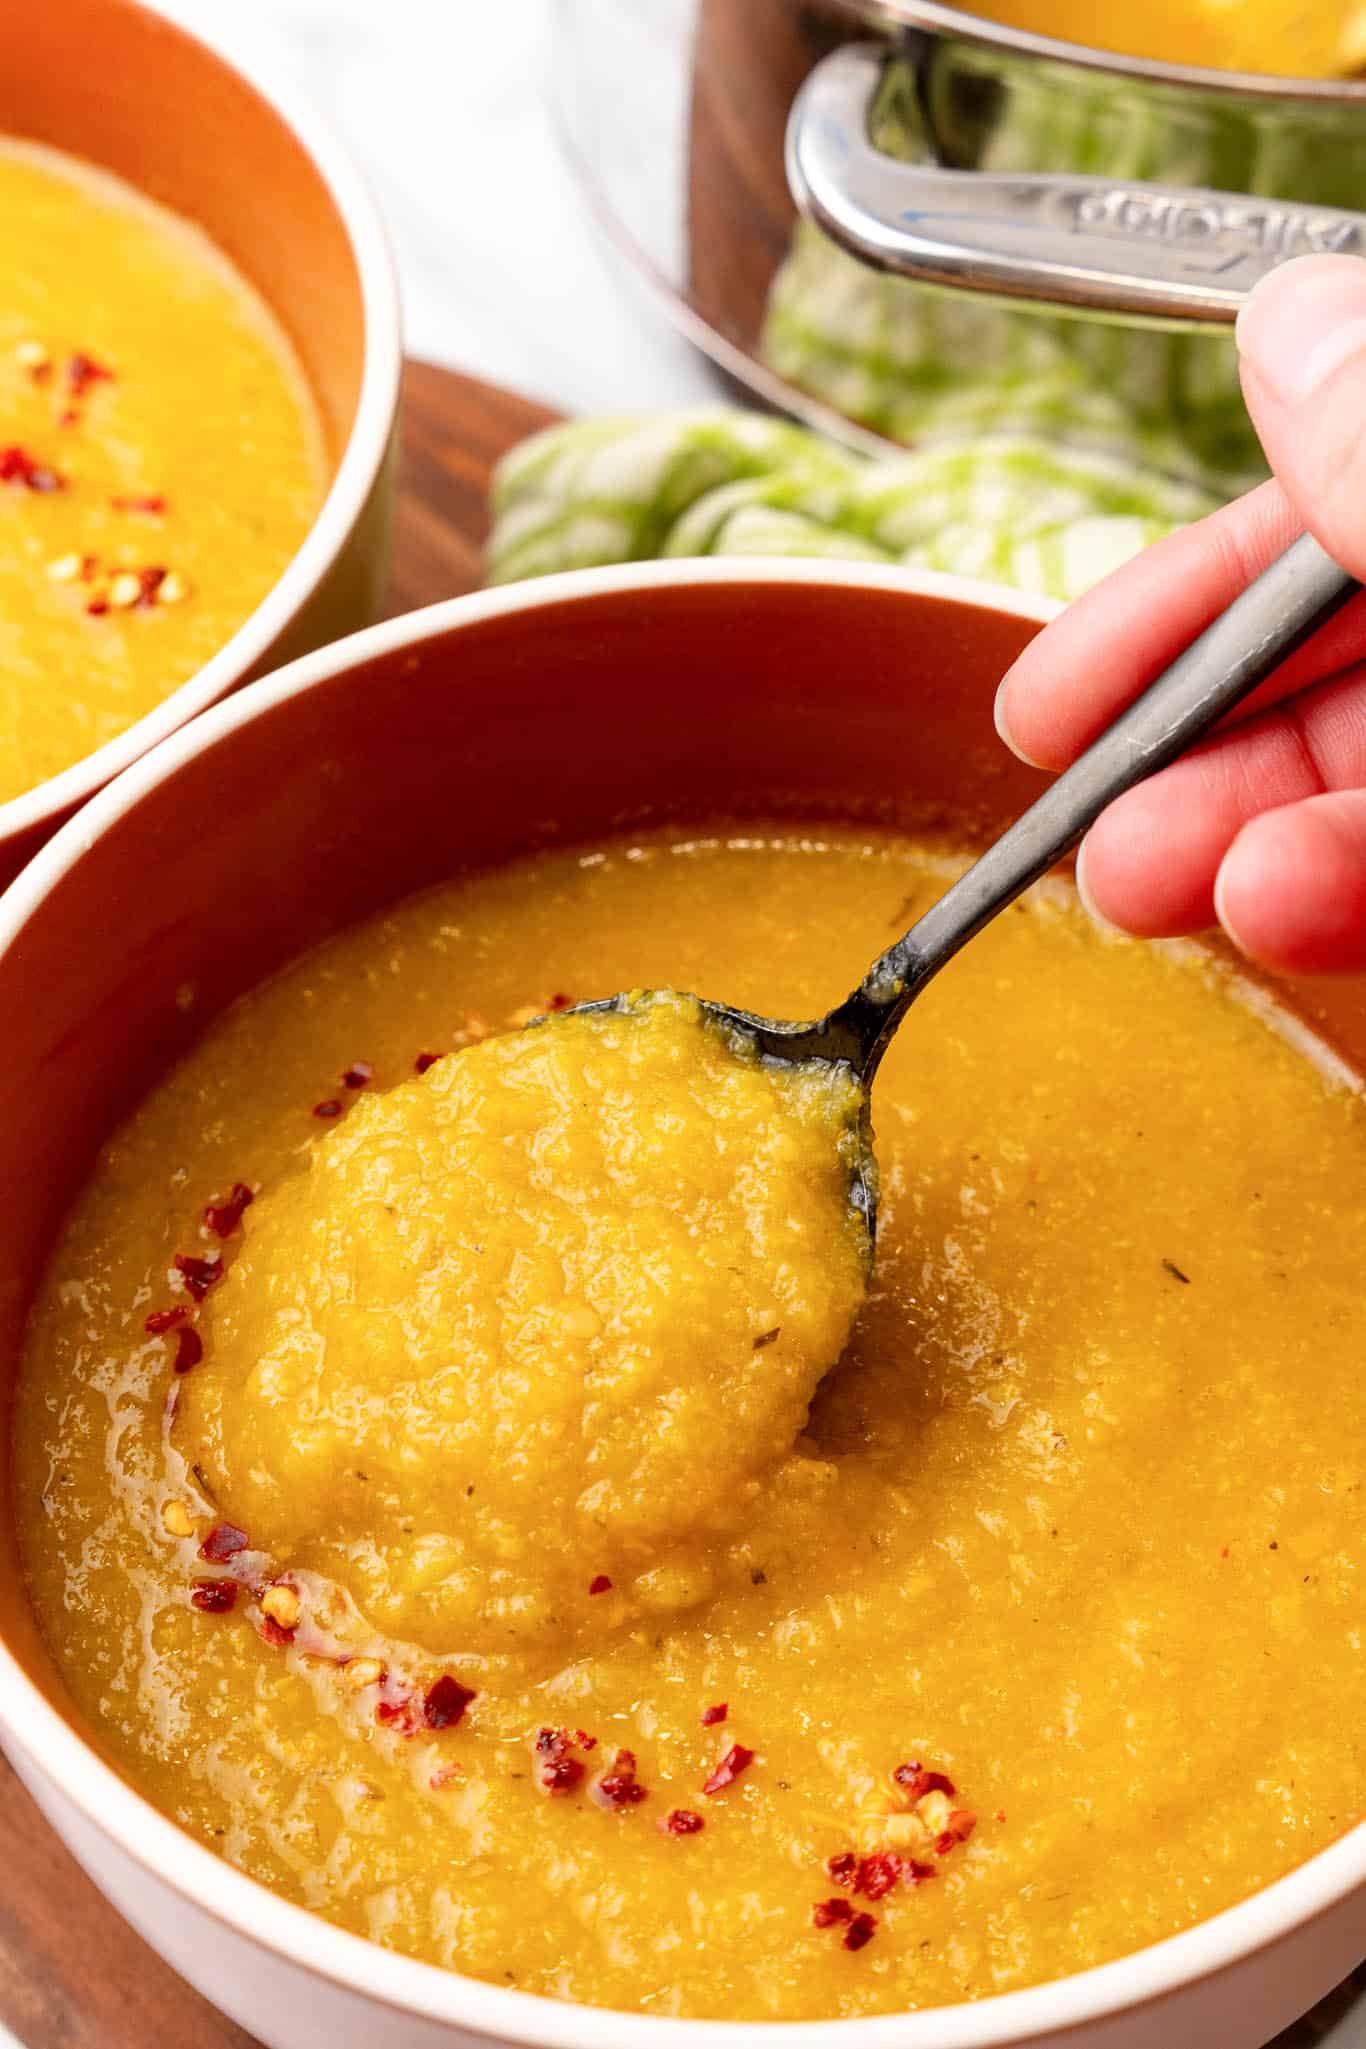
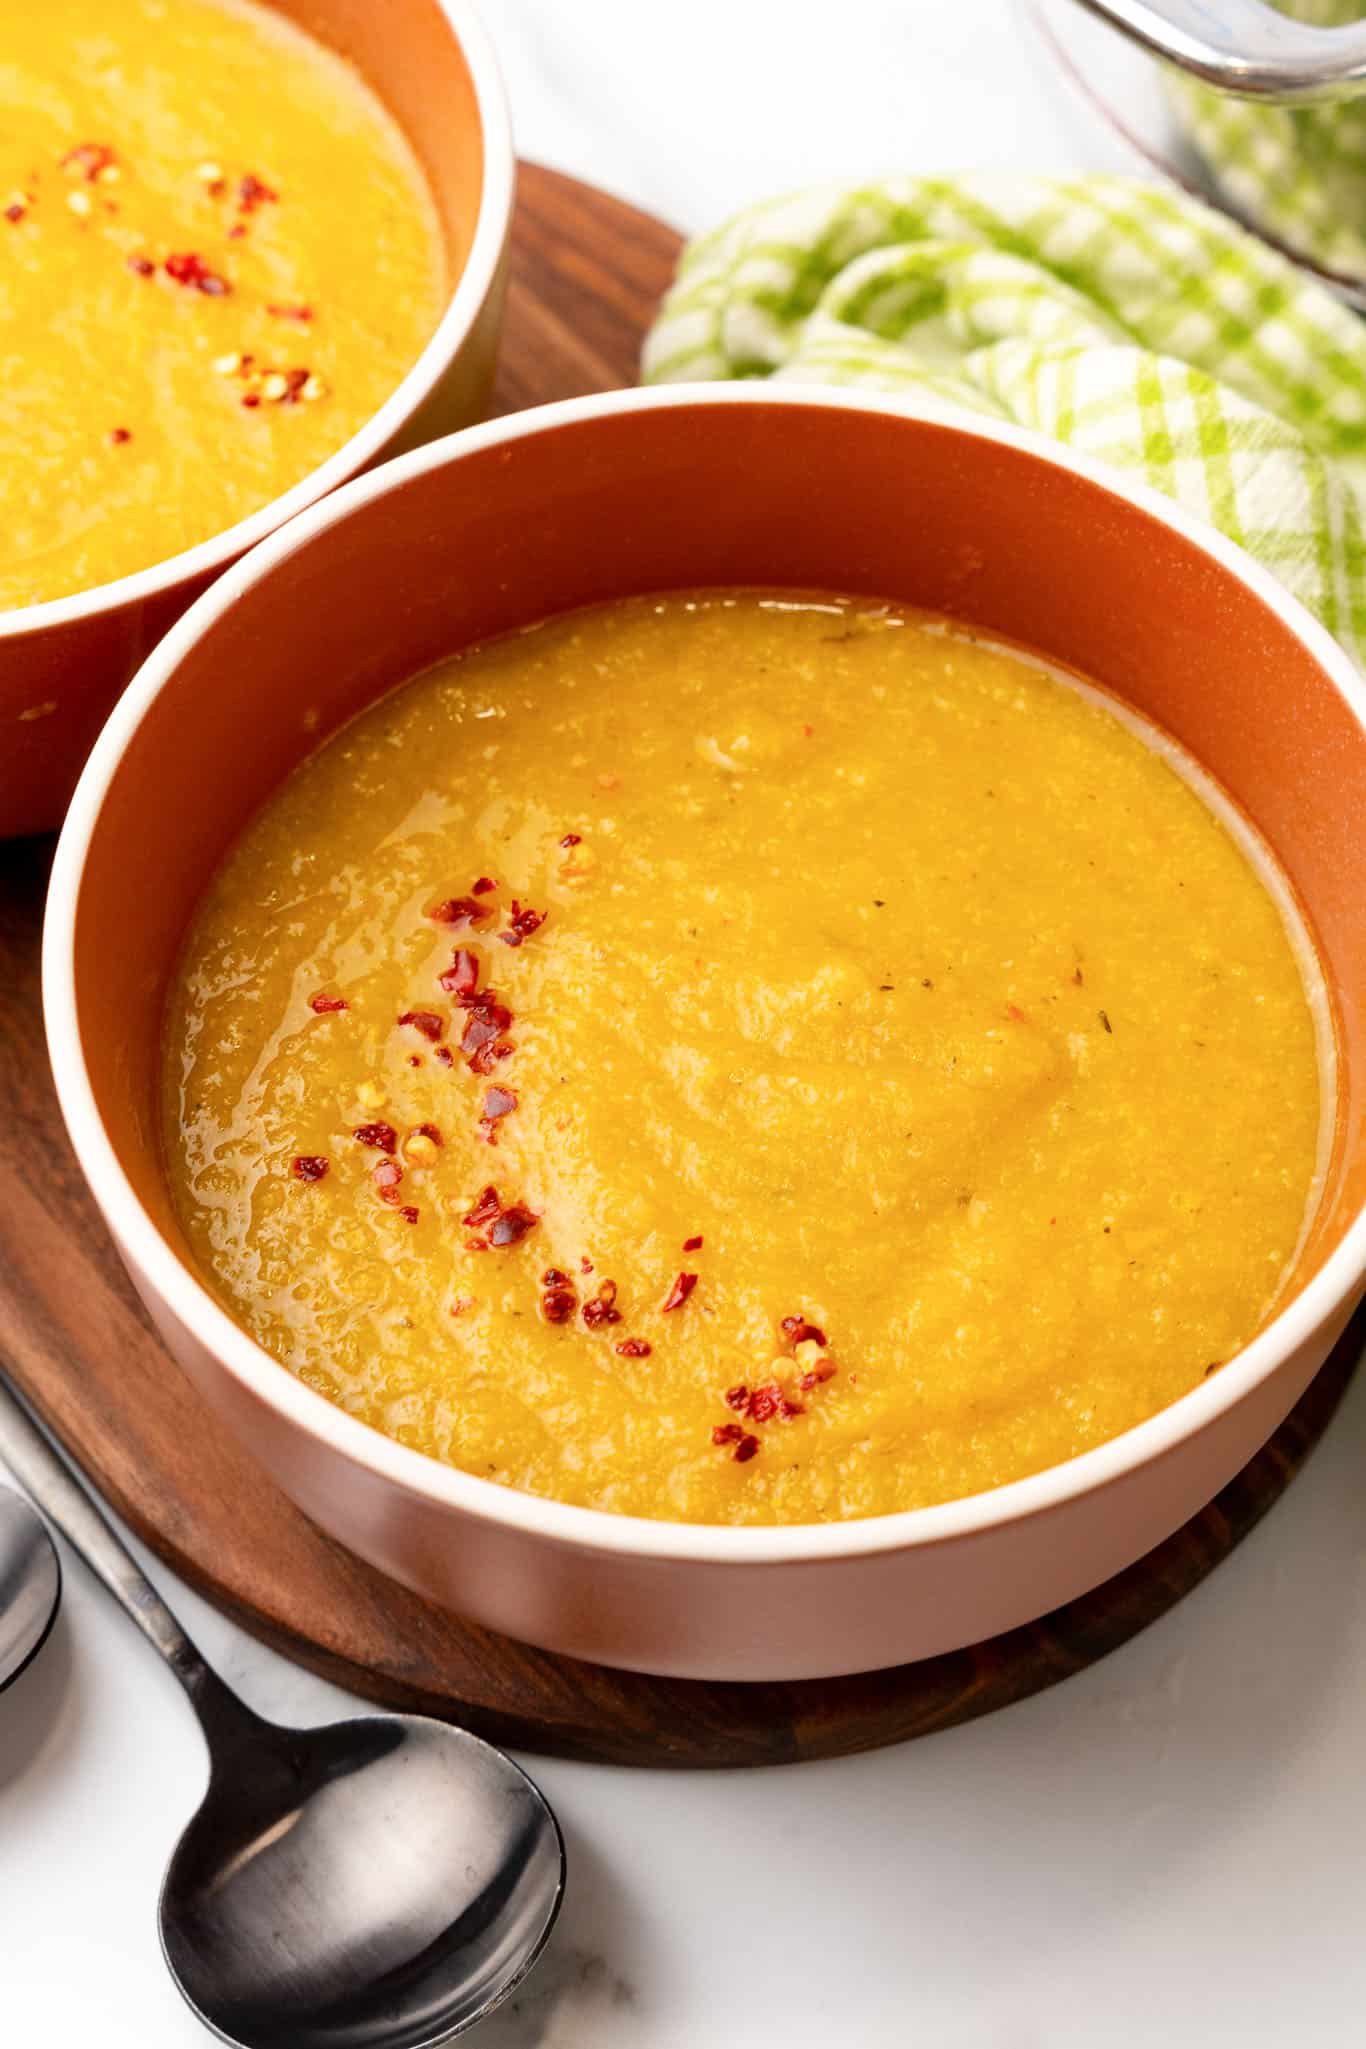
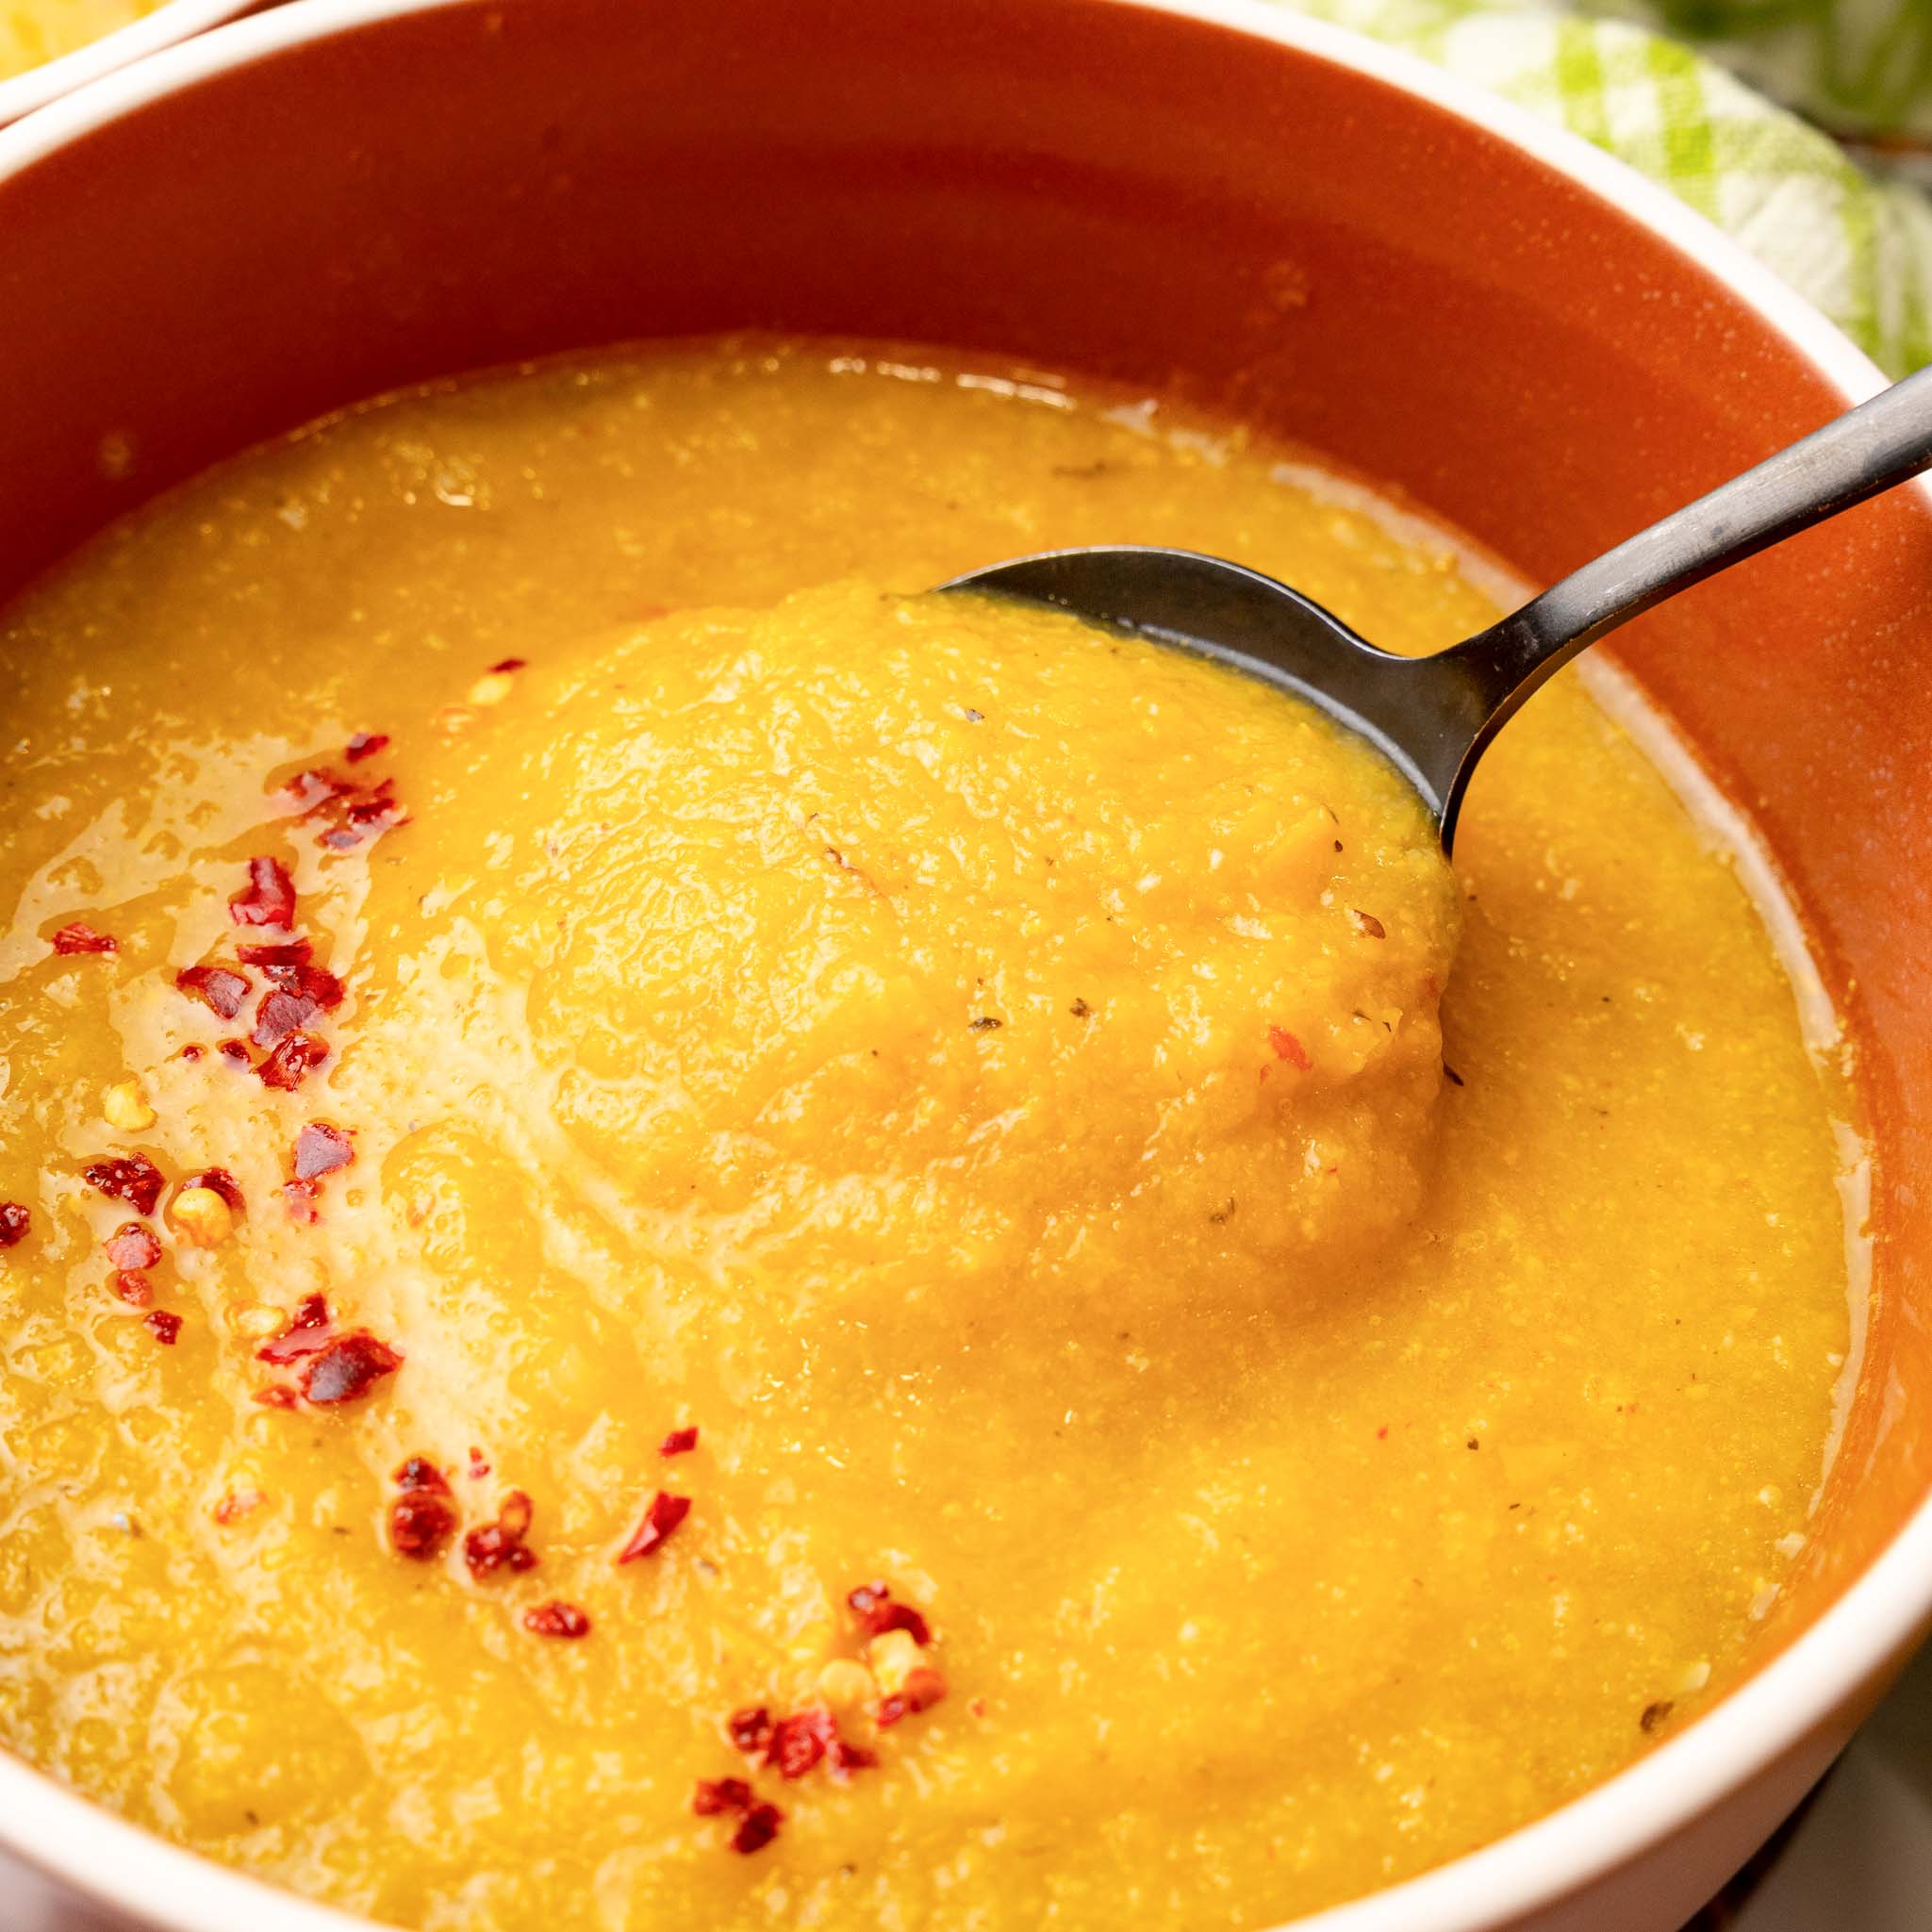
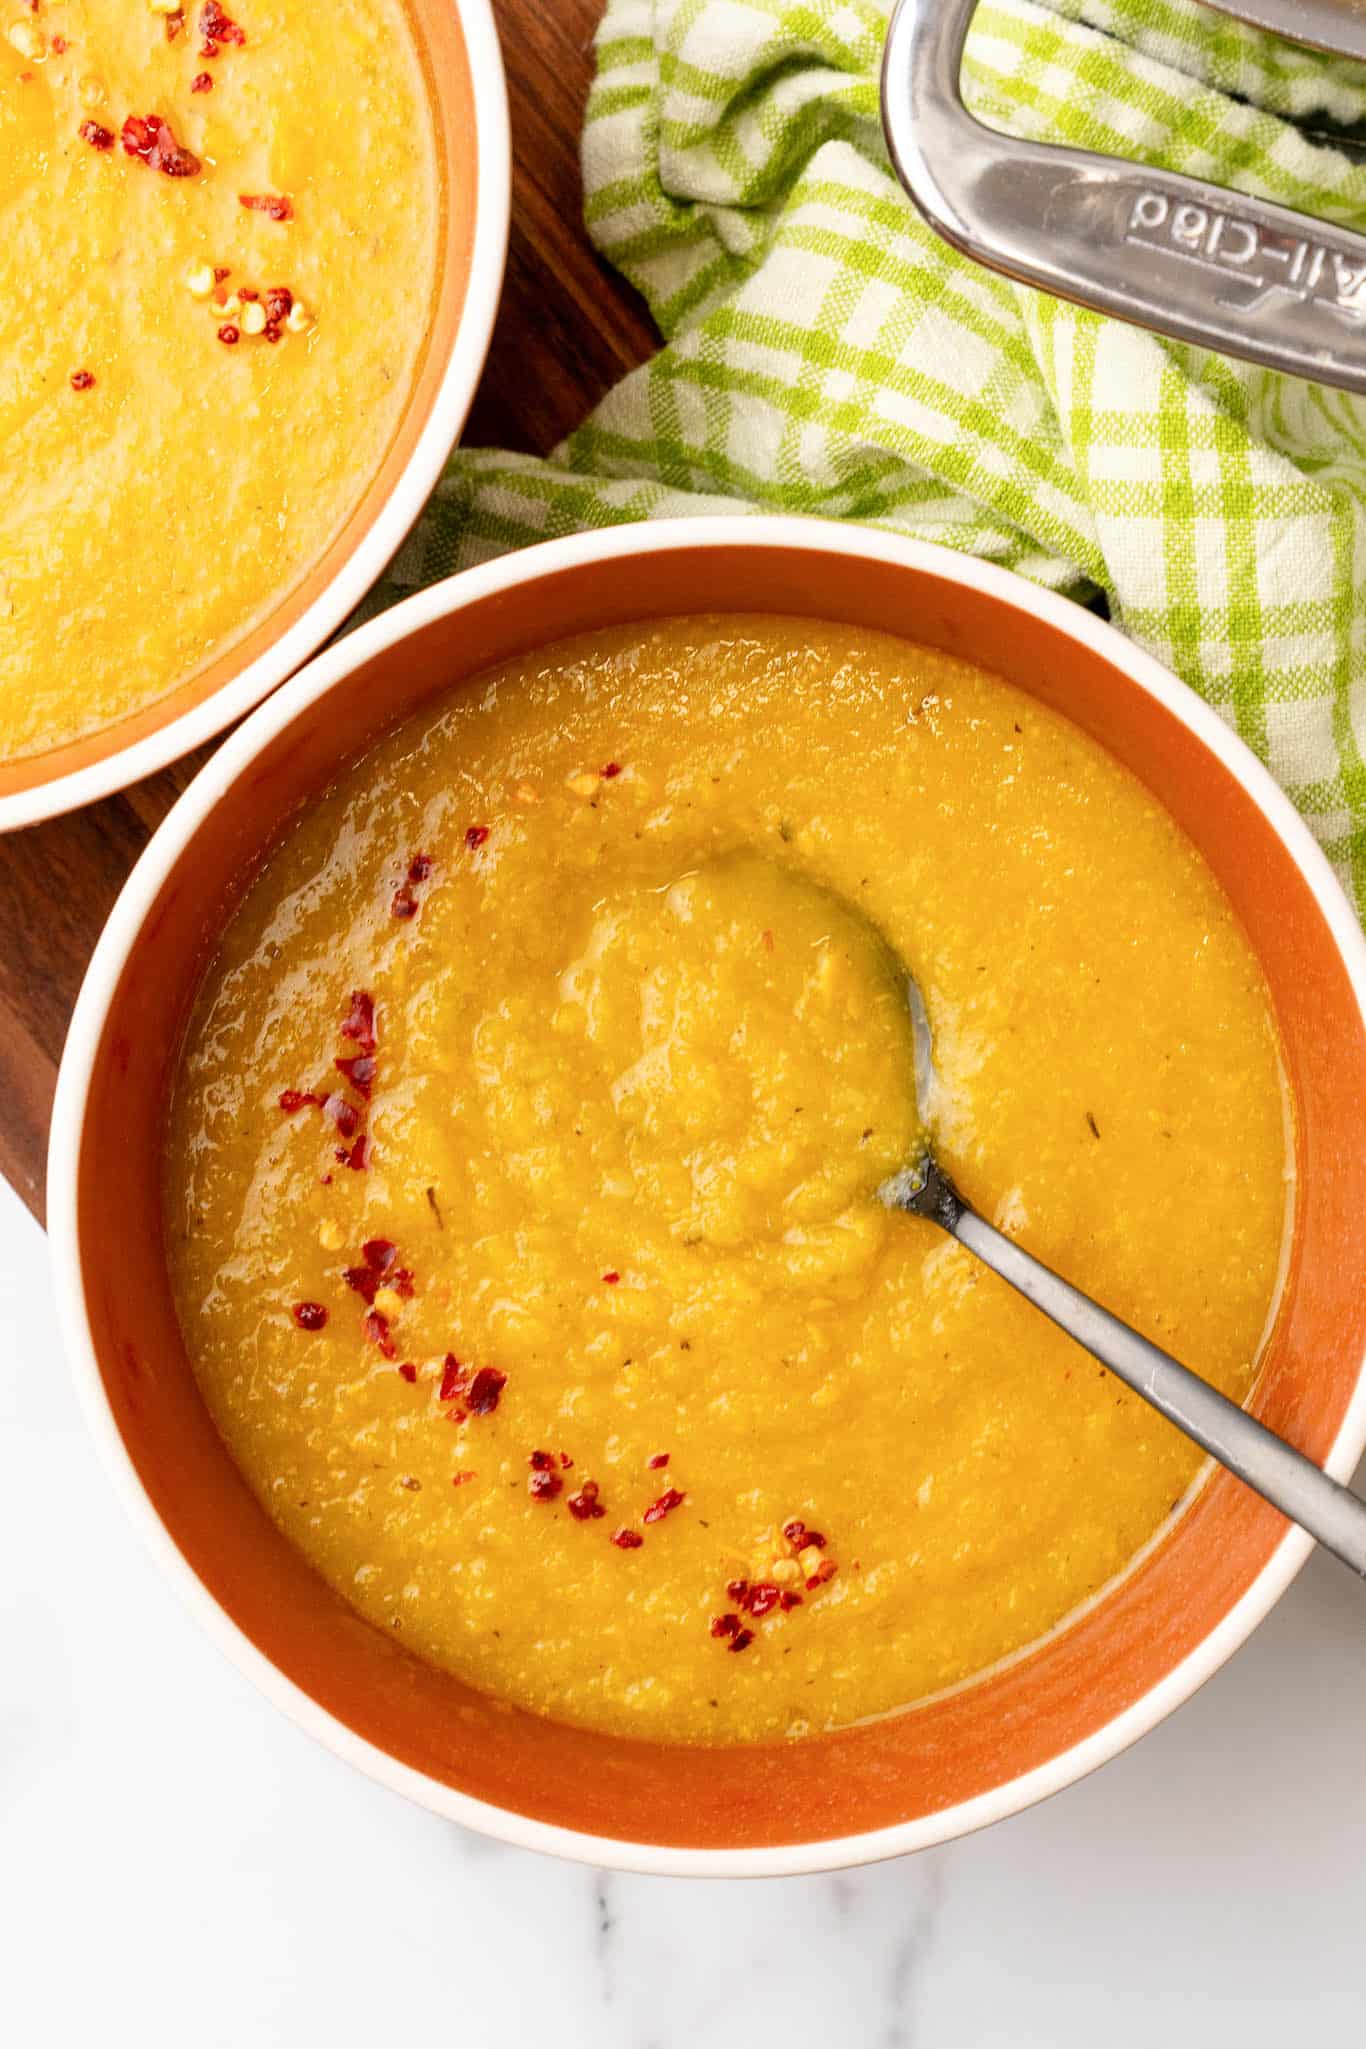
yellow squash soup vegan

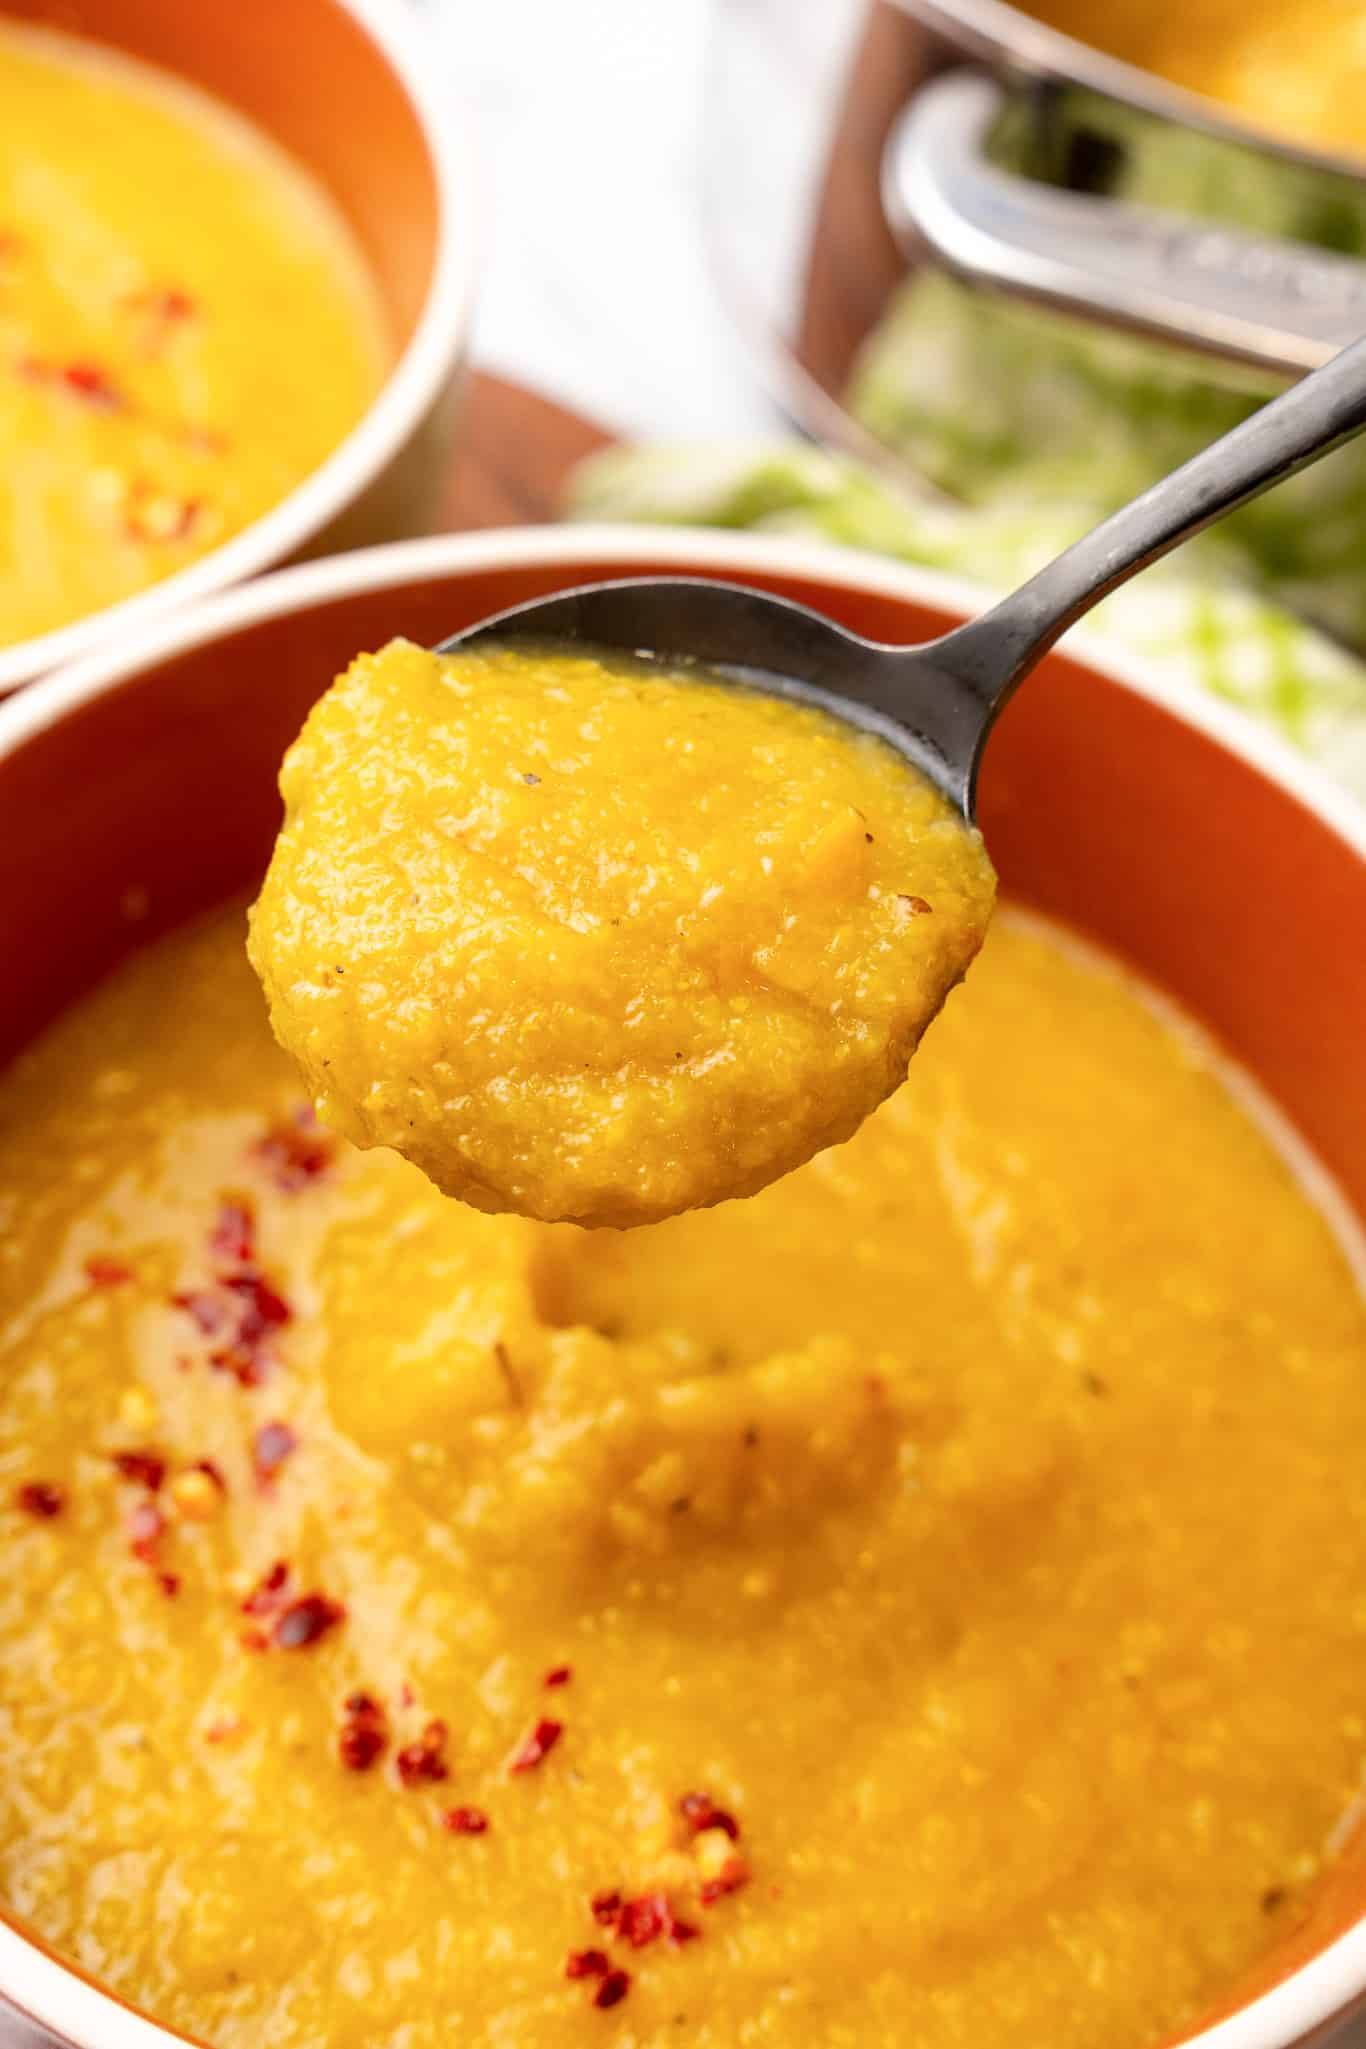
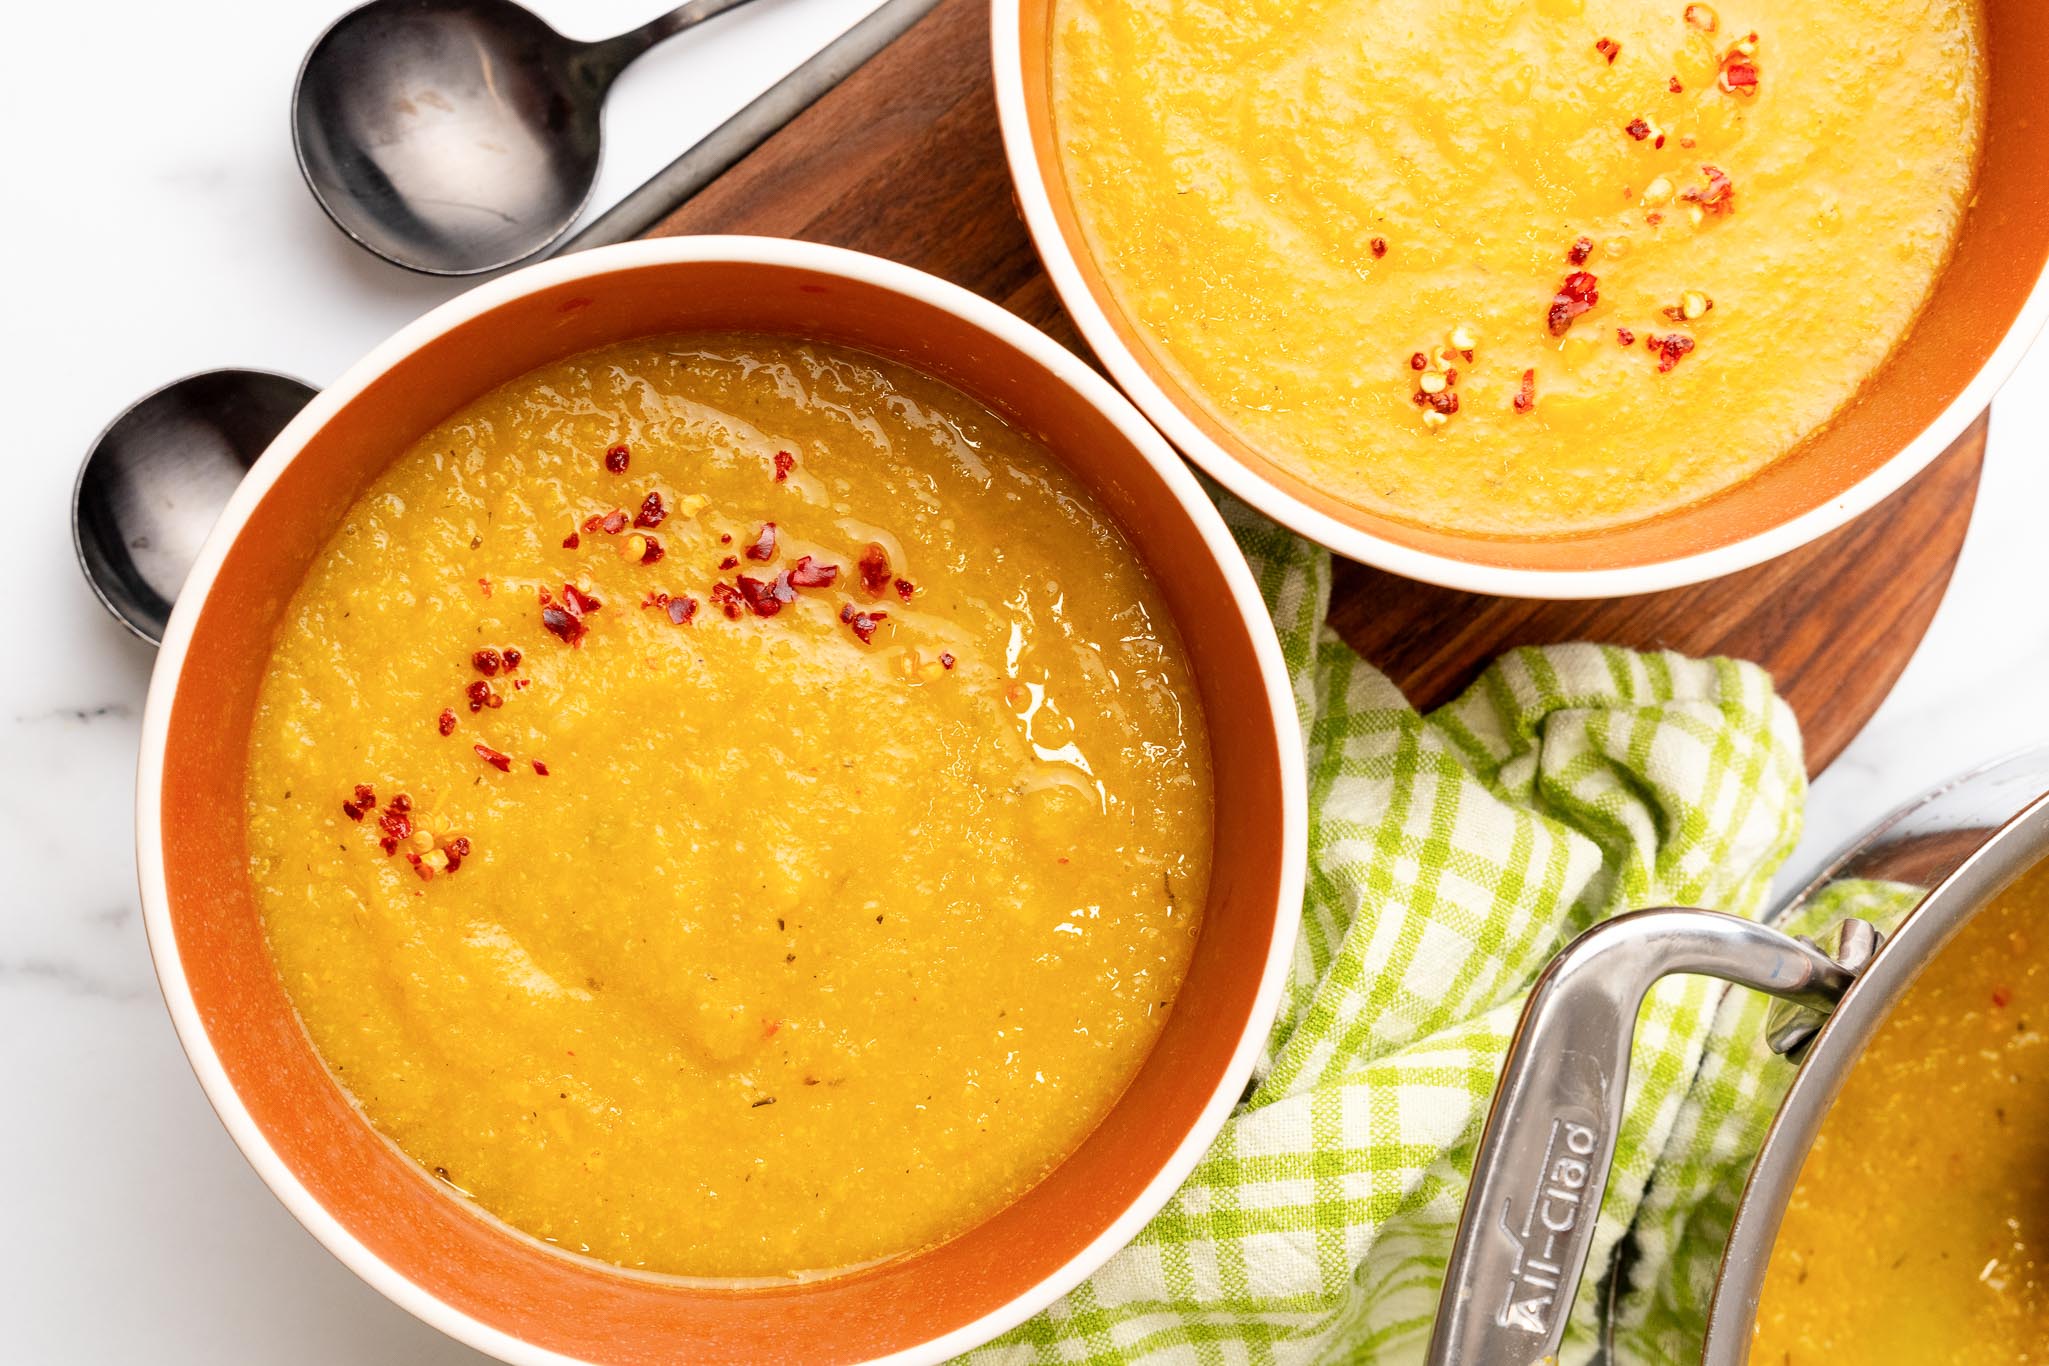
This Yellow Squash Soup turns an often overlooked veggie into a light, healthy, and delicious meal! With just a few simple ingredients and a quick cook time, it's perfect for busy weeknight dinners.

yellow squash soup vegan

Yellow squash is an underrated vegetable, that really deserves a lot more attention in the kitchen! As a summer squash, it's lighter in texture and has a mild flavor that works with many types of dishes. I especially love it in summery tacos or in a simple summer squash sauté.

But one thing I hadn't done with yellow squash before is soup! So this recipe was a bit of an experiment, but I sure am glad I tried it. This yellow squash soup turned out so tasty and it couldn't be any simpler to make. 

yellow squash soup vegan

This Yellow Squash Soup is:

  • Easy to Make: With just 10 minutes of prep and a handful of simple ingredients, you'll have a delicious homemade soup on the table in no time.
  • Healthy and Light: Packed with fresh veggies and a flavorful broth, this soup is low in calories yet incredibly satisfying.
  • Customizable: You can easily adjust the thickness and spice level of this soup to suit your taste. Want it thicker? Use less broth. Prefer a kick of heat? Add extra red pepper flakes!
  • Perfect for Meal Prep: This soup stores well and is great for making ahead of time. It's just as delicious (if not better) the next day.
  • 100% vegan! 
yellow squash soup vegan

Key Ingredients & Substitutions

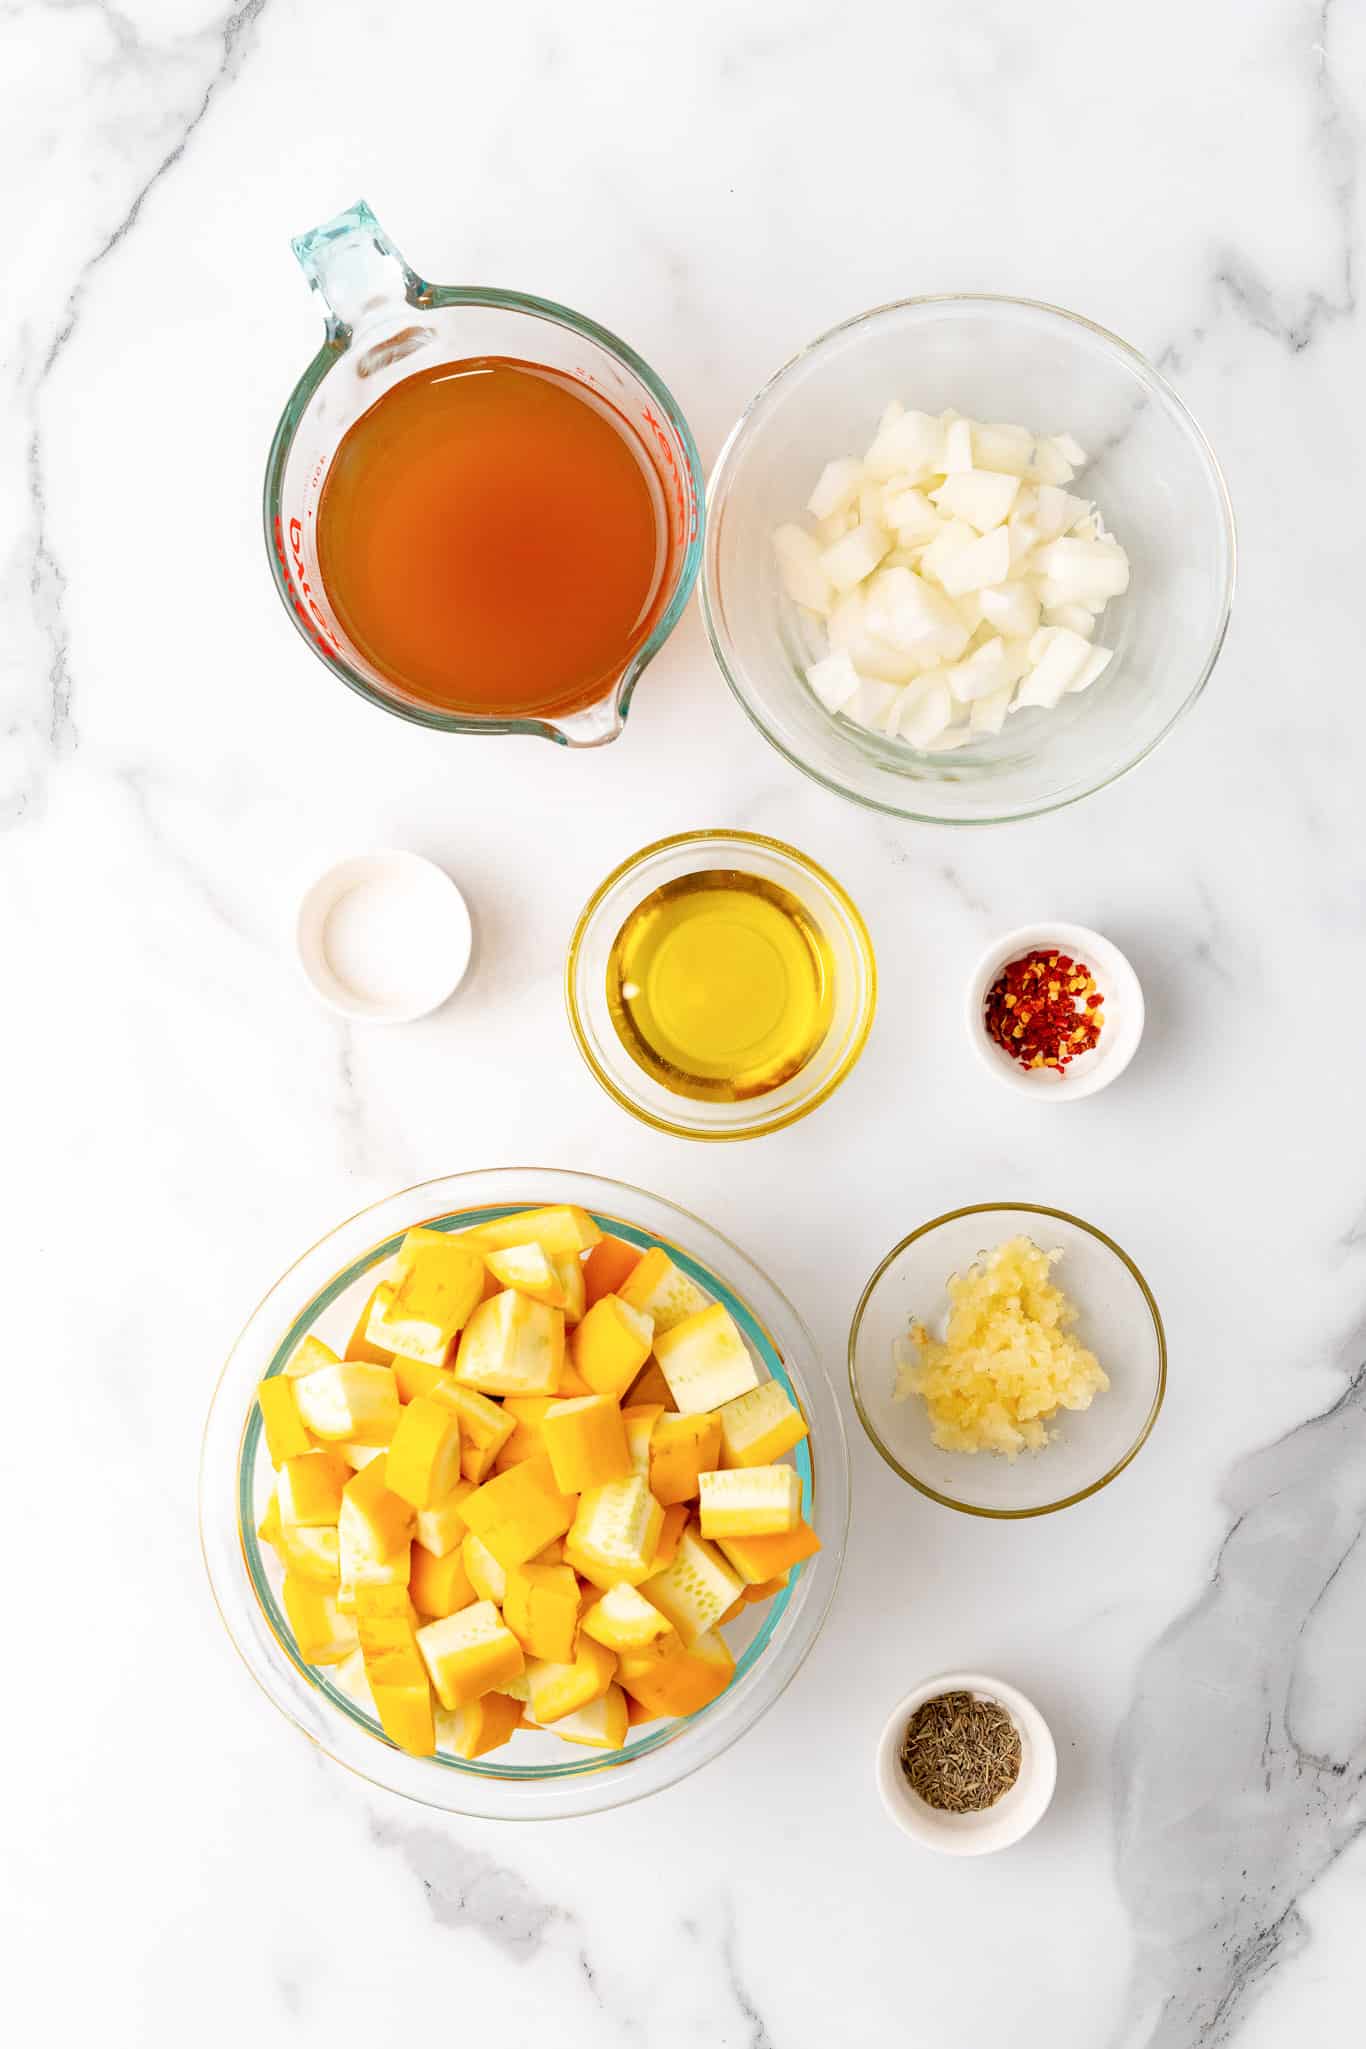
Yellow Squash: The star ingredient! Yellow squash has a mild, slightly sweet flavor and becomes wonderfully creamy when pureed. You could also try this recipe with zucchini or a combination of the two if you like.

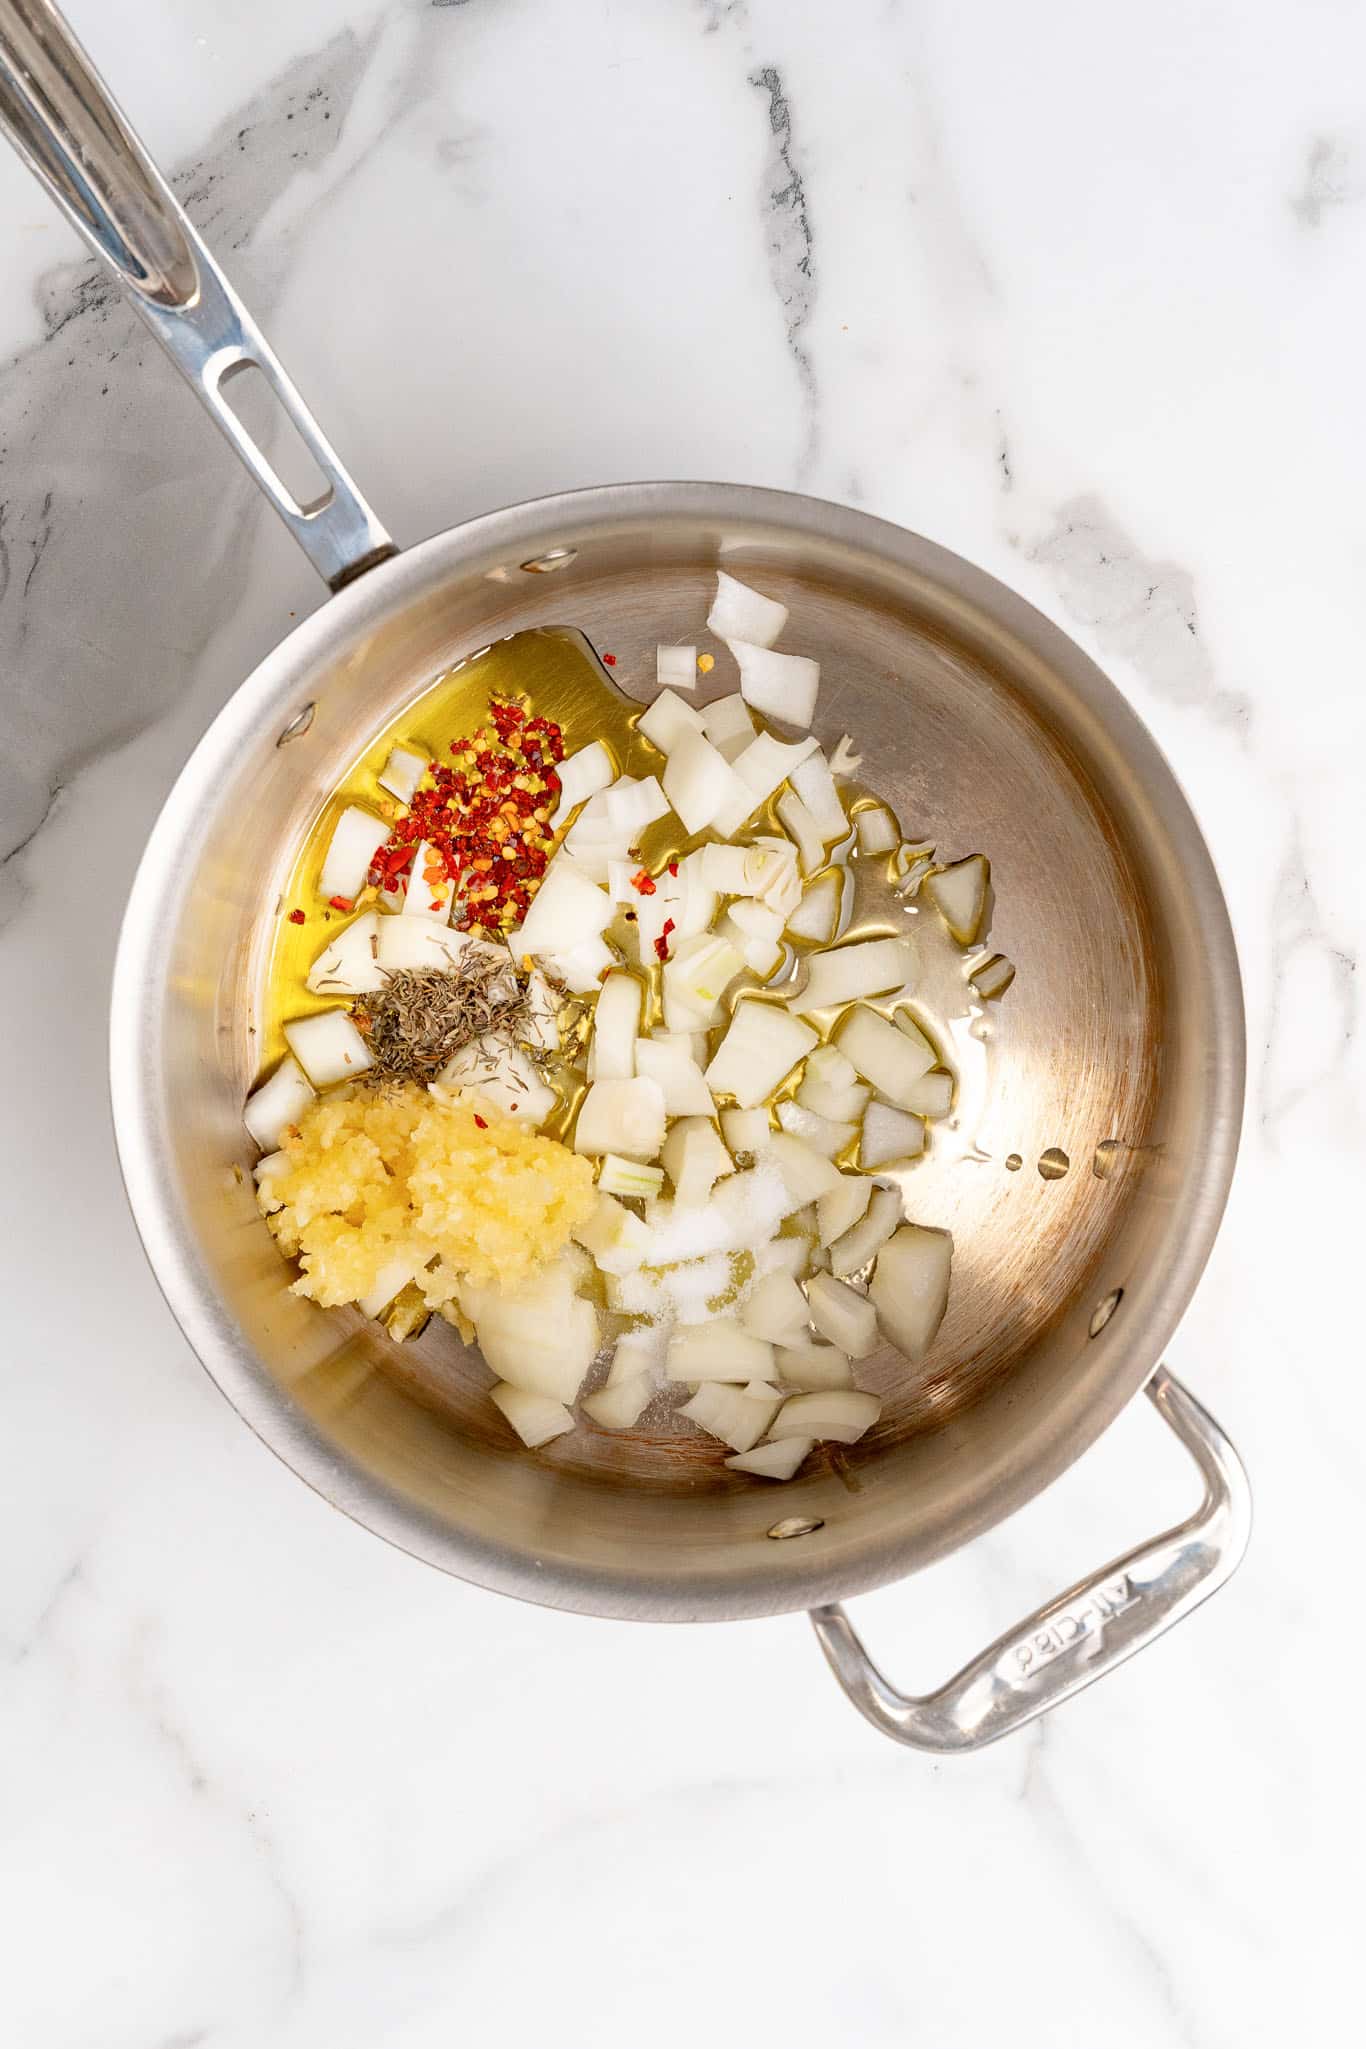
Onion & Garlic: These aromatics form the flavorful base of the soup, adding depth and richness. Feel free to adjust the amount of garlic to your taste.

Thyme: This herb adds a subtle earthy note that complements the sweetness of the squash. Dried thyme is called for here, but fresh thyme would work beautifully as well - just double the amount if you're using fresh.

Red Pepper Flakes: Just a touch adds a hint of heat, but you can dial it up or down depending on your spice preference. If you're not into spicy food, you can omit this altogether.

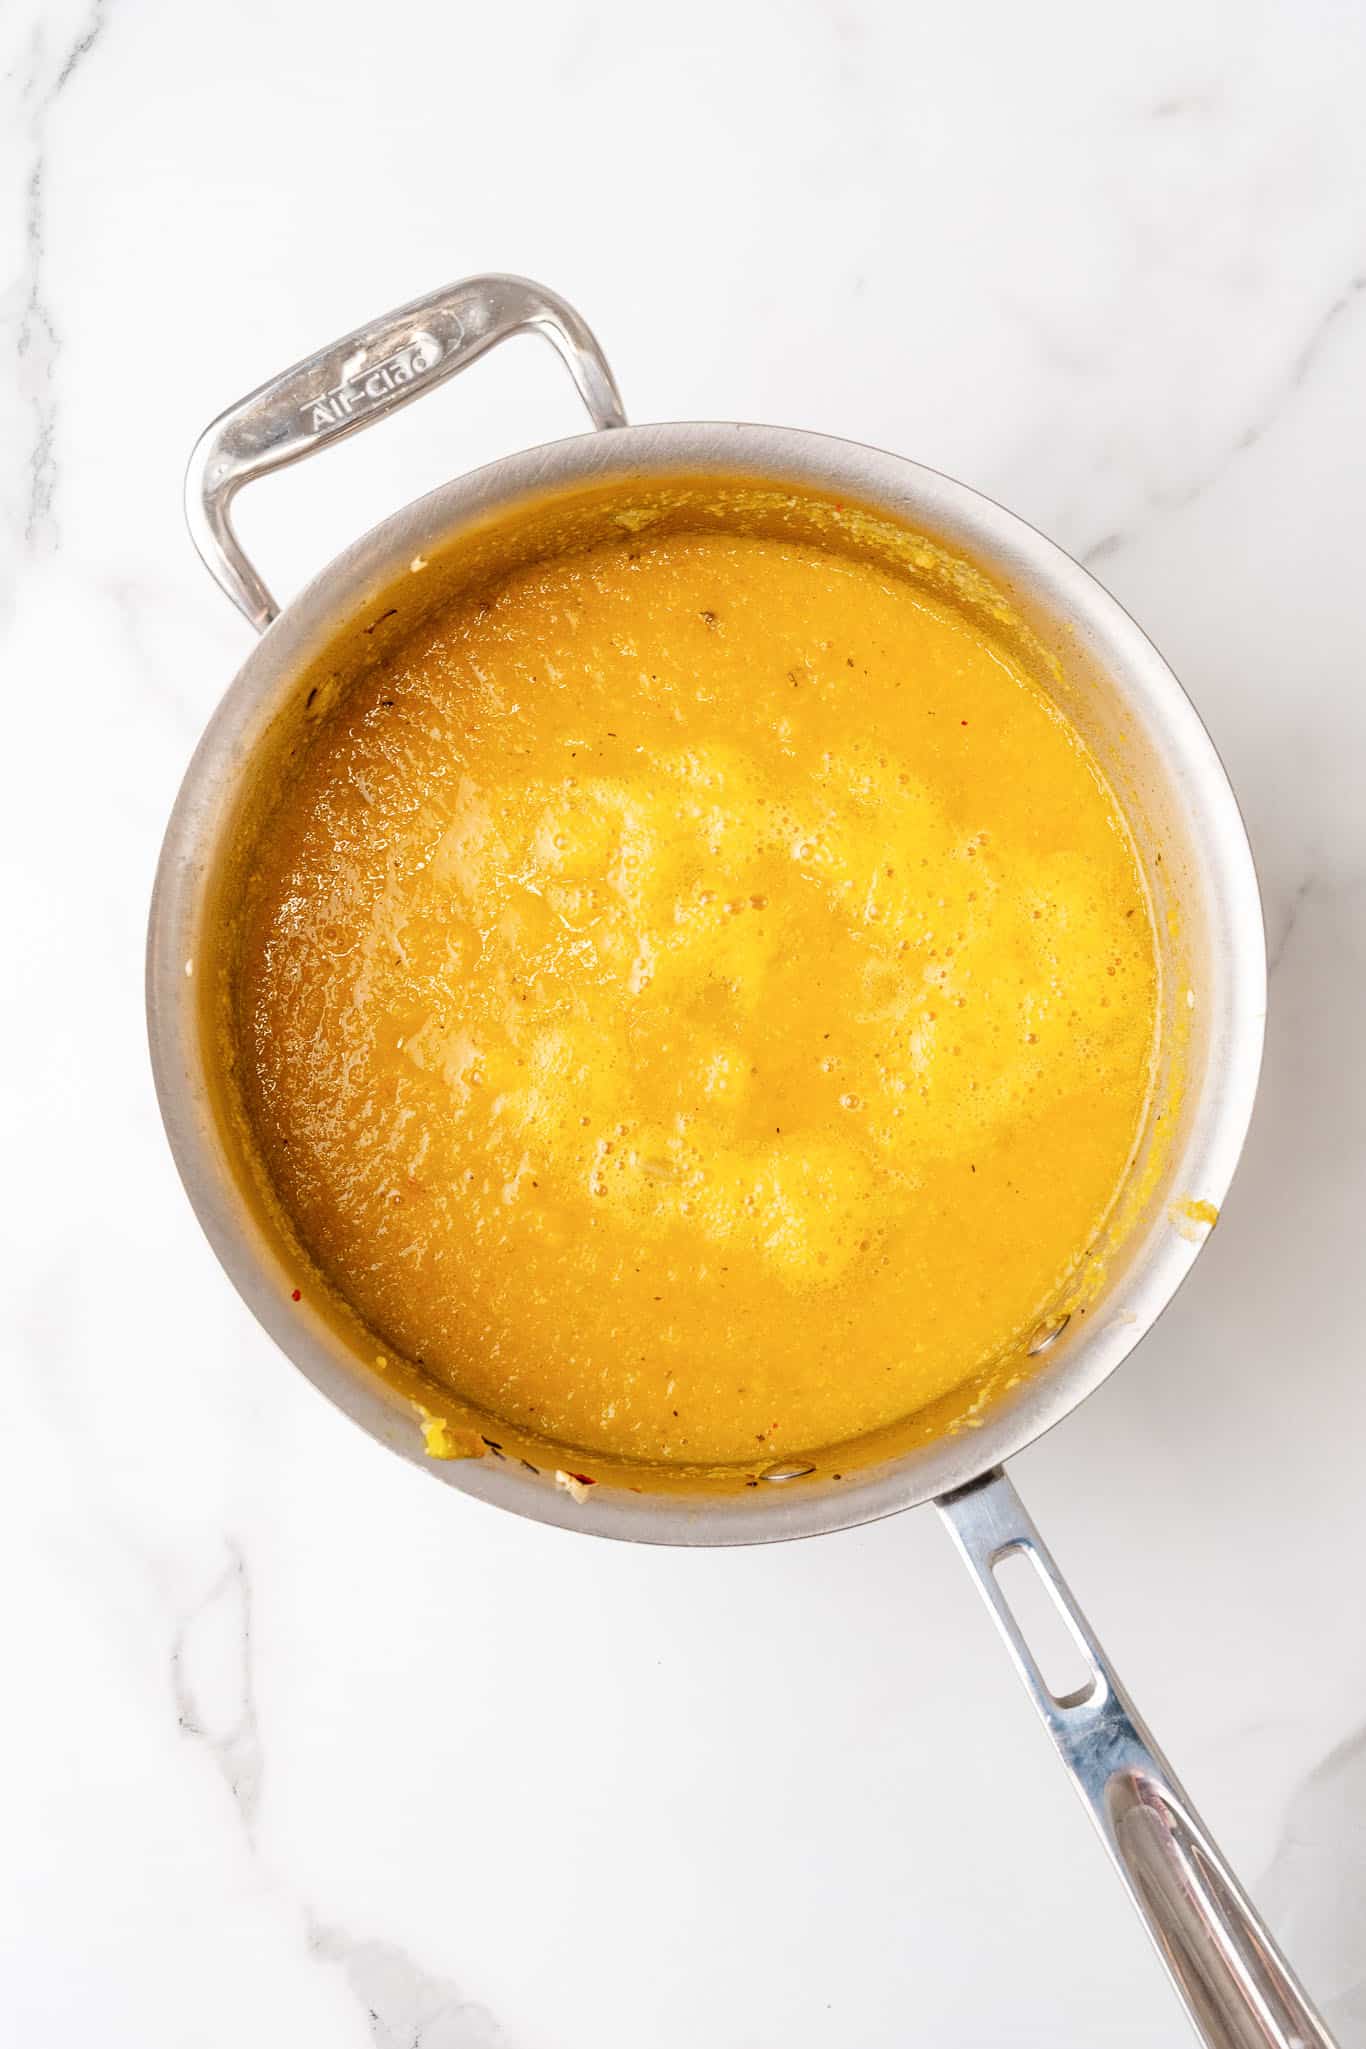
Vegetable Broth: This forms the base of the soup and helps bring everything together. For a fresher flavor, you can use a homemade veggie broth.

yellow squash soup vegan

Helpful Tips for Making the Best Yellow Squash Soup

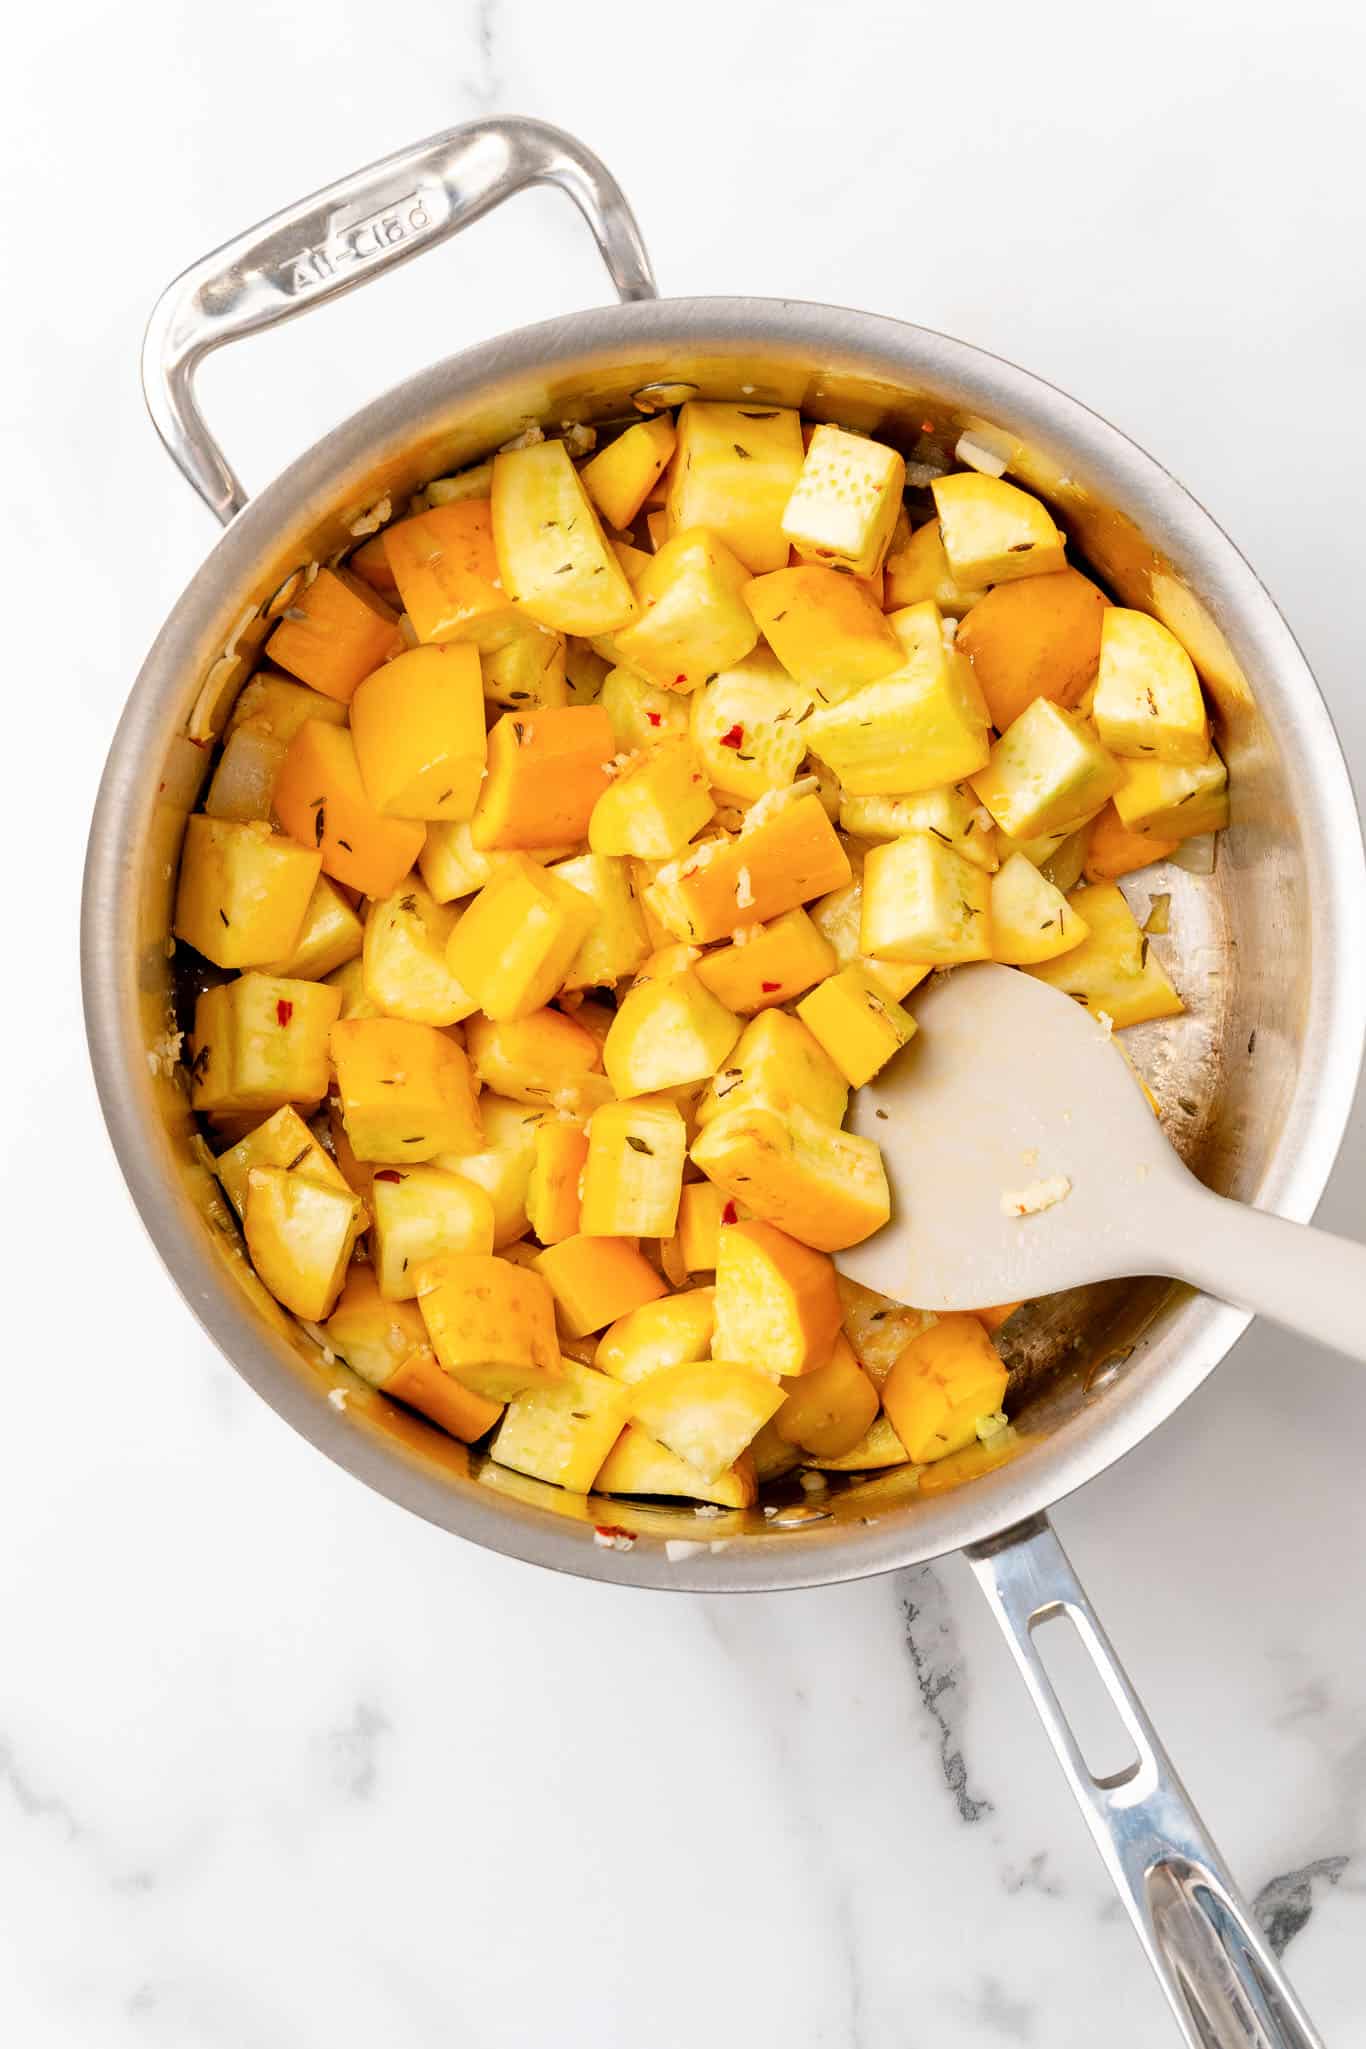
Don't Rush the Onion and Garlic: Take your time cooking the onion and garlic. Let them soften and become fragrant before adding the squash. This step adds depth and flavor to the soup.

Adjust the Broth to Your Preference: Start with 2 cups of broth and add more as needed after pureeing to reach your desired consistency. If you like a thicker, heartier soup, you might want to stick with the smaller amount of broth.

Blending the Soup: An immersion blender is perfect for pureeing the soup right in the pot, but if you don't have one, you can use a regular blender. Just be sure to blend in batches and let the soup cool slightly before transferring it to the blender.

Garnish Options: Want to jazz up your bowl? Add a dollop of sour cream, a sprinkle of fresh herbs, or some crunchy croutons. A drizzle of olive oil or a few extra red pepper flakes can also elevate the presentation and flavor.

yellow squash soup vegan

Variations to Try

Creamy Yellow Squash Soup

For an extra creamy texture, stir in a splash of coconut milk at the end of cooking. This will add richness while keeping the soup silky smooth.

Zucchini and Yellow Squash Soup

Mix things up by adding zucchini along with the yellow squash. It's a great way to use up summer veggies and adds a little variety to the flavor.

Spicy Squash Soup

Increase the amount of red pepper flakes or add a pinch of cayenne for a spicier version of this soup. You can also top it with a drizzle of hot sauce for an extra kick.

yellow squash soup vegan

Serving Suggestions

This soup is versatile and can be served as a starter for a bigger meal, or as a main dish on its own. Try pairing it with a green salad or a slice of crusty bread for a light, satisfying meal. It's also great as a side dish for a vegan grilled sandwich or alongside roasted veggies for a wholesome, plant-based meal.

Also worth trying: our creamy asparagus and pea pasta.

Also worth trying: our miso butternut squash soup.

Also worth trying: our vegan pumpkin mac and cheese.

Also worth trying: our zucchini with mint.

yellow squash soup vegan

Storage & Reheating

Got leftovers? Lucky you! This soup stores well, making it a great choice for meal prep.

Fridge: Store in an airtight container in the fridge for up to 4 days. The flavors will deepen as it sits, making it even more delicious the next day.

Freezer: If you want to save it for later, freeze the soup in individual portions for up to 3 months. Just thaw in the fridge overnight before reheating.

Reheating: Reheat the soup on the stovetop over medium heat, adding a splash of broth or water if it has thickened too much.

yellow squash soup vegan

More Vegan Recipes

If you love this yellow squash soup, be sure to check out these other delicious vegan recipes: 

Also try: our Glazed Baked Onions.

  • Vegan Italian Minestrone Soup
  • Vegan Apple and Butternut Squash Soup
  • Old Fashioned Vegan Stew
  • For a light spring option, also try our cream of asparagus soup.

Recipe

yellow squash soup vegan

Yellow Squash Soup

No ratings yet
This Yellow Squash Soup is light, healthy, and delicious! With just 10 minutes of prep and a handful of simple ingredients, it's perfect for busy weeknight dinners.
Print Pin Save Saved!
Prep Time: 10 minutes minutes
Cook Time: 30 minutes minutes
Total Time: 40 minutes minutes
Servings: 4 servings
Prevent your screen from going dark

Ingredients

  • 2 tablespoons olive oil
  • 1 medium onion diced
  • 3 cloves garlic minced
  • ½ teaspoon thyme
  • ½ teaspoon salt
  • ¼ teaspoon red pepper flakes
  • 4 medium yellow squash diced
  • 2 - 2 ½ cups vegetable broth
US Customary - Metric

Instructions

  • In a large pot over medium heat, add the onion, garlic, thyme, salt and red pepper flakes. Cook, stirring frequently, until the onion starts to soften.
    yellow squash soup vegan
  • Add the yellow squash and cook until it begins to soften. Add 2 cups of broth and bring to a boil. Reduce heat and simmer for 20 minutes, or until the veggies are very tender.
    yellow squash soup vegan
  • Use an immersion blender to puree the soup.
    yellow squash soup vegan
  • Add additional broth until desired consistency is achieved.
    yellow squash soup vegan
  • Serve garnished with additional red pepper flakes if desired.
    yellow squash soup vegan

Nutrition (Estimate per Serving)

Calories: 116kcalCarbohydrates: 12gProtein: 3gFat: 7gSaturated Fat: 1gPolyunsaturated Fat: 1gMonounsaturated Fat: 5gSodium: 886mgPotassium: 567mgFiber: 3gSugar: 7gVitamin A: 755IUVitamin C: 36mgCalcium: 41mgIron: 1mg
Vegan-ize any recipe!Grab our free vegan cheat sheet, packed with my favorite easy substitutions to make any recipe vegan.

Vegan Funfetti Cake

January 30, 2024 by Nicole @ VegKitchen Leave a Comment

vegan birthday cake

This homemade vegan funfetti cake is fluffy, moist, and bursting with colorful sprinkles! And topped with a delicious funfetti frosting too. Perfect for a birthday party or just to satisfy your everyday sweet tooth.

vegan birthday cake

There's something undeniably magical about funfetti - it transforms a simple cake into a totally party-worthy treat. This particular funfetti cake is a family favorite in our house, even among the non-vegans in the crew. In fact, my son swears it's the best funfetti cake he's ever had!

This vegan funfetti cake is: 

  • Easy to make with simple ingredients.
  • Fun and colorful.
  • A surefire crowd pleaser.
  • Better than any boxed cake mix.
  • Perfect for a vegan birthday cake! 
vegan birthday cake

Key Ingredients & Substitutions

All of the ingredients for this cake (and the funfetti frosting) are simple and easy to find. No weird vegan ingredients here. 😉 But here are just a few notes to help you get the best results.

Rainbow Sprinkles

The heart of any funfetti cake is the sprinkles! But be sure to check the ingredients for any sneaky non-vegan ingredients. I like to buy these big jugs of vegan friendly sprinkles for all my baking.

Non-Dairy Milk

You can use any dairy free milk of your choice in this vegan cake. Almond, cashew and soy milk all work very well for baking.

Apple Cider Vinegar

This might seem like an odd cake ingredient, but it reacts with the baking powder to give the cake a perfect rise. I suggest using a high quality apple cider vinegar like Bragg's for the best results.

Sugar

This recipe calls for granulated sugar. Depending on the region you live in, your regular old white sugar may or may not be vegan. In the US, you will want to choose a brand clearly marked organic or vegan. This one from Whole Foods is cheap and vegan friendly.

vegan birthday cake

Tips and Tricks

Parchment Paper is Your Friend

To ensure your cake layers come out of the pans cleanly, don't skip lining your pans with parchment paper.

Cool Completely

Patience is key. Frosting a warm cake can lead to a melting disaster! So make sure to let the cake cool all the way down to room temperature before frosting it. You can speed up the process by putting it in the fridge for a bit.

Storing the Cake

Cover the cake and store in the fridge for 4-5 days. You can also freeze the cake for up to two months. If freezing, you will want to remove from the freezer to thaw the day before you plan to serve it.

If you're after a rich chocolatey cake, try our vegan chocolate orange cake, or for Halloween gatherings our vegan halloween cupcakes are perfect. For a refreshing chocolate treat, our chocolate raspberry banana smoothie doubles as a breakfast or dessert. If you want a quick single-serve vegan treat, our vegan cinnamon roll in a mug is ready in just minutes.

vegan birthday cake

Variations to Try

Make it Gluten-Free

Replace the all-purpose flour with your favorite gluten-free flour blend for a gluten free version. Be sure to choose a gluten free brand of sprinkles too.

Switch Up the Sprinkles

While rainbow sprinkles are classic, feel free to use any vegan-friendly sprinkle variety you like. You can theme this cake to just about any occasion by just changing out the sprinkles. Halloween? Grab some orange and black sprinkles. Christmas? Go with red and green. Valentine's Day? Pink and red. You get the idea.

Alternative Frostings

Not a fan of buttercream? Try a vegan cream cheese frosting for a tangy twist.

Looking for more festive vegan dessert ideas? Our vegan Valentine's Day desserts roundup has 25 chocolatey, fruity, and romantic treats to choose from. Or for a breakfast-friendly alternative, our vegan pumpkin waffles are a festive fall option.

vegan birthday cake

More Vegan Sweets

If you love this Vegan Funfetti Cake, be sure to check out these other delicious recipes: 

Also worth trying: our guide to vegan Halloween candy.

  • Vegan Hummingbird Cake
  • Vegan Carrot Cake
  • Vegan Red Velvet Cake
  • Vegan Banana Cake

Recipe

vegan birthday cake

Vegan Funfetti Cake

5 from 1 vote
This homemade vegan funfetti cake is fluffy, moist, and bursting with colorful sprinkles! And topped with a delicious funfetti frosting too.
Print Pin Save Saved!
Prep Time: 30 minutes minutes
Cook Time: 30 minutes minutes
Total Time: 1 hour hour
Servings: 12 servings
Prevent your screen from going dark

Ingredients

For the Cake:

  • 2 ½ cups all-purpose flour
  • 1 ½ cups granulated sugar organic
  • ½ cup rainbow sprinkles vegan-friendly
  • 1 tablespoon baking powder
  • ½ teaspoon salt
  • 1 ⅓ cups unsweetened non-dairy milk such as almond or soy
  • ½ cup vegetable oil
  • ¼ cup unsweetened applesauce
  • 1 tablespoon apple cider vinegar
  • 1 tablespoon pure vanilla extract

For the Vegan Funfetti Frosting:

  • 1 cup vegan butter softened
  • 4 cups powdered sugar sifted
  • 2 teaspoons pure vanilla extract
  • 2-4 tablespoons unsweetened non-dairy milk as needed for consistency
  • ¼ cup rainbow sprinkles
  • Additional rainbow sprinkles for decoration
US Customary - Metric

Instructions

For the Cake:

  • Preheat your oven to 350°F (175°C). Grease two 8-inch round cake pans and line the bottoms with parchment paper for easy removal.
  • In a large mixing bowl, sift together the flour, sugar, baking powder, and salt. Stir in the rainbow sprinkles to distribute evenly.
  • In another bowl, whisk together the non-dairy milk, vegetable oil, applesauce, apple cider vinegar, and vanilla extract until well combined.
  • Pour the wet ingredients into the dry ingredients and mix until just combined, being careful not to overmix.
  • Divide the batter evenly between the two prepared cake pans, using a spatula to smooth the tops.
  • Bake for 25-30 minutes, or until a toothpick inserted into the center comes out clean.
  • Let the cakes cool in the pans for about 10 minutes, then transfer to a wire rack to cool completely.

For the Vegan Buttercream Frosting:

  • Using a hand mixer or a stand mixer with the paddle attachment, beat the vegan butter until creamy.
  • Gradually add the powdered sugar, 1 cup at a time, beating well after each addition.
  • Add the vanilla extract and 2 tablespoons of non-dairy milk. Beat for an additional 3-5 minutes or until the frosting is light and fluffy. If the frosting is too thick, add more non-dairy milk, one tablespoon at a time, until reaching the desired consistency.
  • Once the cakes are completely cool, place one layer on a serving plate or cake stand.
  • Spread a layer of frosting on the top of the first cake layer, then place the second cake layer on top.
  • Frost the top and sides of the cake with the remaining buttercream frosting, smoothing it out with a knife or spatula.
  • Decorate the top with additional rainbow sprinkles to match the Funfetti theme.
  • Chill the cake in the refrigerator for at least 30 minutes before slicing to allow the frosting to set.

Nutrition (Estimate per Serving)

Calories: 522kcalCarbohydrates: 98gProtein: 3gFat: 13gSaturated Fat: 4gPolyunsaturated Fat: 3gMonounsaturated Fat: 5gTrans Fat: 0.1gSodium: 340mgPotassium: 56mgFiber: 1gSugar: 76gVitamin A: 781IUVitamin C: 0.1mgCalcium: 106mgIron: 2mg
Vegan-ize any recipe!Grab our free vegan cheat sheet, packed with my favorite easy substitutions to make any recipe vegan.

Vegan Lemon Ginger Scones

November 17, 2023 by Nicole @ VegKitchen 1 Comment

vegan scones

Add a tangy twist to tea time with these simple Lemon & Ginger Scones. Bursting with flavor from ginger, lemon zest, and vanilla - and they're 100% vegan too!

vegan scones

When my husband and I were still dating we spent a weekend and the cutest little bed and breakfast in wine country. And while they served up many delicious morsels at breakfast, the one thing that I couldn't get off my mind was the ginger scones!

So I thought I would do my best to finally re-create them here - but as a totally vegan recipe this time.

These Vegan Lemon & Ginger Scones are incredibly easy to whip up. With one bowl and just a few simple steps, you'll have a batch of warm scones ready to enjoy in no time. 

These vegan scones are: 

  • A delicious breakfast or brunch time treat!
  • Kid-friendly.
  • Ready in just 30 minutes.
  • 100% plant based
vegan scones

Useful Tips

Zesting the lemon

Grate the lemon zest with a microplane for a finer consistency and to ensure the lemon's natural oils are released into the dough.

Use cold butter

Make sure you use cold vegan butter or coconut oil for maximum flakiness in the scones.

Use any plant based milk

Any non-dairy milk that you prefer will work fine in this recipe. Try almond, soy, oat, or even coconut milk. 

Serving the scones! 

These scones are perfect all on their own. But for a more indulgent treat, serve them up with a dollop of vegan butter, some raspberry jam, or a drizzle of vegan apple honey. Add some fresh fruit and a cup of lemon ginger tea for a full breakfast!

Make it gluten-free

This recipe is easy to make gluten free by substituting a gluten free baking flour.

Storing leftover scones

The scones will stay fresh for 3-5 days in a covered container in the refrigerator. I recommend warming them in the oven or toaster oven before serving again. You can also freeze the scones for 2-3 months.

vegan scones

Variations

Extra ginger! For extra ginger-y scones, sprinkle some crystalized ginger on top before baking.

Add mix-ins. Try folding some chopped macadamia nuts or walnuts into the batter for a nutty crunch. Or add dried cranberries or blueberries for a pop of sweetness.

Make a glaze. Try finishing off the scones with a drizzle of lemon glaze. Mix together powdered sugar and lemon juice until you get the desired consistency, then drizzle over the warm scones.

Orange Ginger Scones: Replace the lemon juice and lemon zest with orange juice and orange zest for an equally zesty and flavorful scone with a slightly different flavor.

Chocolate Ginger Scones: Mix ¼ cup of cocoa powder with the dry ingredients for an indulgent chocolate-ginger scone.

Chocolate Chip Scones: Add some vegan dark chocolate chips to the dough for a sweet and indulgent treat.

vegan scones

More Vegan Treats

If you love these Vegan Lemon Ginger Scones, be sure to check out these other delicious recipes: 

Also try: our Vegan Chocolate Orange Cake.

  • Best Vegan Scone Recipes
  • Vegan Peanut Butter & Jam Scones
  • No Bake Vegan Lemon Bars
  • 25 Vegan Valentine's Day Desserts
  • Vegan Cinnamon Roll in a Mug

Recipe

vegan scones

Vegan Lemon Ginger Scones

5 from 3 votes
These simple Lemon & Ginger Scones are bursting with flavor from ginger, lemon zest, and vanilla - and they're 100% vegan too!
Print Pin Save Saved!
10 minutes minutes
Total Time: 10 minutes minutes
Servings: 8 servings
Prevent your screen from going dark

Ingredients

  • 2 cups all-purpose flour or a gluten-free blend if preferred
  • ⅓ cup granulated sugar ensure it's vegan
  • 1 tablespoon baking powder
  • ½ teaspoon salt
  • Zest of 1 lemon
  • 1 tablespoon fresh lemon juice
  • ¼ cup crystalized ginger chopped finely
  • 1 teaspoon vanilla extract
  • ½ cup cold vegan butter or coconut oil
  • ¾ cup plant-based milk such as almond, soy, or oat milk
US Customary - Metric

Instructions

  • Preheat your oven to 400°F (200°C). Line a baking sheet with parchment paper.
  • In a large bowl, mix together the flour, sugar, baking powder, salt, and lemon zest.
  • Cut the cold vegan butter or solidified coconut oil into small pieces and use a pastry cutter or fork to blend it into the flour mixture until it resembles coarse crumbs.
  • Make a well in the center of the dry ingredients and pour in the plant-based milk, lemon juice, vanilla extract, and chopped crystallized ginger. Stir until just combined; do not overmix.
  • Turn the dough out onto a lightly floured surface and knead gently a few times to bring it together. Flatten the dough into a circle about 1 inch thick and cut into 8 wedges.
  • Place the wedges on the prepared baking sheet and bake for 15-20 minutes, or until the scones are golden brown.
  • Remove the scones from the oven and allow them to cool slightly on a wire rack.
  • Serve the scones warm or at room temperature.

Nutrition (Estimate per Serving)

Calories: 248kcalCarbohydrates: 36gProtein: 3gFat: 10gSaturated Fat: 2gPolyunsaturated Fat: 3gMonounsaturated Fat: 4gTrans Fat: 0.1gSodium: 427mgPotassium: 41mgFiber: 1gSugar: 12gVitamin A: 540IUVitamin C: 1mgCalcium: 121mgIron: 2mg
Vegan-ize any recipe!Grab our free vegan cheat sheet, packed with my favorite easy substitutions to make any recipe vegan.

Vegan Pumpkin Waffles

November 9, 2023 by Nicole @ VegKitchen Leave a Comment

healthy vegan waffles

These simple Vegan Pumpkin Waffles are packed with delicious pumpkin flavor and made with healthy plant-based ingredients. Serve them up with your favorite toppings for a delicious breakfast treat!

healthy vegan waffles

Mmmm.. pumpkin spice season! I know, I know. You either love it or hate it. And personally... I love it. (As evidenced by all of these vegan-friendly pumpkin recipes!)

I've been meaning to try out my new waffle maker, and figured this would be the perfect opportunity. These pumpkin waffles are perfectly crispy on the outside, soft and pillowy on the inside, and loaded with classic Fall flavors. What's not to love? 

Let's get cooking!

healthy vegan waffles

Helpful Tips & Substitutions 

You can substitute coconut oil with melted vegan butter if you prefer. I like Earth's Balance Buttery Spread.

Try adding a tablespoon of ground flaxseed for an extra dose of protein.

For sweeter waffles, add a tablespoon of organic brown sugar or coconut sugar to the batter.

To keep the cooked waffles warm while you cook the rest of the batter, place them on a baking sheet lined with parchment paper in an oven set to low heat (around 200 degrees).

If you have any leftover pumpkin puree after making this recipe, store it in an airtight container in the refrigerator and use it to make pancakes or muffins.

healthy vegan waffles

Topping Ideas

Get creative with a variety of sweet and savory waffle toppings. Here are some fun ideas:

  • Fresh fruit, such as berries or apple slices.
  • Agave Syrup
  • Vegan Apple Honey
  • Maple Syrup
  • Chopped Nuts
  • Vegan Cream Cheese Frosting
  • Vegan Whipped Cream
  • Homemade Vegan Nutella
  • Shredded Coconut
  • Serve alongside vegan lemon ginger scones for a full brunch spread. For a savory pumpkin dinner, try our vegan pumpkin mac and cheese. For even more pumpkin inspiration, browse our collection of fall pumpkin recipes.
healthy vegan waffles

Recipe Variations

Coconut Waffles - Replace the oat milk with coconut milk and add ¼ cup of shredded coconut to the batter.

Chocolate Pumpkin Waffles - Add 3 tablespoons of cocoa powder to the batter.

Cinnamon Sugar Waffles - Add a teaspoon of cinnamon to the batter and sprinkle each waffle with a bit of organic pure cane sugar before you flip it in the waffle iron.

Apple Filled Waffles - Core and dice 1 apple and fold it into the batter before adding to the waffle iron.

Sweet Potato Waffles - Replace the pumpkin with mashed sweet potatoes. Add a teaspoon of cinnamon to the batter.

healthy vegan waffles

More Vegan Breakfast Ideas

If you love these vegan pumpkin waffles, be sure to check out these other delicious recipes: 

Also try: our Pumpkin Chocolate Chip Muffins.

Also try: our Almond Flour Pancakes.

  • Vegan Pumpkin Donuts
  • Vegan Banana Oat Pancakes
  • 35+ Healthy Vegan Breakfast Recipes
  • Vegan Cinnamon Roll in a Mug

Recipe

healthy vegan waffles

Vegan Pumpkin Waffles

5 from 1 vote
These simple Vegan Pumpkin Waffles are packed with delicious pumpkin flavor and made with plant-based ingredients. A delicious and healthy breakfast treat!
Print Pin Save Saved!
Prep Time: 5 minutes minutes
Cook Time: 4 minutes minutes
Total Time: 9 minutes minutes
Servings: 4 servings
Prevent your screen from going dark

Ingredients

  • 2 ¼ cup all-purpose flour
  • 2 cups oat milk
  • 15 oz pumpkin puree 1 can
  • ¼ cup coconut oil
  • ¼ cup organic pure cane sugar
  • 2 teaspoon baking powder
  • ½ teaspoon baking soda
  • ½ teaspoon cinnamon
  • ¼ teaspoon salt
US Customary - Metric

Instructions

  • In a medium size bowl add the pumpkin puree, oat milk, coconut oil and sugar. Whisk until well combined.
    healthy vegan waffles
  • Then add the flour, baking powder, baking soda, salt and cinnamon to the same bowl and whisk until well combined and smooth.
    healthy vegan waffles
  • Heat your waffle iron to medium high heat and spray with non-stick spray.
  • Add about ⅓ cup batter to the iron. Let it cook for about 3-4 minutes.
  • Repeat until batter is done.
  • Serve with your favorite toppings.
    healthy vegan waffles
  • Enjoy!

Nutrition (Estimate per Serving)

Calories: 519kcalCarbohydrates: 87gProtein: 10gFat: 16gSaturated Fat: 12gPolyunsaturated Fat: 1gMonounsaturated Fat: 1gSodium: 558mgPotassium: 355mgFiber: 6gSugar: 26gVitamin A: 16792IUVitamin C: 4mgCalcium: 331mgIron: 6mg
Vegan-ize any recipe!Grab our free vegan cheat sheet, packed with my favorite easy substitutions to make any recipe vegan.

Vegan Cinnamon Roll in a Mug

August 18, 2023 by Nicole @ VegKitchen 1 Comment

vegan dessert

Craving a warm cinnamon roll, but don't have hours to spend in the kitchen? Enter this Vegan Cinnamon Roll in a Mug. You can whip up a warm, gooey cinnamon bun in just minutes. It's the ultimate vegan dessert for one! 

vegan dessert

You may have seen these cinnamon bun mug cakes making the rounds on TikTok over the last few months. So of course I had to try my hand at creating a vegan version of this tasty little treat. And I am totally in love with the results! 

This Vegan Cinnamon Roll in a Mug is: 

  • Quick and easy to make in just minutes!
  • An easy vegan dessert.
  • Perfect for just one or two people.
  • 100% Vegan and Vegetarian friendly.
vegan dessert

Tips & Variations

Make it gluten free. 

For this recipe I utilized regular all-purpose flour, however, for individuals following a gluten-free diet, almond or coconut flour can be an excellent substitute. Alternatively, you can also replace it with your preferred 1:1 gluten-free baking flour.

vegan dessert

Add mix-ins. 

Add new flavors or mix-ins for a completely new spin on the cinnamon roll. Some ideas include:

  • Dark chocolate chips for a chocolate-chip cinnamon roll.
  • Add a dash of cocoa powder for a chocolate cinnamon roll.
  • Chopped pecans or walnuts for extra crunch.
  • Shredded coconut.
  • Raisins or dried cherries for a fruity spin.
  • Maple or agave syrup.
vegan dessert

Plant based milk. 

I used oat milk for my cinnamon bun mug cake. But you can substitute any vegan friendly milk of your choice. Cashew, almond, or soy milk would all work fine.

vegan dessert

Use organic sugar. 

Note that I have specified organic sugar in the recipe. This is because many brands of non-organic sugar are not actually vegan! If this is important to you, choosing brands marked organic will ensure no bone char was used in the processing.

vegan dessert

More Tasty Ideas

If you love this vegn cinnamon roll in a mug, be sure to check out these other tasty treats:

Also worth trying: our vegan sweet potato brownies.

  • Cinnamon Apple Chickpea Cake
  • Vegan Sweet Potato Mug Cake
  • Vegan Mug Brownies
  • Fudgy Avocado Brownies

Recipe

vegan dessert

Vegan Cinnamon Roll in a Mug

5 from 5 votes
This Vegan Cinnamon Roll in a Mug is the ultimate vegan dessert for one! A warm, gooey cinnamon bun that's so quick and easy to make in just minutes!
Print Pin Save Saved!
Prep Time: 5 minutes minutes
Cook Time: 1 minute minute
Total Time: 6 minutes minutes
Servings: 1 serving
Prevent your screen from going dark

Ingredients

Ingredients dough:

  • 9 tablespoon unbleached all-purpose flour
  • 4 tablespoon plant based milk I used oat milk
  • 1 ½ tablespoon organic cane sugar
  • 1 tablespoon coconut oil
  • ½ teaspoon baking powder
  • ¼ teaspoon salt
  • ¾ teaspoon cinnamon

Ingredients frosting:

  • 4 tablespoon organic powdered sugar
  • 1 teaspoon plant based milk I used oat milk
US Customary - Metric

Instructions

  • Start by making the dough. In a small bowl whisk together the flour, baking powder, salt and 4 tablespoon of vegan milk. Mix until you get a dough ball. You can add a little bit more flour if it is stick, or a little bit more milk, if it seems dry.
  • Put some flour on the surface of your counter and roll out the dough in a square, about the height of your mug.
  • Brush some coconut oil on one side and then sprinkle the sugar and cinnamon over the dough. Roll up the dough.
  • Brush the remaining coconut oil on the inside of your mug. Place the rolled dough in the mug.
  • Put the mug in the microwave for 50 seconds. If it seems too wet, you can add a few more seconds (in increments of 5 seconds), until no longer wet.
  • In a separate small bowl mix together the frosting ingredients, the powdered sugar and vegan milk, and pour this over the cinnamon bun in the mug, and let it sit for 30 seconds before serving.

Nutrition (Estimate per Serving)

Calories: 563kcalCarbohydrates: 104gProtein: 7gFat: 15gSaturated Fat: 12gPolyunsaturated Fat: 1gMonounsaturated Fat: 1gSodium: 880mgPotassium: 86mgFiber: 3gSugar: 50gVitamin A: 6IUVitamin C: 0.1mgCalcium: 221mgIron: 4mg
Vegan-ize any recipe!Grab our free vegan cheat sheet, packed with my favorite easy substitutions to make any recipe vegan.

Chickpea Chocolate Chip Cookies

October 19, 2022 by Nicole @ VegKitchen Leave a Comment

healthy chickpea cookies

Whip up these vegan chickpea chocolate chip cookies for a sweet treat. A protein packed vegan cookie that is studded with chocolate chips. A chewy and delicious chocolate chip cookie that is a treat kids and adults will enjoy. 

healthy chickpea cookies

The chickpeas will be ground up enough you won't even know they are in the cookies. A great way to sneak them into a treat. Here are more easy vegan desserts you should check out. Another easy dessert is this vegan chickpea apple cake. 

Another cookie recipe you might consider are these vegan thumbprint cookies. Or if you like chocolate try these vegan chocolate thumbprint cookies. 

These Chickpea Chocolate Chip Cookies Are...

  • Vegan 
  • Protein Packed 
  • Freezer Friendly 
  • Quick And Easy 
  • No Chill Cookie Dough 

How to Make Chickpea Chocolate Chip Cookies

healthy chickpea cookies

Full steps on how to make chickpea chocolate chip cookies are in the printable recipe card below. This is a quick walk through. 

  1. Start by preheating your oven and prep the baking sheet. 
  2. In a food processor you will add in all ingredients but the chocolate chips. 
  3. Pulse to mix until your dough is formed. 
  4. Remove blades and then fold in the chocolate chips. 
  5. Place cookies on baking sheet and bake as directed. Allow the cookies to cool on tray for 5 minutes, then remove to cooling rack. 

Tips For Chickpea Cookie Recipe 

healthy chickpea cookies

Food Processor 

It is important to have your chickpeas broken up and mixed well, otherwise it will alter the texture of the cookies. So make sure to get the chickpeas ground up nicely. 

Cookie Scoop 

Make sure to use a cookie scoop to ensure all the cookies are evenly shaped and sized. That way all the cookies bake up perfectly. 

Variations to Chickpea Chocolate Chip Cookies 

healthy chickpea cookies

Nuts 

Add in ¼ cup of pecans or even walnuts into the cookies. I recommend walnuts or pecans that are chopped for this recipe. 

Dried Fruit 

You could also mix in some dried cranberries or even raisins for this cookie recipe. Feel free to mix in ¼ cup of dried fruit. 

Chocolate Chips 

So you can use white chocolate chips, semi-sweet or even milk chocolate chips. Or you could skip the chocolate and reach for peanut butter chips. 

Chickpea Chocolate Chip Cookie Recipe FAQs

healthy chickpea cookies

How to store these chickpea cookies? 

You can store your chickpea cookies in an airtight container once the cookies are cooled. These cookies can be stored in an airtight container on the counter. 

Can you freeze these chocolate chip cookies? 

Yes, you can freeze these chocolate chip cookies for up to 3-5 months. Just store the cookies in a freezer bag or airtight freezer container. 

Can I double this cookie recipe? 

Yes, you can double the cookie recipe if you want to make a larger batch. Just whip it up, bake in batches and it will work the same. If you have a smaller food processor then mix up the cookie dough in batches. 

More Vegan Desserts

If you love these chickpea chocolate chip cookies, be sure to check out these other delicious vegan treats:

  • Fudgy Avocado Brownies
  • Vegan Thumbprint Cookies
  • Cinnamon Apple Chickpea Cake

Recipe

healthy chickpea cookies

Chickpea Chocolate Chip Cookies

5 from 1 vote
These chickpea chocolate chip cookies are the ultimate vegan treat! Packed with yummy flavor, loaded with protein, and easy to make with just a handful of ingredients.
Print Pin Save Saved!
Prep Time: 10 minutes minutes
Cook Time: 10 minutes minutes
Total Time: 20 minutes minutes
Servings: 12 cookies
Prevent your screen from going dark

Ingredients

  • 1 can chickpeas rinsed and drained
  • 1 cup flour
  • ½ cup peanut butter
  • ½ cup brown sugar
  • 1 teaspoon vanilla
  • ½ teaspoon baking soda
  • ¼ teaspoon salt
  • 1 cup chocolate chips
US Customary - Metric

Instructions

  • Preheat oven to 350 F, line a baking sheet with parchment paper and set aside
  • In a large food processor, add the chickpeas, flour, peanut butter, brown sugar, vanilla, baking soda, and salt.
    healthy chickpea cookies
  • Pulse until smooth.
    healthy chickpea cookies
  • Remove blades and stir in the chocolate chips
    healthy chickpea cookies
  • Drop by heaping tablespoons onto prepared sheet, bake in preheated oven 10 minutes, or until golden brown and cooked through
  • Allow to cool on tray for 5 minutes before transferring to a wire rack to finish cooling
    healthy chickpea cookies

Nutrition (Estimate per Serving)

Calories: 213kcalCarbohydrates: 29gProtein: 4gFat: 10gSaturated Fat: 4gPolyunsaturated Fat: 1gMonounsaturated Fat: 3gSodium: 143mgPotassium: 128mgFiber: 1gSugar: 19gVitamin A: 0.02IUVitamin C: 0.001mgCalcium: 25mgIron: 1mg
Vegan-ize any recipe!Grab our free vegan cheat sheet, packed with my favorite easy substitutions to make any recipe vegan.

Vegan Hummingbird Cake

October 6, 2022 by Nicole @ VegKitchen 1 Comment

vegan hummingbird cake

Whip up this decadent vegan hummingbird cake for your next sweet craving. This is a layered cake full of crushed pineapple, coconut, bananas and more. Topped with a silky smooth vegan cream cheese frosting!

vegan hummingbird cake

This fruit-filled cake is one of our family favorites! Great for all occasions from birthdays to baby showers, Valentine's Day, and all things in between. For even more romantic sweet ideas, browse our 25+ Vegan Valentine's Day Desserts collection. This vegan dessert is one you will want to make over and over again. 

This Vegan Hummingbird Cake Is...

  • Made from Scratch
  • Vegan 
  • Dairy Free
  • Layered Cake 
  • Rich Creamy Frosting

How to Make Vegan Hummingbird Cake 

vegan hummingbird cake

Full steps on how to make this hummingbird cake are in a printable recipe card. This is a quick walk through. 

  1. In a bowl add your dry ingredients into the bowl and set aside. Grease cake pans and preheat the oven. 
  2. Next you will add the vegan butter in a bowl and whip until fluffy. Then add in the brown sugar and granulated sugar. 
  3. Add in the bananas, pineapple, apple cider vinegar, and coconut. 
  4. Now mix with the dry ingredients mixing till it is combined. Make sure to scrape down the sides. 
  5. Pour the cake into the pan and then bake as directed. Allow the cakes to fully cool before frosting. 
  6. To whip up the frosting just cream ingredients in a stand mixer. Once it is creamy it is ready. 
  7. Spread the frosting between the two layers of cake, and then on the sides. 
  8. Assemble the cake, and fully frost the outside of the cake. 

Helpful Tips For Hummingbird Cake 

vegan hummingbird cake

Hand Mixer or Stand Mixer 

I love using a stand mixer for this recipe. It ensures all the ingredients are fully combined and it takes less effort than hand mixing with a whisk. But if you don't have a mixer you can use a whisk to mix. 

Creaming Butter 

Take the time to properly cream the vegan butter. This is going to ensure that your cake has a super soft and light texture. Creaming butter can take 2-4 minutes to do. 

Cooling Cake In Pans 

Allow the cakes to cool in their pans for around 10 minutes once you remove from the oven. Then you can remove the cake and place on a cooling rack to fully cool down. Do not attempt to frost the cake until it cools!

Variations to Hummingbird Cake Recipe 

vegan hummingbird cake

Dried Fruit 

Consider adding in ¼ cup dried raisins or cranberries into the cake batter. It adds another layer of flavor to the cake. 

9x13 Cake Pan

Instead of making a layered cake, pour the batter into a 9x13 baking dish. Then bake for around 25 minutes or until the cake is fully cooked through. Then frost once the cake is cool. 

Vanilla Frosting 

If you are not wanting a cream cheese frosting you can easily frost with a classic vegan vanilla frosting or other flavor of your choice.

Vegan Hummingbird Cake FAQs

vegan hummingbird cake

Can I substitute the apple cider vinegar? 

If you do not want to use apple cider vinegar, just swap with lemon juice. The acid is needed to help activate the baking soda, which will create a light and fluffy texture to the cake. 

How to store the cake? 

If you don't eat your cake right away or have leftovers, store in the fridge. Place the cake in an airtight container and refrigerate for 3-5 days. Or you can freeze the cake for up to 3 months. Then thaw the cake in the fridge overnight. Or on the counter for an hour. 

More Vegan Treats

If you love this Vegan Hummingbird Cake, be sure to check out these other delicious ideas:

Also worth trying: our vegan funfetti cake.

  • Vegan Banana Cake
  • 35+ Vegan Summer Desserts
  • 20 Best Vegan Pies

Recipe

vegan hummingbird cake

Vegan Hummingbird Cake

5 from 2 votes
This vegan hummingbird cake is bursting with flavor from pineapple, banana, and brown sugar. All topped off with a homemade vegan cream cheese frosting!
Print Pin Save Saved!
Prep Time: 20 minutes minutes
Cook Time: 30 minutes minutes
Total Time: 50 minutes minutes
Servings: 8 servings
Prevent your screen from going dark

Ingredients

For the cake:

  • 3 ½ cups flour
  • ⅓ cup ground flaxseed
  • 1 tablespoon cinnamon
  • 1 tablespoon baking powder
  • 1 teaspoon baking soda
  • ½ teaspoon salt
  • ⅔ cup vegan butter
  • 1 cup brown sugar
  • 1 cup granulated sugar
  • 4 bananas mashed (about 2 cups)
  • 1 can crushed pineapple with juice
  • 1 tablespoon apple cider vinegar
  • ½ cup coconut

For the frosting:

  • 8 oz vegan cream cheese softened to room temperature
  • 8 oz vegan butter softened to room temperature
  • 5 cups powdered sugar
  • 1 teaspoon vanilla extract
US Customary - Metric

Instructions

  • Preheat oven to 350 F, grease and flour two 9" baking pans
  • In a large bowl stir together the flour, flaxseed, cinnamon, baking powder, baking soda, and salt; set aside
    vegan hummingbird cake
  • In a separate bowl, beat the vegan butter until fluffy, then mix in the brown sugar and granulated sugar until smooth
    vegan hummingbird cake
  • Stir in the bananas, pineapple with juice, apple cider vinegar and coconut until evenly distributed
    vegan hummingbird cake
  • Pour the butter mixture into the flour mixture
    vegan hummingbird cake
  • Stir to combine well.
    vegan hummingbird cake
  • Divide the batter evenly between the pans.
    vegan hummingbird cake
  • Bake in preheated oven for 30-35 minutes, or until a toothpick inserted in the center comes out clean
    vegan hummingbird cake
  • Cool in pans for 10 minutes then flip onto wire rack and allow to cool completely
    vegan hummingbird cake
  • While the cake is baking, prepare the frosting by creaming together vegan butter and vegan cream cheese, then adding powdered sugar 1 cup at a time
    vegan hummingbird cake
  • Stir in vanilla extract and set aside to use once cake has cooled
    vegan hummingbird cake
  • Spread the frosting between the two layers of cake and on the top and sides of cake
    vegan hummingbird cake
  • Serve immediately
    vegan hummingbird cake

Nutrition (Estimate per Serving)

Calories: 1160kcalCarbohydrates: 189gProtein: 10gFat: 44gSaturated Fat: 13gPolyunsaturated Fat: 11gMonounsaturated Fat: 13gTrans Fat: 0.2gSodium: 870mgPotassium: 400mgFiber: 8gSugar: 134gVitamin A: 1843IUVitamin C: 5mgCalcium: 169mgIron: 4mg
Vegan-ize any recipe!Grab our free vegan cheat sheet, packed with my favorite easy substitutions to make any recipe vegan.

Vegan Banana Oat Pancakes

August 3, 2022 by Nicole @ VegKitchen Leave a Comment

Light and fluffy pancakes

Did you know you can make these vegan banana oat pancakes with just 3 simple ingredients? Light and fluffy pancakes that are a vegan friendly breakfast option. No milk or eggs needed for this breakfast idea. 

Light and fluffy pancakes

Vegan pancakes are always welcome in our household. You might want to try out these vegan blueberry pancakes, almond flour pancakes, or even try these other vegan breakfast recipes. 

This Vegan Banana Oat Pancake Recipe Is...

  • Vegan 
  • Egg Free
  • Dairy Free 
  • 3 Ingredient Recipe 
  • Homemade 

How to Make Vegan Banana Oat Pancakes 

Light and fluffy pancakes

Full steps on how to make vegan banana oat pancakes are in the printable recipe card at the bottom of the post. 

  1. Start by grabbing a blender and add in the ingredients. 
  2. Blend until it is mixed fully, slowly adding in the remaining coconut milk. 
  3. Heat your pancake griddle or skillet. Then pour ¼ cup of the batter. 
  4. Let it cook, then flip and finish cooking the other side. 

Helpful Tips for Making Banana Oat Pancakes 

Light and fluffy pancakes

High Speed Blender 

When you go to mix up the pancake batter you do need to use a high speed blender. It is going to whip up the mixture and break it down enough to create a thick batter. You can't do it without blending. 

Pancake Griddle 

Whether you use a pancake griddle or nonstick skillet make sure to grease the pan if needed. This is going to make sure that when you go to flip the pancakes they don't stick. 

Bubbles On Pancakes 

You will see that when your pancakes are cooking little bubbles will form on the batter. Once those bubbles begin to pop you can check to flip your pancake gently to cook the other side. Generally they are ready to flip or close to flip at that point. 

Variations to Banana Oat Pancakes 

Light and fluffy pancakes

Fruit

Stir in some fruit at the end of mixing up your batter. This is going to be great at folding into the batter right before you cook. Or pour the batter and then sprinkle on fruit. 

Sweetener 

You can add in a drizzle of maple syrup to make the pancake itself sweeter. Or you can add in a little sweetener to make the pancakes sweeter to the taste. 

Peanut Butter or Nut Butter 

Once your pancakes are done, add a layer of peanut butter or nut butter of choice on top of the pancake. It will add tons of flavor and protein.  This works just as beautifully on our vegan pumpkin waffles or our almond flour pancakes too! Or swap the nut butter for a drizzle of vegan apple honey for a lighter, sweeter twist. And if you're in the mood for something a little different, our vegan lemon ginger scones make a wonderful ginger-y brunch treat.

Banana Oat Pancakes FAQs

Light and fluffy pancakes

How to store banana oat pancakes? 

You can store any pancakes you don't eat right away in a container in the fridge. Just store for 3-5 days in the fridge. Then when you want you can warm up in the microwave or in a skillet on the stove. 

Can you freeze leftover pancakes? 

Place parchment paper on a cookie sheet and then place pancakes in a single layer. Flash freeze your pancakes then place in a freezer container or freezer bag. The pancakes will store for 3-4 months in the freezer. Then defrost from frozen in the microwave or even toss in the toaster to warm them up. 

Does this recipe double? 

Yes, you can make extra pancakes if you would like. Just make sure your blender is large enough and can handle a larger batch. Then cook the same and place pancakes on cooling rack or place in the oven at 200 degrees to keep warm until you are ready to serve. 

Recipe

Light and fluffy pancakes

Vegan Banana Oat Pancakes

5 from 2 votes
These easy vegan banana oat pancakes only take 10 minutes and 3 simple ingredients to throw together!
Print Pin Save Saved!
Prep Time: 5 minutes minutes
Cook Time: 10 minutes minutes
Total Time: 15 minutes minutes
Servings: 8 pancakes
Prevent your screen from going dark

Ingredients

  • 1 ½ cups rolled oats
  • 1 medium banana
  • ¾ - 1 cup coconut milk from the can
US Customary - Metric

Instructions

  • In a high speed blender, add the oats, banana, and ¾ cup coconut milk
    Light and fluffy pancakes
  • Blend on high , adding more coconut milk if needed to get it to blend smooth, batter will be very thick
    Light and fluffy pancakes
  • Heat a nonstick skillet over medium heat, once hot add ¼ cup of batter and use the back of the scoop to gently press down flat
    Light and fluffy pancakes
  • Cook 2-3 minutes each side, or until firm and golden on both sides
    Light and fluffy pancakes
  • Serve with banana, walnuts, and maple syrup
    Light and fluffy pancakes

Nutrition (Estimate per Serving)

Calories: 168kcalCarbohydrates: 15gProtein: 3gFat: 12gSaturated Fat: 10gPolyunsaturated Fat: 0.5gMonounsaturated Fat: 1gSodium: 7mgPotassium: 217mgFiber: 2gSugar: 2gVitamin A: 9IUVitamin C: 2mgCalcium: 18mgIron: 2mg
Vegan-ize any recipe!Grab our free vegan cheat sheet, packed with my favorite easy substitutions to make any recipe vegan.

Vegan Pina Colada

August 2, 2022 by Nicole @ VegKitchen Leave a Comment

creamy pineapple and coconut drink

Vegan Pina Colada takes literally minutes to whip up. This creamy pineapple and coconut drink is ready to be sipped on in no time. This tropical paradise cocktail is made with rum and is vegan, gluten free, and dairy free. 

creamy pineapple and coconut drink

Try out this pina colada green smoothie for a breakfast idea for those busy mornings. Another pina colada recipe are these pina colada squares, a sliceable dessert the whole crew will enjoy. 

This Vegan Pina Colada Recipe Is...

  • Vegan
  • Gluten Free
  • Dairy Free
  • 5 Minute Drink 
  • Alcoholic 
  • Can Be Made As Mocktail 

How to Make A Pina Colada

tropical paradise cocktail

Full steps on how to make a pina colada are in the printable recipe card at the bottom of the post. This is a quick walk through on how it is made. 

  1. Add all the ingredients into the blender. 
  2. Blend until smooth and creamy. 
  3. Pour into a glass and serve over ice. 

Helpful Tips For Making Pina Colada 

creamy pineapple and coconut drink

High Speed Blender 

Make sure that you are using a high speed blender. This is going to ensure the mixture really blends well together. Plus the higher speed will break down the frozen pineapple chunks in the recipe. 

Frozen Pineapple 

Make sure your pineapple is frozen, or it will alter the texture of your cocktail. Just place pineapple on a lined baking sheet and freeze for 1-2 hours. Do a single row of pineapple to ensure it evenly freezes. Or buy pre-frozen pineapple to cut a corner of prep. 

Variations to Pina Colada Recipe 

Rum 

I used a dark rum for this recipe. But you are welcome to swap it out with a lighter rum if you want. Or even try out vodka for another twist. 

Coconut Shavings 

Consider adding on some coconut shavings to the top of your drink to showcase the coconut in the drink. You could even blend some coconut up with the pineapple mixture. It will be a bit chewy when you sip. 

Coconut Ice Cream 

If you want to give this a sweeter flavor, swap the coconut cream with coconut ice cream that is dairy free. This is going to enhance the flavors even more and it offers a creamier texture. 

creamy pineapple and coconut drink

Pina Colada FAQs

Are pina coladas healthy? 

You will find that depending on the ingredients used it depends. Some recipes will use a lot of pineapple, coconut cream, and such, which does add in sugar, calories, etc. So use your judgement on brands of each item you need. 

Can I make this cocktail ahead of time?

I find it is best to serve this up right before you are going to enjoy it. That way it doesn't melt and break down too much and dilute the flavor of the drink. 

Does this recipe double well? 

Go right ahead and make as many of these cocktails as you want. Just make as much that fits in your blender. If you want more then just batch mix up the pina colada mixture then pour in glasses and serve. 

What can I use instead of a simple syrup? 

If you would like you can swap the simple syrup out with a maple syrup. You use the simple syrup to help sweeten up the drink. So just reach for a maple syrup to swap in, if you prefer. The sweeten to your preference. 

How to adjust the thickness of the cocktail? 

Add more liquid to thin up the pina colada. Or to thicken it toss in extra frozen pineapple. Then mix and adjust the ingredients as needed. 

Also try: our Almond Flour Pancakes.

Recipe

creamy pineapple and coconut drink

Vegan Pina Colada

5 from 2 votes
This Vegan Pina Colada is the perfect summer cocktail. Packed with flavor from tangy pineapple and creamy coconut - and ready in just 5 minutes!
Print Pin Save Saved!
Prep Time: 10 minutes minutes
Total Time: 10 minutes minutes
Servings: 4 servings
Prevent your screen from going dark

Ingredients

  • 1 cup dark rum
  • 1 cup pineapple juice
  • 1 ½ cups coconut cream canned
  • ¼ cup lime juice
  • ⅓ cup simple syrup
  • 3 cups frozen pineapple chunks
  • 2 ½ cups ice
US Customary - Metric

Instructions

  • Combine all ingredients in a high speed blender.
    tropical paradise cocktail
  • Blend until the mixture is smooth and creamy. If you have trouble getting it to blend, add a bit more liquid to the mix.
    tropical paradise cocktail
  • Taste and adjust as desired. If it's not sweet enough for your liking, add additional simple syrup.
  • Serve over ice.
    creamy pineapple and coconut drink

Notes

  • You can use coconut flavored rum or light rum in place of the dark rum if you prefer. The dark rum gives a richer flavor.
  • If you prefer, you can substitute agave syrup or maple syrup in place of the simple syrup.
  • You may use coconut milk instead of coconut cream, but will find it has a thinner consistency.
  • Try garnishing your vegan pina colada with fresh coconut shavings, pineapple slices, or lime wedges.

Nutrition (Estimate per Serving)

Calories: 653kcalCarbohydrates: 63gProtein: 4gFat: 31gSaturated Fat: 28gPolyunsaturated Fat: 0.4gMonounsaturated Fat: 1gSodium: 31mgPotassium: 626mgFiber: 4gSugar: 52gVitamin A: 99IUVitamin C: 30mgCalcium: 56mgIron: 4mg
Vegan-ize any recipe!Grab our free vegan cheat sheet, packed with my favorite easy substitutions to make any recipe vegan.

Raw Vegan Strawberry Jam

May 31, 2022 by Nicole @ VegKitchen Leave a Comment

raw strawberry jam

Have you tried raw vegan strawberry jam before? Just 3 ingredients is all it takes to make this thick, delicious, nutrient rich strawberry jam. Vegan friendly and perfect for spreading on toast, vegan lemon ginger scones, vegan pumpkin waffles, pancakes, crepes, or even as a sweetener in place of honey - try our vegan apple honey for a vegan-friendly option! 

raw strawberry jam

If you are a lover of strawberries, you have to give this a try. Also, check out my 12 chia seed pudding recipes to whip up as well. Or learn how to make cherry pomegranate refrigerator jam. It is so tasty as well. 

Chia seeds seemed to be the perfect addition to this jam to transform the texture and of course give you extra nutrients and leave you feeling full and satisfied. I also have some delicious vegan strawberry recipes you guys might be interested in. 

This Raw Vegan Strawberry Jam Recipe Is...

  • Made with 3 Ingredients 
  • Easy to Make 
  • Perfect for Using Ripe Strawberries 
  • Spreads Well On Bread and other items 
  • Vegan 
  • Vegetarian 
  • Naturally Gluten Free 
  • Dairy Free 

How to Make Vegan Strawberry Jam 

raw strawberry jam

Full steps for this vegan raw strawberry jam are in the printable recipe card at the bottom of the post. This is a quick walk through on how it is made. 

  1. Start by adding water and chia seeds into a bowl. Stir and let sit for 1 hour. 
  2. Once the chia seeds are a thick paste, you will add the fresh strawberries, and sweetener to a blender. 
  3. Blend until it is pureed. 

Tips for Making Raw Vegan Strawberry Jam 

raw strawberry jam

Blender or Food Processor 

You will want to add all your ingredients into a food processor or high speed blender. Then turn on and let it puree the mixture. 

Scrape Down The Sides 

When blending make sure to take a spatula and scrape down the sides and lift any stuck on bits in the bottom of your blender. Sometimes you will find the berries splatter to the walls and don't puree fully. 

Variations to Raw Vegan Strawberry Jam 

raw strawberry jam

Fruit 

So this is made with strawberries, but you could easily swap it out for any fresh berries you would like. Blueberries, blackberries, raspberries, or any other fruit of choice. 

Sweetener 

So I used a liquid sweetener but this is of course optional. If you don't want to sweeten the jam you do not have too. Or you could use a maple syrup if you prefer. 

Strawberry Jam FAQs

raw strawberry jam

How to know my chia seeds are ready to be pureed? 

You want your chia seeds to become a thick paste in the cup. As the chia seeds soak in the water they will expand. And in around an hour or a bit longer you will find they have swelled nicely and create a thick paste. 

How to store this fresh jam? 

You will want to put the vegan jam in an airtight container and store in the fridge for up to 5 days. Since there are no preservatives, it will spoil faster than a bottle of jam from the store. 

Can you freeze the strawberry jam? 

To be honest I have never frozen chia seeds in a jam. So I can't say for sure if the texture will be different once it thaws from being frozen. I would think the texture could alter a bit. So if you do try let me know in the comments. 

Recipe

raw strawberry jam

Raw Vegan Strawberry Jam

5 from 3 votes
This raw vegan strawberry jam is quick, easy, and made with just three simple ingredients. It's the perfect topping for pancakes, toast, or muffins!
Print Pin Save Saved!
Prep Time: 10 minutes minutes
Soaking Time: 1 hour hour
Servings: 8 servings (each about ¼ cup)
Prevent your screen from going dark

Ingredients

  • ½ cup water
  • 2 tablespoon chía seeds
  • 2 cups strawberries fresh, green tops removed
  • 1 tablespoon of liquid sweetener such as stevia, optional
US Customary - Metric

Instructions

  • Mix the wáter and chia seeds together in a small bowl or jar.
  • Let the chia seed mixture rest for at least an hour, until it becomes a a thick paste.
  • Combine the chía seed paste, the fresh strawberries and the sweetener (optional) in a blender
    raw strawberry jam
  • Puree until smooth.
    raw strawberry jam

Notes

  • This vegan strawberry jam is a great topping for pancakes, waffles, or crepes.
  • It's even great layered with dairy-free yogurt as a parfait!
  • Keep in the fridge in an airtight container for up to 5 days.
  • You can substitute other berries or fruits for the strawberries to make a variety of jam flavors.

Nutrition (Estimate per Serving)

Calories: 26kcalCarbohydrates: 4gProtein: 1gFat: 1gSaturated Fat: 1gPolyunsaturated Fat: 1gMonounsaturated Fat: 1gTrans Fat: 1gSodium: 2mgPotassium: 67mgFiber: 2gSugar: 2gVitamin A: 6IUVitamin C: 21mgCalcium: 25mgIron: 1mg
Vegan-ize any recipe!Grab our free vegan cheat sheet, packed with my favorite easy substitutions to make any recipe vegan.

Easy Vegan Coleslaw

May 26, 2022 by Nicole @ VegKitchen Leave a Comment

vegan coleslaw no mayo

This easy vegan coleslaw is the ultimate side dish to serve up. Loaded with crisp cabbage, red bell pepper, carrots, and paired with a homemade coleslaw dressing. Top with crunchy slivered almonds and green onions. 

vegan coleslaw no mayo

Whether you are needing a potluck side dish or weeknight side, this vegan coleslaw recipe is a must make. It is nutrient rich and loaded with flavor. Tangy, crunchy, and slightly sweet. A vegan side dish that won't disappoint. 

An easy Asian coleslaw recipe that is going to win you over with one bite. Also check out my other slaw recipes. If you like sweet slaws this apple raisin slaw is popular as well. 

This Vegan Coleslaw Recipe Is...

  • Made without mayo 
  • Vegan 
  • Vegetarian 
  • Naturally Gluten Free 
  • Crunchy 
  • Homemade Coleslaw Dressing 

How to Make Vegan Coleslaw 

vegan coleslaw no mayo

Full steps on how to make this vegan coleslaw is featured in the printable recipe card at the bottom of the post. This is a quick walk through on how it is made. 

  1. Grab a mixing bowl and add your coleslaw, red bell pepper and carrots. Then you you will toss to mix the ingredients together. 
  2. Next you will grab a small bowl and add all the ingredients in the dressing, and whisk well. Once it is creamy and no clumps it is mixed enough. 
  3. Pour the dressing on top of the cabbage mixture and toss to coat all the ingredients. 
  4. If you want top with slivered almonds and green onions right before serving. 

Helpful Tips For Vegan Coleslaw Recipe 

vegan coleslaw no mayo

Chop Vegetables Small 

You will want to chop your vegetables into bite size pieces. If the pieces are too large it will make it harder to eat the salad. If you find your coleslaw mix is in too big of pieces you can chop it down as well. 

Marinate Slaw 

If you want you can marinate the coleslaw for 2-3 hours before you serve it. This will help enhance all the flavors and help break down the coleslaw a bit. You can eat it without chilling first, but it will add more flavor. 

Whisk 

I do recommend using a whisk for mixing up the dressing. I find it helps to remove any clumps that are in the dressing, and really incorporates all the seasonings and oils. 

Variations to Vegan Coleslaw 

vegan coleslaw no mayo

Vinegar 

If you don't have a rice vinegar you can use a white wine vinegar. It will alter the flavor a bit but it won't be that noticeable. 

Soy Sauce 

If you are worried about the sodium, you can use a low sodium sauce. Simply use the same amount the 1 tablespoons. 

Cranberries or Raisins 

If you do want to add sweetness to the coleslaw, just add in ¼ cup of raisins or dried cranberries for the salad. 

Vegan Coleslaw FAQs

vegan coleslaw no mayo

Can I use fresh cabbage instead of coleslaw mix? 

Grab a green cabbage and thinly slice it up and use instead of a bag of coleslaw mix. Depending on the size of the cabbage you might use some or all of the cabbage. 

How long will this coleslaw last? 

You can store this coleslaw in the fridge in an airtight container for 3-4 days. You will find with each day the vegetables will soften up a bit. I do recommend eating it within the first 2 days of it being made. 

Can you freeze coleslaw? 

Unfortunately you can't freeze the coleslaw. The vegetables would become very mushy once it is thawed from being frozen. So I recommend only making what you plan to eat. 

Recipe

vegan coleslaw no mayo

Easy Vegan Coleslaw

5 from 2 votes
This tasty vegan coleslaw is loaded with fresh veggies, easy to make in just a few minutes, and tossed with a delicious sweet and savory dressing. Perfect for summer!
Print Pin Save Saved!
Prep Time: 5 minutes minutes
Cook Time: 5 minutes minutes
Total Time: 10 minutes minutes
Servings: 8 servings
Prevent your screen from going dark

Ingredients

  • 1 bag coleslaw mix shredded
  • 1 red bell pepper thinly sliced
  • 1 cup carrots shredded

For dressing:

  • 2 tablespoons olive oil or sunflower oil
  • 2 tablespoons seasoned rice vinegar
  • 1 tablespoon sesame oil
  • 1 tablespoon soy sauce or tamari
  • juice of 1 lime
  • 1 tablespoon ginger peeled and minced or use ginger paste
  • 1 clove garlic peeled and minced

For topping:

  • ¼ cup slivered almonds
  • 1 pc green onion thinly sliced
US Customary - Metric

Instructions

  • In a large mixing bowl, toss together the coleslaw mix, red bell pepper, and carrots.
    vegan coleslaw no mayo
  • In a separate small bowl, whisk together the olive oil, rice vinegar, sesame oil, soy sauce, lime juice, ginger, and garlic.
    vegan coleslaw no mayo
  • Pour the dressing over the coleslaw mix and toss until the veggies are well coated.
    vegan coleslaw no mayo
  • If desired, top the coleslaw with slivered almonds and green onions before serving.
    vegan coleslaw no mayo

Notes

  • If you prefer your vegan coleslaw more chilled, you can refrigerate for 2 hours before serving.

Nutrition (Estimate per Serving)

Calories: 94kcalCarbohydrates: 7gProtein: 2gFat: 7gSaturated Fat: 1gPolyunsaturated Fat: 2gMonounsaturated Fat: 4gSodium: 148mgPotassium: 213mgFiber: 3gSugar: 3gVitamin A: 3195IUVitamin C: 41mgCalcium: 40mgIron: 1mg
Vegan-ize any recipe!Grab our free vegan cheat sheet, packed with my favorite easy substitutions to make any recipe vegan.

5-Minute Vegan Peanut Butter Dip

April 26, 2022 by Nicole @ VegKitchen Leave a Comment

vegan peanut butter dip

This quick and easy vegan peanut butter dip is perfect for dipping fresh apples, veggies, or spreading on toast or crackers. And it's ready in just 5 minutes!

vegan peanut butter dip
[feast_advanced_jump_to]

I whipped this up one afternoon as a quick snack one afternoon when I was craving something a bit sweet. And it's turned out to be one of my new favorite vegan snack!

How to Serve Peanut Butter Dip

I served this vegan peanut butter dip in so many ways, but my favorites are:

  • As a dipping sauce for fresh apple slices.
  • As a topping for celery sticks.
  • Spread on a slice of whole wheat toast for breakfast.

This could even make a great lunch served on a slice of toast alongside a delicious and healthy green smoothie.

Variations

Any nut butter can replace the peanut butter in this dip - try cashew butter or almond butter for a creamy alternative.

This dip does not need to be measured exactly, just throw the ingredients in your blender and blend away. If you need a bit more nondairy milk to get it to blend, add some. If you need more maple syrup or another date to sweeten it, add it. Experiment! It really is hard to mess up this mixture of ingredients. They just go together and come out great.

This is also a great way to incorporate flax seed into your diet. Flax is high in Omega-3 essential fatty acids which are good fats shown to have heart healthy effects. Flax is also high in fiber. In order to absorb these nutrients, the seed must be broken apart in a blender or grinder.

More Vegan Recipes

If you love this vegan peanut butter dip, be sure to check out our other vegan snack ideas or these reader favorites:

  • Vegan Peanut Butter Cups
  • Easy Vegan Peanut Butter Cookies
  • 25 Best Vegan Dip Recipes

Recipe

vegan peanut butter dip

Easy Vegan Peanut Butter Dip

4.80 from 5 votes
This quick and easy peanut butter dip is perfect for dipping fresh apples, veggies, or spreading on toast or crackers.
Print Pin Save Saved!
Cook Time: 5 minutes minutes
Total Time: 5 minutes minutes
Servings: 6 ¼ cup servings
Prevent your screen from going dark

Equipment

  • Blender or food processor

Ingredients

  • ½ cup peanut butter
  • ¼ cup almond milk or other nondairy milk
  • ¼ cup maple syrup or 2-3 Medjool dates
  • ½ banana
  • 1 tablespoon ground flaxseed
  • apple slices, fresh veggies, or toast for serving
US Customary - Metric

Instructions

  • Blend all ingredients in blender until smooth.
  • Add more nondairy milk if needed and scrape down sides.
  • Serve with apple slices or on toast.

Nutrition (Estimate per Serving)

Calories: 181kcalCarbohydrates: 16gProtein: 5gFat: 12gSaturated Fat: 2gPolyunsaturated Fat: 3gMonounsaturated Fat: 6gSodium: 107mgPotassium: 196mgFiber: 2gSugar: 12gVitamin A: 6IUVitamin C: 1mgCalcium: 41mgIron: 1mg
Vegan-ize any recipe!Grab our free vegan cheat sheet, packed with my favorite easy substitutions to make any recipe vegan.

Images via Canva Pro.

Vegan Blueberry Pancakes

April 5, 2022 by Nicole @ VegKitchen Leave a Comment

vegan blueberry pancakes

Pancakes are a staple in my house, especially when I'm planning our Saturday brunch! Pancakes are so satisfying and have a cozy, nostalgic feel to them. Our Vegan Blueberry Pancakes will be your new go-to. They're made with flour, vanilla almond milk, applesauce, and a few other pantry-staple ingredients. They smell great and have that perfect fluffy pancake texture we all know and love.

stack of vegan blueberry pancakes with a slice cut out and fork and syrup on white plate
[feast_advanced_jump_to]

One of the best parts about making pancakes is knowing that they'll always be tasty-and our recipe for vegan pancakes isn't any different. This recipe has been taste-tasted by even the pickiest of eaters and still checks out as being absolutely DELISH!

Our blueberry pancakes follow a simple recipe. They're a perfect meal to get your littles involved in making. They'll have a blast measuring and mixing, and before you know it, the pancakes will be ready to enjoy!

This Vegan Blueberry Pancakes recipe is...

  • Easy to make
  • A one-bowl recipe
  • Great for making with your littles
  • Perfect for Saturday brunch
  • Loaded with nutrient-packed blueberries
  • Fluffy and scrumptious

How to Make Vegan Blueberry Pancakes

how to make vegan blueberry pancakes collage
  1. Preheat a nonstick skillet over medium heat.
  2. Whisk together dry ingredients in a large bowl.
  3. Add wet ingredients and stir until combined.
  4. Fold in blueberries until evenly distributed.
  5. Cook the pancakes until they're golden brown on both sides.
  6. Serve warm topped with fresh blueberries and maple syrup.

Full directions for how to make Vegan Blueberry Pancakes are in the printable recipe card at the bottom of the post.

Tips & Tricks for Vegan Blueberry Pancakes

stack of vegan blueberry pancakes on white plate on top of wooden cutting board on marble countertop

Large Bowl

This is a simple one-bowl recipe which means all of the ingredients get mixed together in one large mixing bowl. Make sure to choose a large enough bowl that will give you enough room to mix everything. Choosing a large enough bowl will decrease any spillage.We love this stainless steel mixing bowl set.

Whisking Benefits

You've probably seen the word "whisk" countless times in recipes, but do you know why? Whisking accomplishes two things at once: it mixes the ingredients and incorporates air. The shape of the whisk allows the wires to grab all of the batter around the bowl, mix, and bring in air. Because of this, whisking usually results in a fluffy result-in this case, extra fluffy pancakes!

If you don't own a whisk already, here are a few to consider:

  • 3-Pack Stainless Steel Whisk
  • 11-Inch Whisk

Baking Powder

Baking powder is an important ingredient in our pancakes, and it's crucial that your baking powder is fresh and active. Usually, baking powder has a shelf life of anywhere from 6-12 months.

To test if your baking powder is active, simply drop half a teaspoon into boiling water. The water should bubble up quickly. If it doesn't, then the baking powder isn't active, and you'll need to replace it in order to make a recipe successfully.

Brunch Deliciousness

If you're anything like my family and me, then you LOVE brunch! Our blueberry pancakes are a perfect addition to any brunch plan. Here are a few other brunch-y ideas to try:

  • Vegan Lemon Ginger Scones - a bright, citrusy brunch treat that pairs beautifully with jam.
  • Wheat Bran Muffins
  • Southwestern Tofu Scramble
  • Vegan French Toast
  • Vegan Vanilla Fruit Cup Soup

Variations to Vegan Blueberry Pancakes

Pancake Toppings

I topped our pancakes with fresh blueberries and a drizzle of maple syrup. A few other pancake topping ideas include jam, lemon and sugar, vegan apple honey, and for a gluten-free option our almond flour pancakes are excellent. Also try vegan bacon and maple syrup.

Vegan Blueberry Pancakes FAQs

close up stack of vegan blueberry pancakes topped with blueberries and syrup on white plate on wooden board

Why don't my pancakes have the right texture?

The texture of pancakes depends a lot on the quality of the ingredients used and the process of combining them. To have the best tasting pancakes, use fresh ingredients. Additionally, avoid overmixing the batter; simply whisk until combined.

How do you know when to flip the pancakes?

The common mistake when making pancakes is trying to flip them too early. Many people flip their pancakes right after the batter bubbles; however, you should wait until the batter bubbles pop and don't bubble anymore. This indicates that the underside is cooked (because the hole is not filling up with more batter to bubble again), and it's ready to flip.

Recipe

vegan blueberry pancakes

Vegan Blueberry Pancakes

4.67 from 3 votes
Pancakes are a staple in my house, especially when I'm planning our Saturday brunch! Our Vegan Blueberry Pancakes will be your new go-to.
Print Pin Save Saved!
Prep Time: 5 minutes minutes
Cook Time: 10 minutes minutes
Total Time: 15 minutes minutes
Servings: 8 pancakes
Prevent your screen from going dark

Ingredients

  • 1 cup flour
  • 2 tablespoon sugar
  • 2 teaspoon baking powder
  • ¼ teaspoon salt
  • ½ cup vanilla almond milk
  • ⅓ cup applesauce
  • 2 tablespoon oil
  • ½ cup blueberries
US Customary - Metric

Instructions

  • Preheat a nonstick skillet over medium heat.
  • In a large bowl, whisk together the flour, sugar, baking powder, and salt.
    vegan blueberry pancakes
  • Add the almond milk, applesauce, and oil, and stir until combined
    vegan blueberry pancakes
  • Mix well-some lumps are okay.
    vegan blueberry pancakes
  • Fold in the blueberries until evenly distributed.
    vegan blueberry pancakes
  • Cook the pancakes in the preheated pan, using a ¼ cup measuring cup to scoop the batter.
    vegan blueberry pancakes
  • Flip once after 3-4 minutes, then cook an additional 3-4 minutes or until both sides are lightly golden brown.
    vegan blueberry pancakes
  • Serve pancakes warm with additional blueberries and some maple syrup.
    vegan blueberry pancakes

Nutrition (Estimate per Serving)

Calories: 112kcalCarbohydrates: 18gProtein: 2gFat: 4gSaturated Fat: 1gPolyunsaturated Fat: 1gMonounsaturated Fat: 2gTrans Fat: 1gSodium: 200mgPotassium: 32mgFiber: 1gSugar: 5gVitamin A: 8IUVitamin C: 1mgCalcium: 81mgIron: 1mg
Vegan-ize any recipe!Grab our free vegan cheat sheet, packed with my favorite easy substitutions to make any recipe vegan.

Vegan Sugar Cookies

February 24, 2022 by Nicole @ VegKitchen Leave a Comment

Soft, sweet, and delectably chewy, these Vegan Sugar Cookies are a show-stopper dessert! They are made with simple ingredients like unsweetened apple sauce, vanilla extract, and flour.

close up view of vegan sugar cookies on white background with coarse sugar
[feast_advanced_jump_to]

These vegan sugar cookies are sprinkled with coarse sugar giving them a satisfying taste. This recipe is simple to make and is even suitable for cookie cutters!

Sugar cookies are a staple cookie for all your cookie needs! In addition, they can accompany any other cookie type to make a lovely gift basket. Pair these sugar cookies with an assortment of your other favorite cookies:

  • Shortbread Thumbprint Cookies
  • Banana Oatmeal Cookies
  • The Best Chocolate Chip Cookies

These vegan sugar cookies don't lack flavor, that's for sure. They are packed with sweetness and have a wonderful soft crumbly texture.

This Vegan Sugar Cookies recipe is...

  • Egg-less
  • Easily cut with cookie cutters
  • Ready in under 30 minutes 
  • Sweet and tasty
  • A great cookie for any occasion

How to Make Vegan Sugar Cookies

how to make vegan sugar cookies collage
  1. Preheat the oven and spray your cookie sheet with cooking spray.
  2. Combine the dry ingredients (except the coarse sugar) in a bowl and set aside.
  3. In a separate bowl combine the butter and sugars.
  4. Add the vanilla extract and apple sauce to the mixture and stir well.
  5. Combine both the mixtures and stir until it's a thick cookie batter. 
  6. Roll the dough into small 1-inch cookie dough balls and place on a baking sheet.
  7. Use a fork to create a criss-cross pattern and sprinkle cookies with coarse sugar. 
  8. Bake, let cool, and enjoy!

Full directions for how to make Vegan Sugar Cookies are in the printable recipe card at the bottom of the post.

Tips & Tricks for Vegan Sugar Cookies

unbaked vegan sugar cookie dough on a baking sheet

Choose an excellent vegan butter.

When choosing a vegan butter, look for one with a low level of refined oil that is free of artificial additives. We have a few favorites in particular that we shared in our post about the Best Vegan Butter brands.

Our list includes Earth Balance, Miyoko's Vegan Butter, and I Can't Believe It's Not Butter: Vegan. It's helpful to read reviews about vegan butter if you're new to that particular brand.

Using cookie cutters?

Don't worry! You can easily use cookie cutters with this cookie dough in a few simple steps. If you don't already own cookie cutters-or you want some new ones-here are a few of our favorites:

  • Metal Cookie Cutter Set
  • Flower Cookie Cutter Set

In order to use cookie cutters with this cookie dough, simply make the dough, cover, and chill it for two hours. Afterward, sandwich the dough between wax paper and roll the dough out using a rolling pin. Make sure to use a generous amount of flour to prevent sticking. Proceed to use the cookie cutters, bake, cool, and enjoy. 

Preventing a dry cookie.

The key to a moist cookie is ensuring the right amount of fat. Fat is what makes the cookie soft and moist instead of crumbly and hard. This vegan sugar cookie recipe uses vegan butter to produce a cookie that is soft and heavenly.

The significance of fork-pressing.

Though it might seem minor, the crisscross pattern on the cookies is quite significant. The fork-pressing flattens the dough and allows for even cooking. It also gives the cookie a neat design and allows the coarse sugar to sink into the grooves, giving a delicious taste bite after bite. 

Vegan Sugar Cookies FAQs

hand grabbing a cookie from a stack of vegan sugar cookies

What makes these vegan sugar cookies so great?

Everything about these sugar cookies is great! These cookies come together with little effort and are ready to eat in only half an hour. These vegan sugar cookies are a healthier alternative, but you wouldn't even know it by tasting them-they aren't lacking in flavor, that's for sure!

This recipe makes approximately twenty-four cookies, the perfect amount for sharing. They have a beautiful golden color and are sprinkled with coarse sugar. These vegan sugar cookies sure are heavenly!

How do I stop my vegan sugar cookies from cracking?

There are a few things to do to ensure your vegan sugar cookies don't crack. Be cautious to not overspray the baking sheet as it might cause the cookie dough to become too runny and lead to cracking. Baking your cookies on a silicone mat is beneficial to keep the cookie together as well. It helps the cookie dough to stay gripped together.

A Guide to Vegan Baking is a great resource for understanding the craft of vegan baking. Certain ingredients hold a lot of significance in vegan baking, and proper measurements are necessary to create the correct cookie texture and consistency. These vegan sugar cookies shouldn't crack if you follow the steps.

What is coarse sugar? Is it different than refined sugar?

Coarse sugar is, in fact, different from refined sugar. It is a much larger-sized crystal, about the size of pretzel salt. It gives these vegan sugar cookies a dynamic texture and a satisfying taste. Also, because of the size, coarse sugar doesn't melt and adds a nice crunchy texture to the baked goods.

Recipe

Vegan Sugar Cookies

No ratings yet
Soft, sweet, and delectably chewy, these Vegan Sugar Cookies are a show-stopper dessert made with simple ingredients.
Print Pin Save Saved!
Prep Time: 10 minutes minutes
Cook Time: 8 minutes minutes
Total Time: 18 minutes minutes
Servings: 24 cookies
Prevent your screen from going dark

Ingredients

  • 1 ¾ cup flour
  • ½ cup vegan butter room temp
  • ½ cup sugar
  • ¼ cup brown sugar
  • ¼ cup unsweetened applesauce
  • 1 tablespoon pure vanilla extract
  • 1 tablespoon cornstarch
  • 1 teaspoon baking soda
  • 1 teaspoon baking powder
  • ½ teaspoon salt
  • cooking spray
  • coarse sanding sugar optional
US Customary - Metric

Instructions

  • Preheat the oven to 350°F and lightly spray a cookie sheet with cooking spray.
  • In a bowl, combine all the dry ingredients except the coarse sanding sugar and mix well.
  • In a separate bowl, cream together the butter, both sugars, and the vanilla.
  • Add the applesauce to the sugar and mix well again.
  • Combine both the dry and wet ingredients and mix well into a thick cookie dough.
  • Roll into 1-inch balls and place on the prepared baking sheet.
  • Use a fork to press down the cookie dough balls, leaving a criss-cross pattern. Sprinkle with the coarse sugar and bake for about 8-10 minutes or until the edges start to turn a very light gold color.
  • Remove from the oven and leave the cookies on the pan to cool for a few minutes.

Notes

  • If you want to cut shapes out of the sugar cookies, prepare the dough, then cover it and chill for two hours. Next, sandwich the dough in between two sheets of wax paper and roll it out, making sure to use plenty of flour so it doesn't stick. Cut out your shapes and bake them following the same baking time and temps in the recipe.

Nutrition (Estimate per Serving)

Calories: 89kcalCarbohydrates: 14gProtein: 1gFat: 3gSaturated Fat: 1gPolyunsaturated Fat: 1gMonounsaturated Fat: 1gTrans Fat: 1gSodium: 143mgPotassium: 17mgFiber: 1gSugar: 7gVitamin A: 181IUVitamin C: 1mgCalcium: 13mgIron: 1mg
Vegan-ize any recipe!Grab our free vegan cheat sheet, packed with my favorite easy substitutions to make any recipe vegan.

Vegan Tiramisu

January 26, 2022 by Nicole @ VegKitchen Leave a Comment

vegan tiramisu

Vegan Tiramisu gives you all the flavors of the classic Italian dessert but in a vegan-friendly recipe. There isn't any dairy in this dessert-just wholesome ingredients with a big flavor payout.

close up slice of vegan tiramisu with a few bites taken out
[feast_advanced_jump_to]

Skip the classic ladyfingers version and try my homemade vegan-approved Italian dessert! This vegan dessert recipe will impress anyone with its presentation value and the rich decadent flavors. Vegan Tiramisu is a moist and delicious cake soaked in rich coffee syrup, smothered with creamy topping, and dusted with chocolate and cocoa.

This Vegan Tiramisu recipe is...

  • Vegan 
  • Dairy-free 
  • Vegetarian 
  • Make-ahead friendly 
  • An Italian dessert

How to Make Vegan Tiramisu 

how to make vegan tiramisu collage
  1. Prep your pan and preheat the oven.
  2. In a bowl, whisk together dry cake ingredients and set aside. 
  3. In a small bowl, combine yogurt, milk, vanilla. 
  4. Now pour the wet mixture into the dry and mix well. 
  5. Spread cake batter into pan and bake as directed.
  6. Once cake is baked, let cool and slice into squares.
  7. Mix up the coffee syrup in a cup, and allow the sugar dissolve. 
  8. In a mixer, whip together cream layer and until light and fluffy.

How to Assemble Vegan Tiramisu 

dish of vegan tiramisu and slices on two plates
  1. Take the sliced squares of cake and dip them into the coffee mixture. 
  2. Layer the coffee-dipped cake pieces in a casserole pan. 
  3. After one cake layer, add a whipped topping layer.
  4. Repeat cake and cream laters ending with the whipped topping mixture. 
  5. Dust tiramisu with cocoa powder, then shaved dark chocolate. 
  6. Cover tiramisu with plastic wrap, and store in the refrigerator until serving. 

Full directions for how to make Vegan Tiramisu are in the printable recipe card at the bottom of the post.

Tips & Tricks for Vegan Tiramisu 

side view of slice of vegan tiramisu on two plates

Soaking Cake 

Soaking the cake in the coffee syrup is what give this recipe the traditional flavor of tiramisu. I like to use espresso to help give my cake a nice rich flavor. 

Mixing Whipped Topping 

I find that using a hand or stand mixer for mixing up the whipped topping ingredients will give you that ultra creamy texture you want. You can do it by hand, but it will take some work-and I recommend using a whisk if you go that route.

Make In Advance 

This dessert is best made in advance. You have to allow the cake to cool first. Then once you get your layered dessert assembled, you will need to refrigerate it again. It's a good idea to make this tiramisu a day early to ensure your dessert is fully set up - which also makes it a perfect Valentine's Day dessert! For more romantic sweet inspiration, check out our 25+ Vegan Valentine's Day Desserts. 

Variations to Vegan Tiramisu

slice of vegan tiramisu on two shite plates with tray in the background

Strong Coffee 

Instead of an espresso, just use some strongly brewed coffee. If your coffee isn't strong enough, you will find it gets kind of hidden in the flavor of the cake and topping. 

Pipe On The Topping 

You can place your whipped topping in a piping bag, and pipe little dollops of cream all over the top of your cake. This extra piping can really elevate the look of your dessert!

Boozy Tiramisu 

Consider adding some alcohol to your tiramisu. Just add the booze to the coffee syrup once it's fully mixed. This will make your vegan tiramisu into an adult dessert. Brandy, Baileys, rum, and so many other alcohol options work great. 

Vegan Tiramisu FAQs

slice of vegan tiramisu on plate with two forkfuls taken out

What is Tiramisu? 

Tiramisu is a layered Italian dessert. It is traditionally made with lady fingers but I used a homemade cake. This cake is soaked in a coffee syrup and topped with whipped topping and cocoa powder. Tiramisu is a very popular dessert all around the globe!

Can I double this recipe? 

You can easily double this tiramisu recipe. Just reach for a larger pan to bake up the cake. I have found that doubling the recipe to serve a larger crowd works great. 

Is tiramisu suitable for vegans?

Traditional tiramisu contains egg and dairy products, while my vegan version does not. Depending on your diet, you may find that this recipe is a great fit!

Recipe

vegan tiramisu

Vegan Tiramisu

5 from 1 vote
Vegan Tiramisu gives you all the flavors of the classic Italian dessert but in a vegan-friendly, diary-free recipe.
Print Pin Save Saved!
Prep Time: 35 minutes minutes
Cook Time: 25 minutes minutes
Chill time: 2 hours hours
Total Time: 3 hours hours
Servings: 8 servings
Prevent your screen from going dark

Ingredients

Cake

  • 2 cups flour
  • ¾ cup sugar
  • 1 teaspoon baking soda
  • ¼ teaspoon salt
  • 1 cup coconut milk
  • ⅓ cup coconut yogurt
  • 1 teaspoon vanilla extract
  • ¼ cup oil
  • 1 tablespoon apple cider vinegar

Coffee Syrup

  • 4 shots brewed espresso ~½ cup
  • 3 tablespoon sugar
  • 3 tablespoon kahlua liquer
  • warm water ¼-½ cup

Creamy Layer

  • 1 cup plant-based cream cheese
  • ¾ cup coconut yogurt
  • ½ cup coconut milk
  • ¼ cup coconut oil
  • ¾ cup powdered sugar

Topping

  • 2 tablespoon cocoa powder
  • dark chocolate grated; optional
US Customary - Metric

Instructions

Cake

  • Preheat oven to 350°F, and line a 9x13 baking pan with parchment paper.
  • Stir together the flour, sugar, baking soda, and salt. Then set aside.
    vegan tiramisu
  • In a small bowl, whisk together the milk, yogurt, vanilla, oil, and apple cider vinegar.
    vegan tiramisu
  • Pour the milk mixture into the flour mixture and stir until just combined.
    vegan tiramisu
  • Spread the cake batter evenly into the prepared baking pan.
    vegan tiramisu
  • Bake in the oven until cooked through.
    vegan tiramisu
  • Allow to cool, then slice into small rectangles.
    vegan tiramisu

Coffee Syrup

  • Mix together the espresso shots, sugar, and kahlua. Then add the warm water until you have one cup of liquid total, and stir until the sugar dissolves.
    vegan tiramisu

Creamy Layer

  • Beat the cream cheese, yogurt, coconut milk, and coconut oil until smooth and fluffy.
    vegan tiramisu
  • Then add the powdered sugar and beat again.

Assembly

  • Dip the cake squares into the coffee mixture.
    vegan tiramisu
  • Place a layer of the coffee-dipped cake squares in a medium casserole dish.
    vegan tiramisu
  • Add a layer of creamy whipped topping on top.
    vegan tiramisu
  • Continue layering, ending with the creamy mixture.
    vegan tiramisu
  • Top tiramisu with a dusting of cocoa powder and some grated dark chocolate if desired.
    vegan tiramisu
  • Place tiramisu in fridge to chill for at least 2 hours.
    vegan tiramisu

Nutrition (Estimate per Serving)

Calories: 589kcalCarbohydrates: 70gProtein: 7gFat: 33gSaturated Fat: 18gPolyunsaturated Fat: 2gMonounsaturated Fat: 6gTrans Fat: 1gCholesterol: 1mgSodium: 343mgPotassium: 190mgFiber: 3gSugar: 43gVitamin A: 41IUVitamin C: 1mgCalcium: 61mgIron: 3mg
Vegan-ize any recipe!Grab our free vegan cheat sheet, packed with my favorite easy substitutions to make any recipe vegan.

Best Vegan Slow Cooker Recipes

November 27, 2021 by Nicole @ VegKitchen Leave a Comment

Best Vegan Slow Cooker Recipes

I'm always amazed by how many things you can make in a slow cooker. Enchiladas, applesauce, oatmeal, soup, potatoes... This list of best vegan slow cooker recipes really does have something for everyone!

Best Vegan Slow Cooker Recipes

Enchiladas, applesauce, oatmeal, soup, potatoes... This list of best vegan slow cooker recipes really does have something for everyone!

Slow Cooker Moroccan Vegetable Stew

Slow Cooker Moroccan Vegetable Stew

This exotic-tasting Slow Cooker Moroccan Vegetable Stew is smoky-sweet and has a beautiful texture. It's boldly colored with vibrant vegetables in every bite. There are carrots, green peppers, baby spinach, yellow peppers, and more! Every spoonful is loaded with nutrition and flavor.

Maple Pear Oatlmeal

Slow Cooker Maple Pear Walnut Cake Oatmeal

This Slow Cooker Maple Pear Walnut Cake Oatmeal is cozy, comforting, and hearty. It makes for a delicious and filling breakfast and has a glorious texture. As oats combine with walnut and maple dances with pear, this oatmeal recipe is unlike any other you've had in the past!

Split pea soup

Slow-Cooker Split Pea Soup

This thick and creamy Slow-Cooker Split Pea Soup will deliver spoonfuls of heavenly delight. Enjoy the many health benefits of split peas—such as high protein, low fat and sodium, and high fibre. This soup is packed with nutrients and is hearty and filling all at once!

Slow-cooker Boston baked beans

Slow-Cooker Boston Baked Beans

Tender, rich, and savory, these Slow-Cooker Boston Baked Beans will leave you wanting seconds. They are made with the perfect combination of sweet, smokey, and spicy flavors. An excellent side dish for any meal, these beans are versatile and can be enjoyed hot, cold, or room temperature.

Bell peppers of all colors

Slow-Cooker Bell Peppers Stuffed with Salsa, Rice, and Beans

Something unique about these Slow-Cooker Bell Peppers Stuffed with Salsa, Rice, and Beans is that they can be customized to your desired spiciness! Choose between mild and hot salsa and create a dish you and your loved ones will truly enjoy.

Pear chutney recipe

Slow-Cooker Fresh Pear and Dried-Fruit Chutney

Using your favorite type of pear, embrace the soft, sweet fruit in this delightful Slow-Cooker Fresh Pear and Dried-Fruit Chutney. It’s bursting with comforting, cozy hints of cinnamon and small flecks of crushed red pepper. This chutney makes for a great dish on its own and can be served alongside a variety of things.

Image for Slow Cooker Vegan Chili
Photo Credit: www.deliciouseveryday.com

Slow Cooker Vegan Chili

Packed with flavor, protein, and healthy goodness, this Slow Cooker Vegan Chili makes for a beautiful, cozy meal. Top this chilli with your favourite toppings and enjoy this hug-in-a-bowl kind of meal.

Image for Slow Cooker Hasselback Potatoes with Honey-Sriracha Butter
Photo Credit: www.deliciouseveryday.com

Slow Cooker Hasselback Potatoes with Honey-Sriracha Butter

Enjoy homemade honey-sriracha butter slathered on Hasselback potatoes with this recipe. These potatoes are sliced and coated in delicious flavors. Packed with flavor and brimming with savory spices, these Slow Cooker Hasselback Potatoes with Honey-Sriracha Butter are a delight!

Bourbon Mango Slow Cooker Baked Beans

Bourbon Mango Slow Cooker Baked Beans

These sweet and caramelized Bourbon Mango Slow Cooker Baked Beans will be a hit at dinner. They are delicious and taste amazing paired with anything!

Image for Vegan Slow Cooker Pinto Bean Enchiladas

Vegan Slow Cooker Pinto Bean Enchiladas

There's never a wrong time to indulge in enchiladas, is there? These Vegan Slow Cooker Pinto Bean Enchiladas are easy to make with your kitchen best friend—a slow cooker. Simply toss your ingredients in and simmer! This is an easy weeknight dinner that's healthy and filling.

Slow Cooker Indian-Spiced Chickpeas & Potatoes

Slow Cooker Indian-Spiced Chickpeas & Potatoes

These Slow Cooker Indian-Spiced Chickpeas & Potatoes are packed to the brim with aromatic spices and delicious, wholesome ingredients. Enjoy different textures and tastes in every spoonful!

Slow Cooker Smoky Refried Black Beans

Slow Cooker Smoky Refried Black Beans

Slow Cooker Smoky Refried Black Beans are delicious! This recipe features dry black beans, chopped garlic, chili powder, and smoked paprika. Soft, smoky flavors combine to create this heavenly vegan dip.

Image for Chai-Spiced Instant Pot Pear Applesauce

Chai-Spiced Instant Pot Pear Applesauce

This Chai-Spiced Instant Pot Pear Applesauce is absolutely delicious! Adapted from Skinnytaste's Crock Pot Applesauce, this recipe will make sure you'll never go back to plain applesauce again.

Slow Cooker Mushroom-Lentil Stuffed Cabbage Rolls

Slow Cooker Mushrooom-Lentil Stuffed Cabbage Rolls

These hearty and satisfying Slow Cooker Mushroom-Lentil Stuffed Cabbage Rolls swap chopped mushrooms and lentils for the typical meat. This recipe is adapted from Real Simple's Slow Cooker Pork-Stuffed Cabbage.

Image for Slow Cooker Butternut Squash Chili with Porter

Slow Cooker Butternut Squash Chili with Porter

Break out the slow cooker for this hearty fall chili with black beans and nutty butternut squash. This chili benefits from a generous pour of porter, which adds rich chocolate and coffee notes to the mix. Cozy and comforting, this Slow Cooker Butternut Squash Chili with Porter is the perfect dish for cold weather.

Chard, Lentil & Potato Slow Cooker Soup

Chard, Lentil, & Potato Slow Cooker Soup

Chard, Lentil, & Potato Slow Cooker Soup is warm, tasty, and nutritious. This hearty fall soup is adapted from Fresh from the Vegetarian Slow Cooker's Lentil Soup with Ribbons of Kale.

Vegan Banana Pudding

September 17, 2021 by Nicole @ VegKitchen 1 Comment

vegan banana pudding

With just a few simple ingredients you can serve up this creamy and delicious Vegan Banana Pudding! Full of sweet banana flavor, this pudding is sure to be a hit with the whole family. Add a dollop of creamy vegan whipped cream and dig in!

two bowls of vegan banana pudding with banana slices on top
[feast_advanced_jump_to]

Craving a little something sweet? Whip up this simple vegan banana pudding in just 15 minutes, then pop it in the fridge to chill. This easy dessert is one of our family favorites!

This Vegan Banana Pudding recipe is...

  • Vegan 
  • Vegetarian 
  • Dairy-free 
  • Gluten-free 
  • Made with real bananas 
  • Homemade

And while you're here, don't forget to grab a copy of my free vegan cheat sheet. It's packed with all my favorite substitutions to vegan-ize any recipe!

How to Make Vegan Banana Pudding 

collage showing how to make vegan banana pudding
  1. In a bowl, mash bananas. Then add them to a saucepan on the stove. 
  2. Add coconut cream, maple syrup, vanilla, salt, and turmeric. 
  3. Mix well and heat over medium low until boiling. Stir often. 
  4. Transfer mixture to heat-proof container, and chill in fridge at least 4 hours.
  5. Once the banana pudding is set, top with bananas and serve. 

Detailed directions and measurements for this Vegan Banana Pudding are in the printable recipe card below. 

Tips & Tricks for Perfect Vegan Banana Pudding! 

vegan banana pudding cooking on the stove

Use Very Ripe Bananas 

Make sure to use very ripe bananas for this recipe. In fact, it's best if they are a bit overripe. Then you'll want to mash them up with a fork, working out any large lumps so your pudding has a nice creamy texture.

Stir Frequently 

You have to stir the pudding a lot while it is on the stove. If you don't keep stirring, the pudding may burn on the bottom of the pot and ruin your dessert.

Use a Food Processor 

If you want a very creamy pudding with no banana chunks at all, you can use a food processor to pulse the banana mixture. The consistency will also be a bit thinner if you use this method.

Banana Pudding Variations

ingredients for vegan banana pudding in a pot on the stove

Alternative Sweeteners

I used maple syrup for this recipe. But if you want, you can swap the syrup with an artificial sweetener, like Stevia, to cut out some of the sugar content. 

You can also substitute the maple syrup with agave syrup or vegan apple honey for a vegan-friendly sweetener, or regular honey (a non-vegan option) if you prefer.

Add a Dash of Turmeric 

The turmeric is completely optional, but it will add a nice vibrant yellow color to your banana pudding.

Make a Parfait 

You can use this Vegan Banana Pudding to make some tasty vegan parfaits. Use graham crackers or granola for the first layer of your parfait. Then add a layer of pudding and a layer of vegan whipped cream! This makes a delicious vegan breakfast or dessert.

Add Toppings

Serve the banana pudding cold and top with your favorite garnishes. Vegan whipped cream, cherries, or fresh sliced bananas are all great choices.

FAQs

bowl of vegan banana pudding with spoon

Is coconut cream the same thing as coconut milk? 

Coconut cream and coconut milk are not the same, so make sure you buy canned coconut cream. Coconut cream is ultra thick and gives the banana pudding that rich flavor and creamy texture. 

What does the cornstarch do in this recipe? 

The cornstarch in this recipe helps to thicken the pudding while it cooks on the stove. Without cornstarch, your pudding would take a lot longer to reach the desired consistency, if it ever did at all.

How can I make this pudding less sweet? 

If you want to tone down the sweetness of this pudding, simply use less maple syrup. If you prefer less sweet, start with ¼ cup and add more from there.

How should I store banana pudding? 

Banana pudding needs to be stored in an airtight container in the fridge. It can last for up to 5 days in the fridge.

More Vegan Recipes

If you love this vegan banana pudding, be sure to check out these other delicious vegan desserts:

  • Vegan Chia Seed Pudding Recipes
  • Vegan Chocolate Bread Pudding
  • Vegan Coconut Rice Pudding
  • Vegan Oat Flour Banana Bread

Recipe

vegan banana pudding

Vegan Banana Pudding

4.50 from 4 votes
With just a few simple ingredients you can serve up this creamy and delicious Vegan Banana Pudding. This dessert is sure to be a hit with the whole family.
Print Pin Save Saved!
Prep Time: 5 minutes minutes
Cook Time: 10 minutes minutes
Chill time: 4 hours hours
Total Time: 4 hours hours 15 minutes minutes
Servings: 2 servings
Prevent your screen from going dark

Ingredients

  • 2 bananas very ripe, medium
  • 1 ½ cups coconut cream
  • ½ cup maple syrup
  • 1 tablespoon cornstarch
  • 1 teaspoon vanilla
  • ¼ teaspoon salt
  • pinch turmeric optional for color
  • sliced bananas optional for garnish
US Customary - Metric

Instructions

  • In a small bowl, mash the bananas.
    vegan banana pudding
  • Add the mashed bananas, coconut cream, maple syrup, cornstarch, vanilla, salt, and turmeric (if using) to a medium saucepan.
    vegan banana pudding
  • Heat ingredients on medium low until just beginning to boil, stirring frequently.
    vegan banana pudding
  • Transfer pudding to a heat-proof container and place in refrigerator until chilled and thickened, at least 4 hours.
    vegan banana pudding
  • Serve pudding with sliced bananas if desired.
    vegan banana pudding

Notes

  • If you want your pudding to be less sweet, only use half of the maple syrup in the recipe.
  • To make the pudding extra thick, double the amount of cornstarch.
  • Mashing the bananas with a fork won't get them perfectly smooth, so the pudding will have some minor lumps. For a completely smooth pudding, use a food processor to mash your bananas.
  • This recipe calls for coconut cream-not coconut milk. They are not the same thing!

Nutrition (Estimate per Serving)

Calories: 937kcalCarbohydrates: 97gProtein: 8gFat: 63gSaturated Fat: 55gPolyunsaturated Fat: 1gMonounsaturated Fat: 3gSodium: 307mgPotassium: 1192mgFiber: 7gSugar: 63gVitamin A: 76IUVitamin C: 15mgCalcium: 114mgIron: 5mg
Vegan-ize any recipe!Grab our free vegan cheat sheet, packed with my favorite easy substitutions to make any recipe vegan.

Dragon Fruit Smoothie

June 17, 2021 by Nicole @ VegKitchen Leave a Comment

dragon fruit smoothie

Whip up this antioxidant-loaded Dragon Fruit Smoothie for breakfast or a snack. This smoothie takes only 5 minutes and 5 ingredients to make! 

close up glass of dragon fruit smoothie

This smoothie is loaded with dragon fruit, blueberries, and bananas. If you are craving a fruit smoothie, this is a great one to try! Head to the store, grab supplies and get to mixing.

There are so many uses for dragon fruit, but I think my favorite will always be smoothies. (I also love these Strawberry Mango Fizz and Cookie Dough smoothies!)

This Dragon Fruit Smoothie recipe is...

  • Ready in 5 minutes or less 
  • Loaded with fresh fruit 
  • Naturally gluten-free 
  • Dairy-free 
  • Vegan
  • Plant-Based

How to Make Dragon Fruit Smoothie 

how to make dragon fruit smoothie collage
  1. Toss your ingredients into a blender.
  2. Blend ingredients until the smoothie is fully blended. 
  3. Pour the smoothie into glasses, then top with fresh fruit and serve. 

Full directions and ingredients are in the printable recipe card below. 

Tips & Tricks for Dragon Fruit Smoothie 

ingredients for dragon fruit smoothie

High Speed Blender 

I highly recommend using a high-speed blender. Using a high-speed blender will ensure that all your fruit is well blended and that your smoothie has a creamy texture. If your blender isn't fast enough, you will find that the texture of your smoothie is off. 

Thickness of the Smoothie 

You can adjust the texture of your smoothie by adding certain ingredients! Add extra fruit to make your smoothie nice and thick. You can also add extra plant based milk to help thin out the smoothie.

Variations to Dragon Fruit Smoothie 

glasses of dragon fruit smoothie

Added Fruit 

Feel free to change up the fruit you add into this smoothie. Any fruit you have on hand will work great. Toss in some frozen pineapple, kiwi, mango, etc. Create whatever flavor combo you prefer!

Flaxseed 

Add in a little flaxseed to add in extra nutrients. Sneak in a tablespoon or two for your kids who are going to sip this smoothie-or great nutrients for you! 

Plant-Based Yogurt 

Instead of milk, you can use a vanilla plant-based yogurt. This will give you a thicker and richer smoothie. 

Dragon Fruit Smoothie FAQs

glass of dragon fruit smoothie in front of blender

What does dragon fruit taste like? 

Dragon fruit is a mild fruit when it comes to flavor. You will find fresh dragon fruit offers the flavor of a pear mixed with a kiwi. Dragon fruit is a delicious fruit that tastes great mixed in with other fruits. 

Can you freeze dragon fruit? 

You can freeze dragon fruit if you buy some from the store. This is a great way to prep your fruit and keep it ready to toss in smoothies like this.

Dragon fruit can be tricky to find, depending on where you live. So if you find some, go ahead and buy a lot so you can freeze some for later!

How do you store leftover smoothie? 

If you don't drink all your smoothie right away, don't worry-you can save it! Store your leftover smoothie in an airtight container for 1-2 days in the refrigerator. When you're ready to eat it, just give the smoothie a stir, pour into a glass, and enjoy. 

More Tasty Ideas

If you love this dragon fruit smoothie, check out these other delicious recipes:

  • Dragon Fruit Lemonade
  • 50+ Vegan Smoothie Recipes
  • Vegan Chocolate Smoothie Bowl

Recipe

dragon fruit smoothie

Dragon Fruit Smoothie

5 from 27 votes
Whip up this antioxidant-loaded Dragon Fruit Smoothie for breakfast or a snack. This smoothie takes only 5 minutes and 5 ingredients to make!
Print Pin Save Saved!
Prep Time: 5 minutes minutes
Total Time: 5 minutes minutes
Servings: 2 servings
Prevent your screen from going dark

Ingredients

  • 1 ½ cups dragon fruit cubed and frozen
  • 1 ripe banana
  • ½ cup blueberries frozen
  • ½-1 cup plant based milk depending on thickness desired
  • ½ cup blueberries frozen
US Customary - Metric

Instructions

  • In a large high-speed blender, put dragon fruit, banana, blueberries, milk, and chia seeds into the bottom.
    dragon fruit smoothie
  • Turn on blender, starting on a low speed, and gradually increasing speed until everything is completely blended and smooth.
    dragon fruit smoothie
  • Serve immediately!
    dragon fruit smoothie

Notes

  • You can use pink or white dragon fruit.
  • To make it extra creamy, add ½ cup of vegan yogurt.
  • To make it thicker, use frozen banana and less milk.
  • Having a good blender is important to bread down the seeds in the dragon fruit.

Nutrition (Estimate per Serving)

Calories: 227kcalCarbohydrates: 41gProtein: 2gFat: 5gSaturated Fat: 1gSodium: 352mgPotassium: 268mgFiber: 6gSugar: 29gVitamin A: 78IUVitamin C: 12mgCalcium: 232mgIron: 3mg
Vegan-ize any recipe!Grab our free vegan cheat sheet, packed with my favorite easy substitutions to make any recipe vegan.

Vegan Strawberry Mango Popsicles

June 11, 2021 by Nicole @ VegKitchen Leave a Comment

vegan popsicles

Vegan Strawberry Mango Popsicles are the must-have summer dessert. You only need 3 ingredients to make this chilled dessert to cool you off this summer. 

stack of vegan strawberry mango popsicles with a bite out

Popsicles are one of my favorite summer treats! But I prefer making my own to buying some from the store. That way, I can control the ingredients-and the flavors! Some of my favorite flavors are Peaches and Cream and Blackberry Watermelon-and, of course, Chocolate Fudge!

But I always come back to fruity, creamy popsicles. In this recipe, coconut yogurt pairs deliciously with strawberry and mango to make these refreshing dairy-free popsicles!

This Vegan Strawberry Mango Popsicle recipe is...

  • Made with 3 ingredients 
  • Prepared in 5 minutes
  • Easily stored in the freezer
  • Dairy-free
  • Naturally gluten-free

How to Make Vegan Strawberry Mango Popsicles 

how to make vegan strawberry mango popsicles collage
  1. Start by adding your berries and yogurt to the blender, and mix till combined. 
  2. Once mixed, pour berry mixture into a bowl or cup and set aside. 
  3. Then you will blend together the yogurt and mango. 
  4. Layer the mango and strawberry mixtures into the popsicle molds. 
  5. Freeze for 4 hours or overnight to allow popsicles to freeze. 
  6. Serve and Enjoy. 

Tips & Tricks for Vegan Strawberry Mango Popsicles 

vegan strawberry mango popsicles on a wooden tray

Layering Flavors 

I used a spoon to create layers of flavor in the popsicles. To get the layers, I spooned in a bit of the strawberry popsicle mixture, then a bit of the mango popsicle mixture.

Popsicle Molds 

You can use any brand or style of molds you want for the popsicles. I love the ones that let you press the stick into the mold at the end. I find that this keeps the popsicle stick secure since the lid secures onto the popsicle mold. 

Creamier Popsicles 

Want to make a creamier popsicle? Reach for more yogurt instead of fruit to create a delicious, creamy yogurt popsicle. 

Variations to Vegan Strawberry Mango Popsicles 

molds full of vegan strawberry mango popsicles mixture

Change Up The Flavors 

Feel free to change up the flavors by using different fruit. I like to use whatever is freshest at the store or the farmer market. Try making a kiwi strawberry or mixed berry popsicle! Even a tropical popsicle of pineapple and coconut would be delicious. 

Swap Out Yogurt

I used a plain coconut yogurt for this recipe. But you are welcome to reach for an almond milk-based yogurt-or any other variety you would like. It will blend together the same with whatever you choose. 

Vegan Strawberry Mango Popsicles FAQs

close up vegan strawberry mango popsicles clustered on tray

How do you remove popsicles from molds? 

The easiest way to get your popsicles out from the molds is to run them under warm water for a minute-only at the bottom of the mold, though! This will loosen up the popsicle just enough so it slides right out. 

How long will these yogurt popsicles last? 

You can store your popsicles for 3-4 months in the freezer. Just keep them stored properly, and they will last all summer long. 

Are popsicles bad for you? 

Remember to keep all things in moderation when it comes to this frozen treat. However, you will gain some nice nutrients from the fresh fruit in these popsicles. 

How long do popsicles take to freeze? 

Generally you will want to wait a minimum of 4 hours before removing your popsicles from the molds. The freezing time varies depending on the thickness of the popsicle mixture. Smaller and thicker popsicles will freeze faster than larger popsicles with a thinner mixture. 

Also worth trying: our vegan fudgesicles.

Recipe

vegan popsicles

Vegan Strawberry Mango Popsicles

5 from 1 vote
Vegan Strawberry Mango Popsicles are the must-have summer dessert. You only need 3 ingredients to make this chilled dessert to cool you off this summer.
Print Pin Save Saved!
Prep Time: 15 minutes minutes
Freezing Time: 4 hours hours
Total Time: 4 hours hours 15 minutes minutes
Servings: 6 popsicles
Prevent your screen from going dark

Ingredients

  • 1 ½ cup strawberries fresh or frozen
  • 1 ½ cup mango chunks fresh or frozen
  • ½ cup plain coconut yogurt
US Customary - Metric

Instructions

  • Add strawberries and ¼ cup of coconut yogurt to a blender.
    vegan popsicles
  • Blend until smooth. Transfer to a small bowl and set aside.
    vegan popsicles
  • Repeat the first step but with the mango chunks.
    vegan popsicles
  • In the popsicle molds, add a few spoonfuls of the strawberry mixture to one side.
    vegan popsicles
  • Then fill the rest of the molds with the mango mixture. And don't forget to place the popsicle sticks inside!
    vegan popsicles
  • Freeze popsicles for at least four hours, or until completely frozen.
    vegan popsicles

Notes

  • These popsicles will last several months in the freezer-so you can enjoy them all summer long!
  • Experiment with flavors by using other fruits that you enjoy such as kiwis, raspberries, or peaches.
  • For a creamier texture, reduce the amount of fruit and add more coconut yogurt.

Nutrition (Estimate per Serving)

Calories: 49kcalCarbohydrates: 10gProtein: 1gFat: 1gSaturated Fat: 1gCholesterol: 3mgSodium: 10mgPotassium: 156mgFiber: 1gSugar: 8gVitamin A: 471IUVitamin C: 36mgCalcium: 35mgIron: 1mg
Vegan-ize any recipe!Grab our free vegan cheat sheet, packed with my favorite easy substitutions to make any recipe vegan.

Copycat Vegan Big Mac Sauce

June 8, 2021 by Nicole @ VegKitchen Leave a Comment

how to make vegan big mac sauce

Looking for a way to dress up your vegan burgers? Here is a Copycat Vegan Big Mac Sauce that you can slap on those buns!

It only takes 5 minutes to whip up this sweet and tangy veggie burger sauce. Your next veggie burger will be anything but bland.

close up burger with vegan Big Mac sauce

This Copycat Vegan Big Mac Sauce is... 

  • Based on McDonald's Big Mac Sauce 
  • Vegan 
  • Vegetarian 
  • Naturally gluten-free 
  • Quick to prepare 
  • Great on veggie burgers, french fries, etc. 

How to Make Copycat Vegan Big Mac Sauce

  1. Add may, ketchup, mustard, and seasonings to a bowl.
  2. Mix well.
  3. Spread on bun for your sandwich!

Full directions on how to make Copycat Vegan Big Mac Sauce are in the printable recipe card below.

Vegan Burger Recipes

If you're looking for some fresh and creative veggie burgers to serve up with this vegan big mac sauce - here are a few of my favorites:

  • 15 Vegan Burger Recipes
  • Chickpea and Sweet Potato Burgers 
  • Baked Chickpea Burgers 
  • Beets and Brown Rice Burgers 
  • Ginger, Carrot, and Quinoa Burgers

Tips & Tricks for Copycat Vegan Big Mac Sauce 

burger with vegan Big Mac sauce on a plate

Vinegar 

For this recipe, you can use apple cider vinegar or a white distilled vinegar. Apple cider vinegar will add more of a tang to the sauce. White vinegar will still add tang but not be as powerful. 

Make Ahead

Feel free to make this sauce a day in advance of when you want to use it. I find that allowing the sauce to sit for at least 30 minutes actually helps to infuse all the flavors together. 

Variations To Copycat Vegan Big Mac Sauce 

Pickle Relish 

Big Mac sauce tastes great with some pickle relish mixed in. I recommend using a dill relish, but you can also use a sweet relish. Just know that adding relish will change up the flavor of the sauce a bit. 

Mustard 

I used a plain yellow mustard for this recipe. But if you want a bit more of a tang, feel free to use a spicy brown mustard instead. It won't be as true to the original Big Mac sauce, but it will be tasty. 

Copycat Vegan Big Mac Sauce FAQs 

burger with vegan Big Mac sauce

How do you use Big Mac Sauce? 

Dip fries into your sauce, spread it on veggie burgers, dip vegan nuggets into it, etc. I have even used this sauce for dipping roasted veggies! 

How do you store Big Mac sauce? 

Store the sauce in an airtight container in the fridge. This sauce will store for a few days. It may separate in the fridge, so just stir it well before using. 

Can you freeze Big Mac sauce? 

It is not recommended to freeze this sauce. Make only the amount of sauce that you plan to eat. Since this sauce takes just minutes to make, you will find it is easy to whip up a bit of sauce right when you need it. 

Recipe

how to make vegan big mac sauce

Copycat Vegan Big Mac Sauce

4.41 from 5 votes
Looking for a way to dress up your vegan burgers? Here is a Copycat Vegan Big Mac Sauce that you can slap on your buns!
Print Pin Save Saved!
Cook Time: 5 minutes minutes
Total Time: 5 minutes minutes
Servings: 6 servings
Prevent your screen from going dark

Ingredients

  • ½ cup vegan mayonnaise
  • 1 ½ tablespoon ketchup
  • 1 tablespoon yellow mustard
  • 1 teaspoon garlic powder
  • 1 teaspoon onion powder
  • 1 teaspoon apple cider vinegar or white vinegar
  • salt to taste
  • pepper to taste
US Customary - Metric

Instructions

  • In a small bowl, mix together all of the ingredients.
  • Add salt and pepper, to taste.
  • Add to your burger and enjoy!
    how to make vegan big mac sauce

Nutrition (Estimate per Serving)

Calories: 129kcalCarbohydrates: 3gProtein: 1gFat: 12gSaturated Fat: 1gSodium: 170mgPotassium: 25mgFiber: 1gSugar: 1gVitamin A: 21IUVitamin C: 1mgCalcium: 4mgIron: 1mg
Vegan-ize any recipe!Grab our free vegan cheat sheet, packed with my favorite easy substitutions to make any recipe vegan.

Vegan Grilled Cheese Sandwiches 5 Ways

May 13, 2021 by Nicole @ VegKitchen 1 Comment

Vegan grilled cheese sandwich stack

There's nothing quite as comforting as a hot, gooey grilled cheese sandwich. And now the plant based crowd doesn't need to miss out with these easy and delicious vegan grilled cheese recipes!

Vegan grilled cheese sandwich stack

All photos by Hannah Kaminsky.

These days, grilled cheese is hot. (Pun intended.) There are even restaurants devoted solely to grilled cheese sandwiches. So why should us vegans miss out?

So today we have five delicious ways to make a vegan grilled cheese - and most can be made in just a few minutes.

There's no big secret here. We're not going to hand-craft our vegan cheese or anything wild like that. Just simple, delicious, easy vegan grilled cheese.

[feast_advanced_jump_to]

Tips for Making Vegan Grilled Cheese

Now there is a misconception out there than vegan cheeses are un-meltable. Not so! I've impressed many guests with how melty and stretchy a good vegan cheese made for that purpose can be.

There are several good vegan cheeses on the market melt wonderfully well, including Daiya and Follow Your Heart. You may know of other brands, and if so, comment below and let us know which ones you like!

And of course, nothing pairs with grilled cheese like a bowl of tomato soup. I like to dunk my sandwich! If you want some in a hurry, this Imagine Creamy Tomato is vegan and very good. Or make your own homemade vegan tomato soup.

How to Make Vegan Grilled Cheese

Kids, you don't need a recipe to make a grilled cheese sandwich, though the internet seems to think otherwise.

You just need some sturdy whole-grain bread, vegan cheese, your add-ins of choice, vegan butter (like Earth Balance), and a good nonstick pan or griddle.

Best to cook over medium heat with a generous but not ridiculous layer of vegan butter; cover the pan when cooking the first side so that the cheese will melt; when the underside is golden, flip and cook the other side. That's it!

But of course, a recipe can give you some inspiration for more creative flavor combinations. So here are five of my favorites.

5 Vegan Grilled Cheese Recipes

Vegan grilled cheese sandwich with tomato soup

First up is this swoon-worthy vegan grilled cheese, tomato, and vegan bacon sandwich. Use your favorite kind of purchased or homemade vegan bacon.

Precook vegan bacon slices first. Layer some vegan cheese shreds onto a slice of bread, followed by tomato slices, vegan bacon, sliced tomato, more cheese shreds, topped by another slice of bread. Cook on a little vegan butter over medium heat, covered, until both sides are golden.

This is good with either cheddar, mozzarella, or pepper jack style cheese.

Vegan grilled cheese sandwich with mushrooms

Grilled cheese with mushrooms, yum! To make this delightful sandwich, simply precook sliced brown mushrooms (cremini- or for a fancier feast, shiitake) until wilted, then drain.

Layer on the bread: cheese shreds, cooked mushrooms, more cheese shreds, another slice of bread. Cook on a little vegan butter over medium heat, covered, until both sides are golden.

We think this is best with mozzarella style cheese, but you may beg to differ.

Vegan grilled cheese sandwich with apple

Apple and cheddar is a classic flavor combo, and it works quite well in vegan grilled cheese, too. Using a tart granny smith apple is a good move, but if all you've got is a red apple, that's not a bad choice. Either way, just make sure the apple is nice and crisp. 

Layer on bread: cheese shreds, apple slices, more cheese shreds, another slice of bread. Cook on a little vegan butter over medium heat, covered, until both sides are golden.

Vegan grilled cheese sandwich with jalapeno

Spice things up with fresh jalapeño in your grilled cheese! Slice it thinly and remove the seeds. Use the usual precautions when handling hot chili peppers.

Layer on bread: cheese shreds, sliced jalapeños, more cheese shreds, another slice of bread. Cook on a little vegan butter over medium heat, covered, until both sides are golden.

We used a combination of cheddar and mozzarella-style vegan cheese shreds with this one.

Vegan grilled cheese sandwich with spinach

Last but not least, a vegan grilled cheese sandwich with the green goodness of spinach. Rinse some baby spinach and wilt it in the pan you'll be using. Transfer to a colander and squeeze out the liquid.

Layer on bread: cheese shreds, wilted spinach more cheese shreds, another slice of bread. Cook on a little vegan butter over medium heat, covered, until both sides are golden.

We used mozzarella-style vegan cheese shreds here, but this would go with any variety - cheddar, or if you'd like a spicy kick to go with the spinach, pepperjack.

Ta-dah! Five delicious ways to make your favorite comfort food.

And if you love these vegan grilled cheese sandwich ideas, be sure to check out these other delicious recipes as well:

Also try: our Easy Portobello Burgers.

  • 15 Greatest Vegan Burger Recipes
  • Vegan Chipotle Black Bean Burgers
  • Easy Vegan Chickpea Wraps

Recipe

Vegan grilled cheese sandwich stack

Vegan Grilled Cheese Sandwich - 5 Ways!

5 from 1 vote
Here are five deliciously simple ways to make a vegan grilled cheese sandwich. Yum!
Print Pin Save Saved!
Prep Time: 5 minutes minutes
Cook Time: 5 minutes minutes
Total Time: 10 minutes minutes
Servings: 1 sandwich
Prevent your screen from going dark

Ingredients

  • 2 slices bread any variety
  • vegan butter as needed for cooking

#1 - Vegan Grilled Cheese, Tomato, and Vegan Bacon

  • 3 slices vegan bacon store bought or homemade
  • ¼ cup vegan cheddar, mozzarella, or pepper jack style cheese shreds

#2 - Vegan Grilled Cheese with Mushrooms

  • 2 oz mushrooms cremini or shiitake
  • ¼ cup vegan mozzarella style cheese shreds

#3 - Vegan Apple and Cheddar Grilled Cheese

  • ½ granny smith apple sliced thinly
  • ¼ cup vegan cheddar style cheese shreds

#4 Vegan Jalapeno Grilled Cheese

  • ½ jalapeno sliced, seeds removed
  • ¼ cup vegan cheddar or mozzarella style cheese shreds or a combination of both

#5 - Vegan Green Goddess Grilled Cheese

  • 1 cup baby spinach more or less, to taste
  • ¼ cup vegan mozzarella style cheese shreds
US Customary - Metric

Instructions

#1 - Vegan Grilled Cheese, Tomato, and Vegan Bacon

  • Precook vegan bacon slices first. Layer some vegan cheese shreds onto a slice of bread, followed by tomato slices, vegan bacon, sliced tomato, more cheese shreds, topped by another slice of bread.
  • Spread a bit of vegan butter on both sides of the sandwich, and cook over medium heat, covered, until both sides are golden and cheese is melted.

#2 - Vegan Grilled Cheese with Mushrooms

  • Spray a frying pan with olive oil cooking spray, and cook sliced mushrooms for 5-6 minutes, over medium high heat, until wilted. Drain off any excess liquid, and allow mushrooms to cool.
  • On a slice of bread, layer the cheese shreds, cooked mushrooms, more cheese shreds, and then another slice of bread. 
  • Spread a bit of vegan butter on both sides of the sandwich, and cook over medium heat, covered, until both sides are golden and cheese is melted.

#3 - Vegan Apple and Cheddar Grilled Cheese

  • On a slice of bread, layer the cheese shreds, apple slices, more cheese shreds, and then another slice of bread.
  • Spread a bit of vegan butter on both sides of the sandwich, and cook over medium heat, covered, until both sides are golden and cheese is melted.

#4 - Vegan Jalapeno Grilled Cheese

  • On a slice of bread, layer the cheese shreds, sliced jalapeños, more cheese shreds, and then another slice of bread. 
  • Spread a bit of vegan butter on both sides of the sandwich, and cook over medium heat, covered, until both sides are golden and cheese is melted.

#5 - Vegan Green Goddess Grilled Cheese

  • Rinse some baby spinach and wilt it in the pan you'll be using. Transfer to a colander and squeeze out the liquid.
  • On a slice of bread, layer the cheese shreds, wilted spinach, more cheese shreds, and then another slice of bread. 
  • Spread a bit of vegan butter on both sides of the sandwich, and cook over medium heat, covered, until both sides are golden and cheese is melted.

Nutrition (Estimate per Serving)

Calories: 241kcalCarbohydrates: 35gProtein: 7gFat: 8gSaturated Fat: 2gPolyunsaturated Fat: 1gMonounsaturated Fat: 1gTrans Fat: 1gSodium: 571mgPotassium: 102mgFiber: 3gSugar: 3gVitamin A: 1IUVitamin C: 1mgCalcium: 97mgIron: 2mg
Vegan-ize any recipe!Grab our free vegan cheat sheet, packed with my favorite easy substitutions to make any recipe vegan.

This post was originally published in 2018. It has since been updated.

No-Bake Vegan Strawberry Shortcakes

May 4, 2021 by Nicole @ VegKitchen Leave a Comment

vegan strawberry shortcake

These no-bake shortcut vegan strawberry shortcakes are simple to make using rounds of prepared polenta in place of baked biscuits. These sweet treats make a lovely dessert that's easy enough to make for an everyday treat and pretty enough for special occasions.

No-Bake Vegan Strawberry Shortcakes made with polenta
[feast_advanced_jump_to]

Nothing says summertime like a strawberry shortcake - bursting with flavor from fresh strawberries and cream. Yum!

So of course I had to try my hand at making a vegan version of this delightful dessert.

These vegan strawberry shortcakes are:

  • Easy to make in just 15 minutes!
  • Loaded with fresh strawberries
  • And topped with creamy dairy-free whipped cream
  • 100% dairy-free and egg-free
  • A kid-friendly vegan dessert!

So let's get cooking!

No-Bake Vegan Strawberry Shortcake recipe

Tips & Tricks

Polenta

You might be thinking polenta is a weird ingredient for a dessert recipes, but you'll have to trust me on this one. It's actually an incredibly versatile ingredient - here are some more ways to use polenta!

You'll want to get the kind that comes in a tube - like this. You'll usually find it in the refrigerated section at your grocery store, although some brands can be stored at room temperature.

Vegan Whipped Cream

For these, we used So Delicious Coco Whip, which is surprisingly low in fat and sugar, too. You can also try your hand at making your own vegan whipped cream from coconut milk.

Variations

This vegan shortcake recipe works well with other kinds of fruit as well. Try replacing the strawberries with any of these fruits for a totally new dessert:

  • Blueberries
  • Blackberries
  • Raspberries
  • Pomegranate Arils (yes, really!)

And for another fun twist, try adding a layer of this homemade vegan Nutella!

More Recipes

If you love this vegan strawberry shortcake, be sure to check out these amazing strawberry recipes, or these delicious vegan desserts:

  • No-Bake Vegan Lemon Bars
  • Homemade Chocolates with Apricots
  • Cinnamon Apple Chickpea Cake
  • Boozy Chocolate Pudding

Recipe

vegan strawberry shortcake

Vegan Strawberry Shortcake

5 from 2 votes
These no-bake vegan strawberry shortcakes are simple to make using rounds of prepared polenta in place of baked biscuits. It makes a lovely dessert that's easy enough for an everyday treat and pretty enough for the holidays.
Print Pin Save Saved!
Cook Time: 15 minutes minutes
Total Time: 15 minutes minutes
Servings: 6
Prevent your screen from going dark

Ingredients

  • 1 pint strawberries
  • ¼ cup strawberry preserves all-fruit
  • 18 ounce polenta tube
  • vegan butter such as Earth Balance
  • dairy-free whipped cream see note
  • mint leaves optional for garnish
US Customary - Metric

Instructions

  • Remove hulls from the strawberries and slice very thinly. Cut up any large slices into smaller pieces. Reserve 6 small halves for topping, if desired.
  • Combine the strawberries and ¼ cup preserves, more or less to coat, in a small bowl and set aside.
  • Remove the polenta from the plastic wrapping. Cut a little of the puckered ends off from the polenta tube, then cut the rest into 12 equal slices. These will be about ½ inch thick.
  • Heat enough buttery spread on a wide skillet or griddle. Cook the polenta slices in a single layer, about 5 to 7 minutes on each side, or until golden and starting to get crusty.
  • Remove from the skillet to a platter and allow to cool to room temperature, or until ready to serve. If you're impatient and apply the whipped cream to warm polenta, you'll get a runny mess!
  • When ready to serve, layer as follows: A slice of polenta, a small dollop of whipped cream, a few slices of strawberry, another slice of polenta, more whipped cream, a half strawberry (or a few more slices if you didn't reserve halves).
  • Garnish with mint if desired; pass around any unused strawberries and more whipped cream to spoon onto individual shortcakes.

Notes

Some brands of vegan whipped cream will need to thaw in the fridge prior to using, so be sure to check the package instructions.

Nutrition (Estimate per Serving)

Calories: 380kcalCarbohydrates: 84gProtein: 8gFat: 1gSaturated Fat: 1gSodium: 6mgPotassium: 248mgFiber: 3gSugar: 11gVitamin A: 191IUVitamin C: 48mgCalcium: 17mgIron: 1mg
Vegan-ize any recipe!Grab our free vegan cheat sheet, packed with my favorite easy substitutions to make any recipe vegan.

Photos by Hannah Kaminsky.

This recipe was originally published in 2017. It has since been updated.

Gluten-free Vegan Quinoa Bread Rolls

April 21, 2021 by Nicole @ VegKitchen Leave a Comment

gluten-free vegan quinoa bread rolls

These gluten-free vegan quinoa bread rolls make a great snack, or side dish for a hearty bowl of soup. Savory, on the crumblier side, and full of flavor, they practically melt in your mouth. Oil-free and easy to make. 

gluten-free vegan quinoa bread rolls

If you're like me and prefer homely, freshly-baked and tailored to your preferences bread creations, these vegan quinoa bread rolls may be precisely what you need in your life right now.

The quinoa buns I present to you today are startlingly easy. So there's no excuse not to give them a try!

Now, these aren't traditional 'fluffy' write bread rolls, as you can see. They're smaller, denser, with a chewier texture and don't change shape a lot in the oven.

But spread them with some mashed avocado or vegan butter, and you're very likely to eat the whole batch in one sitting! Well, in my humble opinion, that's the only appropriate thing to do after a baking session.

gluten-free vegan quinoa bread rolls

Ingredients and substitutions

  • Ground flaxseed.
  • Quinoa. You can use store-brought quinoa flour, but I prefer to make my own version because not blending all of it entirely adds an amazing slightly crunchy texture.
  • Gluten-free oat flour. You can make your own simply by pulsing rolled oats in a blender or food processor for a couple of minutes.
  • Buckwheat flour.
  • Salt.
  • Baking powder.
  • Garlic granules. Feel free to add any other spices to really switch things up!
  • Lemon juice.
  • Baking soda.
  • Apple cider vinegar.
gluten-free vegan quinoa bread rolls

How to make these quinoa bread rolls

STEP 1: Preheat the oven to 180 degrees C/ 350 degrees F.

STEP 2: Add the ground flaxseed to ½ cup water. Stir together and set aside for 15 minutes.

STEP 3: Add the quinoa to a food processor, and pulse for around 2 minutes until around ½ of it turns into a flour.

STEP 4: Transfer the quinoa to a large mixing bowl together with the oat flour, buckwheat flour, salt, baking powder and garlic granules. Stir together well to combine.

gluten-free vegan quinoa bread rolls

STEP 5: Add the lemon juice to the flaxseed mixture. In a small mixing bowl, add the vinegar to the baking soda, then combine that with the flaxseed too.

STEP 6: Add the wet ingredients to the dry. Mix together thoroughly, gradually pouring in ¼ cup water (but be careful not to add too much as then the bread rolls will not hold their shape.

STEP 7: Using damp hands, roll the dough into even-sized balls and lay them out on a sheet of baking paper over a rectangular tray. Bake in the preheated oven for 17-20 minutes, until crunchy on the outside, but with softness on the inside.

gluten-free vegan quinoa bread rolls

Tips & Tricks

Meal Prep. One of the great things about my quinoa bread roll recipe is that they last really well in the fridge. Keep the quinoa buns in an air-tight container in the fridge for 4-5 days. You can also freeze them for up to a month, reheating at room temperature, in the oven, or the microwave as necessary.

Serving. I love to serve my quinoa bread sliced in half, with a thick layer of mashed avocado or butter. You can also eat them by themselves as a snack or a side for a cozy vegan soup or chili.

Add spice. Make these your own by adding your own favorite herbs or spices, or mixing in a few tablespoons of nuts or seeds! You can also add chopped onion or fresh garlic.

Don't overbake. Keep a close eye on them and make sure not to leave them in the oven for too long/at too high a temperature to prevent drying.

gluten-free vegan quinoa bread rolls

More Recipes to Try:

If you love these simple quinoa buns, check out these other delicious recipes.

  • Italian Quinoa Salad
  • Chapati Flatbread
  • Three-Grain Brown Bread

Recipe

gluten-free vegan quinoa bread rolls

Vegan Quinoa Bread Rolls (Gluten-free)

5 from 1 vote
These gluten-free vegan quinoa bread rolls make a great snack, or side dish for a hearty bowl of soup. Savoury, on the crumblier side, and full of flavour, they practically melt in your mouth. Oil-free and easy to make.
Print Pin Save Saved!
Prep Time: 20 minutes minutes
Cook Time: 20 minutes minutes
Total Time: 40 minutes minutes
Servings: 12 bread rolls
Prevent your screen from going dark

Equipment

  • Conventional oven
  • Mixing bowl
  • Baking paper
  • Baking tray

Ingredients

  • 2 tablespoon ground flaxseed
  • ½ cup quinoa
  • ½ cup gluten-free oat flour
  • ½ cup buckwheat flour
  • ½ teaspoon salt
  • 1 teaspoon baking powder
  • 1 teaspoon garlic granules
  • ½ lemon juice of
  • ½ teaspoon baking soda
  • 1 tablespoon apple cider vinegar
US Customary - Metric

Instructions

  • Preheat the oven to 180 degrees C/350 degrees F.
  • Add the ground flaxseed to ½ cup water. Stir together and set aside for 15 minutes.
  • Add the quinoa to a food processor, and pulse for around 2 minutes until around ½ of it turns into a flour.
  • Transfer the quinoa to a large mixing bowl together with the oat flour, buckwheat flour, salt, baking powder and garlic granules. Stir together well to combine.
  • Add the lemon juice to the flaxseed mixture. In a small mixing bowl, add the vinegar to the baking soda, then combine that with the flaxseed too.
  • Add the wet ingredients to the dry. Mix together thoroughly, gradually pouring in ¼ cup water (but be careful not to add too much as then the bread rolls will not hold their shape.
  • Using damp hands, roll the dough into even-sized balls and lay them out on a sheet of baking paper over a rectangular tray. Bake in the preheated oven for 17-20 minutes, until crunchy on the outside, but with softness on the inside.

Nutrition (Estimate per Serving)

Calories: 72kcalCarbohydrates: 12gProtein: 3gFat: 2gSaturated Fat: 1gSodium: 180mgPotassium: 107mgFiber: 2gSugar: 1gVitamin A: 2IUVitamin C: 2mgCalcium: 32mgIron: 1mg
Vegan-ize any recipe!Grab our free vegan cheat sheet, packed with my favorite easy substitutions to make any recipe vegan.

Boozy Chocolate Bread Pudding (Vegan)

April 21, 2021 by Nicole @ VegKitchen 1 Comment

gluten-free vegan Christmas pudding, with a molten chocolate centre

This chocolate bread pudding has a show-stopping molten lava center, flavored with chocolate and whiskey. This festive dessert is a surefire crowd pleaser, and perfect for the holidays!

chocolate bread pudding being served

This chocolate bread pudding is a fun makeover of a classic British dessert. Bread pudding is one of the world's most well-love comfort foods. It's homey and indulgent, and yet festive enough to serve at Christmas dinner.

But what really makes this chocolate version stand out is the boozy molten chocolate center. Outside you find a fluffy, slightly zest sponge cake. And inside, you find a warm, molten, gooey center with a delightful undertone of whisky. Yes, please!

This chocolate bread pudding is:

  • Incredibly moist and full of flavor.
  • Completed with a heavenly chocolatey center.
  • With a melt-in-your-mouth texture.
  • Vegan.
  • Gluten-free.
  • Oil-free.
  • Flourless.
  • Boozy (but this is optional).
  • Easy enough for beginners.
  • Ideal for the holiday season.
  • Just the ultimate Christmas pudding recipe!
  • Freezer-friendly.
chocolate bread pudding with chocolate whiskey center

I have to say, this proved tricky to perfect. I wanted to create a recipe that was both vegan and gluten-free but didn't involve any commercial gluten-free baking flour.

Hence, almond flour to the rescue. Almond flour is my current obsession, because it's perfect for creating a soft, fluffy and moist texture, especially in combination with a nut butter. You won't believe that any flour is missing!

Of course, if you want to keep this Christmas pudding alcohol-free, you can simply omit the whisky or replace it with a non-alcoholic beverage. Alternatively, use any other alcoholic drink of your choice. Liqueurs work incredibly well.

slice of bread pudding on a white plate

Make the Pudding (Step by Step)

Soak the dates in the boiling water for around 20 minutes.

Add the medjool dates, the water you soaked them in, orange peel, vanilla extract, baking soda, apple cider vinegar, maple syrup, almond butter and almond flour to a blender or food processor. Blend until smooth.

mixing the batter for the chocolate bread pudding

Preheat an oven to 180 degrees C/350 degrees F.

Melt chocolate in a water bath over the stove. Then, transfer to a mixing bowl with whisky, maple syrup and coconut milk. Whisk together thoroughly.

ingredients for the molten chocolate center

Transfer ⅔ of the dough to a hemisphere cake tin and bake a dent in the middle. Pour in the chocolate sauce, then add the rest of the dough over the top.

assembling the bread pudding in the pan

Cover with foil and bake in the preheated oven for 50-55 minutes. Best served immediately, but can be frozen or kept in the fridge for up to 3 days.

More Recipes to Try

If you like this chocolate bread pudding , be sure to check out these other delicious recipes:

  • Creamy Vegan Eggnog
  • Chocolate Banana Bread Pudding
  • Chocolate Crinkle Cookies
  • Homemade Vegan Chocolates

Recipe

gluten-free vegan Christmas pudding, with a molten chocolate centre

Boozy Chocolate Bread Pudding (vegan)

5 from 2 votes
This chocolate bread pudding has a show-stopping molten lava center, flavored with chocolate and whiskey. This festive dessert is a surefire crowd pleaser, and perfect for the holidays!
Print Pin Save Saved!
Prep Time: 35 minutes minutes
Cook Time: 55 minutes minutes
Total Time: 1 hour hour 30 minutes minutes
Servings: 8 servings
Prevent your screen from going dark

Equipment

  • Blender or food processor
  • Conventional ovem
  • Mixing bowl
  • Hemisphere cake tin
  • Aluminium foil

Ingredients

For the sponge

  • 2.5 cups medjool dates pitted and chopped
  • 1.5 cups boiling water
  • 1 large orange peel of, chopped
  • 1 tablespoon vanilla extract
  • 1 tablespoon baking soda
  • 2 tablespoon apple cider vinegar
  • ¼ cup maple syrup
  • 2 tablespoon almond butter
  • 2 cups almond flour

For the chocolate centre

  • 5 oz dark chocolate
  • 2 tablespoon whisky optional
  • ¼ cup maple syrup
  • 2 tablespoon coconut milk
US Customary - Metric

Instructions

  • Soak the dates in the boiling water for around 20 minutes.
  • Add the medjool dates, the water you soaked them in, orange peel, vanilla extract, baking soda, apple cider vinegar, maple syrup, almond butter and almond flour to a blender or food processor. Blend until smooth.
  • Preheat an oven to 180 degrees C/350 degrees F.
  • Melt chocolate in a water bath over the stove. Then, transfer to a mixing bowl with whisky, maple syrup and coconut milk. Whisk together thoroughly.
  • Transfer ⅔ of the dough to a hemisphere cake tin and bake a dent in the middle. Pour in the chocolate sauce, then add the rest of the dough over the top.
  • Cover with foil and bake in the preheated oven for 50-55 minutes. Best served immediately, but can be frozen or kept in the fridge for up to 3 days.

Nutrition (Estimate per Serving)

Calories: 494kcalCarbohydrates: 64gProtein: 9gFat: 25gSaturated Fat: 6gTrans Fat: 1gCholesterol: 1mgSodium: 420mgPotassium: 538mgFiber: 9gSugar: 48gVitamin A: 82IUVitamin C: 2mgCalcium: 142mgIron: 4mg
Vegan-ize any recipe!Grab our free vegan cheat sheet, packed with my favorite easy substitutions to make any recipe vegan.

Chocolate Covered Apricots and Hazelnuts

April 21, 2021 by Nicole @ VegKitchen Leave a Comment

Vegan homemade chocolates

These homemade chocolate covered apricots and hazelnuts are a deliciously healthy indulgence. These easy 3-ingredient treats are perfect for a quick and healthy make-ahead snack. And they're vegan friendly too!

Vegan homemade chocolates with apricots and hazelnuts
[feast_advanced_jump_to]

These easy chocolate dipped apricots and hazelnuts are sure to be your new favorite homemade snack! You can make a big batch of these fruity chocolates at the start of the week and take some with you every day to school or work.

They're also great as a pre- or post-workout treat or a simple dessert with a cup of coffee. And they're delicious when scattered atop a smoothie bowl.

These homemade chocolates are:

  • Filled with apricots, hazelnuts, or prunes.
  • A great option for a healthy snack
  • Made with just 3 wholesome ingredients
  • Vegan
  • Gluten-free
  • Oil-free
  • Easy
  • Ready with only 10 minutes preparation time
  • Great for meal-prep
  • Ideal as a post-workout snack
  • Also perfect for sharing!
 homemade chocolates on a white serving tray

Tips & Tricks

What's great about these homemade chocolates is that they require just 3 ingredients - either prunes or dried apricots, hazelnuts and dark chocolate. That's it!

I've used hazelnuts for this recipe, but you can swap these for any other nut of your choice, such as macadamias, cashews, pecans, etc.

When choosing chocolate, you can also choose whichever one you prefer. I like to use a dark variety with at least 70% cocoa solids, but vegan milk chocolate works too.

Make the Chocolates

It really is super easy!

Start by melting the chocolate either on the stove, or microwaving it on medium power for 1-2 minutes. Meanwhile, stuff the dried apricots with the hazelnuts.

Then, dip the apricots in the chocolate one by one and leave to set in the fridge for around 30 minutes on a sheet or parchment paper.

serving homemade chocolates

More Delicious Recipes

If you love these chocolate covered apricots, don't miss these other delicious recipes.

  • Cinnamon Apple Chickpea Cake
  • Almond Butter Protein Balls
  • No-Bake Lemon Bars
  • Vegan Nutella

Recipe

Vegan homemade chocolates

Chocolate Covered Apricots and Hazelnuts - 3 Ingredients!

5 from 2 votes
These homemade chocolate covered apricots and hazelnuts are a deliciously healthy indulgence. These easy 3-ingredient treats are perfect for a quick and healthy make-ahead snack. And they're vegan friendly too!
Print Pin Save Saved!
Prep Time: 10 minutes minutes
Resting Time: 30 minutes minutes
Total Time: 40 minutes minutes
Servings: 20 chocolates
Prevent your screen from going dark

Ingredients

  • 3.5 oz dark chocolate
  • 20 hazelnuts
  • 20 pitted dried apricots or prunes
US Customary - Metric

Instructions

  • Start by melting the chocolate either on the stove, or microwaving it on medium power for 1-2 minutes. Meanwhile, stuff the dried apricots with the hazelnuts.
  • Dip the apricots in the chocolate one by one and leave to set in the fridge for around 30 minutes on a sheet or parchment paper.

Nutrition (Estimate per Serving)

Calories: 58kcalCarbohydrates: 8gProtein: 1gFat: 3gSaturated Fat: 1gTrans Fat: 1gCholesterol: 1mgSodium: 2mgPotassium: 138mgFiber: 1gSugar: 6gVitamin A: 291IUVitamin C: 1mgCalcium: 10mgIron: 1mg
Vegan-ize any recipe!Grab our free vegan cheat sheet, packed with my favorite easy substitutions to make any recipe vegan.

Massaged Kale Salad with Orange-Miso Dressing

April 19, 2021 by Nicole @ VegKitchen Leave a Comment

winter black bean salad with rice and kale

This massaged kale salad is packed with healthy greens, protein rich black beans, hearty rice, and fresh veggies. All topped with a savory and sweet orange-miso dressing. It makes for a healthy lunch, side, or a deliciously light weeknight meal.

kale salad being served with a checkered cloth
[feast_advanced_jump_to]

I love taking salads to the next level. Because no one likes a boring salad, right? So I do my best to keep my salads filling, flavorful and also high in protein.

That's why I think autumn and winter are actually my favorite times of year for salads. With a kale salad like this one, you can enjoy an abundance of vegetables while using a carb-y base to make the overall dish super cozy and comforting.

Just add a simple yet delicious dressing, and that's lunch or dinner sorted!

massaged kale salad with black beans and rice

What I love about this particular kale salad is just how simple it is to throw together in just about 25-30 minutes (or even less if you have pre-cooked rice on hand).

I actually first came up with this dish when I had a bunch of leftover veggies in the fridge. Falling in love with the outcome, I tested it once more with a delicious orange-miso dressing - and it was perfect!

This massaged kale salad is:

  • Delicious and packed full of flavor
  • Vegan friendly!
  • Easy to make, with simple ingredients and dressing
  • Gluten-free
  • Oil-free
  • Comforting and cozy
  • Ideal for a weeknight dinner.
  • Made from whole, minimally processed ingredients
  • Versatile - add whatever other veggies you fancy!
close up of kale salad in bowl

This kale salad works really well as a side dish for Christmas and Thanksgiving, or other family get togethers.

It's also a great make ahead or vegan meal prep recipe. And I personally love eating this as a post-workout meal!

massaged kale salad being served in a white bowl

How to Make the Salad

Start by cooking your rice according to the instructions on the packaging. This usually takes around 25-30 minutes.

Meanwhile, massage the kale for 2-3 minutes to shrink it down and soften it up. (This is where the recipe gets its name!) Then stir in the tahini and a pinch of salt.

Next, prepare the dressing by stirring together fresh orange juice, miso paste and apple cider vinegar. Add a pinch of salt, to taste.

Once the rice is ready, add it to a large mixing bowl with the black beans, kale, tomatoes, purple cabbage, cucumber and red onion.

When you're just about ready to serve the black bean salad, stir in the dressing, transfer to serving plates and enjoy!

kale salad with fresh veggies and rice

Tips & Tricks

Experiment by adding any other vegetables you have in the fridge. Think zucchini, bell pepper, other types of lettuce or greens. They all work!

If you want the salad less sweet and more tangy, replace the orange juice with the equivalent amount of lemon or lime juice.

You can keep this black bean salad in the fridge in an airtight container for 2-3 days. Although, it's best to store the dressing separate from the salad, so it doesn't get soggy.

More Recipes to Try

If you love this massaged kale salad, be sure to check out these other vegan recipes:

  • Massaged Kale Salad with Cranberries and Cashews
  • White Bean and Kale Skillet
  • Kale Caesar Salad
  • Chickpea and Kale Sandwich Spread

Recipe

winter black bean salad with rice and kale

Massaged Kale Salad with Orange-Miso Dressing

5 from 1 vote
This massaged kale salad is packed with healthy greens, protein rich black beans, hearty rice, and fresh veggies. All topped with a savory and sweet orange-miso dressing. It makes for a healthy lunch, side, or a deliciously light weeknight meal.
Print Pin Save Saved!
Prep Time: 25 minutes minutes
Cook Time: 5 minutes minutes
Total Time: 30 minutes minutes
Servings: 2 servings
Prevent your screen from going dark

Ingredients

  • 1 cup white rice uncooked
  • 2 cups kale chopped
  • 1 tablespoon tahini
  • salt to taste
  • 1 can black beans 15oz, drained and rinsed
  • 8-9 vine ripened tomatoes medium, chopped
  • ½ cup red cabbage chopped
  • ½ large cucumber chopped
  • ½ red onion medium

For the dressing

  • 1 tablespoon apple cider vinegar
  • 1 teaspoon brown rice miso paste
  • juice of 1 small orange
  • salt to taste
US Customary - Metric

Instructions

  • Cook the rice according to instructions on packaging. This usually takes 25-30 minutes.
  • Meanwhile, massage the kale for 2-3 minutes, then stir in the tahini.
  • To make the dressing, stir together the apple cider vinegar, brown rice miso paste, orange juice and salt in a small mixing bowl.
  • Once the rice is cooked, stir it together with the kale, black beans, tomatoes, red cabbage, cucumber and red onion. Add the dressing immediately before serving.

Nutrition (Estimate per Serving)

Calories: 538kcalCarbohydrates: 107gProtein: 17gFat: 7gSaturated Fat: 1gSodium: 180mgPotassium: 1845mgFiber: 9gSugar: 16gVitamin A: 11102IUVitamin C: 165mgCalcium: 215mgIron: 4mg
Vegan-ize any recipe!Grab our free vegan cheat sheet, packed with my favorite easy substitutions to make any recipe vegan.

Vegan Baked Mac And Cheese

April 4, 2021 by Nicole @ VegKitchen 1 Comment

This vegan baked mac and cheese is perfect for a comforting weeknight dinner! Made with a dairy-free 'cheese' sauce, topped with gluten-free breadcrumbs, flavorful and creamy, this meal requires just simple ingredients and a few easy steps.

Vegan baked mac and cheese

Oh, mac and cheese. The stuff that my dreams are made of. I'm not joking - I often fall asleep by switching off my existential worries and thinking about creamy pasta deliciousness instead. 10/10 would recommend.

Seriously though, I can't believe it's taken me this long to share a baked mac and cheese recipe. I have variations of this dish on an almost weekly basis, so finally - here we are. In general, a pasta dinner as good as this is my go-to dish for any Friday night comfort dinner. But it's perfect for pretty much any day or any occasion, and if you give it a go you will see why I say that!

So if you're searching for last-minute dinner inspiration, this vegan baked mac and cheese is a perfect option. You need hardly any time, simple ingredients, and the result is phenomenal.

Bowl of vegan mac and cheese with fresh herbs

Vegan baked mac and cheese

So, a little bit about this recipe. If you're wondering what it tastes like, think chewy, tender noodles enveloped in a thick and rich sauce that melts in your mouth, plus just a light coat of optional vegan cheese (or gluten-free breadcrumbs )on top for a little bit of extra texture. The sauce has a savoury flavour that's also very cheesy. Trust me, it tastes even better than it sounds/looks.

Dairy-free mac and cheese with breadcrumbs and fresh herbs on a plate

The main ingredient for the dairy-free cheese sauce is cashews, which are a staple in vegan cooking in general. Cashews are neutral in flavour and can be blended to make amazing sauces, dressings and dips. This is a great example! Beyond that, you need just simple ingredients to make amazing flavor and a great texture, too.

Right before baking, I added breadcrumbs and grated vegan cheese. These are optional, but 100% recommended! The end result is amazingly comforting and with an amazing texture. Pasta dreams come true!

Ingredients you'll need

Ingredients for baked vegan mac and cheese
  • Olive oil to cook the vegetables.
  • Carrots, onion and garlic. These are cooked in olive oil and added to the sauce.
  • Cashews. Soak these for 3-4 hours, or simmer for 15 minutes to soften.
  • Plant based milk. Use any unsweetened plant based milk variety of your choice.
  • Mustard. Ensure vegan.
  • Paprika.
  • Nutritional yeast. This is an amazing ingredient for adding a cheesy flavor to the sauce!
  • Tomato paste.
  • Apple cider vinegar.
  • Cumin.
  • Breadcrumbs. You can either make your own breadcrumbs, or use store-brought.
  • Vegan cheese. This is optional, but very much recommended! Choose a variety that melts well.

How to make the best dairy-free baked mac and cheese

Preheat the oven to 180 degrees C/350 F.

Cook the pasta. Follow instructions on packaging, but make sure it is slightly al dente/prevent overcooking.

Ingredients for a vegan cheese sauce in a blender
Vegan cheese sauce in a blender

Cook the vegetables. Heat the olive oil in a frying pan over a medium-high heat, then add the carrots, onion and garlic and cook for 5 minutes, until softened.

Make the sauce. Add the vegetables to a blender or food processor, together with the cashews, plant based milk, mustard, paprika, salt, nutritional yeast, tomato paste, apple cider vinegar, and cumin. Blend until smooth.

Pasta with a cheesy sauce in a mixing bowl
Pasta in a cheesy sauce in a baking dish

Combine with the pasta. Drain the pasta (but don't rinse) and mix together in a large mixing bowl together with the sauce.

Bake the mac and cheese. Transfer the mac and cheese to a rectangular baking dish. Sprinkle with breadcrumbs and vegan cheese, then bake in the preheated oven for 25 minutes.

Bake the mac and cheese. Transfer the mac and cheese to a rectangular baking dish. Sprinkle with breadcrumbs and vegan cheese, then bake in the preheated oven for 25 minutes.

Vegan cheesy pasta with breadcrumbs in a baking dish
Dairy-free mac and cheese with breadcrumbs in a baking dish

Cashew alternatives

Let's talk about cheese for a second. It's one of those fears they'll miss intensely if they go vegan. Granted, I've never been a huge cheese fanatic so gave it up with little struggle. But the good news for everyone who is? There are countless ways to replace cheese in your diet.

Vegan baked mac and cheese on a plate with fresh herbs

Cashews is one option. They are amazing for using in sauces and here, they create the amazing creamy texture. If you can't eat cashews, however, you can replace them with a can of coconut milk - don't worry, it won't taste like coconut.

How do I store baked vegan mac and cheese?

You can store leftovers in an airtight container for up to 3-4 days in the fridge. To freeze, store either in freezer-friendly containers or in freezer bags for up to 2 months. Allow to thaw fully in the fridge, then reheat in the microwave or on the stove, adding a splash of plant based milk.

Cheesy vegan pasta with breadcrumbs

If you want to make this dish ahead of time, I would recommend making the sauce, cooking the macaroni and storing them in separate containers. When ready to make, simply mix together, transfer to a baking dish, add the toppings, and bake as instructed.

Stovetop instructions

This vegan mac and cheese can easily be made on the stove, which is a great option if you are in a rush. Simply transfer the sauce and the cooked pasta to a large pan and stir for a few minutes over a medium heat. You can also add extra vegan cheese, or leafy greens like kale or spinach.

Cheesy vegan pasta in a bowl with fresh herbs and breadcrumbs

What's to love about this mac and cheese recipe?

It's ...

  • Very creamy and indulgent.
  • Perfect for a comforting weeknight dinner.
  • Made with simple and accessible ingredients.
  • Freezer-friendly and great for meal prep.
  • Easy and beginner-friendly.
  • A great way to impress non-vegans!
Closeup of dairy-free mac and cheese in a baking dish

Tips and tricks for success

  • The nutritional yeast here works really well to add a cheesy flavour and so I would not recommend leaving it out.
  • Ensure that the mustard is vegan, as some have sneaky non-vegan ingredients.
  • Soak the cashews really well and be patient when blending to ensure the smoothest texture.
  • To make this baked vegan mac and cheese gluten-free, use gluten-free pasta.
  • You can use any pasta of your choice. Make sure it's slightly undercooked before mixing it with the sauce because it will continue cooking in the oven.
  • You can adjust the type and amount of spices you use depending on your preference. Also, if you prefer it spicy, I would recommend adding sriracha, and chilli flakes on top when serving.
Vegan baked mac and cheese on a plate with fresh herbs

Other vegan pasta recipes

  • If you're looking for something meal prep friendly, try my easy vegetable and mushroom pasta.
  • My fail-proof fettuccine Alfredo is yet another crowd-pleasing dinner.
  • If baking pasta is your thing, my pasta bake with tofu may be the dish for you.
  • Vegan avocado pasta is ready in under 15 minutes!
  • My roasted red pepper pasta is perfect for a comforting weeknight dinner.
Vegan baked mac and cheese

Let me know in the comments: what's your favourite type of vegan cheese? If you give this vegan baked mac and cheese recipe a go, be sure to tag me on Instagram (@earthofmariaa) so I can see your creations, and leave your feedback in the comments below together with a star rating.

Also worth trying: our vegan pumpkin mac and cheese.

Pin this for later
Vegan baked mac and cheese

Recipe

Vegan Baked Mac And Cheese (Gluten-free and Oil-free)

5 from 2 votes
This baked vegan mac and cheese is perfect for a weeknight dinner that's super easy to make! Featuring a creamy, smooth dairy-free sauce and a breadcrumb topping, this is a perfect family-friendly and crowd-pleasing dish.
Print Pin Save Saved!
Prep Time: 15 minutes minutes
Cook Time: 25 minutes minutes
Total Time: 40 minutes minutes
Servings: 4
Prevent your screen from going dark

Equipment

  • Conventional oven
  • Saucepan
  • Frying pan
  • Baking dish

Ingredients

  • 3 cups pasta use any pasta of your choice
  • 2 tablespoon olive oil
  • 1 large carrot diced
  • 1 large onion diced
  • 3 cloves garlic minced
  • 1 ½ cups cashews soaked
  • 1 ½ cups plant based milk
  • ½ tablespoon mustard ensure vegan
  • 1 teaspoon paprika
  • ¼ cup nutritional yeast
  • 2 tablespoon tomato paste
  • 1 tablespoon apple cider vinegar
  • ½ teaspoon cumin
  • ½ cup breadcrumbs
  • ½ cup vegan cheese grated
US Customary - Metric

Instructions

  • Preheat the oven to 180 degrees C/350 F.
  • Cook the pasta according to packaging instructions on packaging, but make sure it is slightly al dente/prevent overcooking.
  • Heat the olive oil in a frying pan over a medium-high heat, then add the carrots, onion and garlic and cook for 5 minutes, until softened.
  • Add the vegetables to a blender or food processor, together with the cashews, plant based milk, mustard, paprika, salt, nutritional yeast, tomato paste, apple cider vinegar, and cumin. Blend until smooth.
  • Drain the pasta (but don't rinse) and mix together with the sauce in a large mixing bowl.
  • Transfer the mac and cheese to a rectangular baking dish. Sprinkle with breadcrumbs and vegan cheese, then bake in the preheated oven for 25 minutes.

Notes

Instructions for making ahead and storing
  • Store leftovers in an airtight container for up to 3-4 days in the fridge. To freeze, store either in freezer-friendly containers or in freezer bags for up to 2 months. Allow to thaw fully in the fridge, then reheat in the microwave or on the stove, adding a splash of plant based milk.
  • To make ahead of time, make the sauce, cook the macaroni and store them in separate containers. When ready to make, simply mix together, transfer to a baking dish, add the toppings, and bake as instructed above. 
Tips for success
  • The nutritional yeast here works really well to add a cheesy flavour and so I would not recommend leaving it out.
  • Ensure that the mustard is vegan.
  • Either soak the cashews for 4 hours, or simmer them in a saucepan for 15 minutes.
  • You can use any pasta of your choice. Make sure it's slightly undercooked before mixing it with the sauce because it will continue cooking in the oven.
  • You can adjust the type and amount of spices you use depending on your preference.
  • If you prefer spicy mac and cheese, add sriracha, and chilli flakes on top when serving.

Nutrition (Estimate per Serving)

Calories: 532kcalCarbohydrates: 47gProtein: 17gFat: 34gSaturated Fat: 6gSodium: 1429mgPotassium: 1233mgFiber: 8gSugar: 15gVitamin A: 4176IUVitamin C: 19mgCalcium: 215mgIron: 7mg
Vegan-ize any recipe!Grab our free vegan cheat sheet, packed with my favorite easy substitutions to make any recipe vegan.

Vegan Easter Recipes

March 25, 2021 by Nicole @ VegKitchen 8 Comments

vegan easter recipes

Planning a plant-based Easter feast? You've come to the right place. I've rounded up all my favorite Vegan Easter recipes right here, so you can plan the perfect menu. From easy appetizers, to hearty main dishes, to sweet desserts - there's something for everyone.

Easter is the perfect holiday for putting together a vegan brunch or dinner. With all of the fresh, seasonal product of spring - these recipes are filled with light leafy greens, fresh asparagus, beets, carrots, and bright, citrusy flavors. So much deliciousness!

Use these mix and match vegan menu suggestions to create a memorable Easter feast for your family and friends.

P.S. If you want to make things even easier this Easter, go snag a copy of my new Vegan Brunch Book. It's the perfect way to plan a delicious and simple Easter brunch!

Vegan Easter Appetizers

  • Deviled Tomatoes
  • Mushroom, Asparagus, and Artichoke Medley
  • Beet Muhummara
  • Spinach or Arugula Strudel
  • Green Pea, Parsley, and Pistachio Dip
  • Raw Vegan Cheddar Cheese Spread
  • Rosemary Roasted Mushrooms
  • Mushroom, Asparagus, and Artichoke Medley
Deviled tomatoes recipes
Deviled tomatoes

Vegan Easter Soups

  • Greek-Flavored Spinach and Orzo Soup
  • Vegan Tomato Gazpacho
  • Lemony Leek and Mushroom Soup
  • Creole Carrot Soup
  • Vegan Cream of Broccoli Soup
  • Creole Eggplant Soup
  • Classic Leek and Potato Soup
Creole Eggplant soup recipe
Creole Eggplant Soup

Vegan Easter Salads

  • Spring Greens Salad with Endive and Oranges
  • Mixed Greens Salad with Beets and Walnuts
  • Asparagus with Mustard-Dill Sauce
  • Beet and Red Cabbage Slaw
  • Orange and Cucumber Salad with Spring Greens
  • Mixed Greens Salad with Avocado, Apples, and Baked Tofu
  • Quinoa and Asparagus Salad
Spring greens salad with cucumbers and oranges
Orange and Cucumber Salad with Spring Greens

Vegan Easter Main Dishes

  • Seitan and Polenta Skillet with Fresh Greens
  • Creamy Roasted Red Pepper Pasta
  • Roasted Seitan, Peppers, and Portabellas
  • Crustless Tofu Quiche with Mushrooms and Herbs
  • Orzo-Stuffed Bell Peppers
  • Pasta Primavera
  • Linguine with Asparagus and Portabella Mushrooms
  • Citrus-Roasted Tofu (photo at top)
  • Spring Vegetable Tart
  • Paella Vegetariana
  • Quinoa, Broccoli, and Vegan Cheese Casserole
  • Vegetable White Bean Hash
  • Baked Chickpea Ratatouille
Roasted Seitan with Peppers and Mushrooms
Roasted Seitan, Peppers, and Portabellas

Vegan Easter Side Dishes

  • Roasted Potatoes and Tomatoes with Rosemary
  • New Potatoes with Parsley and Almond Pesto
  • Vegan Lentil Meatballs
  • Hasselback Potatoes
  • Sautéed Broccoli or Broccoli Rabe, Baby Carrots, and Yellow SquashCauliflower with Parsley-Pecan Breadcrumbs
  • Cauliflower Rice Pilaf
  • Contemporary Creamed Spinach
  • Simple Sesame-Roasted Asparagus
  • Asparagus, Squash, and Red Bell Pepper Sauté
  • Orange-Glazed Beets
Hasselback Potatoes Cooked
Hasselback Potatoes

Vegan Easter Desserts and Treats

  • Vegan Rice Pudding
  • Carrot-Walnut Muffins
  • Triple-Citrus Cupcakes
  • Caramel Macchiato "Cheese" Cake
  • Big Orange Bundt Cake
  • Vegan Apple Strudel
  • Cool Season Fruit Bowl
  • Creamy Peanut Butter Pie
  • Chocolate Ganache Cake
  • Chocolate-Coated Key Lime-Coconut Creme Pie

Still craving something sweet? Find even more vegan Easter desserts here.

Also try: our creamy asparagus and pea pasta.

Also try: our vegan chocolate orange cake.

Also try: our cream of asparagus soup.

Also try: our glazed baked onions.

Also try: our Vegan Greek Pasta Salad.

Chocolate-coated vegan key lime pie recipe
Chocolate-Coated Key Lime Coconut Creme Pie

And if you're still searching for the perfect recipes, be sure to check out my new Vegan Brunch Book! It's the easiest way to plan the ultimate vegan friendly Easter Brunch.

Grilled Tofu Skewers

February 6, 2021 by Nicole @ VegKitchen 1 Comment

tofu kebabs

Give these Grilled Tofu Skewers a try for dinner tonight. This recipe is made of Grilled tofu that is marinated and paired with vegetables. Serve up these tofu kebabs for lunch, dinner, or even as a party appetizer for entertaining guests. 

forkful of grilled tofu skewers over a plate

A homemade marinade will bring such incredible flavor to the tofu in this dish. When you pair the marinated tofu with the zucchini, peaches, and red onions, you get the perfect sweet and savory recipe. 

If you are a fan of firm tofu, here is a creative way to use it up! Toss it on the grill and let it crisp up to perfection. 

This Grilled Tofu Skewers Recipe Is ...

  • Vegetarian 
  • Gluten-Free 
  • Vegan 
  • A Great Grilling Recipe for Summer and Spring 
  • Nut-Free 
  • 30-Minute Dinner Idea 

How to Make Grilled Tofu Skewers 

how to make grilled tofu skewers collage

  1. The first thing you will want to do is create your marinade. Add the marinade ingredients in a bowl or sealable bag and mix well. If using wooden bamboo skewers, soak them in water.
  2. Drain the tofu and pat it dry. Try to get out as much liquid as possible by pressing on it.
  3. Cut your tofu into cubes, and toss it in with the marinade. Then prep your vegetables and peaches. 
  4. Start assembling your skewers, add 1-2 tofu, veggies, and repeat. 
  5. Use a grilling pan and cook in the broiler or on the grill as directed. Remove and drizzle with the remaining marinade. 

Full measurements and directions for this recipe are in the printable recipe below. 

Tips and Tricks

tofu kebabs in progress of being skewered

Drain Tofu 

It is essential to drain and squeeze out as much liquid as possible when making this tofu skewers recipe. You can gently squeeze with paper towels to help pull out the liquid. 

Use Firm Tofu

Firm tofu will hold up best when cut and pushed onto the skewers. If you have softer tofu, you will find it might fall apart as it cooks. 

Variations

plate of stacked grilled tofu skewers

Vegetables

Feel free to change up the vegetables you use to pair with the tofu. Peppers, onions, mushrooms, etc., are all great options. You can also consider adding pineapple in place of the peaches. Just use what you have or what you enjoy eating. 

Marinade 

If you want to use a different marinade, go right ahead. This soy sauce-based marinade is one of my go-to's. But any liquid marinade will work. 

Broil, Grill, or Air Fry

You can broiler your kebabs in the oven, toss them on the grill, or even pop them in your air fryer. All methods work great for heating up and cooking these skewers and infusing all the flavors together. 

Grilled Tofu Skewers FAQs

plate of one kebab and one unskewered kebab

What type of tofu is best for grilling?

Firm, non-silken tofu is what I like to use. Having firm tofu is a must, or it will not hold together as it cooks. 

Why did my skewers burn up on the grill? 

Wooden bamboo skewers need to soak in water for at least 10-15 minutes before grilling. Otherwise, when tossed on the grill, they will burn up and make your skewers fall apart. 

What to serve with marinated tofu? 

Rice, cauliflower rice, and quinoa are all great options to pair with this marinated tofu and vegetables. Just cook up your grains how you like, remove the tofu and vegetables from skewers, and place them on top of the rice! 

Recipe

tofu kebabs

Grilled Tofu Skewers

5 from 2 votes
Give these Grilled Tofu Skewers a try for dinner tonight. This recipe is made of Grilled tofu that is marinated and paired with vegetables. Serve up these tofu kebabs for lunch, dinner, or even as a party appetizer for entertaining guests. 
Print Pin Save Saved!
Prep Time: 15 minutes minutes
Cook Time: 15 minutes minutes
Total Time: 30 minutes minutes
Servings: 4 servings
Prevent your screen from going dark

Ingredients

  • 16 oz firm tofu
  • 3-4 small peaches
  • ½ lg red onion
  • 2 medium zucchini

Marinade:

  • 3 tablespoon ginger minced
  • 4 tablespoon lime juice
  • 2 tablespoon brown sugar
  • 3-4 cloves garlic
  • 1 ½ teaspoon ground coriander
  • 2 tablespoon soy sauce*
  • ½ teaspoon mustard powder
US Customary - Metric

Instructions

  • Combine marinade ingredients. Finely mince ginger and garlic, combine with remaining and ingredients, mix and set aside.
    tofu kebabs
  • Drain tofu and pat dry with paper towels, pressing out as much liquid as possible.
    tofu kebabs
  • Cut tofu into 1 ½"x2" (3.5x5cm) cubes. Add to marinade and toss to coat. Set aside while preparing remaining ingredients.
  • If using bamboo skewers, set to soak in cold water.
  • Cut zucchini and peach in 1 ½" (3.5cm) cubes. Slice onion into 1" (2.5cm) pieces and break apart so that you have clusters of 2-3 layers.
    tofu kebabs
  • Turn the tofu pieces in the marinade again. Turn on broiler to high.
  • Assemble the skewers, placing 1-2 pieces of tofu per skewer and even distribute the other ingredients.
    tofu kebabs
  • Place skewers on grilling pan or foil lined baking sheet.
  • Cook under broiler for 8 minutes. Flip skewers and cook the other side for 3-4 minutes to brown slightly on the other side.
    tofu kebabs
  • Remove from oven and drizzle with remaining marinade. Serve immediately.
    tofu kebabs

Notes

  • *Use tamari or other aminos to keep the recipe gluten free.
  • Skewers can also be cooked on a grill over very hot coals.

Nutrition (Estimate per Serving)

Calories: 1416kcalCarbohydrates: 56gProtein: 144gFat: 70gSaturated Fat: 8gSodium: 102mgPotassium: 563mgFiber: 16gSugar: 18gVitamin A: 578IUVitamin C: 36mgCalcium: 2018mgIron: 20mg
Vegan-ize any recipe!Grab our free vegan cheat sheet, packed with my favorite easy substitutions to make any recipe vegan.

Vegan Crunchwrap Supreme

February 6, 2021 by Nicole @ VegKitchen 1 Comment

This vegan Crunchwrap Supreme is made with a smoky tempeh filling, homemade dairy-free nacho 'cheese', and guacamole. It's bursting with flavour, and is perfect for an indulgent lunch. Easy to make gluten-free.

Vegan Crunchwrap Supreme

You know those recipes that you just want to make over and over again? Yep, this tempeh Crunchwrap is one of those for me. I am seriously obsessed. I've seen Crunchwraps all over social media for a while, and knew I needed to make my own vegan version.

The original Crunchwrap Supreme is from Taco Bell, made with beef and nacho cheese. But, a homemade, plant based version is incredibly easy to put together. Just follow the steps below and you will see for yourself! Chances are, if you're like me and love wholesome comfort food, you will love this as well.

Closeup of a Crunchwrap with tempeh

About this vegan Crunchwrap Supreme

The thing that I love about Crunchwraps is that you can really load them up with different ingredients and they won't fall apart. Well, you have to try very hard in order for that to happen (I've had a few such accidents myself during recipe testing lol). Regardless, every bite is packed full of deliciousness, and the wonderful crispy texture of the wrap really brings everything together.

Crunchwrap with tempeh and vegan nacho cheese

Here, I used tempeh for the filling. I love tempeh, because it's such a versatile ingredient with a great texture and a neutral flavour. With just a few ingredients, it's so easy to transform it. In this Crunchwrap recipe, it takes the place of the ground beef.

Crunchwrap Supreme with tempeh and dairy-free nacho cheese

I also made a homemade nacho 'cheese' sauce. The great thing about this one is just how simple it is. You don't need a blender, and there are no cashews. You simply put all the ingredients to a saucepan, whisk, and you're good to go! In fact, I love using this 'cheese' as a sauce for many recipes, such as salads and nourish bowls.

Crunchwrap with tempeh on a wooden board

I also added avocado, rice and a little bit of grated vegan cheese. Simple, but incredibly yummy!

Smoky tempeh filling

You only need a few simple ingredients to make the smoky tempeh filling. Those are:

Ingredients for smoky tempeh
  • Onion and garlic.
  • Tempeh. I would recommend steaming this beforehand to get rid of any bitter flavour. You can also use crumbled extra firm tofu.
  • Sweetcorn.
  • Tomato paste.
  • Tamari. You can also use soy sauce if not avoiding gluten, or coconut aminos for a soy-free version.
  • Cumin and smoked paprika.
Smoky tempeh in a pan

Simply cook the onion and garlic. Then, when they soften, add the rest of the ingredients and cook over a medium-high heat for around 5 minutes. That's it!

Smoky tempeh with sweetcorn

Vegan nacho cheese

As I mentioned, this nacho 'cheese' is cashew-free and doesn't require a blender. The ingredients you will need are:

  • Coconut milk. Full fat coconut milk from a tin works best.
  • Turmeric.
  • Salt.
  • Nutritional yeast. This is great for adding a 'cheesy' flavour.
  • Apple cider vinegar.
  • Cornstarch.
Ingredients for vegan nacho cheese
Vegan nacho cheese

Simply add all the ingredients to a saucepan and whisk over a medium heat until the 'cheese' thickens.

What else should I add to a vegan Crunchwrap?

Crunchwraps are super versatile - you can switch up the ingredients and try out different fillings to see which ones you prefer. As you can see, I added rice, mashed avocado and grated vegan cheese. However, the following filling ideas also work really well:

Vegan Crunchwrap with tempeh on a plate
  • Quinoa.
  • Wholegrain rice.
  • Vegetables of your choice, such as tomatoes, carrots and zucchini.
  • Vegan sour cream.
  • Spicy cashew cream.
  • Chunky guacamole.
  • Black beans.
  • Vegan walnut taco meat - a savory walnut-mushroom mixture that makes a fantastic hearty filling.
  • Sweet potato.
  • Tostada shells or corn chips for some extra crunch.

Try out different ones and see which ones you like best! The great thing is that there are so many options, so you will never get bored of this recipe.

Vegan Crunchwrap with dairy-free nacho cheese on a plate

Vegan Crunchwrap Supreme step-by-step

I would recommend starting by cooking the rice. While that's cooking, make the tempeh filling and the cheese sauce. By preparing them simultaneously, you will save a lot of time.

Place a large tortilla on a flat surface and add 3-4 tablespoon rice in the middle, spreading it out into a circle.

Vegan Crunchwrap ingredients
Vegan wrap with tempeh and rice

Next, add smoked tempeh on top, followed by a layer of mashed avocado. Finish with the homemade nacho 'cheese', and a sprinkle of grated vegan cheese.

Place a smaller tortilla on top and press down lightly. You can either buy a small tortilla at the store, or make your own by placing a round cup or cookie cutter in the centre of a large tortilla and cutting around the edges. Do not discard the rest of the tortilla - you can use it for homemade chips to dip in any leftover nacho 'cheese' sauce.

Vegan wrap with tempeh and nacho cheese
Vegan Crunchwrap on a wooden board

Fold the edges of the tortilla towards the centre until completely sealed. Press it down once again and flip.

Now use a spatula to transfer the Crunchwrap to a lightly greased frying pan. Cook for 3-4 minutes on each side over a medium-high heat, until crispy.

Vegan Crunchwrap Supreme in a frying pan

Can I make a Crunchwrap ahead of time?

You can make this vegan Crunchwrap Supreme ahead of time and leave in the fridge for 2-3 days, but keep in mind this may cause the wrap to go soggy.

Closeup of a Crunchwrap with tempeh and rice

Instead, I would recommend making the smoky tempeh, the rice and the nacho 'cheese' sauce ahead of time and storing them in separate containers for up to around 3 days, and assemble the wraps when ready.

Also worth trying: our vegan sloppy joes.

Other delicious vegan lunch recipes

  • Sweet potato soup, if you're after something cosy!
  • Falafel - these make an amazing addition to pitta bread, wraps and sandwiches.
  • Butter bean sweet potato stew - this is a great comforting meal that's ready in no time!
  • My vegan lentil burgers are easy to make and super flavourful.
  • For a delicious taco filling, try this vegan walnut taco meat - hearty, protein-rich, and packed with Tex-Mex flavor.
  • So are avocado wraps with chickpeas!
Vegan Crunchwrap supreme 1

Let me know in the comments: what's your favourite plant based lunch? If you give this vegan Crunchwrap Supreme recipe a go, be sure to tag me on Instagram (@earthofmariaa), and leave your feedback in the comments below

Recipe

Vegan Cruchwrap Supreme

5 from 3 votes
This vegan Crunchwrap Supreme is made with tempeh, dairy-free nacho 'cheese', rice and avocado. It's easy to make and perfect for a plant based lunch that's ready in 30 minutes!
Print Pin Save Saved!
Prep Time: 10 minutes minutes
Cook Time: 15 minutes minutes
0 minutes minutes
Total Time: 25 minutes minutes
Servings: 2 crunchwraps
Prevent your screen from going dark

Equipment

  • Frying pan
  • Saucepan
  • Whisk

Ingredients

For the smoky tempeh filling

  • 1 tablespoon olive oil
  • 1 medium onion diced
  • 2 cloves garlic minced
  • 5 oz tempeh crumbled
  • ½ cup fresh sweetcorn
  • 2 tablespoon tomato paste
  • 2 tablespoon tamari
  • 1 teaspoon cumin
  • 1 teaspoon smoked paprika

For the dairy-free nacho 'cheese' sauce

  • ½ cup coconut milk full-fat, from a tin
  • ½ teaspoon turmeric
  • ½ teaspoon salt
  • 3 tablespoon nutritional yeast
  • 1 tablespoon apple cider vinegar
  • 2 tablespoon cornstarch

Other ingredients to serve

  • ½ cup cooked rice
  • 1 large avocado mashed
  • ¼ cup vegan cheese grated
US Customary - Metric

Instructions

Make the tempeh filling

  • Heat the olive oil in a non-stick frying pan over a medium-high heat. Add the onion and garlic, cooking for 2-3 minutes, until softened.
  • Add the tempeh, sweetcorn, tomato paste, tamari, cumin and smoked paprika. Cook for 5 minutes, until the tempeh is lightly crispy.

Make the 'cheese' sauce

  • Add the coconut milk, turmeric, salt, nutritional yeast, apple cider vinegar and cornstarch to a saucepan. Whisk until the 'cheese' thickens.

Assemble the Crunchwraps

  • Place a large tortilla on a flat surface and add 3-4 tablespoon rice in the middle, spreading it out into a circle.
  • Add smoked tempeh on top, followed by a layer of mashed avocado. Finish with the homemade nacho 'cheese', and a sprinkle of grated vegan cheese.
  • Place a smaller tortilla on top and press down lightly. You can either buy a small tortilla at the store, or make your own by placing a round cup or cookie cutter in the centre of a large tortilla and cutting around the edges.
  • Fold the edges of the tortilla towards the centre until completely sealed. Press it down once again and flip.
  • Now use a spatula to transfer the Crunchwrap to a lightly greased frying pan. Cook for 3-4 minutes on each side over a medium-high heat, until crispy.

Video

Notes

Do not discard the rest of the tortilla when making the smaller circle - you can use it for homemade chips to dip in any leftover nacho 'cheese' sauce.

Nutrition (Estimate per Serving)

Calories: 737kcalCarbohydrates: 63gProtein: 29gFat: 46gSaturated Fat: 17gSodium: 1881mgPotassium: 1578mgFiber: 14gSugar: 7gVitamin A: 999IUVitamin C: 21mgCalcium: 157mgIron: 8mg
Vegan-ize any recipe!Grab our free vegan cheat sheet, packed with my favorite easy substitutions to make any recipe vegan.
Click here to pin this for later
  • « Previous Page
  • 1
  • 2
  • 3
  • 4
  • …
  • 7
  • Next Page »

Welcome!

Hi, I'm Nicole. I'm the creator behind VegKitchen, and the author of the popular cookbook, Weeknight One Pot Vegan Cooking.

About Me
vegan substitution chart

Featured Recipes

  • vegan lentil soup
    Sweet Potato Lentil Soup (Vegan & Vegetarian)
  • vegan hummingbird cake
    Vegan Hummingbird Cake
  • vegan jalapeno poppers
    Vegan Jalapeno Poppers
  • Sticky Sesame Cauliflower
  • vegan irish stew
    Old-Fashioned Vegan Stew
  • vegan birthday cake
    Vegan Funfetti Cake

Footer

  • Shop Cookbooks
  • Free Vegan Cheat Sheet
  • About Us
  • Work with Me
  • Contact
  • Privacy Policy
  • Terms of Use

As an Amazon Associate I earn from qualifying purchases.

Copyright © 2026 VegKitchen.com

Rate This Recipe

Your vote:


A rating is required
A name is required
An email is required