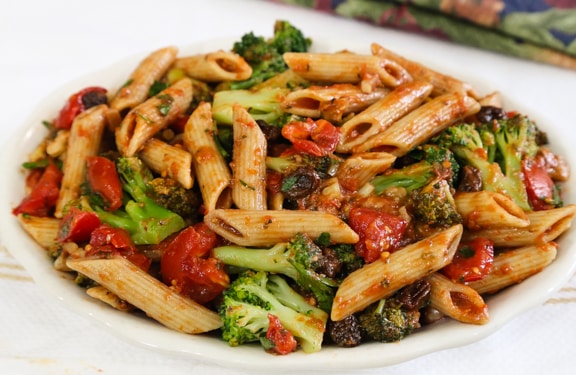
This pasta dish is filled with a variety of delicious flavors and textures - tomatoes walnuts, as well as along with healthful broccoli. Broccoli is loaded with calcium and vitamin C and nutrient-rich walnuts are a good source of alpha-linolenic acid, an essential omega-3 fatty acid. Recipe adapted from Vegan on the Cheap* by Robin Robertson © 2011, published by John Wiley & Sons. Photos by Evan Atlas.
Search Results for: tomato
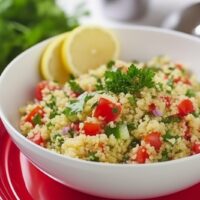
Pasta Salad with Broccoli, Tomatoes, and Red Beans
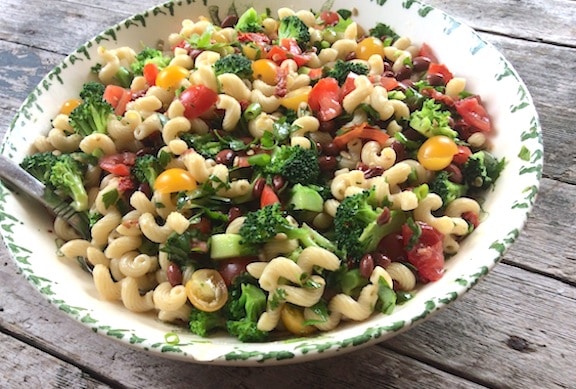
Here's an easy pasta salad featuring red beans and lots of fresh herbs, it's a great dish to make when summer tomatoes are at their best. It's also a good summer potluck dish when a sturdy vegan option is needed. Even though only a half pound of pasta is used, an abundance of veggies ensures that this goes a long way. [Read more...]
Angel Hair Pasta with Mushrooms and Tomatoes
Bold flavors mingle harmoniously in this flavorful dish featuring angel hair pasta with mushrooms and tomatoes. Serve with Mediterranean Bean Salad or a colorful green salad with added chickpeas.
Grits with Fresh Corn and Tomatoes
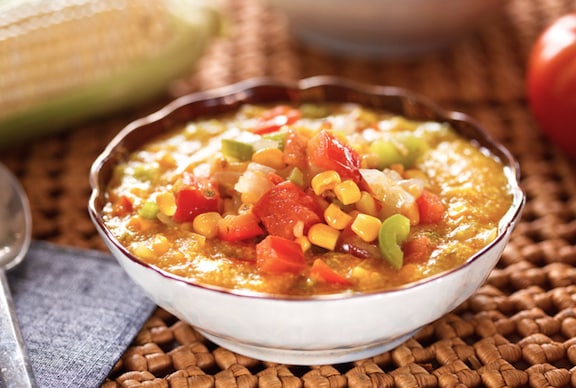
This combination of grits with fresh corn, tomatoes, and chili peppers is an inviting summer dish - good for a weekend brunch or for dinner. Stoneground grits are more flavorful than those available in supermarkets; they're available in natural food stores and well-stocked supermarkets with natural foods sections. Photos by Hannah Kaminisky. [Read more...]
Pan-Roasted Cauliflower with Dried Tomatoes
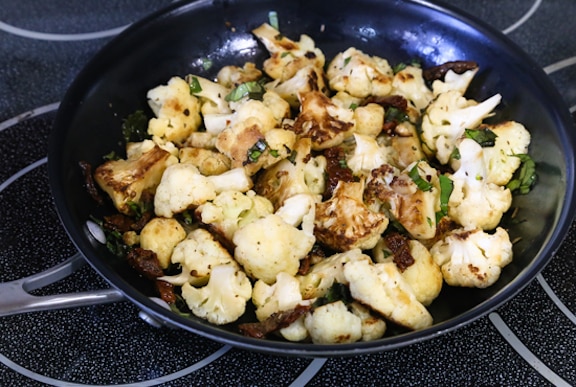
In our home, cauliflower is a favorite vegetable, right up there with kale and broccoli. We're more than glad to have it simply steamed, but pan-roasting it and adding dried tomatoes and basil is an easy way to dress it up.
Creole Tomatoes with Okra
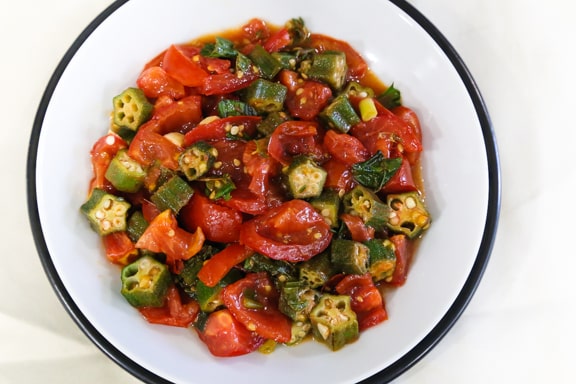
Okra is a vegetable that arguably requires an acquired taste. I learned to appreciate it pickled or fried while traveling through the South, as well as when it is combined with tomatoes, as in this classic Creole recipe. The acidity of the tomatoes seems to temper that unusual texture that us Yankees are so wary of. Photos by Evan Atlas. [Read more...]
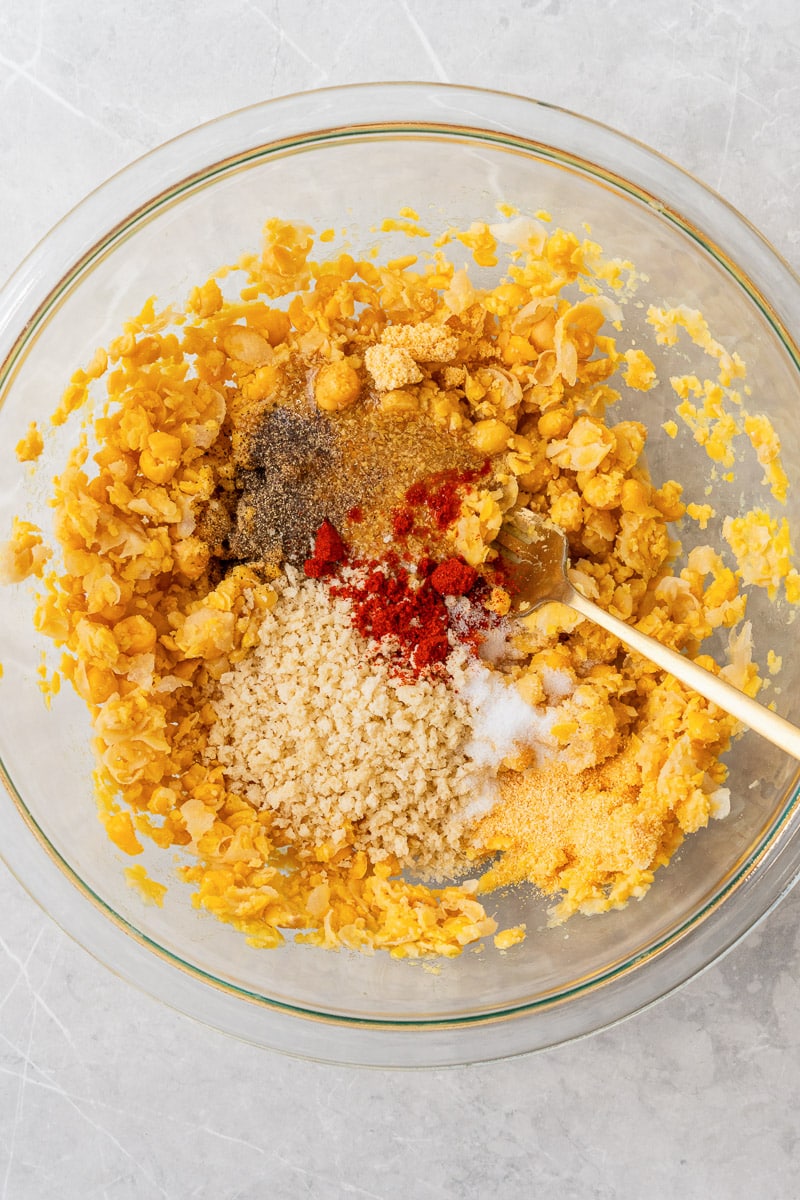
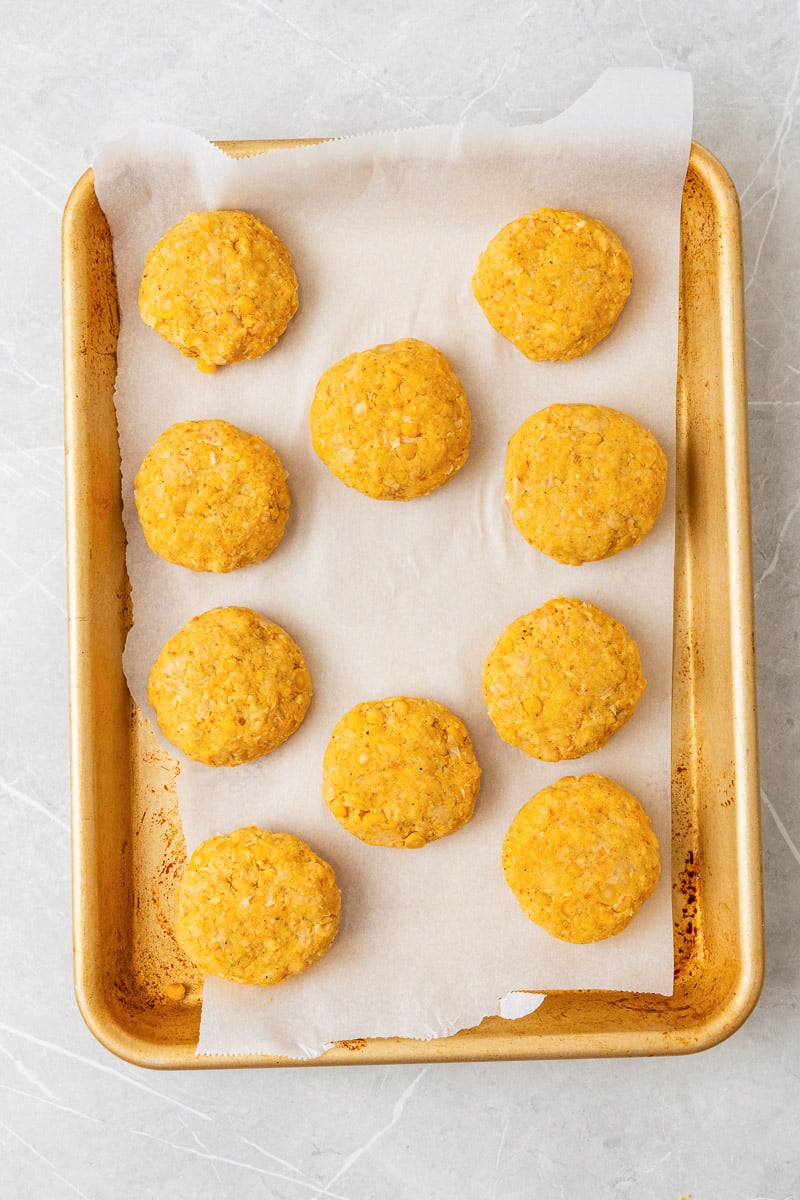
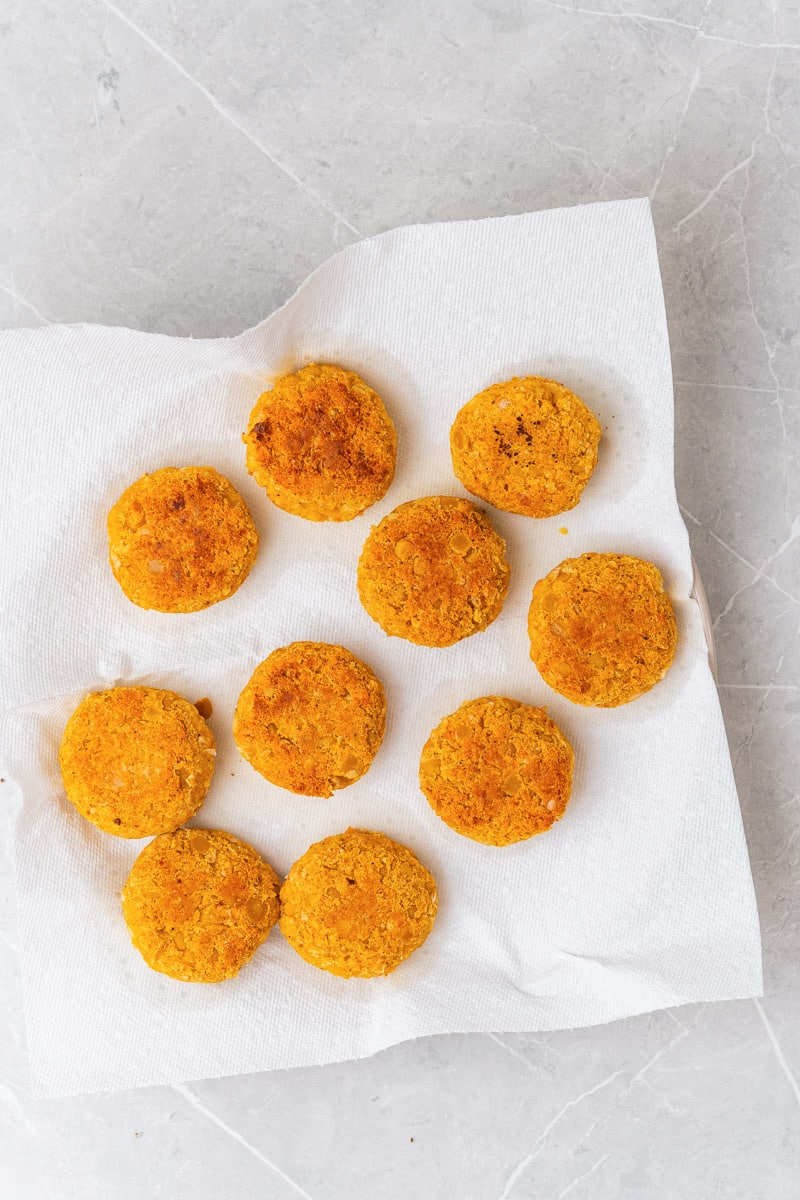
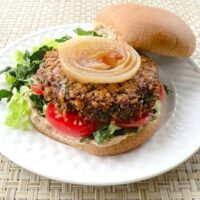
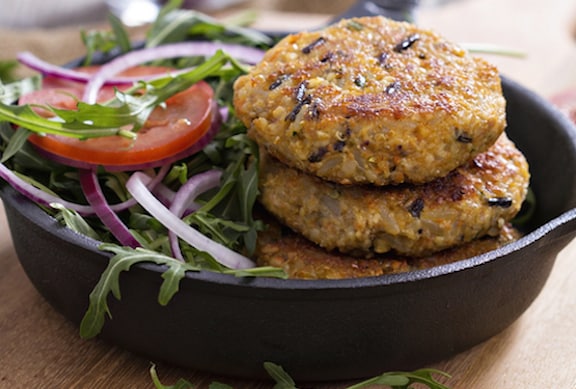
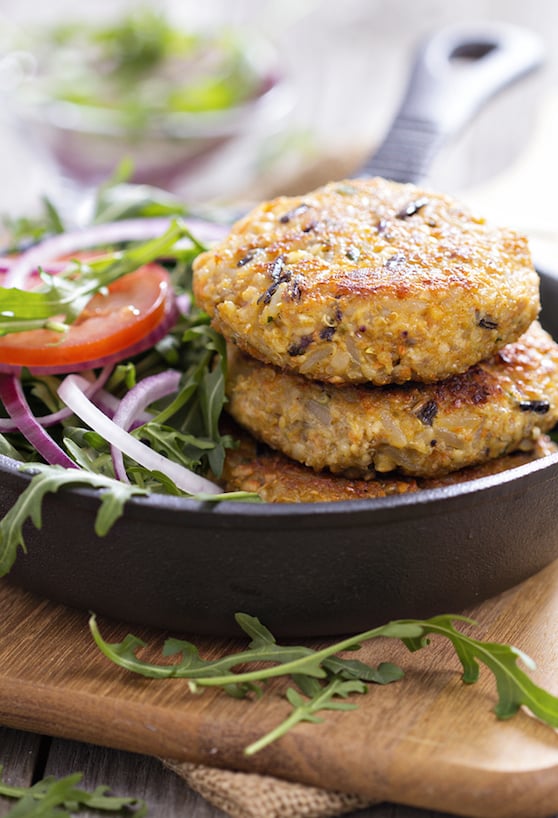
Vegan Chickpea Patties
Crispy, golden, and packed with plant-based protein, these Vegan Chickpea Patties are exactly what weeknight dinners were made for.

Key Ingredients & Substitutions
- Canned chickpeas. The base of the patty - they mash down into a hearty, cohesive texture. One 15 oz can works perfectly. You can use dried chickpeas if you cook them first (about 1½ cups cooked). White beans or cannellini beans make a good substitute if chickpeas aren't on hand.
- Panko breadcrumbs. Panko keeps the patties light and gives them a crispy crust. Regular breadcrumbs work too, but panko is worth it for the texture. For gluten-free, use certified gluten-free breadcrumbs or crushed gluten-free crackers.
- Flax egg. One tablespoon of flax meal whisked with 3 tablespoons of water makes a great egg replacer that binds everything together. Let it sit for 5 minutes before adding. A chia egg (same ratio with chia seeds) works as a swap.
- Smoked paprika. Adds a subtle smoky depth that really makes these patties stand out. Regular sweet paprika can be used instead, though you'll miss a little of that smokiness.
- Garlic and onion powder. The seasoning backbone. The powder keeps the texture uniform and the patties easy to form - fresh garlic and shallot work too if that's what you have.
- Olive oil. For pan-frying to a golden crisp. Coconut oil, avocado oil, or canola oil all work if you prefer.

Helpful Tips
Don't skip the chilling step. After forming your patties, refrigerate them for at least 30 minutes. This helps the flax egg bind fully and firms up the mixture so the patties hold their shape in the pan. You can even chill them overnight - they'll only be better for it.
Mash, don't puree. Whether you use a fork or a food processor, you want the chickpeas roughly mashed with some texture remaining - not a smooth paste. A little chunkiness is what gives these patties their hearty bite. If you're using a food processor, a few quick pulses is all it takes.
Give them space in the pan. Cook the patties in batches rather than crowding the skillet. Crowding drops the pan temperature and leads to steamed, soggy patties instead of the golden crust you're after. Medium heat with a good coat of oil is the sweet spot - 3 to 4 minutes per side.
Bake or grill if you prefer. Pan-frying gives the crispiest result, but these patties are also great baked at 375°F for 20-25 minutes (flip halfway through), or grilled over medium heat for 4-6 minutes per side.
Make them ahead. The uncooked patties keep well in a covered container in the fridge for up to 2 days before cooking. This makes them ideal for meal prepping - pull them out and cook when you're ready to eat.

Variations
- Mediterranean. Add 1 teaspoon of cumin and ½ teaspoon of coriander to the mix, plus a squeeze of lemon zest. Serve with hummus and warm pita.
- Asian-inspired. Stir in 1 tablespoon of soy sauce, 1 teaspoon of sesame oil, a pinch of ginger, and a tablespoon of sesame seeds for a savory, nutty twist.
- Spicy. Add ½ teaspoon of chili flakes or swap the smoked paprika for hot smoked paprika to bring some heat.
- Italian. Mix in 1 teaspoon of dried oregano, ½ teaspoon of dried basil, and 2 tablespoons of finely chopped sun-dried tomatoes for a rich, herby flavor.
- Gluten-free. Replace the panko with certified gluten-free breadcrumbs or crushed gluten-free crackers - same amount, same method.
- Extra veggie. Fold in ¼ cup of finely grated zucchini or carrot (squeeze out excess moisture first) for extra nutrition and color.

Serving Ideas
The most obvious move is to serve these as veggie burgers - stack them on toasted buns with lettuce, tomato, red onion, and your favorite condiments. They pair especially well with a tangy vegan aioli or this Easy Vegan Duck Sauce for dipping.
They're also wonderful crumbled over a big green salad for a protein-packed lunch, or served alongside Easy Vegan Coleslaw for a satisfying plate that works for weeknights and cookouts alike. If you're a chickpea fan, you'll also love this Vegan Chickpea Salad for an easy no-cook option. If you love chickpeas in a more saucy, warming dish, our vegan chana masala or these masala lentils are both must-tries. For more patty inspiration, also check out our best vegan burger recipes. And for a quick homemade dressing to serve alongside any salad, our garlic mustard vinaigrette is a pantry staple. For a lighter, grain-free option, also try our cauliflower fried rice.
For something more casual, skip the bun and serve the patties as an appetizer with a variety of dipping sauces on the side. They disappear fast at parties.
Storing & Freezing
Leftover cooked patties can be stored in an airtight container in the refrigerator for up to 4 days. To reheat, pop them in a skillet over medium heat for a couple of minutes per side to get that crispy exterior back - avoid the microwave, which tends to make them soft and soggy.
These patties freeze well. Let them cool completely, then layer between pieces of parchment paper in a freezer-safe container. They'll keep for up to 3 months. Reheat straight from frozen in a 375°F oven for about 15 minutes, or in a skillet over medium-low heat until warmed through.


More Vegan Burgers & Patties
If you loved these chickpea patties, here are a few more vegan burgers worth trying:
- Vegan Chipotle Black Bean Burgers
- Vegan Quinoa Mushroom Burger
- Vegan Beet Burgers
- Easy Vegan Portobella Burgers
- Best Vegan Burger Recipes
Recipe

Vegan Chickpea Patties
These crispy Vegan Chickpea Patties are golden on the outside, hearty on the inside, and ready in under 30 minutes. Perfect as veggie burgers, a protein-packed salad topper, or a crowd-pleasing appetizer.
Print
Pin
Save
Servings: patties
Ingredients
- 15 oz canned chickpeas drained and rinsed
- ¾ cup panko breadcrumbs
- 1 tablespoon flax meal mixed with 3 tablespoons water to make a flax egg
- 1 teaspoon garlic powder
- 1 teaspoon onion powder
- ½ teaspoon salt
- ¼ teaspoon smoked paprika
- ¼ teaspoon black pepper
- olive oil for frying
Instructions
- In a large bowl, use a fork to mash the chickpeas until they are all smashed. Alternatively, use a food processor to pulse them a few times until chopped but not pasty.
- In a small bowl, whisk together the flax meal and water. Let sit for 5 minutes until thickened into a flax egg.
- Add the panko, flax egg, garlic powder, onion powder, salt, smoked paprika, and black pepper to the mashed chickpeas and stir until evenly combined.
- Form the mixture into small patties and place on a lined baking sheet. Refrigerate for at least 30 minutes to firm up.
- Heat a skillet over medium heat and add enough olive oil to coat the bottom. Cook the patties in batches for 3–4 minutes per side, until golden brown and heated through.

- Transfer to a paper towel-lined plate to absorb any excess oil.
- Serve warm with your favorite dipping sauce or on toasted buns as veggie burgers.
Nutrition (Estimate per Serving)
Calories: 61kcalCarbohydrates: 10gProtein: 3gFat: 1gSaturated Fat: 0.3gPolyunsaturated Fat: 1gMonounsaturated Fat: 1gSodium: 152mgPotassium: 81mgFiber: 2gSugar: 0.4gVitamin A: 6IUVitamin C: 0.1mgCalcium: 26mgIron: 1mg
Vegan-ize any recipe!Grab our free vegan cheat sheet, packed with my favorite easy substitutions to make any recipe vegan.
Also try: our Tomato Relish Salad With Oregano And Thyme.
Also try: our Quinoa And Wild Rice Burgers.
Also try: our Olive And Sun Dried Tomato Tapenade.
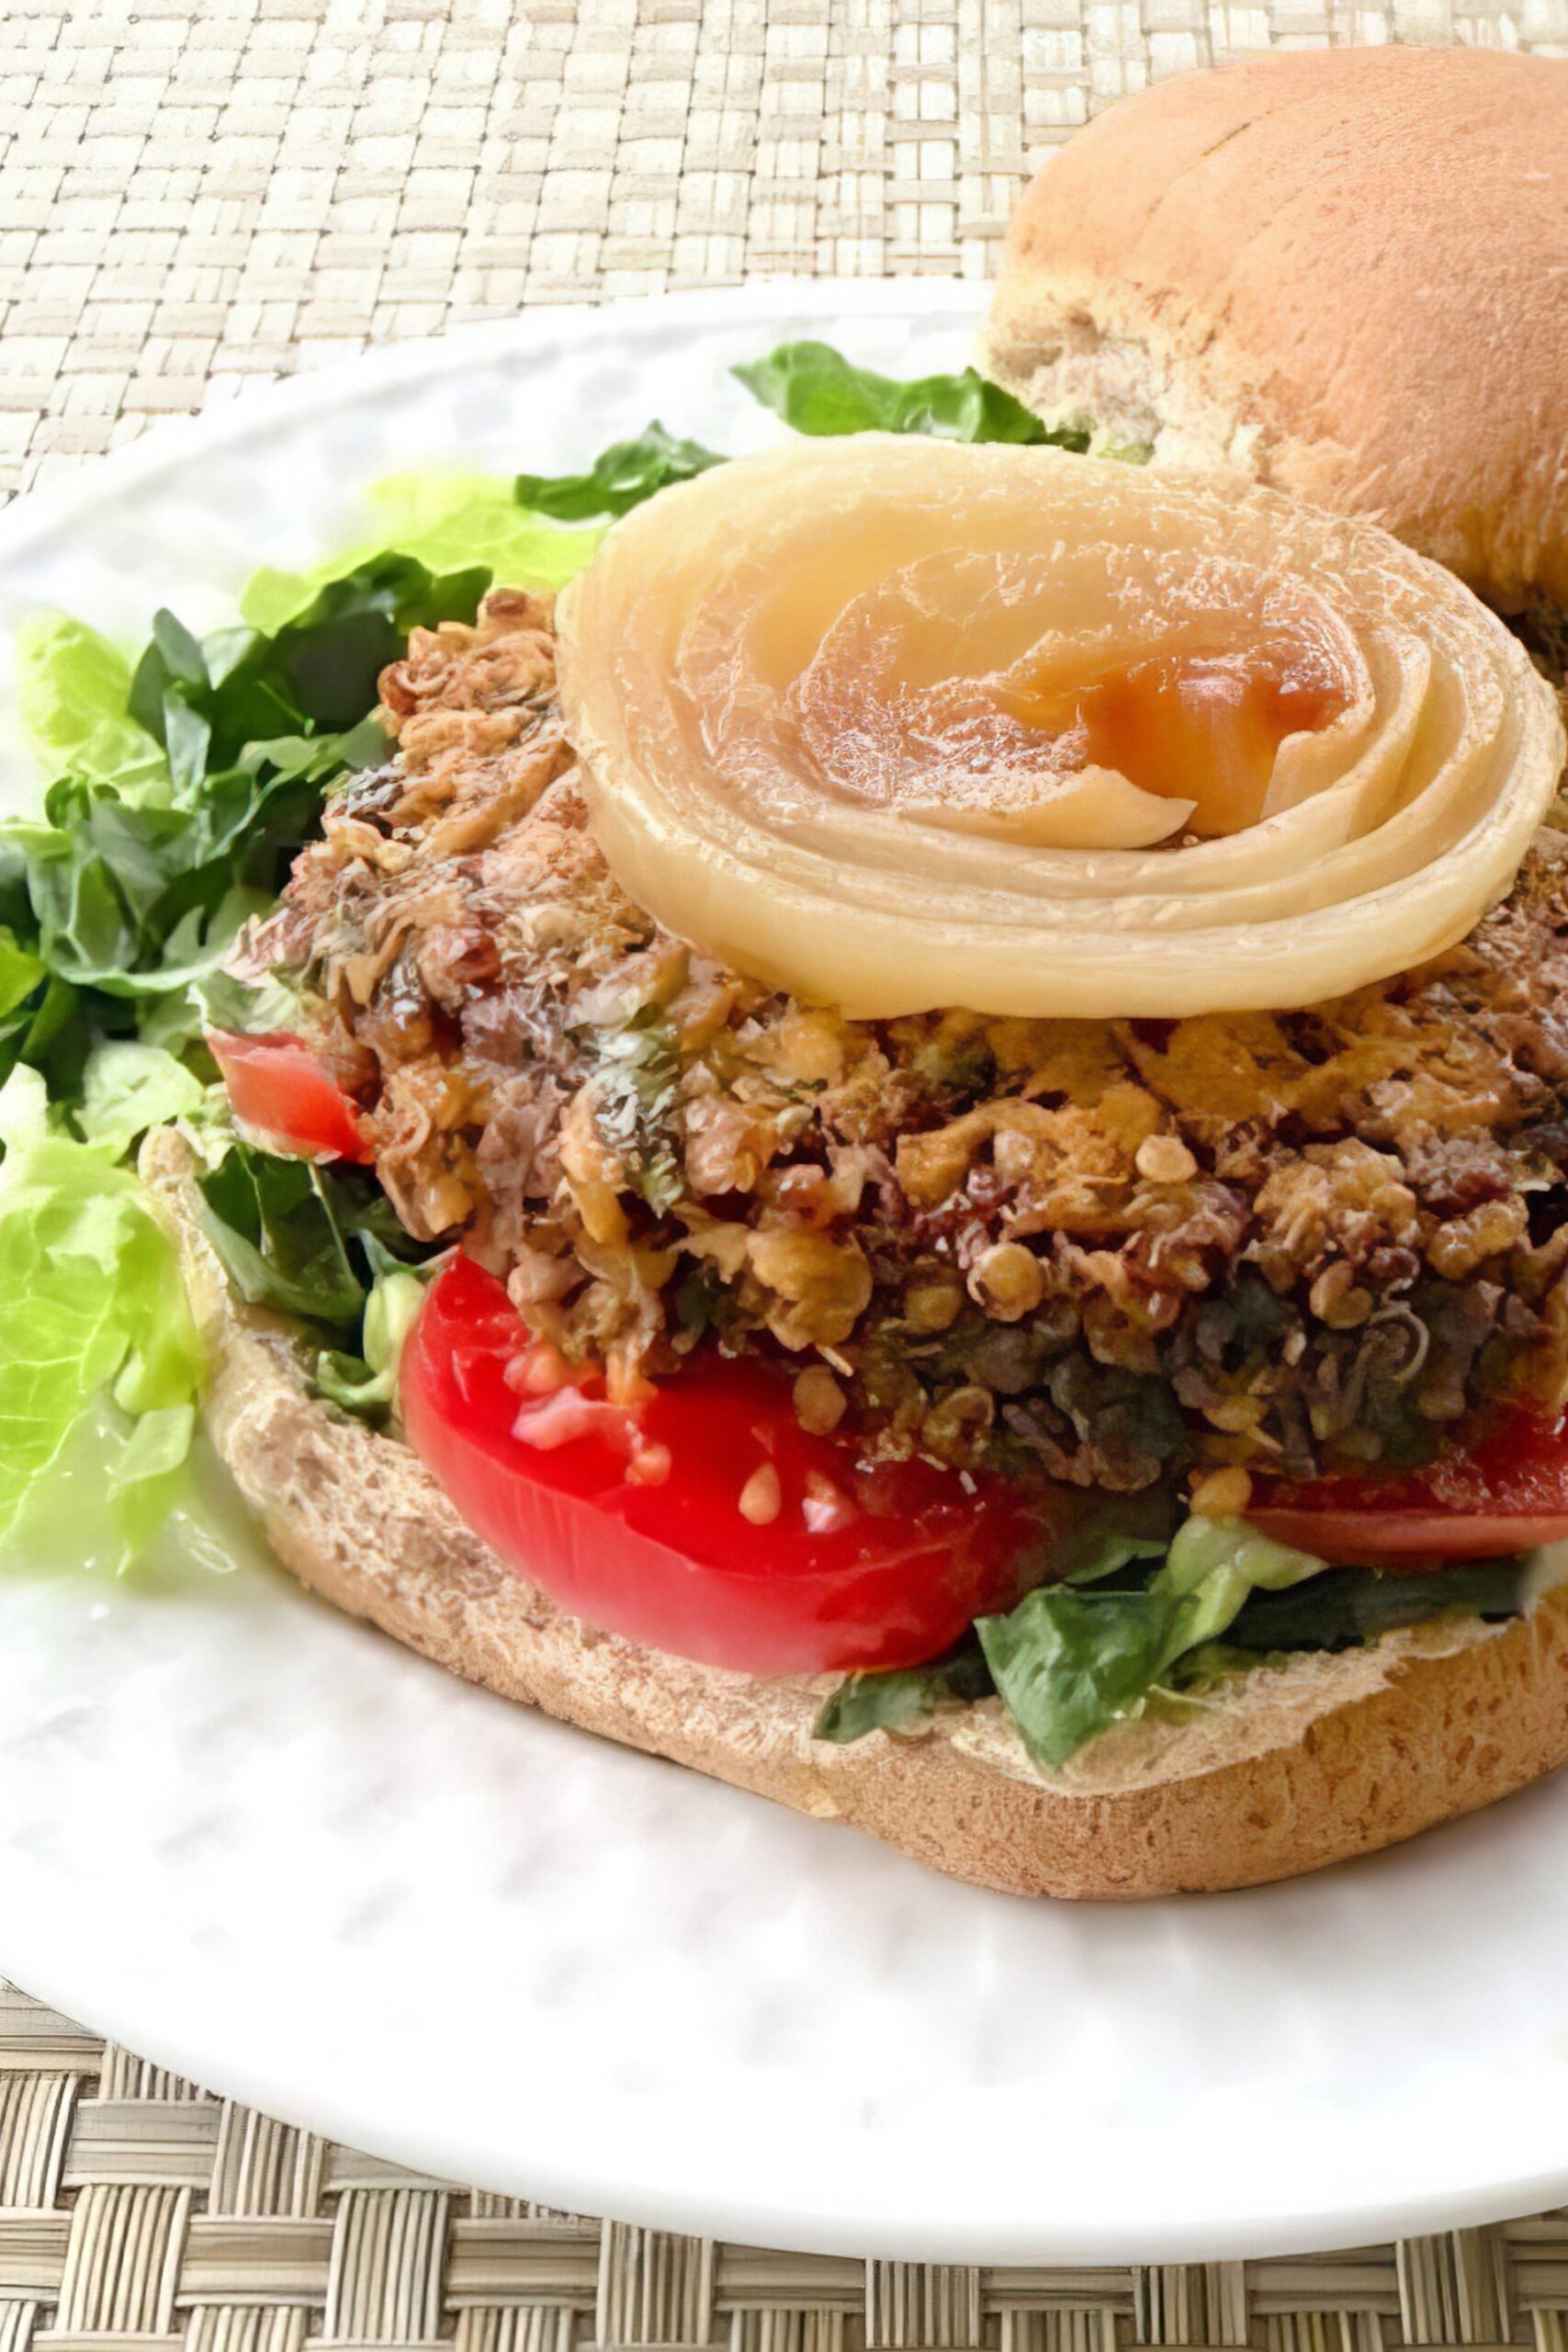
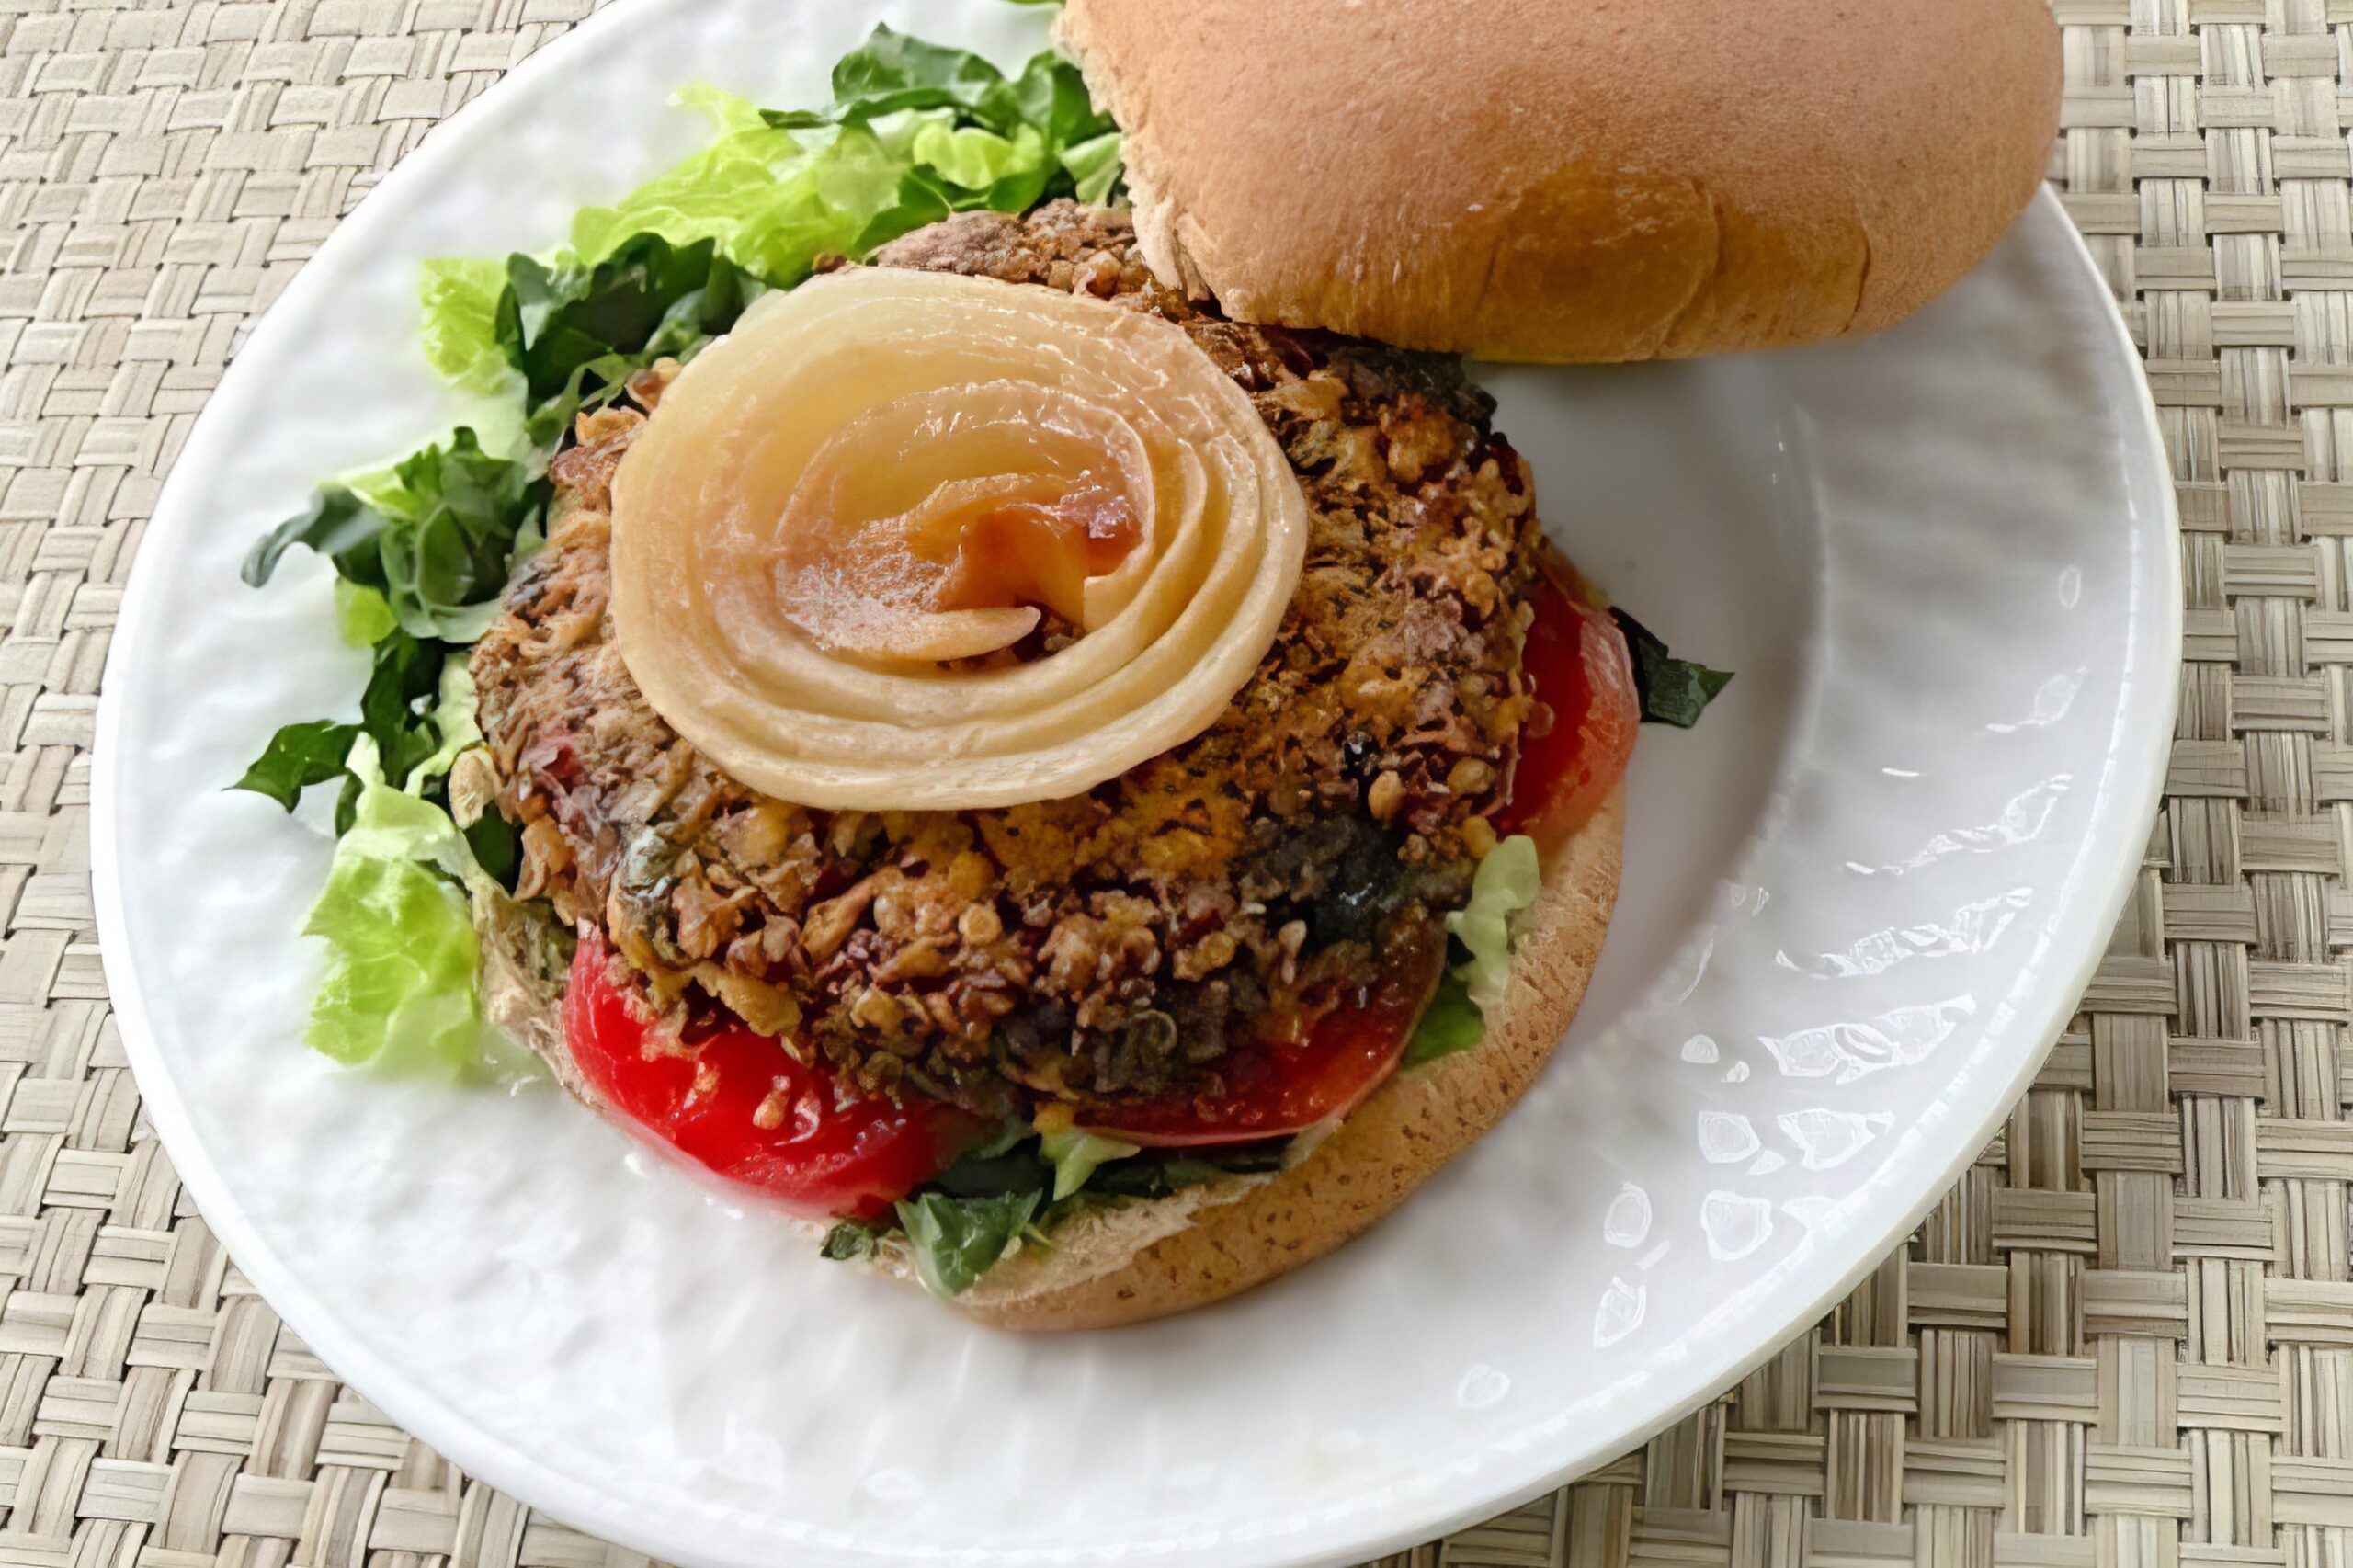
Vegan Quinoa Mushroom Burger
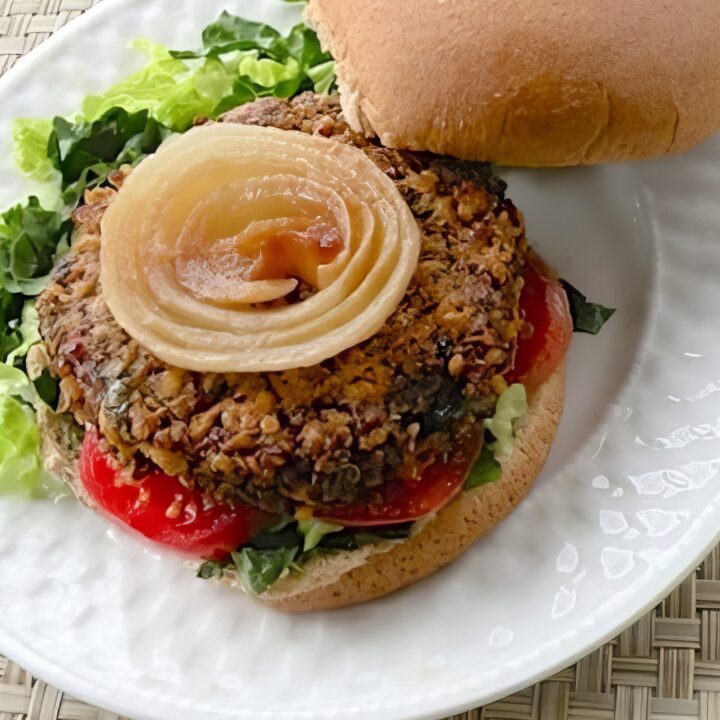
These vegan quinoa mushroom burgers are hearty, protein-packed, and deeply savory - the kind of burger that wins over skeptics without trying to imitate meat.
Key Ingredients & Substitutions
- Quinoa. Cooked quinoa gives the burgers structure and a mild, nutty flavor while packing in complete protein. Any color of quinoa works - white, red, or tri-color. Leftover cooked quinoa is perfect here.
- Brown lentils. Lentils add earthiness, protein, and binding power. Use canned lentils (drained and rinsed) to save time, or cook them from dry. Green lentils work equally well.
- White mushrooms. Chopped and sautéed mushrooms add a savory, meaty depth that makes these burgers genuinely satisfying. Cremini or baby bella mushrooms can be swapped in for even more flavor.
- Marinara sauce. Acts as a binder and adds moisture and flavor. Any jarred or homemade marinara works. Tomato paste thinned with a little water is a quick substitute.
- Quick-cooking oats. Help bind everything together and keep the texture cohesive. Quinoa flakes make a great gluten-free swap.
- Mesquite seasoning. This is the secret flavor weapon - smoky, bold, and deeply savory. Any barbecue-style seasoning blend works in its place.
Helpful Tips
Prep grains ahead. The quinoa and lentils can both be cooked a day or two in advance and kept in the fridge. This turns what feels like a project into a quick weeknight dinner - the actual assembly and baking takes under 45 minutes once everything is cooked.
Don't over-process the mushroom-lentil mixture. You want the food processor to chop the mixture finely, not puree it. Pulse in short bursts and stop when it looks coarsely ground. A little texture goes a long way toward a better burger.
Use a measuring cup to shape. A round ½-cup measuring cup coated lightly with cooking spray makes perfectly uniform patties every time. Invert onto parchment and flatten to about ½ inch thick. For sliders, use a ¼-cup measure instead.
Let them cool slightly before serving. These burgers firm up considerably as they cool - they're more cohesive and easier to eat after 5 minutes out of the oven than straight off the sheet pan.
They freeze beautifully. Bake a full batch, cool completely, then freeze in a single layer on a sheet pan before transferring to a zip bag. Reheat from frozen in a 375°F oven for 10-12 minutes, or in a skillet over medium heat.
Also worth trying: our gently curried tofu burgers.
Variations
- Smoky chipotle version. Add 1-2 teaspoons of chipotle powder and swap the marinara for salsa for a spicy Southwestern spin. These pair great with guacamole and lime.
- Italian-style. Season with Italian herbs (oregano, basil, fennel seed) and swap the mesquite for sun-dried tomato paste. Serve with marinara for dipping instead of ketchup.
- Mushroom-walnut burgers. Replace half the lentils with finely chopped toasted walnuts for extra richness and a slightly meatier texture.
- Pan-fried version. Shape into thinner patties and cook in a little olive oil over medium heat for 3-4 minutes per side until golden and crispy on the outside.
- Slider size. Use a ¼-cup measure and reduce the baking time slightly - about 12 minutes per side. Perfect for parties or lunchboxes.
Serving Ideas
Serve on whole-grain buns or toasted English muffins with classic burger fixings - mustard, ketchup, shredded lettuce, sliced tomato, and red onion. A smear of Copycat Vegan Big Mac Sauce takes things to the next level. A dollop of Quick Tartar Sauce also works surprisingly well with the savory mushroom flavor.
These are just as good served without a bun - try them over a bed of greens with a drizzle of your favorite dressing, or alongside Easy Vegan Coleslaw and roasted sweet potatoes for a full plate. Since they hold up at room temperature, they're great for meal prep and pack well for lunch.
Storing & Freezing
Store leftover burgers in an airtight container in the refrigerator for up to 4 days. Reheat in a skillet over medium heat or in a 350°F oven for about 10 minutes. They're also surprisingly good eaten cold or at room temperature straight from the fridge.
These burgers freeze exceptionally well. Cool them completely, then freeze flat on a baking sheet until solid before transferring to a freezer bag or container. They'll keep for up to 3 months. Reheat directly from frozen in the oven at 375°F for 10-12 minutes per side, or thaw overnight in the fridge first.
More Vegan Burger Recipes
If you loved this recipe, check out our full collection of the best vegan burger recipes, including our easy portobello burgers and our vegan beet burgers - or here are a few more individual favorites:
- Vegan Chipotle Black Bean Burgers
- Baked Chickpea Burgers
- Vegan Chickpea Patties
- Easy Vegan Portobella Burgers
- Best Vegan Burger Recipes
Recipe
Vegan Quinoa Mushroom Burger
These hearty vegan quinoa mushroom burgers are packed with protein from quinoa and lentils, with savory mushrooms and bold smoky seasonings. Easy to make ahead and freezer-friendly.
Print
Pin
Save
Servings: burgers
Ingredients
- 1 tablespoon olive oil
- 1 onion finely chopped
- 2 cloves garlic minced
- 8 ounces white mushrooms cleaned and coarsely chopped
- 1 ½ cups cooked brown lentils or one 15-oz can, drained and rinsed
- 2 cups cooked quinoa
- ½ cup marinara sauce jarred or homemade
- ⅔ cup quick-cooking oats or quinoa flakes for gluten-free
- 1 teaspoon smoked paprika
- 2 teaspoons mesquite seasoning or other barbecue-style seasoning blend
- 1 teaspoon garlic powder
- 1 teaspoon onion powder
- salt and pepper to taste
Instructions
- Preheat the oven to 425°F. Line a baking sheet with parchment paper.
- Heat the oil in a medium skillet over medium heat. Add the onion and sauté until translucent, about 5 minutes. Add the garlic and continue cooking until the onion is golden, 2–3 minutes more.
- Add the mushrooms to the skillet and cover. Cook until wilted, about 5 minutes. Drain any liquid from the skillet, then transfer the mushroom-onion mixture to a food processor along with the cooked lentils. Pulse on and off until the mixture is finely chopped but not pureed.
- Transfer the mixture to a large bowl. Add the cooked quinoa, marinara sauce, oats, smoked paprika, mesquite seasoning, garlic powder, and onion powder. Season with salt and pepper. Mix until evenly combined.
- Lightly oil a round ½-cup measuring cup. Scoop a level portion of the mixture and invert onto the prepared baking sheet, tapping firmly to release. Flatten to about ½-inch thickness with the bottom of the cup. Repeat with remaining mixture.
- Bake for 15 minutes, then carefully flip each burger and bake for another 10–15 minutes, until golden and firm on each side. Let cool for 5 minutes before serving.
Nutrition (Estimate per Serving)
Calories: 103kcalCarbohydrates: 13gProtein: 3gFat: 3gPolyunsaturated Fat: 1gMonounsaturated Fat: 1gSodium: 18mgPotassium: 208mgFiber: 2gVitamin A: 14IUCalcium: 13mgIron: 1mg
Vegan-ize any recipe!Grab our free vegan cheat sheet, packed with my favorite easy substitutions to make any recipe vegan.
Vegan Curried Tofu Burgers

These vegan curried tofu burgers come together in minutes, pack a warm, gentle spice, and cook up golden-crisp in a skillet - no oven required.
Key Ingredients & Substitutions
- Soft tofu. The base of the burger - drained well and crumbled finely. Soft tofu gives a tender, moist interior. Firm tofu can be used in a pinch (crumble it very fine), though the texture will be a bit denser. Make sure to press or drain the tofu thoroughly; excess moisture leads to patties that won't hold together.
- Oats and wheat germ. This two-part starch base is what gives the patties structure. The oats absorb the boiling water and act as a binder; the wheat germ adds a nutty depth and helps soak up moisture from the tofu. All oats work fine if you don't have wheat germ, or swap in quinoa flakes for a gluten-free version.
- Curry powder. The signature flavor - use 1½ teaspoons for a mild, friendly heat or up to 2½ teaspoons for a more assertive curry note. Any good-quality curry powder works. Garam masala can be substituted for a warmer, more complex flavor profile.
- All-purpose seasoning blend. Adds background savory depth without any one spice dominating. Mrs. Dash or Frontier are the classics here; you can substitute a pinch of garlic powder, onion powder, and dried thyme if needed.
- Scallions. A mild, fresh onion note that ties everything together. Chives work well as a substitute, or use 2 tablespoons of finely minced red onion.
- Sesame seeds. Optional but highly recommended - sprinkled on before cooking, they toast in the oil and add a subtle nutty crunch to the exterior.
Helpful Tips
Drain the tofu really well. This is the most important step. Press the tofu between paper towels or a clean kitchen towel and press firmly for a minute or two before crumbling. The drier the tofu, the better the patties hold together. If the mixture feels too wet after mixing, stir in a tablespoon of extra oats.
Let the oats absorb fully before mixing. Give the oats their full 5 minutes in the boiling water before adding anything else. Rushing this step means the oats won't hydrate completely, and the patties won't bind as well. The mixture should look thick and slightly porridge-like before you add the tofu.
Don't make the patties too thick. Ladle the mixture in ¼-cup portions and flatten each one to about ½-inch thickness. Thicker patties don't cook through evenly - the outside browns before the inside sets, and you end up with a soft, crumbly center.
Use a nonstick pan and medium heat. These patties are delicate compared to bean-based burgers. A nonstick surface means you can use less oil and the patty is less likely to stick and break when you flip it. Medium heat is the sweet spot - high heat browns the outside too fast before the patty sets.
These are kid-friendly. The curry level here is gentle enough that children tend to love these at room temperature, almost like a soft finger food. You can reduce the curry powder to 1 teaspoon for even milder flavor, and the sesame seeds can be left off for littler ones.
Variations
- Make them spicier. Add a pinch of cayenne or a small amount of chili garlic sauce to the mix. Pair with a cooling raita-style dip - coconut yogurt with cucumber and mint does the job beautifully.
- Add diced red pepper. Stir in 3 tablespoons of finely diced red bell pepper for a little sweetness and color. Make sure to dice it small so the patties hold their shape.
- Use extra-firm tofu. For a chewier, meatier texture, use pressed extra-firm tofu crumbled very fine. The patties will be slightly denser but hold together even better.
- Thai-inspired version. Swap the curry powder for 1 teaspoon of Thai curry paste, add a tablespoon of soy sauce, and finish with a squeeze of lime. Serve with vegan duck sauce or sweet chili sauce.
- Baked version. Line a baking sheet with parchment, brush both sides of the patties with oil, and bake at 400°F for 15 minutes per side. The exterior won't be quite as crisp but the hands-off approach is useful when making a large batch.
- Mini sliders. Drop the mixture in 2-tablespoon portions for tiny slider patties - great for a party platter with a variety of dipping sauces.
Serving Ideas
These are delicious the classic burger way - on a whole-grain bun with lettuce, sliced tomato, and vegan mayo or a drizzle of copycat vegan burger sauce. They're equally at home tucked into a pita with shredded cabbage, pickled red onion, and tahini for a Middle Eastern-inspired wrap. A simple yogurt-cucumber sauce made from coconut yogurt works beautifully with the curry spices.
Because the flavor is mild and warming rather than boldly spiced, these also make a great side dish alongside a quick vegetable curry, a pot of lentil dal, our aloo gobi, or our vegan chana masala - the warm spices echo beautifully. They pair especially well with a simple grain salad or a pile of roasted cauliflower. Children tend to love them at room temperature, plain or with a little ketchup on the side - they're soft enough to eat out of hand.
Storing & Freezing
Store cooked patties in an airtight container in the refrigerator for up to 3 days. To reheat, warm in a lightly oiled skillet over medium-low heat for 2-3 minutes per side. Avoid the microwave - it makes the exterior soft and steams out the texture that makes these so good.
These freeze well after cooking. Let them cool completely, then freeze in a single layer on a lined baking sheet before transferring to a freezer bag. They'll keep for up to 3 months. Reheat from frozen in a 375°F oven for about 15 minutes, flipping once, or thaw overnight in the fridge and reheat in a skillet.
More Vegan Burger Recipes
If you loved this recipe, check out our full collection of the best vegan burger recipes, including our easy portobello burgers and our quinoa lentil mushroom burgers - or here are a few more individual favorites:
- Vegan Chipotle Black Bean Burgers
- Vegan Beet Burgers
- Vegan Quinoa Mushroom Burger
- Vegan Chickpea Patties
- Best Vegan Burger Recipes
Recipe

Vegan Curried Tofu Burgers
These vegan curried tofu burgers are mildly spiced, golden-crisp on the outside, and tender within — a versatile patty that works on buns, in pitas, or served solo with your favorite sauce.
Print
Pin
Save
Servings: patties
Ingredients
- ¼ cup quick-cooking oats or quinoa flakes for gluten-free
- 14-16 ounce soft tofu drained well and finely crumbled
- ¼ cup wheat germ or quick-cooking oats
- 2 teaspoons all-purpose seasoning blend such as Mrs. Dash
- 1½ teaspoons curry powder or to taste
- 2 scallions thinly sliced
- salt and freshly ground pepper to taste
- sesame seeds optional
- olive oil for the pan
Instructions
- Place the oats or quinoa flakes in a medium mixing bowl and cover with ½ cup boiling water. Let stand for 5 minutes.
- Add the crumbled tofu, wheat germ (or additional oats), seasoning blend, curry powder, scallions, salt, and pepper to the bowl. Stir until completely combined.
- Heat enough oil to coat a wide nonstick skillet or griddle over medium heat. Ladle the tofu mixture onto the skillet in ¼-cup portions and flatten each into a patty.
- Sprinkle with sesame seeds if using. Cook on both sides over medium heat until golden brown, about 4–5 minutes per side.
- Drain on paper towels briefly and serve warm or at room temperature on buns with your favorite condiments, or on their own.
Vegan-ize any recipe!Grab our free vegan cheat sheet, packed with my favorite easy substitutions to make any recipe vegan.
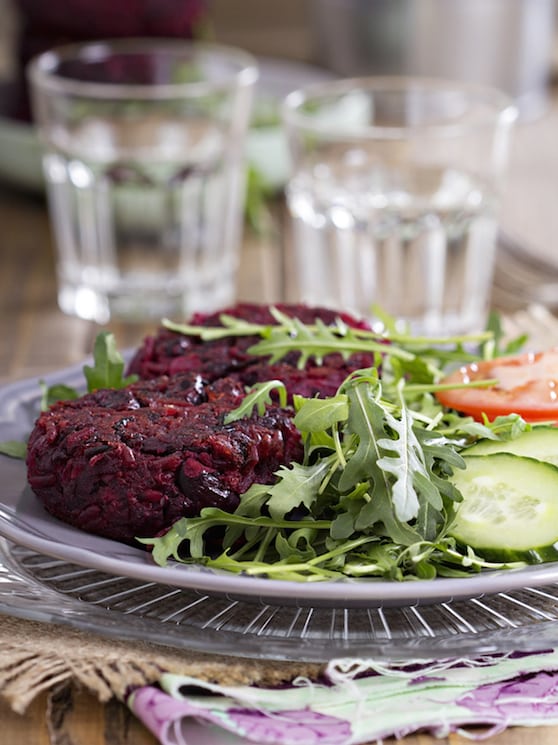
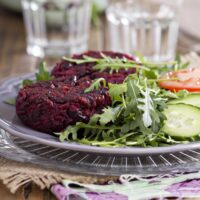
Vegan Beet Burgers
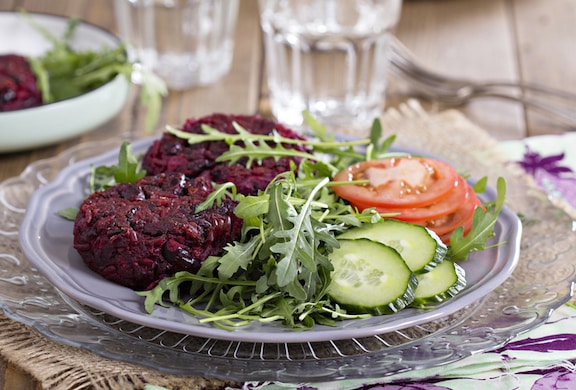
These vegan beet burgers are impossibly vibrant, packed with cumin and smoked paprika, and hearty enough to satisfy even the most skeptical dinner guest at the table.
Key Ingredients & Substitutions
- Fresh beets. The star of the show - cooked and then pulsed in the food processor to create that gorgeous deep-red base. You can microwave, boil, or roast the beets; all methods work, though roasting gives the most concentrated, sweet flavor. No need to peel before cooking - just scrub well and peel after.
- Kidney or red beans. These provide the binding and protein. Red kidney beans blend into the beet color seamlessly. Chickpeas or black beans can be substituted; black beans will give a slightly earthier flavor, while chickpeas yield a firmer, drier texture.
- Quick-cooking oats. Half are soaked in boiling water to act as a binder; the other half go in dry for extra texture. Certified gluten-free oats work for a GF version. Don't use rolled oats - they're too thick and won't blend properly.
- Smoked paprika. This is what takes these burgers from good to memorable. It adds a subtle smokiness that pairs beautifully with the earthy beet. Mesquite seasoning is a direct substitute, or use sweet paprika if smoked isn't available (though you'll lose that depth).
- Ground cumin. Adds warmth and a slightly nutty, savory quality. Don't skip it - it's part of what makes these taste like a real burger rather than just beet patties.
- Scallions. Provide a mild, fresh onion note on top of the sautéed red onion. You can substitute a bit of extra red onion, though scallions give a brighter flavor.
Helpful Tips
Don't over-process in the food processor. Pulse the mixture until finely chopped and combined - you want it cohesive but still with some texture. If you run the machine too long, you'll end up with a smooth paste that makes the patties dense and gummy rather than holding a pleasant, slightly chunky texture.
Pack the measuring cup tightly. The key to a patty that holds its shape is packing the beet mixture firmly into the measuring cup before inverting it onto the baking sheet. Loose packing leads to crumbling. A firm tap to release it, then a gentle press to flatten to about half an inch, and you're set.
Let them get a real crust before flipping. At the 15-minute mark, look for the edges to be visibly browning before you flip. A fully formed bottom crust is what keeps the burger intact through the second side of baking. If it looks pale, give it another 2-3 minutes.
Adjust seasonings before shaping. After mixing everything together, taste the unbaked mixture and bump up the cumin, paprika, or salt as needed. The flavors mellow a bit during baking, so it should taste slightly bold raw.
Pan-fry for an even crispier exterior. These bake beautifully, but for an extra-crisp crust, cook them in a thin layer of olive oil in a skillet over medium-high heat for about 4-5 minutes per side instead. The contact with the hot pan gives a darker, crunchier exterior.
Also worth trying: our garlic mustard vinaigrette.
Variations
- Add walnuts. Pulse ¼ cup of walnuts into the food processor along with the beets. They add healthy fat, a meaty richness, and help the patty hold together even better.
- Make them spicy. Add ¼ teaspoon of cayenne and a pinch of red pepper flakes. Serve with creamy vegan coleslaw to balance the heat.
- Slider version. Use a ¼-cup measure instead of ½-cup to make about 12 slider-sized patties. Great for parties - stack them on small buns with a swipe of hummus and a pickle.
- Mediterranean style. Add 2 tablespoons of chopped kalamata olives and swap the cumin for dried oregano. Serve in pita with tahini sauce and diced cucumber.
- Add quinoa. Replace ¼ cup of the oats with cooked quinoa for extra protein and a slightly nuttier flavor. The patties will be a bit more delicate, so handle carefully.
- Boost with sun-dried tomatoes. Add 2-3 oil-packed sun-dried tomatoes to the food processor. They deepen the umami and add a concentrated, savory richness.
Serving Ideas
These are stunning on a whole-grain bun - the deep red against white vegan mayo and green lettuce looks almost too good to eat. Load them up with classic burger toppings like sliced red onion, pickles, and mustard, or keep it simple with just avocado and a drizzle of copycat vegan burger sauce. A tangy vegan tartar sauce is also a classic pairing that Nicole has always recommended for these.
They work just as well without a bun. Serve them on a bed of mixed greens with beets and walnuts and a light lemon vinaigrette for a complete, restaurant-worthy plate. Or go the grain bowl route - break one patty up over cooked farro or quinoa with roasted vegetables and tahini dressing. The earthy beet flavor ties everything together beautifully.
Storing & Freezing
Store cooled patties in an airtight container in the refrigerator for up to 4 days. Reheat in a dry skillet over medium heat for 2-3 minutes per side, or in a 350°F oven for about 10 minutes. The skillet method gives the best results for reviving the exterior crust.
These freeze very well. Bake them fully and let them cool completely, then freeze on a lined baking sheet until solid before transferring to a zip-close bag. They'll keep for up to 3 months. Reheat from frozen in a 375°F oven for about 18 minutes, flipping once halfway through. No need to thaw first.
More Vegan Burger Recipes
If you loved this recipe, check out our full collection of the best vegan burger recipes or our vegan chickpea patties for a different style of vegan patty - or here are a few more individual favorites:
Also try: our Quinoa And Wild Rice Burgers.
- Vegan Chipotle Black Bean Burgers
- Vegan Beet & Brown Rice Burgers
- Vegan Quinoa Mushroom Burger
- Vegan Chickpea Patties
- Best Vegan Burger Recipes
Recipe
Vegan Beet Burgers
These vegan beet burgers are vibrant, hearty, and packed with flavor - with cumin, smoked paprika, and kidney beans rounding out that gorgeous deep-red beet base.
Print
Pin
Save
Servings: burgers
Ingredients
- 1 to 1¼ pounds beets 3-4 medium, scrubbed
- ½ cup quick-cooking oats divided
- 1 tablespoon olive oil
- 1 medium red onion chopped
- 2 cloves garlic thinly sliced
- 2 scallions chopped
- 15 ounce canned kidney beans drained and rinsed
- 1 teaspoon ground cumin
- 1 teaspoon sweet paprika
- 1 teaspoon smoked paprika or mesquite seasoning
- salt and freshly ground pepper to taste
Instructions
- Cook the beets using any preferred method - microwave, boil, or roast whole - until tender but not overdone. Plunge into cold water to cool, then peel and cut into chunks.
- Preheat the oven to 400°F. Line a baking sheet with parchment paper.
- Place half of the oats in a small bowl and cover with ¼ cup boiling water. Let stand until needed.
- Heat the oil in a small skillet over medium heat. Add the onion and sauté until translucent, about 5 minutes. Add the garlic and scallions and continue to sauté until soft and beginning to turn golden.
- In a food processor, combine the beets, onion mixture, both the soaked and dry oats, beans, cumin, and both kinds of paprika. Pulse until the mixture is evenly and finely chopped, scraping down the sides as needed.
- Transfer the mixture to a bowl. Taste and adjust seasonings, then season with salt and pepper.
- Lightly oil a ½-cup measuring cup and pack it firmly with the beet mixture. Invert onto the baking sheet with a sharp tap and flatten to about ½-inch thickness. Repeat with remaining mixture. (For smaller slider-sized burgers, use a ¼-cup measure.)
- Bake for 15 minutes until the bottom is starting to brown. Carefully flip each burger and bake for another 15 minutes until lightly browned on both sides. Serve hot or warm.
Nutrition (Estimate per Serving)
Calories: 6kcalCarbohydrates: 1gSodium: 1mgPotassium: 20mgSugar: 1gVitamin C: 1mgCalcium: 3mg
Vegan-ize any recipe!Grab our free vegan cheat sheet, packed with my favorite easy substitutions to make any recipe vegan.
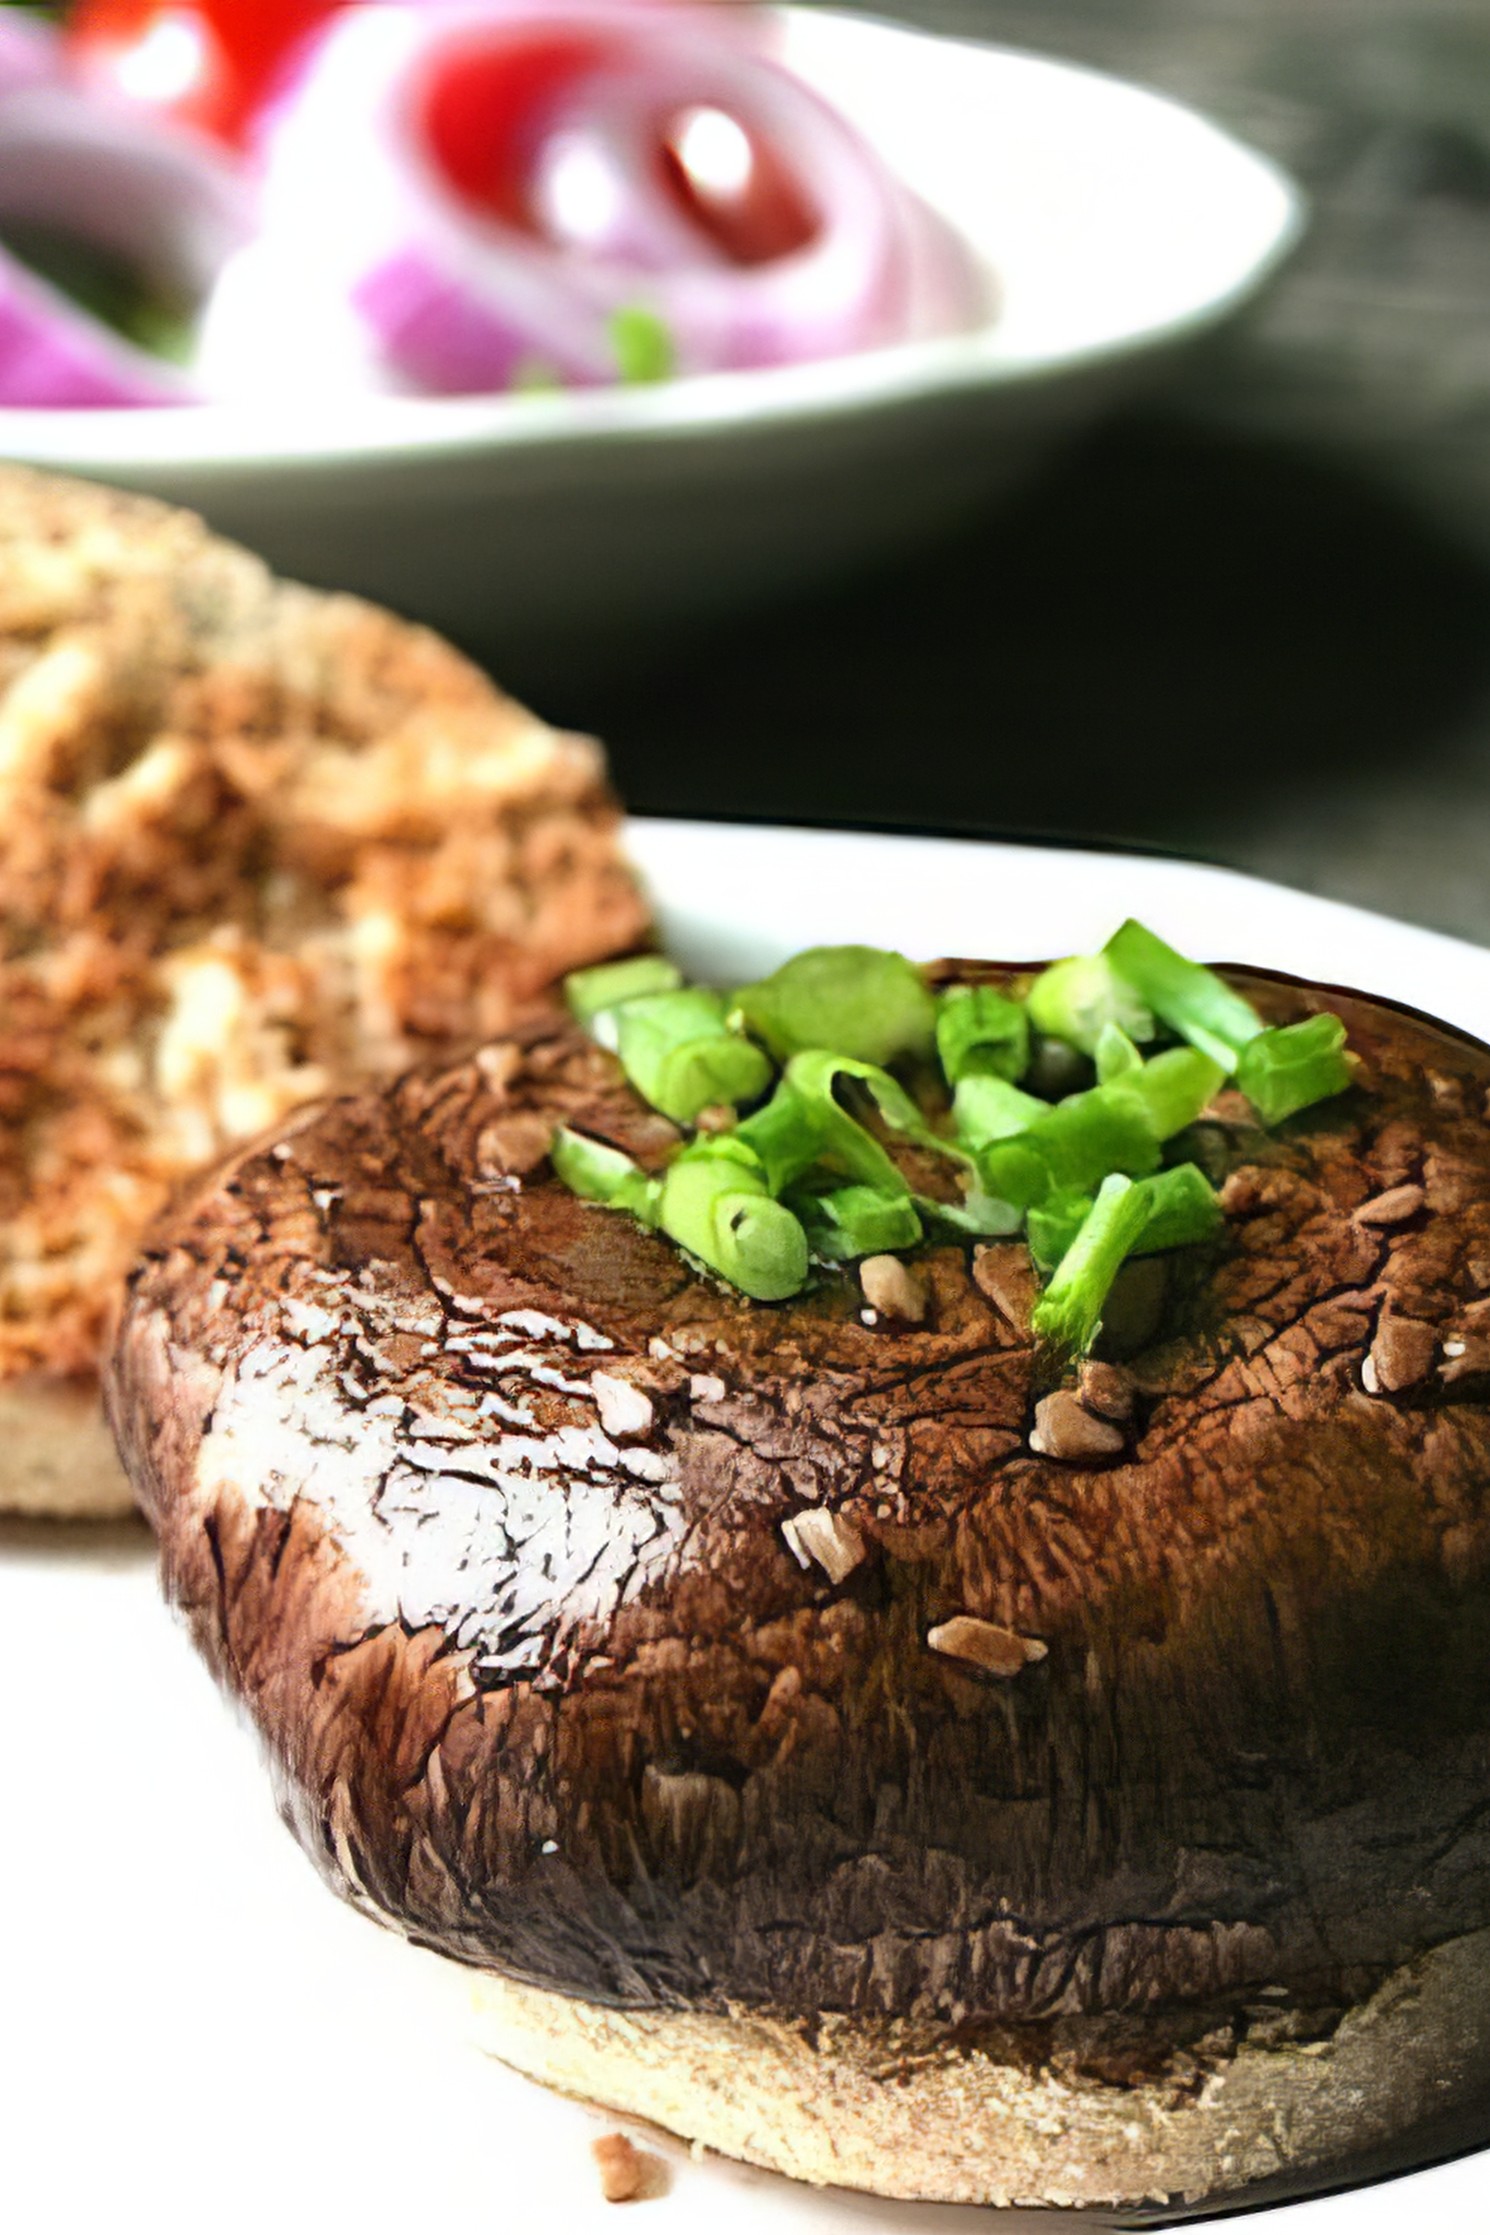
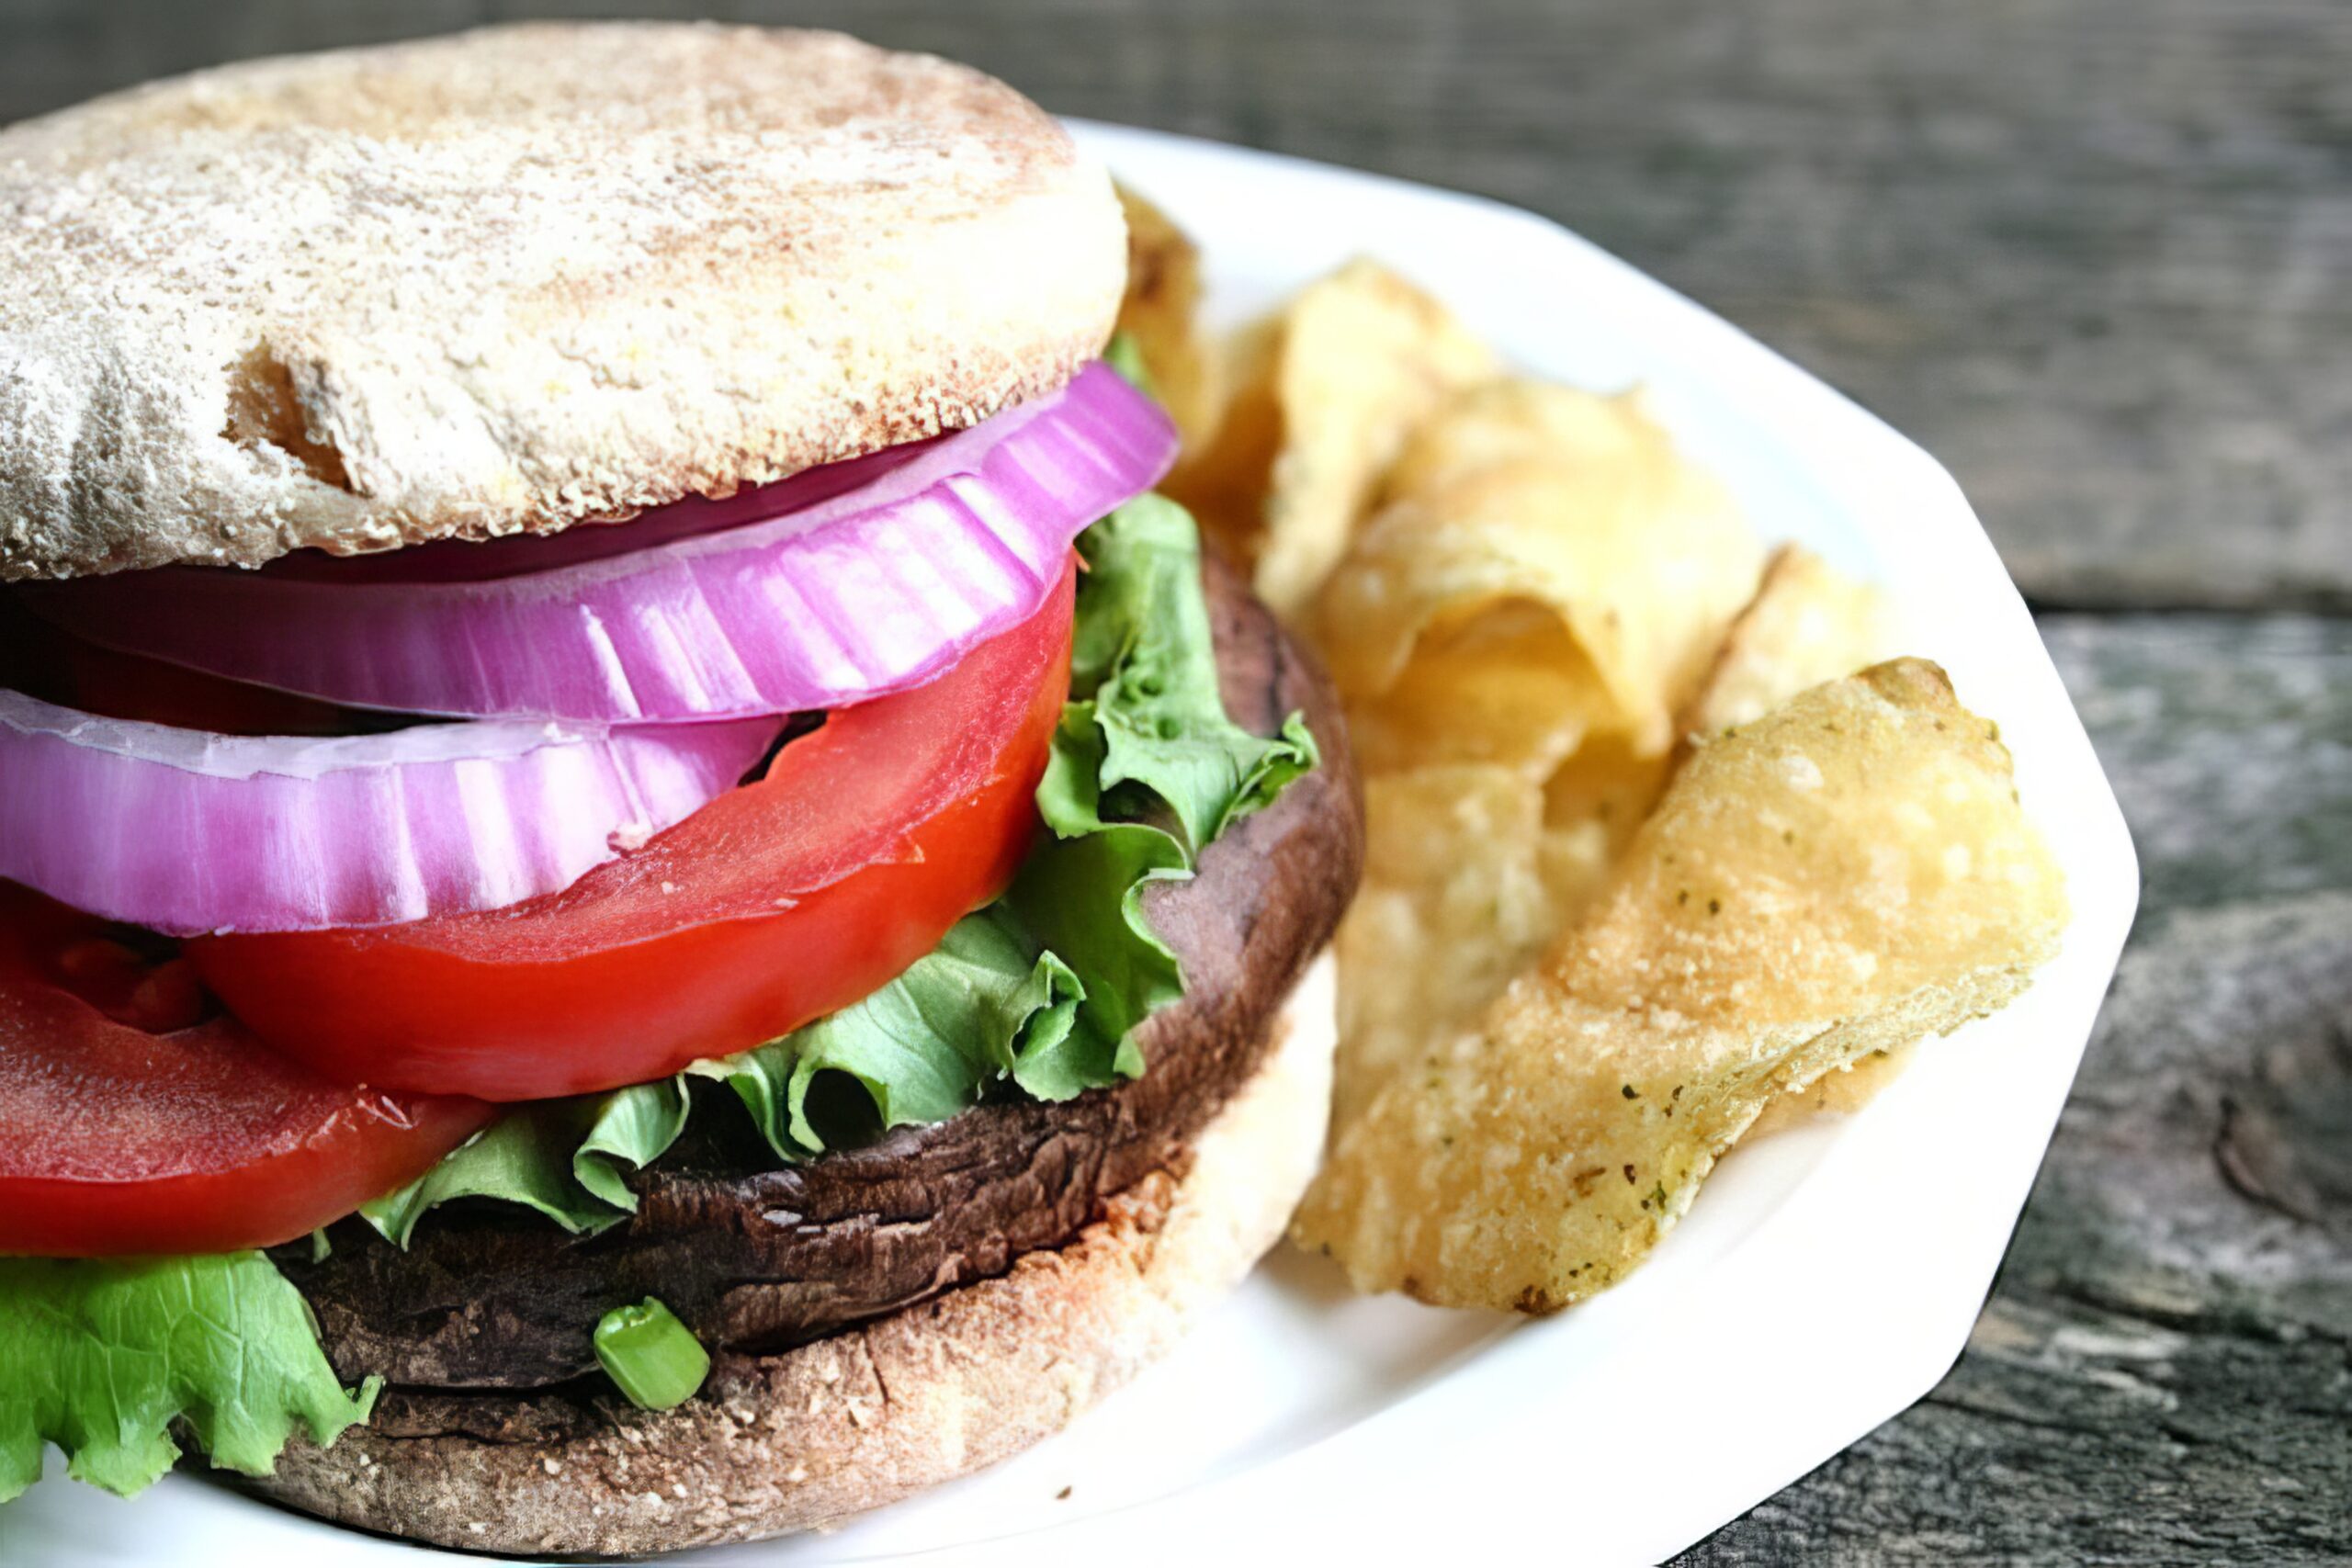
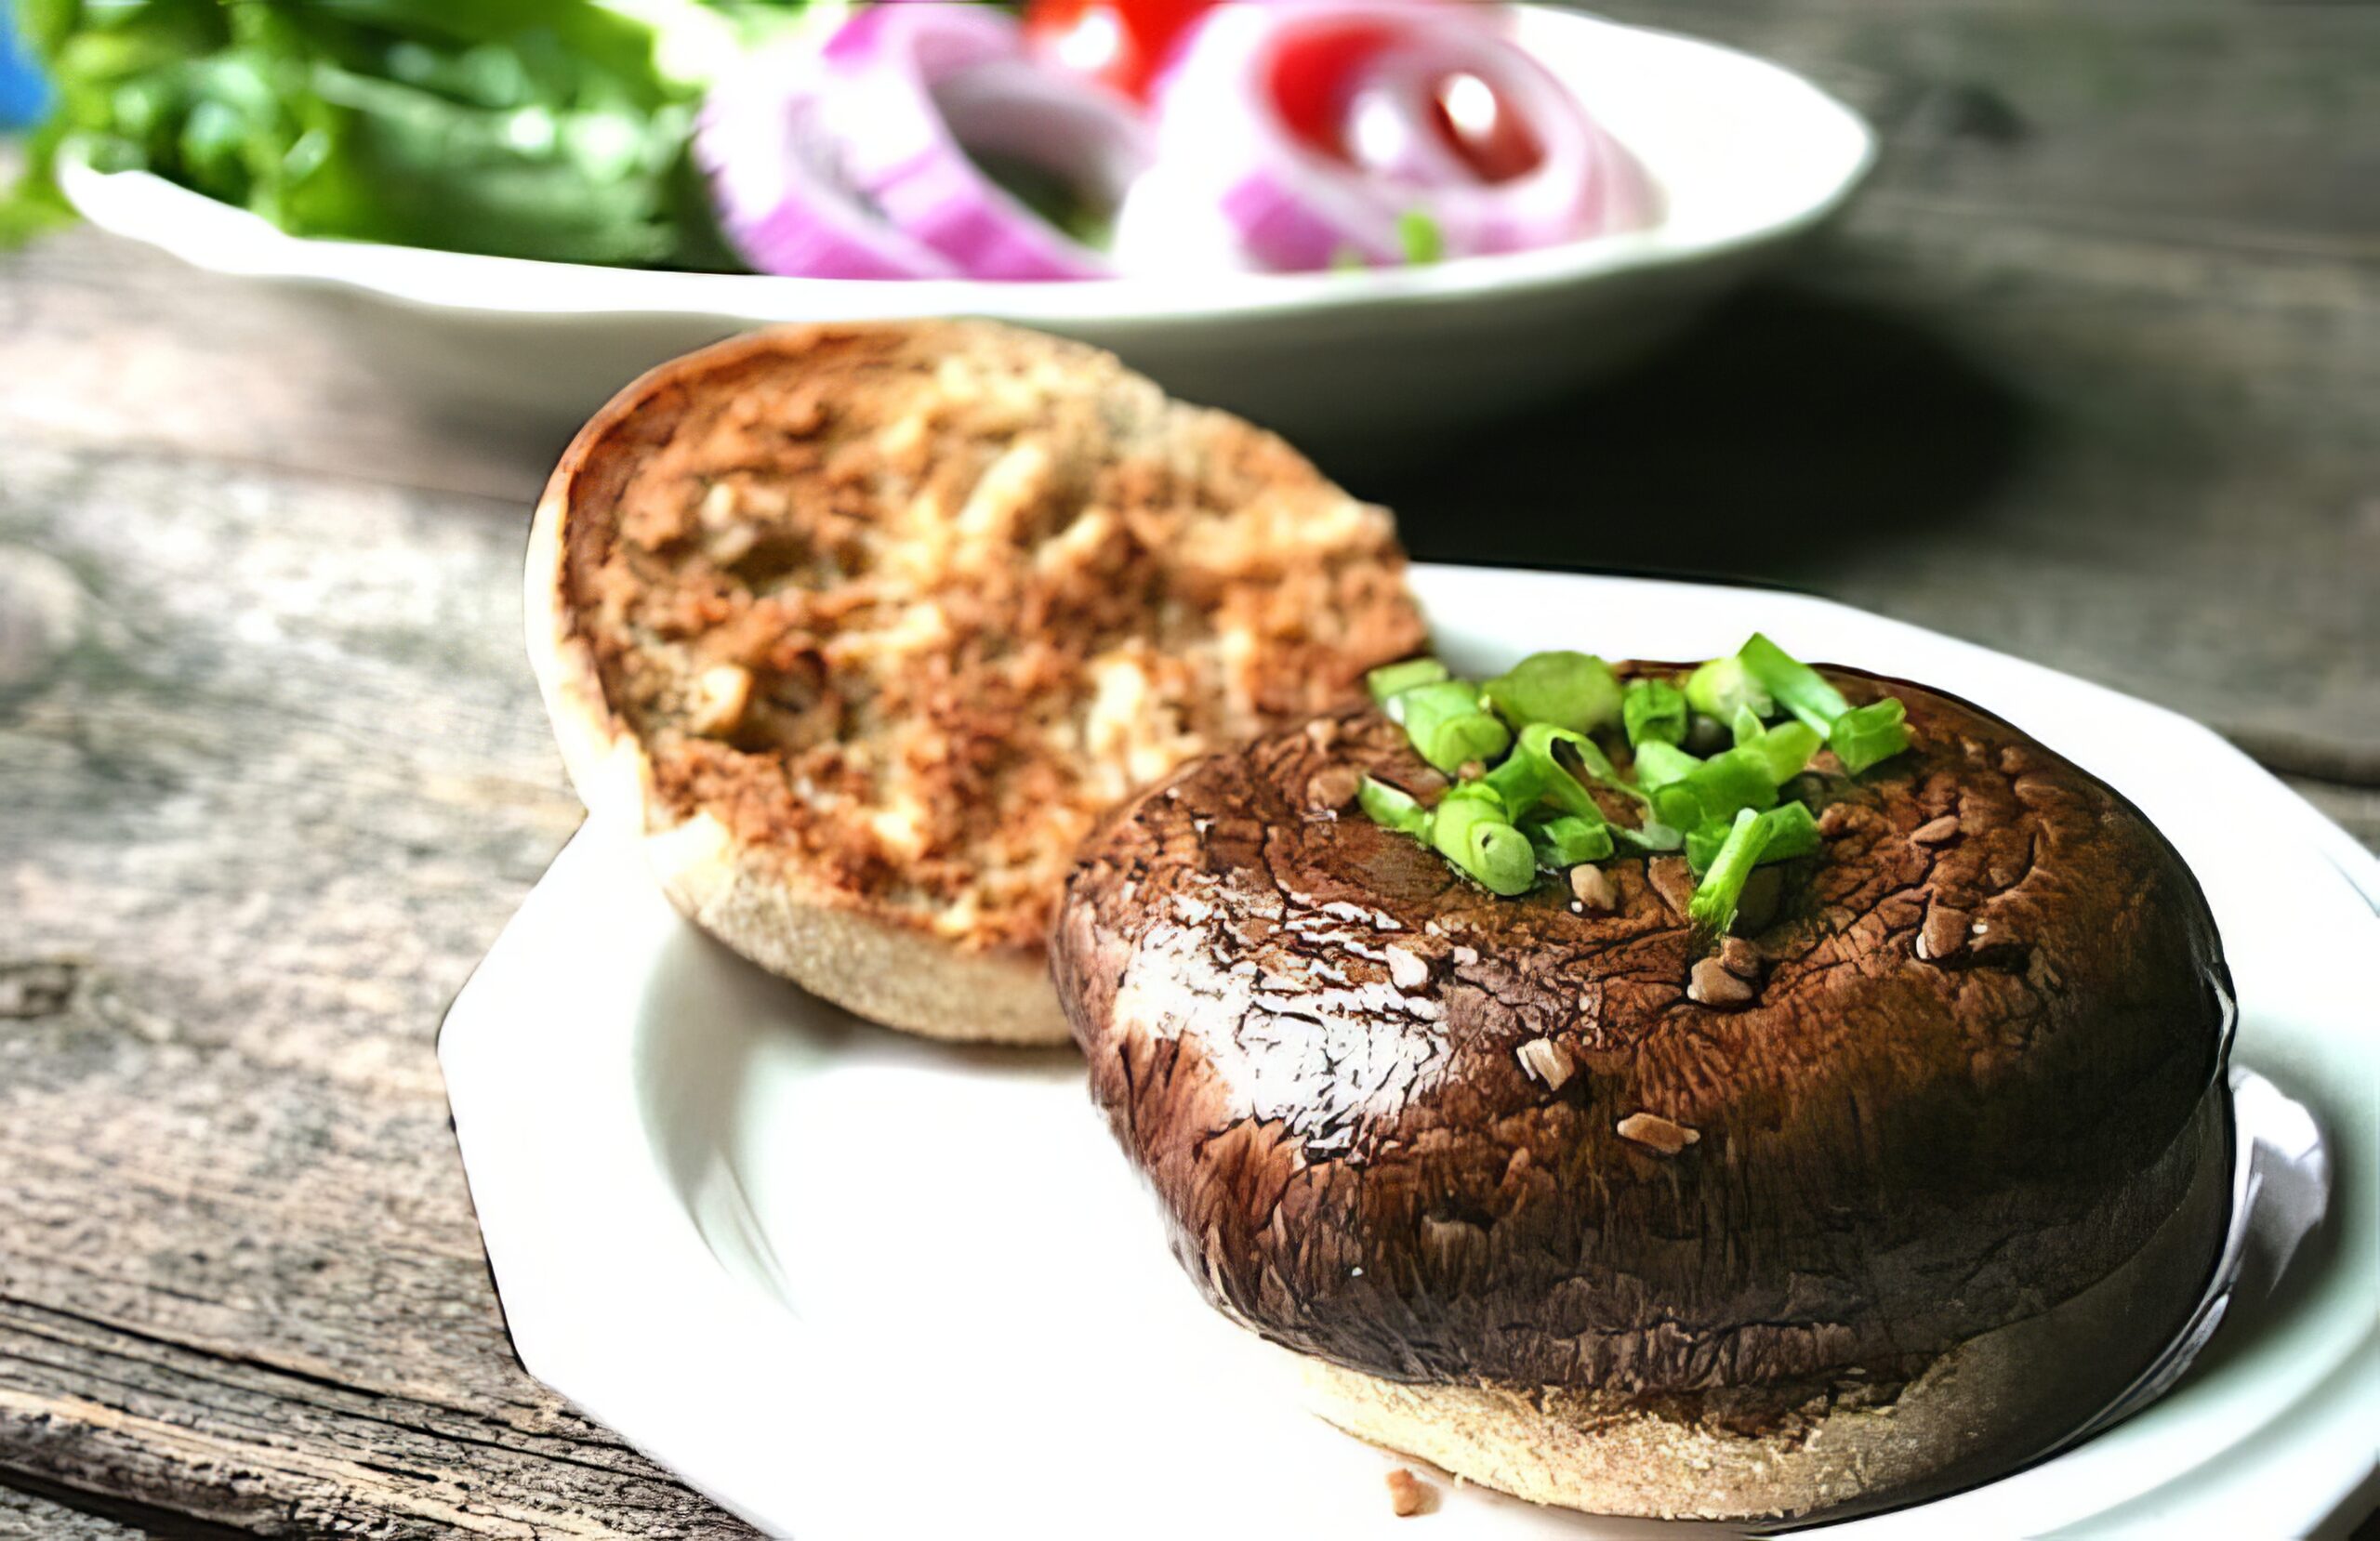
Easy Vegan Portobella Burgers
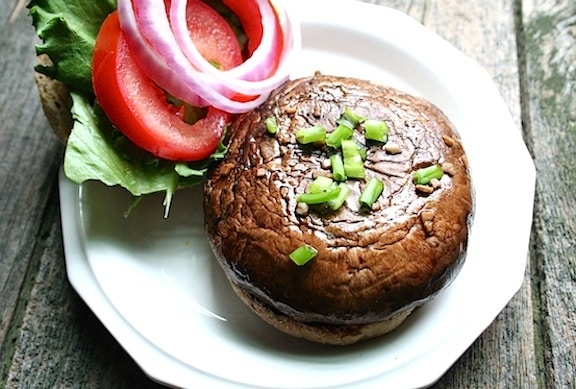
These easy vegan portobella burgers are the simplest path to a seriously satisfying grilled burger - just marinate the caps, hit them with heat, and pile on the toppings.
Key Ingredients & Substitutions
- Portobello mushroom caps. The star - large, meaty caps that absorb marinade beautifully and cook up juicy and satisfying. Look for caps that are firm and dry, without soft spots. Wipe them clean with a damp cloth rather than rinsing, since mushrooms absorb water quickly and you want them to soak up marinade instead.
- Teriyaki marinade. The classic pairing for portobello burgers. Bottled teriyaki sauce is perfectly fine here, or make your own with soy sauce, mirin, a little sesame oil, garlic, and ginger. Other great marinade options: balsamic vinegar with olive oil and herbs, or a simple red wine vinegar and soy sauce combo.
- Whole-grain buns. Sturdy enough to hold a juicy portobello without getting soggy. Toast them on the grill or in a skillet - it makes a real difference. Ciabatta rolls or toasted English muffins are excellent alternatives.
- Toppings. The beauty of these burgers is how customizable they are. Caramelized onions are especially good here - their sweetness complements the savory mushroom. Baby arugula adds a peppery bite; sliced avocado adds creaminess. Have fun with it.
Helpful Tips
Marinate gill-side down first. Place the portobello caps with the gill side facing down in the marinade for the first portion of the marinating time, then flip. This ensures the undersides - which cook first on the grill - are well coated. At least 15 minutes is good; up to an hour is even better.
Don't discard the remaining marinade. Pour any unused marinade back into the bottle and set it aside. You'll want to brush the caps with additional marinade as they cook, which keeps them moist and adds a lacquered, slightly charred glaze that's absolutely delicious.
High heat for grill marks, medium for pan cooking. On a grill, you want high heat to get those gorgeous char marks. In a skillet, medium is better - high heat causes the marinade to burn before the mushroom is cooked through. Either way, don't rush it. The caps need a full 4-5 minutes per side.
Toast your buns. A dry, untoasted bun is the fastest way to make a great portobello burger feel disappointing. Throw the buns on the grill or cut-side-down in a dry skillet for 1-2 minutes. It makes the whole burger better.
Let them rest for a minute before serving. Portobello caps release a lot of moisture as they cool slightly. Give them 60 seconds on a rack or plate before loading onto the bun - this keeps the bottom bun from going soggy immediately.
Variations
- Balsamic marinade. Swap the teriyaki for a mix of 3 tablespoons balsamic vinegar, 2 tablespoons olive oil, 1 teaspoon Dijon mustard, and a pinch of dried thyme. Rich, tangy, and excellent with caramelized onions.
- Smoky chipotle version. Use a marinade of soy sauce, lime juice, 1 teaspoon chipotle powder, and a drizzle of maple syrup. Serve with guacamole and pickled jalapeños for a Tex-Mex twist.
- Italian herb version. Marinate in olive oil with garlic, balsamic, and Italian seasoning. Top with roasted red peppers, vegan mozzarella, and fresh basil - it's essentially a Caprese burger.
- Pan-cooked with wine. For indoor cooking, deglaze the pan with a splash of red wine halfway through cooking. It adds depth and creates a silky pan sauce to drizzle over the finished burger.
- Make it a bowl. Skip the bun entirely and serve the portobello cap over a grain bowl with farro, roasted vegetables, and tahini dressing. The teriyaki flavor works beautifully in this context.
- Add cheese. In the last minute of cooking, place a slice of vegan cheese on the gill side and cover with a lid or dome to melt it slightly. Pepper jack or smoked gouda style vegan cheeses are both fantastic here.
Serving Ideas
The classic approach is on a toasted whole-grain bun with caramelized or raw onion, baby greens, sliced tomato, and a generous schmear of vegan mayo. The portobello is substantial enough to hold its own against bold toppings - sautéed garlic, a drizzle of teriyaki, pickles, and mustard all work beautifully. If you're serving a crowd, set out a spread of condiments and toppings and let everyone build their own. For more inspiration, check out the best portobello mushroom recipes on VegKitchen.
Without a bun, these are just as satisfying. Serve a portobello cap over cooked grains with roasted vegetables and a drizzle of the pan sauce. They're also excellent alongside grilled corn and a bright fresh tomato relish - simple, summery, and effortless.
Storing & Freezing
Cooked portobello caps keep well in an airtight container in the refrigerator for up to 3 days. Reheat in a skillet over medium heat with a splash of marinade or water to prevent sticking, or warm in a 350°F oven for about 8 minutes. They're also surprisingly good cold, sliced thin over a salad.
Portobello burgers don't freeze especially well - the texture becomes quite soft and watery after thawing. They're best made fresh or made a day ahead and refrigerated. If you do freeze them, wrap individually and reheat in the oven rather than the microwave for the best texture.
More Vegan Burger Recipes
If you loved this recipe, check out our full collection of the best vegan burger recipes, including our chipotle black bean burgers and our vegan beet burgers - or here are a few more individual favorites:
- Vegan Chipotle Black Bean Burgers
- Vegan Quinoa Mushroom Burger
- Vegan Beet Burgers
- Vegan Curried Tofu Burgers
- Best Vegan Burger Recipes
Recipe
Easy Vegan Portobella Burgers
These easy vegan portobella burgers are juicy, smoky, and ready in minutes — just marinate, grill or pan-cook, and pile on your favorite toppings.
Print
Pin
Save
Servings: burgers
Ingredients
- portobello caps as many as needed (1 per serving)
- teriyaki marinade homemade or bottled; as needed for marinating
- whole-grain buns or toasted English muffins
Toppings (Optional)
- onions carmelized or raw slices
- garlic sautéed
- scallions thinly sliced
- tomatoes sliced
- baby greens baby spinach or baby arugula
- salsa store bought or homemade
- ketchup
- mustard
- sweet pickle relish
- vegan mayonnaise
Instructions
- Stem the portabellas and wipe them clean. Pour the marinade of choice into a shallow container and arrange the portobello caps, underside down, in a single layer. Let stand for at least 15 minutes and up to an hour. Pour unused marinade back into a bottle for finishing the dish; you'll have enough left over to use for another occasion.
- To grill: Prepare grill. Grill the portobellos, underside down, for 4–5 minutes. Brush generously with more marinade, then flip and grill for 5 minutes longer or until charred to your liking.
- To cook in a skillet: Heat a shallow layer of marinade in the skillet. Cook the portobellos, underside down, for 4–5 minutes. Flip and cook for 5 minutes longer, or until browned to your liking. Add a small amount of additional marinade if needed to keep the skillet moist.
- Serve portobello caps on whole-grain buns with whatever other toppings you'd like. You can place a variety of these toppings and condiments on the table, and let everyone fix their own sandwich!
Nutrition (Estimate per Serving)
Calories: 99kcalCarbohydrates: 17gProtein: 6gFat: 1gSaturated Fat: 1gPolyunsaturated Fat: 1gMonounsaturated Fat: 1gSodium: 2825mgPotassium: 258mgFiber: 1gSugar: 11gVitamin A: 1IUVitamin C: 2mgCalcium: 30mgIron: 2mg
Vegan-ize any recipe!Grab our free vegan cheat sheet, packed with my favorite easy substitutions to make any recipe vegan.
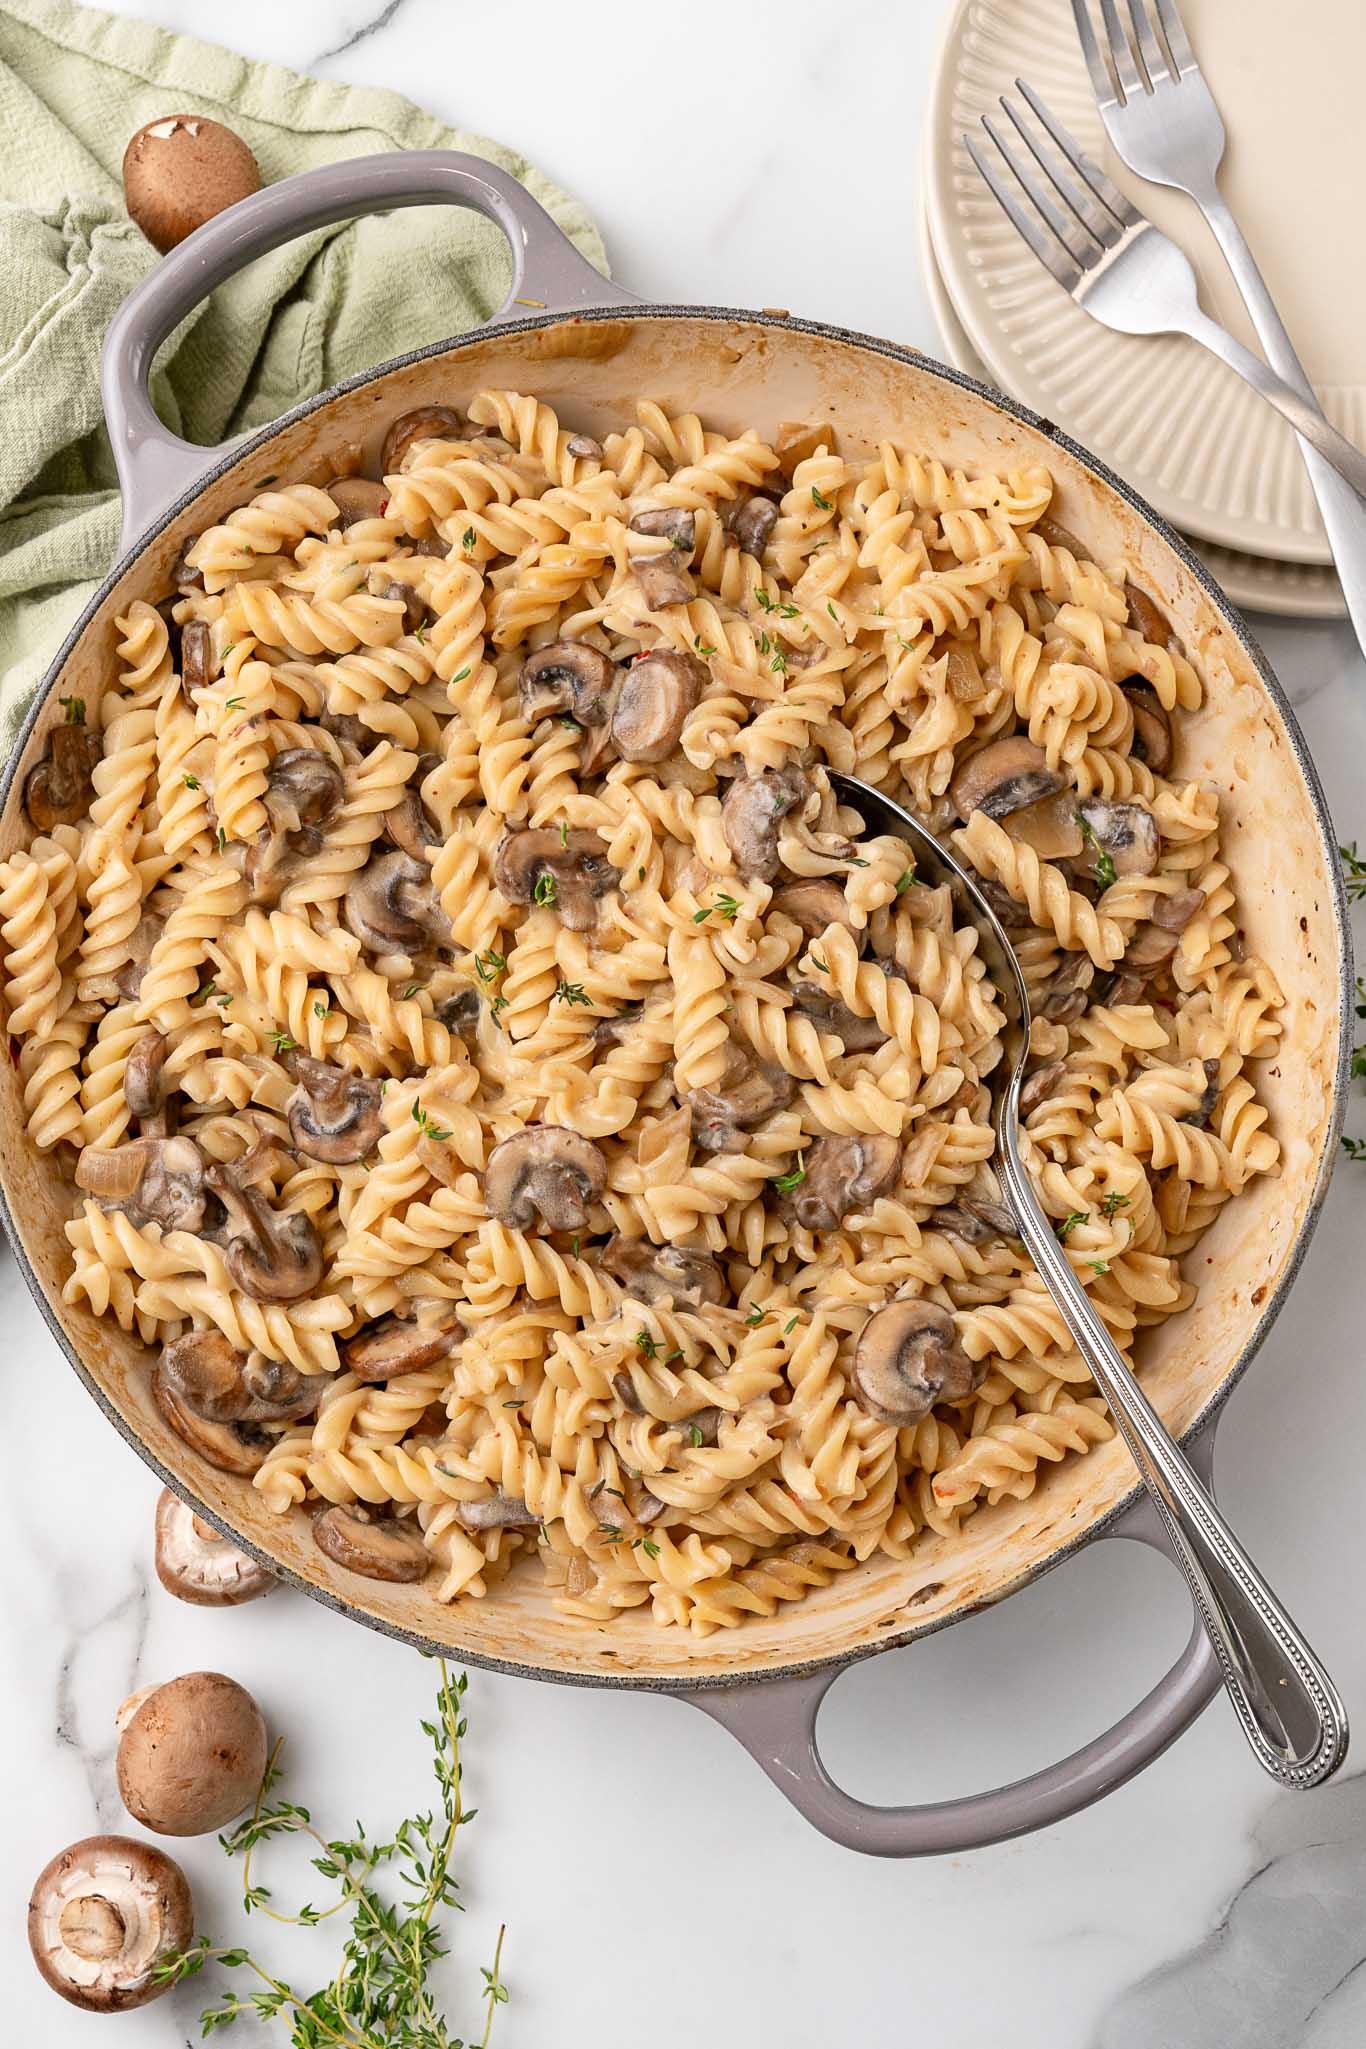
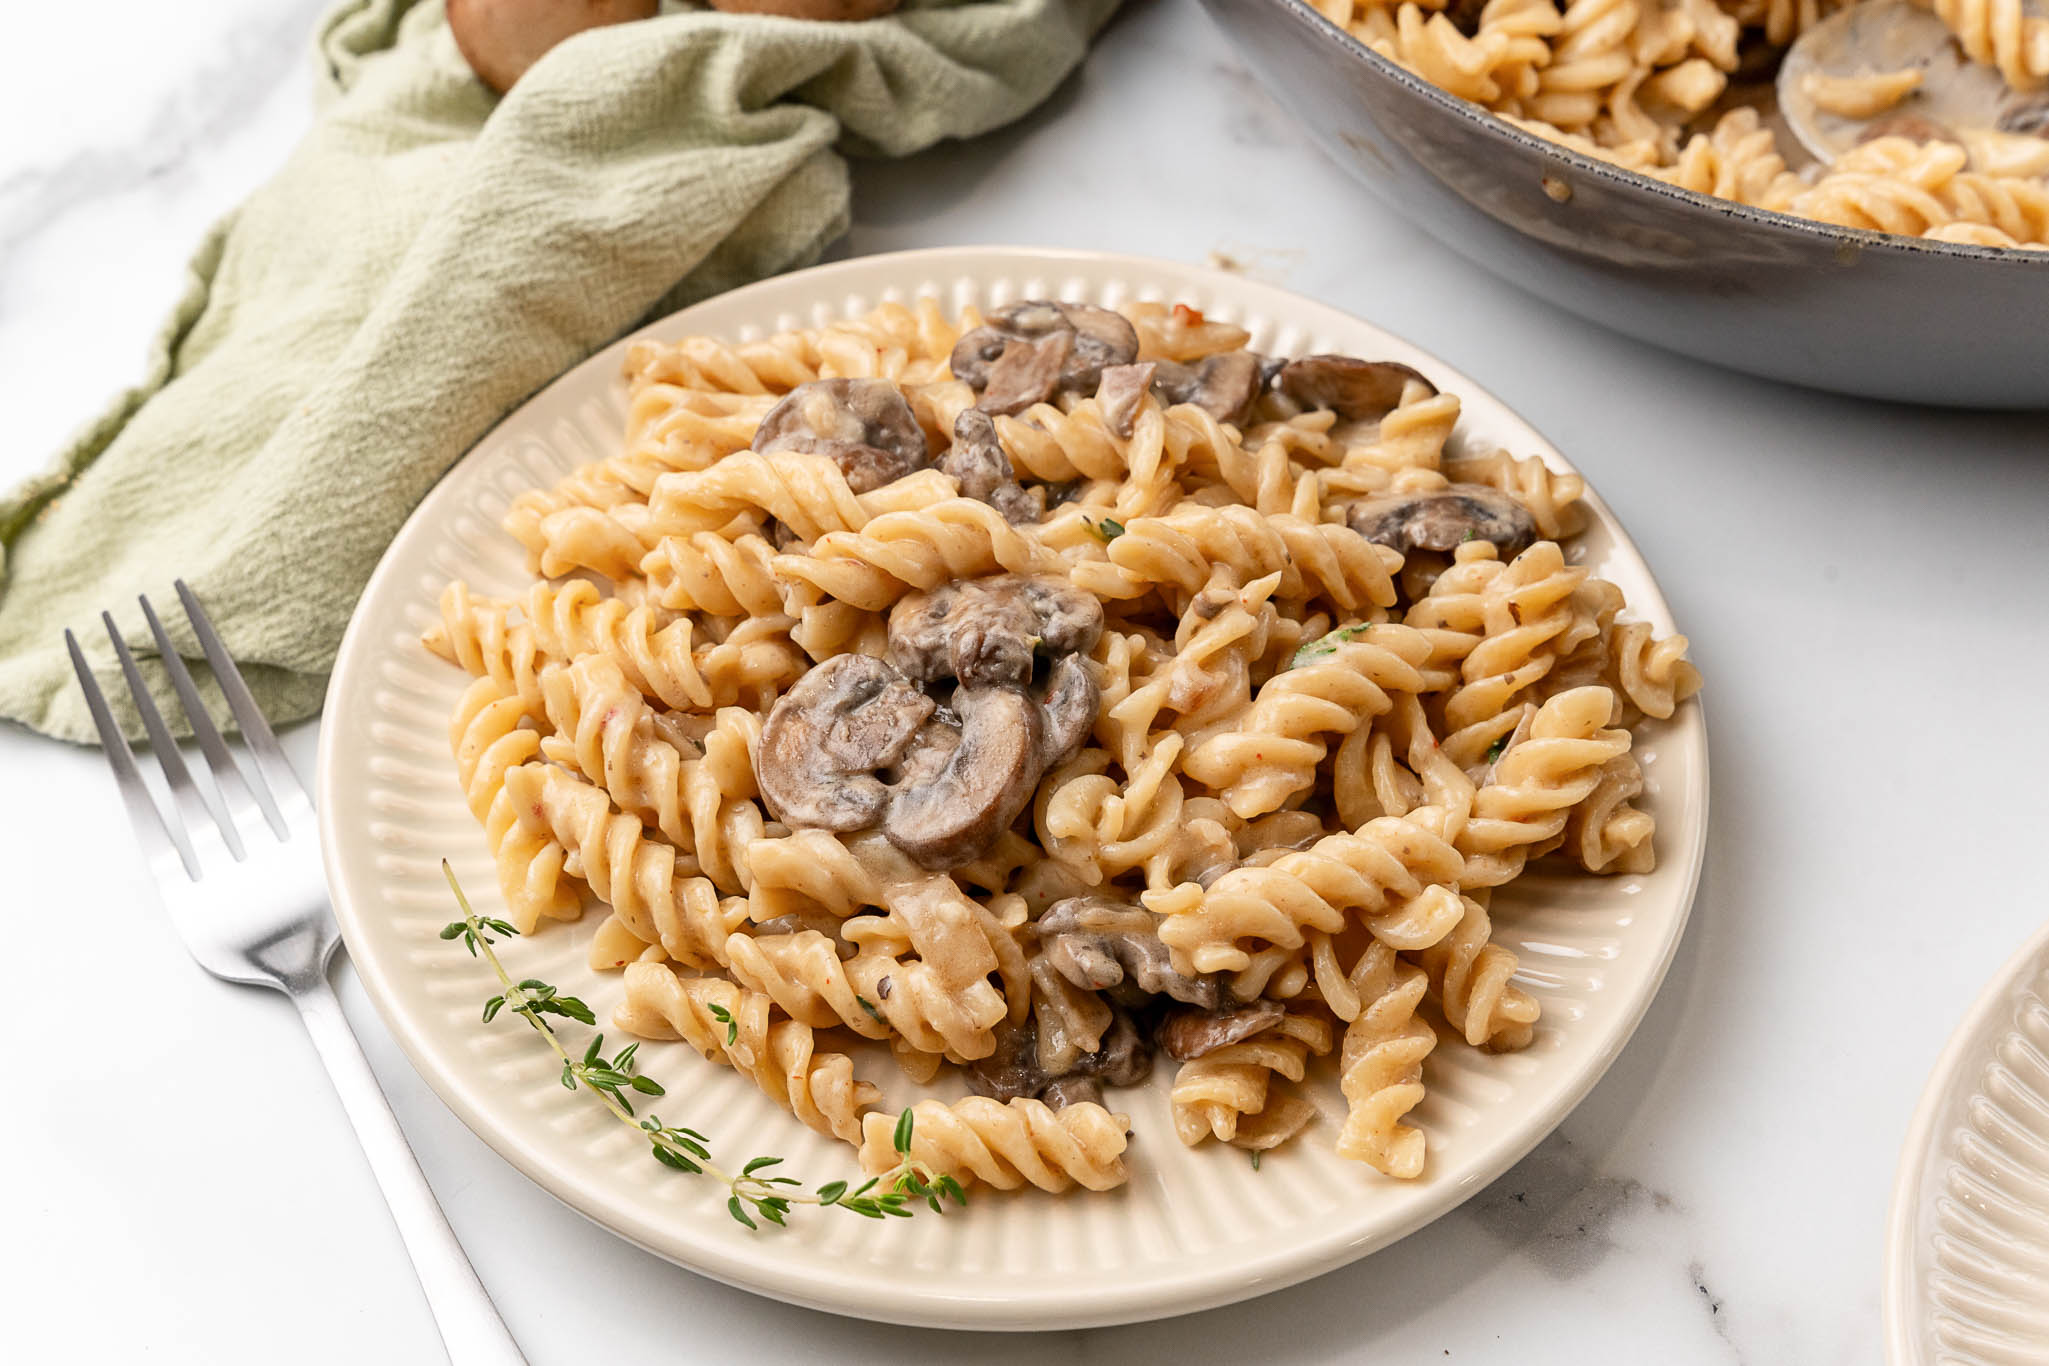
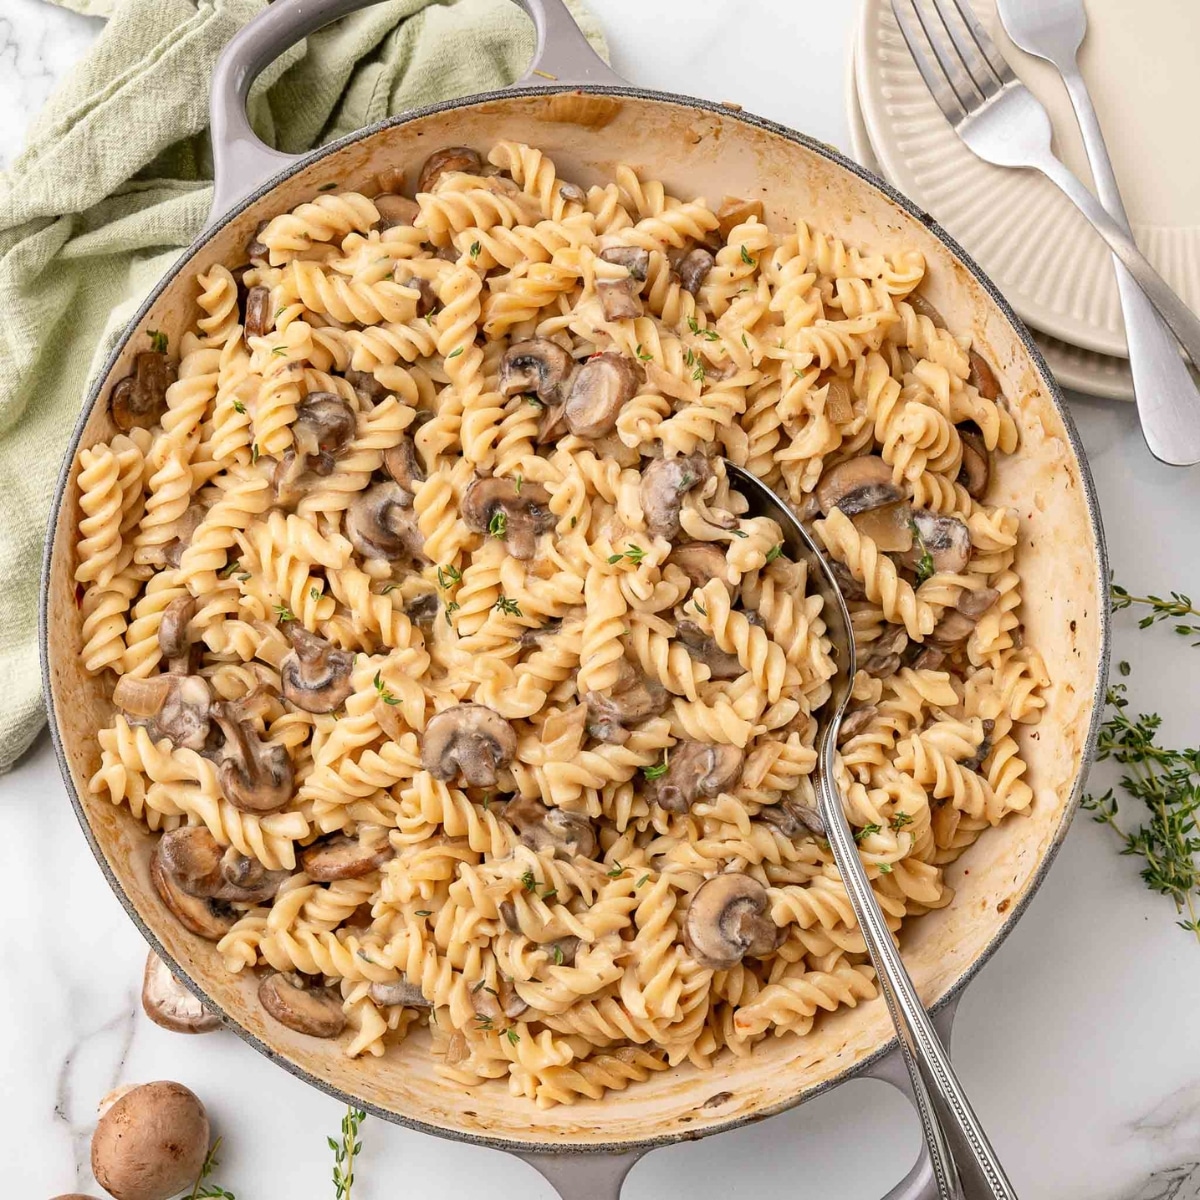
Vegan Creamy Mushroom Pasta
This vegan creamy mushroom pasta delivers everything you want in a comfort food dinner - a velvety, herb-flecked sauce, tender baby bella mushrooms, and hearty pasta, all ready in under 30 minutes.
Key Ingredients & Substitutions
- Pasta. Rotini or penne work beautifully here - their ridges and tubes catch the creamy sauce. Any short pasta shape works; if you use spaghetti or linguine, just be sure to toss well so every strand gets coated.
- Baby bella mushrooms. Also called cremini, these bring a deep, savory flavor and meaty texture. White button mushrooms are the easiest swap, or go more luxurious with shiitakes, oyster mushrooms, or a mix of whatever's at the store.
- Full-fat coconut milk. This is the backbone of the creamy sauce - don't use light coconut milk or the sauce will be thin. Cashew cream (blend 1 cup soaked cashews with ¾ cup water) works beautifully if you want a more neutral flavor.
- Vegan butter. Combined with flour, it forms the roux that thickens the sauce. Olive oil can substitute in a pinch, though the butter adds more richness.
- Vegetable broth. Use a good-quality broth - it forms the other half of the sauce. Low-sodium is fine; just taste and adjust salt at the end.
- Soy sauce. Adds umami depth that makes the sauce complex. Tamari works as a 1:1 swap and keeps the dish gluten-free.
- White wine. A dry white like Chardonnay or Pinot Grigio deglazes the pan and adds brightness. If you'd rather skip it, substitute an equal amount of extra vegetable broth with a small squeeze of lemon juice.
- Fresh thyme. The aromatic that ties everything together. Dried thyme works in a pinch - use about half as much (1 teaspoon dried instead of 2 teaspoons fresh).
Helpful Tips
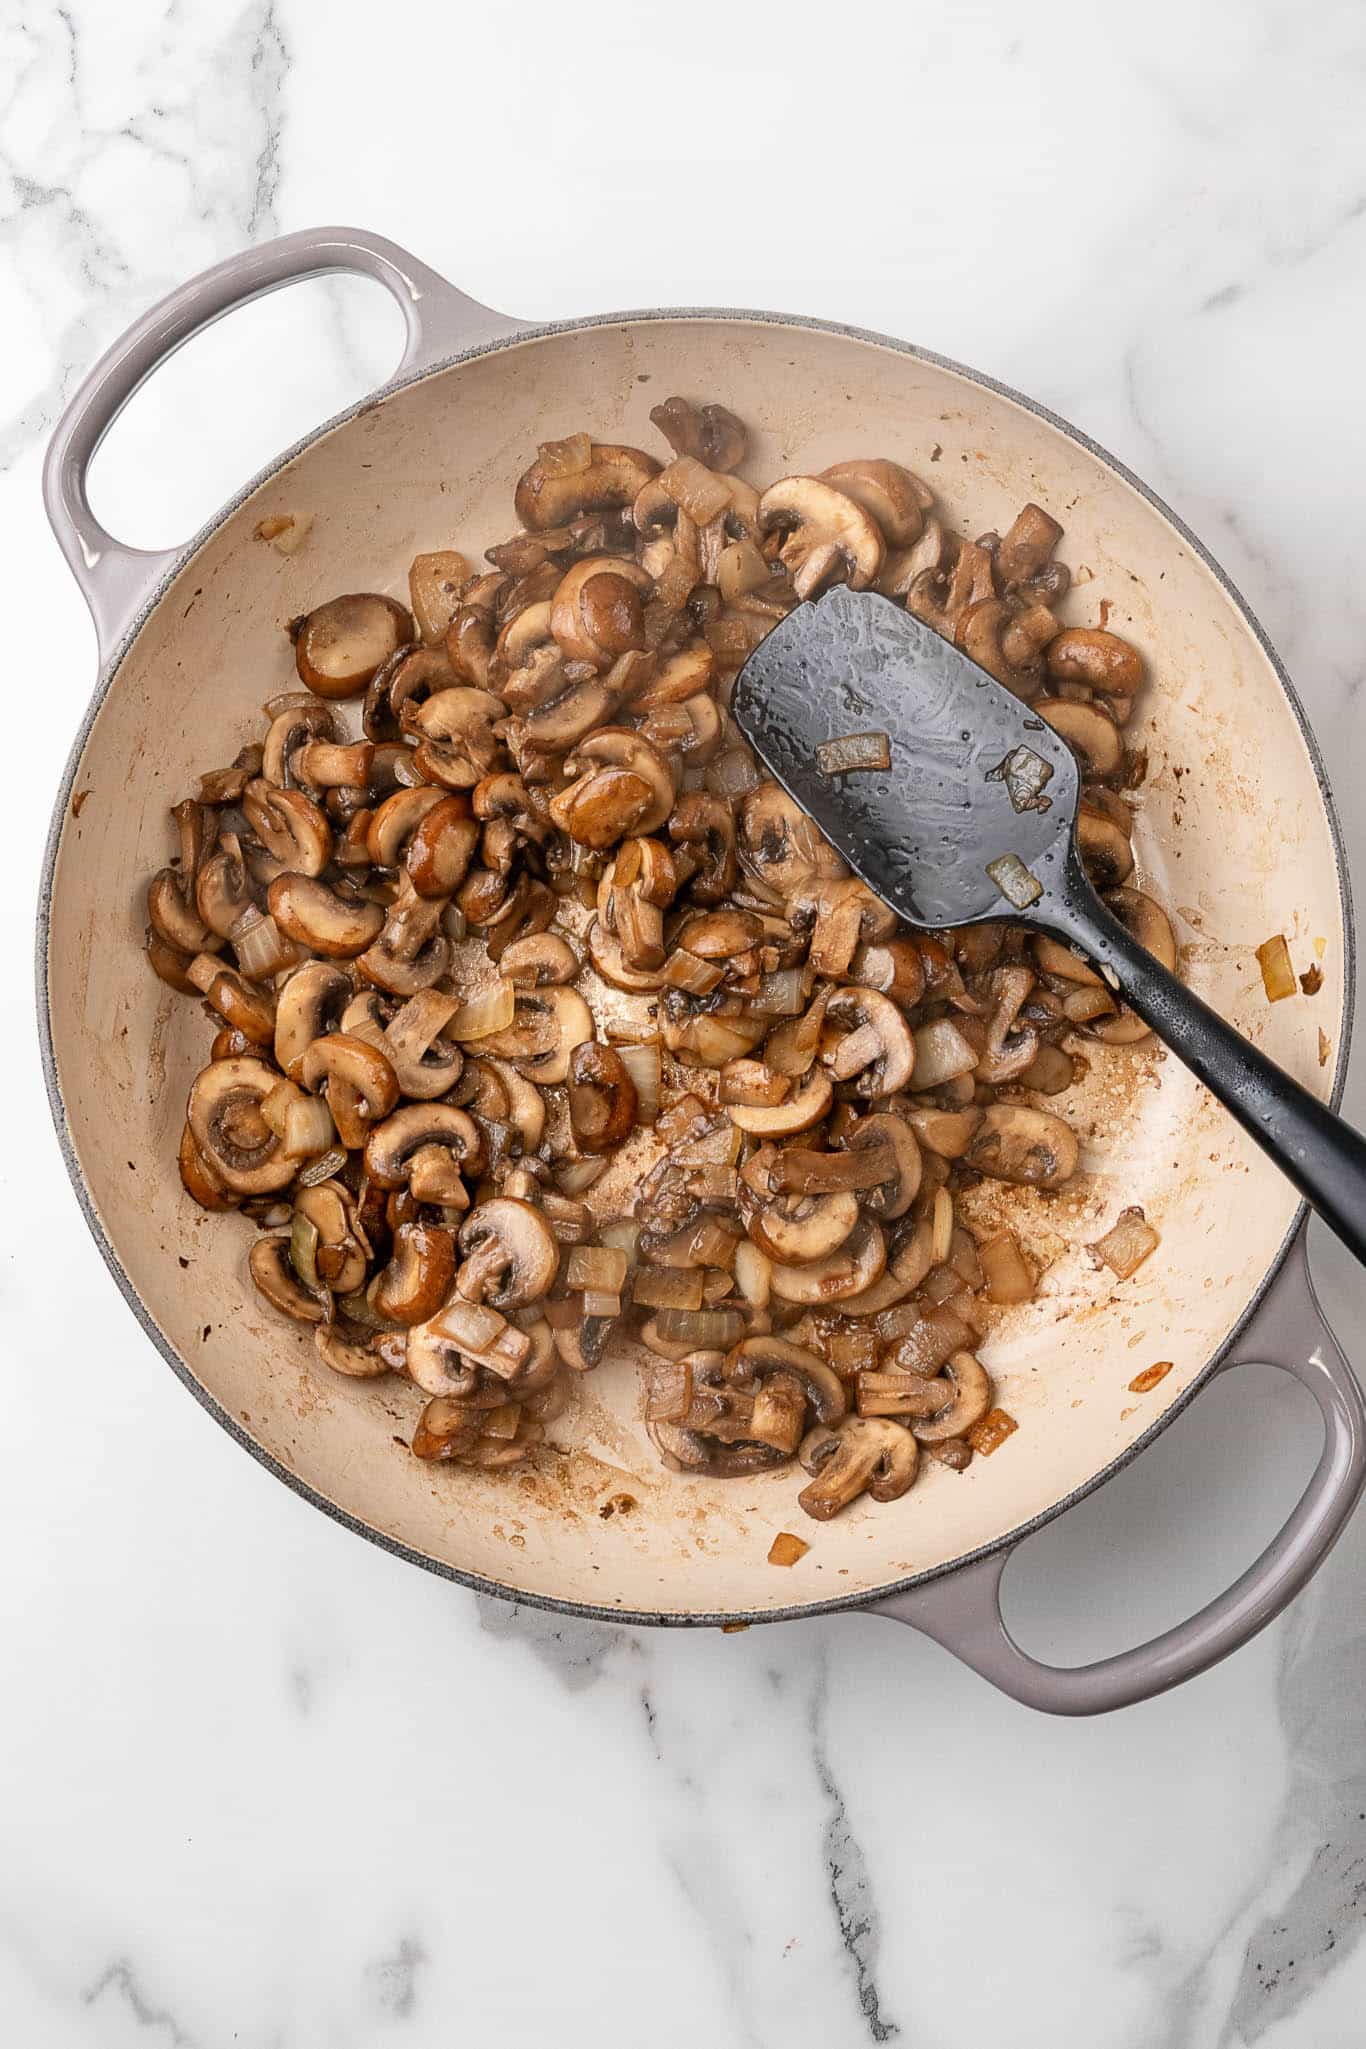
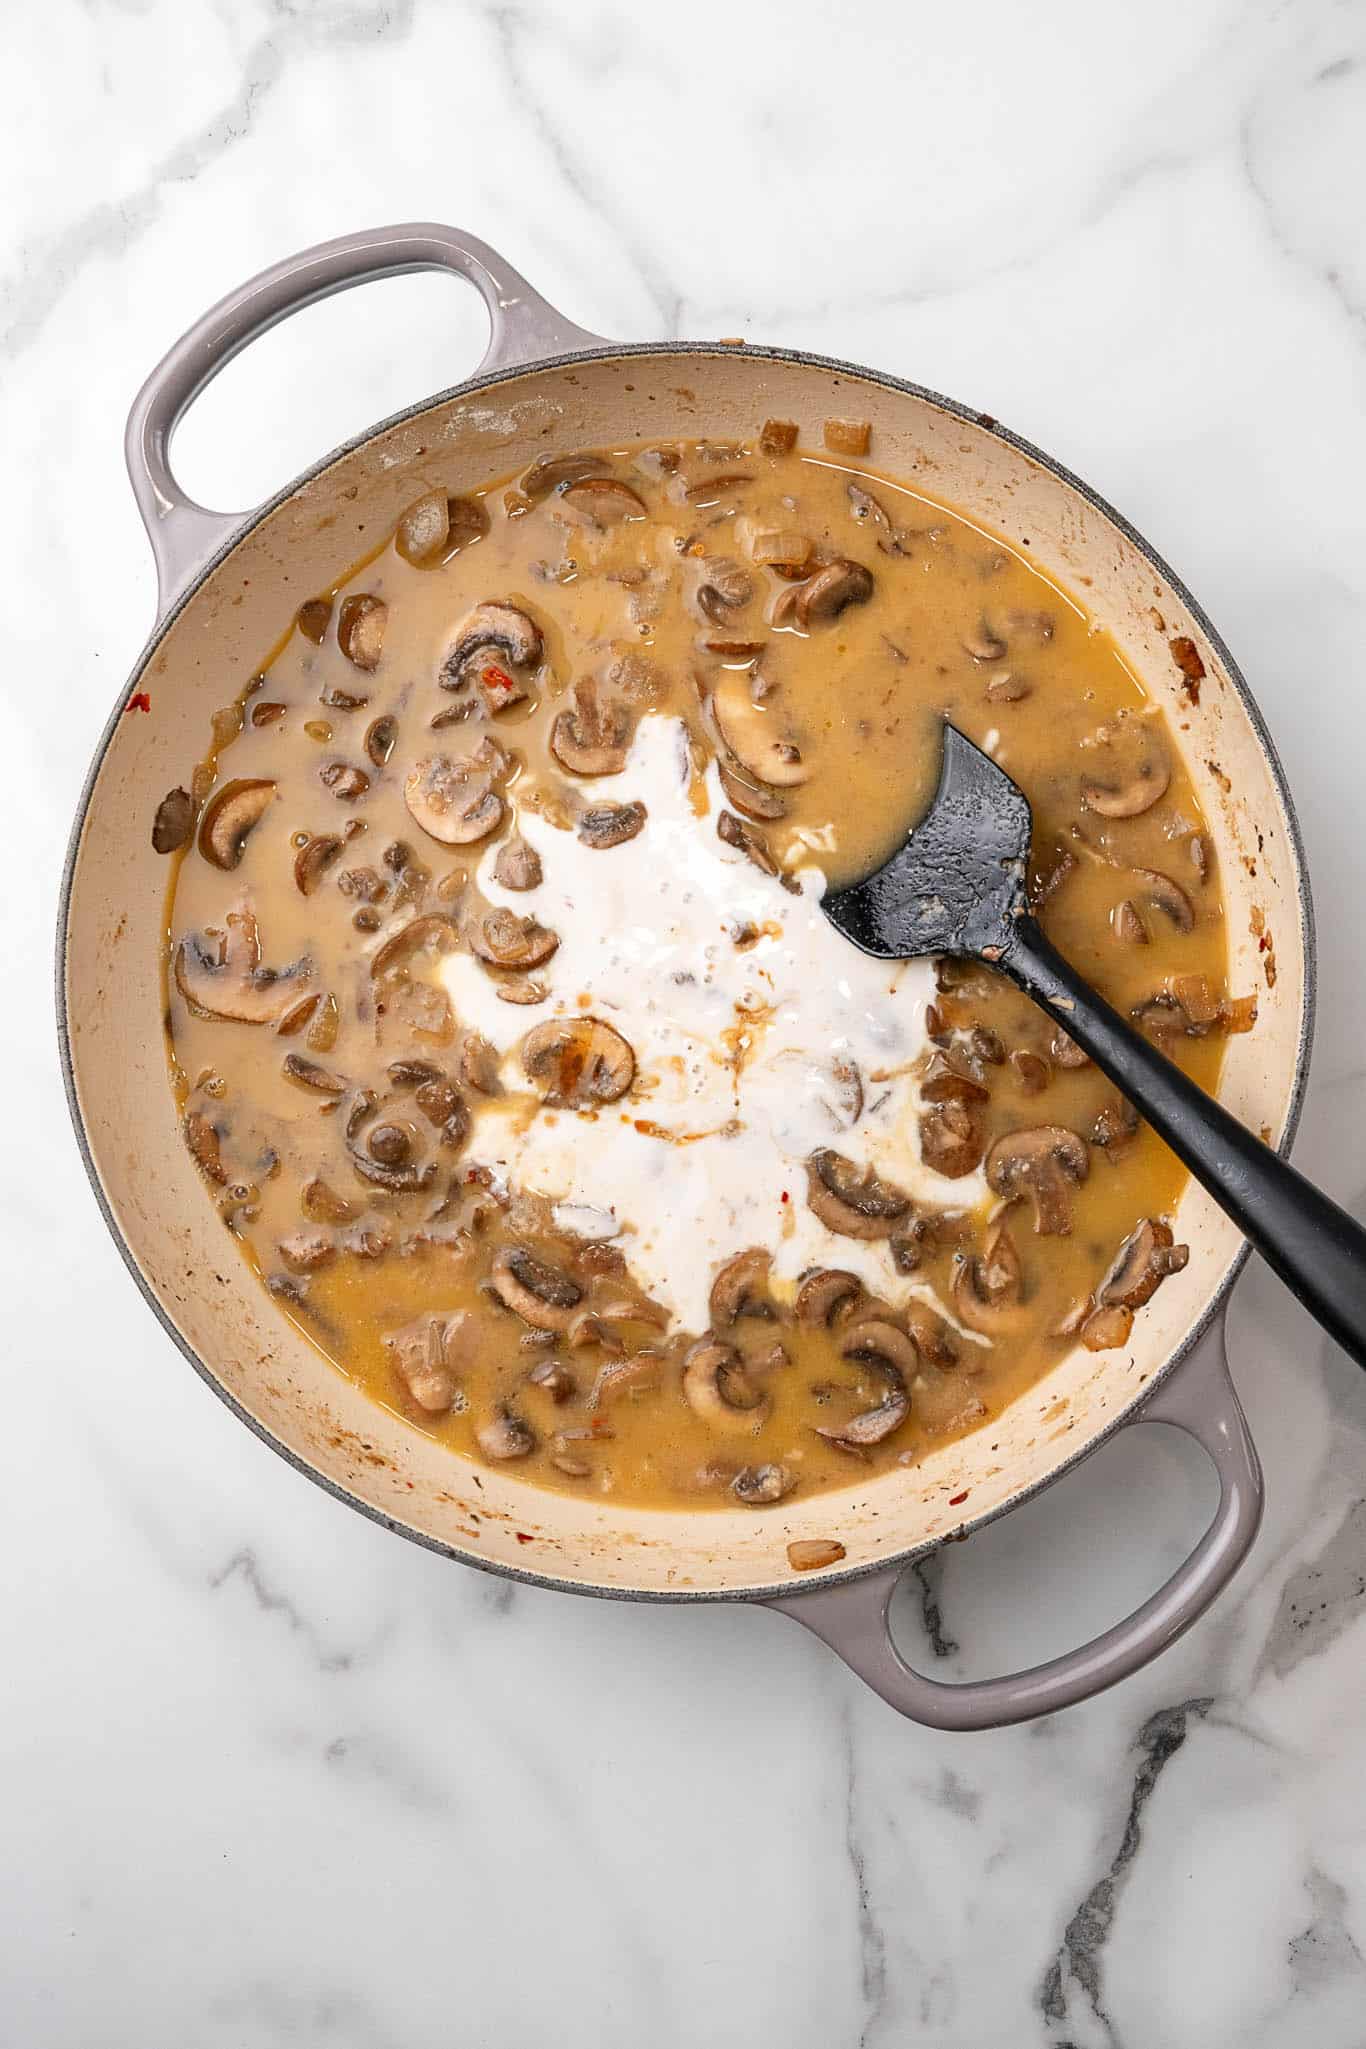
Don't rush the mushrooms. Give them space in the pan and let them cook undisturbed for a couple of minutes before stirring. They need time to release their liquid and then let that liquid fully evaporate - this is where the deep, savory flavor comes from. If you rush this step by stirring constantly, you'll end up with steamed, waterlogged mushrooms instead of golden, concentrated ones.
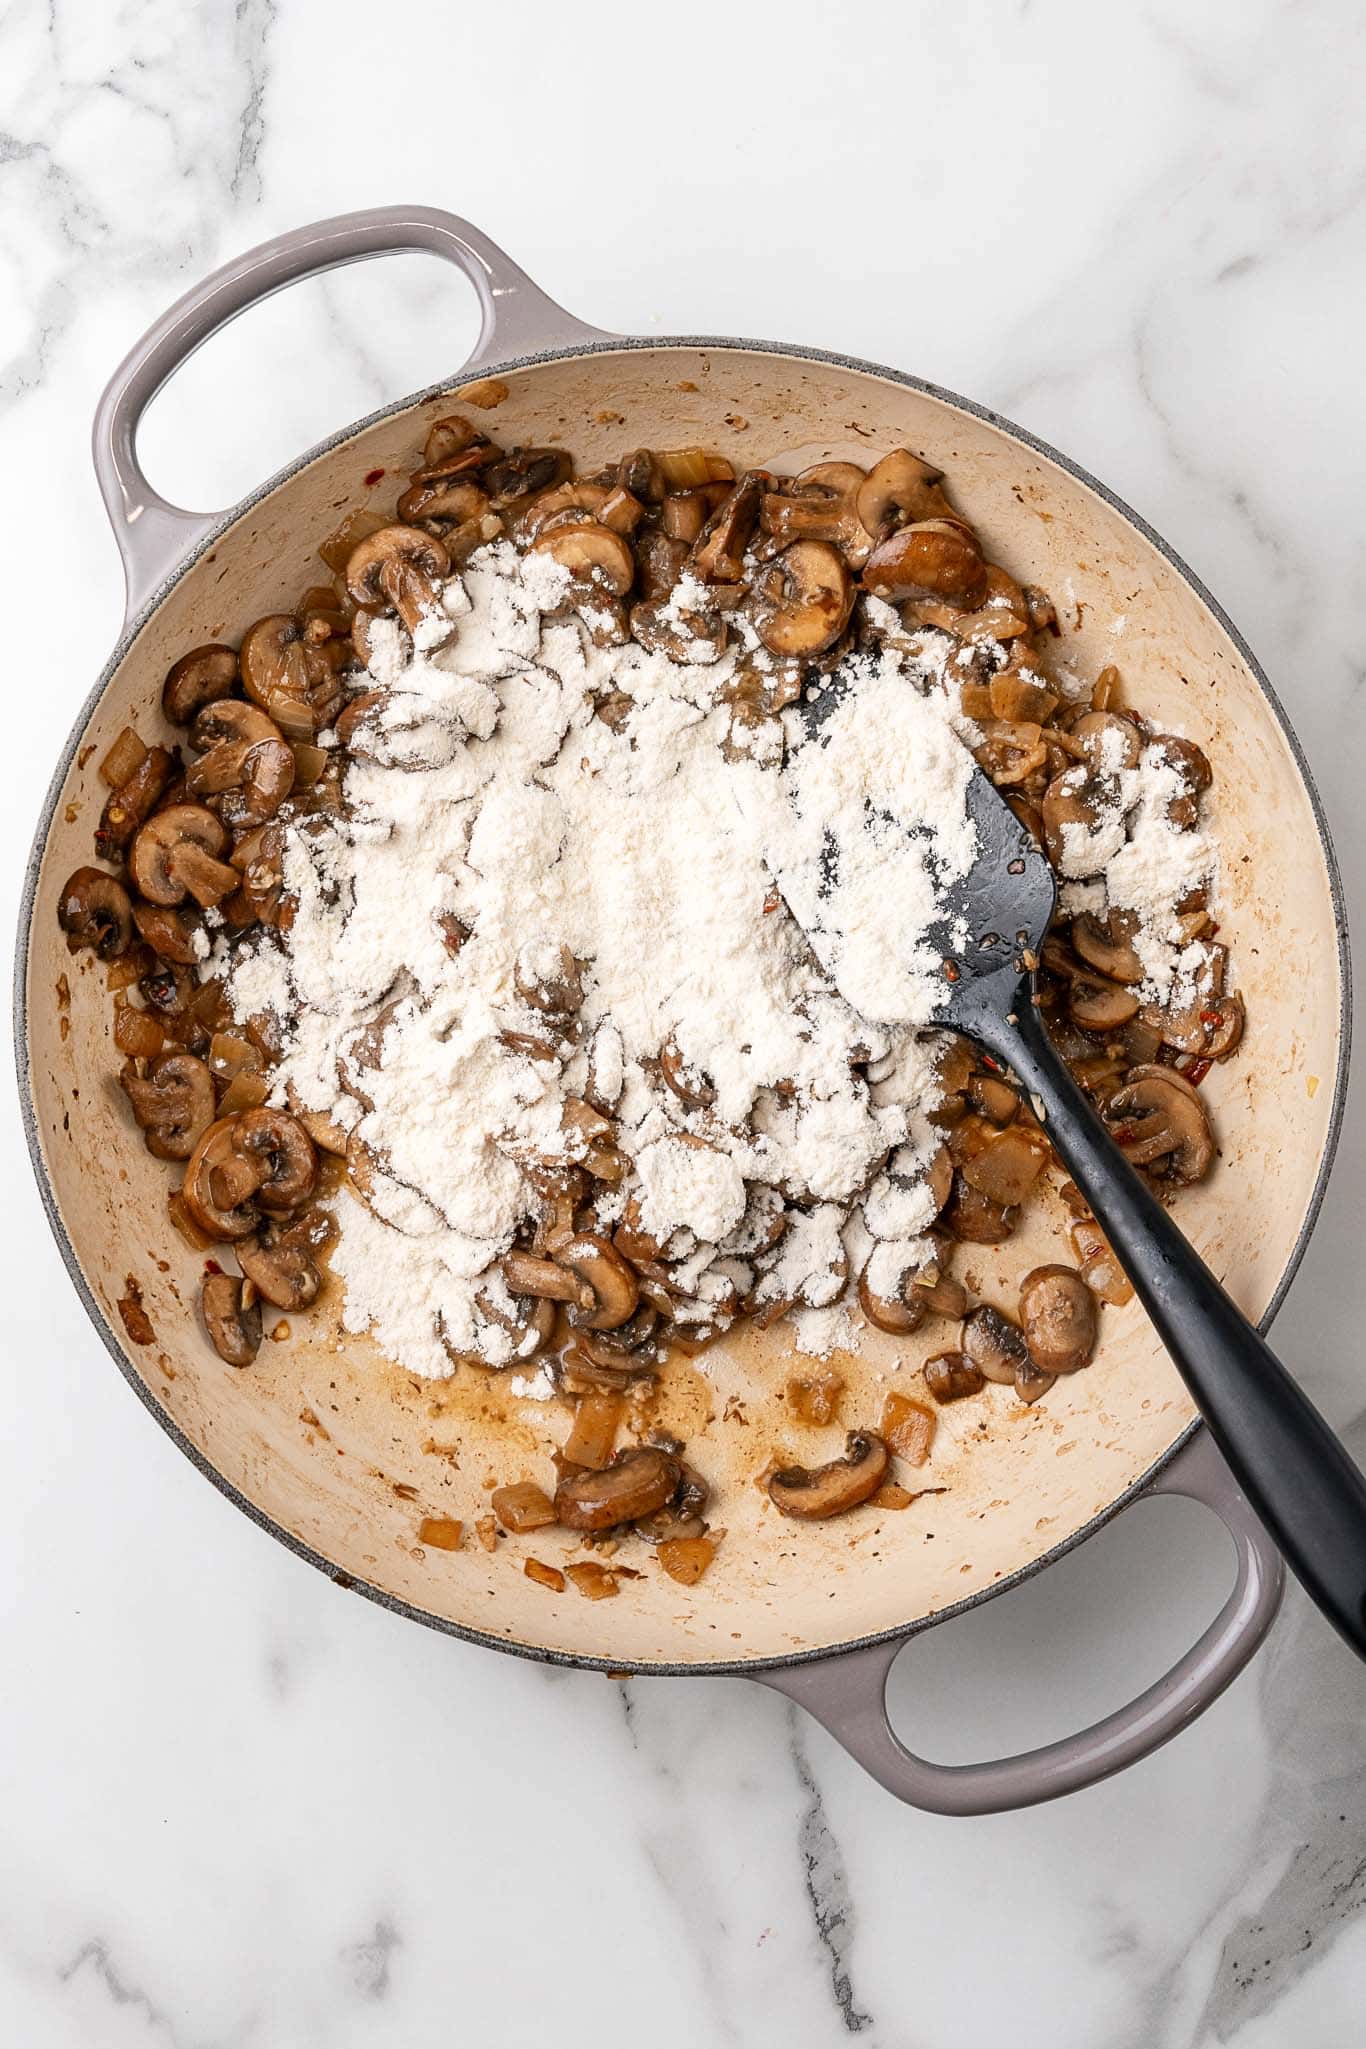
Make a proper roux. After adding the vegan butter to the cooked mushrooms, let it melt fully before sprinkling in the flour. Stir the flour into the butter and vegetables and cook for about a minute - this cooks out the raw flour taste and ensures your sauce won't be starchy. It should look like a pale, sandy paste clinging to the vegetables.
Add the broth slowly. Pour in a splash of vegetable broth, stir vigorously until smooth, then add more. This gradual approach prevents lumps from forming in the sauce. If you do end up with a few lumps, a quick whisk usually smooths everything out.
Use the pasta cooking water. Before you drain the pasta, scoop out a cup of the starchy cooking water. If your sauce turns out thicker than you'd like after adding the pasta, a splash of pasta water loosens it perfectly and helps everything cling together.
Taste before serving. The soy sauce adds salt, and different broths vary in saltiness - so always taste the finished sauce before plating. A pinch of salt, an extra crack of black pepper, or a squeeze of lemon can make a big difference.
Also worth trying: our Italian-style vegan sausage and peppers.
Variations
- Add greens. Stir a few handfuls of fresh spinach or baby kale into the sauce just before adding the pasta - it wilts in about a minute and adds color and nutrients.
- Boost the protein. Fold in crispy baked tofu cubes, white beans, or slices of vegan sausage to make it a heartier meal.
- Make it spicy. Double the red pepper flakes or stir in a teaspoon of sriracha or calabrian chili paste for a sauce with a kick.
- Switch the mushrooms. Shiitakes add a more intense, earthy flavor; oyster mushrooms are silkier and delicate; portobello caps sliced into strips give big, meaty bites. A mix of two or three varieties is especially good.
- Go gluten-free. Use your favorite gluten-free pasta and swap the soy sauce for tamari. The rest of the recipe is naturally gluten-free.
- Add a sun-dried tomato twist. Stir in 2-3 tablespoons of chopped sun-dried tomatoes (oil-packed) with the garlic for a sweet, jammy contrast to the earthy mushrooms.
Serving Ideas
This pasta is a full meal on its own, but a simple side rounds it out nicely. Warm, crusty bread or garlic bread is the obvious choice - you'll want something to swipe up every last bit of sauce from the bowl. A lightly dressed arugula salad with lemon and olive oil cuts through the richness beautifully.
For a bigger spread, roasted broccoli or asparagus alongside this dish is a great pairing - the slight char on the vegetables plays well against the creamy sauce. If you're serving this for guests, pair it with a side of glazed baked onions and pasta dishes like vegan zucchini lasagna or a hearty vegan pot pie casserole or Vegan Pasta Alfredo with Peas & Asparagus for variety.
Storing & Freezing
Leftovers keep well in an airtight container in the refrigerator for up to 4 days. The pasta will absorb some of the sauce as it sits, so when reheating add a splash of vegetable broth or plant milk and stir over medium-low heat until the sauce loosens and everything is warmed through. It reheats beautifully on the stovetop; the microwave works too, just stir halfway through.
This dish doesn't freeze well - the coconut milk sauce tends to separate and become grainy after thawing, and the pasta turns mushy. It's best made fresh or enjoyed within a few days from the fridge. If you want to meal prep ahead, you can make the sauce (without the pasta) and freeze that separately for up to 2 months, then cook fresh pasta to toss with it when ready.
More Vegan Pasta Recipes
If you loved this creamy mushroom pasta, here are a few more vegan pasta dinners to try:
- Vegan Vodka Pasta
- Vegan Spinach Mushroom Lasagna
- Vegan Pasta Alfredo with Peas & Asparagus
- Roasted Butternut Squash and Pasta Casserole
Recipe
Vegan Creamy Mushroom Pasta
Rich, velvety, and packed with earthy mushroom flavor, this vegan creamy mushroom pasta comes together in under 30 minutes with simple pantry staples — no dairy needed.
Print
Pin
Save
Servings: servings
Ingredients
- 1 lb pasta rotini or penne recommended
- 2 tablespoons olive oil
- 1 medium yellow onion diced
- 16 oz baby bella mushrooms sliced
- 3 cloves garlic minced
- ¼ teaspoon red pepper flakes optional
- 2 tablespoons dry white wine such as Chardonnay or Pinot Grigio; sub extra broth if preferred
- 3 tablespoons vegan butter
- 3 tablespoons all-purpose flour use gluten-free flour blend if needed
- 1 cup vegetable broth
- 1 cup full-fat coconut milk shaken well before opening
- 2 tablespoons soy sauce or tamari for gluten-free
- 2 teaspoons fresh thyme minced, plus more to garnish
Instructions
- Cook the pasta according to package directions until al dente. Reserve a cup of pasta water before draining, then drain and set aside.
- Heat the olive oil in a large skillet over medium heat. Add the diced onion and cook, stirring frequently, until softened and translucent, about 4–5 minutes.
- Add the sliced mushrooms and spread them into a single layer. Cook without stirring for 2 minutes, then stir and continue cooking until the mushrooms have released their liquid and it has fully evaporated, about 8–10 minutes total. Add the minced garlic and red pepper flakes and cook for 1 more minute.
- Pour in the white wine and scrape up any browned bits from the bottom of the pan. Let the liquid reduce by half, about 1 minute. Add the vegan butter and let it melt completely, then sprinkle the flour over the vegetables and stir to coat. Cook for 1 minute to eliminate the raw flour taste.
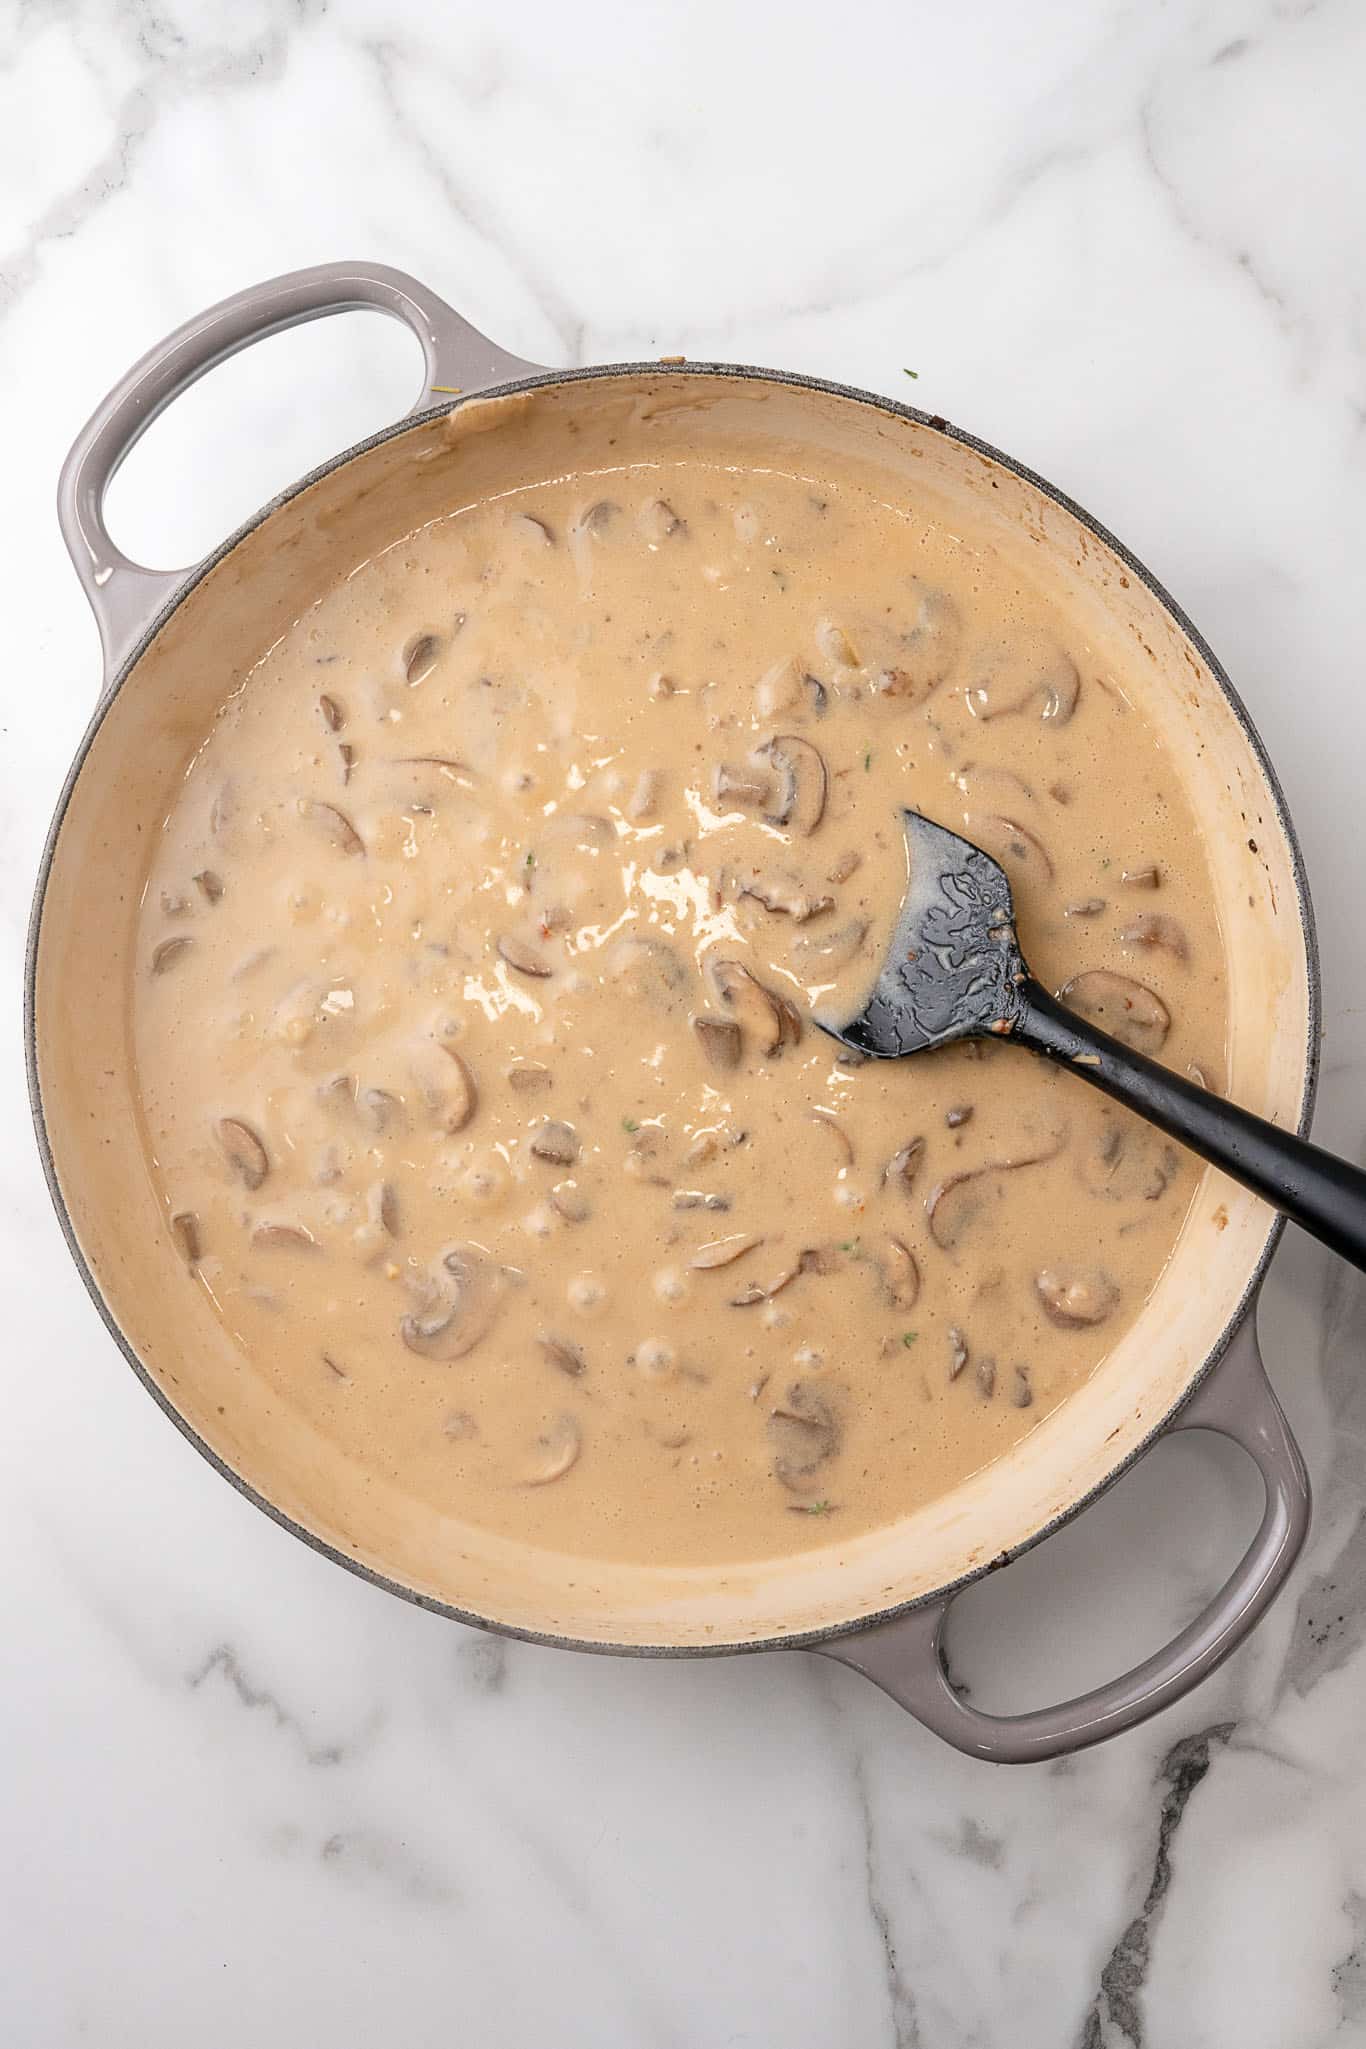
- Slowly pour in the vegetable broth a little at a time, stirring continuously after each addition to prevent lumps. Once all the broth is incorporated, stir in the coconut milk, soy sauce, and thyme.
- Bring the sauce to a gentle simmer and cook, stirring occasionally, until thickened to a creamy consistency, about 3–4 minutes. If the sauce becomes too thick, loosen it with a splash of reserved pasta water.
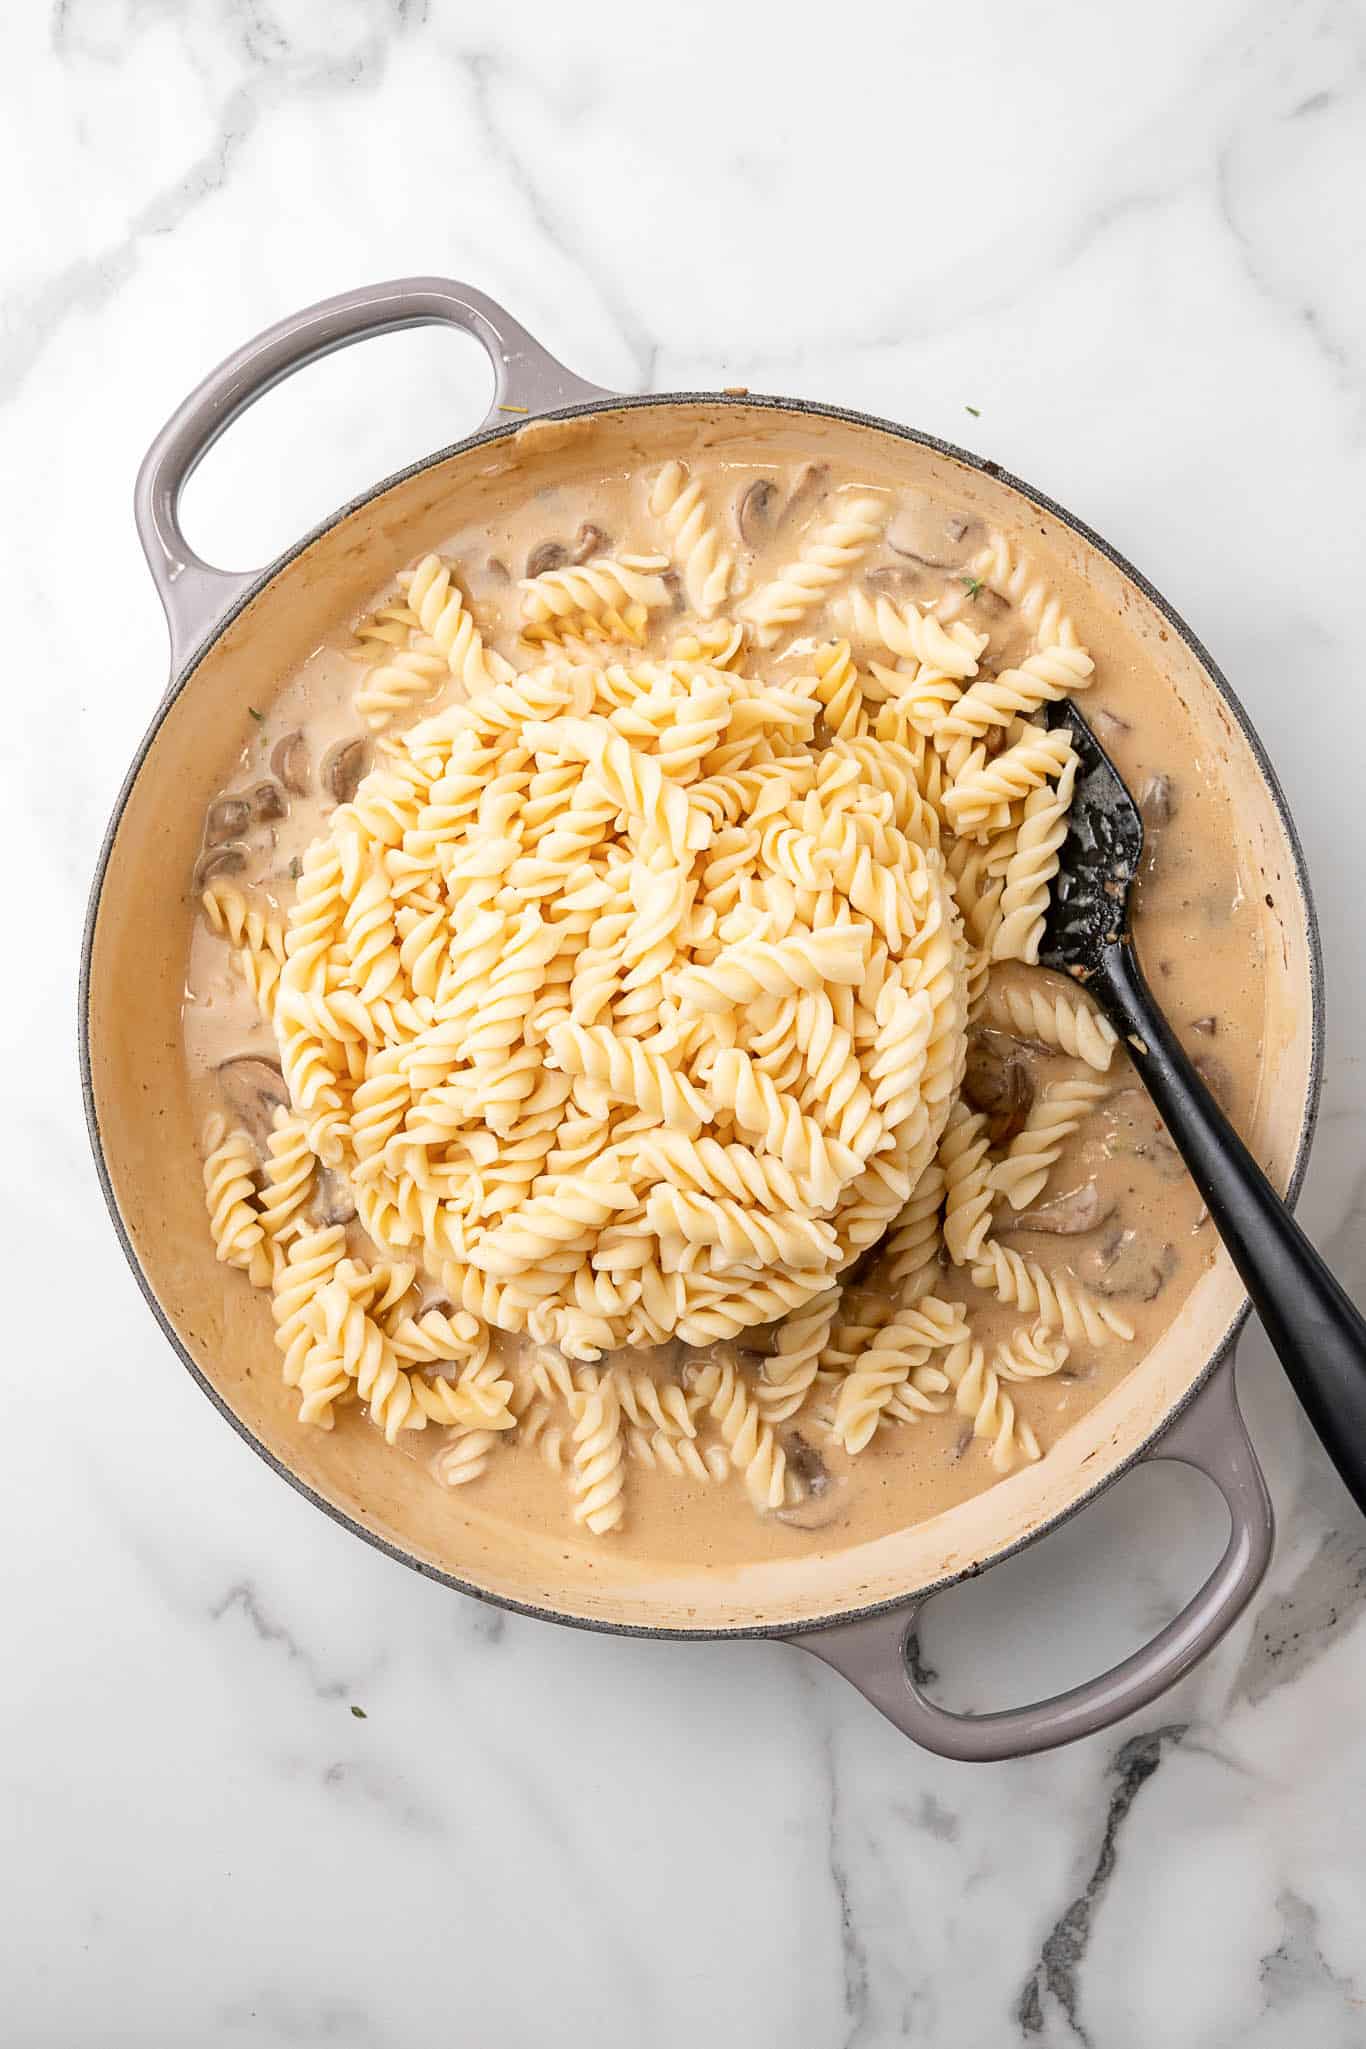
- Add the cooked pasta to the skillet and toss well to coat every piece in the sauce. Taste and adjust salt and pepper as needed.
- Serve immediately, garnished with fresh thyme leaves.
Nutrition (Estimate per Serving)
Calories: 3kcalCarbohydrates: 1gProtein: 14gFat: 19gSaturated Fat: 9gPolyunsaturated Fat: 2gMonounsaturated Fat: 6gTrans Fat: 0.03gSodium: 235mgPotassium: 651mgFiber: 3gSugar: 1gVitamin A: 125IUVitamin C: 3mgCalcium: 48mgIron: 3mg
Vegan-ize any recipe!Grab our free vegan cheat sheet, packed with my favorite easy substitutions to make any recipe vegan.
Vegan Quinoa and Wild Rice Burgers
These vegan quinoa and wild rice burgers are hearty, wholesome, and satisfying enough to win over anyone at the table - no meat required.
Key Ingredients & Substitutions
- Wild rice. The chewy, nutty backbone of these burgers. Wild rice holds its texture well after cooking and gives the patties a nice hearty bite. You can swap it for brown rice in a pinch, though you'll lose some of that characteristic chewiness.
- Cooked quinoa. Adds protein and helps bind the patties together. Any color of quinoa works - white, red, or tri-color. If you're making this gluten-free, quinoa flakes are a great substitute for the oats as well.
- Quick-cooking oats. Soaked in boiling water, they become the glue that holds the burgers together. For a gluten-free version, swap in certified gluten-free oats or quinoa flakes as noted in the recipe.
- Salt-free all-purpose seasoning blend. This is the workhorse flavor builder - look for blends like Mrs. Dash or make your own. If you don't have one on hand, a mix of garlic powder, onion powder, dried thyme, and dried oregano works well.
- Smoked paprika. Adds depth and a very subtle smokiness. Sweet paprika is a perfectly good substitute, or try a pinch of chipotle powder for a spicier kick.
- Fresh cilantro or parsley. Optional but recommended - fresh herbs brighten the whole patty. Cilantro gives a more vibrant, punchy finish; parsley is milder. Either works, or you can skip them entirely.
Helpful Tips
Cook the wild rice low and slow. Wild rice takes about 35 minutes at a gentle simmer, and rushing it makes it tough. The grains should just start to split and curl before you pull them off the heat. Undercooked wild rice won't blend into the patty mixture well.
Let the oat mixture absorb fully. When you cover the oats with boiling water, give them a full 5 minutes before mixing. If you rush this step, the oats won't fully hydrate and your patties will be crumbly rather than cohesive.
Pack the measuring cup firmly. Scooping loosely will give you fragile patties. Fill the ½-cup measuring cup with the burger mixture and press it down firmly before inverting onto the baking sheet. The more compact the patty going in, the better it holds together coming out.
Don't skip the flip. At the 15-minute mark, turn each patty gently using a thin spatula. This is what gives both sides that golden, slightly crisp exterior. If a patty sticks or starts to crumble, let it bake another 2 minutes before attempting the flip.
Make ahead and freeze. These patties freeze beautifully. Bake them fully, let them cool completely, then freeze in a single layer on a baking sheet before transferring to a bag. Reheat from frozen in a 375°F oven for about 15 minutes, flipping once.
Also worth trying: our gently curried tofu burgers.
Variations
- Add lentils. Stir in ½ cup of cooked brown or green lentils for even more protein and a slightly denser texture - similar to the filling Vegan Quinoa Mushroom Burger.
- Make them spicy. Add ½ teaspoon of cayenne pepper or a tablespoon of your favorite hot sauce to the mixture. A dash of chipotle powder in place of (or alongside) the smoked paprika works especially well.
- Tex-Mex version. Swap the cilantro for parsley, add ¼ cup of corn and ¼ cup of drained black beans. Serve with salsa, sliced avocado, and a squeeze of lime.
- Mushroom boost. Sauté ½ cup of finely diced cremini mushrooms with the onion and garlic. They add umami depth and extra moisture that melds beautifully with the wild rice.
- Herbed version. Use a full ¼ cup of mixed fresh herbs - parsley, chives, and a little tarragon - and add 1 teaspoon of Dijon mustard to the mix. Great with a simple aioli or vegan burger sauce.
- Pan-fried option. If you prefer a crispier exterior, pan-fry in a thin layer of oil over medium heat for about 5 minutes per side rather than baking. The outside crisps up more quickly, so watch the heat carefully.
Serving Ideas
These burgers are sturdy enough to hold up in a bun with all the classic toppings - lettuce, tomato, onion, pickles, and a generous smear of vegan mayo or copycat vegan Big Mac sauce. A toasted brioche-style bun is especially good here since the slight sweetness contrasts nicely with the earthy grains. You can also tuck them into a pita pocket with shredded cabbage and tahini sauce for a more Mediterranean feel.
Serve them alongside a simple green salad, roasted sweet potato wedges, or fresh tomato relish for a complete meal. They also work beautifully on top of a grain bowl - break one apart over quinoa or farro, add a handful of greens and a drizzle of lemon tahini dressing, and you have a satisfying lunch that holds you for hours.
Storing & Freezing
Let leftover patties cool completely, then store them in an airtight container in the refrigerator for up to 4 days. To reheat, warm them in a 350°F oven for 8-10 minutes or in a dry skillet over medium-low heat for a couple minutes per side. Avoid microwaving if you can - it softens the exterior and makes the patties a bit mushy.
These burgers freeze very well. Once fully baked and cooled, freeze in a single layer on a lined baking sheet until solid, then transfer to a zip-close freezer bag. They'll keep for up to 3 months. Reheat straight from frozen in a 375°F oven for 15 minutes, flipping halfway through. The texture holds up remarkably well after freezing.
More Vegan Burger Recipes
If you loved this recipe, check out our full collection of the best vegan burger recipes, including our chipotle black bean burgers for a smoky kick - or here are a few more individual favorites:
- Vegan Chipotle Black Bean Burgers
- Vegan Quinoa Mushroom Burger
- Vegan Chickpea Patties
- Easy Vegan Portobella Burgers
- Best Vegan Burger Recipes
Recipe

Vegan Quinoa and Wild Rice Burgers
These vegan quinoa and wild rice burgers are hearty and satisfying, with two wholesome grains making up the base. Great on buns, in pitas, or on their own with your favorite sauce.
Print
Pin
Save
Servings: burgers
Ingredients
- ½ cup wild rice uncooked
- 1 tablespoon olive oil
- 1 medium-large onion finely chopped
- 2 cloves garlic minced
- ½ cup quick-cooking oats or quinoa flakes for gluten-free
- 2 cups cooked quinoa firmly packed
- 1 tablespoon salt-free all-purpose seasoning blend
- 1 teaspoon ground cumin
- 1 teaspoon smoked paprika or sweet paprika
- ¼ cup fresh cilantro or parsley minced, optional
- salt and pepper to taste
Instructions
- Preheat the oven to 400°F. Line a baking sheet with parchment paper.
- Combine the wild rice with 1 ½ cups water in a small saucepan. Bring to a rapid simmer, then lower the heat, cover, and cook until the water is absorbed, about 35 minutes.
- Heat the oil in a medium saucepan. Add the onion and sauté over medium heat until translucent, about 5 minutes. Add the garlic and continue until golden.
- Place the oats in a large bowl and cover with 1 cup boiling water. Let stand for 5 minutes. Add the sautéed onion and garlic, cooked wild rice, cooked quinoa, seasoning blend, cumin, paprika, and cilantro (if using). Season with salt and pepper. Mix well.
- Lightly oil a round ½-cup measuring cup. Scoop a level portion of the mixture and invert onto the parchment, tapping firmly to release. Flatten to about ½-inch thickness with the bottom of the cup. Repeat with remaining mixture.
- Bake for 15 minutes, then flip each burger carefully and bake for another 15 minutes, until golden and firm on both sides. Serve on their own or with buns and your favorite condiments.
Nutrition (Estimate per Serving)
Calories: 107kcalCarbohydrates: 14gProtein: 3gFat: 3gPolyunsaturated Fat: 1gMonounsaturated Fat: 1gSodium: 6mgPotassium: 153mgFiber: 3gSugar: 1gVitamin A: 42IUVitamin C: 1mgCalcium: 45mgIron: 2mg
Vegan-ize any recipe!Grab our free vegan cheat sheet, packed with my favorite easy substitutions to make any recipe vegan.
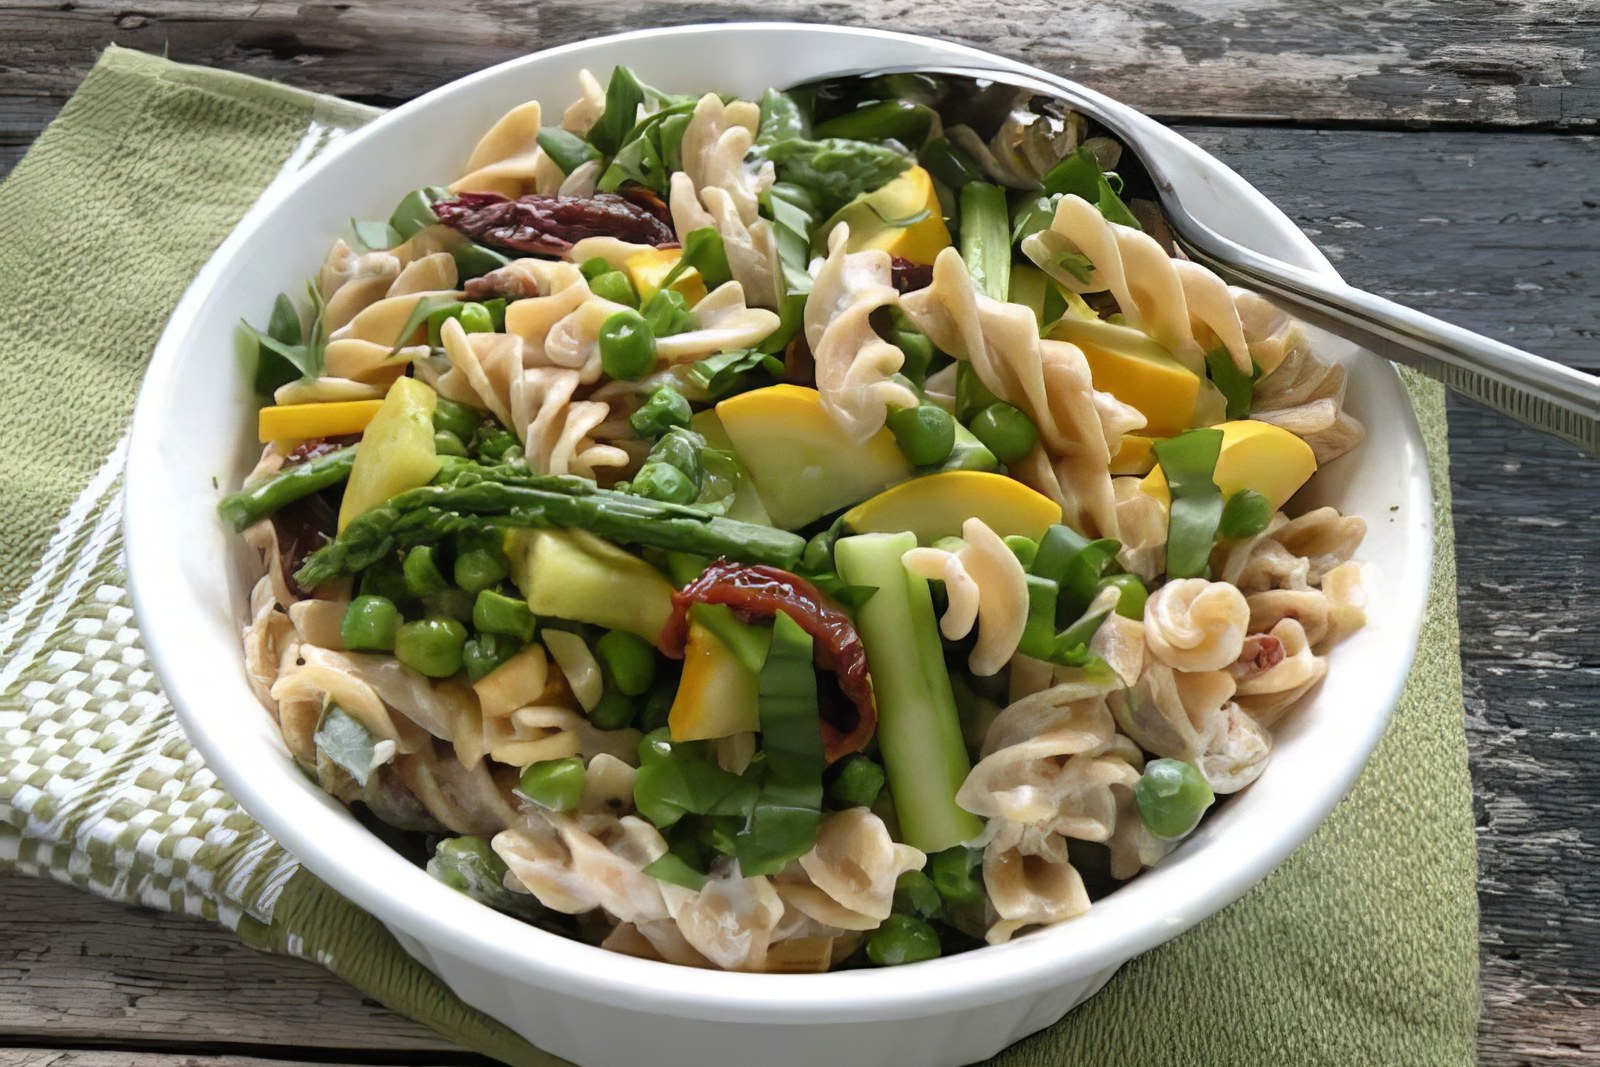
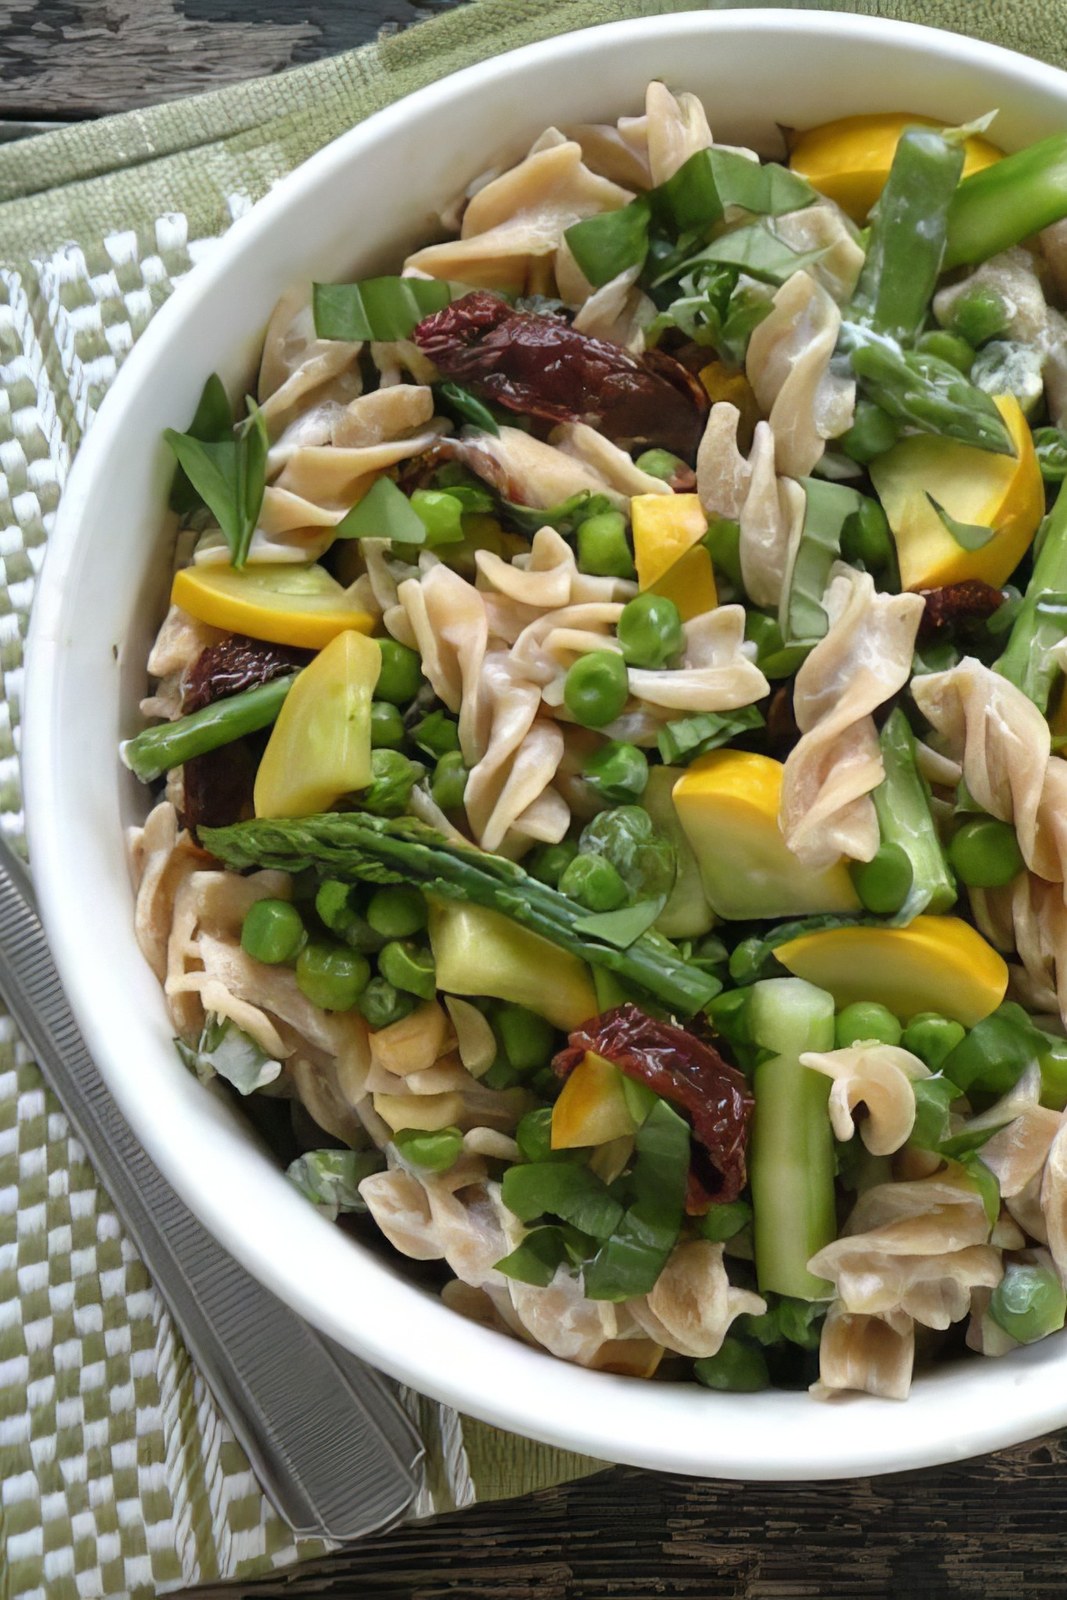
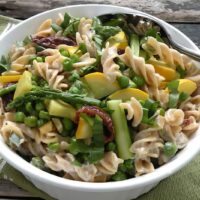
Vegan Pasta Alfredo with Peas & Asparagus
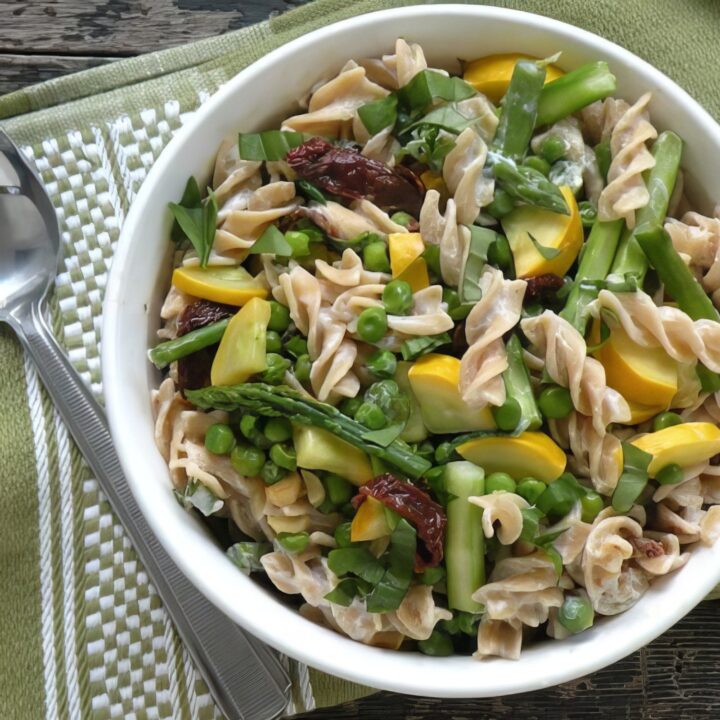
This vegan pasta alfredo with peas and asparagus is spring comfort food at its best - a silky, creamy sauce made entirely from blended silken tofu, tossed with tender spring vegetables and your favorite pasta shape. No dairy, no compromise.
Key Ingredients & Substitutions
- Firm silken tofu. The secret to the dairy-free alfredo sauce - it blends completely smooth and creates a rich, creamy texture without any cream, butter, or cashews. Use firm silken tofu (like Mori-Nu shelf-stable) for the best result. Soft silken tofu works too and gives a slightly thinner sauce. Do not substitute regular firm tofu, which is too grainy to blend smoothly.
- Asparagus. Slender spears are ideal here - they cook quickly and are tender all the way through without peeling. If you can only find thick asparagus, peel the lower third of each stalk. Snap off the woody ends and cut into 1½-inch pieces so they're easy to eat with pasta.
- Yellow summer squash. Adds color and a mild sweetness. Zucchini is a direct swap. You can also skip it and increase the asparagus.
- Frozen peas. Sweet and bright - they thaw almost instantly in the pan. Fresh shelled peas in season are even better if you have them.
- Sun-dried tomatoes. Concentrated, chewy, and deeply savory - they balance the creaminess of the tofu sauce beautifully. Oil-packed or rehydrated dry-packed both work well. Slice them before adding.
- Pasta shape. Use a chunky shape - rotini, fusilli, farfalle, or gemelli - so the sauce and vegetables have something to cling to. Whole-grain pasta adds fiber and a nuttier flavor that plays well with the vegetables.
- Fresh lemon juice. The acid in the tofu sauce is what makes it taste bright and fresh rather than flat. Don't skip it.
Variations
- Add white beans. Stir in a drained 15-ounce can of cannellini or great northern beans for extra protein. For a no-cook pasta option, also try our vegan Greek pasta salad. If you love asparagus, our cream of asparagus soup makes a beautiful spring starter.
- eartiness.
- Make it gluten-free. Use your favorite GF pasta - brown rice pasta, chickpea pasta, or lentil pasta all work well with this sauce.
- Add nutritional yeast. Stir 2 to 3 tablespoons into the tofu sauce before blending for a cheesy, savory depth reminiscent of parmesan.
- Swap the greens. Stir in a few handfuls of baby spinach or arugula with the pasta at the end - they'll wilt just from the heat of the dish.
- Mushroom version. Add 8 ounces of sliced cremini or shiitake mushrooms to the pan with the garlic for an earthier, more substantial dish.
- Lemon herb version. Add the zest of one lemon to the tofu sauce and finish with a generous handful of fresh basil for a brighter, more Italian feel.
Tips for the Best Vegan Pasta Alfredo
- Blend the tofu sauce until completely smooth. Any graininess in the sauce will be noticeable in the final dish. Blend for a full minute, scraping down the sides, until the texture is silky.
- Reserve pasta water. A splash of the starchy cooking water is your best friend for loosening the sauce if it thickens too much when it hits the hot pasta.
- Don't overcook the vegetables. Tender-crisp is what you're after - asparagus and peas should still have a little bite. Five minutes in the covered pan is usually enough.
- Keep the heat low when adding the sauce. Silken tofu can break or become grainy if overheated. Warm it gently over low heat just until it's heated through.
- Serve immediately. Like all creamy pasta dishes, this is best fresh off the stove. The sauce will thicken as it sits - if reheating leftovers, add a splash of water or plant-based milk and warm over low heat.
How to Serve
Serve straight from the pan into wide pasta bowls, topped with extra fresh basil or parsley and a crack of black pepper. This is a complete meal on its own, but it pairs well with a simple green salad, garlic bread, or a wedge of crusty sourdough. For a more elaborate spread, serve alongside a bowl of marinated olives or a light tomato bruschetta. This also pairs beautifully alongside our vegan zucchini lasagna for an Italian dinner spread. Leftovers keep in the fridge for up to 3 days - reheat gently with a splash of water to revive the sauce.
Recipe
Vegan Pasta Alfredo with Peas & Asparagus
A creamy vegan pasta alfredo made with silken tofu instead of dairy — light, luscious, and packed with spring vegetables. Asparagus, sweet peas, yellow squash, and sun-dried tomatoes make every bite colorful and satisfying.
Print
Pin
Save
Servings: servings
Ingredients
Pasta & Vegetables
- 12 ounces rotini, fusilli, farfalle, or other chunky pasta whole-grain preferred
- 1 tablespoon extra-virgin olive oil
- 3 cloves garlic minced
- 10 ounces slender asparagus tough ends snapped off, cut into 1½-inch pieces
- 1 cup frozen green peas or fresh shelled peas
- 1 medium yellow summer squash quartered lengthwise and thinly sliced
- ⅓ cup sun-dried tomatoes sliced (oil-packed or rehydrated)
- ¼ cup fresh parsley or basil minced or thinly sliced
Silken Tofu Alfredo Sauce
- 12.3 ounce package firm silken tofu drained
- 2 tablespoons fresh lemon juice about ½ lemon
- salt and freshly ground black pepper to taste
Instructions
- Cook the pasta in a large pot of well-salted boiling water according to package directions until al dente. Drain and set aside, reserving ¼ cup of the pasta cooking water.
- While the pasta cooks, combine the silken tofu and lemon juice in a blender or food processor. Blend until completely smooth and creamy, about 1 minute. Season with salt and pepper. Set aside.
- Heat the olive oil in a large, wide skillet over medium heat. Add the garlic and sauté for 1 to 2 minutes until fragrant and lightly golden — do not let it brown. Add the asparagus, peas, squash, sun-dried tomatoes, and ¼ cup water. Cover and cook for 4 to 5 minutes, stirring once halfway through, until the vegetables are just tender-crisp.
- Pour the silken tofu sauce over the vegetables and stir to coat. Cook over low heat for 1 to 2 minutes until heated through. If the sauce seems thick, stir in a splash of the reserved pasta water to loosen it.
- Add the drained pasta to the skillet and toss well to combine everything. Stir in the fresh parsley or basil. Taste and adjust salt and pepper. Serve immediately.
Notes
Silken tofu: Firm silken tofu (such as Mori-Nu) blends into a perfectly smooth, dairy-free cream sauce. Do not substitute regular firm tofu — it won't blend smoothly. Soft silken tofu works too and gives a slightly thinner sauce.
Asparagus prep: Use slender asparagus spears — they're tender throughout and don't need peeling. If using thicker spears, peel the lower third of each stalk with a vegetable peeler.
Make it gluten-free: Use your favorite gluten-free pasta. Brown rice pasta or chickpea pasta both hold up well with this sauce.
Add protein: Stir in a drained can of white beans or a handful of shelled edamame with the vegetables for extra plant-based protein.
Nutrition (Estimate per Serving)
Calories: 444kcalCarbohydrates: 23gProtein: 9gFat: 6gSaturated Fat: 2gPolyunsaturated Fat: 1gMonounsaturated Fat: 3gCholesterol: 7mgSodium: 63mgPotassium: 544mgFiber: 3gSugar: 1gVitamin A: 237IUVitamin C: 23mgCalcium: 105mgIron: 3mg
Vegan-ize any recipe!Grab our free vegan cheat sheet, packed with my favorite easy substitutions to make any recipe vegan.
Also try: our vegan creamy mushroom pasta.
Tabbouleh Salad (with Quinoa, Bulgur, or Couscous)
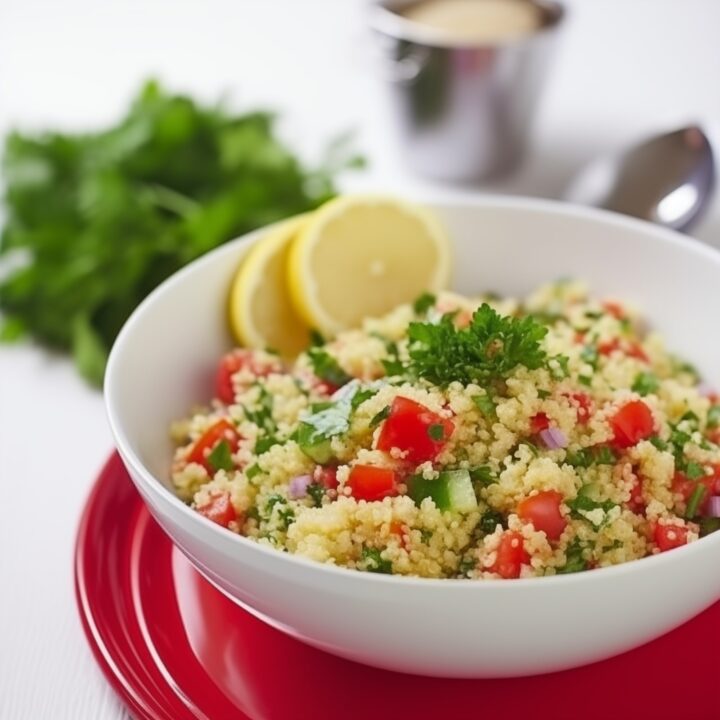
This classic tabbouleh is everything a great salad should be - bright, herby, tangy, and refreshing. Make it the traditional way with bulgur, or swap in quinoa for a gluten-free version or couscous when you want something even faster.
Key Ingredients & Substitutions
- Bulgur wheat. The traditional grain for tabbouleh - it has a nutty flavor, chewy texture, and cooks quickly on the stovetop. Medium or fine bulgur both work; fine bulgur soaks up the dressing especially well. Substitute couscous for a near-instant version, or quinoa to keep it gluten-free and higher in protein.
- Fresh flat-leaf parsley. The star of the dish - don't hold back. Tabbouleh should be heavily green. Flat-leaf (Italian) parsley has more flavor than curly; use at least one large bunch, very finely chopped.
- Ripe tomatoes. Use the best tomatoes you can find - they provide sweetness and juice that becomes part of the dressing. Cherry tomatoes, halved, work beautifully in summer. In winter, Roma tomatoes are your most reliable option.
- Fresh lemon juice. Squeeze it fresh - bottled juice won't give you the same brightness. Start with one large lemon and add more to taste.
- Extra-virgin olive oil. Use a good one; it's a primary flavor in the dressing.
- Scallions. Milder than red onion and traditional in many versions. If you prefer the bite of raw onion, swap in ¼ cup minced red onion.
- Fresh mint. Optional but excellent - a small handful of thinly sliced mint leaves adds a cooling note that makes this especially refreshing in warm weather.
Variations
- Quinoa tabbouleh (gluten-free). Rinse 1 cup quinoa, then cook with 2 cups water for 15 minutes over low heat until absorbed. Cool completely before mixing in - quinoa releases liquid as it cools, so don't rush this step. The result is slightly nuttier and higher in protein than the bulgur version.
- Couscous tabbouleh (fastest version). No stovetop needed. Place 1 cup whole-grain couscous in a heatproof bowl, pour 1¼ cups boiling water over it, cover tightly, and let stand 10 minutes. Fluff and cool, then mix in the other ingredients. On the table in about 20 minutes total.
- Chickpea tabbouleh. Add a drained 15-ounce can of chickpeas to make this a hearty main-dish salad instead of a side.
- Add olives. About ⅓ cup sliced Kalamata olives adds a salty, briny depth - especially good if you're not serving olives alongside.
- Cucumber tabbouleh. Add 1 cup diced English cucumber for extra crunch and freshness. This is common in Lebanese-style versions.
- Grain-free version. Replace the grain entirely with extra-finely chopped cauliflower (raw) for a low-carb tabbouleh that's surprisingly close to the original in texture.
Tips for the Best Tabbouleh
- Cool the grain completely before mixing. Warm grain will wilt the parsley and make the salad soggy. Spread it on a baking sheet to cool faster.
- Chop the parsley very fine. Rough-chopped parsley gives an uneven, chewy texture. Use a sharp knife and chop it until it's almost a finely minced pile - it should almost melt into the grain.
- Let it rest before serving. Tabbouleh gets dramatically better after 30 minutes as the grain absorbs the dressing. An hour is even better. Make it ahead if you can.
- Dress it twice. Add half the lemon juice and olive oil before resting, then taste and add more just before serving - the grain absorbs a lot and it often needs a second hit of lemon.
- Season assertively. Tabbouleh is a bold salad - it needs more salt than you might expect, and plenty of black pepper. Taste it at least twice before serving.
How to Serve
Tabbouleh is a natural fit on a Middle Eastern mezze spread alongside hummus, warm pita, a handful of olives, and stuffed grape leaves. For a bold homemade dressing to accompany any grain salad, try our garlic mustard vinaigrette. For another fresh herb-forward salad, our tomato relish salad is bright and simple. It also works beautifully as a side dish for grilled or roasted vegetables, falafel, or lentil soup. Leftovers keep well in the fridge for up to 3 days - the flavors deepen overnight, though the parsley will lose some of its brightness. Give it a fresh squeeze of lemon and a drizzle of olive oil before serving again.
Recipe
Tabbouleh Salad (Bulgur, Couscous, or Quinoa)
A bright, herb-forward Middle Eastern classic made with bulgur wheat, ripe tomatoes, loads of fresh parsley, and a lemony olive oil dressing. Easily made with couscous or quinoa — see the variations in the notes.
Print
Pin
Save
Servings: servings
Ingredients
- 1 cup bulgur wheat see notes for couscous or quinoa variations
- 2 cups water
- 3 medium ripe tomatoes diced
- 1 cup fresh flat-leaf parsley finely chopped (about 1 large bunch)
- 3 scallions thinly sliced
- 2 tablespoons fresh mint leaves thinly sliced, optional
- 3 tablespoons extra-virgin olive oil
- 1 large lemon juiced (about 3–4 tablespoons)
- salt and freshly ground black pepper to taste
Instructions
- Combine the bulgur and water in a small saucepan. Bring to a boil over medium-high heat, then reduce the heat to low, cover, and simmer for 12 to 15 minutes, until the water is fully absorbed. For a more tender result, add an extra ½ cup water and continue simmering until absorbed. Remove from heat, fluff with a fork, and spread onto a baking sheet or large plate to cool to room temperature.
- While the bulgur cools, dice the tomatoes, finely chop the parsley, and thinly slice the scallions and mint (if using). Juice the lemon.
- Transfer the cooled bulgur to a large serving bowl. Add the tomatoes, parsley, scallions, and mint. Drizzle with the olive oil and lemon juice, then season generously with salt and pepper.
- Toss well to combine. For best flavor, cover and let the salad rest at room temperature for at least 30 minutes before serving — this allows the bulgur to absorb the dressing. Taste and adjust salt, pepper, and lemon juice before serving.
Notes
Couscous variation: Skip the stovetop cooking. Place 1 cup whole-grain couscous in a heatproof bowl. Pour 1¼ cups boiling water over it, cover tightly with a plate or plastic wrap, and let stand for 10 minutes. Fluff with a fork and cool to room temperature, then proceed with the recipe as written.
Quinoa variation (gluten-free): Rinse 1 cup quinoa under cold water. Combine with 2 cups water in a saucepan, bring to a boil, then reduce heat to low, cover, and simmer for 15 minutes until the water is absorbed. Fluff and cool completely before mixing with the other ingredients. Quinoa gives a slightly nuttier flavor and higher protein content than bulgur.
Optional add-ins: A drained 15-ounce can of chickpeas makes this more substantial. About ¼ cup minced red onion adds bite. A handful of sliced Kalamata olives works well if you're not serving olives on the side.
Nutrition (Estimate per Serving)
Calories: 210kcal
Vegan-ize any recipe!Grab our free vegan cheat sheet, packed with my favorite easy substitutions to make any recipe vegan.
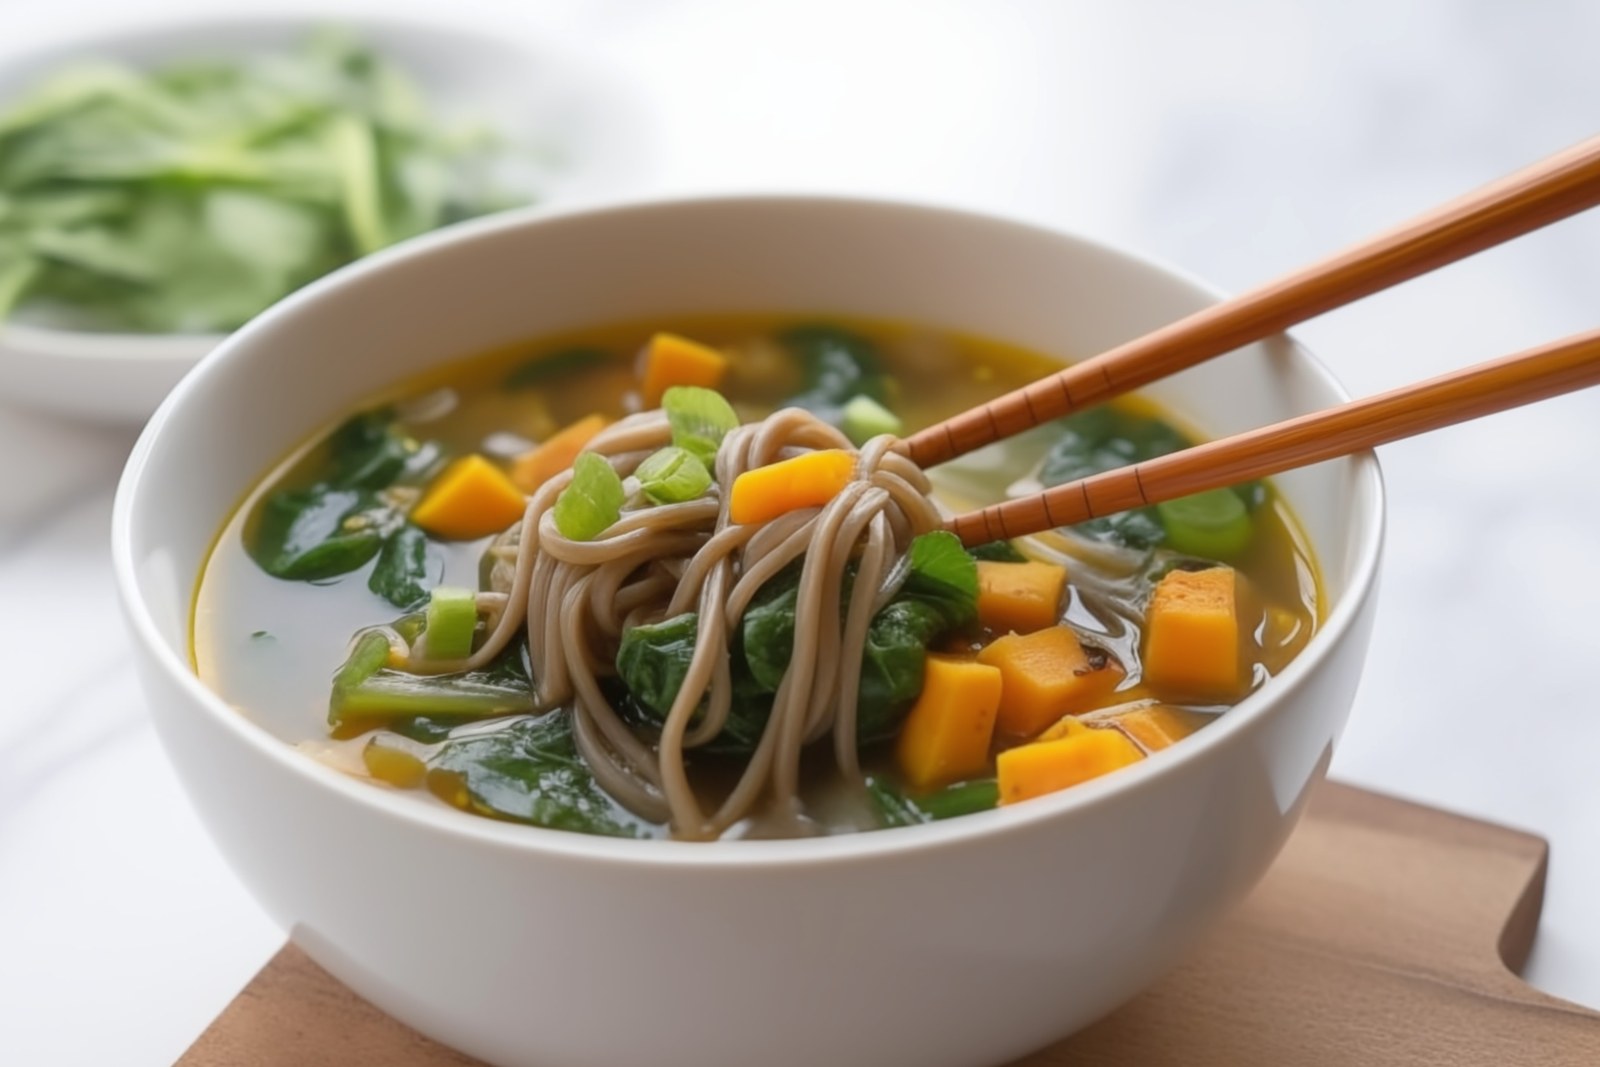
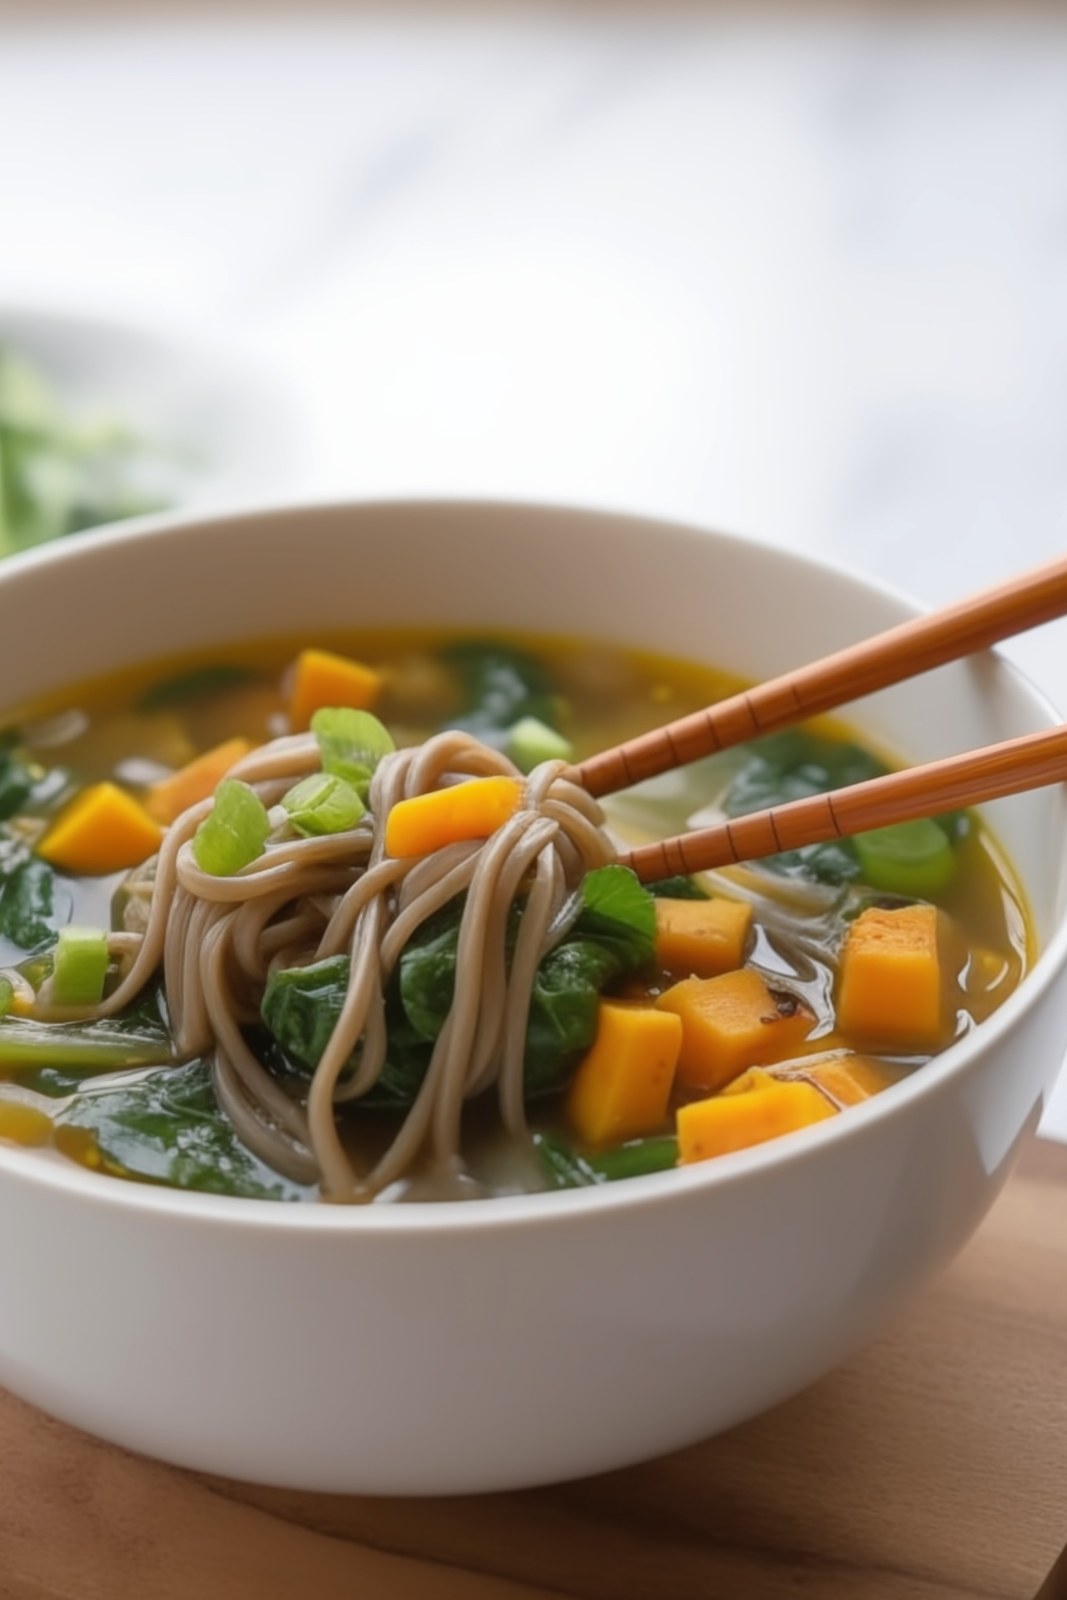
Miso-Butternut Squash Soup with Soba or Udon Noodles

This miso butternut squash soup has been a reader favorite on VegKitchen since 2018 - and it's just as cozy and satisfying as ever. We've given it a fresh update with brand-new photos, but the recipe is the same warming bowl we've always loved: a rich miso-ginger broth, tender squash, soba noodles, and a heap of wilted greens.
Key Ingredients & Substitutions
- Butternut squash. Roasted or microwaved until just tender - it adds natural sweetness and body to the broth. Kabocha squash or sweet potato work as swaps and cook in roughly the same time.
- Vegan miso paste. The soul of this soup. White (shiro) miso is mild and slightly sweet; yellow miso is a bit more savory; red miso is the boldest and most intense. Any variety works - just make sure it's labeled vegan, as some miso pastes contain dashi (fish stock). Stir it in at the very end, off the heat, to preserve its probiotic benefits.
- Soba noodles. Buckwheat soba gives the soup its earthy, nutty character. Pure buckwheat soba is also gluten-free - just check the label, as many commercial soba blends include wheat flour. Udon noodles work equally well for a thicker, chewier texture.
- Fresh ginger. Grated fresh ginger is essential here - it adds warmth and brightness that ground ginger can't replicate. Use as much as you like.
- Vegan vegetable bouillon cubes. Two cubes give the broth depth and savory umami to complement the miso. Choose a low-sodium, MSG-free brand. Vegetable broth works as a direct substitute - just use it in place of the water.
- Baby spinach. Stirred in at the end, it wilts in about a minute and adds color and nutrition. Watercress, baby arugula, baby bok choy, or any tender Asian green are excellent alternatives.
- Frozen peas. A simple addition that adds sweetness, color, and a little extra protein. Thaw them before adding so they don't drag down the broth temperature.
Variations
- Make it brothier. This soup is fairly thick as written. For a more broth-forward bowl, increase the water to 6 cups and add an extra bouillon cube.
- Add tofu. Cube a block of firm or extra-firm tofu and add it with the squash for extra protein. Press it first so it holds its shape in the soup.
- Spicy miso version. Stir a teaspoon of sriracha or a pinch of red pepper flakes into the broth along with the miso for a warming kick.
- Add edamame. Swap the peas for shelled edamame (thawed from frozen) for higher protein and a slightly nuttier flavor.
- Rice noodle version (gluten-free). Use thin rice noodles in place of soba. Soak them separately according to package directions, then add to bowls when serving to keep them from absorbing all the broth.
- Richer broth. Stir in a tablespoon of tahini or a drizzle of toasted sesame oil just before serving for a creamier, nuttier finish.
Tips for the Best Miso Butternut Squash Soup
- Never boil miso. Always dissolve it in warm (not boiling) water and stir it in at the very end with the heat off or very low. Boiling destroys the beneficial probiotics and dulls the flavor.
- Cook the squash just until tender. You want it to hold its shape in the soup, not turn to mush. Whether you're microwaving or roasting, test it with a knife - it should pierce easily but still feel firm.
- Cook noodles separately if making ahead. Soba absorbs broth quickly as it sits. If you think you'll have leftovers, cook the noodles separately and add them to individual bowls at serving time.
- Taste and adjust the miso at the end. Start with 2 tablespoons, then add more to taste. The amount you need depends on the brand and type of miso - some are much saltier than others.
- Prep the squash ahead. The squash can be cooked, peeled, and cubed up to 2 days in advance and kept in the fridge. It makes this a genuinely quick weeknight soup.
How to Serve
Serve immediately in deep bowls with chopsticks for the noodles and a spoon for the broth. This soup is a complete meal on its own but pairs beautifully with a simple cucumber salad, edamame, or steamed dumplings. For a heartier spread, serve alongside brown rice or a wedge of crusty sourdough bread. Leftovers keep for up to 3 days in the fridge - store the noodles and broth separately if possible, and reheat gently over low heat without boiling. For another light and healthy vegan soup, try our yellow squash soup, our cream of asparagus soup, or our fresh tomato and corn soup. For a hearty butternut squash dinner, our creamy butternut squash pasta casserole is wonderfully satisfying.
Recipe

Miso Butternut Squash Soup with Soba Noodles
A warming, deeply savory vegan noodle soup built on a miso-ginger broth with tender butternut squash, soba noodles, spinach, and peas. Quick to pull together once the squash is cooked — and beautiful in the bowl.
Print
Pin
Save
Servings: servings
Ingredients
- 1 small butternut squash about 1 pound
- 4 cups water plus more as needed
- 4 ounces soba (buckwheat) or udon noodles broken in half
- 2 teaspoons fresh ginger grated, or more to taste
- 2 vegan vegetable bouillon cubes low-sodium, no MSG
- 4 ounces fresh baby spinach about 4 to 6 cups loosely packed
- 1 cup frozen green peas thawed
- 3 scallions thinly sliced
- 3 tablespoons vegan miso paste white, yellow, or red — see notes
- freshly ground black pepper to taste
Instructions
- Pierce the butternut squash a few times with a knife. Microwave on high for 4 to 6 minutes, adding 1 minute at a time, until it can be pierced easily with a knife but still holds its shape. Alternatively, wrap the whole squash in foil and bake at 375°F for 30 to 40 minutes until just tender. Let cool until easy to handle, then halve, scoop out the seeds, peel, and cut the flesh into bite-sized chunks. Set aside. (This step can be done ahead of time.)
- Bring the 4 cups of water to a rapid simmer in a large soup pot. Add the soba or udon noodles and cook according to package directions until al dente, about 4 to 5 minutes.
- Add the grated ginger, bouillon cubes, thawed peas, and squash chunks to the pot. Stir to dissolve the bouillon and cook for 3 to 4 minutes over medium heat. Add up to 1 cup additional water if the soup seems too thick.
- Stir in the spinach and cook just until wilted, about 1 to 2 minutes. Add the scallions and stir to combine.
- In a small bowl, whisk the miso paste with ⅓ cup warm (not boiling) water until smooth. Stir into the soup. Taste and add more dissolved miso if desired — do not boil the soup after adding miso, as heat destroys the beneficial probiotics. Season with black pepper and serve immediately.
Notes
Choosing miso: Use white (shiro) or yellow miso for a milder, sweeter flavor; red miso for a more intense, earthy broth. Always check the label — some miso pastes contain dashi (fish stock) and are not vegan. Look for miso labeled vegan or check that the ingredients list only soybeans, salt, and grain (rice or barley).
Soba noodles: Pure buckwheat soba is gluten-free, but many commercial soba blends contain wheat flour — check the label if gluten is a concern.
Greens variation: Watercress, baby arugula, chopped baby bok choy, or other Asian greens all work beautifully in place of or alongside the spinach.
Make ahead: Cook the squash up to 2 days in advance and refrigerate. The assembled soup is best eaten fresh — the noodles will absorb the broth on standing.
Vegan-ize any recipe!Grab our free vegan cheat sheet, packed with my favorite easy substitutions to make any recipe vegan.
Also try: our creamy asparagus and pea pasta.
Basic Vegan Pizza Dough

There are a handful of recipes I make so often I don't even think about them anymore, and this Basic Vegan Pizza Dough is one of them. It's dependable, unfussy, and made with ingredients I almost always have in the pantry. No specialty flours, no obscure techniques-just a solid, hearty crust that works every single time.

Sometimes I just want pizza. Tonight. Do you know the feeling? This super simple vegan pizza dough is my answer to that mood.
It's sturdy enough to hold generous toppings (because I refuse to skimp), but still tender with those chewy edges that make you want to eat the crust first. The mix of whole wheat and white flour gives it a bit of extra texture and flavor. And makes it feel perhaps a little healthier than it really is. 😉
And because pizza dough is naturally vegan, there's nothing to compromise on here. It just works.
Isn't all pizza dough vegan?
Not always - but most traditional pizza dough is naturally vegan.
Classic pizza dough is typically made with just flour, water, yeast, salt, and sometimes oil. That basic formula contains no dairy or eggs, which makes it accidentally vegan.
However, there are a few exceptions to watch for:
- Milk or milk powder: Some commercial or enriched doughs add dairy for softness.
- Butter: Occasionally used instead of oil, especially in thicker or "pan-style" crusts.
- Honey: Sometimes added as a sweetener instead of sugar (common in certain artisan or whole wheat recipes).
- Eggs: Rare, but sometimes used in specialty or enriched crusts.
If you're ordering out or buying store-bought dough, it's always worth checking the ingredient list. Most traditional Italian-style crusts are vegan, but some American-style or prepackaged versions sneak in dairy.
If you're making it at home with flour, water, yeast, salt, and oil? You're almost certainly in the clear.
Key Ingredients & Substitutions
Active Dry Yeast: This is what gives your dough life (literally). Dissolving it in warm water for about 10 minutes wakes it up and ensures a good rise. Alternatively, you can use instant yeast. Just mix it directly with the flour and skip the proofing step.
Olive Oil: Oil adds moisture and helps create that golden, slightly crisp crust. I usually reach for olive oil for the subtle flavor boost. Avocado oil works well also.
Granulated Sugar: Just a little sugar feeds the yeast, so you can get that wonderful fluffy rise. It won't make your dough sweet.
Whole Wheat Flour: I like using whole wheat flour because it adds structure and a mild nutty flavor. It's what makes this crust feel hearty without being dense. But you can also make this recipe with all white flour, if you prefer.
Unbleached White Flour: Adding some white flour helps keep the dough soft and stretchy, so it's still easy to roll and shape.
Salt: Essential for flavor. Fine sea salt or kosher salt both work.
Helpful Tips
If your kitchen runs cold, you can let the dough rise inside your oven with just the light on. It creates a cozy environment without overheating!
A sprinkle of cornmeal on the pan adds a subtle crunch to the crust and helps prevent the dough from sticking to the pan.
If the dough keeps shrinking back while rolling, let it rest for 5-10 minutes. It just needs to relax.
Also worth trying: our Italian-style vegan sausage and peppers.
Variations
- Garlic Herb Crust: Add garlic powder and dried Italian herbs to the flour mixture.
- Thin & Crispy: Roll it extra thin and go lighter on toppings.
- Stuffed Crust: Roll vegan mozzarella-style shreds into the outer edge.
Storing and Freezing
One of the reasons I love this dough so much? It fits real life. You can make it ahead, stash it, forget about it for a bit-and it still shows up beautifully when you're ready for pizza.
Storing in the Refrigerator
If you're planning to use the dough within a couple of days, the fridge is your friend.
- After the first rise, lightly coat the dough with oil and place it in an airtight container or tightly wrapped bowl.
- It will keep well in the refrigerator for up to 3 days.
- The flavor actually deepens a bit as it rests, which is a nice little bonus.
When you're ready to use it, let the dough sit at room temperature for about 30-60 minutes before shaping. Cold dough fights back. Room temp dough cooperates.
Freezing for Later
Pizza emergencies are real. Having dough in the freezer feels like a small act of self-care.
- After the first rise, divide the dough into portions.
- Lightly coat each piece with oil.
- Wrap tightly in plastic wrap and place in a freezer-safe bag.
The dough freezes beautifully for up to 3 months.
To use, transfer it to the refrigerator overnight to thaw. Then let it sit at room temperature for about 30-60 minutes before shaping. It should feel soft, pliable, and ready to stretch-not stiff or icy.
If you're anything like me, future-you will be extremely grateful when pizza night requires exactly zero effort beyond choosing toppings.
Vegan Pizza Ideas
If you need some inspiration for your pizza creations, be sure to check out these tasty vegan pizzas recipes:
- Vegan Mexican Pizza
- Veggie Pesto Pizza
- Easy Vegan Pizza Recipes
- Broccoli, Mushroom, and Sun Dried Tomato Pizza
Recipe

Basic Vegan Pizza Dough
This Basic Vegan Pizza Dough is hearty, chewy, and made with simple pantry staples. A reliable, no-fuss crust that's perfect for homemade pizza night and freezer-friendly, too.
Print
Pin
Save
Servings: 12" pizzas
Ingredients
- 4 ½ teaspoon active dry yeast two packets
- ¼ cup olive oil
- 2 tablespoon sugar
- 2 ½ cups whole wheat flour
- 2 ½ cups unbleached white flour
- 1 teaspoon salt
Instructions
- Combine the yeast with 2 cups of warm water. Let stand for 10 minutes to dissolve. Stir in the oil and sugar.
- In a large mixing bowl, combine the flours and salt. Make a well in the center and stir in the yeast mixture. Work everything together. first with a wooden spoon and then your hands, to form a dough.
- Turn it out onto a well-floured board and knead it for 8 minutes, adding flour until the dough loses stickiness. Place the dough in a floured bowl, cover it with a tea towel, and put it in a warm place. Let rise until doubled in bulk, 1 to 1 ½ hours.
- Punch the dough down. divide it. and form into two rounds. Roll out each round on a well-floured board and stretch it to fit a 12- to 14-inch round pizza pan. Lightly oil the pans and sprinkle them with cornmeal.
- Lay the rounds on the pans and make a lip of dough around the edge. Arrange topping of choice on the dough. Bake in a preheated 450°F oven for 15 minutes, until crust is golden.
Vegan-ize any recipe!Grab our free vegan cheat sheet, packed with my favorite easy substitutions to make any recipe vegan.
Italian-Style Vegan Sausage and Peppers

Savory vegan sausage, sweet bell peppers, and tender onions simmered in a garlicky tomato sauce - this Italian classic goes plant-based without losing an ounce of flavor. It's hearty, colorful, and perfect spooned over pasta, grains, or tucked into a crusty roll.
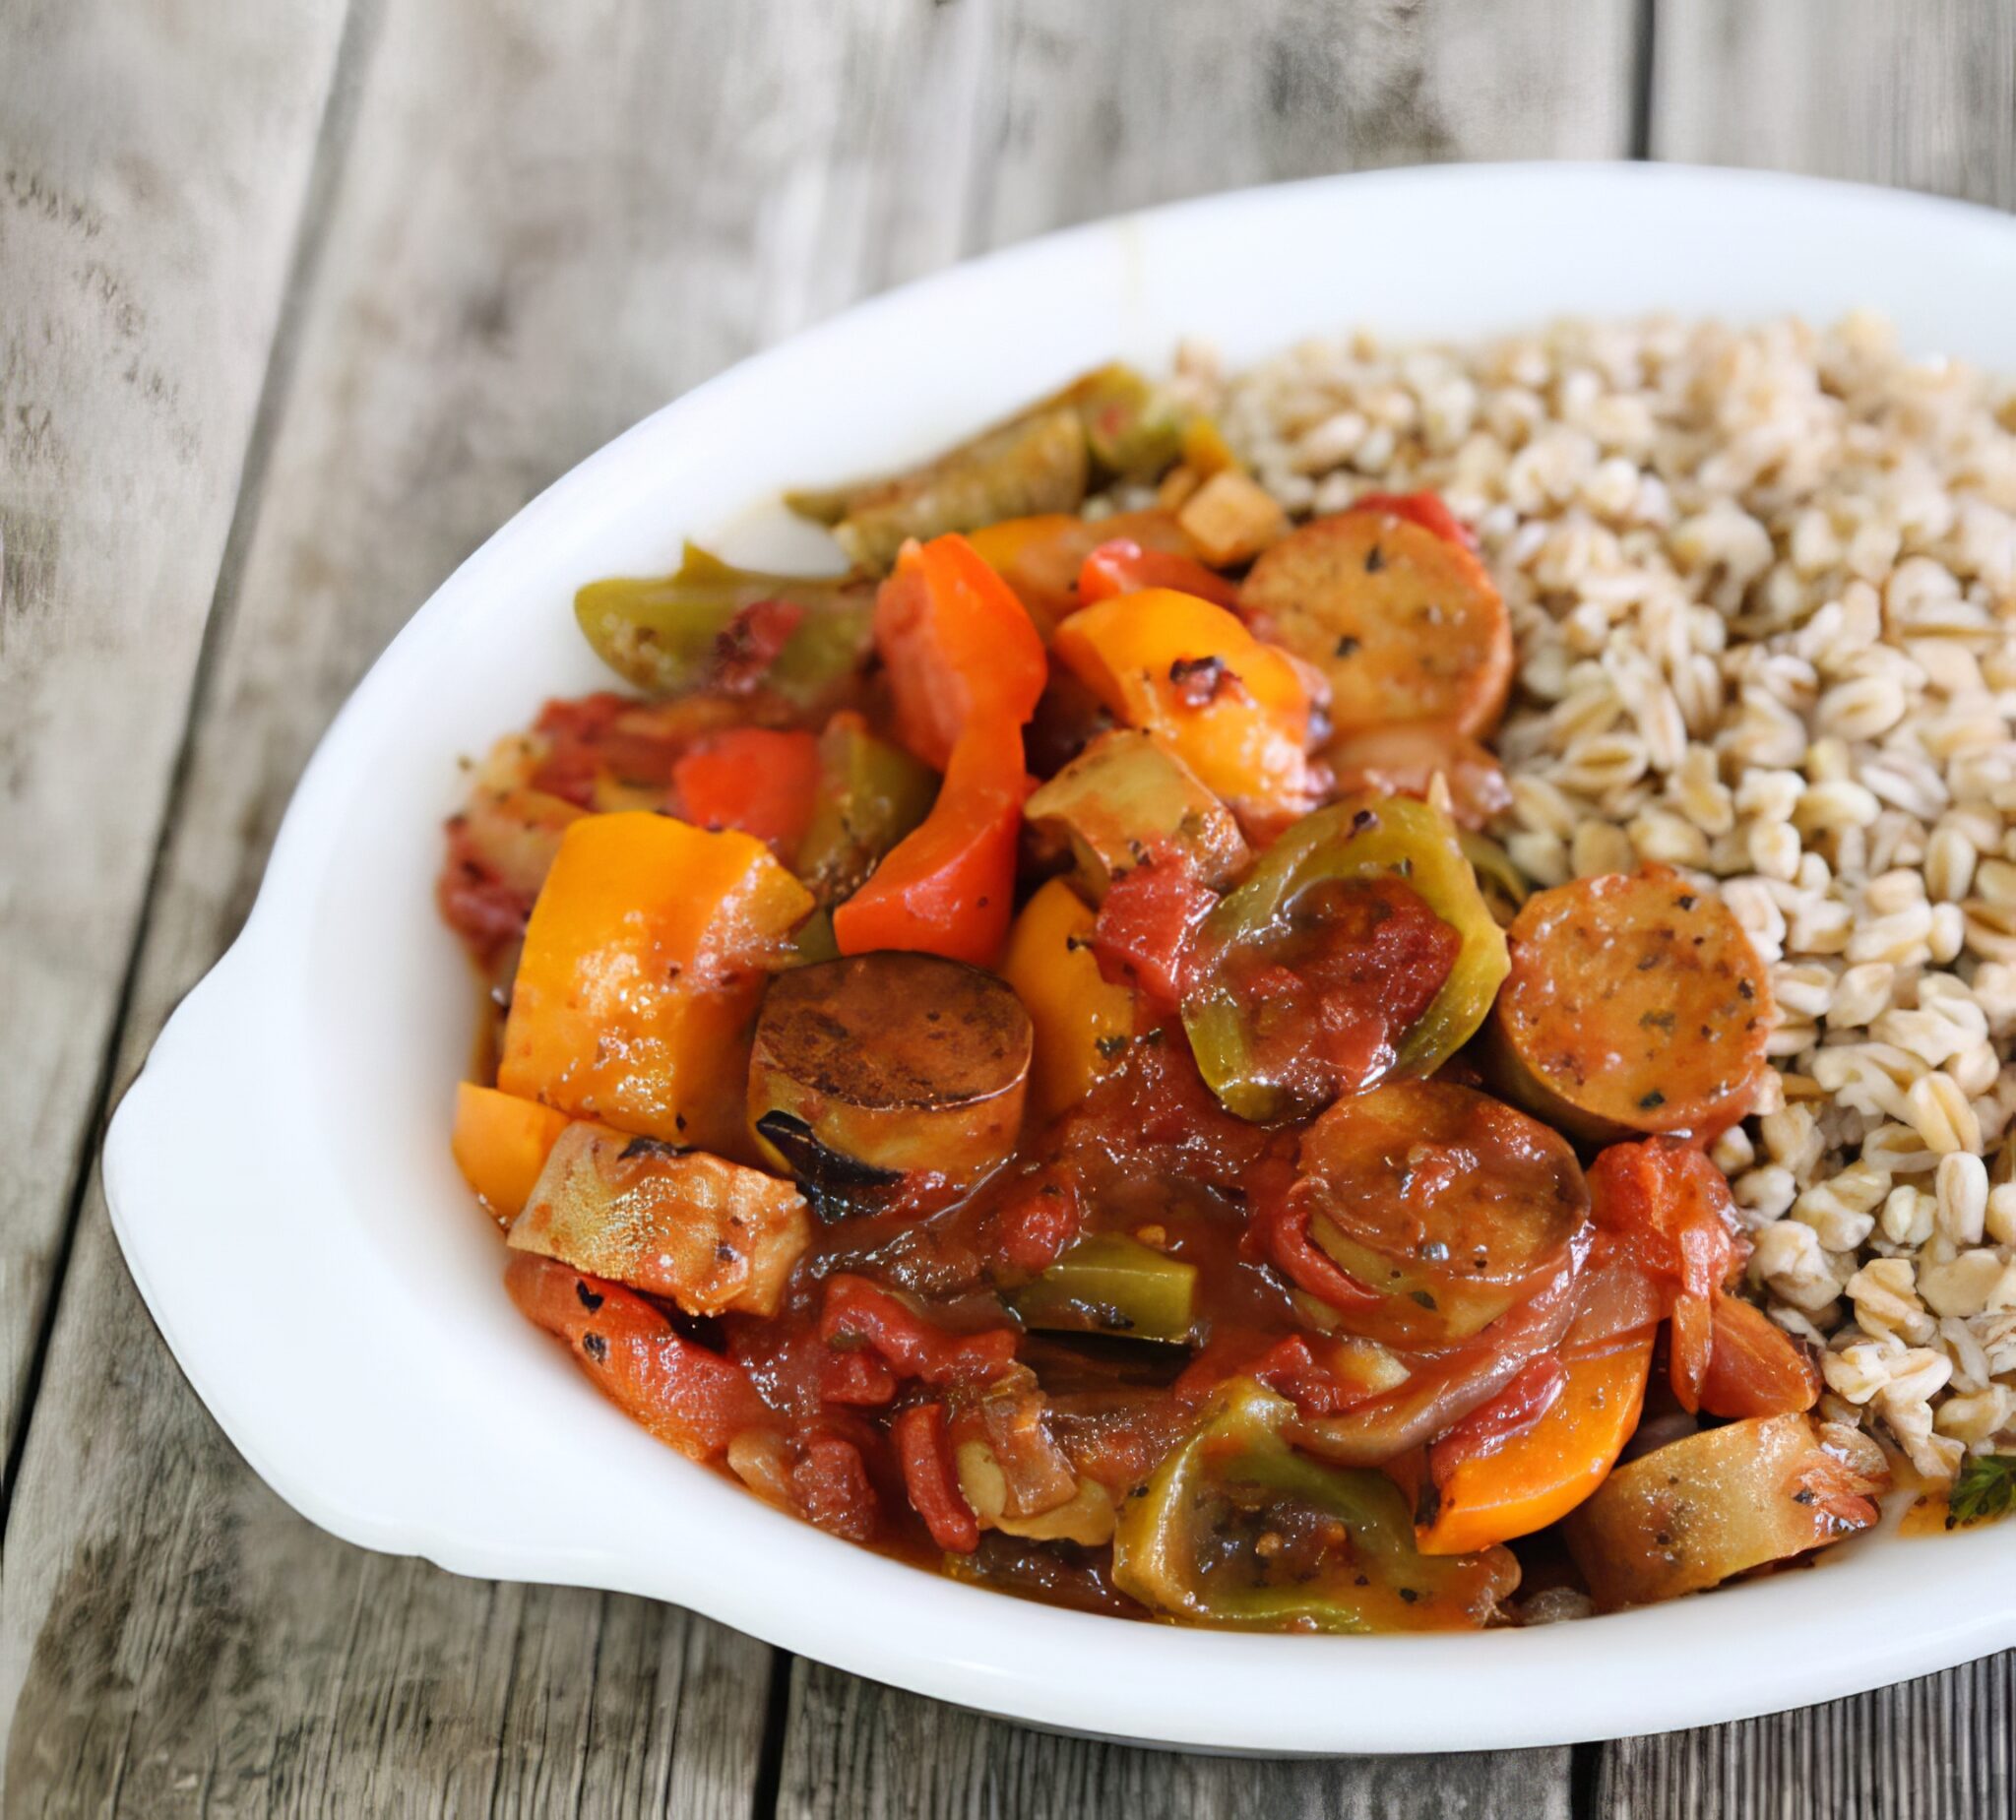
This recipe updates the Italian classic, sausage and peppers, with vegan sausage. What I love most about this recipe is that it delivers big, familiar flavor with very little fuss. It's rustic in the best way. Nothing complicated. Just solid ingredients, cooked well, and layered together until everything tastes like it belongs in the same bowl.
And it's flexible. Serve it over pasta. Serve it with your favorite grains (I like farro!) Spoon it onto creamy polenta. Stuff it into a hoagie roll. Or honestly? Eat it straight from the skillet. I won't judge.
These Italian Vegan Sausage and Peppers are…
- Hearty and satisfying without being heavy
- Weeknight-friendly, ready in about 30 minutes
- Naturally dairy-free and plant-based
- Easy to customize depending on what peppers or sausage you have
- Perfect for meal prep, since the flavors deepen as it sits
Key Ingredients & Substitutions
Vegan Italian Sausage - Choose your favorite plant-based Italian-style links. Slice them into coins or half-moons so they brown nicely. Browning is key here - it builds flavor before the sauce even begins.
Substitution tip: If you can't find Italian-style sausage, use plain vegan sausage and boost the seasoning with extra oregano, fennel seed, and a pinch of red pepper flakes.
Bell Peppers - A mix of red, yellow, and green adds sweetness and color. If you can find Italian frying peppers, even better - but standard bell peppers work beautifully.
Onion and Garlic - These are the aromatic backbone of the dish. Let the onions soften and lightly caramelize before adding garlic!
Crushed or Puréed Tomatoes - This creates the base for the sauce. If you prefer a chunkier texture, use crushed tomatoes. For a smoother finish, go with purée.
Dried Italian Herbs - Oregano is essential. Basil and thyme add balance. A pinch of red pepper flakes gives subtle heat.
Optional White Wine - A splash deglazes the pan and adds brightness. If you skip it, a squeeze of lemon juice at the end can add a similar lift.
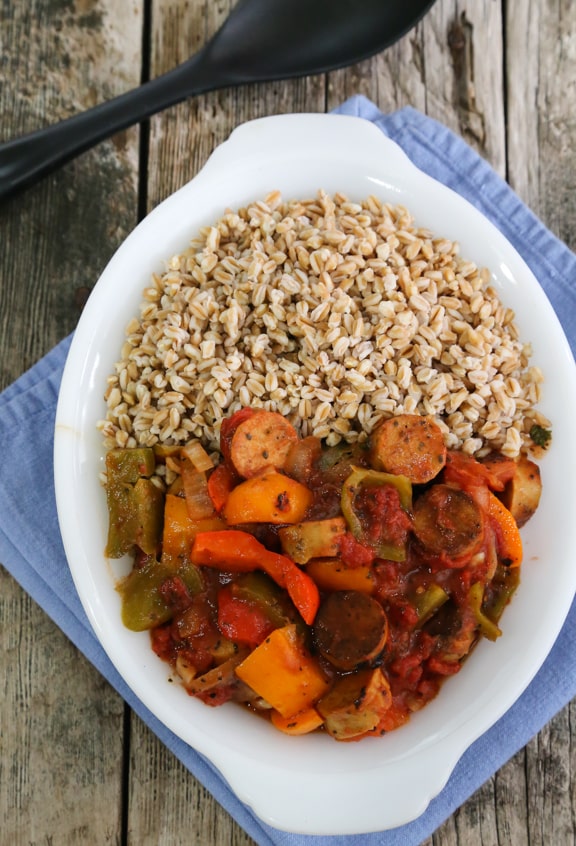
Helpful Tips
- Brown the vegan sausage well. Don't rush this step. A little caramelization goes a long way in boosting flavor.
- Slice peppers evenly. Uniform strips cook at the same rate and give the dish that classic look.
- Simmer gently. Once the tomatoes go in, let everything bubble softly so the flavors meld without over-reducing.
- Taste before serving. A pinch of salt or splash of acidity at the end can make all the difference.
Storing & Freezing
One of the best things about this dish? It might taste even better the next day!
Refrigerator:
Let the vegan sausage and peppers cool completely before transferring to an airtight container. It will keep well in the fridge for up to 4 days. The flavors continue to deepen as it sits, making leftovers ideal for quick lunches or easy dinners.
Reheating:
Warm gently in a skillet over medium-low heat until heated through. If the sauce has thickened in the fridge, add a splash of water or vegetable broth to loosen it. You can also reheat it in the microwave in 30-second intervals, stirring between each.
Freezing:
This recipe freezes beautifully. Store in a freezer-safe container for up to 2 months. For best texture, freeze it without pasta or polenta - just the sausage and pepper mixture.
To reheat from frozen, thaw overnight in the refrigerator, then warm on the stovetop until hot throughout. If reheating straight from frozen, use a covered skillet over low heat and stir occasionally as it thaws and warms.
Also worth trying: our vegan creamy mushroom pasta.
Variations
- Make It Spicy: Use hot Italian-style vegan sausage or increase the red pepper flakes.
- Add Greens: Stir in a handful of baby spinach or chopped kale during the last few minutes of cooking.
- Turn It Into a Sandwich: Pile the mixture into toasted rolls and top with vegan mozzarella for a classic sausage-and-peppers vibe.
- Bulk It Up: Add sautéed mushrooms for extra umami and texture.
- Serve Italian-Style: Round out an Italian dinner night by pairing this with our vegan zucchini lasagna or a simple side of zucchini with mint - a hearty, veggie-forward baked dish that complements these bold flavors perfectly. This mixture also makes a fantastic pizza topping on homemade vegan pizza dough.
Recipe
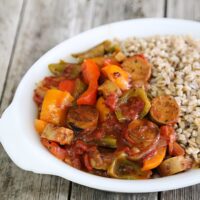
Italian Style Vegan Sausage & Peppers
Hearty Italian-style vegan sausage and peppers simmered in a rich tomato sauce with sweet bell peppers and onions. An easy, flavorful plant-based dinner perfect for pasta, polenta, or sandwiches.
Print
Pin
Save
Servings: servings
Ingredients
- 2 tablespoon extra-virgin olive oil
- 12 oz Vegan Italian-style Sausage cut into ½-inch slices, see notes
- 1 yellow onion peeled, quartered and thinly sliced
- 3 cloves garlic peeled and minced
- 4 bell peppers seeded and cut into strips
- ¼ cup dry white wine such as Chardonnay, optional
- 28 oz canned crushed tomatoes or tomato puree
- 1 teaspoon dried oregano or fresh oregano to taste
- 1 teaspoon dried basil or fresh basil to taste
- ½ teaspoon dried thyme
- red pepper flakes to taste
- salt and freshly ground pepper to taste
For Serving
- cooked pasta, grains, or polenta optional for serving
Instructions
- Heat just enough of the oil to lightly coat the bottom of a large skillet, reserving the rest. Add the sausage and cook over medium-high heat, stirring frequently until all sides are golden brown. Remove from the skillet and set aside.
- Heat the remaining oil in the same pan. Add the onion and sauté over medium-low heat until translucent. Add the garlic and peppers and sauté until all are soft and golden.
- Stir in the optional wine, pureed tomatoes, and seasonings. Bring to a simmer, then cover and cook over low heat for 10 minutes.
- Stir the reserved vegan sausage into the mixture. Season with salt and pepper. Serve at once, spooning some of the sausage and peppers mixture over individual servings of pasta, grains, or polenta, or on its own if you prefer.
Notes
You can use any brand of vegan sausage you prefer here. I have made this recipe with Field Roast, Tofurkey, and Beyond sausages. All work well.
I served this vegan sausage over top of cooked farro. You may also choose to serve it over rice, pasta, or polenta.
Nutrition (Estimate per Serving)
Calories: 672kcalCarbohydrates: 76gProtein: 37gFat: 27gSaturated Fat: 5gPolyunsaturated Fat: 6gMonounsaturated Fat: 13gCholesterol: 9mgSodium: 1507mgPotassium: 2379mgFiber: 23gSugar: 32gVitamin A: 8364IUVitamin C: 354mgCalcium: 438mgIron: 12mg
Vegan-ize any recipe!Grab our free vegan cheat sheet, packed with my favorite easy substitutions to make any recipe vegan.
Glazed Baked Onions

Soft, sweet, and bathed in a buttery brown sugar glaze - these baked onions are the ultimate side dish for any vegan feast.

Let's talk about onions for a minute. Usually, they're the unsung heroes hiding out in the background - chopped, sautéed, and forgotten about. But not today. Today, onions take center stage, get all gussied up in a glossy glaze, and come strutting out of the oven like they own the dinner table.
These Glazed Baked Onions are pure comfort food, with just enough elegance to make them holiday-worthy. They are especially perfect for Thanksgiving!
These Glazed Baked Onions are:
- A total glow-up for the humble onion.
- Sweet, buttery, and gloriously simple.
- A perfect plant-based side dish for the holidays or any cozy meal.
- Oven-roasted to soft, caramelized perfection.
- Naturally vegan and easy to make gluten-free too.
And if you're here planning your holiday menu, don't forget to check out our new Vegan Thanksgiving and Vegan Christmas cookbooks!
Key Ingredients & Substitutions
- Onions: Large yellow onions work best here. You want them big and round, so they hold up in the oven and soak up all that glaze. My personal favorite are Vidalia Onions!
- Vegan Butter: Adds richness and helps create that luscious glaze. I am a fan of the Earth's Best Buttery Sticks for this type of dish. If you're not vegan, regular butter works here too.
- Brown Sugar: The star of the glaze - gives it that warm, molasses-y sweetness. Light or dark, either is fine.
- Salt & Pepper: Simple seasoning, balances the sweetness beautifully.
- Water: Just enough to help the glaze form while the onions roast.
Helpful Tips
Don't peel too much: Just remove the papery outer layers of the onions and trim the ends slightly - you want them to stay intact when baked.
Score the tops: A shallow cross-cut on top of each onion helps the glaze seep into the onions while they bake.
Roast covered, then uncovered: Start with foil covering the baking dish to steam and soften the onions, then uncover to let them caramelize.
Baste as you go: Spoon that buttery glaze over the onions occasionally as they bake, for maximum flavor and that pretty shine.
Also worth trying: our vegan creamy mushroom pasta.

Easy Variations
- Add herbs: A sprig of thyme or rosemary tucked into the baking dish adds a savory, aromatic note.
- Spice it up: A pinch of cayenne or smoked paprika in the glaze gives a little extra kick.
- Maple twist: Swap brown sugar for maple syrup for a deeper, woodsy sweetness.
- Make it Bite Sized: Try this with small pearl onions or even shallots for a bite-sized take that's great for appetizers or tapas-style meals.
More Vegan Recipes
If you love these baked onions, be sure to check out these other delicious recipes:
Photos were taken by Hannah Kaminsky.
Recipe

Glazed Baked Onions
Soft, sweet, and bathed in a buttery brown sugar glaze - these baked onions are the ultimate side dish for any vegan feast.
Print
Pin
Save
Servings: onion halves
Equipment
Ingredients
- 1 cup vegetable broth homemade or store bought
- ¼ cup maple syrup or agave nectar
- 1 tablespoon vegan butter such as Earth Balance Buttery Sticks
- ⅛ teaspoon dried rosemary
- ⅛ teaspoon dried thyme
- ⅛ teaspoon ground nutmeg
- 6 large onions sweet variety, such as Vidalia
- 1 cup breadcrumbs
- fresh rosemary sprigs optional, for garnish
Instructions
- Preheat the oven to 375°F (190°C).
- Combine all the ingredients except the onions and breadcrumbs in a small saucepan. Heat gently, stirring, until all are smoothly blended. Remove from the heat.
- Peel the outer skin from the onions, and cut them in half crosswise. Cut a thin sliver from the bottom of each onion half, so that they'll stand steadily in a baking dish.
- Arrange the 12 onions halves in a shallow baking dish and pour the mixture from the saucepan evenly over them.
- Cover and bake for 45 minutes to 1 hour, or until the onions are tender when pierced with a fork. Once or twice during this time, spoon some of the liquid from the bottom of the baking dish over the onions.
- Sprinkle the onions with breadcrumbs and bake, uncovered, for an additional 10 to 15 minutes, or until most of the liquid has been absorbed. Serve at once or keep warm until needed.
Nutrition (Estimate per Serving)
Calories: 92kcalCarbohydrates: 18gProtein: 2gFat: 1gSaturated Fat: 0.3gPolyunsaturated Fat: 0.4gMonounsaturated Fat: 0.4gTrans Fat: 0.01gSodium: 155mgPotassium: 143mgFiber: 2gSugar: 8gVitamin A: 88IUVitamin C: 6mgCalcium: 41mgIron: 1mg
Vegan-ize any recipe!Grab our free vegan cheat sheet, packed with my favorite easy substitutions to make any recipe vegan.
Vegan Sloppy Joes - with Pinto Beans and Quinoa!
These Vegan Sloppy Joes bring big flavor to everyone's favorite messy sandwich. Packed with quinoa, pinto beans, and loads of flavor. Yum!
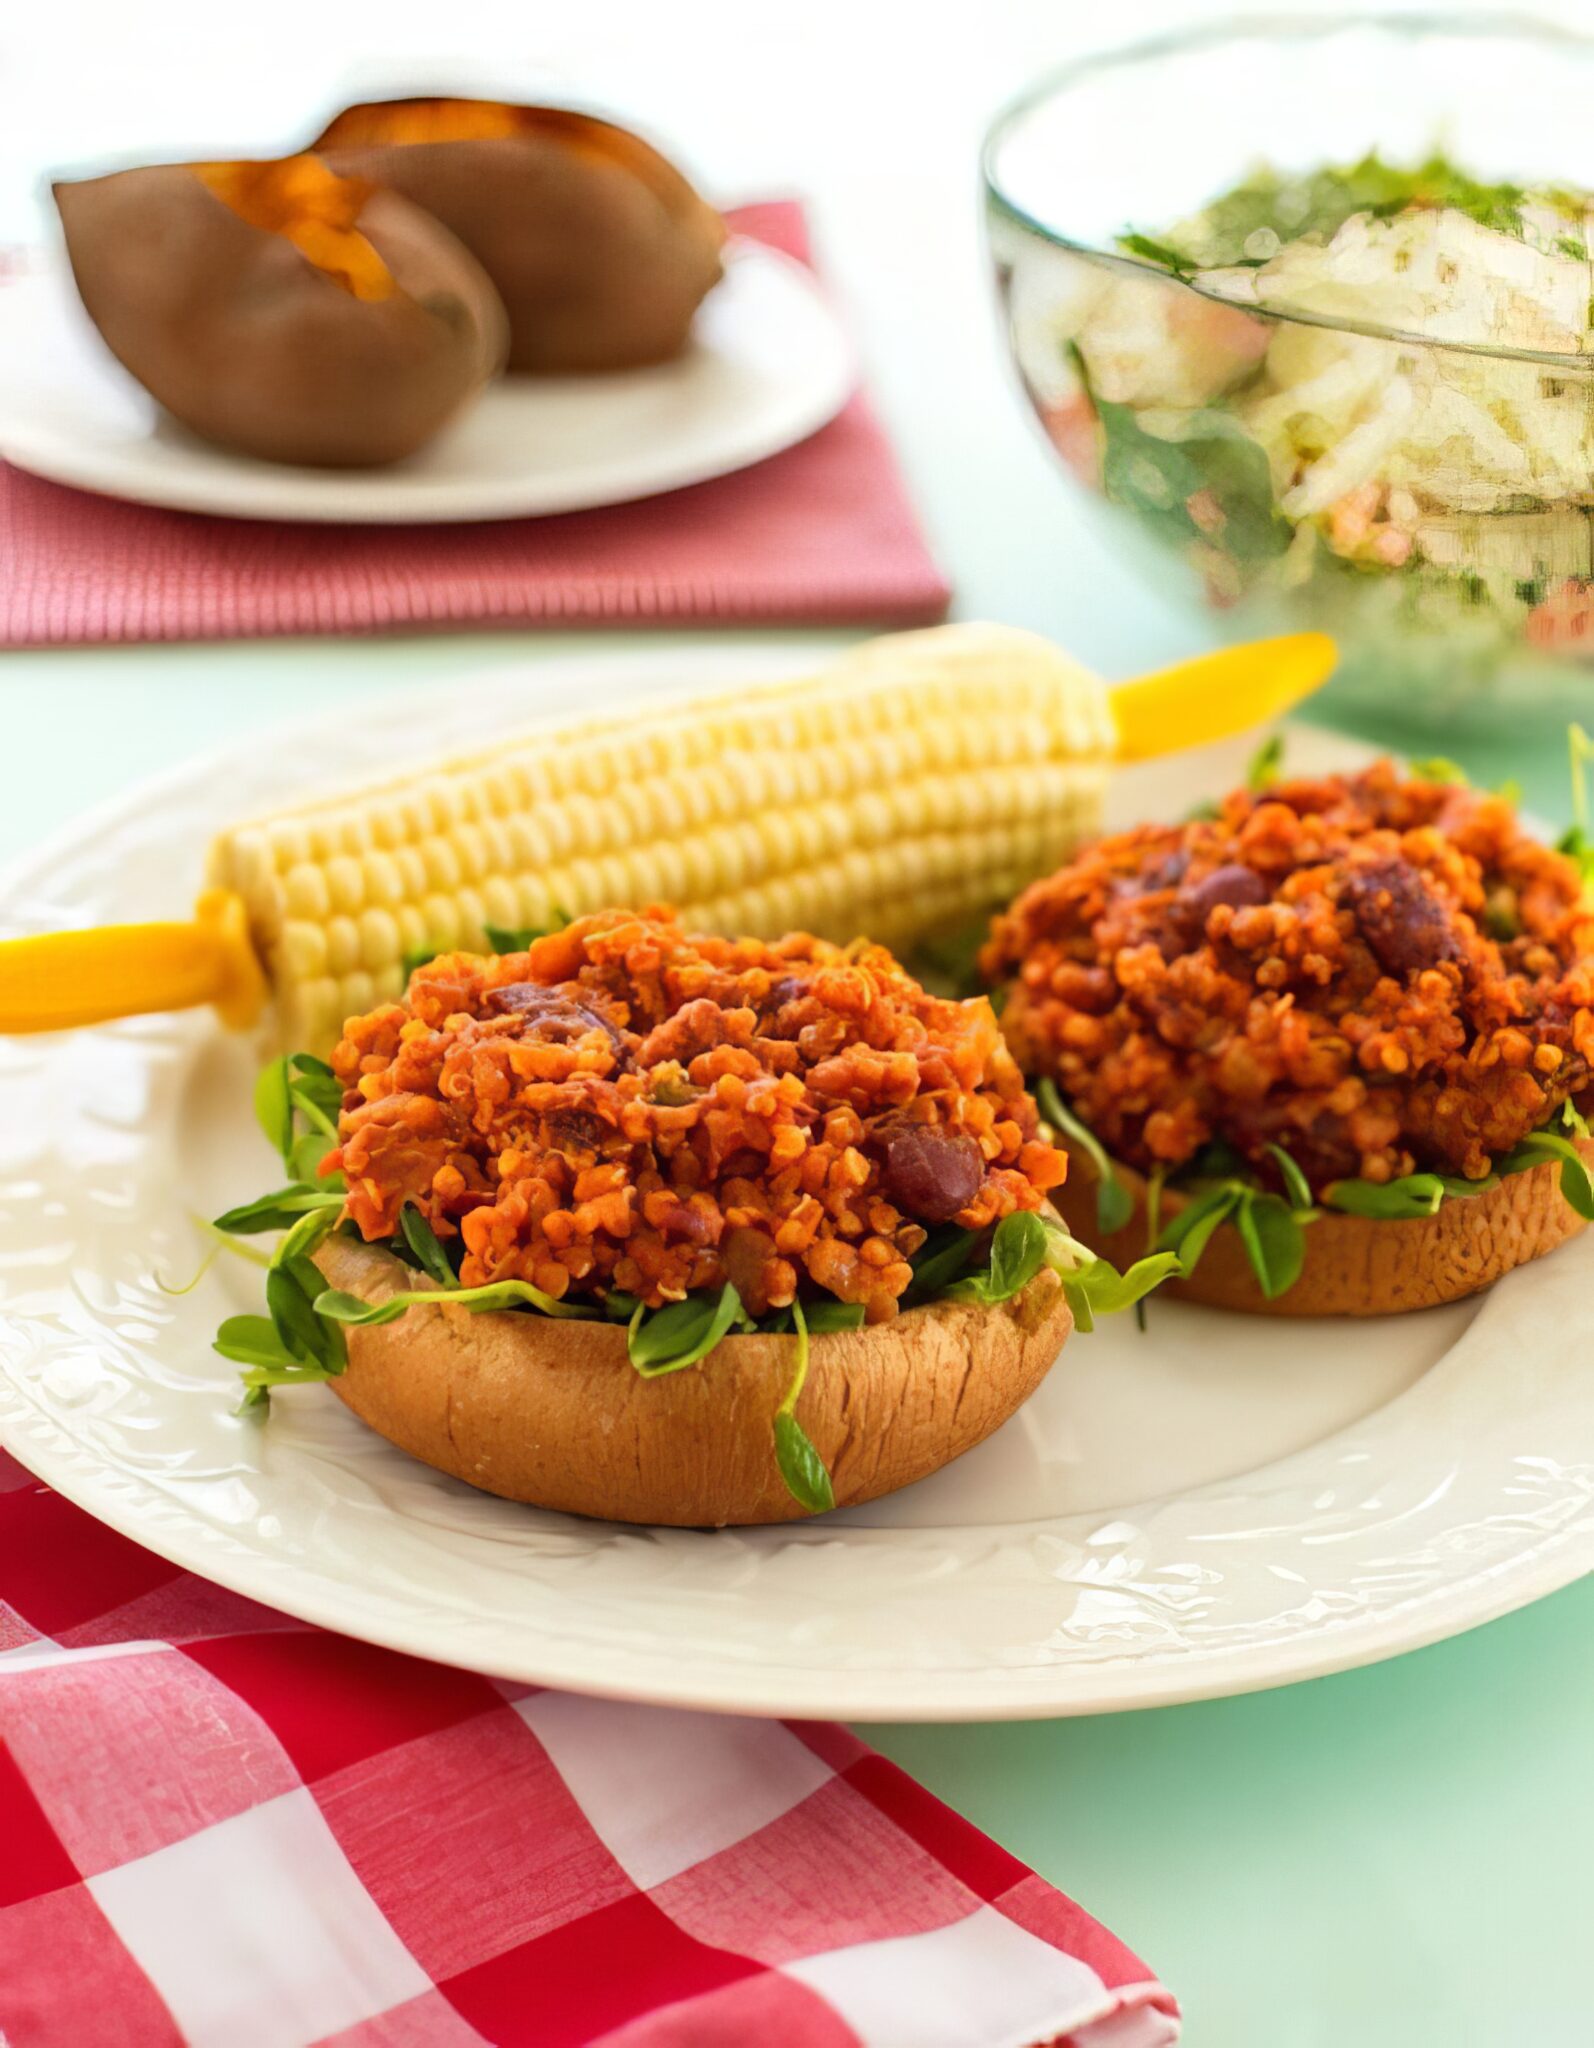
Let's be real: sometimes you just want a messy, saucy sandwich that you can barely fit in your mouth. Enter these Vegan Sloppy Joes, a plant-based spin on the nostalgic classic we all grew up loving.
Packed with hearty quinoa, creamy pinto beans, and a tangy tomato-based sauce, they're every bit as satisfying as the original-just without the meat.
Whether you're feeding a hungry crowd or just need a quick weeknight dinner, this recipe is a guaranteed hit. Grab some napkins; it's about to get deliciously sloppy.
Why You'll Love These Vegan Sloppy Joes
- Protein-Rich: Quinoa and pinto beans provide a substantial protein boost, keeping you full and energized.
- Quick and Easy: Ready in under 30 minutes, making it perfect for weeknight dinners.
- Family-Friendly: A crowd-pleaser that appeals to both kids and adults.
- Versatile: Serve on whole-grain rolls, in lettuce wraps, or over a bed of greens for a gluten-free option.
- Make-Ahead: The flavors deepen over time, so it's great for meal prep and leftovers.
Get the Plant Power Cookbook!
This recipe is a sneak preview from the excellent cookbook: Plant Power: Transform Your Kitchen, Plate, and Life with More Than 150 Fresh and Flavorful Vegan Recipes by Nava Atlas.
I originally published this article years ago when the cookbook was first released, but I recently gave it a refresh because this recipe is simply too good to miss. I highly recommend giving it a try-and consider adding the cookbook to your vegan cookbook collection!
The recipe has been shared here with permission from the cookbook publisher, HarperOne. Photos were taken by Hannah Kaminsky.
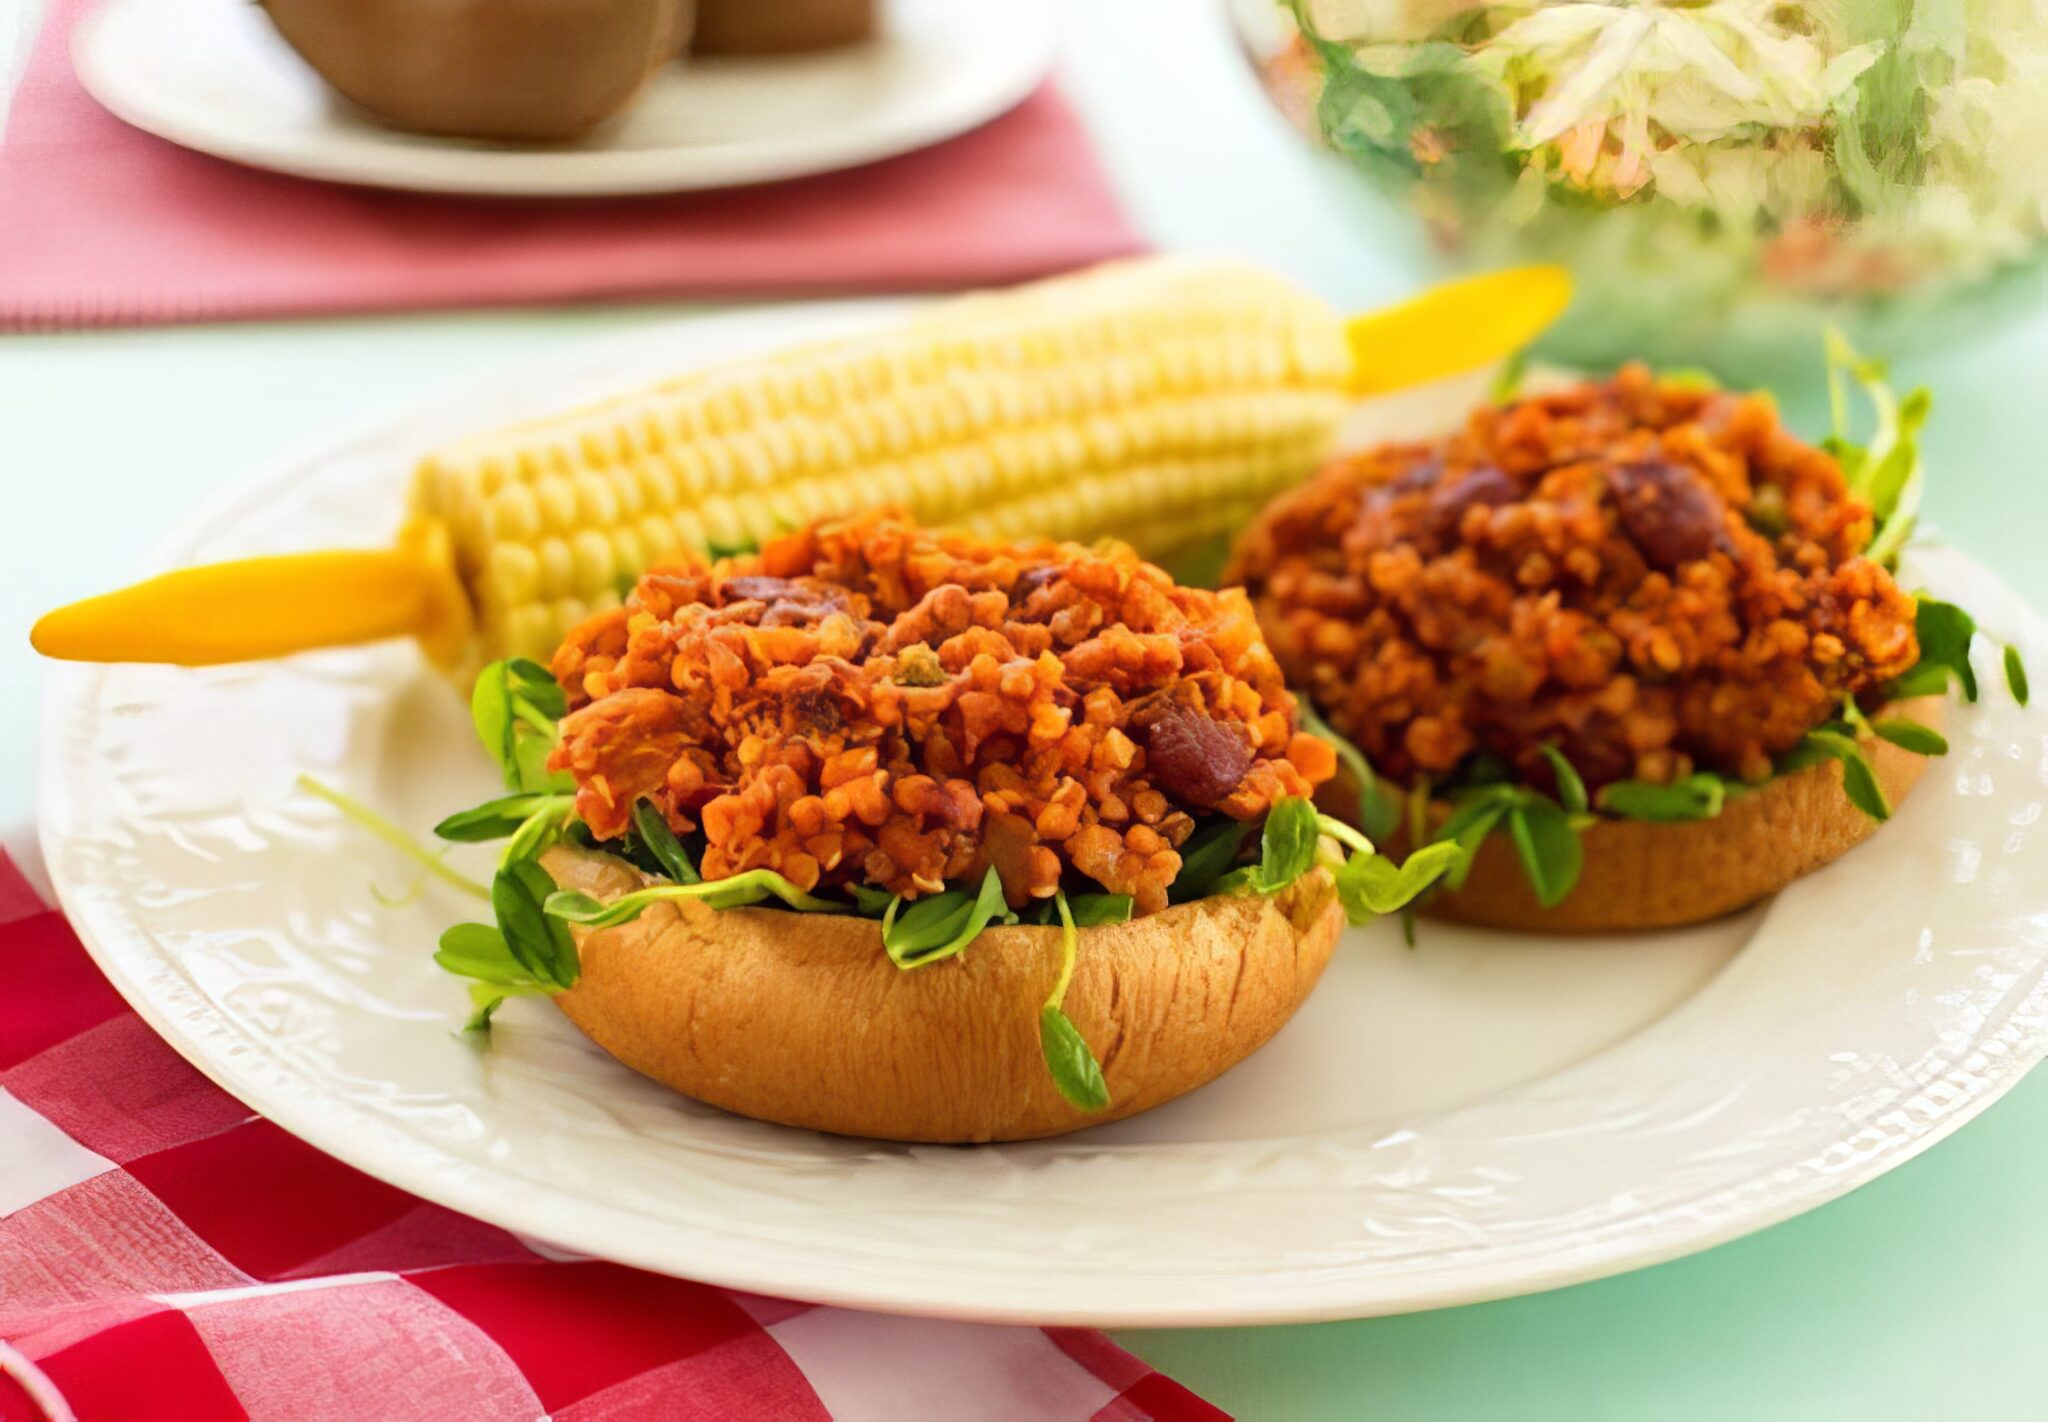
Helpful Tips & Substitutions
Rinse the Quinoa: To remove its natural bitterness, always rinse quinoa under cold water before cooking.
Toast the Buns: Lightly toasting the rolls adds a pleasant crunch and prevents them from becoming soggy from the filling.
Customize the Spice Level: Adjust the chili powder and add hot sauce if you prefer a spicier kick.
Substitute the Pinto Beans: I like pinto beans, but black beans or kidney beans can be used as alternatives.
Serving Suggestions
Classic Style: Spoon the mixture onto toasted whole-grain buns and serve with a side of vegan coleslaw or pickles.
Lettuce Wraps: For a lighter option, serve the sloppy joe mixture in large lettuce leaves.
Over Grains: Serve atop brown rice or quinoa for a hearty, bun-free meal.
With Sweet Potatoes: Pair with baked sweet potatoes for a balanced and nutritious dinner.
Taco Night: Love a savory plant-based filling in a tortilla? Try our vegan walnut taco meat - made with walnuts and mushrooms for a hearty, Tex-Mex twist. Or fire up the grill and browse our best vegan burger recipes for the best plant-based patties. For a simple but impressive side dish, our glazed baked onions pair beautifully.
More Vegan Recipes
If you love these Vegan Sloppy Joes, be sure to check out these other delicious recipes:
Also try: our Quinoa And Wild Rice Burgers.
Also try: our Easy Portobello Burgers.
- Copycat Vegan Big Mac Sauce
- Vegan Grilled Cheese Five Ways
- 25+ Vegan Tailgate Recipes
- Vegan Walnut Taco Meat
Recipe
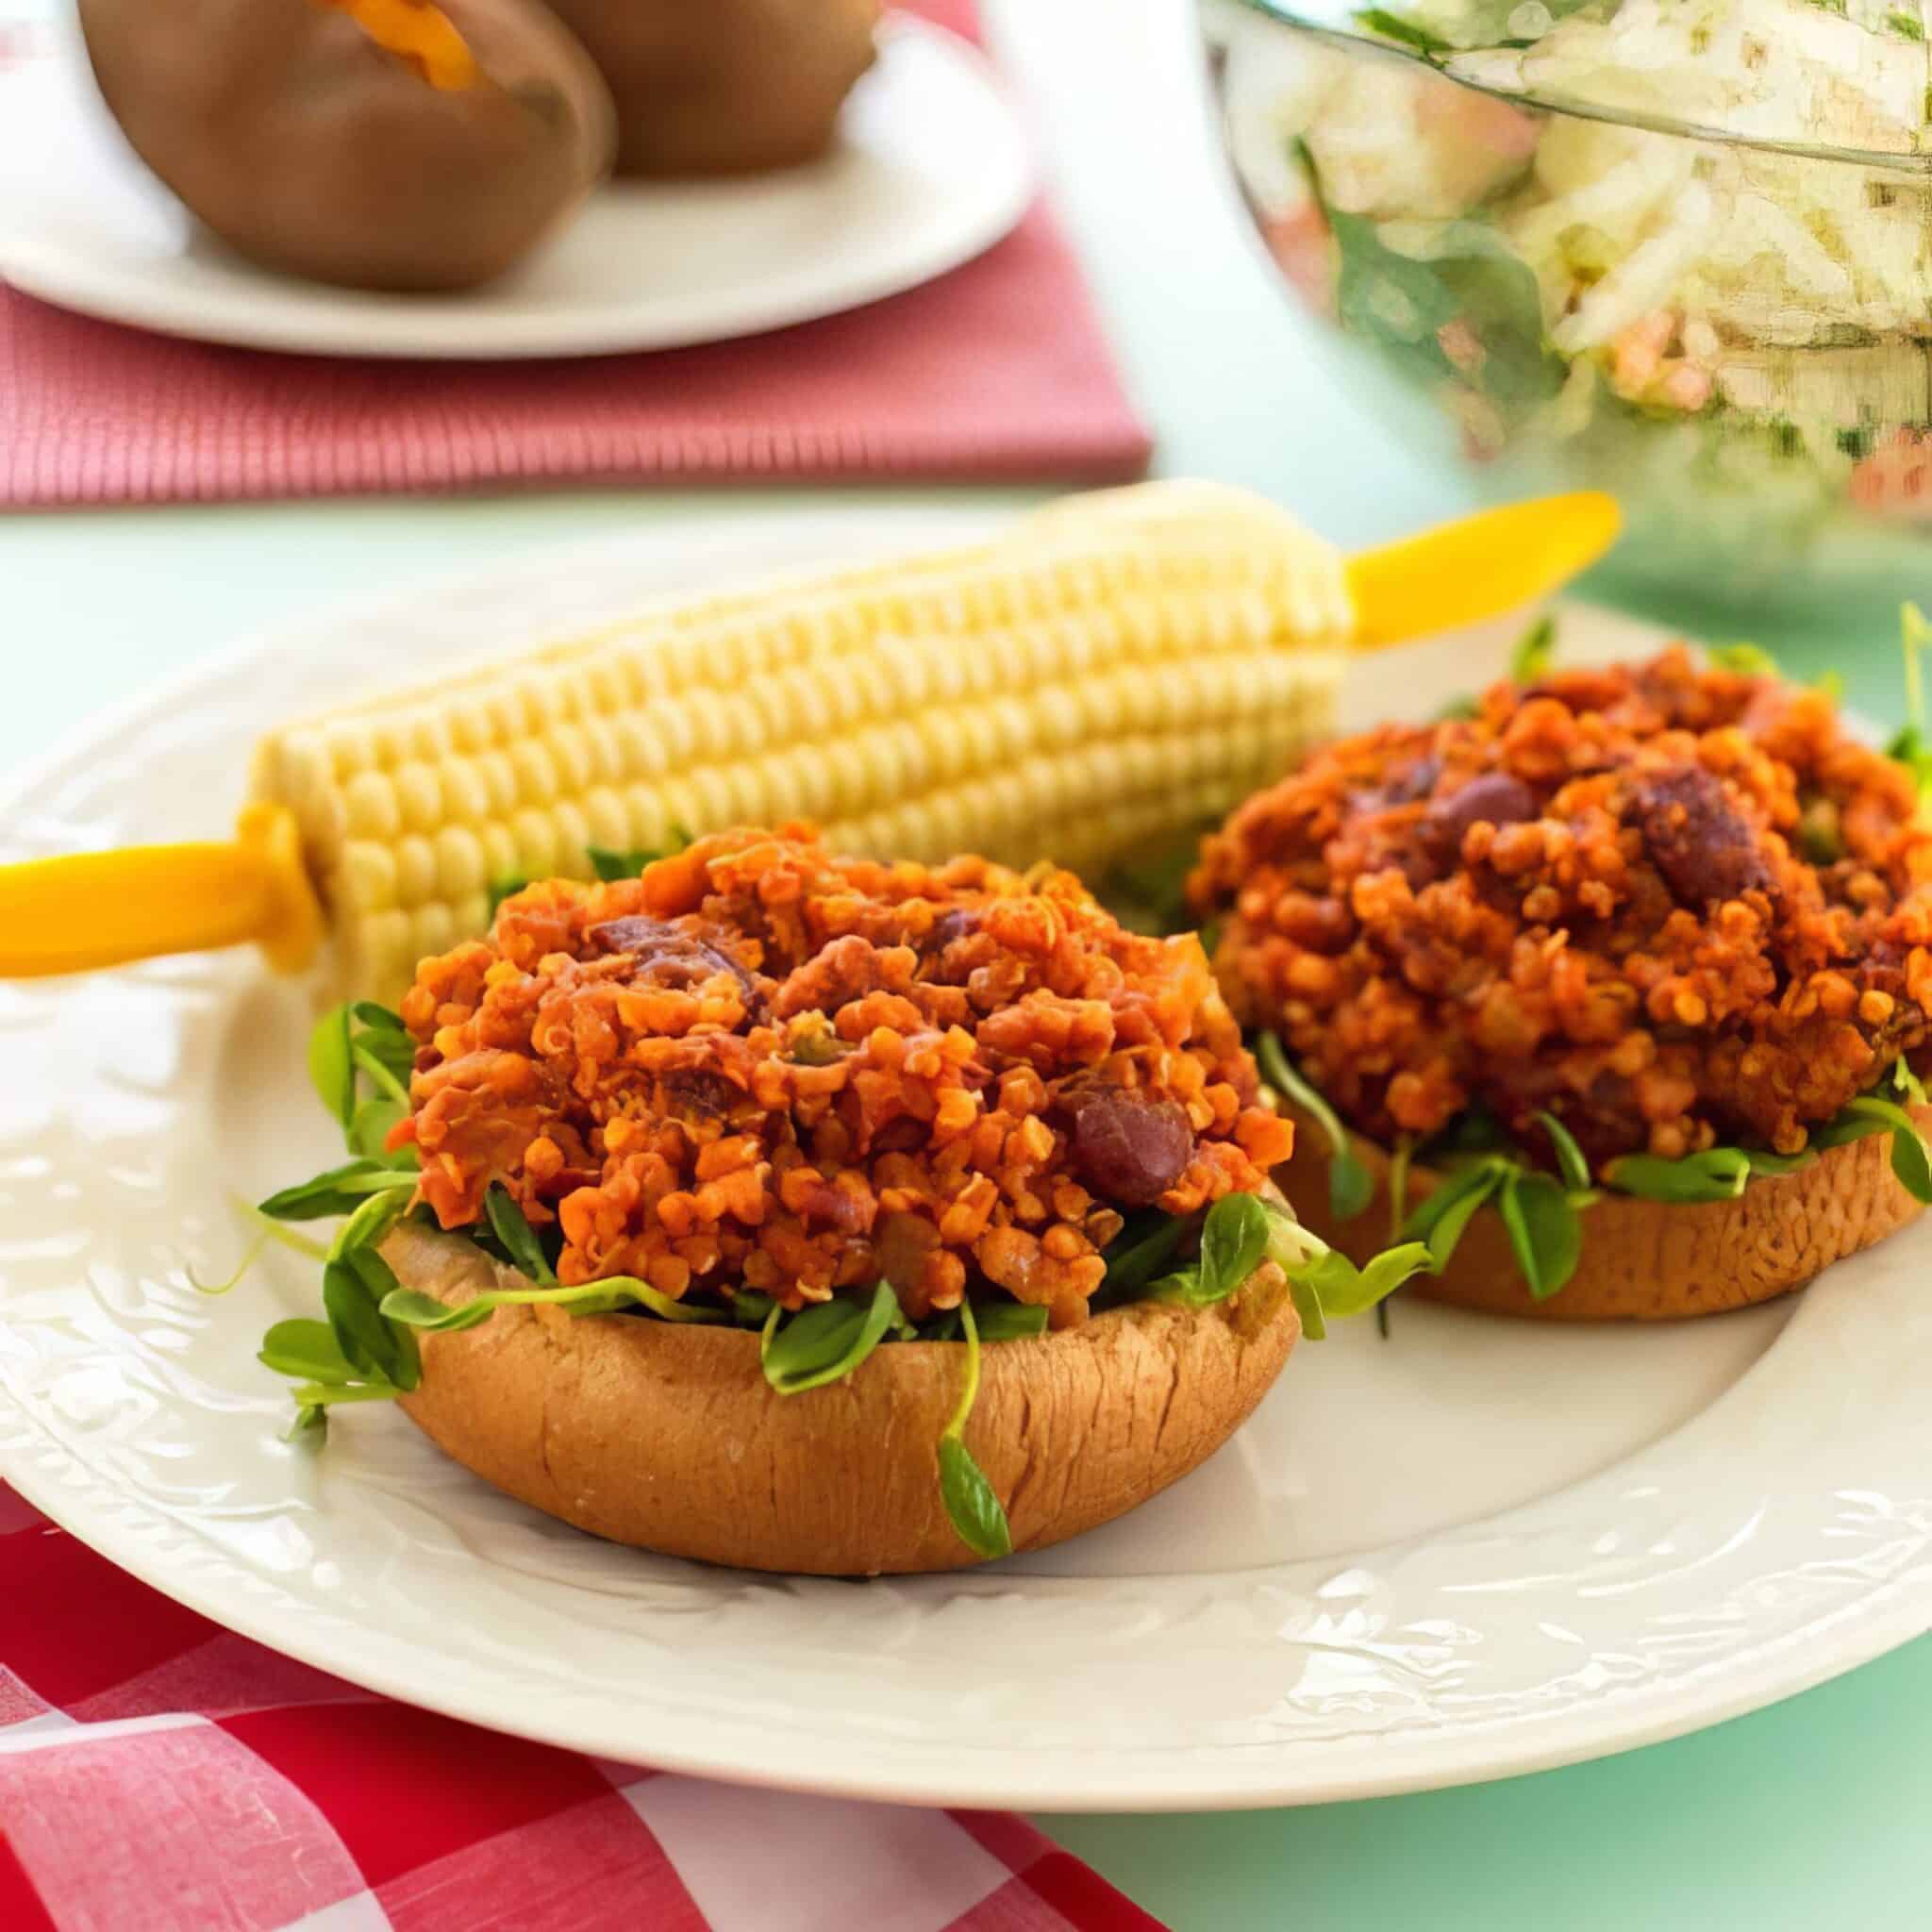
Vegan Sloppy Joes
These Vegan Sloppy Joes are made with protein-packed quinoa, creamy pinto beans, and a tangy, sweet tomato sauce
Print
Pin
Save
Servings: sandwiches
Ingredients
- ½ cup uncooked quinoa rinsed in a fine sieve
- 1 tablespoon extra-virgin olive oil
- 1 medium onion finely chopped
- ½ medium green bell pepper finely diced
- 15 oz canned pinto beans (or 1 ½ cups cooked), drained, rinsed, and coarsely mashed
- 15 oz canned tomato sauce or crushed tomatoes
- 1 medium tomato finely diced
- 1 tablespoon soy sauce to tamari, adjust to taste
- 1 teaspoon agave nectar or maple syrup to taste, or substitute maple syrup
- 2 teaspoon chili powder add more for extra spice
- 1 teaspoon paprika
- ½ teaspoon dried oregano
- 6 whole grain rolls or use English muffins or mini-pitas
Instructions
- Combine the quinoa with 1 cup water in a small saucepan. Bring to a slow boil, then lower the heat, cover, and simmer until the water is absorbed, about 15 minutes.
- Meanwhile, heat the oil, broth, or water in a medium skillet. Add the onion and sauté until translucent. Add the bell pepper and sauté until both are golden.
- Add the remaining ingredients except the bread of choice, and bring to a gentle simmer. Cook over medium-low heat, loosely covered, for 5 to 7 minutes, stirring occasionally. Let the skillet stand off the heat for 5 minutes to allow the flavors to mingle further and for the quinoa to absorb the tomato flavors.
- Evenly spoon the filling over the bottoms of whole-grain rolls, cover with the tops, or serve open-faced.
Nutrition (Estimate per Serving)
Calories: 170kcalCarbohydrates: 29gProtein: 7gFat: 4gSaturated Fat: 1gPolyunsaturated Fat: 1gMonounsaturated Fat: 2gSodium: 707mgPotassium: 602mgFiber: 6gSugar: 6gVitamin A: 743IUVitamin C: 19mgCalcium: 63mgIron: 3mg
Vegan-ize any recipe!Grab our free vegan cheat sheet, packed with my favorite easy substitutions to make any recipe vegan.
Garlic Mustard Vinaigrette
This Garlic Mustard Vinaigrette proves that a simple dressing can pack a serious flavor punch. So, go ahead - shake things up and drizzle it on everything. Your taste buds will thank you!
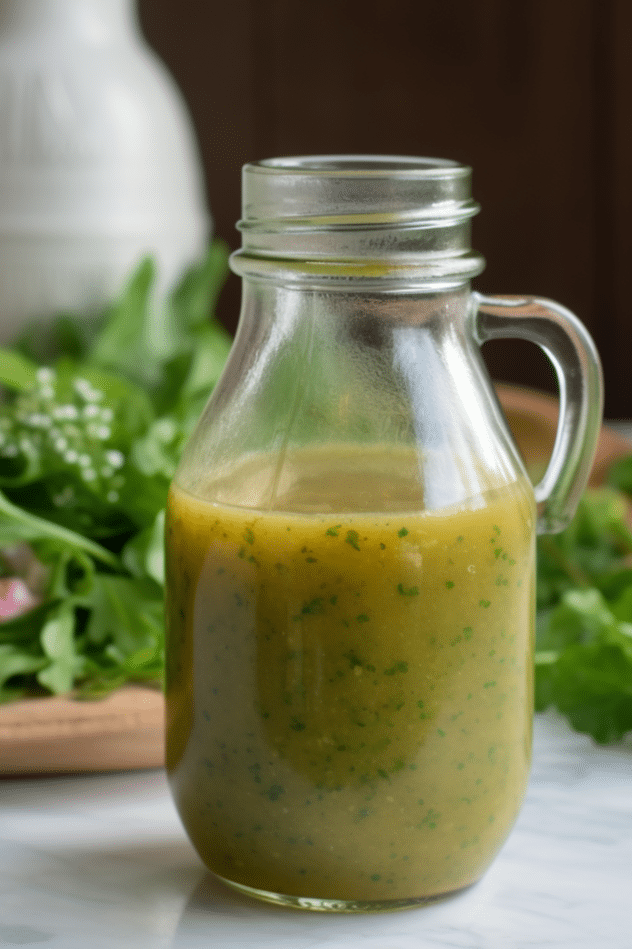
If you've ever wondered what separates a good salad from a great one, the answer is often in the dressing. Enter this Garlic Mustard Vinaigrette - a simple, shake-and-go blend that's packed with bold flavors.
It's bright, garlicky (if you want it to be), and full of herby goodness, making it perfect for everything from crisp greens to roasted veggies.
This vinaigrette isn't just for salads, though. Drizzle it over grilled asparagus, use it as a marinade for tempeh, or even toss it with warm roasted potatoes for a quick, flavorful side dish. Trust me, you'll want to keep a bottle of this in your fridge at all times.
Why You'll Love This Garlic Mustard Vinaigrette
- Quick and Easy: Made in minutes with just a cruet or jar.
- Flavor-Packed: A zesty combo of garlic, mustard, and herbs.
- Customizable: Adjust the mustard, garlic, or herbs to suit your taste.
- Versatile: Perfect for salads, marinades, and roasted veggies.
- Make-Ahead Friendly: Stores beautifully in the fridge for up to a week.
Ways to Use this Vinaigrette
This Garlic Mustard Vinaigrette isn't just a salad topper-it's a multitasking flavor hero! Here are some vegan-friendly ways to use it:
Salad Star: Toss with mixed greens, arugula, spinach, or kale for a bold, tangy kick. Add roasted chickpeas and avocado for a hearty vegan salad, or try it tossed with our vegan Greek pasta salad or our tabbouleh. Check out my fave vegan salad recipes here.
Grain Bowl Drizzle: Pour it over quinoa, farro, or couscous bowls loaded with roasted vegetables, nuts, and seeds.
Veggie Roasts: Use it as a marinade for veggies like zucchini, bell peppers, or mushrooms before roasting or grilling.
Potato Upgrade: Toss warm roasted or boiled potatoes with the vinaigrette for an instant potato salad that's light and zesty.
Quick Pickle: Marinate thinly sliced cucumbers, carrots, or radishes in the vinaigrette for a quick, tangy pickle.
Tofu Marinade: Soak tofu slabs in the vinaigrette before grilling, baking, or pan-frying for a savory burst of flavor.
Bread Dipper: Serve it as a dip for crusty bread alongside a plant-based charcuterie board.
Pasta Salad Hero: Mix it into a cold pasta salad with cherry tomatoes, olives, and fresh herbs for a Mediterranean-inspired dish.
Roasted Chickpeas: Toss cooked chickpeas with the dressing and roast until crispy for a protein-packed snack or salad topper.
More Tasty Recipes
If you love this simple vinaigrette dressing, be sure to check out all my vegan sauces and dressings, plus these other delicious recipes:
Recipe
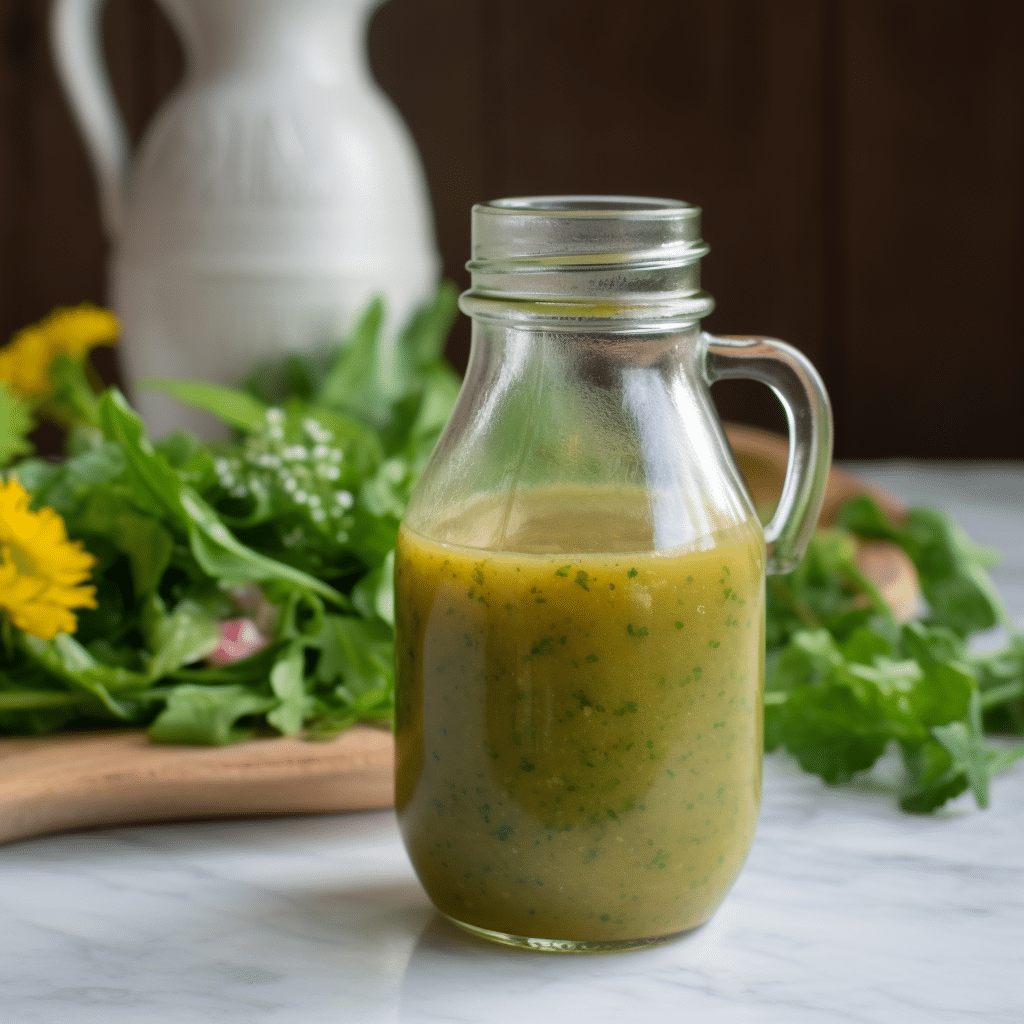
Garlic Mustard Vinaigrette
This simple Garlic Mustard Vinaigrette packs a serious flavor punch.
Print
Pin
Save
Servings: servings
Ingredients
- ½ cup extra-virgin olive oil
- Juice of ½ lemon
- ¼ cup balsamic vinegar
- 2 to 3 tablespoons Dijon mustard to taste
- 1 clove garlic crushed, optional
- ¼ teaspoon dried oregano
- ¼ teaspoon dried dill
- ¼ teaspoon dried basil
- salt and freshly ground black pepper to taste
Instructions
- ½ cup extra-virgin olive oil
- Juice of ½ lemon
- ¼ cup balsamic vinegar
- 2 to 3 tablespoons grainy mustard, to taste
- 1 clove garlic, crushed, optional
- ¼ teaspoon each: dried oregano, dill, and basil
- Freshly ground black pepper to taste
Notes
This recipe makes approximately one cup of dressing.
Nutrition (Estimate per Serving)
Calories: 130kcalCarbohydrates: 2gProtein: 0.2gFat: 14gSaturated Fat: 2gPolyunsaturated Fat: 1gMonounsaturated Fat: 10gSodium: 44mgPotassium: 19mgFiber: 0.2gSugar: 1gVitamin A: 6IUVitamin C: 0.2mgCalcium: 8mgIron: 0.3mg
Vegan-ize any recipe!Grab our free vegan cheat sheet, packed with my favorite easy substitutions to make any recipe vegan.
Vegan Greek Pasta Salad
Looking for a simple dish that's light, refreshing, and packed with flavor? This Vegan Greek Pasta Salad ticks all the boxes. Loaded with crisp veggies, tangy olives, and an herby homemade dressing, it's the perfect go-to recipe for potlucks, meal prep, or quick lunches.
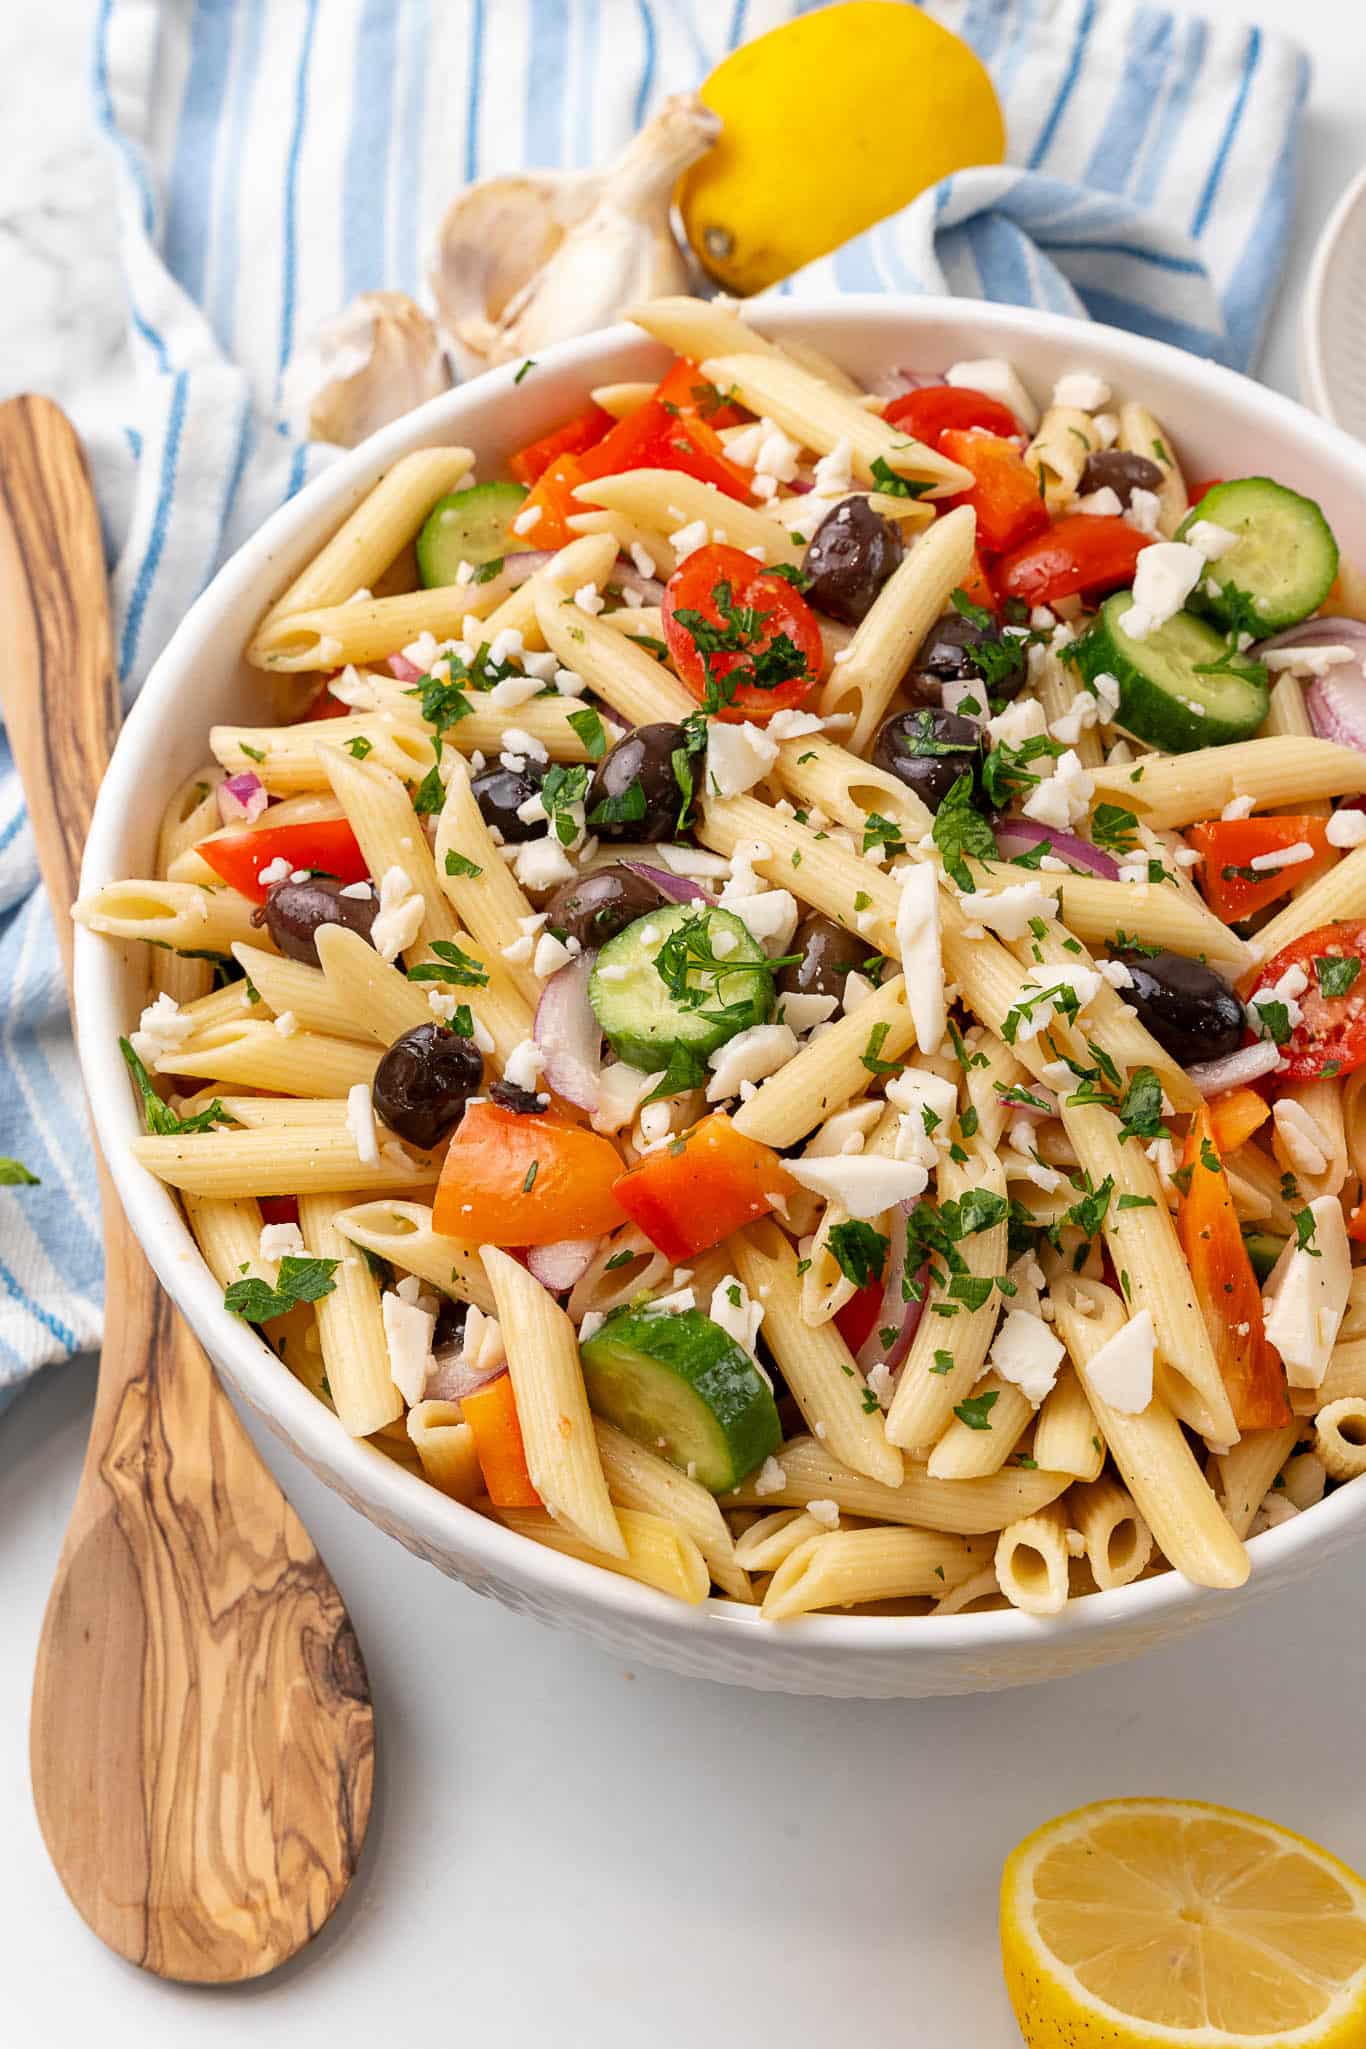
Bonus? It's super easy to make and totally customizable, so you can tweak it to suit your taste or what you have in your fridge.
The lemony dressing is zippy and bright, the olives and vegan feta (if you're using it) bring the perfect amount of saltiness, and the fresh veggies add crunch and color. Toss all that with tender pasta, and you've got yourself a dish that's satisfying without being heavy.
It's perfect for warm weather gatherings, but honestly, I'd eat this year-round. Plus, it gets better as it sits, which means leftovers are absolutely something to look forward to.
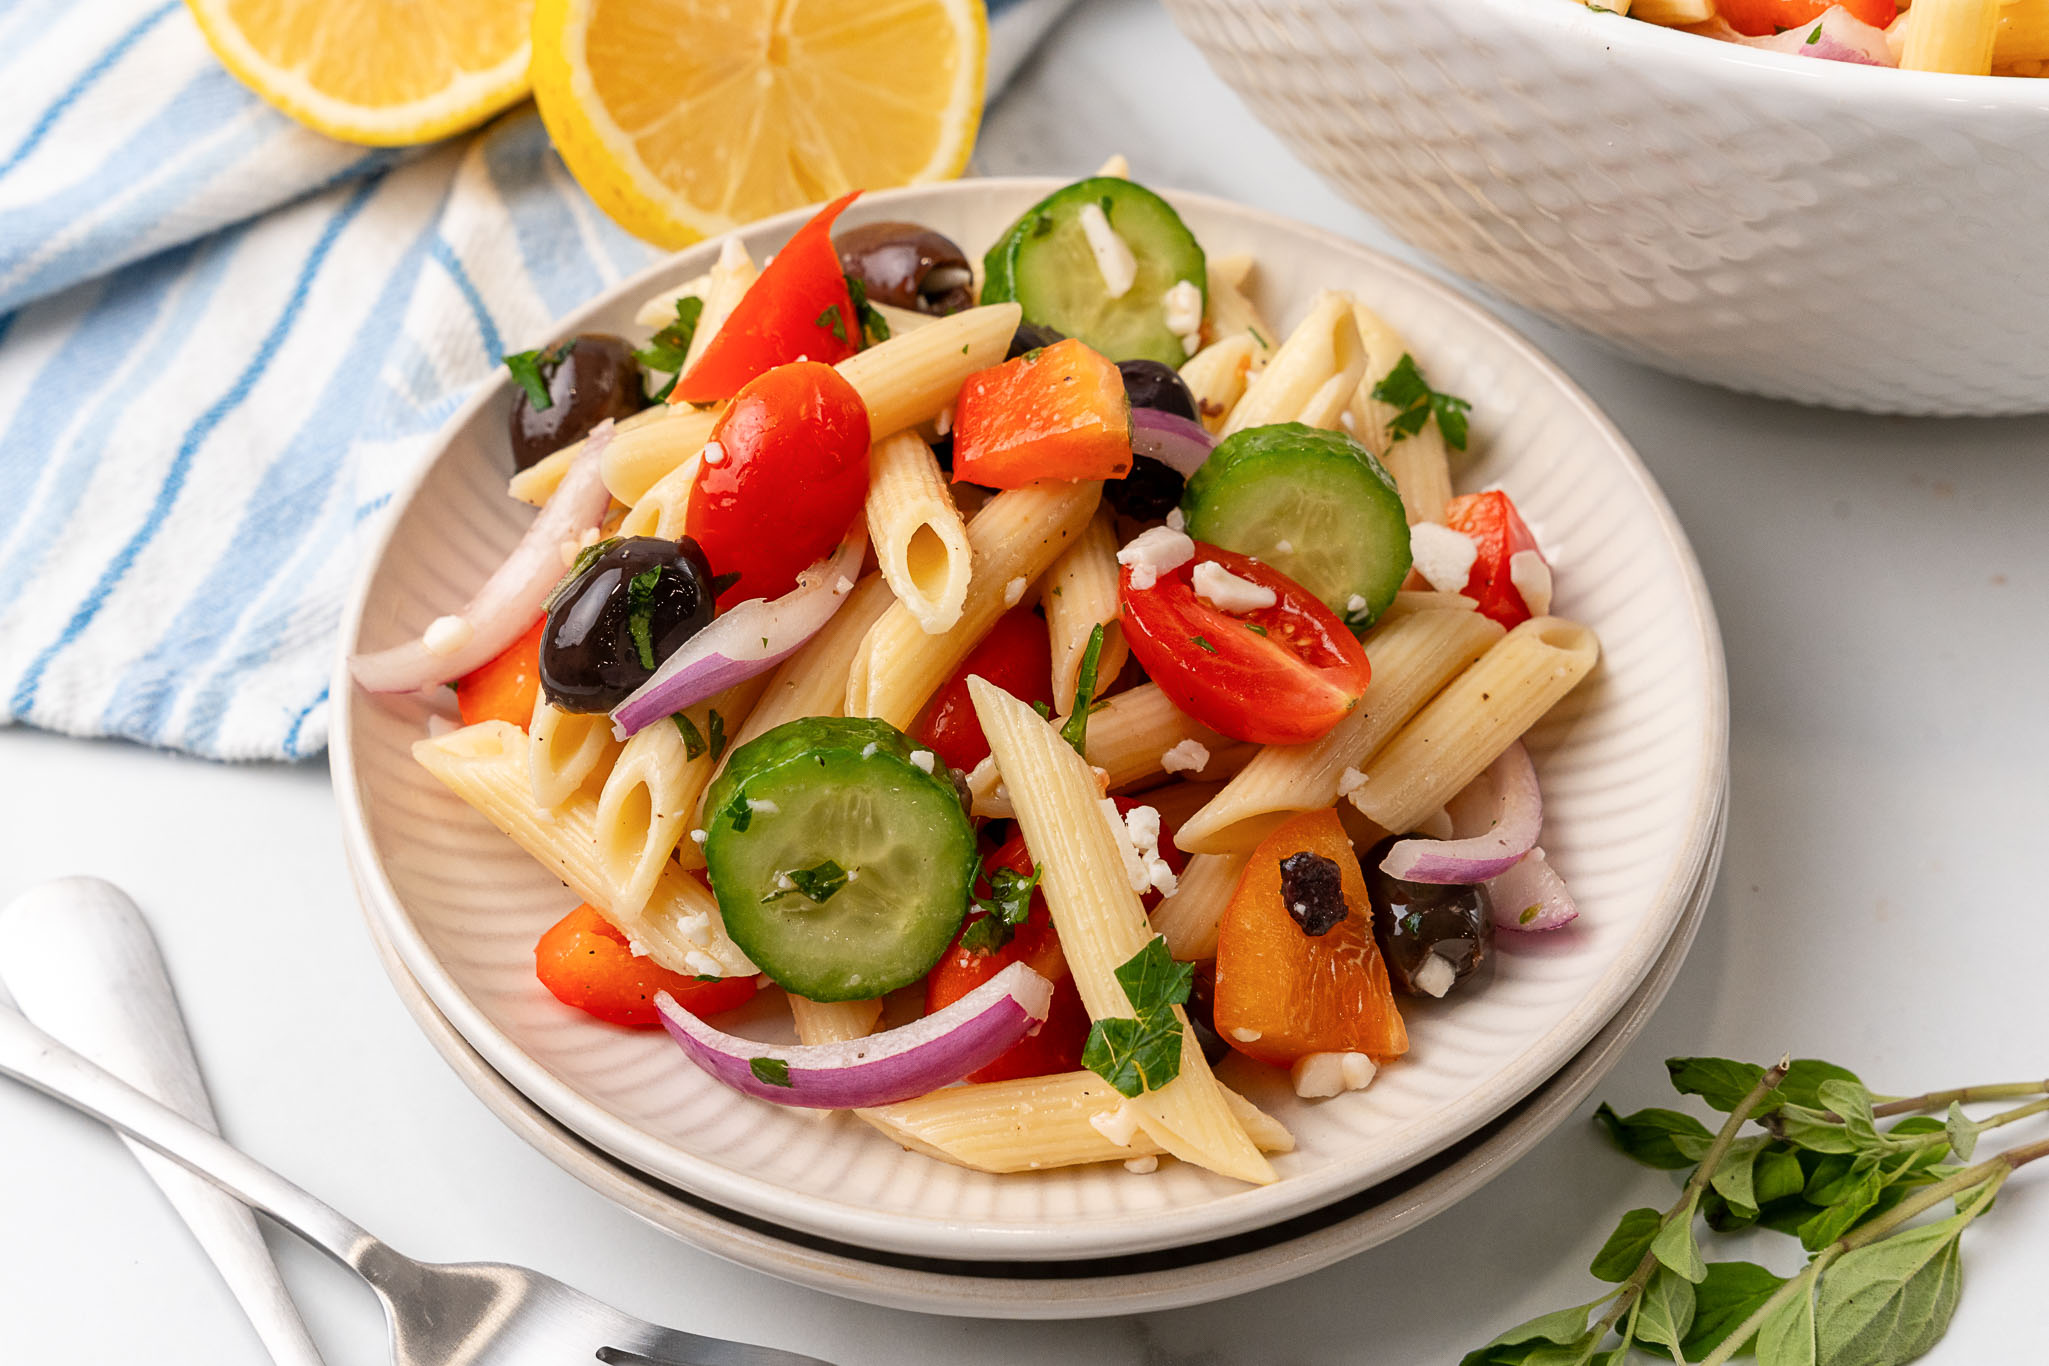
This Vegan Greek Pasta Salad Is:
- Light and refreshing: Thanks to the lemony vinaigrette and fresh veggies.
- Perfect for sharing: Ideal for BBQs, picnics, or weeknight dinners.
- Easy to make ahead: The flavors deepen over time, so it's meal-prep friendly.
- Customizable: Mix in extra veggies, switch up the pasta, or skip the vegan feta-it's all good.
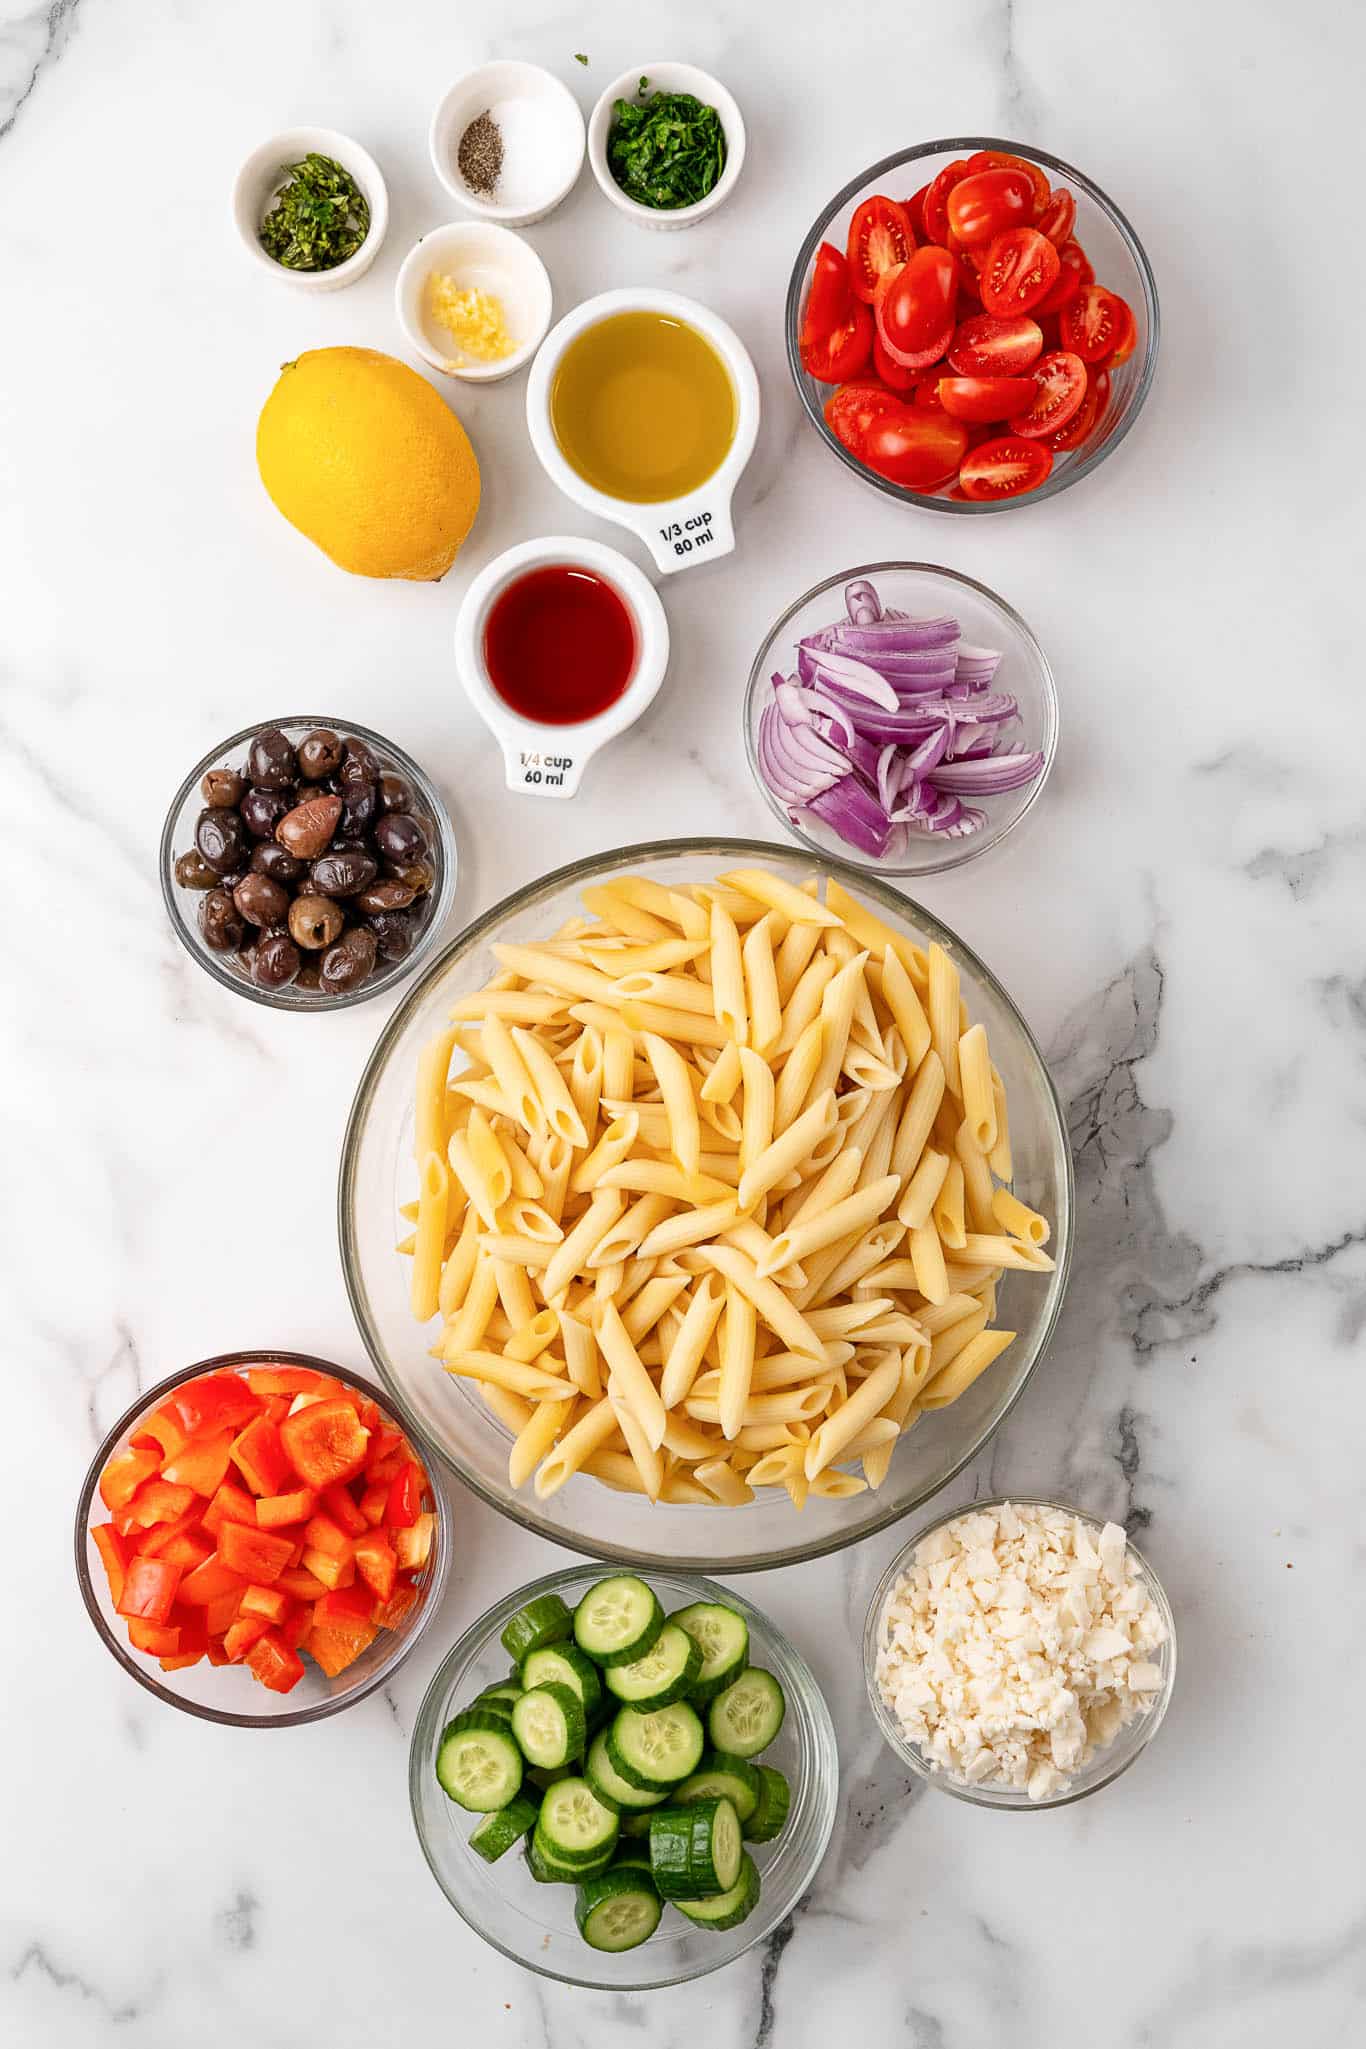
Substitutions
Make it gluten free. Just use your favorite gluten free pasta brand - the rest of the ingredients are naturally gluten free.
Kalamata Olives are essential for that briny flavor. But if olives aren't your thing, try substituting capers.
Vegan Feta: Totally optional, but if you can find it, it's worth it for that tangy creaminess. Or make your own vegan feta with tofu!
Red Wine Vinegar: Brings the perfect amount of tang to the dressing. Apple cider vinegar can pinch-hit if needed.

Helpful Tips
Let it sit before serving: If you have time, let the salad chill in the fridge for at least 30 minutes before serving. The flavors meld together beautifully.
Customize the dressing: Taste and adjust-need more tang? Add a splash of vinegar or lemon. Want it a little sweeter? A tiny drizzle of maple syrup does the trick.
Keep it fresh: If making ahead, reserve some dressing and add it just before serving to keep everything tasting fresh.
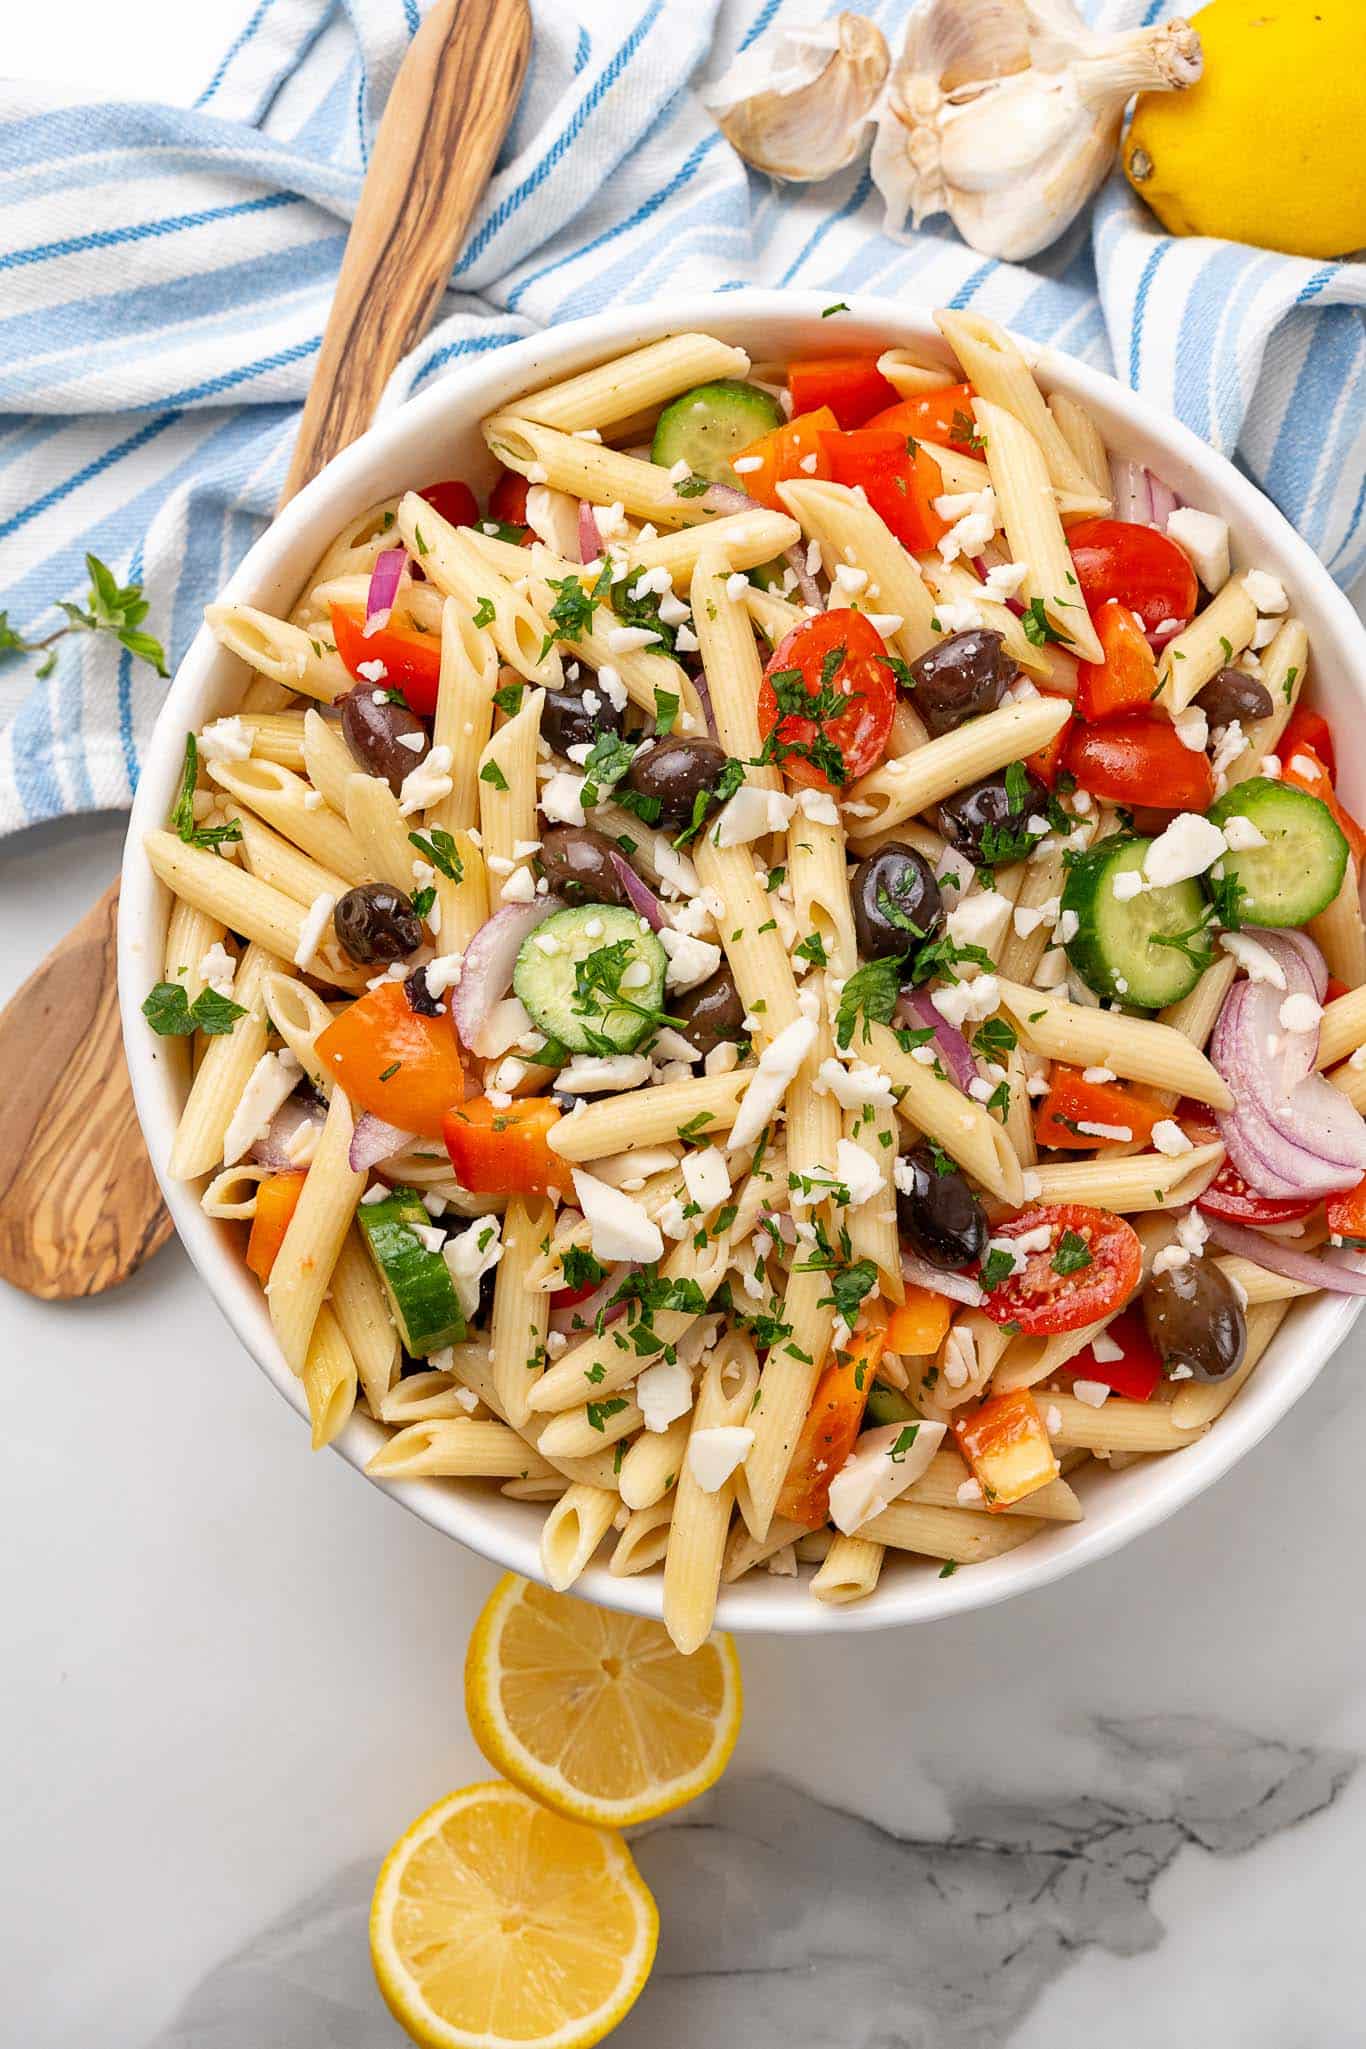
Variations to Try
Add protein: Toss in some chickpeas or roasted tofu for a heartier salad.
Go extra green: Add spinach, arugula, or kale for more veggies.
Make it spicy: Throw in a pinch of chili flakes or a drizzle of hot sauce.
Change the pasta: Try orzo or bowtie pasta for a fun twist.
Herb swap: Basil or dill can replace or complement the oregano and parsley.
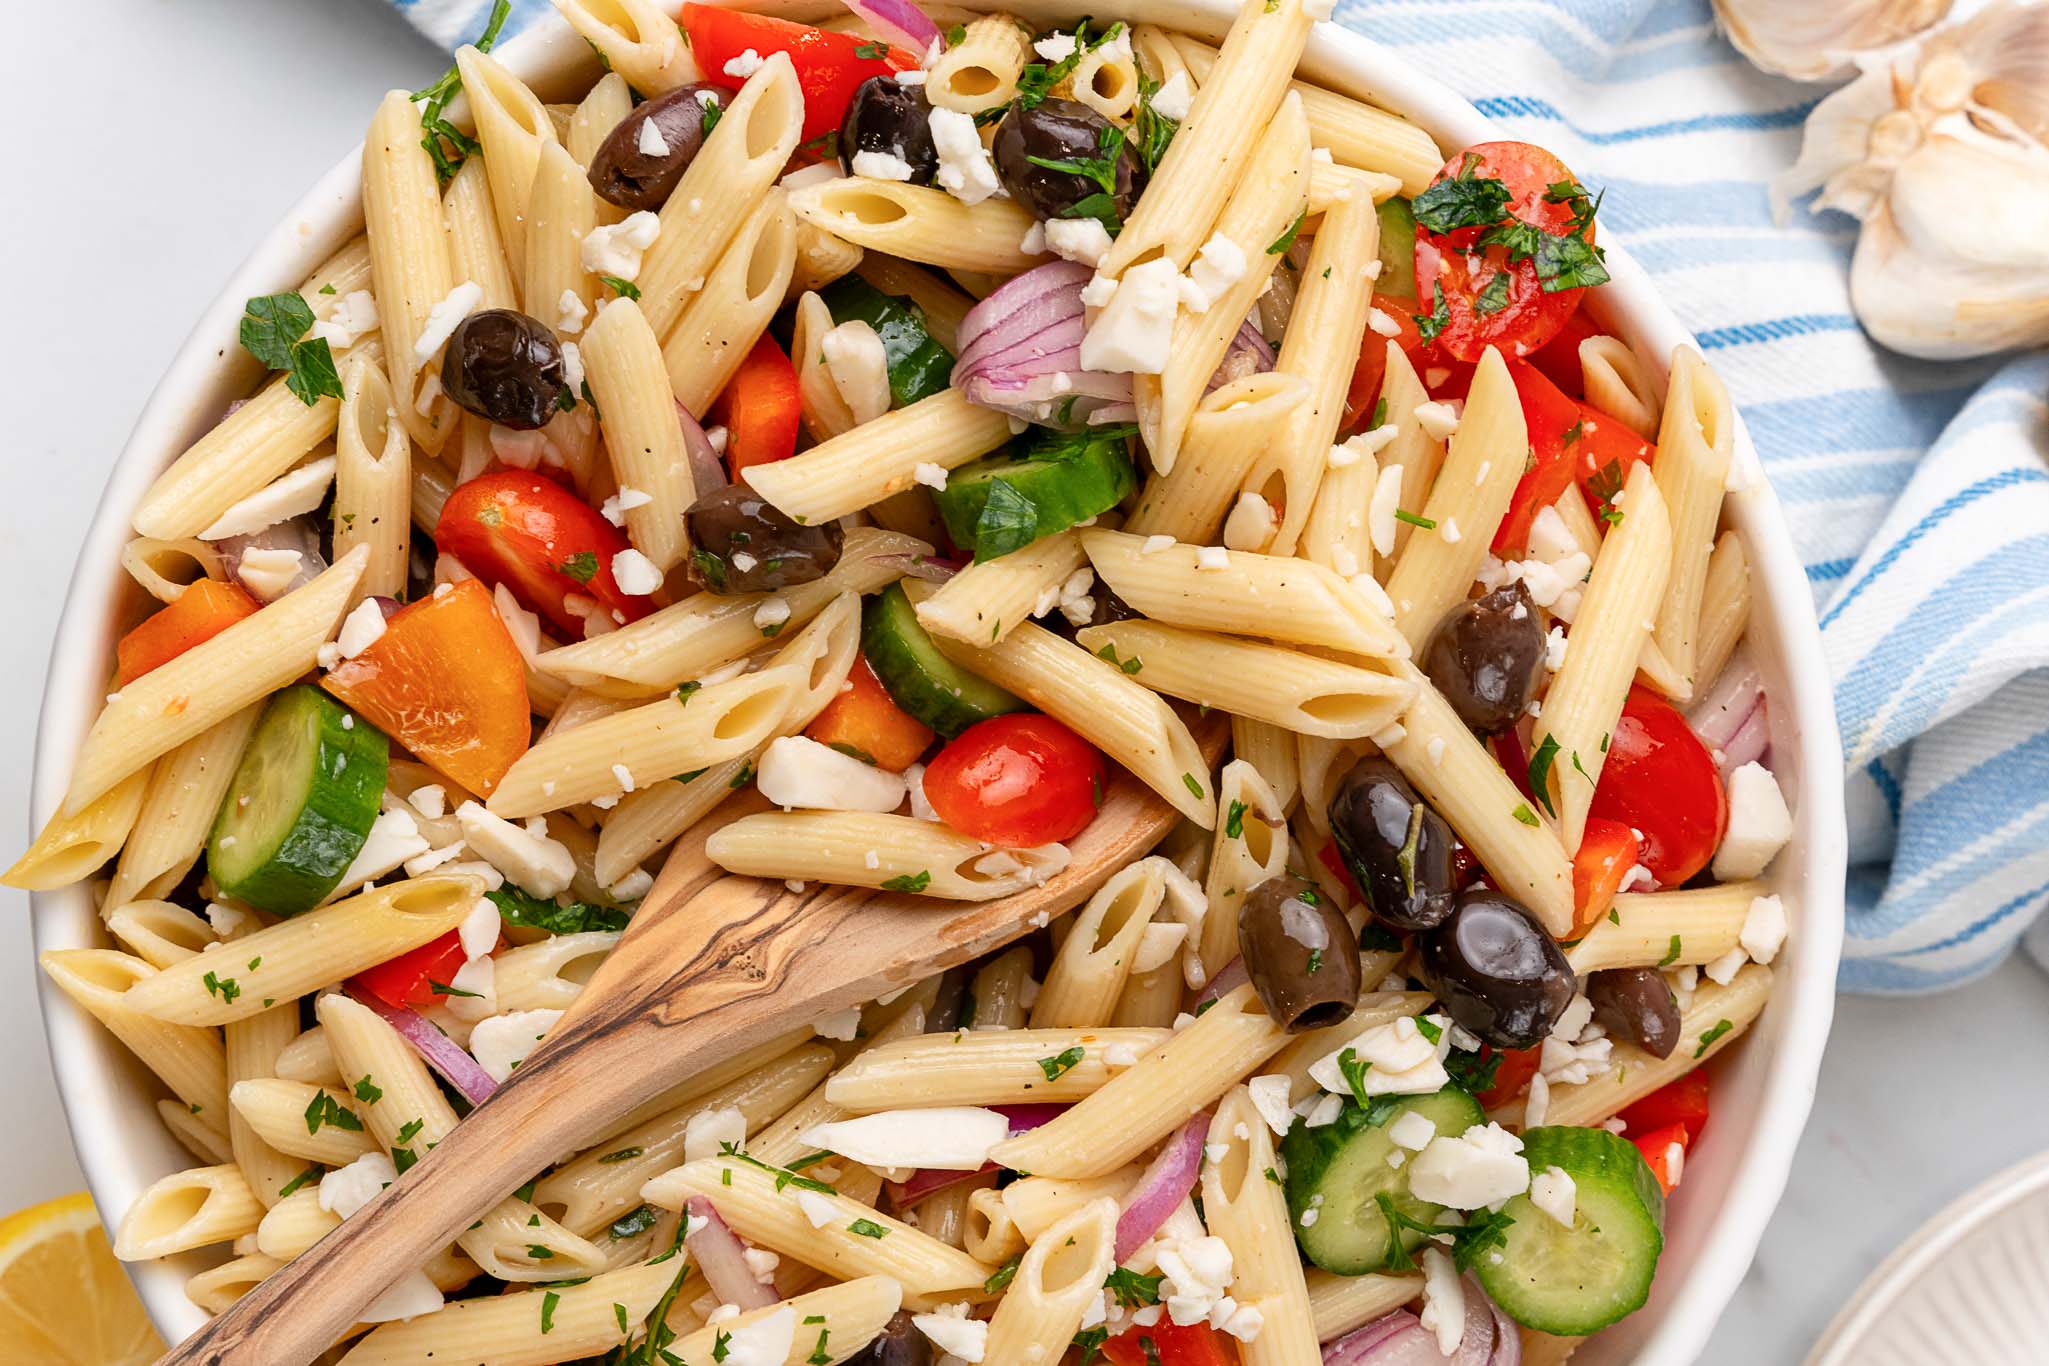
More Vegan Recipes
If you love this vegan pasta salad, be sure to check out these other vegan ideas:
Also try: our Tomato Relish Salad With Oregano And Thyme.
Recipe
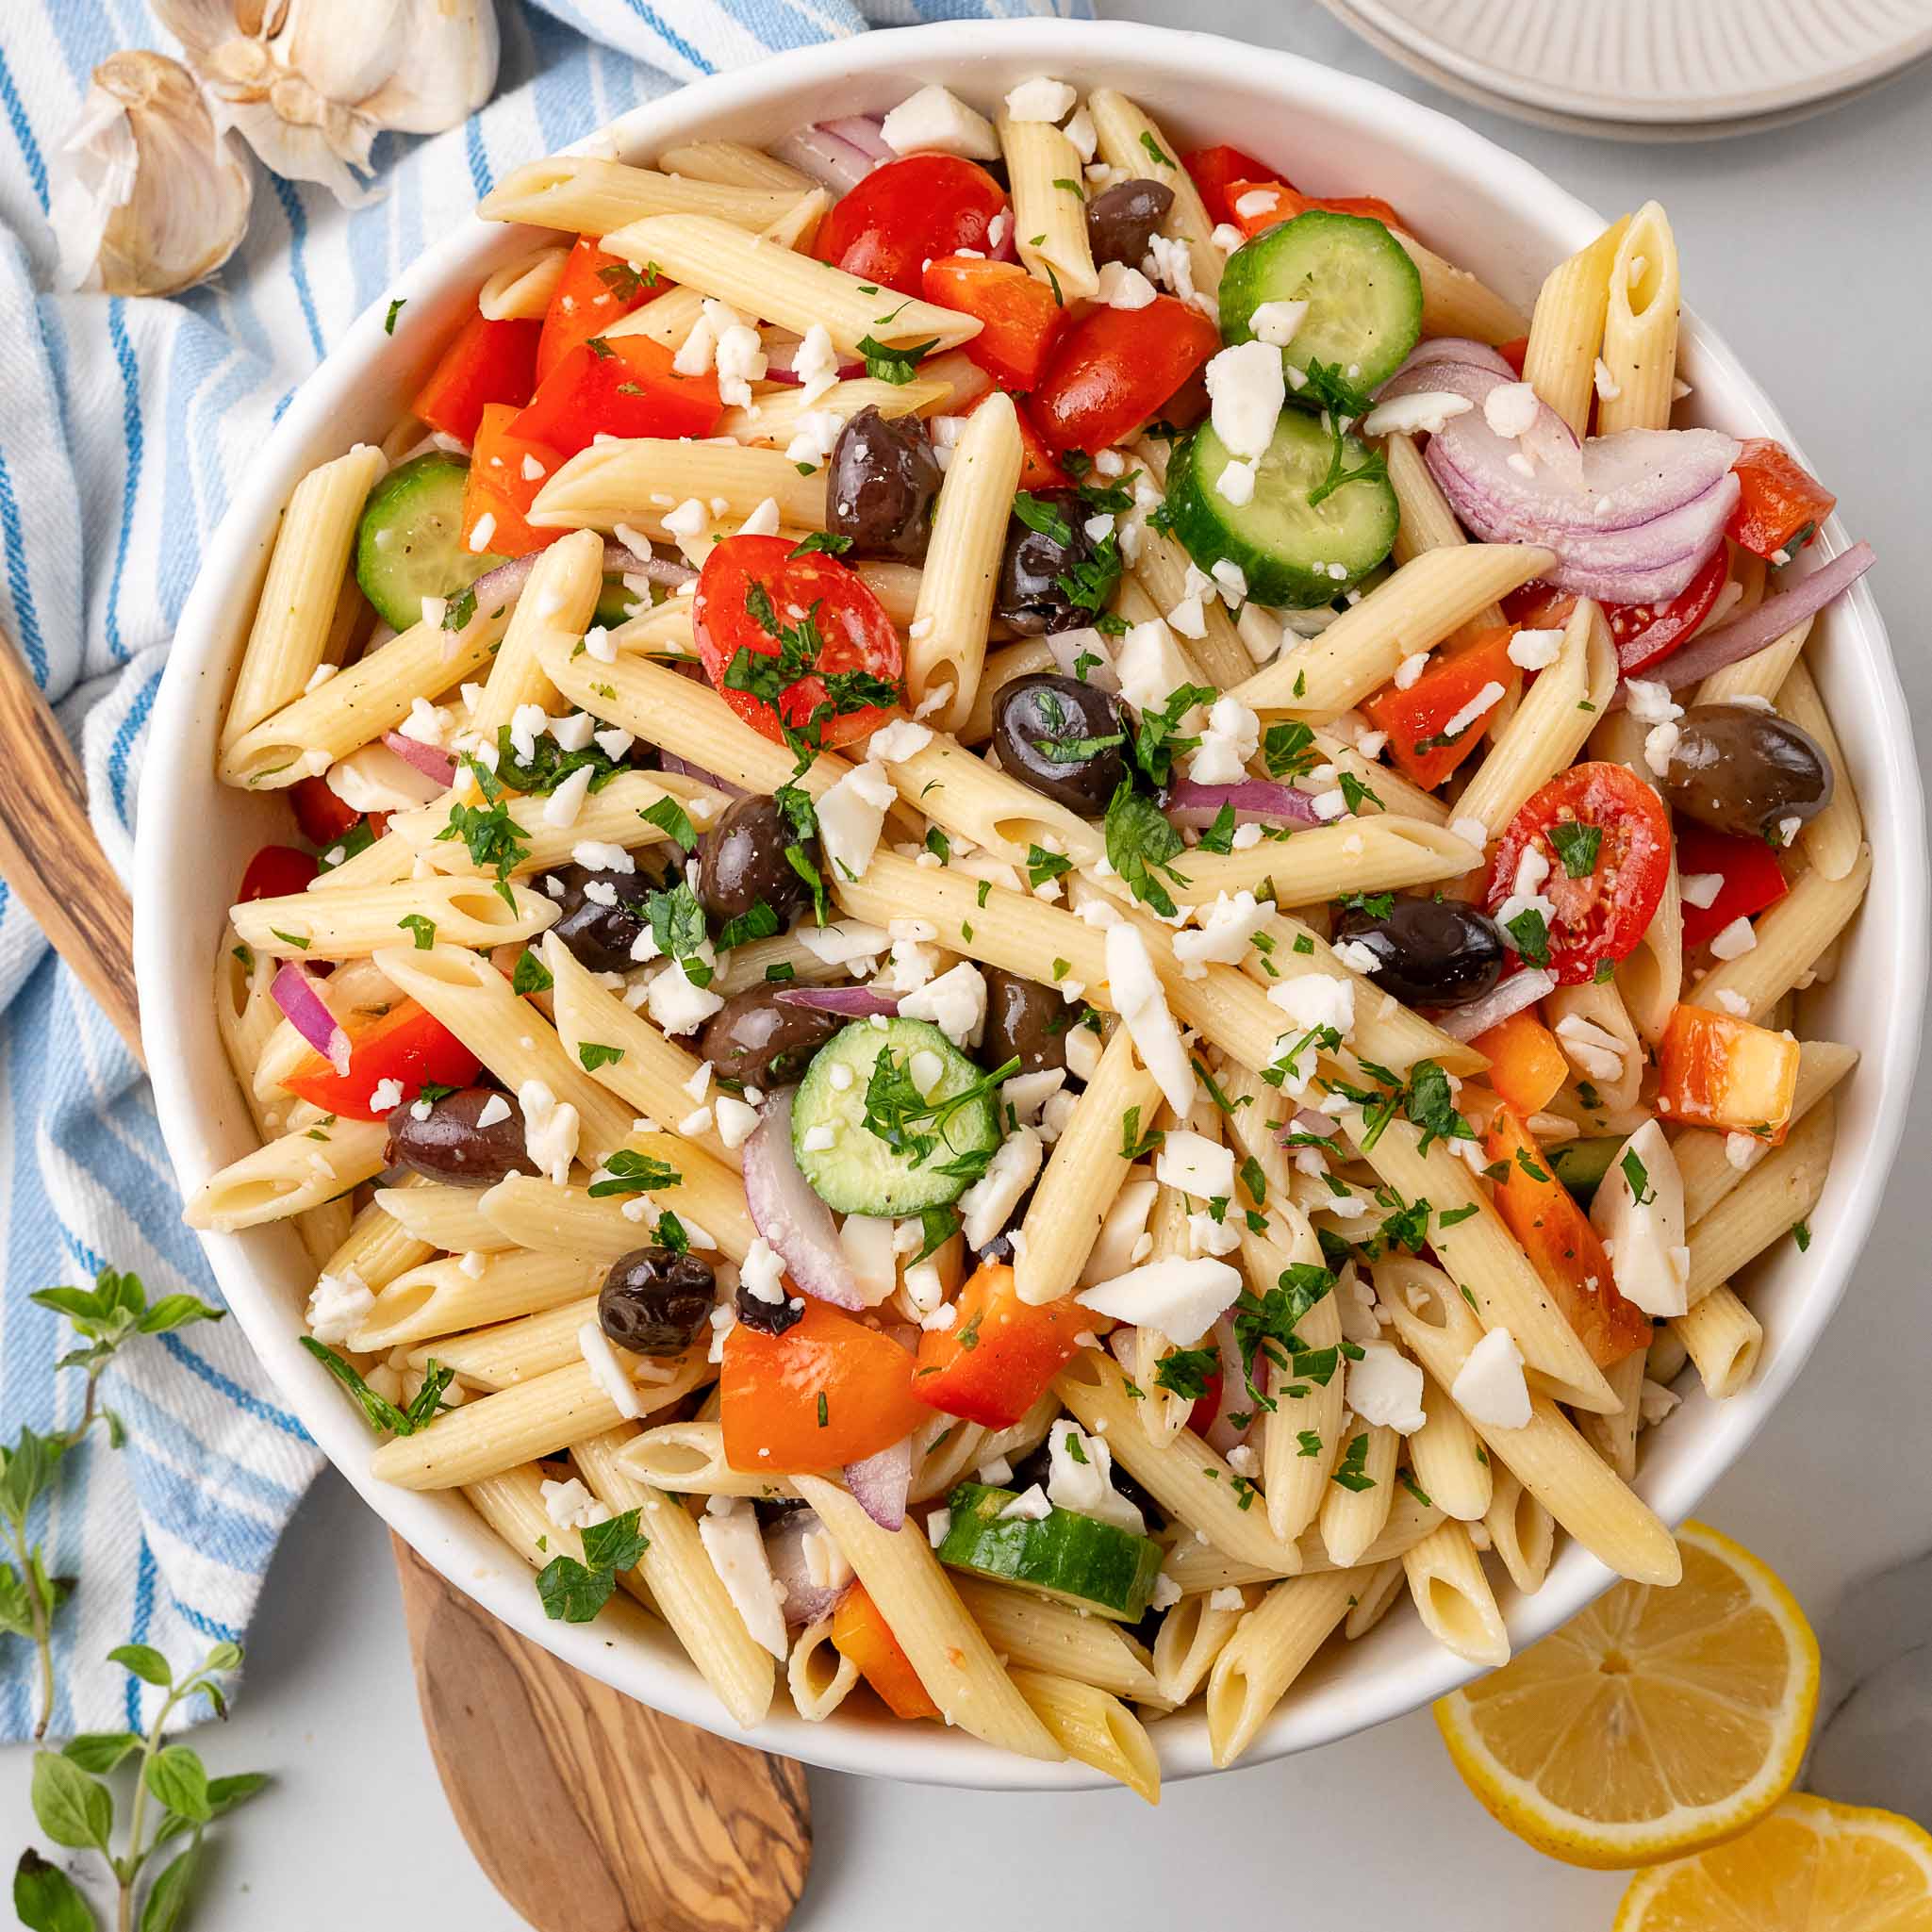
Vegan Greek Pasta Salad
This Vegan Greek Pasta Salad is light, refreshing, and packed with flavor. It's the perfect go-to recipe for potlucks, meal prep, or quick lunches.
Print
Pin
Save
Servings: servings
Ingredients
Dressing:
- ⅓ cup olive oil
- ¼ cup red wine vinegar
- 1 lemon juiced
- 1 clove garlic minced
- 1 tablespoon minced fresh oregano
- 1 tablespoon minced fresh parsley
- Salt and pepper to taste
Pasta salad:
- 16 oz dry pasta rotini or penne
- 4-5 mini cucumbers sliced
- 1 pint grape tomatoes halved
- 1 bell pepper seeded and diced
- 1 cup vegan feta optional
- 1 cup kalamata olives pitted
- ½ small red onion sliced
Instructions
Dressing:
- In a small jar with a lid, add the olive oil, red wine vinegar, lemon juice, garlic, oregano, parsley and salt and pepper.
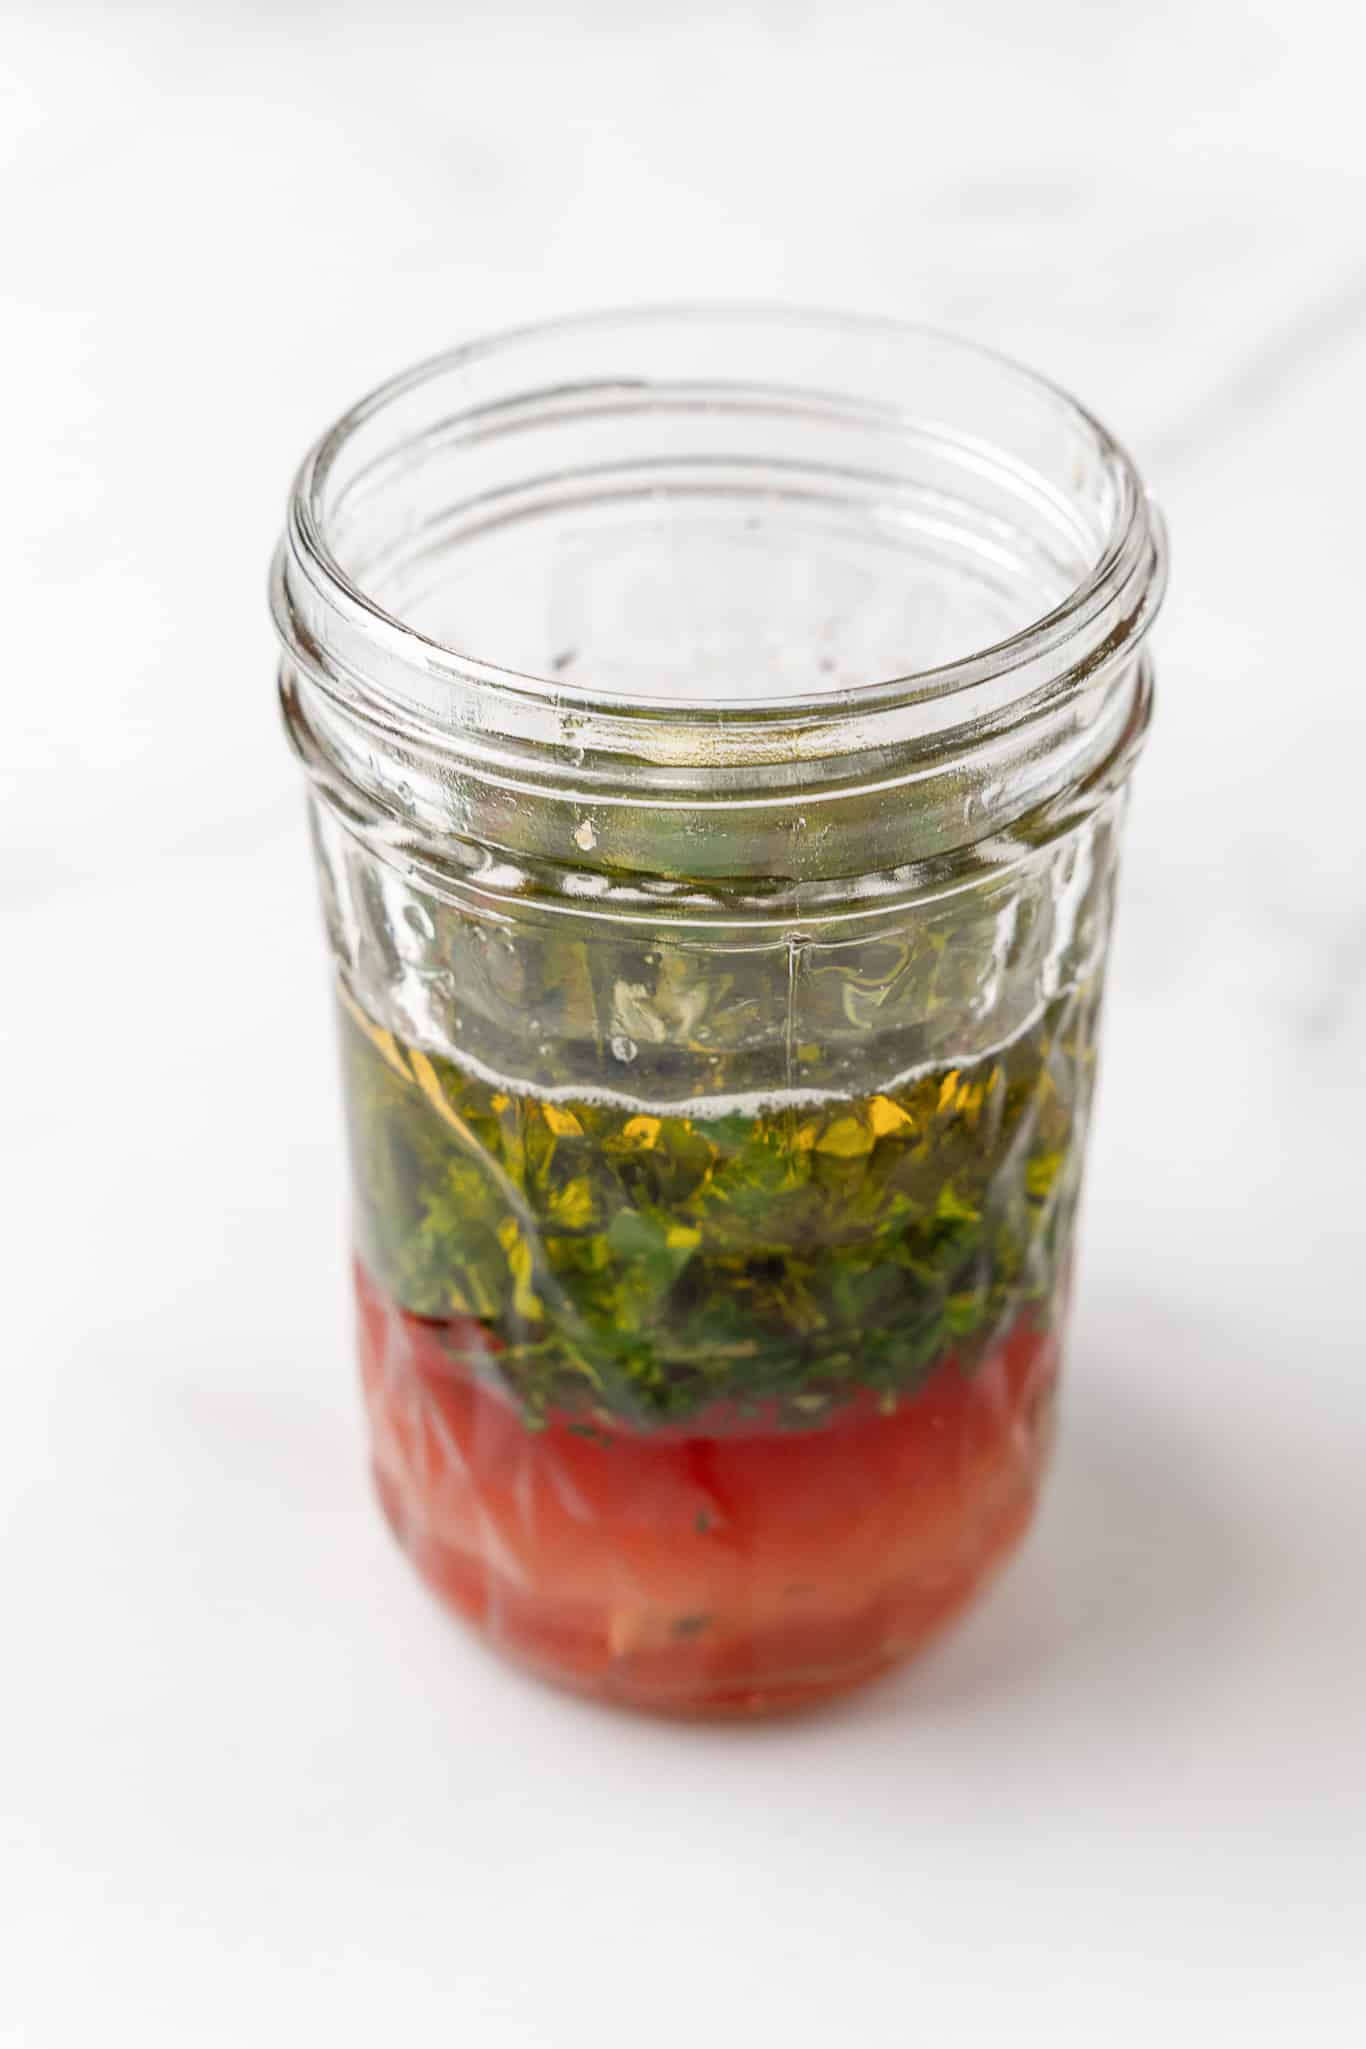
- Close the lid and shake until homogenous. Set aside until needed.
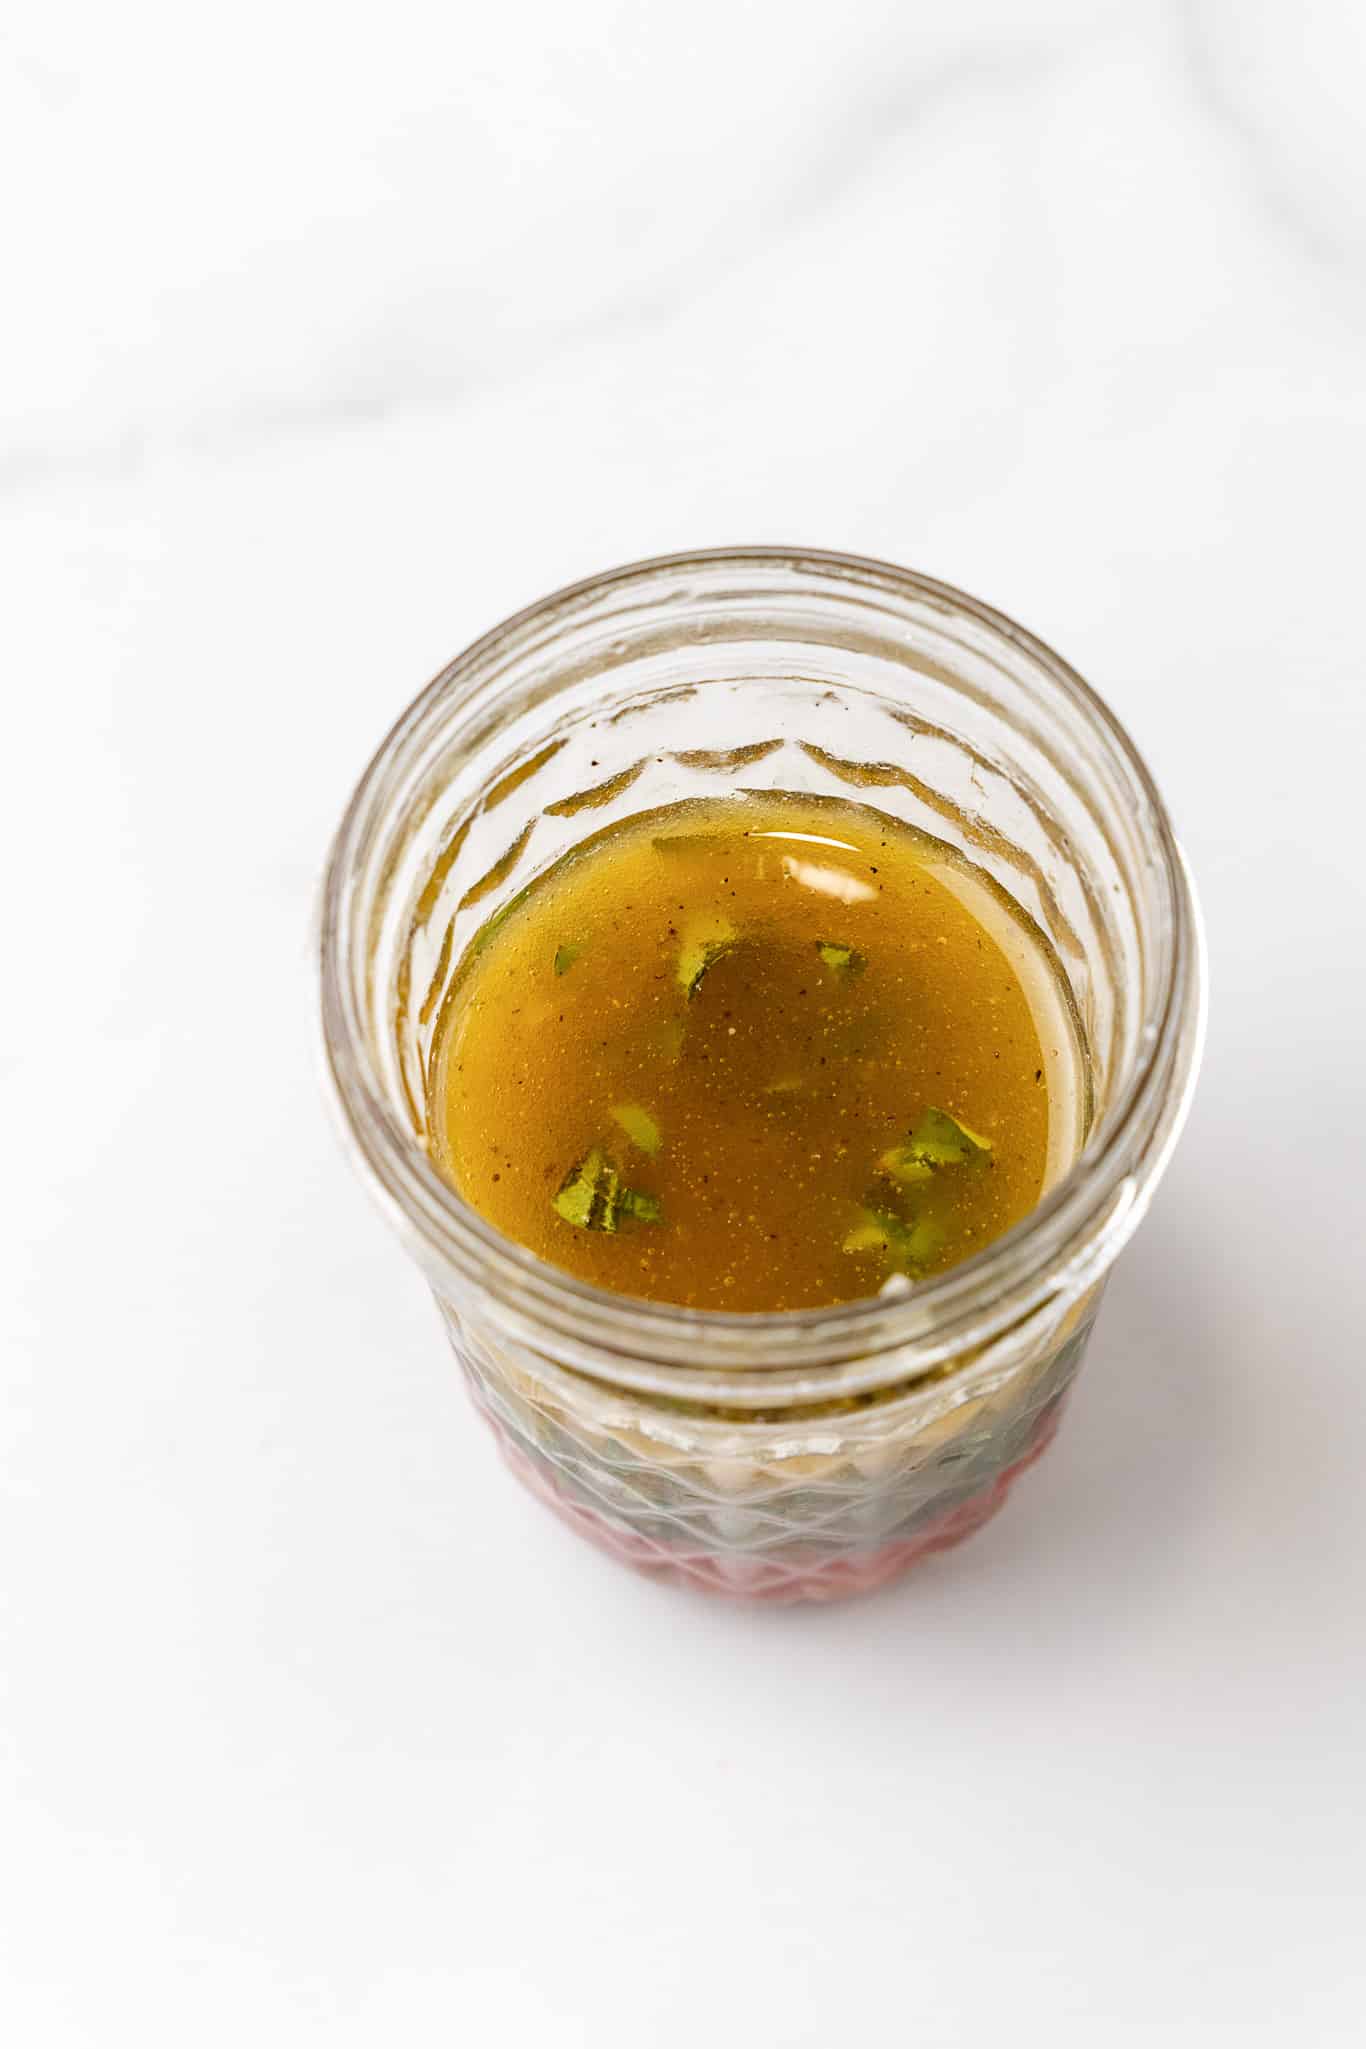
Salad:
- To a large bowl, add the pasta, cucumbers, grape tomatoes, bell pepper, vegan feta, kalamata olives, and red onion.
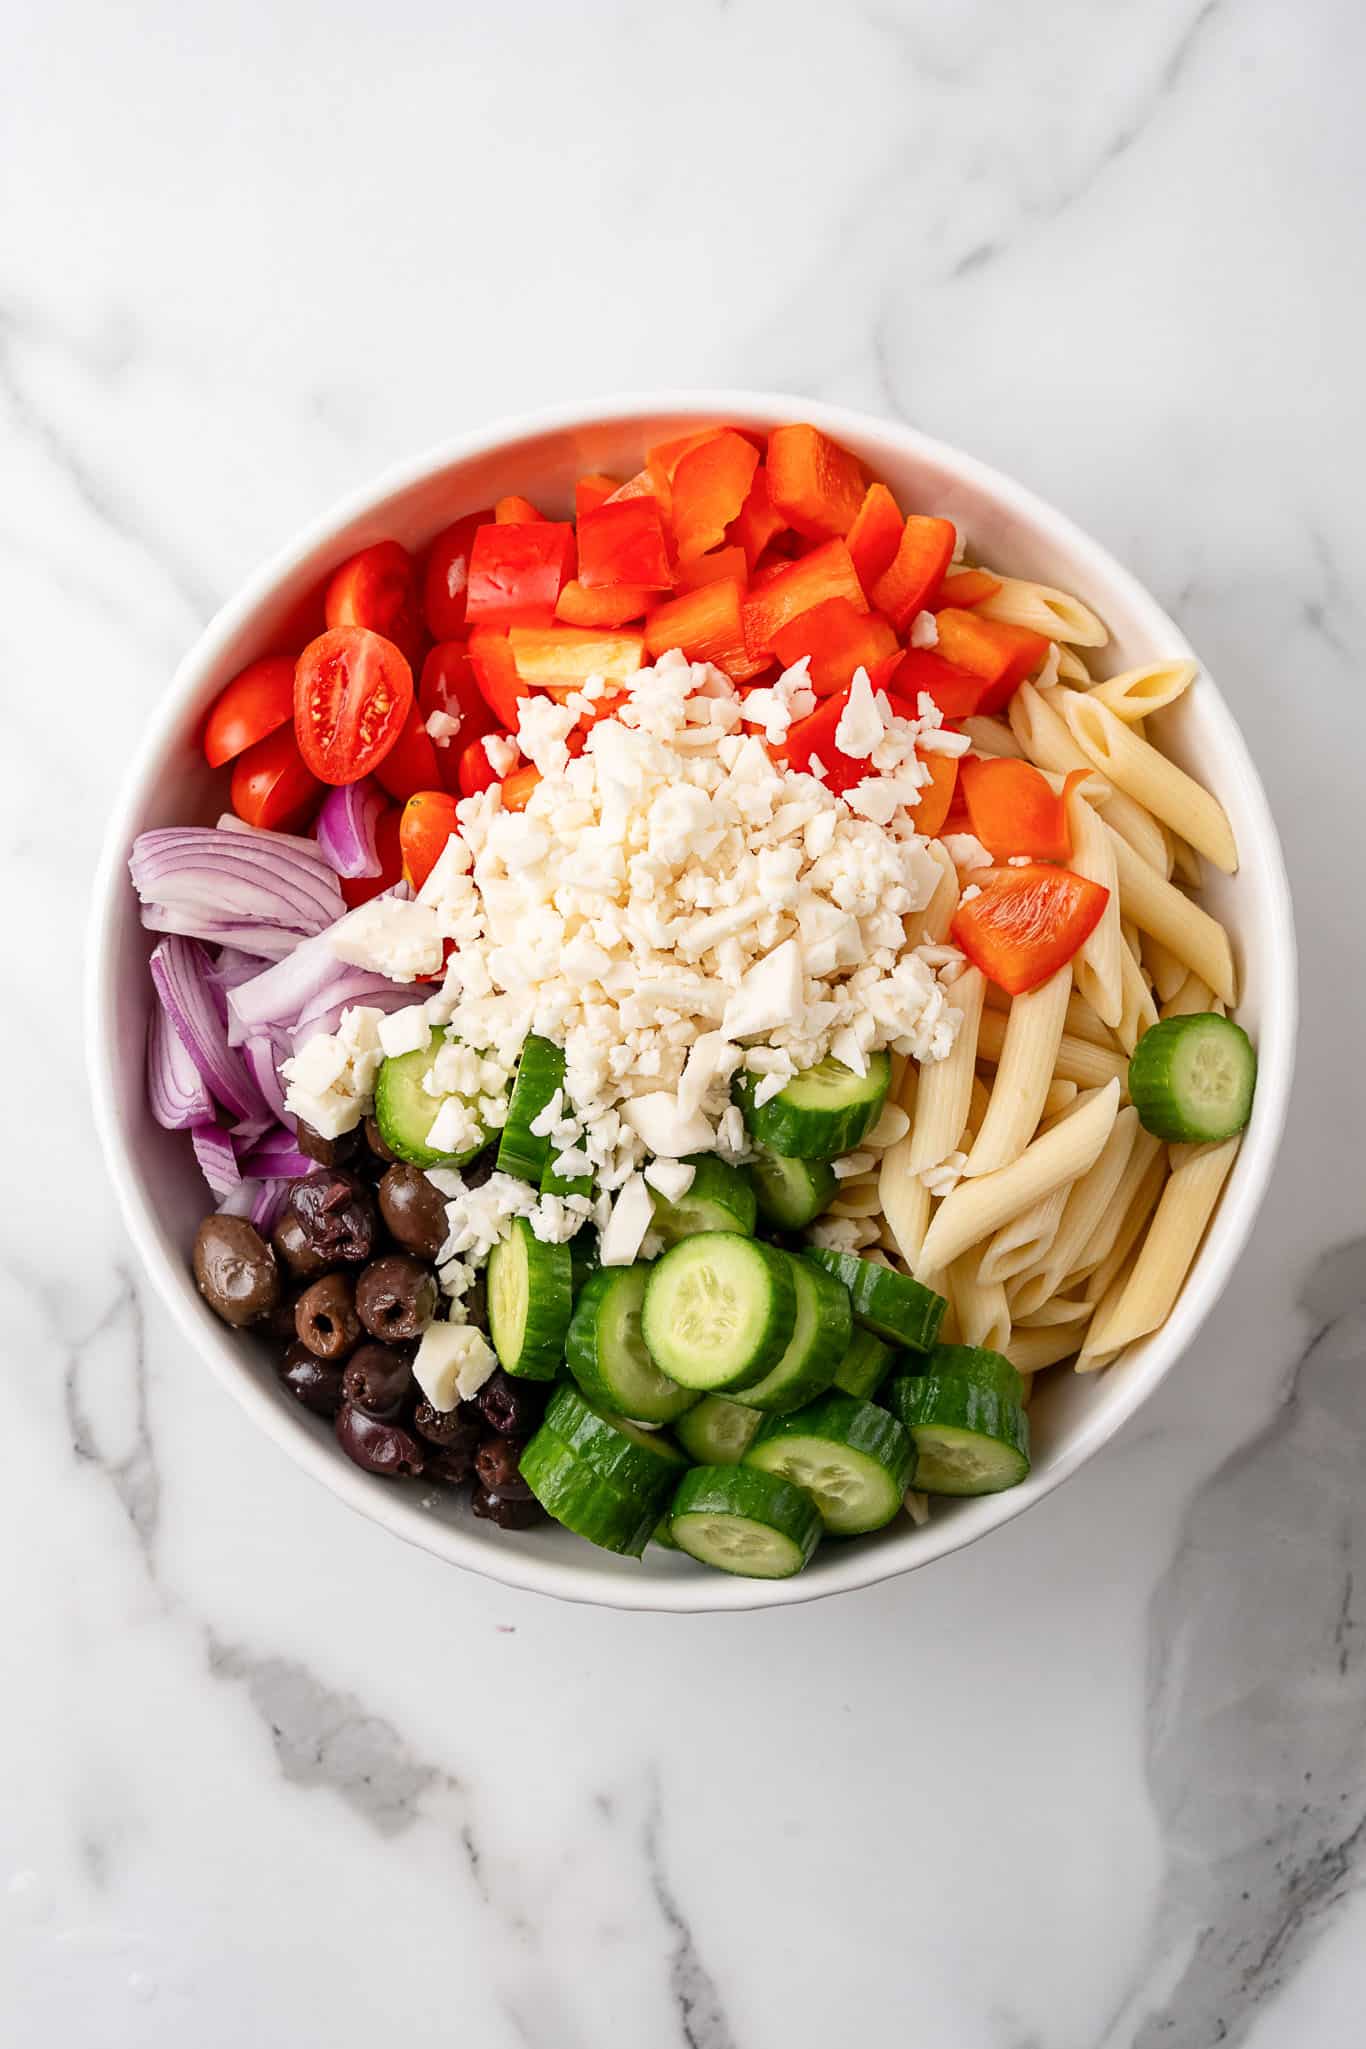
- Toss all the ingredients together. Drizzle the dressing over the salad and toss again
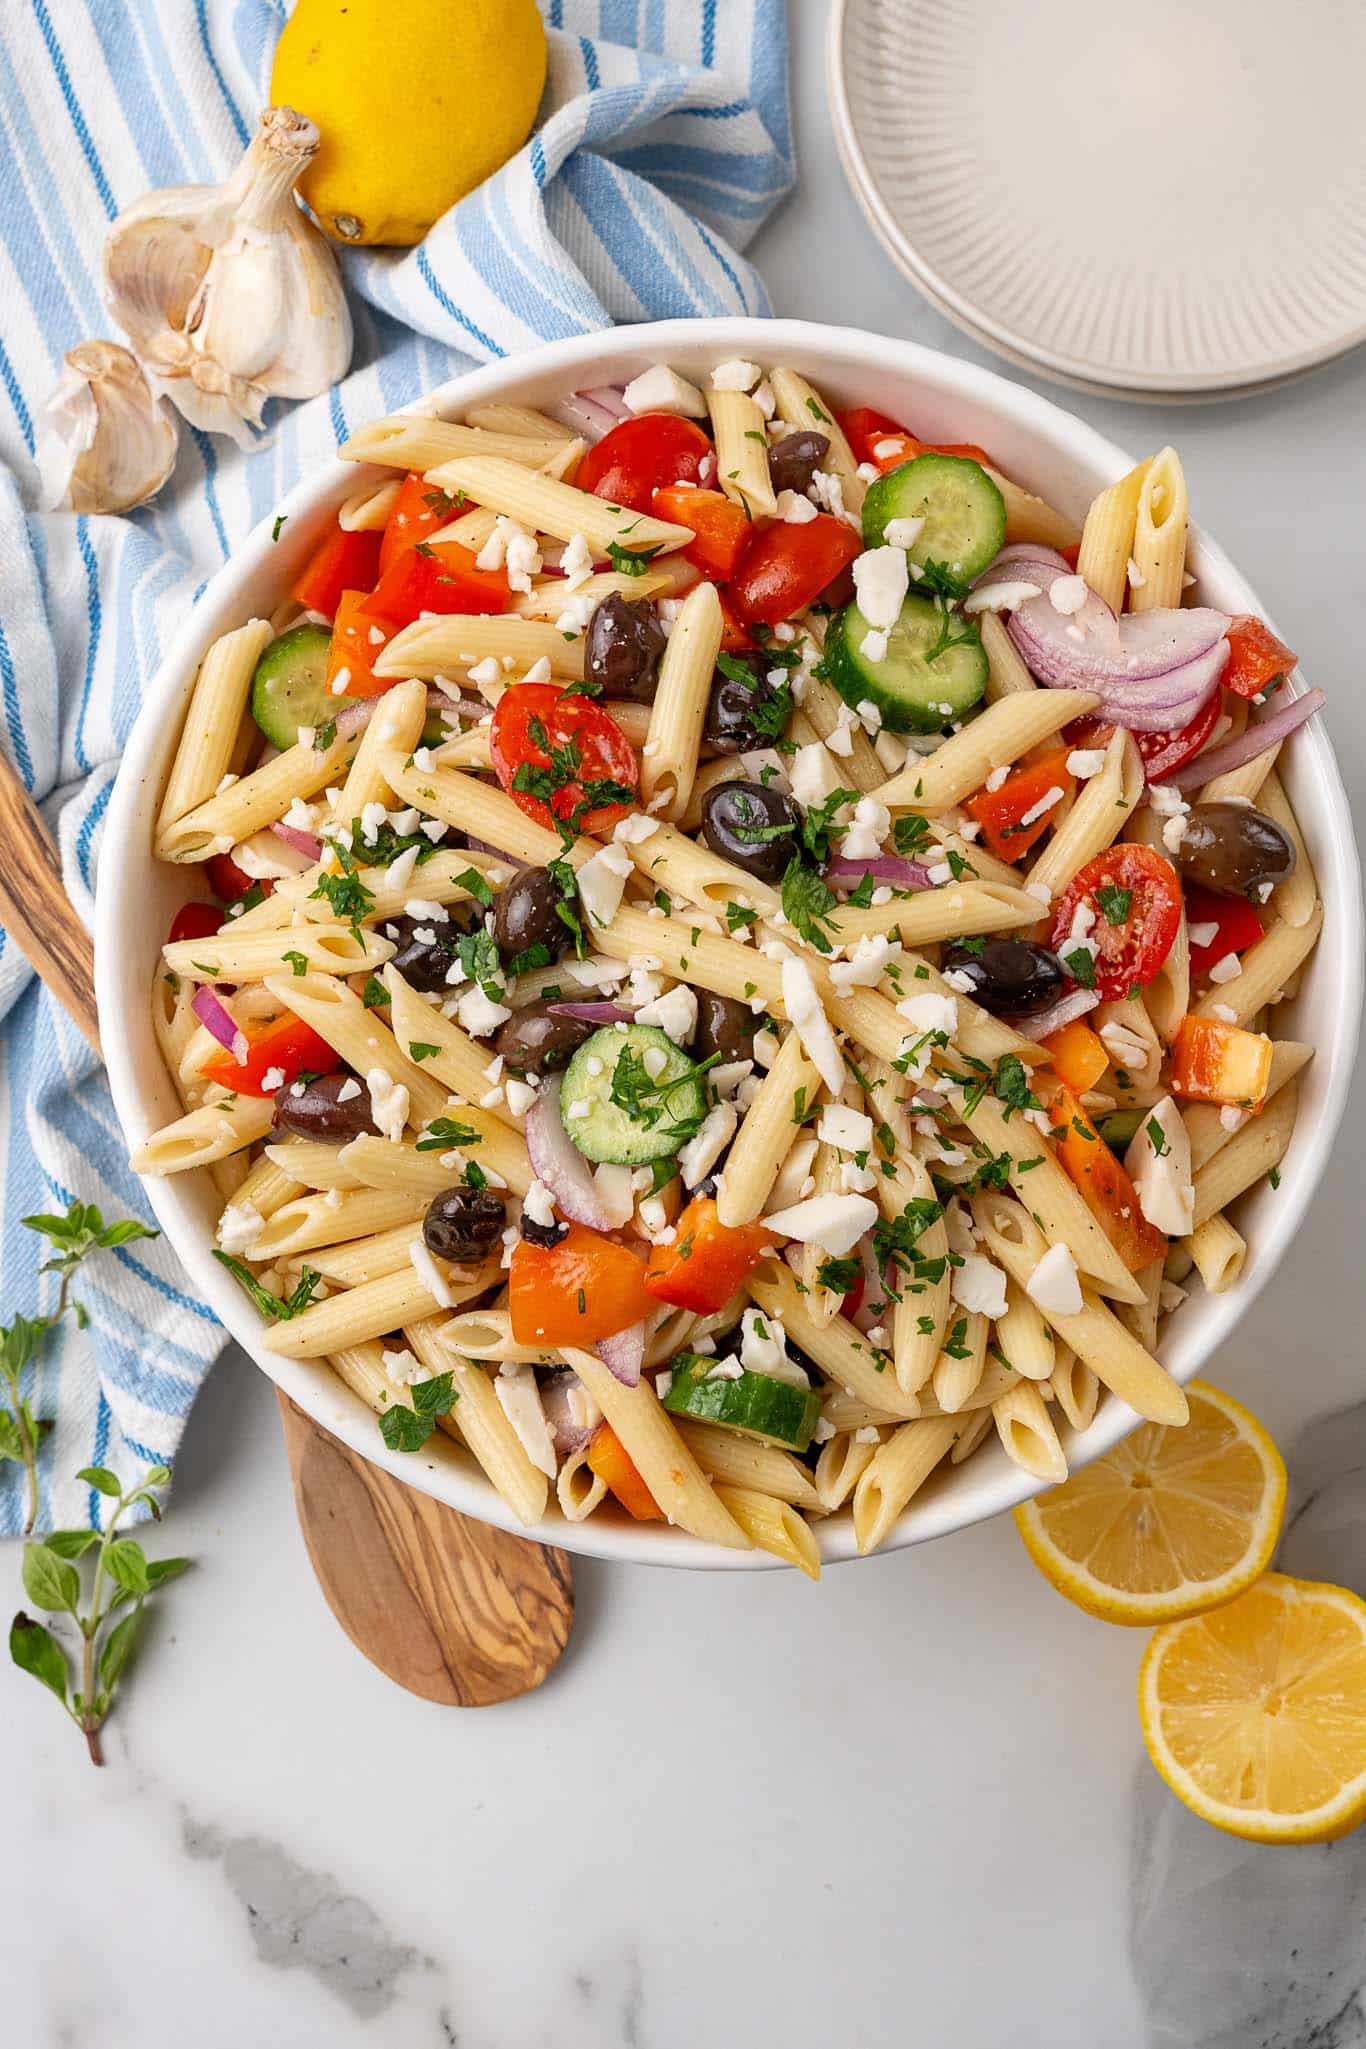
Nutrition (Estimate per Serving)
Calories: 381kcalCarbohydrates: 53gProtein: 14gFat: 13gSaturated Fat: 2gPolyunsaturated Fat: 2gMonounsaturated Fat: 9gCholesterol: 3mgSodium: 449mgPotassium: 553mgFiber: 5gSugar: 7gVitamin A: 1189IUVitamin C: 40mgCalcium: 66mgIron: 2mg
Vegan-ize any recipe!Grab our free vegan cheat sheet, packed with my favorite easy substitutions to make any recipe vegan.
30-Minute Aloo Gobi (Vegan)
This Aloo Gobi tastes just as delicious as the restaurant version - and you won't believe how easy it is to make this popular Indian potato and cauliflower curry at home!
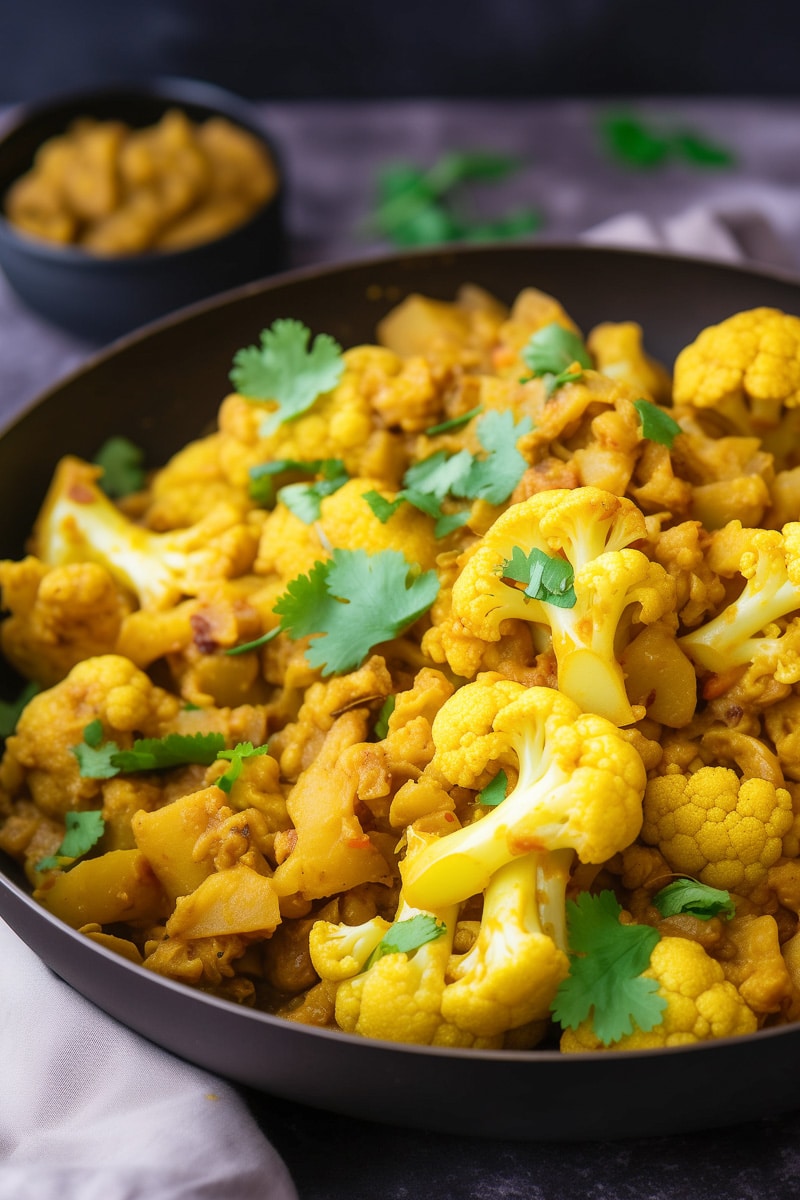
I've always been a big fan of Indian food, but my interest certainly increased when I married into my husband's Indian family. I really enjoy experimenting with all of the rich flavors of this vegan-friendly cuisine.
And while I will never claim to be an expert on Indian cooking - I think I've come up with some real keepers. 😉 This Aloo Gobi is one of my faves for its simplicity. It's relatively quick, only takes 30 minutes to throw together, and my whole family loves it.
This aloo gobi is:
- Indian comfort food.
- Slightly spicy and packed with flavor.
- Easy to make with simple ingredients.
- 100% vegan!
What is Aloo Gobi?
Aloo Gobi is a classic Indian curry consisting of "aloo" - meaning potato in Hindi - and "gobi" - meaning cauliflower. It's a no-frills kind of meal that's a staple in North India, especially in Punjab. The dish is pretty much what you'd get if potatoes and cauliflower had a party and invited some spices like turmeric, cumin, and coriander to jazz things up.
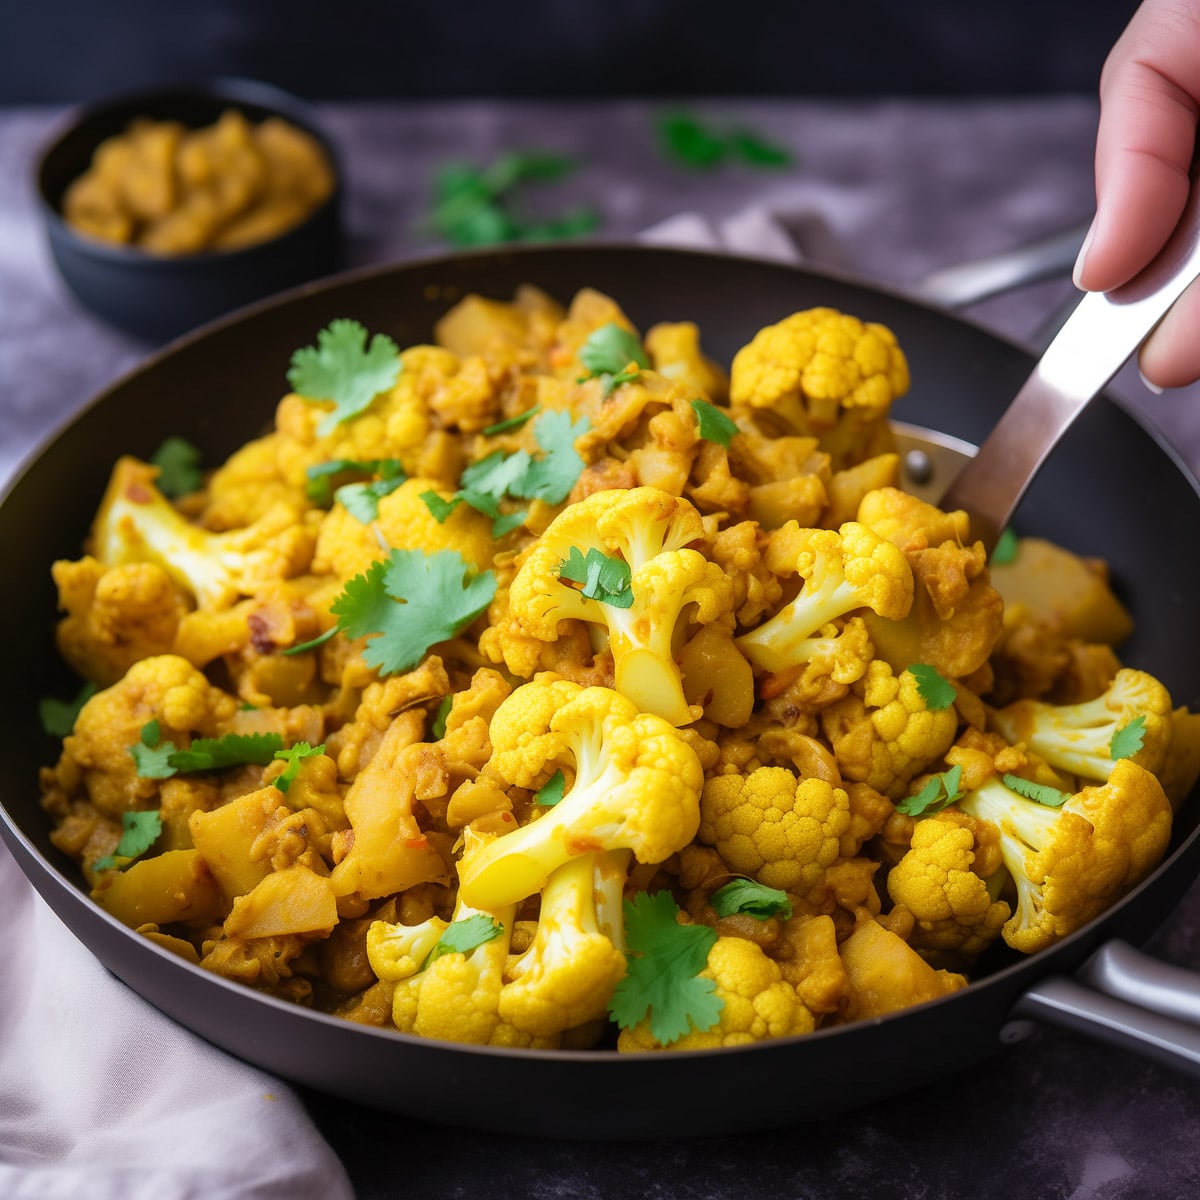
Key Ingredients & Substitutions:
Potatoes
I use plain old Russet potatoes most often, but waxy potatoes like Yujon Gold also work really well.
Cauliflower
You'll use a medium size head of cauliflower in this recipe, which you will cut into florets. But you can also use the pre-cut florets for convenience.
Tomatoes
I prefer to use fresh tomatoes in aloo gobi, but you can also used canned diced tomatoes. The fire roasted varieties give a great flavor!
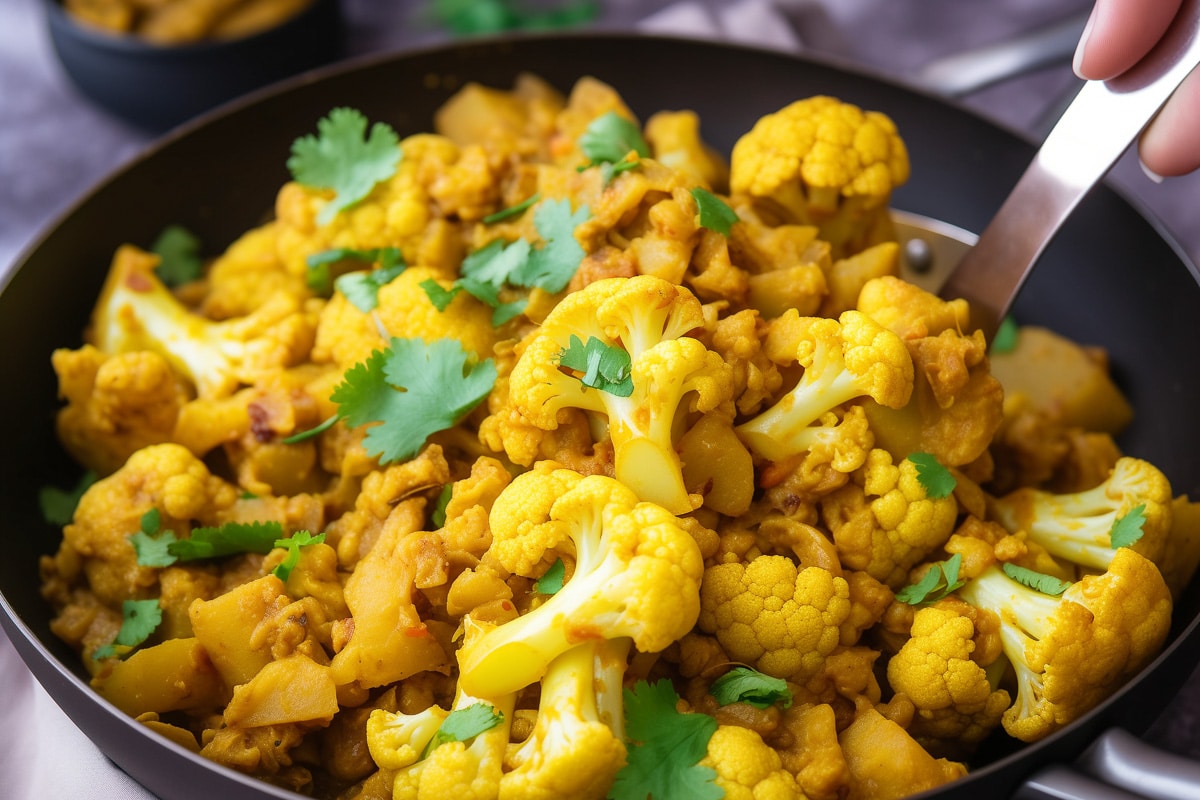
Helpful Tips:
Even Cooking. Cut your potatoes and cauliflower into uniform pieces to ensure they cook at the same pace.
Adjust the Spice Level. You can add more or less chili powder to this recipe, to suit your own spice preference. Or for another spicy option, add some slivered red chili peppers to the masala.
Serving Suggestions. Serve the Aloo Gobi with warm vegan naan bread, fluffy basmati rice, or even couscous or quinoa for a twist. It also pairs well with a dollop of vegan raita or a drizzle of lemon juice for an extra zing. For an even heartier meal, serve it as a side along with this vegan chana masala.
Storing Leftovers. You can serve any leftover aloo gobi in the refrigerator in an airtight container for 4-5 days. You can also freeze for up to 2 months. Reheat on the stovetop over medium heat or in the microwave.
Variations
Add Some Protein
Chickpeas or tofu can bulk this aloo gobi up, for an even heartier meal.
Make it Creamier
A dollop of coconut milk added in the last few minutes of cooking can be a nice addition for a creamier finish.
Herb it Up!
Apart from cilantro, try fresh mint or dill for a different herby note.
For a Smoky Flavor
Roast the cauliflower in the oven until slightly charred before adding it to the dish.
Sweet Potato Aloo Gobi
Replace the white potatoes with sweet potatoes for a totally new dish with a sweeter flavor.
Roasted Aloo Gobi
As an alternative, you can prepare the masala on the stovetop and then add it to oven roasted potatoes and cauliflower!
More Vegan Ideas
If you love this Aloo Gobi, be sure to check out these other delicious vegan recipes:
Also try: our 30 Minute Madras Lentils Vegan.
Recipe
30-Minute Aloo Gobi (Vegan)
This Aloo Gobi is Indian comfort food - and you won't believe how easy it is to make this popular Indian potato and cauliflower curry at home!
Print
Pin
Save
Servings: servings
Ingredients
- 2 large potatoes aloo, such as Russet, peeled and cut into bite-sized chunks
- 1 medium cauliflower gobi, cut into small florets
- 2 tablespoons vegetable oil
- 1 teaspoon cumin seeds
- 1 medium onion finely chopped
- 2 cloves garlic minced
- 1- inch piece of ginger grated
- 1 large tomato diced
- 1 teaspoon turmeric powder
- 1 teaspoon ground cumin
- 1 teaspoon ground coriander
- ½ teaspoon red chili powder adjust to taste
- Salt to taste
- ½ cup water
- Fresh cilantro leaves chopped for garnish
Instructions
- Prep the Vegetables: Prepare the potatoes and cauliflower as described. Set aside.
- Sauté Cumin Seeds: In a large pan or wok, heat the vegetable oil over medium heat. Add the cumin seeds and let them sizzle for about 30 seconds until aromatic.
- Cook Onions, Garlic, and Ginger: Add the chopped onion to the pan and sauté until it starts to turn golden. Then, add the minced garlic and grated ginger, cooking for another minute until fragrant.
- Add Tomatoes and Spices: Mix in the diced tomatoes, turmeric powder, ground cumin, ground coriander, red chili powder, and salt. Cook until the tomatoes soften and the oil starts to separate from the spices.
- Cook the Potatoes and Cauliflower: Add the potato chunks and cauliflower florets to the pan. Stir well to coat the vegetables with the spice mixture.
- Add Water and Simmer: Pour in the water, and mix everything well. Cover the pan with a lid and let it simmer on medium-low heat for about 15-20 minutes, or until the potatoes and cauliflower are tender. Stir occasionally to prevent sticking and to ensure even cooking.
- Garnish and Serve: Once the vegetables are cooked to your liking, turn off the heat. Garnish with fresh cilantro leaves.
Notes
This Aloo Gobi is best served with flatbreads like roti or naan, or with a side of basmati rice for a simple, satisfying vegan meal. Enjoy your cooking!
Nutrition (Estimate per Serving)
Calories: 146kcalCarbohydrates: 31gProtein: 6gFat: 1gSaturated Fat: 0.3gPolyunsaturated Fat: 0.2gMonounsaturated Fat: 0.3gSodium: 60mgPotassium: 1046mgFiber: 7gSugar: 6gVitamin A: 346IUVitamin C: 97mgCalcium: 72mgIron: 3mg
Vegan-ize any recipe!Grab our free vegan cheat sheet, packed with my favorite easy substitutions to make any recipe vegan.
30-Minute Madras Lentils (Vegan)
This quick and easy version of Indian Madras Lentils is ideal for a fast and flavorful weeknight meal. Serve it with a side of basmati rice or warm flatbread for a healthy and hearty vegan dinner. Enjoy!

As the days grow shorter and the nights cooler, there's nothing quite like a bowl of warm, spiced lentils to wrap up your day. Enter these vegan Madras Lentils: a dish that's as comforting as it is quick. It's a modern twist on a classic Indian dish - that you can make with easy ingredients and no special equipment.
So, next time you're in need of a quick culinary escape, let these Madras Lentils transport you to the bustling streets of Chennai, where flavors are always rich and life is full of zest.
What are Madras Lentils?
Despite the fact that you can find the term "Madras Lentils" on both Indian menus and store bought offerings, it's not truly an authentic Indian dish. It's more of a Western creation. 😉
The name 'Madras' comes from the former title of the city now known as Chennai. The dish referred to as 'Madras lentils' is a westernized version of several classic Indian lentil dishes, inspired by the flavors and cuisine of Madras.
Madras lentils draw inspiration from dishes like 'Dal Makhani' or 'Maa ki Dal' which are made with whole black lentils and kidney beans, slow-cooked to perfection with aromatic spices and often finished with butter and cream for richness. The 'Madras' version keeps the essential elements of this comfort food intact - lentils, beans and spices - while omitting the dairy. Perfect for a vegan diet!
While 'Madras lentils' may not be all that authentic - it sure is popular. And it's also one of the simplest Indian recipes that you can make at home in your own kitchen!
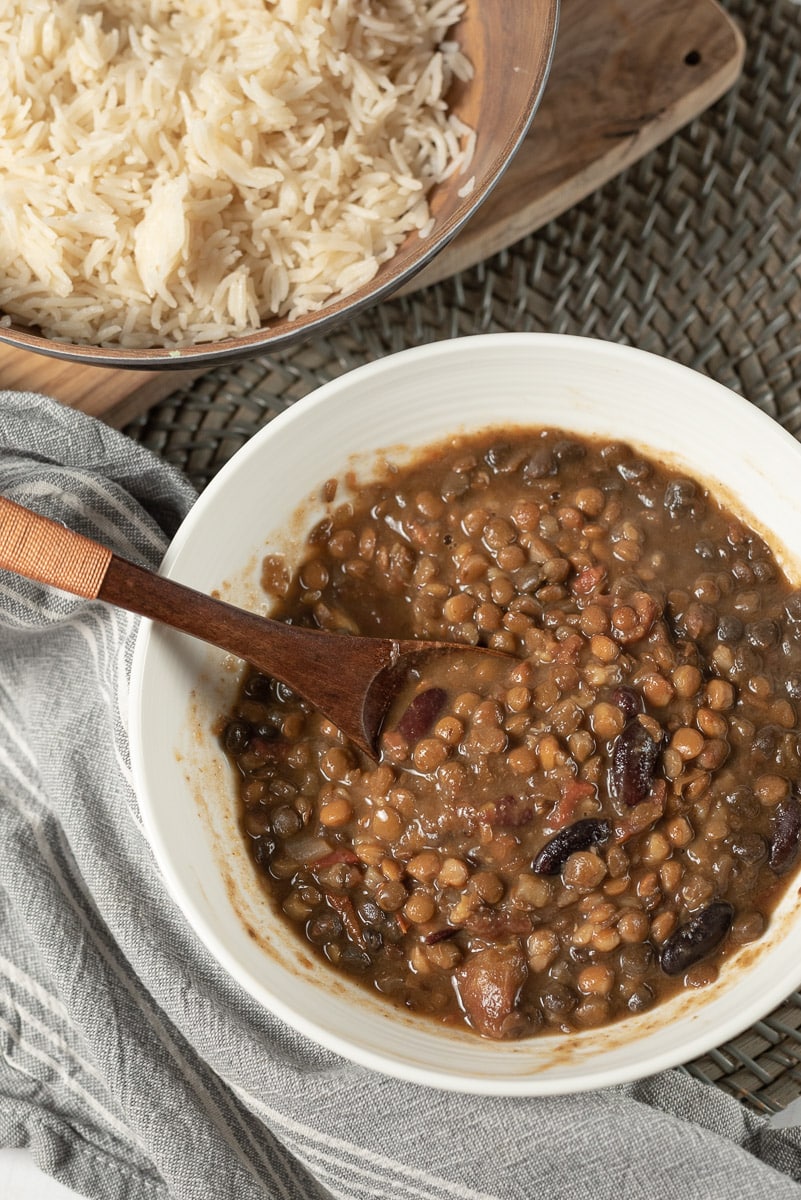
Why You'll Love This Recipe
Who says comfort food can't be nutritious and delicious? These Madras lentils are:
- Healthy & Wholesome. Packed with plenty of plant based protein and fiber, this is a hearty dish that satisfies without weighing you down.
- Quick enough for a Weeknight Dinner. This simplified version of the original dish can be made without a pressure cooker and cooks in under 30 minutes thanks to the use of canned lentils and beans.
- An easy one pot vegan meal! Less fuss and less mess.
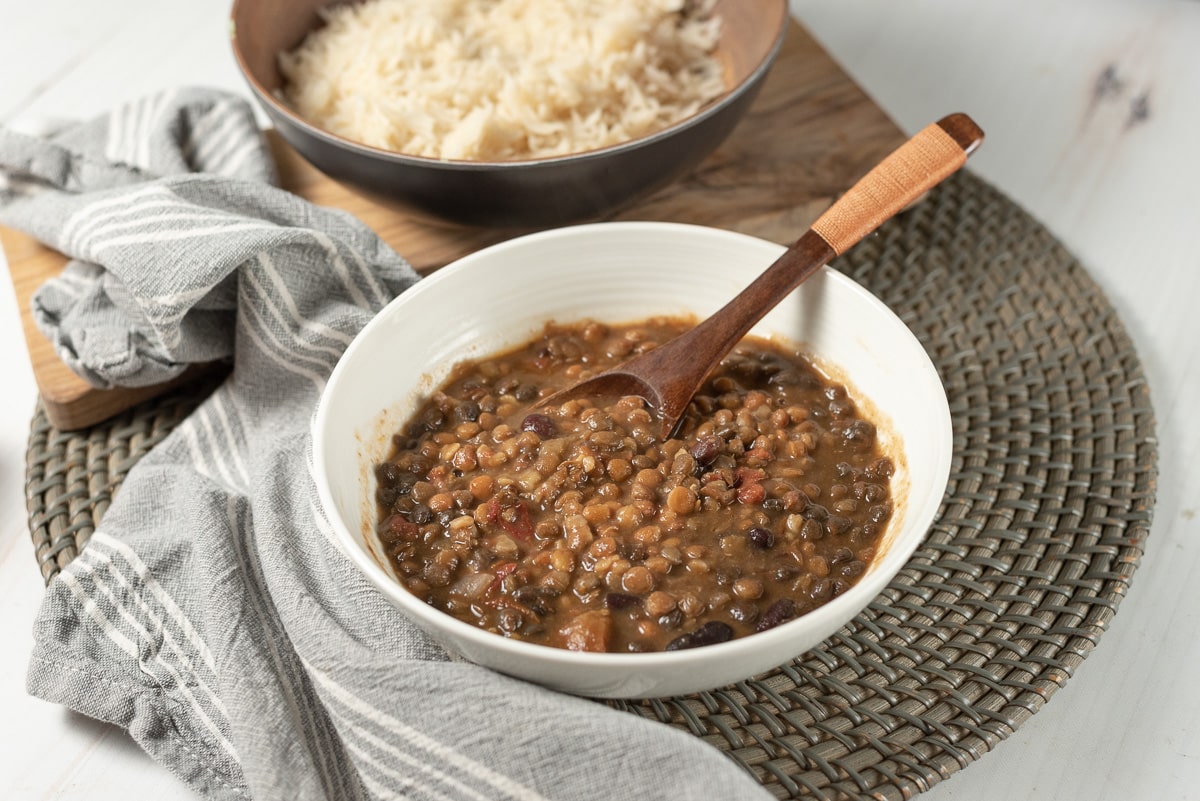
Ingredients & Substitutions
Canned Black Lentils & Kidney Beans
These pantry staples are the stars of the dish! The traditional version of Madras Lentils uses dried beans and lentils that need to be soaked and simmered for a long time. Using the canned versions delivers great results in way less time!
Classic Indian Spices
Cumin, turmeric, garam masala, and coriander all play their part in creating the quintessential Indian flavor profile we all love.
Tomato Options
No crushed tomatoes? No problem. Feel free to use fresh diced tomatoes or even tomato puree in a pinch.
Spice Swap
If garam masala isn't on hand, try a blend of cinnamon, cloves, and nutmeg to mimic its warm, sweet notes.
Oil Alternatives
While olive oil is a great choice, coconut oil can add a subtle sweetness and vegan butter will give a richer flavor.
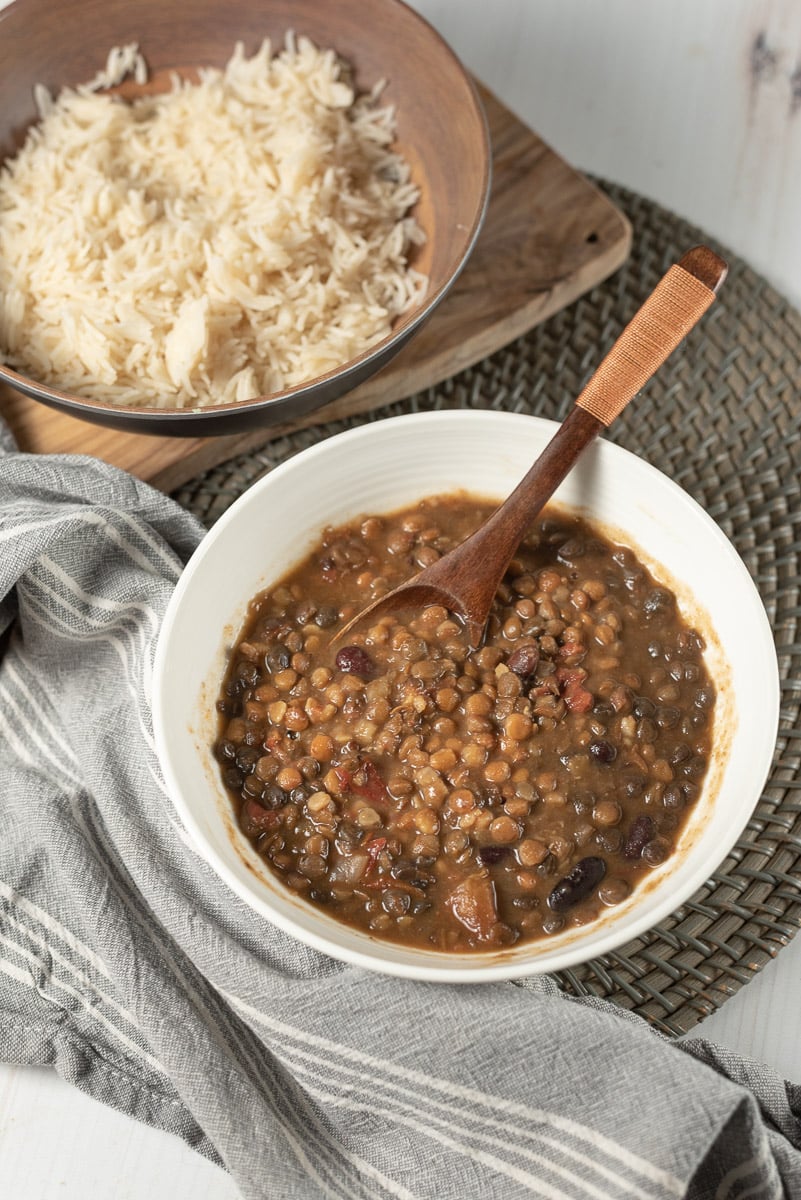
Helpful Tips
Rinse the Lentils and Beans. Canned legumes can be very high in sodium. Use a strainer to give both the beans and lentils a good rinse under cold water to remove all that extra salt before cooking.
Cook it Low and Slow. Even though this is a quick recipe, giving the dish some time to simmer at the end will deepen the flavors. So don't get impatient!
Serving Suggestions. Pair these Madras Lentils with fluffy basmati rice, a warm piece of vegan naan bread, or even serve atop a baked potato for a fun twist! For a complete Indian dinner spread, serve alongside our bhindi masala, our quick vegetable curry, or our aloo gobi.
Get Garnishes! Fresh cilantro adds a pop of color and a burst of freshness to the dish. You may also want to serve your madras lentils with a handful of chopped onions, slivered chili peppers, or a dollop of vegan raita.
Storing Leftovers. Store leftover Madras Lentils in a covered container in the fridge for 3-4 days, or freeze for up to 2 months. To serve the lentils again, allow them to defrost (if frozen) and warm on the stovetop over medium heat.
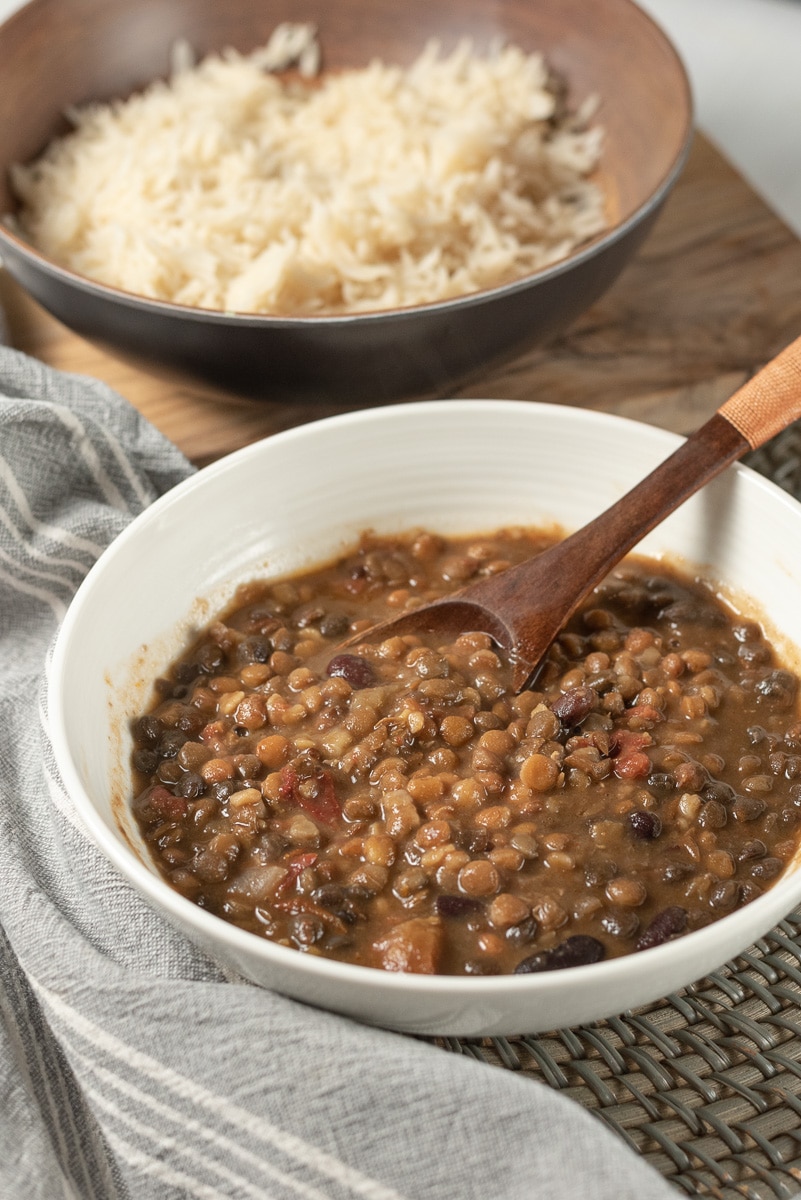
Variations
Add more plant based protein. Amp up the protein by adding cubes of firm tofu or tempeh to the curry!
Add more veggies. Feel free to add more fresh veggies to the dish as well. Bell peppers, zucchini, mushrooms, or kale are all great additions.
More Vegan Indian Recipes
If you love these Madras Lentils, be sure to check out these other tasty vegan ideas:
Also try: our Easy Vegan Dal Tadka.
Recipe
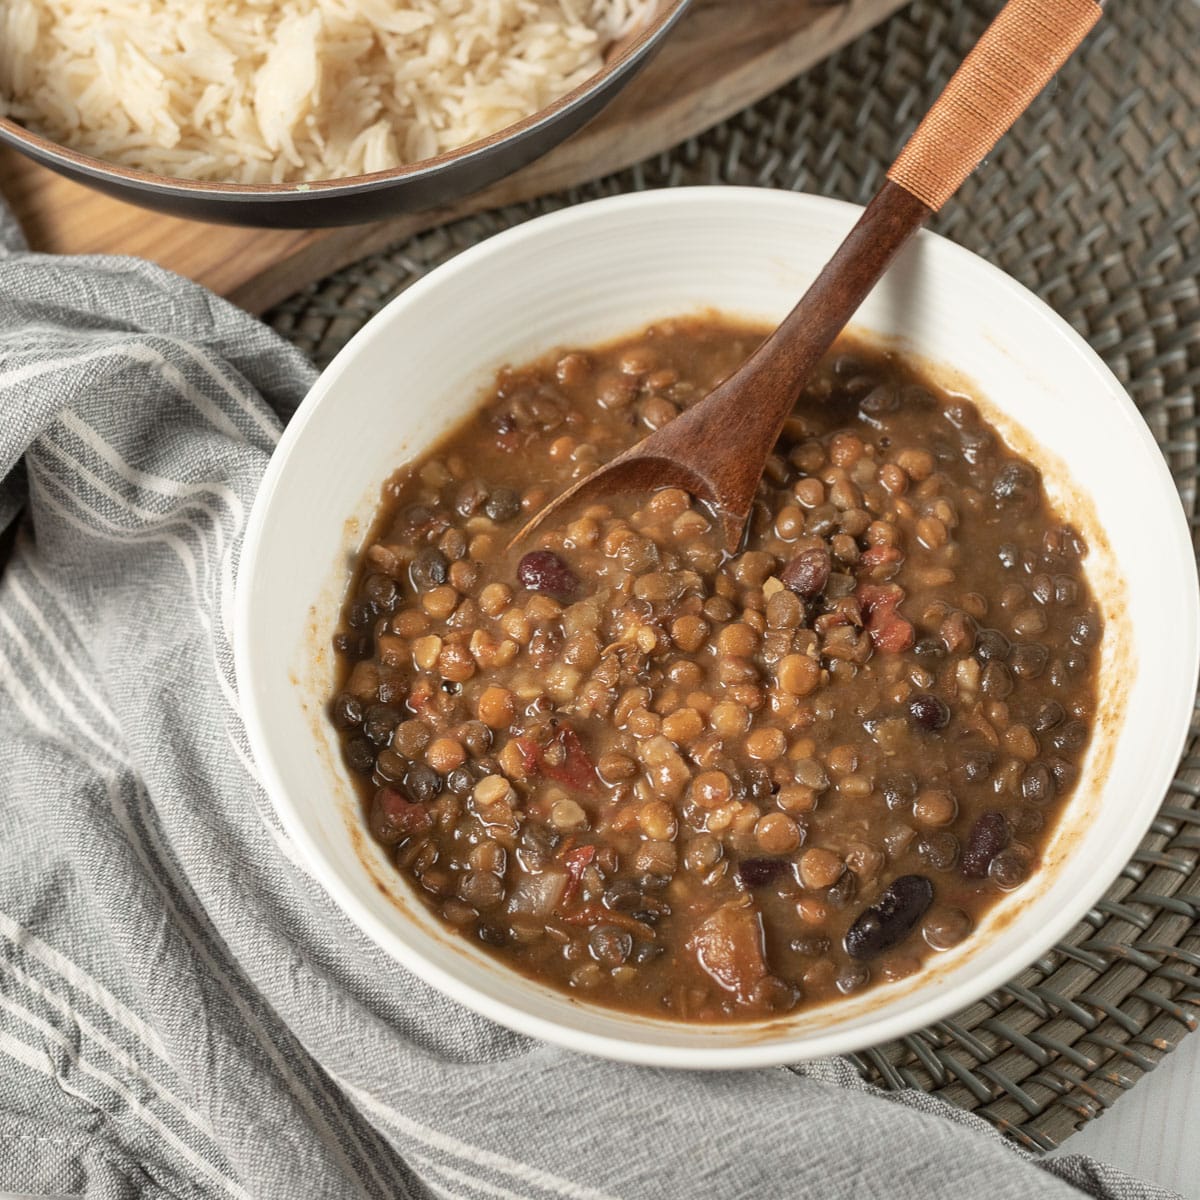
30-Minute Madras Lentils (Vegan)
Serve this easy Madras Lentils with a side of basmati rice or warm flatbread for a healthy and hearty vegan dinner. Enjoy!
Print
Pin
Save
Servings: -6 servings
Ingredients
- 2 cans 15 ounces each black lentils, drained and rinsed
- 1 can 15 ounces red kidney beans, drained and rinsed
- 2 tablespoons olive oil or any vegan cooking oil
- 1 large onion finely chopped
- 3 cloves garlic minced
- 1- inch piece ginger minced
- 1 green chili slit (optional, adjust to heat preference)
- 1 teaspoon cumin seeds
- ½ teaspoon ground turmeric
- ½ teaspoon red chili powder
- 1 ½ teaspoons garam masala
- 1 teaspoon ground coriander
- 1 can 14 ounces crushed tomatoes
- Salt to taste
- 1-2 cups vegetable broth or water for desired consistency
- 1 tablespoon vegan butter or additional olive oil for a buttery flavor
- Fresh cilantro leaves for garnish
Instructions
- Prepare the Canned Lentils and Beans: Since the canned lentils and beans are pre-cooked, simply rinse them to remove any excess sodium and set aside.
- Sauté the Aromatics: Heat the olive oil in a large pot over medium heat. Add the cumin seeds and wait until they start to crackle. Then, add the onions, garlic, ginger, and green chili. Sauté until the onions are soft and golden.
- Add the Spices: Stir in the turmeric, red chili powder, garam masala, and ground coriander. Cook the spices for about a minute until they are fragrant.
- Cook the Tomato Base: Add the crushed tomatoes and salt to the pot. Let the mixture simmer until it thickens slightly, which should take about 8-10 minutes.
- Combine with Lentils and Beans: Add the rinsed lentils and kidney beans to the pot. Mix well with the tomato and spice mixture.
- Adjust Consistency: Pour in the vegetable broth or water to reach the consistency you like for your dal.
- Simmer: Allow the mixture to come to a gentle boil, then reduce the heat and simmer for 10-15 minutes to blend the flavors together.
- Finish with Vegan Butter: Stir in the vegan butter or extra olive oil right before you're ready to serve.
- Garnish: Sprinkle with freshly chopped cilantro for a touch of color and freshness.
Nutrition (Estimate per Serving)
Calories: 126kcalCarbohydrates: 6gProtein: 1gFat: 11gSaturated Fat: 2gPolyunsaturated Fat: 2gMonounsaturated Fat: 7gTrans Fat: 1gSodium: 303mgPotassium: 86mgFiber: 2gSugar: 2gVitamin A: 207IUVitamin C: 4mgCalcium: 21mgIron: 1mg
Vegan-ize any recipe!Grab our free vegan cheat sheet, packed with my favorite easy substitutions to make any recipe vegan.
Masala Lentils (Sabut Masoor)
Ever craved something hearty, spicy, and just downright soul-satisfying? That's exactly what you'll get with these Masala Lentils. This dish isn't just food; it's a warm hug in a bowl, infused with rich, aromatic spices that'll transport you straight to the bustling streets of India. Let me take you on a culinary journey with this simple yet flavorful recipe that's sure to become a staple in your kitchen.
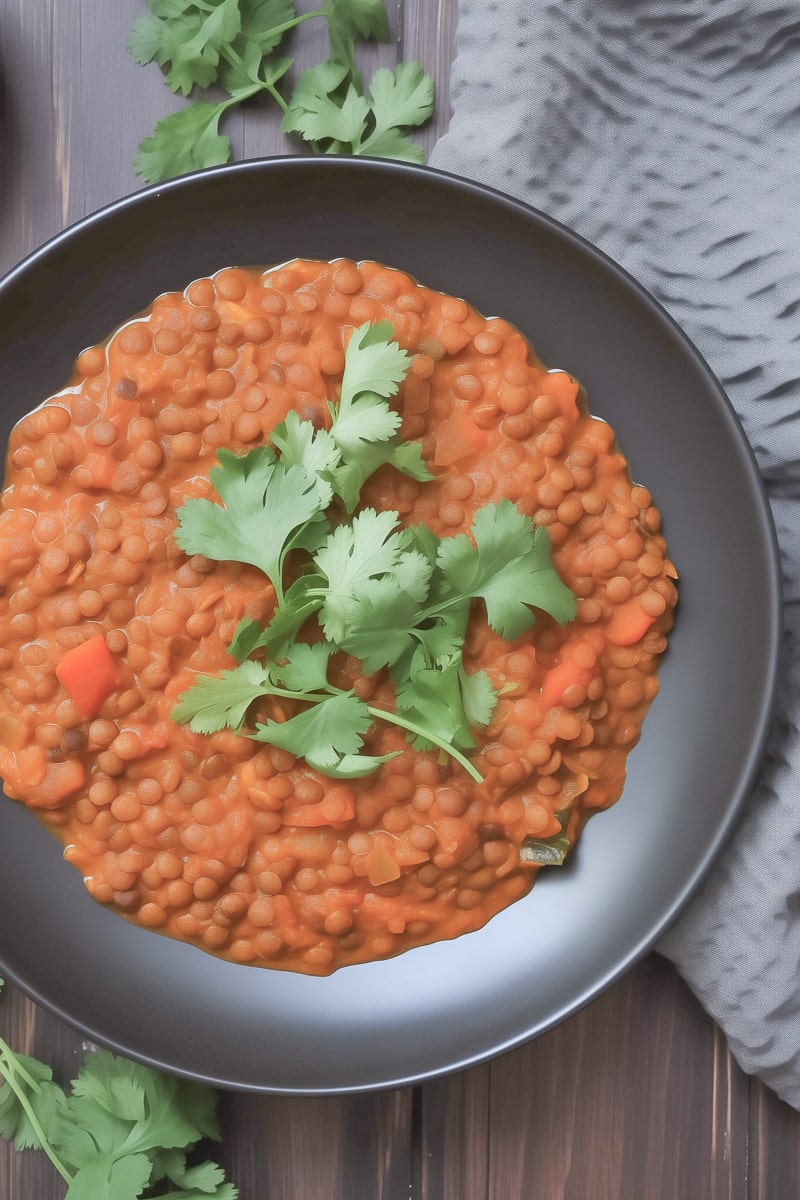
Picture this: a chilly evening, a cozy kitchen, and a craving for something that warms you from the inside out. Enter the magic of Masala Lentils. One spoonful, and I was totally hooked! And I bet you will be as well.
Don't be intimidated by the array of spices - this is one of the simplest lentil recipes I've come across. In fact, it's a great way to introduce yourself to Indian cooking.
This amazing lentil recipe was contributed by Richa Hingle way back in 2015, and is a sample recipe from her cookbook, Vegan Richa's Indian Kitchen. While the article has been updated with more helpful tips and better photos - the recipe is still the original. And still delicious! I highly recommend checking out that cookbook.
This Masala Lentils Recipe is:
- Hearty & Comforting.
- Packed with flavorful spices.
- Easy to customize with your favorite lentil varieties and veggies.
- Naturally vegan!
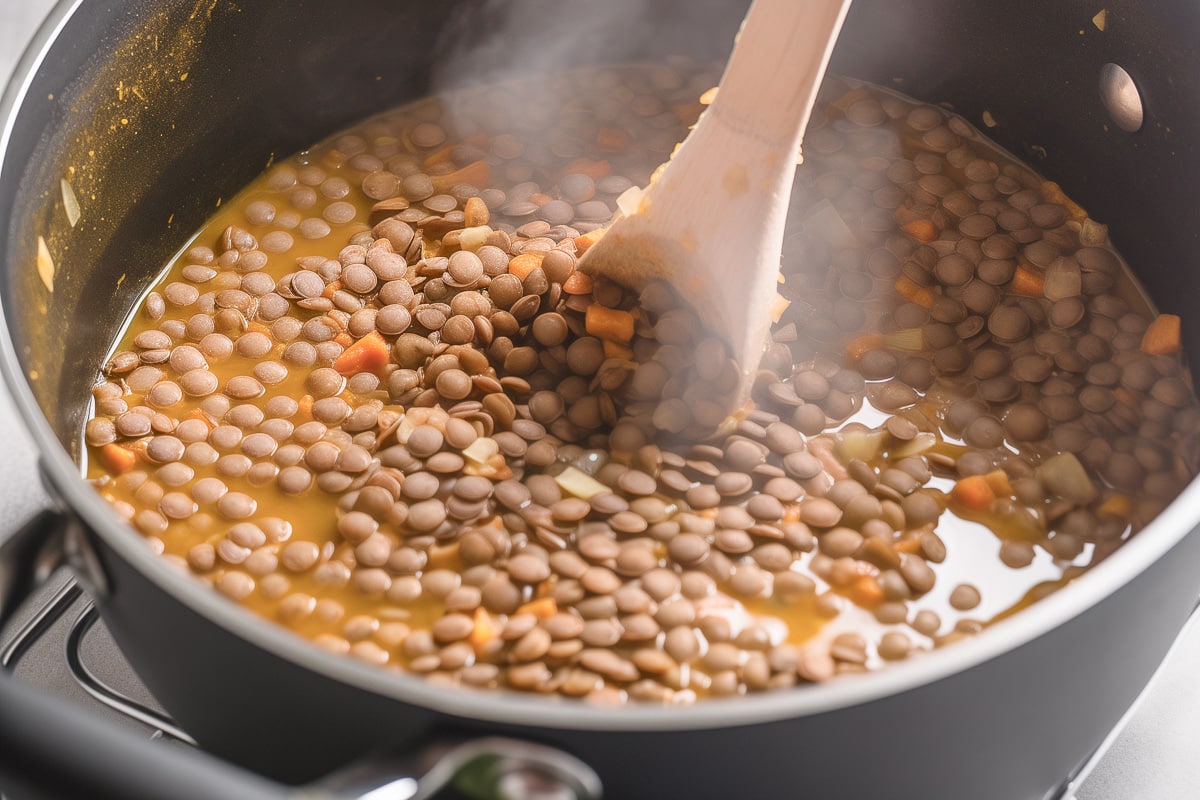
Key Ingredients & Substitutions
- Brown Lentils: The star of the show! But I've also made this with red lentils and it worked well also.
- Safflower Oil: I love its neutral taste, but any cooking oil will do the trick.
- Ground Spices: Cumin, coriander, cardamom, cinnamon, and more - each adding its unique note to this dish.
- Sriracha: For that kick! You can substitute it with another hot sauce if you prefer.
- Tomatoes: I like using fresh tomatoes for my lentil masala, but you can also use canned chopped tomatoes. The fire roasted ones have a great flavor.
- Cilantro: Be sure to use fresh cilantro for the best flavor!
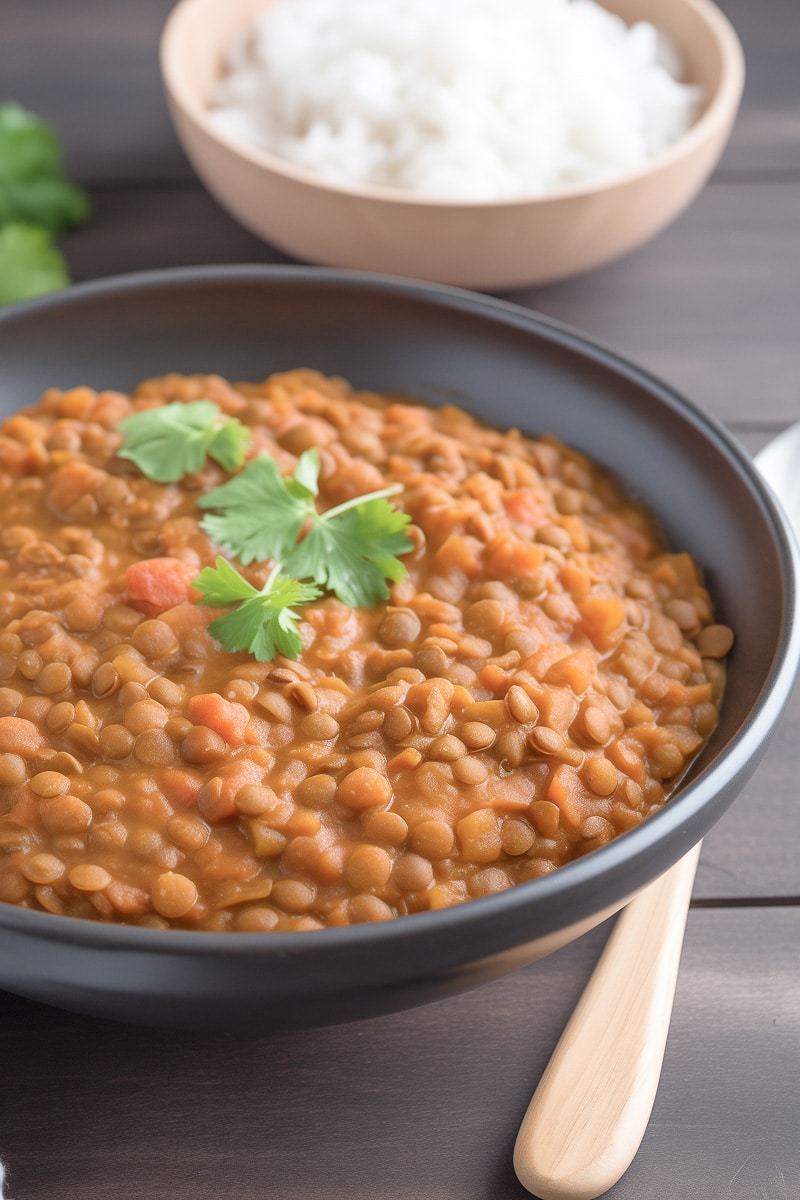
Helpful Tips & Variations
Add more protein. Toss in some chickpeas or pan-fried tofu for an extra protein punch.
Make it creamier. A splash of coconut milk to transform these lentils into a creamy delight.
Add leafy greens. Stir in some spinach or kale for added nutrition and a beautiful pop of color.
Serving Suggestions: Serve masala lentils with fluffy basmati rice, fresh rotis, or vegan naan bread.
Storing Leftovers: Store leftover masala lentils in the fridge for 3-4 days. Love Indian-spiced dishes? Also try our bhindi masala, our quick vegetable curry, or our aloo gobi.
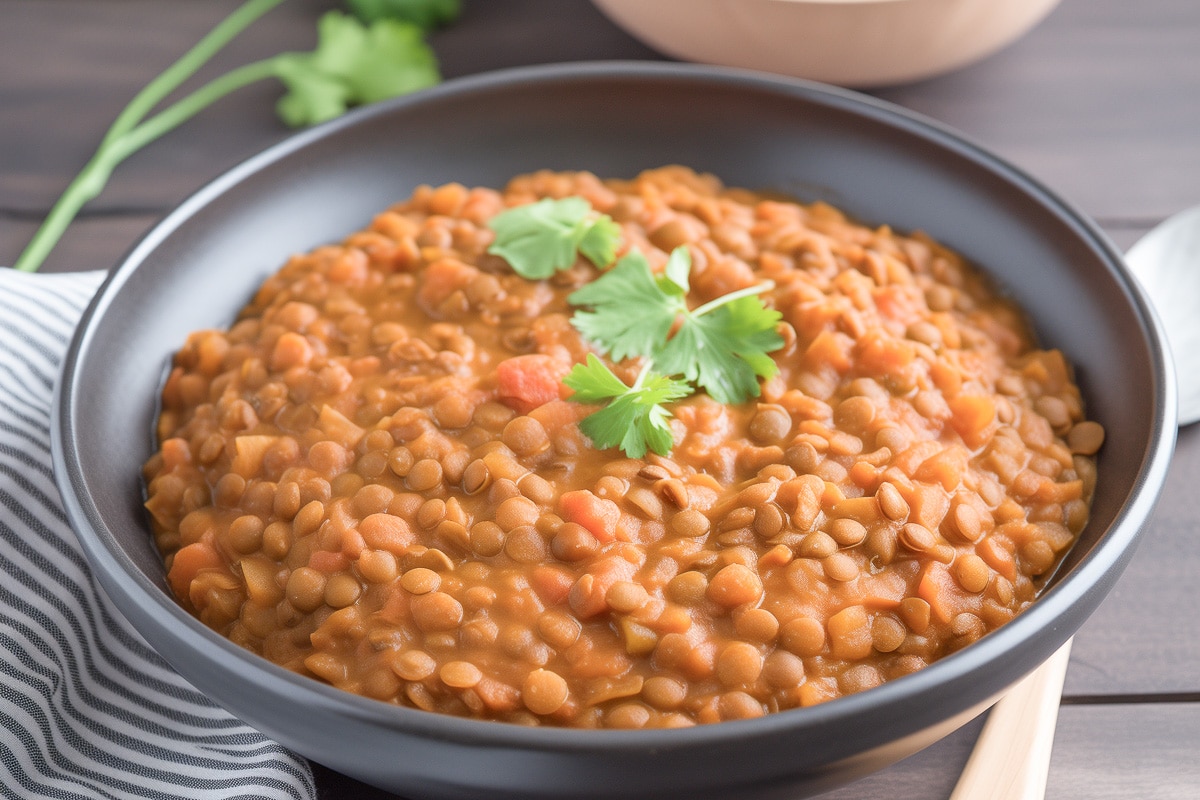
More Tasty Vegan Ideas
If you love these Masala Lentils, be sure to check out these other vegan recipes:
Recipe
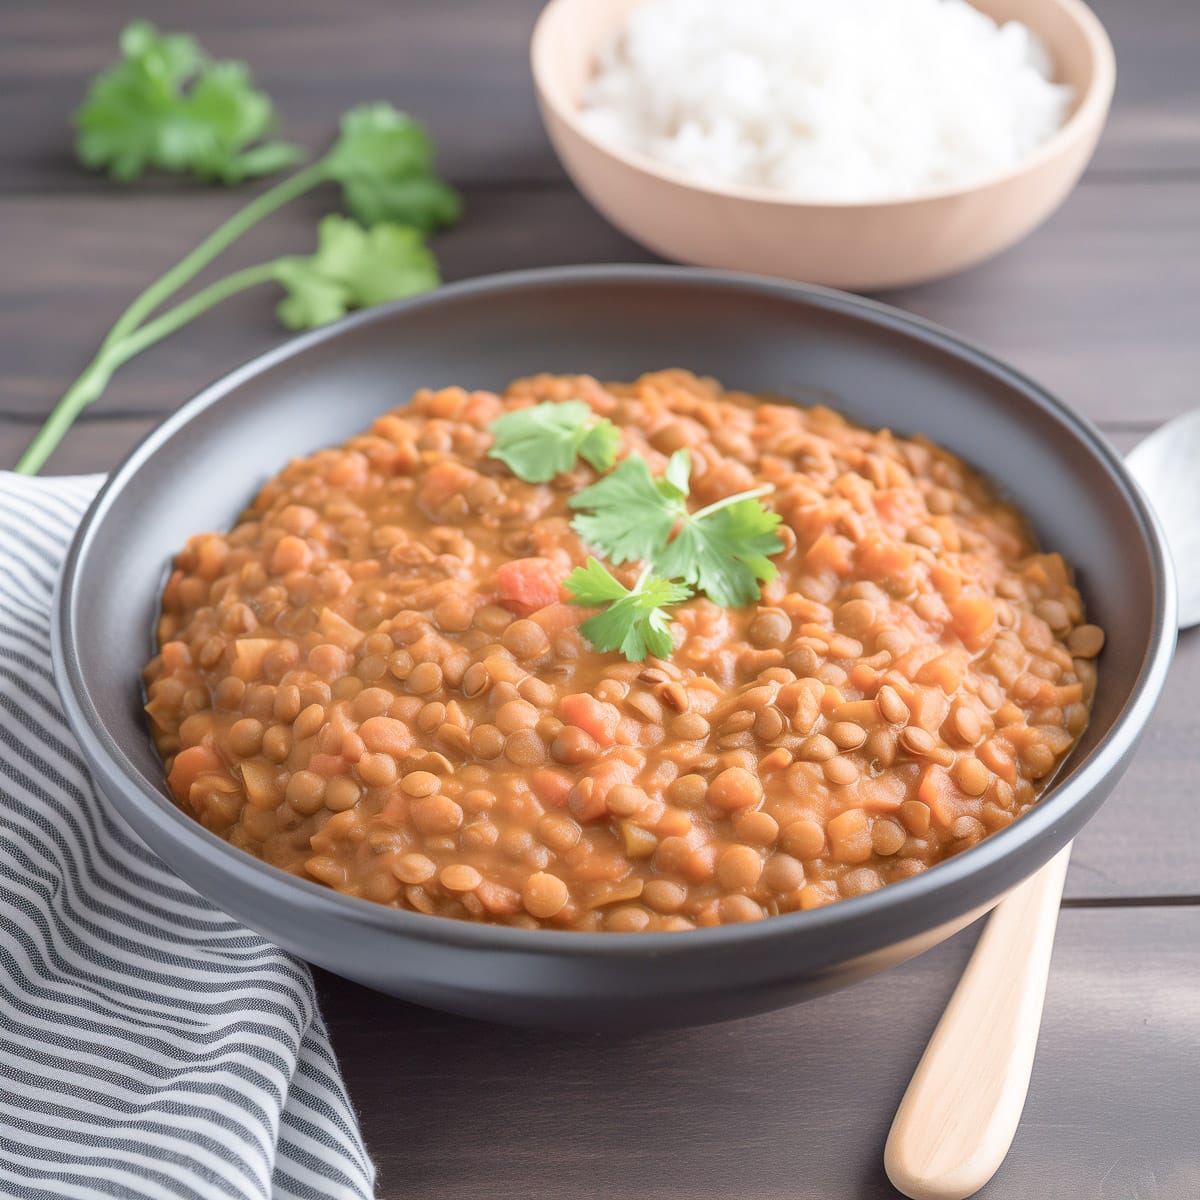
Masala Lentils (Sabut Masoor)
A hot sauce (chiles, garlic, and vinegar) is the secret to getting the right flavor profile in this lentil dal. Serve this as a part of a meal, or with rice or naan or other flatbread.
Print
Pin
Save
Servings: servings
Ingredients
- ¾ cup brown lentils washed and drained
- 2 cups water
- 2 to 3 teaspoons safflower or other neutral oil
- ½ cup finely chopped red or white onion
- 6 cloves garlic chopped
- ½ teaspoon ground cumin
- 2 teaspoons ground coriander
- ½ teaspoon ground cardamom
- ½ teaspoon ground cinnamon
- ½ teaspoon fenugreek leaves or ⅛ teaspoon fenugreek seeds
- 1 teaspoon sweet or hot paprika
- ⅛ teaspoon nutmeg
- ¼ teaspoon black pepper
- 1 ½ tablespoons sriracha or other hot sauce to taste
- 2 tablespoons water
- 1 ½ cups chopped tomato
- ¾ teaspoon salt
- 2 tablespoons chopped cilantro for garnish
- 1 tablespoon vegan butter optional
Instructions
- Combine the lentils with 2 cups of water in a saucepan. Partially cover and cook over medium heat until the lentils are tender, 25 to 30 minutes.
- While the lentils are cooking, make the tempering. Heat the oil in a skillet over medium heat. Add the onion and cook until golden brown, 5 to 6 minutes.
- In a blender, combine the garlic, cumin, coriander, cardamom, cinnamon, fenugreek, paprika, nutmeg, black pepper, sriracha, and 2 tablespoons of water. Blend to combine well.
- Add this paste to the onions in the skillet. Cook until fragrant, about 2 minutes. Stir in the tomatoes and salt, and cook until the tomatoes are tender, about 8 minutes. Mash the larger tomato pieces.
- Add the tempering to the lentils. Bring to a boil over medium heat. Reduce heat and simmer for another 5 minutes.
- Taste and adjust salt and spice. Garnish with cilantro and vegan butter, if using, and serve hot.
Nutrition (Estimate per Serving)
Calories: 204kcalCarbohydrates: 30gProtein: 11gFat: 5gSaturated Fat: 1gPolyunsaturated Fat: 1gMonounsaturated Fat: 3gTrans Fat: 0.02gSodium: 728mgPotassium: 599mgFiber: 13gSugar: 4gVitamin A: 319IUVitamin C: 18mgCalcium: 80mgIron: 4mg
Vegan-ize any recipe!Grab our free vegan cheat sheet, packed with my favorite easy substitutions to make any recipe vegan.
Easy Vegan Dal Tadka

Turn up the flavor with this vegan-friendly Dal Tadka! It's packed with flavorful spices, hearty lentils, and it couldn't be easier to make. This is Indian comfort food at its best.
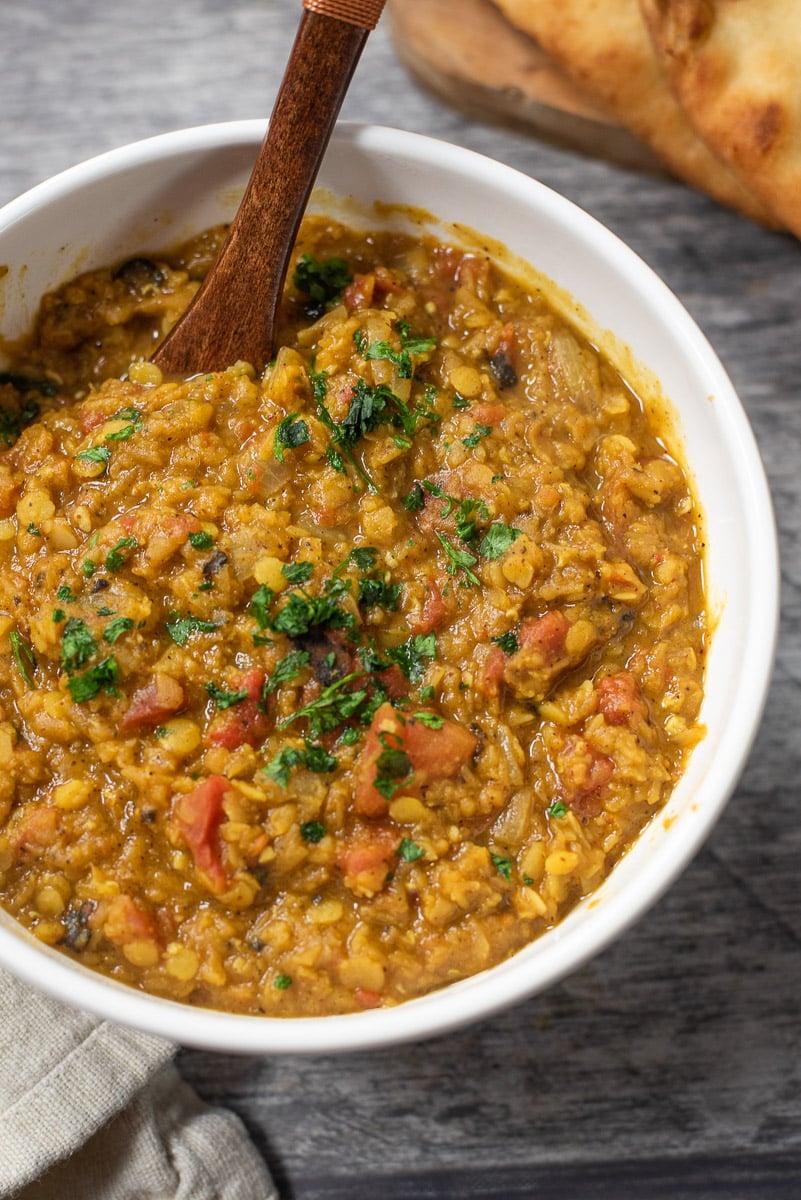
What is Dal Tadka?
Dal Tadka, pronounced [dahl tad-ka], is a classic Indian comfort food dish. The name itself describes the dish very accurately. 'Dal' is the Hindi word for lentils, which are a staple ingredient in South Asian cooking. 'Tadka' means tempering - a cooking technique where spices are roasted in hot oil or ghee, releasing their essential oils and enhancing their flavor.
The lentils are typically cooked until tender and then mixed with a base of onions, tomatoes, and ginger, along with turmeric and salt. The Tadka, prepared separately, can include a range of spices like cumin, mustard seeds, garlic, and chili, depending on regional and personal preferences. The sizzling Tadka is then drizzled over the creamy dal, creating a dish that's comforting, nutritious, and packed with flavor.
Variations of the classic Dal Tadka can be found across the different regions of India, each with their own local touch!
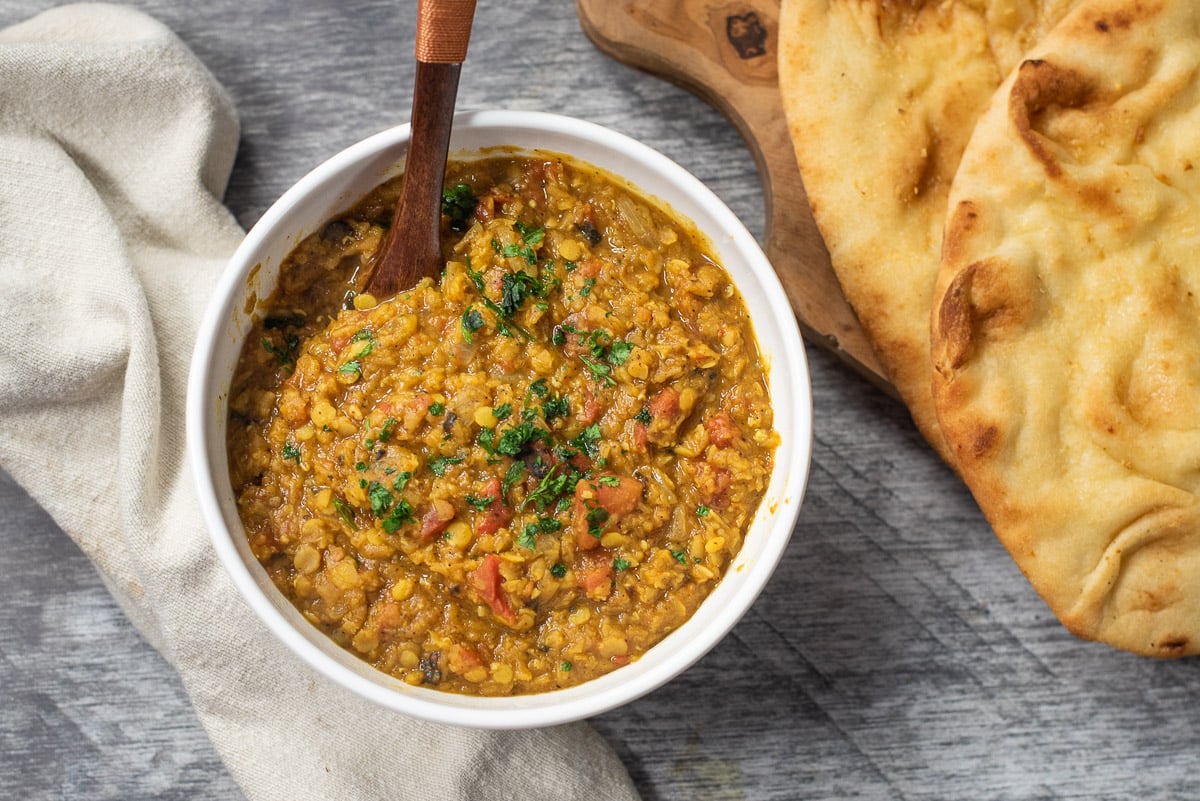
Why You'll Love this Recipe
This recipe is my spin on the traditional dal tadka - simplified so it can easily be made by a home cook with easy-to-find ingredients and no special equipment. This dal tadka is:
- Just as creamy and delicious as your favorite restaurant style Dal Tadka!
- Doesn't require a pressure cooker - or any other special equipment.
- Easy enough to make for a weeknight meal.
- 100% Vegan and Vegetarian friendly!
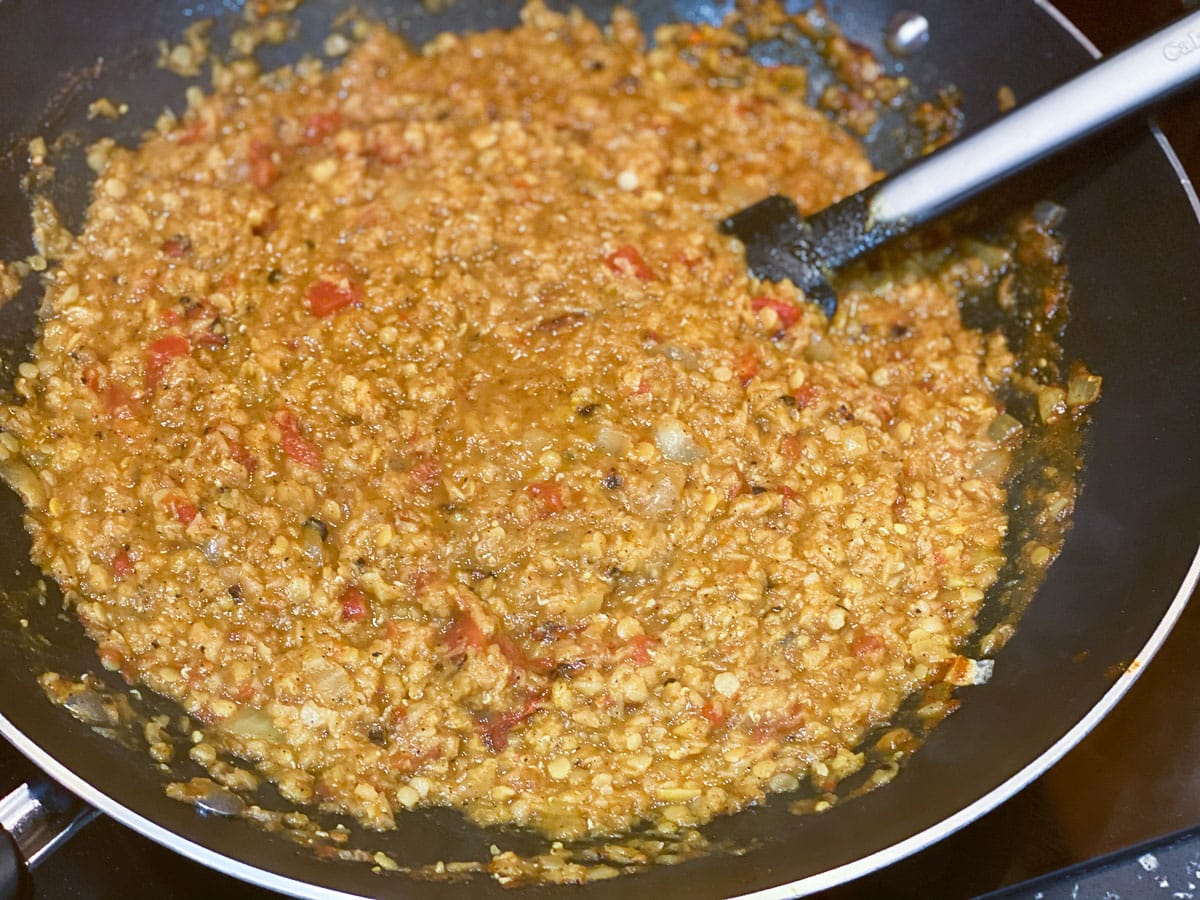
Key Ingredients & Substitutions
Lentils.
I used yellow lentils (toor dal) for this recipe, but it works well with many types of lentils. Other good choices are moong dal (split yellow moong lentils), masoor dal (red lentils), chana dal (split chickpeas), and urad dal (split black gram). Some folk even use a mix of two or three different types of lentils.
Oil or Ghee?
I simply used olive oil for my tadka, because it's the simplest vegan substitution for the traditional ghee used in this dish. But there are several brands that make a vegan ghee, so feel free to give that a try if you prefer. This one from Livlo is the brand I see recommended most often!
The spices!
This recipe uses a variety of traditional Indian spices, but the key here is a high quality garam masala. It's worth splurging on a high quality garam masala, like this one, for the best flavor.
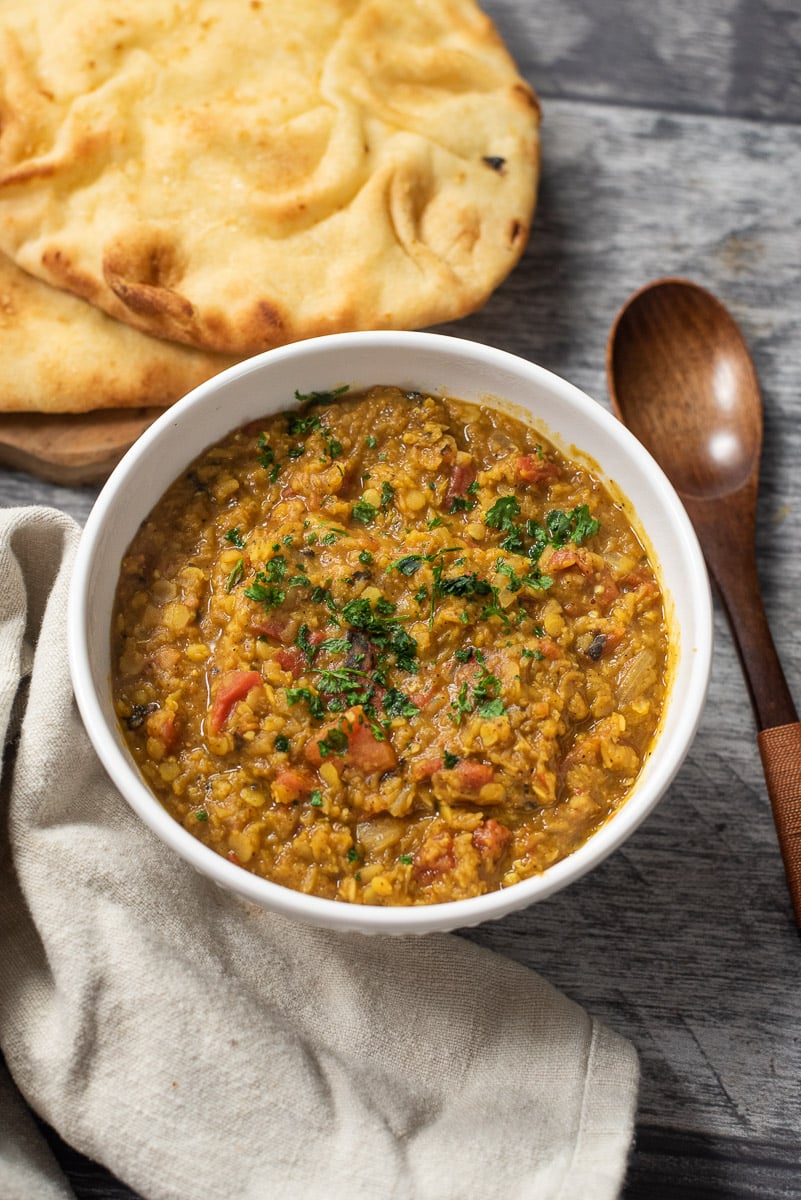
Helpful Tips & Variations
Soak the lentils. If possible, rinse and soak your dry lentils for 30 minutes before cooking. It helps to reduce cook time and enhance texture.
Make it creamier. Lightly mashing some of the lentils after cooking helps achieve a rich, velvety consistency. For even more creaminess, you can use an immersion or regular blender to puree a portion of the cooked dal. I do not recommend pureeing all of it - the texture will be too mushy.
Serving suggestions: Serve dal tadka over steamed basmati rice or Indian flatbread like naan or roti for a complete vegan meal. You may also wish to serve with a dollop of vegan raita (yogurt sauce).
Storing leftovers. Store leftover dal tadka in a covered container in the fridge for 3-4 days. You can also freeze for up to two months. To serve again, let it defrost (if frozen) and reheat on the stovetop over medium heat.
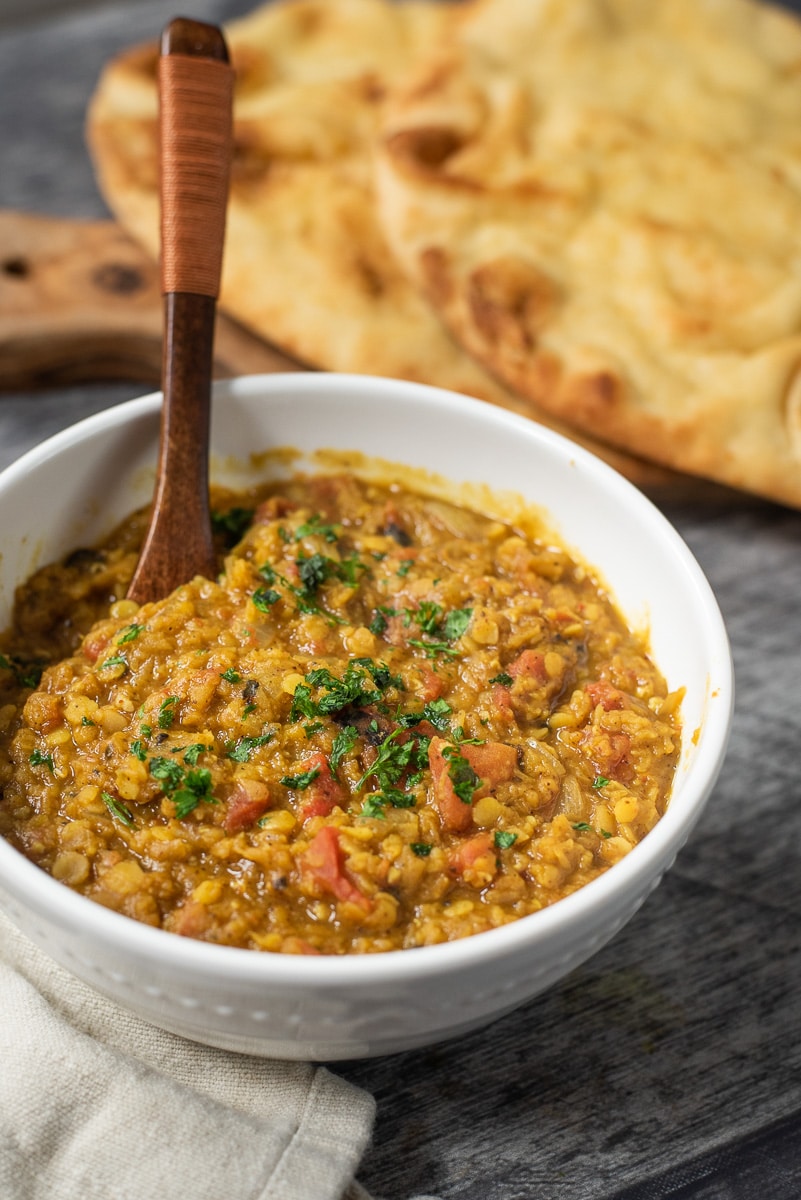
Variations
Add more spice. This recipe is just mildly spicy to start with. For more heat, add additional chili powder or add a minced red chili pepper to the tadka mixture.
Add more plant based protein. Stir in diced firm tofu or tempeh cubes for extra protein.
With simple ingredients and flavors, this vegan dal tadka recipe is sure to become a new weeknight staple. Enjoy! Serve it alongside our bhindi masala, our aloo gobi, or our quick vegetable curry for a full Indian spread.
Also worth trying: our yellow squash soup.
Also worth trying: our cauliflower fried rice.
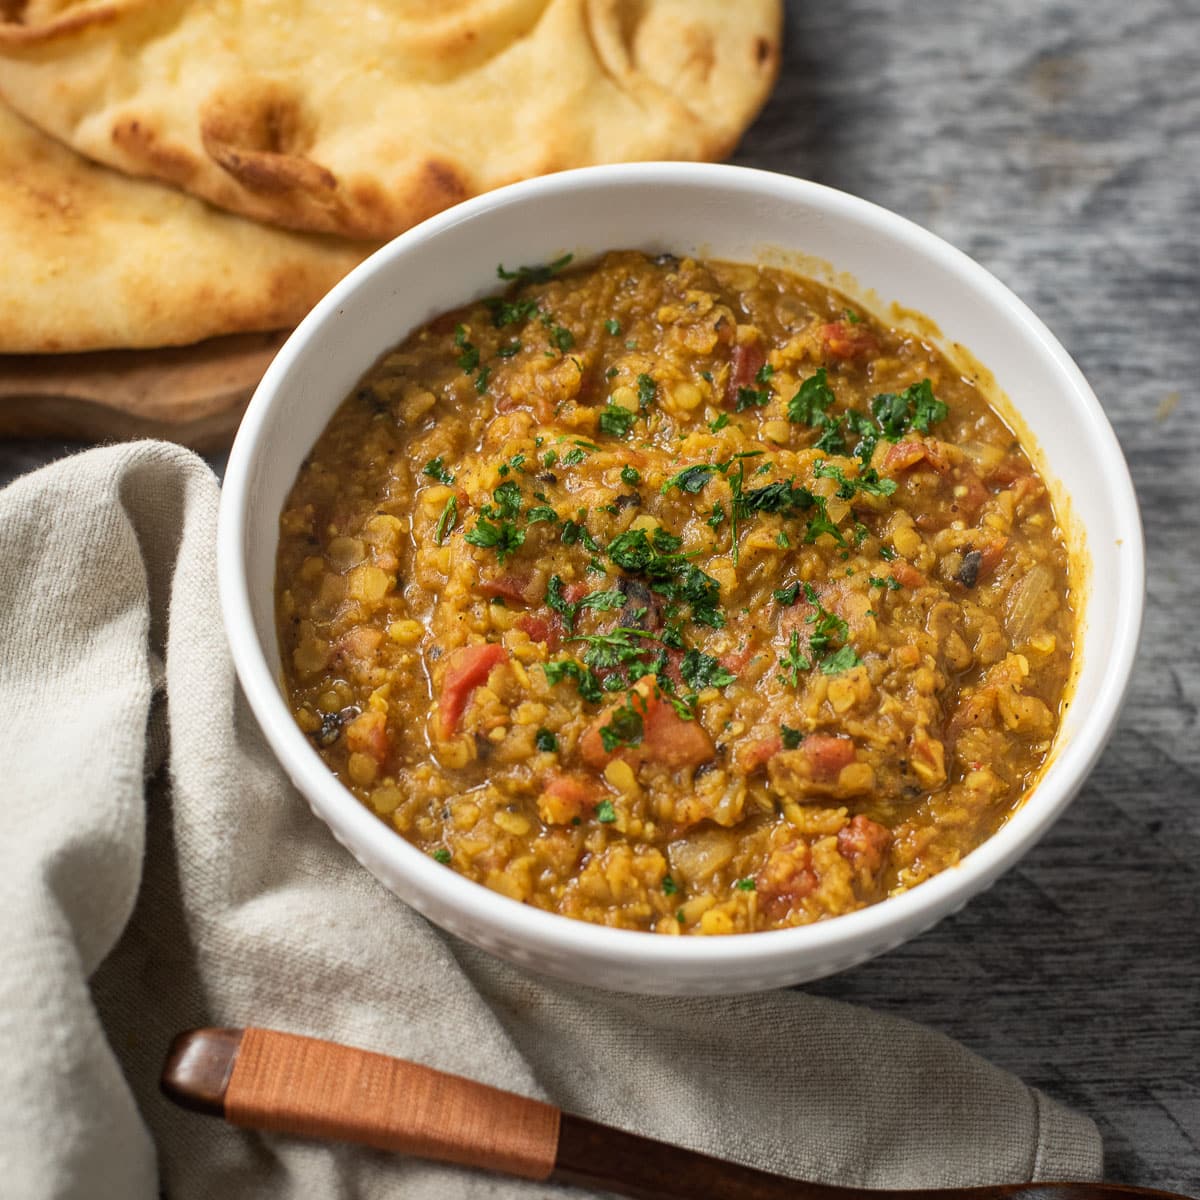
More Vegan Indian Recipes
If you love this Vegan Dal Tadka, be sure to check out these other delicious recipes:
Also try: our 30 Minute Madras Lentils Vegan.
Recipe
Easy Vegan Dal Tadka
This vegan-friendly Dal Tadka is packed with flavorful spices, hearty lentils, and it couldn't be easier to make. This is Indian comfort food at its best.
Print
Pin
Save
Servings: servings
Ingredients
For the Dal:
- 1 cup yellow lentils toor dal, rinsed and soaked for 30 minutes
- 3 cups water for cooking
- 1 teaspoon turmeric powder
- 1 teaspoon salt
- 2 medium tomatoes finely chopped
- 1- inch piece of ginger grated
For the Tadka (Tempering):
- 2 tablespoons olive oil
- 1 teaspoon mustard seeds
- 1 teaspoon cumin seeds
- 2 cloves of garlic minced
- 1 small onion finely chopped
- ½ teaspoon garam masala
- 1 teaspoon ground coriander
- ¼ teaspoon red chili powder or to taste
- Juice of ½ a lemon
- Fresh cilantro chopped for garnish
Instructions
Cook the Lentils:
- In a large pot, combine the soaked and drained yellow lentils, water, turmeric powder, and salt. Bring to a boil, then simmer on low heat for about 20-25 minutes or until the lentils are soft and fully cooked.
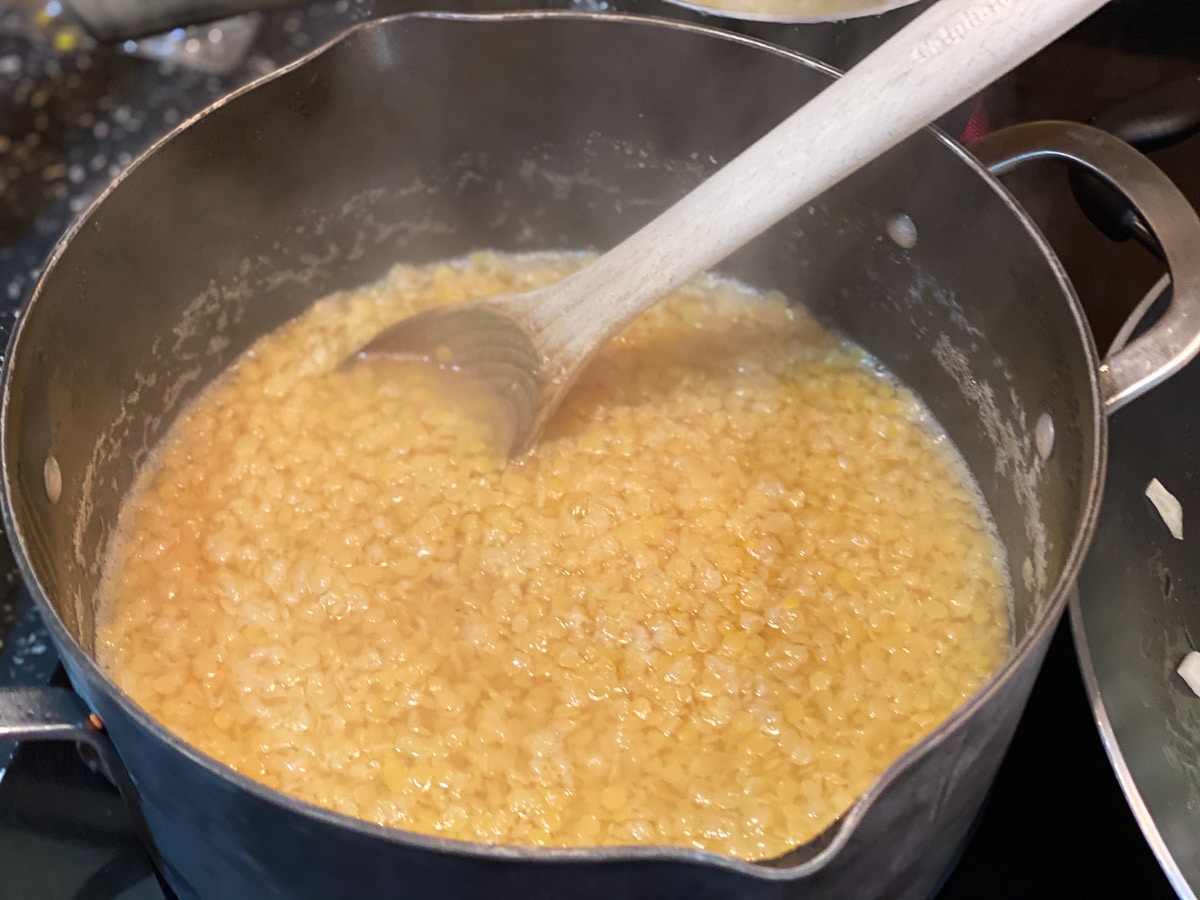
Mash the Dal:
- Once the lentils are cooked, use a back of a spoon or a potato masher to mash them slightly for a creamier texture. If the mixture is too thick, add a little water to reach your desired consistency.
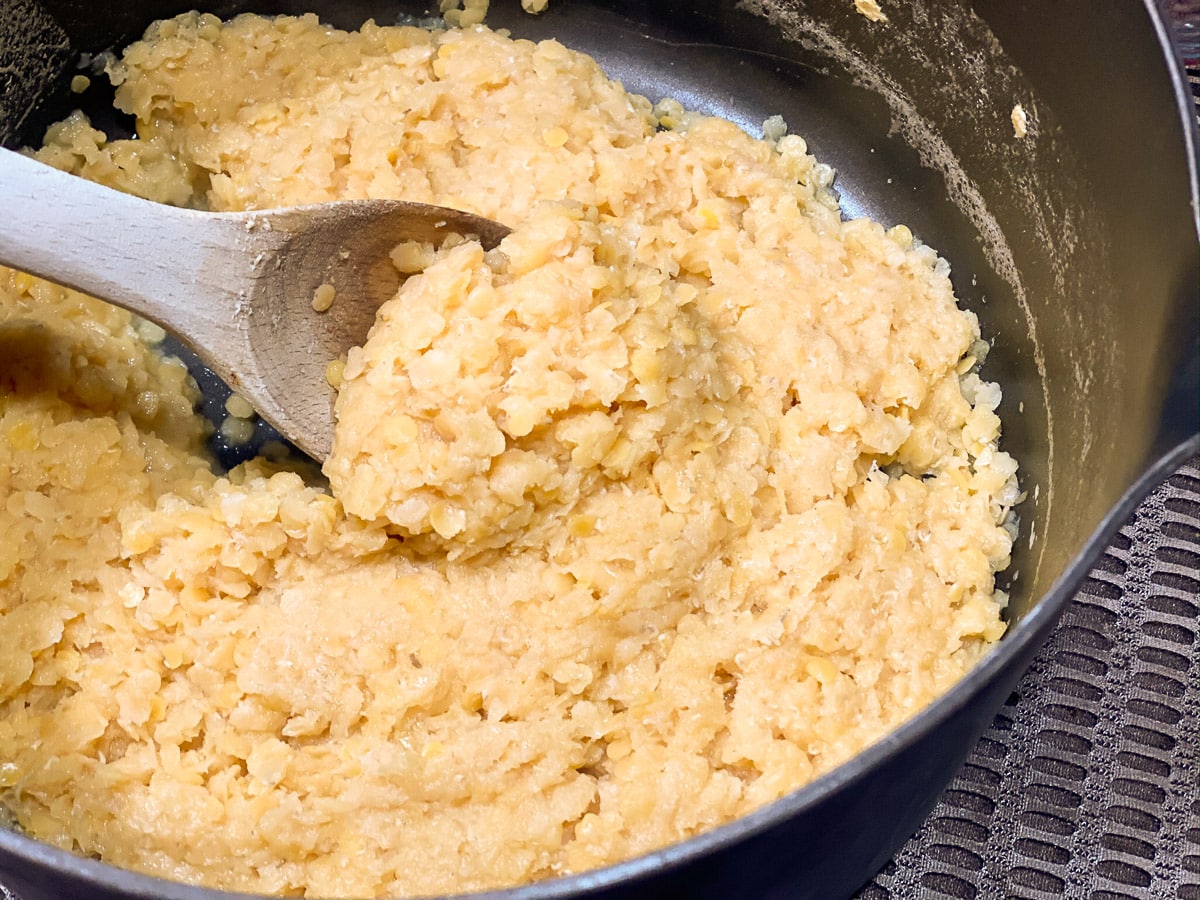
Prepare the Tadka:
- In a separate small pan, heat the olive oil. Add the chopped onion and cook for 4-5 minutes, until it turns golden.
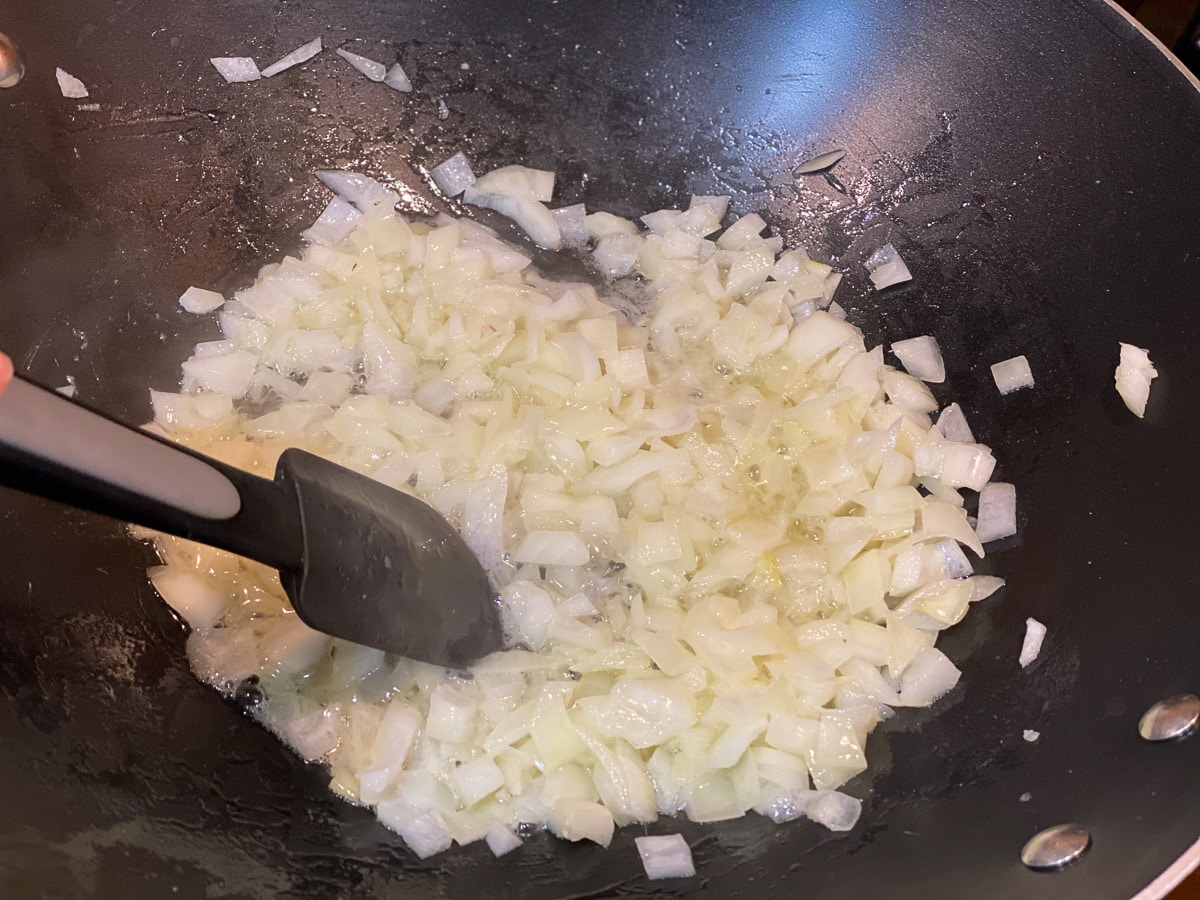
- Add mustard seeds and cumin seeds, and let them pop.
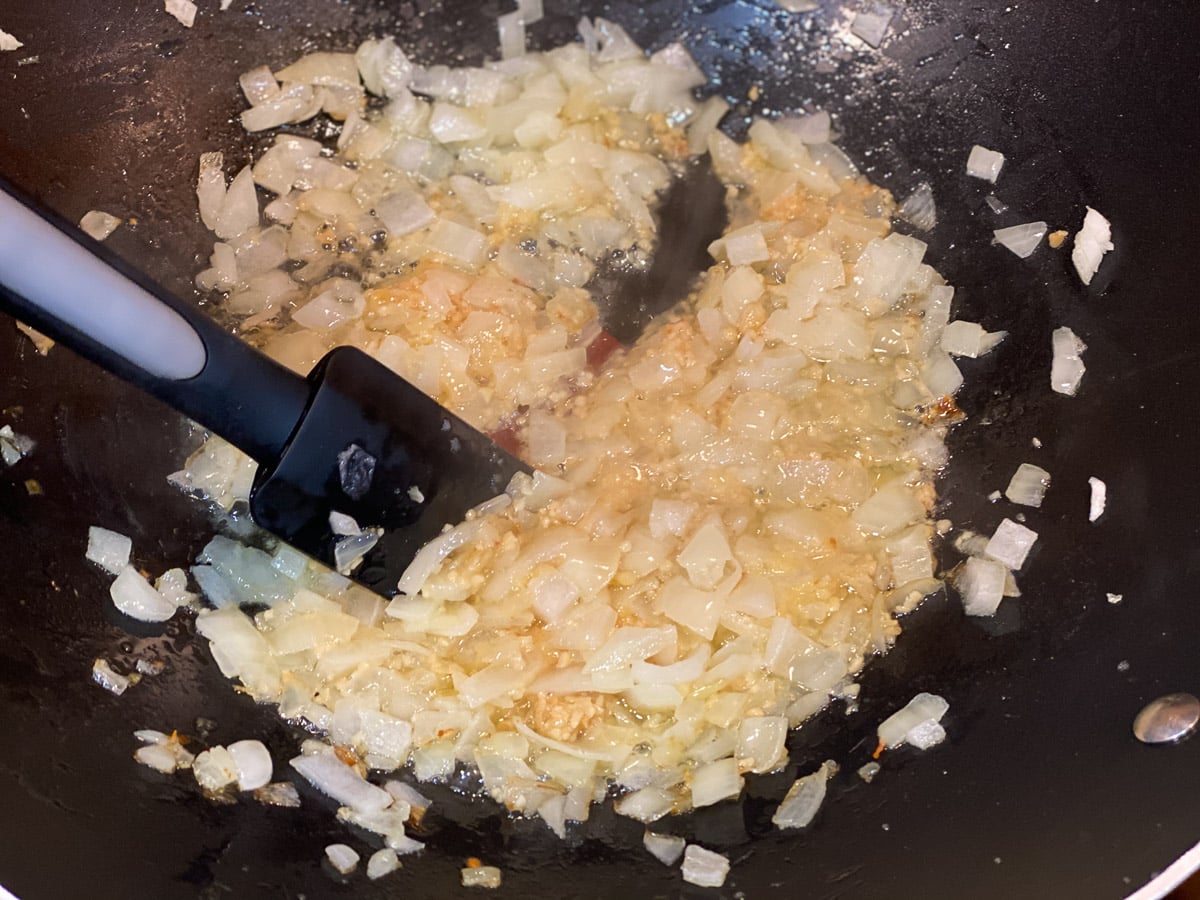
- Add the garam masala, ground coriander, and red chili powder. Stir to coat the onions with spices. Then add the minced garlic and ginger, and cook for another minute, until fragrant.
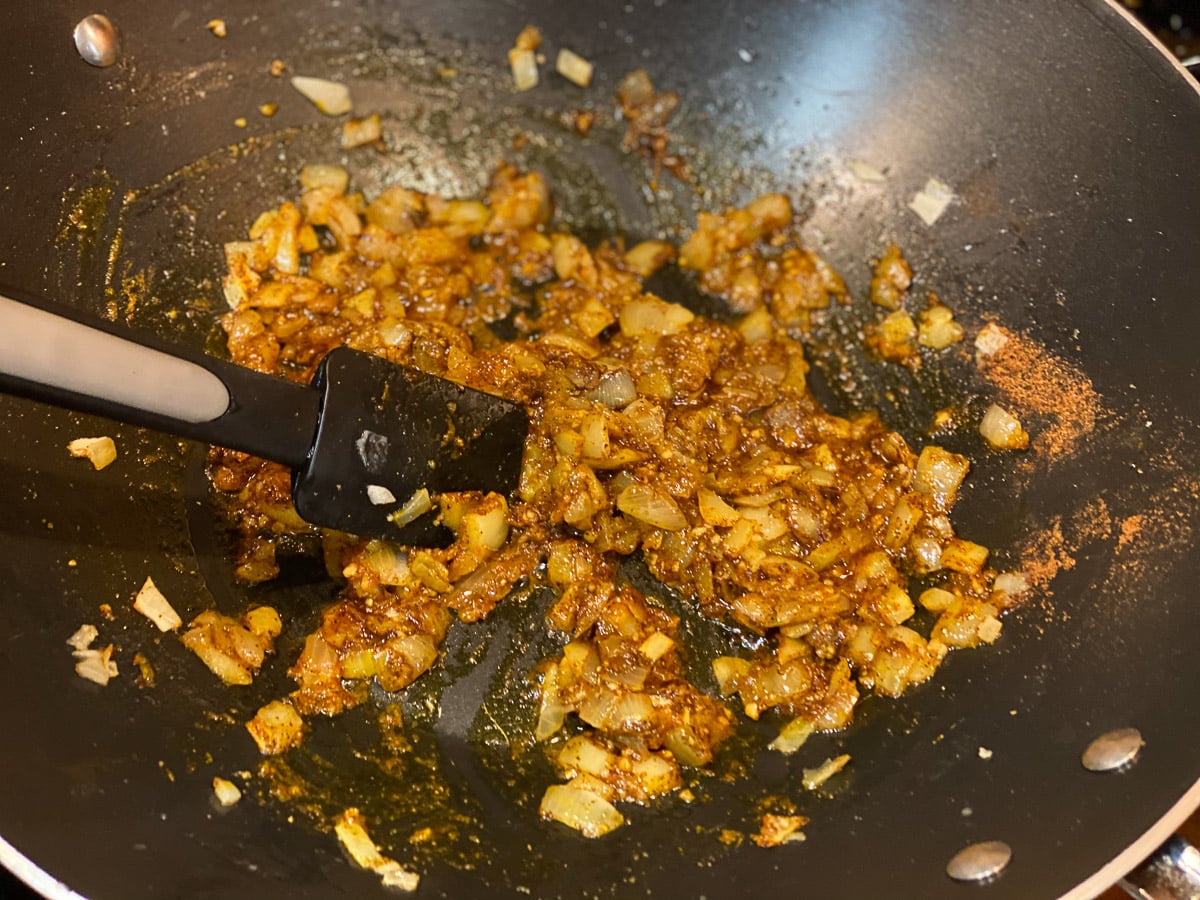
- Stir in the chopped tomatoes and cook for another 5 minutes. If the mixture begins to feel too dry, add a bit of additional oil.

Combine Dal and Tadka:
- Combine the tadka and the cooked lentils.
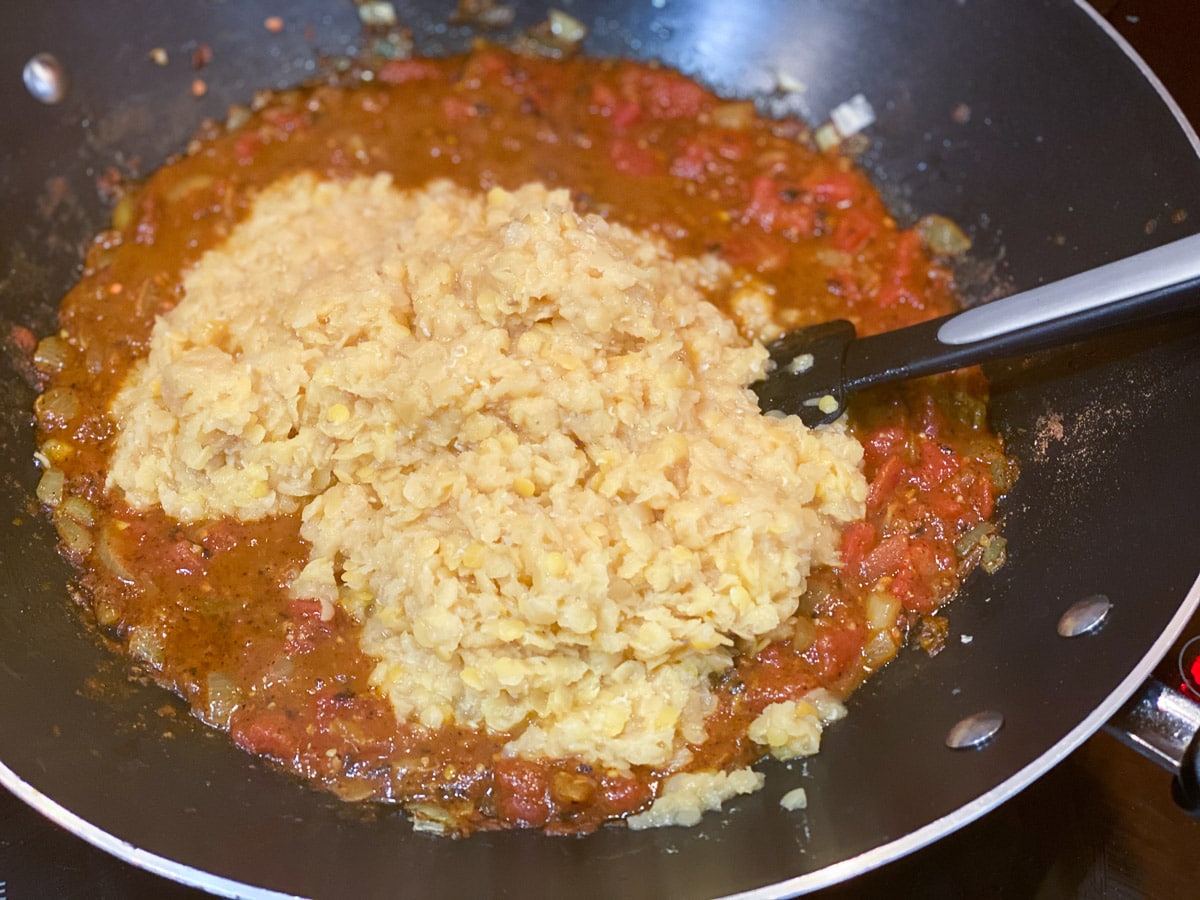
- Stir well. Add the fresh lemon juice now for a bit of tang.
Garnish and Serve:
- Garnish with chopped fresh cilantro. Serve with steamed rice or your favorite Indian bread like naan or roti.
Nutrition (Estimate per Serving)
Calories: 267kcalCarbohydrates: 36gProtein: 14gFat: 8gSaturated Fat: 1gPolyunsaturated Fat: 1gMonounsaturated Fat: 6gSodium: 601mgPotassium: 694mgFiber: 16gSugar: 4gVitamin A: 575IUVitamin C: 13mgCalcium: 60mgIron: 5mg
Vegan-ize any recipe!Grab our free vegan cheat sheet, packed with my favorite easy substitutions to make any recipe vegan.
Bhindi Masala (Okra Masala)
Get ready to spice up your dinner routine with this hearty and flavorful Bhindi Masala - a classic Indian dish that's as simple as it is delicious. And it's 100% vegan and ready in 30 minutes too.
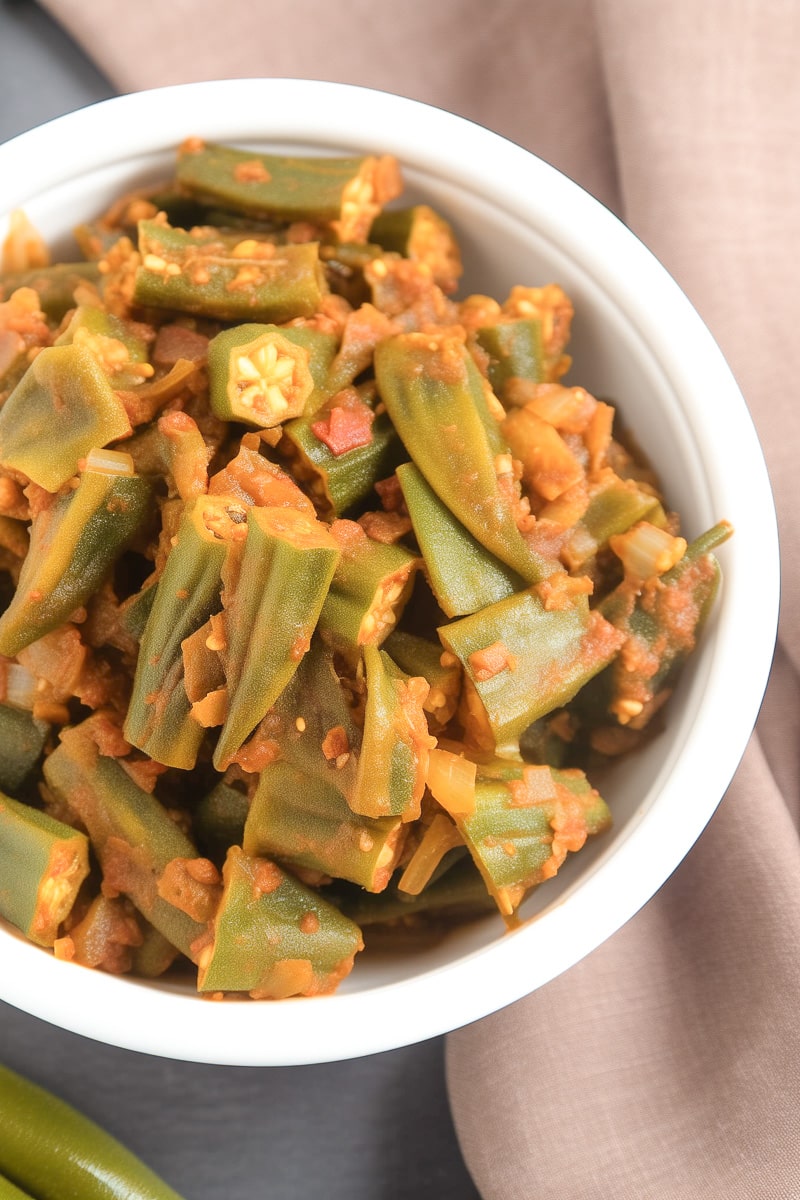
So you might have seen the word okra here and are currently thinking - has she lost her mind?! But stick with me. This Bhindi Masala is a dish even non-okra lovers can get behind. (And I know, because I am one of them.)
I first published a version of this recipe titled Bhindi Bhaji, which was generously shared by Terry Hope Romero as a sample recipe from her cookbook Vegan Eats World. The recipe has been updated slightly over the years, and I've added my own photos. But I still highly recommend you check out that cookbook!
This Bhindi Masala Recipe is...
- Authentically Flavorful: With traditional spices like garam masala, turmeric, and amchur, it's a taste of India in every bite.
- Surprisingly Simple: Despite its complex flavors, this recipe is straightforward and easy to follow.
- Adaptable: Whether you like it spicy or mild, this dish can be tailored to your palate.
- Vegan!
What is Bhindi Masala?
Bhindi Masala, is a classic Indian dish that has found its way into the hearts and kitchens of food enthusiasts worldwide. The name itself is a direct nod to its main ingredient and preparation style: "Bhindi" in Hindi means okra, and "Masala" refers to a mixture of spices. The exact origin of Bhindi Masala is a bit hazy, but it's widely believed to have originated in the northern parts of India.
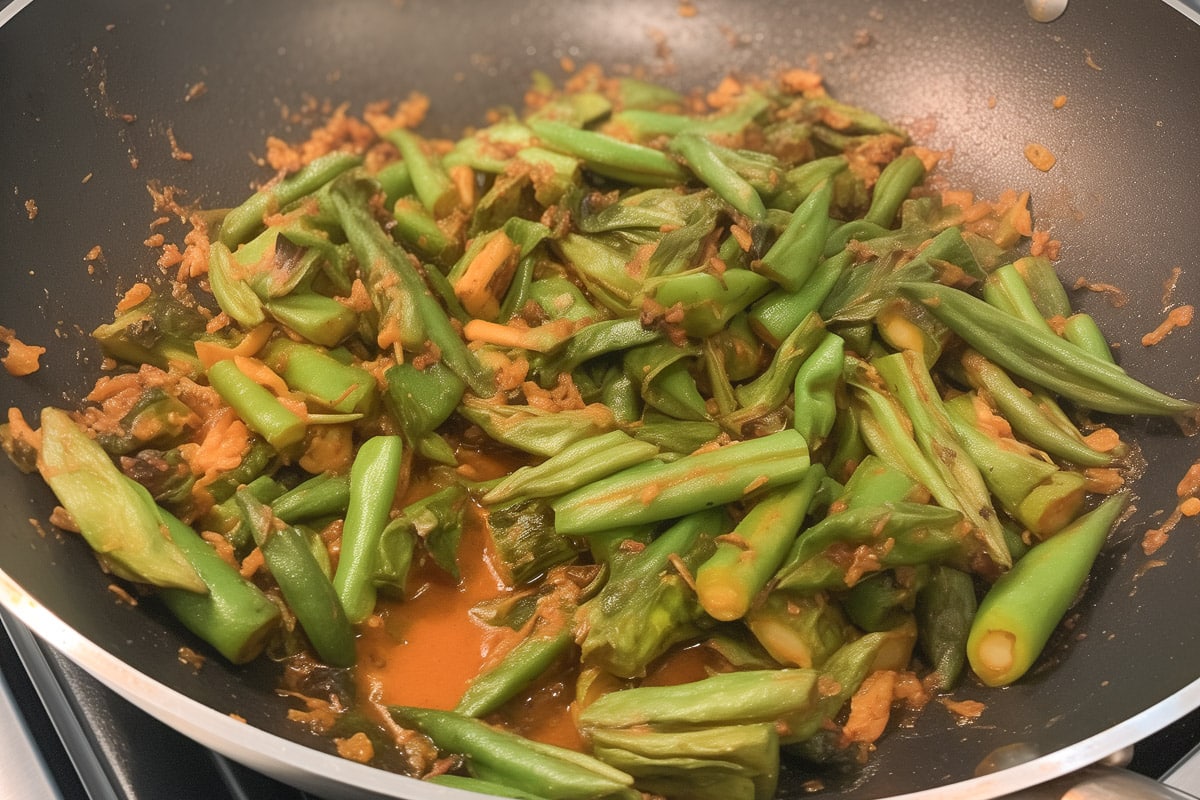
Key Ingredients & Substitutions
Okra
The star of the dish. If fresh okra isn't available, frozen okra can be a good substitute, though you will need to defrost and dry it thoroughly first to avoid getting a slimy texture.
Garam Masala
This classic spice blend is at the heart of many Indian dishes. It's worth splurging on a quality brand (like this one) for all of your Indian cooking.
Amchur Powder (Dry Mango Powder)
Adds a tangy twist. You can find amchur powder at Indian grocers or grab it online here. If unavailable, lime juice works as an easy alternative.
Cayenne Pepper
For heat lovers! Reduce or omit this for a milder version of the recipe.
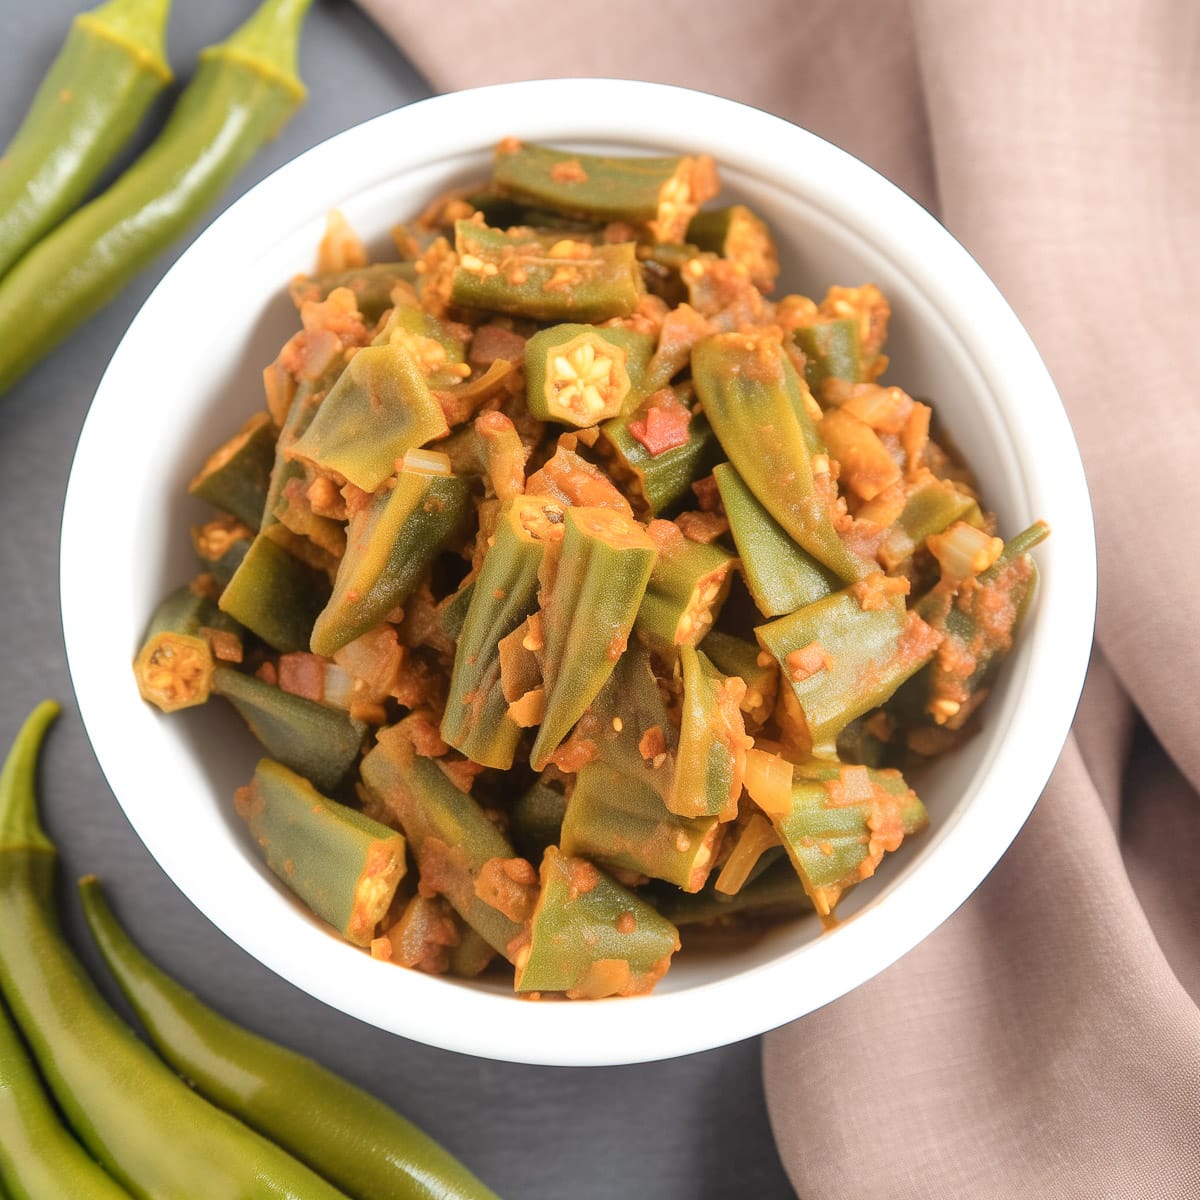
Helpful Tips & Variations
Buying Okra
When selecting okra, choose medium-sized okra that feel crisp to the touch. Dark green Indian okra or light green okra both work well for this recipe. You can find okra at any Indian grocery store.
Dry the Okra
Before cooking, ensure the okra is completely dry to avoid it becoming too slimy. That sliminess is the reason most people don't like okra. I suggest getting a paper towel and literally drying off each piece of okra before you slice it.
Stir Gently!
Okra is delicate. Stir gently to avoid breaking them apart - you don't want a mushy mess.
Add Protein
Throw in some pan-fried tofu, tempeh, or chickpeas for an added protein boost.
Serving Suggestions
Serve your bhindi masala over steamed basmati rice or with a side of Indian bread like rotis or vegan naan bread. For a complete Indian feast, pair it with our easy vegan dal tadka, our quick vegetable curry, or our aloo gobi.
More Vegan Recipes
If you love this Bhindi Masala, be sure to check out these other tasty vegan ideas:
Also try: our Masala Lentils Sabut Masoor.
- African Peanut and Okra Stew
- Creole Tomatoes and Okra
- 30-Minute Vegan Chana Masala
- 30-Minute Madras Lentils
Recipe
Bhindi Masala (Okra Masala)
Spice up your dinner routine with this hearty and flavorful Bhindi Masala - a classic Indian dish that's as simple as it is delicious. 100% vegan and ready in 30 minutes.
Print
Pin
Save
Servings: servings
Ingredients
- 1 pound fresh okra pods
- 2 tablespoons vegetable oil
- 1 teaspoon mustard seeds
- 3 garlic cloves finely chopped
- 1 large onion chopped
- 2 teaspoons Garam Masala plus extra for garnish
- 1 teaspoon turmeric powder
- ½ teaspoon cinnamon
- ½ teaspoon cayenne pepper optional, for less heat
- 1 teaspoon salt
- 2 to 4 tablespoons water or broth
- 1 cup chopped tomatoes fresh or canned
- 1 teaspoon dried mango powder amchur or lime juice
Instructions
- Prepare Okra. Trim the ends off the okra and cut them into ½-inch pieces.
- Cook Mustard Seeds.In a large skillet, heat the oil over high heat. Add mustard seeds. Once they start popping, reduce heat to medium.
- Add Garlic and Onion. Sauté garlic for a few seconds, then add onion. Cook until the onion is soft, about 3 minutes.
- Add okra to the skillet. Mix in Garam Masala, turmeric, cinnamon, cayenne, and salt. Cook for 5 minutes, stirring occasionally.
- Add water or broth, reduce heat to low. Cover and simmer for 10-12 minutes, stirring occasionally.
- If it sticks to the pan, add a little more water or broth.
- Add tomatoes and amchur powder or lime juice. Cook uncovered for 3-4 minutes until tomatoes are soft.
- Taste and adjust seasoning as desired. Garnish with extra garam masala. Serve warm with rice, rotis, or naan bread.
Nutrition (Estimate per Serving)
Calories: 77kcalCarbohydrates: 16gProtein: 4gFat: 1gSaturated Fat: 0.1gPolyunsaturated Fat: 0.2gMonounsaturated Fat: 0.2gSodium: 678mgPotassium: 525mgFiber: 5gSugar: 5gVitamin A: 988IUVitamin C: 35mgCalcium: 128mgIron: 2mg
Vegan-ize any recipe!Grab our free vegan cheat sheet, packed with my favorite easy substitutions to make any recipe vegan.
30-Minute Vegan Chana Masala
This one-pot vegan chana masala is packed with delicious Indian flavor and ready in just 30 minutes. Perfect for a weeknight meal!
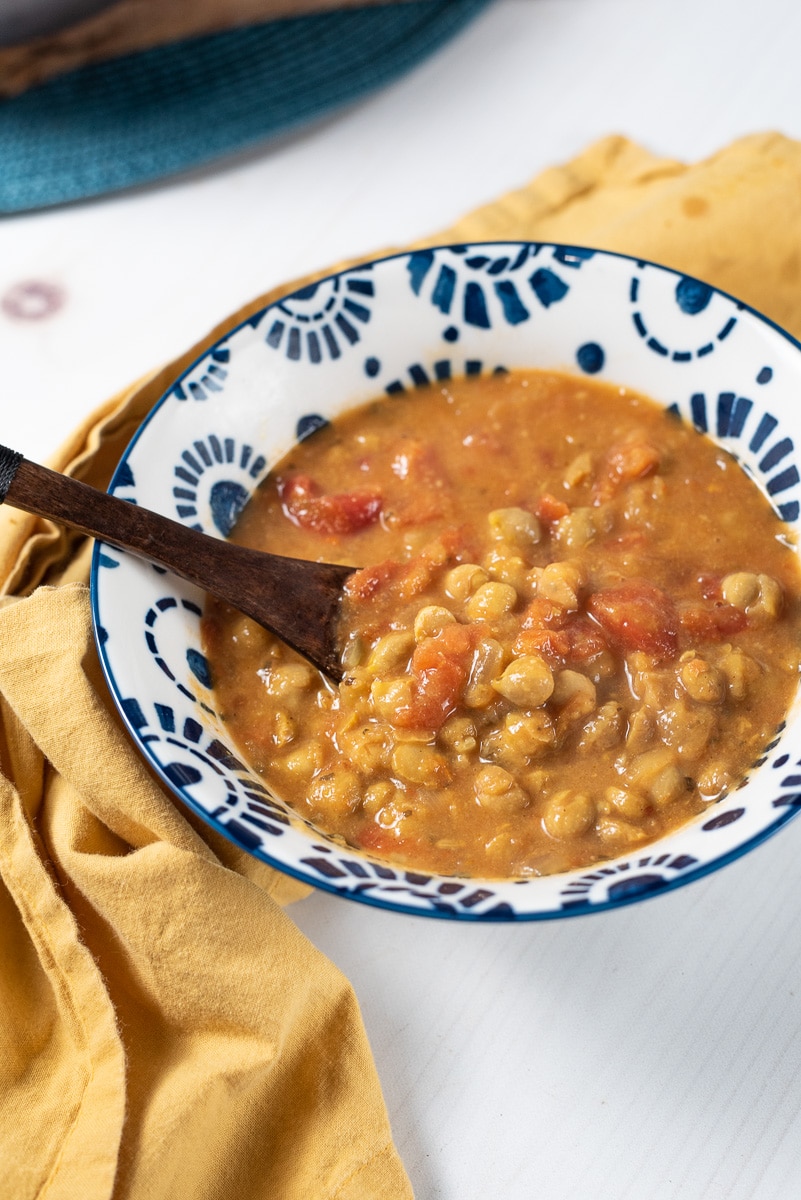
It's been a minute since I've added a new curry recipe to the blog, so I wanted to share this quick and easy Chana Masala recipe with you today. This curry is absolutely packed with flavor, and yet it's simple enough to make on a busy weeknight. What's not to love?
What is Chana Masala?
Chana Masala, also known colloquially as "Chole" in many parts of India, is a popular dish that originates from the Indian subcontinent, particularly in the northern regions.
The name itself is quite descriptive of its ingredients and preparation: "Chana" refers to chickpeas, and "Masala" refers to a particular mixture of spices. This dish reflects the rich culinary heritage of India, where legumes like chickpeas have been a staple for centuries and are celebrated for their versatility and nutritional value.
Chana Masala is traditionally made with chickpeas that are simmered in a spicy, tangy tomato-based sauce infused with an array of aromatic spices like cumin, coriander, garam masala, and turmeric.
The dish has become a beloved part of vegetarian cuisine worldwide. Each region in India has its own version of Chana Masala, with variations in spice blends and cooking techniques, reflecting the diversity of Indian cuisine.
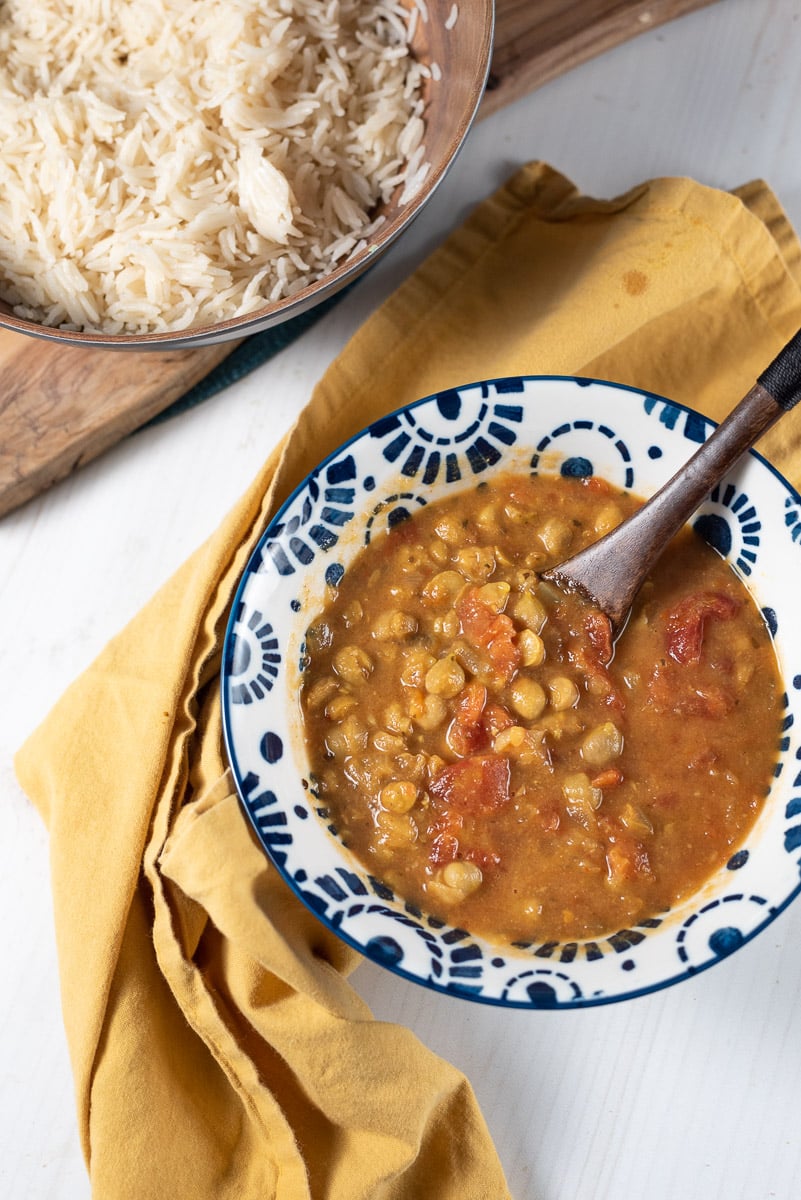
Why You'll Love This Recipe
Vegan Chana Masala is a dish that's as nutritious as it is delicious! Packed with protein-rich chickpeas and a symphony of spices, it's a vegan dish that will delight even the most picky palates. It's:
- Hearty and Satisfying: The chickpeas provide a wonderful, filling base that's both comforting, satisfying, and loaded with healthy protein.
- Flavor-Packed: A blend of traditional Indian spices ensures each bite is bursting with flavor.
- Easy to Make: My simplified version of traditional chana masala uses easy to find ingredients and straightforward steps for an easy recipe that can be ready in just 30 minutes.
Ingredient Spotlight
Chickpeas
These are obviously the star of the show here. I like to use canned chickpeas for convenience, but you can also prepare dried chickpeas for use in this recipe if you prefer. You would need about two cups of cooked chickpeas. Note that chickpeas are also commonly called garbanzo beans!
Garam Masala
I use a handful of common Indian spices in this recipe, but the most important one is the garam masala, which gives the dish it's classic flavor. I recommend using a high quality garam masala powder for the best results! (I like this one.)
Tomatoes
I use fresh tomatoes in my chana masala, and I do think it gives the best flavor and texture. But you can substitute a 15 oz can of chopped or crushed tomatoes if you prefer.
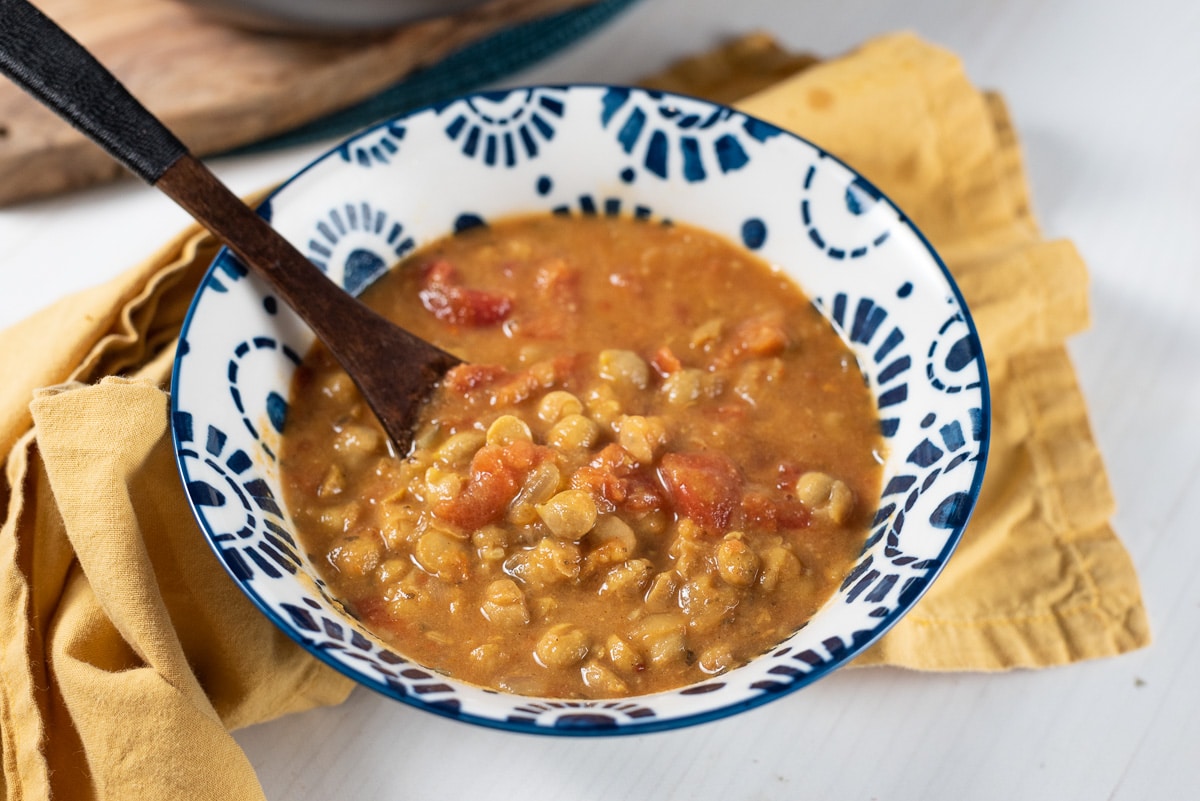
Tips and Tricks
Spice Level
The recipe is mildly spicy as it's written (at least from my perspective!). You can add more chili powder or an additional green chili pepper to amp up the heat. Or cut out both for a milder dish.
Serving Suggestions
Pair this Vegan Chana Masala with fluffy basmati rice, warm vegan naan, or even over a bed of fresh greens for a lighter option. It's versatile and pairs well with various sides.
Storing Leftovers
Store leftover chana masala in the fridge for 3-4 days, or freeze for up to 2 months. To serve again, defrost (if frozen) and reheat over medium heat on the stovetop.
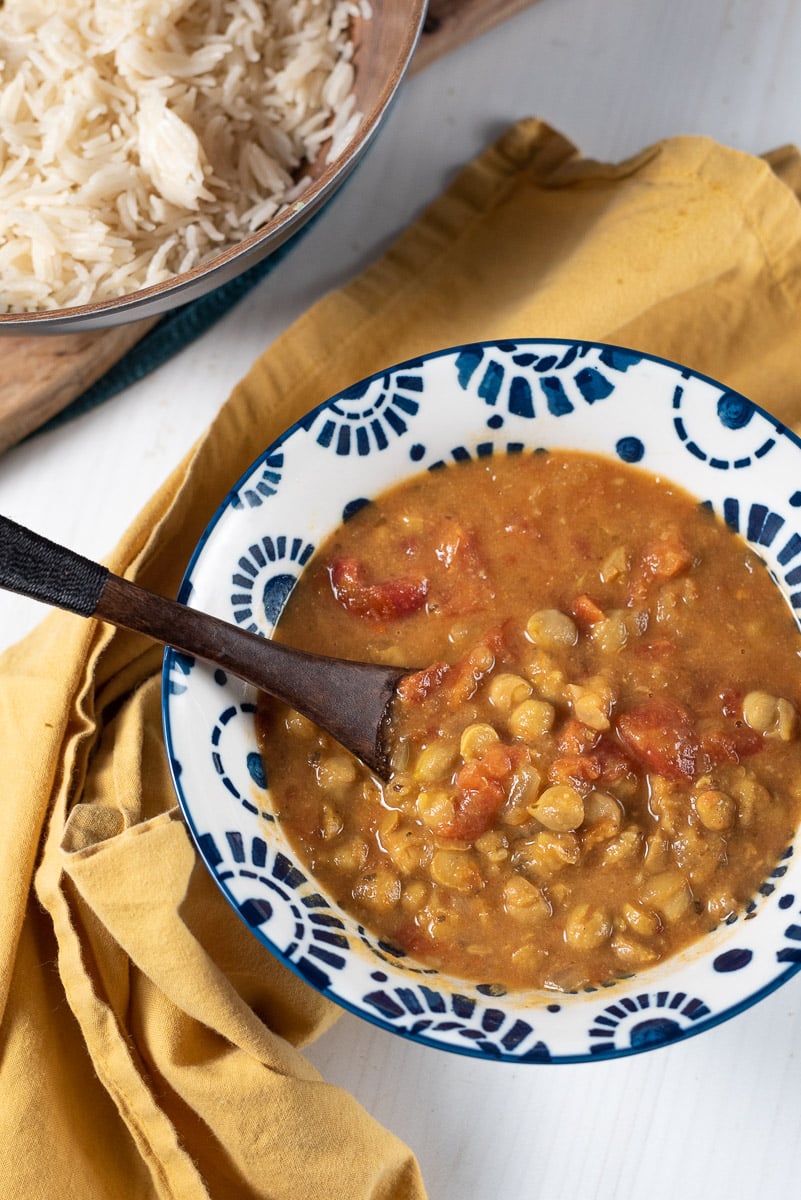
Variations and Substitutions
Make a Creamier Version: Add a splash of coconut milk for a richer, creamier texture.
Tangy Twist: An additional squeeze of lemon juice before serving adds a fresh zing.
Garnish Galore: Top your chana masala with fresh cilantro, diced onions, or a dollop of vegan raita for added flavor and texture.
More Vegan Indian Recipes
If you love this Vegan Chana Masala, be sure to check out these other Indian inspired vegan recipes:
Also try: our Easy Vegan Dal Tadka.
Also try: our Masala Lentils Sabut Masoor.
Recipe
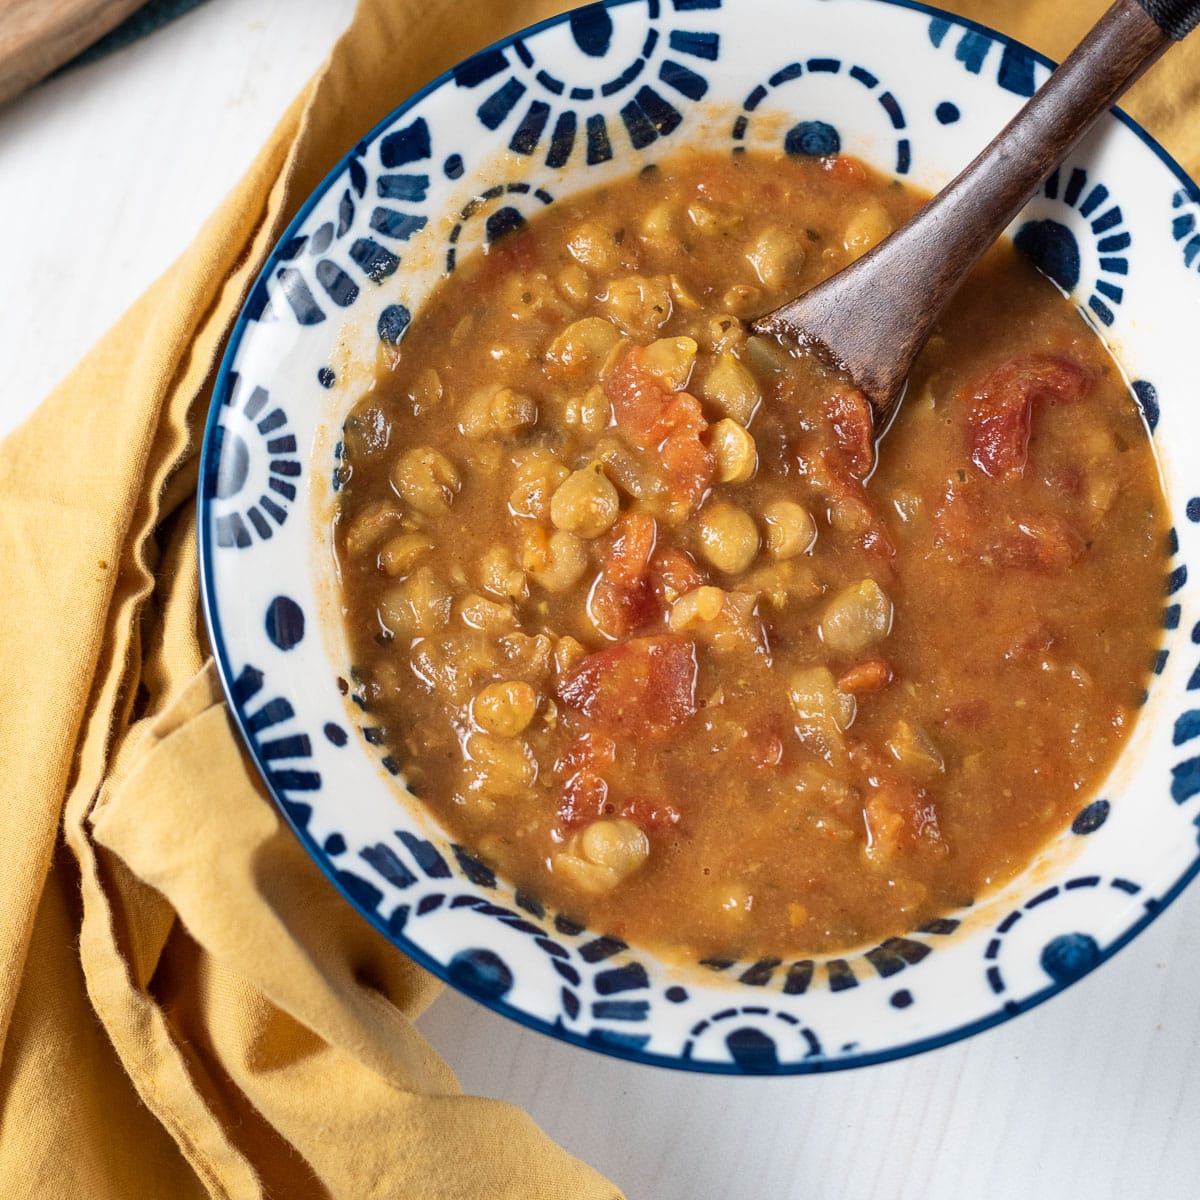
30-Minute Vegan Chana Masala
This one-pot vegan chana masala is packed with delicious Indian flavor and ready in just 30 minutes. Perfect for a weeknight meal!
Print
Pin
Save
Servings: servings
Ingredients
- 15 oz canned chickpeas drained and rinsed
- 1 large onion finely chopped
- 3 cloves garlic minced
- 1 inch piece of ginger minced
- 1 large tomato finely chopped
- 1 green chili finely chopped (optional, adjust to taste)
- 2 tablespoons tomato paste
- 1 teaspoon cumin seeds
- 1 teaspoon ground coriander
- 1 teaspoon garam masala
- ½ teaspoon turmeric powder
- ½ teaspoon red chili powder adjust to taste
- juice of half a lemon
- 2 tablespoons cooking oil such as coconut or vegetable oil
- Salt to taste
- Fresh cilantro optional, for garnishing
- 1 cup vegetable broth
Instructions
- Sauté Spices: Heat the oil in a large pan over medium heat. Add the cumin seeds and let them sizzle for a few seconds. Then add the chopped onions and sauté until they turn golden brown.
- Add Garlic and Ginger: Add the minced garlic and ginger to the pan and sauté for another minute.
- Tomato and Spices: Add the chopped tomatoes, green chili, and tomato paste. Cook until the tomatoes are soft and the oil starts to separate. Then add the ground coriander, garam masala, turmeric, red chili powder, and lemon juice. Stir well.
- Chickpeas: Add the cooked chickpeas to the pan. Mix well to ensure the chickpeas are coated with the spice mixture.
- Simmer: Add the vegetable broth, bring to a boil, then reduce the heat and simmer for about 15-20 minutes. The gravy should thicken, and the flavors will meld together.
- Season and Garnish: Adjust salt to taste. Garnish with fresh cilantro before serving.
- Serve: Serve hot with rice, naan, or your favorite Indian bread.
Nutrition (Estimate per Serving)
Calories: 196kcalCarbohydrates: 23gProtein: 7gFat: 10gSaturated Fat: 1gPolyunsaturated Fat: 3gMonounsaturated Fat: 5gTrans Fat: 0.03gSodium: 640mgPotassium: 390mgFiber: 7gSugar: 4gVitamin A: 600IUVitamin C: 10mgCalcium: 63mgIron: 2mg
Vegan-ize any recipe!Grab our free vegan cheat sheet, packed with my favorite easy substitutions to make any recipe vegan.
Vegan Zucchini Lasagna

Are you looking for a delicious and healthy vegan dinner idea? Look no further than this vegan zucchini lasagna. It's light, healthy, and bursting with flavor from fresh veggies, tangy marinara, and creamy vegan ricotta. Yum!
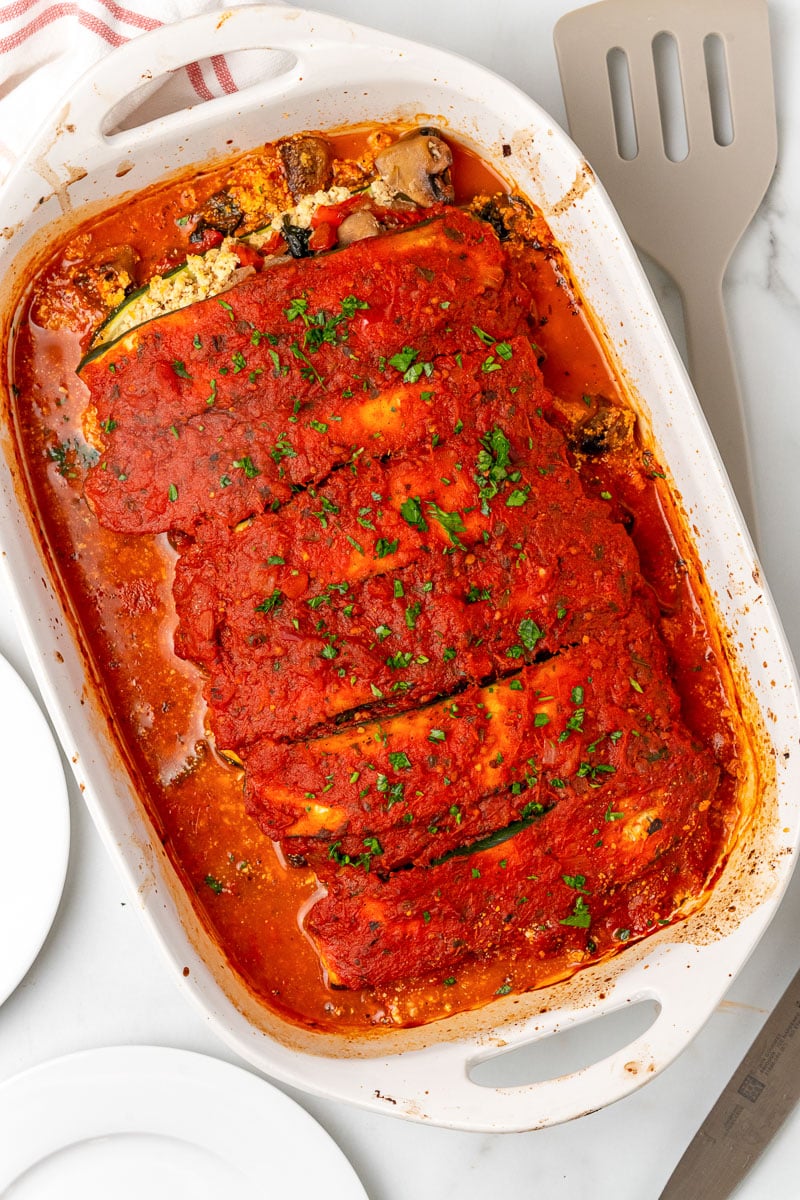
As an Italian, I've eaten more than my share of lasagna in my life. In fact, traditional lasagna is my son's all time favorite food and the dish we make for most holidays in our home. It's comfort food at its finest!
But it's also a heavy dish. And on these hot summer days, I need something a bit lighter. So I came up with this veggie-centric vegan friendly version of my fave pasta dish!
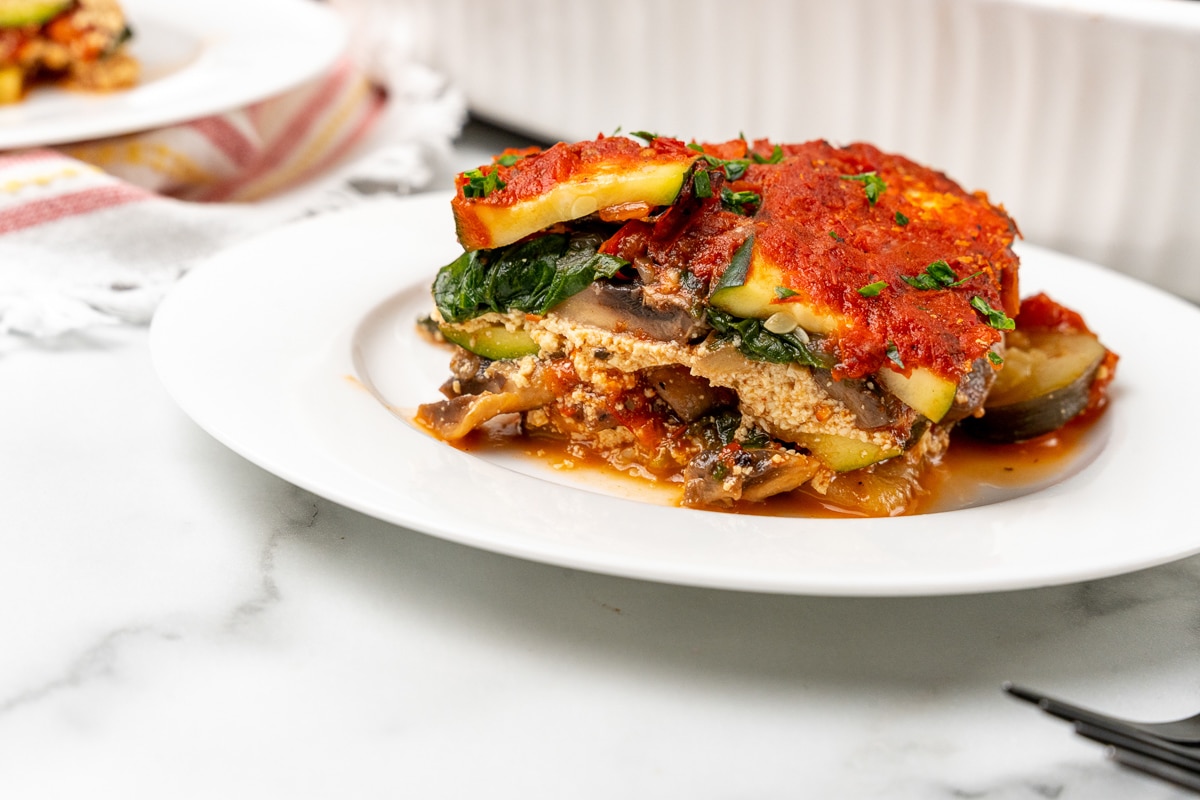
This Vegan Zucchini Lasagna is:
- Light & healthy!
- Family friendly - even the kids will eat this.
- Ready in under an hour.
- Vegan.
- Vegetarian.
- Dairy-free.
- Gluten-free.
- a delicious plant-based meal!
With its fresh vegetables, rich tomato sauce, and hearty vegan cheese, this zucchini lasagna is sure to satisfy your taste buds. Plus, it's the perfect way to sneak more veggies into your meal. Enjoy!
And don't forget to check out my other vegan pasta recipes for more delicious vegan dinner ideas.
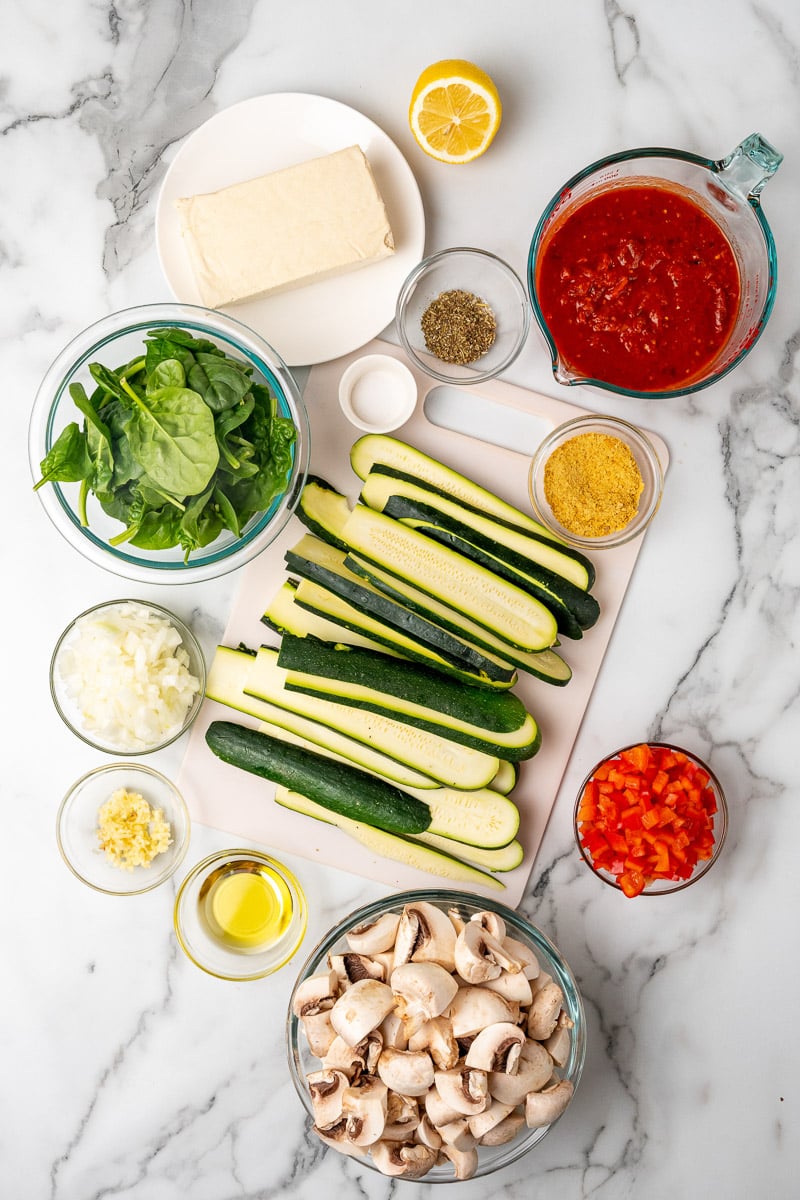
Ingredients & Supplies You'll Need
Here's what you'll need to make this delicious zucchini lasagna:
- Zucchini - the star ingredient!
- Firm Tofu - to make a vegan ricotta cheese substitute.
- Nutritional yeast - to add that cheesy flavor.
- Italian Seasoning
- Salt
- Lemon Juice
- Olive oil
- Onion
- Bell pepper
- Garlic
- Mushrooms
- Baby Spinach - Or you can use kale if you prefer.
- Tomato Sauce
- Fresh Basil - Optional, but recommended!
In addition to these ingredients, you will need a 9"x 13" baking dish and either a vegetable peeler or a mandoline slicer for slicing the zucchini.
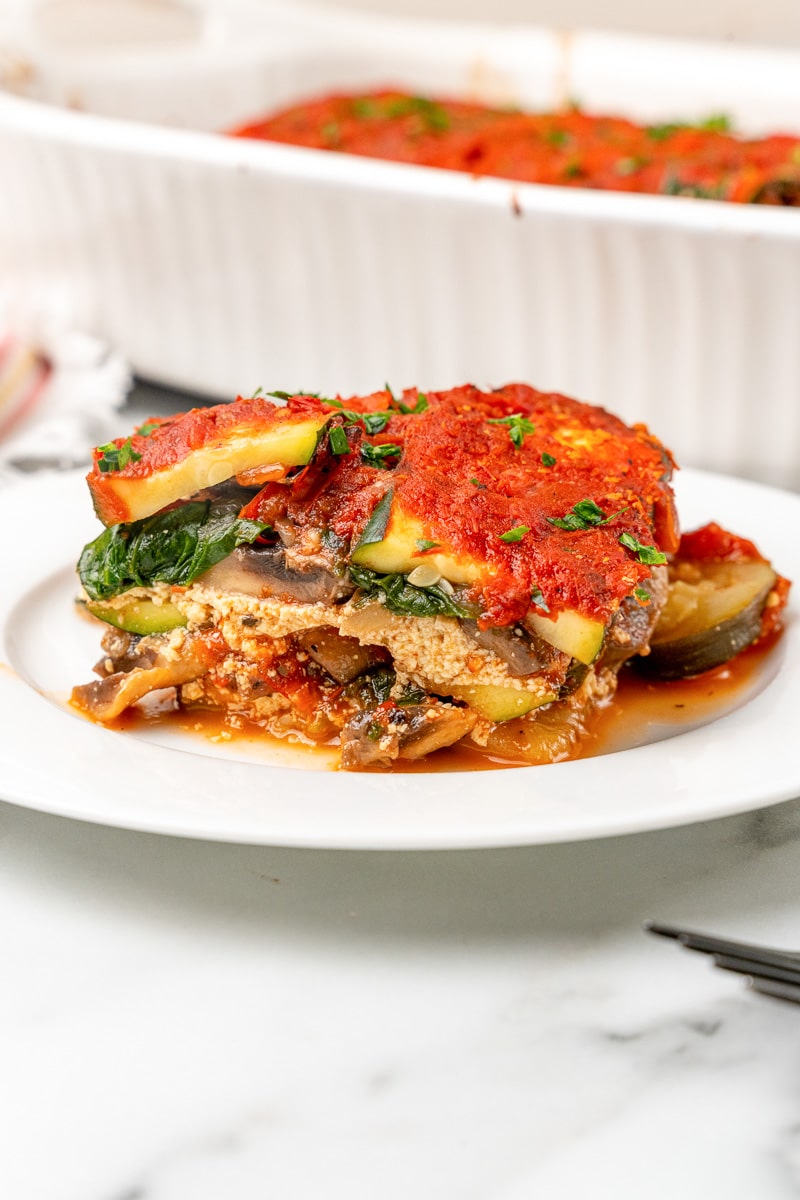
How to Make Zucchini Lasagna
The first step is to slice your zucchinis lengthwise into thin strips. Lay them out on a paper towel and sprinkle them all over with salt. Allow them to sit for at least 15 minutes to draw out all of the excess moisture - this will keep your lasagna from becoming a soggy mess!
Next, you'll prepare a vegan tofu "ricotta" by blending the tofu, nutritional yeast, Italian seasoning, salt, and lemon juice in a food processor until smooth.
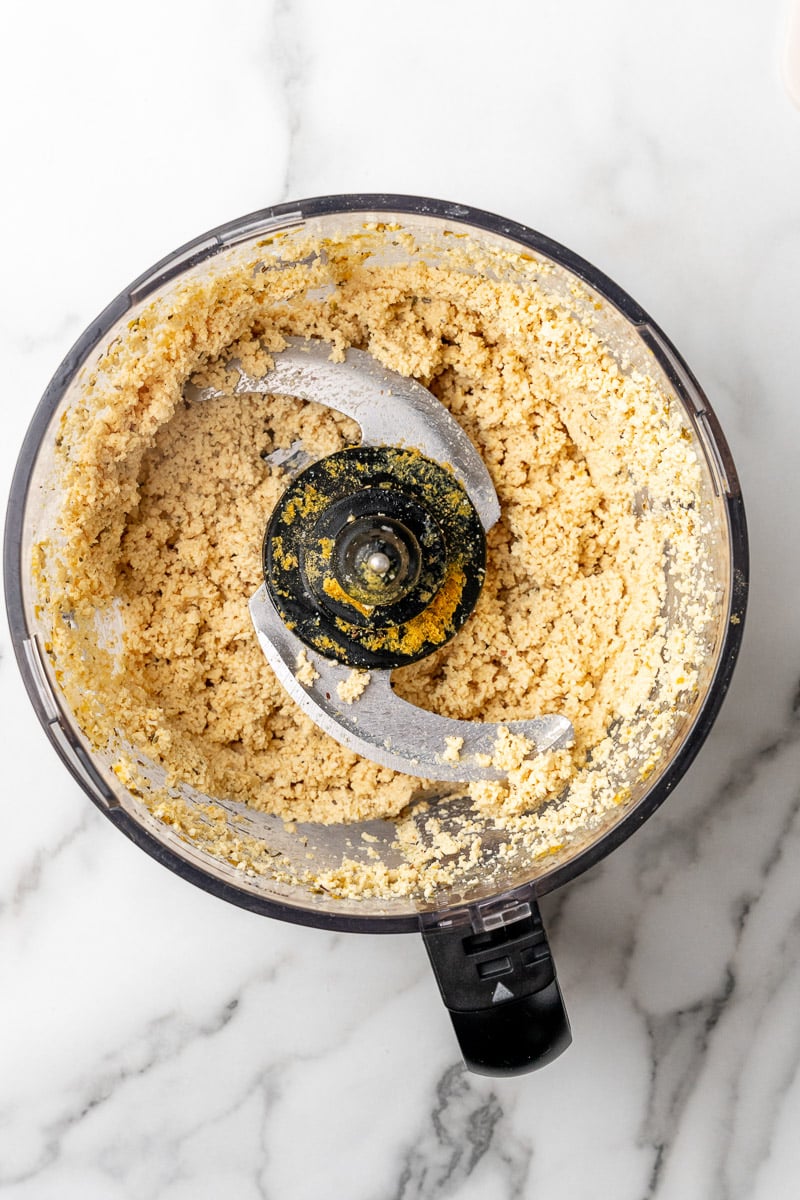
In a large skillet, sauté the bell peppers and onions until they are translucent. Add the garlic and mushrooms and cook until the mushrooms are browned and the excess liquid has evaporated. Finally, add the spinach and allow it to wilt.
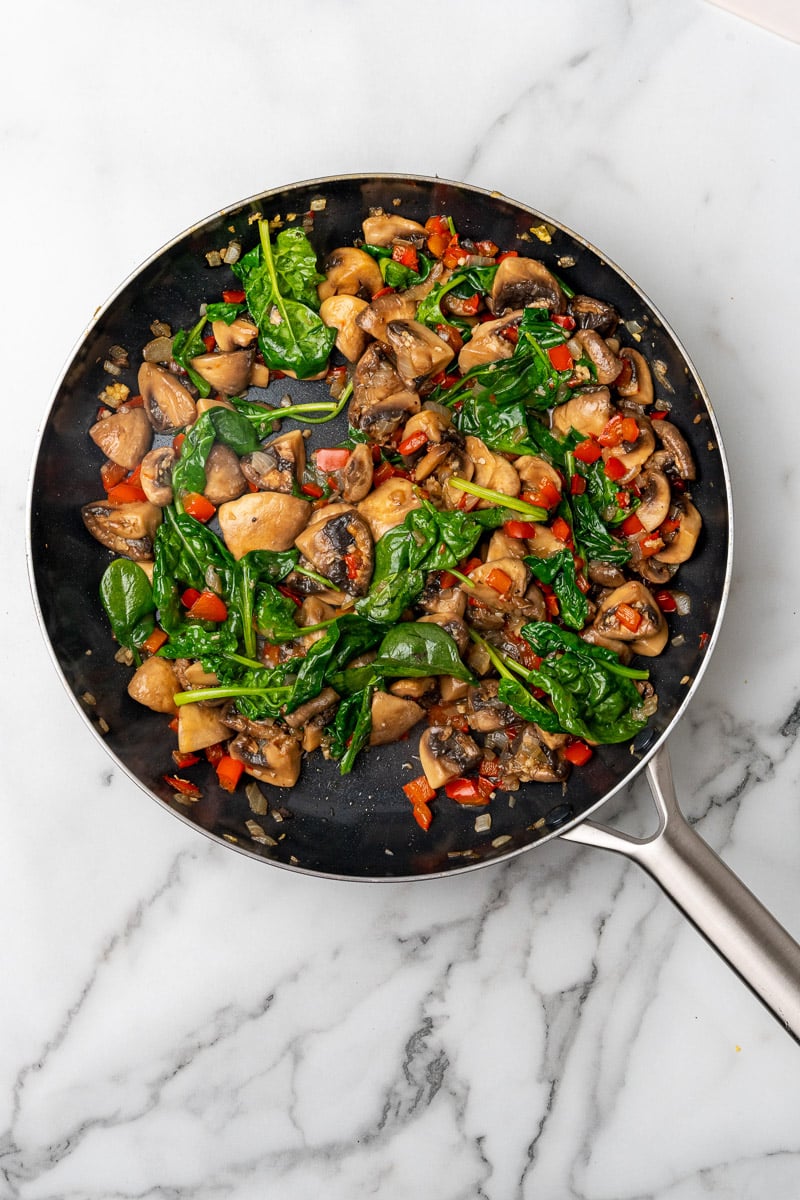
Now, it's time to assemble your lasagna. Add a layer of tomato sauce to the bottom of a 9x13 baking dish, then a layer of zucchini slices. Follow that with another layer of sauce, followed by half of the cooked vegetables and half of the vegan ricotta. Then, add another layer of zucchini noodles, sauce, remaining vegetables, and remaining vegan ricotta. Finally, top with a final layer of zucchini slices and remaining sauce.
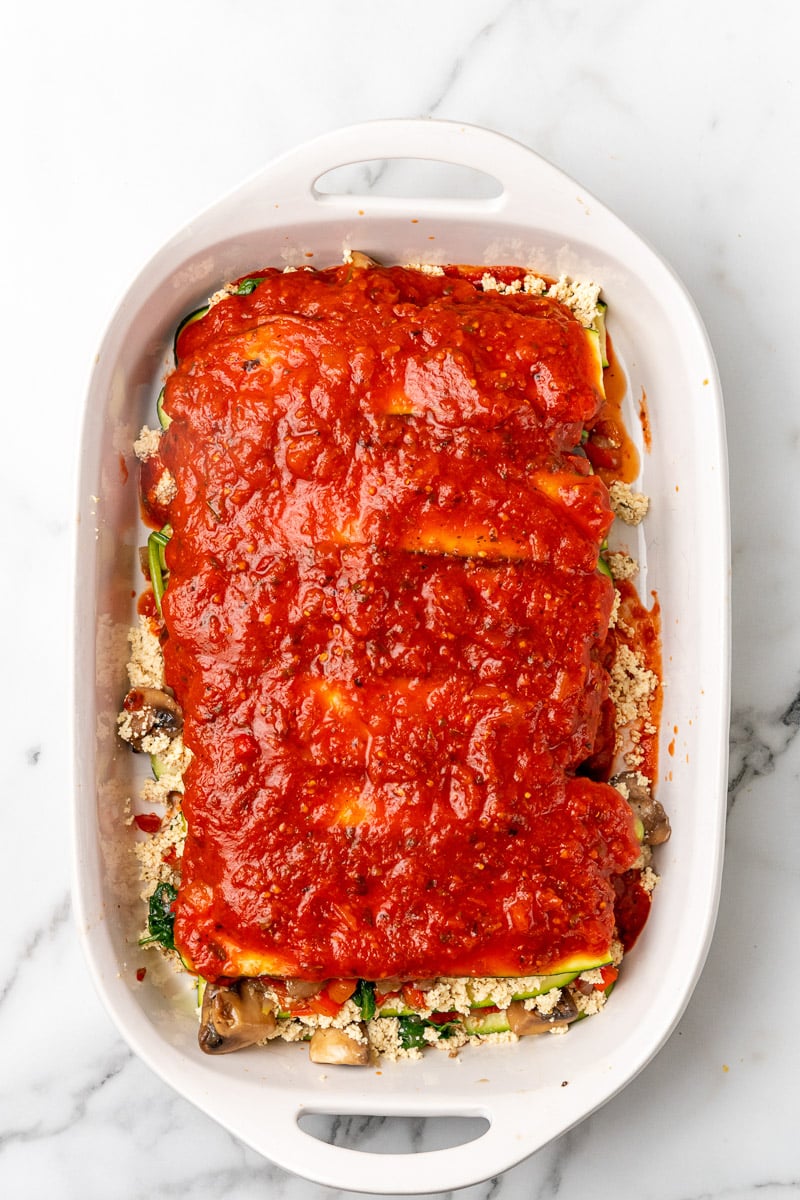
Cover the baking dish and bake in the oven at 400 degrees Fahrenheit for 45 minutes or until it is bubbly. Once done, remove the lasagna from the oven and add fresh minced basil. Allow it to sit for 10 minutes before serving.
(As always, see the recipe card below for more detailed instructions, measurements, and step-by-step images.)
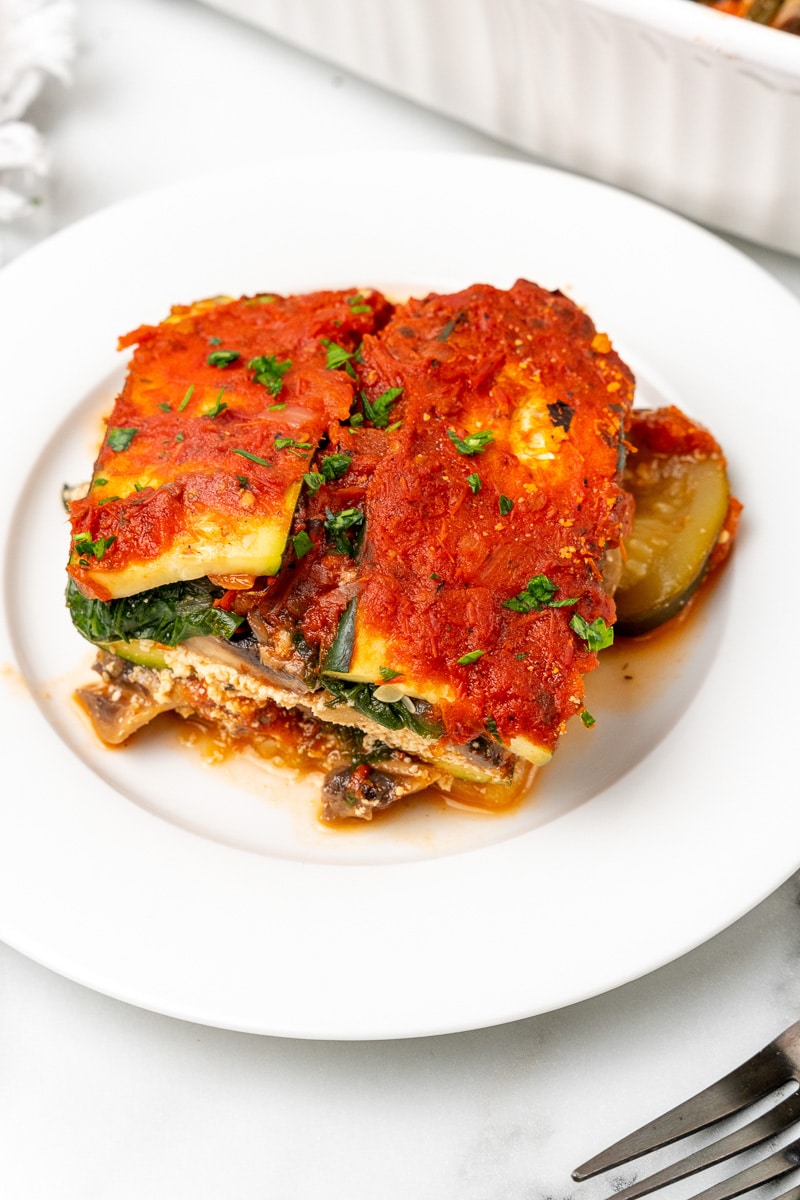
Helpful Tips & Tricks
Here are some helpful tips and tricks for making a delicious vegan lasagna!
Slicing the Zucchini Strips
Use a vegetable peeler or a mandoline slicer to create very thin, uniform slices of zucchini. This will ensure that your lasagna layers cook evenly and don't become mushy. You are unlikely to get thin enough slices by simply using a kitchen knife.
Remove the Moisture from the Zucchini
After slicing your zucchini, lay the pieces out on paper towels and sprinkle with salt. This will help draw out excess moisture, making for a firmer lasagna. Don't skip this step or you will get soggy lasagna!
Storing the Leftovers
If you have leftovers, store them in an airtight container in the fridge for up to 3-4 days. For best results, reheat in the oven or microwave before enjoying.

Variations & Substitutions
Homemade Marinara Sauce
I used a simple plain tomato sauce for this recipe, to let the veggies shine. You can use any tomato or pasta sauce of your choice, or try your hand at making homemade tomato sauce.
Vegan Ricotta
This recipe uses a simple homemade tofu ricotta. For an alternative, this cashew ricotta is also a great choice. If you're short on time, consider using store bought vegan ricotta. There are many delicious options available at most grocery stores. I'm a fan of the Kite Hill brand.
Add Vegan Mozzarella
I wanted to limit the processed ingredients in this healthy lasagna recipe, but you could also add some dairy free mozzarella shreds to the top if you're craving more cheesiness.
Spice it Up
For more flavor, consider adding fresh herbs such as basil or oregano to your marinara sauce. Or for a little spice, add some crushed red pepper flakes. Yum!
Add Some Protein
If you want a protein boost, add in some meatless soy crumbles or crumble up some Beyond Sausages - they are perfect for this! You could also add lentils, chickpeas, or beans for a fun variation.
Roasted Vegetables
Consider using roasted vegetables such as eggplant, bell peppers, or mushrooms to add different textures and flavors to the dish.
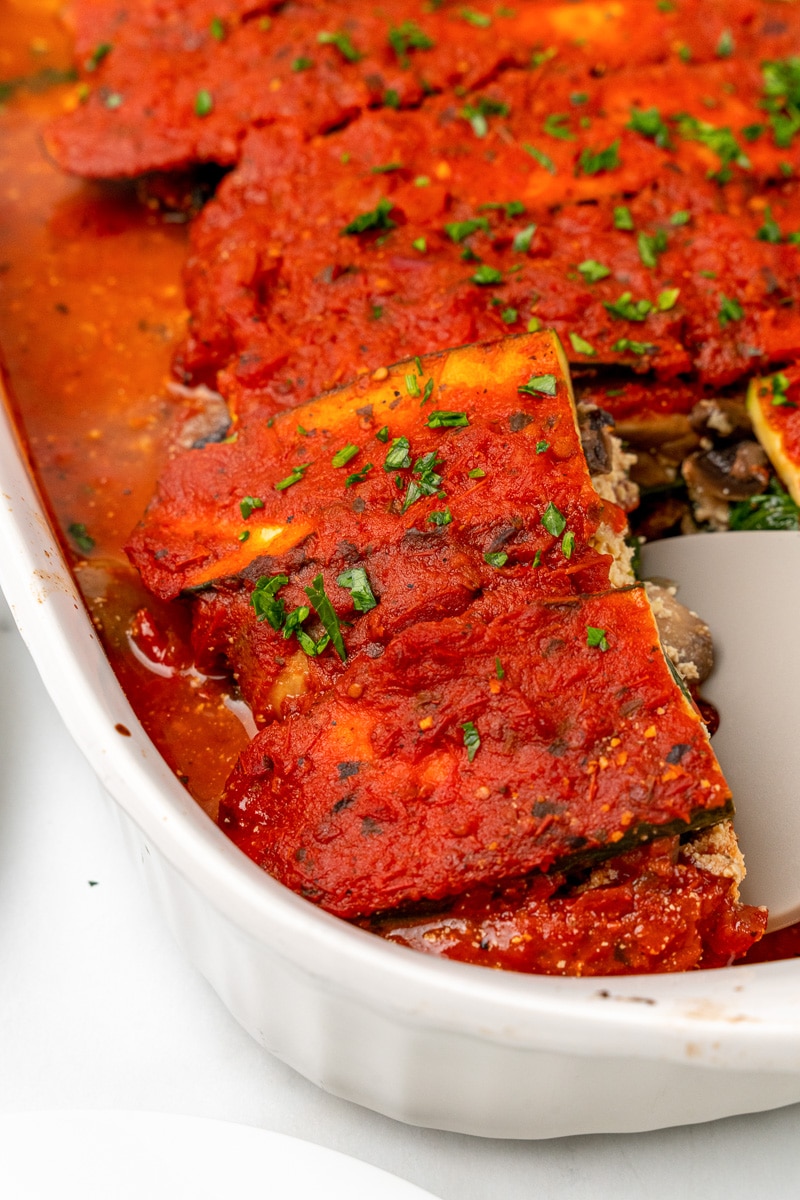
Fun Fact: Where did Lasagna Originate?
The origins of lasagna are a highly debated topic. While most people assume the dish came from Italy, this popular recipe has made quite the journey around the world!
Some believe it began with laganon, a Greek word describing flat sheets of pasta that were cut into strips. Still others suggest that lasagna first appeared as far back as the 14th century in England and Italy, where cookbooks detailed various recipes for layers of cheese and pasta baked together. It wasn't until the 16th century when tomato-based versions of the dish were recorded that it bore closer resemblance to today's version.
But wherever it came from and whoever created it - our taste buds thank you!
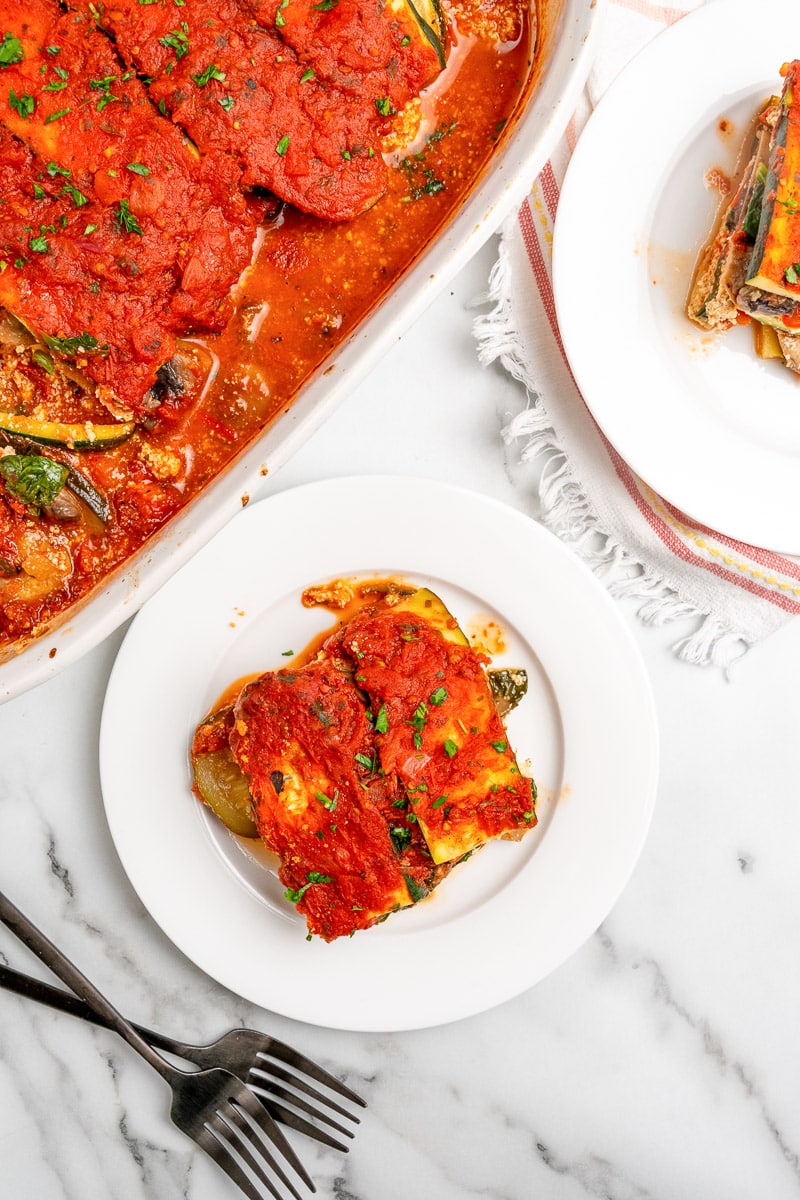
More Tasty Vegan Recipes
If you love this vegan zucchini lasagna, be sure to check out these other delicious plant based ideas:
Also worth trying: our Italian-style vegan sausage and peppers.
Also worth trying: our vegan creamy mushroom pasta.
Also worth trying: our vegan pot pie casserole.
Also worth trying: our homemade vegan pizza dough.
Also try: our Vegan Greek Pasta Salad.
Also try: our Zucchini With Mint.
- Vegan Zucchini Noodles with Vegan Bolognese Sauce
- Vegan Vodka Pasta
- 15+ Comforting Vegan Casserole Ideas
- For a fresh summer side, also try our tomato relish salad with grilled vegetables.
Recipe

Vegan Zucchini Lasagna
This vegan zucchini lasagna is light, healthy, and bursting with flavor from fresh veggies, tangy marinara, and creamy vegan ricotta. Yum!
Print
Pin
Save
Servings: servings
Ingredients
- 4 large zucchini
- 14 oz. firm tofu
- 2 tablespoons nutritional yeast
- 2 teaspoons italian seasoning
- 1 teaspoon salt
- Juice of half a lemon
- 1 tablespoon olive oil
- 1 onion chopped
- 1 bell pepper diced
- 3 cloves garlic minced
- 1 lb mushrooms quartered
- 4 cups baby spinach
- 3-4 cups tomato sauce
- Minced fresh basil optional
Instructions
- Preheat oven to 400 F
- Slice the zucchini lengthwise into thin strips, lay out on a paper towel and sprinkle with salt, allow to sit at least 15 minutes to draw some moisture out
- Meanwhile prepare the tofu ricotta. Combine the tofu, nutritional yeast, italian seasoning, salt and lemon juice in a food processor
- Blend until smooth and set aside

- In a large skillet over medium heat, add the oil followed by the onion and peppers and saute for 5-6 minutes, or until the onion is translucent
- Add the garlic and stir, then add the mushrooms and cook until the mushrooms are browned and the excess liquid has evaporated
- Add the spinach and allow to wilt
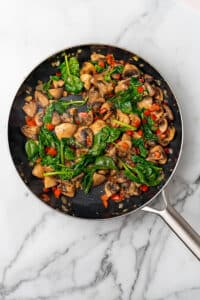
- Add a layer of sauce to the bottom of a 9x13 baking dish, then a layer of zucchini, followed by sauce, then half the vegetables, then half the vegan ricotta
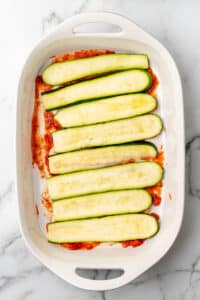
- Repeat with another layer of zucchini, followed by sauce, then half the vegetables, then half the vegan ricotta
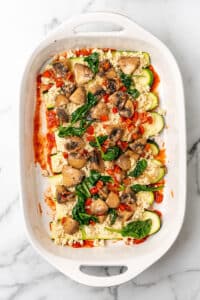
- Keep repeating with a layer of zucchini, sauce, remaining vegetables and remaining vegan ricotta
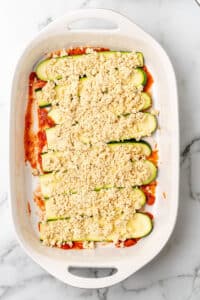
- Then fininsh with a final layer of zucchini and remaining sauce on top
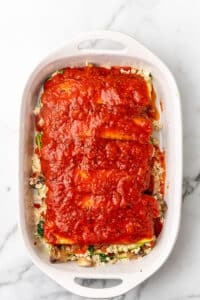
- Cover and bake in the oven for 45 minutes, or until bubbly

- Add the fresh minced basil and allow to sit for 10 minutes before slicing and serving
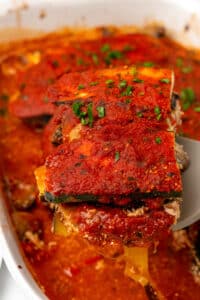
Nutrition (Estimate per Serving)
Calories: 175kcalCarbohydrates: 20gProtein: 14gFat: 7gSaturated Fat: 1gPolyunsaturated Fat: 3gMonounsaturated Fat: 3gSodium: 1003mgPotassium: 1190mgFiber: 7gSugar: 11gVitamin A: 3300IUVitamin C: 66mgCalcium: 162mgIron: 4mg
Vegan-ize any recipe!Grab our free vegan cheat sheet, packed with my favorite easy substitutions to make any recipe vegan.
Vegan Vodka Pasta

This vegan vodka pasta is my all time favorite pasta dish. Perfectly cooked rigatoni tossed in a savory and creamy vegan vodka sauce. Yum!
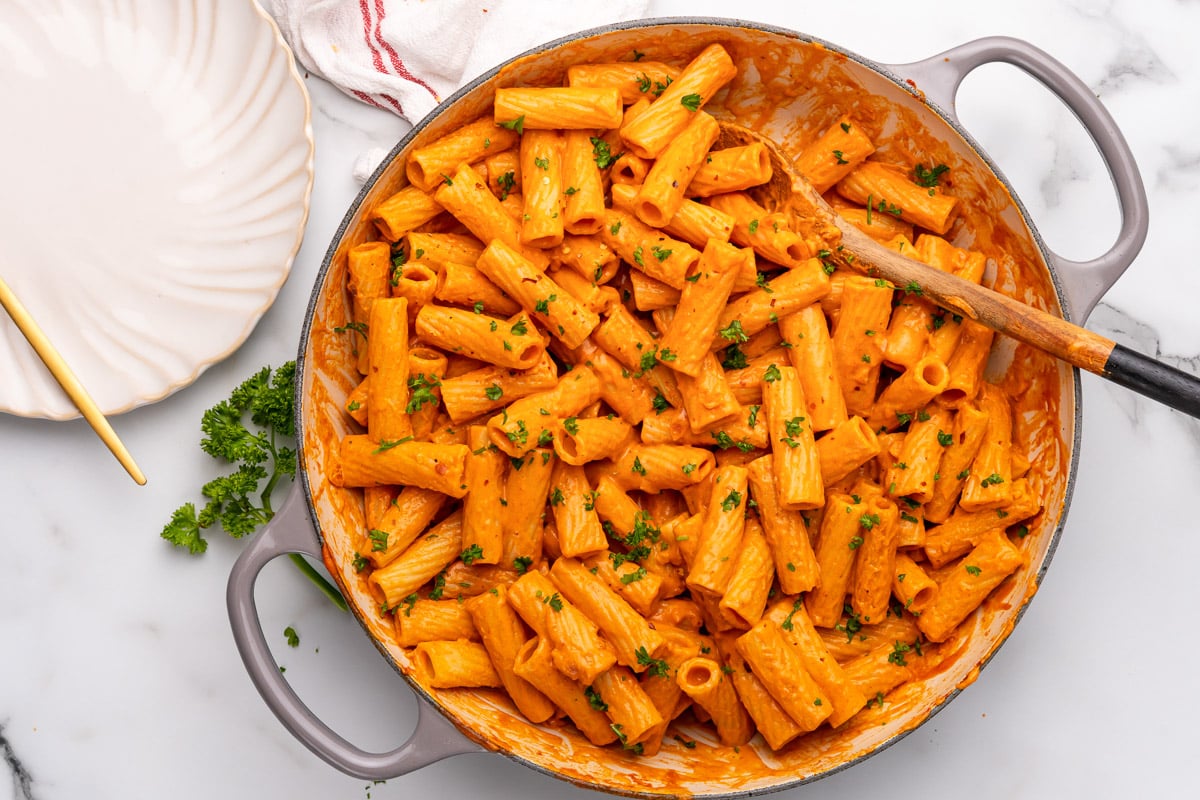
Growing up in an Italian family meant eating my fair share of pasta dishes. Ok, probably way more than my share. And I've traditional vodka pasta was always one of my favorites.
So I finally spent the time to figure out how to vegan-ize this traditional Italian recipe. And here it is - vegan vodka pasta!
The vegan vodka sauce is super rich and creamy thanks to some key ingredients like coconut milk and nutritional yeast. And I have to say - this is one darn good vegan pasta dish.
And while you're here, don't forget to grab a copy of my free vegan cheat sheet. It's packed with all my favorite substitutions to vegan-ize any recipe!
The Ingredients
The vegan vodka pasta is easy to make with simple ingredients that you probably already have in your pantry. Then just toss with your favorite pasta and mangia!
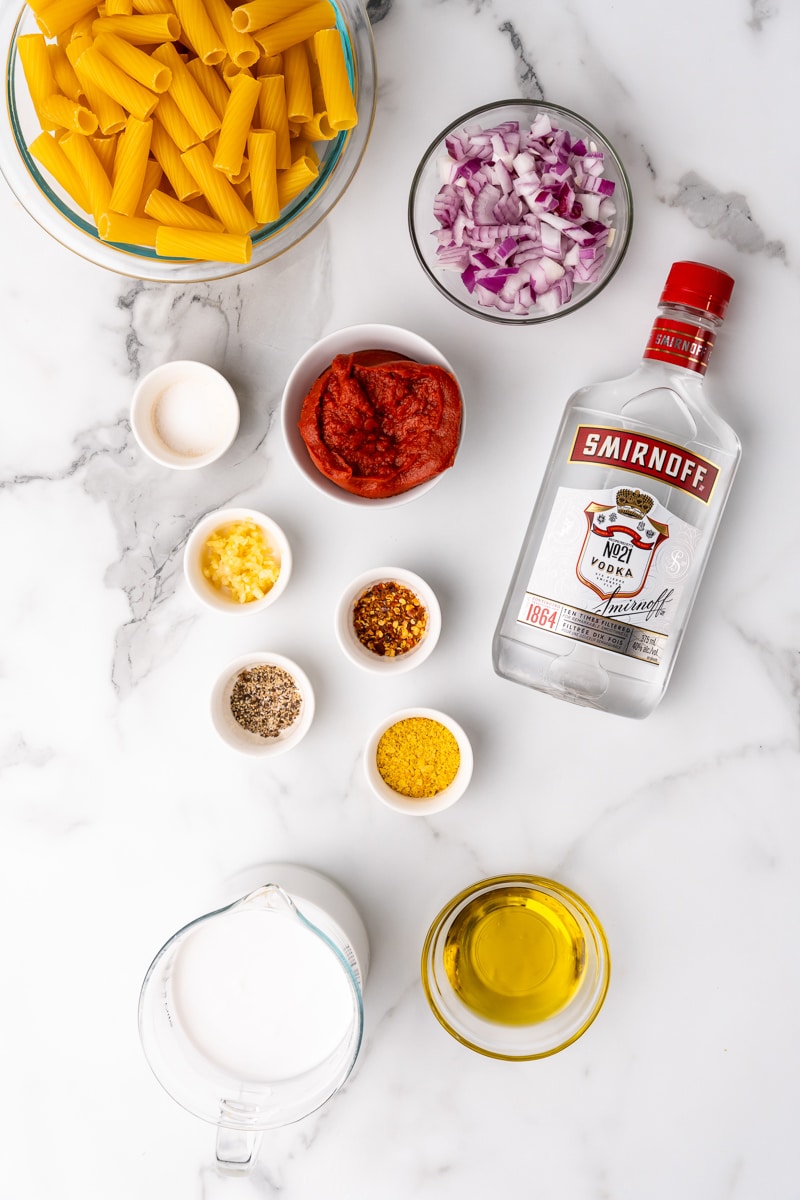
- Pasta of your choice. I used rigatoni!
- Vodka. Obviously!
- Red onion.
- Garlic.
- Crushed red pepper flakes.
- Tomato paste.
- Coconut milk. You want the canned variety - like this.
- Nutritional yeast.
- Fresh parsley. Optional, for a garnish.
- Olive oil, salt, and pepper.
See the recipe card below for detailed measurements and instructions.
How to Make Vegan Vodka Sauce - Step by Step
While this vegan vodka pasta tastes like it took all day to make, it's actually easy to throw together in about 20 minutes. Perfect for an easy weeknight meal!
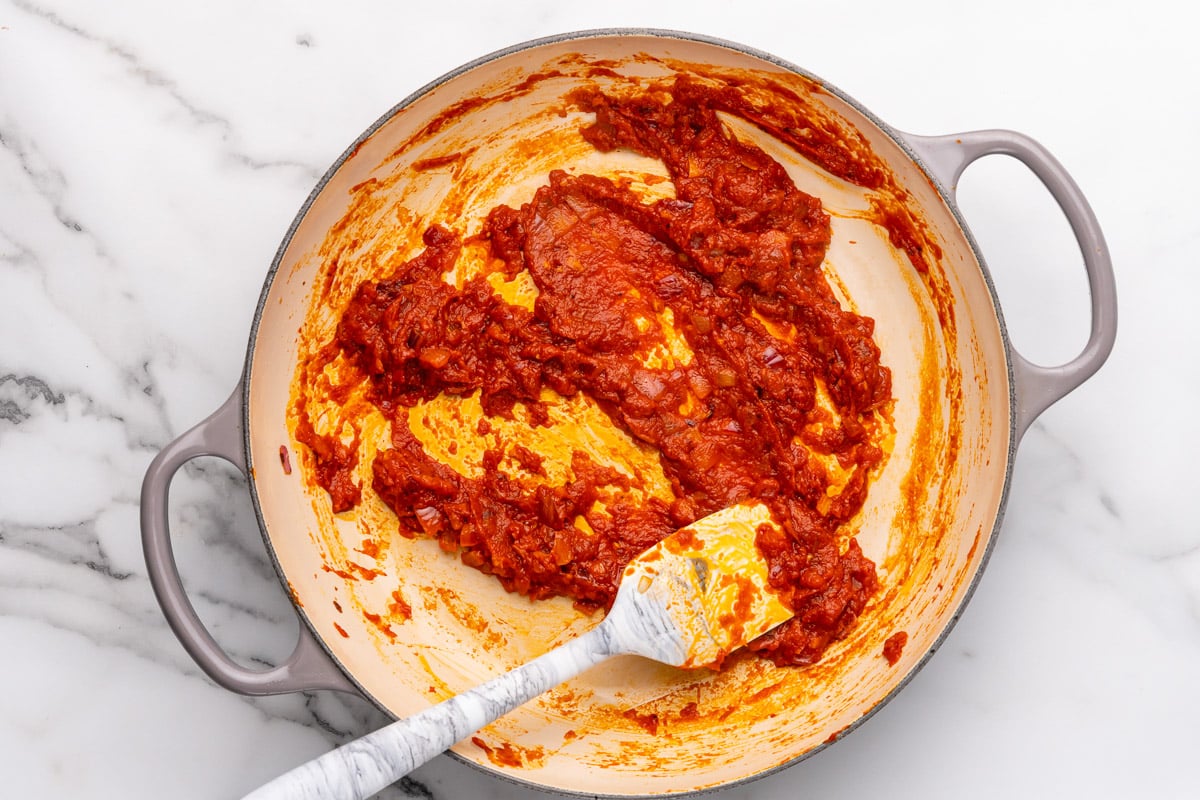
On the stovetop, sauté the onion, garlic, crushed red pepper, salt, and black pepper. Add the tomato paste.
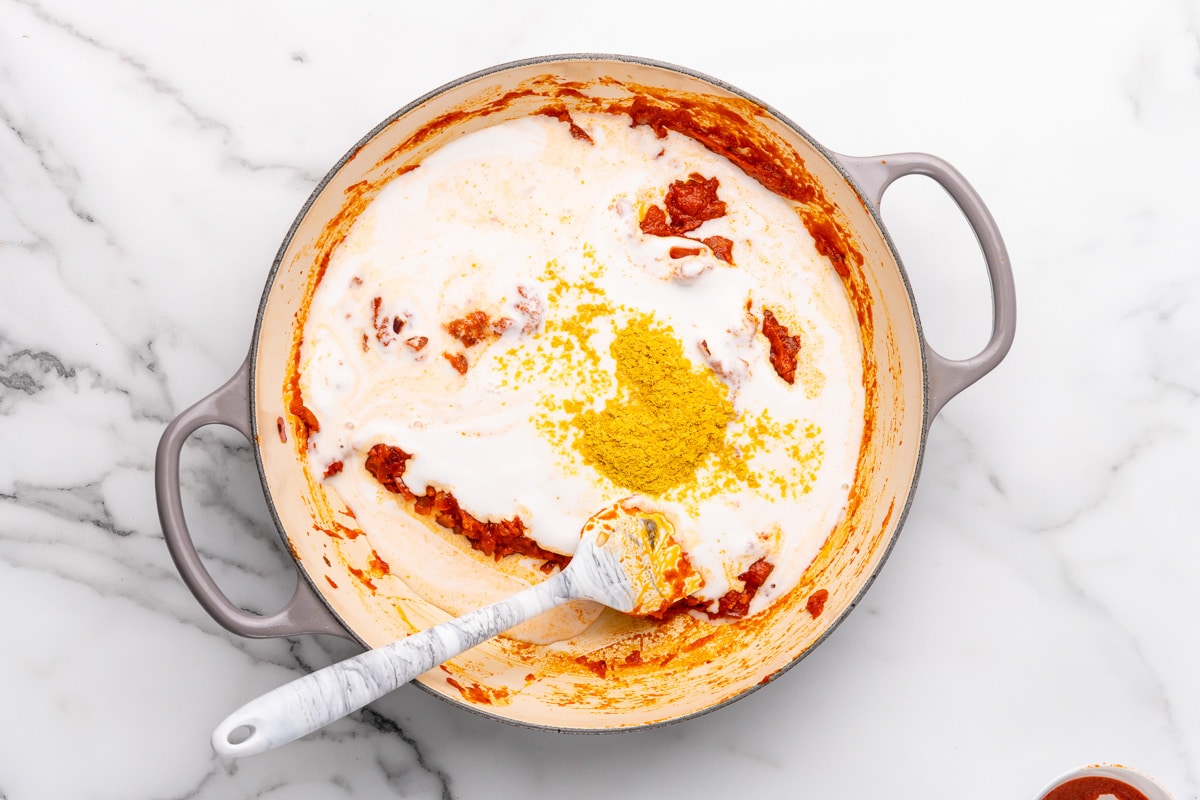
Add the vodka! Then stir in the coconut milk and nutritional yeast.
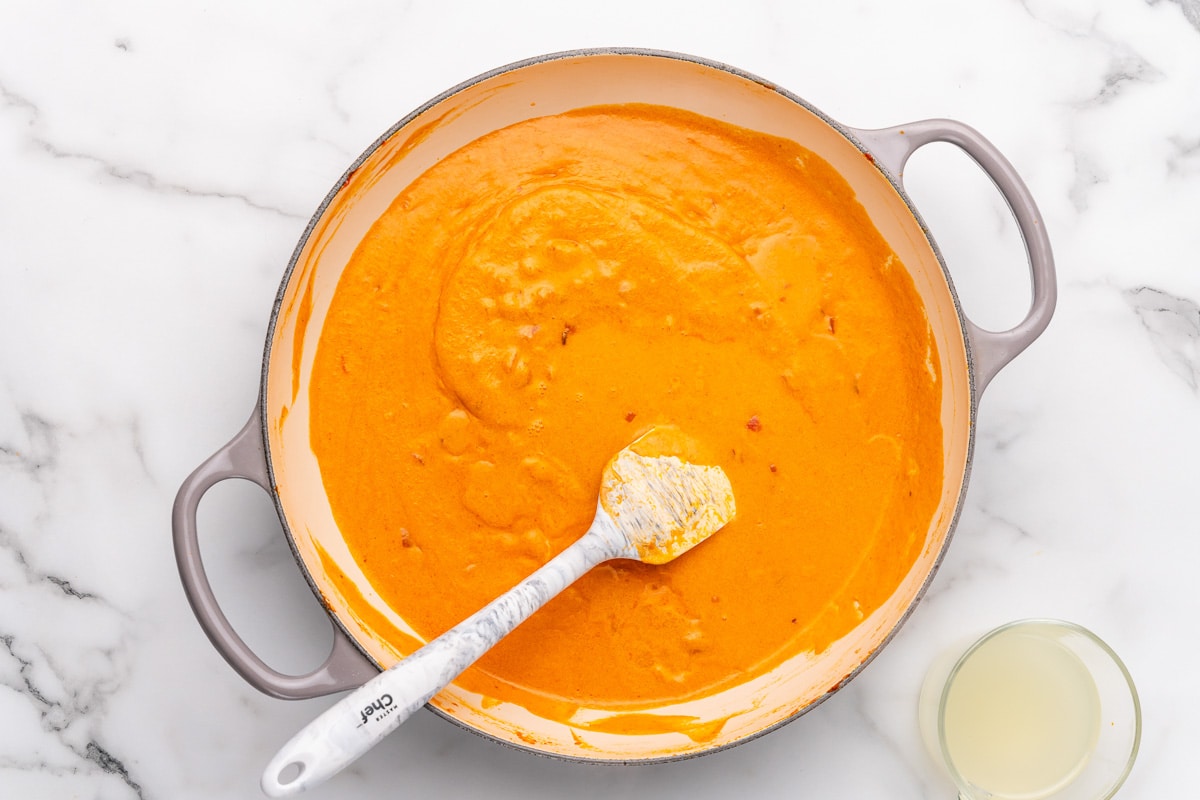
Stir until the vodka sauce is nice and creamy, and bring to a simmer.

Toss the vegan vodka sauce with your favorite pasta and enjoy!
And there you have it! A deliciously simple vegan vodka pasta that's ready in under 30 minutes. What's not to love?

Hint: While you can use any pasta of your choice, penne or rigatoni pasta is the most traditional choice. And it works well because the vodka sauce clings to all those little ridges!
Variations
Make it without vodka. You can omit the vodka from your vodka sauce, and you'll still end up with a delicious spicy, garlicky tomato sauce.
Make it gluten free. This vegan vodka pasta is gluten free when made with a gluten free pasta, like this chickpea pasta.
Add veggies. While a traditional vodka pasta doesn't contain any extras, you can make this dish a bit heartier by adding sauteed veggies like bell peppers, onions, or zucchini. You could even add chickpeas for a protein boost!
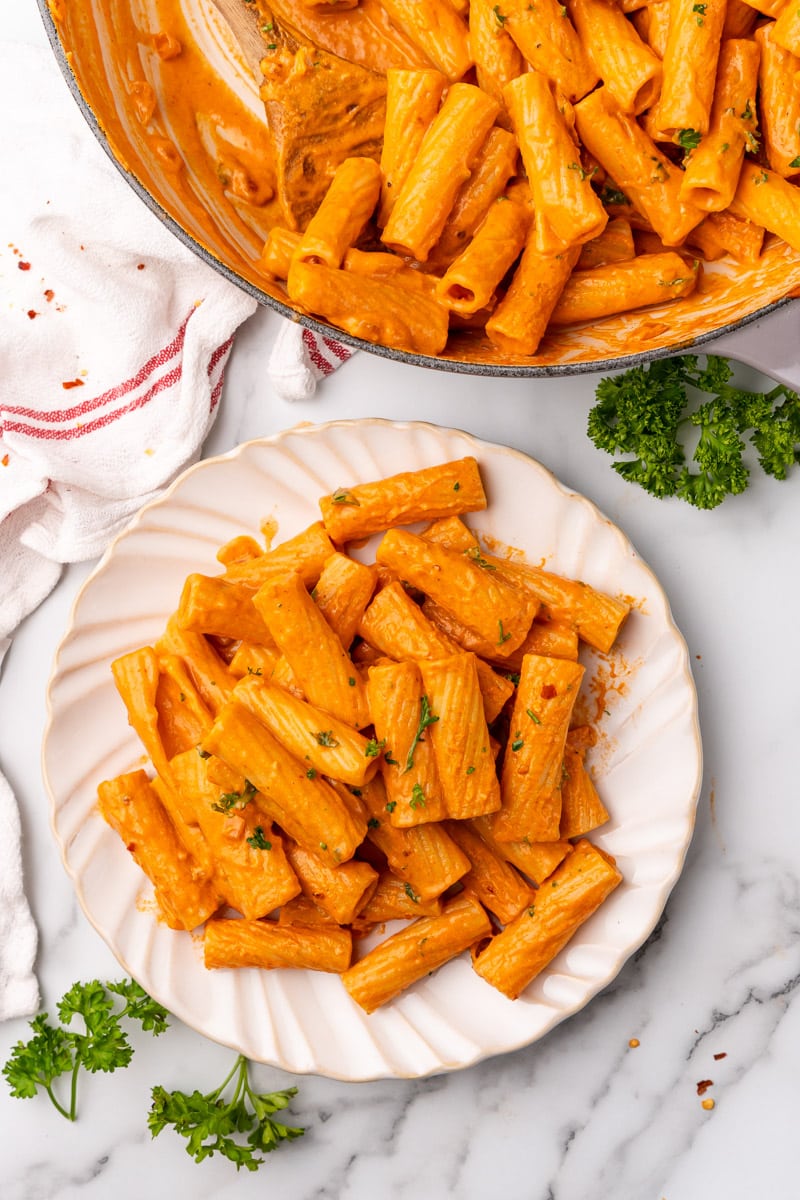
Storing Vodka Pasta
Store any leftover vodka pasta in the refrigerator for 3-5 days, in an airtight container. You can also freeze the vodka sauce for 2-3 months.
If freezing, freeze the sauce on its own in an airtight container. Then defrost, warm on the stovetop, and toss with cooked pasta.
What vodka should I use?
Any unflavored vodka will work just fine. It does not need to be fancy or expensive. But as with wine, I don't recommend cooking with anything you wouldn't be willing to drink!
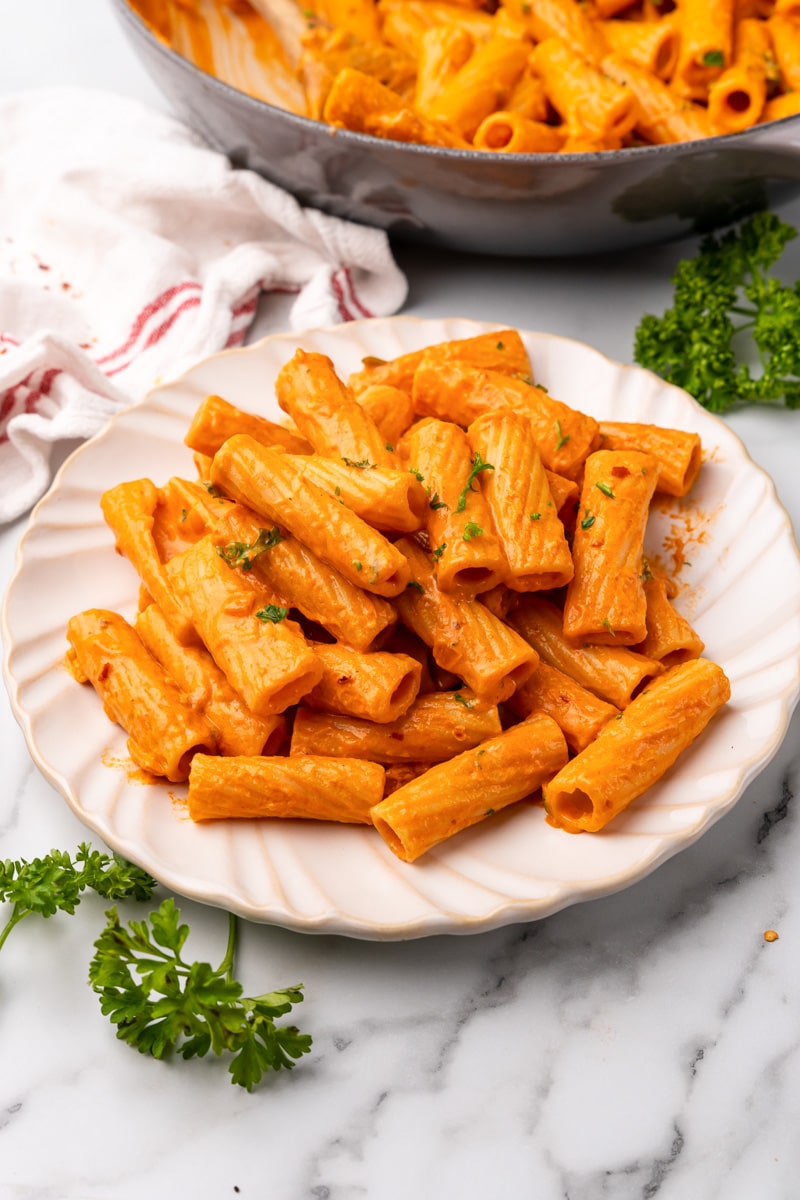
More Vegan Recipes
If you love this vegan vodka pasta, be sure to check out these other tasty recipes:
Recipe

Vegan Vodka Pasta
This vegan vodka pasta is my all time favorite pasta dish. Perfectly cooked rigatoni tossed in a savory and creamy vegan vodka sauce. Yum!
Print
Pin
Save
Servings: servings
Ingredients
- 1 lb pasta I used rigatoni
- 2 tablespoons olive oil
- ½ red onion small, diced
- 3 cloves garlic minced
- ½ teaspoon salt
- ¼ teaspoon black pepper
- ¼ teaspoon red pepper flakes
- 6 oz tomato paste canned
- ¼ cup vodka
- 14.5 oz coconut milk canned
- 1 tablespoon nutritional yeast
- ½ cup reserved pasta water
- Fresh chopped parsley optional, or garnish
Instructions
- Bring a large pot of salted water to a boil, add the rigatoni and cook until al dente; drain but reserve ½ cup of the cooking water for use in the sauce
- While the pasta cooks, get started on the sauce by using a large skillet or pot over medium heat, then adding olive oil, red onion, garlic, salt, and peppers and cooking, stirring frequently, until the onions begin to soften
- Add the tomato paste and cook an additional 2-3 minutes
- Pour in the vodka and allow the alcohol to evaporate, about 4-5 minutes
- Stir in the coconut milk and nutritional yeast, and bring to a light simmer, then slowly add the pasta water until desired consistency has been reached
- Serve the sauce over the noodles and garnish with fresh parsley if desired
Nutrition (Estimate per Serving)
Calories: 386kcalCarbohydrates: 49gProtein: 10gFat: 15gSaturated Fat: 10gPolyunsaturated Fat: 1gMonounsaturated Fat: 3gSodium: 325mgPotassium: 491mgFiber: 3gSugar: 4gVitamin A: 343IUVitamin C: 6mgCalcium: 33mgIron: 3mg
Vegan-ize any recipe!Grab our free vegan cheat sheet, packed with my favorite easy substitutions to make any recipe vegan.
Sweet Potato Lentil Soup (Vegan & Vegetarian)

This Sweet Potato Lentil Soup is loaded with healthy flavor from hearty sweet potatoes, protein-packed lentils, and fresh tomatoes. Plus it's vegetarian, vegan, and ready in under an hour!
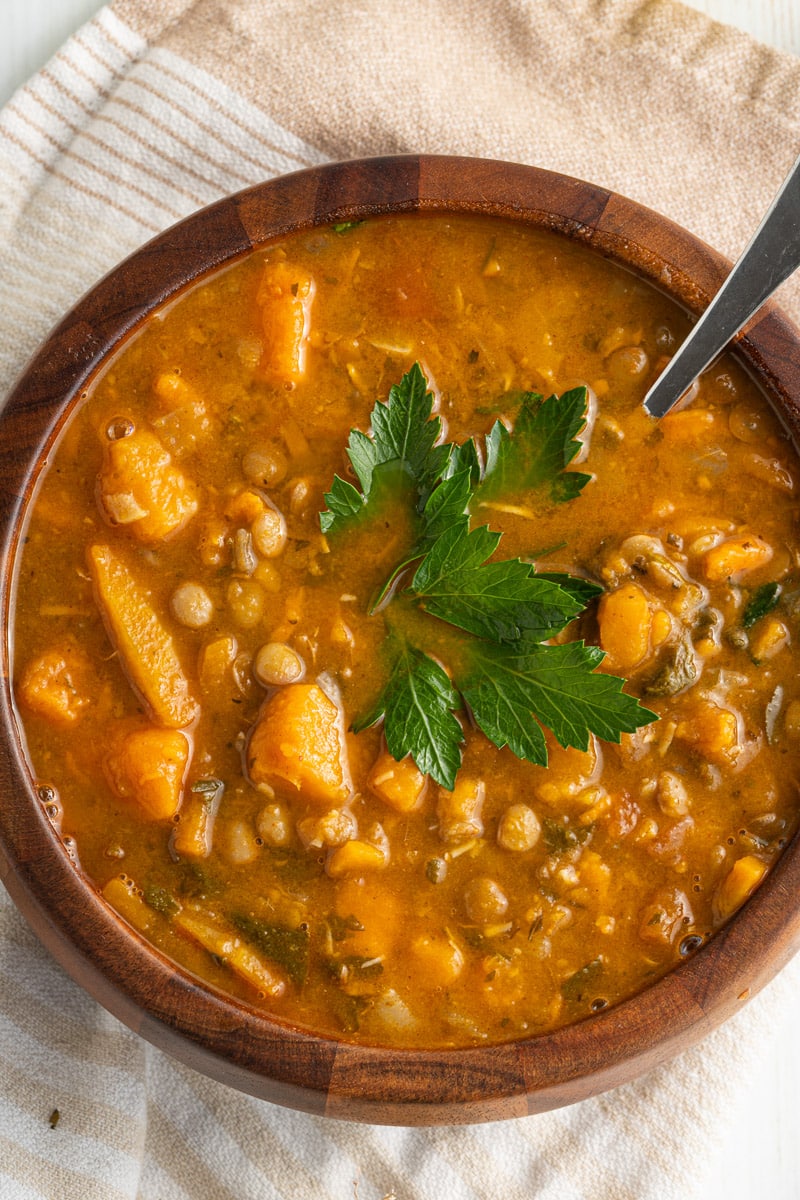
This vegan soup is one you can make and use to meal prep for lunches and dinners. Learn how easy it is to make this sweet potato soup.
Another delicious soup is this sweet potato chili, it is loaded with flavor. You might also want to try out my vegan stew. For a tasty side to pair with your soup try my quinoa bread rolls.
This Sweet Potato Lentil Soup Recipe Is...
- Vegan
- Vegetarian
- Dairy Free
- Nutrient Rich
- Meal Prep Friendly Recipe
How to Make Lentil and Sweet Potato Soup
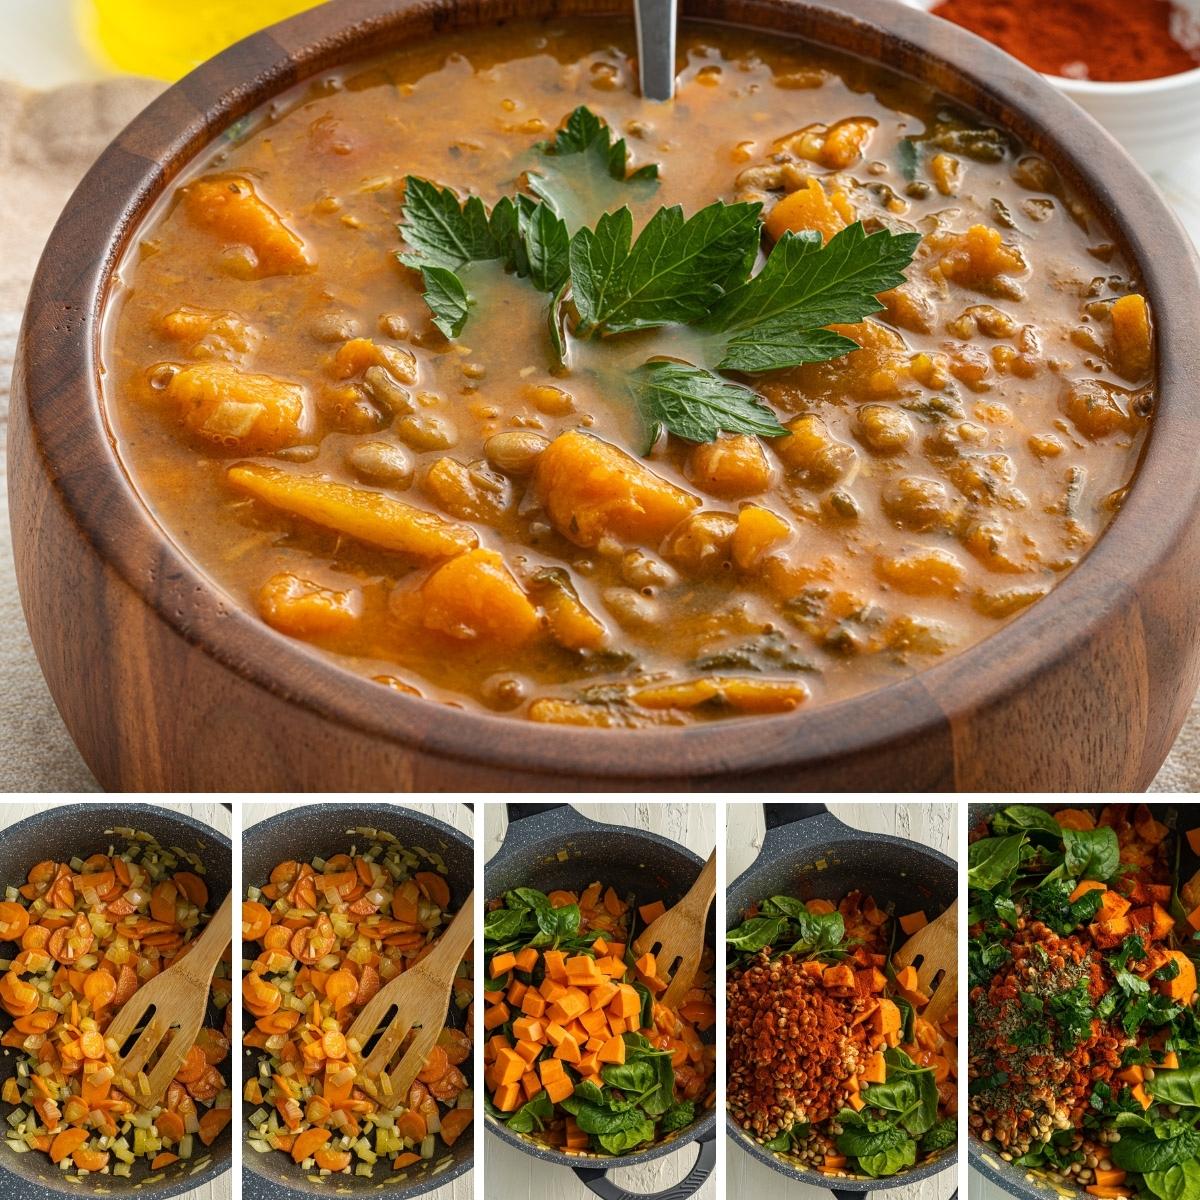
Full directions for this vegan lentil soup are in the printable recipe card at the bottom of the post. This is a quick walk through.
- Start by heating oil in a pot on the stove. Add in the carrots and saute till they are softened.
- Then add in the onion and garlic cooking until the onions are transluscent.
- Next add in the tomatoes and bay leaves and cook for a few minutes.
- Add in remaining ingredients, and bring the soup to a boil. Then reduce and simmer for 30 minutes or until the potatoes are fork tender.
- Serve and enjoy.
Helpful Tips for Sweet Potato Lentil Soup
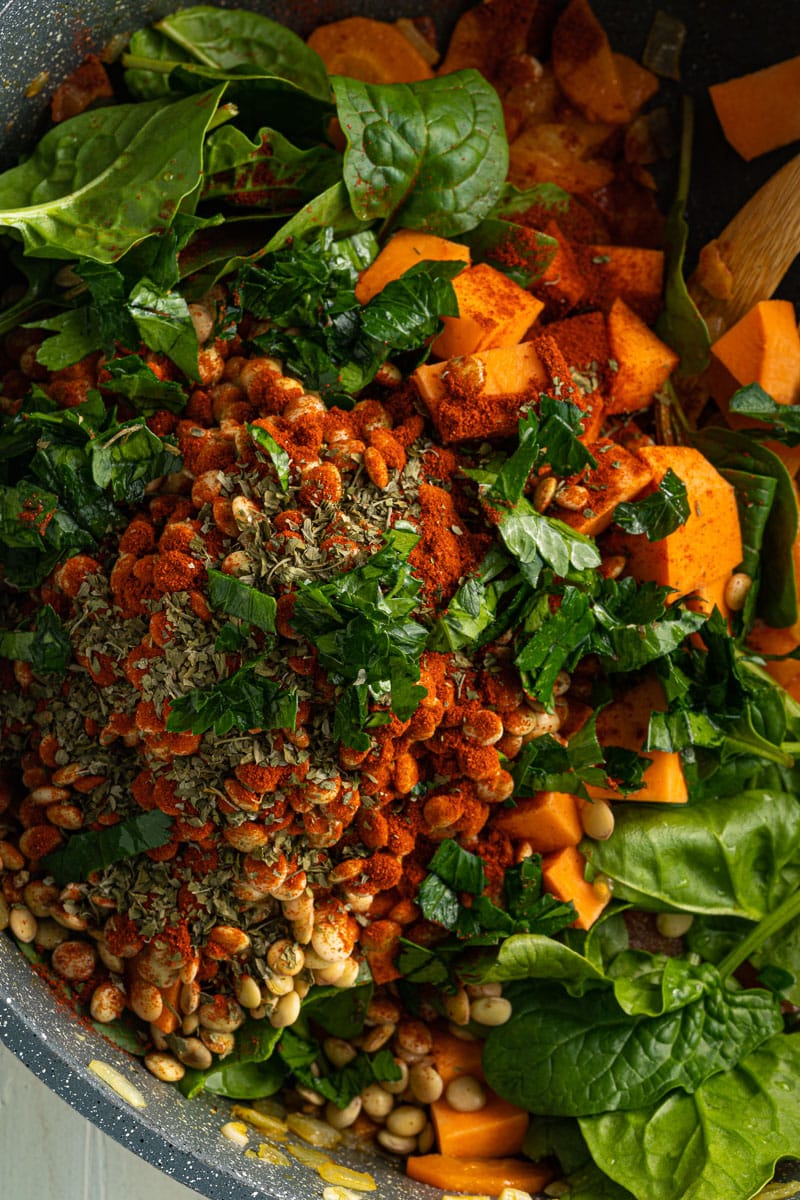
Heavy Duty Pot
I recommend using a heavy duty pot like a Dutch oven as it will create an even heating on the soup. If you use a lighter pot you will find that hot spots can be created and the overall doneness of the soup can vary.
Cutting Up Vegetables
Aim to cut up your vegetables into bite-size pieces. It is also important to cut your vegetables into evenly cut pieces. That way all the potatoes and carrots are cooked evenly.
Variations To Sweet Potato Lentil Soup
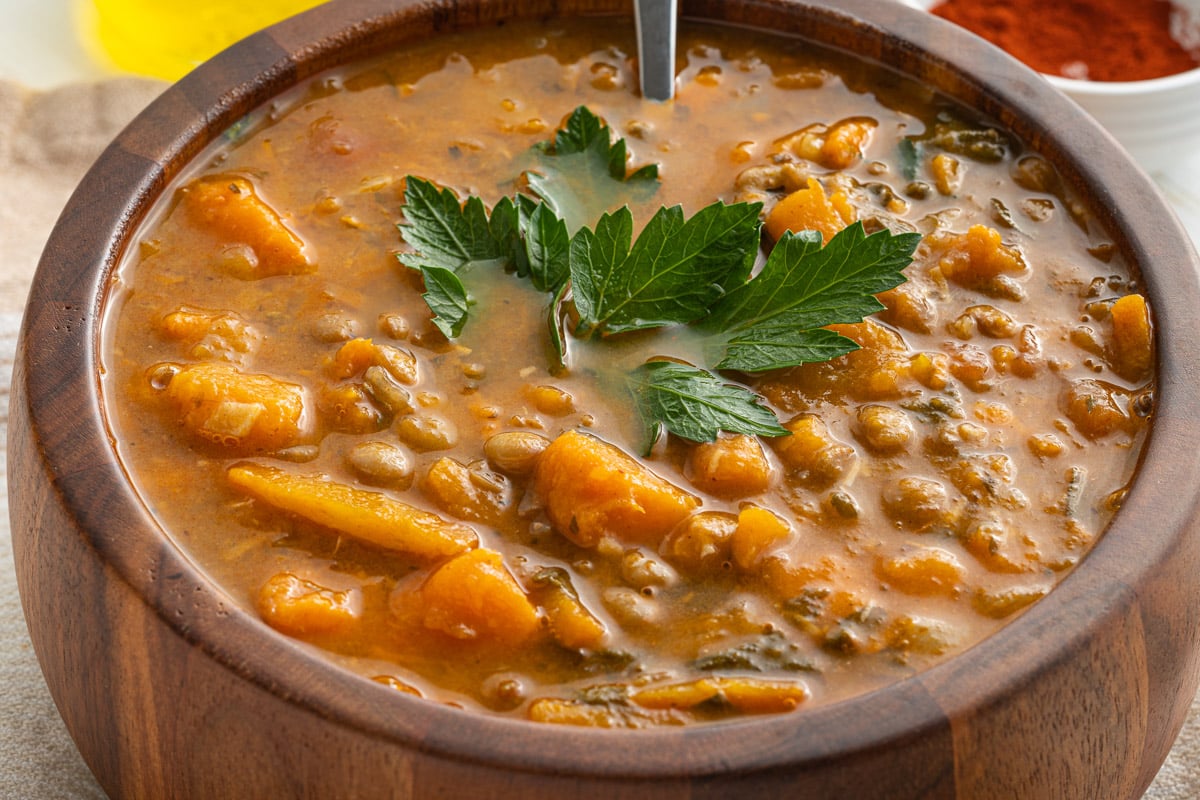
Add More Spices and Herbs
As you can see I used just a handful of spices and herbs for this recipe. Feel free to adjust the spices to fit your flavor preference if you would like. This would also be delicious with some garam masala or curry powder, or some chili powder for extra spice. If you love those Indian-inspired spices, you'll also enjoy our vegan chana masala, our easy vegan dal tadka, or our Madras lentils.
Mix up the Vegetables
You are welcome to use any vegetables of your choosing to flavor your soup. You could peel and dice up a Russet or Yukon Gold potato. Or add in some corn or other vegetables to add more flavor. Use whatever is in season!
Try Kale
Instead of using spinach you could swap with kale. I prefer the flavor of spinach, but kale is a wonderful substitute and also super nutritious.
Sweet Potato Lentil Soup FAQs
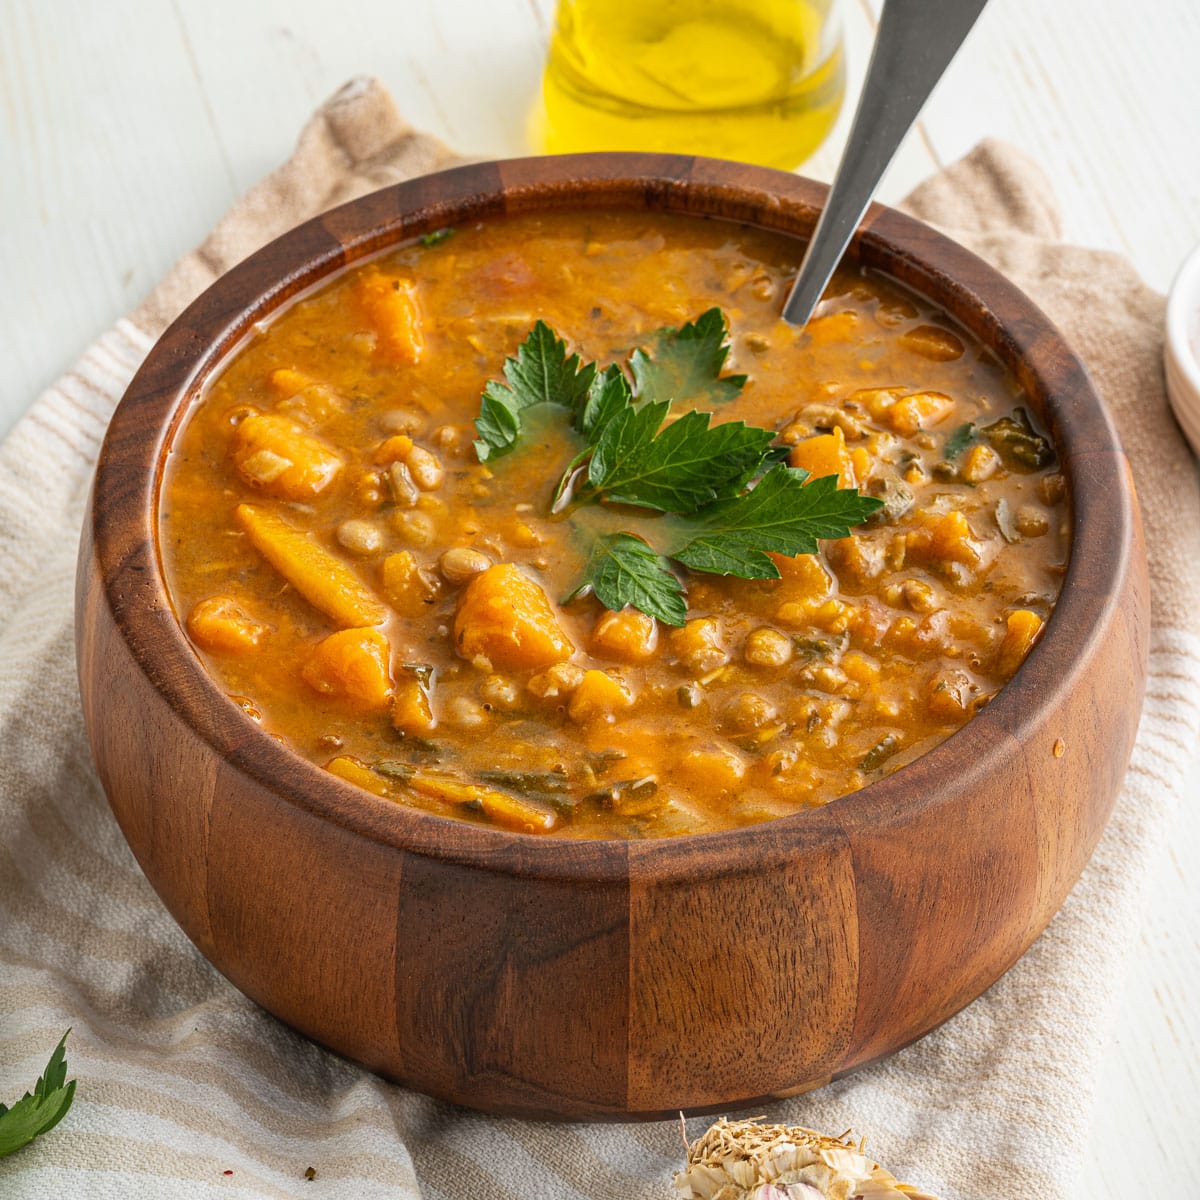
How to make the soup creamier?
You can take out some of the soup and blend it up to puree it. This will then be poured back into the pot and stir to thicken. Or you can add in some coconut milk to add a creamy texture to the soup if you want.
How to store the sweet potato lentil soup?
This soup can be stored in the fridge in an airtight container for up to a week. This soup is wonderful for meal prepping for lunches or dinners.
Best way to warm up lentil and sweet potato soup?
You can warm it up in the microwave or even on the stovetop in a pan. Just heat on low heat and stir often or it will burn.
More Tasty Recipes
If you love this Lentil Sweet Potato Soup, be sure to check out these other delicious recipes:
Also try: our Okra Masala Bindi Bhaji.
Also try: our Masala Lentils Sabut Masoor.
Recipe

Sweet Potato Lentil Soup (Vegan & Vegetarian)
This Sweet Potato Lentil Soup is loaded with healthy flavor from hearty sweet potatoes, protein-packed lentils, and fresh tomatoes. Plus it's vegetarian, vegan, and ready in under an hour!
Print
Pin
Save
Servings: servings
Ingredients
- 1 cup dry lentils rinsed and drained
- 1 yellow onion peeled and finely chopped
- 1 sweet potato large, peeled and chopped into small cubes
- 2 carrots peeled and sliced
- 6 cups vegetable broth
- 2 tablespoon olive oil
- 3 garlic cloves minced
- 1 cup fresh spinach roughly chopped
- 2 to matoes chopped
- ½ teaspoon smoked paprika
- 4 bay leaves
- 1 teaspoon salt
- ½ teaspoon ground black pepper
- 1 teaspoon dried oregano
- ¼ cup fresh parsley chopped
Instructions
- Heat the olive oil in a large pot and add the sliced carrots. Sauté until slightly golden and softened, about 4-5 minutes.
- Add the onion and garlic and continue cooking for another 4-5 minutes. Until onion begins to soften and turn translucent.

- Add the chopped tomatoes and bay leaves. Cook for another 3-5 minutes.
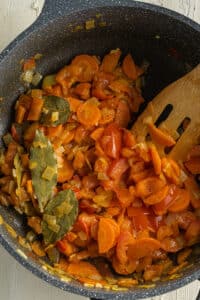
- Add the sweet potato, fresh spinach leaves, lentils, smoked paprika, dried oregano, fresh parsley and vegetable broth.
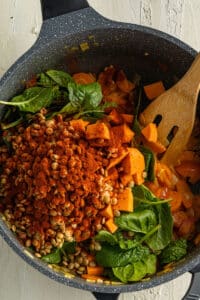
- Bring the soup to a boil, then reduce heat and simmer for 30 minutes, or until the potatoes are tender.

Nutrition (Estimate per Serving)
Calories: 342kcalCarbohydrates: 55gProtein: 15gFat: 8gSaturated Fat: 1gPolyunsaturated Fat: 1gMonounsaturated Fat: 5gSodium: 2059mgPotassium: 1020mgFiber: 19gSugar: 11gVitamin A: 15552IUVitamin C: 24mgCalcium: 94mgIron: 5mg
Vegan-ize any recipe!Grab our free vegan cheat sheet, packed with my favorite easy substitutions to make any recipe vegan.
Sweet Potato Black Bean Chili
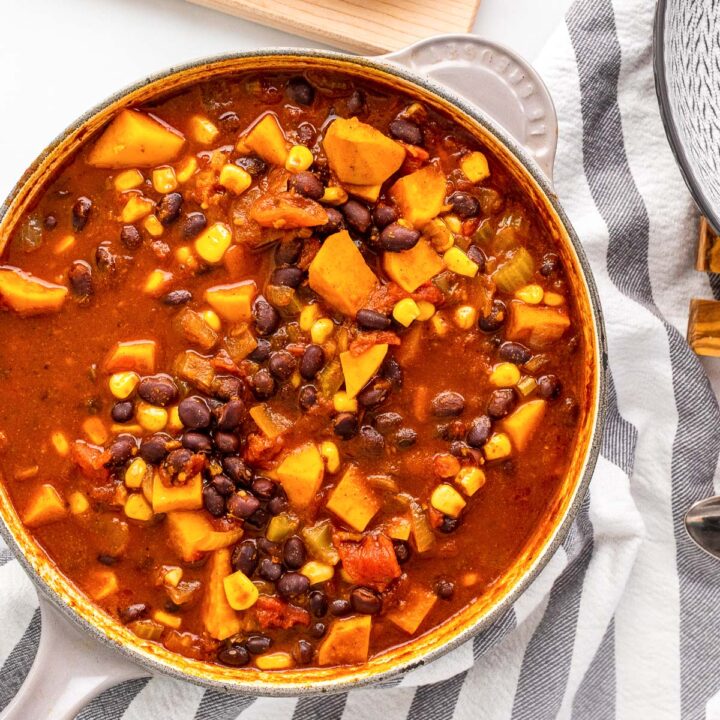
This Sweet Potato Black Bean Chili is loaded with healthy flavors from tender sweet potatoes, hearty black beans, and smoky spices. Plus, it's 100% vegan and easy to make in under an hour.
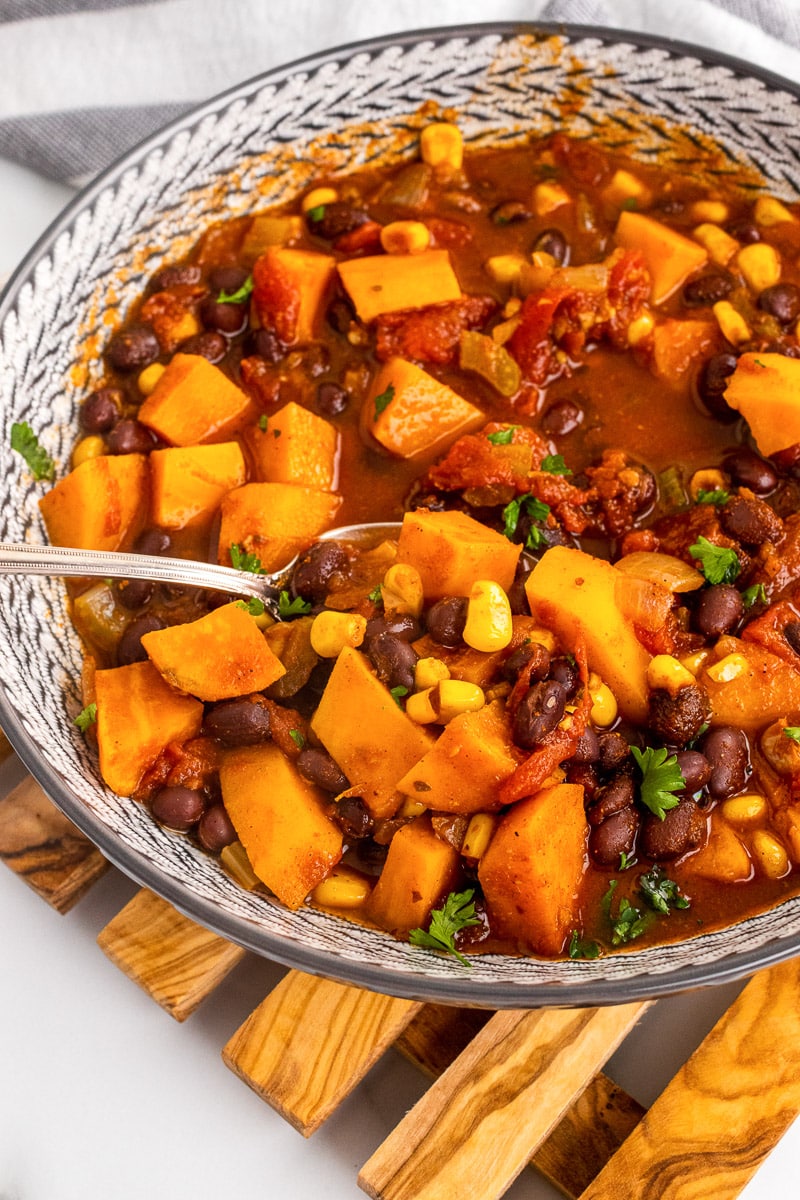
If there's one thing I always crave as soon as the weather starts cooling down, it's a big pot of chili. There's just something about a piping hot one-bowl dinner that makes me want to cozy up in front of the fireplace.
And this Sweet Potato Black Bean Chili is one of my all time favorites. It's so easy to throw together, packed with delicious flavors, and it's great for meal prep too!
This Sweet Potato Black Bean Chili recipe is...
- Full of flavor
- Packed with smoky heat
- Healthy
- Plant-based
- Vegetarian
- Good enough to impress a crowd
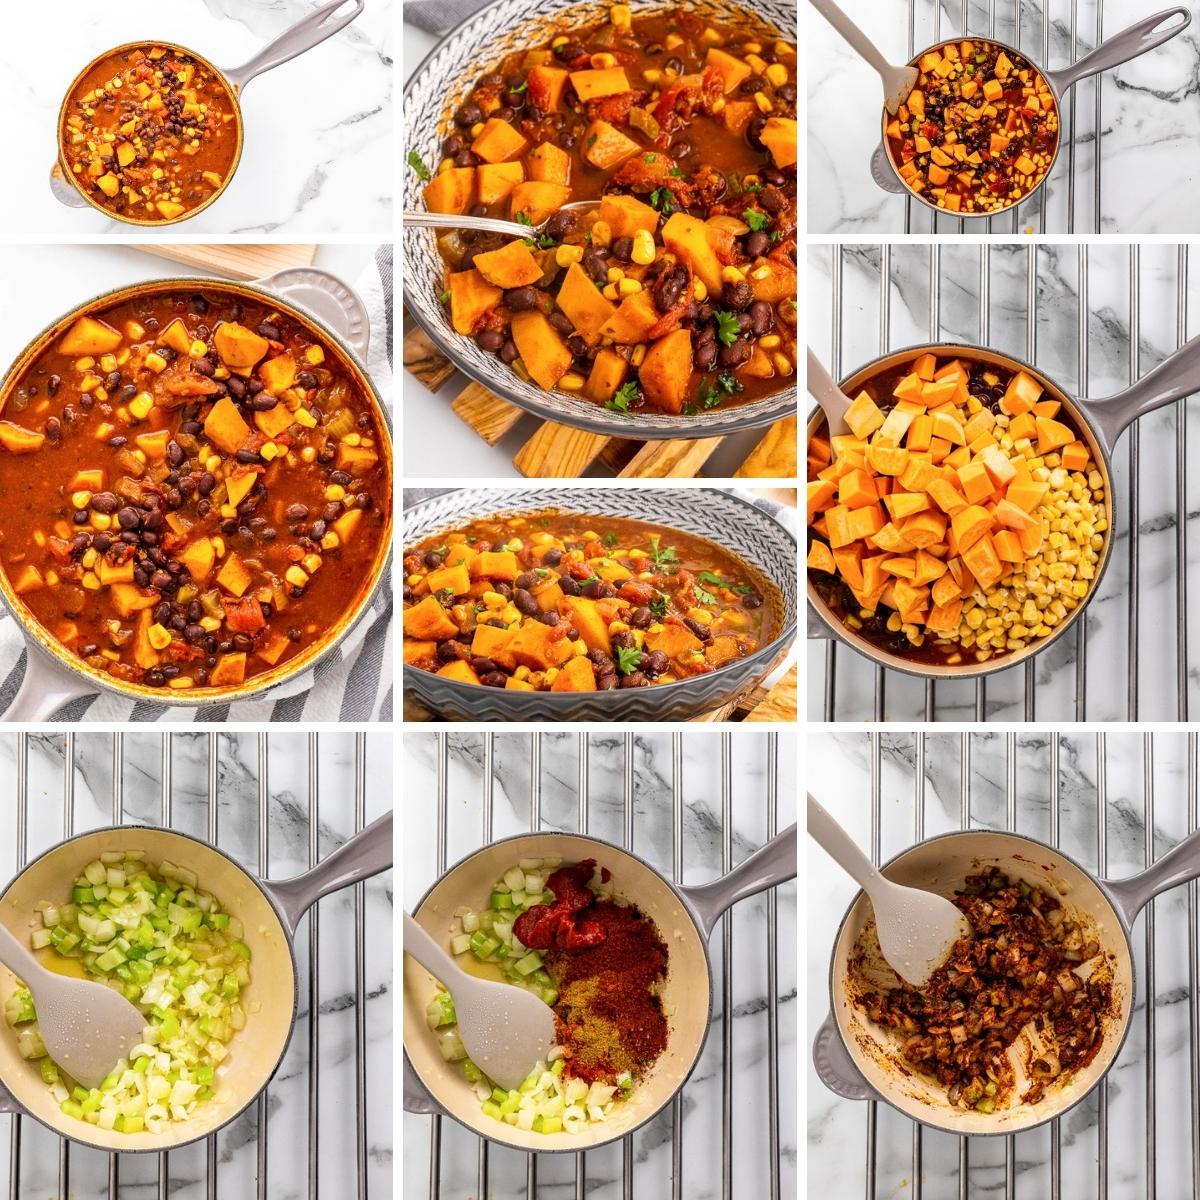
Helpful Tips
Dice your sweet potatoes evenly. This ensures they cook at the same rate and don't turn to mush. Aim for bite-sized pieces - not too chunky, not too small.
Don't skip the sauté. Cooking the onions, garlic, celery, and spices at the start builds a flavorful base. Give the spices a minute or two to bloom in the oil before adding liquids - it makes a difference.
Add broth gradually. Depending on how thick or soupy you like your chili, you can start with less broth and add more as it simmers. It's easier to thin it out than to fix a watery chili.
Let it simmer. Even though the chili comes together quickly, giving it at least 20-30 minutes to simmer helps the flavors meld together and the sweet potatoes fully soften.
Taste and adjust. Chili is one of those recipes that begs for a final taste test. Add more salt, a splash of lime juice, or a dash of hot sauce to finish - whatever makes it pop for you.
Meal Prep, Storing & Freezing Leftovers
This chili holds up like a champ, which makes it perfect for meal prep or cooking once and eating all week.
In the fridge: Store cooled chili in an airtight container for up to 5 days. The flavors actually get better over time, so leftovers are a win. Reheat on the stovetop over medium heat or in the microwave until warmed through.
In the freezer: Let the chili cool completely before transferring it to freezer-safe containers or resealable bags (lay them flat for easy stacking). It'll keep for up to 3 months. Thaw overnight in the fridge, then reheat as usual.
Pro tip: If you're freezing the chili in portions, label with the date and serving size so you're not guessing later. And leave a little space at the top of the containers - liquids expand as they freeze.
Serving Suggestions
This chili is hearty enough to stand on its own, but a few simple add-ons can take it from a basic bowl to something a little more fun (or dinner party-worthy, if that's your thing).
- Add Toppings: Classic chili toppings work great here - think avocado slices, a dollop of vegan sour cream or plain dairy-free yogurt, dairy-free cheese shreds, chopped cilantro, green onions, jalapeño slices, or a squeeze of lime juice for brightness.
- Cornbread on the side: You can't go wrong with a warm piece of vegan cornbread (or corn chips if you're keeping it casual). It's the perfect contrast to the smoky-sweet chili.
- Over rice or quinoa: Stretch your servings by spooning the chili over cooked grains. It makes for a super satisfying, protein-packed meal.
- Stuffed in a baked potato: For a comfort food twist, load it into a baked russet or sweet potato and pile on your favorite toppings.
- Taco night twist: For a light summery alternative, also try our fresh tomato and corn soup. Use the chili as a filling for tacos or burritos - or try swapping in this vegan walnut taco meat for a heartier, protein-packed version. Especially good with shredded lettuce, diced tomatoes, and a little hot sauce.
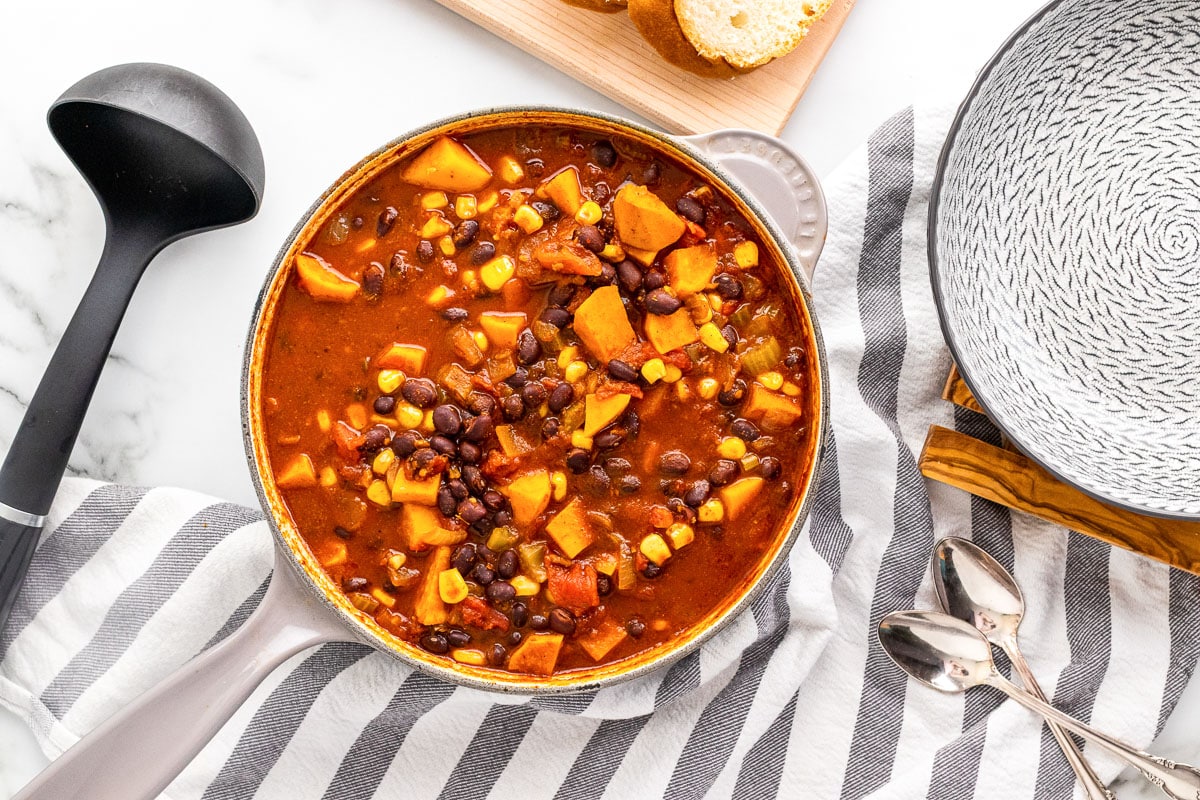
Fun Variations to Try
Add greens: Stir in a few handfuls of chopped kale, spinach, or Swiss chard during the last 5 minutes of cooking. It's an easy way to add color and a boost of healthy greens.
Make it spicier: If you like heat, add a chopped chipotle pepper in adobo sauce, a pinch of cayenne, or extra jalapeño. You can also finish each bowl with your favorite hot sauce.
Use different beans: No black beans? No problem. Pinto beans, kidney beans, or even chickpeas all work well here - or mix a few together for a little variety.
Bulk it up with grains: Stir in cooked quinoa, brown rice, or bulgur for an even heartier chili. Lentils would also be a great addition. It's especially great if you're serving a crowd or stretching leftovers.
Try roasted sweet potatoes: For extra flavor, roast the sweet potatoes in the oven before adding them to the chili. It adds a slightly caramelized edge and changes the texture in a good way.
Make it smoky: Adding a dash of smoked paprika or a splash of liquid smoke can deepen the flavor if you want a more pronounced smoky note without adding spice.
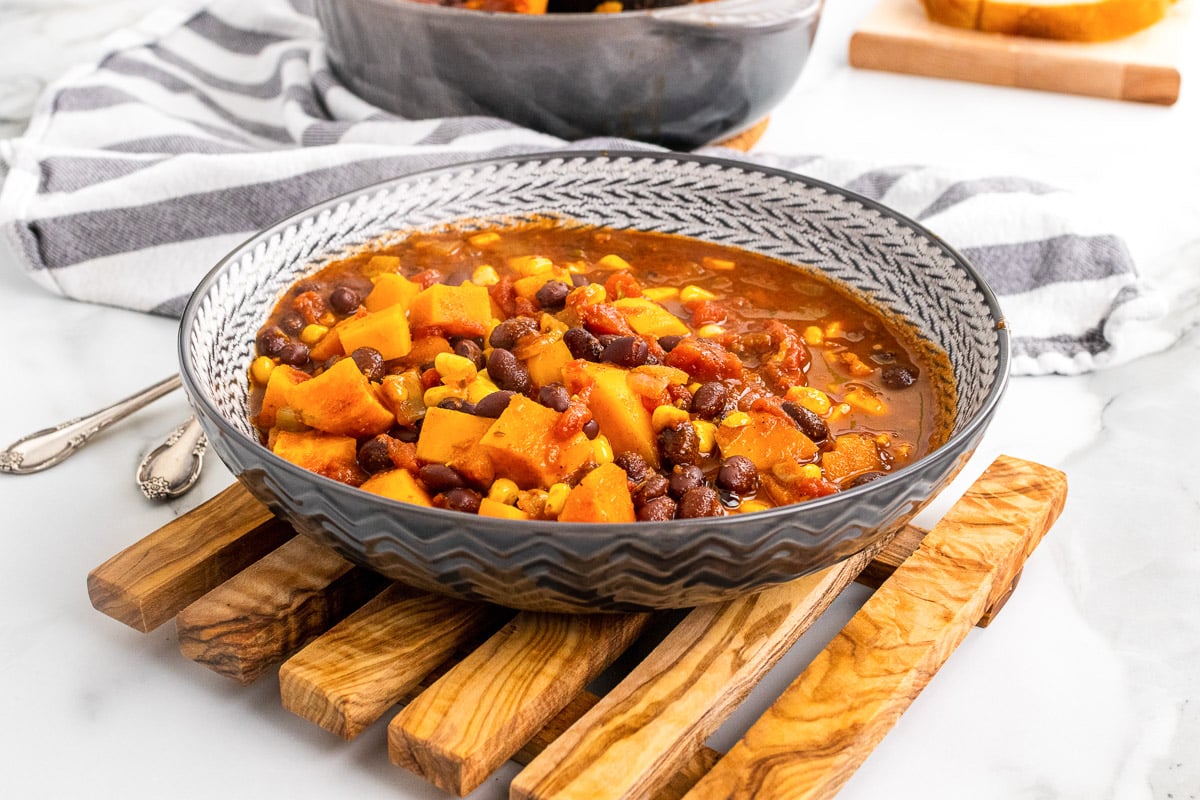
More Vegan Recipes
If you're on the lookout for some other hearty, vegetarian dinner ideas, consider trying a few of our favorites:
- Old-Fashioned Vegan Stew
- Portobello Mushroom Steak
- Marinated Mushrooms with Wild Rice
- Smoky Lentil and Sweet Potato Chili
Recipe
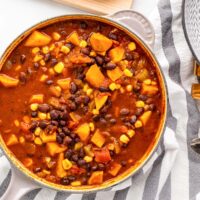
Sweet Potato Black Bean Chili
This Sweet Potato Black Bean Chili is loaded with healthy flavors from tender sweet potatoes, hearty black beans, and smoky spices. Plus, it's vegan and vegetarian friendly!
Print
Pin
Save
Servings: servings
Ingredients
- 2 tablespoon olive oil
- 1 onion peeled and diced
- 3 cloves garlic peeled and minced
- 1 stalk celery minced
- 2 tablespoon tomato paste
- 2 tablespoon chili powder
- 2 teaspoon dried oregano
- 1 teaspoon ground cumin
- 1 teaspoon paprika
- 1 teaspoon salt
- 15 oz black beans canned, rinsed and drained
- 14.5 oz diced tomatoes with chilies
- 1 ½ cups sweet potato peeled and diced,
- 1 cup corn kernels fresh or frozen
- 1 cup vegetable broth homemade or store bought
Instructions
- In a large pot, heat olive oil over medium heat. Add onion, garlic, and celery. Cook until veggies start to soften, about 4-5 minutes.

- Add in tomato paste, chili powder, oregano, cumin, paprika, and salt and cook an additional 1-2 minutes.

- Stir in the black beans, diced tomatoes, sweet potato, corn, and vegetable broth.

- Bring to a boil. When it reaches a boil, reduce heat to a simmer.
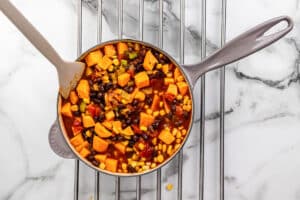
- Simmer for 45 minutes, or until the sweet potatoes are softened.
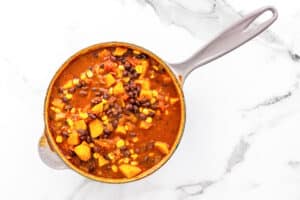
Nutrition (Estimate per Serving)
Calories: 221kcalCarbohydrates: 36gProtein: 9gFat: 6gSaturated Fat: 1gPolyunsaturated Fat: 1gMonounsaturated Fat: 4gSodium: 719mgPotassium: 701mgFiber: 10gSugar: 6gVitamin A: 5841IUVitamin C: 12mgCalcium: 86mgIron: 4mg
Vegan-ize any recipe!Grab our free vegan cheat sheet, packed with my favorite easy substitutions to make any recipe vegan.
Old-Fashioned Vegan Stew
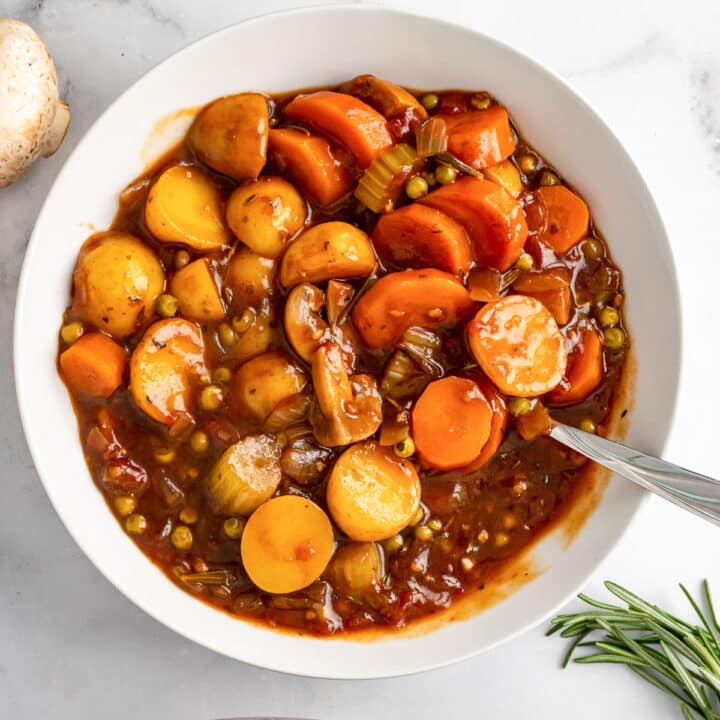
This Old-Fashioned Vegan Stew is thick, hearty, and comforting. It's loaded with tons of veggies and smothered in a thick, creamy, savory broth. This vegan stew is great for dinner and tastes delicious reheated the next day too.
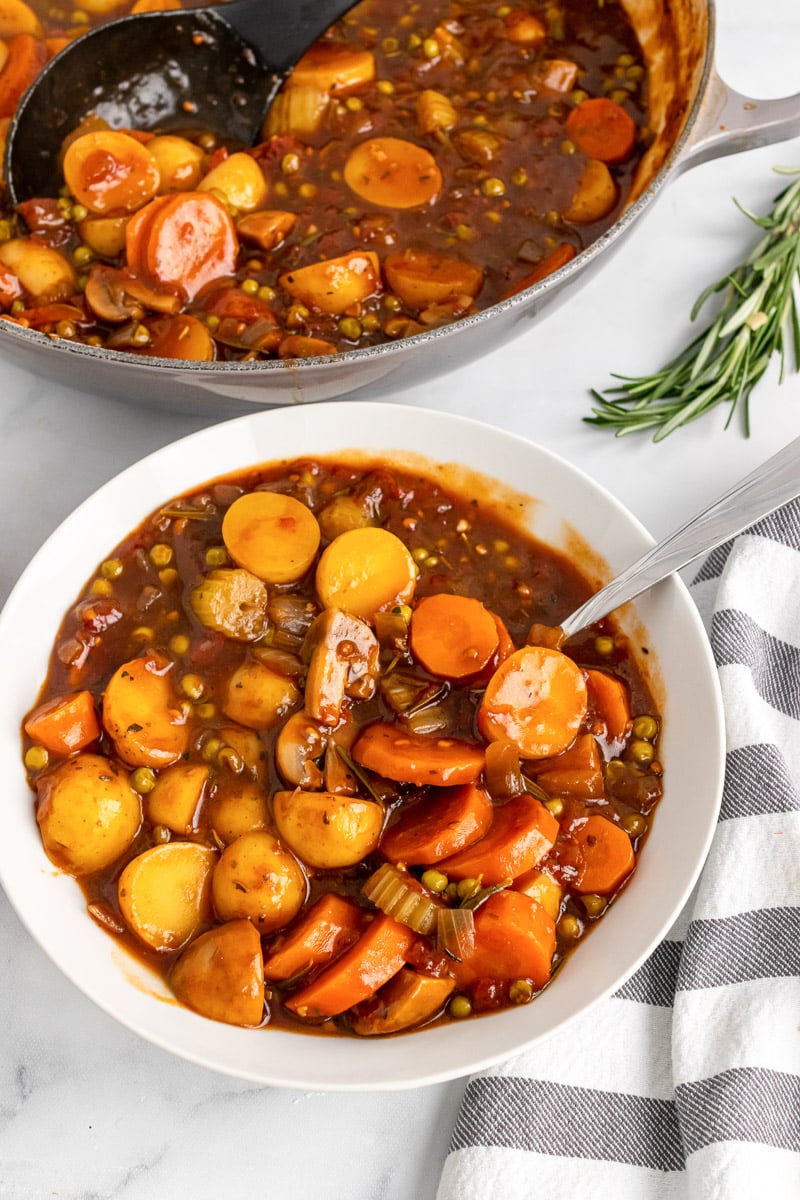
This vegan stew is loaded with carrots, celery, potatoes, mushrooms, peas, and more. This has quickly become one of my all time favorite vegan stews. Give it a try and let me know how you enjoy it!
This Old-Fashioned Vegan Stew recipe is...
- An old-fashioned classic stew
- Loaded with nutrient-rich veggies
- Thickened with a roux base
- Made with flavorful fresh herbs
- Great for meal prepping
How to Make Old-Fashioned Vegan Stew
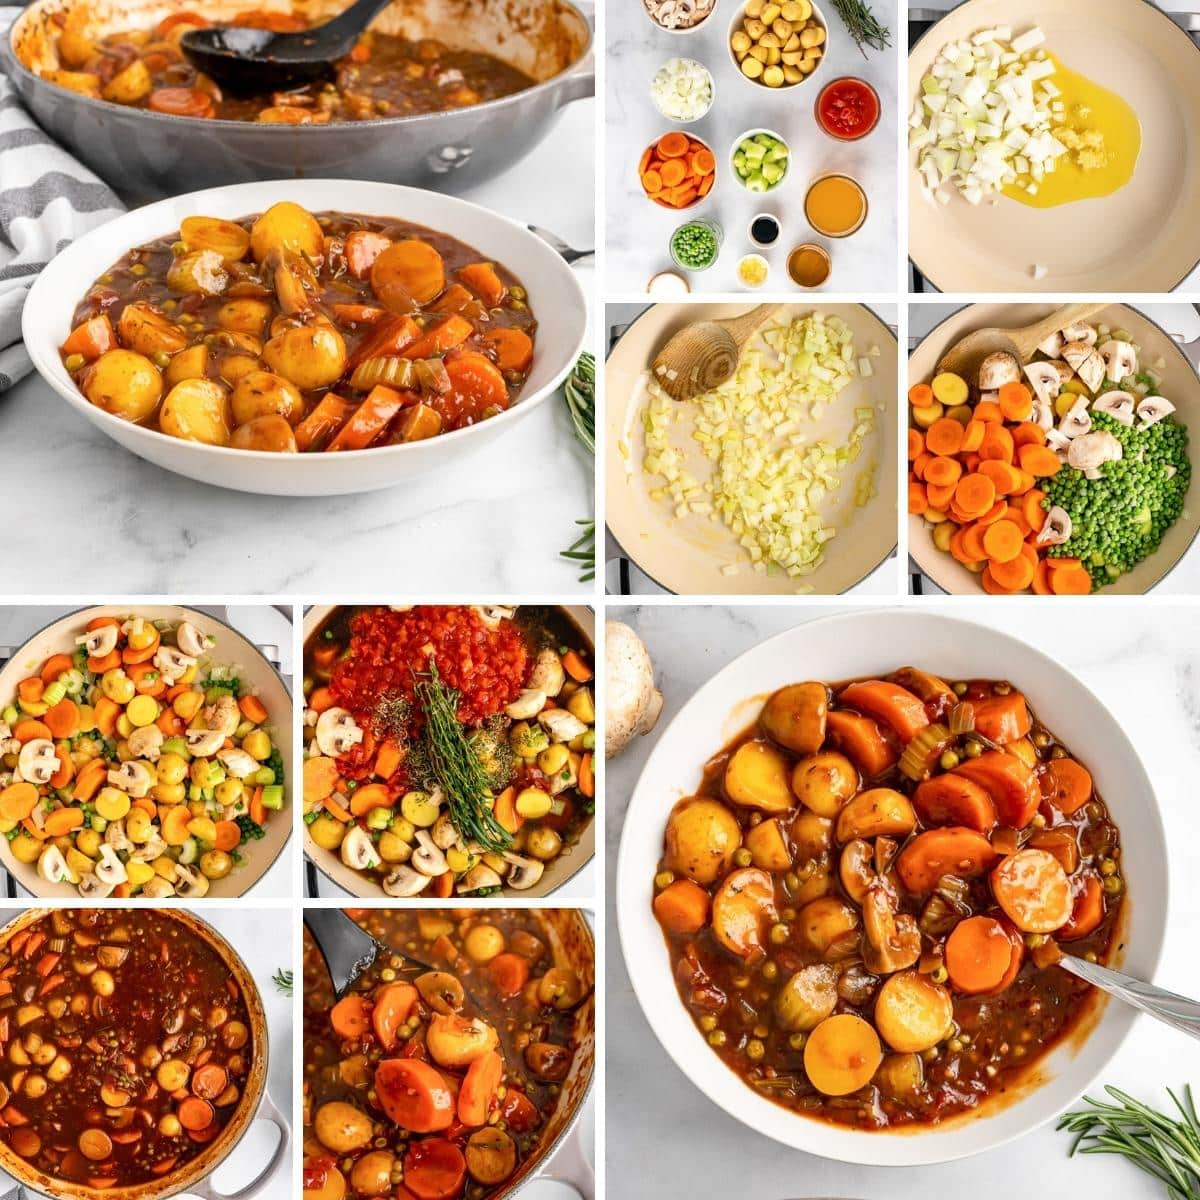
- Add oil to a pot. Cook onion and garlic on medium heat until translucent.
- Add potatoes, carrots, peas, and mushrooms, and cook.
- Add herbs, broth, tomatoes, soy sauce, and vinegar. Stir and bring to boil.
- Make cornstarch slurry and stir in to thicken soup.
- Turn down heat, cover, and let simmer.
Full directions for how to make Old-Fashioned Vegan Stew are in the printable recipe card at the bottom of the post.
Tips & Tricks for Old-Fashioned Vegan Stew

Cutting the Vegetables
Make sure that when you are chopping the vegetables for this stew, you cut everything into true bite-size pieces. You don't want super large chunks of vegetables, as they will be hard to eat.
Sauté the Garlic & Onions
When you sauté the onion and garlic, it helps to really enhance the deep flavor of this vegan stew. The sautéed vegetables will give your stew a rich and hearty flavor. If you don't sauté the onions and garlic, as some people do to save time, you will find that they have a sharper flavor.
Use a Heavy Duty Pot
Using a Dutch oven or other heavy duty pot is great as it will provide an even cooking surface for the stew. Cast iron is a good choice as well. If your pot isn't sturdy, it can create hot spots and your veggies will vary in doneness.
Variations to Old-Fashioned Vegan Stew
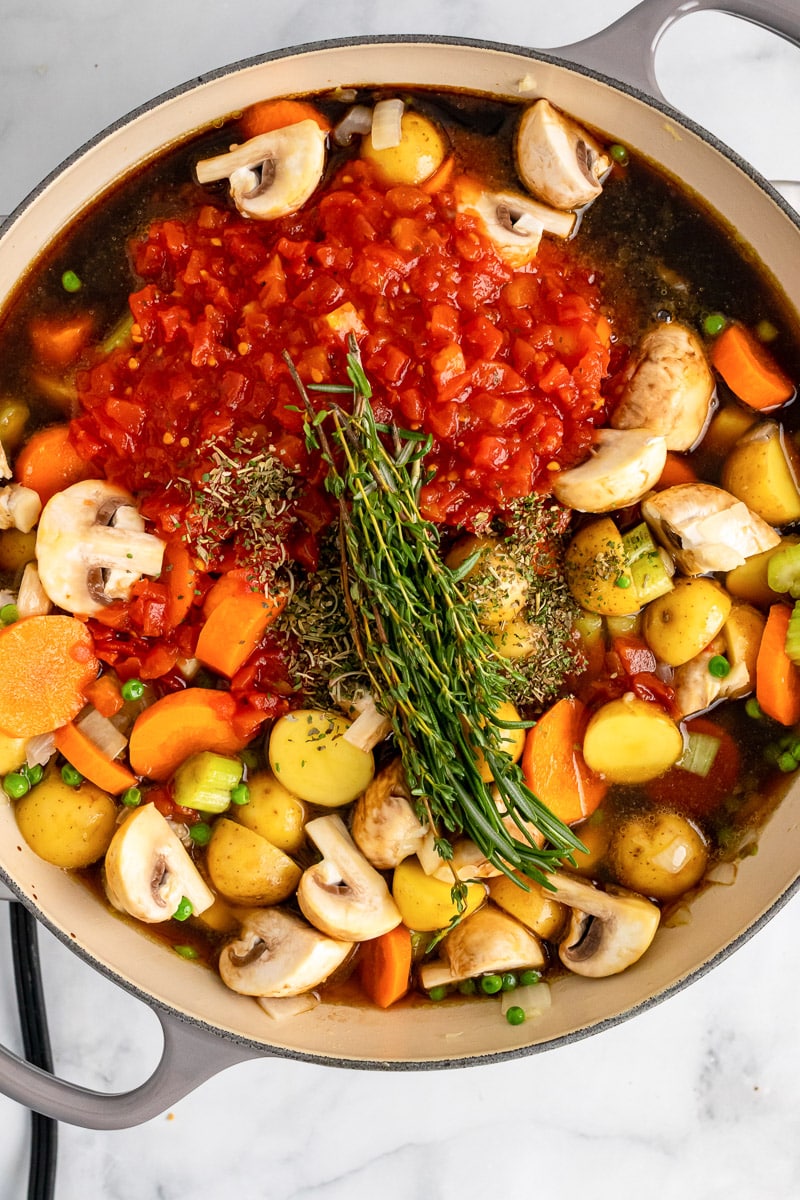
Add Rice or Quinoa
Barley, rice, and quinoa are all great additions to this veggie-packed stew. Adding any of these grains will make your stew a lot heartier. I would recommend tossing some in if you feel you want a bit more depth.
Mix in Pasta
You can also add some vegan-friendly pasta to your stew. Just add it in at the end of the cooking time. Adding pasta will add more carbs to your soup but also allow the stew to stretch a bit more and feed a larger crowd.
Different Vegetables
You can mix in other varieties of veggies to your stew, as well. I used what I had on hand, but you can swap out different vegetables depending on what you have in your fridge and what's in season. For example, you could toss in some squash, zucchini or cauliflower!
Old-Fashioned Vegan Stew FAQs
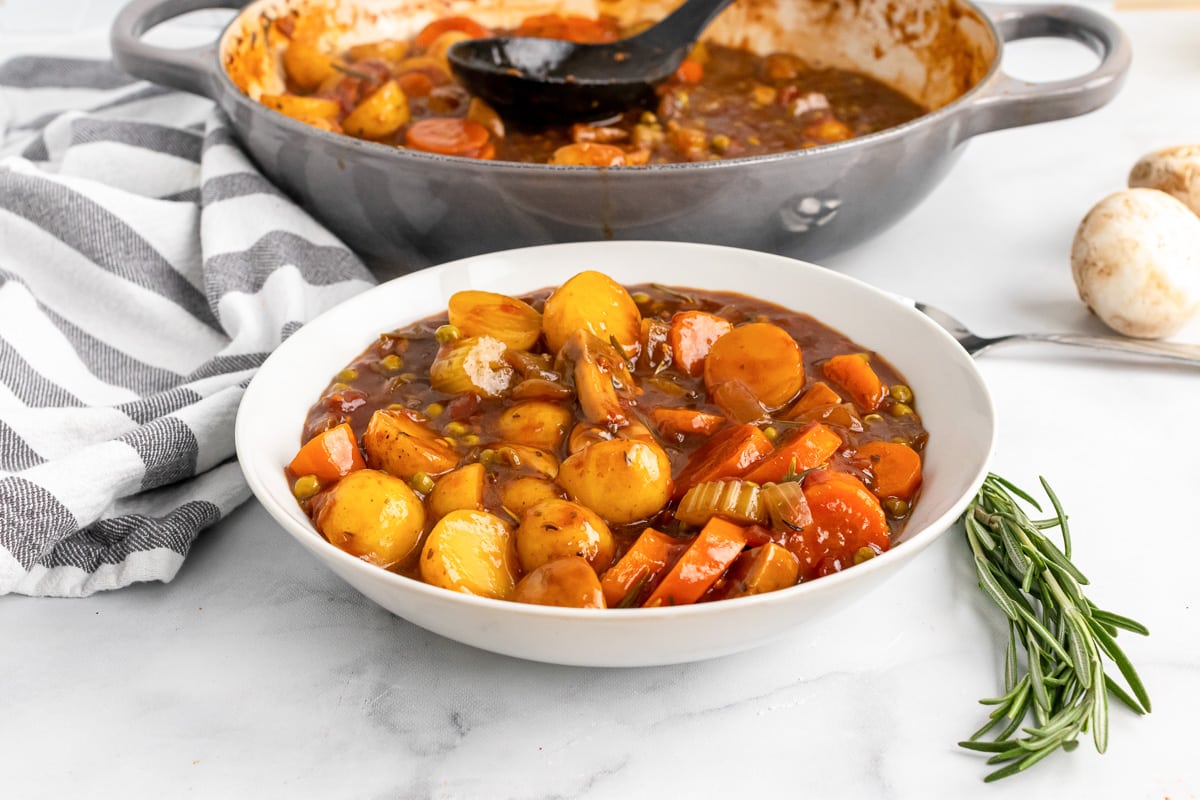
How do you know when the stew is done?
You will know your stew is done when the potatoes are fork tender. When the potatoes are done, you can take your stew off the heat. However, I like to cook mine a bit longer as it helps blend the flavors even more.
Why add in the cornstarch slurry?
Cornstarch and water combined - referred to as a slurry - is a thickening agent used for thickening soups, stews, and more. I find that a cornstarch slurry is great for thickening dishes without altering the flavor of the recipes you are cooking.
How do you store leftovers?
Store your leftover stew in the fridge for 3-5 days. When you want some, you can simply warm it up in the microwave or over low heat on the stove. Just make sure to stir your stew periodically as it reheats- it will burn if left to simmer too long.
More Tasty Vegan Recipes
If you love this vegan stew, be sure to check out these other delicious ideas:
Also worth trying: our vegan creamy mushroom pasta.
Also worth trying: our yellow squash soup.
Also try: our Creamy Pasta And Butternut Squash Casserole.
- Vegan Sweet Potato Lentil Soup
- Vegan Comfort Food Casseroles
- Vegan Sweet Potato Black Bean Chili
- Or try our warming miso butternut squash soup for a Japanese-inspired twist.
And while you're here, don't forget to grab a copy of my free vegan cheat sheet. It's packed with all my favorite substitutions to vegan-ize any recipe!
Recipe

Old-Fashioned Vegan Stew
This Old-Fashioned Vegan Stew is thick, hearty, and comforting. It's loaded with tons of veggies and smothered in a thick, creamy broth base.
Print
Pin
Save
Servings: servings
Ingredients
- 2 tablespoon olive oil
- 1 onion minced
- 2 cloves garlic minced
- 3 large carrots sliced
- 2 stalks celery sliced
- 2 cups baby potatoes halved
- 1 cup white mushrooms sliced & quartered
- 1 cup frozen peas
- 1 teaspoon Italian seasoning
- 2 cups vegetable broth
- 19 oz diced tomatoes canned with garlic
- 3 tablespoon soy sauce
- 1 tablespoon balsamic vinegar
- 2 sprigs rosemary
- small bunch fresh thyme
- 2 tablespoon cornstarch
- 3 tablespoon water
Instructions
- In a large pot, heat olive oil, then add onion and garlic; sauté 3-4 minutes or until onion is translucent.

- Add the carrots, celery, baby potatoes, mushrooms, and peas into the pot.

- Cook for 2-3 minutes.
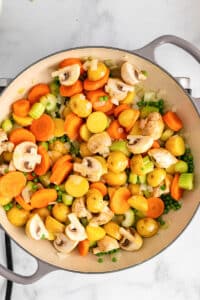
- Add the Italian seasoning, vegetable broth, diced tomatoes, soy sauce, balsamic vinegar, rosemary, and thyme. Stir and bring to a boil.
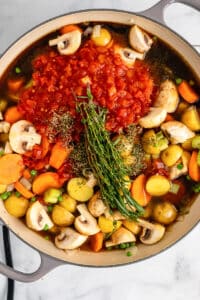
- In a small bowl, whisk together the cornstarch and water to form a slurry mix. Add to the stew and stir.
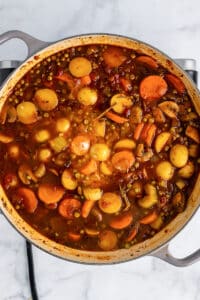
- Turn heat down, cover pot, and simmer for 45 minutes or until veggies are tender.

- Serve.

Nutrition (Estimate per Serving)
Calories: 244kcalCarbohydrates: 39gProtein: 8gFat: 8gSaturated Fat: 1gPolyunsaturated Fat: 1gMonounsaturated Fat: 5gSodium: 1282mgPotassium: 974mgFiber: 7gSugar: 12gVitamin A: 8362IUVitamin C: 48mgCalcium: 99mgIron: 3mg
Vegan-ize any recipe!Grab our free vegan cheat sheet, packed with my favorite easy substitutions to make any recipe vegan.
Vegan Biscuits Recipe

Vegan biscuits with dairy-free 'buttermilk' are a must-try! These American biscuits are soft, flaky and tall, with a distinctive buttery flavor. They make an exceptional side dish or snack, and no one will be able to tell that they are entirely plant based!

Are you on the lookout for your new favorite vegan biscuit recipe? If so, I've got you covered! These buttermilk biscuits that are entirely dairy-free are a must-try. I've made a good number of batches over the last few weeks, and each time they disappear within a few hours. I always think I'll end up having leftovers, but I'm yet to run into that situation!

These biscuits have the most exceptional texture. They're flaky and soft, and melt in your mouth. You'll also love their distinctive buttery flavor, and the fact that they have a beautiful rise! These's nothing quite like a tall, soft biscuit served with a cup of tea and some jam.

Plus, you need just 7 very simple ingredients that you probably have in your kitchen already. And they take just around 30 minutes from start to finish! Get them on the table in no time, and serve either as a snack or a side dish with any meal of your choice. I'd recommend you start by making vegan biscuits and gravy as a breakfast or brunch!
What are biscuits?

Southern-style American biscuits are essentially a type of bread that's very similar to a British scone. The main difference is that scones are much sweeter. Biscuits have more of a savory flavor profile, and are typically served as a side dish.
Ingredients you'll need
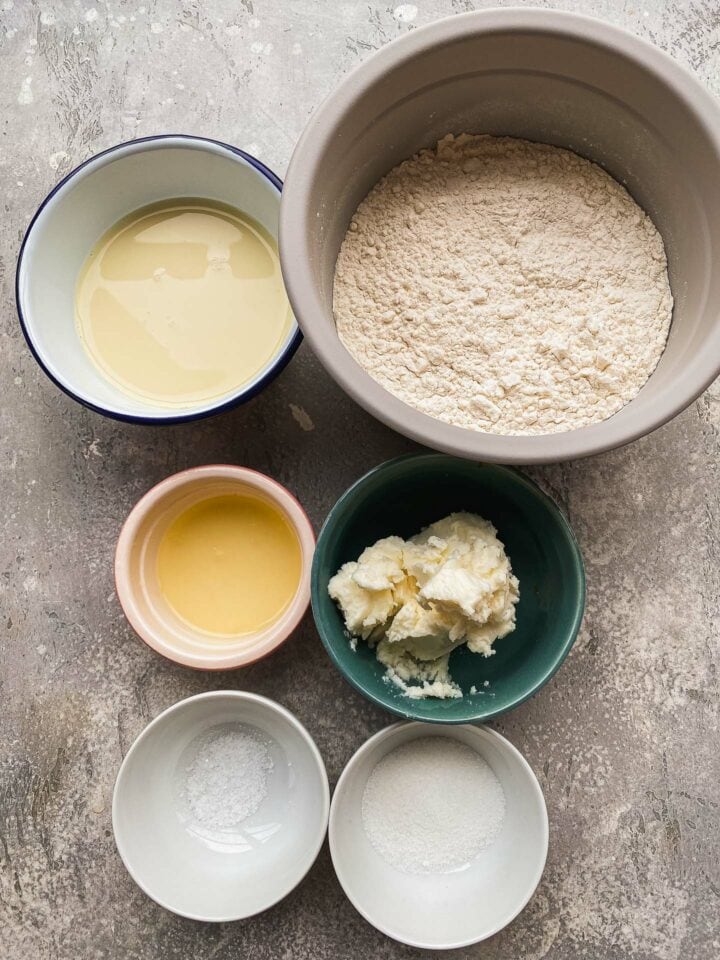
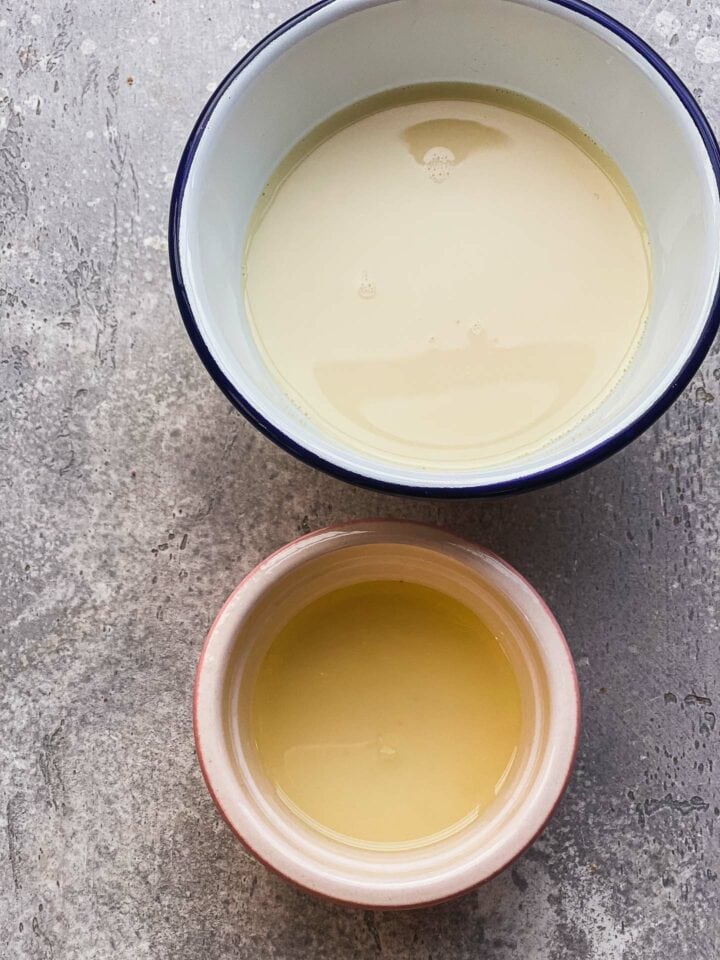
- Plant based milk and lemon juice to make the vegan buttermilk. The dairy-free buttermilk is a key ingredient for giving the biscuits a great rise, while the lemon juice gives the flavors a subtle tanginess. You can also use apple cider vinegar.
- All-purpose plain flour.
- Sugar. You can use either brown or white sugar for this recipe.
- A pinch of good quality sea salt.
- Baking powder. Together with the vegan buttermilk, this helps to make the biscuits taller and fluffier.
- Vegan butter or margarine. Make sure to use the form that comes in a stick rather than a tub, as the latter version has a too high water content. Also ensure that it's not warm or softened - it should be cold, straight out of the fridge
How to make vegan biscuits
Firstly, make the vegan buttermilk. Mix together the plant based milk and lemon juice, and set aside to curdle for one minute.
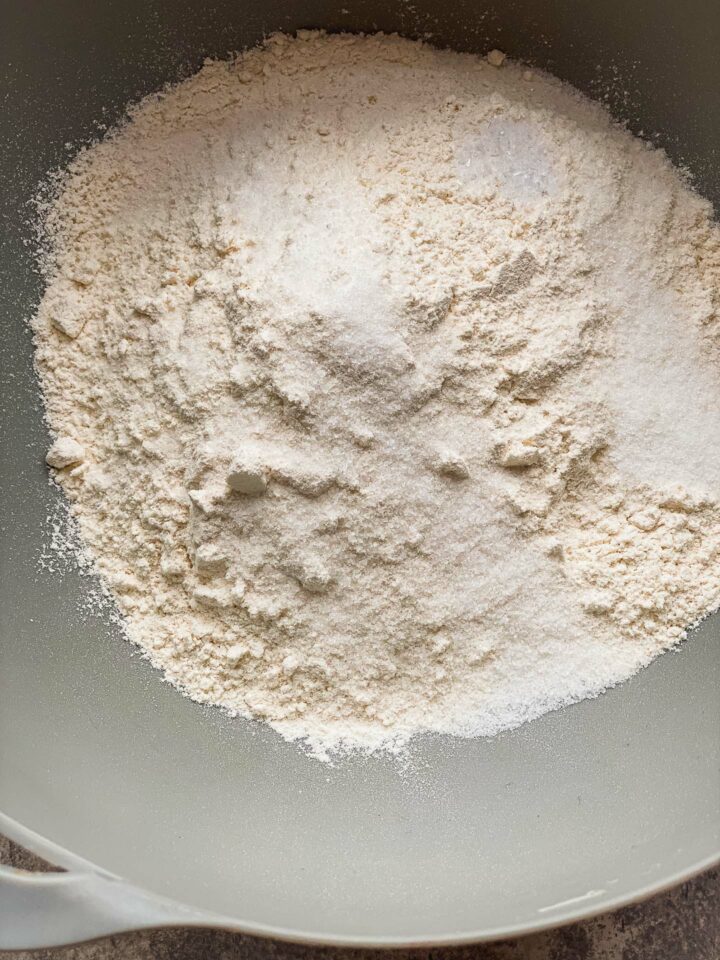
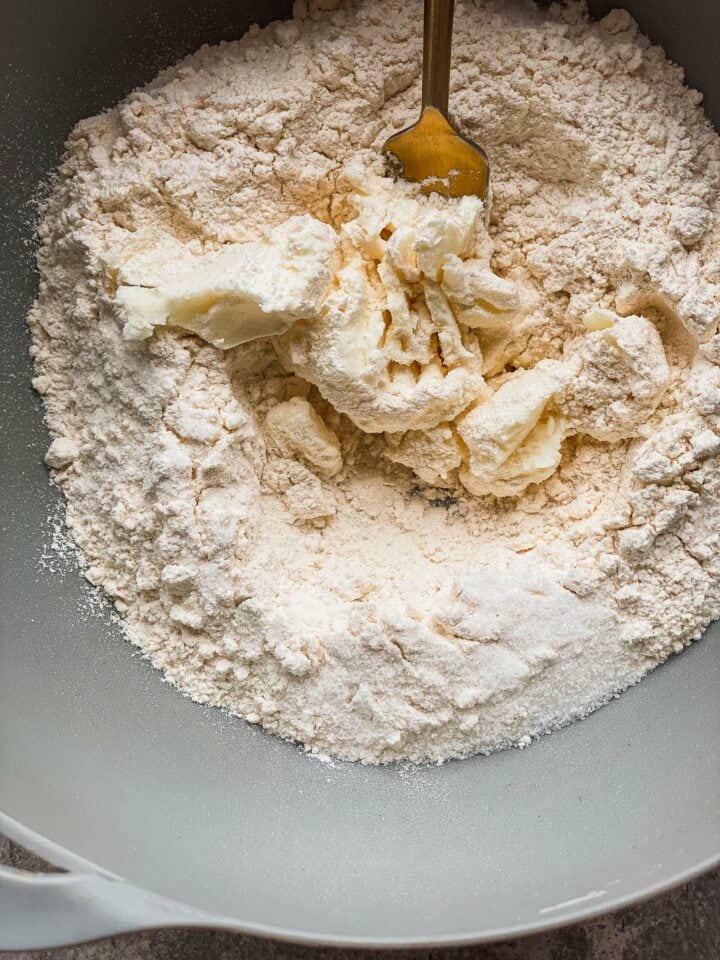

Meanwhile, mix together the flour, sugar, salt, and baking powder. Then, add the vegan butter/margarine, and mix together using a fork until a fine crumb forms.


Now add the buttermilk, and continue mixing using either a fork or a wooden spoon until a shaggy dough forms.
Preheat the oven to 350 degrees F/180 degrees C. Transfer the dough to a lightly-floured surface and roll out into a rectangle around an inch in thickness. Then, fold in the upper and lower edge, and roll it out once again.


Use a cookie cutter to cut out circles around 3 inches in diameter and transfer them to the baking tray. Brush with some melted vegan butter if desired, then bake in the preheated oven for 18-20 minutes, until lightly golden brown on top.


Allow to cool down for 5 minutes before serving!
Recipe tips for success
- As for all baking recipes, I would recommend weighing the ingredients for the most accurate results.
- Make sure that all of the ingredients are as cold as possible before using them. The vegan butter/margarine in particular needs to be solid, because if it's softened the biscuits won't have a soft and light texture.
- Don't overwork the dough, because this will also cause the biscuits to acquire a tough texture.
- Don't leave them in the oven for too long, especially as they will continue cooking from the heat of the baking tray when you take them out.

Instructions on storage and freezing
Biscuits are at their most delicious when eaten shortly after baking. You can, however, keep them on the counter covered with a dish cloth for up to 2 days. Or, you can keep them in the fridge in an airtight container for up to 5 days.
To freeze the vegan biscuits, wrap them up individually in cling film and transfer to a freezer-friendly container. Keep them frozen for up to 2 months. Allow to thaw fully at room temperature for a couple of hours before reheating and serving. I would recommend reheating the biscuits either in the microwave or in the toaster.

How to serve vegan buttermilk biscuits
The great thing about vegan biscuits is that they're super versatile! You can:
- Eat them by themselves with butter, jam, or both.
- Serve them as a side dish for a classic vegan chili, or a white bean vegan chili.
- Pair them with a soup such as my vegan tomato soup or lentil butter bean soup.
- Serve them with a flavorful spinach artichoke dip.
- Use garlic confit as a spread.
- For a lighter, sweeter option alongside your brunch spread, try these vegan lemon ginger scones.

Other must-try vegan side dishes
- My vegan dinner rolls go well with any dish of your choice.
- Olive oil skillet bread is flavorful and exceptionally fluffy.
- Vegan cornbread pairs super well with a variety of dishes.
- Focaccia with tomatoes is a perfect beginner-friendly bread.

If you give this vegan biscuits recipe a go, be sure to tag me on Instagram (@earthofmariaa) and leave your feedback in the comments below together with a star rating!
Recipe

Vegan Biscuits Recipe
Vegan biscuits with dairy-free 'buttermilk' are a must-try! These American biscuits are soft, flaky and tall, with a distinctive buttery flavor. They make an exceptional side dish or snack, and no one will be able to tell that they are entirely plant based!
Print
Pin
Save
Servings: biscuits
Equipment
- Small mixing bowl
- Large mixing bowl
- Conventional oven
- Baking tray
Ingredients
- 1 cup plant based milk
- 1 tablespoon lemon juice
- 3 ¼ cups flour
- ½ tablespoon sugar
- 1 teaspoon salt
- 1 tablespoon baking powder
- 2.8 oz vegan butter or margarine
Instructions
- Make the vegan buttermilk. Mix together the plant based milk and lemon juice, and set aside to curdle for one minute.1 cup plant based milk, 1 tablespoon lemon juice
- Mix together the flour, sugar, salt, and baking powder. Then, add the vegan butter/margarine, and mix together using a fork until a fine crumb forms.½ tablespoon sugar, 1 teaspoon salt, 1 tablespoon baking powder, 2.8 oz vegan butter, 3 ¼ cups flour
- Add the buttermilk, and continue mixing using either a fork or a wooden spoon until a shaggy dough forms.
- Preheat the oven to 350 degrees F/180 degrees C.
- Transfer the dough to a lightly-floured surface and roll out into a rectangle around an inch in thickness. Then, fold in the upper and lower edge, and roll it out once again.
- Use a cookie cutter to cut out circles around 3 inches in diameter and transfer them to a baking tray lined with parchment paper.
- Brush with some melted vegan butter if desired, then bake in the preheated oven for 18-20 minutes, until lightly golden brown on top.
- Allow to cool down for 5 minutes before serving!
Video
Nutrition (Estimate per Serving)
Calories: 168kcalCarbohydrates: 27gProtein: 4gFat: 5gSaturated Fat: 1gPolyunsaturated Fat: 1gMonounsaturated Fat: 2gTrans Fat: 1gSodium: 265mgPotassium: 140mgFiber: 1gSugar: 1gVitamin A: 253IUVitamin C: 1mgCalcium: 74mgIron: 2mg
Vegan-ize any recipe!Grab our free vegan cheat sheet, packed with my favorite easy substitutions to make any recipe vegan.
Vegan French Onion Soup
This vegan French onion soup with baguette and dairy-free cheese is tangy, savory and made with a handful of simple ingredients! Served either as a starter or main course, it's guaranteed to be a crowdpleaser.

As I'm writing this, it's getting progressively colder outside. Which, of course, means that I'm making all the vegan soup recipes I possibly can - soup is just the perfect cold weather food! And the one that I'm sharing today is an all-time favorite of mine that I like to make multiple times during soup season. More precisely - vegan French onion soup!
The best vegan French onion soup
What I love about this French onion soup is how well it works both for special occasions and a weeknight dinner. Impressive and fancy, yet super simple at the same time. Everyone is guaranteed to love it!
If I'm honest, it took me ages to try French onion soup and my only regret is that I didn't try it sooner. This stuff is so good, I can eat it by the bucketful. And no panic if you're not an onion fan. This dish won't leave you with that sharp, pungent aftertaste.
Instead, the flavour is earthy and savoury. The vegetables give a lot of texture. And the best part is probably the addition of crusty baguette and grated vegan cheese. Even without, it's delicious. But the addition of bread and cheesy deliciousness just takes it over the top.
Ingredients for vegan French onion soup
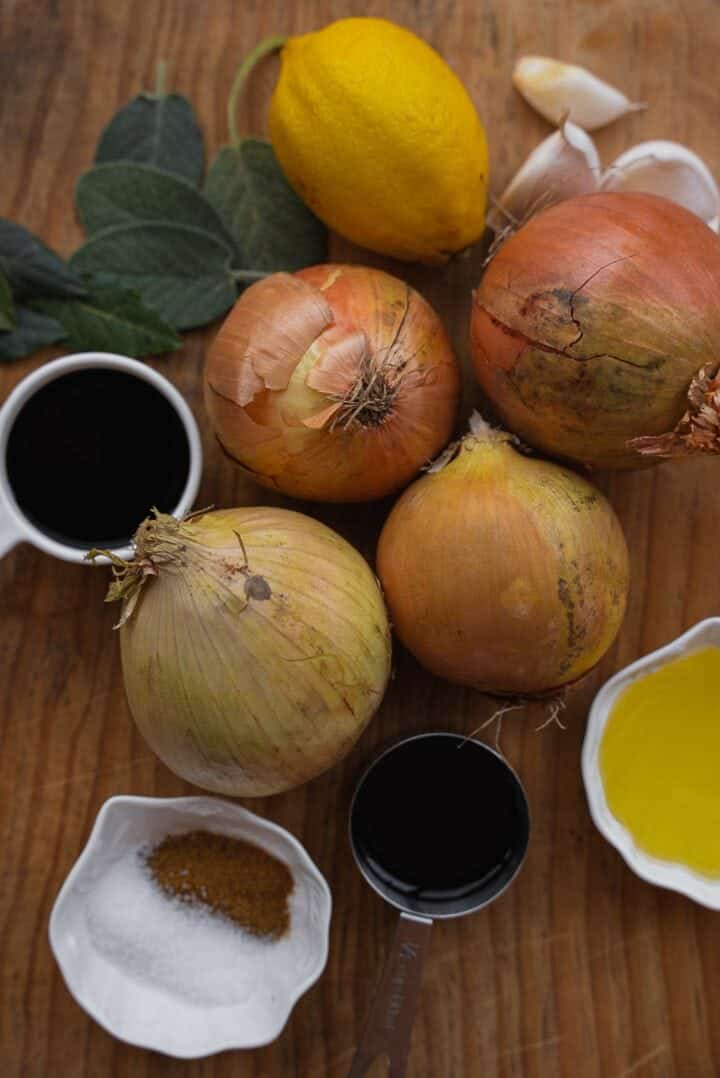
- Olive oil for cooking the onions. Pick a good quality olive oil for the best depth of flavor.
- Salt and cumin. These spices will be toasted briefly at the start of the cooking process.
- Garlic. A must in any soup recipe!
- Onions. A lot of them. This is, of course, the star ingredient of the recipe. If you've never tried dishes involving caramelized onions before (like my amazing caramelized onion pasta) you are definitely missing out!
- Balsamic vinegar. This will help to create the signature tangy flavor of the French onion soup.
- Soy sauce. Use tamari for a gluten-free alternative.
- Flour. Use a standard gluten-free flour blend as an alternative to plain flour.
- Lemon juice. I love adding a hint of citrus to soup for a great finishing touch.
- Bay leaves and sage leaves. These will be simmered for a bit to infuse the soup with flavor and discarded at the last minutes.
- Baguette, or any other bread of your choice. You can leave this out if you wish, for instance if serving the soup as a side dish, but it really does make an amazing finishing touch.
- Vegan cheese. Pick a brand that melts well, or make your own easy vegan cheese sauce from scratch and add that instead.
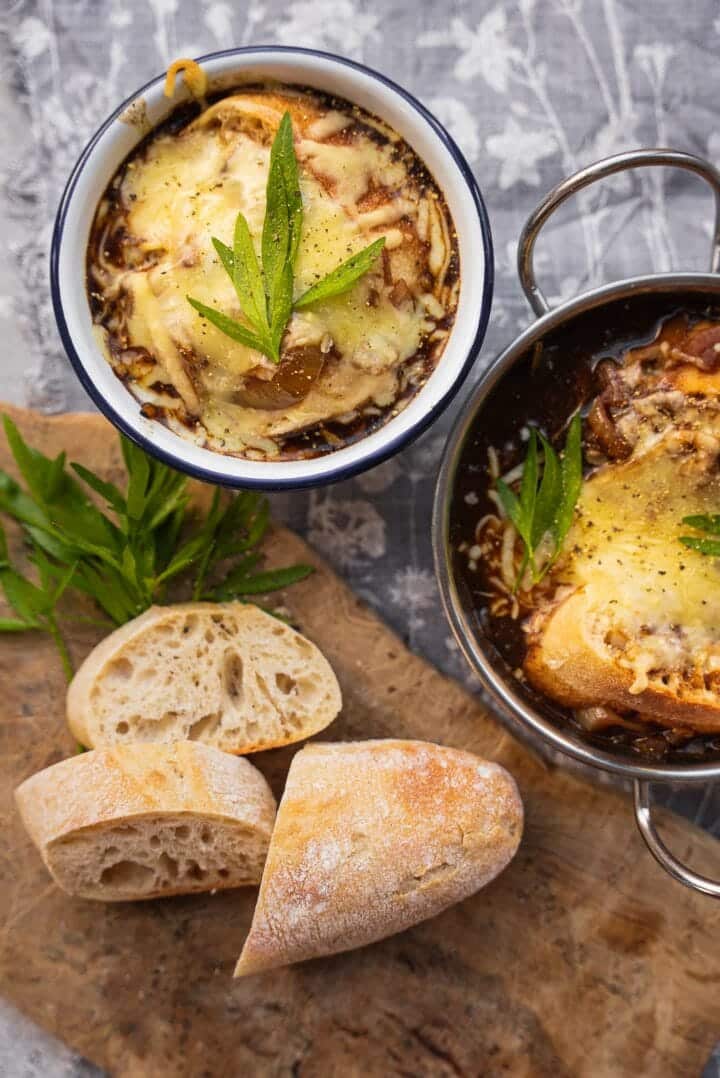
How to make vegan French onion soup
Start by adding the olive oil to a large, heavy-bottomed saucepan over a medium heat. Add the salt, cumin and garlic. Cook for 2-3 minutes, until fragrant and lightly toasted.

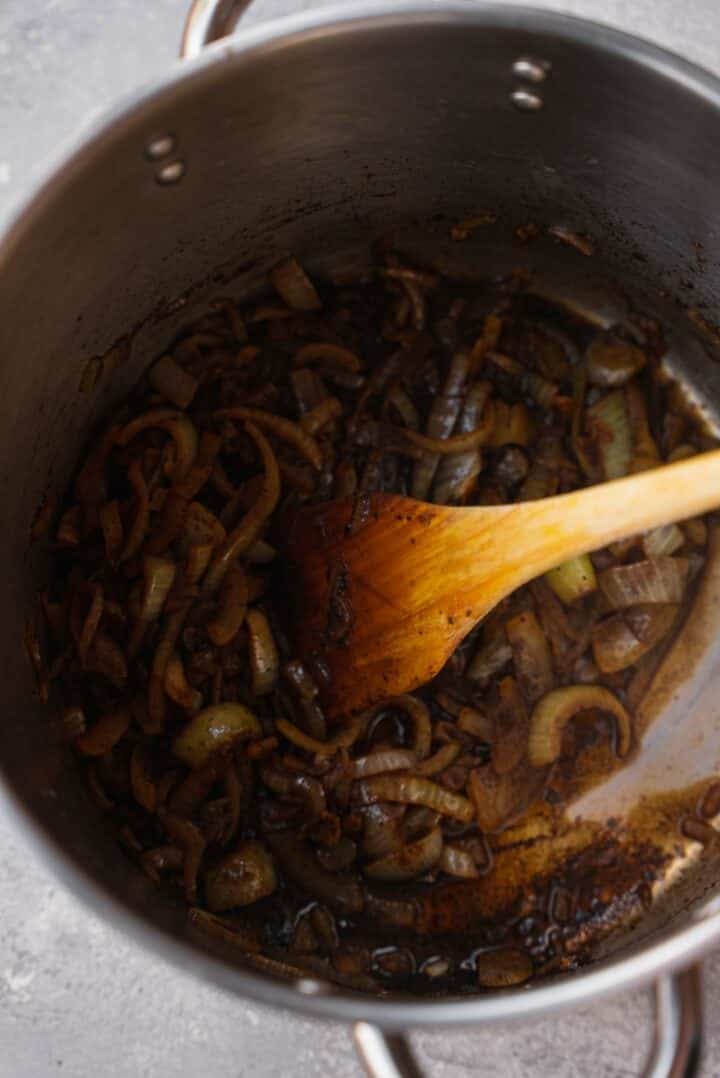
Now add the onions, and it's time to caramelize them! Turn down the heat to low-medium and cook for around 40-45 minutes, stirring every 5 minutes or so, until the onions are lightly browned and translucent. De-glaze the pan using vegetable stock or water if necessary.
Now add balsamic vinegar, soy sauce, ½ cup vegetable stock, flour and lemon juice. Stir for around 5 minutes, until the mixture starts to thicken.
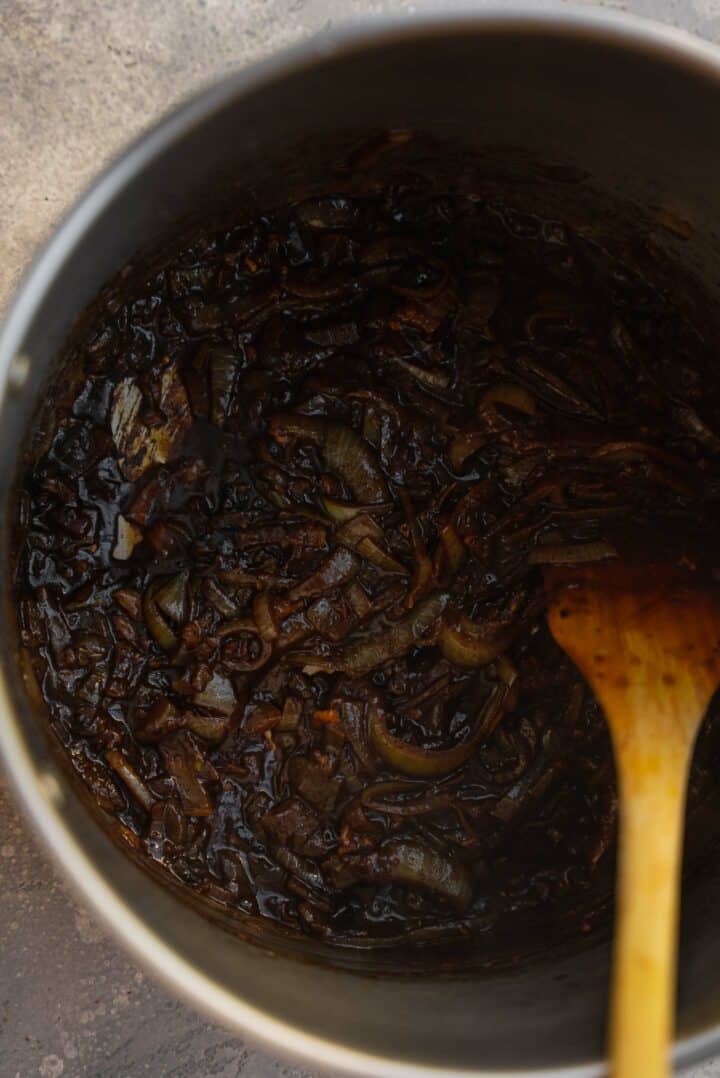
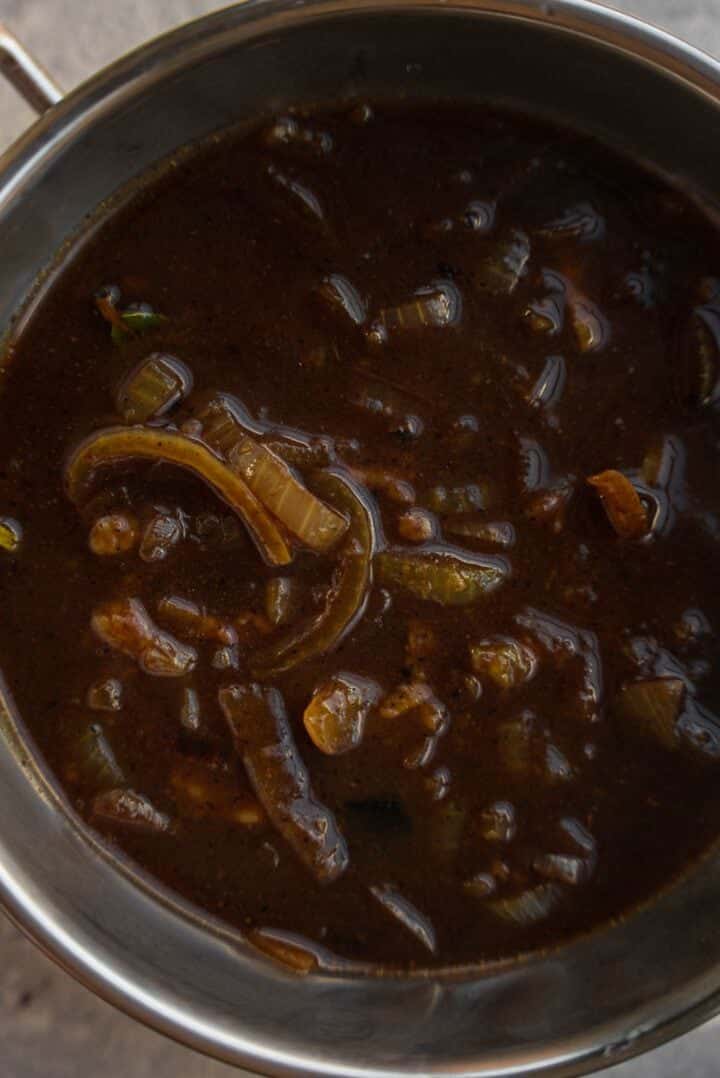
Next, pour in the rest of the vegetable stock together with bay and sage leafs and simmer, stirring occasionally, for 10 minutes. In the meantime, preheat the oven to 350 degrees F (180 degrees C).
Divide around ¾ of the soup between oven-safe soup bowls or large ramekins. Now add two small baguette slices to each bowl, before adding the rest of the soup. Sprinkle the vegan cheese on top, and place in the oven for 5-7 minutes, until the cheese melts and browns slightly.


Serve and enjoy the soupy deliciousness!
Can I freeze this French onion soup?
For sure! Simply allow the soup to cool down fully, then divide between freezer-friendly bags, allowing some space for expansion. Freeze for up to 3 months. When ready to eat, allow to thaw fully in the fridge and then reheat in a saucepan over a medium heat until fully warmed through. You can then eat straight away, or bake with the addition of baguette and vegan cheese.
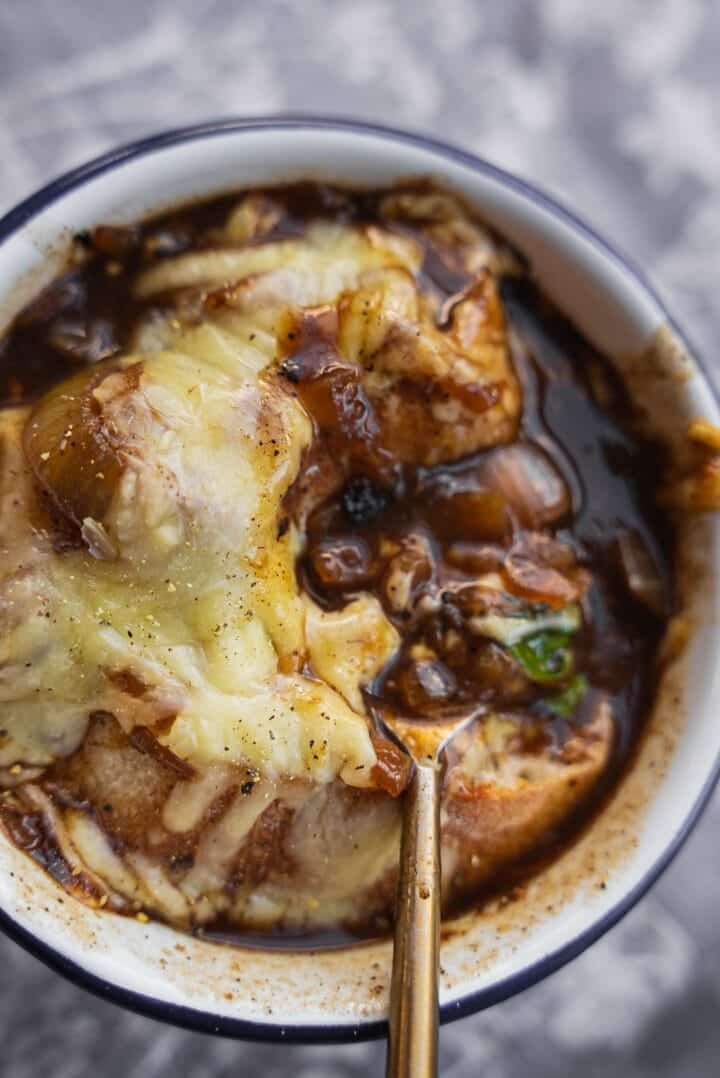
Other vegan soup recipes you must try!
- My spicy butternut squash soup never fails as a weeknight dinner!
- Vegan tomato soup is a must-try with a side of olive oil skillet bread.
- If you love gnocchi, you have to give vegan gnocchi soup a go.
- Vegan lasagna soup is easy to make and super cozy.
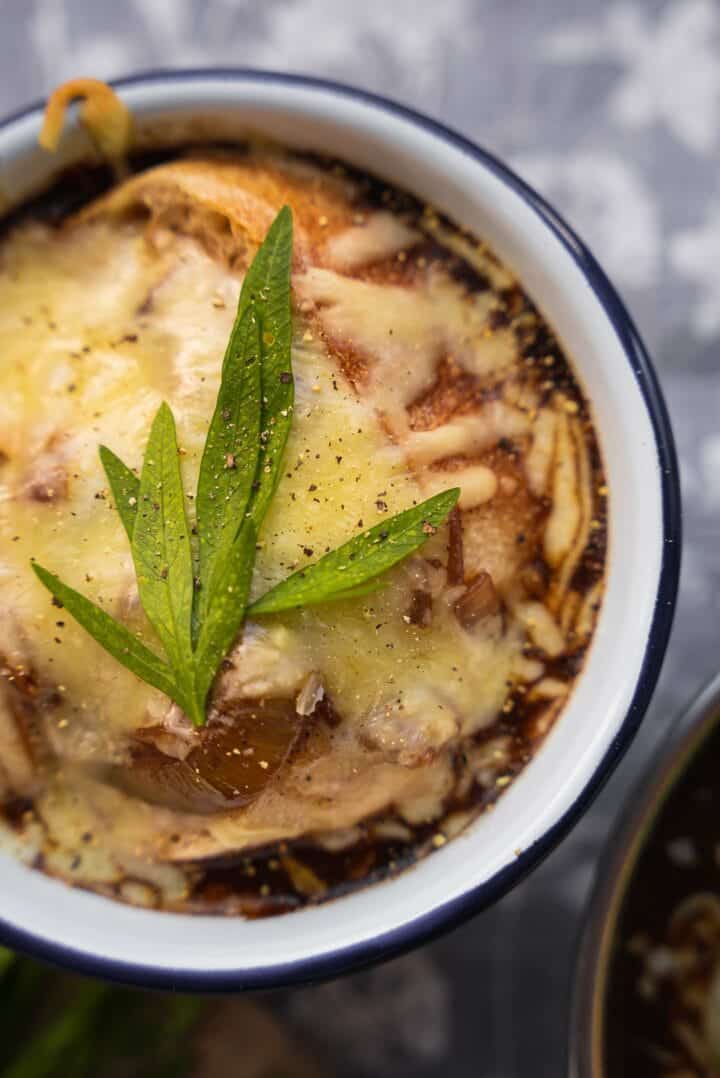
If you give this vegan French onion soup recipe a go, be sure to tag me on Instagram (@ohmyveggies) so I can see your creations, and leave your feedback in the comments below! I love hearing from you.

Recipe

Vegan French Onion Soup
This vegan French onion soup with baguette and dairy-free cheese is tangy, savory and made with a handful of simple ingredients! Served either as a starter or main course, it's guaranteed to be a crowdpleaser.
Print
Pin
Save
Servings:
Equipment
- Large, heavy-bottomed saucepan
- Conventional oven
- Oven-safe soup bowls or ramekins
Ingredients
- 2 tablespoon olive oil
- 1 teaspoon salt
- 1 teaspoon cumin
- 2 cloves garlic sliced
- 4 large onions sliced
- ¼ cup balsamic vinegar
- 3 tablespoon soy sauce or tamari
- 3 cups vegetable stock
- ¼ cup flour use gluten-free if necessary
- 1 large lemon for lemon juice
- 3 bay leafs
- 2 sage leafs
- 4 slices baguette or any other bread of your choice
- ½ cup vegan cheese
Instructions
- Add the olive oil to a large, heavy-bottomed saucepan over a medium heat. Now add the salt, cumin and garlic. Cook for 2-3 minutes, until fragrant and lightly toasted.2 tablespoon olive oil, 1 teaspoon salt, 1 teaspoon cumin, 2 cloves garlic
- Caramelize the onions. Turn down the heat to low-medium and cook for around 40-45 minutes, stirring every 5 minutes or so, until the onions are lightly browned and translucent. De-glaze the pan using vegetable stock or water if necessary.4 large onions
- Add balsamic vinegar, soy sauce, ½ cup vegetable stock, flour and lemon juice. Stir for around 5 minutes, until the mixture starts to thicken.¼ cup balsamic vinegar, 3 tablespoon soy sauce, 3 cups vegetable stock, ¼ cup flour, 1 large lemon
- Pour in the rest of the vegetable stock together with the bay and sage leafs and simmer, stirring occasionally, for 10 minutes.3 cups vegetable stock, 3 bay leafs, 2 sage leafs
- In the meantime, preheat the oven to 350 degrees F (180 degrees C).
- Divide around ¾ of the soup between oven-safe soup bowls or large ramekins. Now add two small baguette slices to each bowl, before adding the rest of the soup. Sprinkle the vegan cheese on top.4 slices baguette, ½ cup vegan cheese
- Placee in the oven for 5-7 minutes, until the cheese melts and browns slightly. Serve and enjoy the soupy deliciousness!
Video
Nutrition (Estimate per Serving)
Calories: 325kcalCarbohydrates: 49gProtein: 8gFat: 12gSaturated Fat: 2gPolyunsaturated Fat: 1gMonounsaturated Fat: 5gSodium: 2388mgPotassium: 362mgFiber: 5gSugar: 11gVitamin A: 398IUVitamin C: 26mgCalcium: 94mgIron: 3mg
Vegan-ize any recipe!Grab our free vegan cheat sheet, packed with my favorite easy substitutions to make any recipe vegan.
Roasted Veggies with Vegan Cheese Sauce
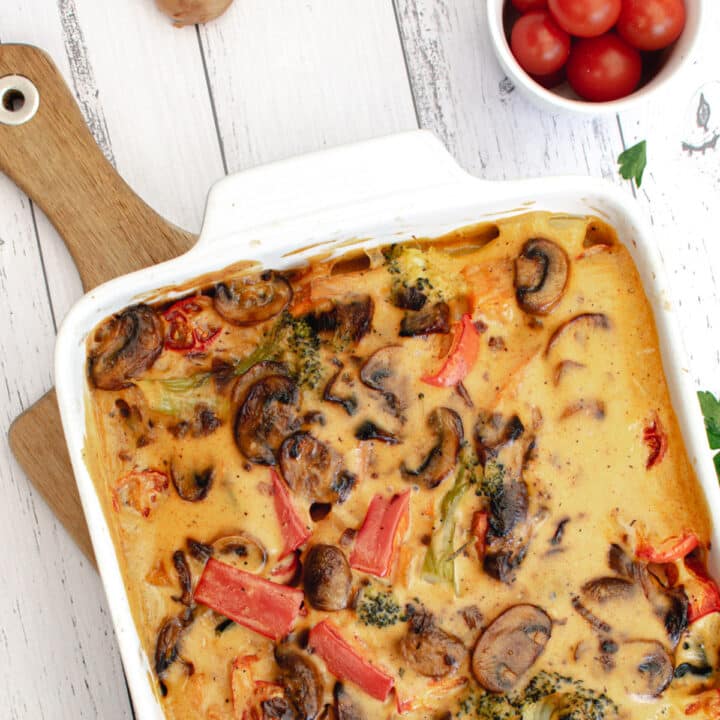
Serve up these Roasted Veggies with Vegan Cheese Sauce for dinner tonight. This vegetable side dish will blow you away!
In this simple recipe, roasted onions, broccoli, zucchini, and sweet potatoes, are smothered in a creamy homemade vegan cheese sauce.
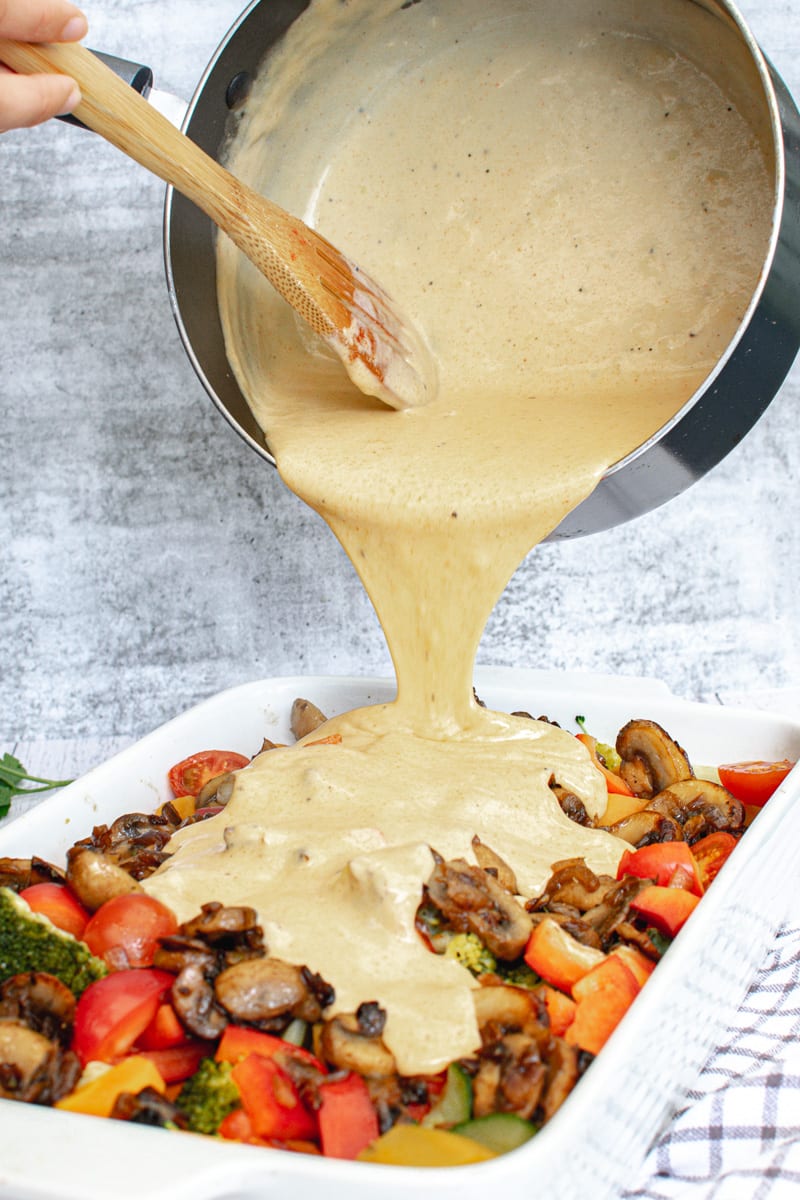
Skip the boring side dishes and whip up one that will become the star of the night. This cheesy vegetable recipe will change your side dishes in a big way.
I love using this dish as a side when we have meals like Lentil Fritters with Garlic Sauce or Vegan Bolognese.
Why You Will Love Roasted Veggies with Vegan Cheese Sauce...
- Simple ingredients
- Unique combo
- Tons of flavor
- Easy to make
- Great side dish
- Gluten-free
How to Make Roasted Veggies with Vegan Cheese Sauce
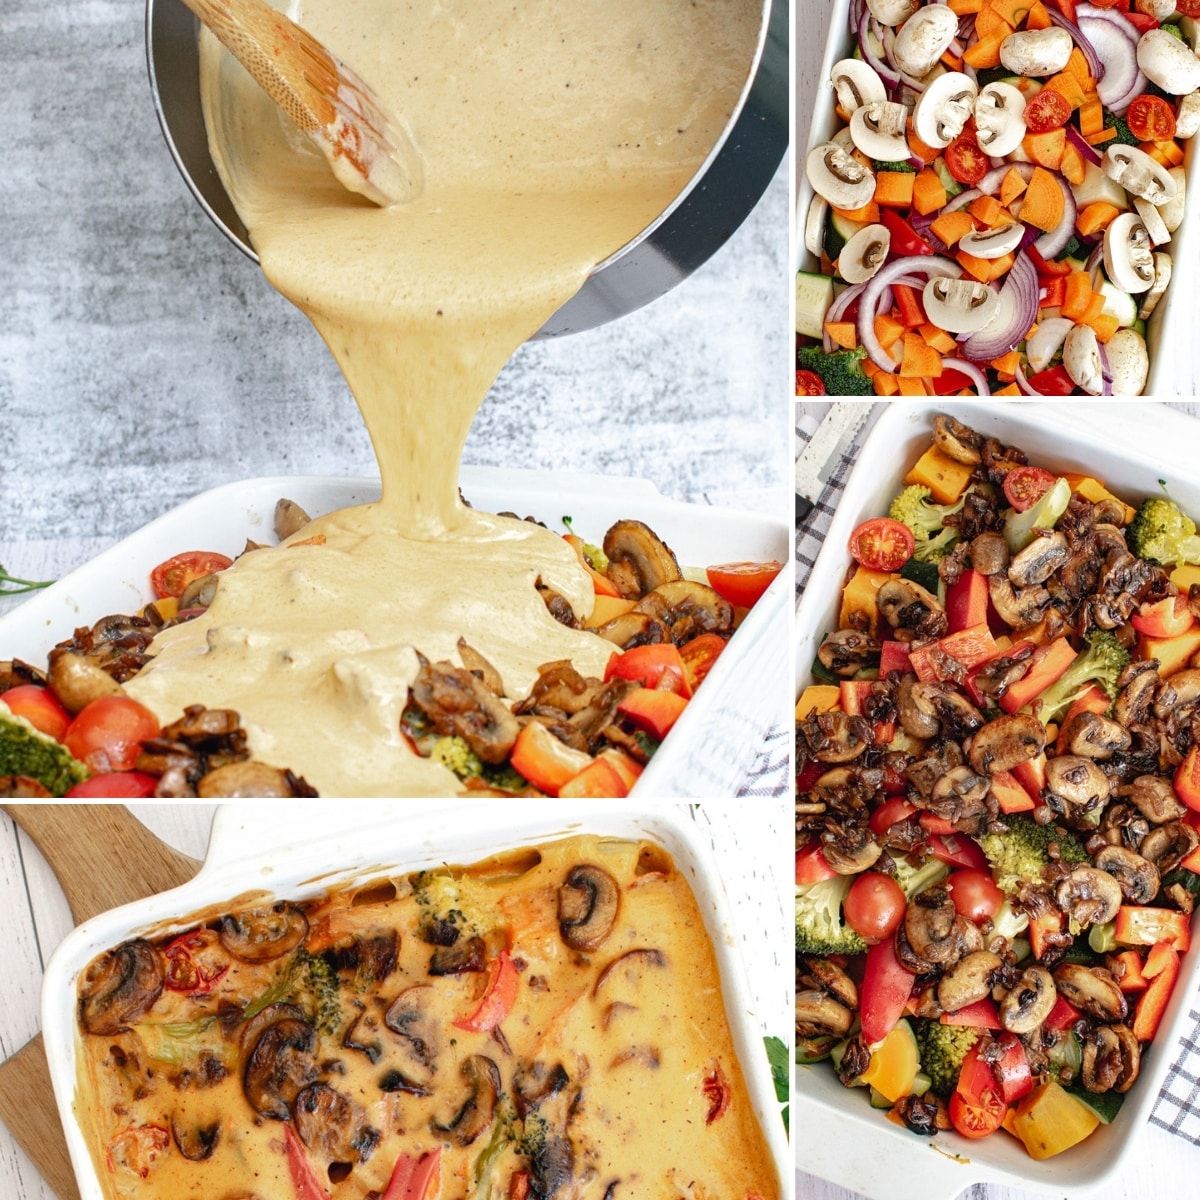
- Start by preheating the oven.
- Add some oil to a non-stick pan and sauté your onions.
- Next, add in the garlic and mushrooms, and cook till onions are translucent and the mushrooms are tender.
- In a pot, bring water to a boil. Add other veggies and cook as directed.
- For the cheese sauce, add ingredients to a pot and stir until sauce thickens.
- Place all veggies on a baking sheet, drizzle with oil, then salt and pepper. Roast veggies.
- Drizzle with cheese and devour!
Full directions for this Roasted Veggies with Vegan Cheese Sauce recipe are in the printable recipe card below.
Tips & Tricks for Roasted Veggies with Vegan Cheese Sauce
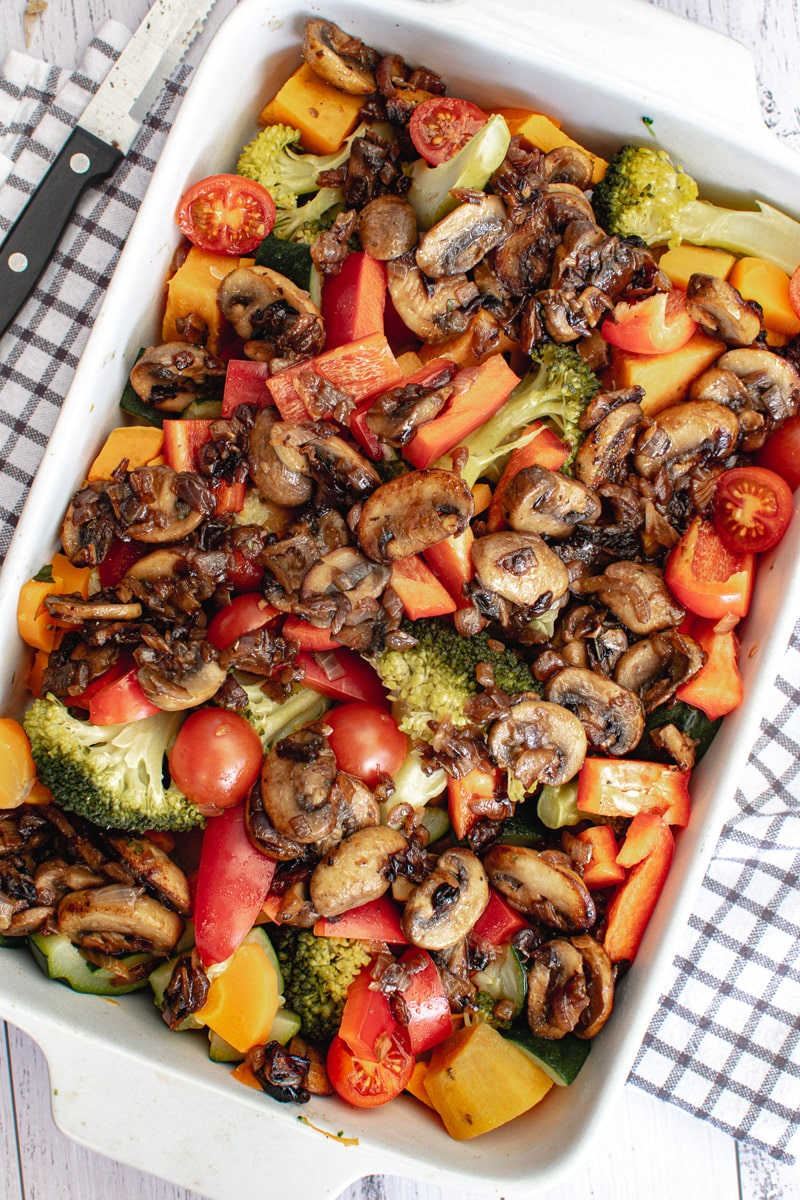
Sautéing the Vegetables
It is important to follow the directions for sautéing the vegetables. Sautéing them first will provide a nice texture to the dish and bring out the optimal flavor of the vegetables.
Stirring the Sauce
Make sure to stir the cheese sauce until it reaches the proper thickness. If you do not stir continuously, the bottom of your cheese sauce will be burnt.
Variations To Roasted Veggies with Vegan Cheese Sauce
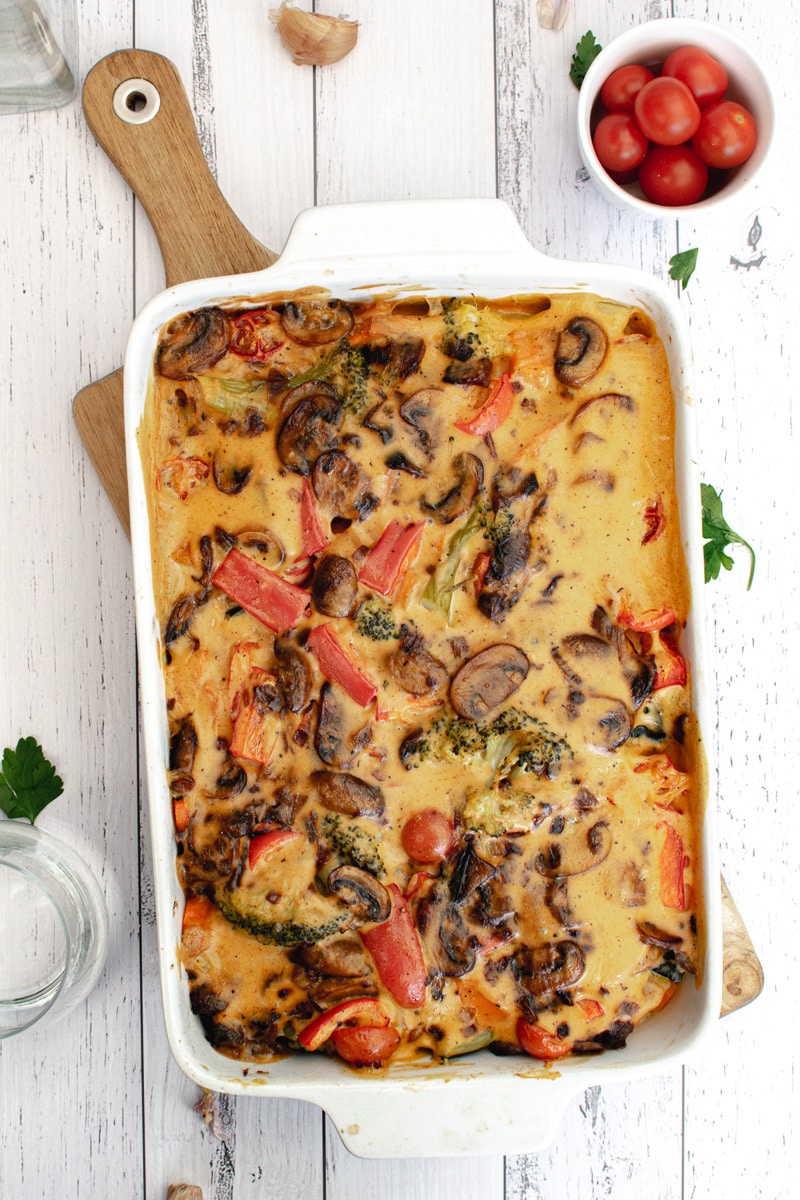
Use Different Spices
Consider changing up the spices that you use in the cheese sauce. I used paprika, oregano, salt, and pepper. Consider adding in some garlic, Cajun spice, or other ingredients to change up the flavor of your sauce.
Swap Vegetables
If you want, swap the veggies in the recipe for other veggies that you have on hand. Snap peas, fresh green beans, etc would all taste great!
Roasted Veggies with Vegan Cheese Sauce FAQs
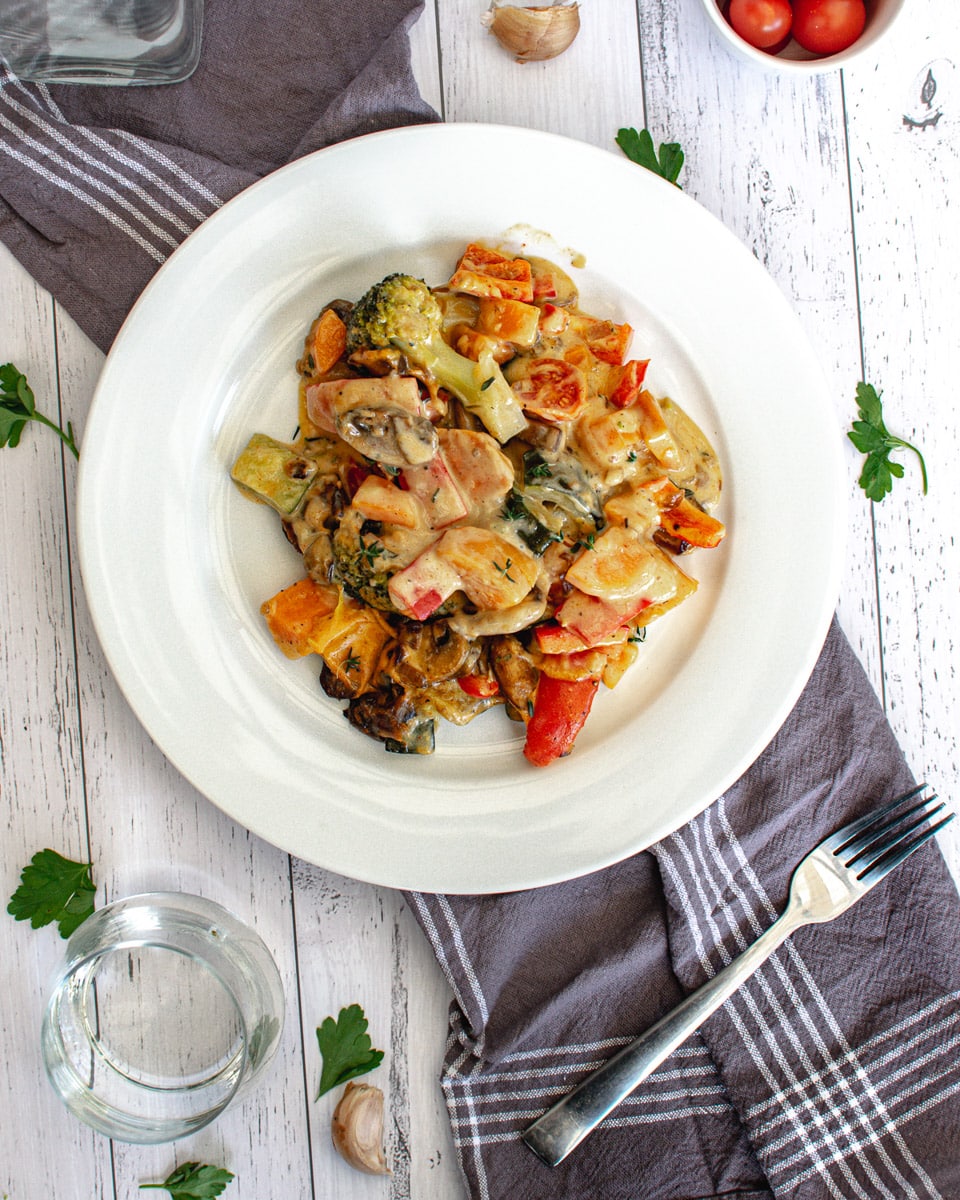
What is a substitute for nutritional yeast?
If you don't have nutritional yeast, you can use dried mushrooms, concentrated vegetable bouillon, or even mashed chickpeas instead. Though, for this creamy cheese sauce, I recommend using nutritional yeast as the other ingredients will alter the texture of the cheese.
Why didn't my cheese sauce thicken?
The key to making this cheese sauce is to follow the directions and make sure that you give the sauce time on the stovetop. If you rush the cooking process, you will find the sauce doesn't have time to thicken.
Stir the sauce continuously, and it will thicken.
How do you store leftovers?
Store your vegetables and cheese sauce in the refrigerator. It will last 3-4 days. You will find the vegetables soften a bit, so they are best served warm and fresh.
When ready to eat your leftovers, reheat in a skillet or in the microwave.
Recipe

Roasted Veggies with Vegan Cheese Sauce
Need a simple veggie-packed side dish? These roasted onions, broccoli, zucchini, and sweet potatoes, are smothered in a creamy homemade vegan cheese sauce. Yum!
Print
Pin
Save
Servings: servings
Ingredients
For the Vegan Cheese Sauce:
- ½ cup vegan cheese cheddar variety
- 1 cup non-dairy milk such as soy milk
- 2 tablespoon nutritional yeast
- 1 teaspoon smoked paprika
- 1 teaspoon oregano
- 2 tablespoon olive oil
- salt and pepper, to taste
For the Roasted Vegetables:
- 4 cloves garlic minced
- 1 onion peeled and chopped
- 1 large sweet potato chopped into bite sized pieces
- 2 carrots peeled and chopped into ½" pieces
- 1 zucchini halved and sliced into ½" thick half moons
- ½ head broccoli florets roughly chopped
- 1 red bell pepper chopped into bite sized pieces
- 1 cup cherry tomatoes
- 2 cups button white mushrooms cleaned and sliced
- salt and pepper
Instructions
- Preheat the oven to 400°F.
- Heat olive oil in a non-stick pan over medium-high heat. Add onion and sauté for 2-3 minutes.
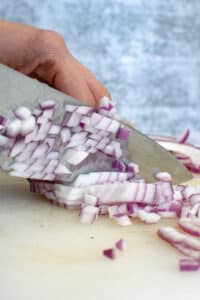
- Add garlic and mushroom. Sauté until onion is translucent and mushrooms are cooked, 5-6 minutes. Set aside.
- Meanwhile, bring a pot of water to a boil.
- Add the carrots, broccoli, and sweet potatoes to the boiling water and cook for 10 minutes. (They don't need to be totally cooked, as the cooking will finish in the oven.)
- For the sauce, simply place all the ingredients into a saucepan stirring continuously until you get a thick-cheesy sauce.
- Place all the vegetables, including the red pepper and cherry tomatoes, onto a baking sheet. Drizzle with additional olive oil. Season with salt and pepper, to taste.
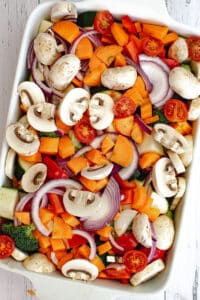
- Roast vegetables in the oven for 10-15 minutes, until the red pepper is tender.

- Pour the cheese sauce over the vegetables, and cook for 5 more minutes or until all the veggies are fork-tender.

Nutrition (Estimate per Serving)
Calories: 262kcalCarbohydrates: 32gProtein: 9gFat: 12gSaturated Fat: 2gSodium: 236mgPotassium: 945mgFiber: 7gSugar: 11gVitamin A: 14819IUVitamin C: 68mgCalcium: 157mgIron: 2mg
Vegan-ize any recipe!Grab our free vegan cheat sheet, packed with my favorite easy substitutions to make any recipe vegan.
Vegan Grilled Cheese Sandwiches 5 Ways
There's nothing quite as comforting as a hot, gooey grilled cheese sandwich. And now the plant based crowd doesn't need to miss out with these easy and delicious vegan grilled cheese recipes!

All photos by Hannah Kaminsky.
These days, grilled cheese is hot. (Pun intended.) There are even restaurants devoted solely to grilled cheese sandwiches. So why should us vegans miss out?
So today we have five delicious ways to make a vegan grilled cheese - and most can be made in just a few minutes.
There's no big secret here. We're not going to hand-craft our vegan cheese or anything wild like that. Just simple, delicious, easy vegan grilled cheese.
[feast_advanced_jump_to]Tips for Making Vegan Grilled Cheese
Now there is a misconception out there than vegan cheeses are un-meltable. Not so! I've impressed many guests with how melty and stretchy a good vegan cheese made for that purpose can be.
There are several good vegan cheeses on the market melt wonderfully well, including Daiya and Follow Your Heart. You may know of other brands, and if so, comment below and let us know which ones you like!
And of course, nothing pairs with grilled cheese like a bowl of tomato soup. I like to dunk my sandwich! If you want some in a hurry, this Imagine Creamy Tomato is vegan and very good. Or make your own homemade vegan tomato soup.
How to Make Vegan Grilled Cheese
Kids, you don't need a recipe to make a grilled cheese sandwich, though the internet seems to think otherwise.
You just need some sturdy whole-grain bread, vegan cheese, your add-ins of choice, vegan butter (like Earth Balance), and a good nonstick pan or griddle.
Best to cook over medium heat with a generous but not ridiculous layer of vegan butter; cover the pan when cooking the first side so that the cheese will melt; when the underside is golden, flip and cook the other side. That's it!
But of course, a recipe can give you some inspiration for more creative flavor combinations. So here are five of my favorites.
5 Vegan Grilled Cheese Recipes

First up is this swoon-worthy vegan grilled cheese, tomato, and vegan bacon sandwich. Use your favorite kind of purchased or homemade vegan bacon.
Precook vegan bacon slices first. Layer some vegan cheese shreds onto a slice of bread, followed by tomato slices, vegan bacon, sliced tomato, more cheese shreds, topped by another slice of bread. Cook on a little vegan butter over medium heat, covered, until both sides are golden.
This is good with either cheddar, mozzarella, or pepper jack style cheese.

Grilled cheese with mushrooms, yum! To make this delightful sandwich, simply precook sliced brown mushrooms (cremini- or for a fancier feast, shiitake) until wilted, then drain.
Layer on the bread: cheese shreds, cooked mushrooms, more cheese shreds, another slice of bread. Cook on a little vegan butter over medium heat, covered, until both sides are golden.
We think this is best with mozzarella style cheese, but you may beg to differ.

Apple and cheddar is a classic flavor combo, and it works quite well in vegan grilled cheese, too. Using a tart granny smith apple is a good move, but if all you've got is a red apple, that's not a bad choice. Either way, just make sure the apple is nice and crisp.
Layer on bread: cheese shreds, apple slices, more cheese shreds, another slice of bread. Cook on a little vegan butter over medium heat, covered, until both sides are golden.

Spice things up with fresh jalapeño in your grilled cheese! Slice it thinly and remove the seeds. Use the usual precautions when handling hot chili peppers.
Layer on bread: cheese shreds, sliced jalapeños, more cheese shreds, another slice of bread. Cook on a little vegan butter over medium heat, covered, until both sides are golden.
We used a combination of cheddar and mozzarella-style vegan cheese shreds with this one.
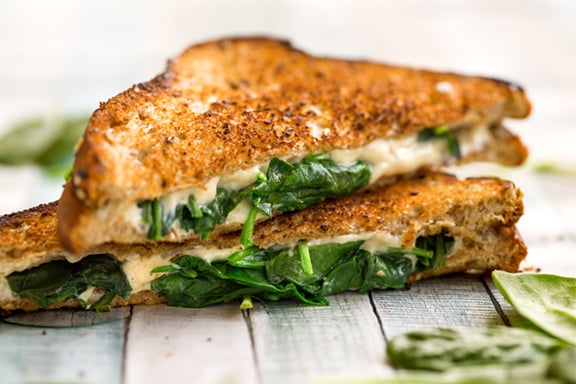
Last but not least, a vegan grilled cheese sandwich with the green goodness of spinach. Rinse some baby spinach and wilt it in the pan you'll be using. Transfer to a colander and squeeze out the liquid.
Layer on bread: cheese shreds, wilted spinach more cheese shreds, another slice of bread. Cook on a little vegan butter over medium heat, covered, until both sides are golden.
We used mozzarella-style vegan cheese shreds here, but this would go with any variety - cheddar, or if you'd like a spicy kick to go with the spinach, pepperjack.
Ta-dah! Five delicious ways to make your favorite comfort food.
And if you love these vegan grilled cheese sandwich ideas, be sure to check out these other delicious recipes as well:
Also try: our Easy Portobello Burgers.
Recipe

Vegan Grilled Cheese Sandwich - 5 Ways!
Here are five deliciously simple ways to make a vegan grilled cheese sandwich. Yum!
Print
Pin
Save
Servings: sandwich
Ingredients
- 2 slices bread any variety
- vegan butter as needed for cooking
#1 - Vegan Grilled Cheese, Tomato, and Vegan Bacon
- 3 slices vegan bacon store bought or homemade
- ¼ cup vegan cheddar, mozzarella, or pepper jack style cheese shreds
#2 - Vegan Grilled Cheese with Mushrooms
- 2 oz mushrooms cremini or shiitake
- ¼ cup vegan mozzarella style cheese shreds
#3 - Vegan Apple and Cheddar Grilled Cheese
- ½ granny smith apple sliced thinly
- ¼ cup vegan cheddar style cheese shreds
#4 Vegan Jalapeno Grilled Cheese
- ½ jalapeno sliced, seeds removed
- ¼ cup vegan cheddar or mozzarella style cheese shreds or a combination of both
#5 - Vegan Green Goddess Grilled Cheese
- 1 cup baby spinach more or less, to taste
- ¼ cup vegan mozzarella style cheese shreds
Instructions
#1 - Vegan Grilled Cheese, Tomato, and Vegan Bacon
- Precook vegan bacon slices first. Layer some vegan cheese shreds onto a slice of bread, followed by tomato slices, vegan bacon, sliced tomato, more cheese shreds, topped by another slice of bread.
- Spread a bit of vegan butter on both sides of the sandwich, and cook over medium heat, covered, until both sides are golden and cheese is melted.
#2 - Vegan Grilled Cheese with Mushrooms
- Spray a frying pan with olive oil cooking spray, and cook sliced mushrooms for 5-6 minutes, over medium high heat, until wilted. Drain off any excess liquid, and allow mushrooms to cool.
- On a slice of bread, layer the cheese shreds, cooked mushrooms, more cheese shreds, and then another slice of bread.
- Spread a bit of vegan butter on both sides of the sandwich, and cook over medium heat, covered, until both sides are golden and cheese is melted.
#3 - Vegan Apple and Cheddar Grilled Cheese
- On a slice of bread, layer the cheese shreds, apple slices, more cheese shreds, and then another slice of bread.
- Spread a bit of vegan butter on both sides of the sandwich, and cook over medium heat, covered, until both sides are golden and cheese is melted.
#4 - Vegan Jalapeno Grilled Cheese
- On a slice of bread, layer the cheese shreds, sliced jalapeños, more cheese shreds, and then another slice of bread.
- Spread a bit of vegan butter on both sides of the sandwich, and cook over medium heat, covered, until both sides are golden and cheese is melted.
#5 - Vegan Green Goddess Grilled Cheese
- Rinse some baby spinach and wilt it in the pan you'll be using. Transfer to a colander and squeeze out the liquid.
- On a slice of bread, layer the cheese shreds, wilted spinach, more cheese shreds, and then another slice of bread.
- Spread a bit of vegan butter on both sides of the sandwich, and cook over medium heat, covered, until both sides are golden and cheese is melted.
Nutrition (Estimate per Serving)
Calories: 241kcalCarbohydrates: 35gProtein: 7gFat: 8gSaturated Fat: 2gPolyunsaturated Fat: 1gMonounsaturated Fat: 1gTrans Fat: 1gSodium: 571mgPotassium: 102mgFiber: 3gSugar: 3gVitamin A: 1IUVitamin C: 1mgCalcium: 97mgIron: 2mg
Vegan-ize any recipe!Grab our free vegan cheat sheet, packed with my favorite easy substitutions to make any recipe vegan.
This post was originally published in 2018. It has since been updated.
Marinated Mushrooms With Wild Rice
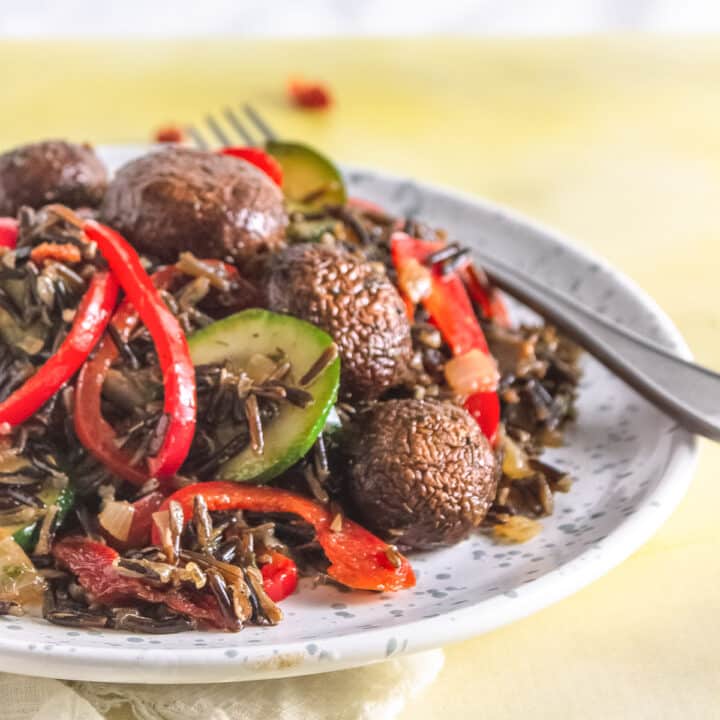
Check out this tasty recipe for Marinated Mushrooms with Wild Rice. Your whole family will enjoy this easy and satisfying vegan wild rice full of flavorful marinated mushrooms.
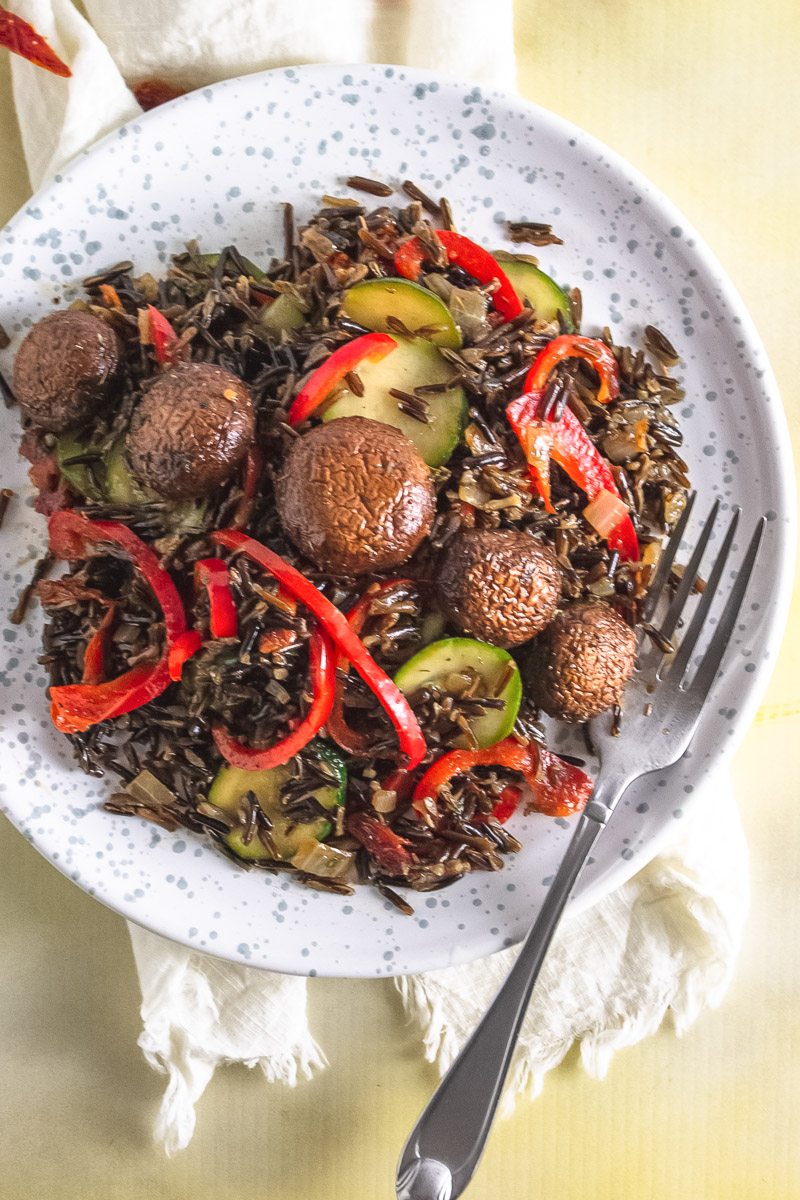
Marinated Mushrooms with Wild Rice is a wonderful meatless dinner option that is a great source of nutrients. You can also use your mushroom rice leftovers to meal prep for quick grab-and-go lunches or dinner another night.
For other tasty dishes with cremini mushrooms, try this Creamy Mushroom Pasta or this fresh Vegan Mushroom and Lentil Salad. Need to use up a bit of wild rice? This Cranberry-Pear Wild Rice Stuffing is one of my favorites!
This Marinated Mushrooms With Wild Rice Is...
- Vegan
- Gluten-free
- Soy-free
- Nut-free
- Meal prep-friendly
- Easy to make
And while you're here, don't forget to grab a copy of my free vegan cheat sheet. It's packed with all my favorite substitutions to vegan-ize any recipe!
How to Make Marinated Mushrooms with Wild Rice
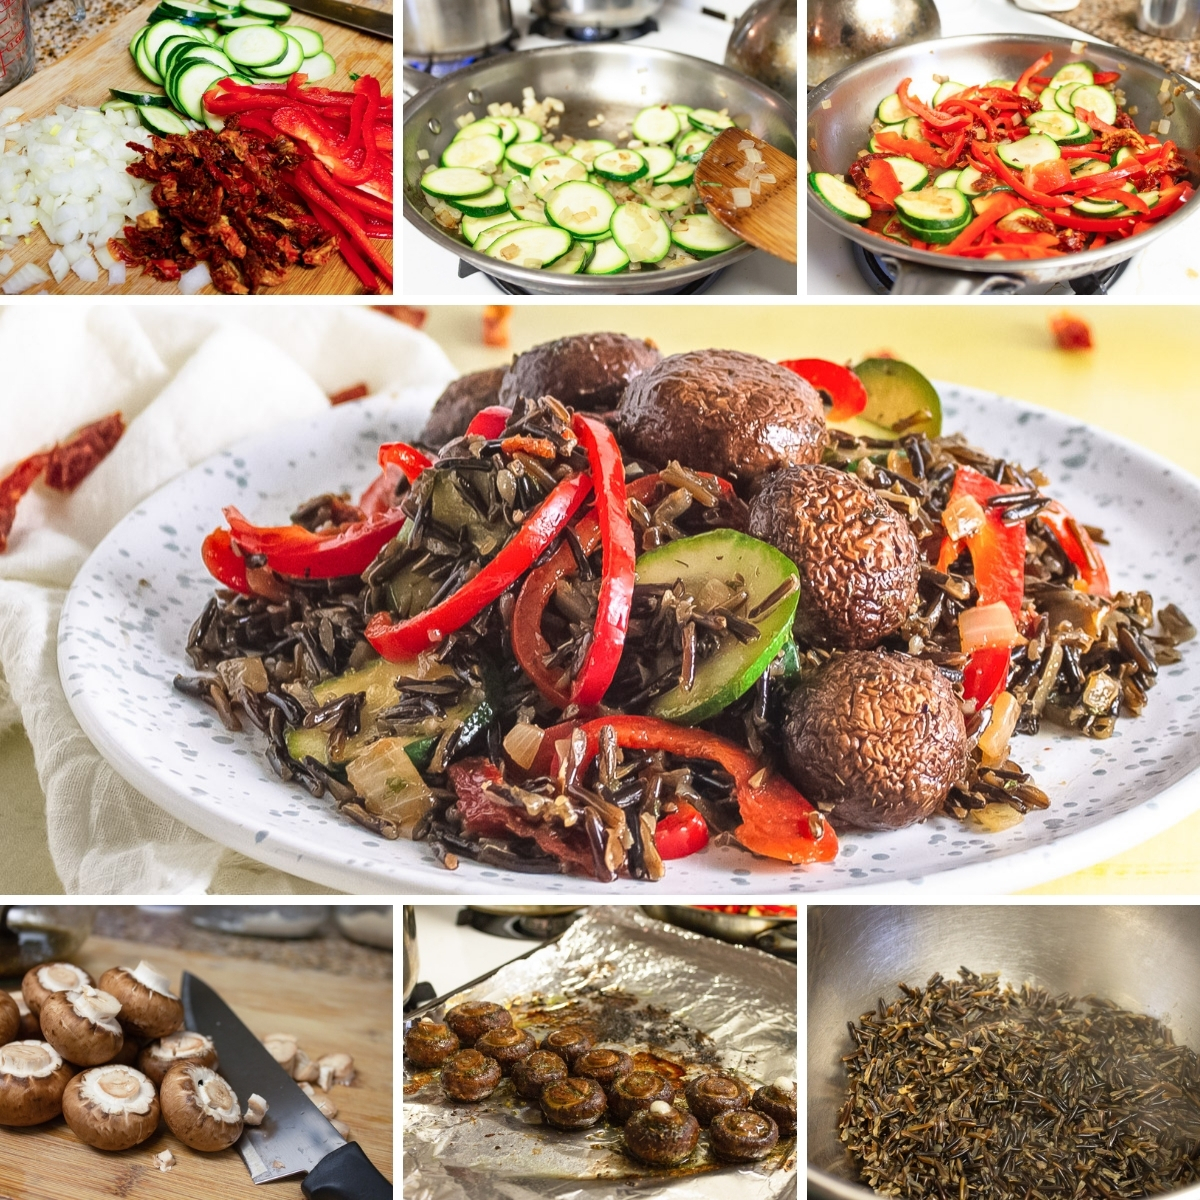
- Cook the wild rice.
- In a new bowl, add all your marinade ingredients and mix.
- Prep the mushrooms and toss in the marinade. Let them sit for 15 minutes.
- Prep all the veggies. Place mushrooms in a pan and broil.
- Cook veggies, stir in rice, and add mushrooms. Serve and enjoy.
See detailed instructions and list of ingredients below.
Tips and Tricks for Perfect Marinated Mushrooms
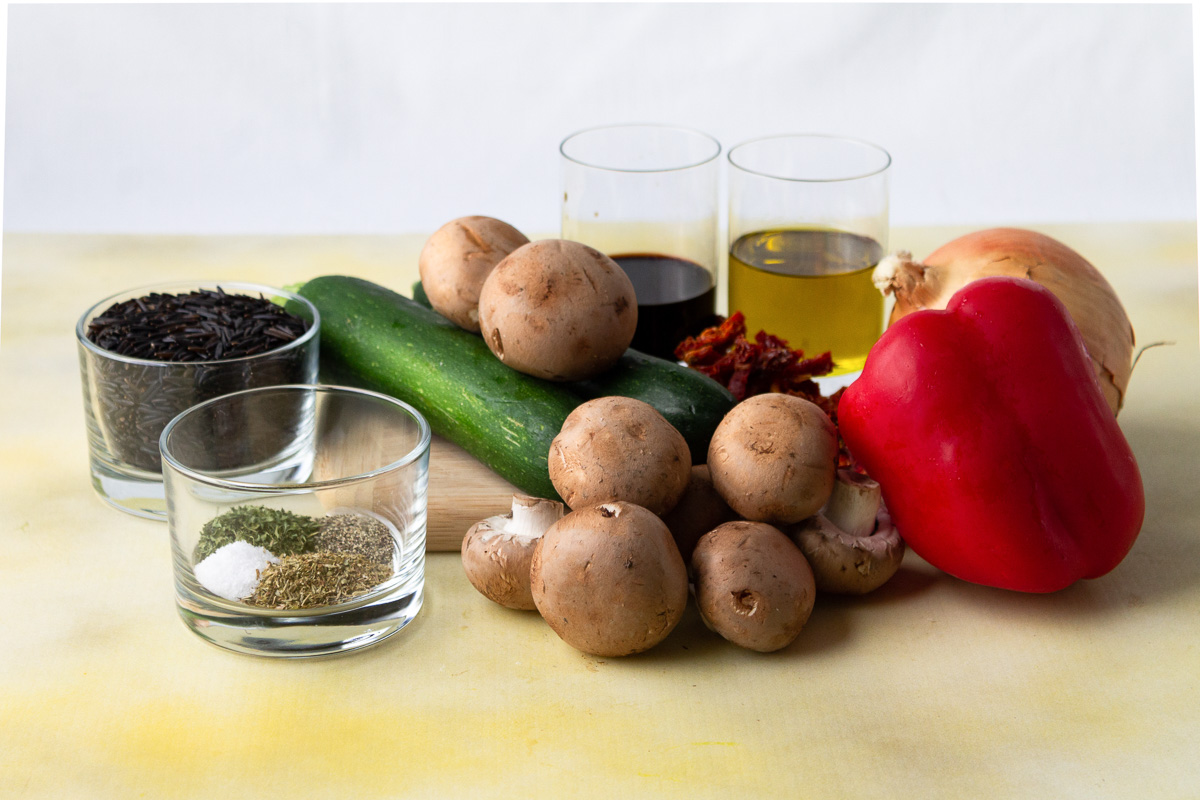
Stir Marinated Mushrooms
Make sure to stir the mushrooms in the marinade a few times while they are soaking. This will help to evenly coat the mushrooms and create a delicious flavor throughout the dish when cooked.
Cooking Rice
You can use a rice cooker or Instant Pot if you don't want to cook your rice on the stovetop. Just cook the rice as as directed for whatever device you decide to use.
Variations
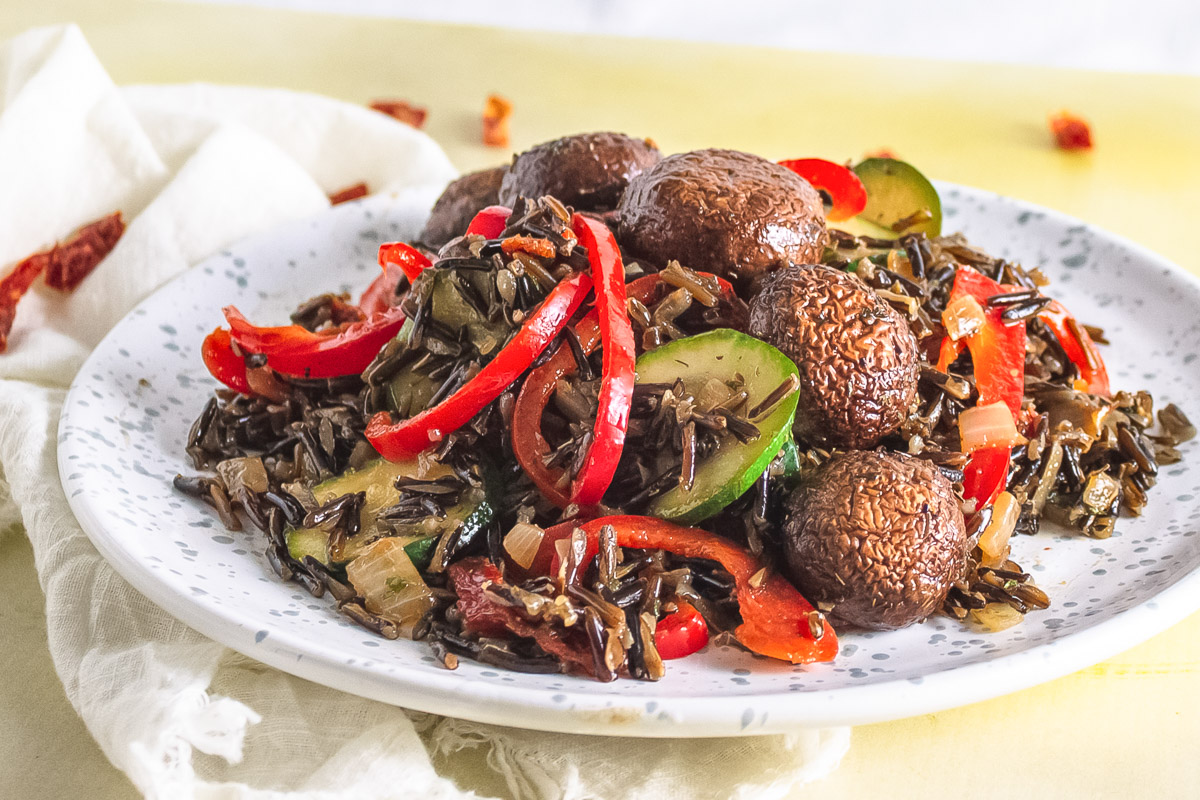
Swap Variety Of Rice
Feel free to make this dish using white rice, jasmine rice, or brown rice instead of the wild rice. You can use any variety of rice that you prefer or have on hand. Just make sure to adjust the cook time of the rice according to the package. This also works well with other whole grains such as quinoa or barley.
Change Up The Vegetables
This dish is great for using up vegetables in your pantry. I have found that even veggies like yellow squash are a great mix-in for this dish. Just chop up whatever vegetables you decide to use and add them in!
It's a win-win when you can clean out your old produce and create a satisfying meal.
Try Adding Tofu
Consider dicing up a bit of tofu, cooking it, and mixing it into the mushroom and rice mix. You could even marinate the tofu with the mushrooms for added flavor. Then cook your tofu when you cook the mushrooms.
FAQs

How do you store leftover mushrooms and rice?
This dish is best served fresh, but can be refrigerated for a few days. If you have leftovers, you can store the mix in the refrigerator for 2-3 days. Anything left after three days will need to be tossed out.
What are the health benefits of wild rice?
Wild rice is a wonderful mix of protein and fiber. Wild rice is also a source of antioxidants, if you want to incorporate more into your diet.
What mushrooms should I use for marinated mushrooms?
I used cremini mushrooms, but you could also use shiitake mushrooms, white button mushrooms, or sliced portobello mushrooms. Softer mushrooms like oyster mushrooms will not hold up as well to the marinade.
If you love these marinated mushrooms, be sure to check out these other delicious recipes:
Recipe
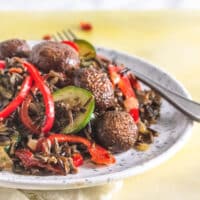
Vegan Wild Rice With Marinated Mushrooms
These Marinated Mushrooms are packed with flavor from fresh herbs and balsamic vinegar, and served over hearty Wild Rice. Yum!
Print
Pin
Save
Servings: servings
Ingredients
Marinade
- ¼ cup olive oil
- 2 tablespoon balsamic vinegar
- 1 teaspoon dried parsley
- 1 teaspoon dried oregano
- ½ teaspoon ground pepper
- ½ teaspoon salt
Instructions
- In a medium pot, combine wild rice with 3 ½ c (825ml) water and ½ teaspoon (3g salt). Cook on medium-low heat for 40-45 minutes until all water is absorbed.
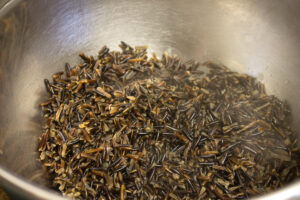
- Combine all ingredients for marinade in a medium bowl. Whisk to blend.
- Clean and trim stems from mushrooms.

- Add to marinade and toss to coat. Allow to sit for 15 minutes, tossing occasionally to redistribute marinade.
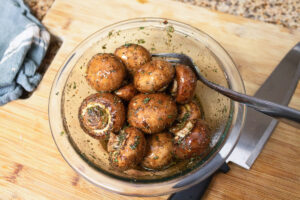
Prepare Vegetables
- Dice onion and slice sun-dried tomatoes if not already done.
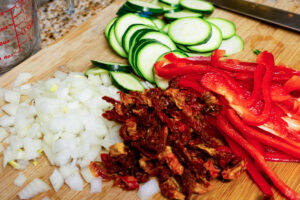
- Slice zucchini into very thin ⅛" (3mm) rounds.
- Remove veins and excess seeds from the red bell pepper and cut lengthwise into ⅛" (3mm) strips.
Broil Mushrooms
- Heat broiler to high. Line a baking sheet with aluminum foil.
- Place marinated mushrooms cap side up on prepared baking sheet. Reserve the remaining marinating liquid.

- Cook the 1st side for 5 minutes under the broiler.
- Remove from oven and flip the mushrooms with a spatula or fork. Return to oven and continue broiling other side for a further 4 minutes or until mushrooms are slightly soft and a bit wrinkled.
Cook Vegetables
- Heat 1 tablespoon (15ml) olive oil in a frying pan over medium heat.
- Add diced onion. Cook for 2-3 minutes, stirring regularly, until the onions start to become translucent.
- Add sliced zucchini. Cook for a further 2 minutes, stirring occasionally, until zucchini is just barely soft.
- Turn off heat and add sliced peppers and sun-dried tomatoes. Stir and toss to soften peppers slightly.
- When rice has absorbed all the water, transfer to a large bowl and add cooked vegetables.
- Add the remaining marinating liquid and toss to coat everything.
- Divide onto plates and top with marinated mushrooms.
- This dish is best enjoyed warm, but can also be eaten cold or reheated by lightly sautéing. If storing for later, keep remaining marinating liquid separate and toss with other ingredients when ready to eat. Can be stored in the fridge in an airtight container for 2-3 days.
Nutrition (Estimate per Serving)
Calories: 151kcalCarbohydrates: 28gProtein: 9gFat: 3gSaturated Fat: 1gSodium: 36mgPotassium: 1625mgFiber: 7gSugar: 16gVitamin A: 4232IUVitamin C: 193mgCalcium: 103mgIron: 3mg
Vegan-ize any recipe!Grab our free vegan cheat sheet, packed with my favorite easy substitutions to make any recipe vegan.
Best Vegan Potato Salad Recipe
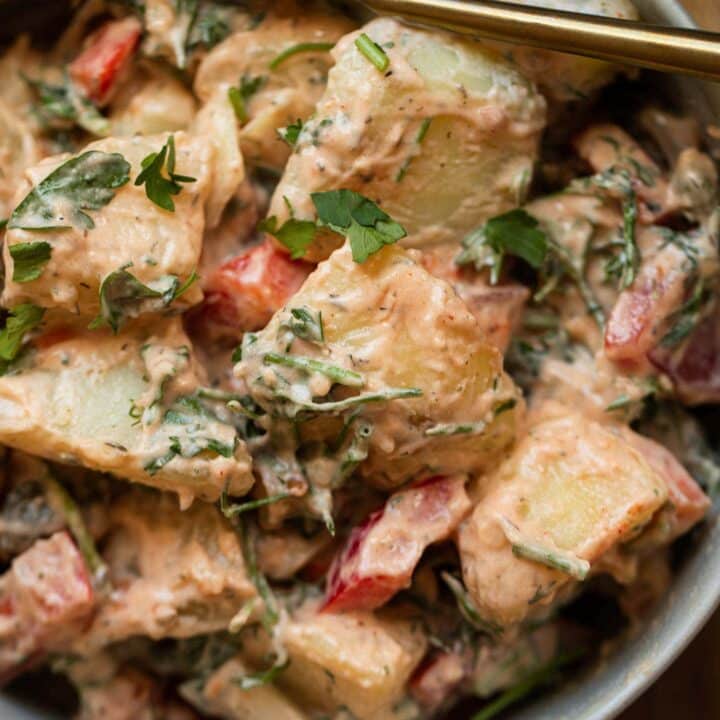
The best vegan potato salad recipe, loaded with fresh herbs and lots of vegetables! Creamy, indulgent and flavorful, it's a perfect summery side dish that's great for BBQs and picnics. It's guaranteed to impress even the fussiest eaters!
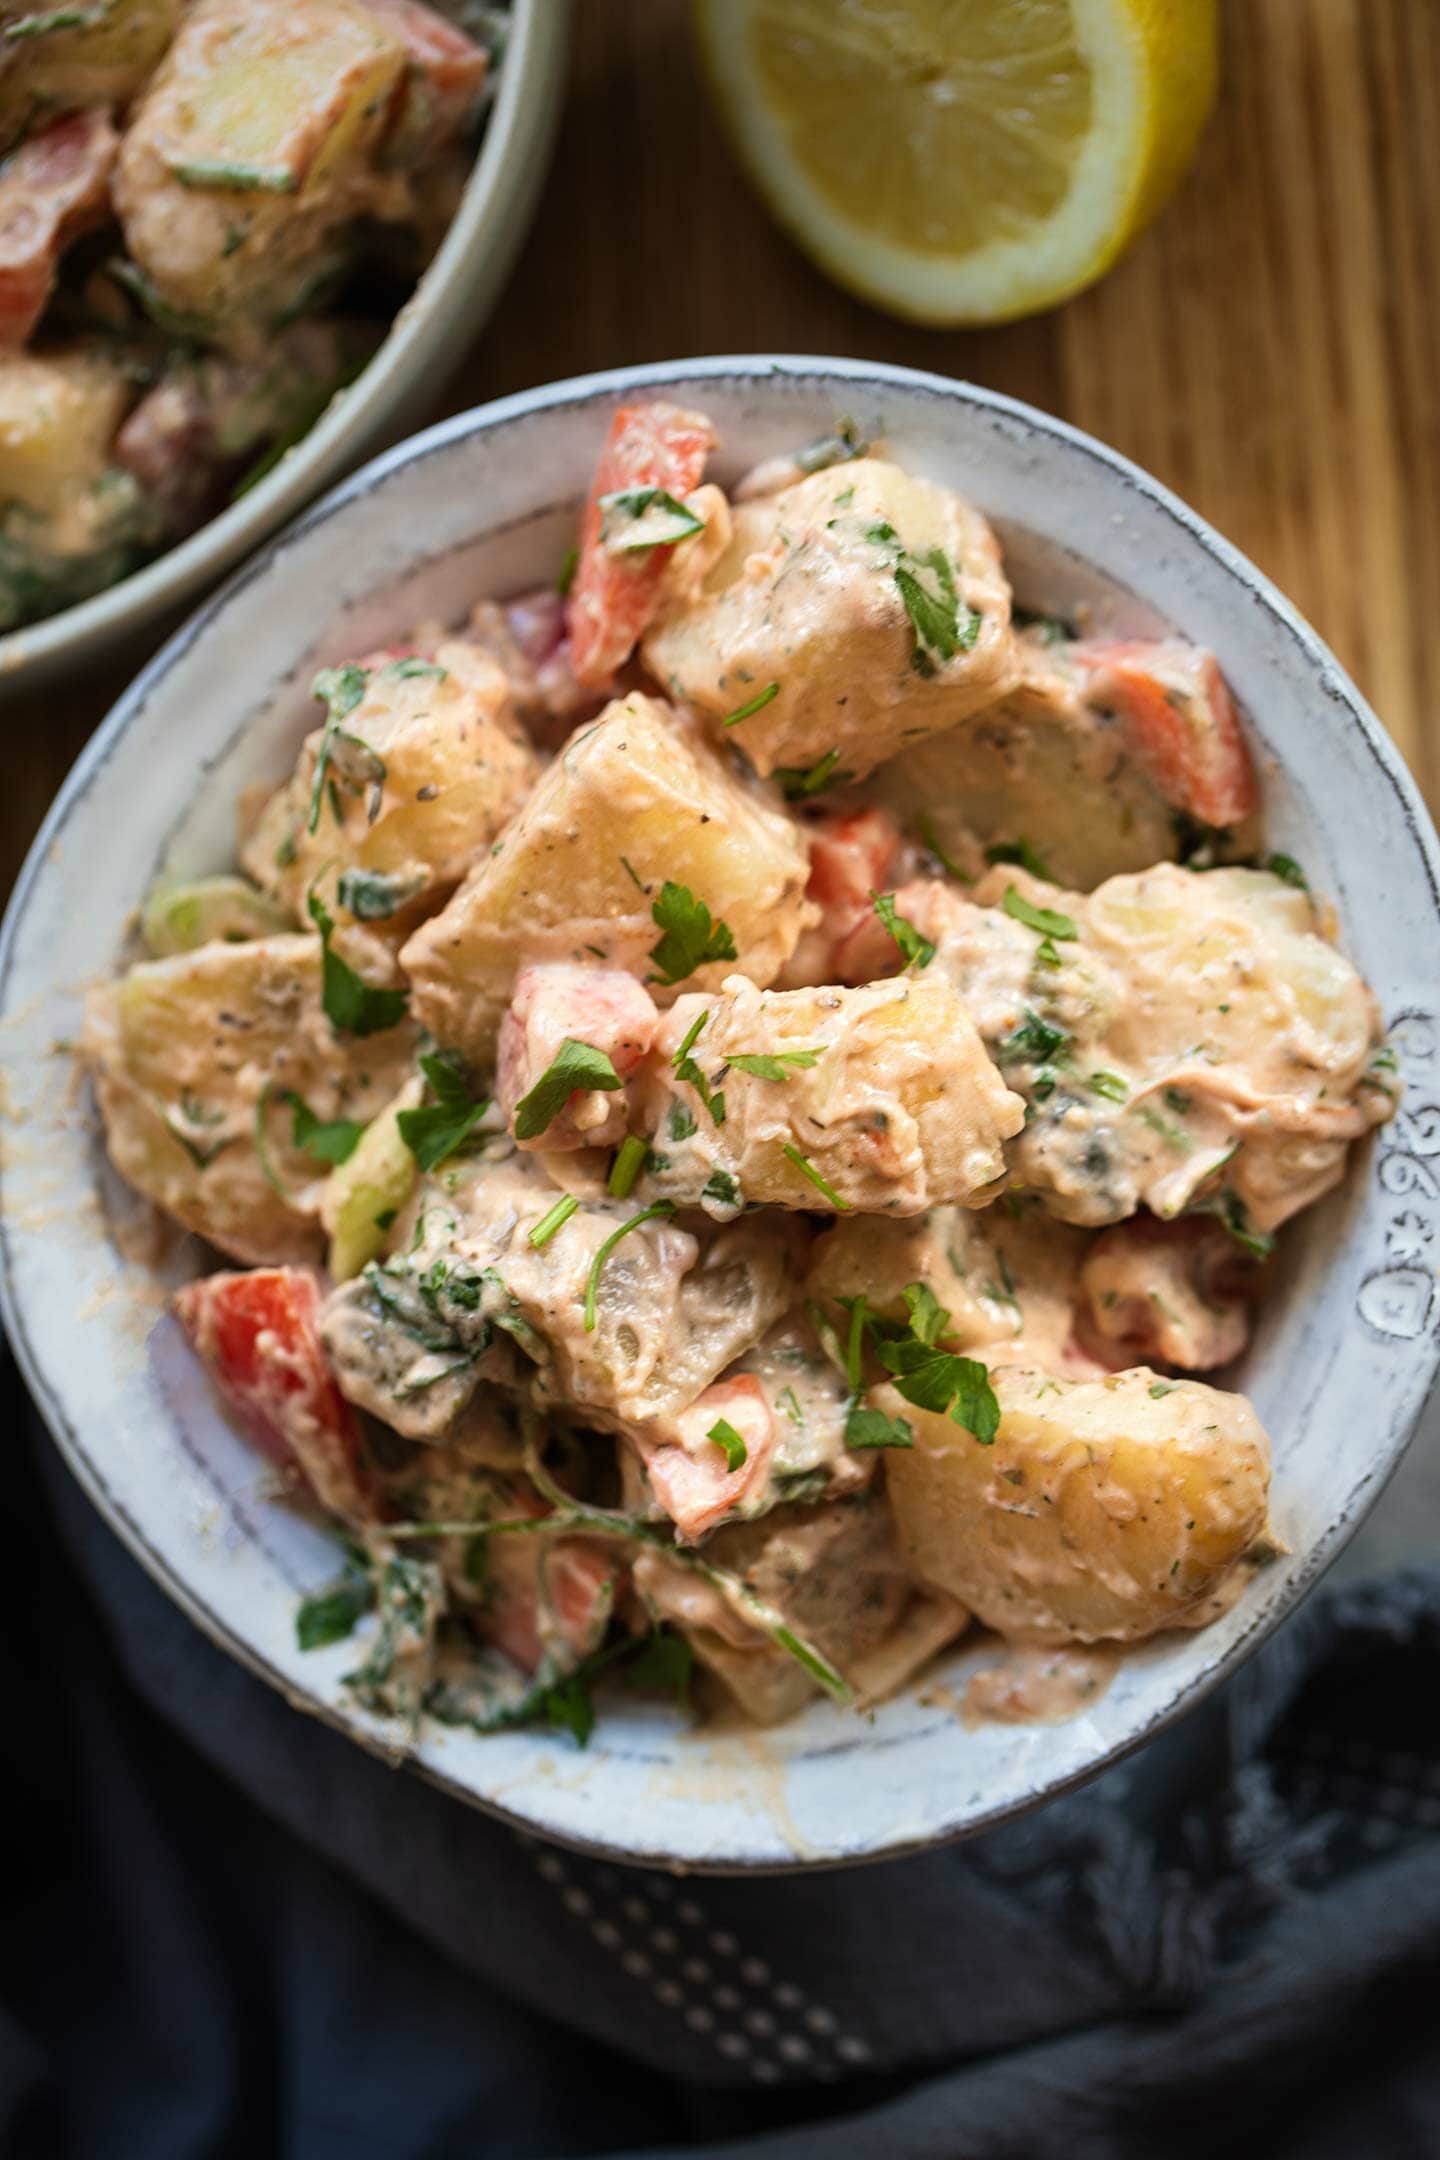
As summer approaches, I find myself craving salad more and more. Potato salad in particular. It's just such a nostalgic dish that goes so well with everything, making it ideal for an outdoor get-together. And I believe that when it comes to potato salad, homemade is always the way to go. Not only is it hard to find vegan potato salads at the store, all the ones that are available are mediocre at best.
But don't worry, because this amazing dairy-free potato salad will be perfect for vegans and non-vegans alike. Last year, I made a potato salad with smoky tempeh. But, I wanted to develop an even simpler recipe for which you need literally 20 minutes. The ingredients and preparation are super simple, but the resulting flavor is phenomenal. It's herby, it's refreshing, it has just the right amount of tanginess. The potatoes are creamy and fluffy, adding hints of earthiness and nostalgia.
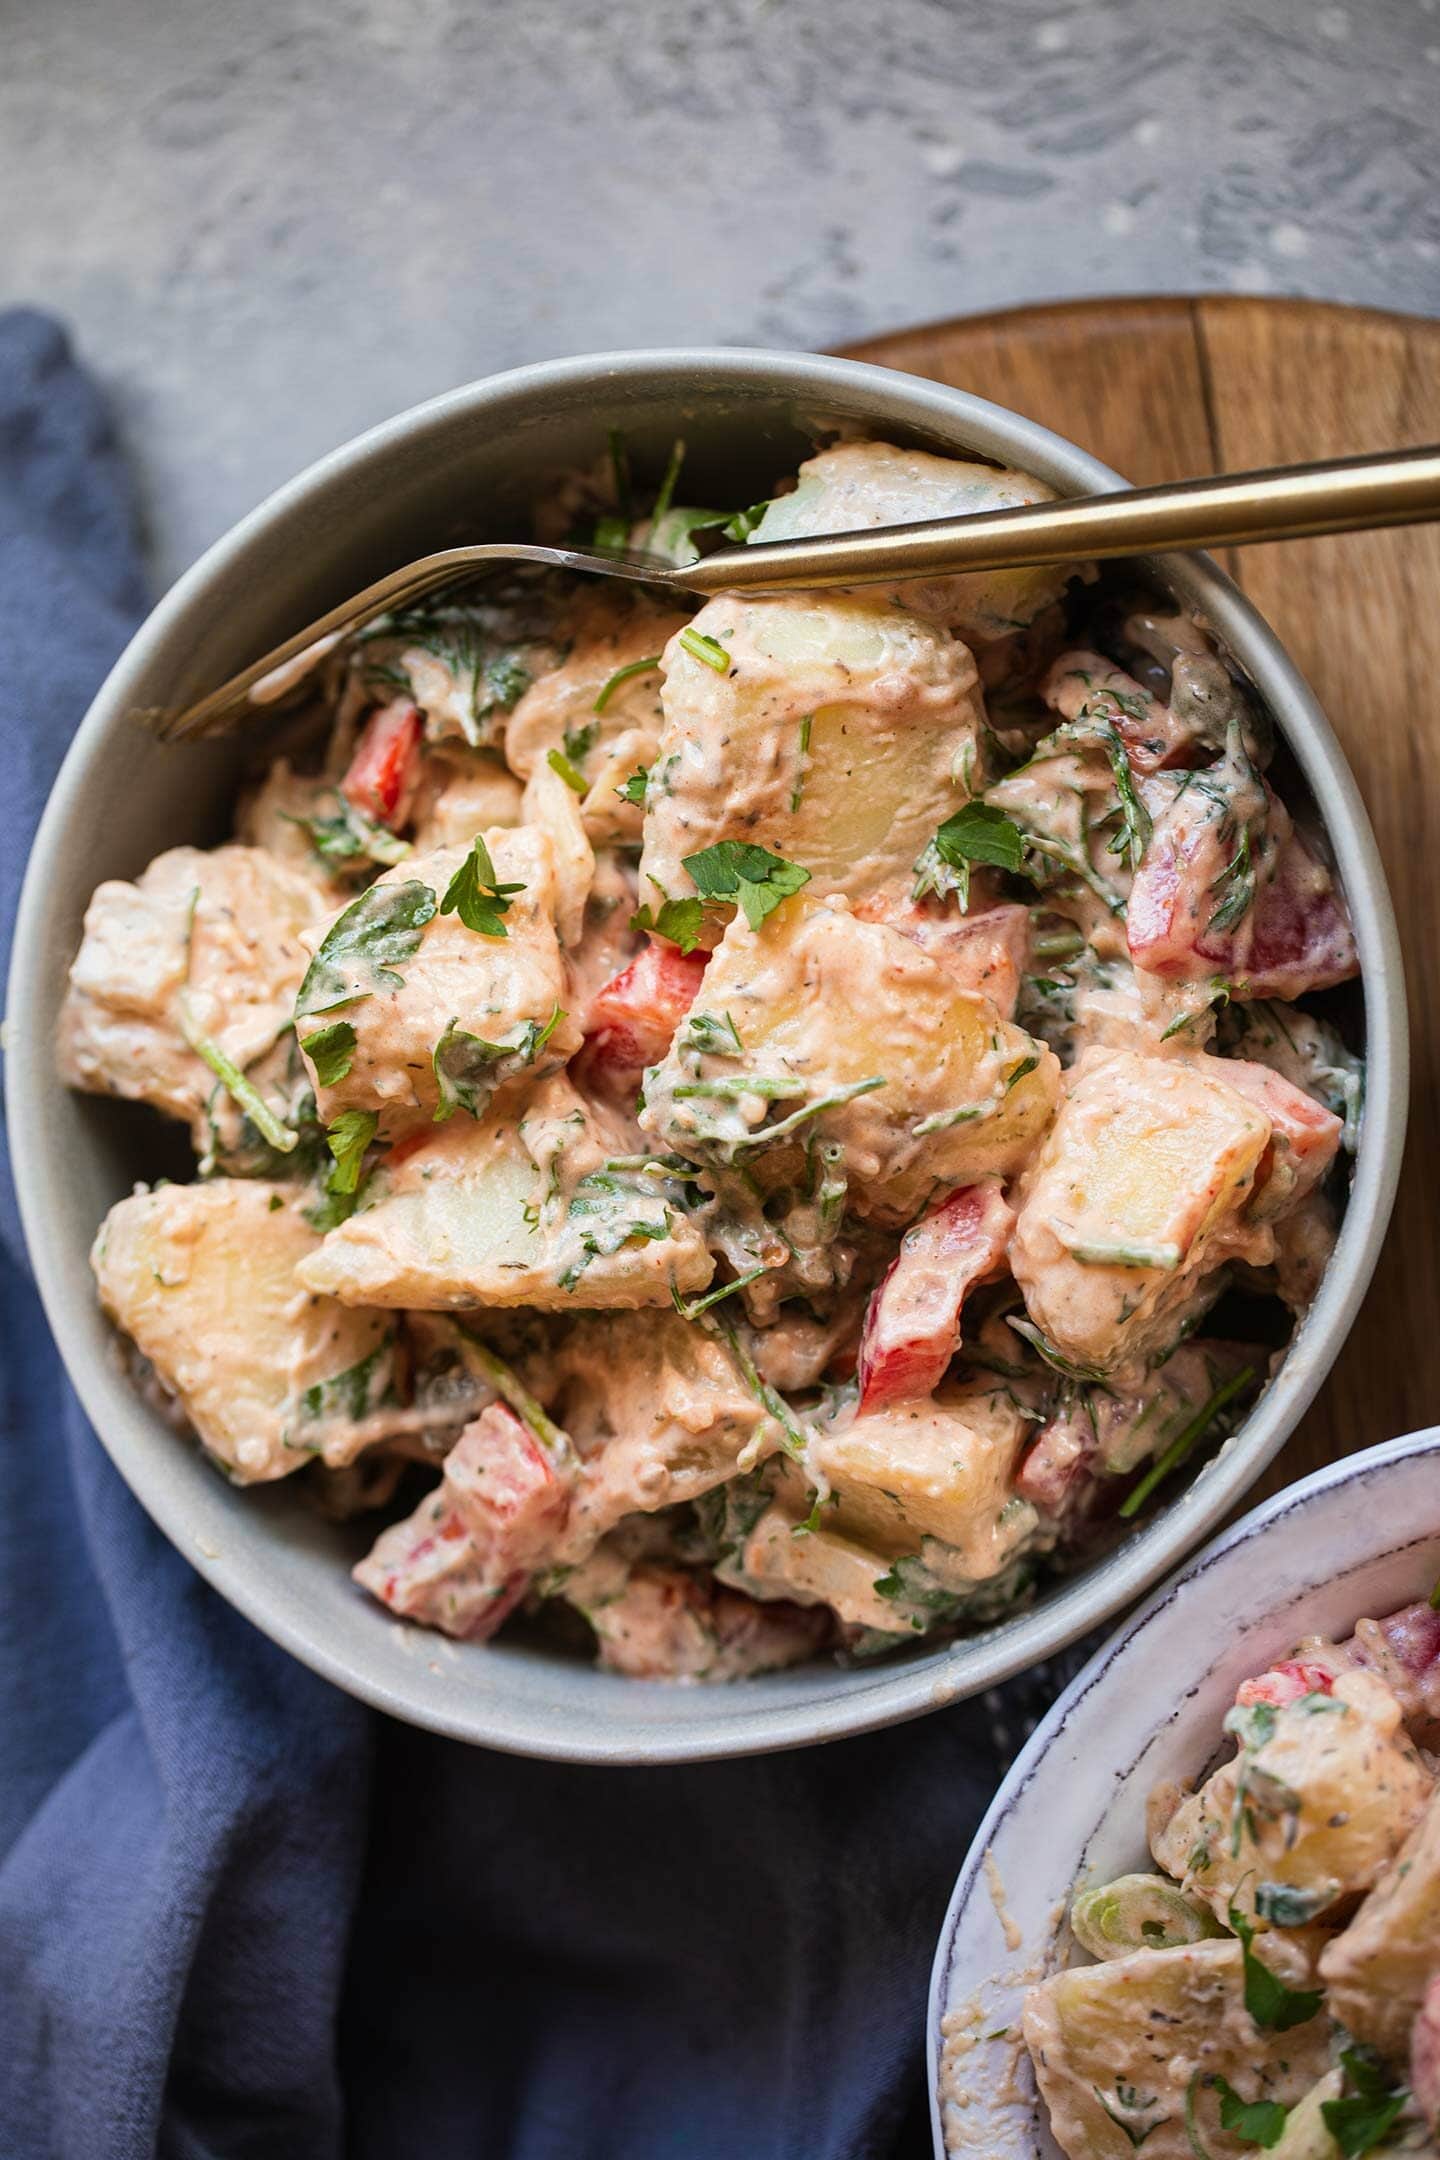
Bring it along to a BBQ or picnic, or serve as a side dish for any summery dinner. There's a few tricks that you need to keep in mind when it comes to making a perfect potato salad, but overall, it's an ideal effortless dish that everyone will love.
Vegan potato salad recipe ingredients
Potatoes. You can use any potato variety of your choice, but waxy potatoes usually work best. You can use either large potatoes, simply peeling and dicing them, or new potatoes, which you can boil whole and save even more time.
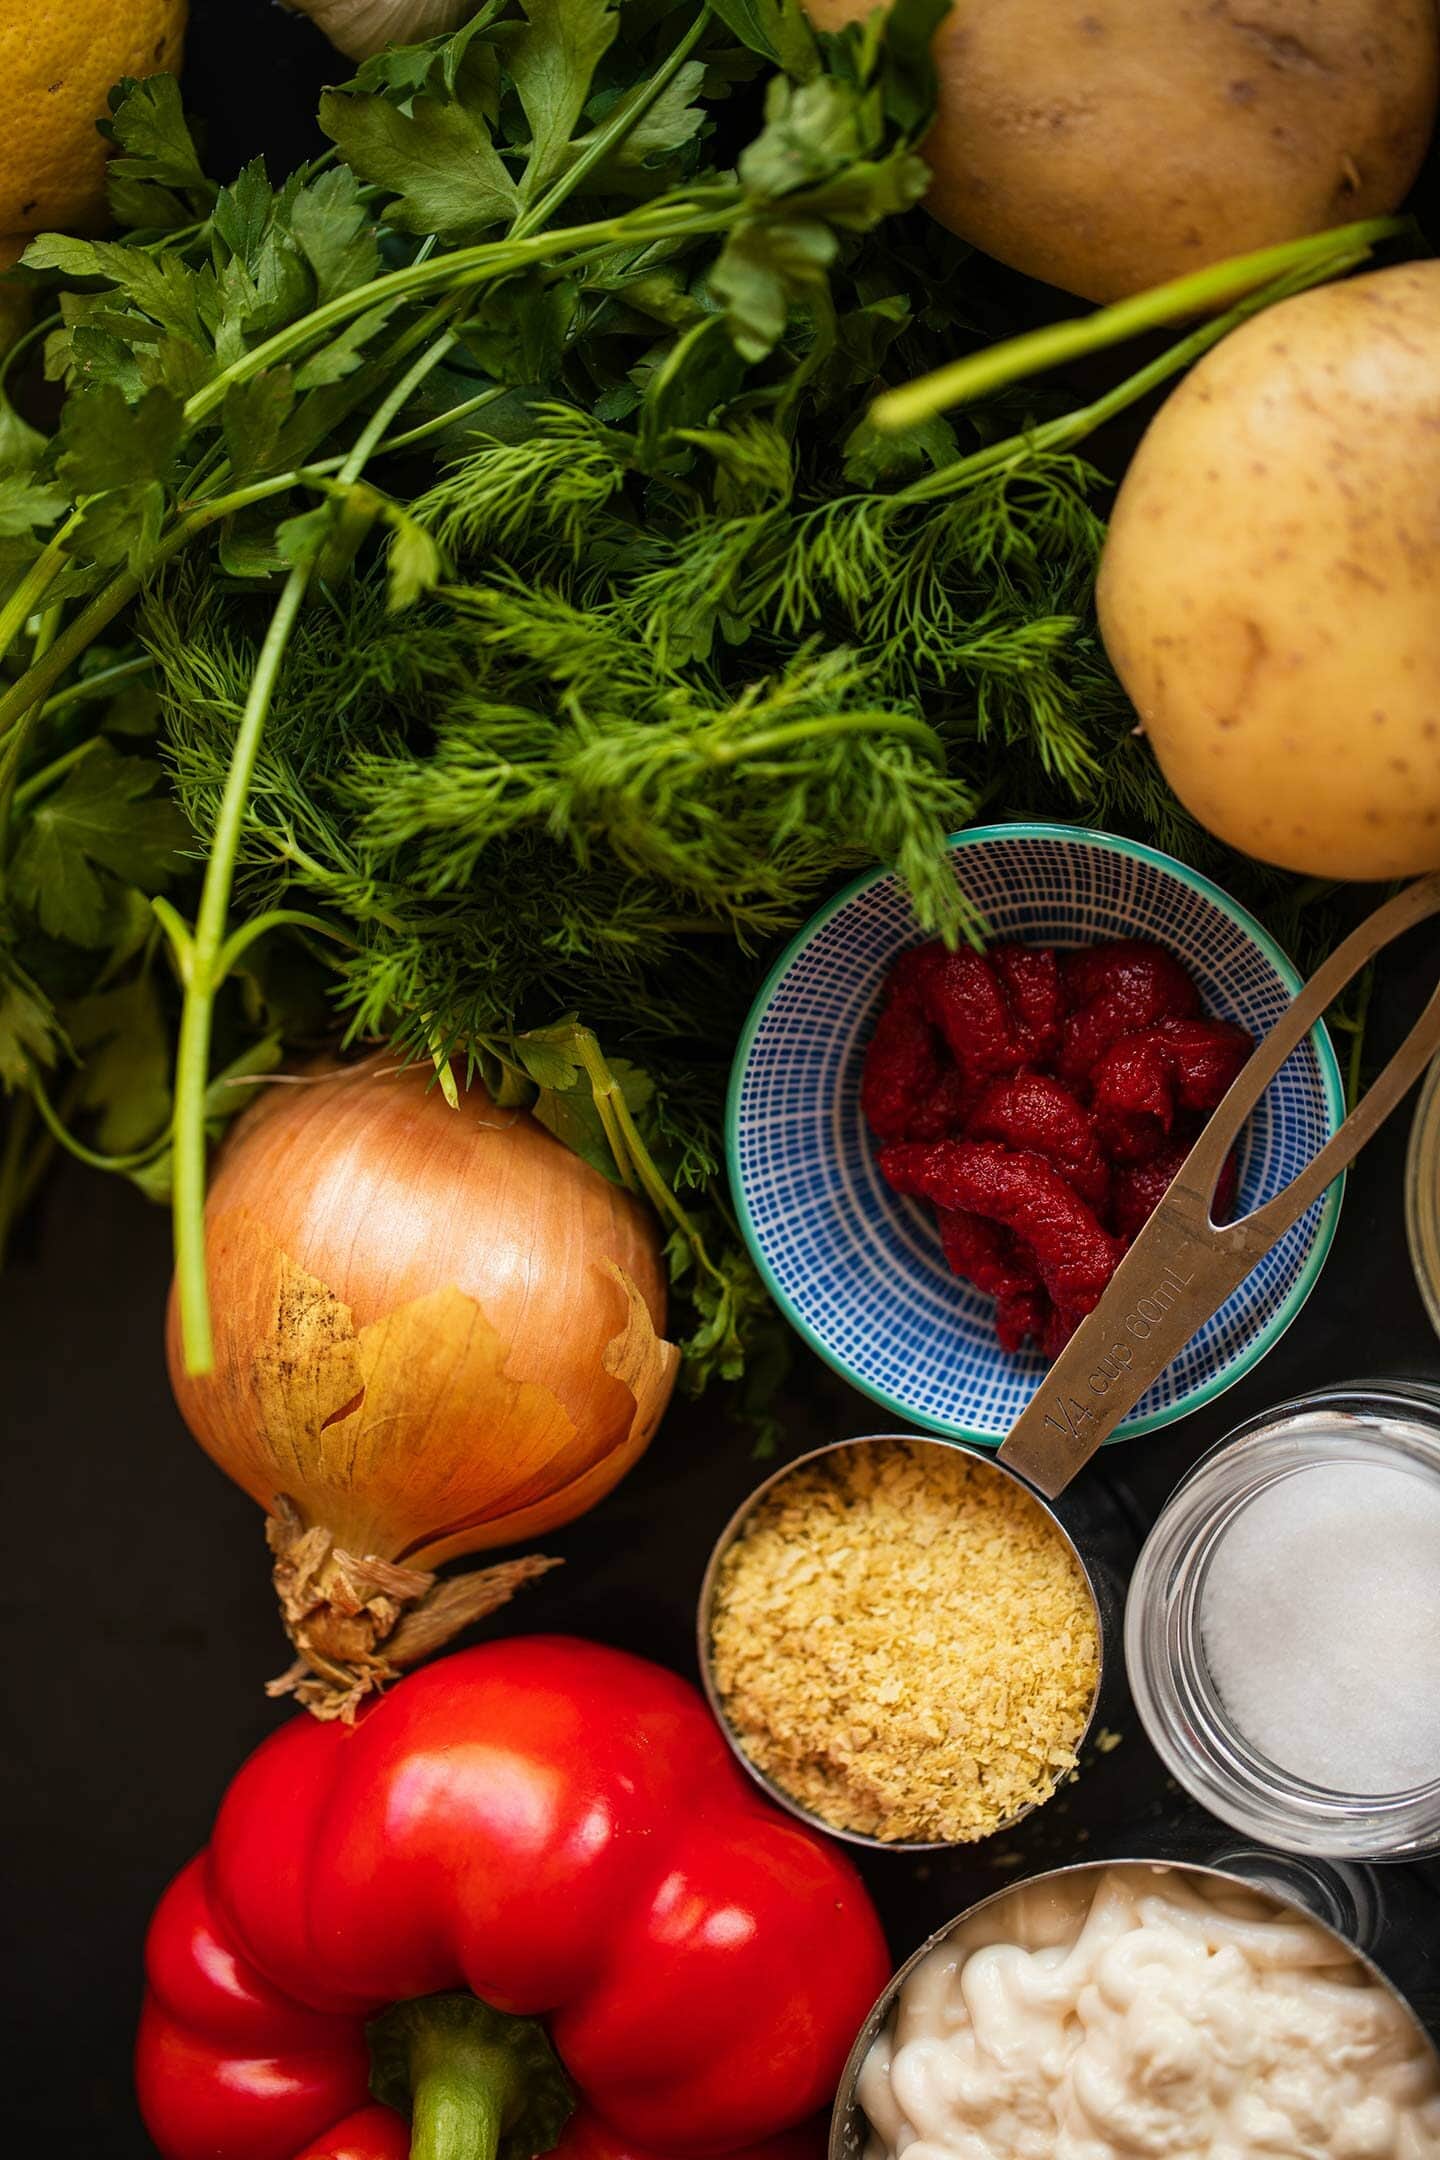
Vegetables of your choice. You can really add any vegetables that you prefer or that you may have in the fridge. I used red peppers, onions, and carrots. Other vegetables that work well involve cucumber, zucchini and cauliflower.
Fresh herbs. I used dill and cilantro. A generous amount of fresh herbs is an ideal addition to vegan potato salad. They add a lot of flavor and freshness, working perfectly with the other ingredients to create nuance.
Garlic. Don't skip this, because garlic is a key ingredient that can take any salad to the next level.

Pickles. Once again, don't leave out the finely diced pickles, because they add that signature tanginess we all love in a potato salad. Capers also work really well.
Lemon juice. I would recommend using freshly-squeezed lemon juice for the best results in order to give the potato salad a more authentic flavor.
Vegan mayonnaise. You can either make your own, or use a good quality store-bought vegan mayo. Keep reading as I've listed some substitutions below that you can use instead. You can also leave it out completely for a more fresh/light salad.
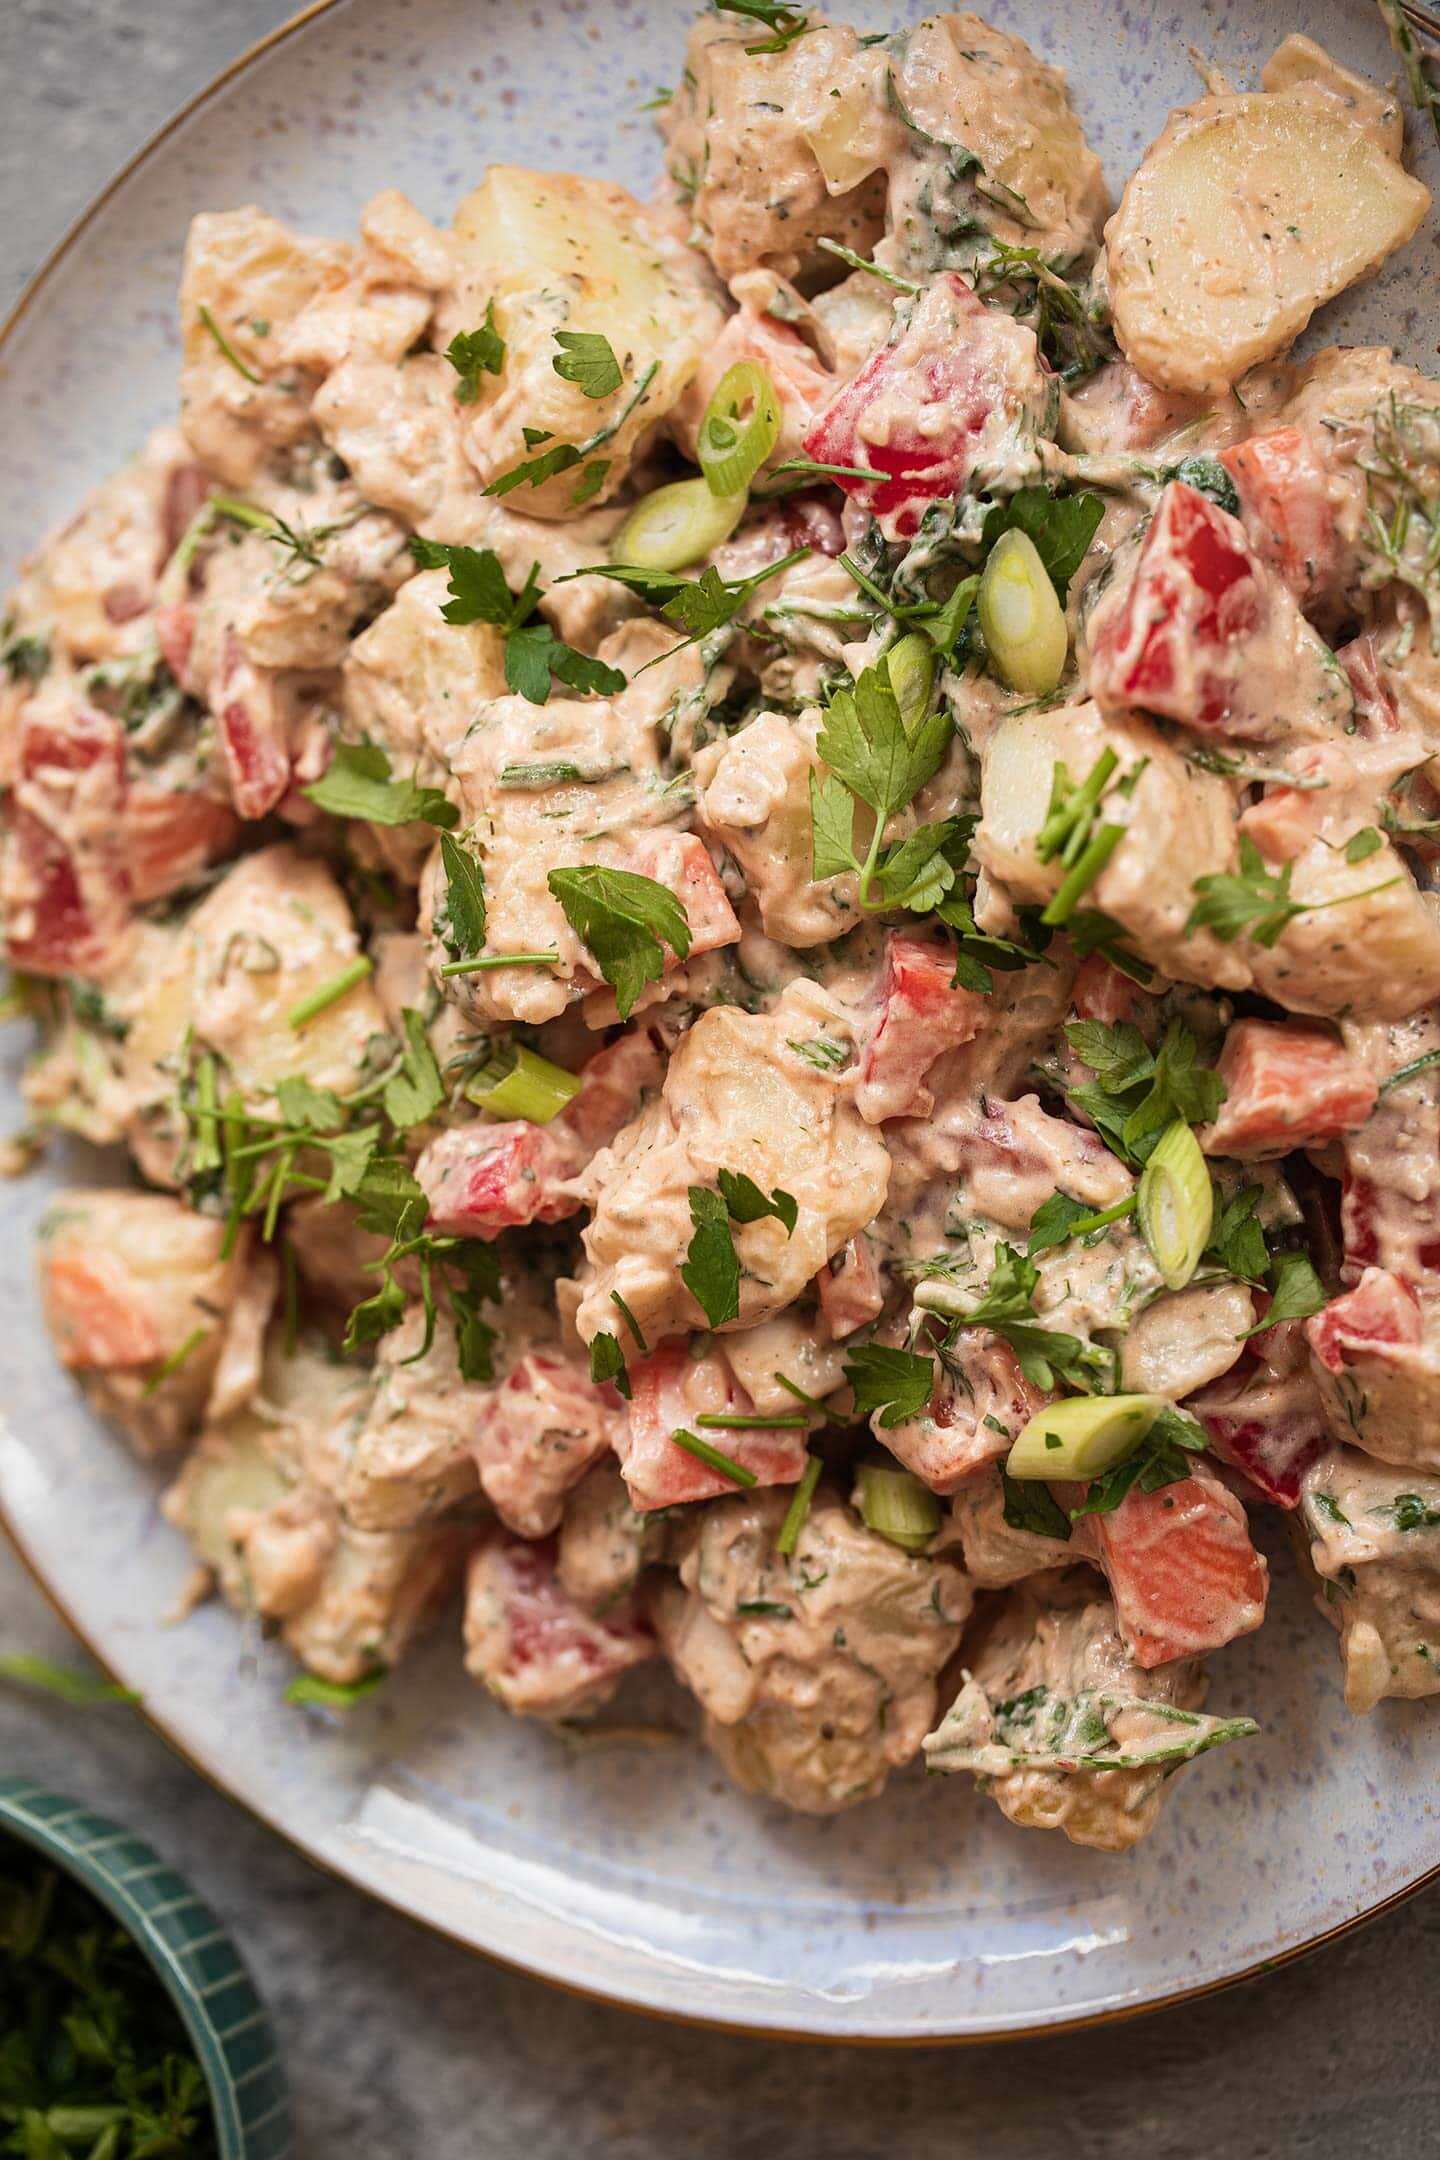
Nutritional yeast. This is great for adding a hint of cheesiness. You can leave it out or add grated vegan cheese instead.
Tomato paste. This will also help to create a distinctive tangy flavor.
Mustard. This is another key potato salad ingredient that helps to create that signature authenticity. Ensure that it's vegan though because some brands have sneaky non-vegan ingredients.
Dried thyme. Great for another layer of earthiness.
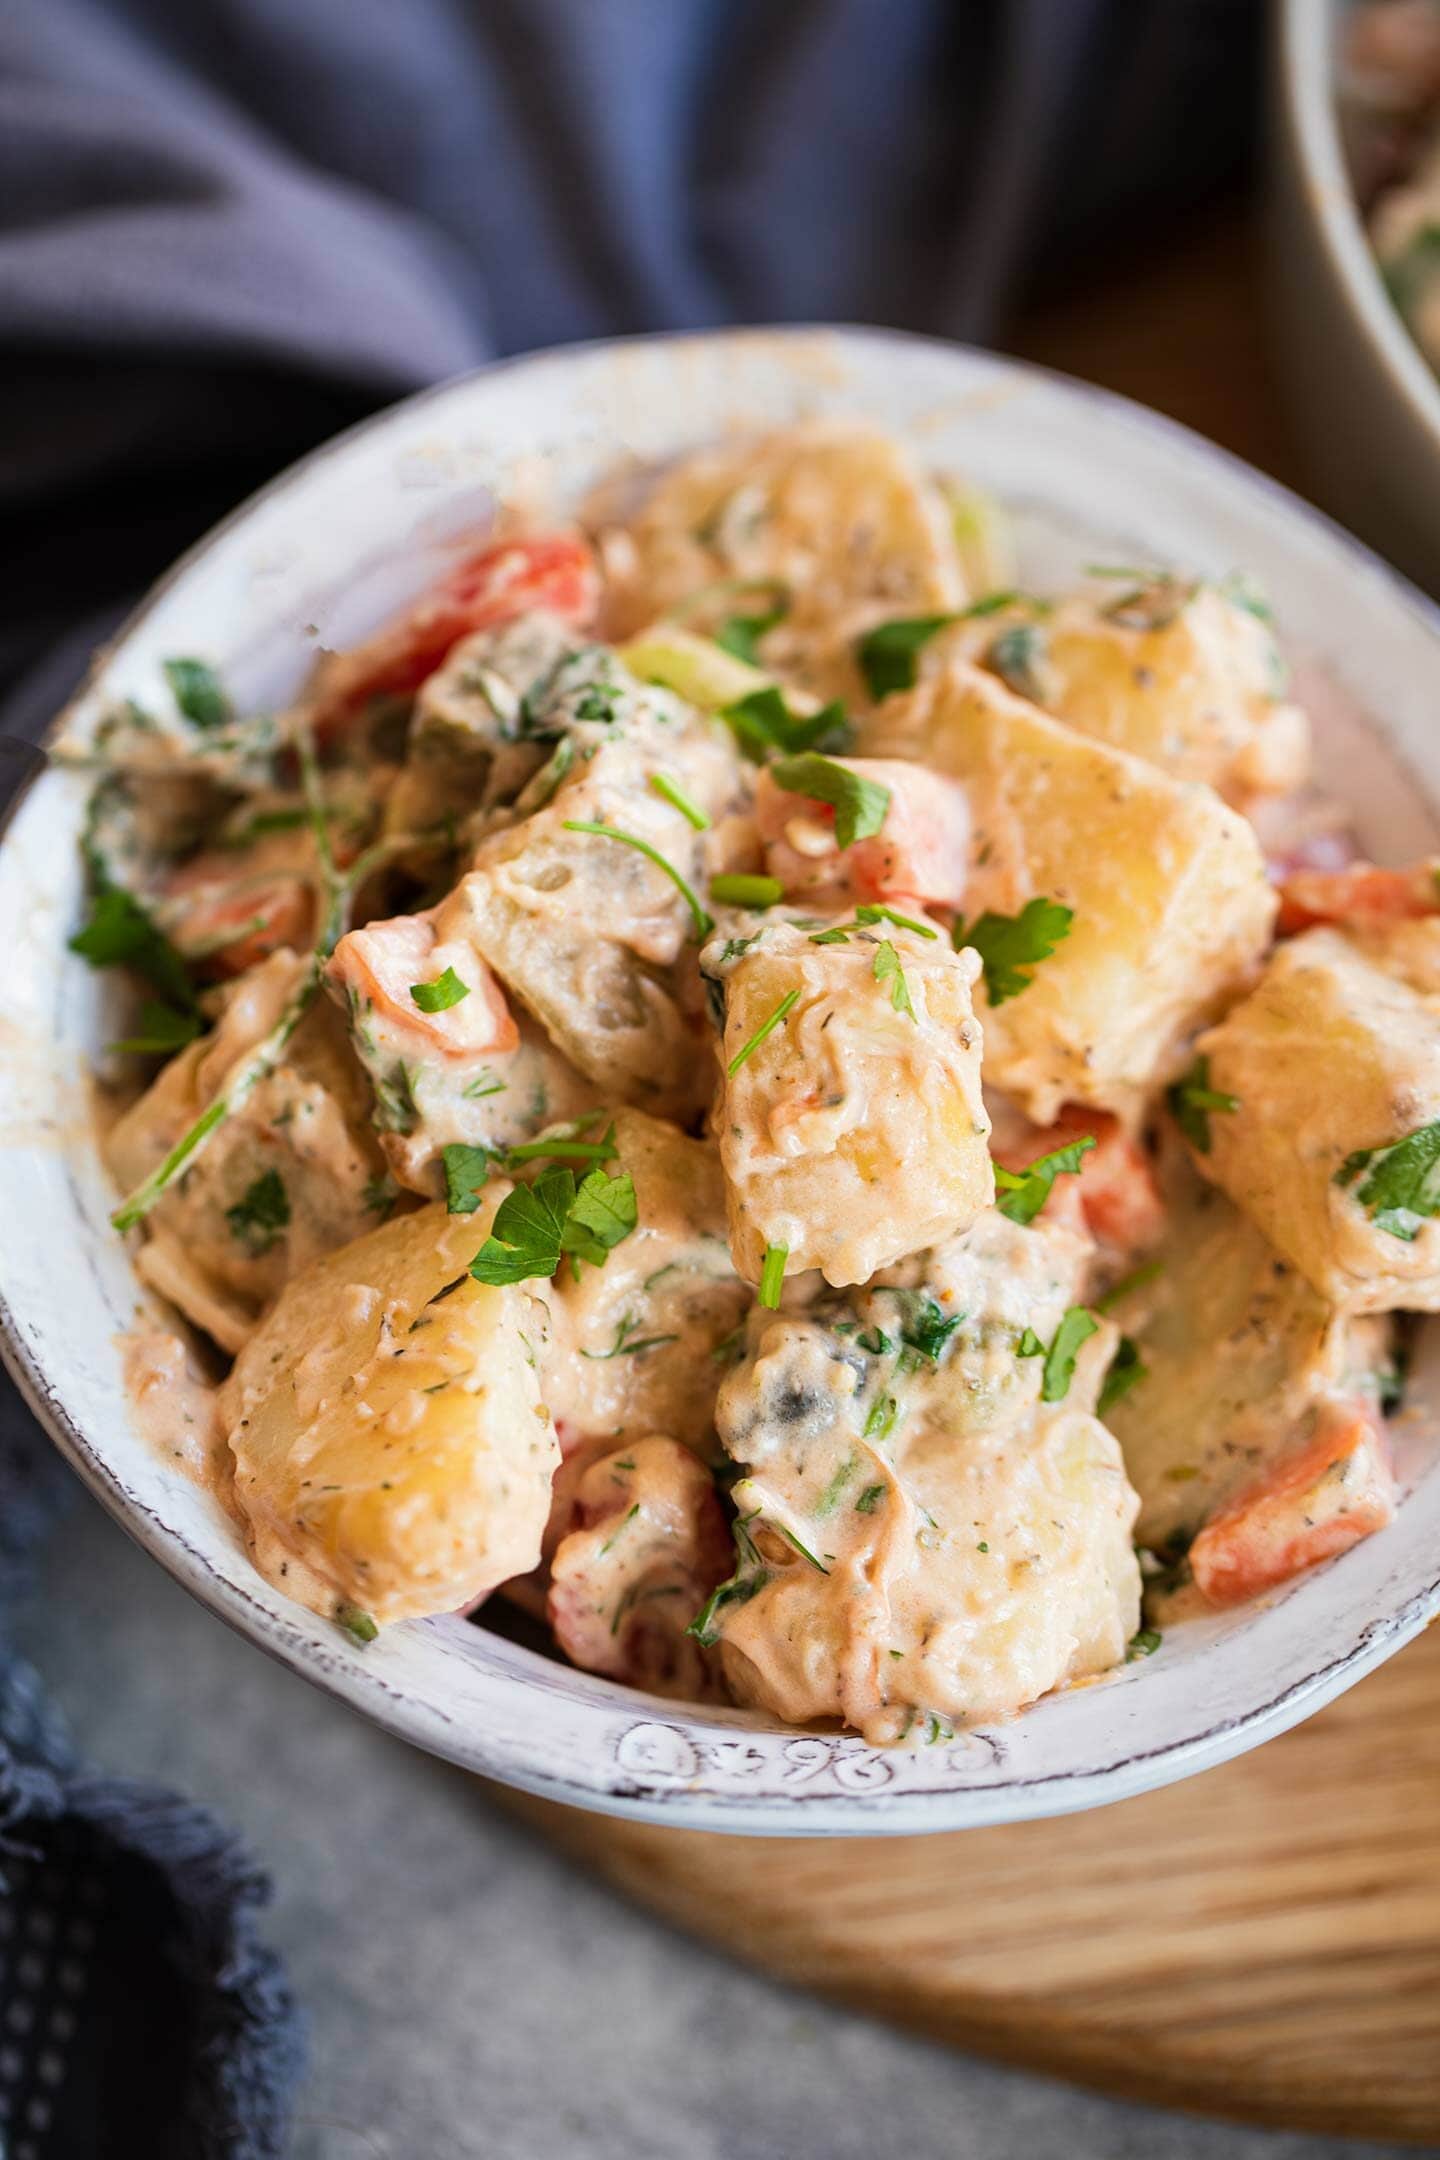
How to make vegan potato salad from scratch
Start by generously salting a saucepan of water and add the peeled and diced potatoes. Cook until fully fork-tender, but make sure not to overcook. For medium-sized potato chunks, you will need around 12-15 minutes.
Meanwhile, you can prepare the other vegetables by de-seeding and dicing the peppers, peeling and dicing the onion, and peeling and chopping the carrots. Also finely chop the dill and cilantro.

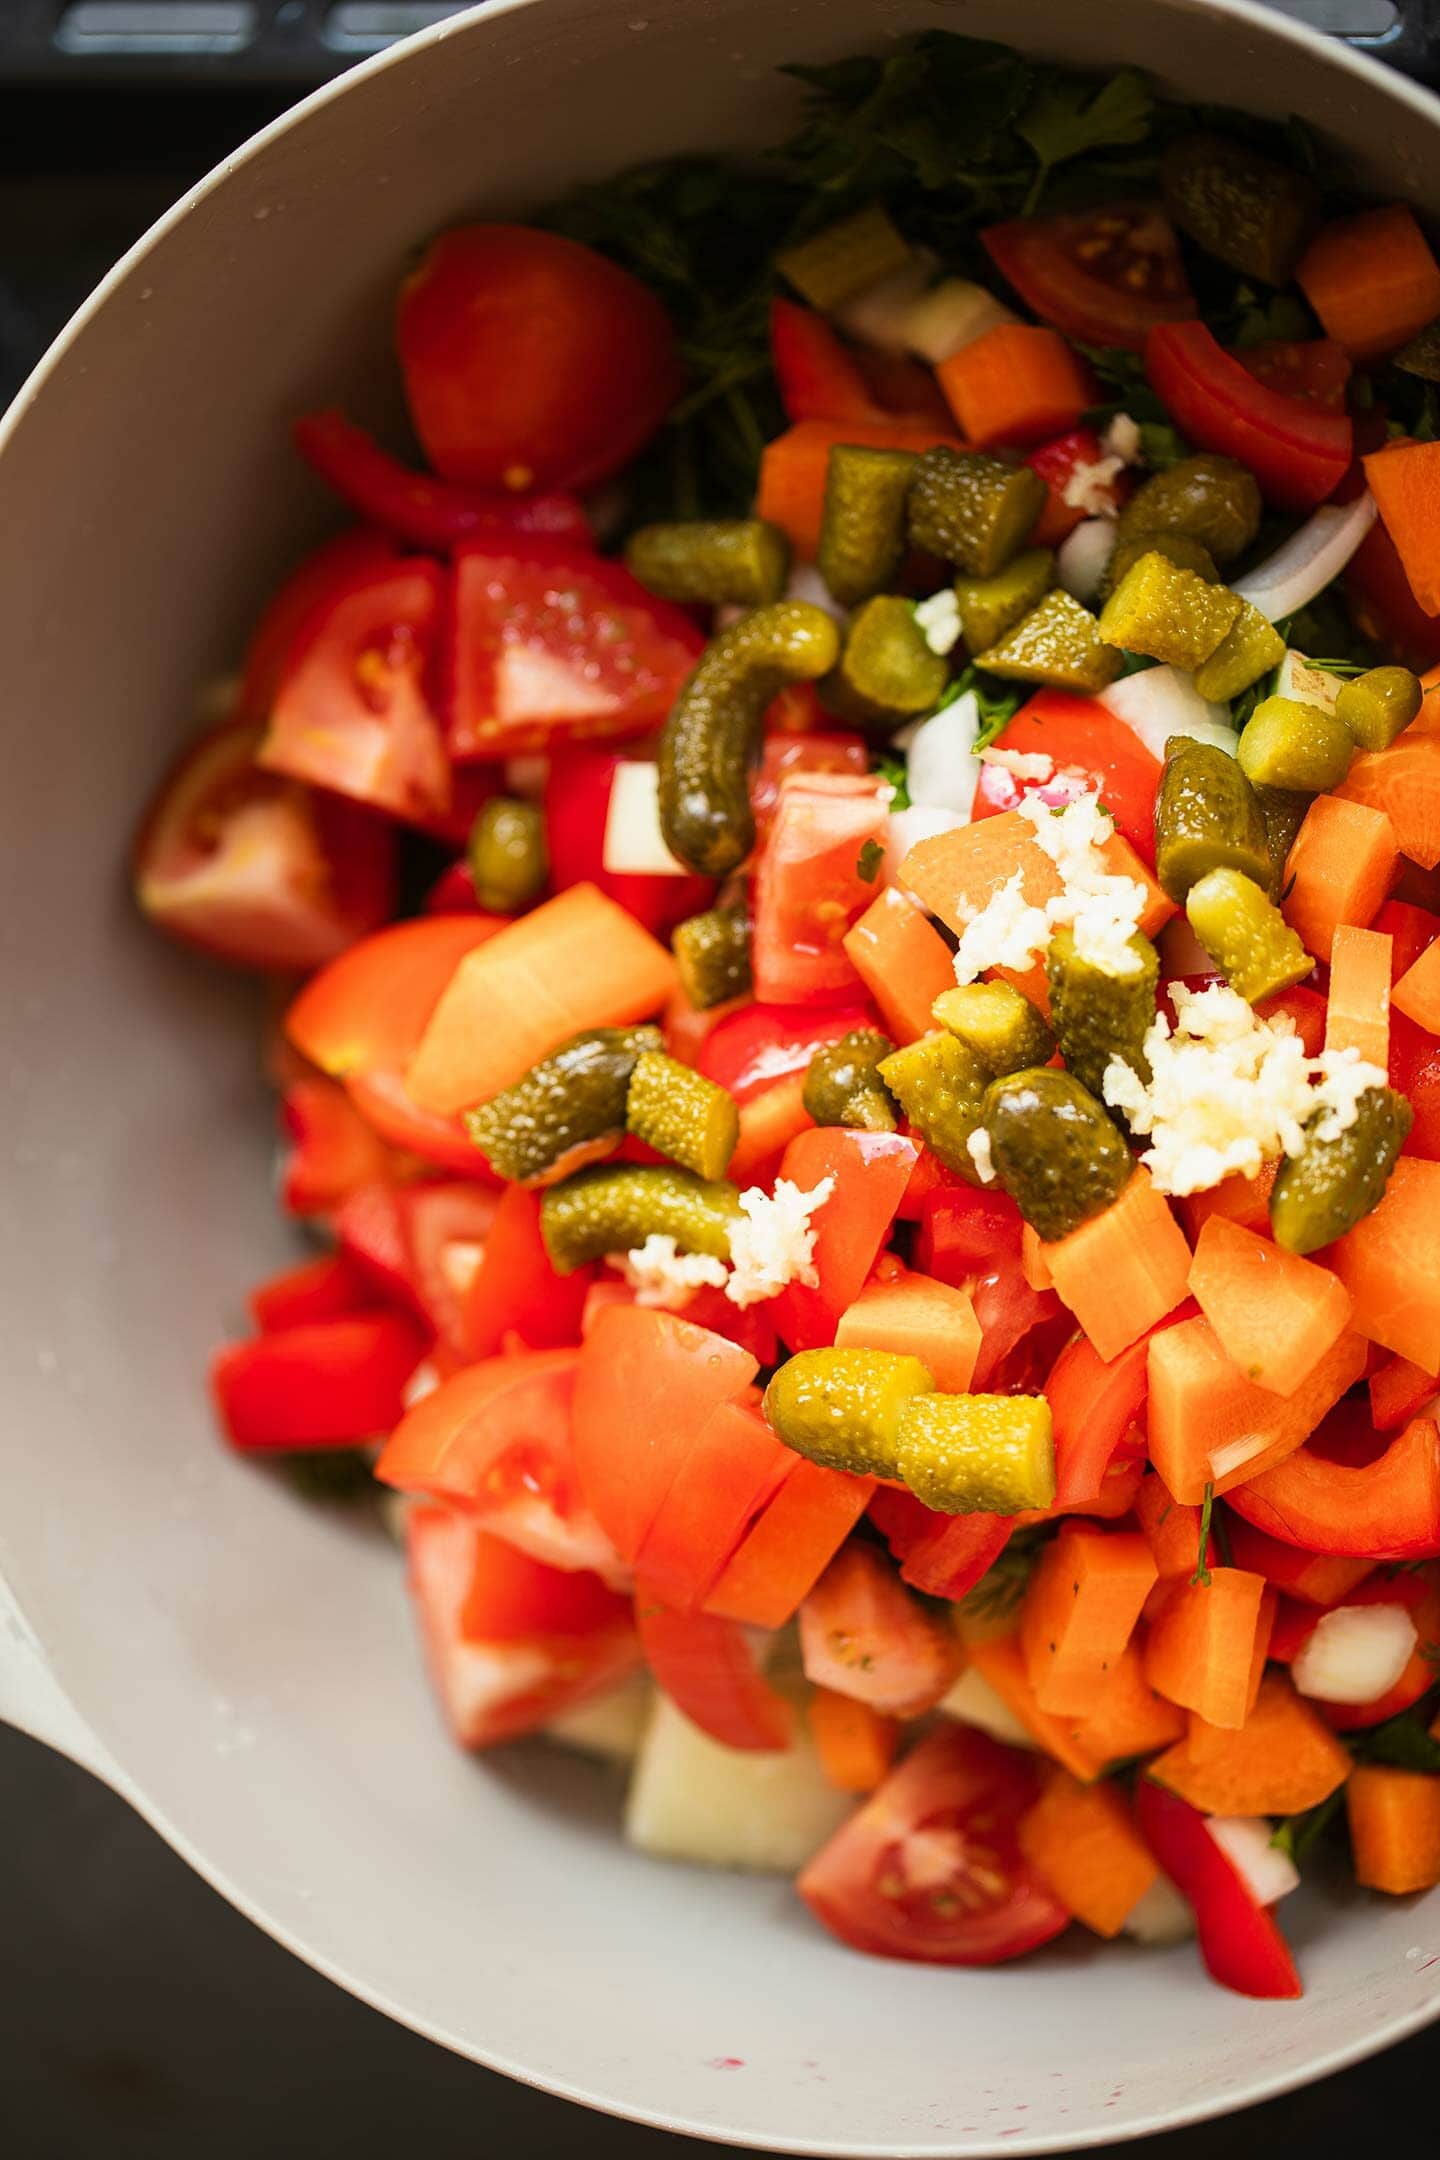
When the potatoes are ready, drain and rinse them, and shake them a few times in the colander to fluff up. Then, transfer them to a large mixing bowl together with the vegetables, fresh herbs, garlic, pickles and lemon juice. Mix together thoroughly.
Now, add the vegan mayonnaise, nutritional yeast, tomato paste, mustard and dried thyme. Mix together thoroughly once again, and the potato salad is now ready to serve!
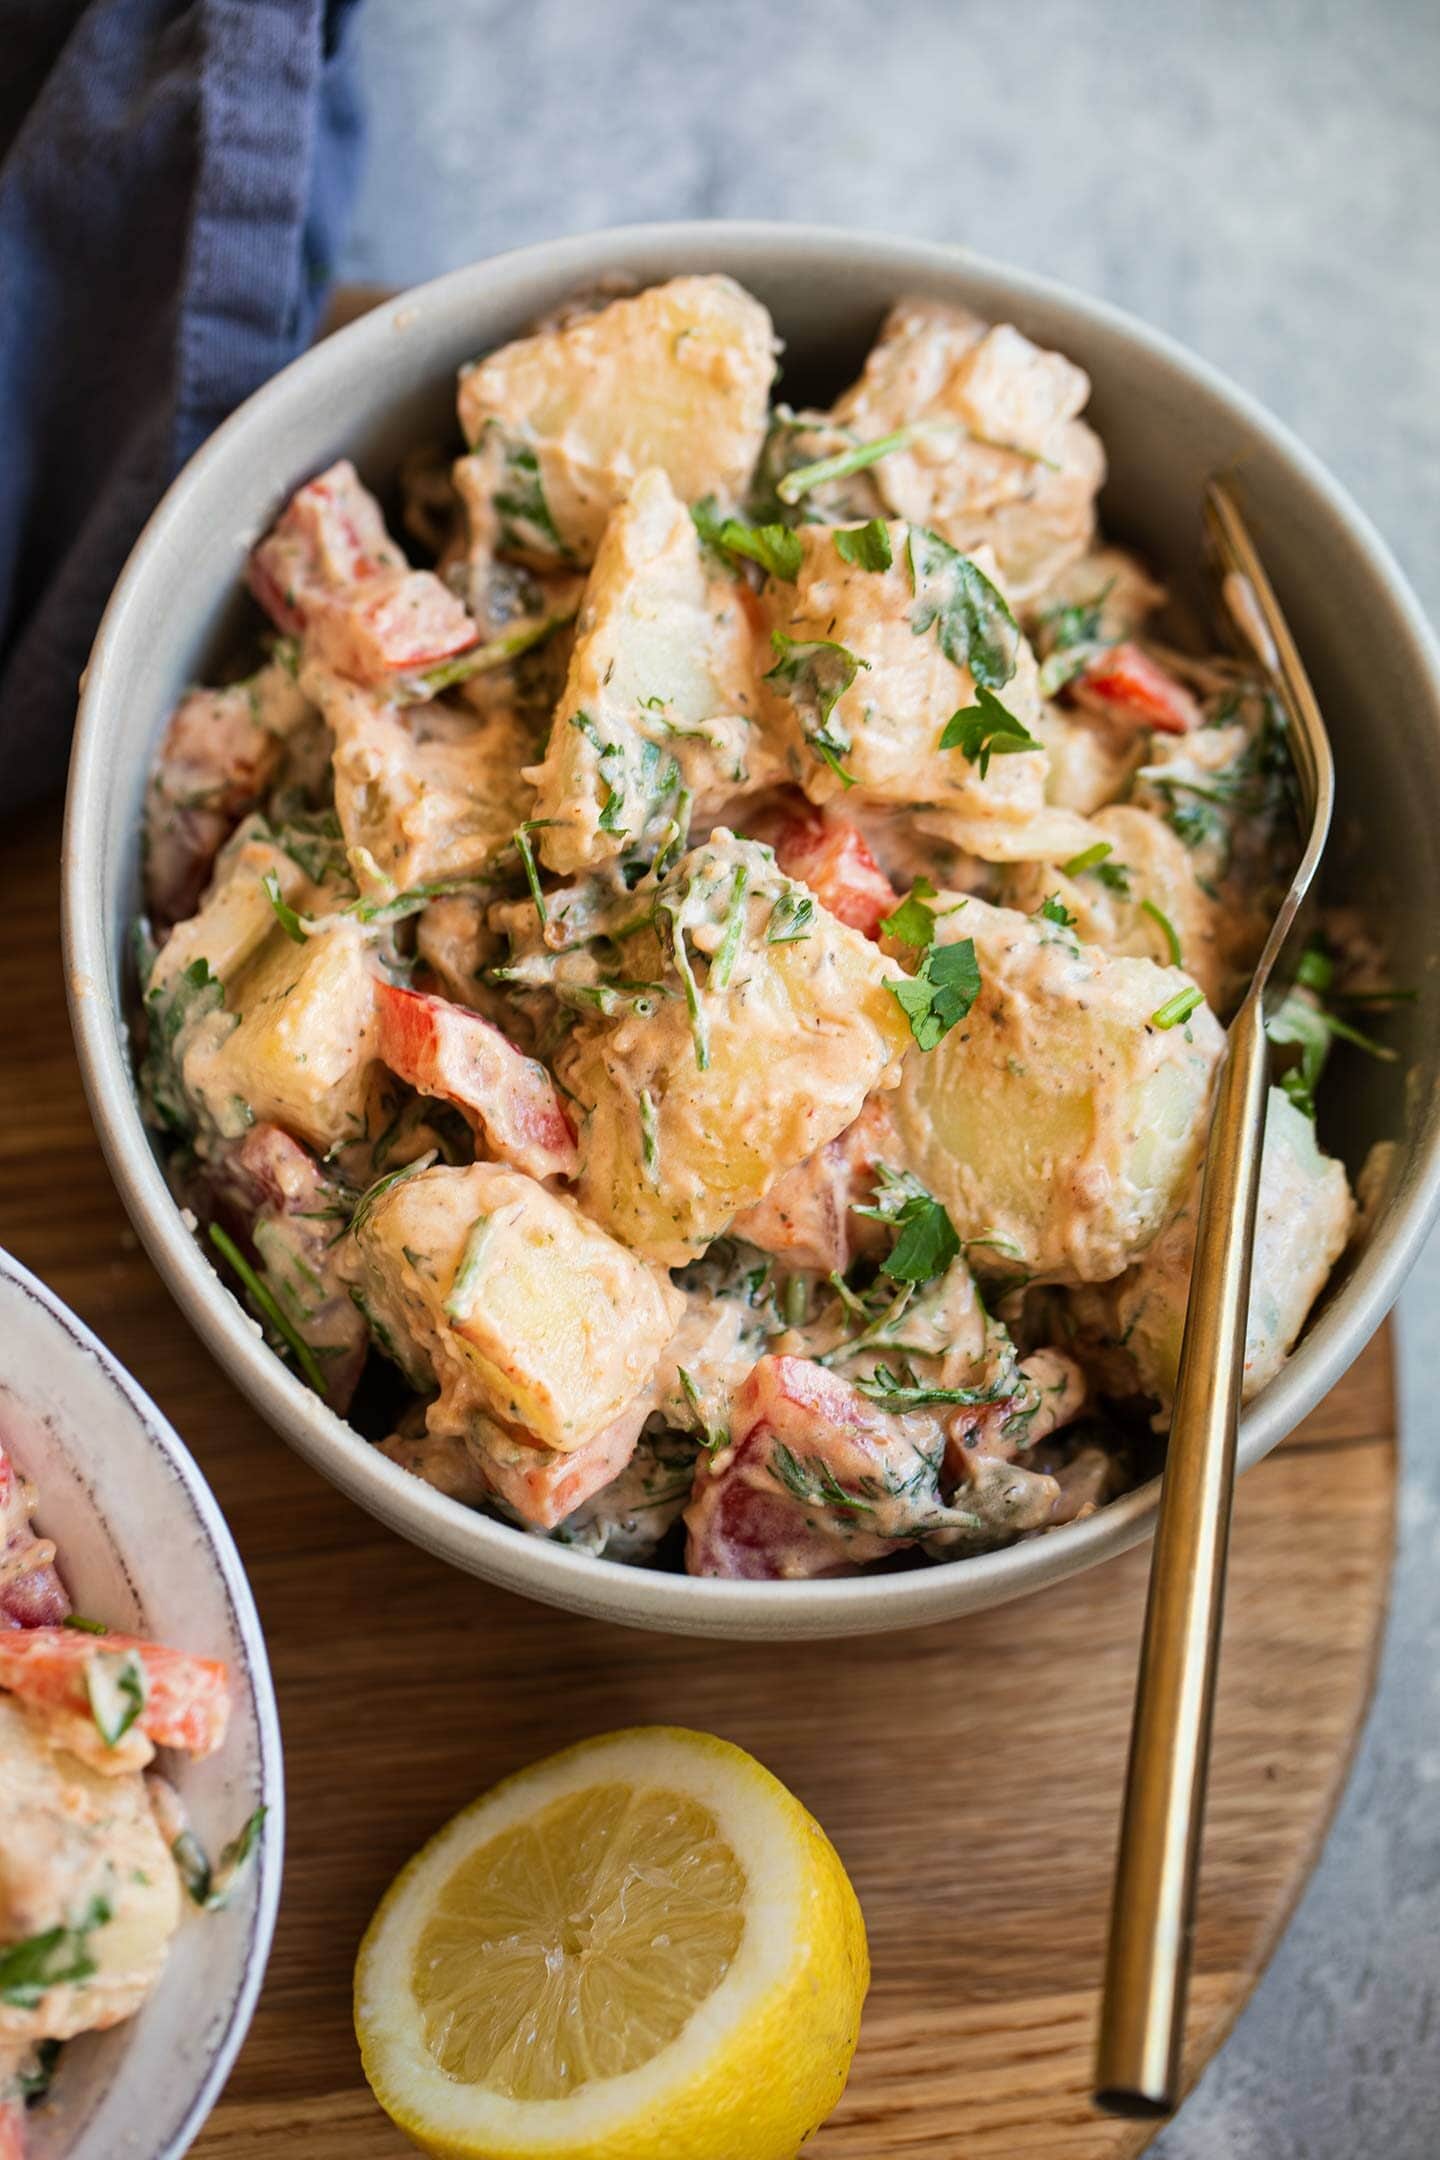
Tips for success
- Make sure to generously salt the water before boiling the potatoes. This will help to maximise the flavor of the actual potatoes.
- Shaking the potatoes in the colander a few times, like in my recipe for crispy roast potatoes, will help to fluff them up and make the final vegan potato salad creamier.
- Be generous with the fresh herbs and the vegetables! This is key for adding texture and freshness, which is key to a great summery side dish.
- Serve immediately while still slightly warm, or leave to chill in the fridge for 15 minutes before serving.
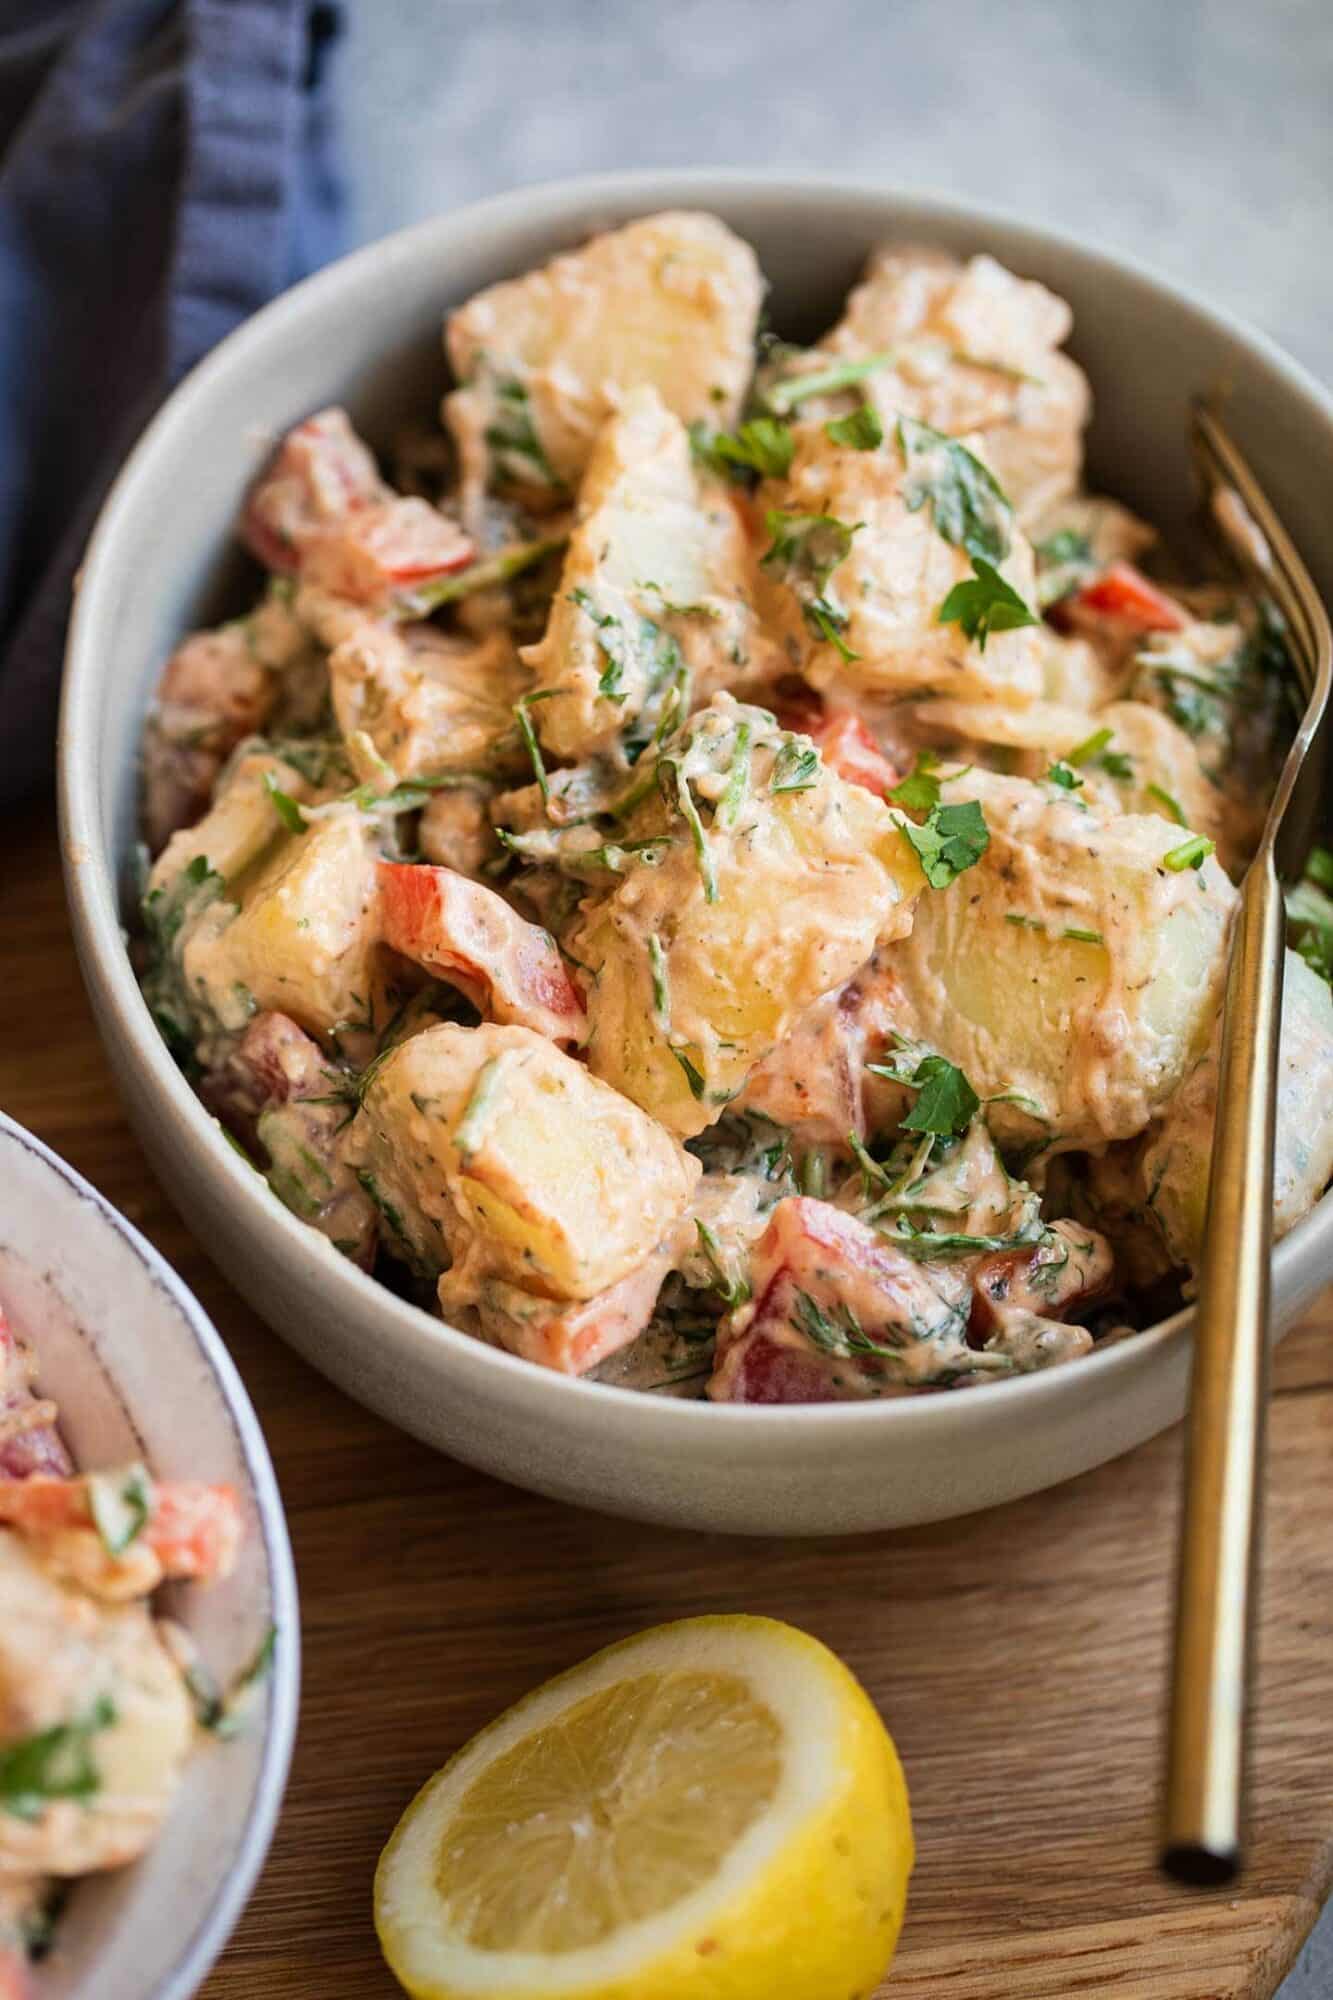
Alternatives to vegan mayonnaise
While using vegan mayonnaise in potato salad is probably the easiest option, I understand that it may not be everyone's cup of tea. If that's the case, you can use homemade vegan sour cream instead, or spicy cashew cream. Simply using a dairy-free yoghurt, like soy yoghurt or coconut yoghurt, would also work. Just make sure that it's unsweetened and neutrally-flavored.
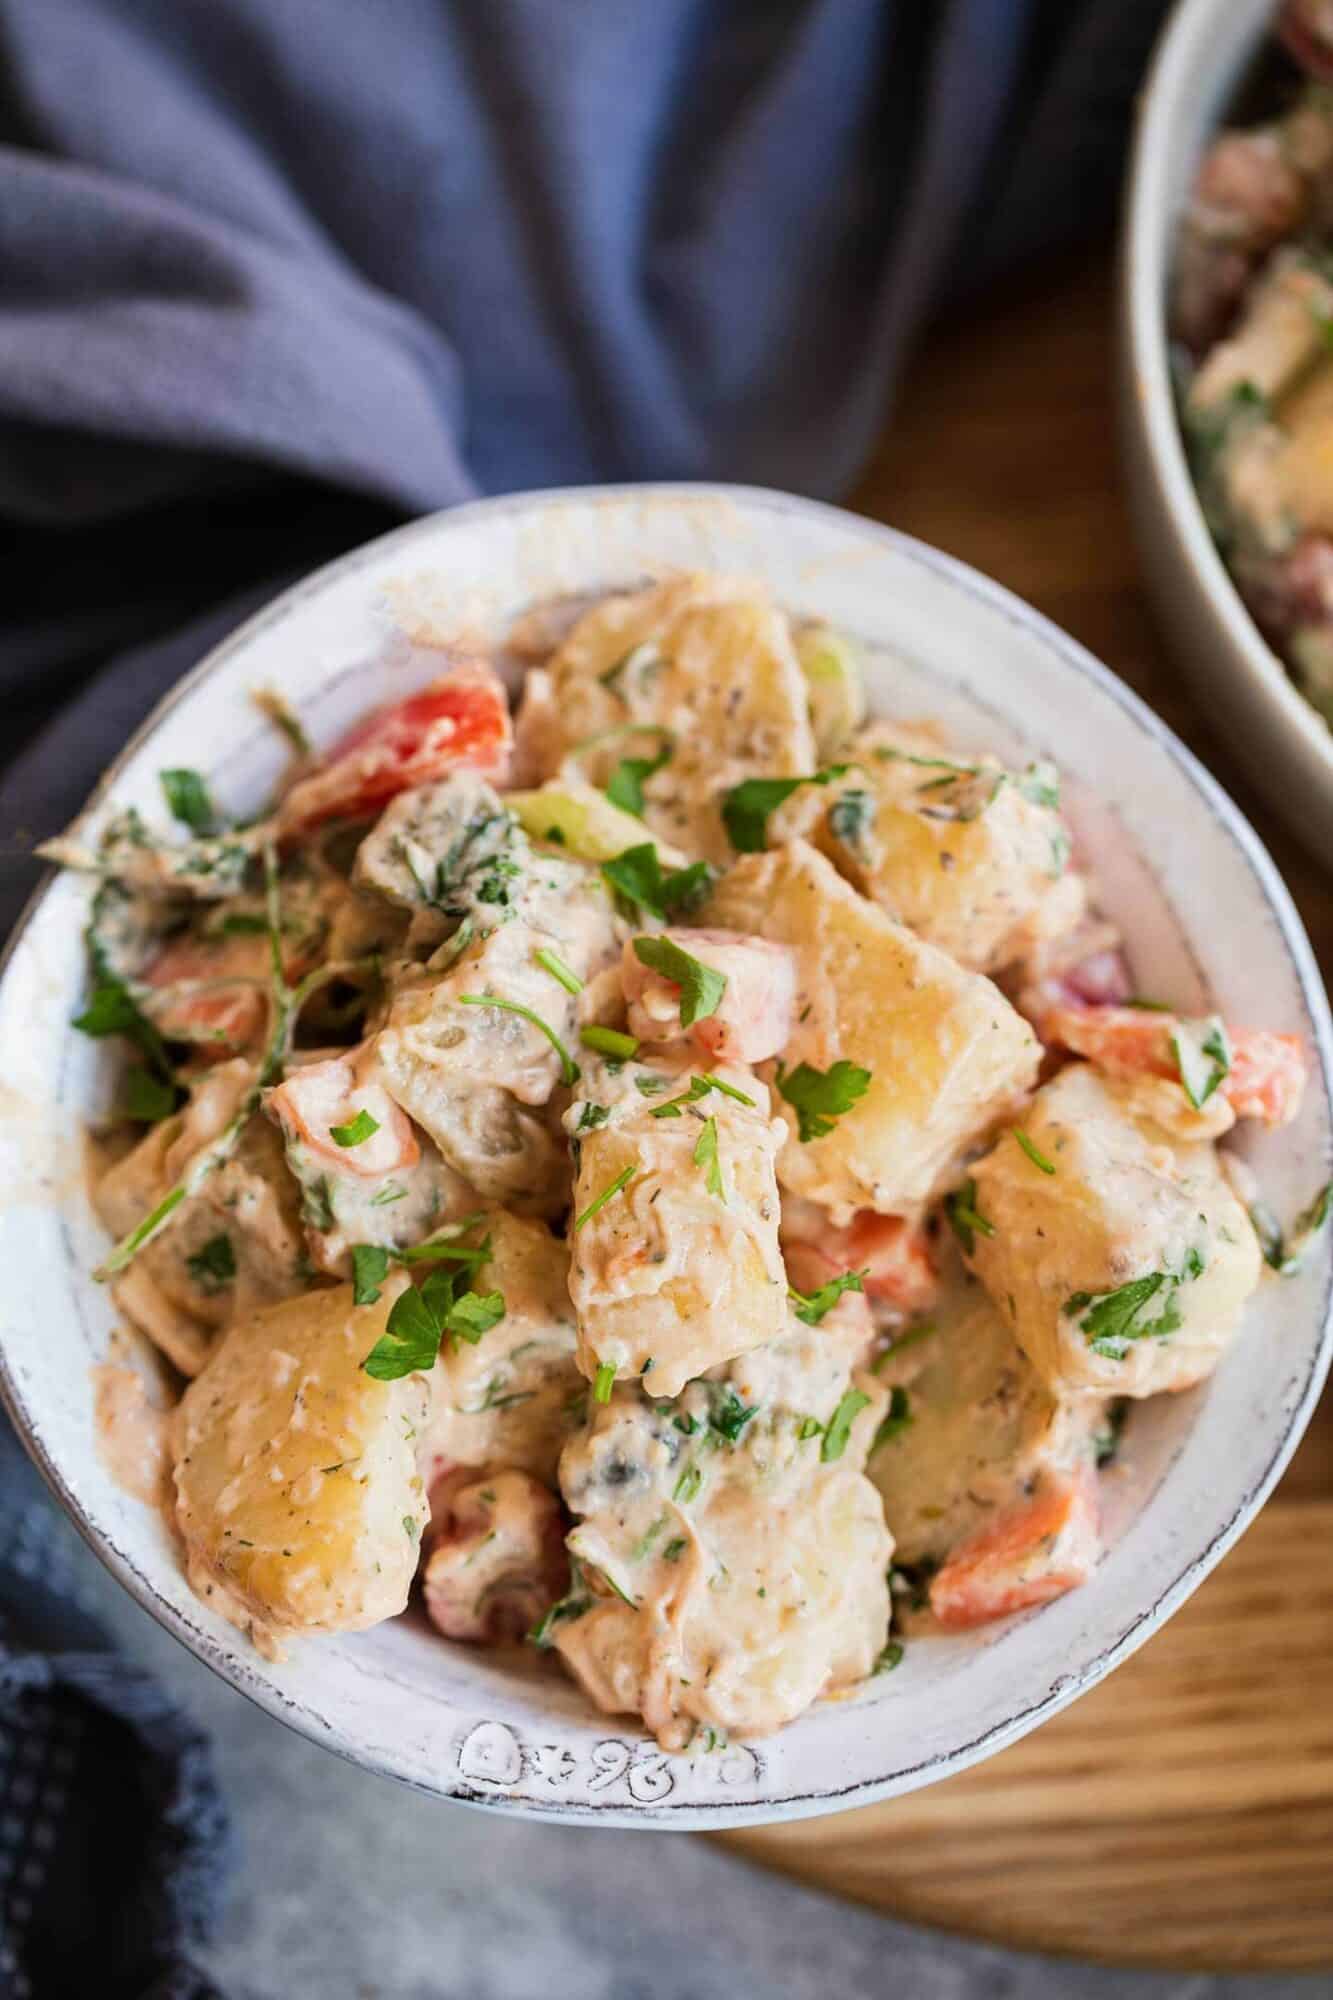
How to make vegan potato salad ahead of time
Potato salad keeps really well in the fridge and tastes even better the next day! You can keep it in the fridge in an airtight container for up to 4 days. Unfortunately, however, this is not a freezer-friendly dish as freezing and thawing ruins the texture.
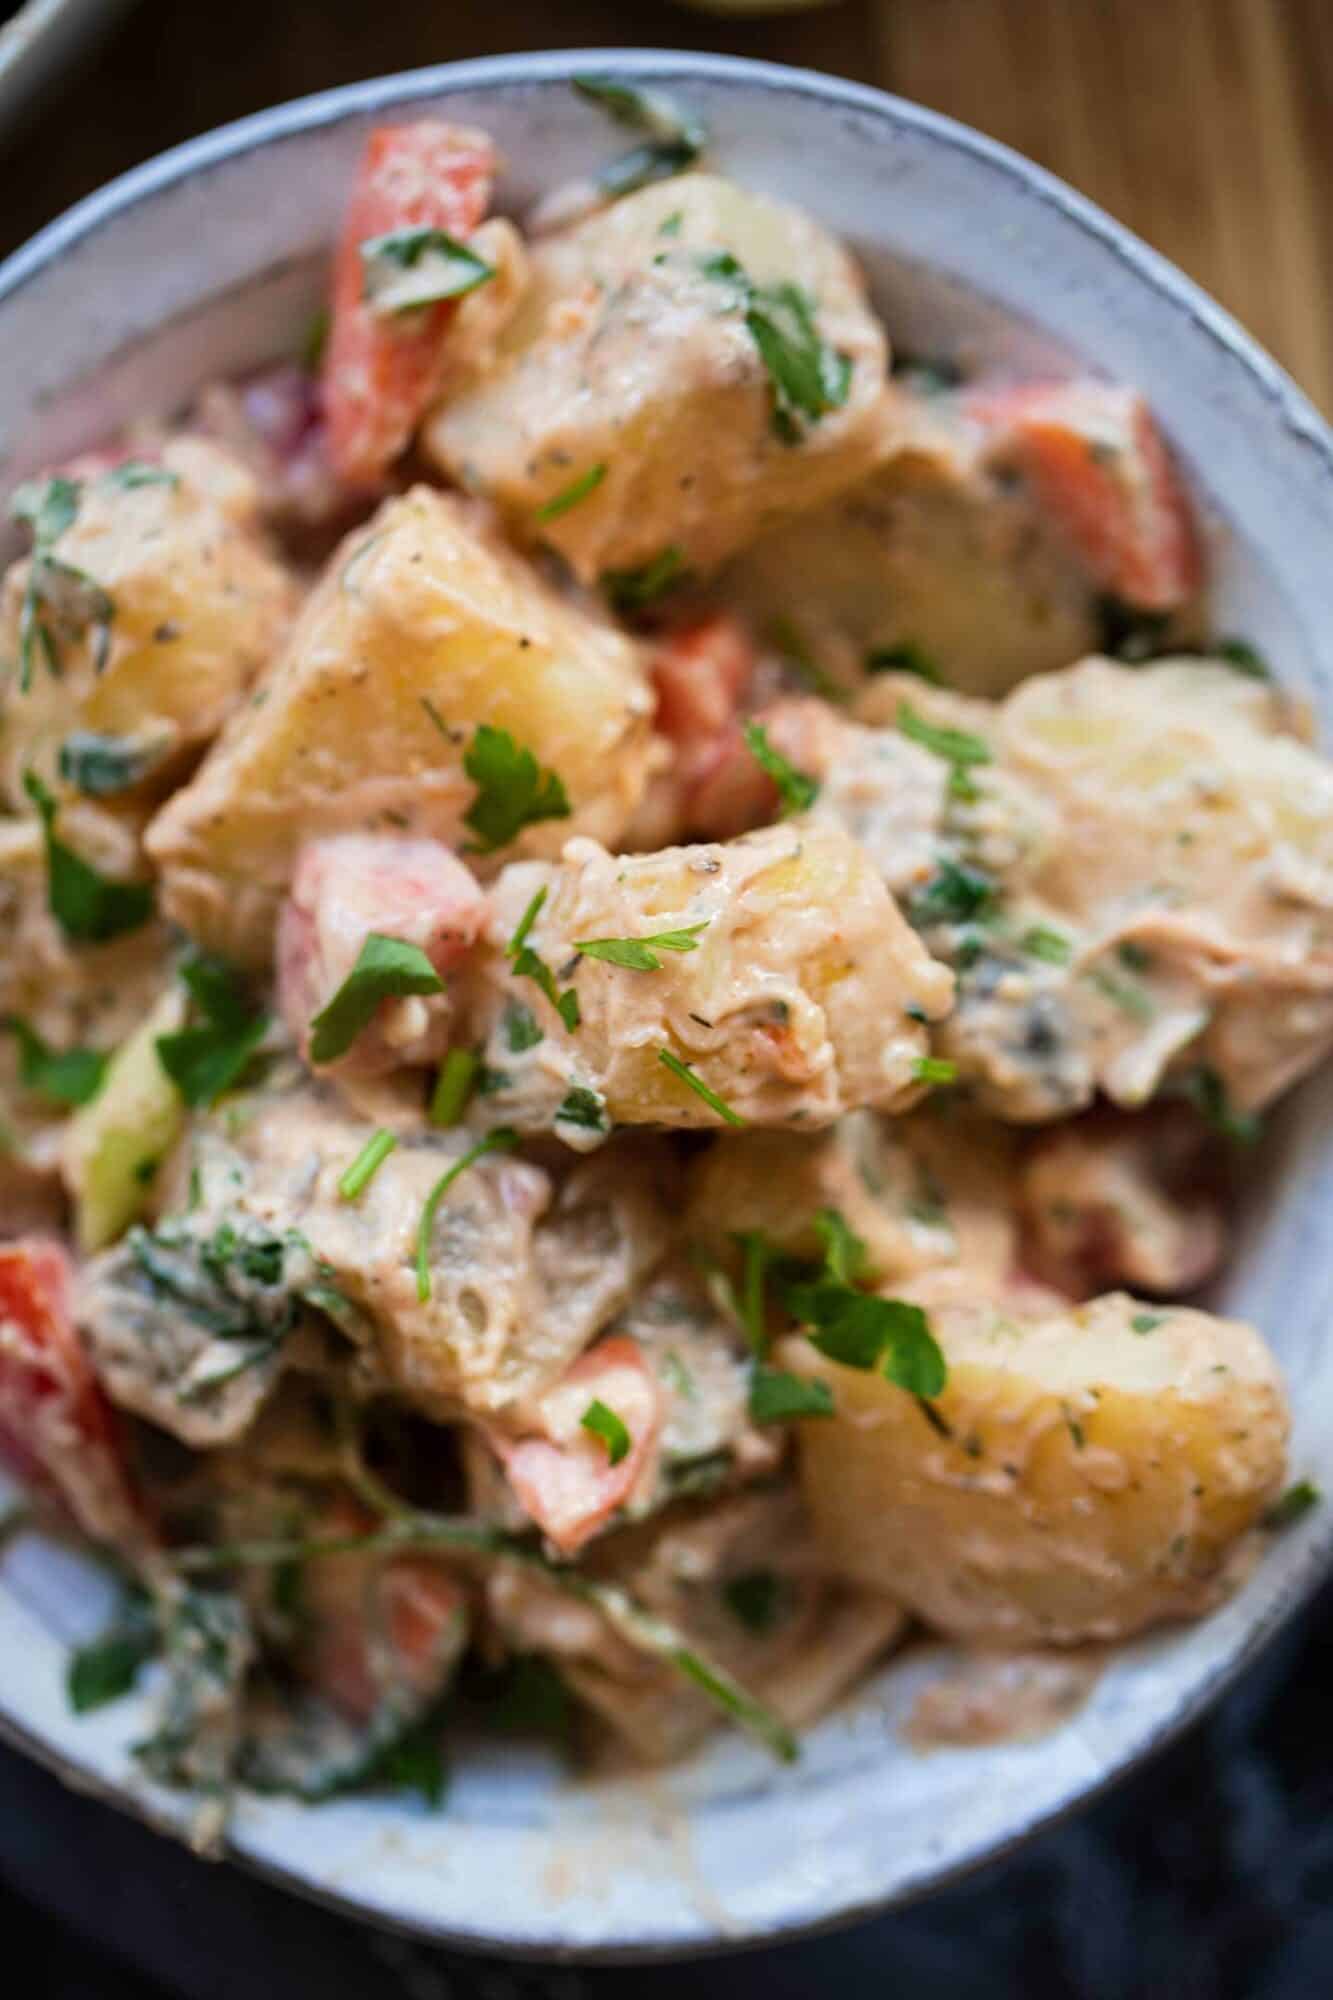
Other amazing vegan side dishes
- Vegan cauliflower cheese is comforting and crowd-pleasing.
- Try a creamy vegan pasta salad for a refreshing, summery side dish.
- You just can't go wrong with crispy sweet potato wedges!
- Smashed potatoes with avocado sauce are crispy and cheesy.
- Try a macaroni salad with tofu 'feta'!
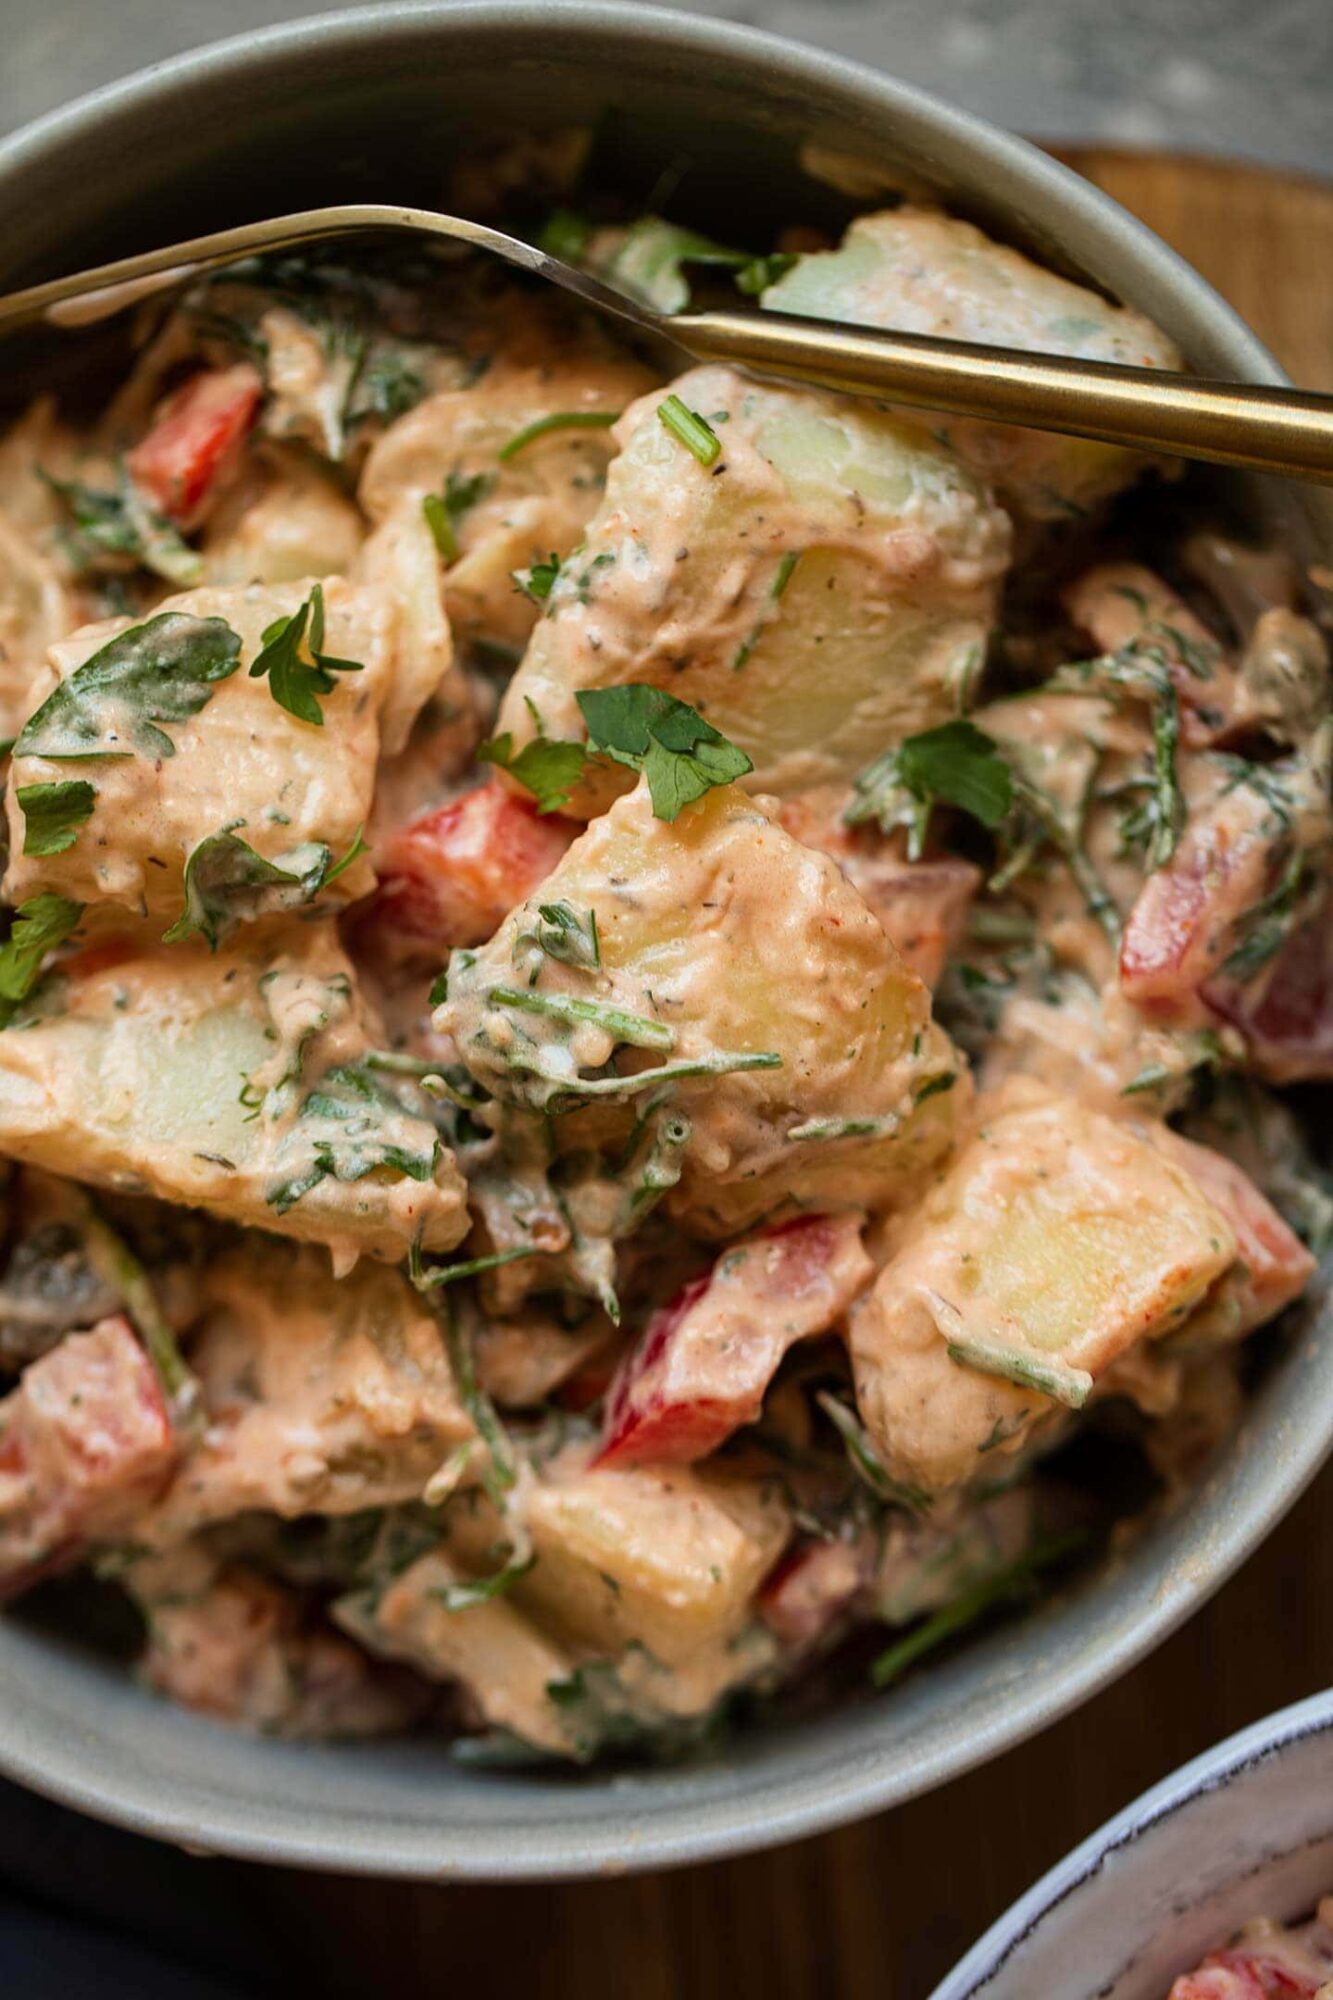
If you give this vegan potato salad recipe a go, be sure to tag me on Instagram (@earthofmariaa) so I can see your creations, and leave your feedback in the comments below together with a star rating - I love hearing from you!

Recipe

Best Vegan Potato Salad Recipe
This best vegan potato salad recipe with lots of vegetables is an ideal side dish for summer! Creamy and herby, with just the right amount of tanginess, it's great for BBQs and picnics. Guaranteed to impress vegans and non-vegans alike!
Print
Pin
Save
Servings:
Equipment
- Saucepan
- Colander
- Mixing bowl
Ingredients
- 5 cups potatoes peeled and diced
- 1 large red bell pepper
- 1 large onion
- 2 large carrots
- 1 cup dill
- 1 cup cilantro
- 3 cloves garlic minced
- ½ cup pickles diced
- 1 large lemon juice of
- 1 ½ cups vegan mayonnaise
- ¼ cup nutritional yeast
- 2 tablespoon tomato paste
- ½ tablespoon mustard
- 1 tablespoon dried thyme
Instructions
- Generously salt a saucepan of water and add the peeled and diced potatoes. Cook until fully fork-tender, but make sure not to overcook. For medium-sized potato chunks, you will need around 12-15 minutes.
- Prepare the other vegetables by de-seeding and dicing the peppers, peeling and dicing the onion, and peeling and chopping the carrots. Also finely chop the dill and cilantro.
- Drain and rinse the potatoes, and shake them a few times in the colander to fluff up. Then, transfer them to a large mixing bowl together with the vegetables, fresh herbs, garlic, pickles and lemon juice. Mix together thoroughly.
- Add the vegan mayonnaise, nutritional yeast, tomato paste, mustard and dried thyme. Mix together thoroughly once again. Serve immediately, or leave to chill in the fridge for 15 minutes.
Video
Notes
- Make sure to generously salt the water before boiling the potatoes.
- Shaking the potatoes in the colander a few times, like in my recipe for crispy roast potatoes, will help to fluff them up and make the final vegan potato salad creamier.
- Be generous with the fresh herbs and the vegetables!
- This vegan potato salad keeps well in the fridge for 4-5 days in an airtight container.
Nutrition (Estimate per Serving)
Calories: 344kcalCarbohydrates: 19gProtein: 3gFat: 27gSaturated Fat: 3gSodium: 388mgPotassium: 500mgFiber: 3gSugar: 4gVitamin A: 4341IUVitamin C: 47mgCalcium: 51mgIron: 2mg
Vegan-ize any recipe!Grab our free vegan cheat sheet, packed with my favorite easy substitutions to make any recipe vegan.
Vegan Charcuterie Board

This beautiful and delicious Vegan Charcuterie Board is perfect for holiday celebrations, casual entertaining, or just a fun weeknight in. This vegan snack board is loaded with fresh veggies, fruits, nuts, and plenty of yummy dips.
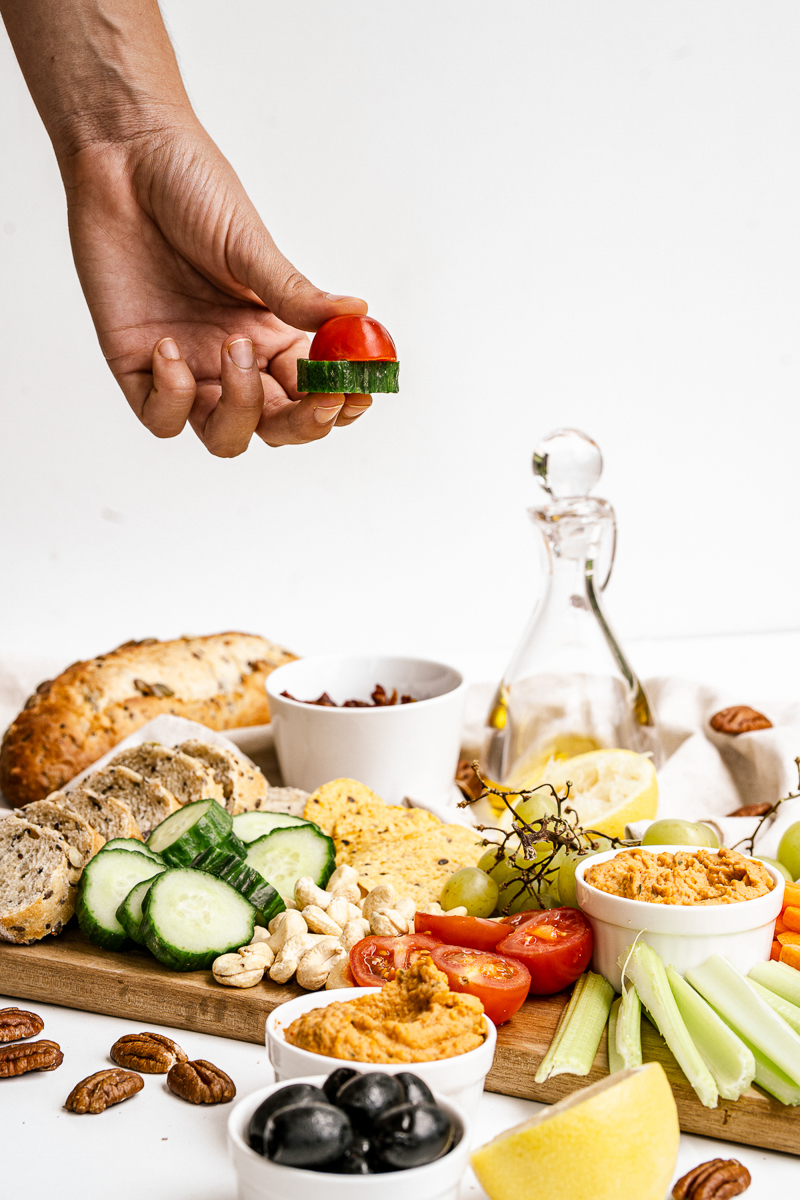
This vegan snack board is loaded with healthy and satisfying snacking options. Crunchy nuts, creamy hummus, fresh veggies, and more.
Want to get a bit fancier than just basic hummus? Try adding this Vegan Jackfruit Crab Dip or this Garlic Cashew Cheese spread to your board.
Or simply spice up your hummus game (literally) with this Grilled Red Pepper Hummus.
Why You Will Love This Vegan Charcuterie Board...
- Simple assembly.
- Homemade hummus,
- Crisp veggies and crunchy nuts!
- Nice variety of snacks,
- Vegan friendly.
- Vegetarian friendly.
- Stunning presentation,
And while you're here, don't forget to grab a copy of my free vegan cheat sheet. It's packed with all my favorite substitutions to vegan-ize any recipe!
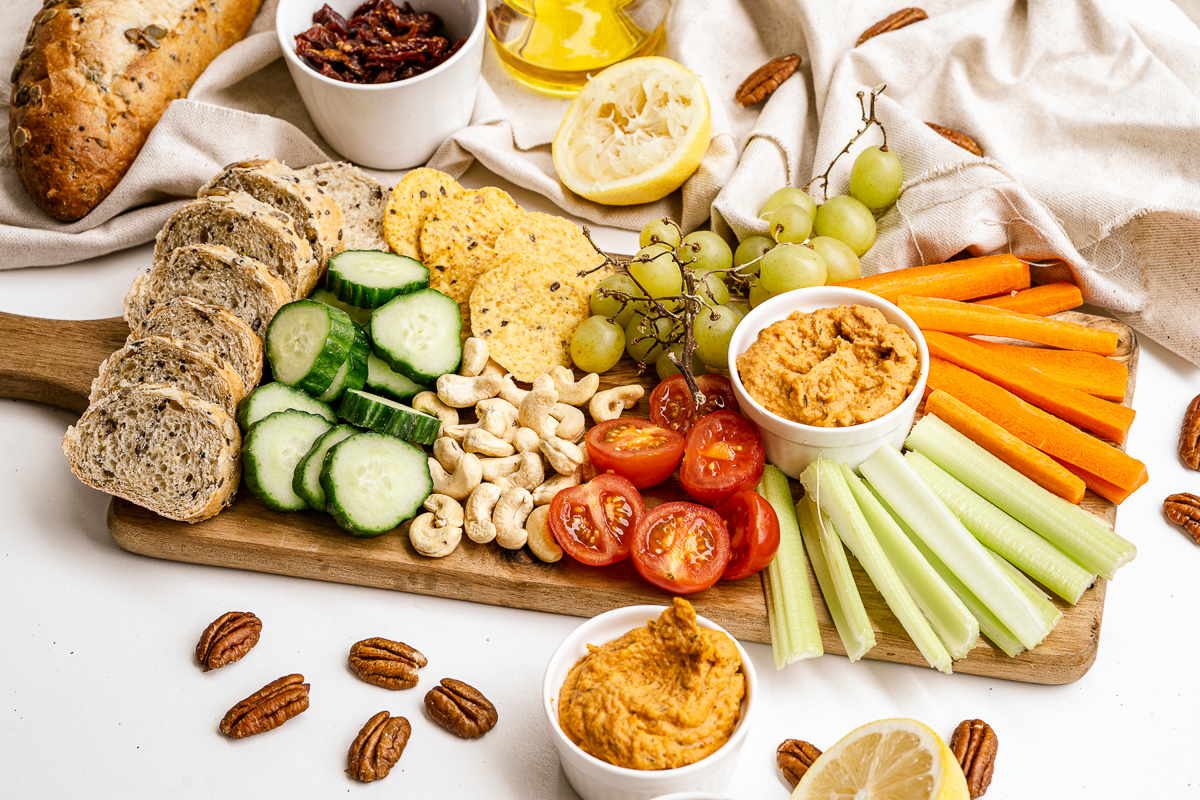
How to Make Vegan Charcuterie Board
- Start by adding all the ingredients for your hummus in the blender or food processor. Mix until creamy in texture.
- Pour the hummus into serving bowls, and place on a charcuterie board.
- Assemble all your snacks around it, and get to snacking!
Tips and Tricks for the Perfect Vegan Charcuterie Board
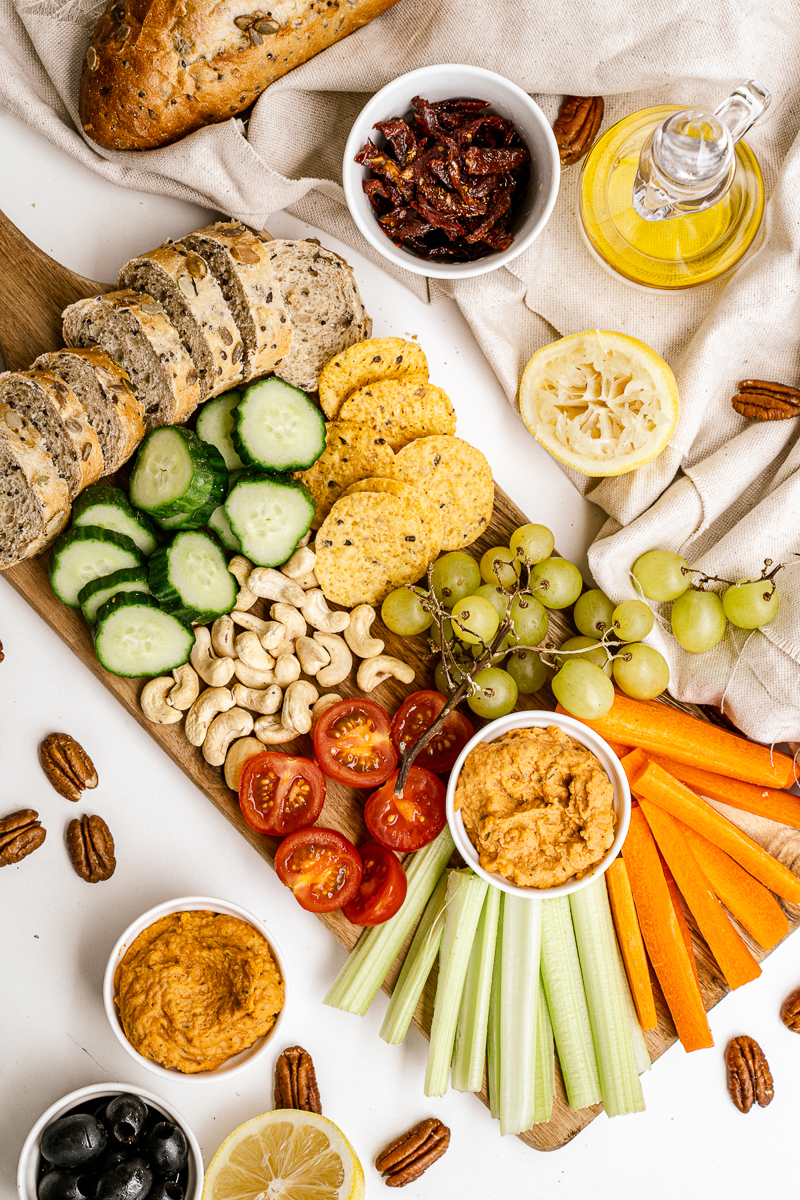
Choosing A Board
Making a charcuterie doesn't mean you have to go out and buy a super expensive board. Just reach for any wooden cutting board or tray that is large enough to hold all you plan to serve.
Even a cookie sheet can be a base for your board in a pinch! Make sure to pick a tray that has enough room for all your snacks to fit, but doesn't leave a lot of empty space. The board needs to look full for the best presentation.
Prepare in Advance
You can prepare your board in advance if you prefer, which is great for entertaining. Just assemble your snack board as you would like, cover it tightly with plastic wrap, and store in the fridge until you are ready to serve.

Add More Dips
I served my vegan charcuterie board with homemade hummus - the recipe is in the recipe card below!
Consider placing several small bowls of hummus around the snack board, rather than one large bowl. The placement can help create balance!
Plus, it's easier for everyone grab a bite when there are several dip bowls strategically placed.
However, serving a few different vegan dips will help balance out your board flavor-wise as well as visually. If you want to add more dips, here are a few of my favorite options:
- Vegan Blue Cheese Dressing, such as this one from Daiya
- Vegan Artichoke Dip (This 5-minute version is a great choice!)
- Vegan Jackfruit "Crab" Dip
- Baba Ghanouj (an eggplant and tahini dip)
- Sun Dried Tomato Dip
- Avocado Edamame Dip
- Olive Oil & Balsamic Vinegar - perfect for dipping bread.
More Snack Board Ingredients
You can change up this grazing board to fit your own tastes and use whatever you have on hand. Some delicious choices for your vegan charcuterie board are:
- Carrot Sticks
- Cucumbers
- Tomatoes
- Artichoke Hearts
- Sun Dried Tomatoes
- Olives - all different varieties!
- Nuts - Cashews and Pecans are a great coice.
- Pita Chips
- Tortilla Chips
- Sliced Whole Grain Bread
- Grapes
- Berries - Strawberries, Raspberries, Blueberries
- Vegan Mozzarella Sticks - a crowd-pleasing hot appetizer that disappears fast.
Include Something Sweet!
I tend to lean towards savory ingredients when it comes to snacking. But it can be nice to include a little something sweet on your board as well.
Grapes and fresh berries are a great option, and they pair well with many of the savory ingredients too.
Or you could get really fancy and serve a chocolate hummus paired with strawberries and melon on one end of the tray. Yum!
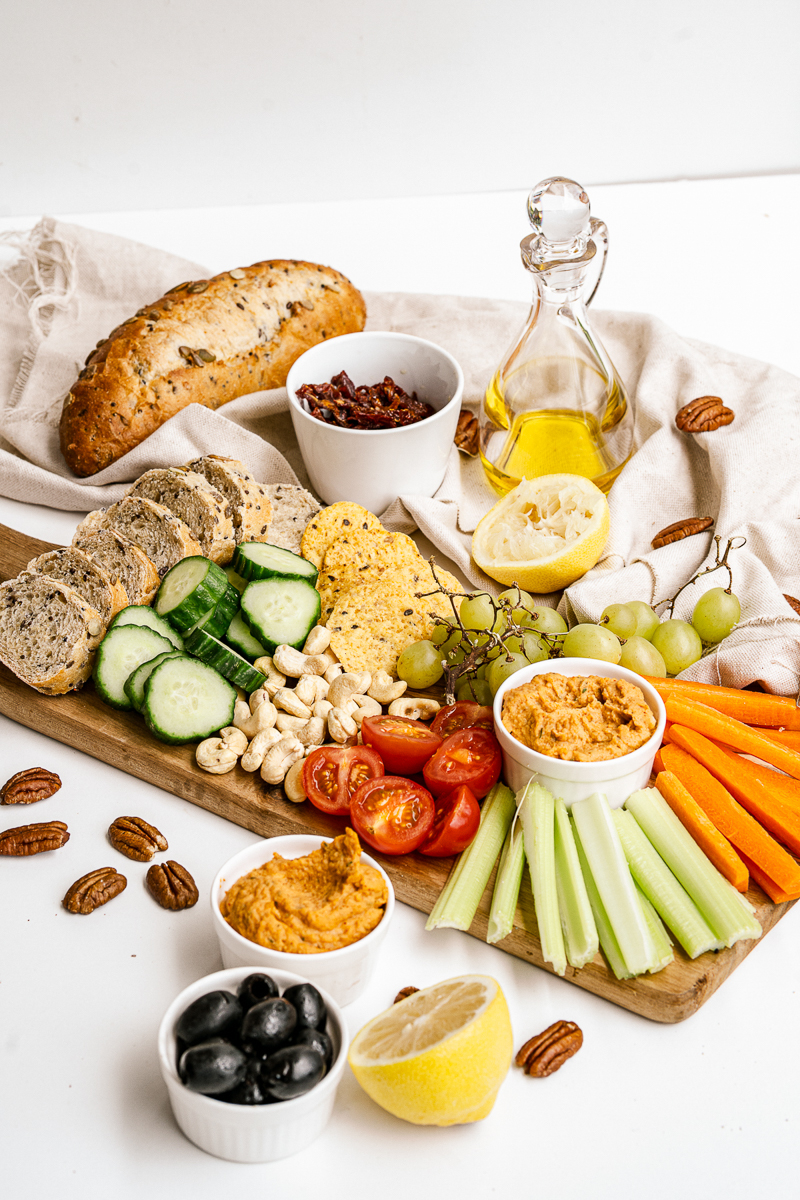
Vegan Charcuterie FAQs
How do you say "charcuterie board?"
Not quite sure how to say "charcuterie?" Here is how to pronounce it: "shahr-ku-tuh-ree." Now you know. 😉
How do you build a charcuterie board?
Start by placing dip on both ends of the board. Then begin to add vegetables, nuts, and such on the board. I began by laying items around the bowls, and then worked my way out to the edge of the board, filling in all the empty spaces.
Are a grazing board and a charcuterie the same thing?
Essentially, yes, the two names mean the same thing. Traditionally "charcuterie" includes meat, but today most people use the term "charcuterie board" to refer to any assortment of snacks laid out on a tray.
You will find that - no matter the name - an arrangement of your favorite tasty snacks on a board is a surefire crowd pleaser!
What are items to put on a vegan charcuterie tray?
Vegetables, veggie "meat," vegan cheese, dips, crackers, bread, etc. You might even enjoy adding in some nuts, fresh fruit, and more.
More Recipes to Try
I love serving up one of these snack boards as the start to a delicious Sunday Brunch. And if brunching sounds amazing to you - go check out my Vegan Brunch Book!
If you love this vegan charcuterie board, don't miss these other delicious vegan ideas:
Also worth trying: our olive and sun-dried tomato tapenade.
- Vegan Thanksgiving and Vegan Christmas Cookbooks (new!)
- Easy & Inexpensive Vegan Party Snacks
- 25 Best Vegan Dip Recipes
- The Best Vegan Tailgate Foods
Recipe

Vegan Charcuterie Board
This beautiful and delicious Vegan Charcuterie Board is perfect for holiday celebrations, casual entertaining, or just a fun weeknight in. This vegan snack board is loaded with fresh veggies, fruits, nuts, and plenty of yummy dips.
Print
Pin
Save
Servings: servings
Ingredients
Board
- 2 carrots peeled and sliced into matchsticks
- 1 cucumber sliced
- 3 celery stalks trimmed and cut in half lengthwise
- ½ cup pecans
- 1 cup grapes
- 1 cup cherry tomatoes halved
- ½ cup cashews
- ½ cup sundried tomatoes
- 1 cup corn chips
- ½ cup olives
- baguette sliced
Homemade Hummus
- 15 oz chickpeas canned, drained, and rinsed
- 1 garlic clove
- ¼ cup fresh parsley
- ½ teaspoon salt
- 1 tablespoon olive oil plus extra for drizzling
- 1 tablespoon tahini paste
- ½ teaspoon smoked paprika plus extra for garnish
- juice of ½ lemon
Instructions
- Add all hummus ingredients to the bowl of a food processor. Blend on high speed until it forms a smooth paste.
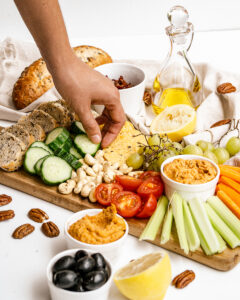
- Garnish hummus with additional smoked paprika and a drizzle of olive oil.
- Arrange hummus and all remaining ingredients onto a large serving platter to form your charcuterie board.
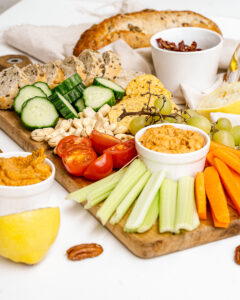
Nutrition (Estimate per Serving)
Calories: 254kcalCarbohydrates: 29gProtein: 8gFat: 14gSaturated Fat: 2gTrans Fat: 1gSodium: 300mgPotassium: 553mgFiber: 6gSugar: 9gVitamin A: 2413IUVitamin C: 11mgCalcium: 68mgIron: 3mg
Vegan-ize any recipe!Grab our free vegan cheat sheet, packed with my favorite easy substitutions to make any recipe vegan.
Massaged Kale Salad with Orange-Miso Dressing

This massaged kale salad is packed with healthy greens, protein rich black beans, hearty rice, and fresh veggies. All topped with a savory and sweet orange-miso dressing. It makes for a healthy lunch, side, or a deliciously light weeknight meal.
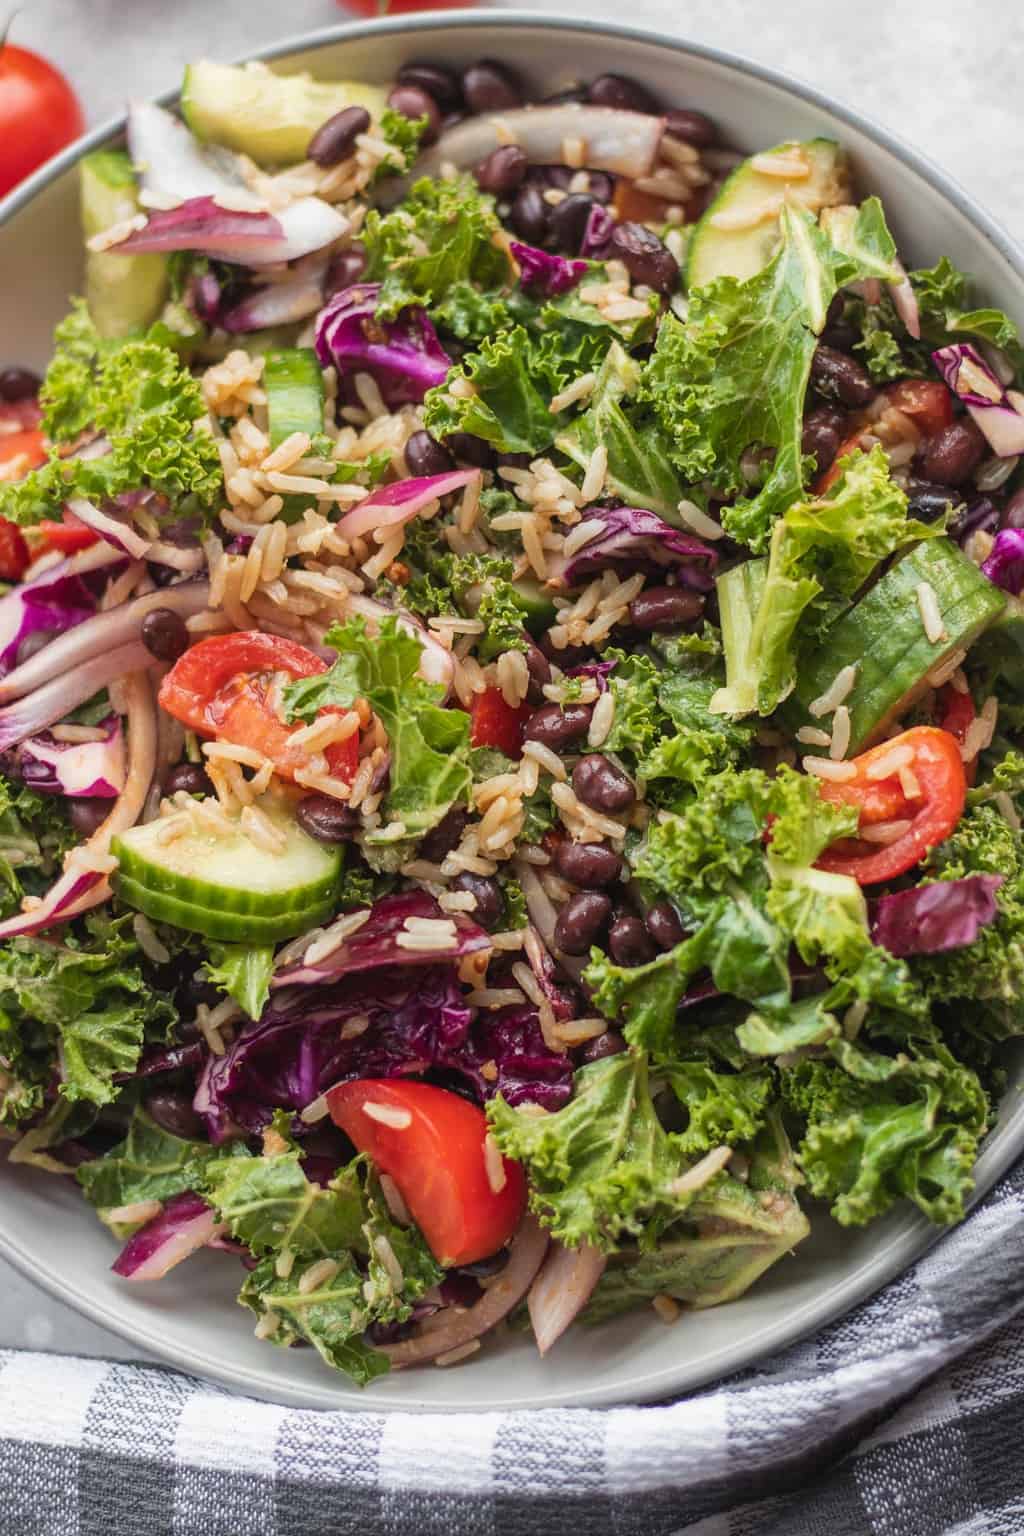
I love taking salads to the next level. Because no one likes a boring salad, right? So I do my best to keep my salads filling, flavorful and also high in protein.
That's why I think autumn and winter are actually my favorite times of year for salads. With a kale salad like this one, you can enjoy an abundance of vegetables while using a carb-y base to make the overall dish super cozy and comforting.
Just add a simple yet delicious dressing, and that's lunch or dinner sorted!
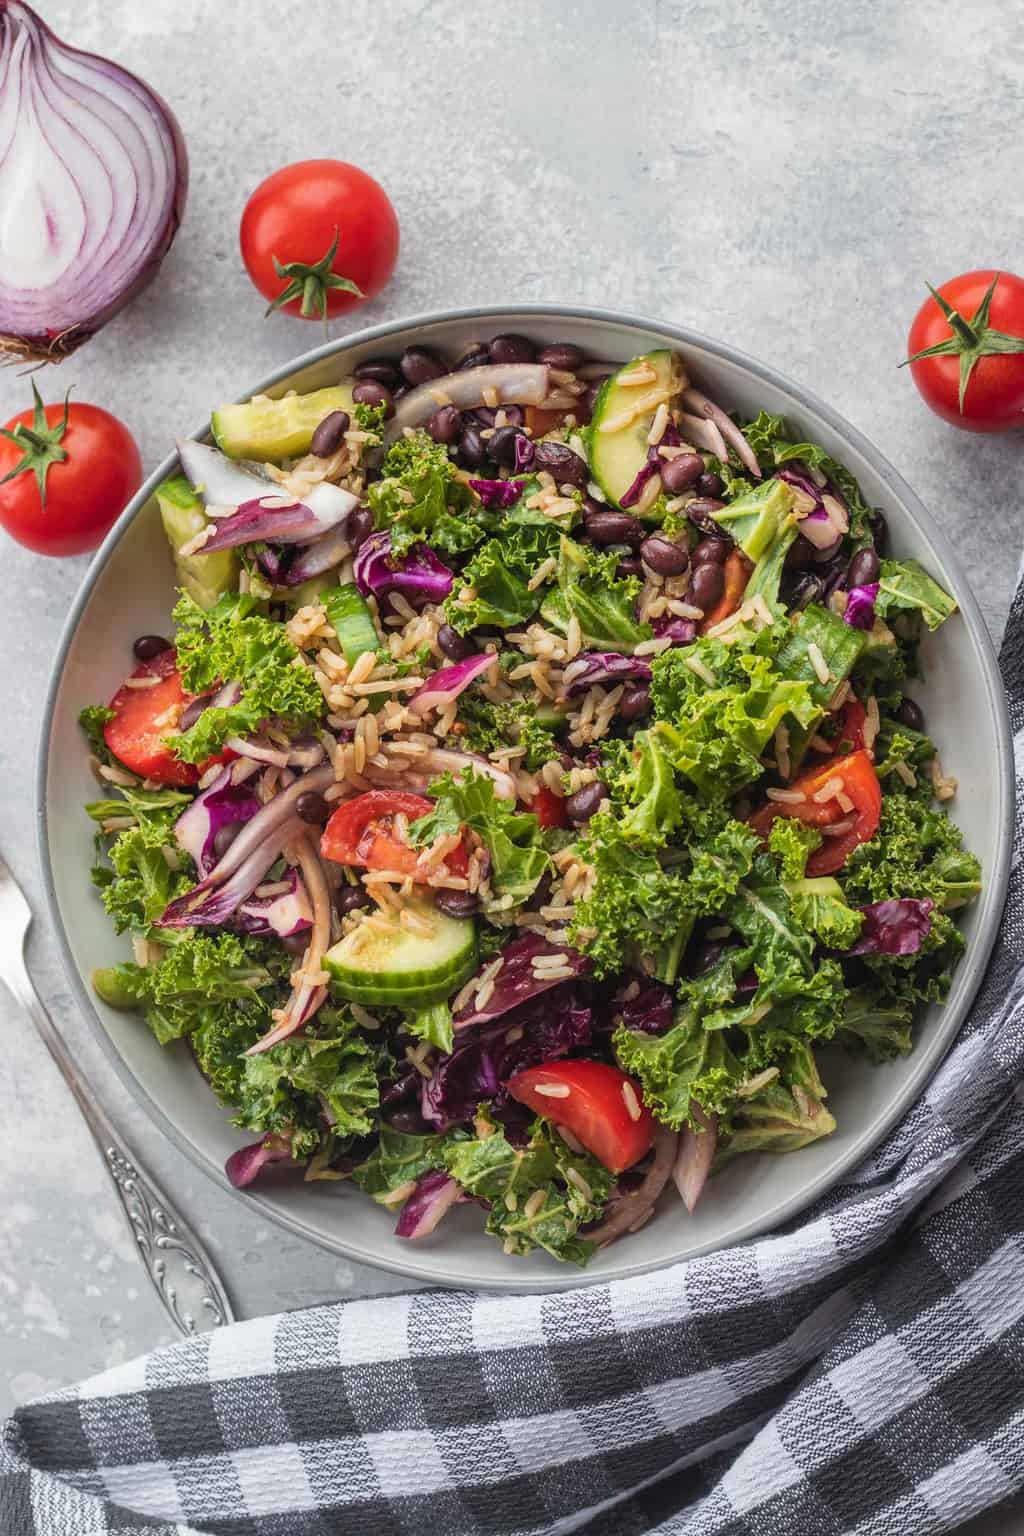
What I love about this particular kale salad is just how simple it is to throw together in just about 25-30 minutes (or even less if you have pre-cooked rice on hand).
I actually first came up with this dish when I had a bunch of leftover veggies in the fridge. Falling in love with the outcome, I tested it once more with a delicious orange-miso dressing - and it was perfect!
This massaged kale salad is:
- Delicious and packed full of flavor
- Vegan friendly!
- Easy to make, with simple ingredients and dressing
- Gluten-free
- Oil-free
- Comforting and cozy
- Ideal for a weeknight dinner.
- Made from whole, minimally processed ingredients
- Versatile - add whatever other veggies you fancy!
This kale salad works really well as a side dish for Christmas and Thanksgiving, or other family get togethers.
It's also a great make ahead or vegan meal prep recipe. And I personally love eating this as a post-workout meal!
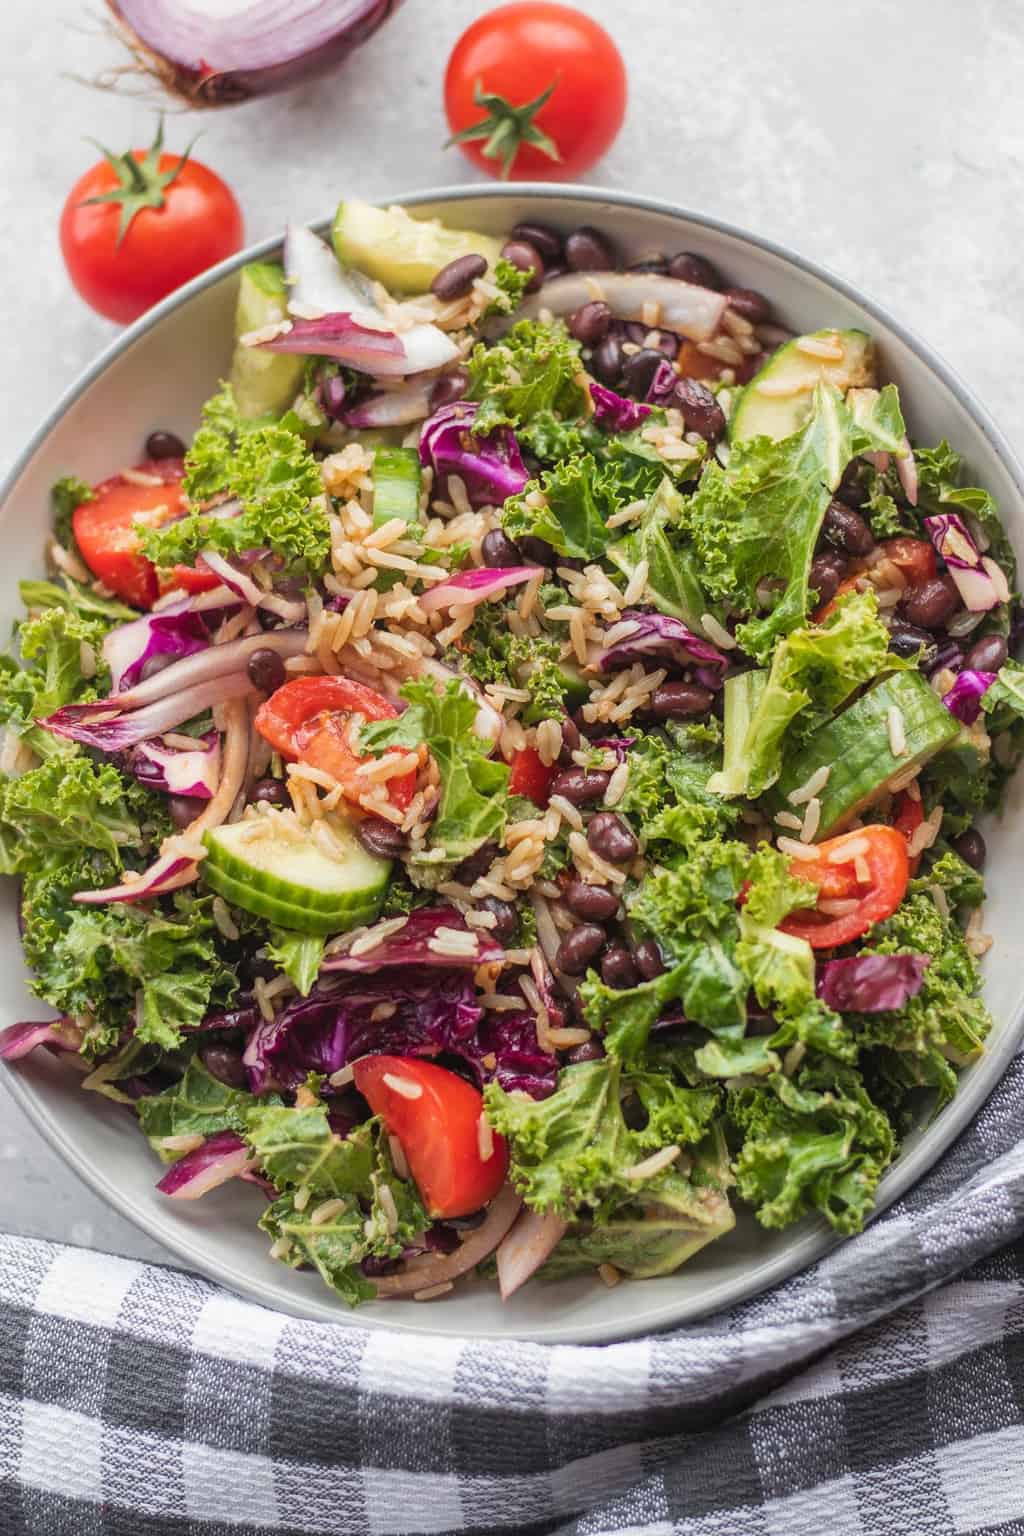
How to Make the Salad
Start by cooking your rice according to the instructions on the packaging. This usually takes around 25-30 minutes.
Meanwhile, massage the kale for 2-3 minutes to shrink it down and soften it up. (This is where the recipe gets its name!) Then stir in the tahini and a pinch of salt.
Next, prepare the dressing by stirring together fresh orange juice, miso paste and apple cider vinegar. Add a pinch of salt, to taste.
Once the rice is ready, add it to a large mixing bowl with the black beans, kale, tomatoes, purple cabbage, cucumber and red onion.
When you're just about ready to serve the black bean salad, stir in the dressing, transfer to serving plates and enjoy!
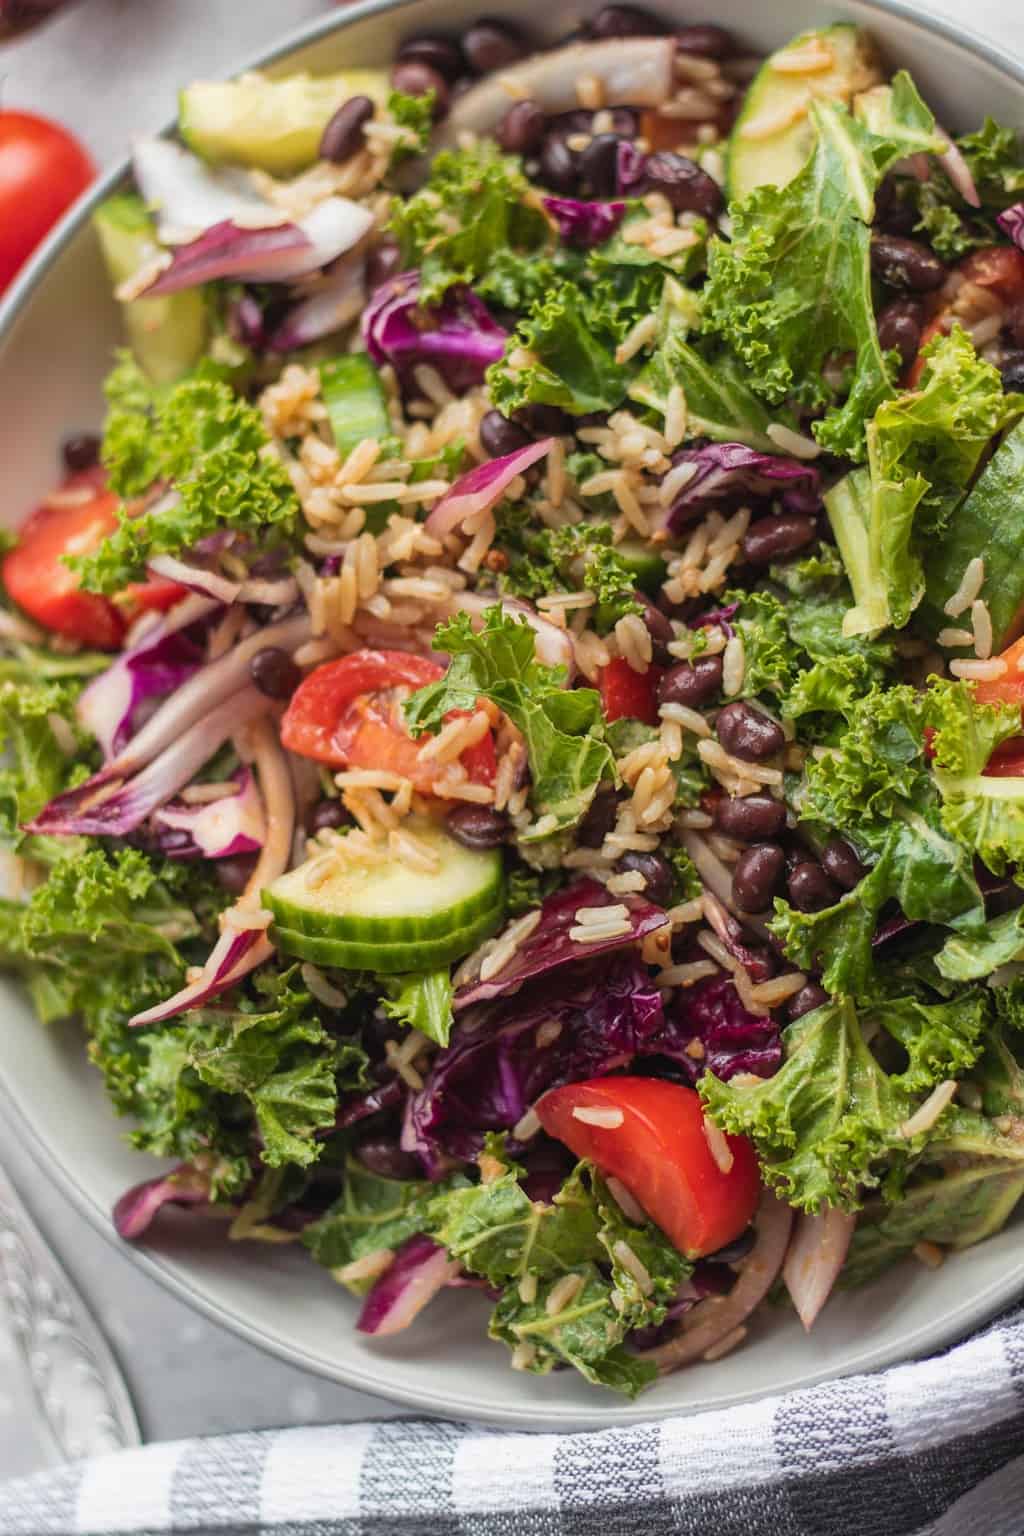
Tips & Tricks
Experiment by adding any other vegetables you have in the fridge. Think zucchini, bell pepper, other types of lettuce or greens. They all work!
If you want the salad less sweet and more tangy, replace the orange juice with the equivalent amount of lemon or lime juice.
You can keep this black bean salad in the fridge in an airtight container for 2-3 days. Although, it's best to store the dressing separate from the salad, so it doesn't get soggy.
More Recipes to Try
If you love this massaged kale salad, be sure to check out these other vegan recipes:
- Massaged Kale Salad with Cranberries and Cashews
- White Bean and Kale Skillet
- Kale Caesar Salad
- Chickpea and Kale Sandwich Spread
Recipe
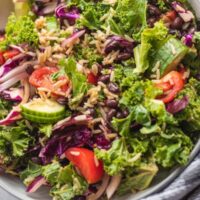
Massaged Kale Salad with Orange-Miso Dressing
This massaged kale salad is packed with healthy greens, protein rich black beans, hearty rice, and fresh veggies. All topped with a savory and sweet orange-miso dressing. It makes for a healthy lunch, side, or a deliciously light weeknight meal.
Print
Pin
Save
Servings: servings
Ingredients
- 1 cup white rice uncooked
- 2 cups kale chopped
- 1 tablespoon tahini
- salt to taste
- 1 can black beans 15oz, drained and rinsed
- 8-9 vine ripened tomatoes medium, chopped
- ½ cup red cabbage chopped
- ½ large cucumber chopped
- ½ red onion medium
For the dressing
- 1 tablespoon apple cider vinegar
- 1 teaspoon brown rice miso paste
- juice of 1 small orange
- salt to taste
Instructions
- Cook the rice according to instructions on packaging. This usually takes 25-30 minutes.
- Meanwhile, massage the kale for 2-3 minutes, then stir in the tahini.
- To make the dressing, stir together the apple cider vinegar, brown rice miso paste, orange juice and salt in a small mixing bowl.
- Once the rice is cooked, stir it together with the kale, black beans, tomatoes, red cabbage, cucumber and red onion. Add the dressing immediately before serving.
Nutrition (Estimate per Serving)
Calories: 538kcalCarbohydrates: 107gProtein: 17gFat: 7gSaturated Fat: 1gSodium: 180mgPotassium: 1845mgFiber: 9gSugar: 16gVitamin A: 11102IUVitamin C: 165mgCalcium: 215mgIron: 4mg
Vegan-ize any recipe!Grab our free vegan cheat sheet, packed with my favorite easy substitutions to make any recipe vegan.
Vegan Baked Mac And Cheese

This vegan baked mac and cheese is perfect for a comforting weeknight dinner! Made with a dairy-free 'cheese' sauce, topped with gluten-free breadcrumbs, flavorful and creamy, this meal requires just simple ingredients and a few easy steps.

Oh, mac and cheese. The stuff that my dreams are made of. I'm not joking - I often fall asleep by switching off my existential worries and thinking about creamy pasta deliciousness instead. 10/10 would recommend.
Seriously though, I can't believe it's taken me this long to share a baked mac and cheese recipe. I have variations of this dish on an almost weekly basis, so finally - here we are. In general, a pasta dinner as good as this is my go-to dish for any Friday night comfort dinner. But it's perfect for pretty much any day or any occasion, and if you give it a go you will see why I say that!
So if you're searching for last-minute dinner inspiration, this vegan baked mac and cheese is a perfect option. You need hardly any time, simple ingredients, and the result is phenomenal.

Vegan baked mac and cheese
So, a little bit about this recipe. If you're wondering what it tastes like, think chewy, tender noodles enveloped in a thick and rich sauce that melts in your mouth, plus just a light coat of optional vegan cheese (or gluten-free breadcrumbs )on top for a little bit of extra texture. The sauce has a savoury flavour that's also very cheesy. Trust me, it tastes even better than it sounds/looks.
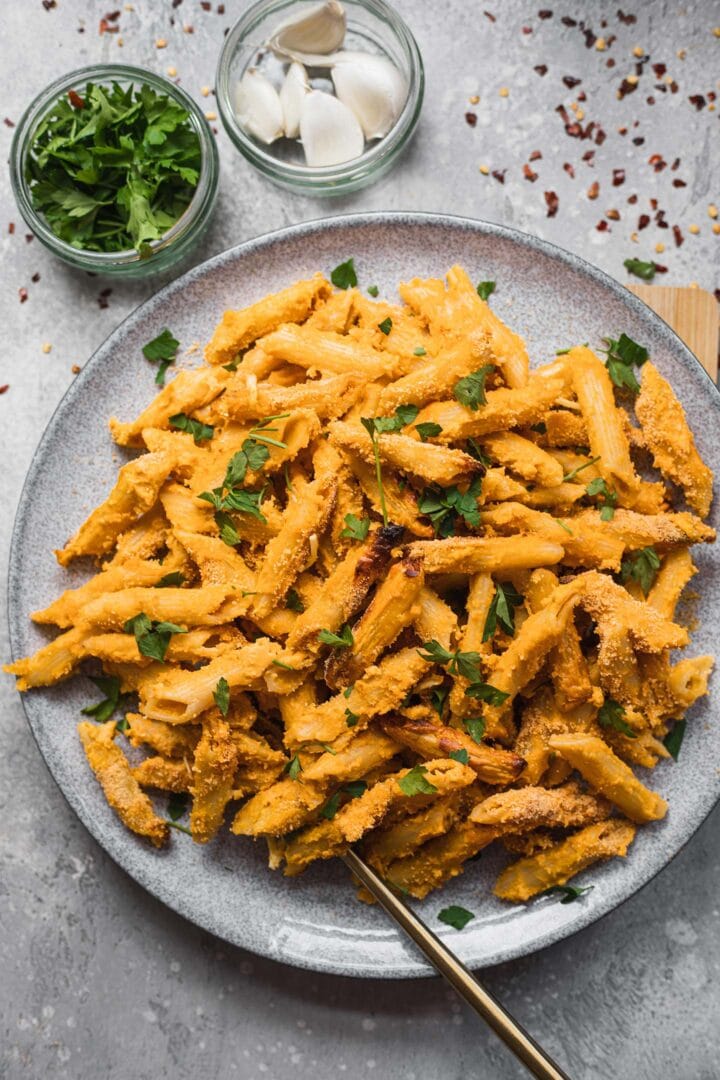
The main ingredient for the dairy-free cheese sauce is cashews, which are a staple in vegan cooking in general. Cashews are neutral in flavour and can be blended to make amazing sauces, dressings and dips. This is a great example! Beyond that, you need just simple ingredients to make amazing flavor and a great texture, too.
Right before baking, I added breadcrumbs and grated vegan cheese. These are optional, but 100% recommended! The end result is amazingly comforting and with an amazing texture. Pasta dreams come true!
Ingredients you'll need
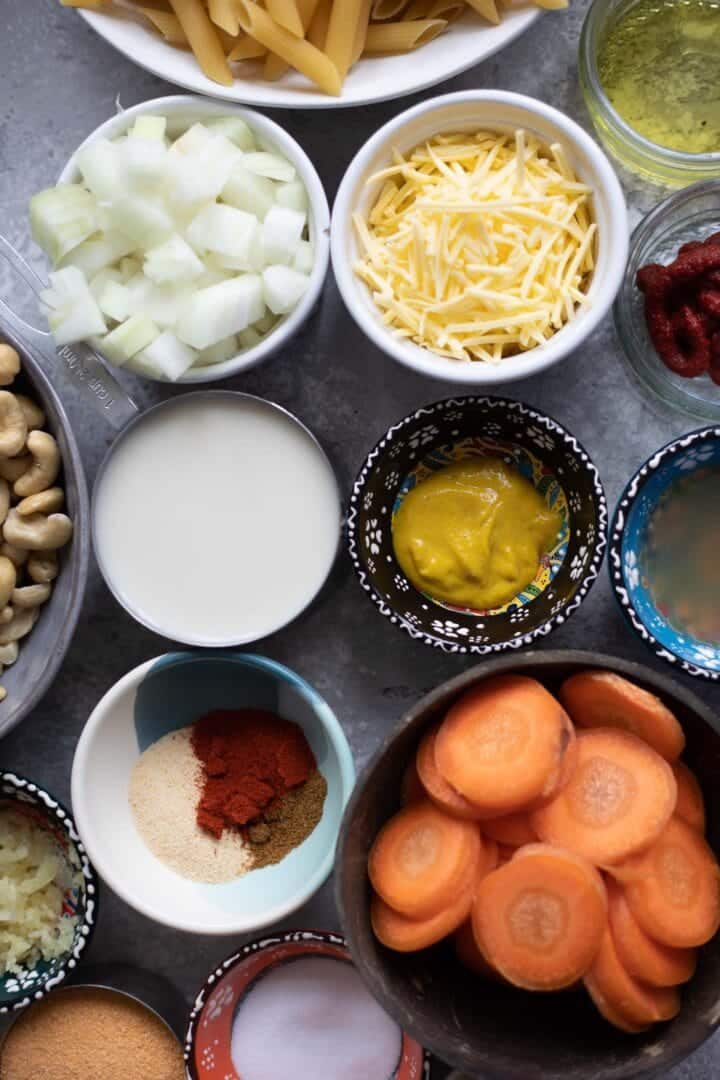
- Olive oil to cook the vegetables.
- Carrots, onion and garlic. These are cooked in olive oil and added to the sauce.
- Cashews. Soak these for 3-4 hours, or simmer for 15 minutes to soften.
- Plant based milk. Use any unsweetened plant based milk variety of your choice.
- Mustard. Ensure vegan.
- Paprika.
- Nutritional yeast. This is an amazing ingredient for adding a cheesy flavor to the sauce!
- Tomato paste.
- Apple cider vinegar.
- Cumin.
- Breadcrumbs. You can either make your own breadcrumbs, or use store-brought.
- Vegan cheese. This is optional, but very much recommended! Choose a variety that melts well.
How to make the best dairy-free baked mac and cheese
Preheat the oven to 180 degrees C/350 F.
Cook the pasta. Follow instructions on packaging, but make sure it is slightly al dente/prevent overcooking.
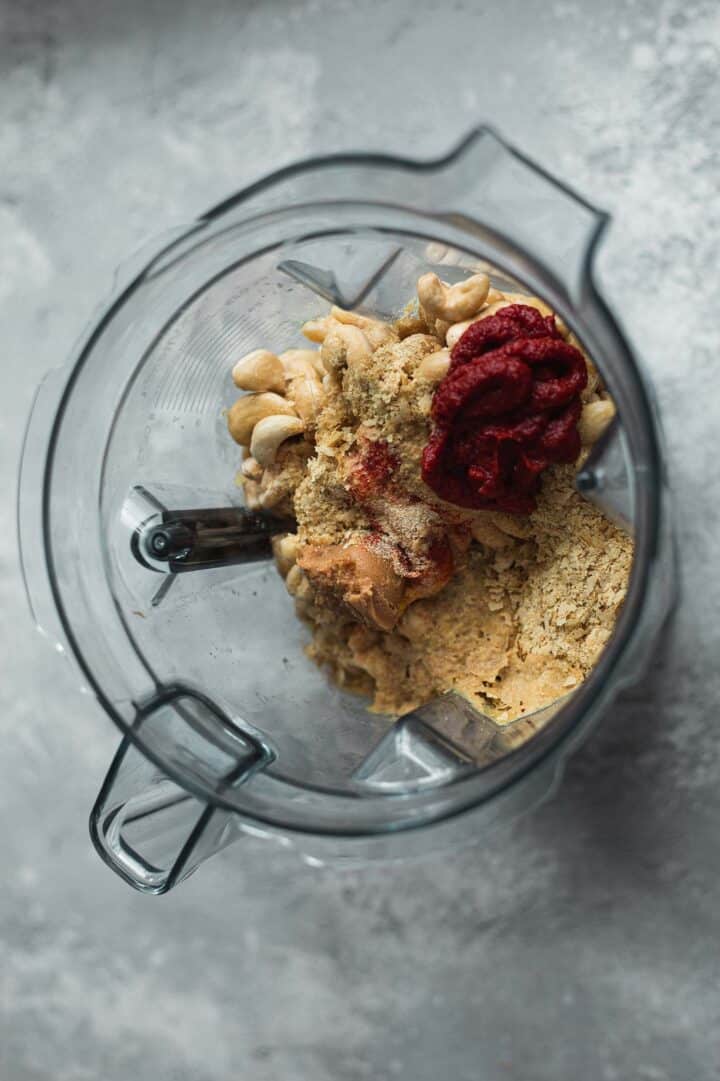
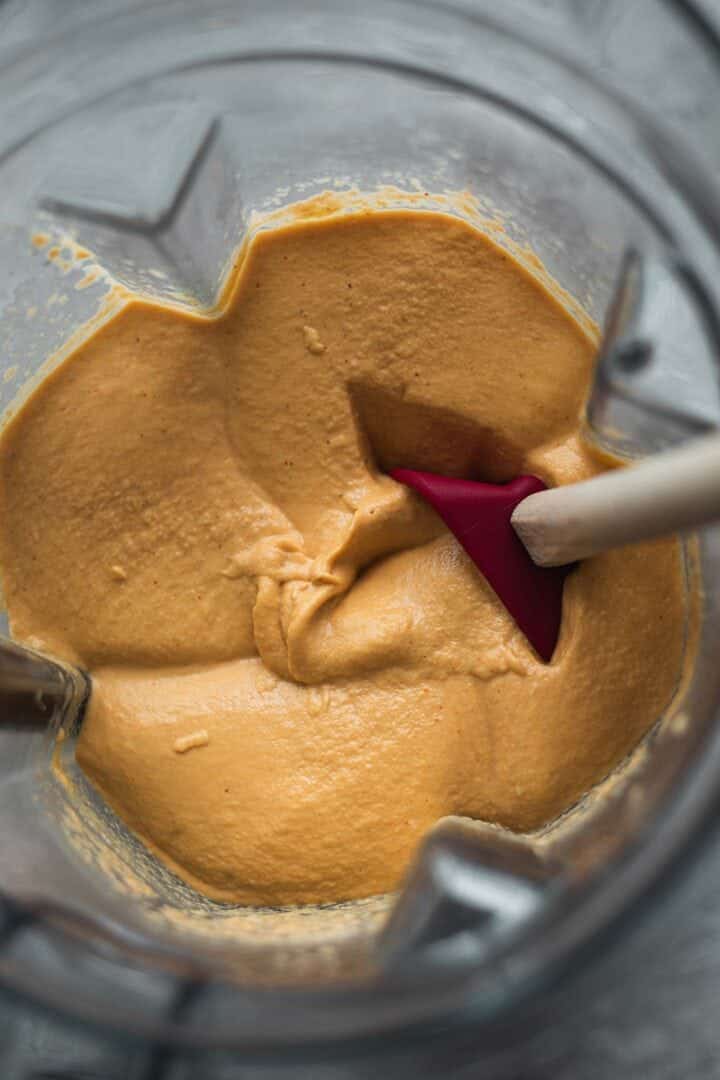
Cook the vegetables. Heat the olive oil in a frying pan over a medium-high heat, then add the carrots, onion and garlic and cook for 5 minutes, until softened.
Make the sauce. Add the vegetables to a blender or food processor, together with the cashews, plant based milk, mustard, paprika, salt, nutritional yeast, tomato paste, apple cider vinegar, and cumin. Blend until smooth.

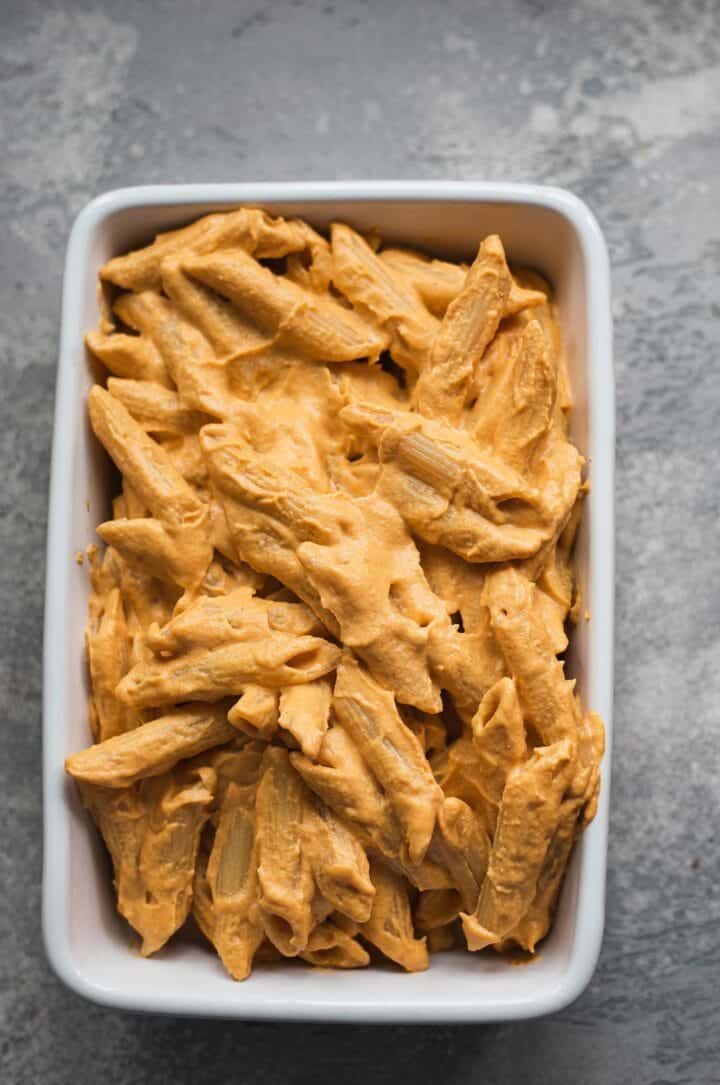
Combine with the pasta. Drain the pasta (but don't rinse) and mix together in a large mixing bowl together with the sauce.
Bake the mac and cheese. Transfer the mac and cheese to a rectangular baking dish. Sprinkle with breadcrumbs and vegan cheese, then bake in the preheated oven for 25 minutes.
Bake the mac and cheese. Transfer the mac and cheese to a rectangular baking dish. Sprinkle with breadcrumbs and vegan cheese, then bake in the preheated oven for 25 minutes.


Cashew alternatives
Let's talk about cheese for a second. It's one of those fears they'll miss intensely if they go vegan. Granted, I've never been a huge cheese fanatic so gave it up with little struggle. But the good news for everyone who is? There are countless ways to replace cheese in your diet.
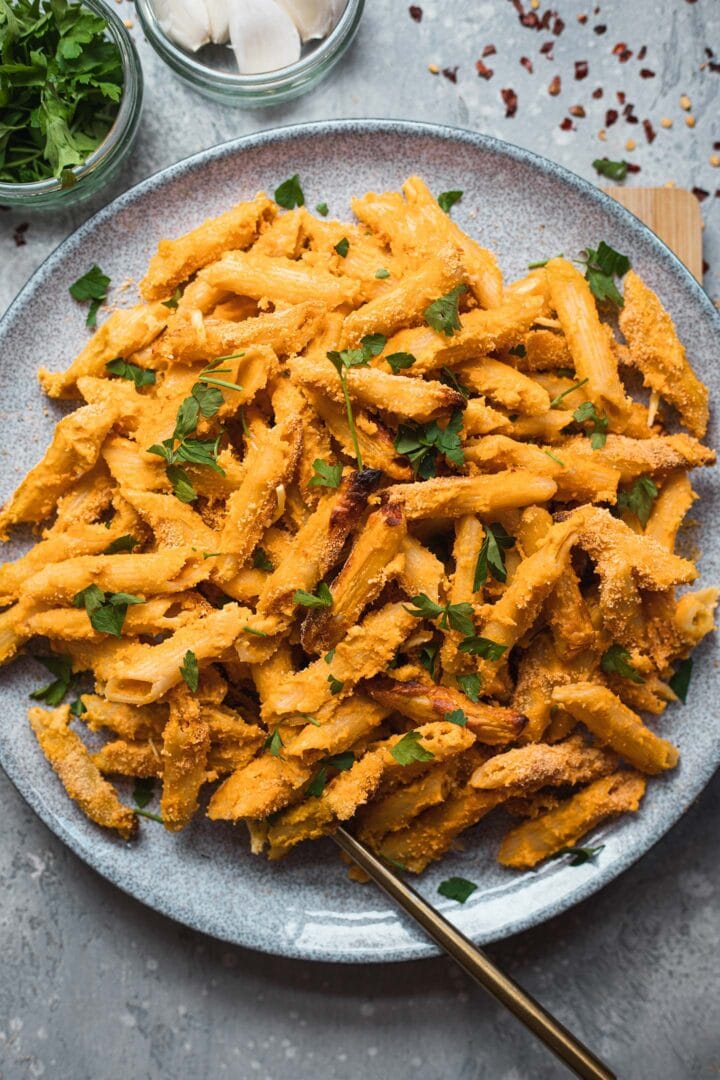
Cashews is one option. They are amazing for using in sauces and here, they create the amazing creamy texture. If you can't eat cashews, however, you can replace them with a can of coconut milk - don't worry, it won't taste like coconut.
How do I store baked vegan mac and cheese?
You can store leftovers in an airtight container for up to 3-4 days in the fridge. To freeze, store either in freezer-friendly containers or in freezer bags for up to 2 months. Allow to thaw fully in the fridge, then reheat in the microwave or on the stove, adding a splash of plant based milk.
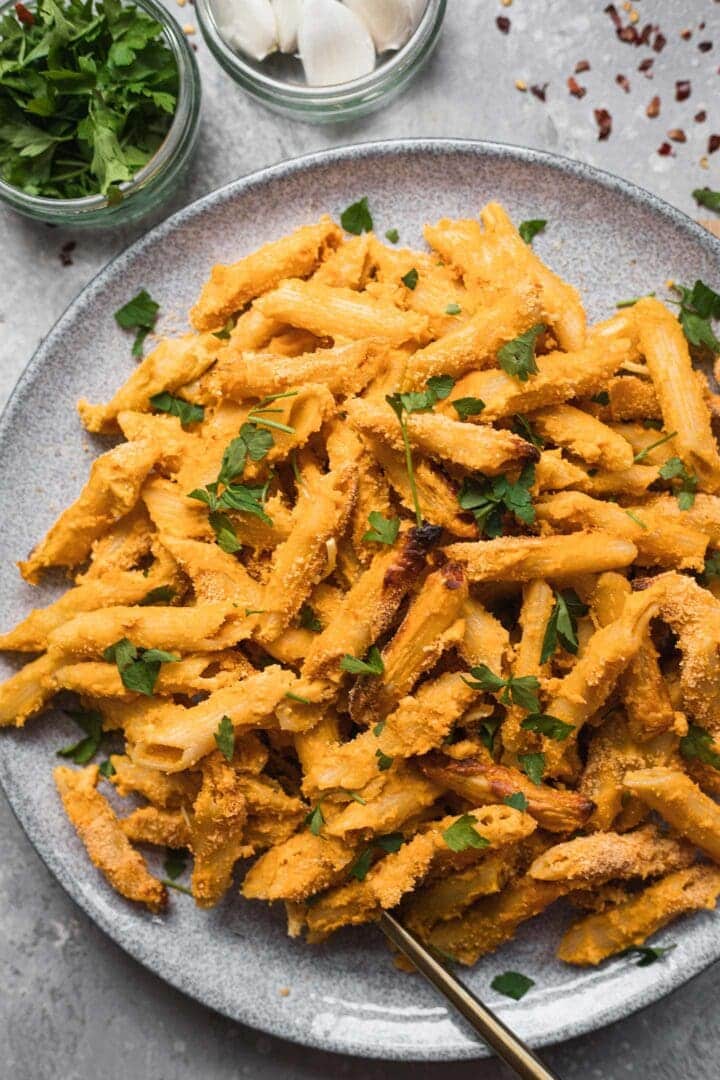
If you want to make this dish ahead of time, I would recommend making the sauce, cooking the macaroni and storing them in separate containers. When ready to make, simply mix together, transfer to a baking dish, add the toppings, and bake as instructed.
Stovetop instructions
This vegan mac and cheese can easily be made on the stove, which is a great option if you are in a rush. Simply transfer the sauce and the cooked pasta to a large pan and stir for a few minutes over a medium heat. You can also add extra vegan cheese, or leafy greens like kale or spinach.
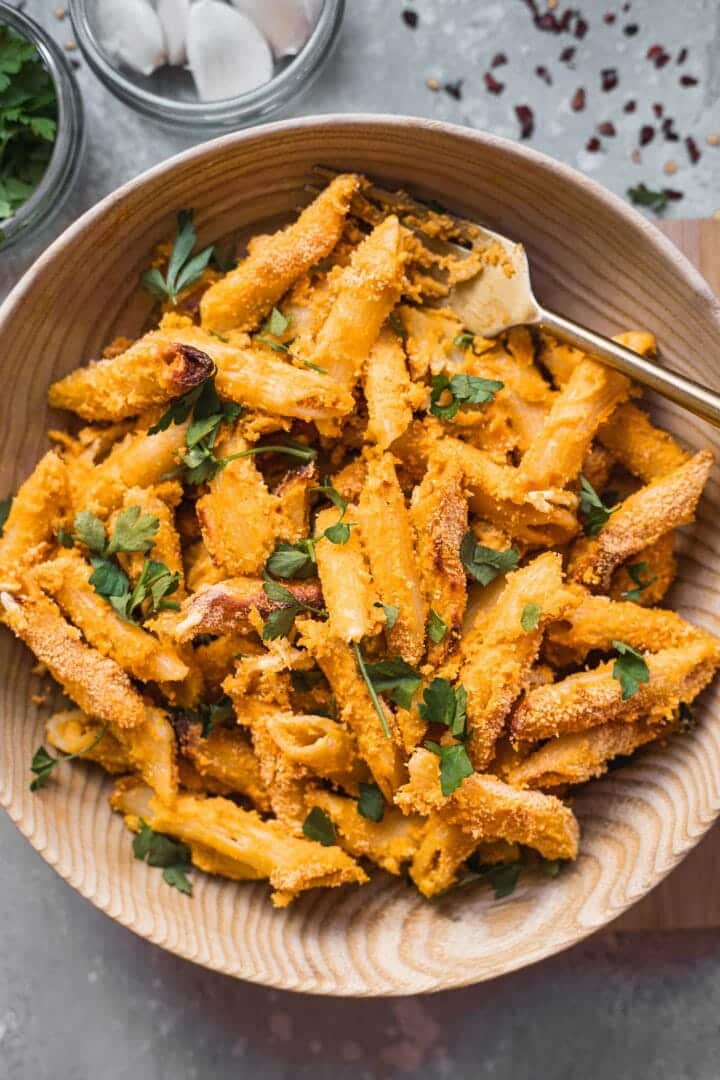
What's to love about this mac and cheese recipe?
It's ...
- Very creamy and indulgent.
- Perfect for a comforting weeknight dinner.
- Made with simple and accessible ingredients.
- Freezer-friendly and great for meal prep.
- Easy and beginner-friendly.
- A great way to impress non-vegans!
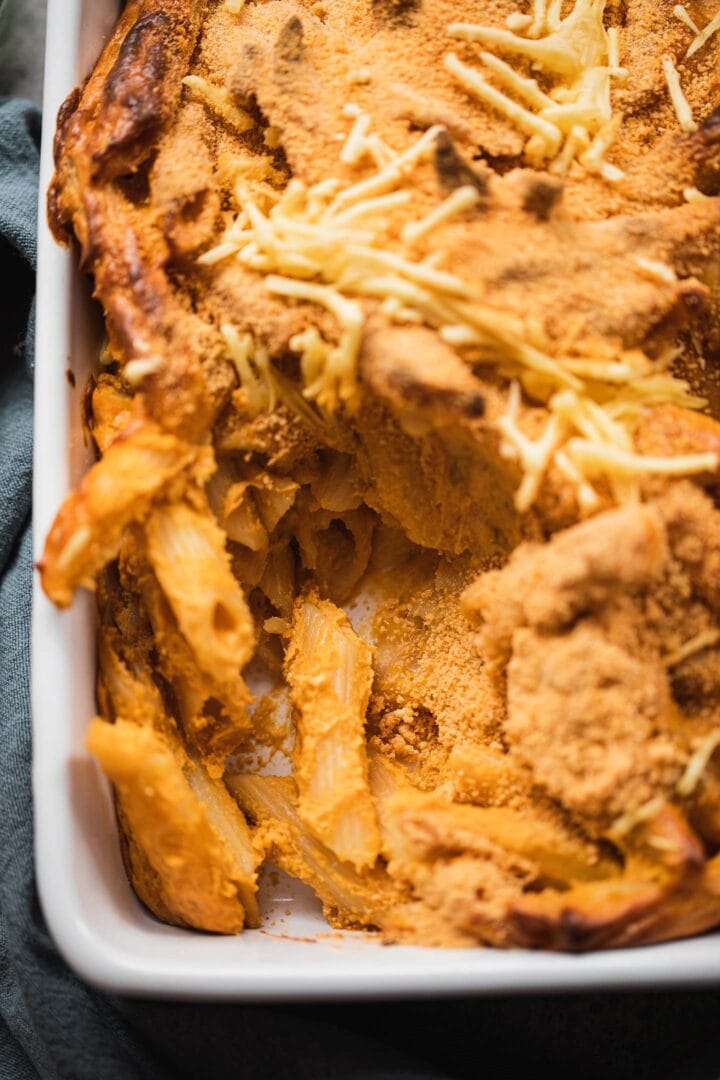
Tips and tricks for success
- The nutritional yeast here works really well to add a cheesy flavour and so I would not recommend leaving it out.
- Ensure that the mustard is vegan, as some have sneaky non-vegan ingredients.
- Soak the cashews really well and be patient when blending to ensure the smoothest texture.
- To make this baked vegan mac and cheese gluten-free, use gluten-free pasta.
- You can use any pasta of your choice. Make sure it's slightly undercooked before mixing it with the sauce because it will continue cooking in the oven.
- You can adjust the type and amount of spices you use depending on your preference. Also, if you prefer it spicy, I would recommend adding sriracha, and chilli flakes on top when serving.
Other vegan pasta recipes
- If you're looking for something meal prep friendly, try my easy vegetable and mushroom pasta.
- My fail-proof fettuccine Alfredo is yet another crowd-pleasing dinner.
- If baking pasta is your thing, my pasta bake with tofu may be the dish for you.
- Vegan avocado pasta is ready in under 15 minutes!
- My roasted red pepper pasta is perfect for a comforting weeknight dinner.

Let me know in the comments: what's your favourite type of vegan cheese? If you give this vegan baked mac and cheese recipe a go, be sure to tag me on Instagram (@earthofmariaa) so I can see your creations, and leave your feedback in the comments below together with a star rating.
Also worth trying: our vegan pumpkin mac and cheese.

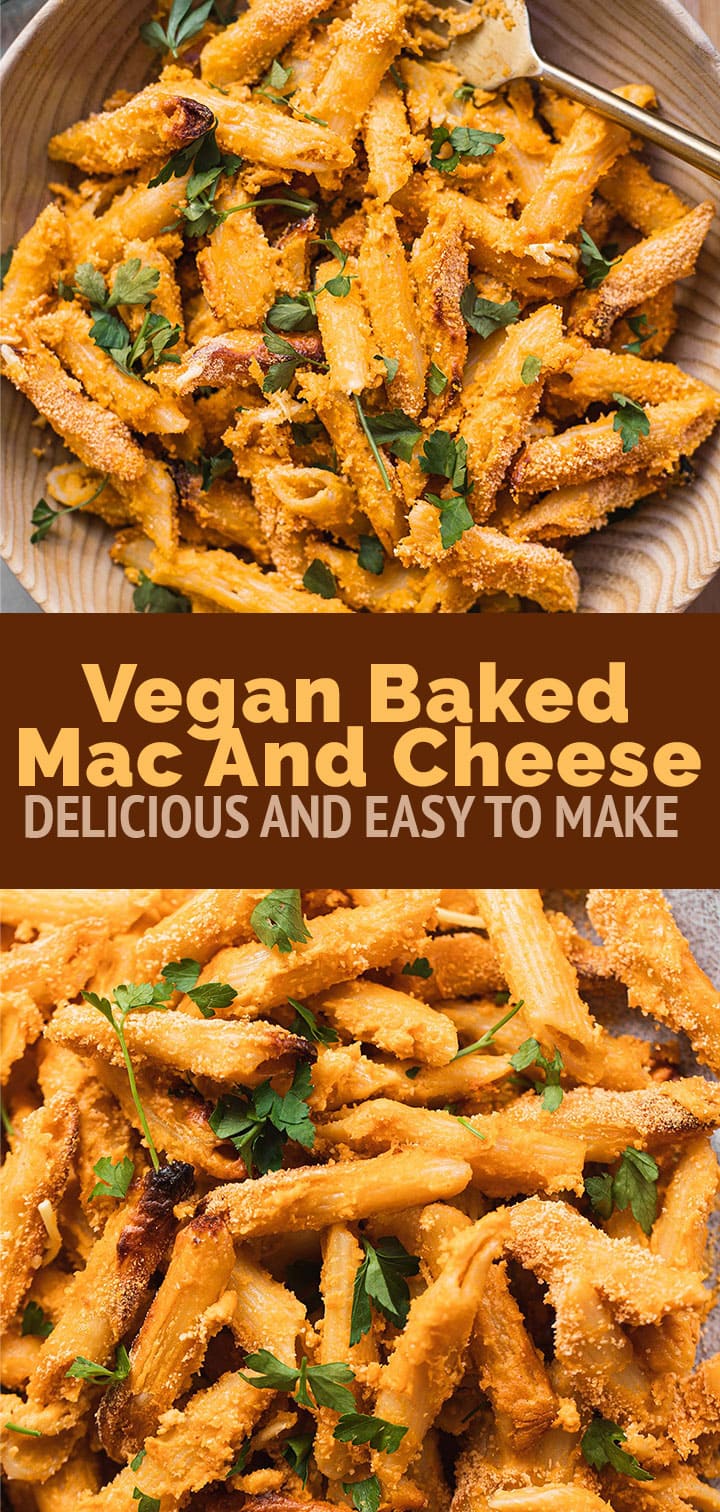
Recipe

Vegan Baked Mac And Cheese (Gluten-free and Oil-free)
This baked vegan mac and cheese is perfect for a weeknight dinner that's super easy to make! Featuring a creamy, smooth dairy-free sauce and a breadcrumb topping, this is a perfect family-friendly and crowd-pleasing dish.
Print
Pin
Save
Servings:
Equipment
- Conventional oven
- Saucepan
- Frying pan
Ingredients
- 3 cups pasta use any pasta of your choice
- 2 tablespoon olive oil
- 1 large carrot diced
- 1 large onion diced
- 3 cloves garlic minced
- 1 ½ cups cashews soaked
- 1 ½ cups plant based milk
- ½ tablespoon mustard ensure vegan
- 1 teaspoon paprika
- ¼ cup nutritional yeast
- 2 tablespoon tomato paste
- 1 tablespoon apple cider vinegar
- ½ teaspoon cumin
- ½ cup breadcrumbs
- ½ cup vegan cheese grated
Instructions
- Preheat the oven to 180 degrees C/350 F.
- Cook the pasta according to packaging instructions on packaging, but make sure it is slightly al dente/prevent overcooking.
- Heat the olive oil in a frying pan over a medium-high heat, then add the carrots, onion and garlic and cook for 5 minutes, until softened.
- Add the vegetables to a blender or food processor, together with the cashews, plant based milk, mustard, paprika, salt, nutritional yeast, tomato paste, apple cider vinegar, and cumin. Blend until smooth.
- Drain the pasta (but don't rinse) and mix together with the sauce in a large mixing bowl.
- Transfer the mac and cheese to a rectangular baking dish. Sprinkle with breadcrumbs and vegan cheese, then bake in the preheated oven for 25 minutes.
Notes
Instructions for making ahead and storing
- Store leftovers in an airtight container for up to 3-4 days in the fridge. To freeze, store either in freezer-friendly containers or in freezer bags for up to 2 months. Allow to thaw fully in the fridge, then reheat in the microwave or on the stove, adding a splash of plant based milk.
- To make ahead of time, make the sauce, cook the macaroni and store them in separate containers. When ready to make, simply mix together, transfer to a baking dish, add the toppings, and bake as instructed above.
- The nutritional yeast here works really well to add a cheesy flavour and so I would not recommend leaving it out.
- Ensure that the mustard is vegan.
- Either soak the cashews for 4 hours, or simmer them in a saucepan for 15 minutes.
- You can use any pasta of your choice. Make sure it's slightly undercooked before mixing it with the sauce because it will continue cooking in the oven.
- You can adjust the type and amount of spices you use depending on your preference.
- If you prefer spicy mac and cheese, add sriracha, and chilli flakes on top when serving.
Nutrition (Estimate per Serving)
Calories: 532kcalCarbohydrates: 47gProtein: 17gFat: 34gSaturated Fat: 6gSodium: 1429mgPotassium: 1233mgFiber: 8gSugar: 15gVitamin A: 4176IUVitamin C: 19mgCalcium: 215mgIron: 7mg
Vegan-ize any recipe!Grab our free vegan cheat sheet, packed with my favorite easy substitutions to make any recipe vegan.
- « Previous Page
- 1
- 2
- 3
- 4
- …
- 10
- Next Page »