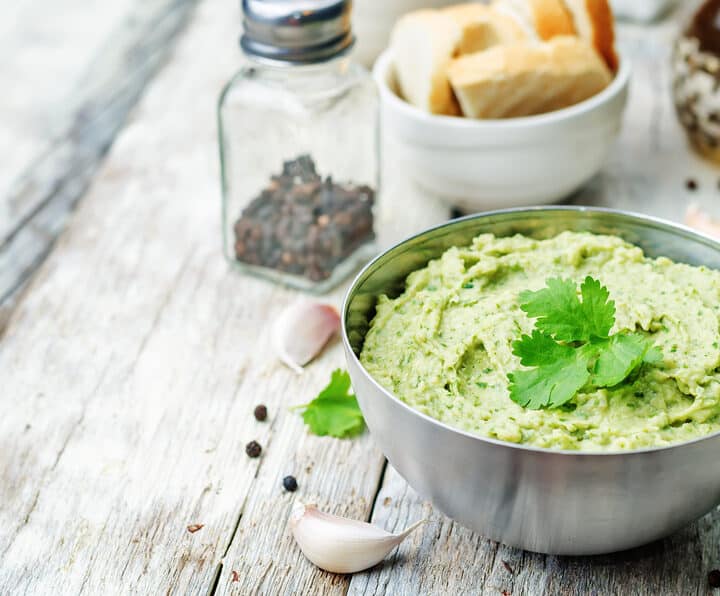
Everyone loves hummus these days; the basic traditional recipe is delicious straight up. And it's so useful, too, whether as a spread for fresh pita, a dip for fresh veggies, and as a spread for sandwiches and wraps. The flavored varieties of store-bought hummus are nice but they don't go a long way, and honestly, one flavor tastes pretty much like another. Use this simple recipe for basic hummus (it's more economical, too!) and then use the suggestions below to boost the flavor and eye appeal. [Read more...]
Search Results for: fresh veg
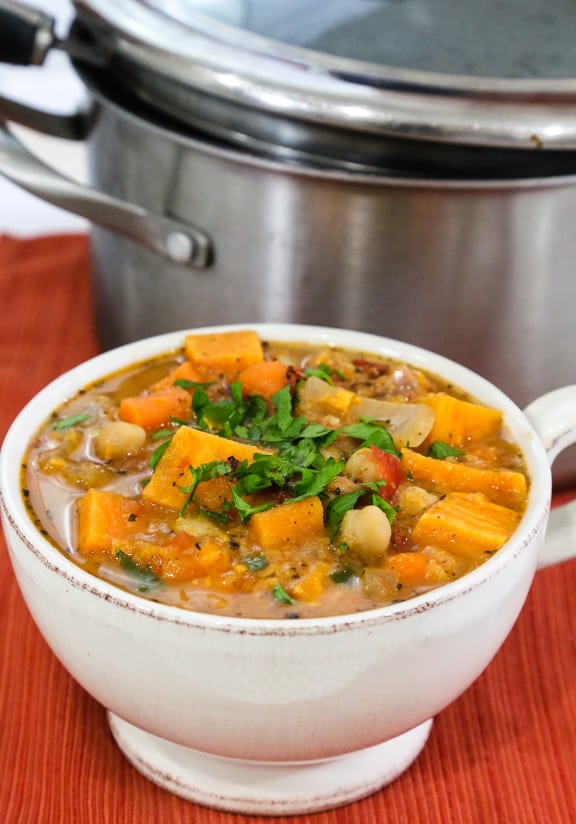
Chunky Sweet Potato Bisque

A satisfying soup that gets its golden-orange color from sweet potatoes and carrots, this will warm you throughout the fall and winter.
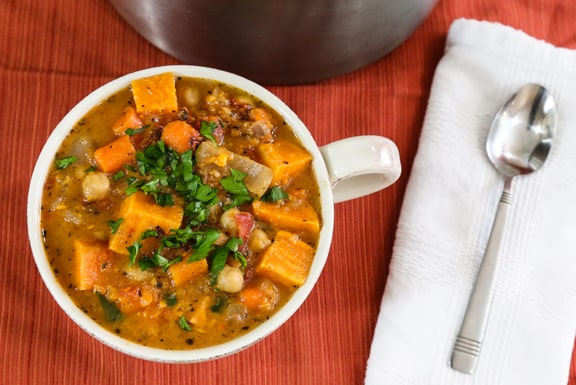
I'm completely in love with this chunky sweet potato soup! It's loaded with healthy flavor from hearty sweet potatoes, fresh veggies, and plenty of spice.
Served in a generous bowl, it can be a main dish, completed simply with salad and fresh bread. Served in smaller portions, it's a nice way to start a vegan Thanksgiving meal too.
Tips, Tricks & Variations
Mix up the veggies! Feel free to swap in your own veggies of choice depending on what is in season. Cauliflower would be a great addition!
Add some spice. To up the heat factor, try adding a bit of chili powder or a sliced jalapeno to the mix.
Plant based milk. I used coconut milk for this recipe, which lends a lot of flavor. But it will work fine with any dairy free milk of your choice.
More Tasty Ideas
If you love this chunky sweet potato soup, be sure to check out my other soup and stew recipes, plus these delicious ideas:
Recipe

Chunky Sweet Potato Bisque
A satisfying soup that gets its golden-orange color from sweet potatoes and carrots, this will warm you throughout the fall and winter.
Print
Pin
Save
Servings: to 9
Ingredients
- 1 ½ tablespoons extra-virgin olive oil
- 1 large yellow or red onion chopped
- 2 large or 3 medium sweet potatoes peeled and cut into large dice, about ¾ inch
- 2 large or 3 to 4 medium carrots peeled and sliced
- 15- to 16- ounce can diced tomatoes try fire-roasted
- 2 bay leaves
- 2 teaspoons salt-free all-purpose seasoning such as Frontier or Mrs. Dash
- ¼ teaspoon ground cinnamon
- ½ teaspoon dried basil or oregano
- 15- to 16- ounce can chickpeas or large white beans cannellini or Great Northern, drained and rinsed
- 1 to 2 cups unsweetened nondairy milk very good with unsweetened coconut milk
- Salt and freshly ground pepper to taste
- Minced fresh parsley or cilantro for topping as desired
Instructions
- Heat the oil in a soup pot. Add the onion and sauté over medium-low heat until golden.
- Add the sweet potatoes, carrots, and enough water to barely cover the vegetables.
- Bring to a slow boil, then stir in the tomatoes, bay leaves and seasonings. Simmer gently, covered, until the sweet potatoes and carrots are tender, about 20 to 25 minutes. Remove and discard the bay leaves.
- If using an immersion blender, add the beans and blend about half of the ingredients in the pot, giving the soup a chunky texture.
- If using a food processor, transfer about half of the solid ingredients into the container, along with half of the beans and a little of the cooking liquid, then return to the soup pot.
- Add enough nondairy milk to give the soup a slightly thick consistency. Season with salt and pepper, then return to the heat and simmer over very low heat for 10 minutes longer.
- Serve at once, or let stand off the heat for an hour or two before serving, then heat through as needed. Top individual servings with parsley or cilantro, if desired.
Nutrition (Estimate per Serving)
Calories: 197kcalCarbohydrates: 33gProtein: 6gFat: 6gSaturated Fat: 1gPolyunsaturated Fat: 1gMonounsaturated Fat: 3gSodium: 409mgPotassium: 604mgFiber: 8gSugar: 7gVitamin A: 14209IUVitamin C: 11mgCalcium: 160mgIron: 3mg
Vegan-ize any recipe!Grab our free vegan cheat sheet, packed with my favorite easy substitutions to make any recipe vegan.
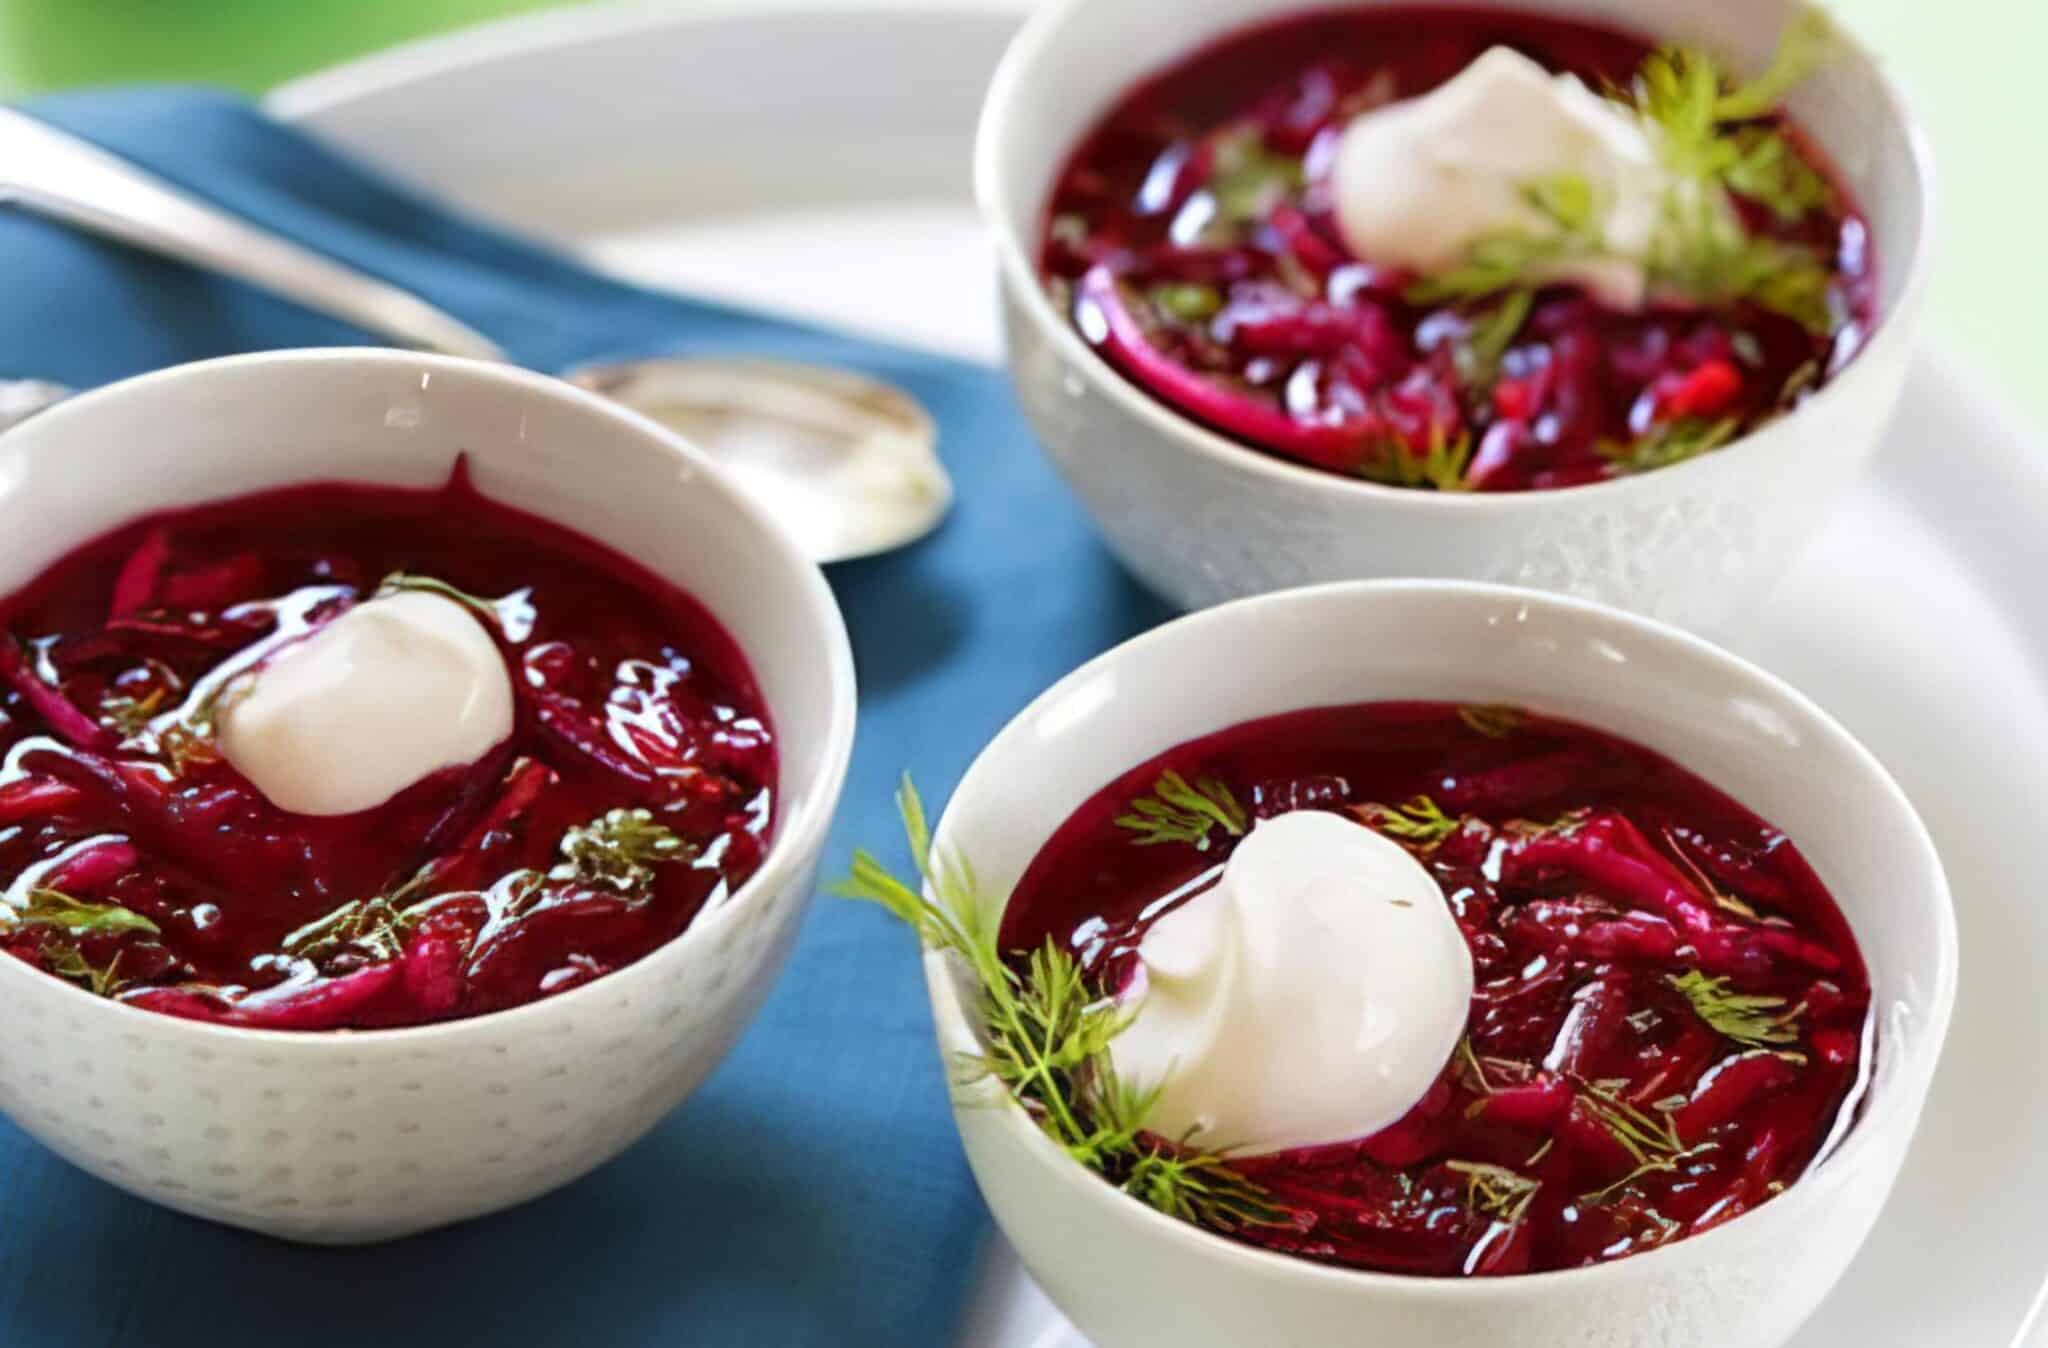
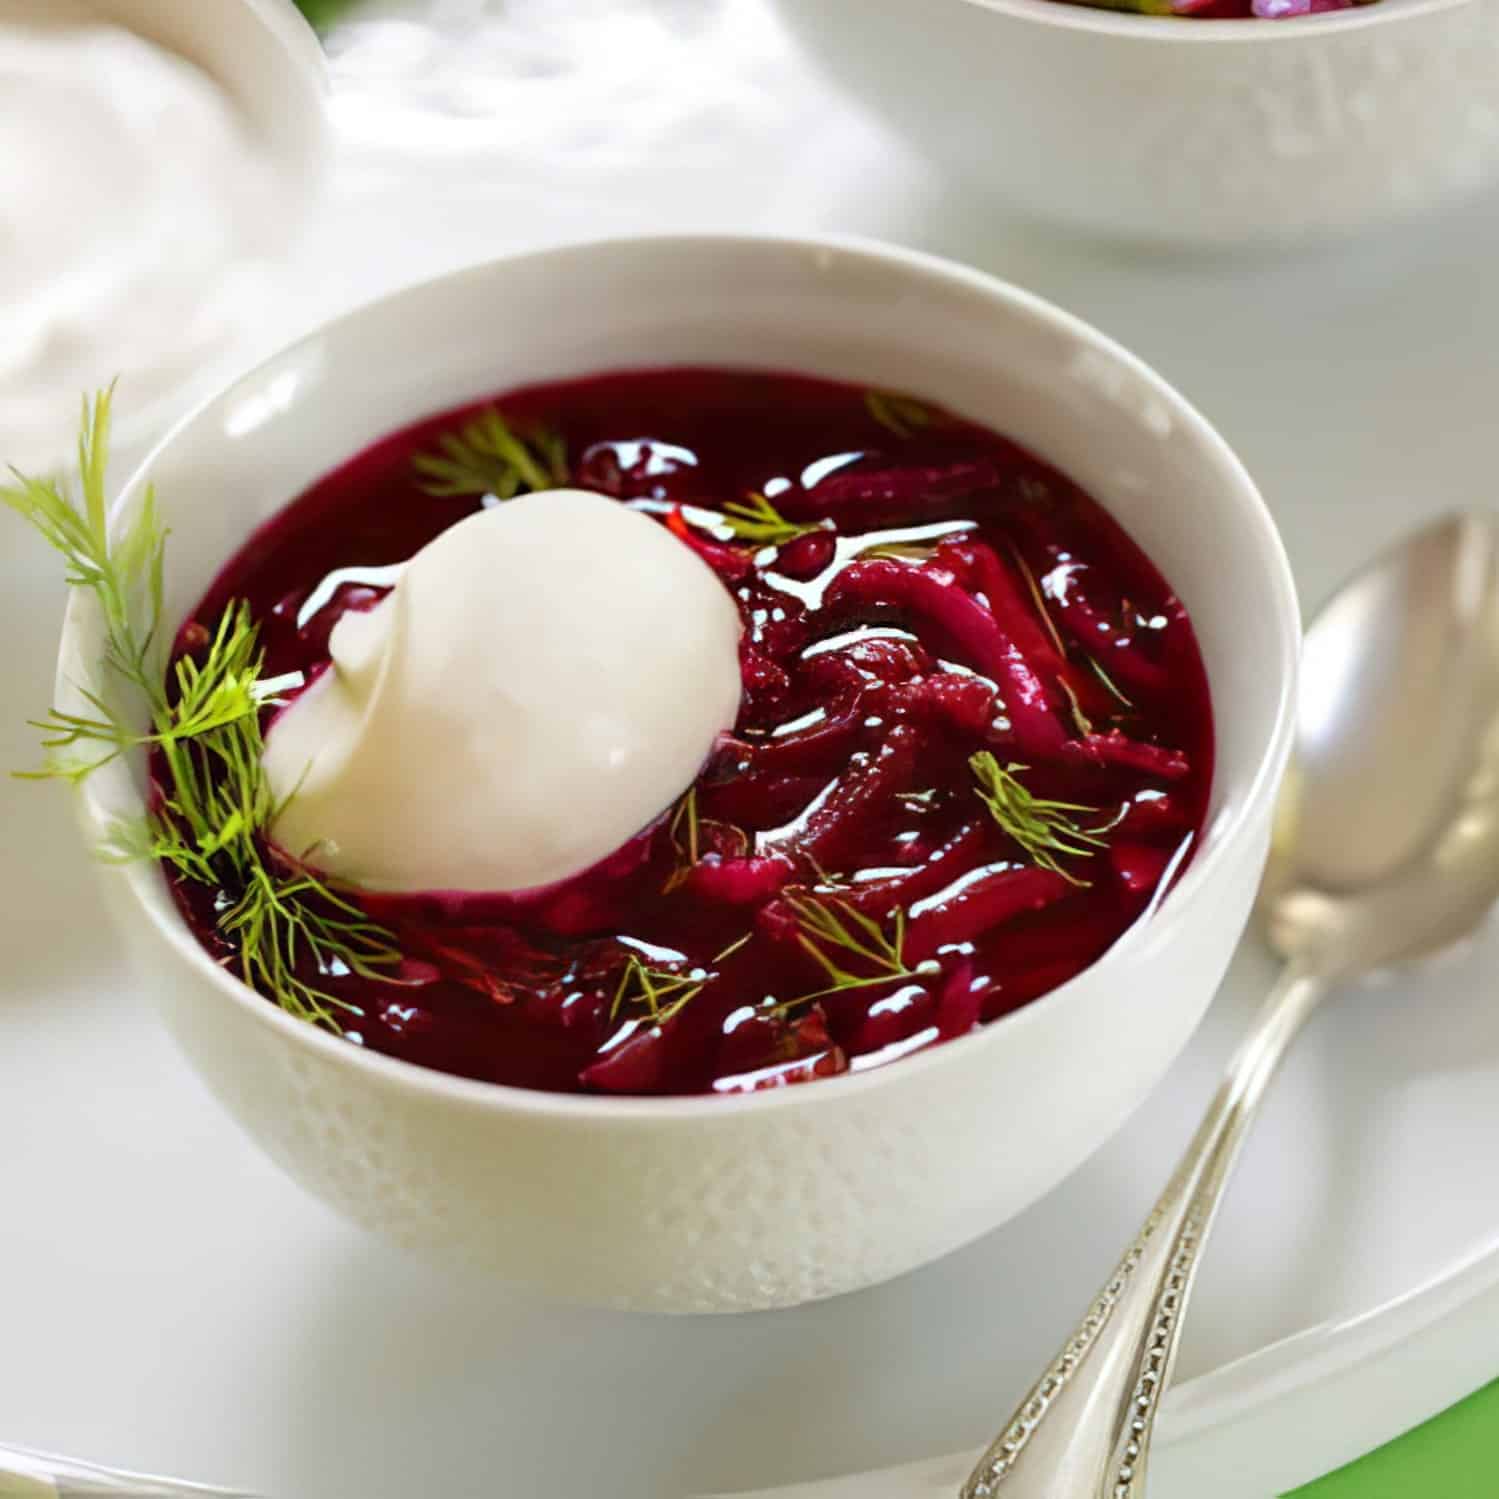
Raw Cold Beet Borscht
This raw beet borscht is a refreshing, no-cook version of the classic Eastern European soup. Bursting with the natural sweetness of beets, carrots, and apples, it's a vibrant dish perfect for warm days.
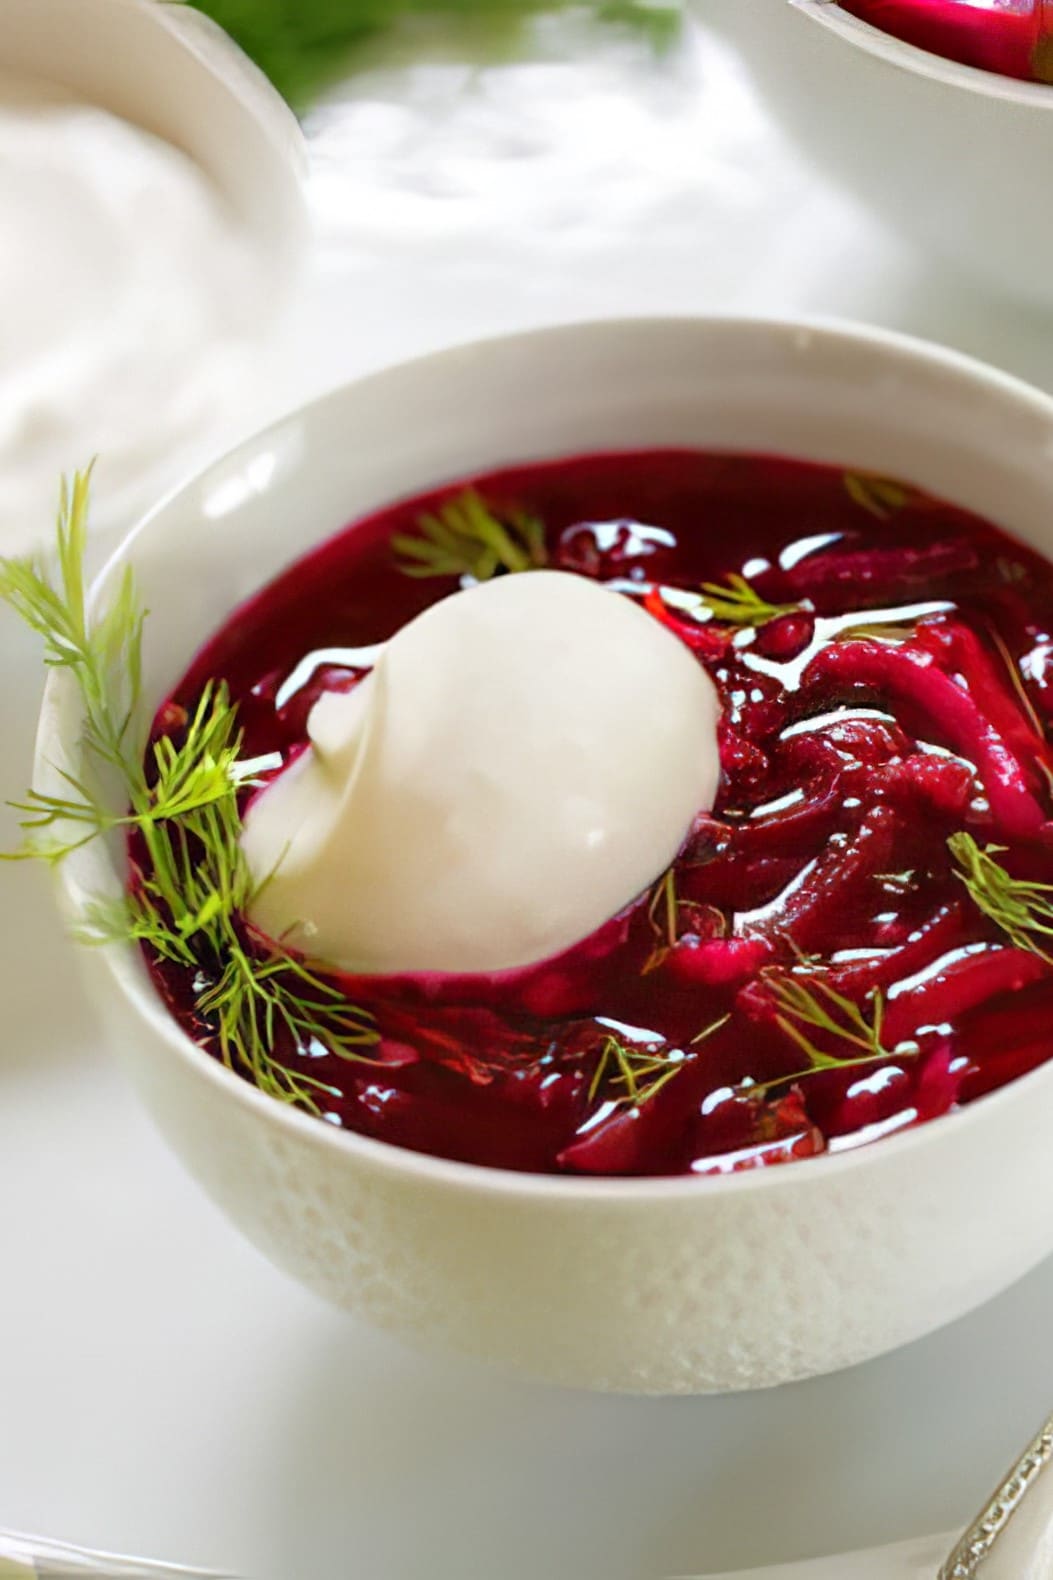
Traditional borscht is a hearty, cooked beet soup enjoyed hot or cold. This raw adaptation skips the cooking, preserving the crisp textures and earthy flavors of fresh vegetables and fruits.
The combination of grated beets, carrots, cucumber, and sweet apple creates a naturally sweet base, while lemon juice adds a zesty brightness.
Fresh dill and scallions introduce herbal notes, making this chilled soup a delightful starter or light meal.
Why You'll Love This Raw Beet Borscht
- No-Cook Preparation: Ideal for hot days when you want to avoid the stove.
- Nutrient-Rich: Retains the full spectrum of vitamins and minerals from raw vegetables.
- Vegan and Gluten-Free
- Quick and Easy: Minimal pr!eparation time; just grate, mix, and chill.
Helpful Tips & Substitutions
Grate with Ease: Use a food processor with a grating attachment to save time and effort. You can grate the vegetables by hand as well, but it quite the chore. Be sure to check the guide to cooking beets for more tips on how to prepare them!
Chill Thoroughly: Allow the soup to refrigerate for at least 3 hours to enhance the flavors and ensure it is fully chilled.
Creamy toppings: Top your borscht with a dollop of vegan sour cream or cashew cream. It's a delightful contrast to the tangy soup. Coconut yogurt is also a good choice.
Use any beets! While traditional red beets are the most common for making borscht, golden beets can be used for a different hue and milder taste.
Variations to Try
Add a Spicy Kick: Add a pinch of cayenne pepper or finely chopped jalapeño for some heat.
Herbal Twist: Incorporate fresh mint or basil for a different flavor profile.
Nutty Addition: Top with chopped walnuts or almonds for added texture and richness.
More Vegan Recipes
If you love this vegan borscht, be sure to check out these other delicious ideas:
Recipe
Raw Cold Beet Borscht
This raw beet borscht is a refreshing, no-cook version of the classic Eastern European soup.
Print
Pin
Save
Servings:
Equipment
- Food processor with grater attachment
Ingredients
- 2 large beets peeled and cut into chunks (or see note if you'd like to lightly cook the beets)
- ½ small cucumber cut into chunks
- 1 medium apple sweet variety, cut into chunks
- 1 medium carrot peeled and cut into chunks
- 2 tablespoons fresh dill minced, add more to taste
- 1 scallion thinly sliced
- Juice of 1 to 2 lemons to taste
- 3 tablespoons agave nectar or to taste
- salt and freshly ground pepper to taste
- vegan sour cream purchased or homemade, or Cashew Cream for topping, optional
Instructions
- Grate the beets, cucumber, apple, and carrot in a food processor fitted with the grating blade. Transfer the grated ingredients to a soup tureen or some other kind of serving container such as a deep, steep-sided casserole dish.
- Fill the container with enough water to give the soup a dense but not overly crowded consistency. Stir in the dill and scallions.
- Add the juice of 1 to 1 ½ lemons (depending on how large and juicy they are), and the agave. Season gently with salt and pepper.
- Cover and let the soup chill for at least 3 hours. This can be made the morning before you want to serve it for dinner, or the day before. Just before serving, taste and add more lemon juice and agave to your liking.
- Serve garnished with a dollop of vegan sour cream or cashew cream, if desired.
Notes
If you prefer beets lightly cooked, just use your favorite cooking method, whether in the microwave or on the stovetop. Don't overcook! Cook just until they can be pierced, then plunge them in a bowl of ice water until they're cool enough to handle.
Nutrition (Estimate per Serving)
Calories: 94kcalCarbohydrates: 22gProtein: 2gFat: 0.3gSaturated Fat: 0.04gPolyunsaturated Fat: 0.1gMonounsaturated Fat: 0.03gSodium: 79mgPotassium: 384mgFiber: 4gSugar: 17gVitamin A: 1784IUVitamin C: 9mgCalcium: 23mgIron: 1mg
Vegan-ize any recipe!Grab our free vegan cheat sheet, packed with my favorite easy substitutions to make any recipe vegan.
Cold Peanut Butter-Sesame Noodles
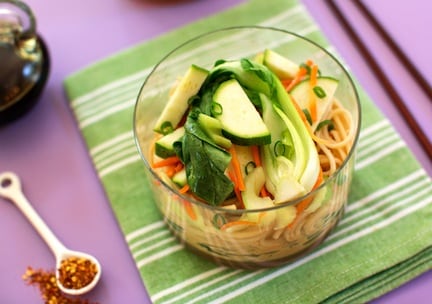
Here’s an easy rendition of peanut butter noodles, with a dollop of tahini and a dash of spice. Delicious as a summer dinner served with an easy tofu dish and a simple salad of tomatoes, cucumbers, and basil. Photos by Hannah Kaminsky of Bittersweet. [Read more...]
Spicy Pumpkin and Peanut Soup
This hearty soup is packed with flavor from sugar pumpkin, fresh veggies, and protein-packed beans. It's delicious, warm, comforting, and perfect for Fall!
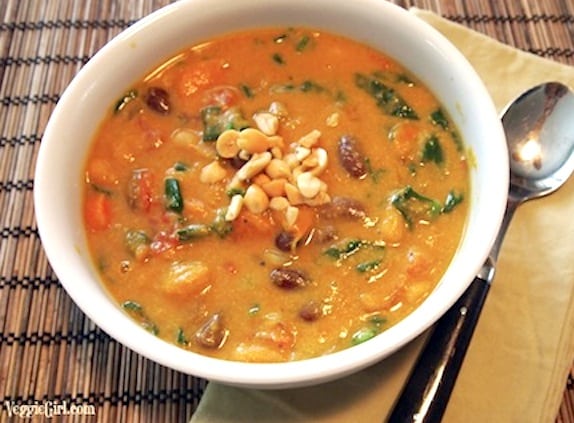
This pumpkin packed soup can be served as a starter for festive occasions like Thanksgiving. But it's also filling enough to be a one-pot dinner all on its own!
This pumpkin and peanut soup is:
- Hearty & filling.
- Totally delicious.
- Easy to make in just 1 hour.
- Vegan & Vegetarian.
It's a perfect meatless meal for those chilly fall and winter nights!
Tip: If you don't have sharp enough knives to cut a thick-skinned pumpkin or squash, wrap the whole thing in foil, set in a casserole dish, and bake 375º F. for 30 to 45 minutes, or until you can pierce through the skin, with some resistance. When cool enough to handle, it will cut more easily!
You can also see a quick how-to in our video on How to Cut Butternut Squash Easily, which applies to other large squashes as well.
Recipe and photos were contributed by Dianne Wenz of VeggieGirl.
Recipe

Spicy Pumpkin and Peanut Soup
This hearty soup is packed with flavor from sugar pumpkin, fresh veggies, and protein-packed beans. It's delicious, warm, comforting, and perfect for Fall!
Print
Pin
Save
Servings:
Ingredients
- 4 cups sugar pumpkin or substitute kabocha squash or butternut squash; peeled, seeds removed, and diced
- 2½ cups vegetable broth
- 1 onion large, diced
- 1 tablespoon ginger fresh grated
- 2 carrots sliced
- 14 ounces canned diced tomatoes
- 3 cups canned kidney beans drained and rinsed, can use a mix of white and red if desired
- ⅔ cup natural creamy peanut butter
- 2 teaspoons curry powder
- 1 teaspoon chili powder adjust up or down for preferred spice level
- ½ teaspoon sea salt
- 2 ½ cups plain unsweetened nondairy milk
- 4 cups fresh spinach chopped
- ¼ cup roasted peanuts chopped
Instructions
- Preheat oven to 400º F. Line a baking sheet with parchment paper and roast the pumpkin for 20 minutes, until fork tender. Let cool slightly.
- While the pumpkin is roasting, combine the broth, onion, ginger, carrots, tomatoes, and kidney beans in a large pot over medium heat and cook for about 30 minutes, until the vegetables have softened.
- Add the curry powder, chili powder, and peanut butter and mix to incorporate.
- Place the roasted pumpkin and nondairy milk in a food processor or blender and process until smooth, stopping to scrape down the sides if necessary.
- Add the pureed pumpkin to the pot with the vegetables and stir to combine. Stir in the salt. Cook for several more minutes, until heated throughout. Add more broth or non-dairy milk if the consistency seems too thick.
- Stir in the spinach and cook until it's just wilted. Transfer to bowls and top with chopped peanuts
Nutrition (Estimate per Serving)
Calories: 357kcalCarbohydrates: 35gProtein: 16gFat: 20gSaturated Fat: 4gPolyunsaturated Fat: 6gMonounsaturated Fat: 9gSodium: 1236mgPotassium: 927mgFiber: 10gSugar: 11gVitamin A: 12435IUVitamin C: 17mgCalcium: 242mgIron: 4mg
Vegan-ize any recipe!Grab our free vegan cheat sheet, packed with my favorite easy substitutions to make any recipe vegan.
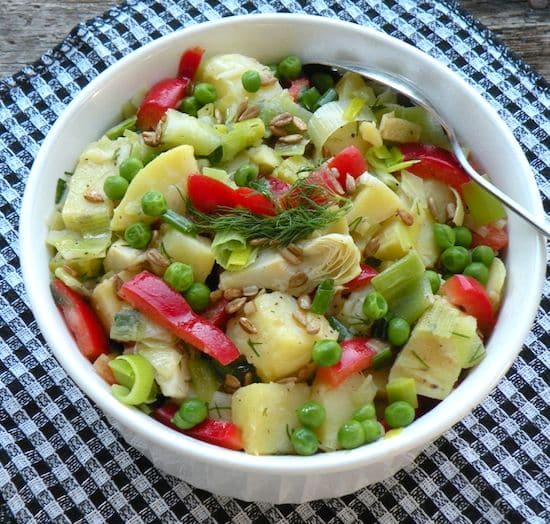
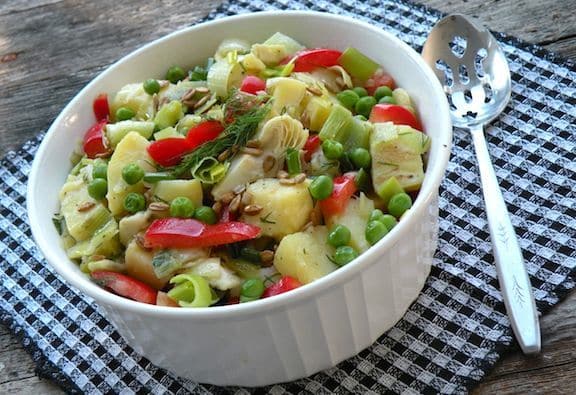
Potato and Leek Salad
This Potato Leek Salad is a dressed-up potato salad that's easy to make, and bursting with flavor from fresh herbs and a homemade vinaigrette dressing.
If you're tired of the same old-fashioned potato salad recipes, you've come to the right place!
This jazzed up version is just loaded with flavor from fresh veggies, tangy artichokes, and a homemade dressing. It's light and refreshing, and perfect for summertime cookouts.
It's great with grilled dishes (grab some vegan grilling ideas here), and works really well as a potluck dish too.
More Recipes
If you love this potato leek salad, be sure to check out these other delicious vegan ideas:
Also try: our Garlicky Grainy Mustard Vinaigrette.
- Best Traditional Vegan Potato Salad
- Curried Potato Salad
- Best Vegan Pasta Salads
- 25+ Vegan Tailgate Recipes
Recipe
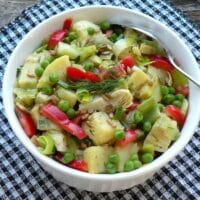
Potato Leek Salad
This Potato Leek Salad is a dressed-up potato salad that's easy to make, and bursting with flavor from fresh herbs and a homemade vinaigrette dressing.
Print
Pin
Save
Servings:
Ingredients
- 4 potatoes red-skinned or Yukon gold, scrubbed, about 2 pounds
- 2 leeks large, white and palest green parts only
- 1 tablespoon olive oil
- 8 ounces Marinated artichoke hearts halved or quartered, jarred, with a little of their liquid
- 1 red bell pepper cut into narrow, 1-inch strips
- 1 cup green peas frozen or fresh
- salt and pepper to taste
- 2 scallions green parts only, thinly sliced, or several minced fresh chives
- fresh dill or parsley finely chopped, for garnish
- 2 tablespoons toasted sunflower seeds
Vinaigrette Dressing
- ½ cup olive oil
- ¼ cup balsamic vinegar
- 1 tablespoon Dijon mustard
- 1 tablespoon agave nectar or organic sugar
- 1 teaspoon Italian seasoning
Instructions
- Cook or microwave the potatoes in their skins until done but still firm. When cool enough to handle, but still warm, cut in approximately ¾-inch chunks. Place in a serving bowl.
- Trim the leeks and cut in half lengthwise. Cut ¼-inch thick crosswise, then rinse well in a colander. Separate the rings and mix them up a bit with your hands, to make sure you get rid of all the grit.
- Heat the olive oil in a large skillet or steep-sided stir-fry pan along with ¼ cup water. Add the leeks, then cover and cook until tender, stirring occasionally, about 8 to 10 minutes. Add a bit more water if the skillet gets dry; on the other hand, if any liquid remains, drain it off.
- Add the leeks, artichoke hearts, bell pepper and peas to the bowl with the potatoes.
- In a separate small bowl, combine all dressing ingredients. Whisk to combine.
- Add enough vinaigrette to moisten the potato mixture (I used about ⅓ cup). Reserve the rest for another recipe or add more to taste when serving.
- Stir in the scallions, dill or parsley, and sunflower seeds. Season with salt and pepper and stir together gently and thoroughly. Serve at once or let stand at room temperature until needed.
Nutrition (Estimate per Serving)
Calories: 417kcalCarbohydrates: 41gProtein: 6gFat: 26gSaturated Fat: 3gPolyunsaturated Fat: 3gMonounsaturated Fat: 16gSodium: 192mgPotassium: 805mgFiber: 7gSugar: 9gVitamin A: 1730IUVitamin C: 76mgCalcium: 65mgIron: 3mg
Vegan-ize any recipe!Grab our free vegan cheat sheet, packed with my favorite easy substitutions to make any recipe vegan.
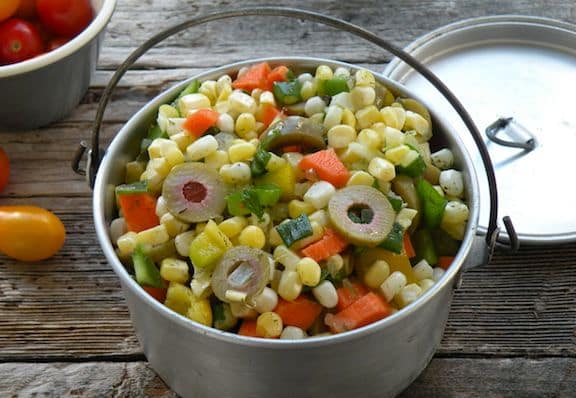
Corn Relish Salad
This corn relish salad is loaded with fresh veggies, pimiento olives, and flavorful herbs. It's the perfect summer side for burgers, wraps, and more!
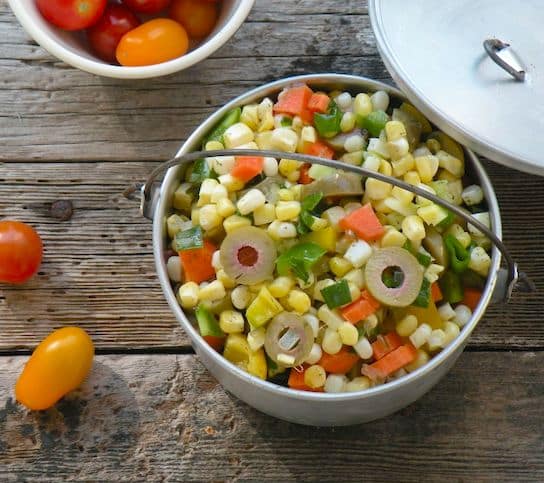
If you're looking for the perfect summery side dish, you've come to the right place. This simple corn relish salad is perfect paired with veggie burgers, grilled veggie kebabs, or your favorite vegan sandwiches and wraps.
It's loaded with fresh flavors and nutritious veggies. And best of all - it's easy to make in just 10 minutes!
Tips & Tricks
For the corn, you can use fresh or frozen corn kernels. Fresh always tastes best of course, but frozen kernels work just fine to save time. I suggest defrosting the corn and then letting it dry out well before mixing it in, so you don't get a soggy salad.
Feel free to use any type of olives that you prefer. I think these pimiento olives work really well, but something fancy like garlic-stuffed olives would also be a fun twist.
For more spice, add a second jalapeno pepper or swap it for a spicier red chili pepper instead.
More Vegan Recipes
If you love this corn relish salad, be sure to check out these other delicious vegan ideas:
Recipe
Corn Relish Salad
This corn relish salad is loaded with fresh veggies, pimiento olives, and flavorful herbs. It's the perfect summer side for burgers, wraps, and more!
Print
Pin
Save
Servings:
Ingredients
- 3 cups corn kernels from about 4 medium ears, fresh or frozen
- ½ medium bell pepper finely diced, any color
- 1 stalk celery finely diced
- 1 carrot peeled and finely diced
- ½ cup pimiento olives halved or sliced
- 2 scallions thinly sliced
- ¼ cup fresh parsley minced
- 1 tablespoon fresh dill minced, or ½ teaspoon dried
- 1 hot chili pepper fresh, such as jalapeño, seeded and minced, optional
- 1 tablespoon olive oil
- 3 tablespoons sweet pickle relish or more, to taste
- 3 tablespoons apple cider vinegar or more, to taste
- Salt and pepper to taste
Instructions
- Combine the salad ingredients in a serving bowl and stir together.
- If time allows, cover and let stand for an hour or two before. Stir occasionally to distribute the dressing. Taste to adjust the various flavors - more pickle relish, cider vinegar, salt and pepper, then serve.
Vegan-ize any recipe!Grab our free vegan cheat sheet, packed with my favorite easy substitutions to make any recipe vegan.
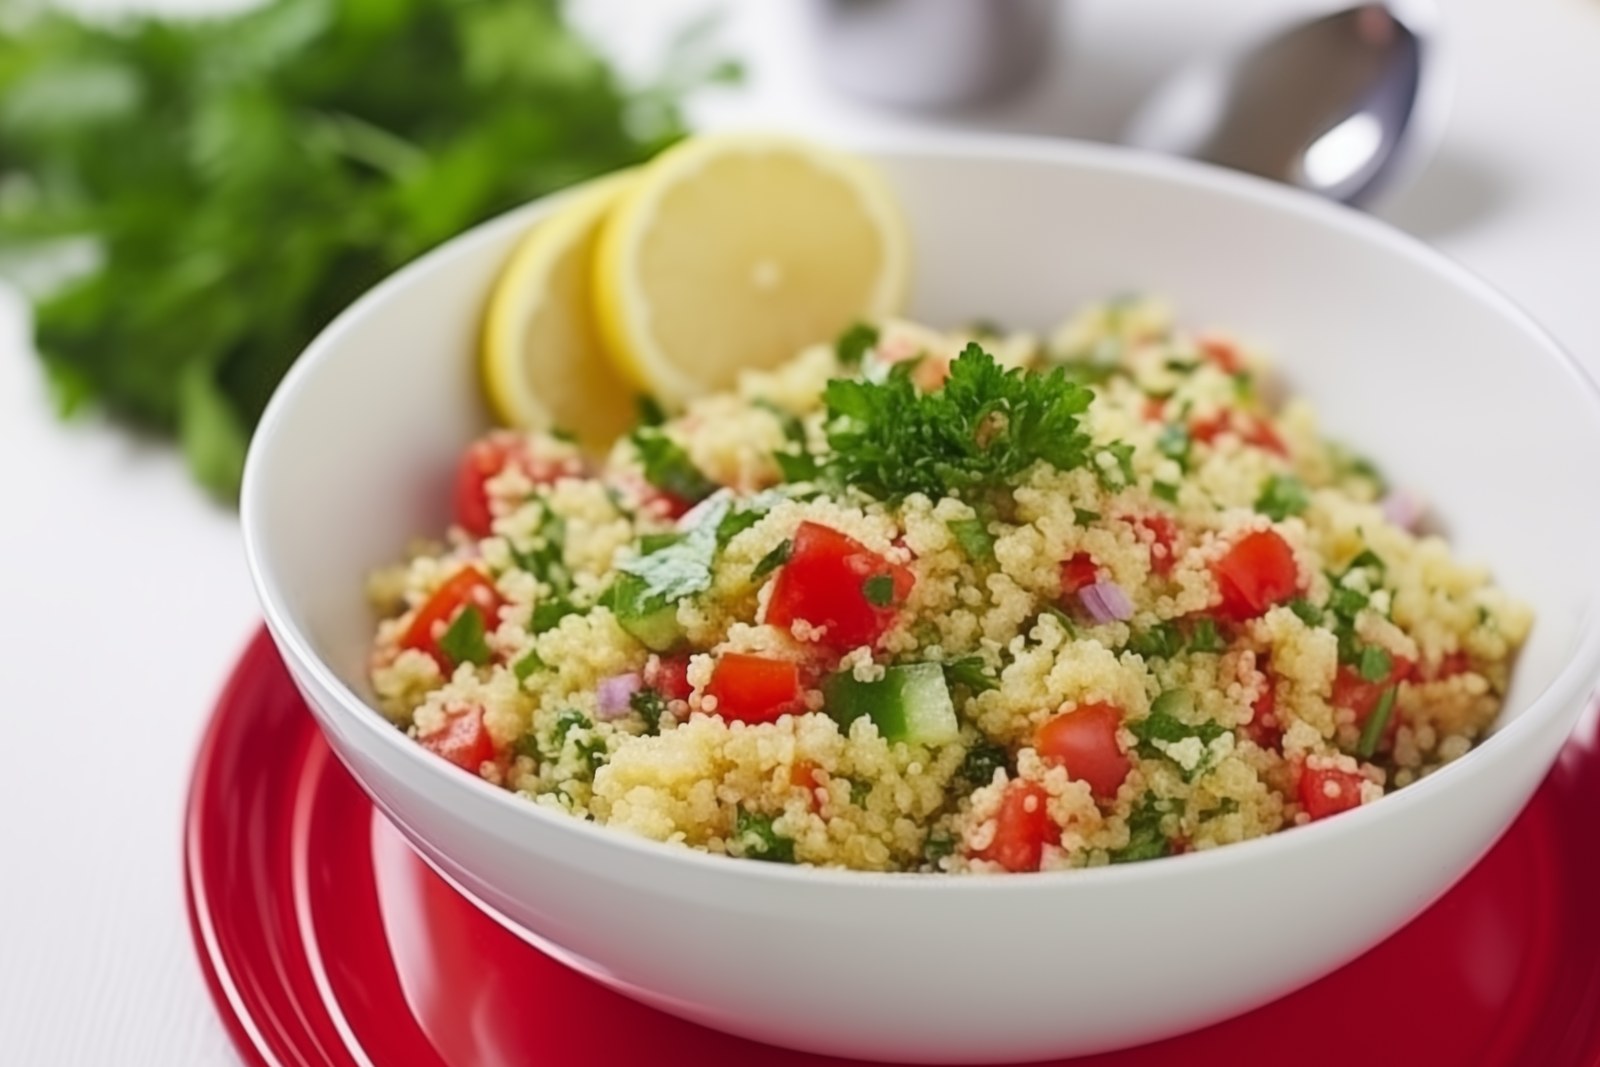
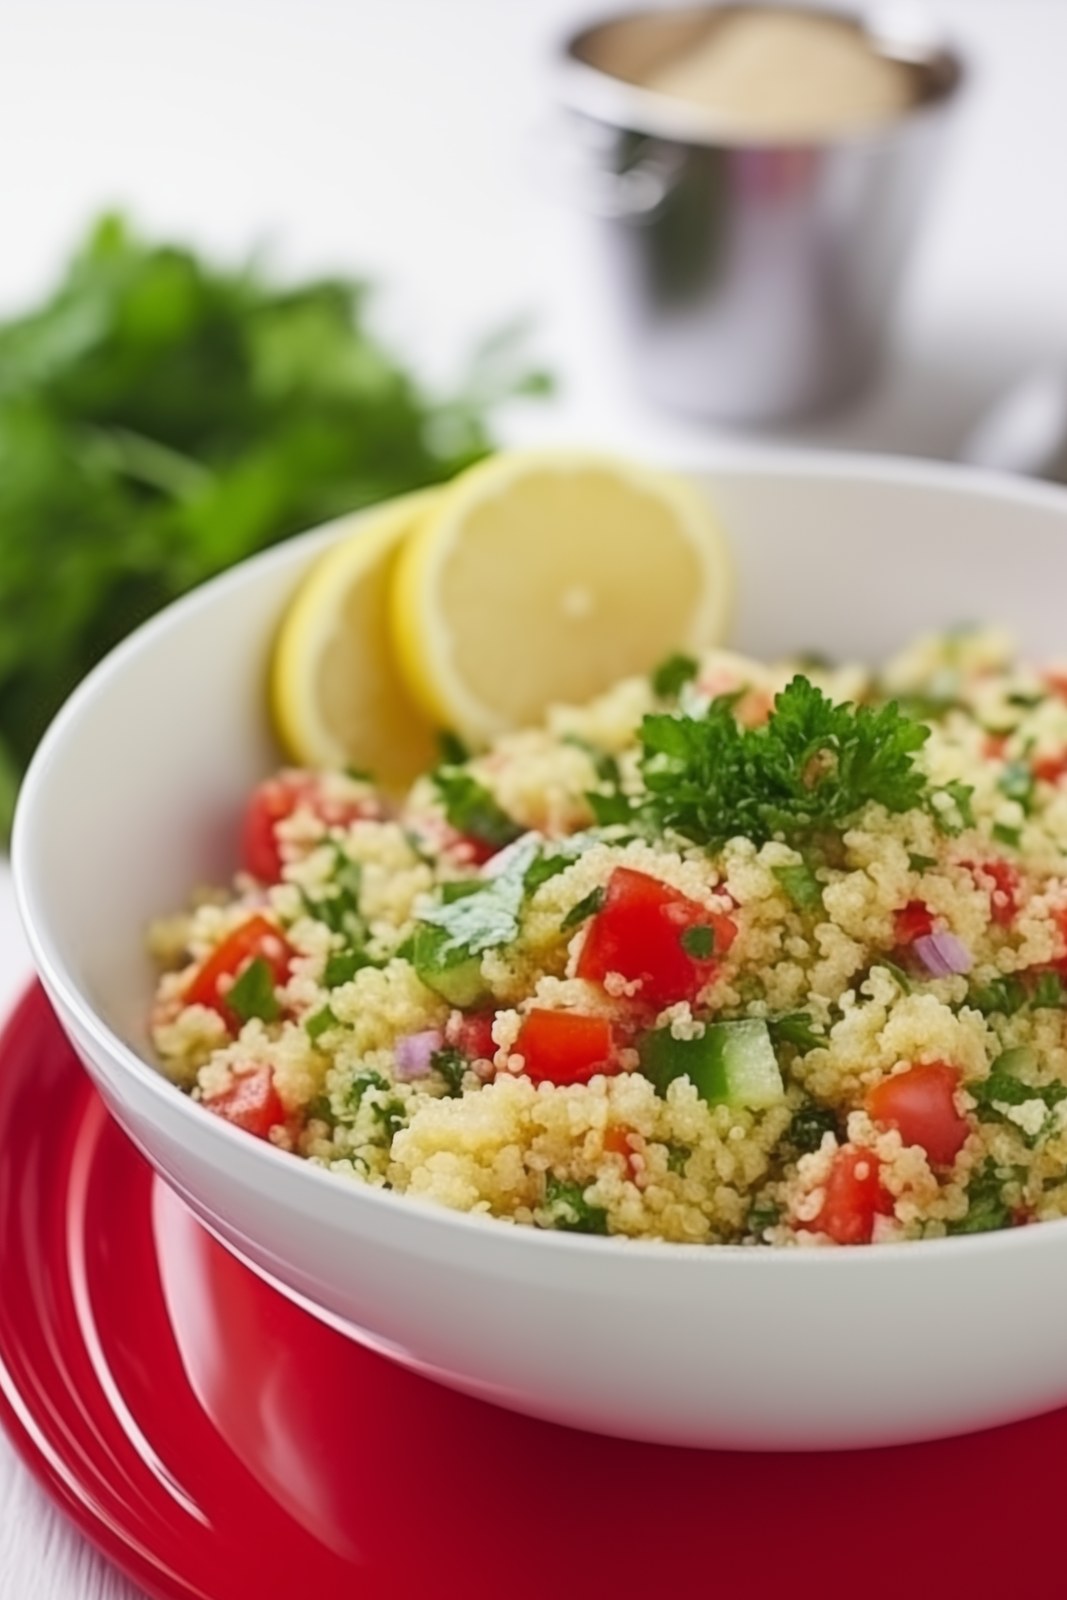
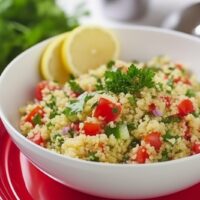
Tabbouleh Salad (with Quinoa, Bulgur, or Couscous)
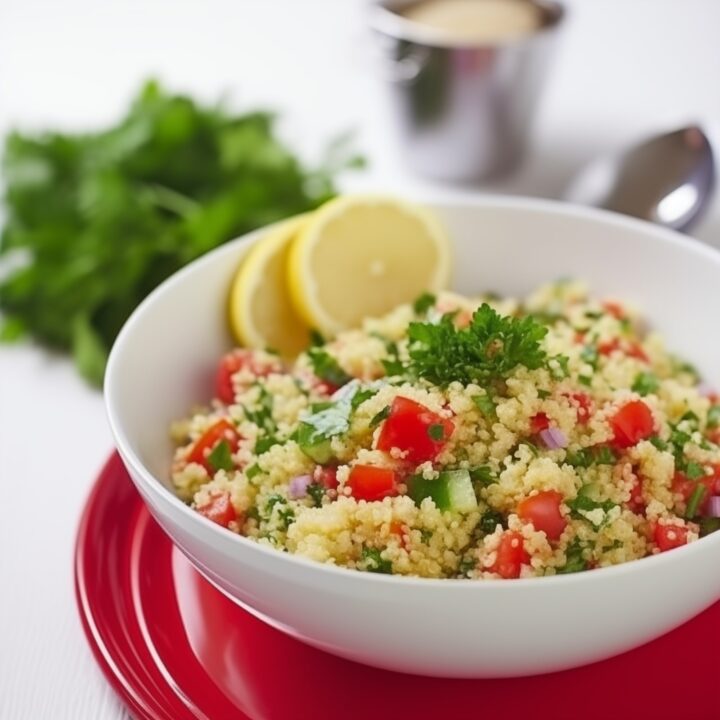
This classic tabbouleh is everything a great salad should be - bright, herby, tangy, and refreshing. Make it the traditional way with bulgur, or swap in quinoa for a gluten-free version or couscous when you want something even faster.
Key Ingredients & Substitutions
- Bulgur wheat. The traditional grain for tabbouleh - it has a nutty flavor, chewy texture, and cooks quickly on the stovetop. Medium or fine bulgur both work; fine bulgur soaks up the dressing especially well. Substitute couscous for a near-instant version, or quinoa to keep it gluten-free and higher in protein.
- Fresh flat-leaf parsley. The star of the dish - don't hold back. Tabbouleh should be heavily green. Flat-leaf (Italian) parsley has more flavor than curly; use at least one large bunch, very finely chopped.
- Ripe tomatoes. Use the best tomatoes you can find - they provide sweetness and juice that becomes part of the dressing. Cherry tomatoes, halved, work beautifully in summer. In winter, Roma tomatoes are your most reliable option.
- Fresh lemon juice. Squeeze it fresh - bottled juice won't give you the same brightness. Start with one large lemon and add more to taste.
- Extra-virgin olive oil. Use a good one; it's a primary flavor in the dressing.
- Scallions. Milder than red onion and traditional in many versions. If you prefer the bite of raw onion, swap in ¼ cup minced red onion.
- Fresh mint. Optional but excellent - a small handful of thinly sliced mint leaves adds a cooling note that makes this especially refreshing in warm weather.
Variations
- Quinoa tabbouleh (gluten-free). Rinse 1 cup quinoa, then cook with 2 cups water for 15 minutes over low heat until absorbed. Cool completely before mixing in - quinoa releases liquid as it cools, so don't rush this step. The result is slightly nuttier and higher in protein than the bulgur version.
- Couscous tabbouleh (fastest version). No stovetop needed. Place 1 cup whole-grain couscous in a heatproof bowl, pour 1¼ cups boiling water over it, cover tightly, and let stand 10 minutes. Fluff and cool, then mix in the other ingredients. On the table in about 20 minutes total.
- Chickpea tabbouleh. Add a drained 15-ounce can of chickpeas to make this a hearty main-dish salad instead of a side.
- Add olives. About ⅓ cup sliced Kalamata olives adds a salty, briny depth - especially good if you're not serving olives alongside.
- Cucumber tabbouleh. Add 1 cup diced English cucumber for extra crunch and freshness. This is common in Lebanese-style versions.
- Grain-free version. Replace the grain entirely with extra-finely chopped cauliflower (raw) for a low-carb tabbouleh that's surprisingly close to the original in texture.
Tips for the Best Tabbouleh
- Cool the grain completely before mixing. Warm grain will wilt the parsley and make the salad soggy. Spread it on a baking sheet to cool faster.
- Chop the parsley very fine. Rough-chopped parsley gives an uneven, chewy texture. Use a sharp knife and chop it until it's almost a finely minced pile - it should almost melt into the grain.
- Let it rest before serving. Tabbouleh gets dramatically better after 30 minutes as the grain absorbs the dressing. An hour is even better. Make it ahead if you can.
- Dress it twice. Add half the lemon juice and olive oil before resting, then taste and add more just before serving - the grain absorbs a lot and it often needs a second hit of lemon.
- Season assertively. Tabbouleh is a bold salad - it needs more salt than you might expect, and plenty of black pepper. Taste it at least twice before serving.
How to Serve
Tabbouleh is a natural fit on a Middle Eastern mezze spread alongside hummus, warm pita, a handful of olives, and stuffed grape leaves. For a bold homemade dressing to accompany any grain salad, try our garlic mustard vinaigrette. For another fresh herb-forward salad, our tomato relish salad is bright and simple. It also works beautifully as a side dish for grilled or roasted vegetables, falafel, or lentil soup. Leftovers keep well in the fridge for up to 3 days - the flavors deepen overnight, though the parsley will lose some of its brightness. Give it a fresh squeeze of lemon and a drizzle of olive oil before serving again.
Recipe
Tabbouleh Salad (Bulgur, Couscous, or Quinoa)
A bright, herb-forward Middle Eastern classic made with bulgur wheat, ripe tomatoes, loads of fresh parsley, and a lemony olive oil dressing. Easily made with couscous or quinoa — see the variations in the notes.
Print
Pin
Save
Servings: servings
Ingredients
- 1 cup bulgur wheat see notes for couscous or quinoa variations
- 2 cups water
- 3 medium ripe tomatoes diced
- 1 cup fresh flat-leaf parsley finely chopped (about 1 large bunch)
- 3 scallions thinly sliced
- 2 tablespoons fresh mint leaves thinly sliced, optional
- 3 tablespoons extra-virgin olive oil
- 1 large lemon juiced (about 3–4 tablespoons)
- salt and freshly ground black pepper to taste
Instructions
- Combine the bulgur and water in a small saucepan. Bring to a boil over medium-high heat, then reduce the heat to low, cover, and simmer for 12 to 15 minutes, until the water is fully absorbed. For a more tender result, add an extra ½ cup water and continue simmering until absorbed. Remove from heat, fluff with a fork, and spread onto a baking sheet or large plate to cool to room temperature.
- While the bulgur cools, dice the tomatoes, finely chop the parsley, and thinly slice the scallions and mint (if using). Juice the lemon.
- Transfer the cooled bulgur to a large serving bowl. Add the tomatoes, parsley, scallions, and mint. Drizzle with the olive oil and lemon juice, then season generously with salt and pepper.
- Toss well to combine. For best flavor, cover and let the salad rest at room temperature for at least 30 minutes before serving — this allows the bulgur to absorb the dressing. Taste and adjust salt, pepper, and lemon juice before serving.
Notes
Couscous variation: Skip the stovetop cooking. Place 1 cup whole-grain couscous in a heatproof bowl. Pour 1¼ cups boiling water over it, cover tightly with a plate or plastic wrap, and let stand for 10 minutes. Fluff with a fork and cool to room temperature, then proceed with the recipe as written.
Quinoa variation (gluten-free): Rinse 1 cup quinoa under cold water. Combine with 2 cups water in a saucepan, bring to a boil, then reduce heat to low, cover, and simmer for 15 minutes until the water is absorbed. Fluff and cool completely before mixing with the other ingredients. Quinoa gives a slightly nuttier flavor and higher protein content than bulgur.
Optional add-ins: A drained 15-ounce can of chickpeas makes this more substantial. About ¼ cup minced red onion adds bite. A handful of sliced Kalamata olives works well if you're not serving olives on the side.
Nutrition (Estimate per Serving)
Calories: 210kcal
Vegan-ize any recipe!Grab our free vegan cheat sheet, packed with my favorite easy substitutions to make any recipe vegan.
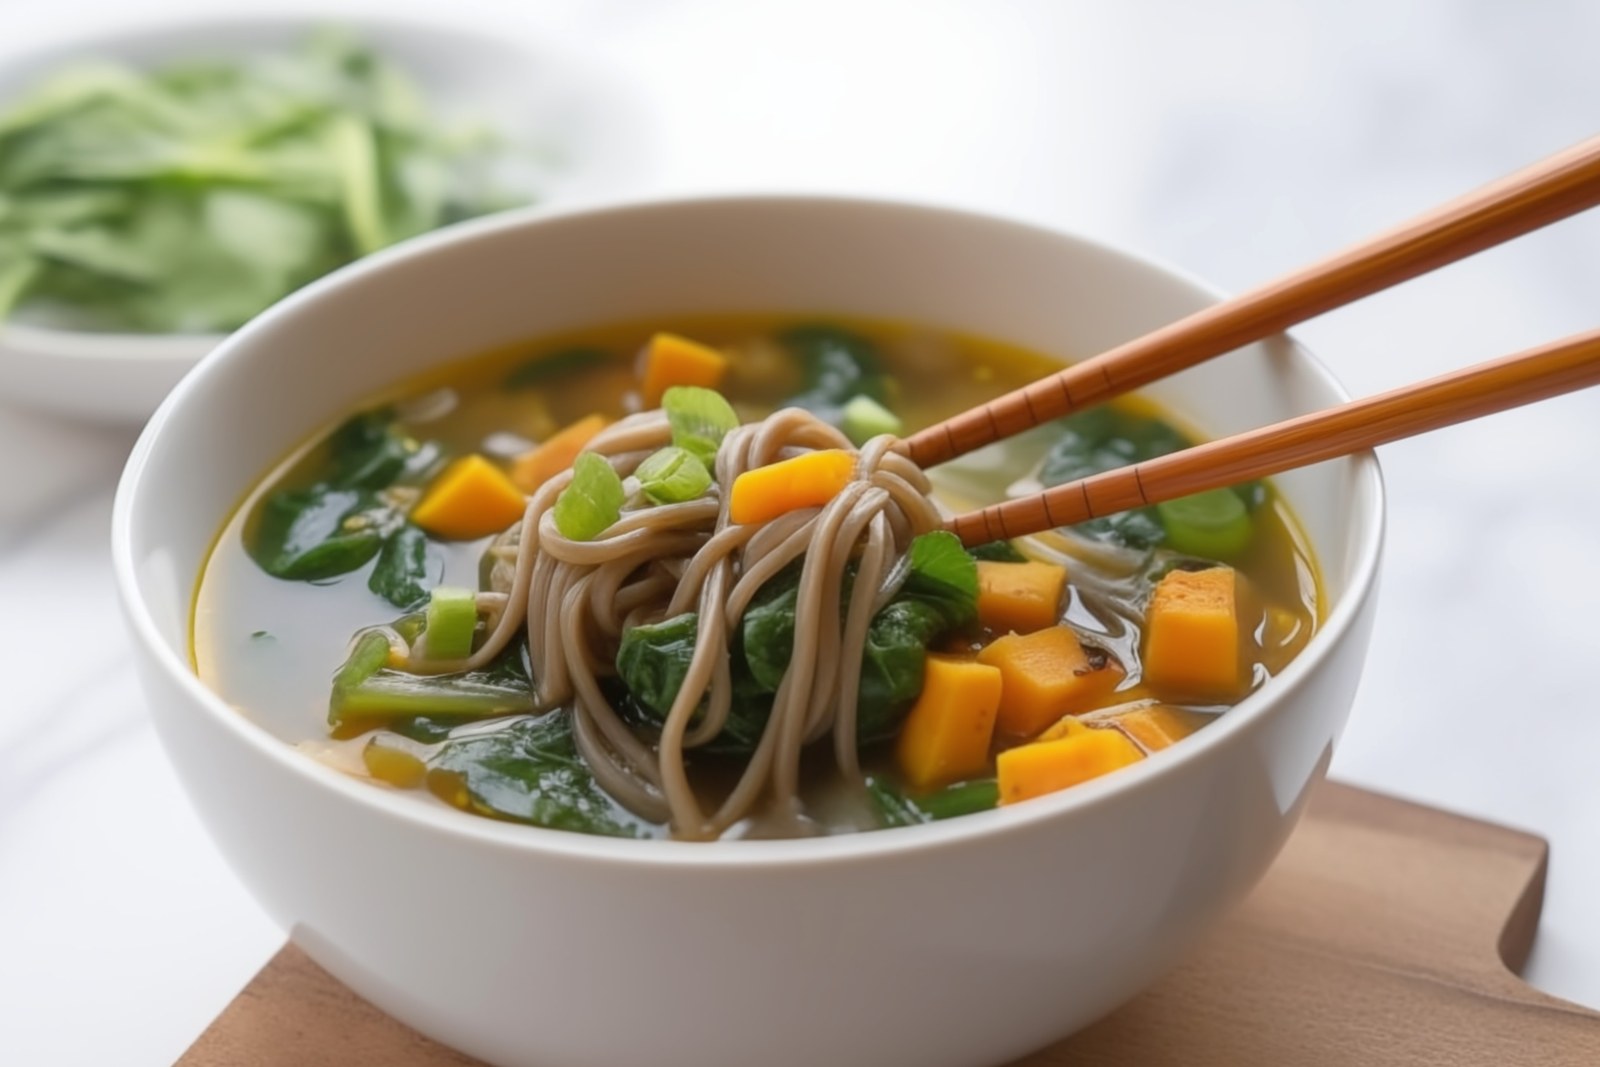
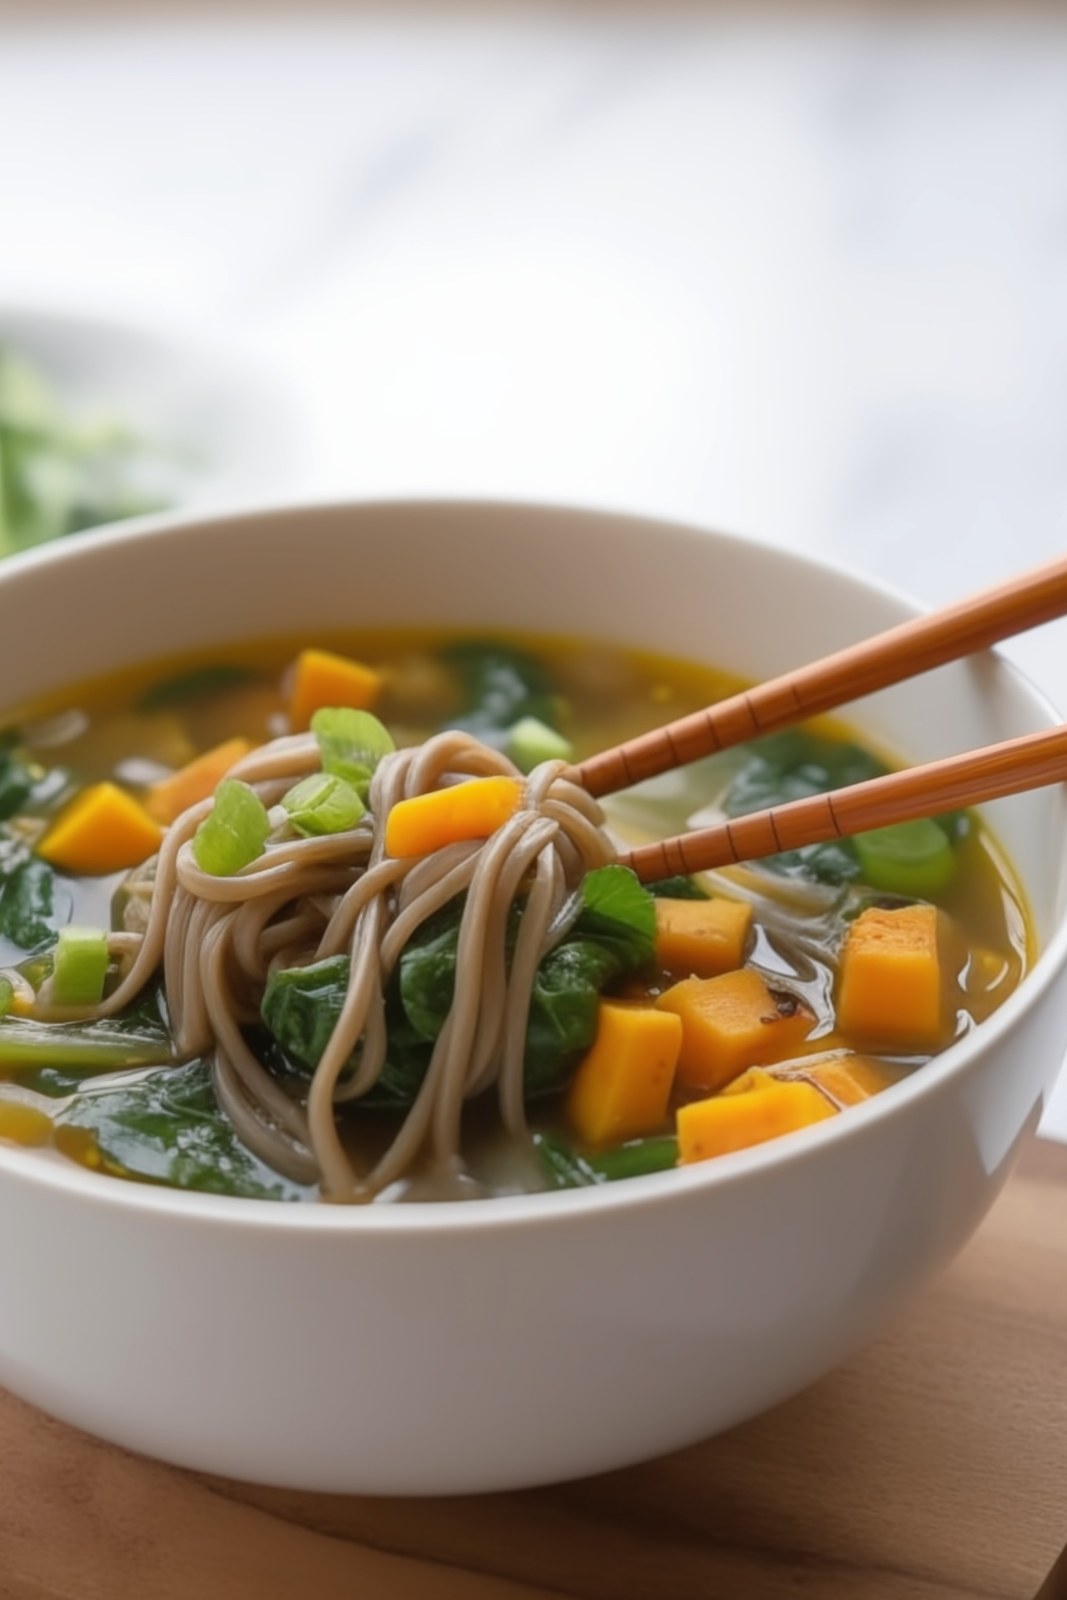
Miso-Butternut Squash Soup with Soba or Udon Noodles

This miso butternut squash soup has been a reader favorite on VegKitchen since 2018 - and it's just as cozy and satisfying as ever. We've given it a fresh update with brand-new photos, but the recipe is the same warming bowl we've always loved: a rich miso-ginger broth, tender squash, soba noodles, and a heap of wilted greens.
Key Ingredients & Substitutions
- Butternut squash. Roasted or microwaved until just tender - it adds natural sweetness and body to the broth. Kabocha squash or sweet potato work as swaps and cook in roughly the same time.
- Vegan miso paste. The soul of this soup. White (shiro) miso is mild and slightly sweet; yellow miso is a bit more savory; red miso is the boldest and most intense. Any variety works - just make sure it's labeled vegan, as some miso pastes contain dashi (fish stock). Stir it in at the very end, off the heat, to preserve its probiotic benefits.
- Soba noodles. Buckwheat soba gives the soup its earthy, nutty character. Pure buckwheat soba is also gluten-free - just check the label, as many commercial soba blends include wheat flour. Udon noodles work equally well for a thicker, chewier texture.
- Fresh ginger. Grated fresh ginger is essential here - it adds warmth and brightness that ground ginger can't replicate. Use as much as you like.
- Vegan vegetable bouillon cubes. Two cubes give the broth depth and savory umami to complement the miso. Choose a low-sodium, MSG-free brand. Vegetable broth works as a direct substitute - just use it in place of the water.
- Baby spinach. Stirred in at the end, it wilts in about a minute and adds color and nutrition. Watercress, baby arugula, baby bok choy, or any tender Asian green are excellent alternatives.
- Frozen peas. A simple addition that adds sweetness, color, and a little extra protein. Thaw them before adding so they don't drag down the broth temperature.
Variations
- Make it brothier. This soup is fairly thick as written. For a more broth-forward bowl, increase the water to 6 cups and add an extra bouillon cube.
- Add tofu. Cube a block of firm or extra-firm tofu and add it with the squash for extra protein. Press it first so it holds its shape in the soup.
- Spicy miso version. Stir a teaspoon of sriracha or a pinch of red pepper flakes into the broth along with the miso for a warming kick.
- Add edamame. Swap the peas for shelled edamame (thawed from frozen) for higher protein and a slightly nuttier flavor.
- Rice noodle version (gluten-free). Use thin rice noodles in place of soba. Soak them separately according to package directions, then add to bowls when serving to keep them from absorbing all the broth.
- Richer broth. Stir in a tablespoon of tahini or a drizzle of toasted sesame oil just before serving for a creamier, nuttier finish.
Tips for the Best Miso Butternut Squash Soup
- Never boil miso. Always dissolve it in warm (not boiling) water and stir it in at the very end with the heat off or very low. Boiling destroys the beneficial probiotics and dulls the flavor.
- Cook the squash just until tender. You want it to hold its shape in the soup, not turn to mush. Whether you're microwaving or roasting, test it with a knife - it should pierce easily but still feel firm.
- Cook noodles separately if making ahead. Soba absorbs broth quickly as it sits. If you think you'll have leftovers, cook the noodles separately and add them to individual bowls at serving time.
- Taste and adjust the miso at the end. Start with 2 tablespoons, then add more to taste. The amount you need depends on the brand and type of miso - some are much saltier than others.
- Prep the squash ahead. The squash can be cooked, peeled, and cubed up to 2 days in advance and kept in the fridge. It makes this a genuinely quick weeknight soup.
How to Serve
Serve immediately in deep bowls with chopsticks for the noodles and a spoon for the broth. This soup is a complete meal on its own but pairs beautifully with a simple cucumber salad, edamame, or steamed dumplings. For a heartier spread, serve alongside brown rice or a wedge of crusty sourdough bread. Leftovers keep for up to 3 days in the fridge - store the noodles and broth separately if possible, and reheat gently over low heat without boiling. For another light and healthy vegan soup, try our yellow squash soup, our cream of asparagus soup, or our fresh tomato and corn soup. For a hearty butternut squash dinner, our creamy butternut squash pasta casserole is wonderfully satisfying.
Recipe

Miso Butternut Squash Soup with Soba Noodles
A warming, deeply savory vegan noodle soup built on a miso-ginger broth with tender butternut squash, soba noodles, spinach, and peas. Quick to pull together once the squash is cooked — and beautiful in the bowl.
Print
Pin
Save
Servings: servings
Ingredients
- 1 small butternut squash about 1 pound
- 4 cups water plus more as needed
- 4 ounces soba (buckwheat) or udon noodles broken in half
- 2 teaspoons fresh ginger grated, or more to taste
- 2 vegan vegetable bouillon cubes low-sodium, no MSG
- 4 ounces fresh baby spinach about 4 to 6 cups loosely packed
- 1 cup frozen green peas thawed
- 3 scallions thinly sliced
- 3 tablespoons vegan miso paste white, yellow, or red — see notes
- freshly ground black pepper to taste
Instructions
- Pierce the butternut squash a few times with a knife. Microwave on high for 4 to 6 minutes, adding 1 minute at a time, until it can be pierced easily with a knife but still holds its shape. Alternatively, wrap the whole squash in foil and bake at 375°F for 30 to 40 minutes until just tender. Let cool until easy to handle, then halve, scoop out the seeds, peel, and cut the flesh into bite-sized chunks. Set aside. (This step can be done ahead of time.)
- Bring the 4 cups of water to a rapid simmer in a large soup pot. Add the soba or udon noodles and cook according to package directions until al dente, about 4 to 5 minutes.
- Add the grated ginger, bouillon cubes, thawed peas, and squash chunks to the pot. Stir to dissolve the bouillon and cook for 3 to 4 minutes over medium heat. Add up to 1 cup additional water if the soup seems too thick.
- Stir in the spinach and cook just until wilted, about 1 to 2 minutes. Add the scallions and stir to combine.
- In a small bowl, whisk the miso paste with ⅓ cup warm (not boiling) water until smooth. Stir into the soup. Taste and add more dissolved miso if desired — do not boil the soup after adding miso, as heat destroys the beneficial probiotics. Season with black pepper and serve immediately.
Notes
Choosing miso: Use white (shiro) or yellow miso for a milder, sweeter flavor; red miso for a more intense, earthy broth. Always check the label — some miso pastes contain dashi (fish stock) and are not vegan. Look for miso labeled vegan or check that the ingredients list only soybeans, salt, and grain (rice or barley).
Soba noodles: Pure buckwheat soba is gluten-free, but many commercial soba blends contain wheat flour — check the label if gluten is a concern.
Greens variation: Watercress, baby arugula, chopped baby bok choy, or other Asian greens all work beautifully in place of or alongside the spinach.
Make ahead: Cook the squash up to 2 days in advance and refrigerate. The assembled soup is best eaten fresh — the noodles will absorb the broth on standing.
Vegan-ize any recipe!Grab our free vegan cheat sheet, packed with my favorite easy substitutions to make any recipe vegan.
Also try: our creamy asparagus and pea pasta.
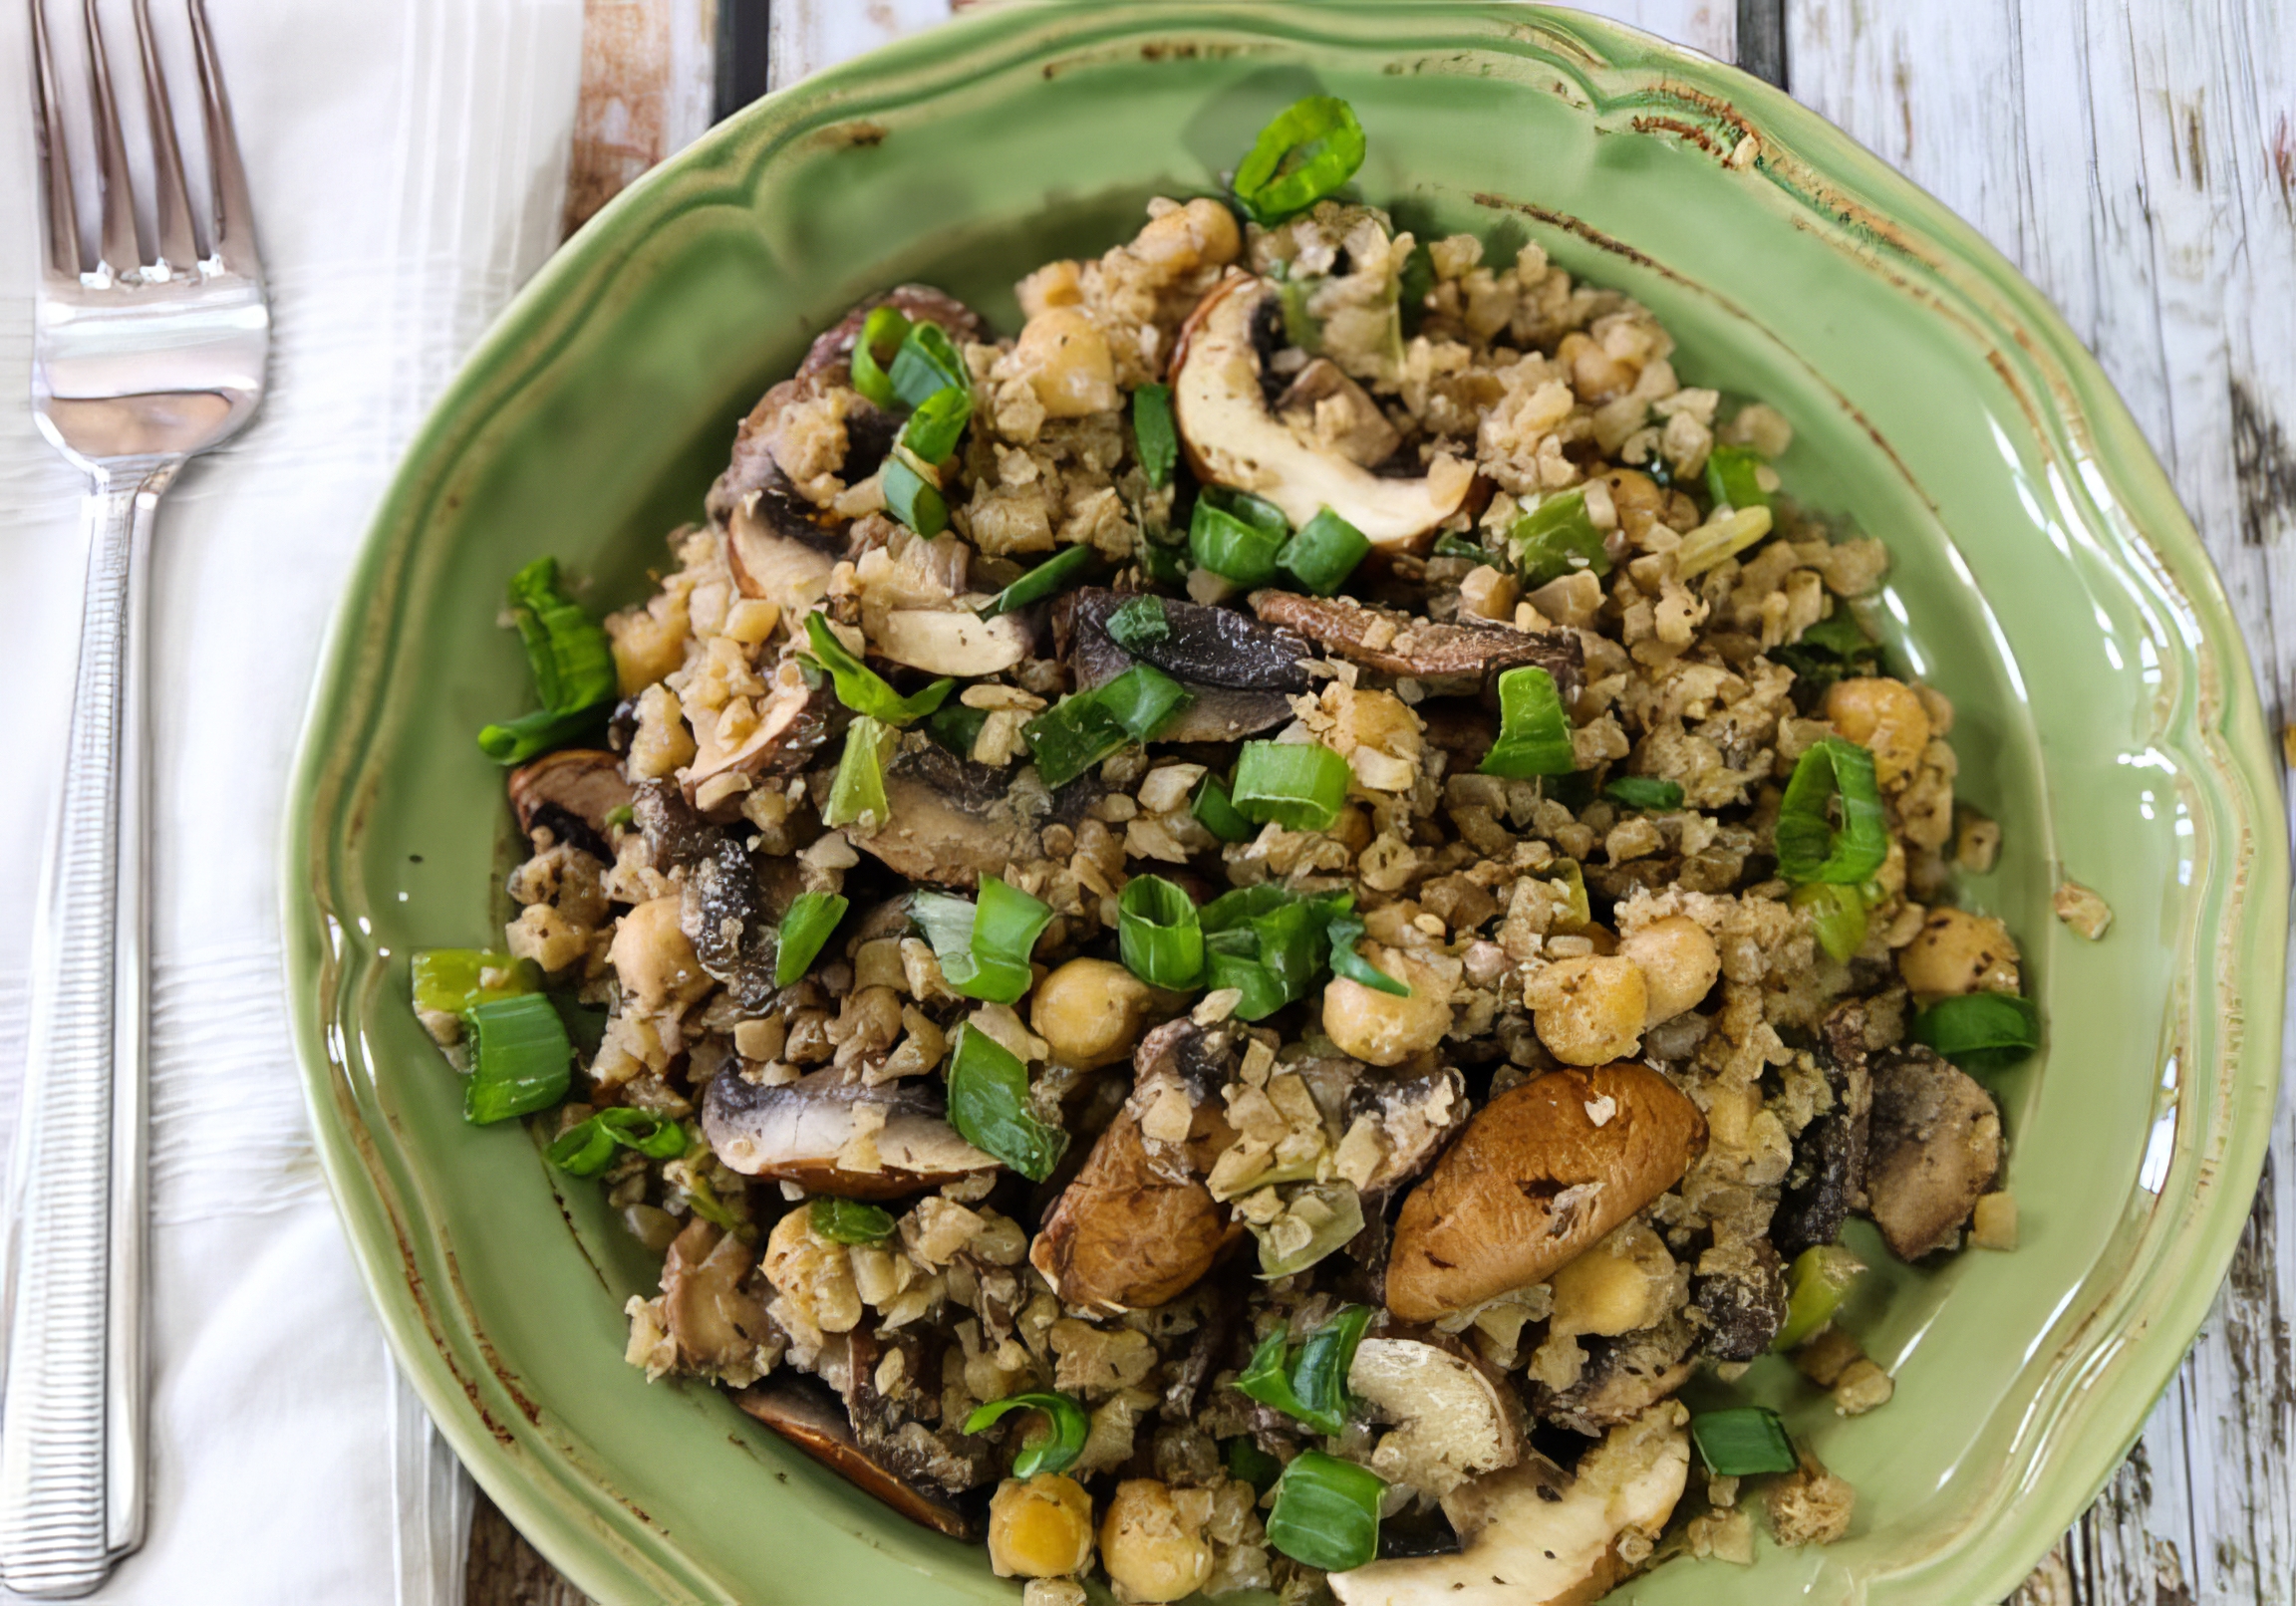
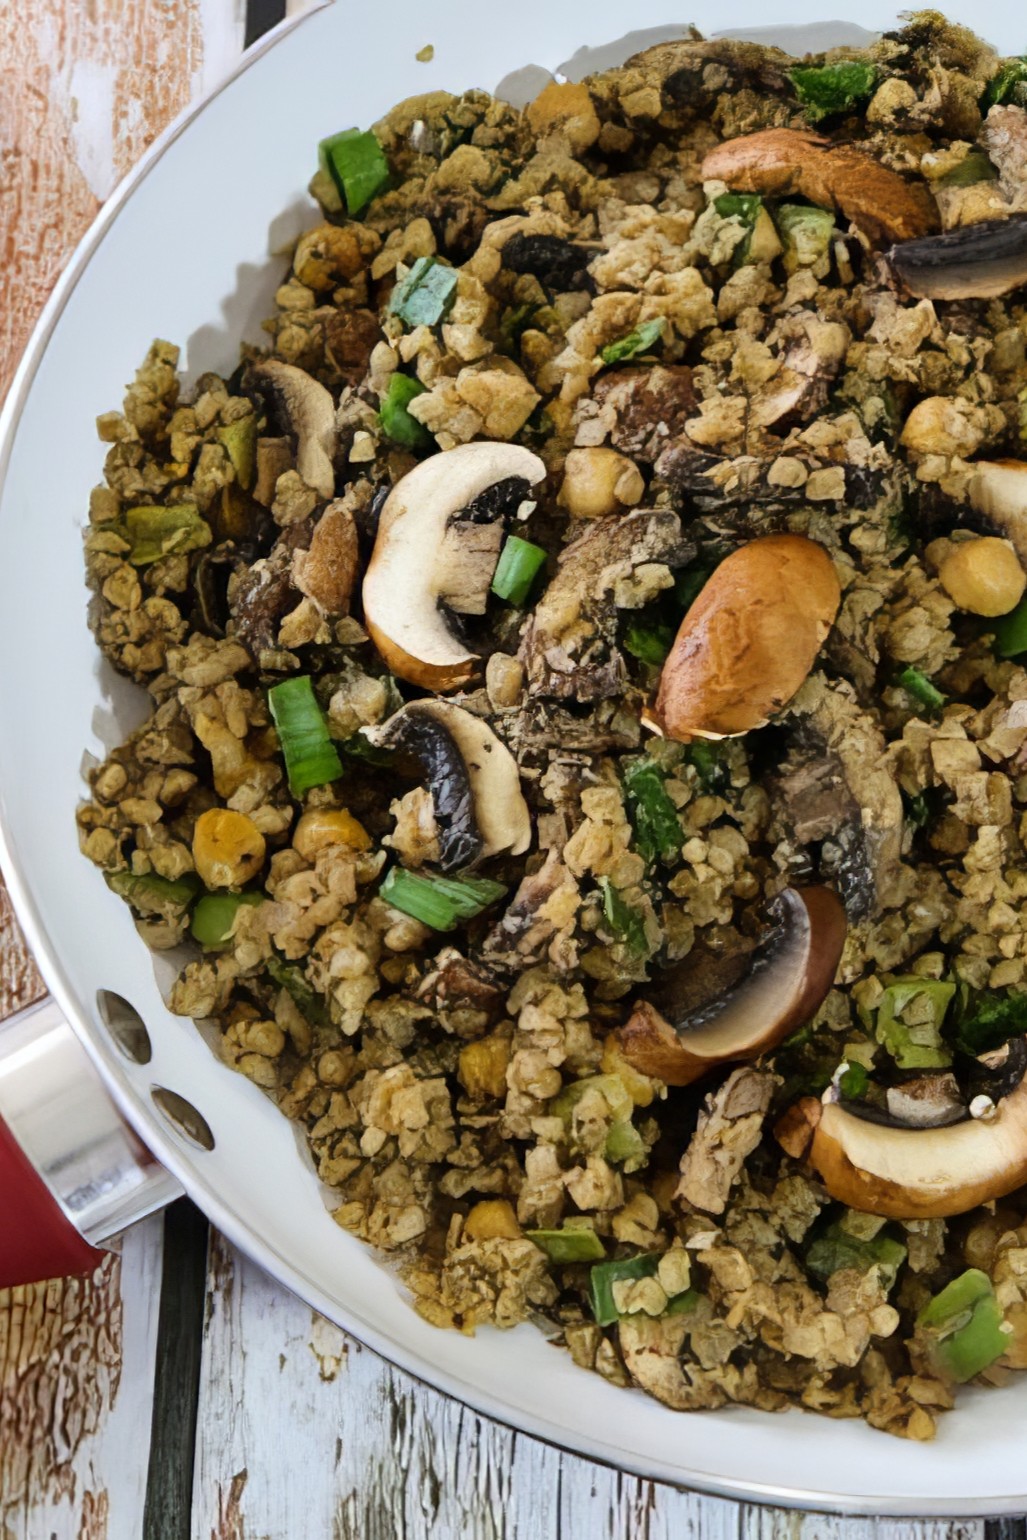
Cauliflower Fried Rice with Mushrooms & Chickpeas
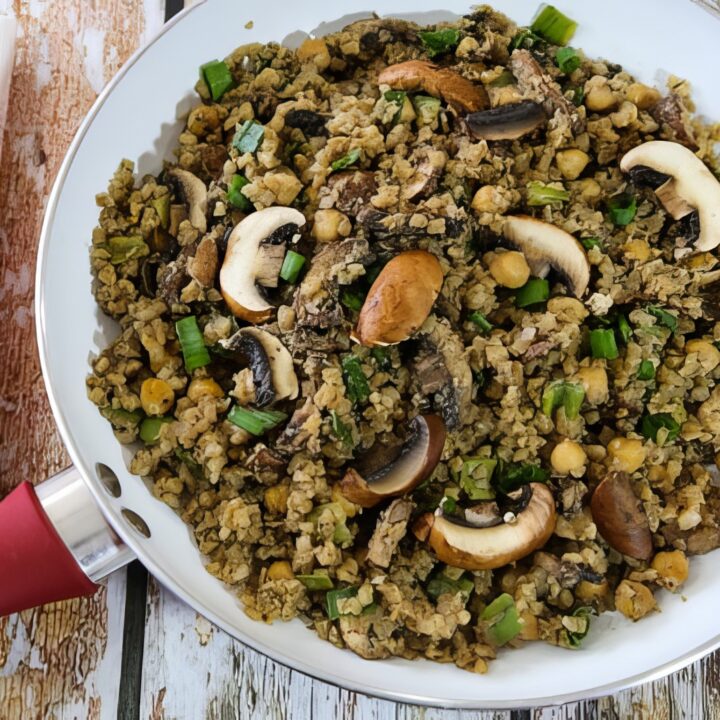
This cauliflower fried rice with mushrooms and chickpeas is a hearty, one-pan vegan dinner that comes together in just 22 minutes - no chopping, no fuss.
Key Ingredients & Substitutions
- Frozen riced cauliflower. The shortcut that makes this recipe genuinely weeknight-friendly - no head of cauliflower to break down. Green Giant, 365 Organic, and Trader Joe's all work great. Taylor Farms' cauliflower pearls are slightly chunkier if you want more texture. To use fresh, rice it in a food processor and skip the water.
- Mushrooms. Cremini or button mushrooms are the easy default. Shiitake adds a deeper, more savory umami punch that plays especially well with the fried-rice vibe. Pre-sliced is fine - just make sure they look fresh and not dried out.
- Chickpeas. One 15-ounce can (drained and rinsed) adds protein, fiber, and a satisfying heartiness. White beans or black beans swap in easily.
- Scallions. Mild onion flavor and a pop of color. A small shallot or a few tablespoons of diced yellow onion works if you don't have scallions.
- Salt-free seasoning blend. Frontier Co-op or Dash are the go-to brands here. Any all-purpose herb blend works, or use a mix of garlic powder, onion powder, and dried thyme.
- Nutritional yeast. Optional but recommended - 2 tablespoons stirred in at the end adds a subtle cheesy, nutty depth. Skip it if you don't have it.
Variations
- Asian-style fried rice. Stir in 1-2 tablespoons of low-sodium soy sauce (or tamari to keep it gluten-free) and a drizzle of toasted sesame oil at the end.
- Spicy version. Add a pinch of red pepper flakes or a drizzle of sriracha when you add the mushrooms.
- Add more vegetables. Frozen peas, shelled edamame, diced bell pepper, or baby spinach all work well - stir them in with the chickpeas.
- Make it higher protein. Add pan-fried cubed extra-firm tofu or a handful of shelled hemp seeds stirred in at the end.
- Lemon herb version. Swap the seasoning blend for Italian herbs and finish with a squeeze of lemon juice and fresh parsley.
- Grain-free rice bowl. Serve over a bed of mixed greens instead of eating it straight from the pan for a lighter, salad-bowl presentation.
Tips for the Best Cauliflower Fried Rice
- Dry out the cauliflower before adding anything else. Cook the frozen cauliflower with the water over medium heat until the water has fully evaporated - this is what separates fluffy from soggy. Don't rush it.
- Use a large, wide pan. More surface area means more evaporation and more browning. A wok or a 12-inch skillet is ideal. A smaller pan traps steam and makes the whole thing wet.
- Crank the heat at the end. After adding the vegetables and chickpeas, turning the heat up to medium-high for the last few minutes gives the dish its "fried" character - slightly crispy edges and concentrated flavor.
- Don't stir too much at the end. Let the cauliflower sit undisturbed for 30-60 seconds between stirs so it can pick up some color from the pan.
- Season at the end. The seasoning blend goes in with the vegetables, but final salt and pepper adjustments should happen last - after the nutritional yeast - so you can taste accurately.
How to Serve
This works great as a complete main dish on its own - the chickpeas bring enough protein and substance to be satisfying. For a more complete spread, serve it alongside a simple miso soup, a cucumber and rice vinegar salad, our teriyaki eggplant as a side, or drizzle with our easy duck sauce for extra flavor, or our Asian Tofu Salad with Thai Peanut Dressing. Leftovers keep well in the fridge for up to 4 days and reheat best in a skillet over medium heat.
Recipe
Cauliflower Fried Rice with Mushrooms & Chickpeas
A quick, one-pan vegan dinner that uses frozen riced cauliflower as the base — no chopping required. Hearty mushrooms and chickpeas make it filling enough to stand alone as a main dish.
Print
Pin
Save
Servings: to 6
Ingredients
- 16 ounce bag frozen riced cauliflower
- ½ cup water
- 8 ounces mushrooms cleaned, stemmed sliced (see note)
- 3 scallions thinly sliced
- 15 ounce can chickpeas drained and rinsed
- 2 teaspoons salt-free seasoning blend like Frontier or Mrs. Dash
- 2 tablespoons nutritional yeast optional
- Salt and freshly ground pepper to taste
Instructions
- Combine the riced cauliflower and water in a large skillet or wok over medium heat.
- Cook, stirring occasionally, until the cauliflower is fully thawed and the water has evaporated, about 5 minutes.
- Add the mushrooms, scallions, chickpeas, and seasoning blend. Turn the heat up to medium-high and cook for 5 to 7 minutes, stirring often, until the mushrooms are tender and the cauliflower starts to brown at the edges.
- Stir in the nutritional yeast if using, then season with salt and pepper to taste. Serve immediately.
Nutrition (Estimate per Serving)
Calories: 158kcalCarbohydrates: 26gProtein: 11gFat: 3gSaturated Fat: 1gPolyunsaturated Fat: 1gMonounsaturated Fat: 1gSodium: 336mgPotassium: 803mgFiber: 10gSugar: 4gVitamin A: 148IUVitamin C: 58mgCalcium: 111mgIron: 3mg
Vegan-ize any recipe!Grab our free vegan cheat sheet, packed with my favorite easy substitutions to make any recipe vegan.
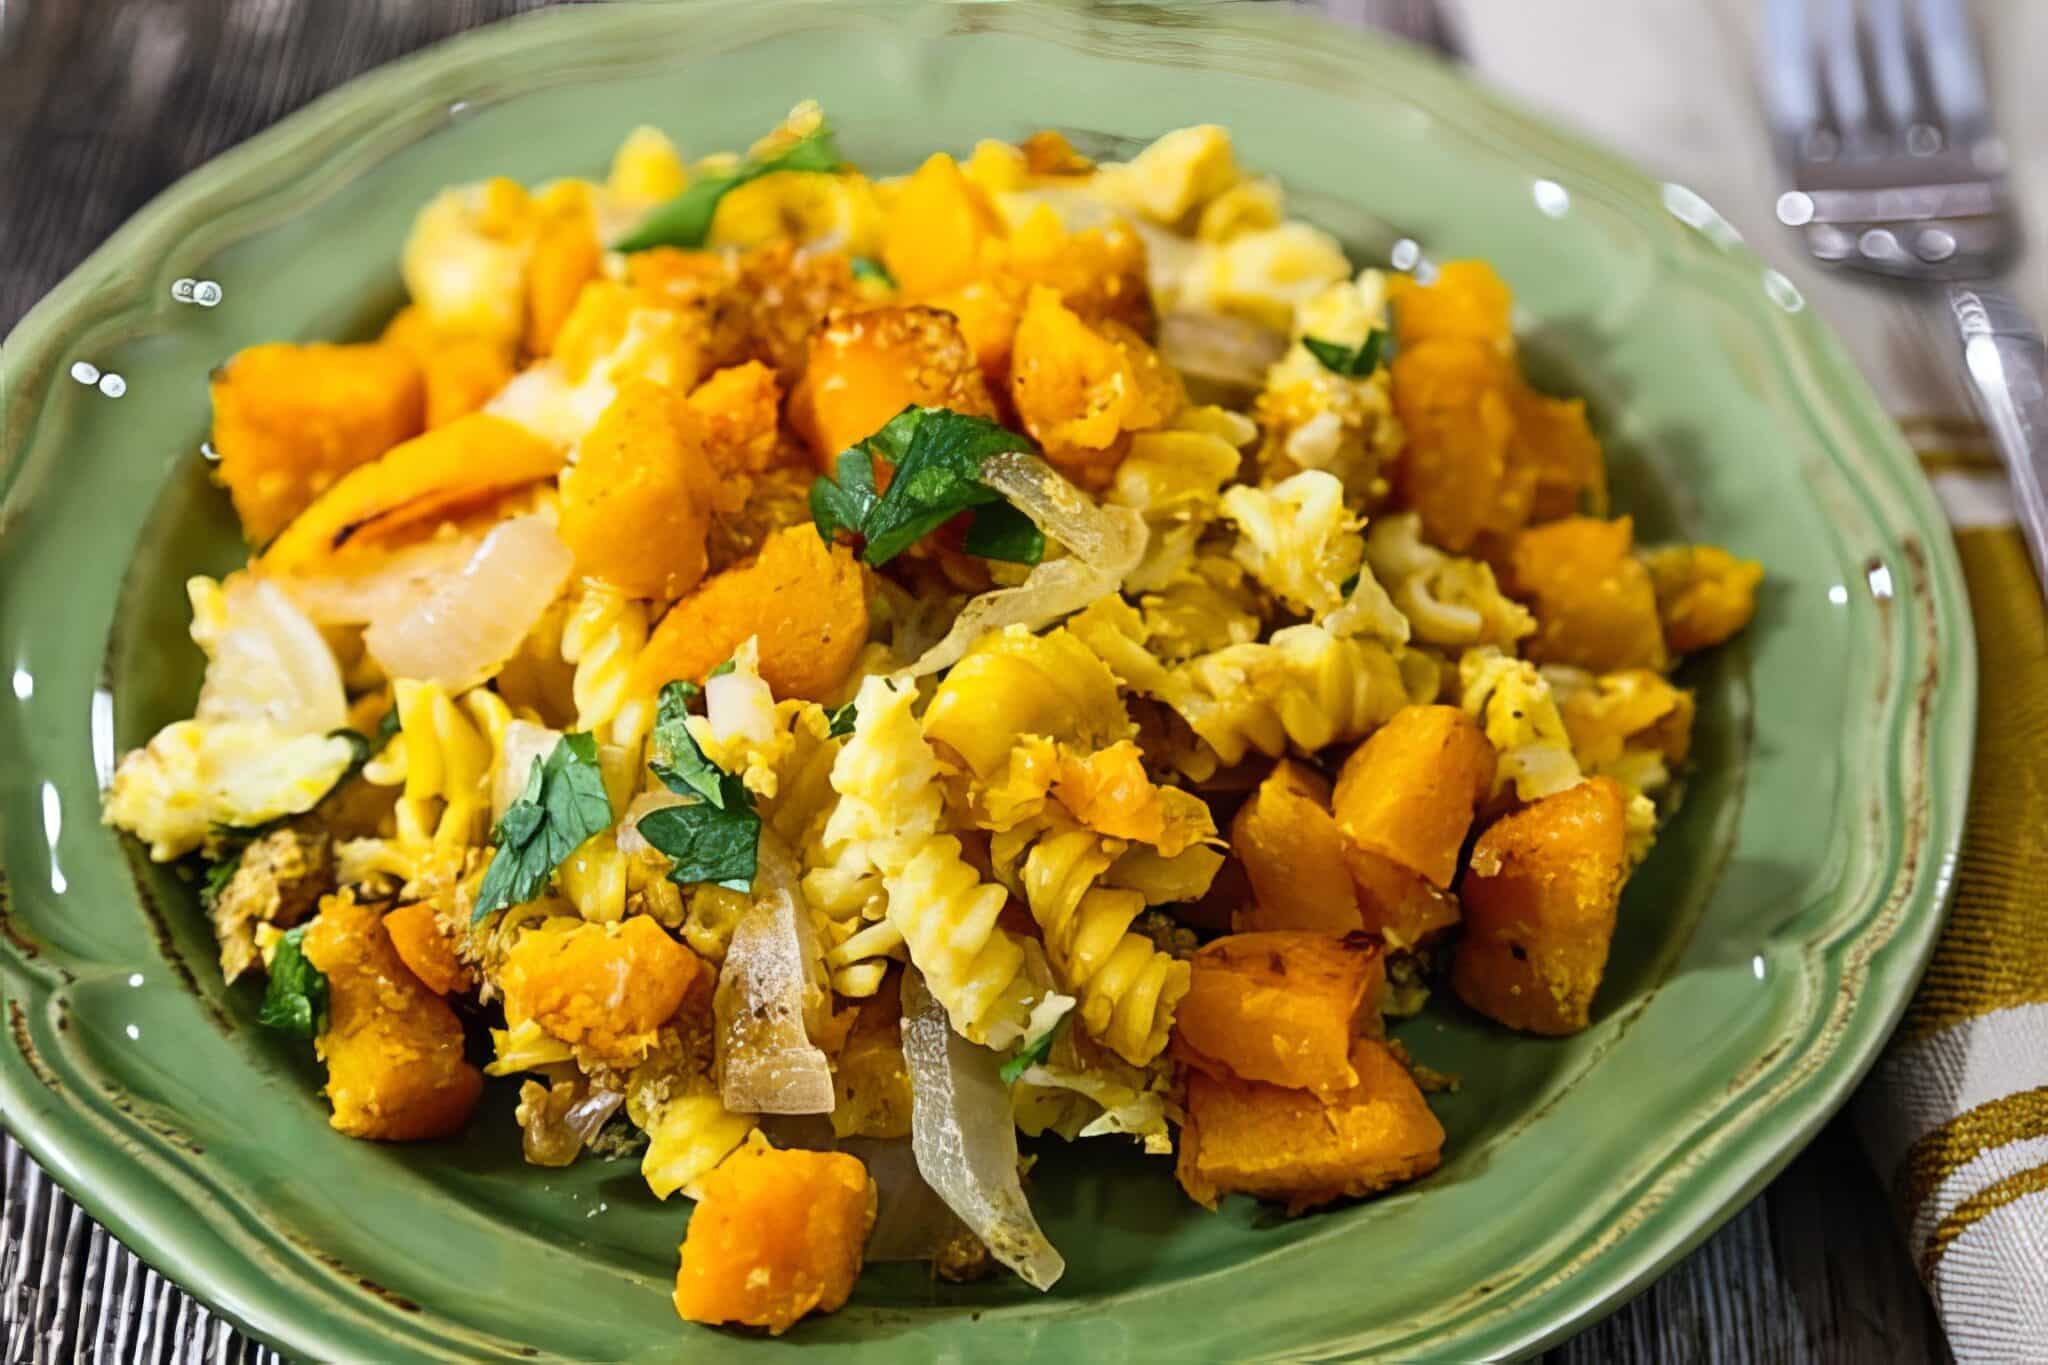
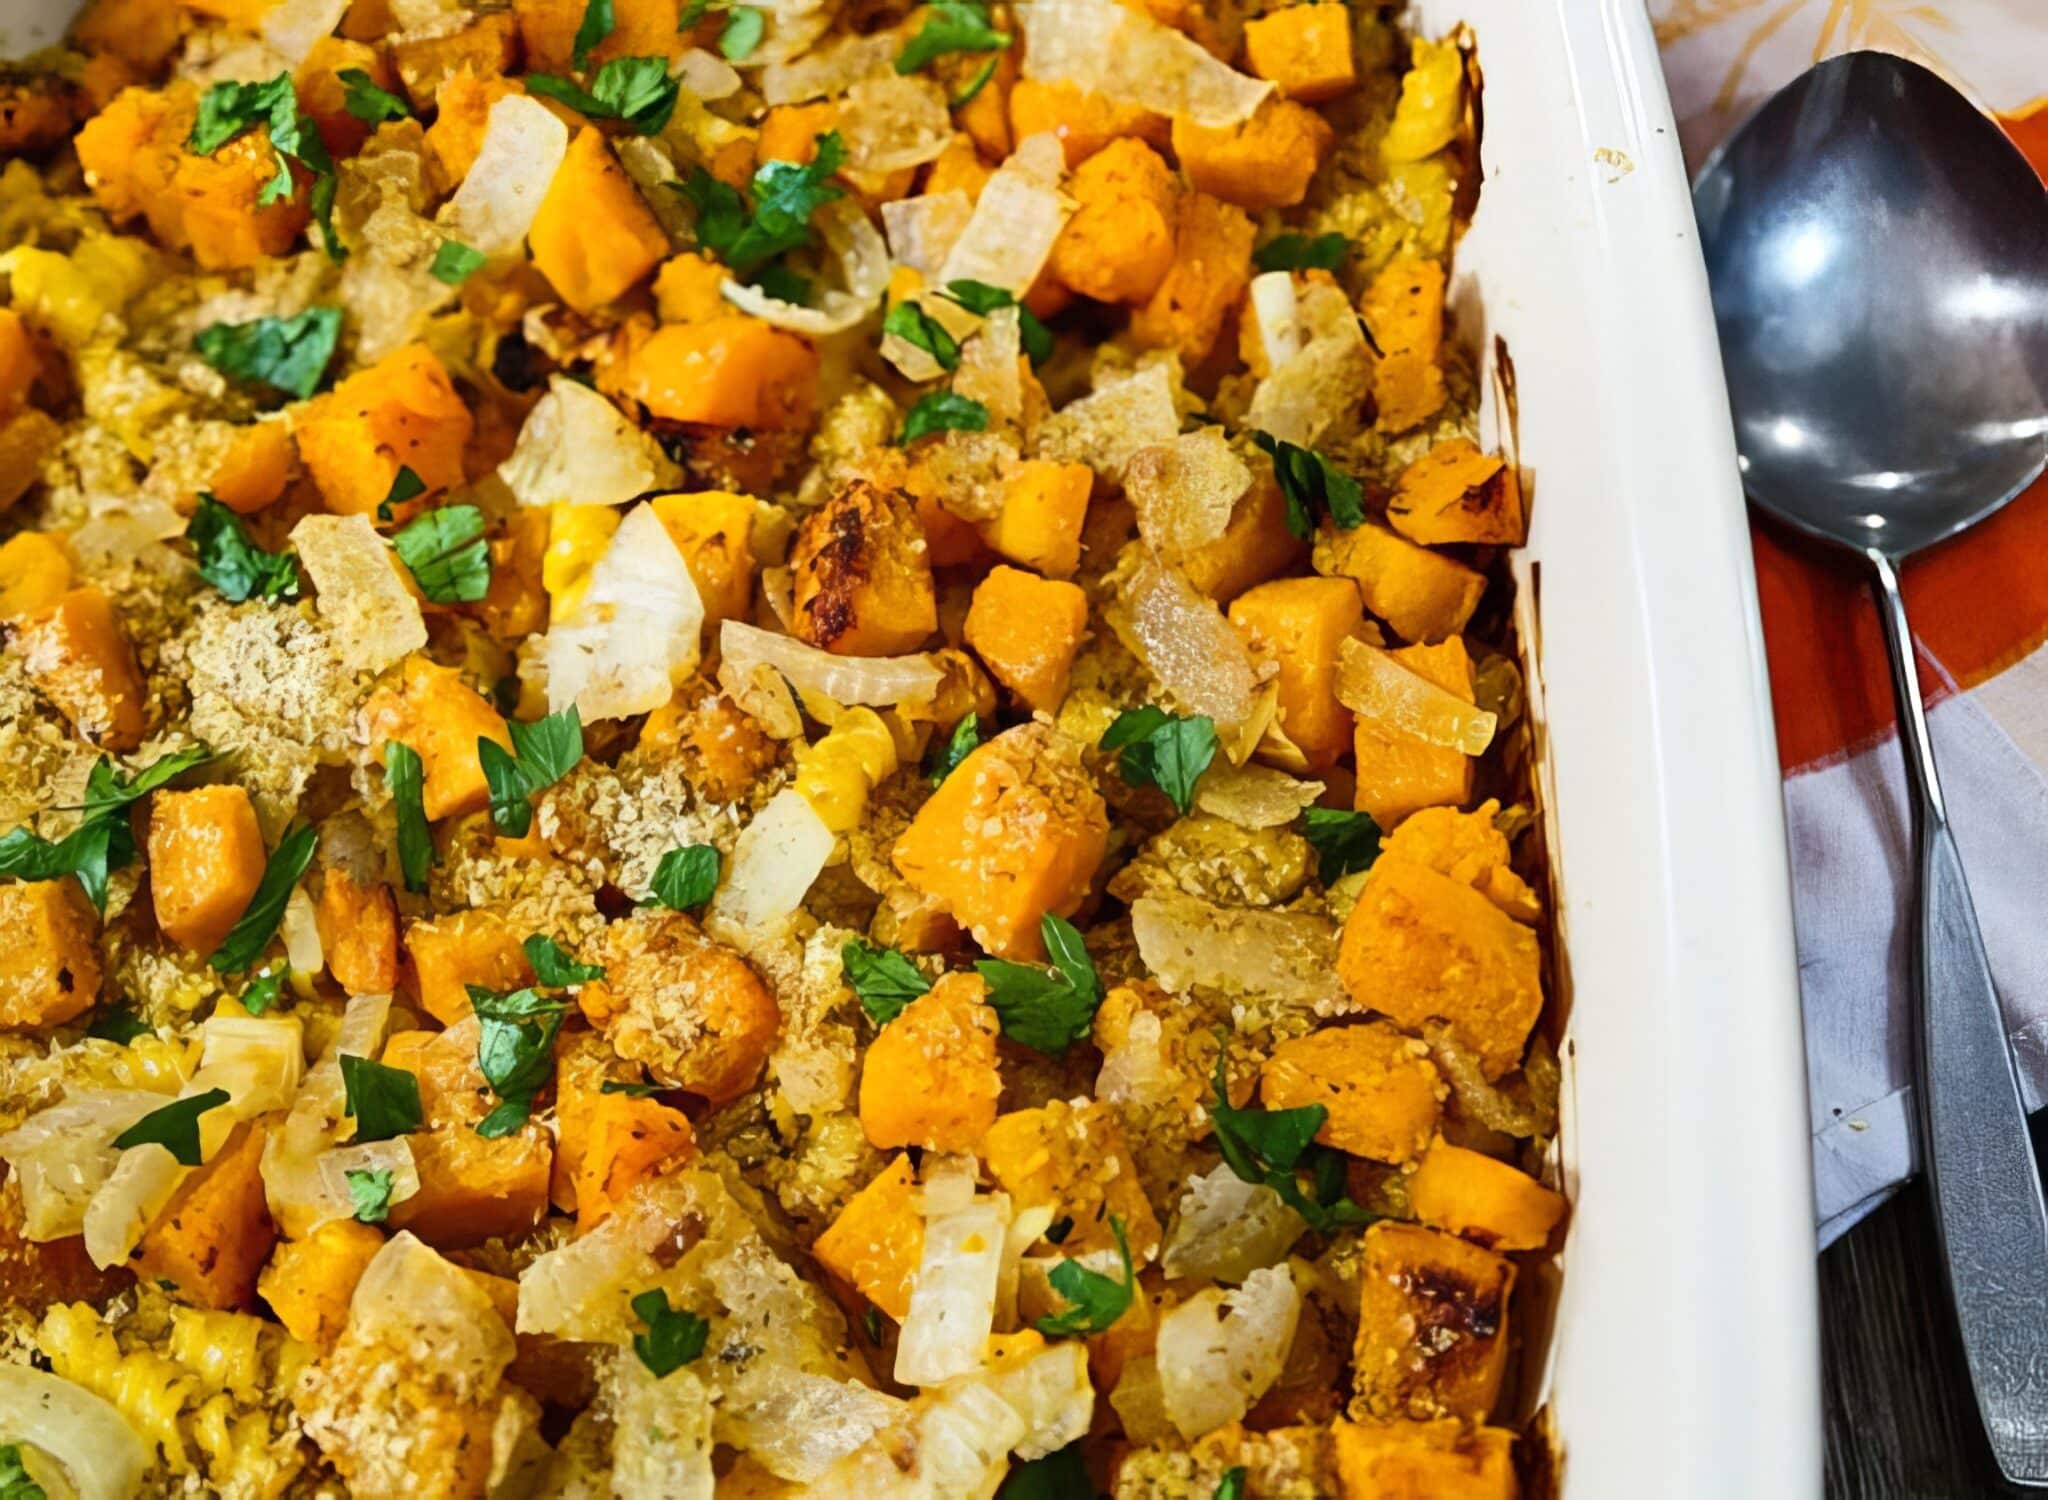
Roasted Butternut Squash and Pasta Casserole
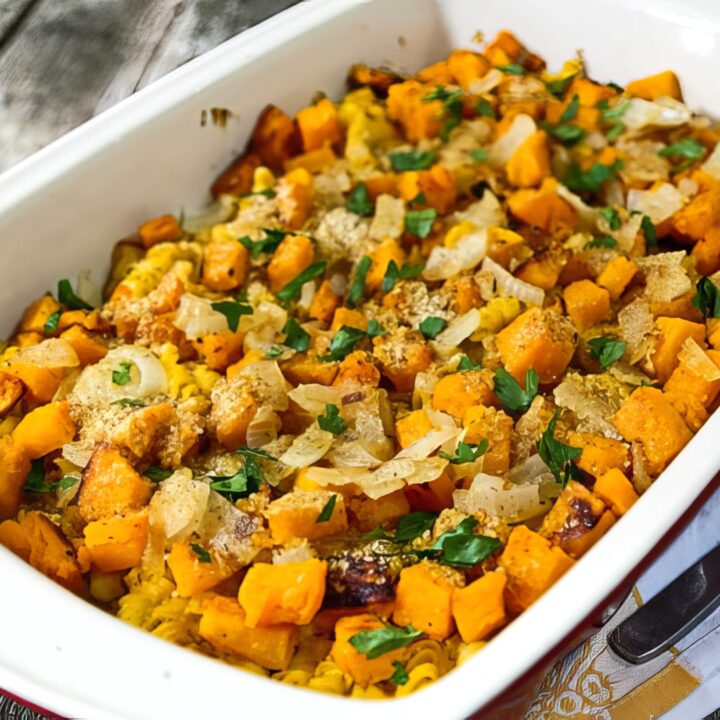
This hearty pasta casserole is loaded with flavor from roasted butternut squash and a velvety, dairy-free sauce, all finished with a golden, crunchy breadcrumb topping. It's comforting, easy to make, and guaranteed to have everyone coming back for seconds.

This is the kind of casserole you make when you're craving comfort food but still want to feel like a responsible adult. It's rich, creamy, baked to golden perfection. And, plot twist: there's no dairy, no cream, and no cheese.
I first made this on one of those in-between fall days - too warm for soup, too cool for salad, and just right for something slowly baked. It turned out to be one of those meals you don't expect to fall in love with, but then you go back for thirds and start texting people about it.
Key Ingredients & Substitutions
- Pasta - Short shapes like rotini or shells hold onto all that dreamy sauce best. You can use whole grain, gluten-free, or just classic white pasta.
- Butternut Squash - Roasted until tender, then blended into the base of the sauce.
- Onion - Sautéed until golden and sweet!
- Silken Tofu - Don't fear the tofu! It makes the sauce ultra-creamy and keeps things nice and light. If you do not want to use tofu, you can substitute cooked (or canned) white beans for a similar consistency.
- Nutritional Yeast - That umami-rich, cheesy flavor - without any dairy.
- Nondairy Milk - Unsweetened, please. Just enough to help everything blend smoothly. You can use almond milk, cashew milk, or your own favorite.
- Paprika - A dash for warmth and color, plus a little extra for sprinkling on top. Smoked paprika works well here also.
- Breadcrumbs - For that golden, crunchy finish.
Helpful Tips
Make ahead tip! You can roast the butternut squash a day ahead and store it in the fridge. This makes prep time a breeze when you're ready to assemble the casserole.
Use the neck for cubes, the base for sauce. - The thicker neck of the squash stays firmer after roasting and is perfect for dicing into cubes for texture in the casserole. The softer base (the bulb) gets softer and blends best into a super creamy sauce.
Blend until smooth and silky. - Take your time when blending the butternut squash sauce. A high-speed blender will give you that ultra-velvety finish, but any blender or food processor will work with a little patience. If the mixture seems too dry, add a bit more almond milk.
Don't overcook the pasta. - Cook the pasta just to al dente. It'll soften more as it bakes, so this helps keep the texture just right.
Customize the topping. - No breadcrumbs? No problem. Use crushed crackers, panko, or even a sprinkle of chopped nuts for a crunchy finish.
Also worth trying: our creamy asparagus and pea pasta.
Easy Variations
Add greens. - Stir in a handful of sautéed spinach or kale before baking for an extra boost of color and nutrients.
Make it smoky. - Add a pinch of smoked paprika or chipotle powder to the sauce for a subtle smoky flavor that plays well with the sweetness of the squash.
Gluten-free option. - Use your favorite gluten-free pasta and swap the breadcrumbs for gluten-free panko or crushed rice crackers.
Use zucchini instead of pasta. - Swap the pasta for thin zucchini strips to make a lighter, gluten-free version. For a fully developed take on that idea, check out our vegan zucchini lasagna.
Go herbaceous! - Mix in chopped fresh sage or thyme. A little goes a long way and pairs beautifully with the squash.
Protein boost. - Add cooked lentils, chickpeas, or vegan sausage slices to the mix before baking for a heartier, more filling dish.
Single-serve style - Divide the mixture into ramekins for mini casseroles. Perfect for dinner parties or easy meal prep! For another hearty baked casserole dinner, our vegan pot pie casserole is a crowd-pleasing comfort food classic. For a fresh summer side, also try our zucchini with mint. For a creamy weeknight pasta option, our vegan creamy mushroom pasta is a favorite.
More Tasty Recipes
If you love this casserole, be sure to check out these other delicious recipes:
- Vegan Sweet Potato Casserole
- Black Bean and Zucchini Tortilla Casserole
- 15 Best Vegan Casserole Recipes
- 10 Make Ahead Vegan Breakfast Casseroles
Recipe

Roasted Butternut Squash and Pasta Bake
This hearty pasta casserole is loaded with flavor from roasted butternut squash and a velvety, dairy-free sauce, all finished with a golden, crunchy breadcrumb topping. It's comforting, easy to make, and guaranteed to have everyone coming back for seconds.
Print
Pin
Save
Servings:
Equipment
Ingredients
- 12 ounces pasta such as rigatoni or rotini
- 2 tablespoons olive oil plus extra for topping
- 1 large onion finely chopped
- 1 medium butternut squash
- ¼ cup nutritional yeast
- 12.3 ounces firm or extra-firm silken tofu
- ½ cup almond milk or other nondairy milk, unsweetened
- ½ teaspoon paprika plus extra more for topping
- salt and pepper to taste
- ½ cup breadcrumbs
- 2 tablespoons fresh parsley optional, chopped, for topping
Instructions
- Preheat the oven to 400°F (200°C).
- Cut a medium butternut squash in half lengthwise. Scoop out the seeds and place both halves, cut side down, on a parchment-lined or lightly oiled baking sheet. Roast for 35-45 minutes, or until the wide (bulb) end is completely tender and can be easily pierced with a fork, but is not mushy. The narrow (neck) end should be tender but still hold its shape.
- Let the squash cool until safe to handle. Gently remove the tough skin, so only the tender squash remains. Chop into cubes and set aside. You should get about 3 - 4 cups total.
- While the squash is roasting, cook the pasta according to package directions, then drain and transfer to a large mixing bowl. Set aside.
- Heat 1 tablespoon olive oil in a large skillet over medium heat. Add 1 large finely chopped onion and sauté until golden and soft, about 8-10 minutes. Scoop out about ¼ cup of the cooked onion and set it aside to mix into the casserole later. The rest will go into the sauce.
- Heat half of the oil in a medium skillet. Add the onion cook until golden. Transfer to a food processor or blender, leaving about ½ cup's worth aside for topping.
- Blend the Sauce. In a blender or food processor, approximately ⅔ of the cubed squash, the remaining sauteed onion, silken tofu, nondairy milk, nutritional yeast, paprika, salt and pepper. Blend until completely smooth. The sauce should be velvety and pourable; add a splash more milk if needed.
- In a large mixing bowl, combine the cooked pasta, remaining squash cubes, and the reserved ¼ cup of sautéed onion. Pour the creamy squash sauce over everything and stir gently to coat.
- Transfer the mixture to a lightly oiled 2-quart casserole dish. Sprinkle the breadcrumbs over the top. Add a sprinkle of paprika and a drizzle of olive oil, if desired.
- Bake uncovered at 400°F for 20-25 minutes, or until the top is golden and the edges are bubbling. For extra crispiness, broil for the last 2-3 minutes, watching closely.
- Let the casserole sit for 5-10 minutes after baking. Garnish with parsley, if desired. This helps it set up and makes it easier to serve. Slice, scoop, and enjoy warm!
Nutrition (Estimate per Serving)
Calories: 297kcalCarbohydrates: 51gProtein: 10gFat: 6gSaturated Fat: 1gPolyunsaturated Fat: 2gMonounsaturated Fat: 3gSodium: 80mgPotassium: 578mgFiber: 4gSugar: 5gVitamin A: 10060IUVitamin C: 23mgCalcium: 104mgIron: 2mg
Vegan-ize any recipe!Grab our free vegan cheat sheet, packed with my favorite easy substitutions to make any recipe vegan.
Glazed Baked Onions

Soft, sweet, and bathed in a buttery brown sugar glaze - these baked onions are the ultimate side dish for any vegan feast.

Let's talk about onions for a minute. Usually, they're the unsung heroes hiding out in the background - chopped, sautéed, and forgotten about. But not today. Today, onions take center stage, get all gussied up in a glossy glaze, and come strutting out of the oven like they own the dinner table.
These Glazed Baked Onions are pure comfort food, with just enough elegance to make them holiday-worthy. They are especially perfect for Thanksgiving!
These Glazed Baked Onions are:
- A total glow-up for the humble onion.
- Sweet, buttery, and gloriously simple.
- A perfect plant-based side dish for the holidays or any cozy meal.
- Oven-roasted to soft, caramelized perfection.
- Naturally vegan and easy to make gluten-free too.
And if you're here planning your holiday menu, don't forget to check out our new Vegan Thanksgiving and Vegan Christmas cookbooks!
Key Ingredients & Substitutions
- Onions: Large yellow onions work best here. You want them big and round, so they hold up in the oven and soak up all that glaze. My personal favorite are Vidalia Onions!
- Vegan Butter: Adds richness and helps create that luscious glaze. I am a fan of the Earth's Best Buttery Sticks for this type of dish. If you're not vegan, regular butter works here too.
- Brown Sugar: The star of the glaze - gives it that warm, molasses-y sweetness. Light or dark, either is fine.
- Salt & Pepper: Simple seasoning, balances the sweetness beautifully.
- Water: Just enough to help the glaze form while the onions roast.
Helpful Tips
Don't peel too much: Just remove the papery outer layers of the onions and trim the ends slightly - you want them to stay intact when baked.
Score the tops: A shallow cross-cut on top of each onion helps the glaze seep into the onions while they bake.
Roast covered, then uncovered: Start with foil covering the baking dish to steam and soften the onions, then uncover to let them caramelize.
Baste as you go: Spoon that buttery glaze over the onions occasionally as they bake, for maximum flavor and that pretty shine.
Also worth trying: our vegan creamy mushroom pasta.

Easy Variations
- Add herbs: A sprig of thyme or rosemary tucked into the baking dish adds a savory, aromatic note.
- Spice it up: A pinch of cayenne or smoked paprika in the glaze gives a little extra kick.
- Maple twist: Swap brown sugar for maple syrup for a deeper, woodsy sweetness.
- Make it Bite Sized: Try this with small pearl onions or even shallots for a bite-sized take that's great for appetizers or tapas-style meals.
More Vegan Recipes
If you love these baked onions, be sure to check out these other delicious recipes:
Photos were taken by Hannah Kaminsky.
Recipe

Glazed Baked Onions
Soft, sweet, and bathed in a buttery brown sugar glaze - these baked onions are the ultimate side dish for any vegan feast.
Print
Pin
Save
Servings: onion halves
Equipment
Ingredients
- 1 cup vegetable broth homemade or store bought
- ¼ cup maple syrup or agave nectar
- 1 tablespoon vegan butter such as Earth Balance Buttery Sticks
- ⅛ teaspoon dried rosemary
- ⅛ teaspoon dried thyme
- ⅛ teaspoon ground nutmeg
- 6 large onions sweet variety, such as Vidalia
- 1 cup breadcrumbs
- fresh rosemary sprigs optional, for garnish
Instructions
- Preheat the oven to 375°F (190°C).
- Combine all the ingredients except the onions and breadcrumbs in a small saucepan. Heat gently, stirring, until all are smoothly blended. Remove from the heat.
- Peel the outer skin from the onions, and cut them in half crosswise. Cut a thin sliver from the bottom of each onion half, so that they'll stand steadily in a baking dish.
- Arrange the 12 onions halves in a shallow baking dish and pour the mixture from the saucepan evenly over them.
- Cover and bake for 45 minutes to 1 hour, or until the onions are tender when pierced with a fork. Once or twice during this time, spoon some of the liquid from the bottom of the baking dish over the onions.
- Sprinkle the onions with breadcrumbs and bake, uncovered, for an additional 10 to 15 minutes, or until most of the liquid has been absorbed. Serve at once or keep warm until needed.
Nutrition (Estimate per Serving)
Calories: 92kcalCarbohydrates: 18gProtein: 2gFat: 1gSaturated Fat: 0.3gPolyunsaturated Fat: 0.4gMonounsaturated Fat: 0.4gTrans Fat: 0.01gSodium: 155mgPotassium: 143mgFiber: 2gSugar: 8gVitamin A: 88IUVitamin C: 6mgCalcium: 41mgIron: 1mg
Vegan-ize any recipe!Grab our free vegan cheat sheet, packed with my favorite easy substitutions to make any recipe vegan.
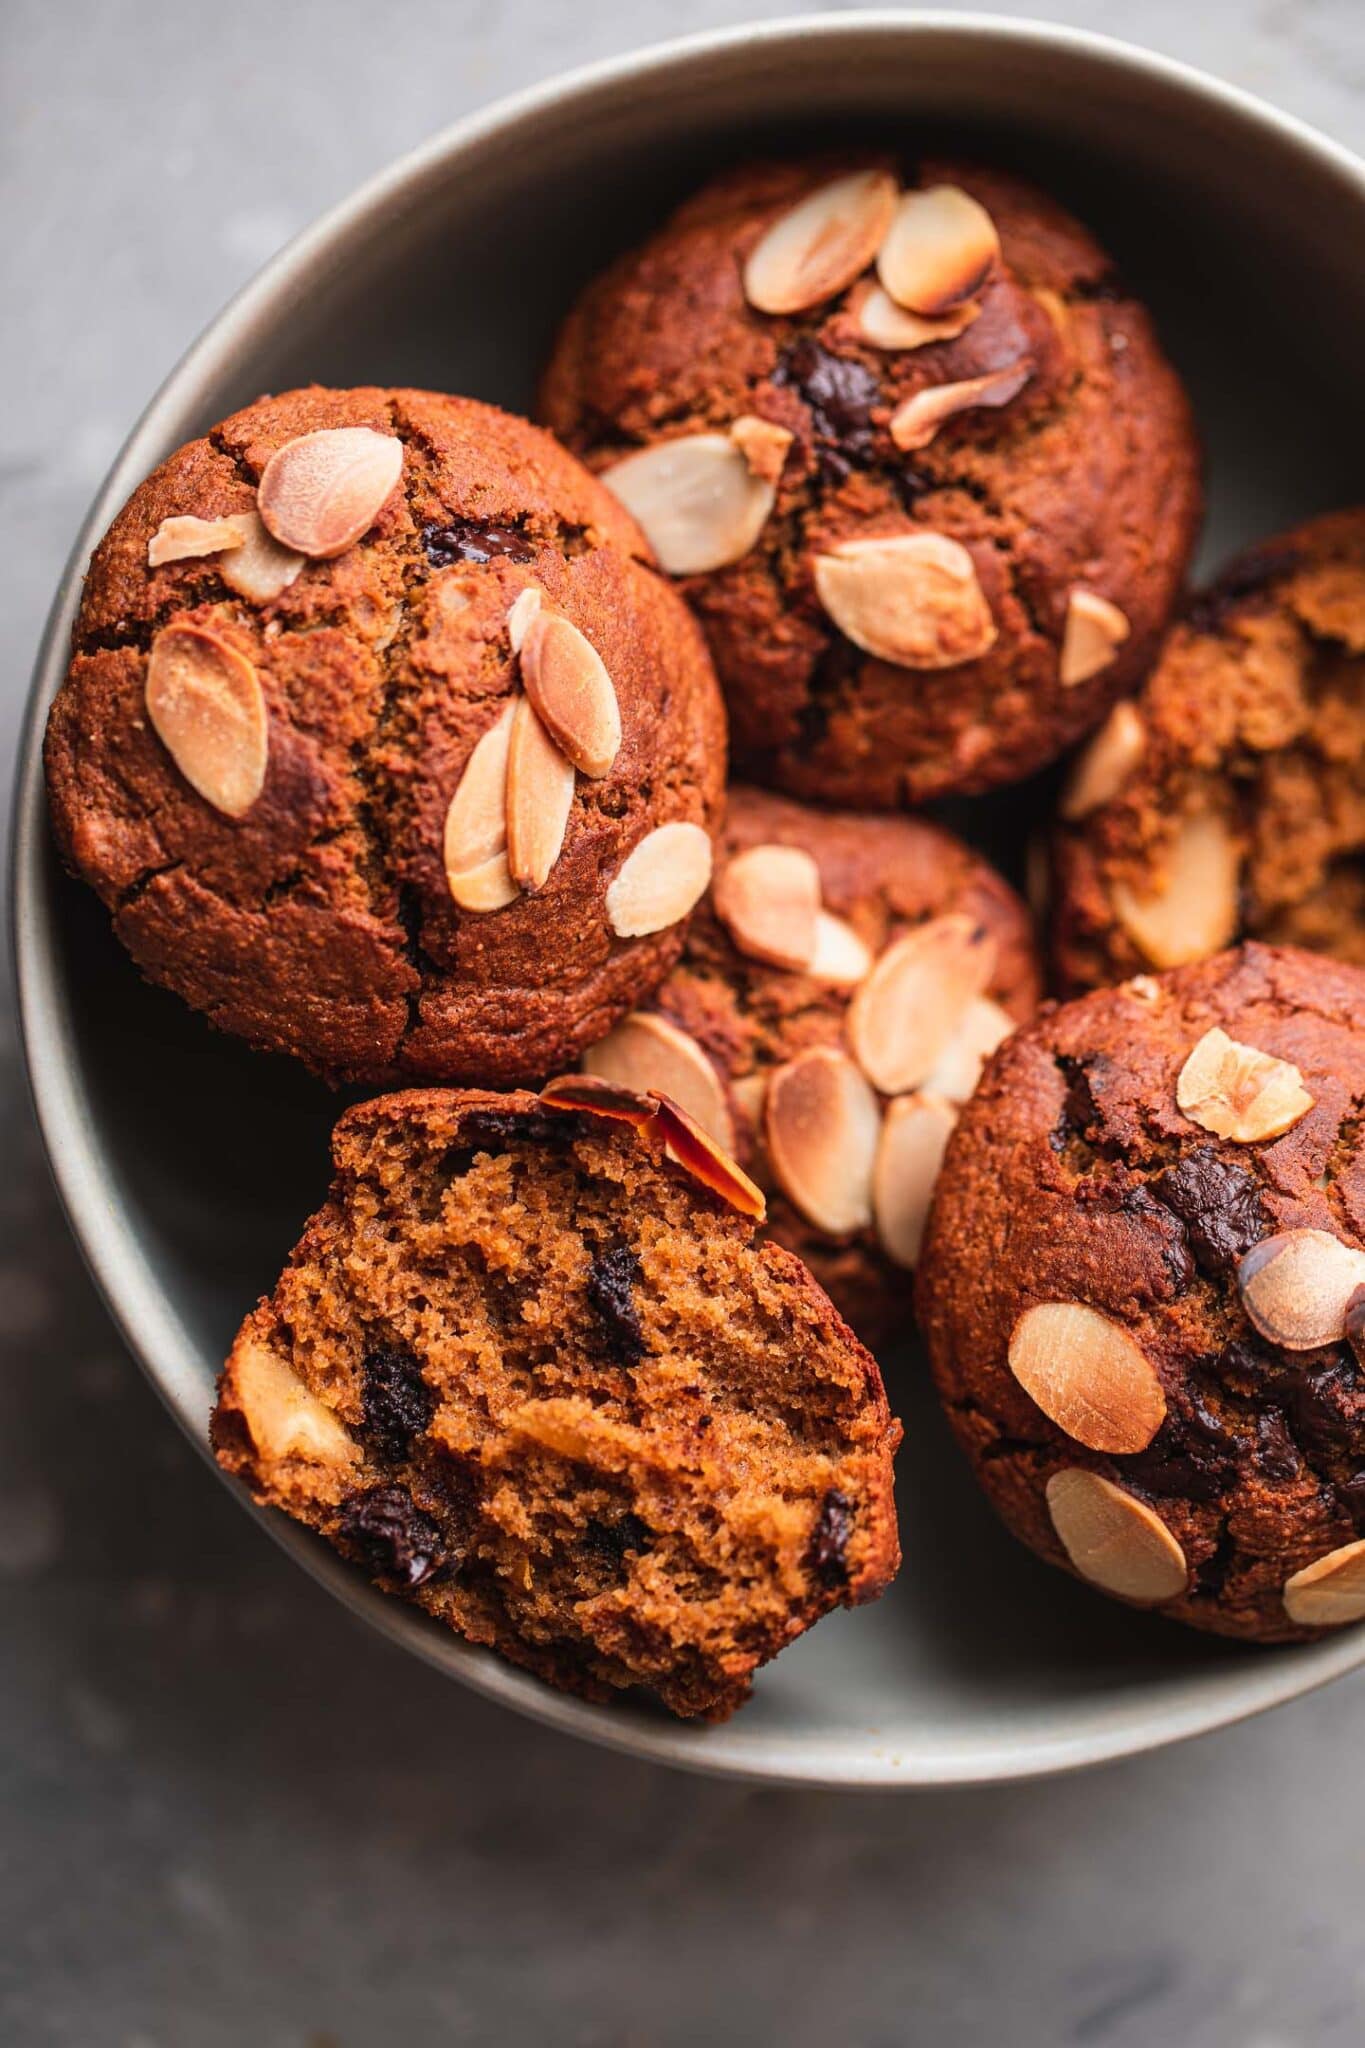
Pumpkin Chocolate Chip Muffins

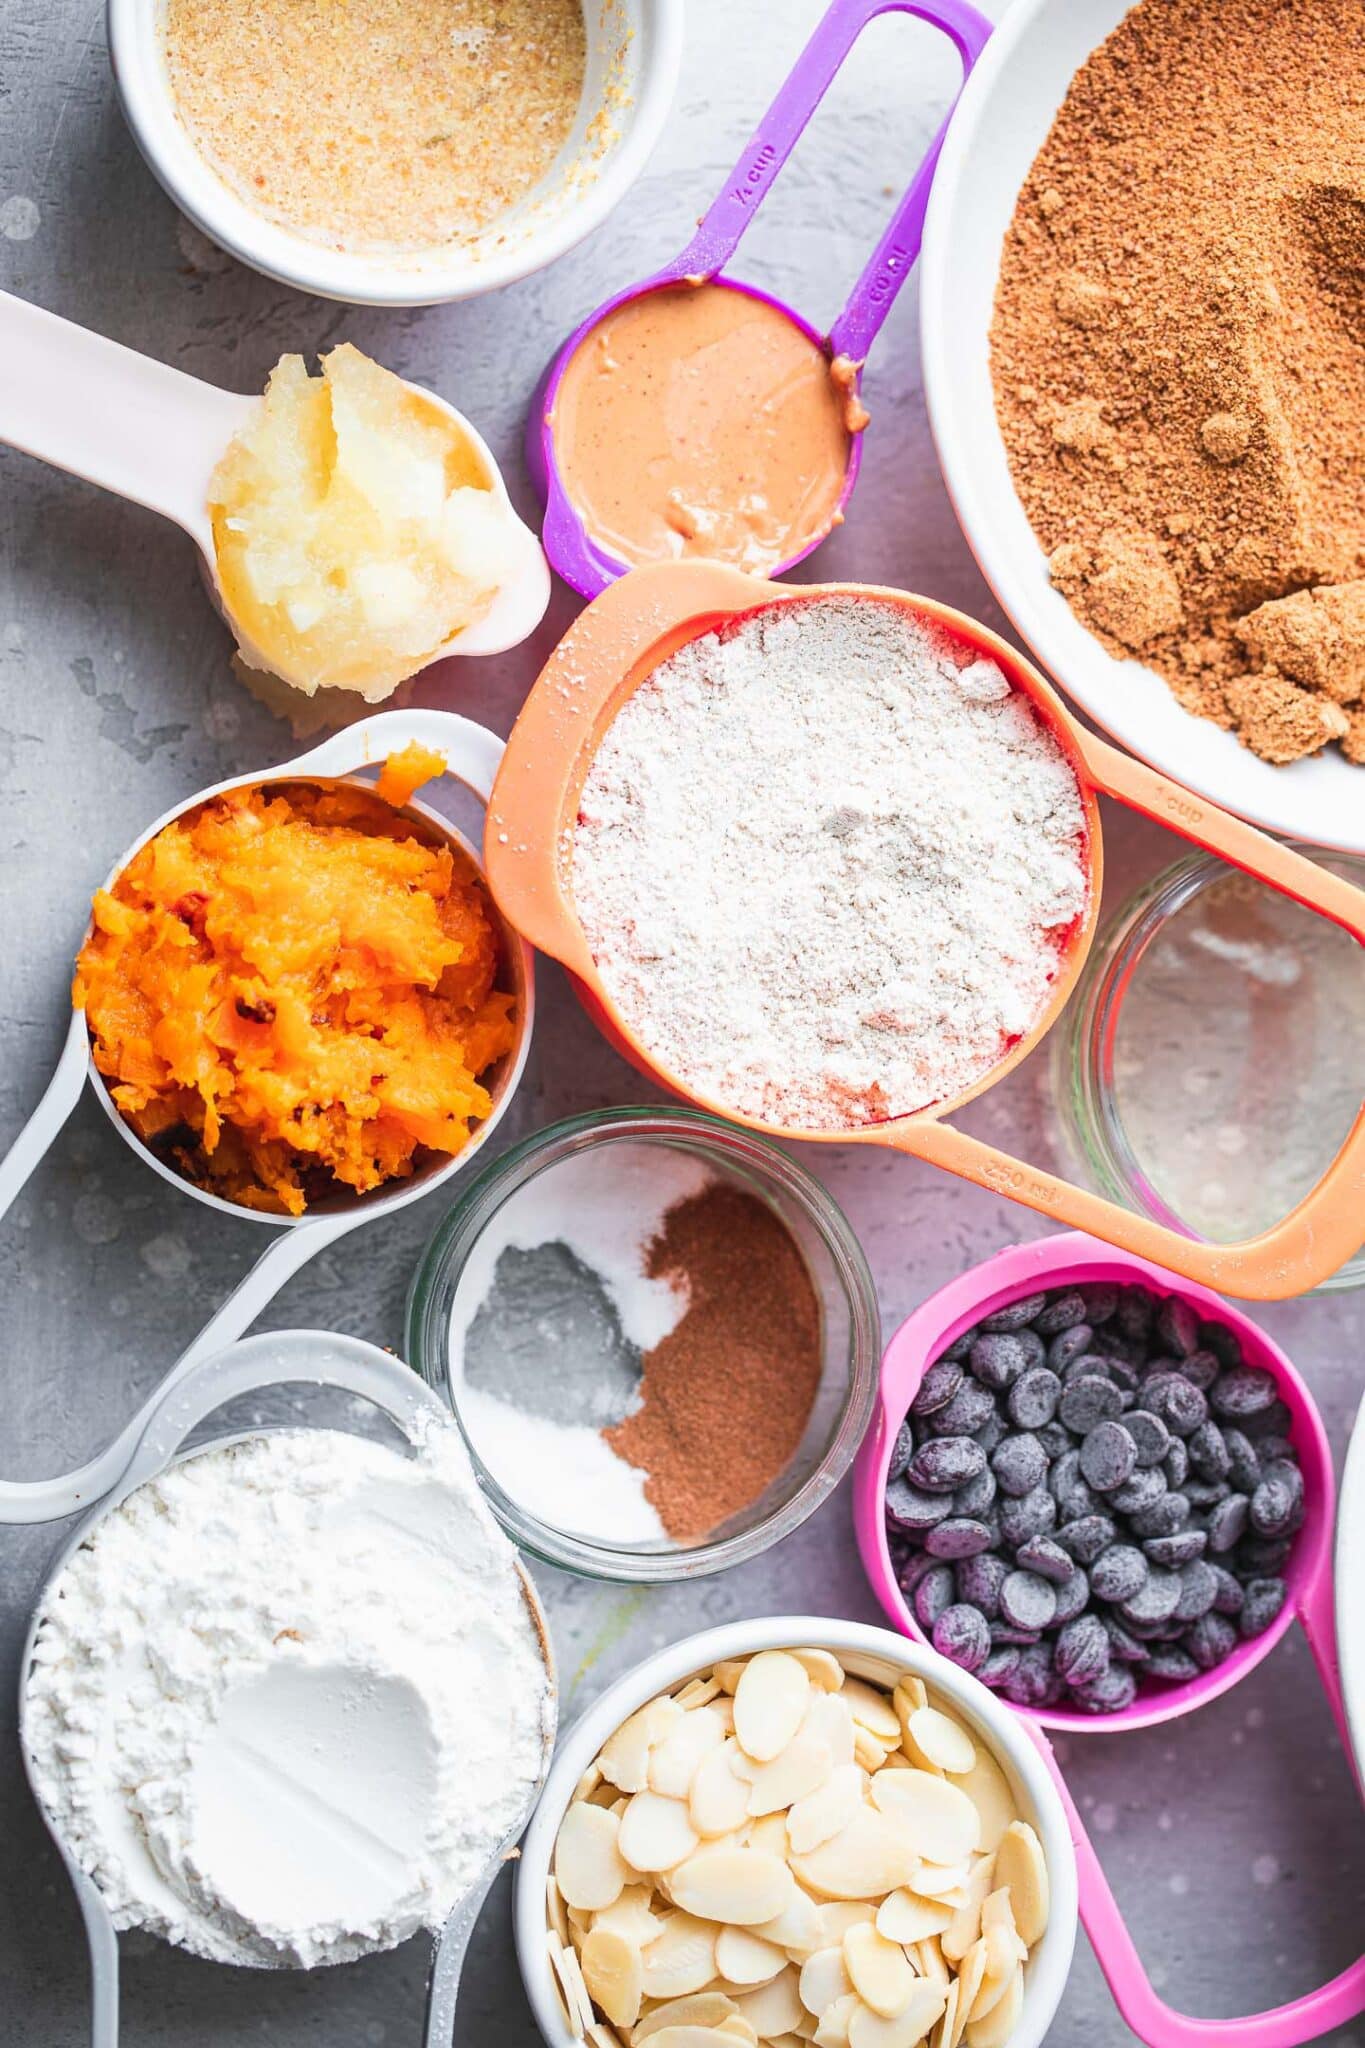
These yummy vegan pumpkin chocolate chip muffins are loaded with healthy ingredients like fresh pumpkin puree, oat flour, and flaked almonds. Plus, this one bowl recipe takes just 30 minutes to make!
I'm obsessed with putting pumpkin in everything in the Fall, but especially muffins and cookies. So it should be no surprise to see these pumpkin muffins hit the blog!
These vegan muffins are ridiculously easy. You need just one bowl, a muffin tray and an oven to make them. And even better yet - they're the healthiest pumpkin muffins you'll ever find too!
These vegan pumpkin muffins are:
- Vegan.
- Gluten-Free.
- Refined sugar free.
- Packed with fiber and other nutrients.
- Healthy!
- And totally delicious.
As a chocolate lover, I added dark chocolate chips to mine. But I've also tried them with blueberries, which also made a great addition.
The almonds add a nice crunch, while the peanut butter gives them a great creamy texture. They taste so indulgent, you can even get away with serving them for dessert.
Making the Vegan Pumpkin Muffins (Step by Step)
It really is unbelievably easy. First, preheat the oven to 350 degrees Fahrenheit / 180 degrees Celsius, and lightly grease a muffin tray.
If you want to keep this recipe completely oil-free and still prevent sticking, you can use silicone muffin cups instead.
Add the dry ingredients (gluten-free oat flour, gluten-free self-raising flour, baking soda, cinnamon and coconut sugar) to a large mixing bowl. Mix together well.
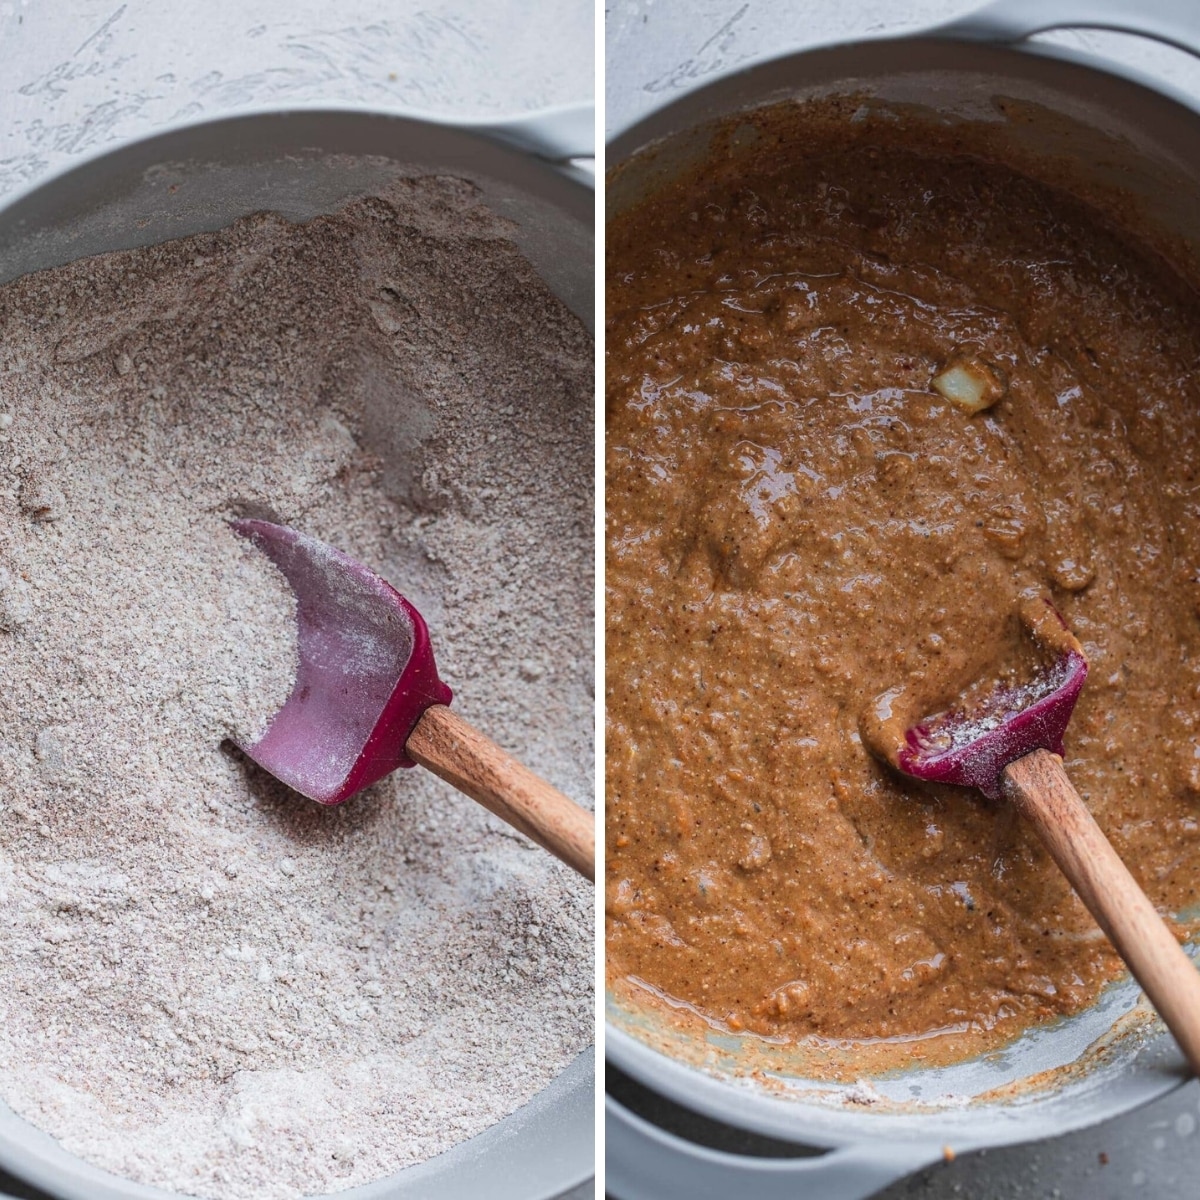
Now add the plant based milk, apple cider vinegar, pumpkin purée, flax eggs, peanut butter and apple purée.
Mix together once again, then finally mix in the dairy-free chocolate chips and flaked almonds.
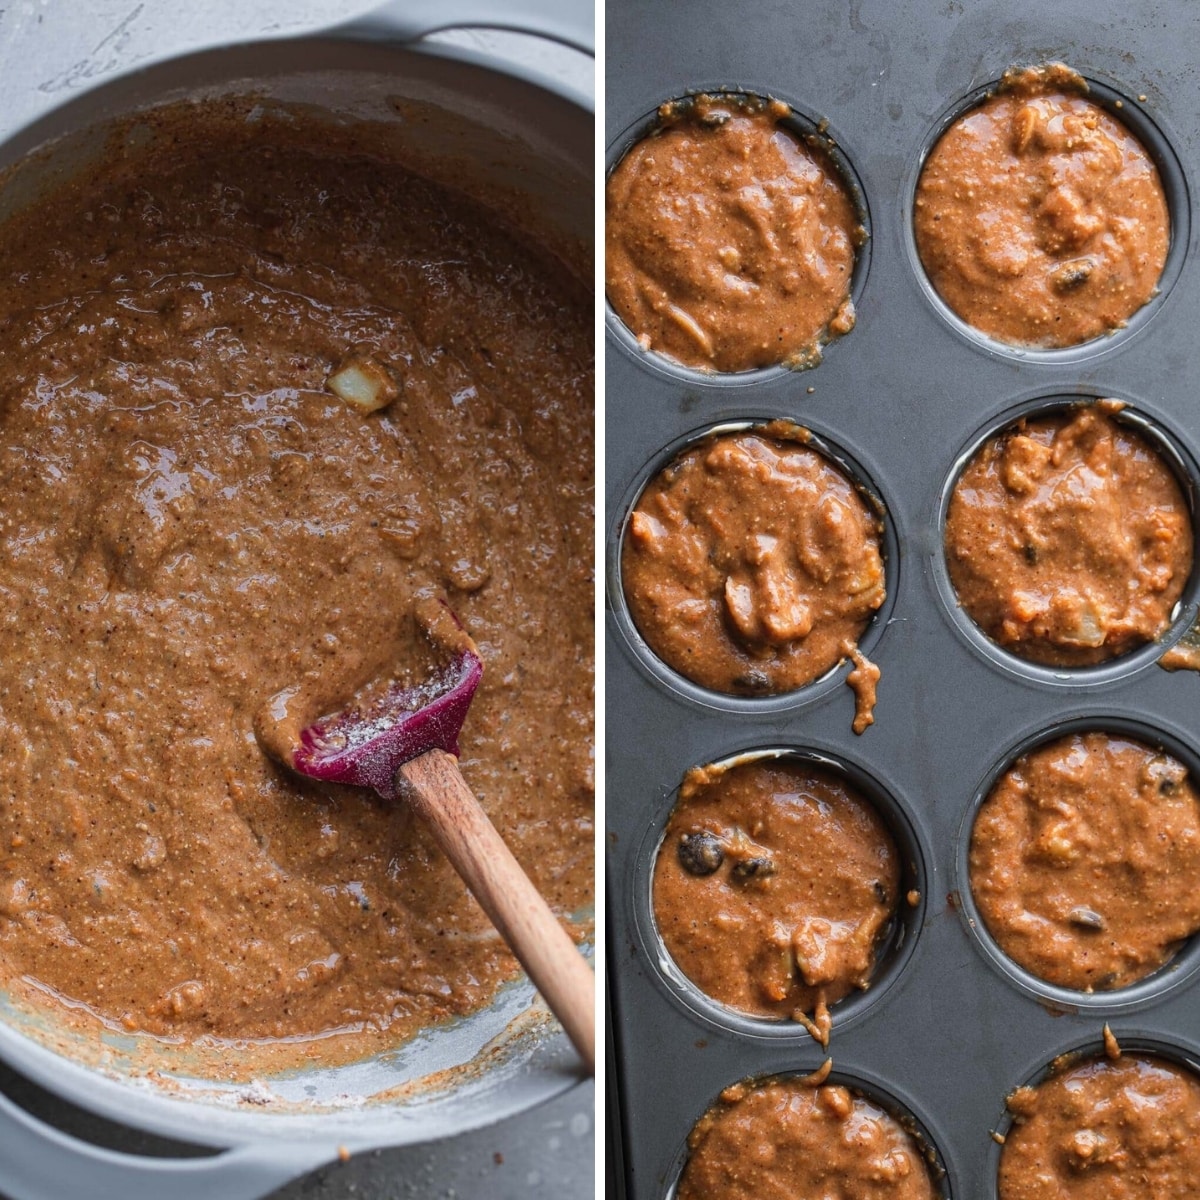
Divide the batter evenly across the muffin tray, filling the divisions almost all the way to the top (or around ¾, if using muffin cases).
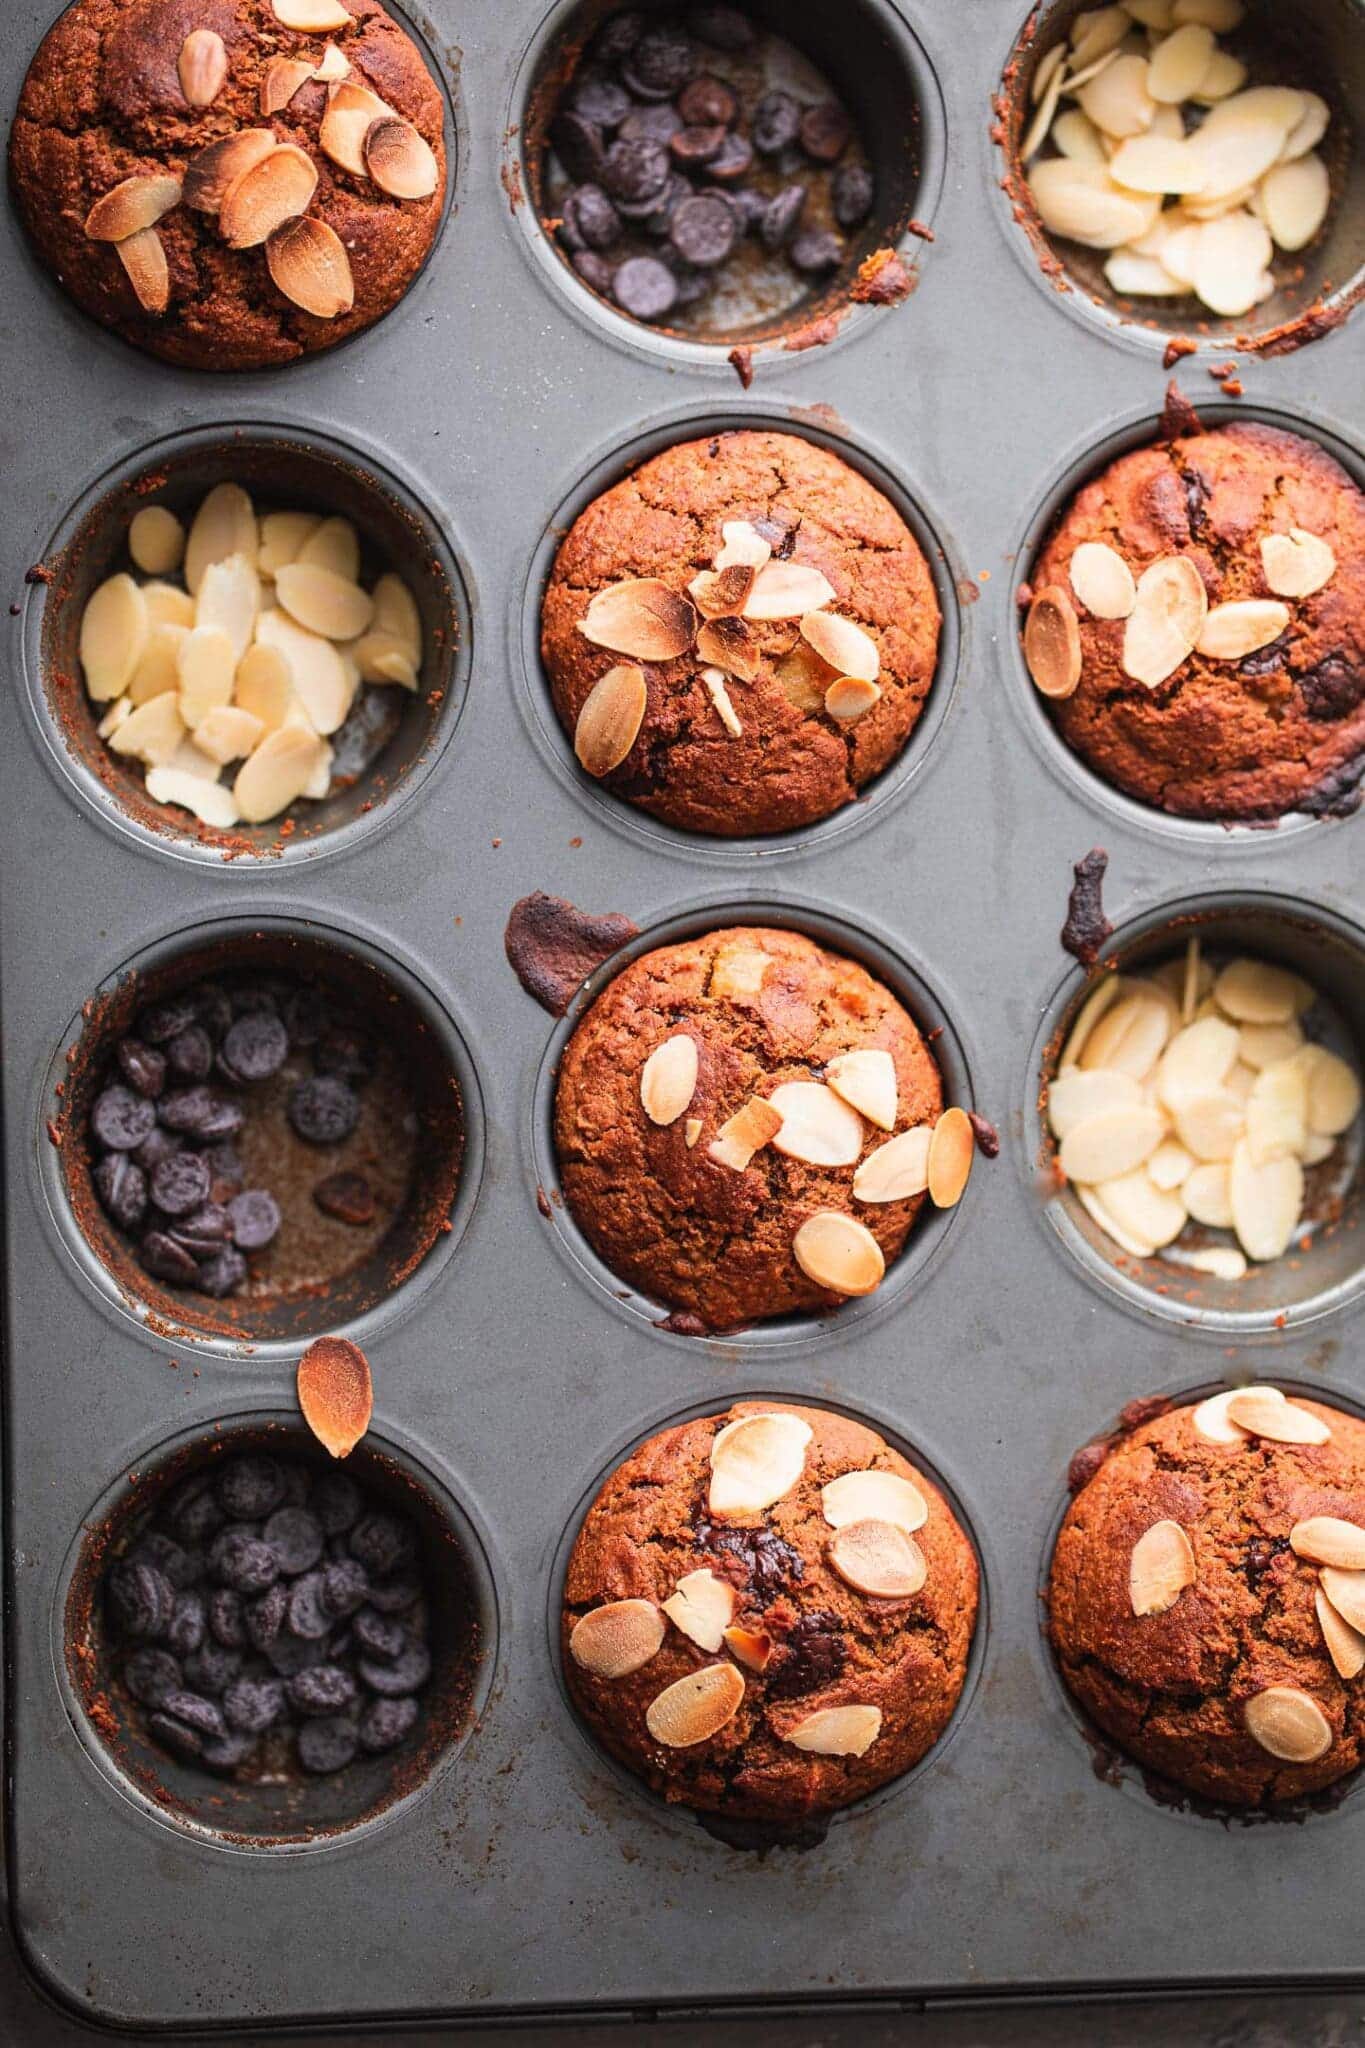
Bake in the preheated oven for around 18-20 minutes, until golden brown and a toothpick comes out clean from the centre.
Allow the pumpkin muffins to cool for around 10 minutes before removing from the muffin tray and serving.
Homemade Pumpkin Puree
You can, of course, use canned pumpkin for this recipe. But in an effort to keep things as healthy and natural as possible, I do like to make my own.
Simply peel and chop a sweet pumpkin variety, spread across a sheet of parchment paper on a baking tray and bake at 400 degrees F for 20-25 minutes, until soft and golden brown.
You can then mash the pumpkin with a potato masher, or add it to a blender or food processor to make pumpkin purée.
Storing and Freezing the Muffins
You can keep these pumpkin muffins in the fridge, covered or in an airtight container, for 5-6 days.
They are also freezer-friendly. Store them in a freezer-friendly container for up to around 2 months, leaving to thaw fully in the fridge or on the counter before serving. For a festive celebration cake, our vegan funfetti cake is another great option. For a no-bake pumpkin snack, try our pumpkin protein balls. If you love pumpkin baked treats, our vegan pumpkin waffles are another cozy fall favorite worth trying.
Tips & Substitutions
If you are not using self-raising flour, add ½ teaspoon more baking soda.
The peanut butter can be replaced with any other nut or seed butter of your choice. Alternatively, you can take it out and replace with an equal amount of apple sauce.
Feel free to replace the flaked almonds with any other nuts or seeds of your choice. For instance, I love adding pecans and/or pumpkin seeds to muffins.
Fresh berries also make a great addition.
Do not overmix the batter because if you do, the texture won't be as fluffy.
Make sure not to leave them in the oven for too long as they can burn quite easily. It's best to stick more to the 18-minute mark, as they do firm up a bit more while cooling.
More Recipes to Try
If you love these vegan pumpkin muffins, be sure to try these other delicious treats.
Also worth trying: our pumpkin seed butter.
Recipe

Vegan Pumpkin Chocolate Chip Muffins
These fluffy vegan muffins are packed with pumpkin flavor, crunchy pecans, and sweet dark chocolate chips. Yum!
Print
Pin
Save
Servings: muffins
Equipment
Ingredients
- 1 cup oat flour gluten-free if desired
- 1 cup self raising flour gluten-free if desired
- 1 teaspoon baking soda
- 1 teaspoon ground cinnamon
- 1 ½ cups coconut sugar
- 1 cup plant based milk
- 1 tablespoon apple cider vinegar
- ⅔ cup pumpkin puree
- 2 tablespoon ground flaxseed
- ¼ cup water
- ¼ cup peanut butter creamy
- ¼ cup apple sauce
- ½ cup vegan chocolate chips
- ⅓ cup sliced almonds plus extra for garnish
Instructions
- Make the "flax eggs", which will be our egg substitute. In a small bowl, whisk together the ground flaxseed and water. Set aside for 10-15 minutes to thicken.
- Preheat the oven to 350 degrees Fahrenheit (180 degrees Celsius ) and lightly grease a muffin tray.
- Add the oat flour, self-raising flour, baking soda, cinnamon and coconut sugar to a large mixing bowl. Mix together well.
- Now add plant based milk, apple cider vinegar, pumpkin purée, flax eggs, peanut butter and apple sauce. Mix together once again, then finally fold in the dairy-free chocolate chips and flaked almonds.
- Divide the batter evenly across the muffin tray, filling the divisions almost all the way to the top (or around ¾, if using muffin liners).
- Bake in the preheated oven for around 18-20 minutes, until golden brown and a toothpick inserted comes out clean from the center. (You can optionally sprinkle some extra flaked almonds on top of the muffins in the last 5 minutes of baking.)
- Allow to cool for around 10 minutes before removing from the muffin tray and serving.
Notes
If you want to keep this recipe completely oil-free and still prevent sticking, you can use muffin cases instead.
If not using self-raising flour, add ½ teaspoon more baking soda.
These pumpkin muffins keep in the fridge, covered or in an airtight container, for 5-6 days. You can also freeze them in a freezer-friendly container for around 2 months.
Nutrition (Estimate per Serving)
Calories: 244kcalCarbohydrates: 40gProtein: 5gFat: 8gSaturated Fat: 2gPolyunsaturated Fat: 2gMonounsaturated Fat: 3gTrans Fat: 0.001gSodium: 184mgPotassium: 139mgFiber: 3gSugar: 18gVitamin A: 2120IUVitamin C: 1mgCalcium: 60mgIron: 2mg
Vegan-ize any recipe!Grab our free vegan cheat sheet, packed with my favorite easy substitutions to make any recipe vegan.
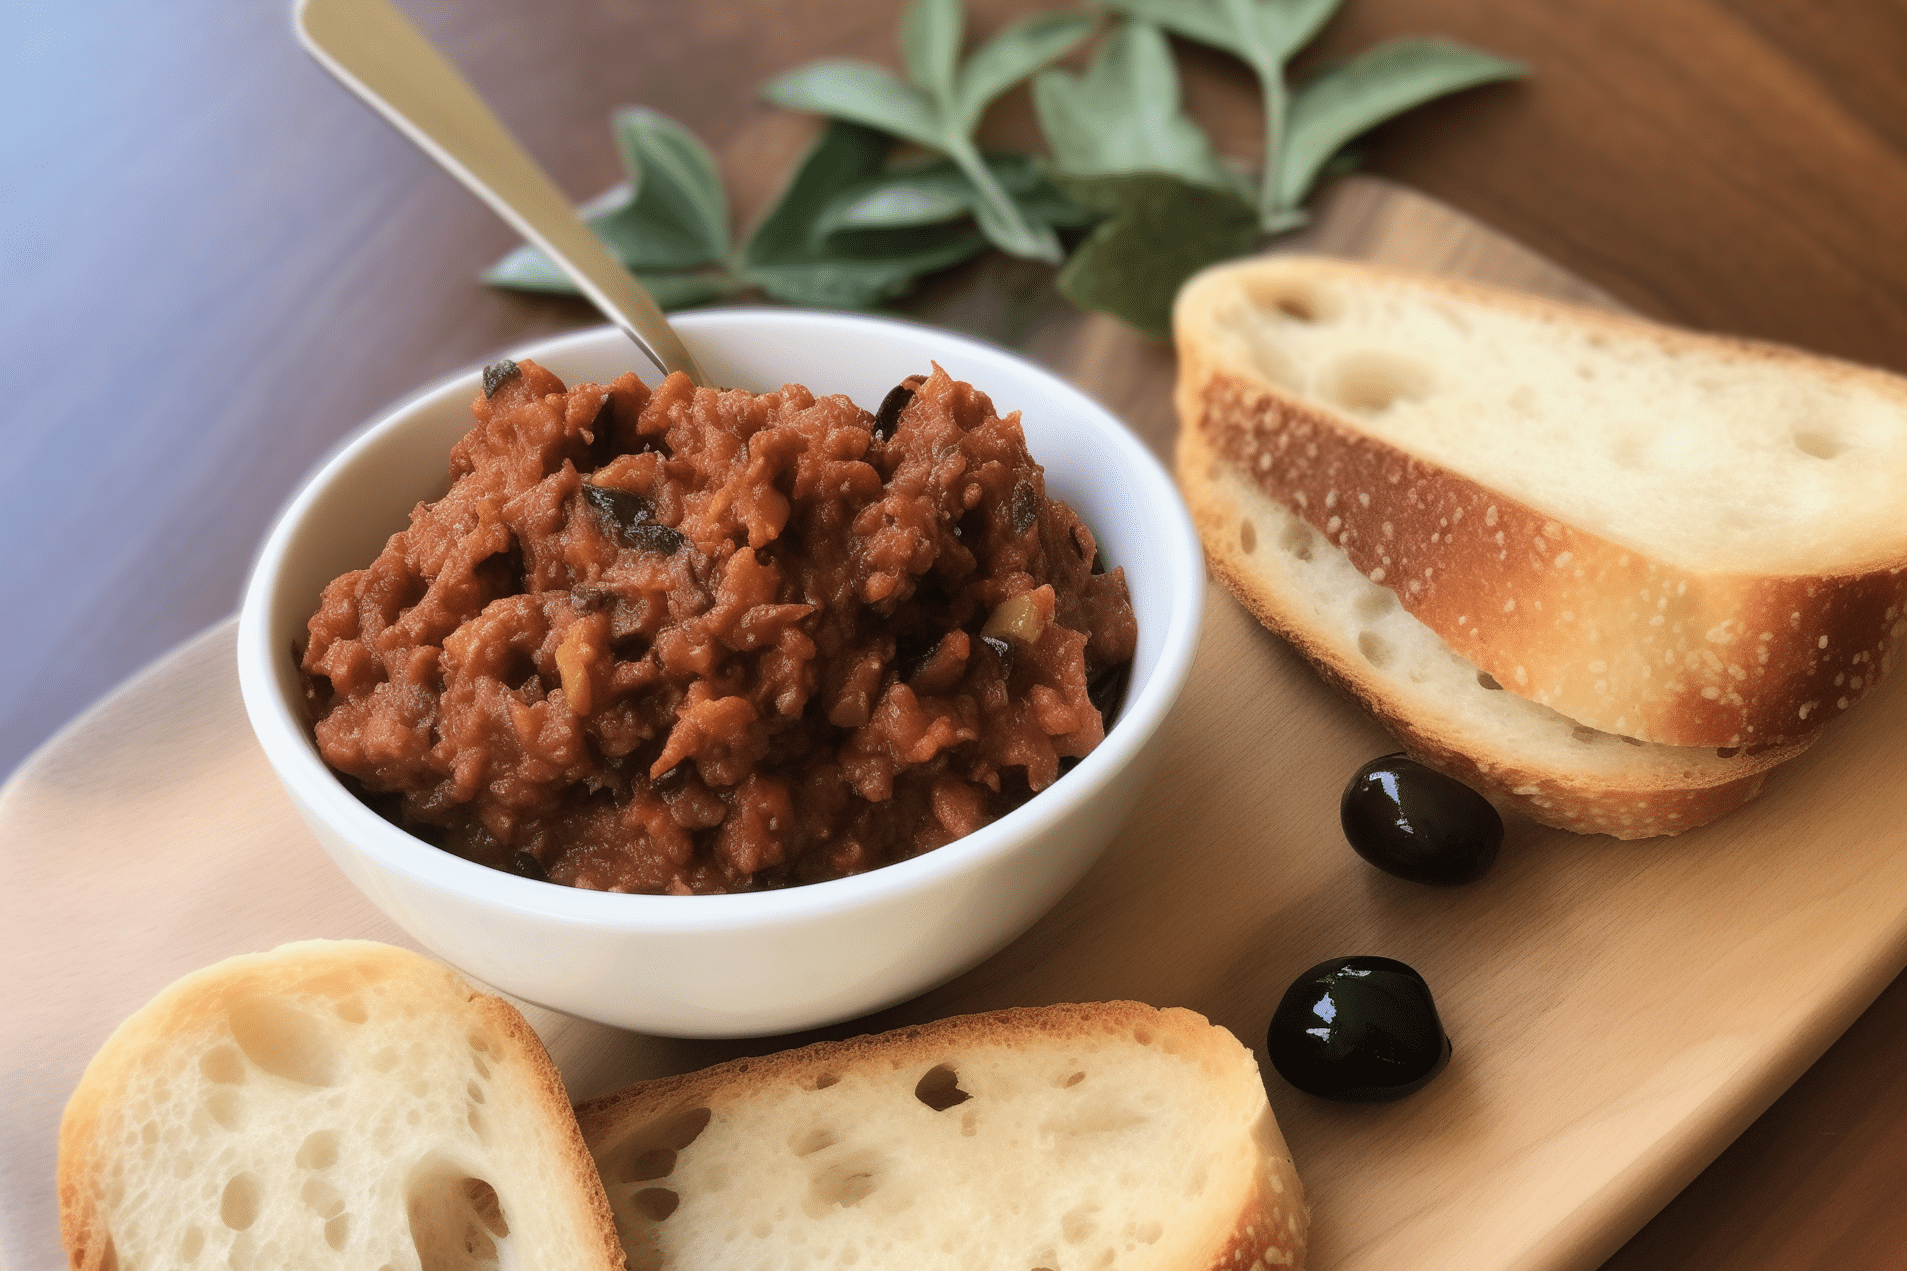
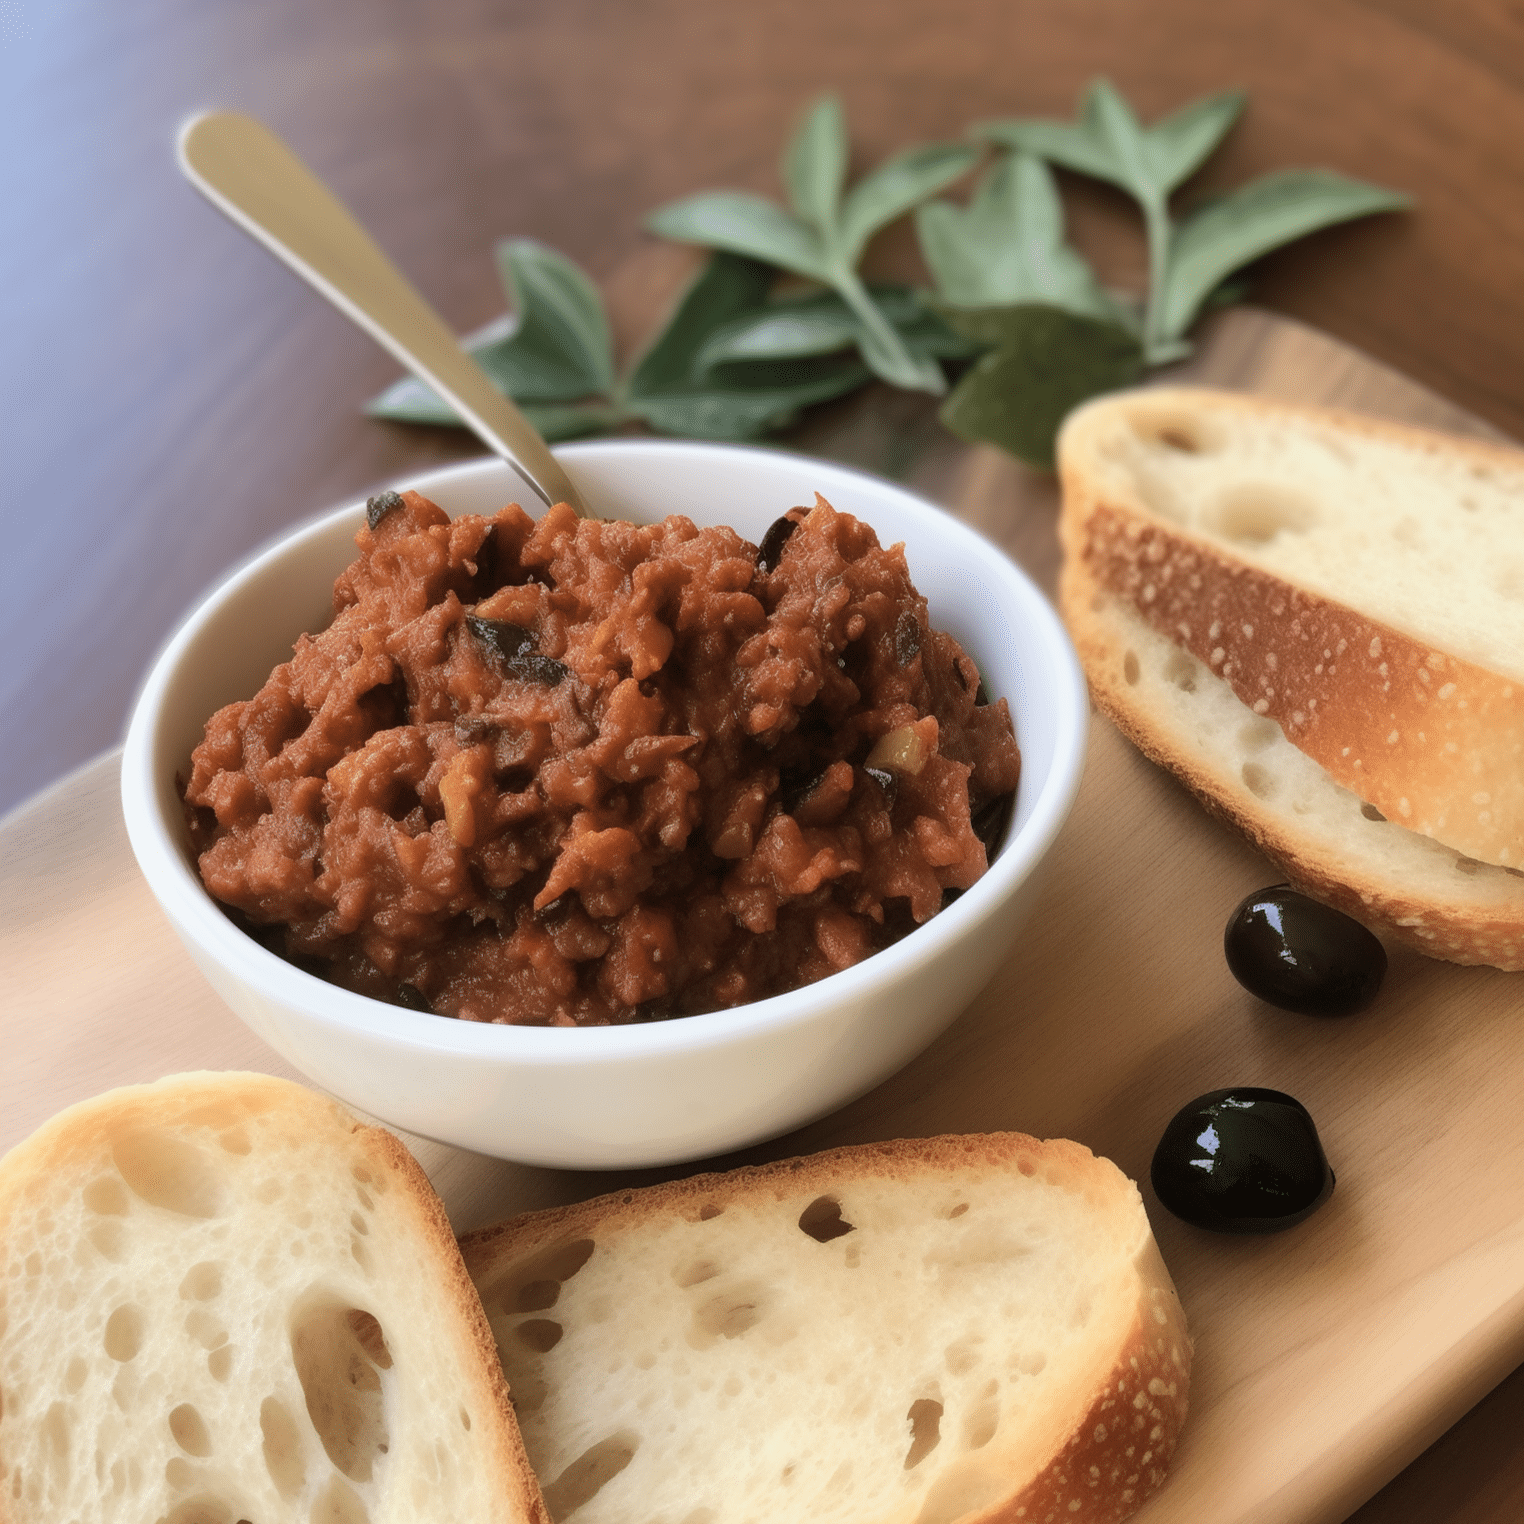
Olive and Sun-Dried Tomato Tapenade
This bold and briny Olive and Sun-Dried Tomato Tapenade is the ultimate Mediterranean-inspired spread - salty, savory, and just a touch tangy. Made with a mix of black and green olives, sun-dried tomatoes, garlic, and capers, it comes together in minutes and instantly elevates crostini, pasta, or even your favorite sandwich.
So... You Like Olives?
Same. And if you've ever found yourself eating olives straight out of the jar with zero regrets, then you, my friend, are going to love this tapenade. This isn't your average tapenade either-it's got depth, attitude, and a whole lot of umami thanks to the magical addition of sun-dried tomatoes. It's the kind of spread that feels fancy but takes less time to make than a cup of coffee.
Key Ingredients & Substitutions
Lemon juice (optional) - Just a splash really brightens things up. Fresh is best.
Kalamata olives - These briny beauties bring deep, fruity richness and a signature bold flavor. Be sure to use pitted ones to save your food processor (and your sanity).
Sun-dried tomatoes - Oil-packed ones bring the best texture and flavor, but dry-packed will work if you rehydrate them in warm water first.
Fresh parsley - Adds a bright, herby freshness that balances all the rich, salty elements. Basil and sage are also nice additions.
Walnuts or pecans - Nuts add body and a subtle earthy flavor. Walnuts are traditional, but pecans give it a slightly sweeter twist. Pine nuts would also work well, but would give a consistency more like a pesto.
Helpful Tips
Pulse, don't purée. You want a coarse texture, not a paste. Tapenade should still have some personality-think chunky pesto vibes.
Taste as you go. Olives are naturally salty, so you probably won't need extra salt. But feel free to tweak the flavors to your liking.
Make it ahead. This tapenade gets even better after a few hours in the fridge. The flavors mingle, get cozy, and deepen beautifully. This is great for a party because you can make a big batch in advance! Try serving it alongside vegan mozzarella sticks for a crowd-pleasing Italian-style appetizer spread.
Also worth trying: our Italian-style vegan sausage and peppers.
More Vegan Appetizers
If you love this olive and sun dried tomato tapenade, be sure to check out these other delicious recipes:
Recipe
Olive & Sun Dried Tomato Tapenade
Savory olive and sun-dried tomato tapenade packed with bold Mediterranean flavors-perfect as a spread, dip, or pasta topper.
Print
Pin
Save
Servings: servings
Ingredients
- ¾ cup Kalamata olives pitted
- ¼ cup sun-dried tomatoes oil cured or not, as preferred (see note)
- ½ cup fresh parsley leaves chopped
- ¼ cup walnuts or pecans roughly chopped
- 1 tablespoon lemon juice or to taste
- ¼ cup water
- fresh parsley or other herbs of choice for garnish
- baguette or crackers optional, for serving
Instructions
- Place all of the tapenade ingredients in a food processor. Pulse on and off until everything is finely and evenly minced.
- If need be add a small amount of additional water so that the mixture adheres.
- Transfer to a serving bowl. Serve with bread or crackers, and fresh herbs for garnish.
Notes
make sure they're moist if not oil-cured; soak in hot water if necessary
Vegan-ize any recipe!Grab our free vegan cheat sheet, packed with my favorite easy substitutions to make any recipe vegan.
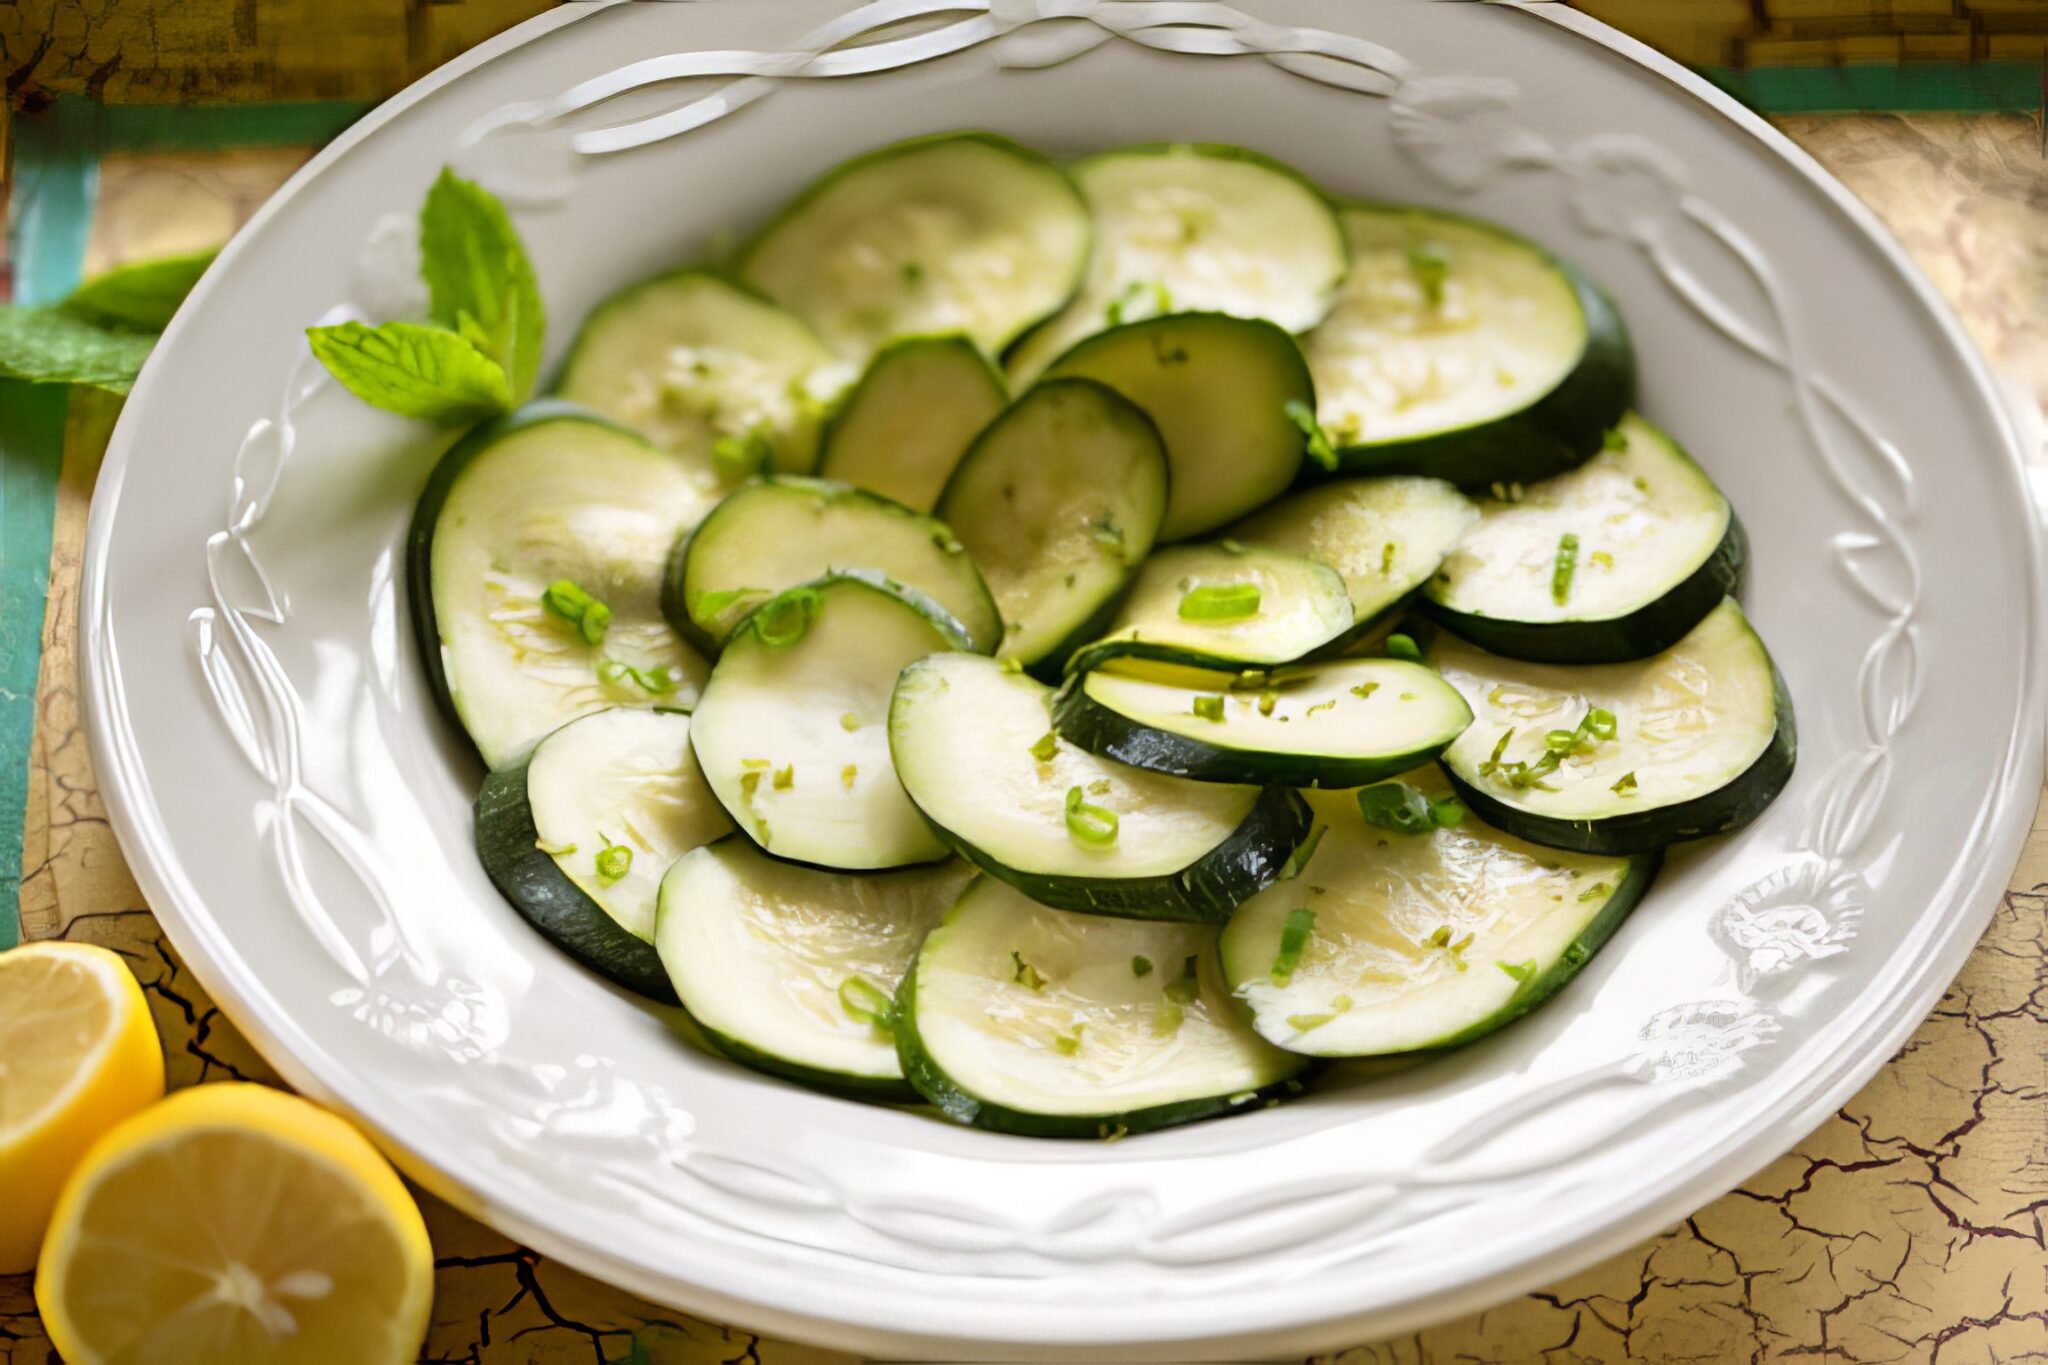
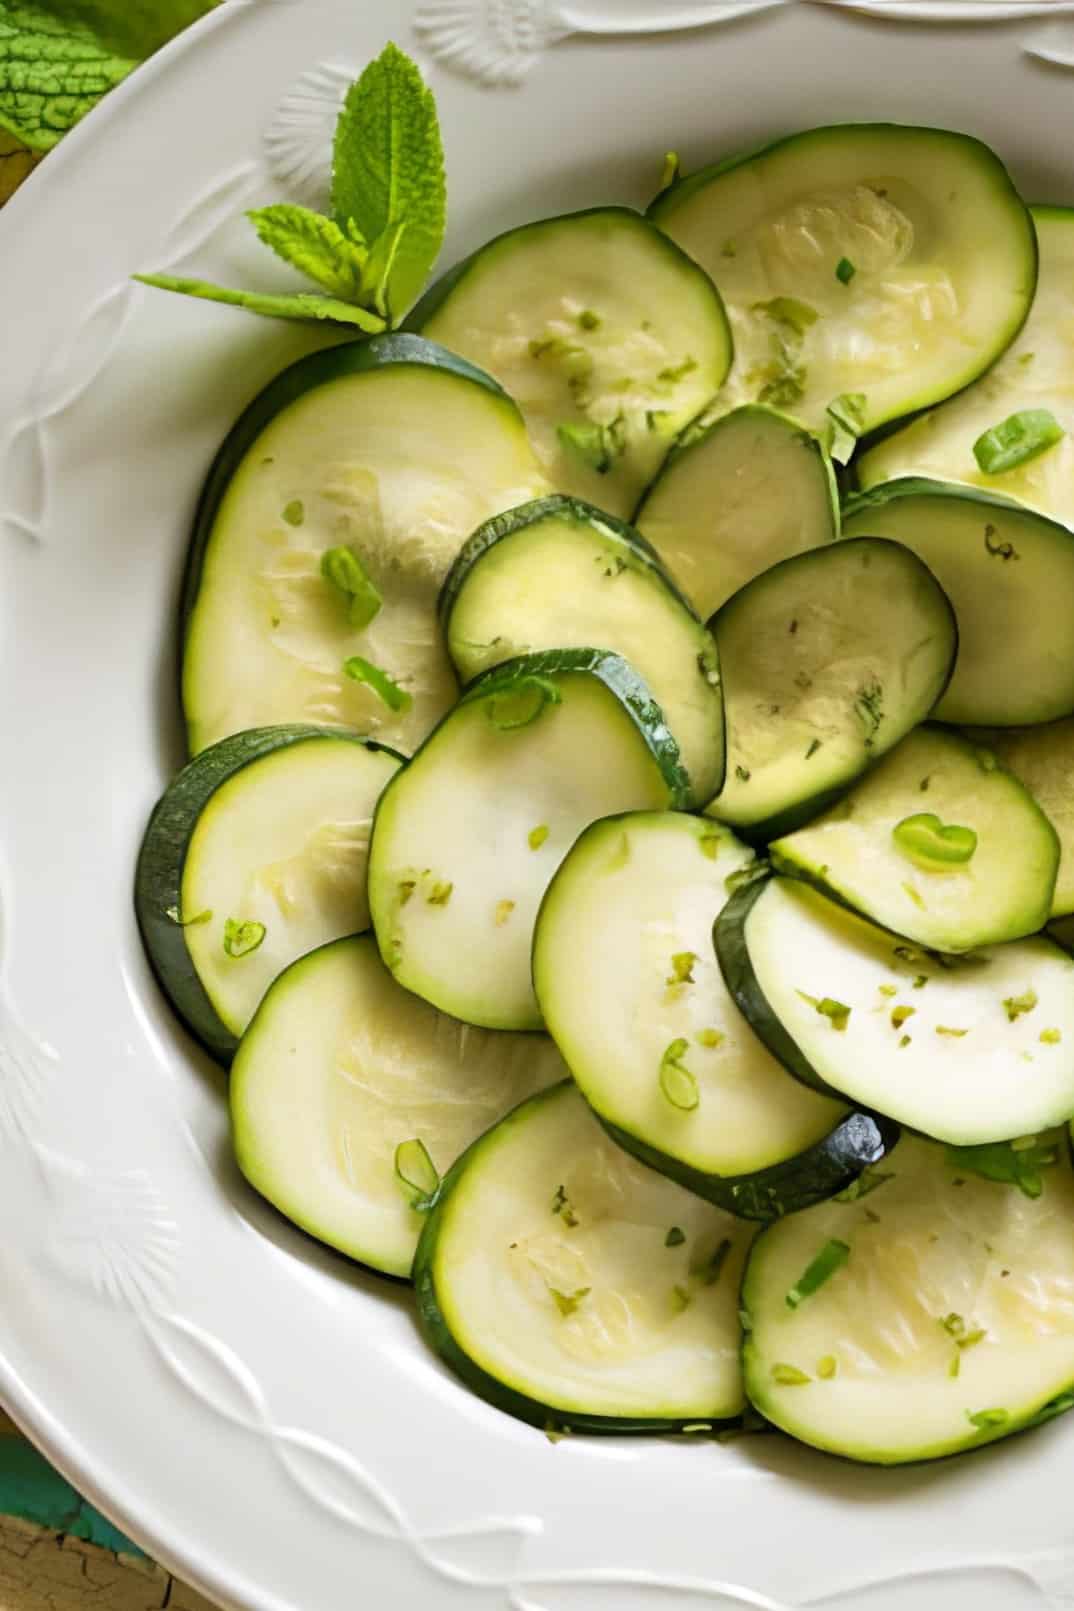
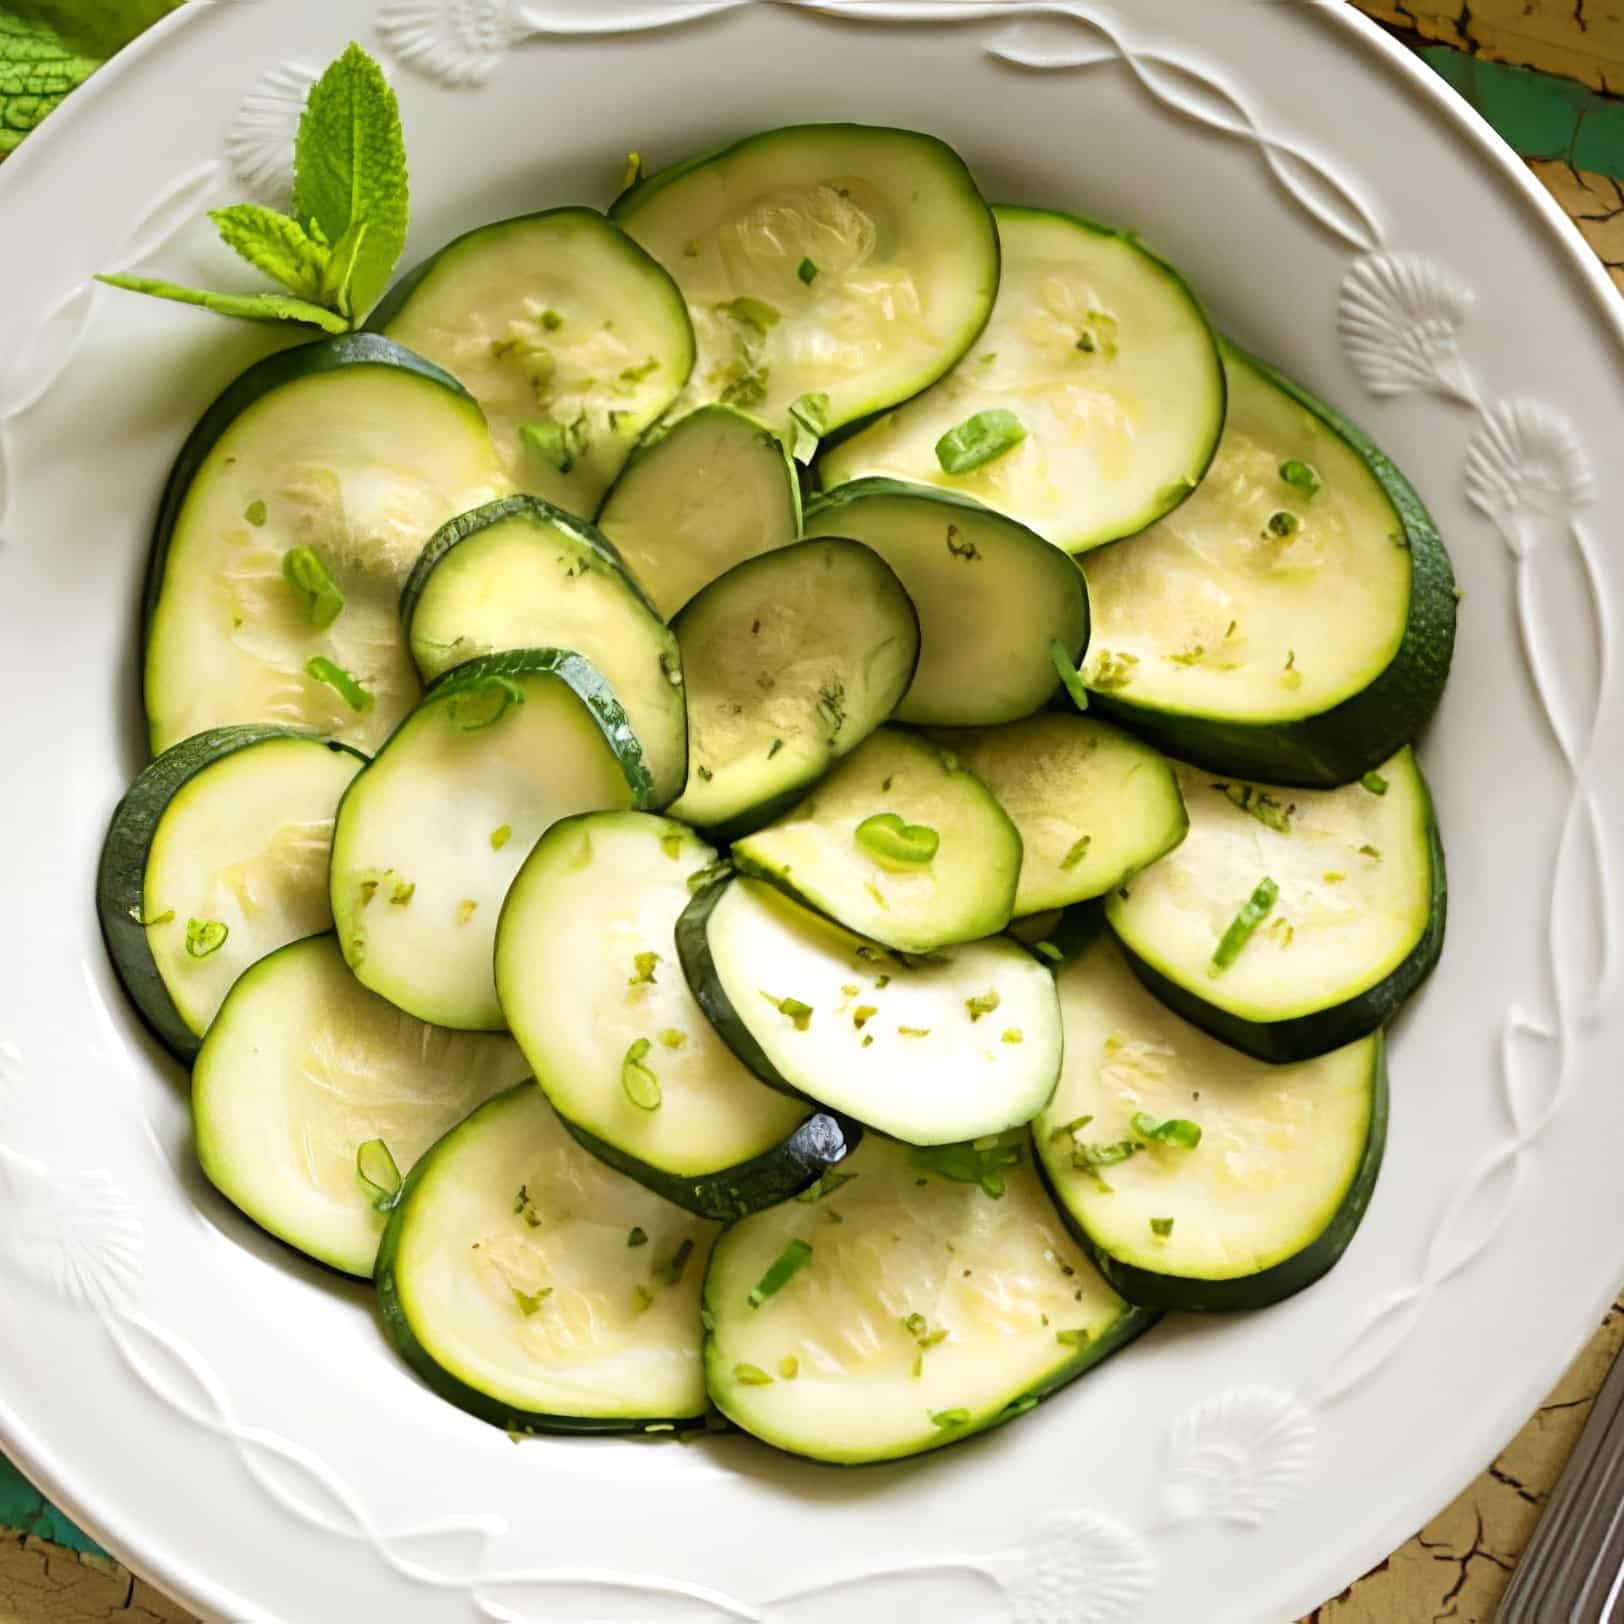
Zucchini with Mint
This simple yet flavorful dish combines tender zucchini with the bright freshness of mint, making it a perfect side for warm-weather meals. Inspired by a Sicilian classic, it's an ideal way to enjoy the abundance of late summer produce.
You know those summer days when zucchini seems to multiply overnight, and you're running out of ideas for what to do with it? Enter this easy recipe - a dish so simple and refreshing, it feels like a little culinary magic.
With crisp zucchini ribbons, a zing of lemon, and the cooling burst of fresh mint, this recipe is proof that less is more. It's the perfect sidekick for lazy summer dinners, impromptu picnics, or anytime you're craving something light and bright.
This Zucchini with Mint Is...
- Quick and Easy: Prepped and ready in just a few minutes, with an hour of chilling time to let the flavors meld.
- Healthy and Light: Low in calories and packed with fresh ingredients.
- Vegan and Gluten-Free: Suitable for various dietary preferences.
- Versatile: Works as a side dish, a salad, or even a light appetizer.
- Flavorful: The combination of lemon, mint, and a touch of sweetness brings out the best in zucchini.
Variations to Explore
Zucchini Ribbons: Use a vegetable peeler or mandoline slicer to create thin ribbons for a different texture and appearance.
Grilled Zucchini: Lightly grill the zucchini slices before tossing with the dressing for a nice smoky flavor.
Additional Herbs: Incorporate fresh dill or cilantro for extra flavor.
Nutty Crunch: Sprinkle toasted pine nuts or slivered almonds on top for extra texture and richness.
Cheesy Touch: Add crumbled vegan feta for a tangy twist.
More Vegan Recipes
If you love this simple zucchini recipe, be sure to check out these other delicious ideas:
- Zucchini Pappardelle
- Zucchini Noodles with Vegan Bolognese
- Sesame Zucchini Noodles
- Vegan Zucchini Lasagna
Recipe
Fresh Zucchini with Mint
This simple Sicilian dish combines tender zucchini with the bright freshness of mint.
Print
Pin
Save
Servings:
Ingredients
- 2 medium zucchinis 1 to 1½ pounds total, thinly sliced (about ⅛-inch thick)
- 2 scallions thinly sliced
- juice of 1 lemon
- 1 tablespoon agave nectar adjust to taste, can substitute maple syrup
- salt and freshly ground black pepper to taste
- ¼ cup fresh mint leaves chopped, can add more to taste
Instructions
- Combine Ingredients: Place zucchini slices in a mixing bowl. Add scallions, lemon juice, agave nectar (or sugar), salt, and pepper. Toss to combine.
- Chill: Cover and refrigerate for 1 hour to allow flavors to meld.
- Add Mint: Just before serving, stir in the chopped fresh mint.
- Serve: Arrange zucchini in overlapping circles for a decorative presentation, or simply serve as is. Enjoy!
Nutrition (Estimate per Serving)
Calories: 25kcalCarbohydrates: 5gProtein: 1gFat: 0.3gSaturated Fat: 0.1gPolyunsaturated Fat: 0.1gMonounsaturated Fat: 0.01gSodium: 7mgPotassium: 192mgFiber: 1gSugar: 4gVitamin A: 250IUVitamin C: 14mgCalcium: 18mgIron: 0.4mg
Vegan-ize any recipe!Grab our free vegan cheat sheet, packed with my favorite easy substitutions to make any recipe vegan.
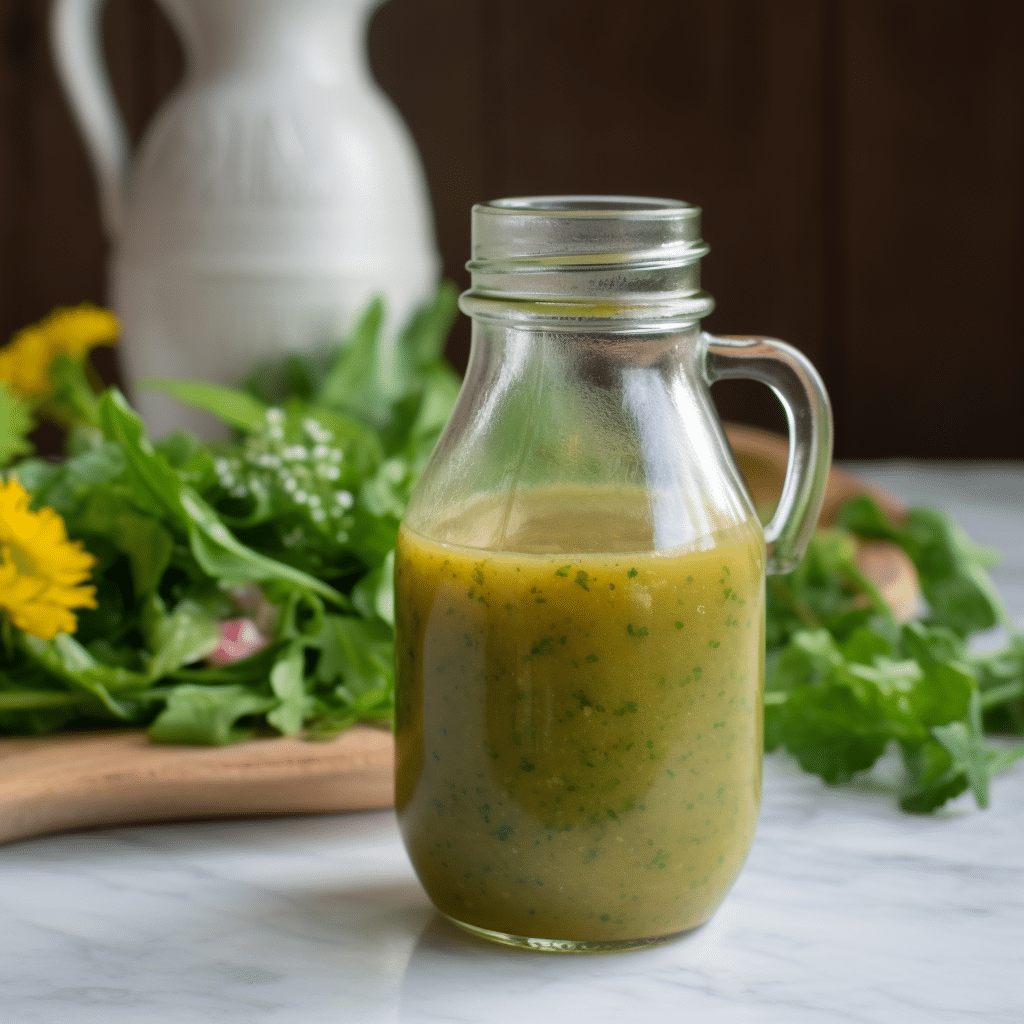
Garlic Mustard Vinaigrette
This Garlic Mustard Vinaigrette proves that a simple dressing can pack a serious flavor punch. So, go ahead - shake things up and drizzle it on everything. Your taste buds will thank you!
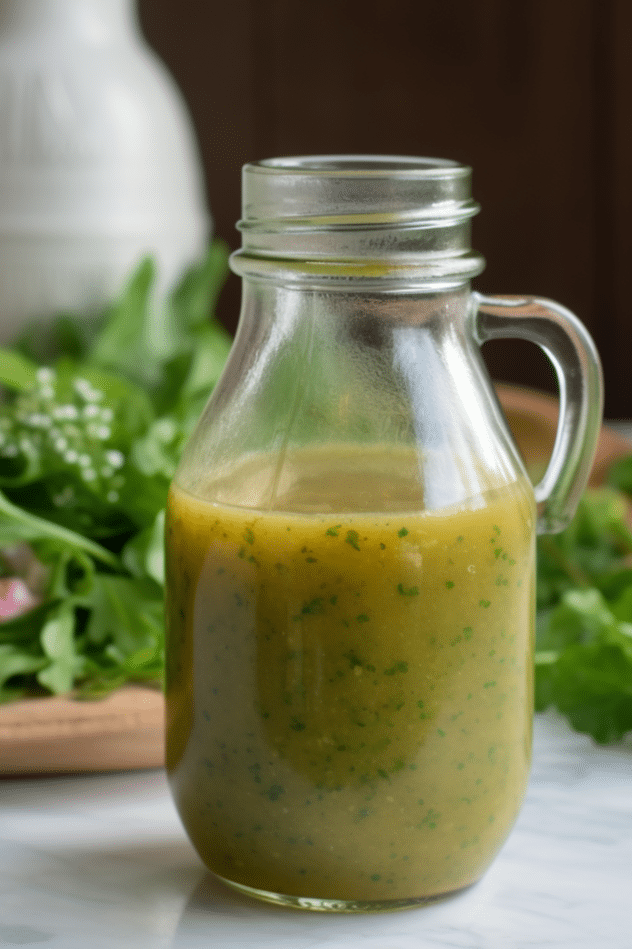
If you've ever wondered what separates a good salad from a great one, the answer is often in the dressing. Enter this Garlic Mustard Vinaigrette - a simple, shake-and-go blend that's packed with bold flavors.
It's bright, garlicky (if you want it to be), and full of herby goodness, making it perfect for everything from crisp greens to roasted veggies.
This vinaigrette isn't just for salads, though. Drizzle it over grilled asparagus, use it as a marinade for tempeh, or even toss it with warm roasted potatoes for a quick, flavorful side dish. Trust me, you'll want to keep a bottle of this in your fridge at all times.
Why You'll Love This Garlic Mustard Vinaigrette
- Quick and Easy: Made in minutes with just a cruet or jar.
- Flavor-Packed: A zesty combo of garlic, mustard, and herbs.
- Customizable: Adjust the mustard, garlic, or herbs to suit your taste.
- Versatile: Perfect for salads, marinades, and roasted veggies.
- Make-Ahead Friendly: Stores beautifully in the fridge for up to a week.
Ways to Use this Vinaigrette
This Garlic Mustard Vinaigrette isn't just a salad topper-it's a multitasking flavor hero! Here are some vegan-friendly ways to use it:
Salad Star: Toss with mixed greens, arugula, spinach, or kale for a bold, tangy kick. Add roasted chickpeas and avocado for a hearty vegan salad, or try it tossed with our vegan Greek pasta salad or our tabbouleh. Check out my fave vegan salad recipes here.
Grain Bowl Drizzle: Pour it over quinoa, farro, or couscous bowls loaded with roasted vegetables, nuts, and seeds.
Veggie Roasts: Use it as a marinade for veggies like zucchini, bell peppers, or mushrooms before roasting or grilling.
Potato Upgrade: Toss warm roasted or boiled potatoes with the vinaigrette for an instant potato salad that's light and zesty.
Quick Pickle: Marinate thinly sliced cucumbers, carrots, or radishes in the vinaigrette for a quick, tangy pickle.
Tofu Marinade: Soak tofu slabs in the vinaigrette before grilling, baking, or pan-frying for a savory burst of flavor.
Bread Dipper: Serve it as a dip for crusty bread alongside a plant-based charcuterie board.
Pasta Salad Hero: Mix it into a cold pasta salad with cherry tomatoes, olives, and fresh herbs for a Mediterranean-inspired dish.
Roasted Chickpeas: Toss cooked chickpeas with the dressing and roast until crispy for a protein-packed snack or salad topper.
More Tasty Recipes
If you love this simple vinaigrette dressing, be sure to check out all my vegan sauces and dressings, plus these other delicious recipes:
Recipe
Garlic Mustard Vinaigrette
This simple Garlic Mustard Vinaigrette packs a serious flavor punch.
Print
Pin
Save
Servings: servings
Ingredients
- ½ cup extra-virgin olive oil
- Juice of ½ lemon
- ¼ cup balsamic vinegar
- 2 to 3 tablespoons Dijon mustard to taste
- 1 clove garlic crushed, optional
- ¼ teaspoon dried oregano
- ¼ teaspoon dried dill
- ¼ teaspoon dried basil
- salt and freshly ground black pepper to taste
Instructions
- ½ cup extra-virgin olive oil
- Juice of ½ lemon
- ¼ cup balsamic vinegar
- 2 to 3 tablespoons grainy mustard, to taste
- 1 clove garlic, crushed, optional
- ¼ teaspoon each: dried oregano, dill, and basil
- Freshly ground black pepper to taste
Notes
This recipe makes approximately one cup of dressing.
Nutrition (Estimate per Serving)
Calories: 130kcalCarbohydrates: 2gProtein: 0.2gFat: 14gSaturated Fat: 2gPolyunsaturated Fat: 1gMonounsaturated Fat: 10gSodium: 44mgPotassium: 19mgFiber: 0.2gSugar: 1gVitamin A: 6IUVitamin C: 0.2mgCalcium: 8mgIron: 0.3mg
Vegan-ize any recipe!Grab our free vegan cheat sheet, packed with my favorite easy substitutions to make any recipe vegan.
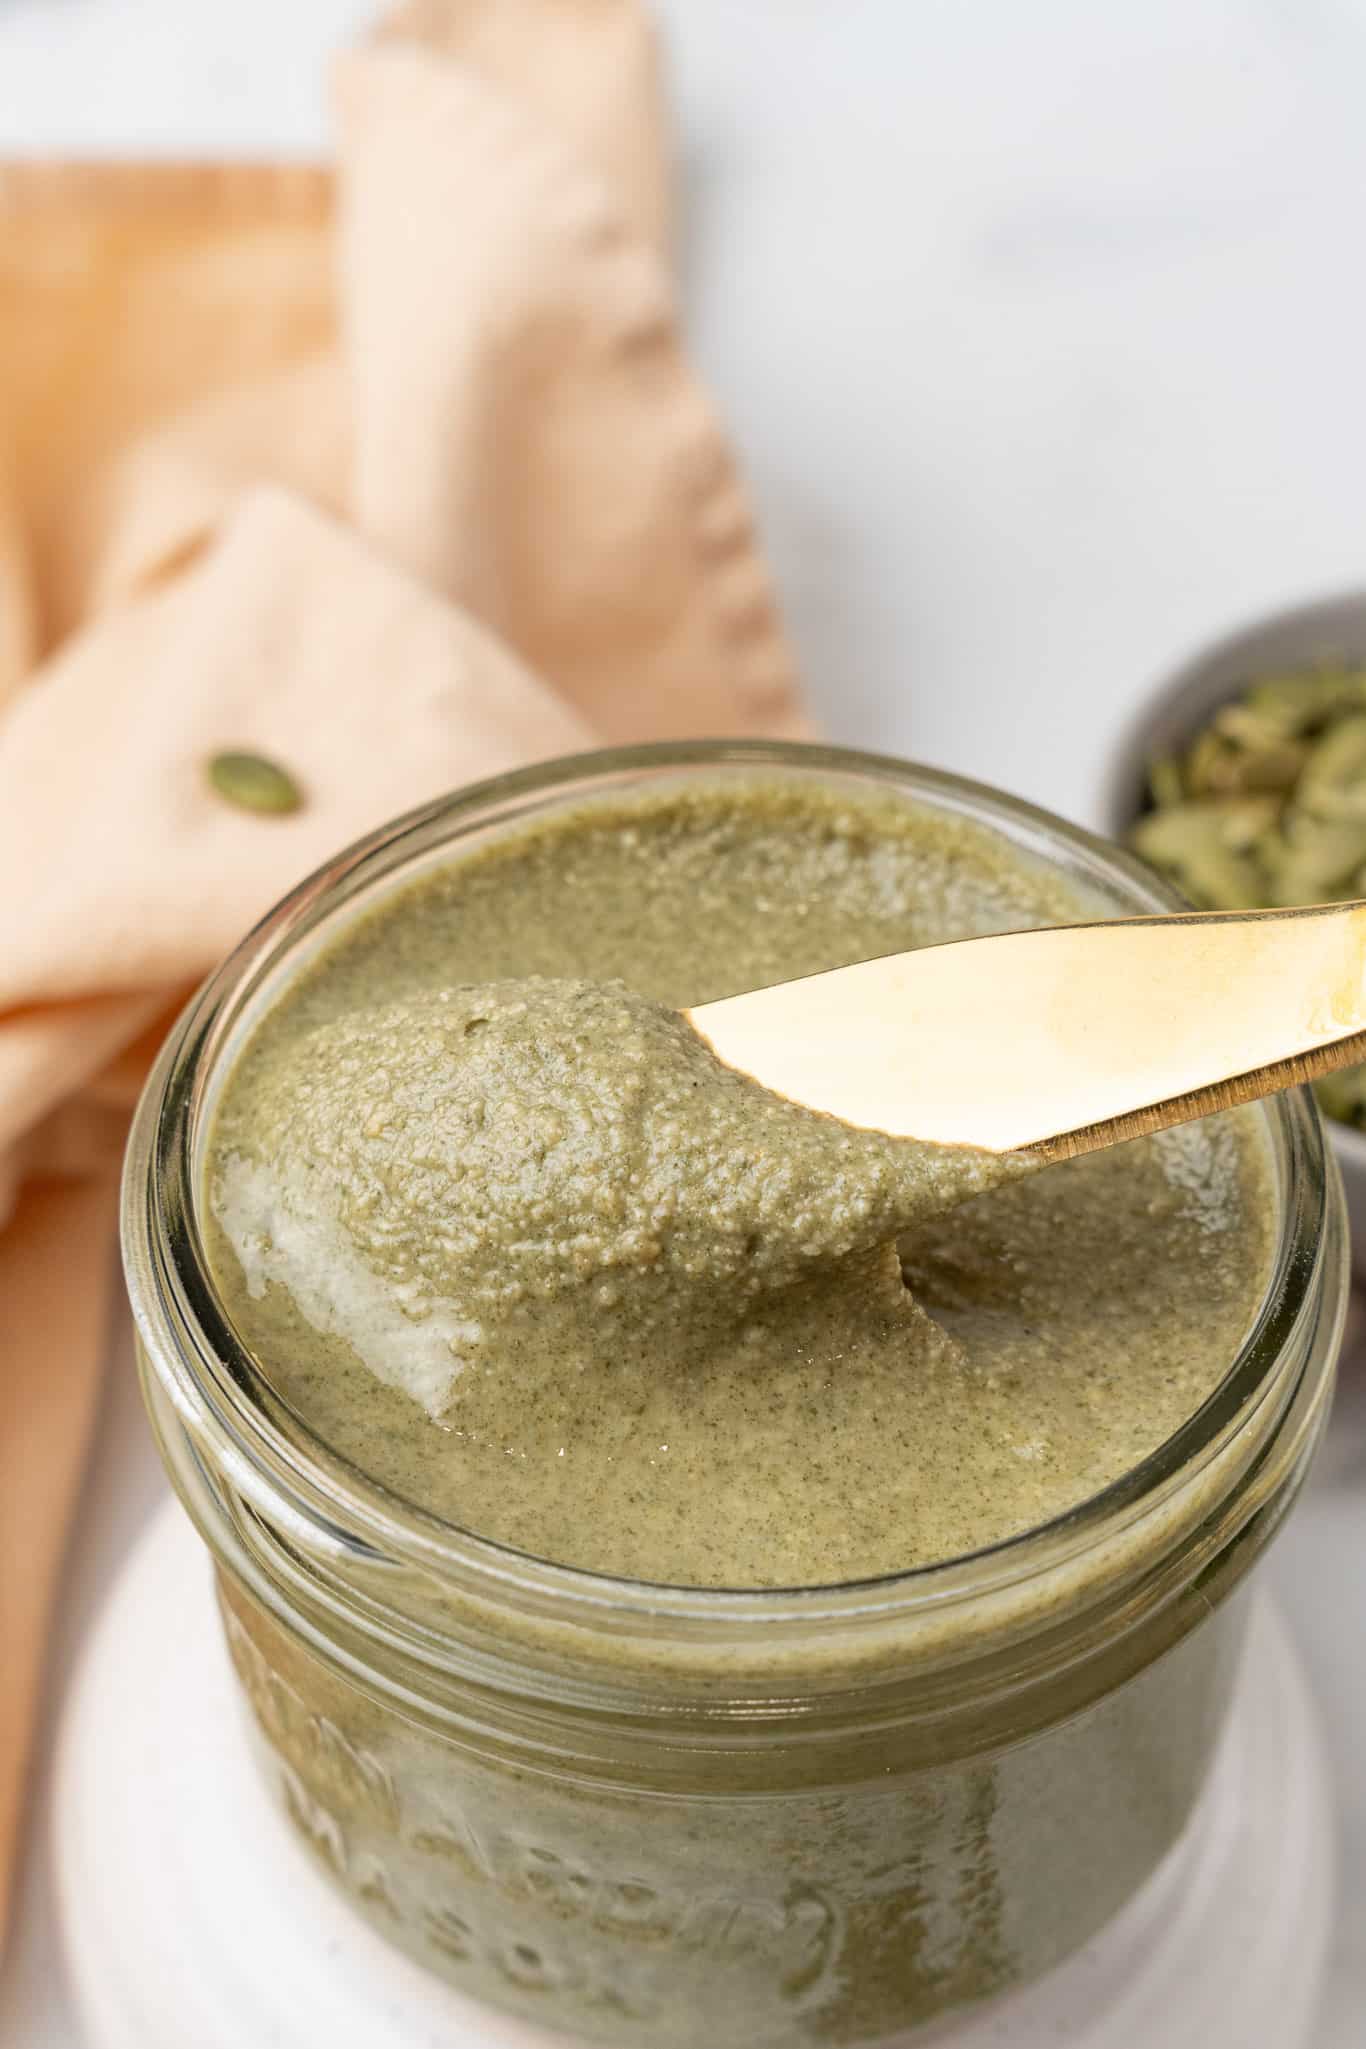
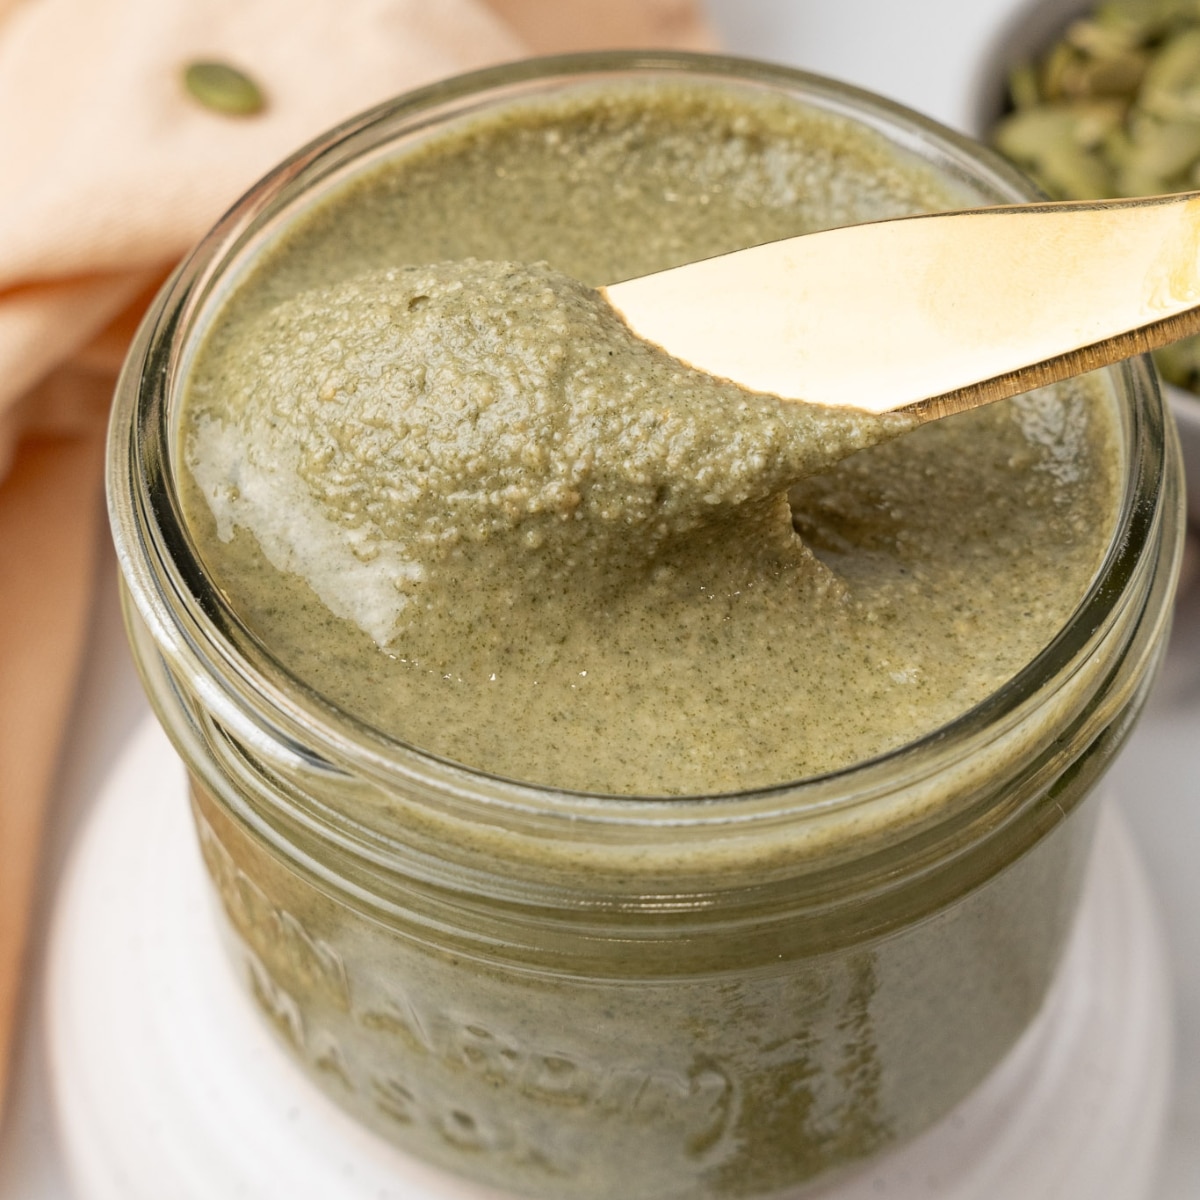
Pumpkin Seed Butter
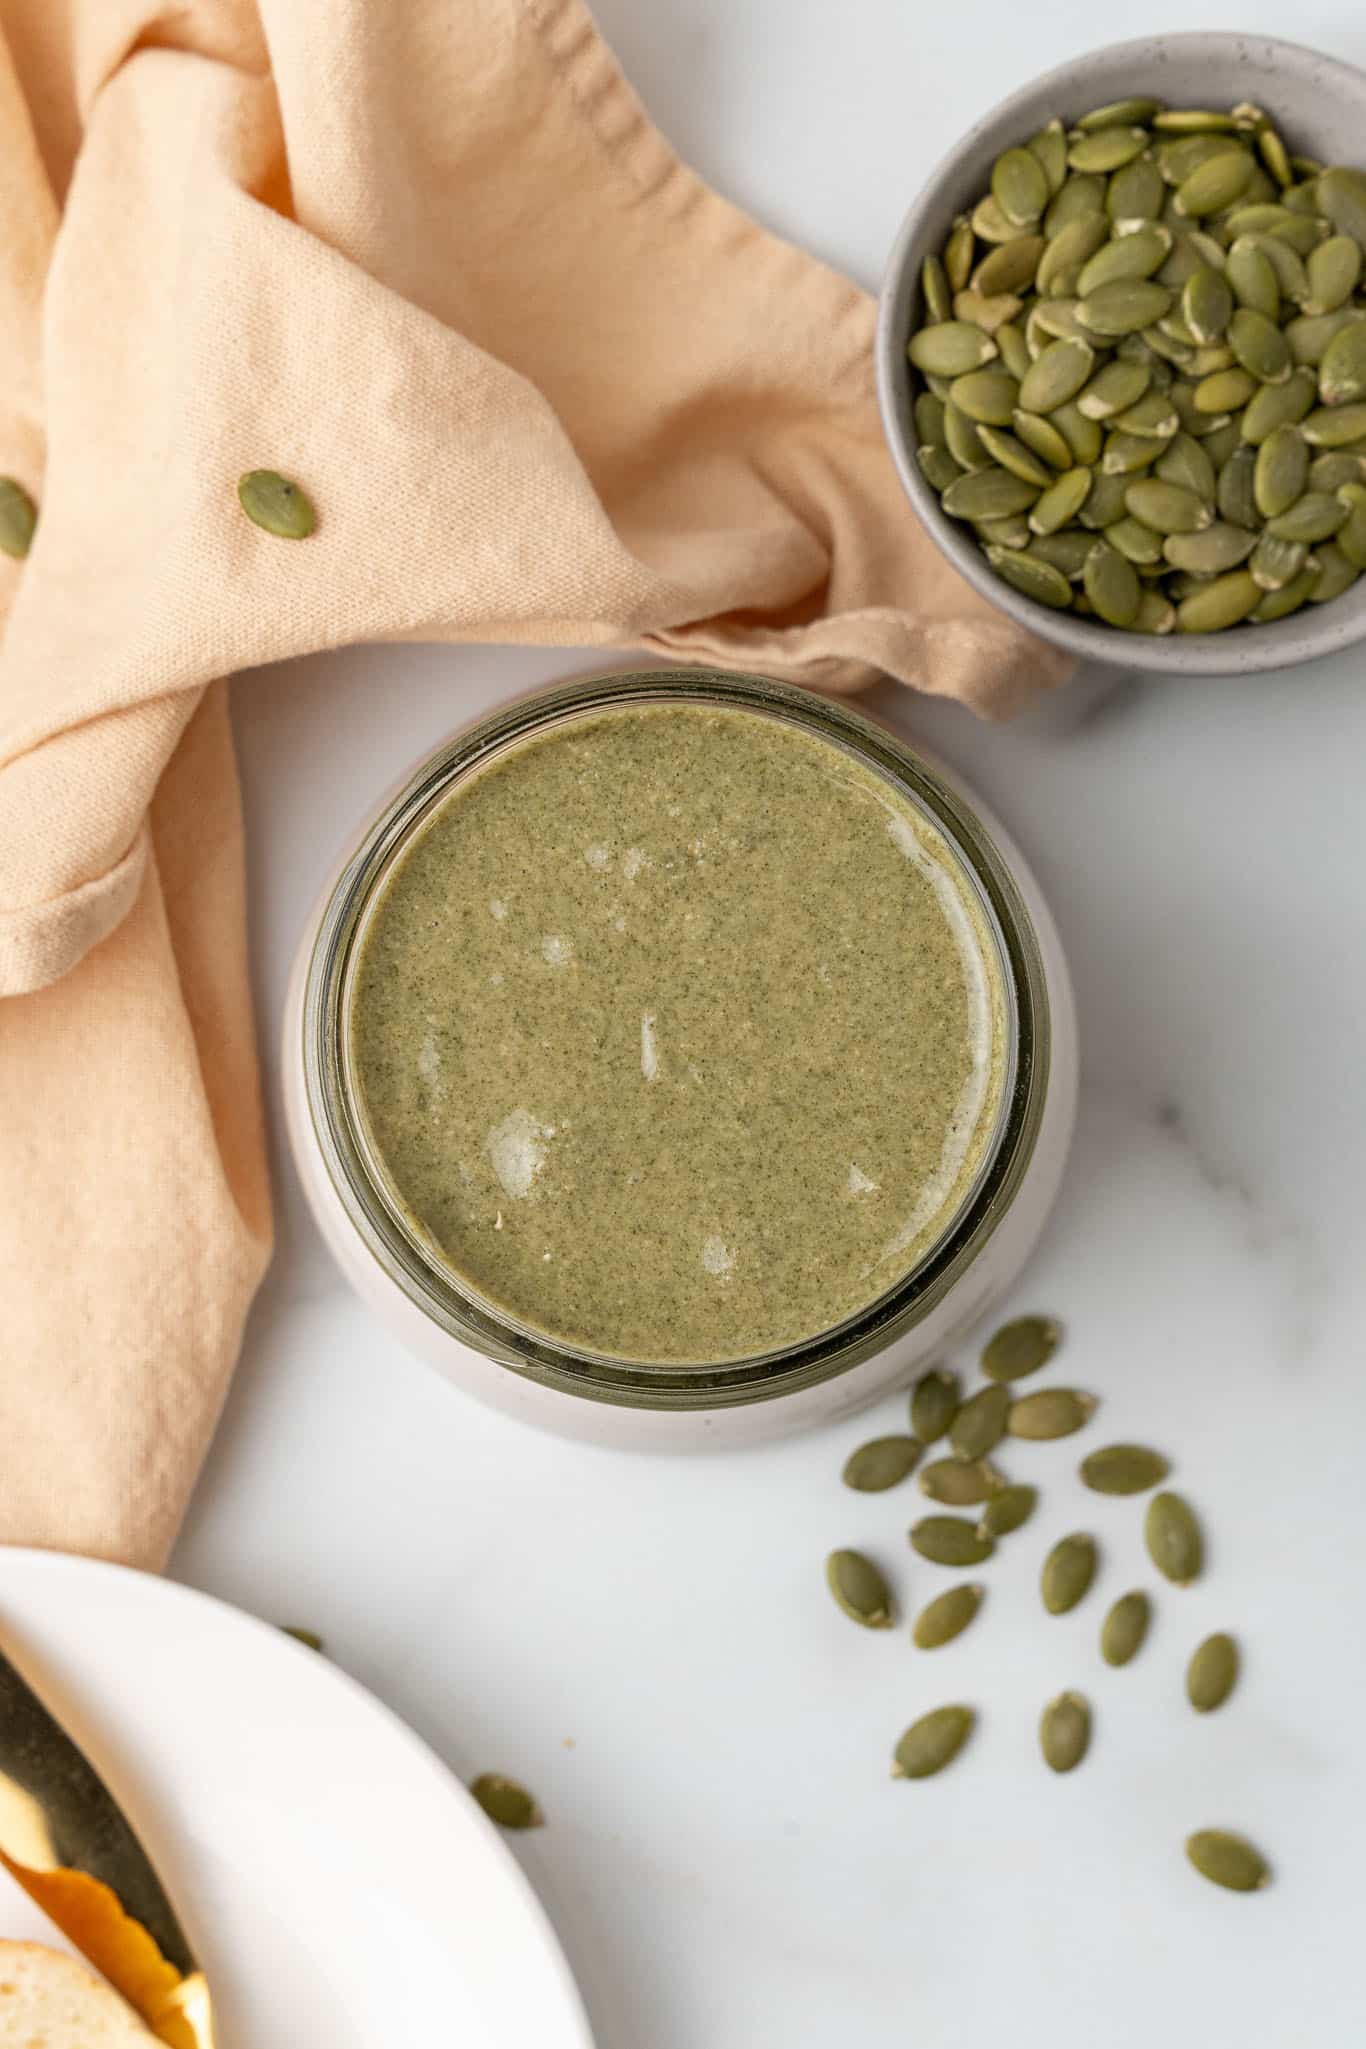
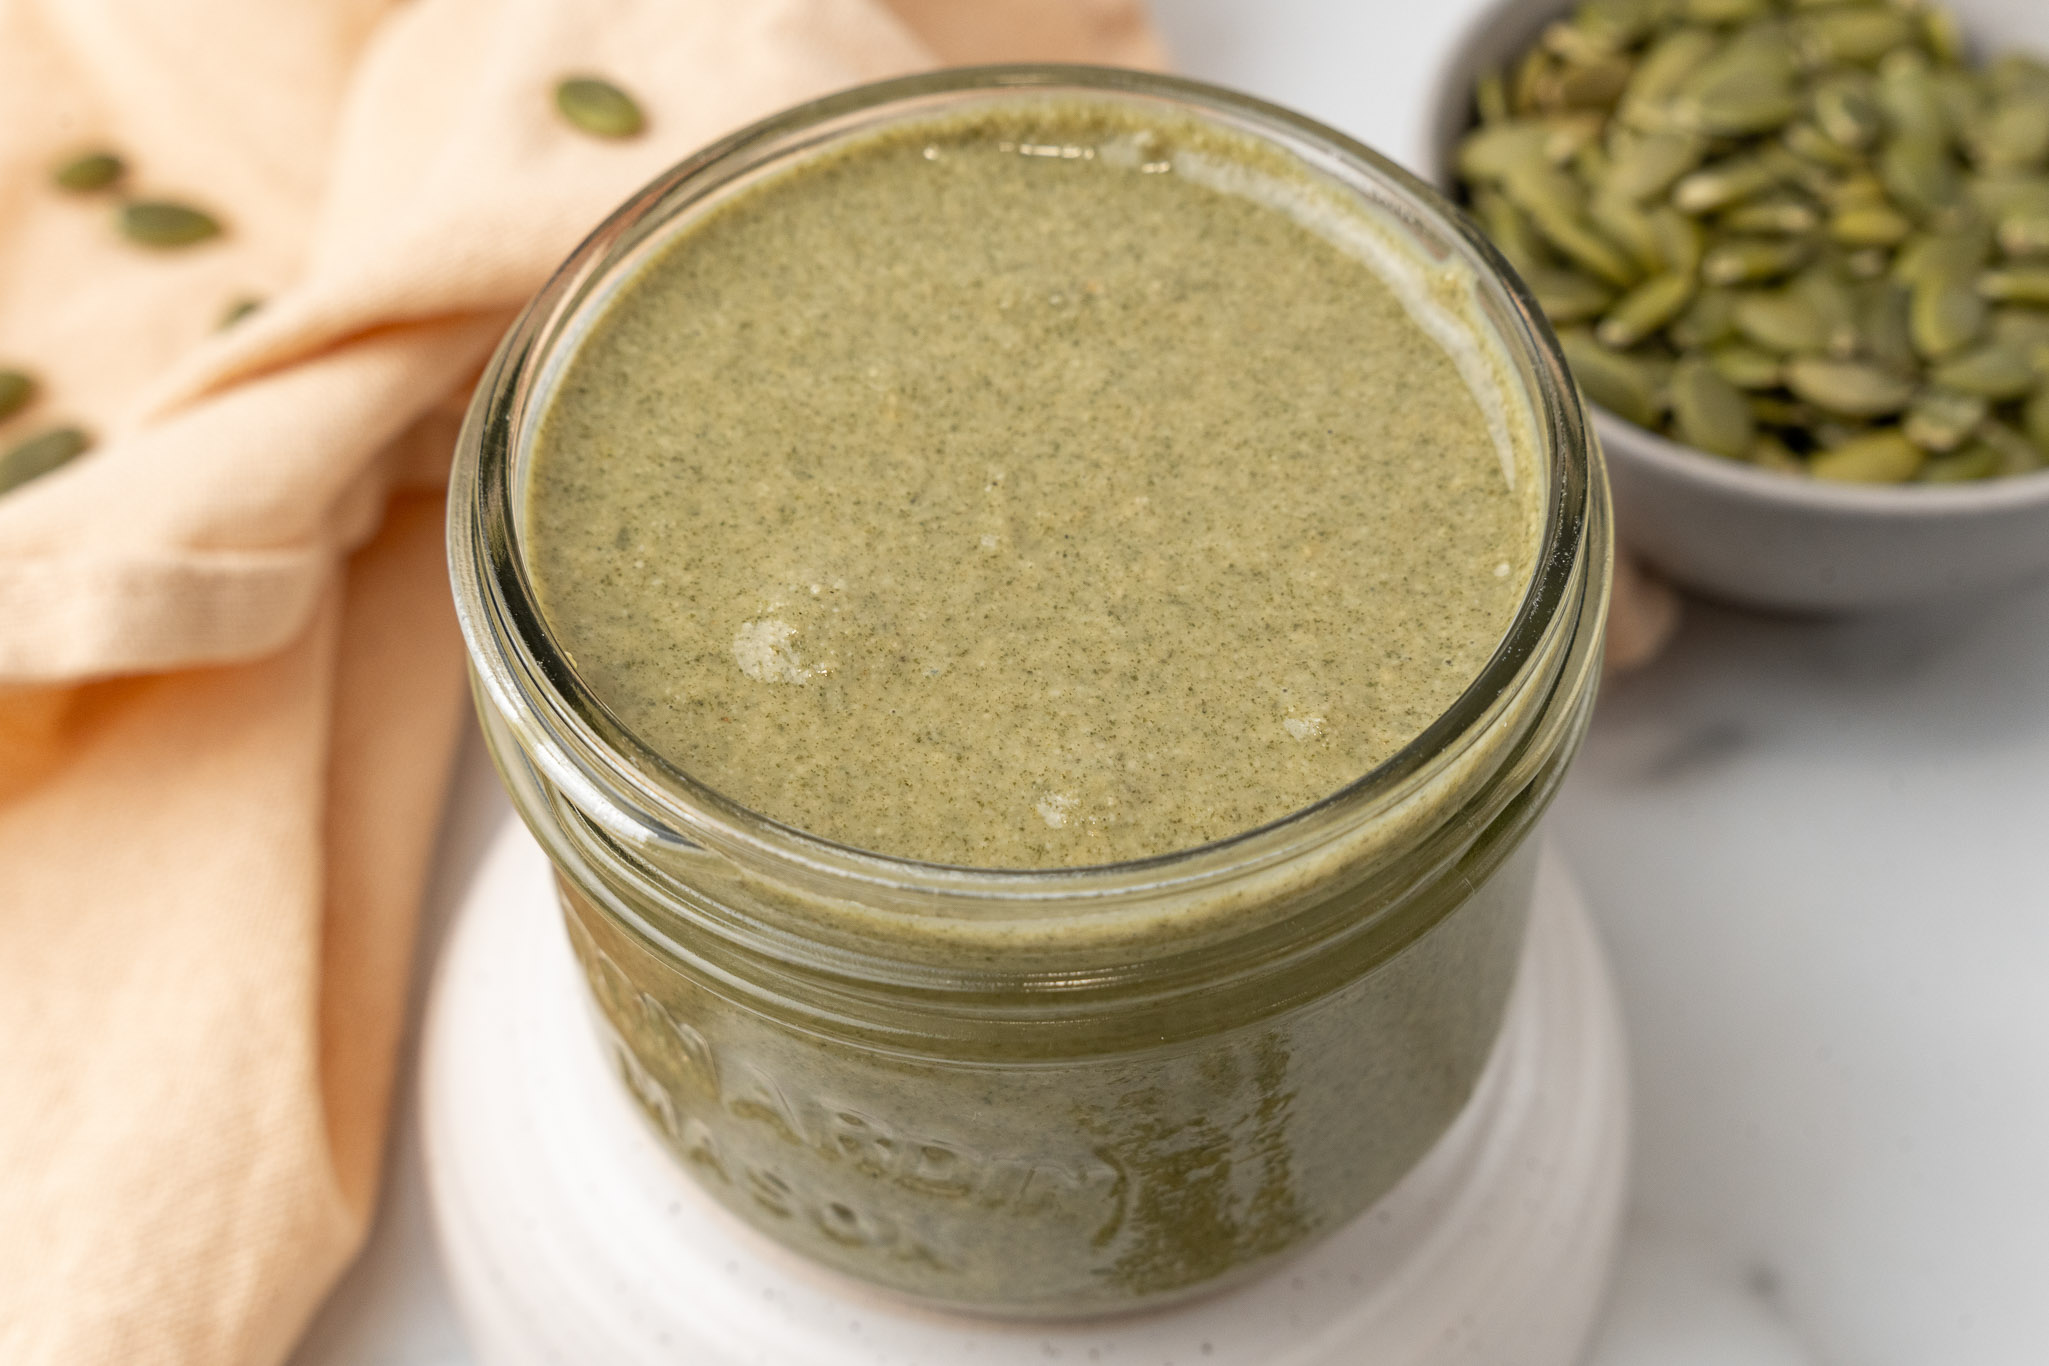
If you're looking for a creamy, nut-free alternative to traditional nut butters, you've got to try this homemade Pumpkin Seed Butter!
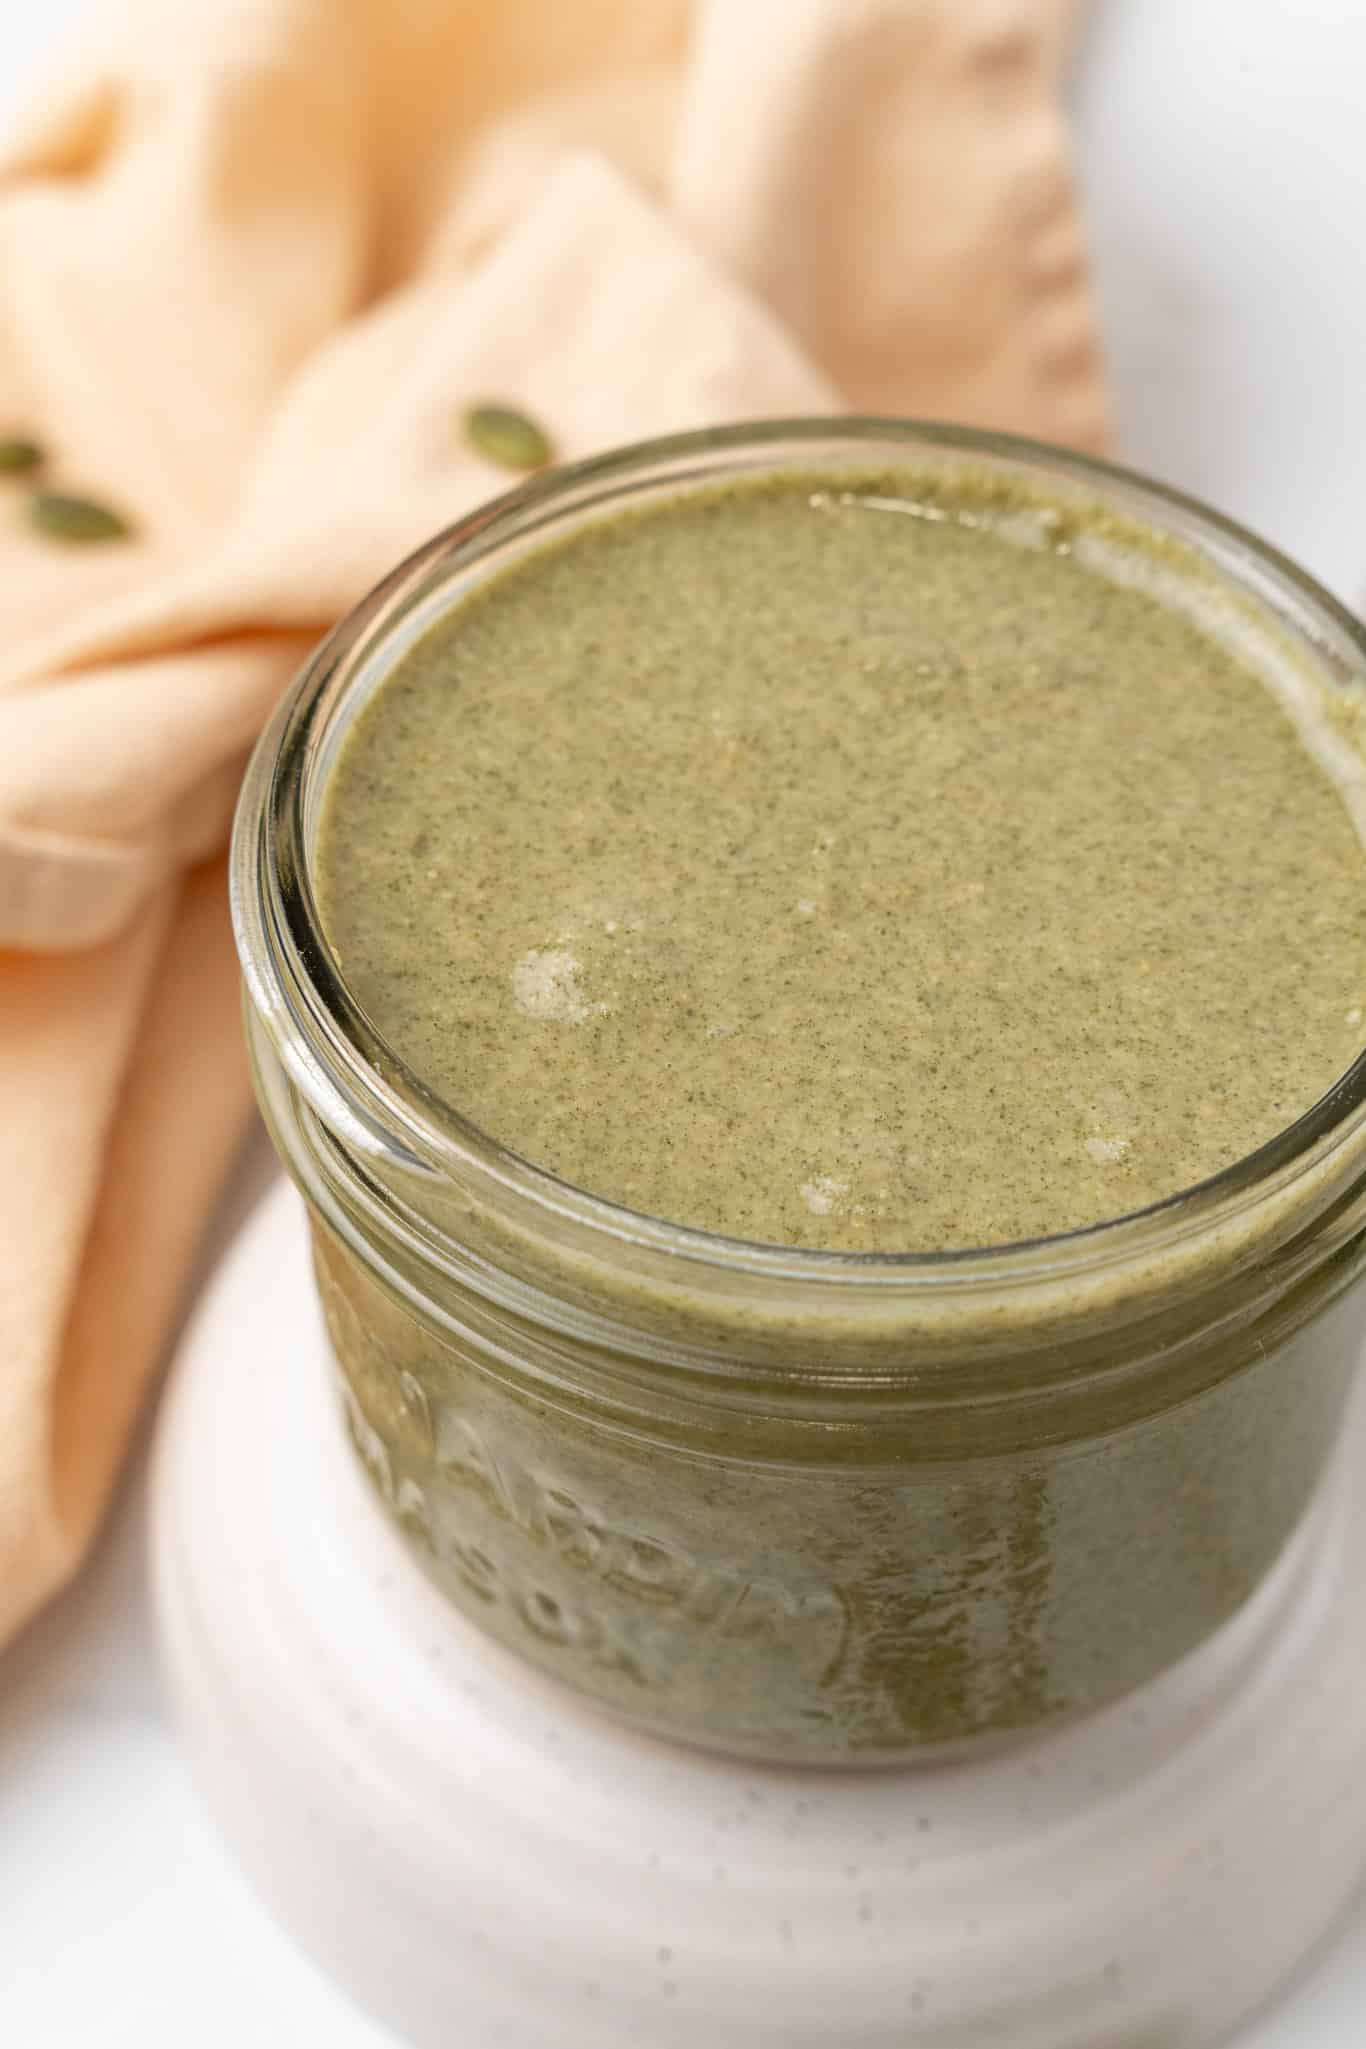
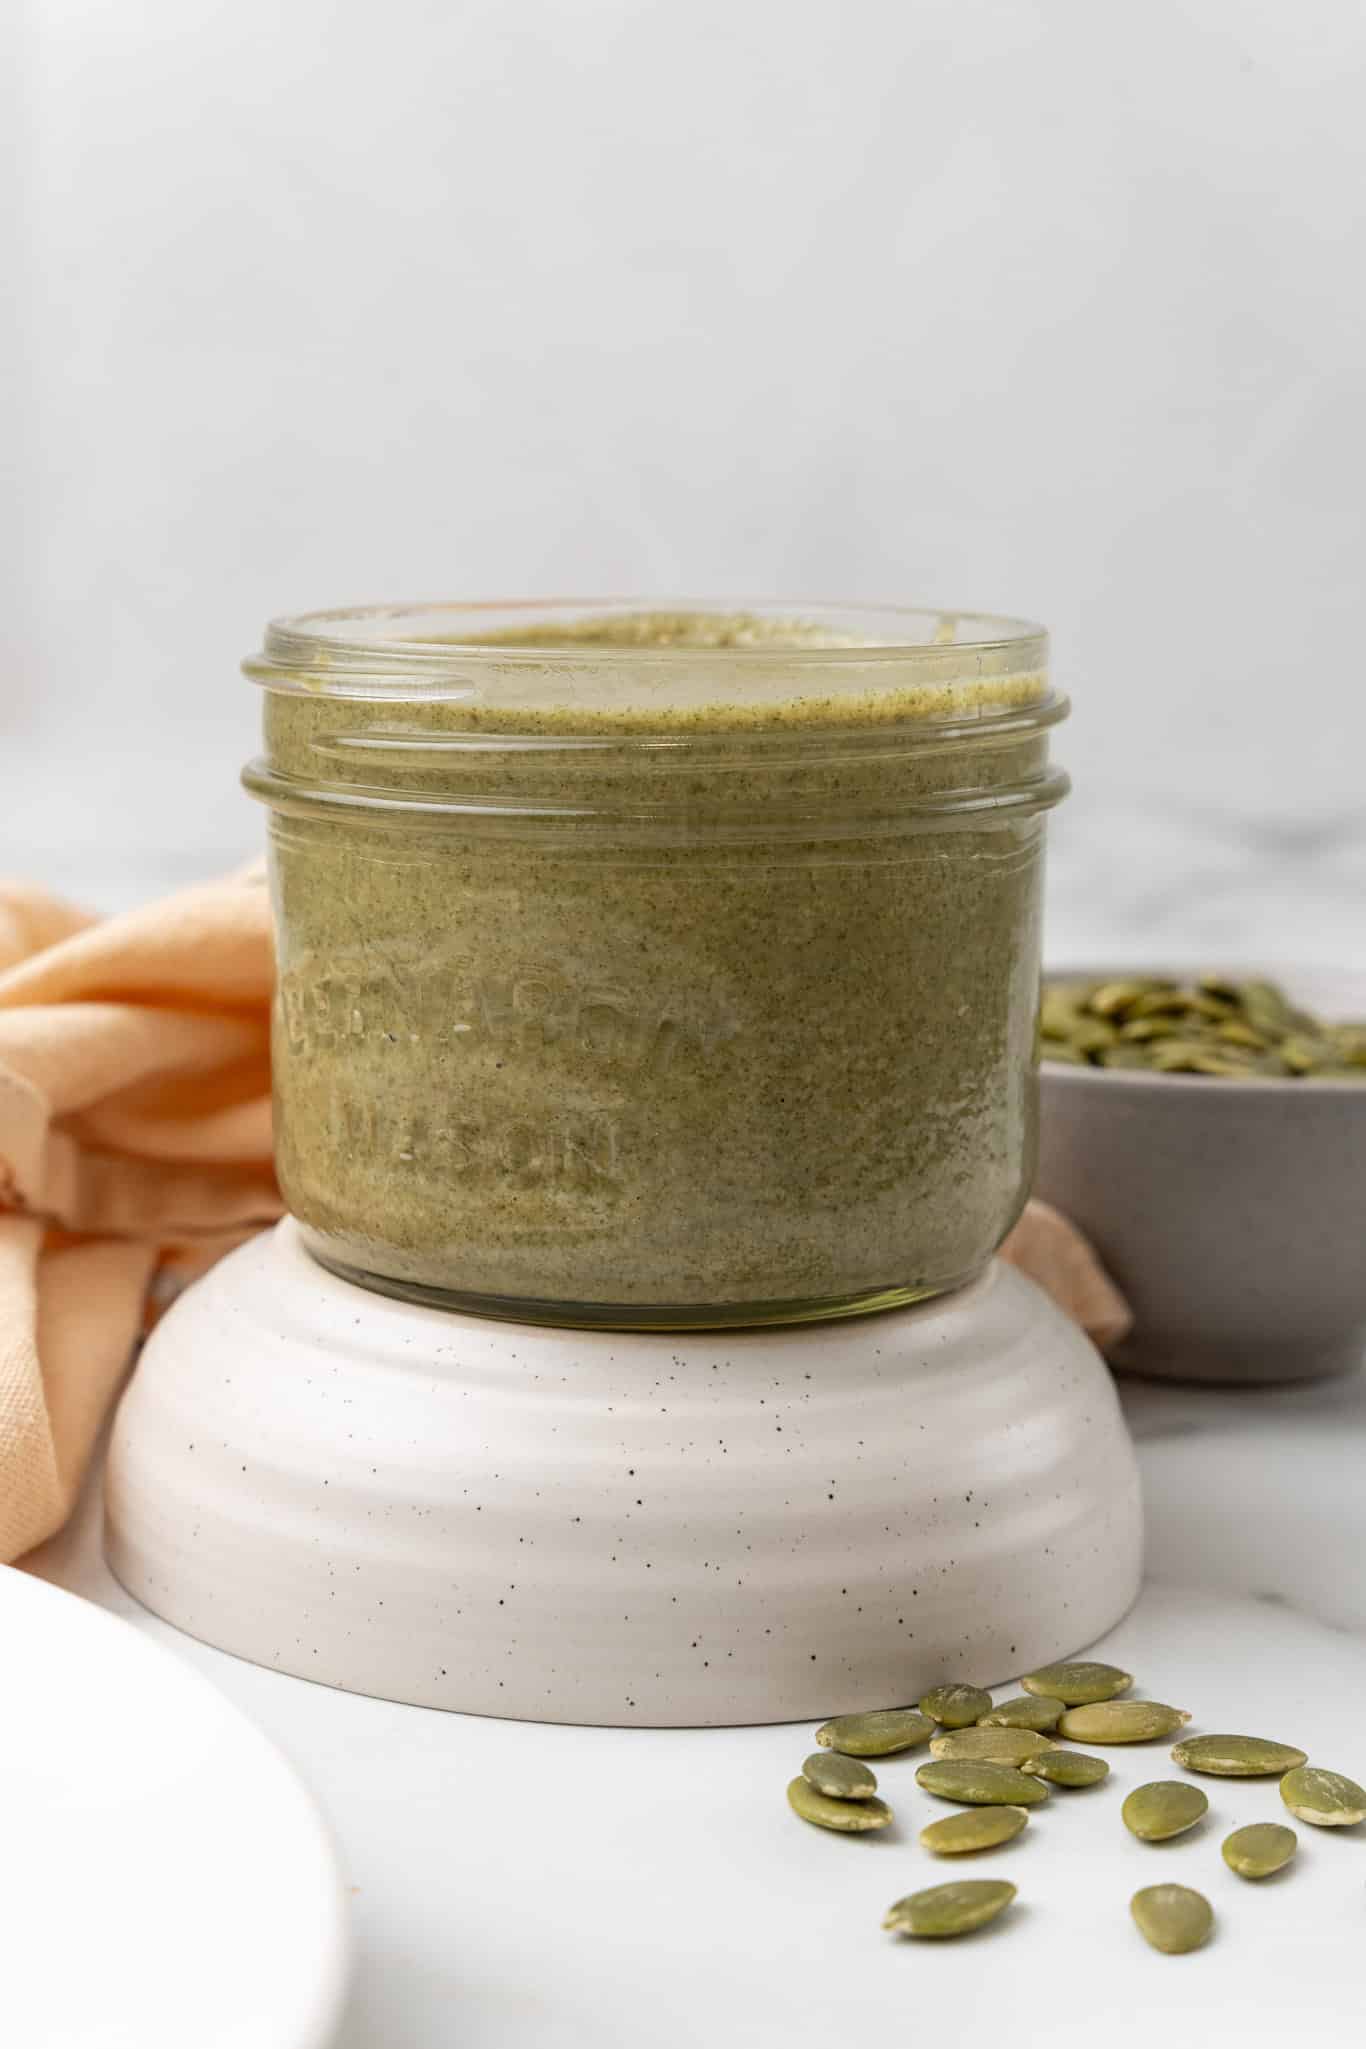
With just a few simple ingredients - pumpkin seeds, oil, and a pinch of salt - you can whip up a batch of this rich, green-hued spread. It's a delicious vegan alternative to traditional nut butters.
Not only is it super easy to make, but pumpkin seed butter is also loaded with nutrients like healthy fats, protein, and magnesium.
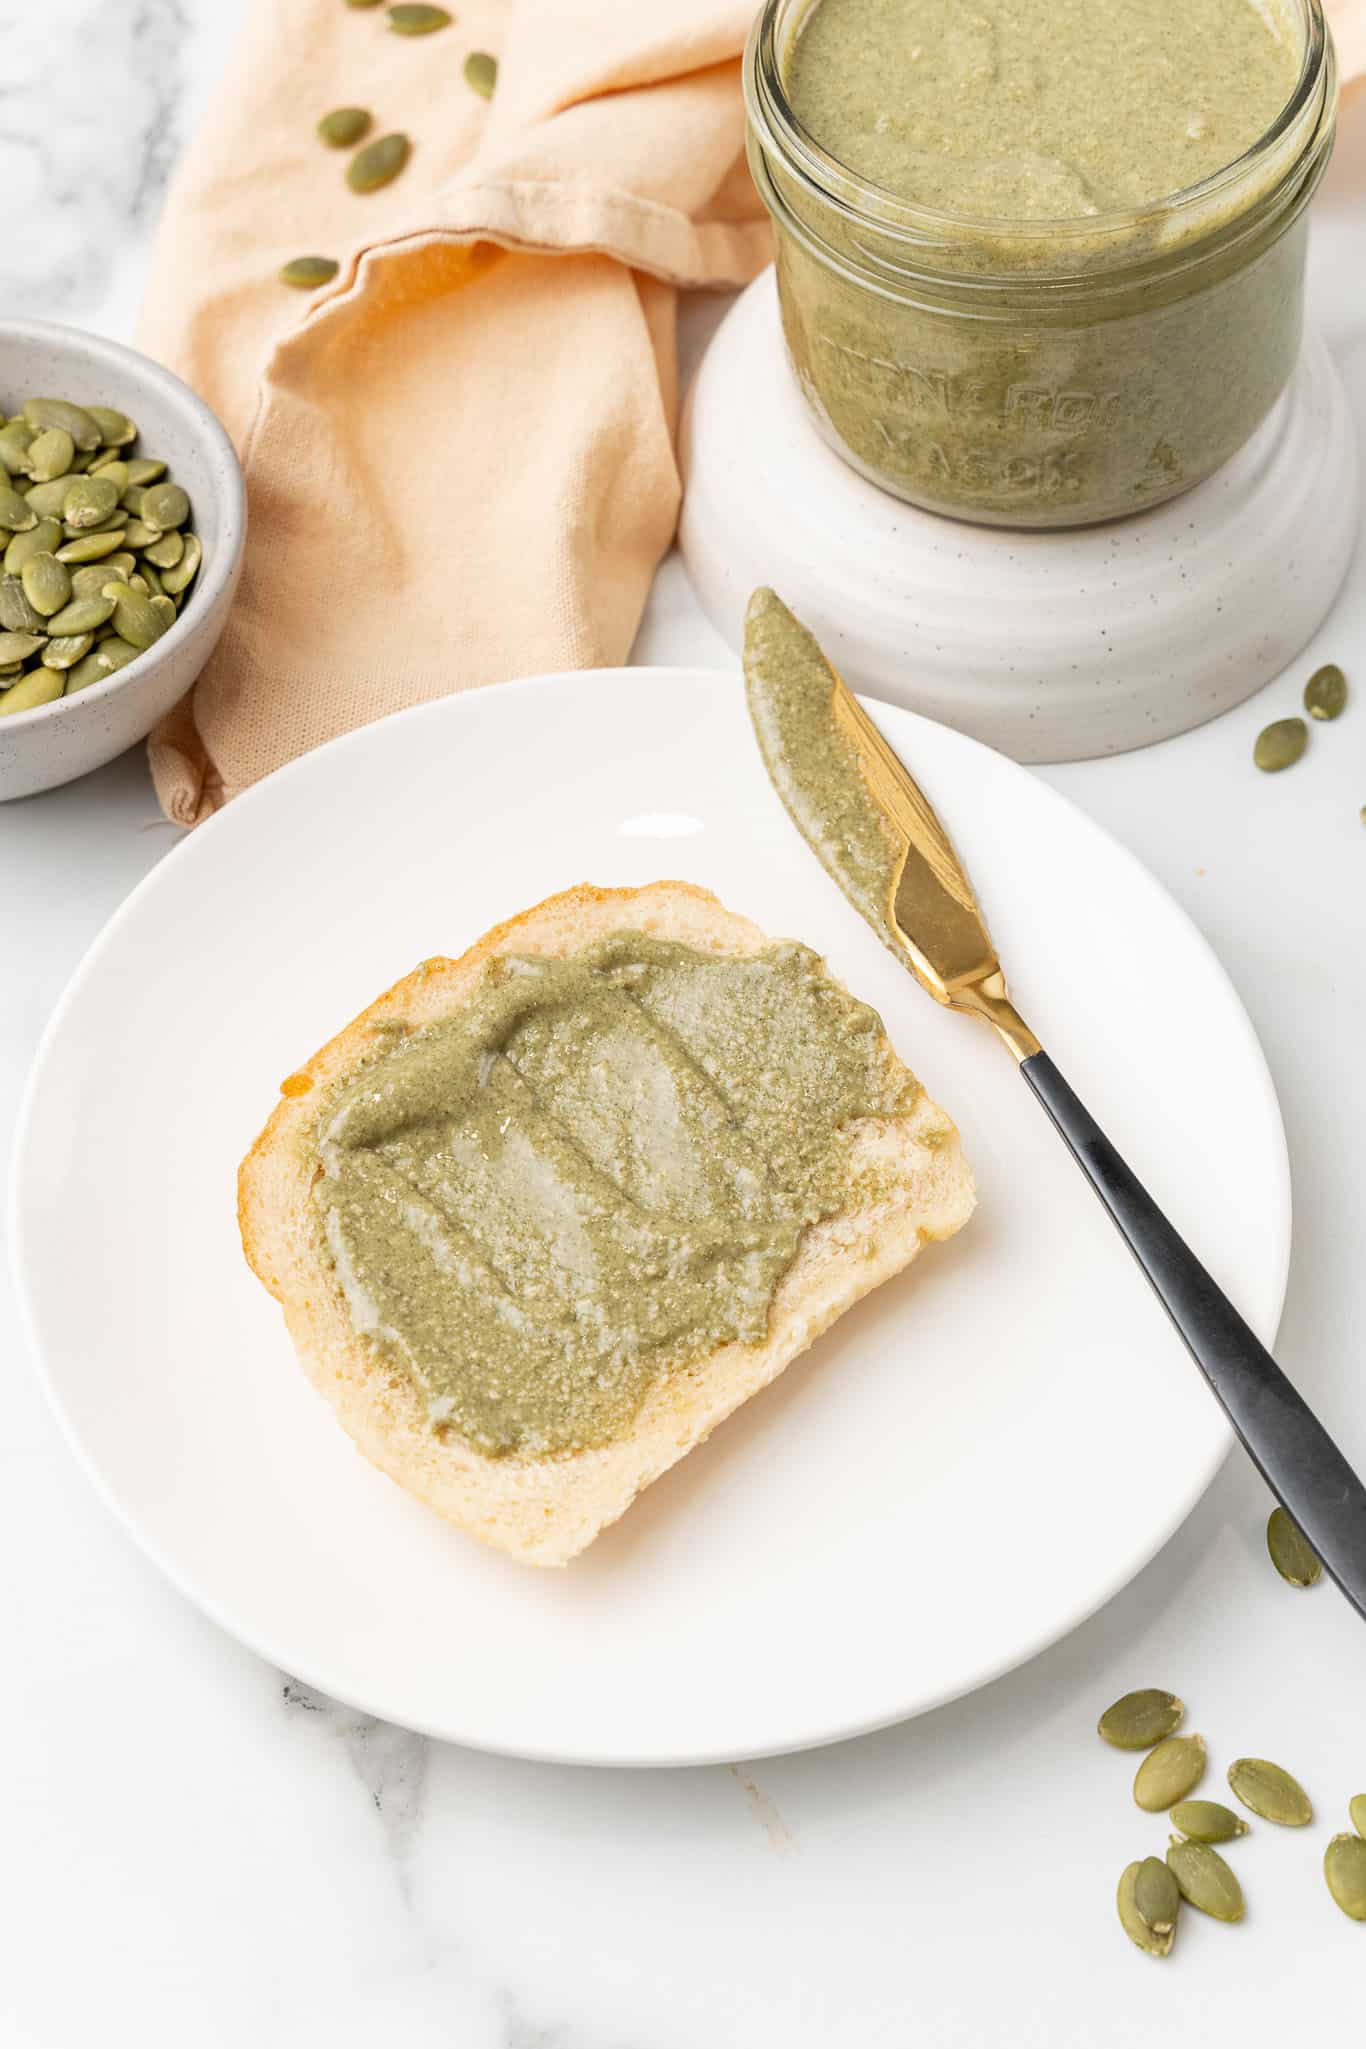
Plus, it's wonderfully versatile. Spread it on toast, drizzle it over oatmeal, or add a spoonful to your smoothies for an extra boost of flavor and nutrition. And did I mention it's ridiculously easy to make? Let's dive in!
Why I Love Pumpkin Seed Butter
There's something satisfying about transforming a handful of raw pumpkin seeds into a smooth, creamy butter with just a little time and patience. It makes me feel like some kind of homesteading rockstar.
I love that it's a great alternative for those with nut allergies or for when I want to switch up my usual peanut butter or almond butter routine.
And let's not forget - it's green, which makes it visually fun and unique! Every time I spread this pumpkin butter on toast or stir it into a recipe, it's a conversation starter.
This Pumpkin Seed Butter Recipe is...
- Vegan: As always, 100% plant based.
- Nut-Free: Perfect for anyone with allergies or sensitivities to nuts.
- Versatile: Spread it, drizzle it, or use it as a dip.
- Nutrient-Dense: Packed with healthy fats, protein, and essential minerals like magnesium and zinc.
- Easy to Make: With just three simple ingredients and a food processor, you'll have a creamy, homemade spread in no time.
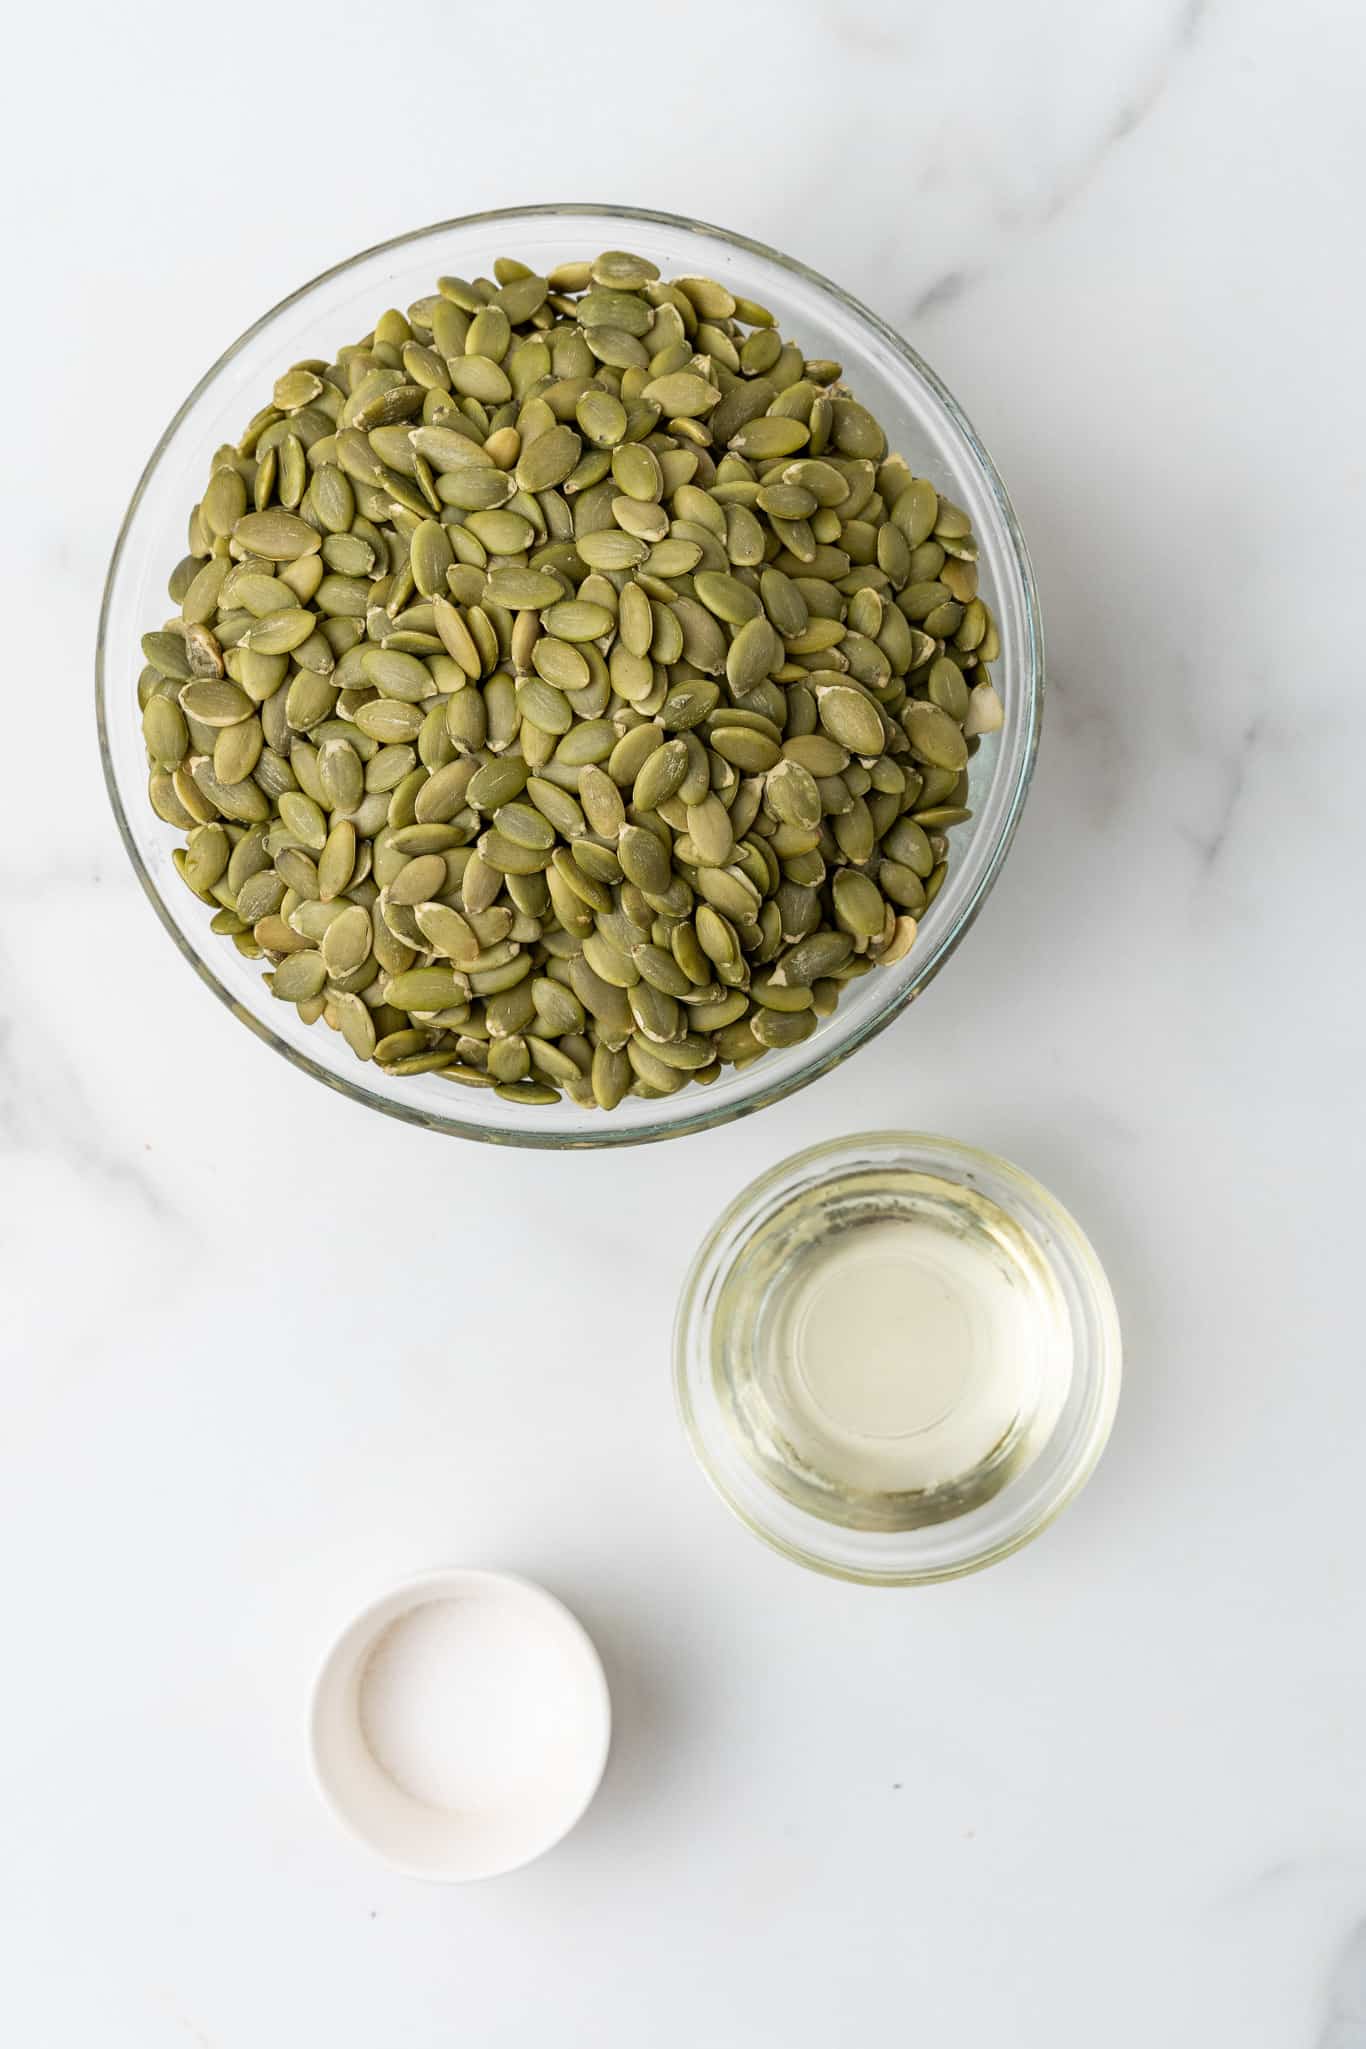
Key Ingredients & Substitutions
Pumpkin Seeds: I started with raw, unsalted pumpkin seeds (also known as pepitas) for this recipe.
Oil: A little oil helps smooth out the texture. I like using neutral oils like avocado oil or grapeseed oil, but you can also use olive oil for a richer flavor. Just add it slowly to get the perfect consistency.
Salt: A touch of salt brings out the natural flavors of the pumpkin seeds. You can adjust the amount to your taste preference or omit it entirely if you're watching your sodium intake.
Helpful Tips
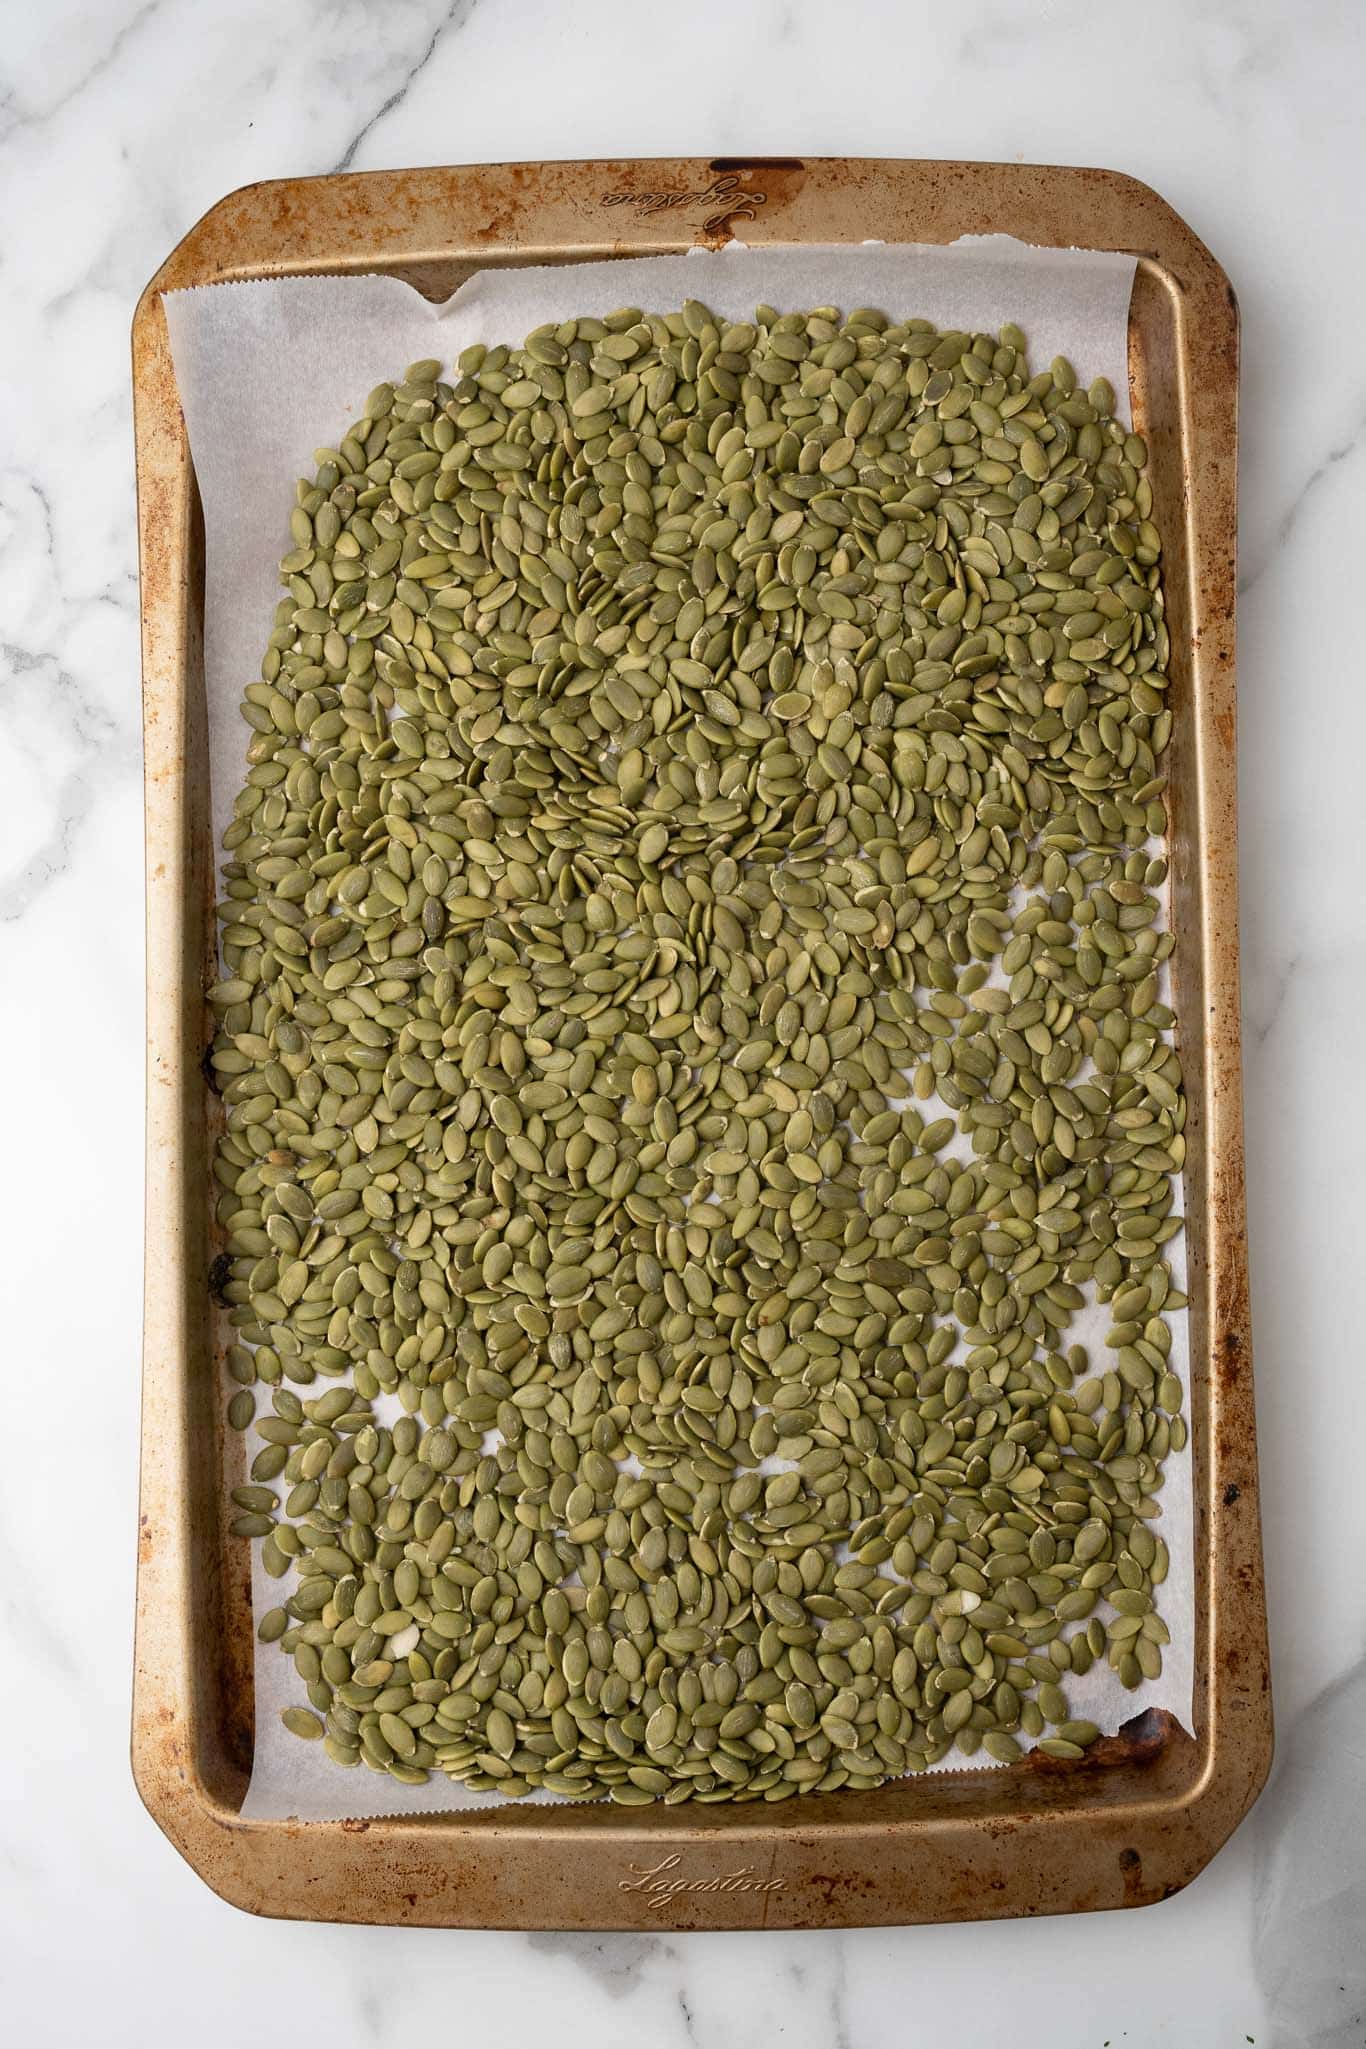
Toasting the Seeds for Flavor: Toasting the pumpkin seeds before processing helps release their natural oils and enhances the flavor, making the butter richer and nuttier. Just be sure to let them cool completely before processing to avoid heating your food processor too much.
Patience is Key: The transformation from whole seeds to smooth butter takes time - about 15 minutes of processing. Be patient, and make sure to stop and scrape down the sides of your food processor occasionally. The seeds will first turn into a crumbly texture before becoming smooth and creamy.
Add Oil Slowly: Start with 1 tablespoon of oil, and only add more if necessary. You want a smooth, spreadable consistency, but not too runny. The natural oils from the pumpkin seeds will help create the butter, so you may not need much extra oil.
Also worth trying: our chocolate avocado cookies.
Variations to Try
Sweet Pumpkin Seed Butter: Add a teaspoon of maple syrup or agave syrup along with a dash of cinnamon for a naturally sweetened, fall-flavored spread.
Spicy Pumpkin Seed Butter: If you like a bit of heat, add a pinch of chili powder or cayenne to the mixture for a spicy kick. Perfect for dipping veggies or crackers.
Chocolate Pumpkin Seed Butter: Stir in a tablespoon of unsweetened cocoa powder and a bit of sweetener (like maple syrup) for a chocolatey version that's perfect for spreading on toast or eating straight off the spoon!
How to Use Pumpkin Seed Butter
- On Toast: Spread it on toast or rice cakes for a simple, nutritious snack.
- In Smoothies: Add a spoonful to your vegan smoothies for a boost of healthy fats and flavor.
- Drizzle over Oatmeal or Yogurt: For a creamy, nutty addition to your morning bowl.
- As a Dip: Pair it with apple slices, celery sticks, or crackers for a wholesome snack. It's a great alternative to traditional peanut butter dip.
- In Baking: Use it in place of other nut butters in cookies, energy balls, or even homemade vegan granola bars.
- On Waffles: Drizzle it over vegan pumpkin waffles for a fall-flavored breakfast that's packed with nutrition.
Storing Pumpkin Seed Butter
Once you've made your pumpkin seed butter, store it in an airtight jar in the refrigerator. It will keep for up to 2 weeks (though it usually disappears much faster in my house!).
Because it's made without preservatives, refrigeration helps keep it fresh and prevents separation. If the butter starts to separate over time, just give it a good stir, and it's ready to go again!
More Vegan Treats
If you love this pumpkin seed butter, be sure to check out these other tasty ideas:
Recipe
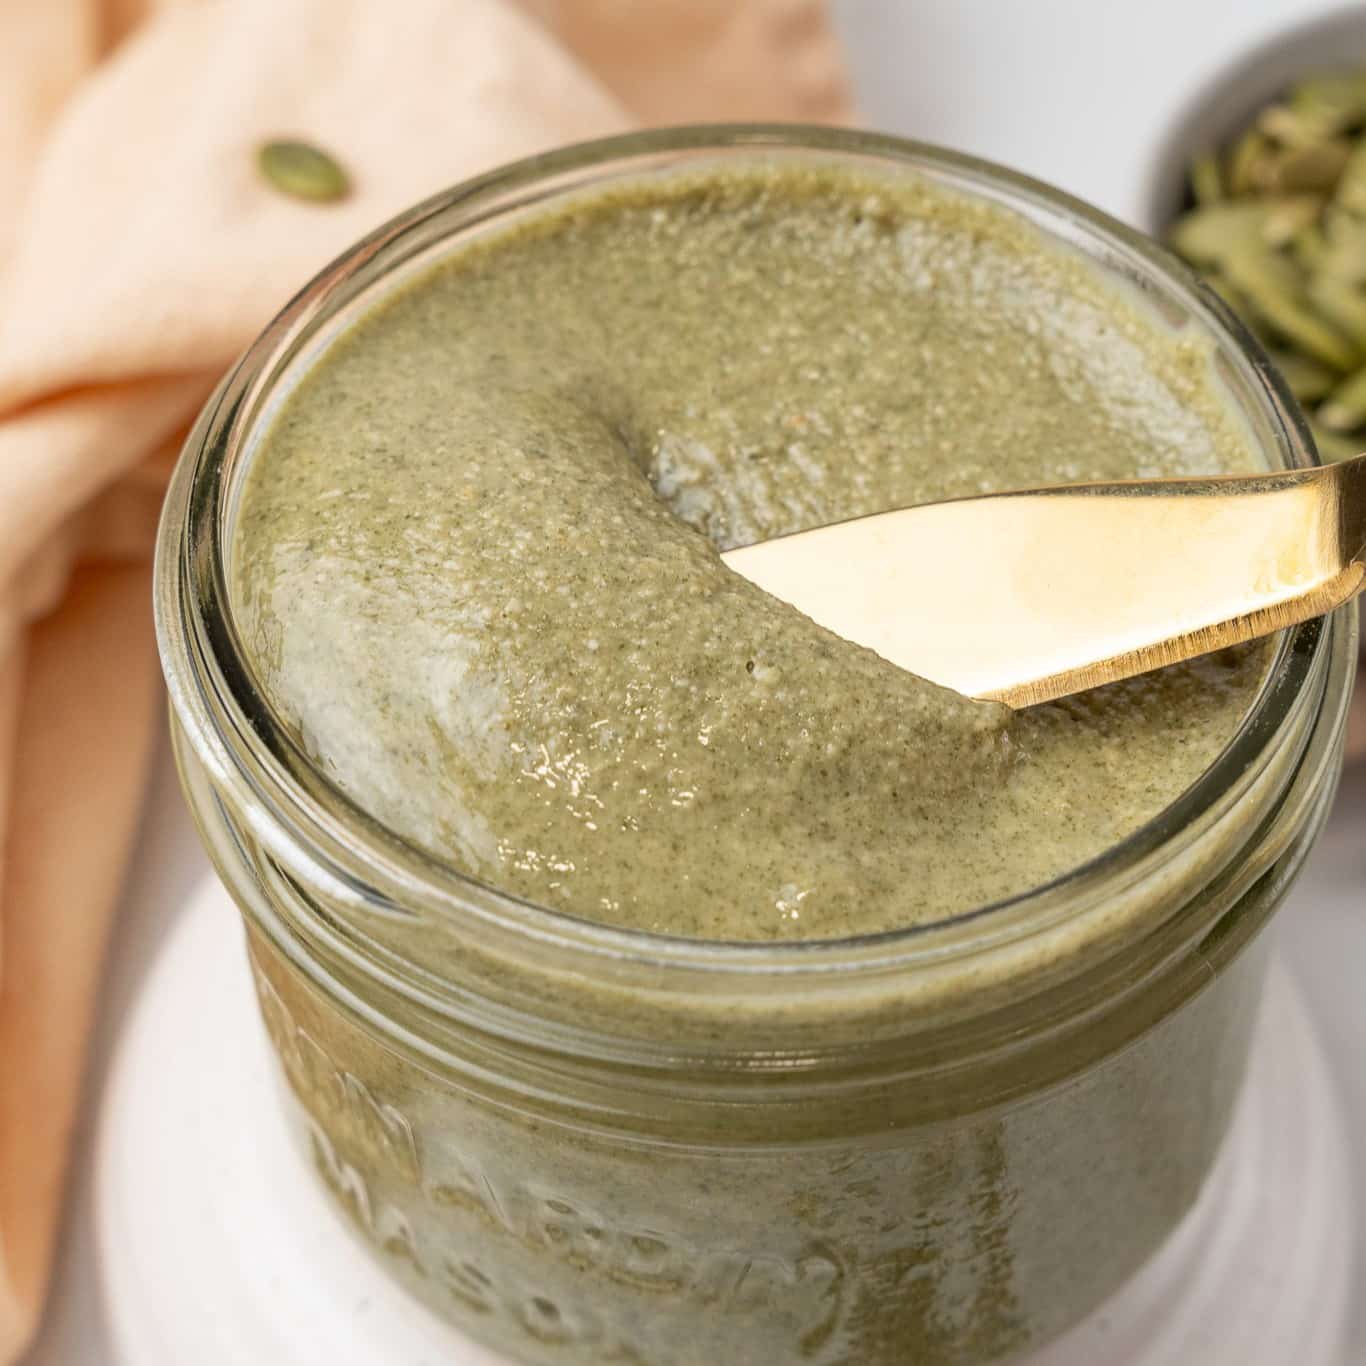
Pumpkin Seed Butter
This homemade Pumpkin Seed Butter is a creamy, nut-free alternative to traditional nut butters. Plus it's so easy to make with just a few simple ingredients!
Print
Pin
Save
Servings: servings
Equipment
Ingredients
- 2 ½ - 3 cups raw pumpkin seeds
- 1 teaspoon salt
- 1-2 tablespoons avocado oil or other neutral oil, as needed
Instructions
- Preheat the oven to 300F. Line a baking sheet with parchment paper and set aside.
- Spread the pumpkin seeds alone the baking sheet in an even layer, then toast in the preheated oven for 10 minutes, stirring halfway through.
- Allow the seeds to cool completely.
- Add the seeds, salt, and 1 tablespoon of oil to a high speed food processor.
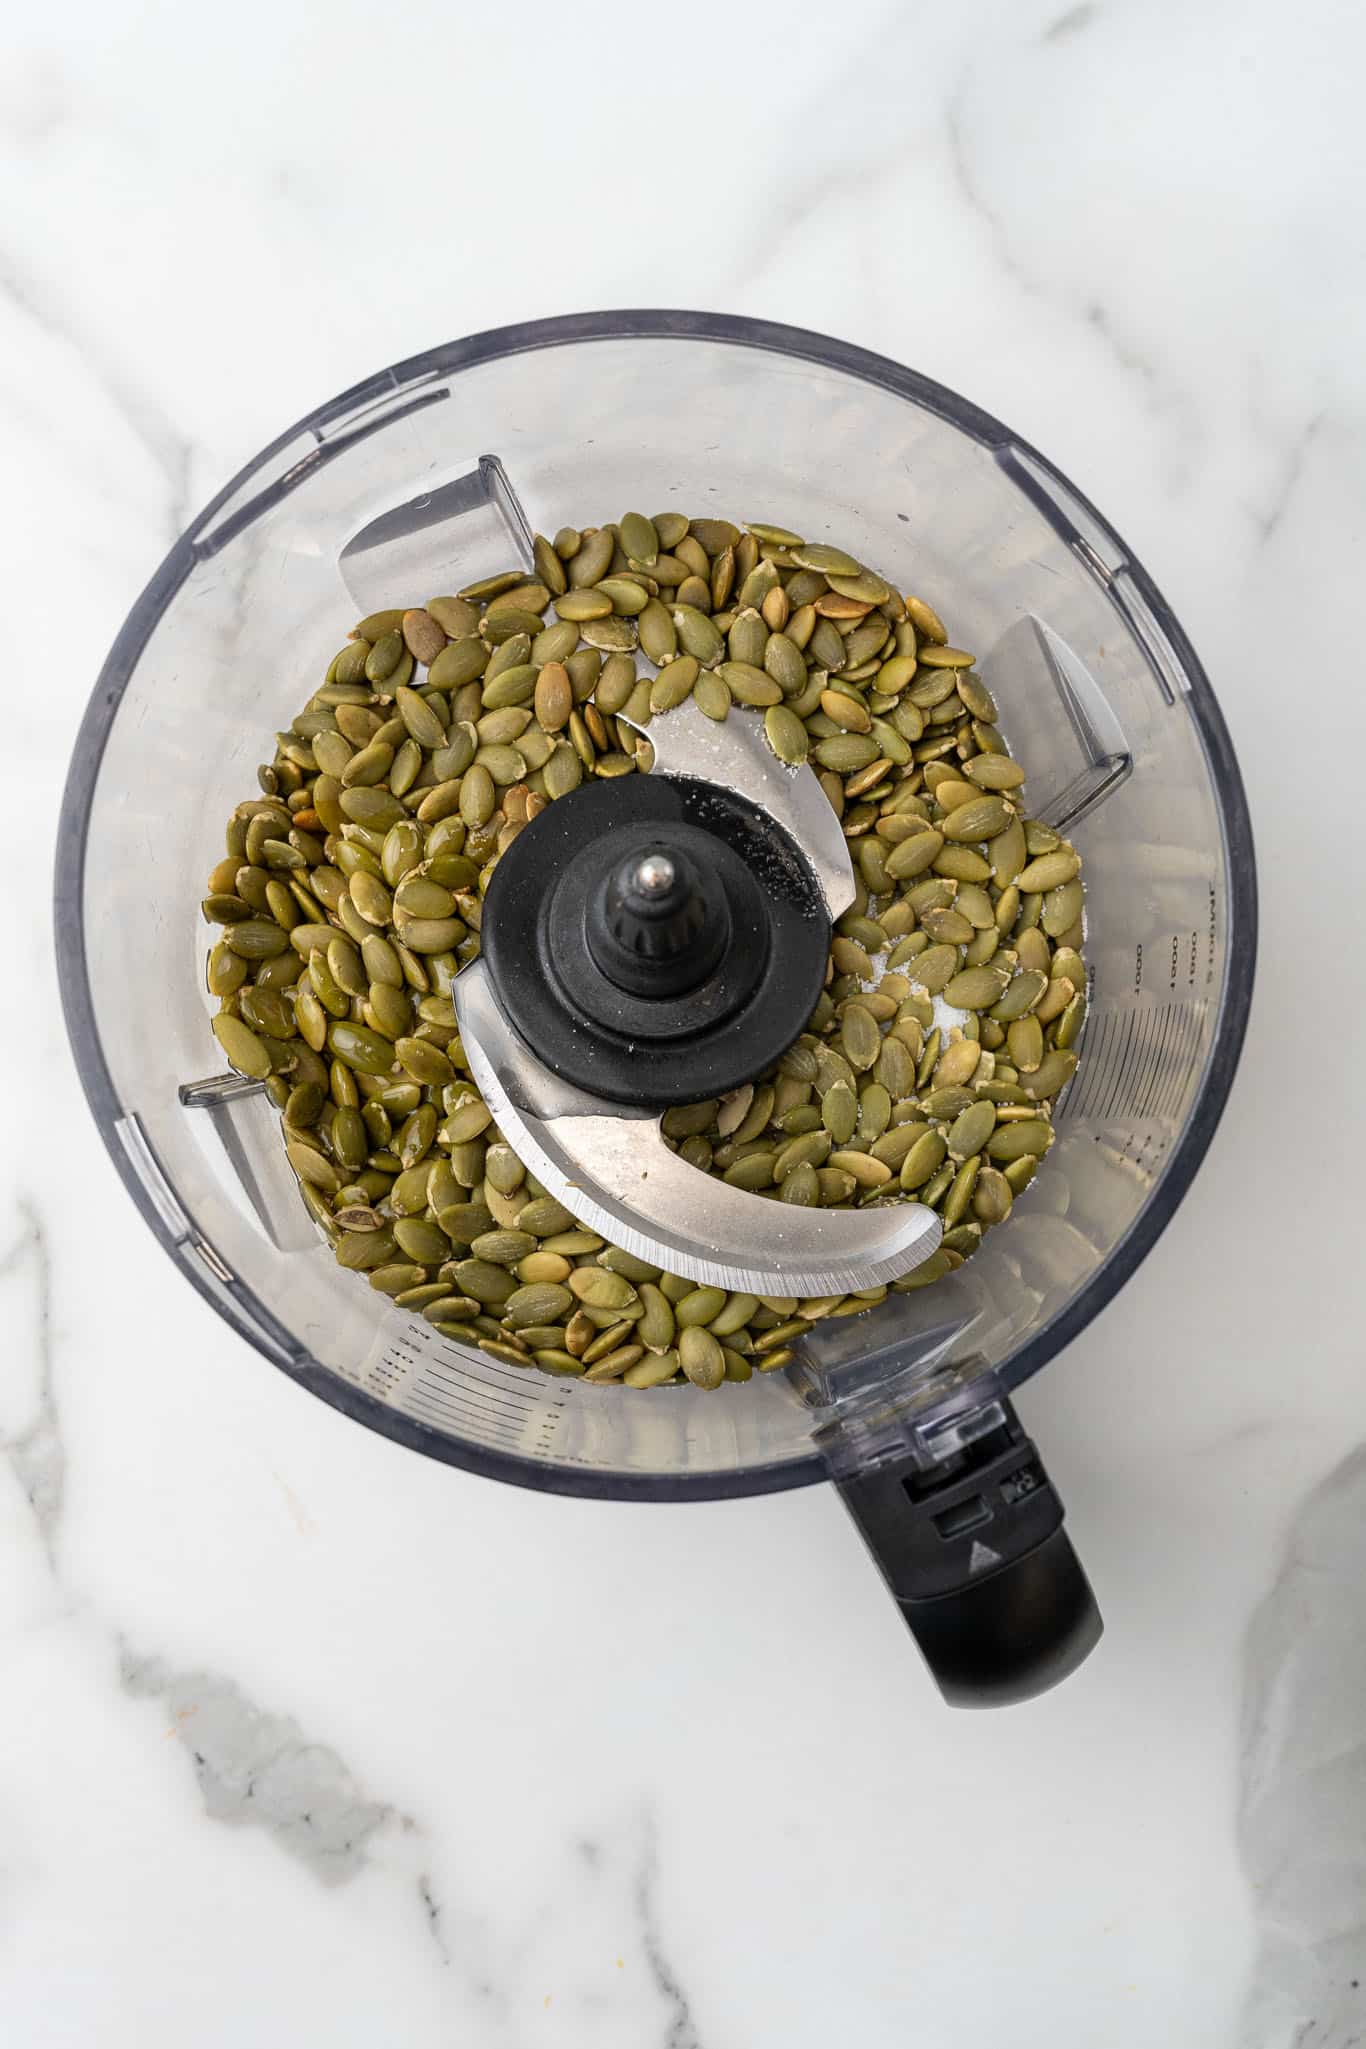
- Process until smooth, stopping to scrape the sides as needed. Add additional oil if required to get the right consistency.

- After about 15 minutes, you should have processed the seeds enough that they become the consistency of natural peanut butter.
Nutrition (Estimate per Serving)
Calories: 85kcalCarbohydrates: 1gProtein: 4gFat: 8gSaturated Fat: 1gPolyunsaturated Fat: 3gMonounsaturated Fat: 3gTrans Fat: 0.01gSodium: 195mgPotassium: 108mgFiber: 1gSugar: 0.2gVitamin A: 2IUVitamin C: 0.3mgCalcium: 6mgIron: 1mg
Vegan-ize any recipe!Grab our free vegan cheat sheet, packed with my favorite easy substitutions to make any recipe vegan.
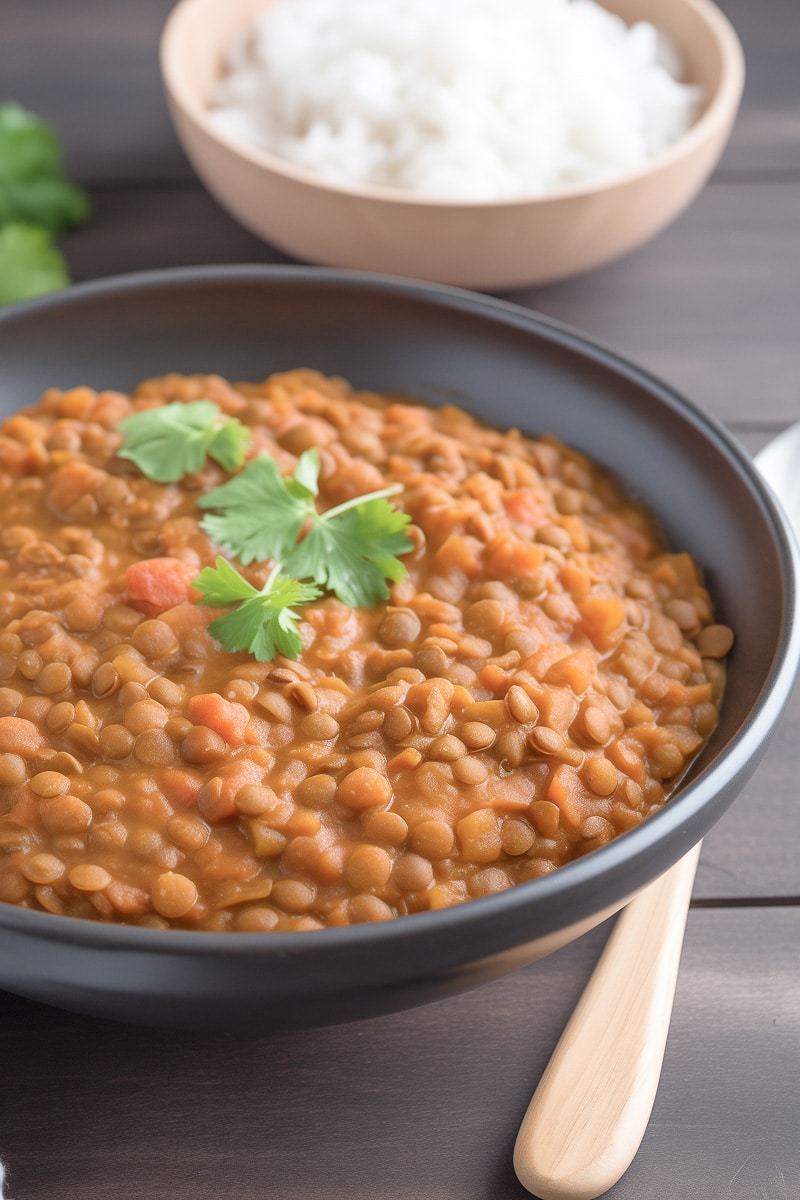
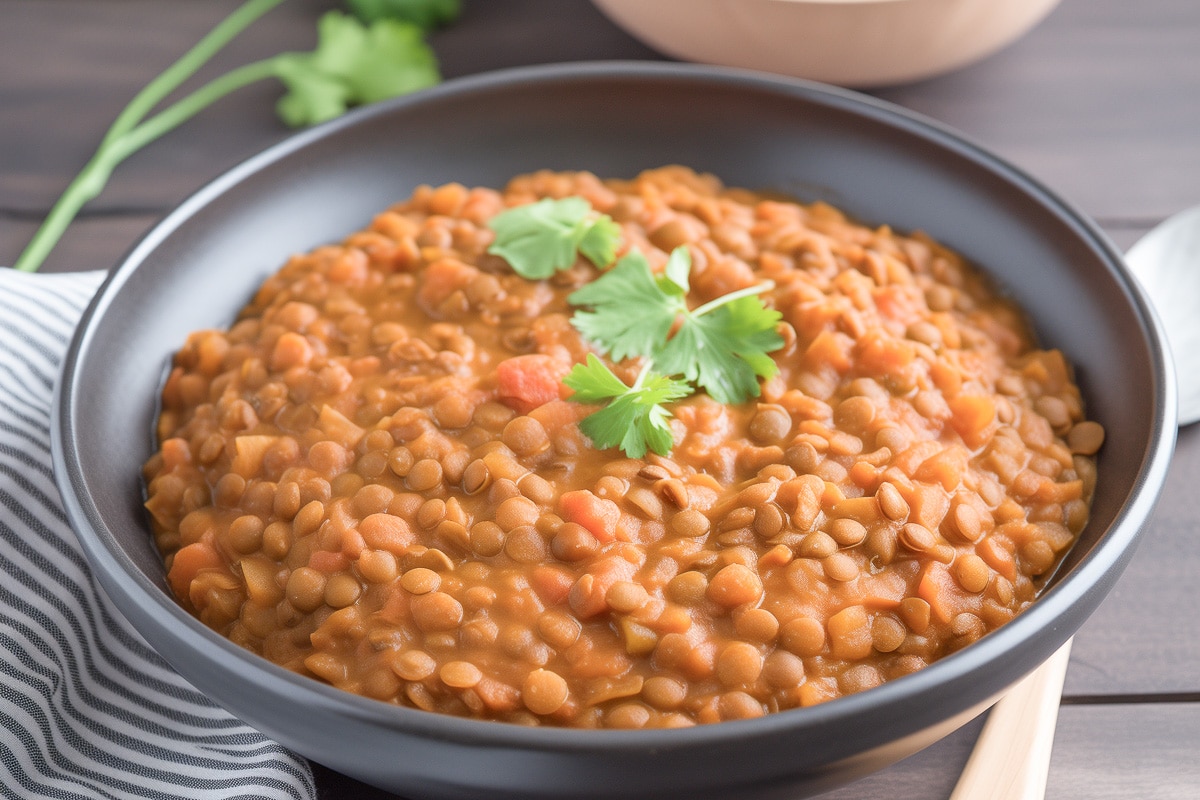
Masala Lentils (Sabut Masoor)
Ever craved something hearty, spicy, and just downright soul-satisfying? That's exactly what you'll get with these Masala Lentils. This dish isn't just food; it's a warm hug in a bowl, infused with rich, aromatic spices that'll transport you straight to the bustling streets of India. Let me take you on a culinary journey with this simple yet flavorful recipe that's sure to become a staple in your kitchen.
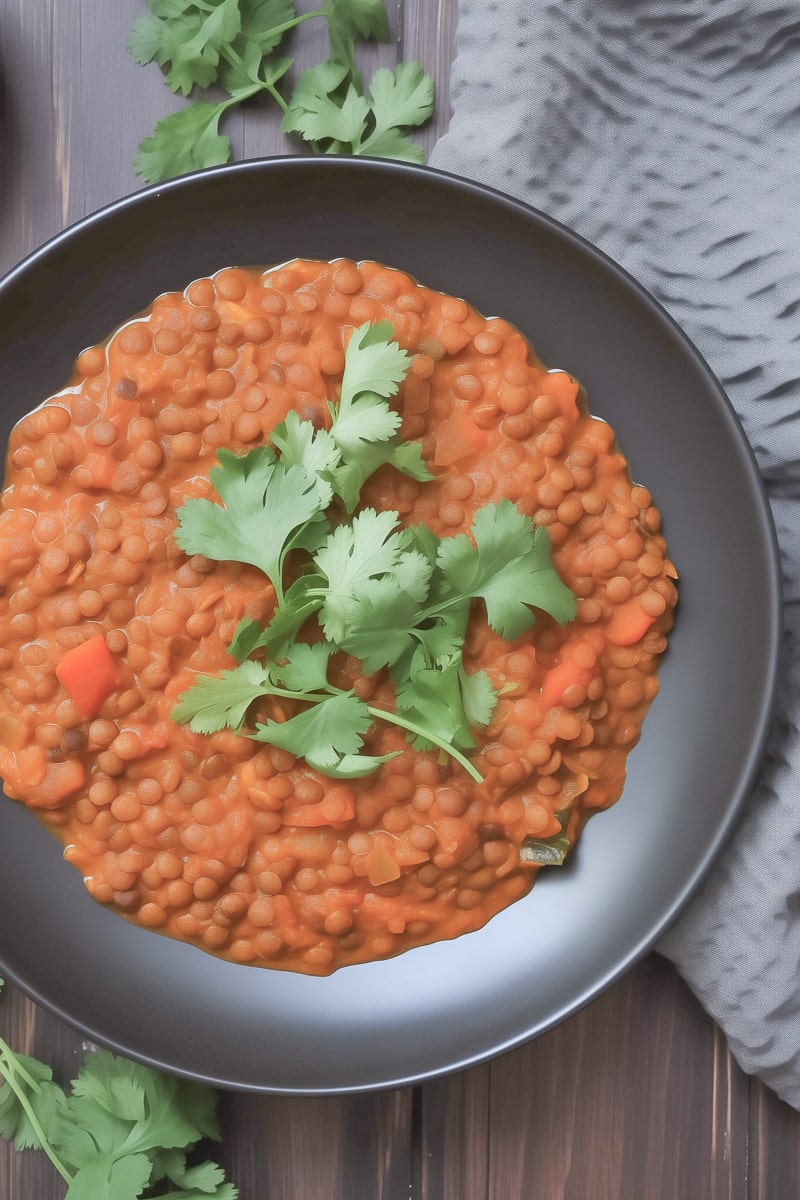
Picture this: a chilly evening, a cozy kitchen, and a craving for something that warms you from the inside out. Enter the magic of Masala Lentils. One spoonful, and I was totally hooked! And I bet you will be as well.
Don't be intimidated by the array of spices - this is one of the simplest lentil recipes I've come across. In fact, it's a great way to introduce yourself to Indian cooking.
This amazing lentil recipe was contributed by Richa Hingle way back in 2015, and is a sample recipe from her cookbook, Vegan Richa's Indian Kitchen. While the article has been updated with more helpful tips and better photos - the recipe is still the original. And still delicious! I highly recommend checking out that cookbook.
This Masala Lentils Recipe is:
- Hearty & Comforting.
- Packed with flavorful spices.
- Easy to customize with your favorite lentil varieties and veggies.
- Naturally vegan!
Key Ingredients & Substitutions
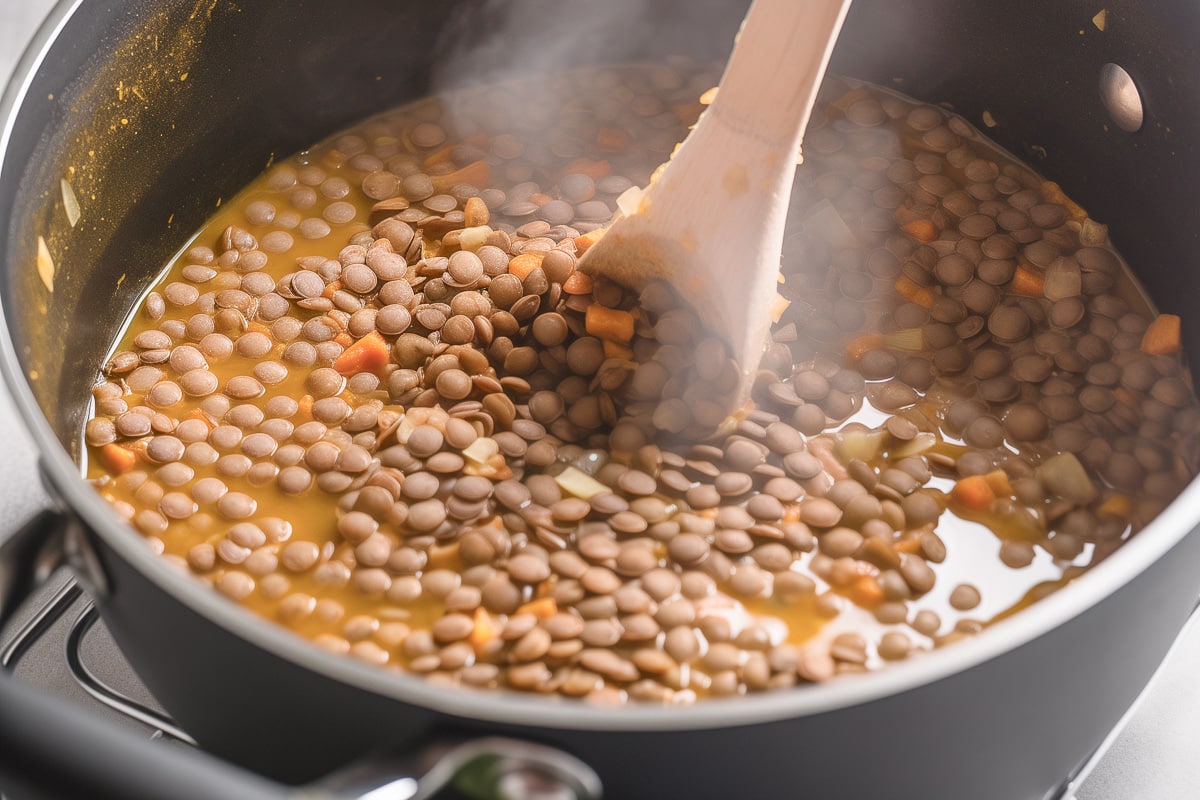
- Brown Lentils: The star of the show! But I've also made this with red lentils and it worked well also.
- Safflower Oil: I love its neutral taste, but any cooking oil will do the trick.
- Ground Spices: Cumin, coriander, cardamom, cinnamon, and more - each adding its unique note to this dish.
- Sriracha: For that kick! You can substitute it with another hot sauce if you prefer.
- Tomatoes: I like using fresh tomatoes for my lentil masala, but you can also use canned chopped tomatoes. The fire roasted ones have a great flavor.
- Cilantro: Be sure to use fresh cilantro for the best flavor!
Helpful Tips & Variations
Add more protein. Toss in some chickpeas or pan-fried tofu for an extra protein punch.
Make it creamier. A splash of coconut milk to transform these lentils into a creamy delight.
Add leafy greens. Stir in some spinach or kale for added nutrition and a beautiful pop of color.
Serving Suggestions: Serve masala lentils with fluffy basmati rice, fresh rotis, or vegan naan bread.
Storing Leftovers: Store leftover masala lentils in the fridge for 3-4 days. Love Indian-spiced dishes? Also try our bhindi masala, our quick vegetable curry, or our aloo gobi.
More Tasty Vegan Ideas
If you love these Masala Lentils, be sure to check out these other vegan recipes:
Recipe
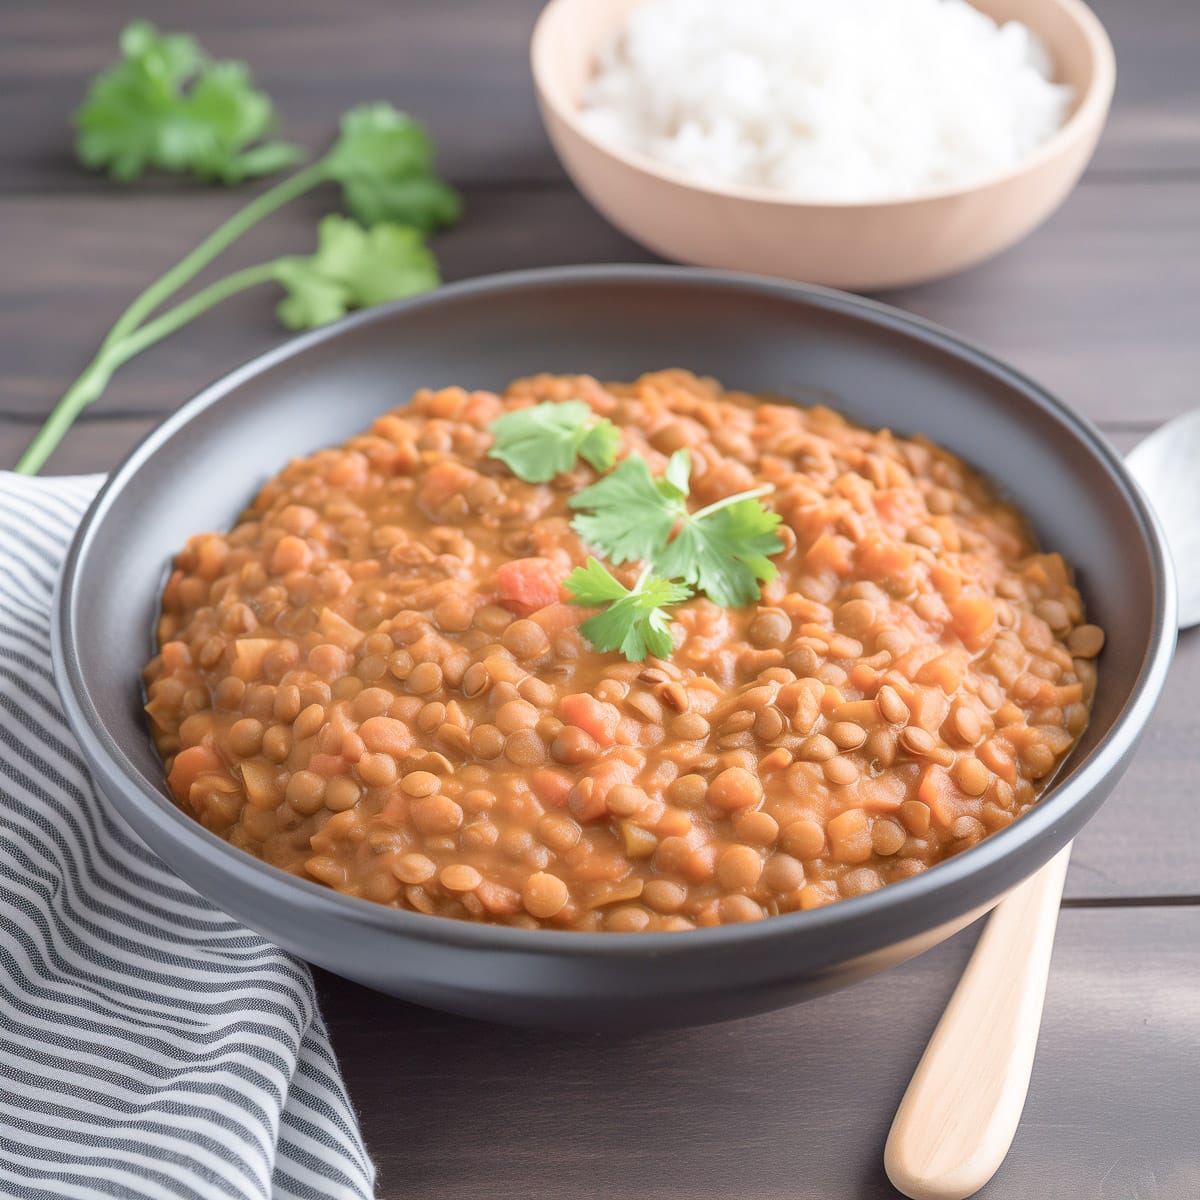
Masala Lentils (Sabut Masoor)
A hot sauce (chiles, garlic, and vinegar) is the secret to getting the right flavor profile in this lentil dal. Serve this as a part of a meal, or with rice or naan or other flatbread.
Print
Pin
Save
Servings: servings
Ingredients
- ¾ cup brown lentils washed and drained
- 2 cups water
- 2 to 3 teaspoons safflower or other neutral oil
- ½ cup finely chopped red or white onion
- 6 cloves garlic chopped
- ½ teaspoon ground cumin
- 2 teaspoons ground coriander
- ½ teaspoon ground cardamom
- ½ teaspoon ground cinnamon
- ½ teaspoon fenugreek leaves or ⅛ teaspoon fenugreek seeds
- 1 teaspoon sweet or hot paprika
- ⅛ teaspoon nutmeg
- ¼ teaspoon black pepper
- 1 ½ tablespoons sriracha or other hot sauce to taste
- 2 tablespoons water
- 1 ½ cups chopped tomato
- ¾ teaspoon salt
- 2 tablespoons chopped cilantro for garnish
- 1 tablespoon vegan butter optional
Instructions
- Combine the lentils with 2 cups of water in a saucepan. Partially cover and cook over medium heat until the lentils are tender, 25 to 30 minutes.
- While the lentils are cooking, make the tempering. Heat the oil in a skillet over medium heat. Add the onion and cook until golden brown, 5 to 6 minutes.
- In a blender, combine the garlic, cumin, coriander, cardamom, cinnamon, fenugreek, paprika, nutmeg, black pepper, sriracha, and 2 tablespoons of water. Blend to combine well.
- Add this paste to the onions in the skillet. Cook until fragrant, about 2 minutes. Stir in the tomatoes and salt, and cook until the tomatoes are tender, about 8 minutes. Mash the larger tomato pieces.
- Add the tempering to the lentils. Bring to a boil over medium heat. Reduce heat and simmer for another 5 minutes.
- Taste and adjust salt and spice. Garnish with cilantro and vegan butter, if using, and serve hot.
Nutrition (Estimate per Serving)
Calories: 204kcalCarbohydrates: 30gProtein: 11gFat: 5gSaturated Fat: 1gPolyunsaturated Fat: 1gMonounsaturated Fat: 3gTrans Fat: 0.02gSodium: 728mgPotassium: 599mgFiber: 13gSugar: 4gVitamin A: 319IUVitamin C: 18mgCalcium: 80mgIron: 4mg
Vegan-ize any recipe!Grab our free vegan cheat sheet, packed with my favorite easy substitutions to make any recipe vegan.
Bhindi Masala (Okra Masala)
Get ready to spice up your dinner routine with this hearty and flavorful Bhindi Masala - a classic Indian dish that's as simple as it is delicious. And it's 100% vegan and ready in 30 minutes too.
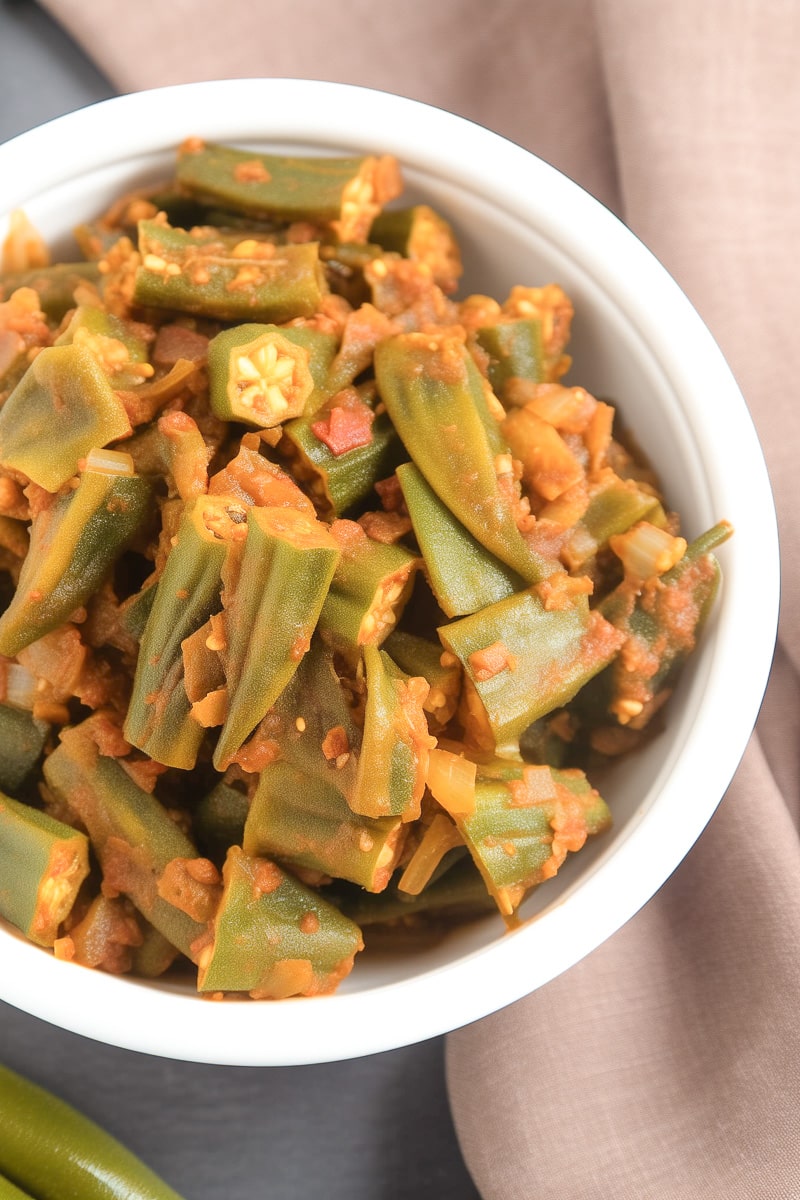
So you might have seen the word okra here and are currently thinking - has she lost her mind?! But stick with me. This Bhindi Masala is a dish even non-okra lovers can get behind. (And I know, because I am one of them.)
I first published a version of this recipe titled Bhindi Bhaji, which was generously shared by Terry Hope Romero as a sample recipe from her cookbook Vegan Eats World. The recipe has been updated slightly over the years, and I've added my own photos. But I still highly recommend you check out that cookbook!
This Bhindi Masala Recipe is...
- Authentically Flavorful: With traditional spices like garam masala, turmeric, and amchur, it's a taste of India in every bite.
- Surprisingly Simple: Despite its complex flavors, this recipe is straightforward and easy to follow.
- Adaptable: Whether you like it spicy or mild, this dish can be tailored to your palate.
- Vegan!
What is Bhindi Masala?
Bhindi Masala, is a classic Indian dish that has found its way into the hearts and kitchens of food enthusiasts worldwide. The name itself is a direct nod to its main ingredient and preparation style: "Bhindi" in Hindi means okra, and "Masala" refers to a mixture of spices. The exact origin of Bhindi Masala is a bit hazy, but it's widely believed to have originated in the northern parts of India.
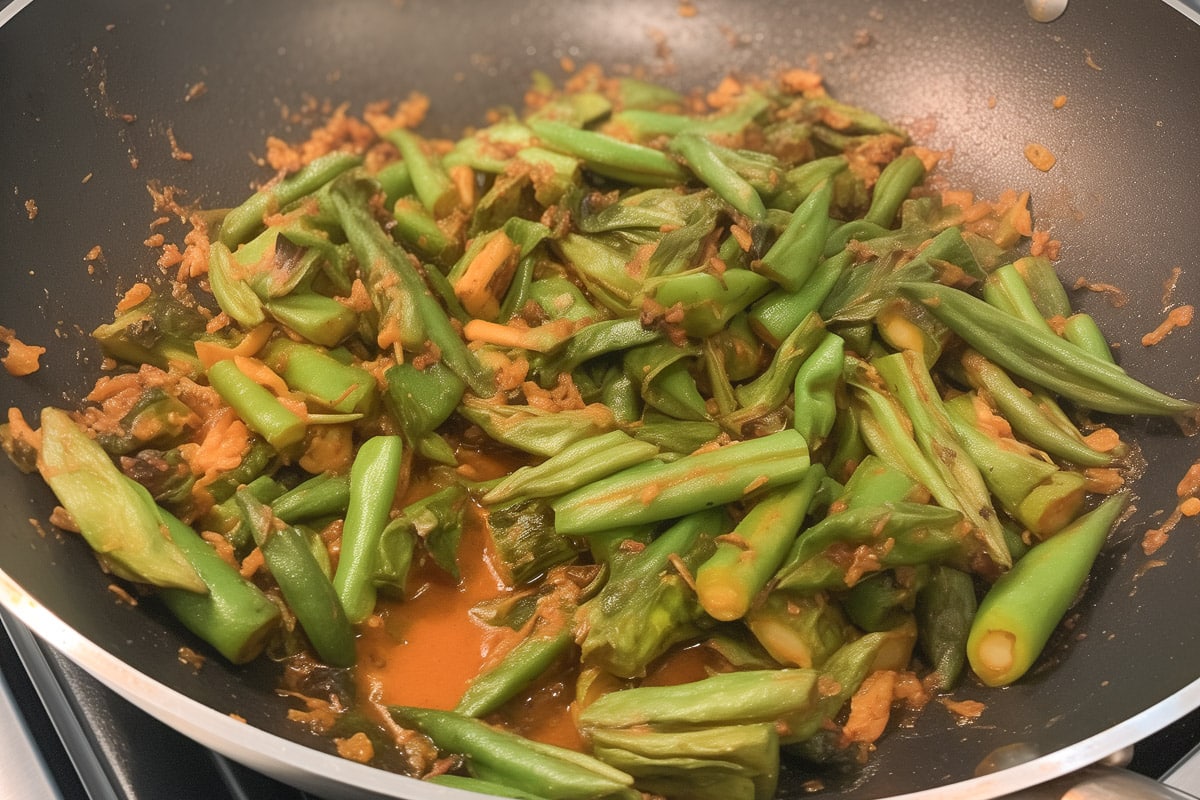
Key Ingredients & Substitutions
Okra
The star of the dish. If fresh okra isn't available, frozen okra can be a good substitute, though you will need to defrost and dry it thoroughly first to avoid getting a slimy texture.
Garam Masala
This classic spice blend is at the heart of many Indian dishes. It's worth splurging on a quality brand (like this one) for all of your Indian cooking.
Amchur Powder (Dry Mango Powder)
Adds a tangy twist. You can find amchur powder at Indian grocers or grab it online here. If unavailable, lime juice works as an easy alternative.
Cayenne Pepper
For heat lovers! Reduce or omit this for a milder version of the recipe.
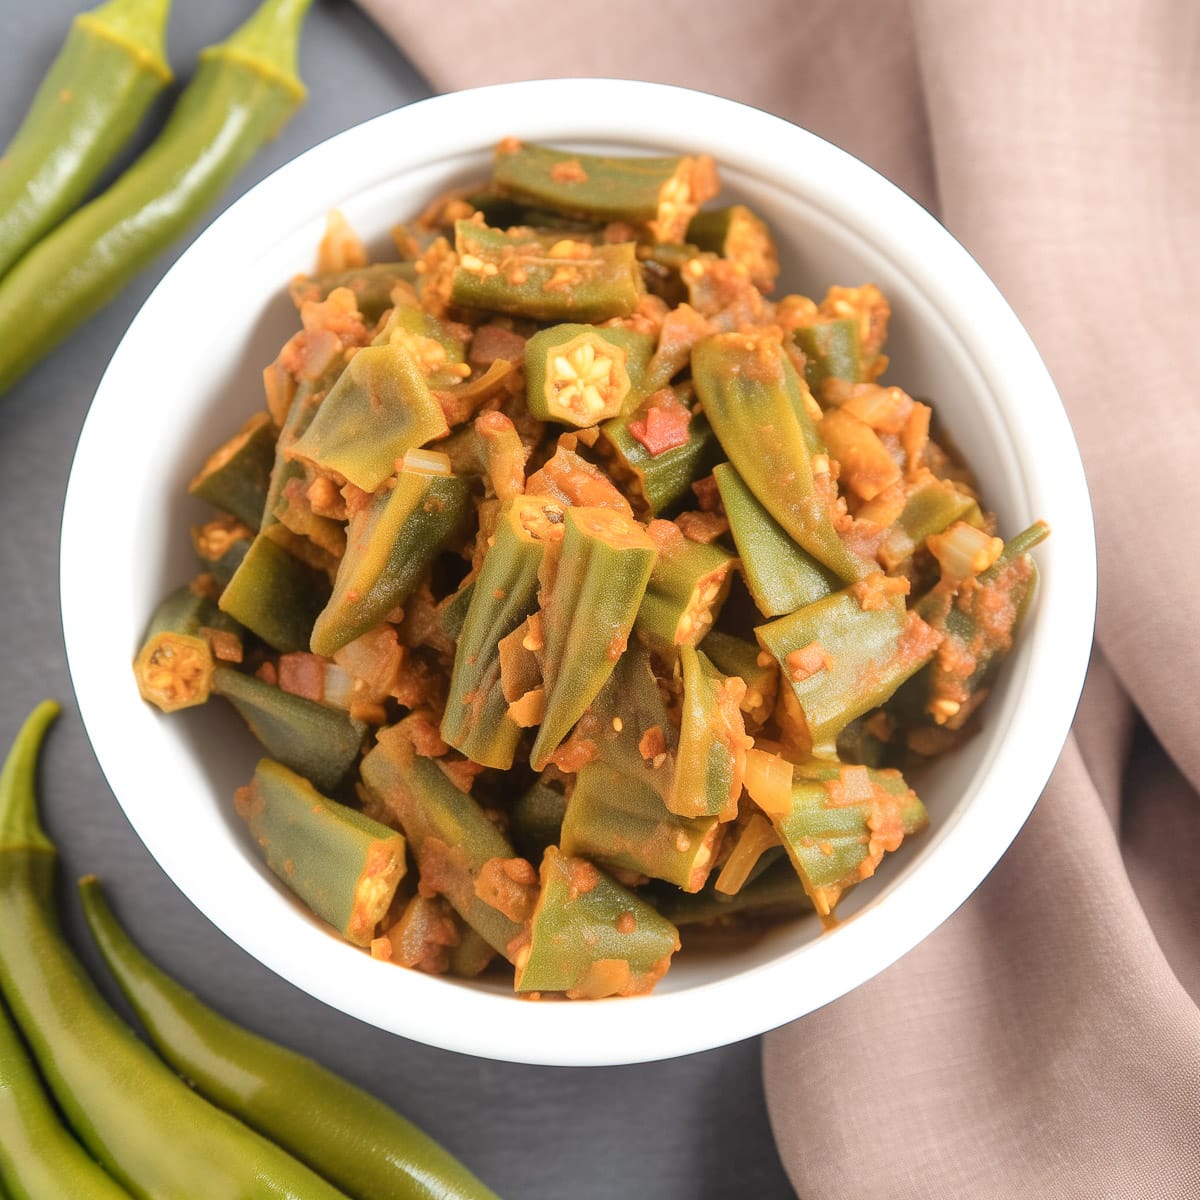
Helpful Tips & Variations
Buying Okra
When selecting okra, choose medium-sized okra that feel crisp to the touch. Dark green Indian okra or light green okra both work well for this recipe. You can find okra at any Indian grocery store.
Dry the Okra
Before cooking, ensure the okra is completely dry to avoid it becoming too slimy. That sliminess is the reason most people don't like okra. I suggest getting a paper towel and literally drying off each piece of okra before you slice it.
Stir Gently!
Okra is delicate. Stir gently to avoid breaking them apart - you don't want a mushy mess.
Add Protein
Throw in some pan-fried tofu, tempeh, or chickpeas for an added protein boost.
Serving Suggestions
Serve your bhindi masala over steamed basmati rice or with a side of Indian bread like rotis or vegan naan bread. For a complete Indian feast, pair it with our easy vegan dal tadka, our quick vegetable curry, or our aloo gobi.
More Vegan Recipes
If you love this Bhindi Masala, be sure to check out these other tasty vegan ideas:
Also try: our Masala Lentils Sabut Masoor.
- African Peanut and Okra Stew
- Creole Tomatoes and Okra
- 30-Minute Vegan Chana Masala
- 30-Minute Madras Lentils
Recipe
Bhindi Masala (Okra Masala)
Spice up your dinner routine with this hearty and flavorful Bhindi Masala - a classic Indian dish that's as simple as it is delicious. 100% vegan and ready in 30 minutes.
Print
Pin
Save
Servings: servings
Ingredients
- 1 pound fresh okra pods
- 2 tablespoons vegetable oil
- 1 teaspoon mustard seeds
- 3 garlic cloves finely chopped
- 1 large onion chopped
- 2 teaspoons Garam Masala plus extra for garnish
- 1 teaspoon turmeric powder
- ½ teaspoon cinnamon
- ½ teaspoon cayenne pepper optional, for less heat
- 1 teaspoon salt
- 2 to 4 tablespoons water or broth
- 1 cup chopped tomatoes fresh or canned
- 1 teaspoon dried mango powder amchur or lime juice
Instructions
- Prepare Okra. Trim the ends off the okra and cut them into ½-inch pieces.
- Cook Mustard Seeds.In a large skillet, heat the oil over high heat. Add mustard seeds. Once they start popping, reduce heat to medium.
- Add Garlic and Onion. Sauté garlic for a few seconds, then add onion. Cook until the onion is soft, about 3 minutes.
- Add okra to the skillet. Mix in Garam Masala, turmeric, cinnamon, cayenne, and salt. Cook for 5 minutes, stirring occasionally.
- Add water or broth, reduce heat to low. Cover and simmer for 10-12 minutes, stirring occasionally.
- If it sticks to the pan, add a little more water or broth.
- Add tomatoes and amchur powder or lime juice. Cook uncovered for 3-4 minutes until tomatoes are soft.
- Taste and adjust seasoning as desired. Garnish with extra garam masala. Serve warm with rice, rotis, or naan bread.
Nutrition (Estimate per Serving)
Calories: 77kcalCarbohydrates: 16gProtein: 4gFat: 1gSaturated Fat: 0.1gPolyunsaturated Fat: 0.2gMonounsaturated Fat: 0.2gSodium: 678mgPotassium: 525mgFiber: 5gSugar: 5gVitamin A: 988IUVitamin C: 35mgCalcium: 128mgIron: 2mg
Vegan-ize any recipe!Grab our free vegan cheat sheet, packed with my favorite easy substitutions to make any recipe vegan.
Dragonfruit Lemonade (3 Ingredients!)

Dragonfruit lemonade is a must make this summer. It takes just three ingredients to make this thirst quenching lemonade recipe. Fresh lemons, dragonfruit, maple syrup for sweetness and water.

If you are a fan of dragon fruit you have to try this lemonade recipe. It is colorful, easy, and refreshing. Whip this up for your next pool party or summer cookout. It is gorgeous to serve up but also delicious. Try my green lemonade recipe as well!
Here is a dragon fruit smoothie for you to try out as well. This recipe is one of my favorites for a mid-day pick me up or breakfast. Also check out my other vegan drink recipes, for new things to try out.
This Dragonfruit Lemonade Recipe Is...
- Made with 3 ingredients
- Thirst Quenching
- Takes 10 minutes to make
- Colorful
- Perfect for spring and summer
How to Make Dragon Fruit Lemonade
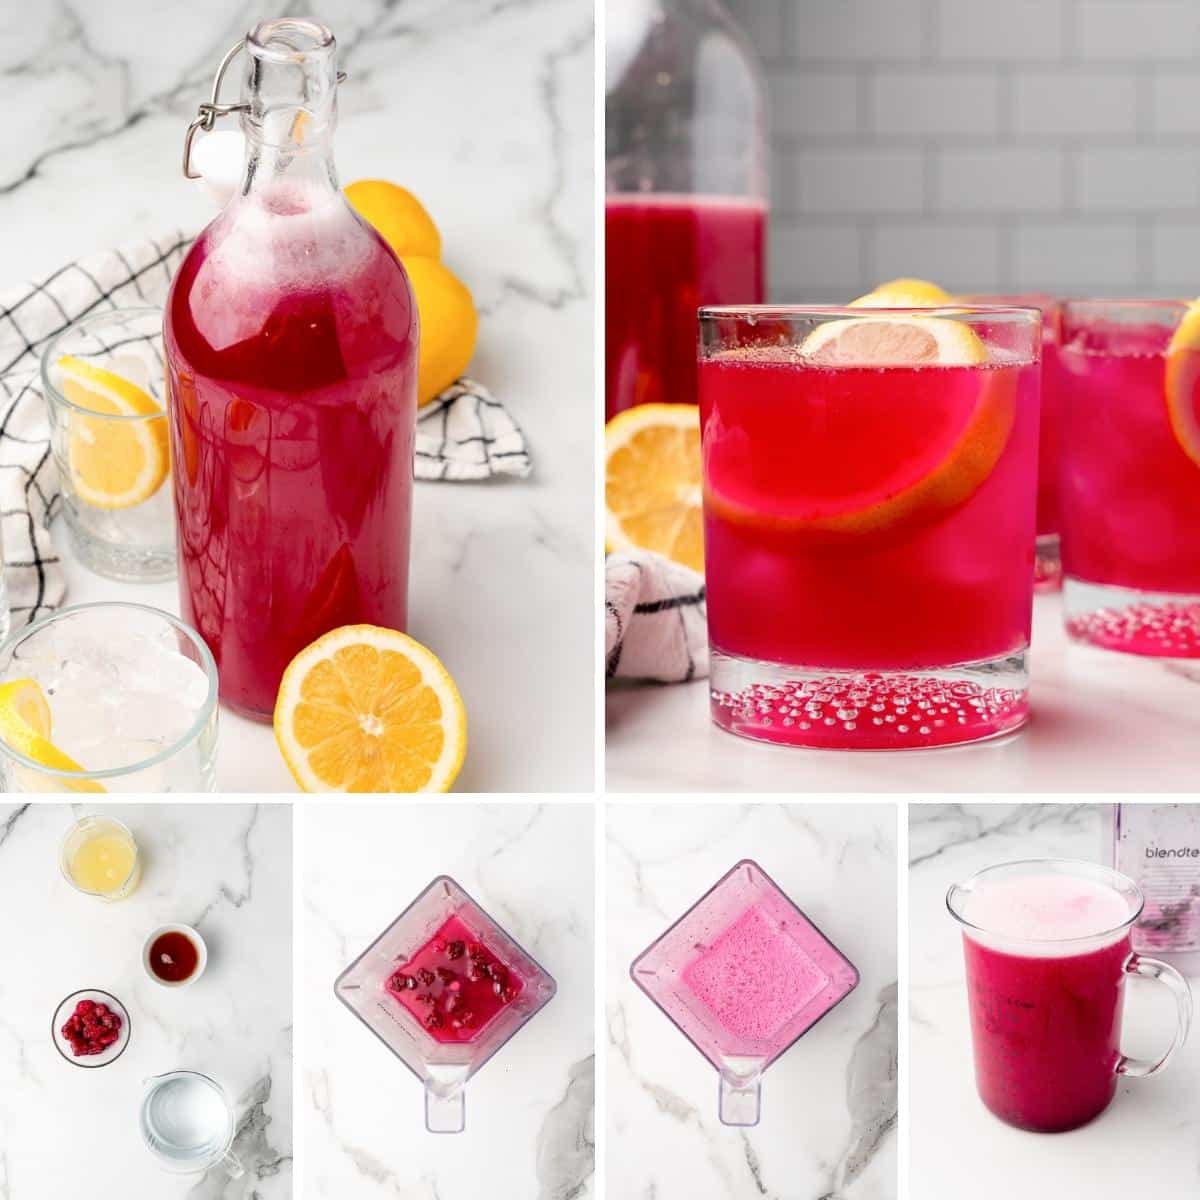
At the bottom of the post you will find the full recipe with the measurements needed. This is a quick walk through of the recipe.
- In a blender you will add in your dragon fruit, lemon juice, and maple syrup.
- Blend on high until it is smooth all the way through.
- Add the dragonfruit mixture to a large pitcher, and stir in water.
- Serve over ice, and garnish with more dragonfruit or lemon slices.
Helpful Tips for Making This Dragon Fruit Lemonade

Scrape Down Sides of Blender
As you are mixing up the dragon fruit in the blender make sure to scrape down the sides. Some pieces can stick to the sides, so you want to ensure you get it all blended.
Sweeten To Taste
If you find you want your lemonade sweeter simply stir in some extra maple syrup. Or if you find it is too sweet you can add a bit more water to help dilute the sweetness.
Variations For Dragon Fruit Lemonade

Sweetener
If you do not want to use maple syrup you can sweeten the lemonade anyway you want. I do find that using a liquid sweetener is best. If you use granulated sugar it can leave a crunchy texture if it doesn't dissolve.
Other Fruit
So I used just dragonfruit for this recipe, but you could add in some fresh strawberries or even kiwi to help add an extra layer of flavor to your lemonade.
Dragon Fruit Lemonade FAQs

How to store lemonade?
Leave out the ice, and store your lemonade in the fridge in a sealed pitcher. Then put the ice in each glass and pour the lemonade on top. Make sure to stir between pouring to ensure all the ingredients are incorporated.
Does this recipe double well?
Yes, you can easily double or triple the recipe if needed. I have made a larger batch for parties and the recipe doubles well.
How to know if dragon fruit is ripe?
Dragon fruit that is ripe will be bright in color. Then grab the fruit and gently squeeze it. You want it to have some give and not be rock hard. If the fruit feels mushy or extra soft, it is overripe.
Can I make this an alcoholic drink?
Simply add in a shot of vodka or even rum to make this an alcoholic lemonade. If you want a stronger drink you can add additional alcohol to the lemonade.
Recipe

Dragonfruit Lemonade (3 Ingredients!)
This three ingredient Dragonfruit Lemonade is simple, light, and refreshing. It's the perfect summer drink!
Print
Pin
Save
Servings: servings
Ingredients
- 5 large lemons juiced (about 1 cup lemon juice), plus more for garnish if desired
- ½ cup cubed pink dragonfruit about one small dragon fruit
- ¼ cup maple syrup or more if you want it sweeter
- 4 cups cold water
Instructions
- Add the dragon fruit, lemon juice, and maple syrup to a blender.
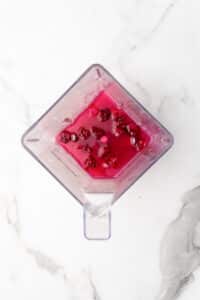
- Blend on high until smooth.

- Add the dragon fruit mixture to large pitcher and stir in the water

- Serve over ice, and garnish with dragonfruit and lemon slices

Nutrition (Estimate per Serving)
Calories: 111kcalCarbohydrates: 29gProtein: 1gFat: 1gSaturated Fat: 1gPolyunsaturated Fat: 1gMonounsaturated Fat: 1gSodium: 34mgPotassium: 232mgFiber: 4gSugar: 18gVitamin A: 30IUVitamin C: 72mgCalcium: 64mgIron: 1mg
Vegan-ize any recipe!Grab our free vegan cheat sheet, packed with my favorite easy substitutions to make any recipe vegan.
Sweet Potato Black Bean Chili
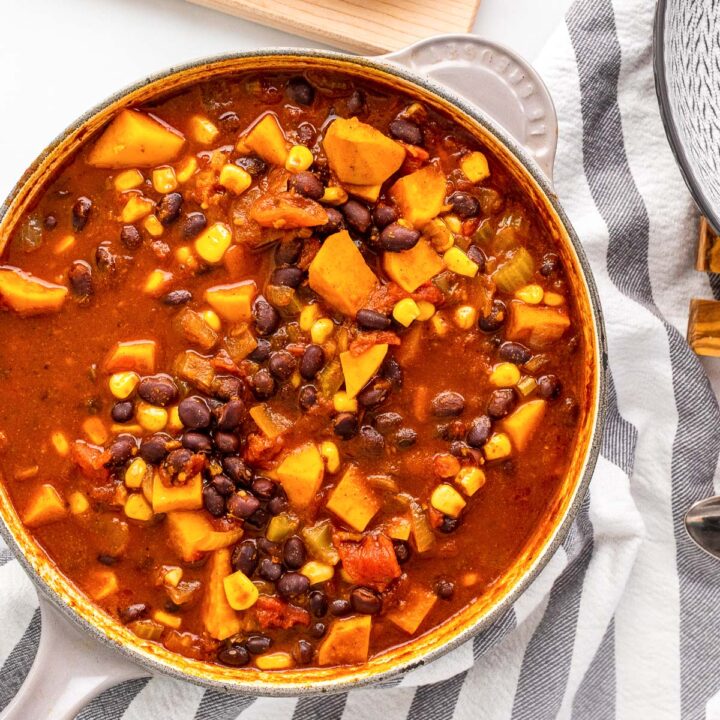
This Sweet Potato Black Bean Chili is loaded with healthy flavors from tender sweet potatoes, hearty black beans, and smoky spices. Plus, it's 100% vegan and easy to make in under an hour.
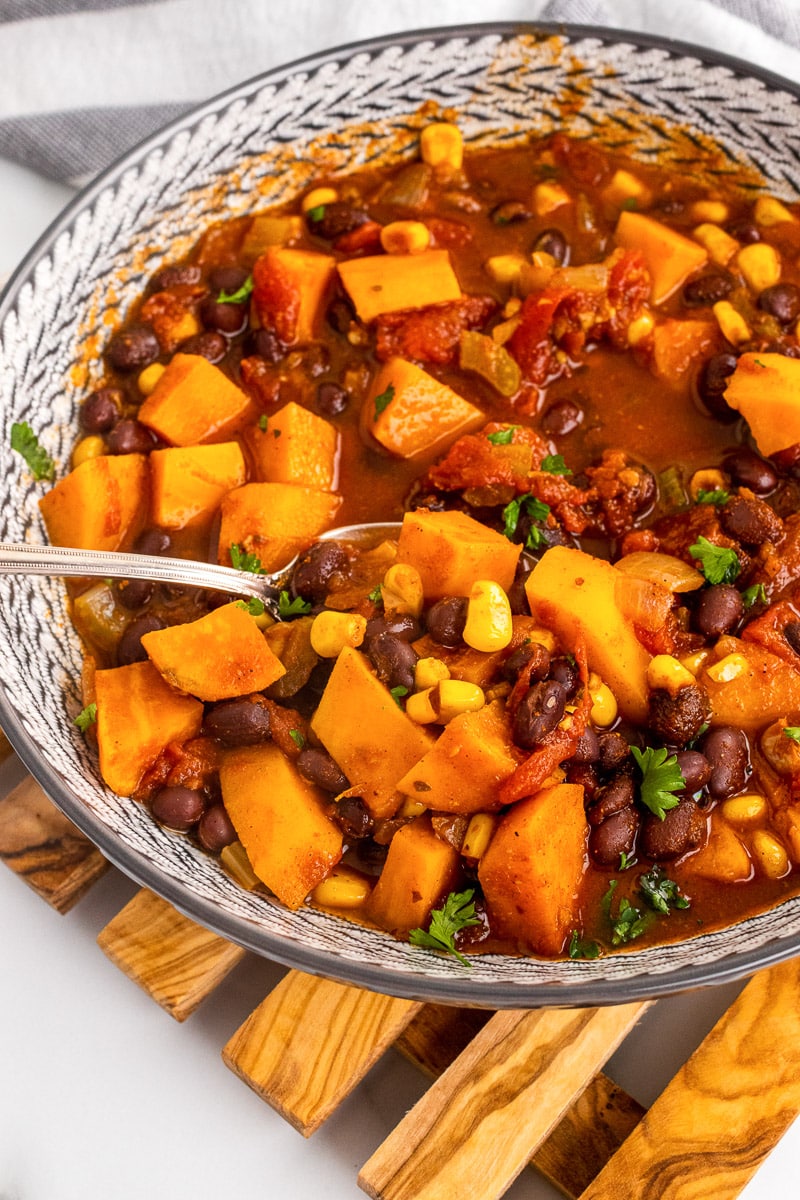
If there's one thing I always crave as soon as the weather starts cooling down, it's a big pot of chili. There's just something about a piping hot one-bowl dinner that makes me want to cozy up in front of the fireplace.
And this Sweet Potato Black Bean Chili is one of my all time favorites. It's so easy to throw together, packed with delicious flavors, and it's great for meal prep too!
This Sweet Potato Black Bean Chili recipe is...
- Full of flavor
- Packed with smoky heat
- Healthy
- Plant-based
- Vegetarian
- Good enough to impress a crowd
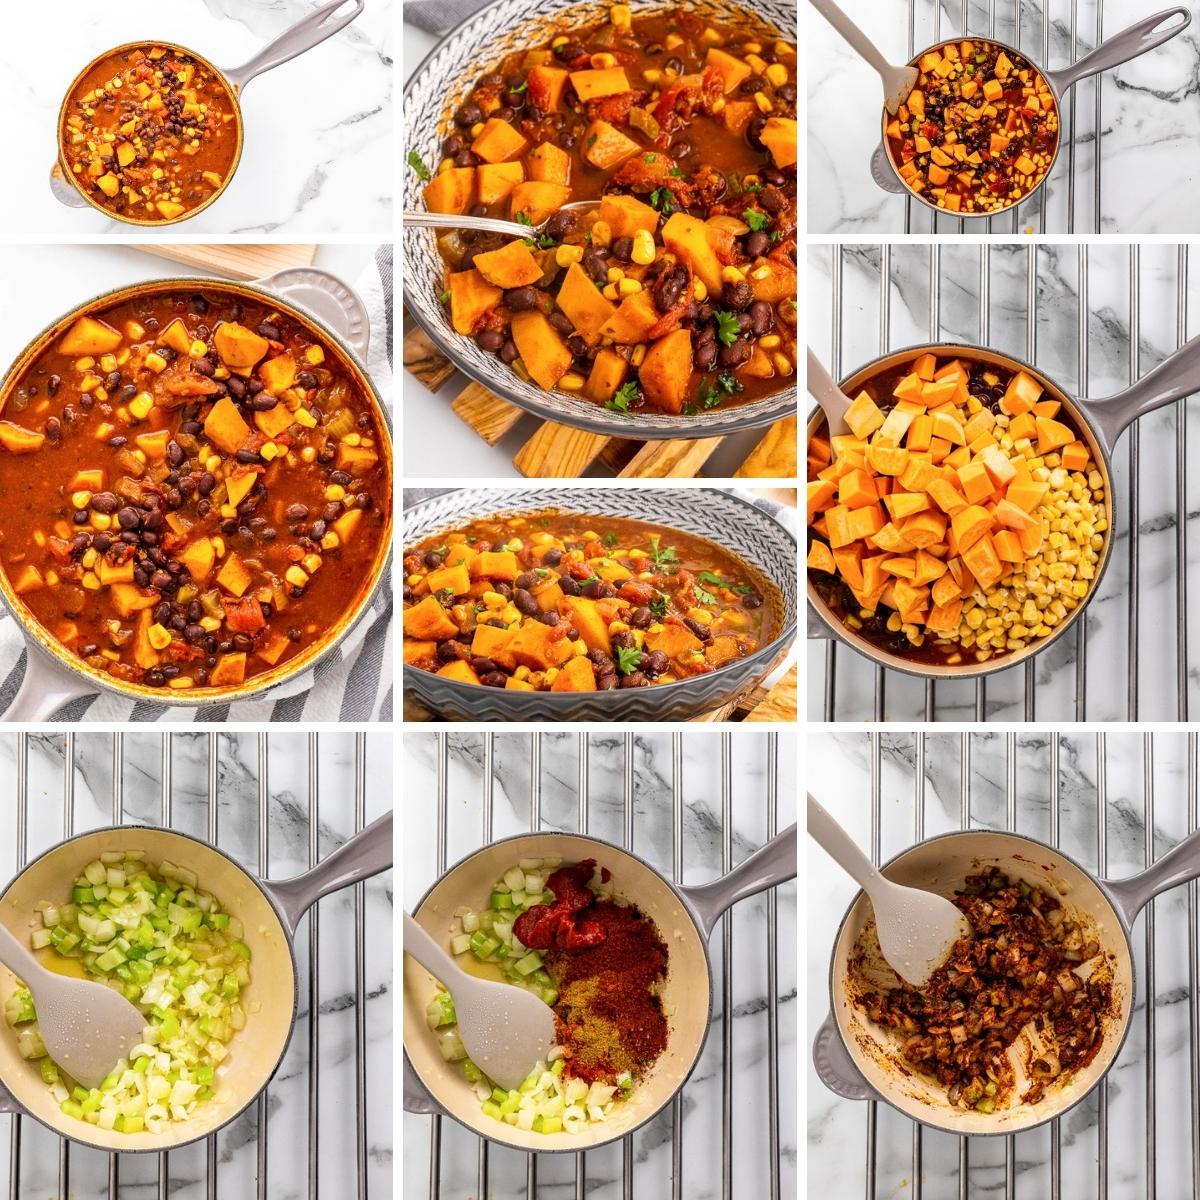
Helpful Tips
Dice your sweet potatoes evenly. This ensures they cook at the same rate and don't turn to mush. Aim for bite-sized pieces - not too chunky, not too small.
Don't skip the sauté. Cooking the onions, garlic, celery, and spices at the start builds a flavorful base. Give the spices a minute or two to bloom in the oil before adding liquids - it makes a difference.
Add broth gradually. Depending on how thick or soupy you like your chili, you can start with less broth and add more as it simmers. It's easier to thin it out than to fix a watery chili.
Let it simmer. Even though the chili comes together quickly, giving it at least 20-30 minutes to simmer helps the flavors meld together and the sweet potatoes fully soften.
Taste and adjust. Chili is one of those recipes that begs for a final taste test. Add more salt, a splash of lime juice, or a dash of hot sauce to finish - whatever makes it pop for you.
Meal Prep, Storing & Freezing Leftovers
This chili holds up like a champ, which makes it perfect for meal prep or cooking once and eating all week.
In the fridge: Store cooled chili in an airtight container for up to 5 days. The flavors actually get better over time, so leftovers are a win. Reheat on the stovetop over medium heat or in the microwave until warmed through.
In the freezer: Let the chili cool completely before transferring it to freezer-safe containers or resealable bags (lay them flat for easy stacking). It'll keep for up to 3 months. Thaw overnight in the fridge, then reheat as usual.
Pro tip: If you're freezing the chili in portions, label with the date and serving size so you're not guessing later. And leave a little space at the top of the containers - liquids expand as they freeze.
Serving Suggestions
This chili is hearty enough to stand on its own, but a few simple add-ons can take it from a basic bowl to something a little more fun (or dinner party-worthy, if that's your thing).
- Add Toppings: Classic chili toppings work great here - think avocado slices, a dollop of vegan sour cream or plain dairy-free yogurt, dairy-free cheese shreds, chopped cilantro, green onions, jalapeño slices, or a squeeze of lime juice for brightness.
- Cornbread on the side: You can't go wrong with a warm piece of vegan cornbread (or corn chips if you're keeping it casual). It's the perfect contrast to the smoky-sweet chili.
- Over rice or quinoa: Stretch your servings by spooning the chili over cooked grains. It makes for a super satisfying, protein-packed meal.
- Stuffed in a baked potato: For a comfort food twist, load it into a baked russet or sweet potato and pile on your favorite toppings.
- Taco night twist: For a light summery alternative, also try our fresh tomato and corn soup. Use the chili as a filling for tacos or burritos - or try swapping in this vegan walnut taco meat for a heartier, protein-packed version. Especially good with shredded lettuce, diced tomatoes, and a little hot sauce.
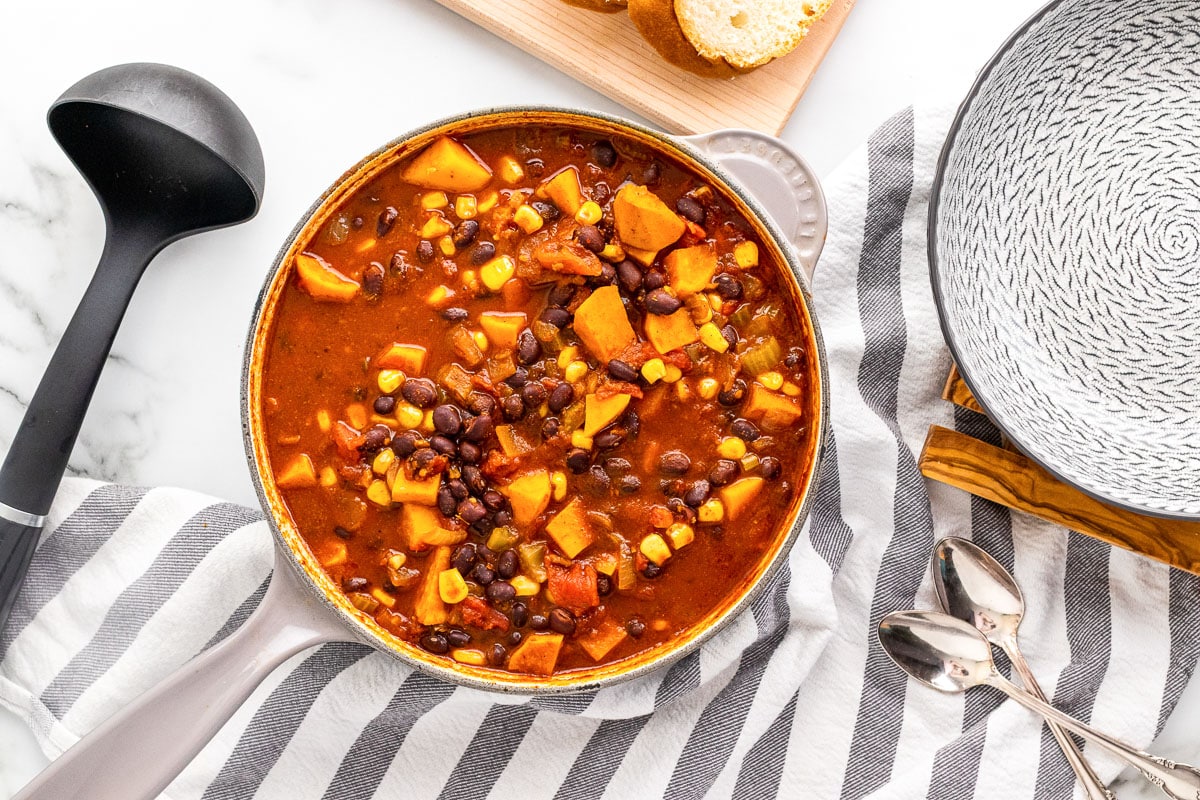
Fun Variations to Try
Add greens: Stir in a few handfuls of chopped kale, spinach, or Swiss chard during the last 5 minutes of cooking. It's an easy way to add color and a boost of healthy greens.
Make it spicier: If you like heat, add a chopped chipotle pepper in adobo sauce, a pinch of cayenne, or extra jalapeño. You can also finish each bowl with your favorite hot sauce.
Use different beans: No black beans? No problem. Pinto beans, kidney beans, or even chickpeas all work well here - or mix a few together for a little variety.
Bulk it up with grains: Stir in cooked quinoa, brown rice, or bulgur for an even heartier chili. Lentils would also be a great addition. It's especially great if you're serving a crowd or stretching leftovers.
Try roasted sweet potatoes: For extra flavor, roast the sweet potatoes in the oven before adding them to the chili. It adds a slightly caramelized edge and changes the texture in a good way.
Make it smoky: Adding a dash of smoked paprika or a splash of liquid smoke can deepen the flavor if you want a more pronounced smoky note without adding spice.
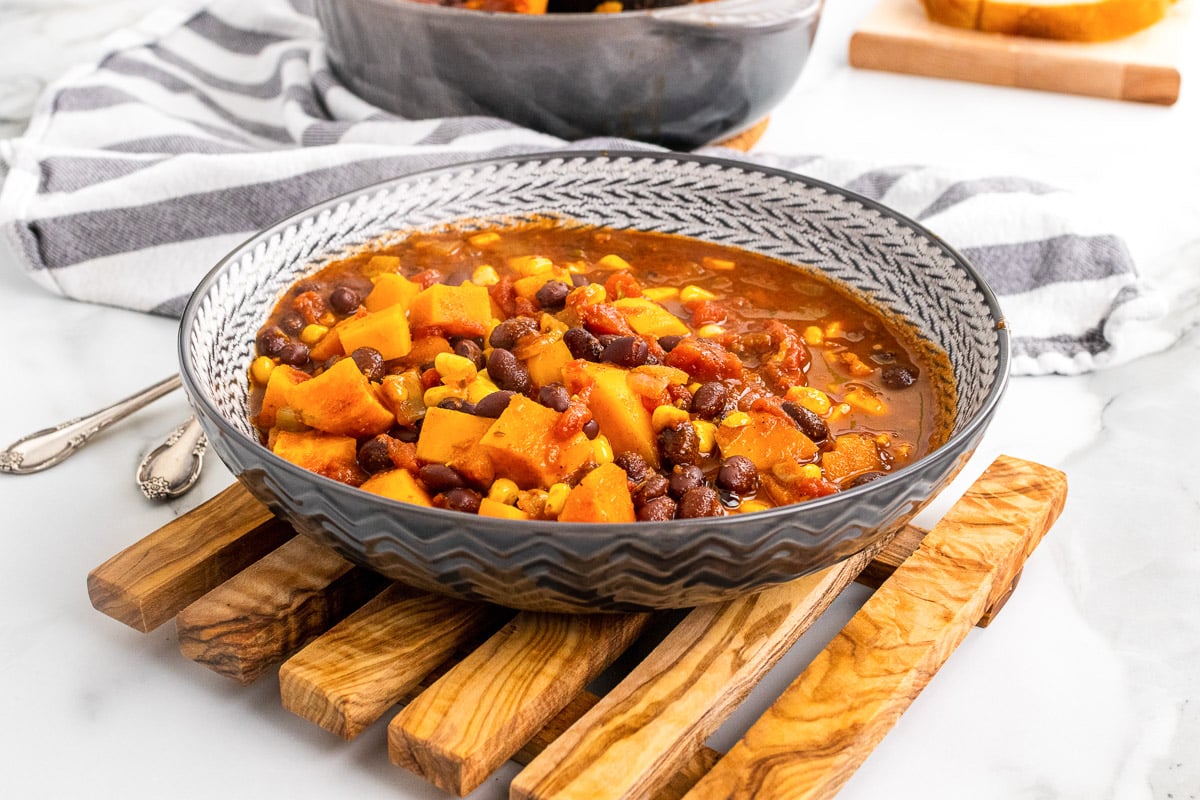
More Vegan Recipes
If you're on the lookout for some other hearty, vegetarian dinner ideas, consider trying a few of our favorites:
- Old-Fashioned Vegan Stew
- Portobello Mushroom Steak
- Marinated Mushrooms with Wild Rice
- Smoky Lentil and Sweet Potato Chili
Recipe
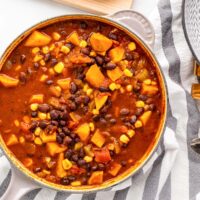
Sweet Potato Black Bean Chili
This Sweet Potato Black Bean Chili is loaded with healthy flavors from tender sweet potatoes, hearty black beans, and smoky spices. Plus, it's vegan and vegetarian friendly!
Print
Pin
Save
Servings: servings
Ingredients
- 2 tablespoon olive oil
- 1 onion peeled and diced
- 3 cloves garlic peeled and minced
- 1 stalk celery minced
- 2 tablespoon tomato paste
- 2 tablespoon chili powder
- 2 teaspoon dried oregano
- 1 teaspoon ground cumin
- 1 teaspoon paprika
- 1 teaspoon salt
- 15 oz black beans canned, rinsed and drained
- 14.5 oz diced tomatoes with chilies
- 1 ½ cups sweet potato peeled and diced,
- 1 cup corn kernels fresh or frozen
- 1 cup vegetable broth homemade or store bought
Instructions
- In a large pot, heat olive oil over medium heat. Add onion, garlic, and celery. Cook until veggies start to soften, about 4-5 minutes.

- Add in tomato paste, chili powder, oregano, cumin, paprika, and salt and cook an additional 1-2 minutes.

- Stir in the black beans, diced tomatoes, sweet potato, corn, and vegetable broth.

- Bring to a boil. When it reaches a boil, reduce heat to a simmer.
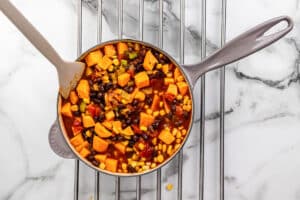
- Simmer for 45 minutes, or until the sweet potatoes are softened.

Nutrition (Estimate per Serving)
Calories: 221kcalCarbohydrates: 36gProtein: 9gFat: 6gSaturated Fat: 1gPolyunsaturated Fat: 1gMonounsaturated Fat: 4gSodium: 719mgPotassium: 701mgFiber: 10gSugar: 6gVitamin A: 5841IUVitamin C: 12mgCalcium: 86mgIron: 4mg
Vegan-ize any recipe!Grab our free vegan cheat sheet, packed with my favorite easy substitutions to make any recipe vegan.
Buffalo Cauliflower Wraps

Craving something simple and easy for lunch or dinner? If so, give these Buffalo Cauliflower Wraps a try. In these wraps, baked cauliflower is dredged in buffalo sauce and placed in a pita wrap loaded with lettuce, onions, and any other toppings you want.

Learn how to make these Buffalo Cauliflower Wraps for a simple and satisfying lunch or dinner option! This vegan buffalo cauliflower is going to win over your taste buds with one bite.
This Buffalo Cauliflower Wraps recipe is...
- Vegan
- Vegetarian
- Made with fresh ingredients
- Nutrient-rich
- Packed with flavor
And while you're here, don't forget to grab a copy of my free vegan cheat sheet. It's packed with all my favorite substitutions to vegan-ize any recipe!
How to Make Buffalo Cauliflower Wraps

- Coat cauliflower florets in flour and seasoning wet mixture and bake in the oven.
- When close to done, remove cauliflower and coat in the buffalo sauce, then return cauliflower to the oven for a few more minutes.
- Remove cauliflower from the oven.
- Grab your flatbread and load it with buffalo cauliflower, lettuce, and toppings.
Full directions for how to make Buffalo Cauliflower Wraps are in the printable recipe card at the bottom of the post.
Helpful Tips For Making Buffalo Cauliflower Wraps

Extra Crispy
Want an even crispier cauliflower? If so, just bake them for a few minutes longer. The great thing about making your own wraps is that you can control how long you bake your cauliflower. Just coat the florets in the buffalo sauce at the end of baking. Otherwise, it will burn in the oven.
Prepare the Pan
Make sure to line your baking pan with parchment paper, foil, or a silicone baking mat. This recipe is a bit messy as it bakes, and you will have to scrub a lot to remove the stuck on bits if you don't line your baking tray.
Frozen Cauliflower
If you want to use frozen cauliflower instead of fresh, just allow the veggies to thaw completely first. Then dredge them in the mixture and bake as usual. You won't have to bake your cauliflower quite as long if you have smaller pieces, so adjust the baking time as you see fit.
Variations to Buffalo Cauliflower Wraps

Sauce
You can dredge your cauliflower in any flavor of sauce you want. A BBQ or even dry ranch powder added to the flour mixture could give your cauliflower a really great flavor.
Wrap
You can use a tortilla in place of the flatbread if you want. I have used a spinach tortilla and it added some great flavor to the wrap!
Toppings
You are in control of what toppings you use. Try drizzling on some homemade vegan ranch, blue cheese, or even nondairy yogurt. In terms of veggies, you can use any kind you want. And of course, you could always just eat your buffalo cauliflower without toppings, too.
Buffalo Cauliflower Wraps FAQs
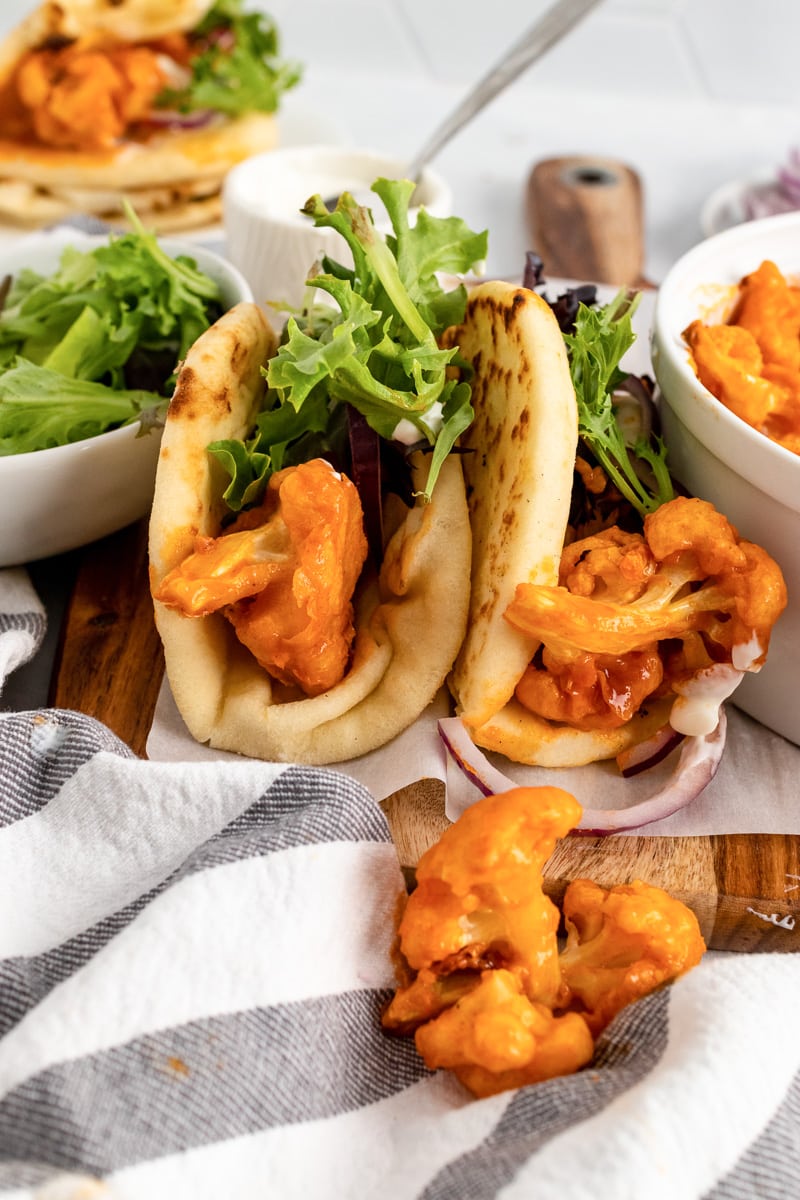
How to know when cauliflower is done?
You will know your cauliflower is done when it is a bit browned on the outside. Also make sure that the wet mixture you dip the cauliflower in is firmed up and cooked. The cauliflower will be fork tender when you poke it.
Is buffalo sauce hot?
Buffalo sauce does carry quite a bit of heat. You can find some brands that sell a mild buffalo sauce which isn't as spicy as the original.
How do you store leftover cauliflower?
You can store your leftover cauliflower for up to 2-3 days in the fridge. It will be a lot softer but will still be delicious when you reheat it.
Recipe

Buffalo Cauliflower Wraps
Craving something simple and easy for lunch or dinner? If so, give these tasty Buffalo Cauliflower Wraps a try.
Print
Pin
Save
Servings: servings
Ingredients
- ½ cup flour
- 1 teaspoon garlic powder
- ½ teaspoon salt
- ½ teaspoon paprika
- ½ cup almond milk plain
- 1 head cauliflower chopped into florets
- ½ cup hot sauce such as Frank's buffalo sauce
- 1 tablespoon canola oil or your oil of choice
- 1 tablespoon maple syrup or agave syrup
- 6 small flatbreads or wraps
Toppings (choose your favorites):
- Chopped lettuce or salad greens
- Sliced red onions
- Plain Nondairy Yogurt
- Cilantro
- Avocado
Instructions
- Preheat the oven to 425°F, and line a baking sheet with parchment paper.
- In a large bowl, stir together the flour, garlic powder, salt, and paprika until combined.
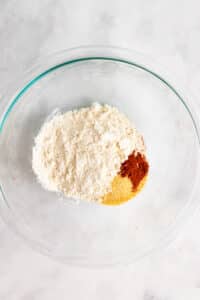
- Whisk in the almond milk until the batter is smooth.
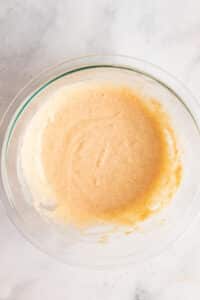
- Then add the cauliflower florets and toss until they are evenly coated.

- Spread cauliflower out on the prepared baking sheet.

- Bake for 20 minutes, gently stirring halfway through or until fork tender.

- While cauliflower is cooking, mix together the hot sauce, oil, and maple syrup in a small bowl. Set aside.
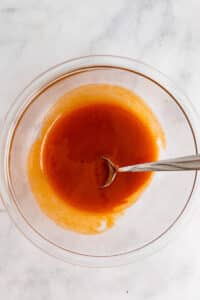
- Once cauliflower is cooked, transfer it to a large mixing bowl and toss with the prepared hot sauce

- Use a slotted spoon to transfer the cauliflower back to the baking sheet and return to the oven for 2-3 minutes, until sauce is bubbling.

- To make the wraps, top the flatbreads with buffalo cauliflower, lettuce, and your favorite toppings (see suggestions above).

Nutrition (Estimate per Serving)
Calories: 148kcalCarbohydrates: 24gProtein: 5gFat: 5gSaturated Fat: 1gPolyunsaturated Fat: 1gMonounsaturated Fat: 2gTrans Fat: 1gSodium: 1169mgPotassium: 511mgFiber: 4gSugar: 6gVitamin A: 68IUVitamin C: 93mgCalcium: 80mgIron: 2mg
Vegan-ize any recipe!Grab our free vegan cheat sheet, packed with my favorite easy substitutions to make any recipe vegan.
Oat Flour Banana Bread
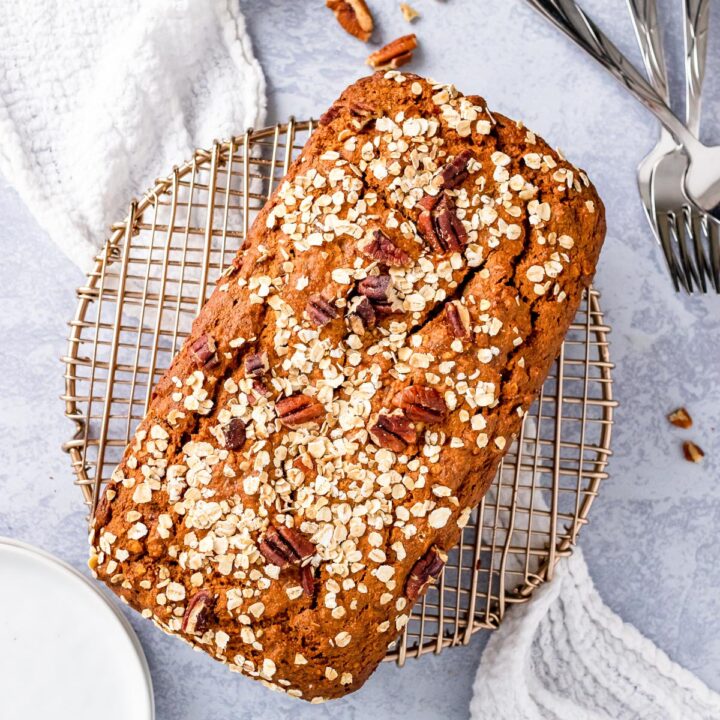
Slice and serve up this Oat Flour Banana Bread as a delicious breakfast or dessert. This banana oat bread is easy to throw together and makes your home smell incredible!

If you're craving a big slice of vegan banana bread, this recipe is the answer! It only takes a few simple steps to whip up. Plus, this banana bread is freezer-friendly so you can make a big batch for later too.
I love eating slices of this banana bread covered in nut butter or drizzled with a fresh berry sauce. If you're serving your banana oat bread as a dessert, you could even top it with a scoop of dairy free ice cream!
This Oat Flour Banana Bread recipe is…
- Gluten-free
- Vegan
- Dairy-free
- Freezer-friendly (great for meal prep!)
The oat flour keeps this recipe gluten-free and gives it a wonderful depth of flavor and texture. This has quickly become one of my favorite vegan baking recipes.
Making Oat Flour Banana Bread
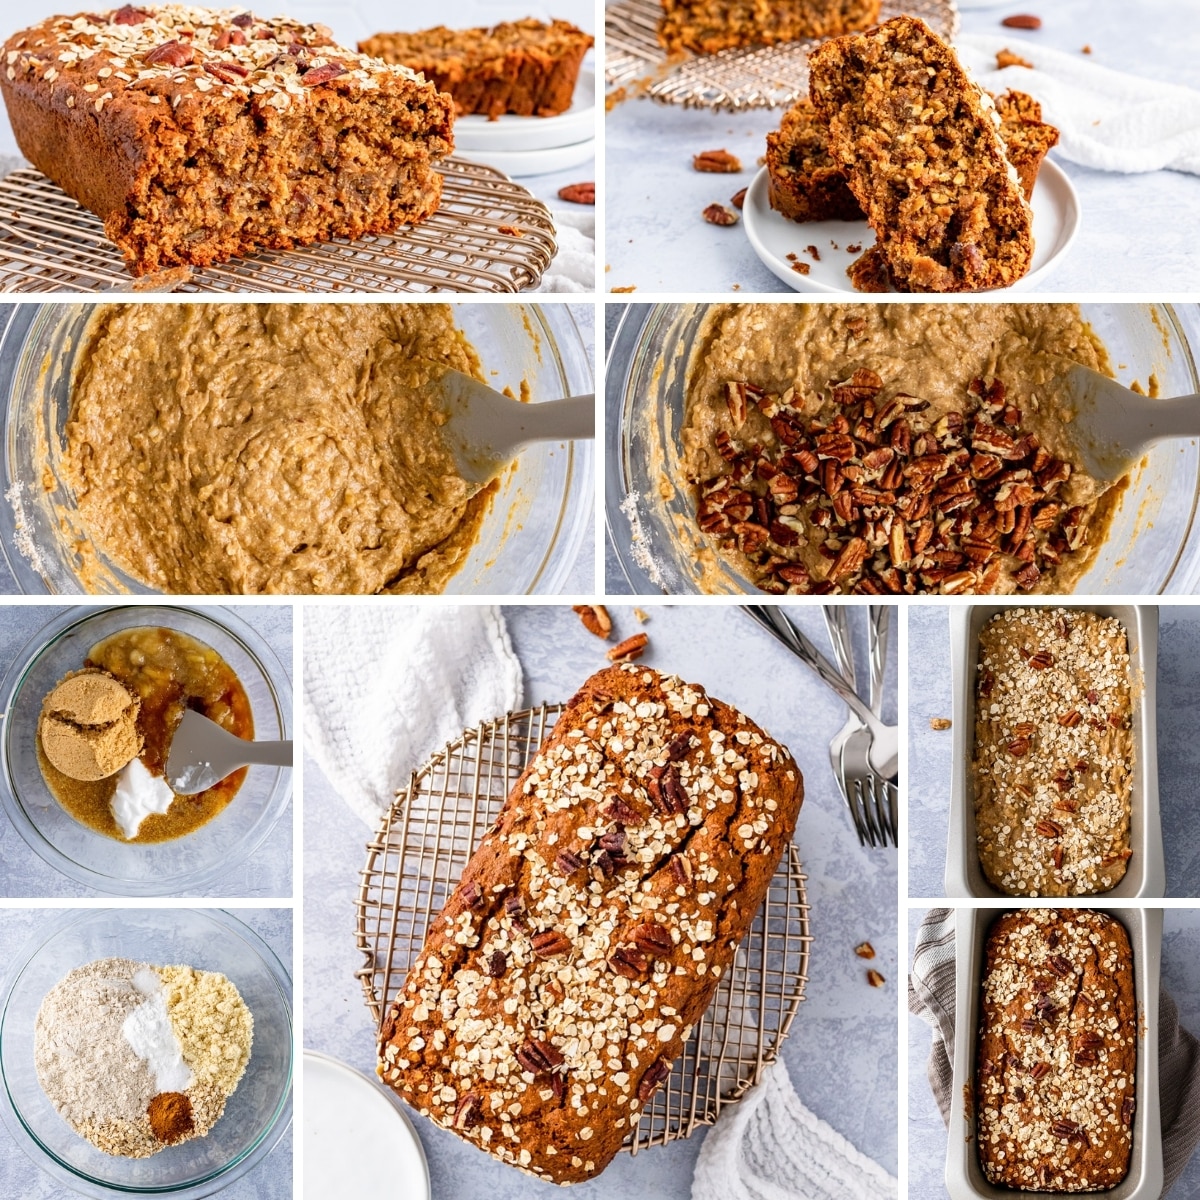
- Preheat oven and grease a loaf pan.
- In a bowl, mix together dry ingredients.
- In another bowl, whisk together wet ingredients.
- Mix the dry and wet mixtures together.
- Pour batter into the pan, and bake.
- Let cool, then slice and serve.
Detailed directions and measurements for this Oat Flour Banana Bread are in the printable recipe card below.
Tips & Tricks

Use Ripe Bananas
Like any banana bread recipe, using very ripe bananas is key. You will find using extra-ripe bananas will give your banana bread that rich banana flavor, and the perfect texture.
Lumps Are Okay
When working with bananas, mashing them up is key. It's okay if there are a few smaller lumps of banana in the batter. Just make sure that all the other ingredients are well mixed.
Loaf Pan
I recommend using a loaf pan for this recipe. I used a 9"x5" pan, but you could also make mini loaves for gifting! Just bake the mini loaves for a shorter amount of time.
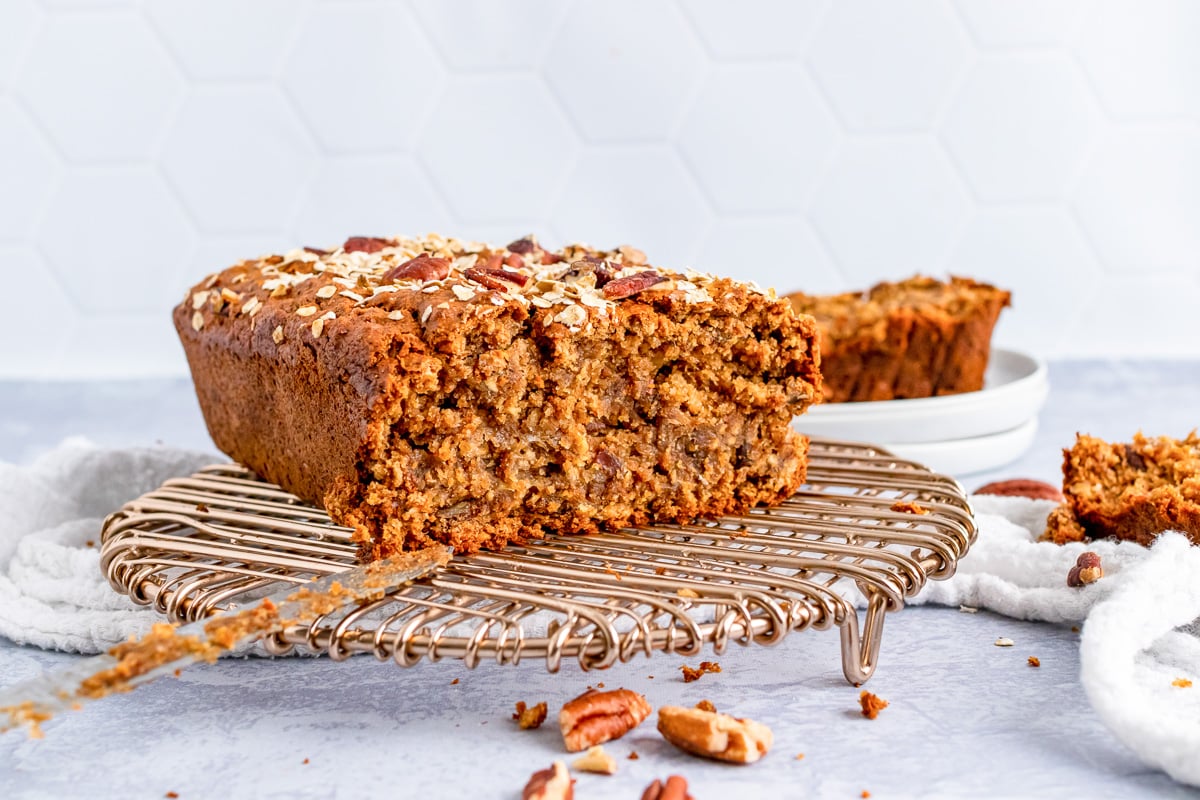
Variations
Chocolate Chips
Grab some vegan-friendly, dark chocolate chips to stir into your oat flour banana bread. Just fold them into the batter right before baking, and bake as normal.
Nut Butter
You can add a swirl of this vegan Nutella, peanut butter, or any other nut better to your banana bread. Just add around ¼ cup of nut butter to the batter in the loaf pan, then use a knife to swirl in into the batter.
Dried Fruit
Dice up some dried fruit to mix in the batter for added flavor. Dried cranberries would be a really great pairing with this banana bread. You could even try adding some dried blueberries or strawberries!
FAQs
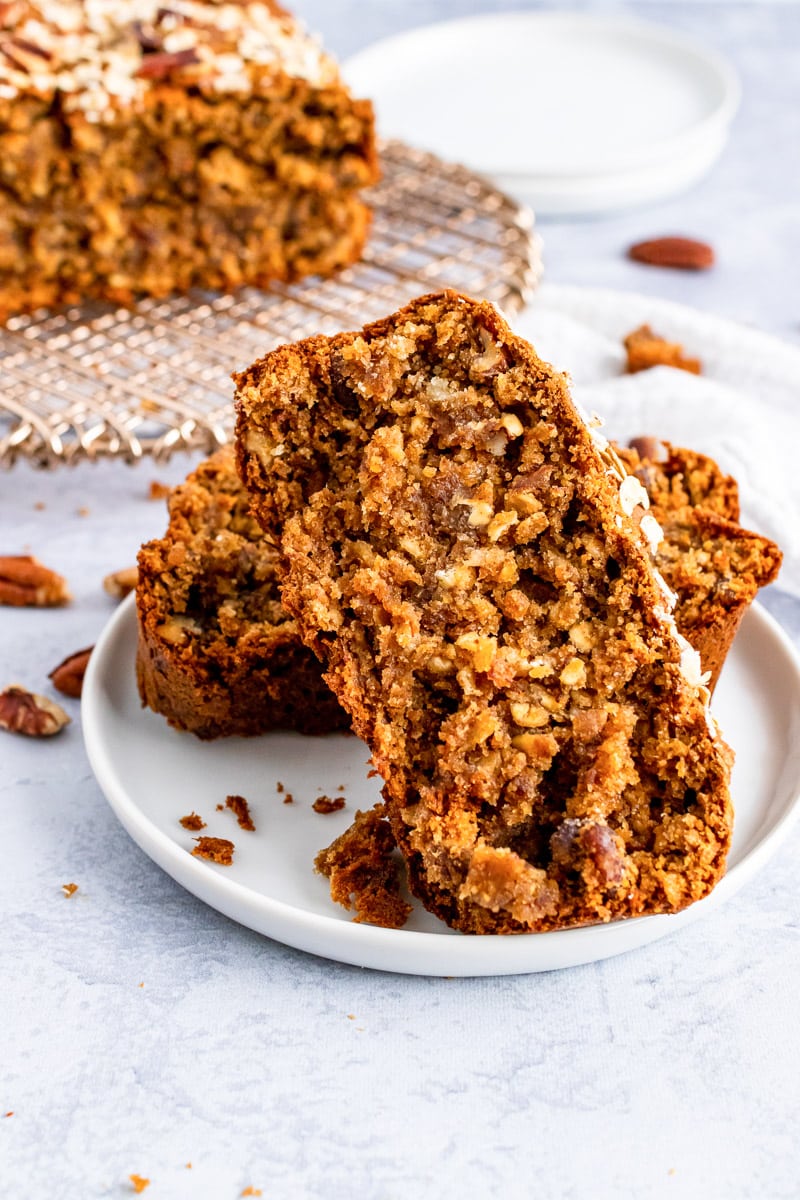
How do you make flax eggs?
To make a flax egg, mix one tablespoon of ground flax seed and two tablespoons of water together and let it sit for 5-10 minutes. During this time, the mixture will thicken, and become a binder for the recipe.
Can you freeze banana bread?
You can freeze any bread you don't plan to eat right away. Place the loaf in a freezer bag or container and store for 2-3 months in the freezer.
When you're ready to eat your bread again, you can thaw it in the fridge or on the counter at room temperature.
Why is my bread brown on top but raw in the center?
Because banana bread is very moist, it may take longer to cook in the middle. If you find the top of your bread is becoming too brown, place a tent of aluminum foil over the top of your loaf pan. This will help prevent the top from burning while the center of your bread continues to cook.
More Recipes
If you love this oat flour banana bread, check out these other delicious recipes:
Also worth trying: our almond flour pancakes.
Recipe

Oat Flour Banana Bread
Slice and serve up this Oat Flour Banana Bread as a delicious breakfast or dessert. It's easy to make and your home will smell incredible!
Print
Pin
Save
Servings: servings
Ingredients
- 1 ¾ cups oat flour
- 1 cup quick oats
- ⅔ cup almond flour
- 1 tablespoon baking powder
- 1 teaspoon cinnamon
- ½ teaspoon salt
- 2 medium bananas mashed (about 1 cup)
- ½ cup canola oil
- ½ cup brown sugar
- 2 flax eggs 2 tablespoon + 6 tablespoon water
- 1 teaspoon vanilla extract
Instructions
- Preheat oven to 350°F, and grease a 9x5" loaf pan.
- In a large bowl, stir together the oat flour, quick oats, almond flour, baking powder, cinnamon, and salt.
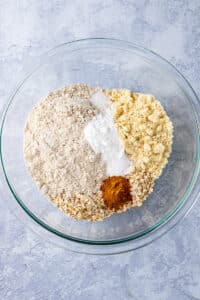
- In a smaller bowl, whisk together the bananas, canola oil, brown sugar, flax eggs, and vanilla until smooth. Some banana lumps are ok.
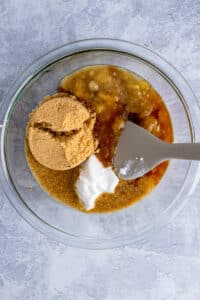
- Add the banana mixture to the dry ingredients and stir until just combined.
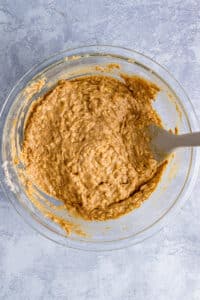
- Pour the banana mixture into the prepared loaf pan, and bake for 60-70 minutes, or until the loaf is a nice golden brown and a toothpick inserted into the center comes out clean.

- Allow to cool completely before slicing and serving.

Nutrition (Estimate per Serving)
Calories: 414kcalCarbohydrates: 48gProtein: 8gFat: 23gSaturated Fat: 2gPolyunsaturated Fat: 6gMonounsaturated Fat: 10gTrans Fat: 1gSodium: 315mgPotassium: 280mgFiber: 5gSugar: 18gVitamin A: 20IUVitamin C: 3mgCalcium: 149mgIron: 2mg
Vegan-ize any recipe!Grab our free vegan cheat sheet, packed with my favorite easy substitutions to make any recipe vegan.
Oat Milk Latte

Skip the coffee shop drive thru and make a delicious Oat Milk Latte at home! Sip away and enjoy this refreshingly smooth, rich espresso topped with an oat milk foam at home.

If you love Dunkin Donuts' Oat Milk Lattes, you will enjoy this homemade version. Plus the price of making your own latte at home is only a fraction of the price of ordering one!
Since you'll be skipping the coffee shop drive thru, you'll probably want to whip up a coffee shop treat to go with your Oat Milk Latte. A donut is the classic choice, but I also love pairing my latte with a sweet muffin or a bagel with a savory spread!
This Oat Milk Latte recipe is...
- Dairy-free
- Vegan
- Vegetarian
- Naturally gluten-free
- Made with 2 ingredients
How to Make Oat Milk Latte

- Start by brewing a cup of espresso.
- Then add your oat milk to a bowl or cup and use a frother.
- Pour brewed espresso in a cup, and top with the oat milk foam.
- Serve and enjoy.
Full directions for how to make Oat Milk Latte are in the printable recipe card featured below.
Tips & Tricks for Oat Milk Latte
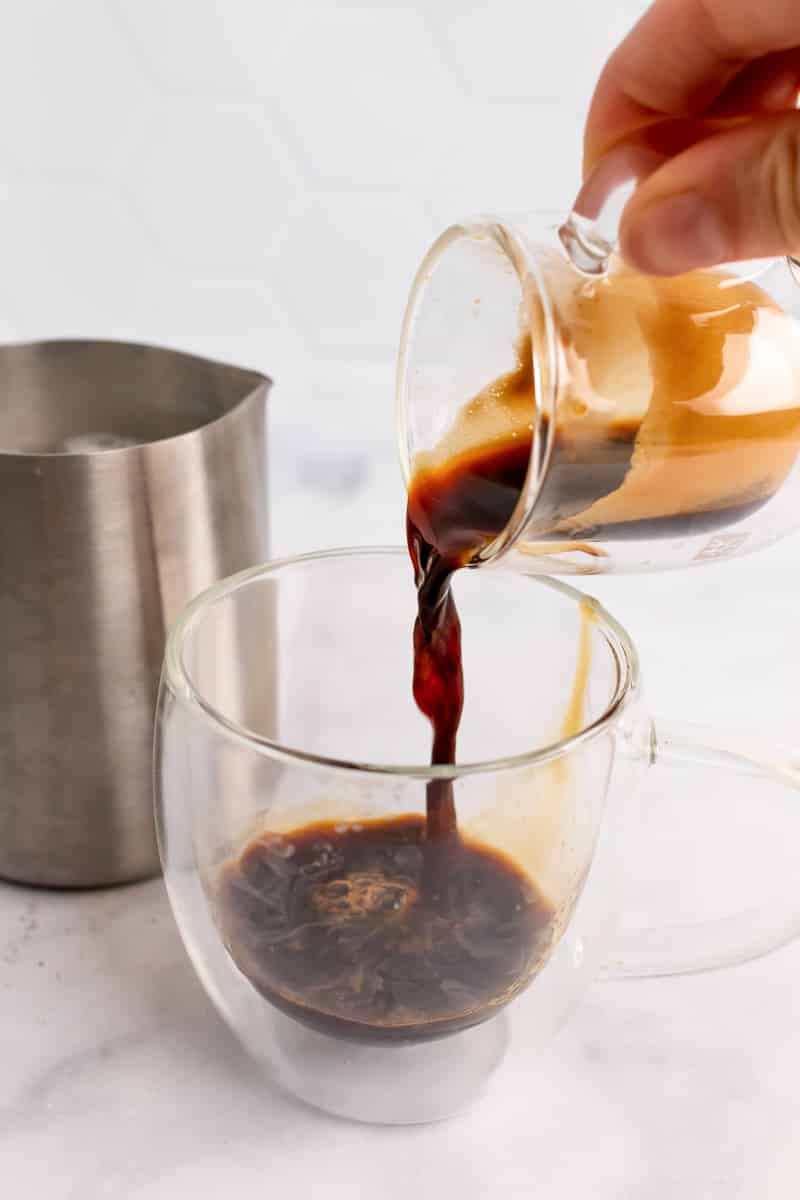
Espresso
You can use an espresso machine to make your espresso, or you can use instant espresso. Just mix up your espresso as directed on the package.
Or if you don't own an espresso maker, you can make a strong coffee in place of the espresso. Make a double strength brew of regular coffee to get a flavor similar to espresso.
Frothing Milk
I used a milk frother for this recipe, but not every home has one. You can whisk your milk by hand on the stovetop. This takes a good amount of work, but is do-able.
Another option is to add in the warm milk and blend for around a minute to froth. Just make sure your blender can handle the heat!
Variations to Oat Milk Latte

Sweetening
Go right ahead and sweeten your latte with a splash of sugar, sweetener of choice, etc. Just stir your sweetener in with the espresso, then pour the frothy milk on the top.
Decaf
If you don't need the caffeine but want a coffee fix, reach for a decaf coffee and brew it up to double strength. Then top with the oat milk and enjoy.
Spices
Try adding cinnamon, nutmeg, or even pumpkin spice to your drink. You can sprinkle the spices on top, or stir them into the espresso before you top it with the milk.
Vanilla
Add a splash of vanilla to flavor the espresso-a sweet treat for sure!
Flavored Oat Milk
Go right ahead and grab any flavor of oat milk you want: unflavored, vanilla, or even extra creamy. You will find that the coffee will have a slightly different flavor depending on what flavor of oat milk you use.
Oat Milk Latte FAQs

What is the difference between coffee and espresso?
Espresso is a dark roast that is finely ground and brewed. Alternately, coffee can have a variety of blends from mild to rich. The biggest difference between coffee and espresso is how they are brewed.
Can I make an iced Oat Milk Latte?
Go right ahead and make an iced latte if you would like. To ice your latte, brew up your espresso and let it cool a bit. Then pour ice in a cup, add espresso, and pour the oat milk on top. Then add any sweeteners.
What is an alternative to oat milk?
If you want other plant-based milk alternatives, use coconut milk or almond milk to replace the oat milk.
Recipe

Oat Milk Latte
Skip the coffee shop drive thru and make a delicious Oat Milk Latte at home! Sip away and enjoy this refreshingly smooth, rich espresso topped with an oat milk foam at home.
Print
Pin
Save
Servings: (6 oz) latte
Instructions
- Pour espresso into mug.

- Using a milk frother on the max foam setting, froth the oat milk.

- Carefully pour the oat milk into the mug with the espresso.

- Enjoy!

Notes
- There is literally so much you can do to make this recipe your own!
- I like to stir a bit of maple syrup into the espresso, then pour the frothed oat milk on top, and finally top with some ground cinnamon.
- If you don't own a milk frother, then the best way to get frothy milk is with a blender.
- Make sure that your blender is meant to handle hot liquids-it should have steam escape holes.
- To use a blender, first heat the oat milk, then blend on high for 30 seconds to a minute.
- You can also whisk the oat milk while heating it over the stove, however this method takes the most effort.
- You can add a splash of vanilla and some sugar to the espresso to make it a sweet treat!
- If you don't have an espresso machine, use double-strength coffee (about ¼ cup).
- I also tested this recipe with instant espresso powder-follow the instructions on the package to get a shot of instant espresso, then proceed with the instructions
- I find that adding the flavorings, sugars, etc. is best when stirred into the espresso, before adding the milk.
- You can also buy flavored oat milks (ex. sweetened vanilla) to make this extra tasty!
Nutrition (Estimate per Serving)
Calories: 86kcalCarbohydrates: 16gProtein: 3gFat: 2gSodium: 76mgPotassium: 80mgFiber: 1gSugar: 12gVitamin A: 328IUCalcium: 230mgIron: 1mg
Vegan-ize any recipe!Grab our free vegan cheat sheet, packed with my favorite easy substitutions to make any recipe vegan.
Dragon Fruit Smoothie
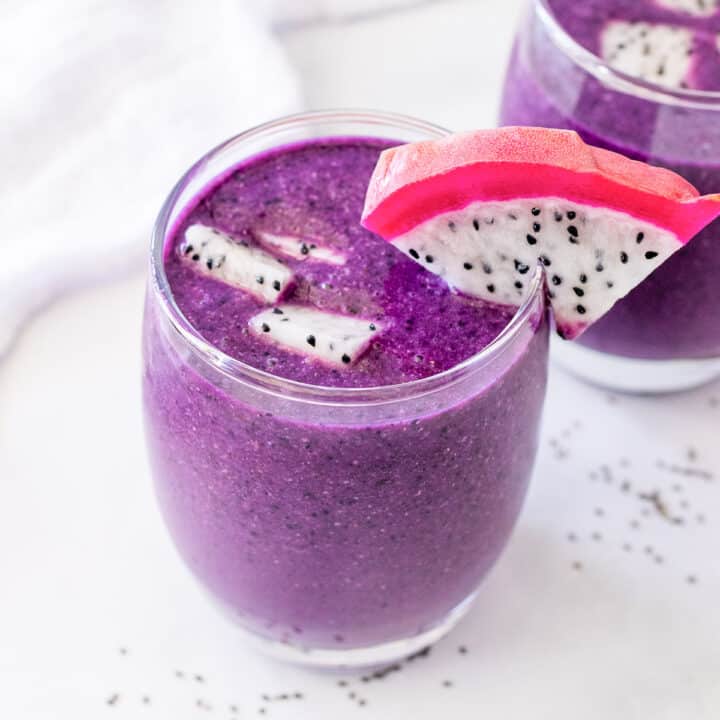
Whip up this antioxidant-loaded Dragon Fruit Smoothie for breakfast or a snack. This smoothie takes only 5 minutes and 5 ingredients to make!

This smoothie is loaded with dragon fruit, blueberries, and bananas. If you are craving a fruit smoothie, this is a great one to try! Head to the store, grab supplies and get to mixing.
There are so many uses for dragon fruit, but I think my favorite will always be smoothies. (I also love these Strawberry Mango Fizz and Cookie Dough smoothies!)
This Dragon Fruit Smoothie recipe is...
- Ready in 5 minutes or less
- Loaded with fresh fruit
- Naturally gluten-free
- Dairy-free
- Vegan
- Plant-Based
How to Make Dragon Fruit Smoothie
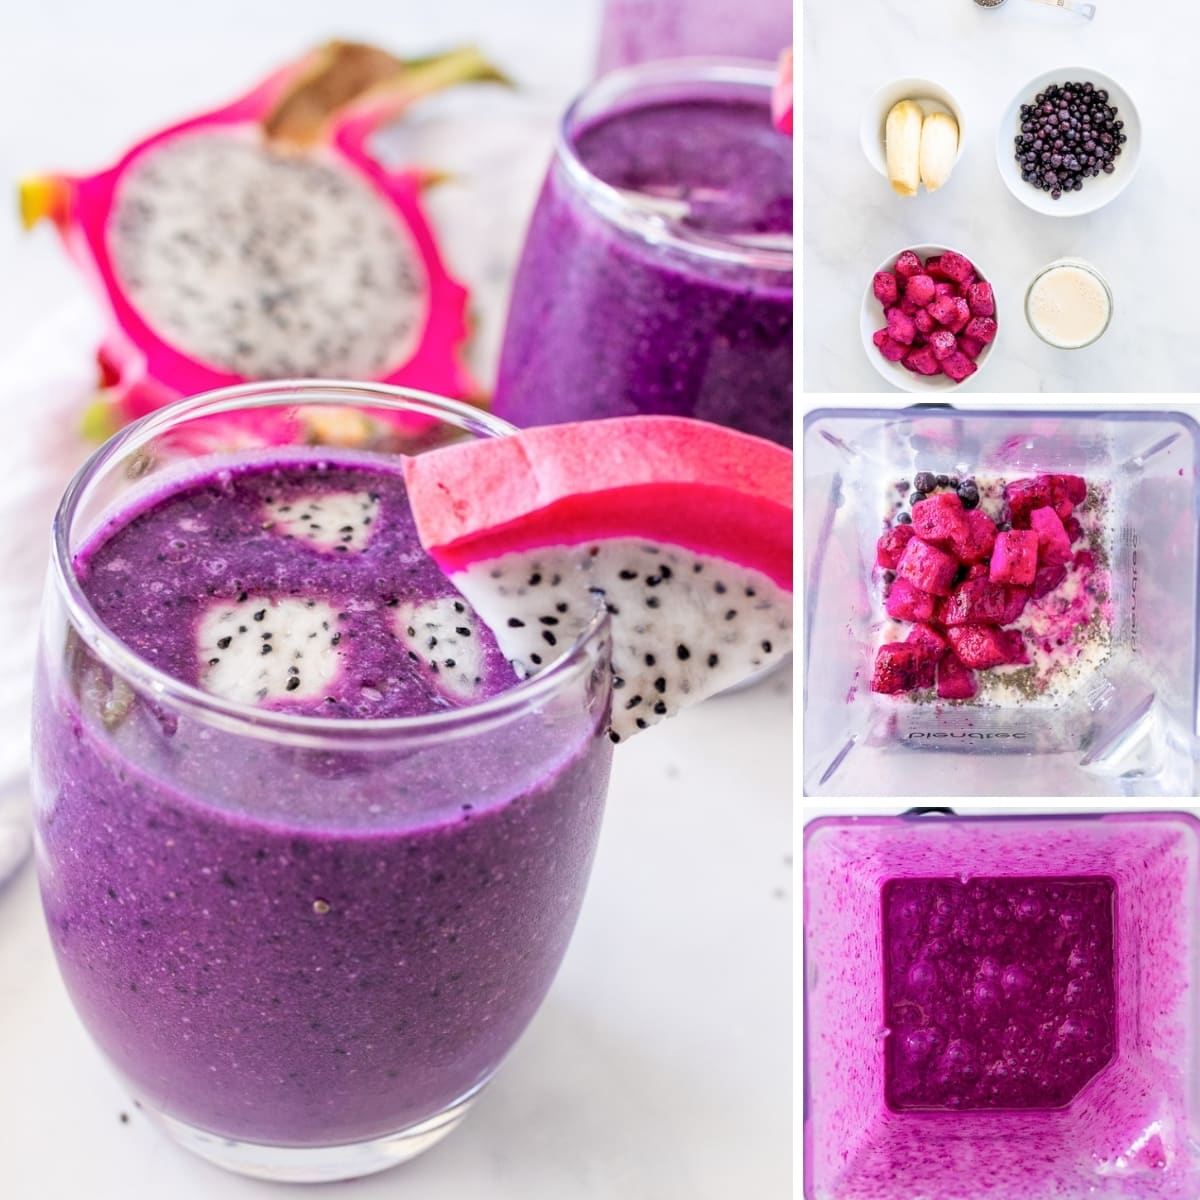
- Toss your ingredients into a blender.
- Blend ingredients until the smoothie is fully blended.
- Pour the smoothie into glasses, then top with fresh fruit and serve.
Full directions and ingredients are in the printable recipe card below.
Tips & Tricks for Dragon Fruit Smoothie
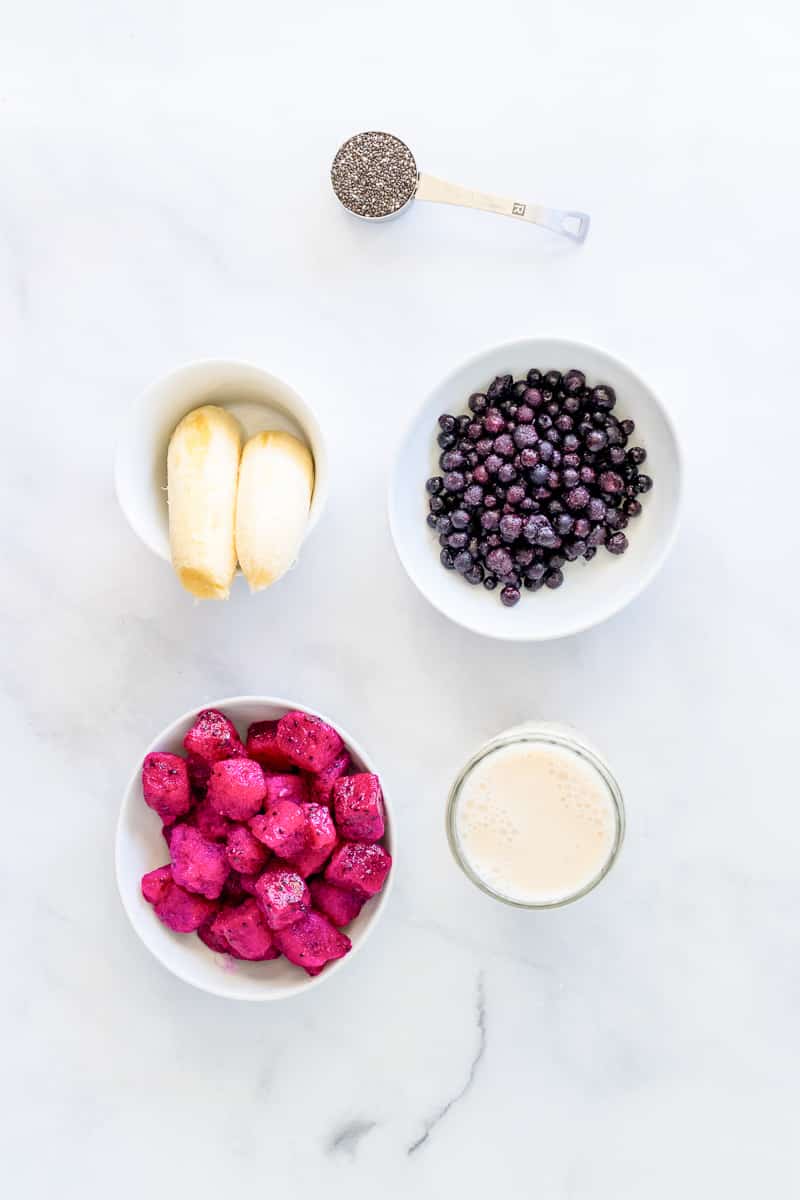
High Speed Blender
I highly recommend using a high-speed blender. Using a high-speed blender will ensure that all your fruit is well blended and that your smoothie has a creamy texture. If your blender isn't fast enough, you will find that the texture of your smoothie is off.
Thickness of the Smoothie
You can adjust the texture of your smoothie by adding certain ingredients! Add extra fruit to make your smoothie nice and thick. You can also add extra plant based milk to help thin out the smoothie.
Variations to Dragon Fruit Smoothie
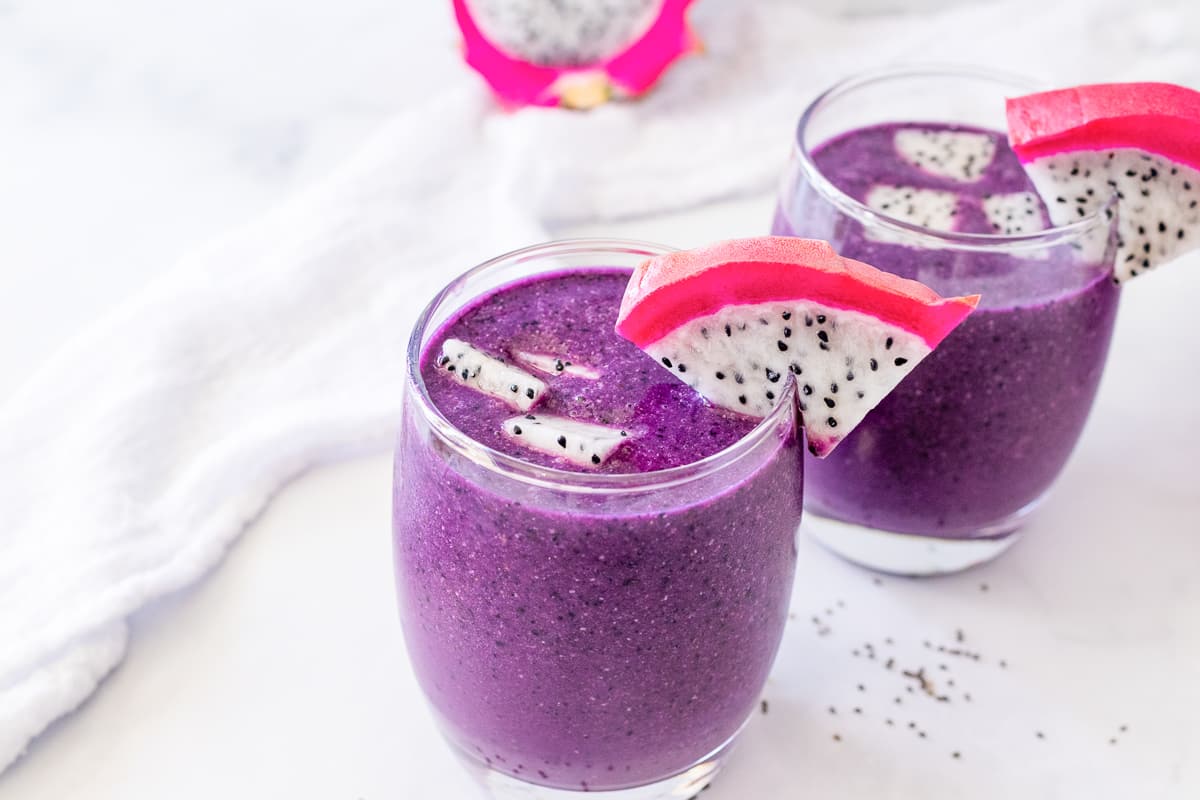
Added Fruit
Feel free to change up the fruit you add into this smoothie. Any fruit you have on hand will work great. Toss in some frozen pineapple, kiwi, mango, etc. Create whatever flavor combo you prefer!
Flaxseed
Add in a little flaxseed to add in extra nutrients. Sneak in a tablespoon or two for your kids who are going to sip this smoothie-or great nutrients for you!
Plant-Based Yogurt
Instead of milk, you can use a vanilla plant-based yogurt. This will give you a thicker and richer smoothie.
Dragon Fruit Smoothie FAQs
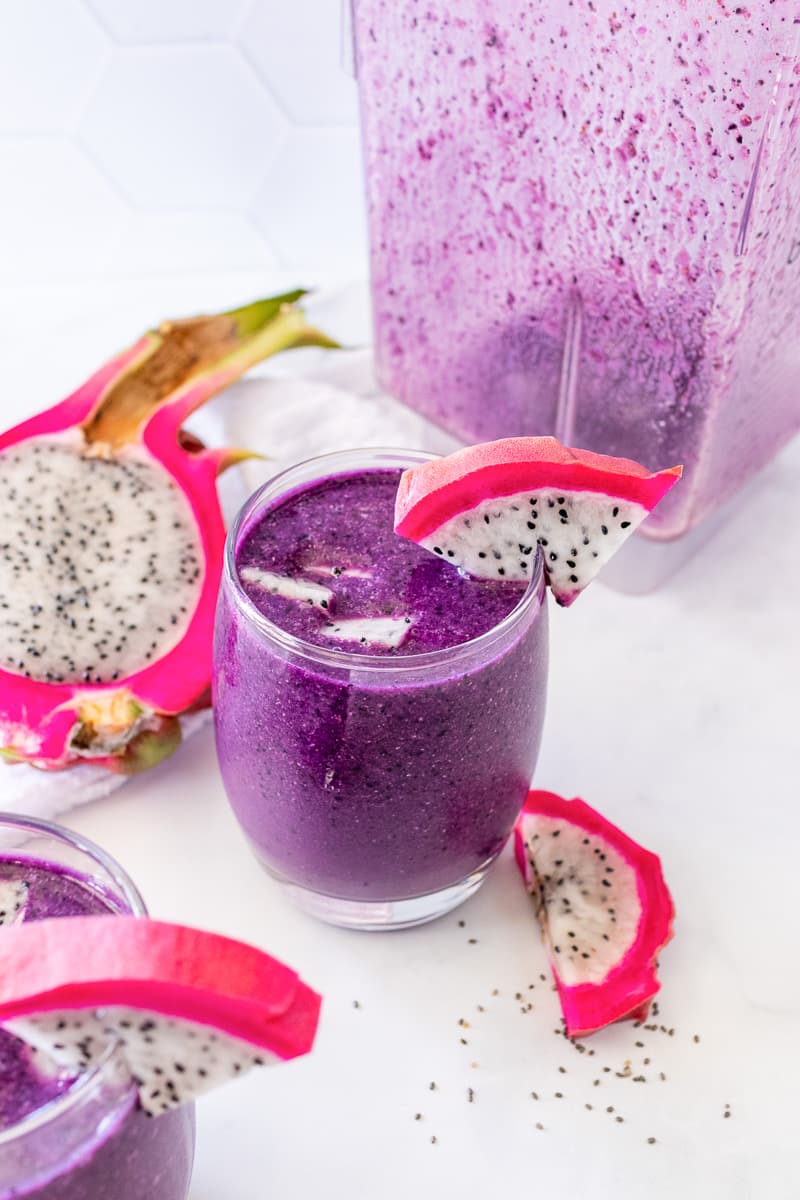
What does dragon fruit taste like?
Dragon fruit is a mild fruit when it comes to flavor. You will find fresh dragon fruit offers the flavor of a pear mixed with a kiwi. Dragon fruit is a delicious fruit that tastes great mixed in with other fruits.
Can you freeze dragon fruit?
You can freeze dragon fruit if you buy some from the store. This is a great way to prep your fruit and keep it ready to toss in smoothies like this.
Dragon fruit can be tricky to find, depending on where you live. So if you find some, go ahead and buy a lot so you can freeze some for later!
How do you store leftover smoothie?
If you don't drink all your smoothie right away, don't worry-you can save it! Store your leftover smoothie in an airtight container for 1-2 days in the refrigerator. When you're ready to eat it, just give the smoothie a stir, pour into a glass, and enjoy.
More Tasty Ideas
If you love this dragon fruit smoothie, check out these other delicious recipes:
Recipe

Dragon Fruit Smoothie
Whip up this antioxidant-loaded Dragon Fruit Smoothie for breakfast or a snack. This smoothie takes only 5 minutes and 5 ingredients to make!
Print
Pin
Save
Servings: servings
Ingredients
- 1 ½ cups dragon fruit cubed and frozen
- 1 ripe banana
- ½ cup blueberries frozen
- ½-1 cup plant based milk depending on thickness desired
- ½ cup blueberries frozen
Instructions
- In a large high-speed blender, put dragon fruit, banana, blueberries, milk, and chia seeds into the bottom.
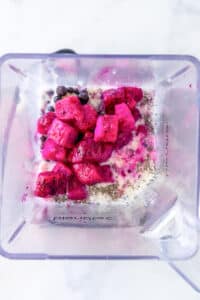
- Turn on blender, starting on a low speed, and gradually increasing speed until everything is completely blended and smooth.
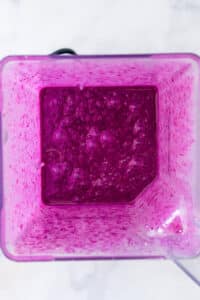
- Serve immediately!
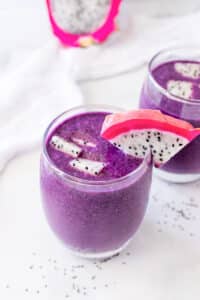
Notes
- You can use pink or white dragon fruit.
- To make it extra creamy, add ½ cup of vegan yogurt.
- To make it thicker, use frozen banana and less milk.
- Having a good blender is important to bread down the seeds in the dragon fruit.
Nutrition (Estimate per Serving)
Calories: 227kcalCarbohydrates: 41gProtein: 2gFat: 5gSaturated Fat: 1gSodium: 352mgPotassium: 268mgFiber: 6gSugar: 29gVitamin A: 78IUVitamin C: 12mgCalcium: 232mgIron: 3mg
Vegan-ize any recipe!Grab our free vegan cheat sheet, packed with my favorite easy substitutions to make any recipe vegan.
Portobello Mushroom Steak

This Portobello Mushroom Steak recipe makes a delicious vegan steak that is incredibly easy to whip up. You can make this vegan steak and potatoes recipe any night of the week!

These juicy, seasoned portobello steaks are baked with asparagus and then paired with vegan mashed potatoes. Serve them alongside a crisp green salad and some homemade lemonade. You could also serve them with some rice and green beans.
There are so many delicious options for meatless dinners! Lately I've been loving these Vegan Sloppy Joes, this Lentil Shepherd's Pie, and these Tofu Enchiladas with Sweet Potato in Mole Sauce. But, I think these Portobello Mushroom Steaks are turning into my new favorite!
This Portobello Mushroom Steak recipe is…
- Vegan
- Naturally gluten-free
- Vegetarian
- Ready in 30 minutes
- Simple to make
- Made with everyday ingredients
- Versatile
How to Make Portobello Mushroom Steak
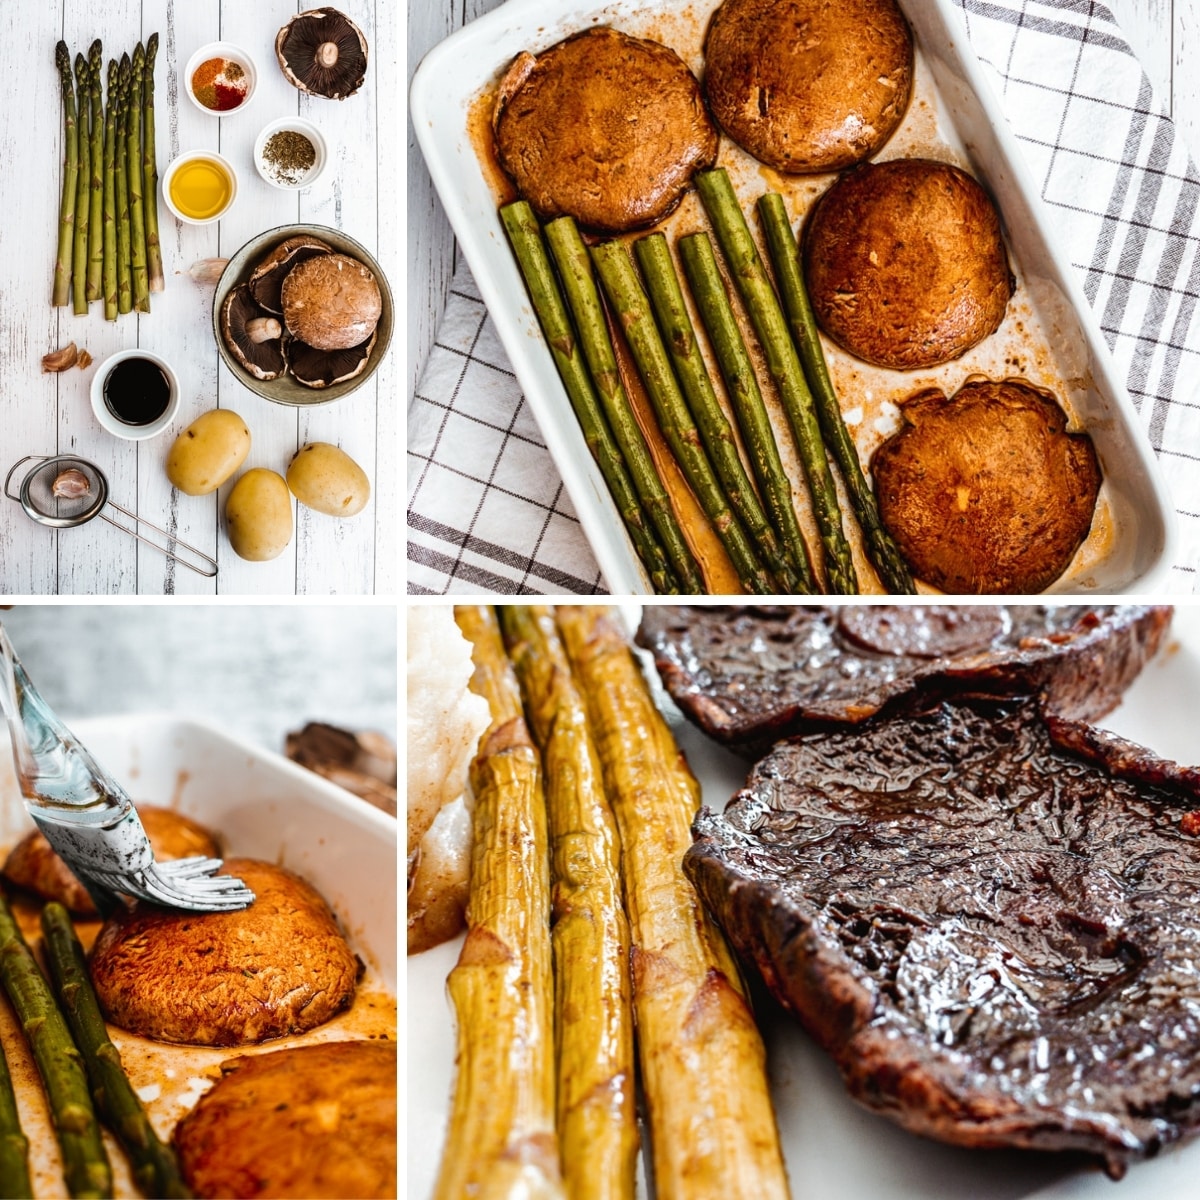
- Preheat oven and prepare the mushroom marinade.
- Prep mushrooms, then place in baking dish.
- Brush with marinade & bake, flipping both sides.
- Serve warm and enjoy!
Full directions for how to make Portobello Mushroom Steak are in the printable recipe card below.
Tips & Tricks for Portobello Mushroom Steak
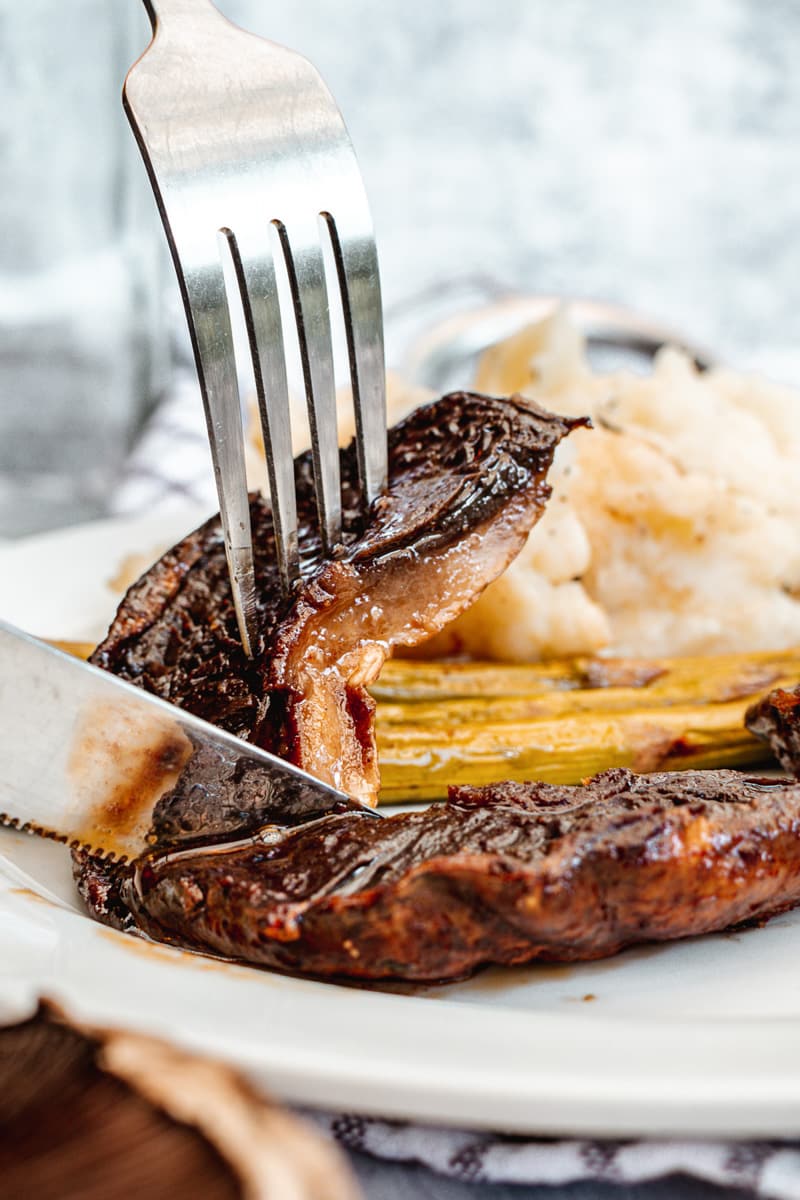
Baking Time
Depending on the size of your mushrooms, the bake time will vary. Make sure you use the baking time in the recipe as a guide. You will need to check on your mushrooms to make sure they are cooked to your preference.
Cooking Vegetables
I added asparagus to my baking dish as an extra side, but adding asparagus to the pan is optional. Alternately, you could add other different vegetables into your baking dish. Broccoli, snap peas, Brussels sprouts, and more would all be tasty.
Mushroom Marinade
Once you baste the mushrooms, pour the remainder of the marinade into the baking dish. As the mushrooms bake, they will soak up the additional marinade flavor. The extra marinade also provides a nice texture to the outside of the baked mushrooms.
Variations To Portobello Mushroom Steak

Seasoning the Steaks
I used a simple marinade, but you are welcome to change it up using ingredients you prefer. I find this marinade to have a savory and tangy flavoring that makes these steaks really stand out. If you are looking for a different flavor profile, feel free to alter the ingredients to match your flavor preference.
Adding Vegetables
Cook your mushrooms with different vegetables. Broccoli, cauliflower, carrots, or even green beans could be a delicious swap for the asparagus!
Portobello Mushroom Steak FAQs
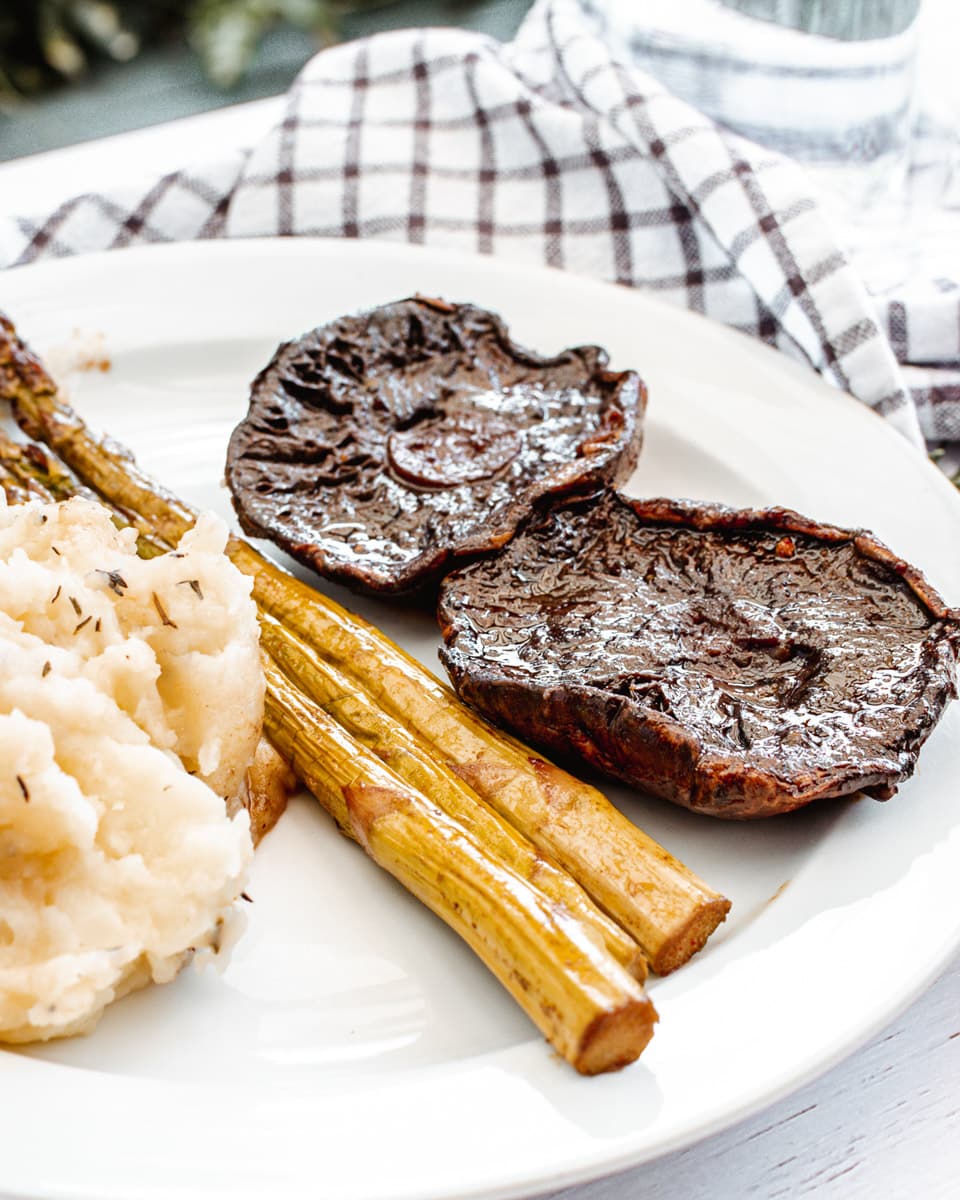
How do you know when mushroom steaks are cooked?
Your steaks are done once they have browned up a bit in the oven. You will want to bake the steaks to your preference of doneness. Since there is no meat in this recipe, you can cook the mushrooms as long or little as you prefer.
How do you store leftover mushrooms?
Place your cooked mushrooms in an airtight container and store them in the fridge for 2-3 days. You will find that after 3 days the mushrooms begin to get a bit softer in texture.
How do you reheat mushroom steaks?
I find that reheating mushrooms steaks in the oven or even a skillet on the stove helps to give them a better texture. You can reheat them in the microwave, but the mushrooms will be a bit softer in texture.
More Vegan Recipes
If you love this portobello mushroom "steak" recipe, be sure to check out these other delicious ideas:
Also try: our Easy Portobello Burgers.
Recipe

Portobello Steak with Mashed Potatoes
This Portobello Mushroom Steak recipe makes a delicious vegan steak that is incredibly easy to whip up. Make this vegan steak and potatoes recipe for any night of the week!
Print
Pin
Save
Servings: servings
Ingredients
Portobello steaks
- 4 large Portobello mushrooms
- ⅓ cup balsamic vinegar
- ¼ cup olive oil
- ½ teaspoon cumin
- ½ teaspoon black pepper
- ½ teaspoon smoked paprika
- 3 cloves garlic
- 1 tablespoon vegan-friendly steak seasoning
- salt to taste
Mashed Potatoes
- 3 small potatoes
- 1 tablespoon olive oil or vegan butter
- ½ teaspoon salt
- ½ teaspoon black ground pepper
- 1 teaspoon thyme or rosemary optional
Optional:
- 1 bunch asparagus
Instructions
- Preheat the oven to 400°F.
- In a large bowl, make the portobello marinade. Combine the olive oil, balsamic vinegar, spices, and garlic.
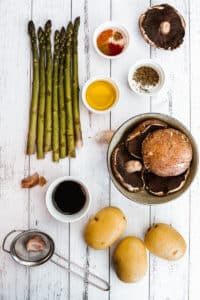
- Place portobellos and asparagus in a large oven-safe skillet. With a pastry brush, generously brush the marinade over the tops and bottoms of the mushrooms and asparagus.
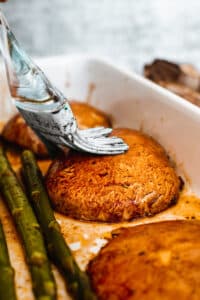
- Arrange mushrooms top side down and pour the remaining marinade over them. Bake for 20 minutes. Remove from oven, flip, and bake another 5-10 minutes or until mushrooms are cooked all the way through.

- For Potatoes: Wash and peel the potatoes. Bring them to boil and cook until tender, about 15 minutes. Mash the potatoes using a potato masher or a hand blender. Add olive oil, black pepper, and salt, to taste. Add fresh herbs just before serving.

- Enjoy!

Nutrition (Estimate per Serving)
Calories: 624kcalCarbohydrates: 71gProtein: 15gFat: 34gSaturated Fat: 5gTrans Fat: 1gSodium: 675mgPotassium: 2260mgFiber: 13gSugar: 17gVitamin A: 2065IUVitamin C: 66mgCalcium: 144mgIron: 9mg
Vegan-ize any recipe!Grab our free vegan cheat sheet, packed with my favorite easy substitutions to make any recipe vegan.
Marinated Mushrooms With Wild Rice
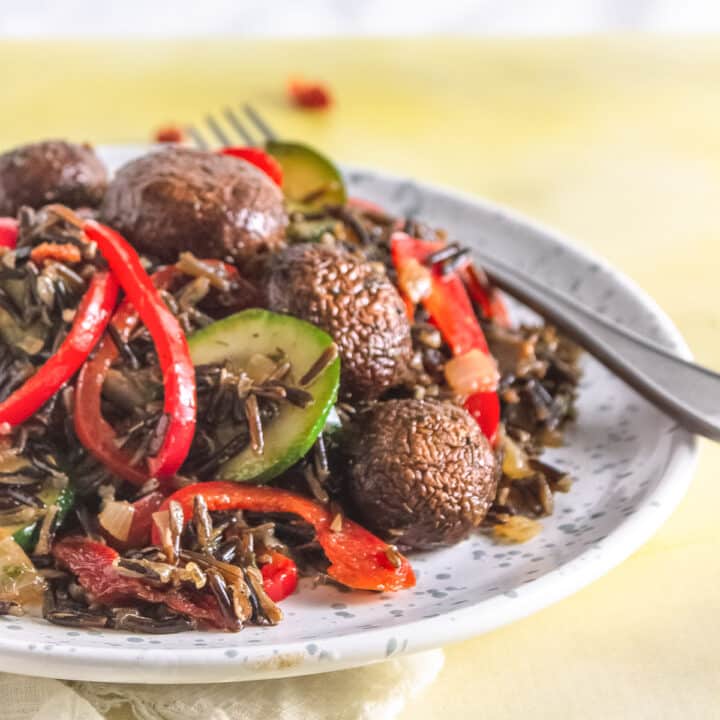
Check out this tasty recipe for Marinated Mushrooms with Wild Rice. Your whole family will enjoy this easy and satisfying vegan wild rice full of flavorful marinated mushrooms.
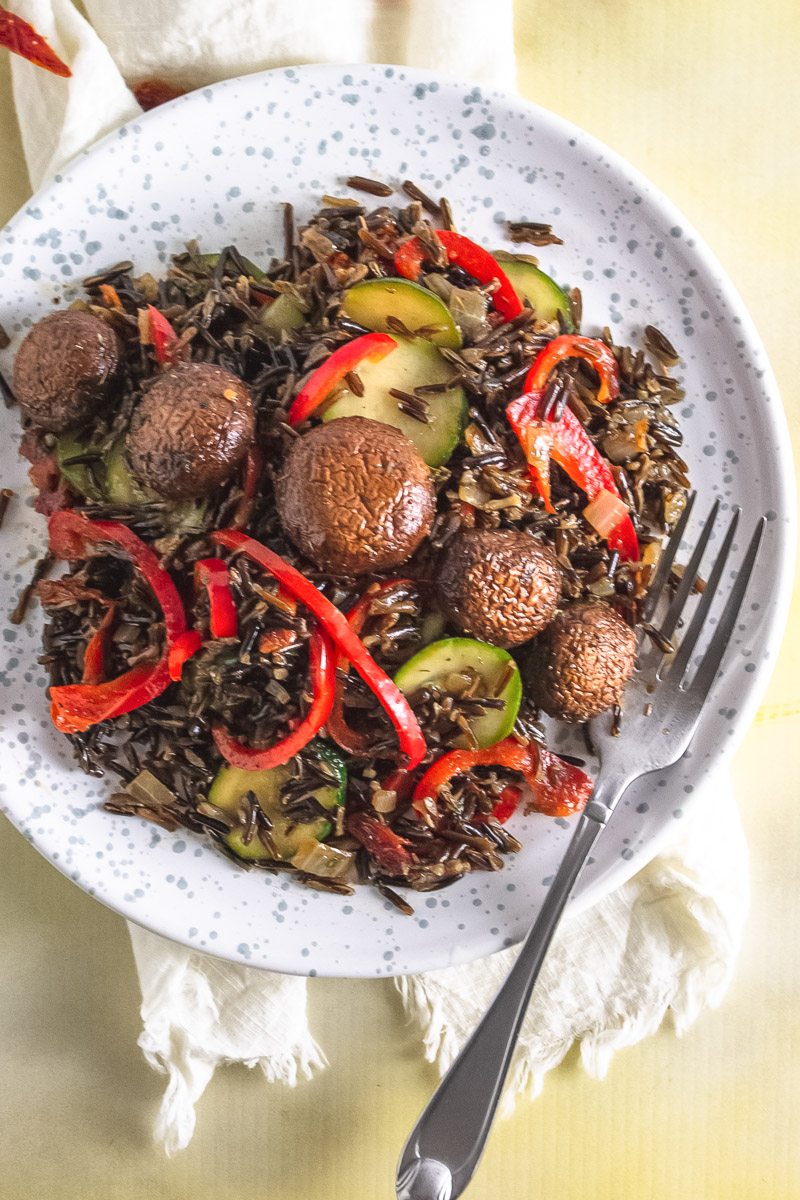
Marinated Mushrooms with Wild Rice is a wonderful meatless dinner option that is a great source of nutrients. You can also use your mushroom rice leftovers to meal prep for quick grab-and-go lunches or dinner another night.
For other tasty dishes with cremini mushrooms, try this Creamy Mushroom Pasta or this fresh Vegan Mushroom and Lentil Salad. Need to use up a bit of wild rice? This Cranberry-Pear Wild Rice Stuffing is one of my favorites!
This Marinated Mushrooms With Wild Rice Is...
- Vegan
- Gluten-free
- Soy-free
- Nut-free
- Meal prep-friendly
- Easy to make
And while you're here, don't forget to grab a copy of my free vegan cheat sheet. It's packed with all my favorite substitutions to vegan-ize any recipe!
How to Make Marinated Mushrooms with Wild Rice
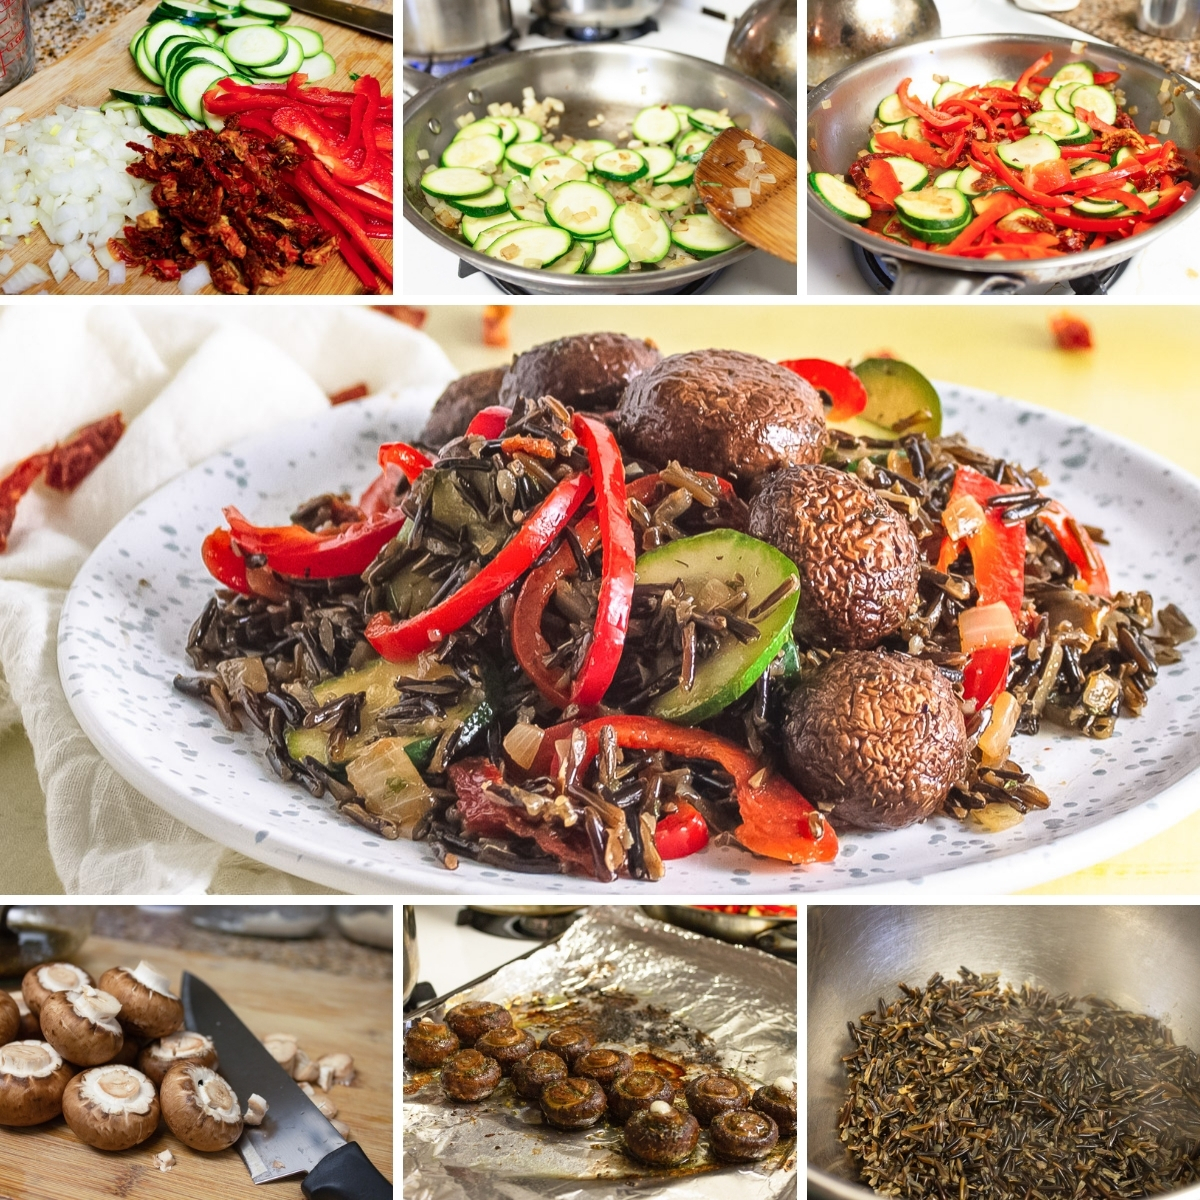
- Cook the wild rice.
- In a new bowl, add all your marinade ingredients and mix.
- Prep the mushrooms and toss in the marinade. Let them sit for 15 minutes.
- Prep all the veggies. Place mushrooms in a pan and broil.
- Cook veggies, stir in rice, and add mushrooms. Serve and enjoy.
See detailed instructions and list of ingredients below.
Tips and Tricks for Perfect Marinated Mushrooms
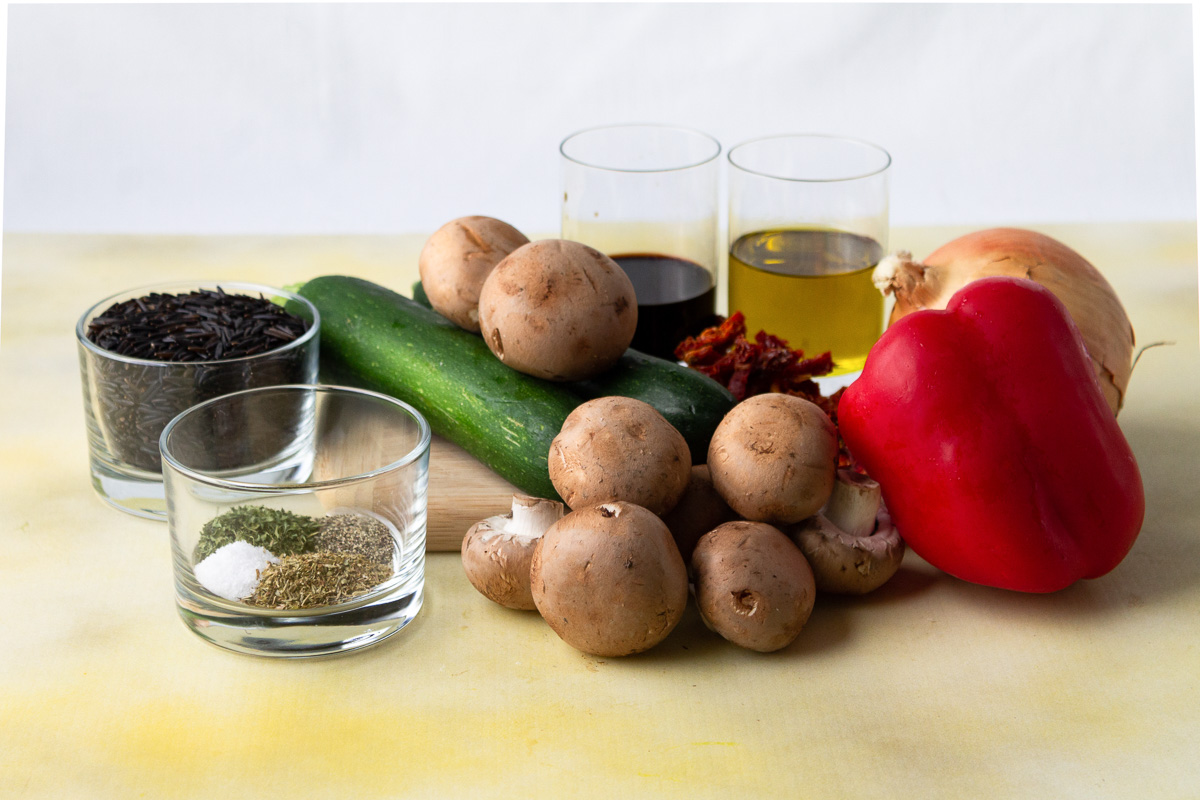
Stir Marinated Mushrooms
Make sure to stir the mushrooms in the marinade a few times while they are soaking. This will help to evenly coat the mushrooms and create a delicious flavor throughout the dish when cooked.
Cooking Rice
You can use a rice cooker or Instant Pot if you don't want to cook your rice on the stovetop. Just cook the rice as as directed for whatever device you decide to use.
Variations
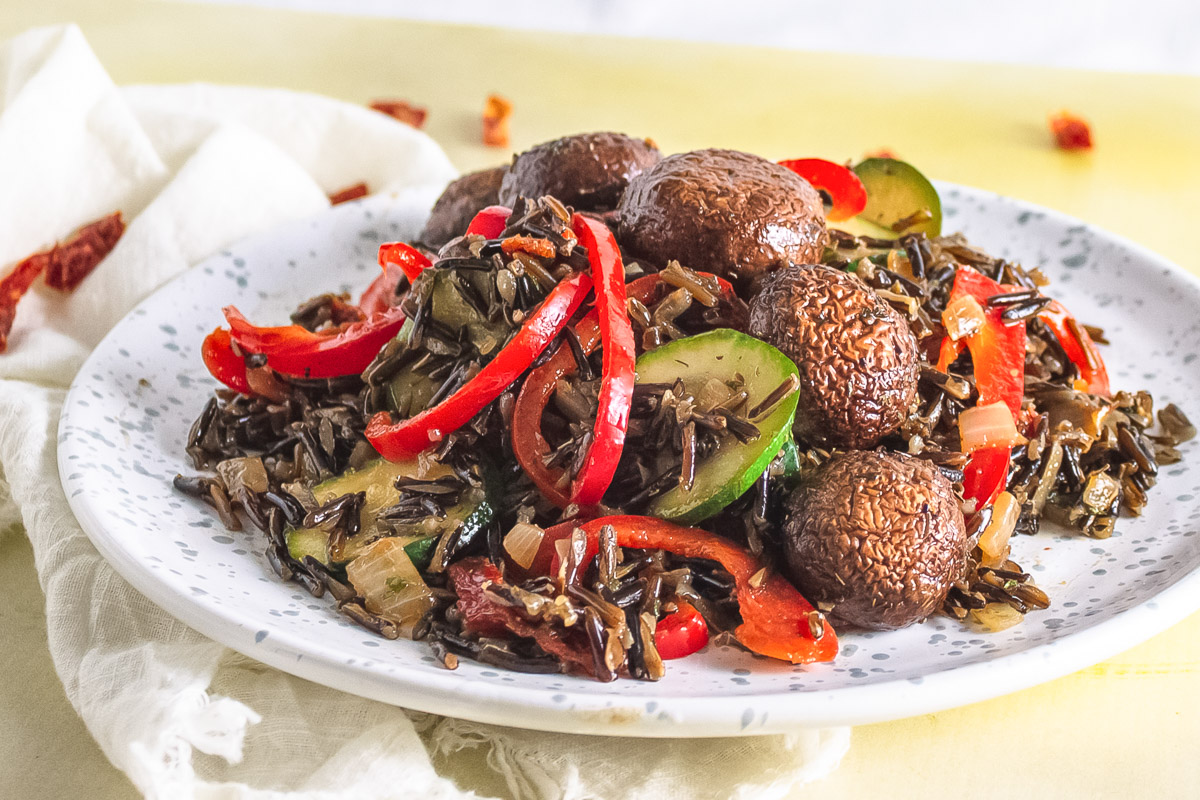
Swap Variety Of Rice
Feel free to make this dish using white rice, jasmine rice, or brown rice instead of the wild rice. You can use any variety of rice that you prefer or have on hand. Just make sure to adjust the cook time of the rice according to the package. This also works well with other whole grains such as quinoa or barley.
Change Up The Vegetables
This dish is great for using up vegetables in your pantry. I have found that even veggies like yellow squash are a great mix-in for this dish. Just chop up whatever vegetables you decide to use and add them in!
It's a win-win when you can clean out your old produce and create a satisfying meal.
Try Adding Tofu
Consider dicing up a bit of tofu, cooking it, and mixing it into the mushroom and rice mix. You could even marinate the tofu with the mushrooms for added flavor. Then cook your tofu when you cook the mushrooms.
FAQs

How do you store leftover mushrooms and rice?
This dish is best served fresh, but can be refrigerated for a few days. If you have leftovers, you can store the mix in the refrigerator for 2-3 days. Anything left after three days will need to be tossed out.
What are the health benefits of wild rice?
Wild rice is a wonderful mix of protein and fiber. Wild rice is also a source of antioxidants, if you want to incorporate more into your diet.
What mushrooms should I use for marinated mushrooms?
I used cremini mushrooms, but you could also use shiitake mushrooms, white button mushrooms, or sliced portobello mushrooms. Softer mushrooms like oyster mushrooms will not hold up as well to the marinade.
If you love these marinated mushrooms, be sure to check out these other delicious recipes:
Recipe
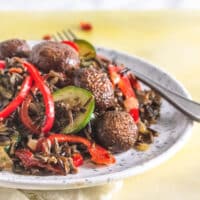
Vegan Wild Rice With Marinated Mushrooms
These Marinated Mushrooms are packed with flavor from fresh herbs and balsamic vinegar, and served over hearty Wild Rice. Yum!
Print
Pin
Save
Servings: servings
Ingredients
Marinade
- ¼ cup olive oil
- 2 tablespoon balsamic vinegar
- 1 teaspoon dried parsley
- 1 teaspoon dried oregano
- ½ teaspoon ground pepper
- ½ teaspoon salt
Instructions
- In a medium pot, combine wild rice with 3 ½ c (825ml) water and ½ teaspoon (3g salt). Cook on medium-low heat for 40-45 minutes until all water is absorbed.
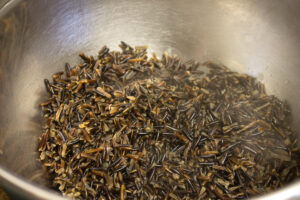
- Combine all ingredients for marinade in a medium bowl. Whisk to blend.
- Clean and trim stems from mushrooms.

- Add to marinade and toss to coat. Allow to sit for 15 minutes, tossing occasionally to redistribute marinade.

Prepare Vegetables
- Dice onion and slice sun-dried tomatoes if not already done.
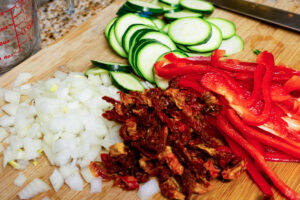
- Slice zucchini into very thin ⅛" (3mm) rounds.
- Remove veins and excess seeds from the red bell pepper and cut lengthwise into ⅛" (3mm) strips.
Broil Mushrooms
- Heat broiler to high. Line a baking sheet with aluminum foil.
- Place marinated mushrooms cap side up on prepared baking sheet. Reserve the remaining marinating liquid.

- Cook the 1st side for 5 minutes under the broiler.
- Remove from oven and flip the mushrooms with a spatula or fork. Return to oven and continue broiling other side for a further 4 minutes or until mushrooms are slightly soft and a bit wrinkled.
Cook Vegetables
- Heat 1 tablespoon (15ml) olive oil in a frying pan over medium heat.
- Add diced onion. Cook for 2-3 minutes, stirring regularly, until the onions start to become translucent.
- Add sliced zucchini. Cook for a further 2 minutes, stirring occasionally, until zucchini is just barely soft.
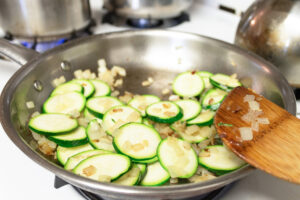
- Turn off heat and add sliced peppers and sun-dried tomatoes. Stir and toss to soften peppers slightly.
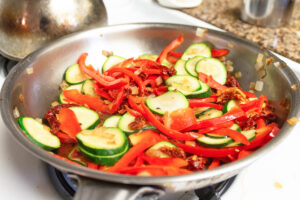
- When rice has absorbed all the water, transfer to a large bowl and add cooked vegetables.
- Add the remaining marinating liquid and toss to coat everything.
- Divide onto plates and top with marinated mushrooms.
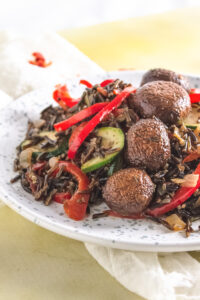
- This dish is best enjoyed warm, but can also be eaten cold or reheated by lightly sautéing. If storing for later, keep remaining marinating liquid separate and toss with other ingredients when ready to eat. Can be stored in the fridge in an airtight container for 2-3 days.
Nutrition (Estimate per Serving)
Calories: 151kcalCarbohydrates: 28gProtein: 9gFat: 3gSaturated Fat: 1gSodium: 36mgPotassium: 1625mgFiber: 7gSugar: 16gVitamin A: 4232IUVitamin C: 193mgCalcium: 103mgIron: 3mg
Vegan-ize any recipe!Grab our free vegan cheat sheet, packed with my favorite easy substitutions to make any recipe vegan.
Cinnamon Apple Chickpea Cake

Made with chickpeas as the 'secret' ingredient, this Cinnamon Apple Chickpea Cake is fudgy, delicious and healthy at the same time! It's the perfect high protein and dairy-free dessert to enjoy with a cup of tea.

I hope you can sense my excitement through this post, because today we're making cake. And not just any cake - a cinnamon apple chickpea cake.
It's three amazing things in one: cinnamon, apples, and cake. Actually, four amazing things, because chickpeas are pretty incredible too.
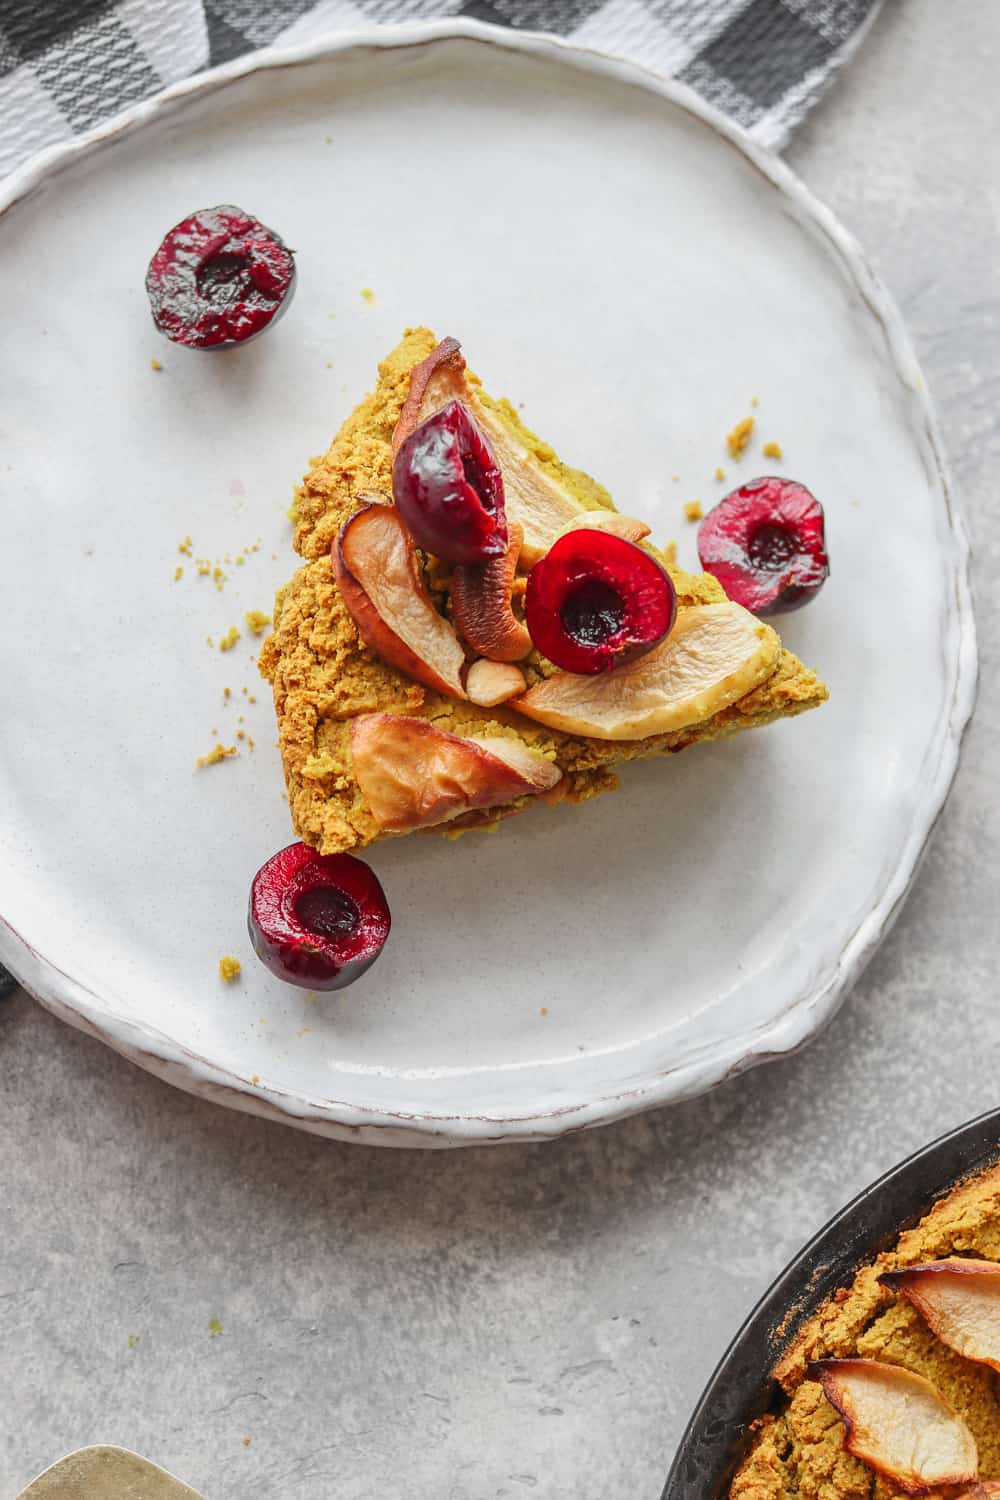
A fun fact is that I always struggle with naming my recipes. I didn't know whether to call this a cake or a pie, and went with the former because it doesn't have a crust.
But I don't know, apples are typically used in pies and you don't hear "apple cake" all too often. And I don't think I've ever heard of a "chickpea cake". But let's go with it.
And while you're here, don't forget to grab a copy of my free vegan cheat sheet. It's packed with all my favorite substitutions to vegan-ize any recipe!
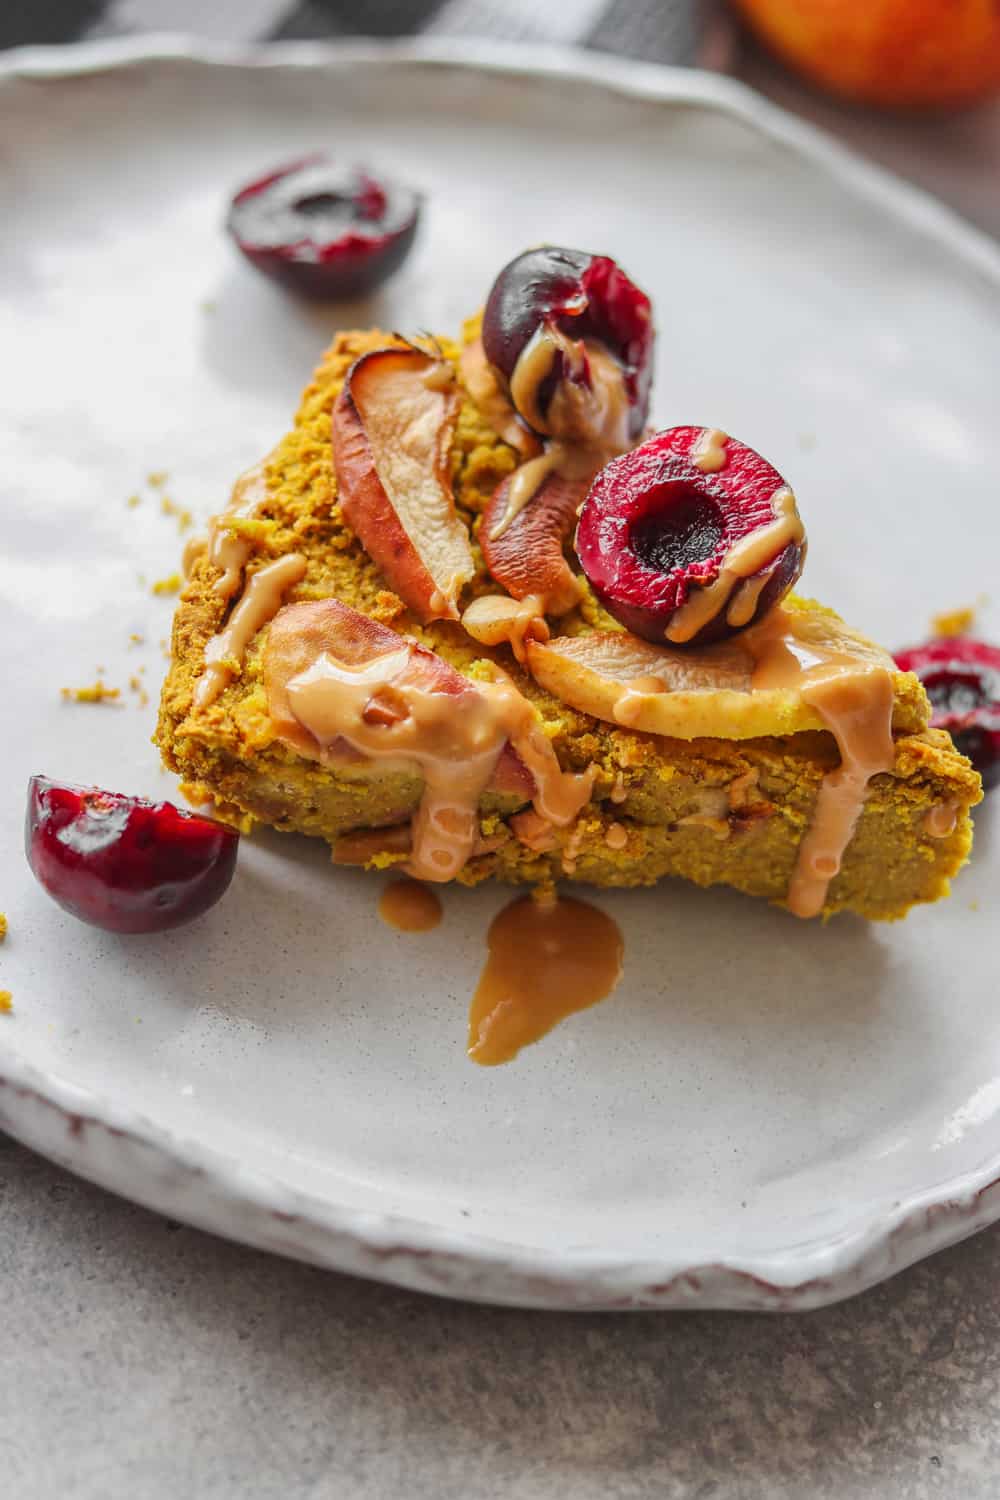
Anyway, regardless of the name, the result is absolutely phenomenal. Fudgy, moist, the sort of thing you can eat all by yourself as a meal. I won't tell. 😉
It has just the right level of sweetness and a wonderful soft texture thanks to the chickpeas and the peanut butter.
Plus, there's just something so cozy about baking with apples in Fall. Apples and pumpkin - the two things that make me less sad about short days, colder weather and the end of summer fruit that doesn't cost the equivalent of my weekly grocery budget per pound.
Oh, and this cake just happens to be completely vegan too!
Baking with Chickpeas
If you've never baked with beans of any kind before, fear not. I swear this vegan apple cake doesn't taste like hummus. And as much as we all love hummus, we don't want our sweet treats tasting like it either.
Chickpeas by themselves are pretty neutral in taste. The key is using the right ratio of other ingredients to sweeten them up and create a fudgy, cake-like texture.
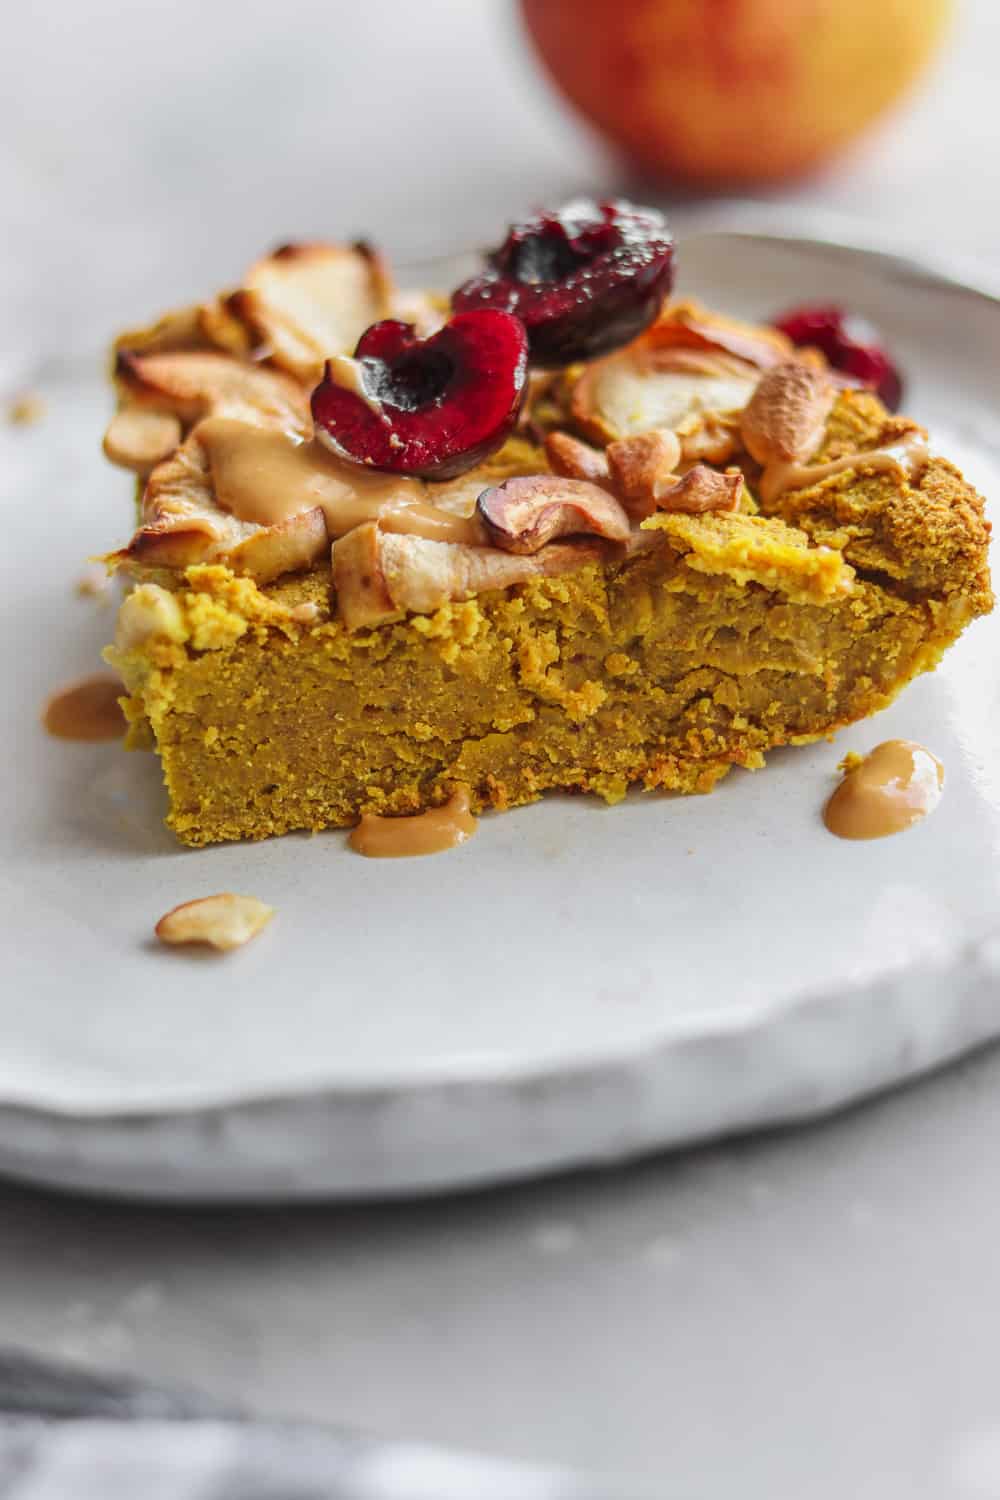
Baking with beans (that sounds so catchy it should be a TV show) is cool for many reasons. They're great for adding softness to treats like chocolate cookies, brownies, or blondies.
Plus, they naturally make the treat higher in healthy protein - without your kids ever knowing. I'm a huge believer in creating recipes that are good for both the body and the soul, and this is certainly one of them.

How to Make a Chickpea Cake
As I mentioned, you definitely don't have to be a gifted baker to make this chickpea cake. I'm certainly not - savory recipes are much further into my comfort zone.
Here is a quick summary of the instructions. Scroll down for the detailed, printable recipe card.
Simply start by adding the all of the ingredients to a food processor. Don't worry too much about the order, but I'd recommend starting with the chickpeas and dry ingredients followed by the wet. Blend for 1-2 minutes, until a soft mixture forms (almost like a dense hummus lol).
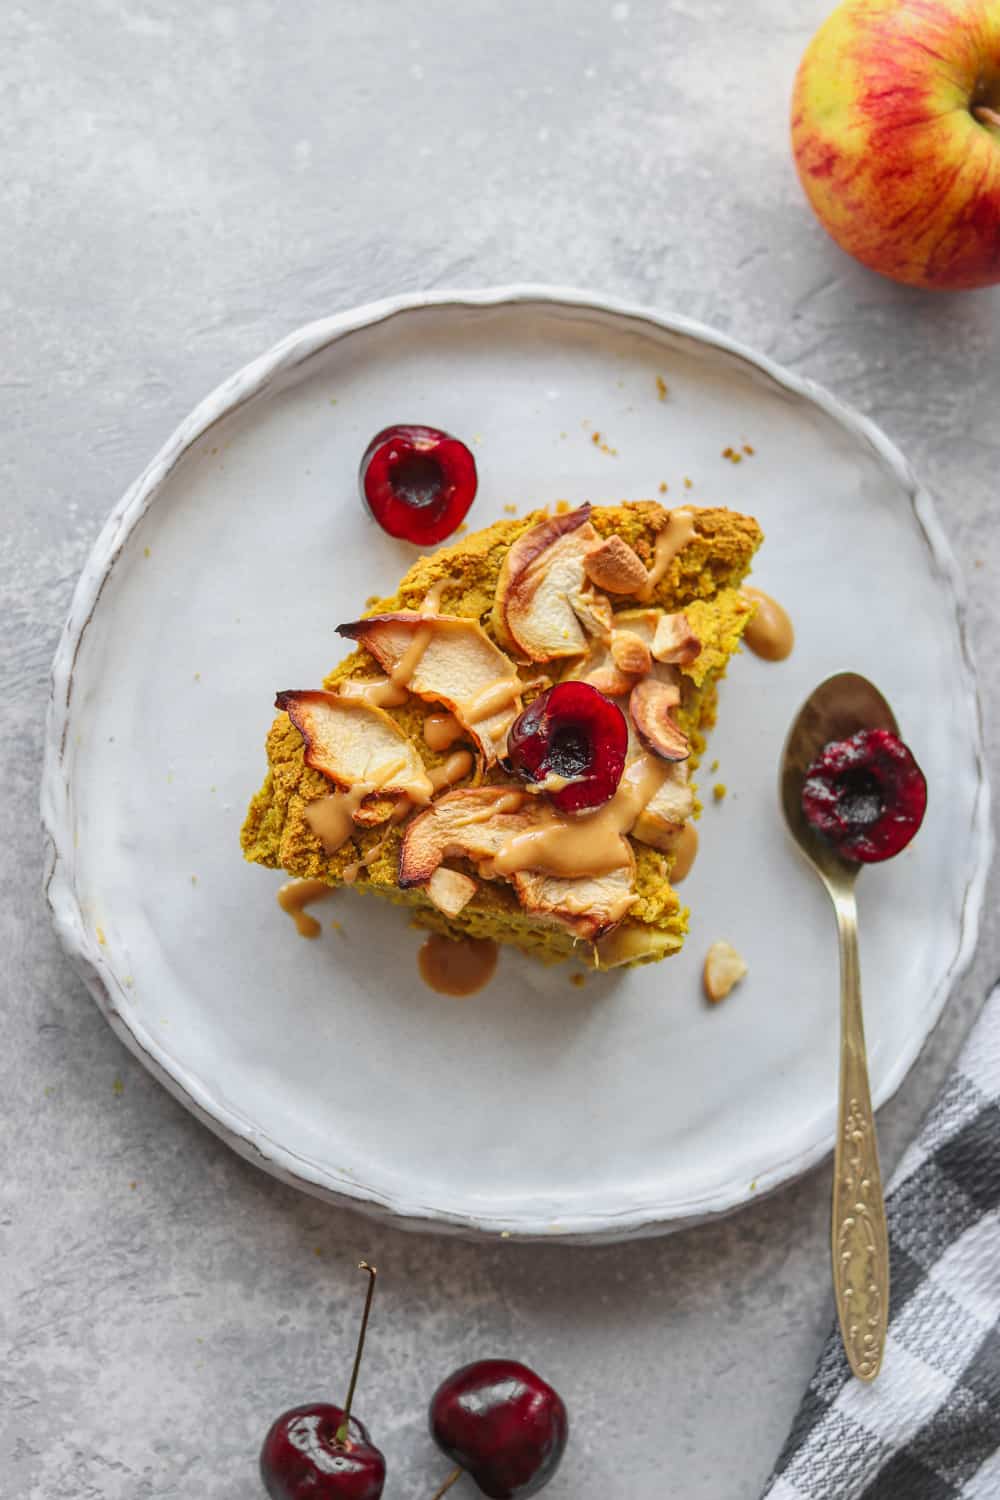
Then, pour the batter into a lightly greased shallow cake pan. Add a chopped apple on top, and a handful of cashew nuts, if you want. Then, bake in a preheated oven at 400 degrees F for 45-50 minutes. The cake should be golden and crispy around the edges, with still a bit of softness in the center.
Allow the chickpea cake to cool for 15-20 minutes. Then, it's ready to serve with fresh fruit or berries and a drizzle of nut butter.
Keep it in the fridge (covered) for 3-4 days and enjoy the chickpea cake either as a dessert or snack.
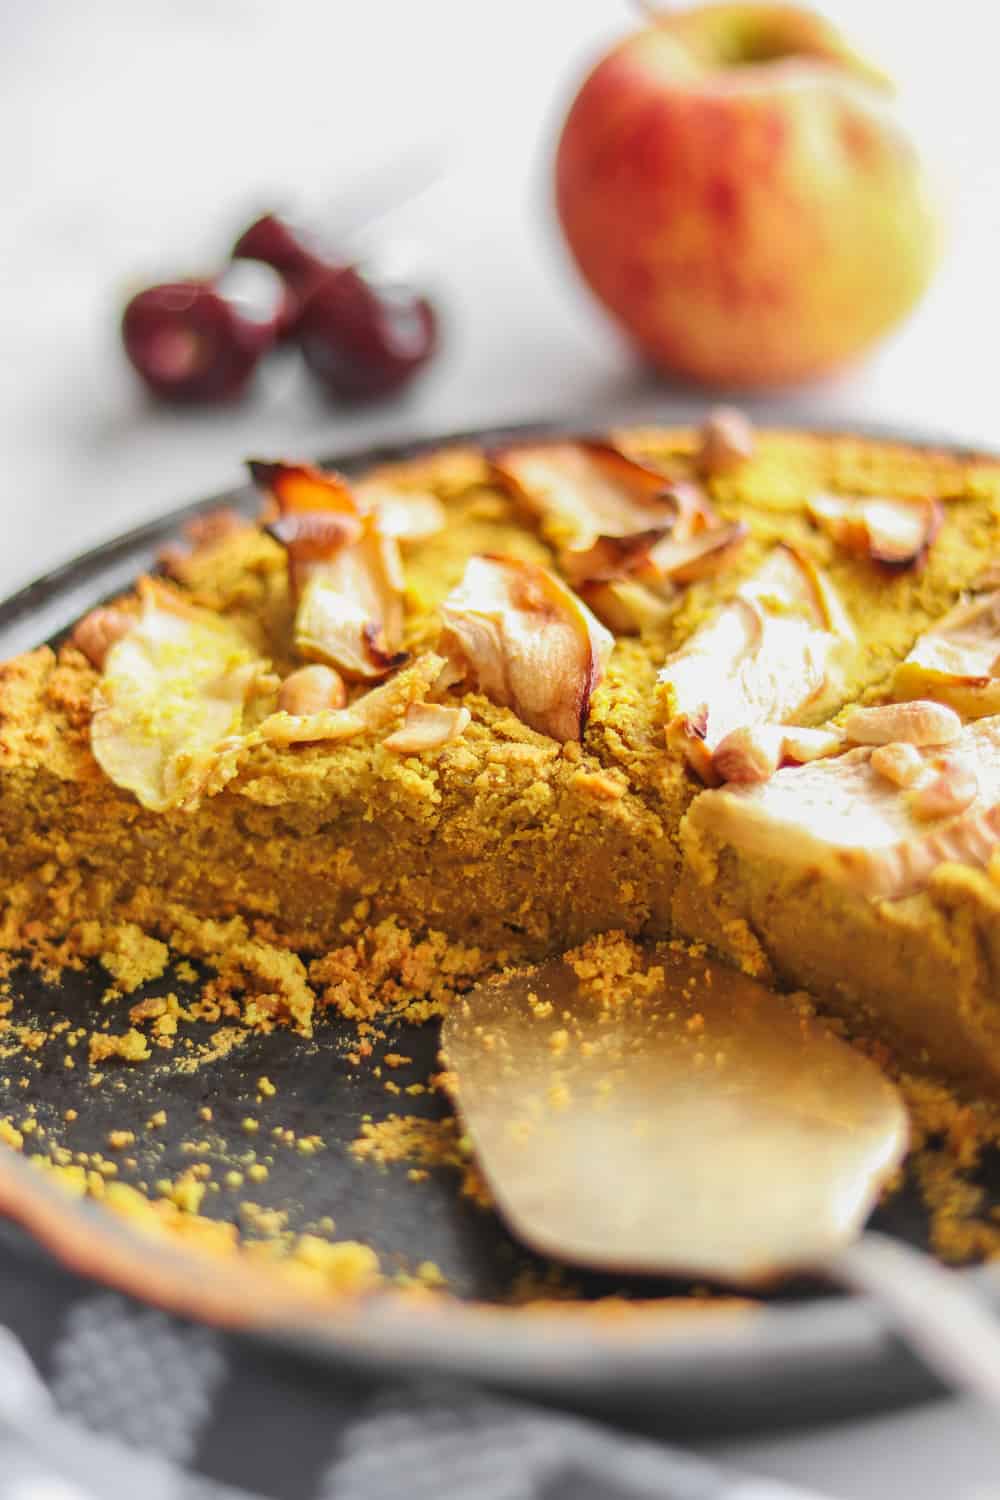
Add More Protein to the Cake
To take the protein content of this cake even further (and also add extra flavor), I added a scoop of protein powder.
The one I used in this recipe is Vega Protein Powder in Caramel Toffee. It's my favorite from the ones I've tried, and doesn't have a weird aftertaste.
You can use your own favorite brand and flavor. I recommend using a protein powder that's either a neutral or vanilla flavored so that it doesn't interfere too much with the other ingredients.
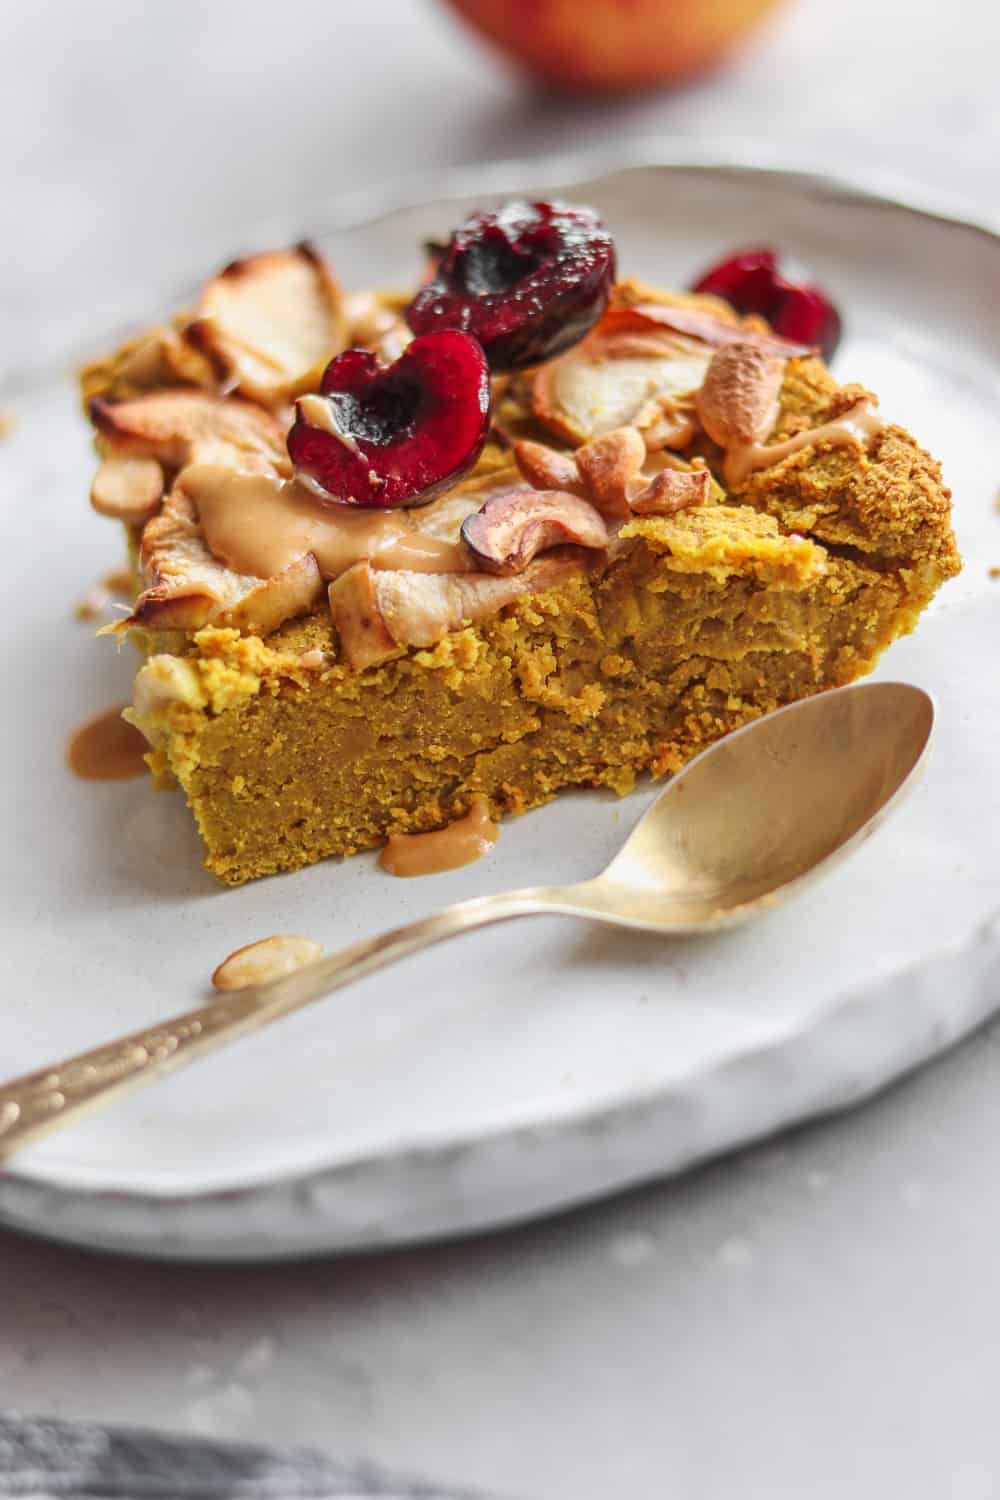
Tips & Tricks
If you want to leave out the protein powder, use 2 extra tablespoons of coconut flour.
Add any nuts, seeds or berries of your choice into the batter - chocolate chips would work brilliantly too! I love sprinkling in some goji berries for an extra superfood boost.
For a chocolate chickpea cake, use either chocolate protein powder or 2 tablespoons of extra cacao powder.
If you're leaving out the protein powder or using a neutral-tasting one, use ½ a banana in place of the flax egg for extra sweetness.
Use any nut or seed butter of your choice (either crunchy or smooth).
More Recipes to Try
If you love this Cinnamon Apple Chickpea Cake, be sure to check out these other delicious recipes:
- How to Roast Chickpeas - 4 Ways
- Chunky Applesauce Cake
- Apple Pie Oatmeal
- Almond Butter Protein Balls
- Vegan Cinnamon Roll in a Mug
Recipe

Cinnamon Apple Chickpea Cake
Made with chickpeas as the 'secret' ingredient, this Cinnamon Apple Chickpea Cake is fudgy, delicious and healthy at the same time! It's the perfect high protein and dairy-free dessert to enjoy with a cup of tea.
Print
Pin
Save
Servings: slices
Equipment
Ingredients
- 1.5 cups chickpeas see notes
- 1 scoop protein powder see notes
- ¼ cup coconut flour + 3 tablespoon additional
- 1 tablespoon cacao powder
- 1 teaspoon ground cinnamon
- 1 teaspoon baking powder
- ½ cup peanut butter or any other nut or seed butter of your choice
- ¼ cup maple syrup
- 1 cup almond milk
- 1 large chopped apple for topping
- ¼ cup chopped cashews for topping
- fresh berries and nut butter optional extra toppings
Instructions
- Preheat the oven to 400 degrees Fahrenheit.
- Add the cooked chickpeas, protein powder, coconut flour, cacao powder, cinnamon, baking powder, peanut butter, maple syrup and almond milk to a food processor. Blend until smooth.
- Transfer the batter to a shallow cake tin. Decorate the top with apple slices and chopped cashew nuts, and bake for 45 minutes, until golden and crispy around the edges, but still slightly soft in the centre.
- Allow to cool for 15 minutes before serving with fresh berries and a drizzle of nut butter.
Notes
For the chickpeas, you can opt to use canned or cooked. If using canned chickpeas, drain and rinse before using in the recipe.
If you want to leave out the protein powder, replace it with 2 tablespoon extra coconut flour and ½ a banana instead of the flax egg for extra sweetness.
This cake can be stored in the fridge for 3-4 days.
Nutrition (Estimate per Serving)
Calories: 207kcalCarbohydrates: 24gProtein: 8gFat: 10gSaturated Fat: 2gSodium: 180mgPotassium: 252mgFiber: 6gSugar: 12gVitamin A: 21IUVitamin C: 1mgCalcium: 105mgIron: 2mg
Vegan-ize any recipe!Grab our free vegan cheat sheet, packed with my favorite easy substitutions to make any recipe vegan.
Sticky Sesame Cauliflower

This sticky sesame cauliflower is bursting with delicious flavor and easy to make in just 30 minutes! Baked cauliflower is crispy on the outside, but soft and tender on the inside. Serve this vegan cauliflower with a sweet, tangy sesame sauce for a weeknight dinner, or a simple side dish. Vegetarian and vegan friendly too!

I have to say that my love for cauliflower has no end in sight. You can make so many different types of dishes with it - from cauliflower crust pizza to a flavorful cauliflower Alfredo sauce. The possibilities really are endless!
And nope, cauliflower-centric recipes don't have to be bland. Far from it!
Cauliflower by itself has a neutral flavour, and can take on many different flavor profiles depending on how you cook it. (Here are some more vegan cauliflower recipes if you need ideas!) One of the tricks is adding a fantastic sauce.
And that's exactly what we're doing today. I suggest you run to the kitchen to make this Sticky Sesame Cauliflower asap because it is calling your name!
In fact, this might be my favorite vegan cauliflower recipe yet.

Sticky Sesame Cauliflower 'Wings'
When I say I am obsessed with this recipe, I really mean it. I have a habit of eating this cauliflower straight from the pan, and watching it disappear in around 5 minutes. It really is that phenomenal.
If you're skeptical about cauliflower this may be the recipe that will change your mind when you make it for your next weeknight dinner. (And if this doesn't do it for you - this buffalo cauliflower surely will.)
The cauliflower 'wings' are incredibly realistic and can impress vegans and non-vegans alike. They are super crispy on the outside, coated in a garlicky batter with a hint of cheesiness. The inside of the 'wings' are very tender and soft. They make a great meatless alternative to chicken wings!

My favorite part of this cauliflower recipe is the sticky sesame sauce. It's absolutely incredible!
The flavor is tangy, sweet, and with a hint of spice due to the addition of sriracha sauce. I love sesame seeds, having used them for a lot of recipes, such as my sesame peanut tofu, and they go incredibly well with the cauliflower.
Trust me, this is a phenomenal example of how to make vegetables taste good - to the point where you won't be able to tell that the main ingredient is a veggie!

You can serve these vegan sesame cauliflower wings as a main course with a side of your choice such as rice or noodles for a homemade takeout night.
They also make a great side dish, and you can even serve the sauce as a dip, rather than mixing it with the cauliflower bites in a frying pan.
How to Make Cauliflower Crispy
Ever wondered why your cauliflower 'wings' may turn out soggy? Worry no further, because here are my top tips for making sure that these cauliflower wings turn out perfect, with just the right amount of crunch:
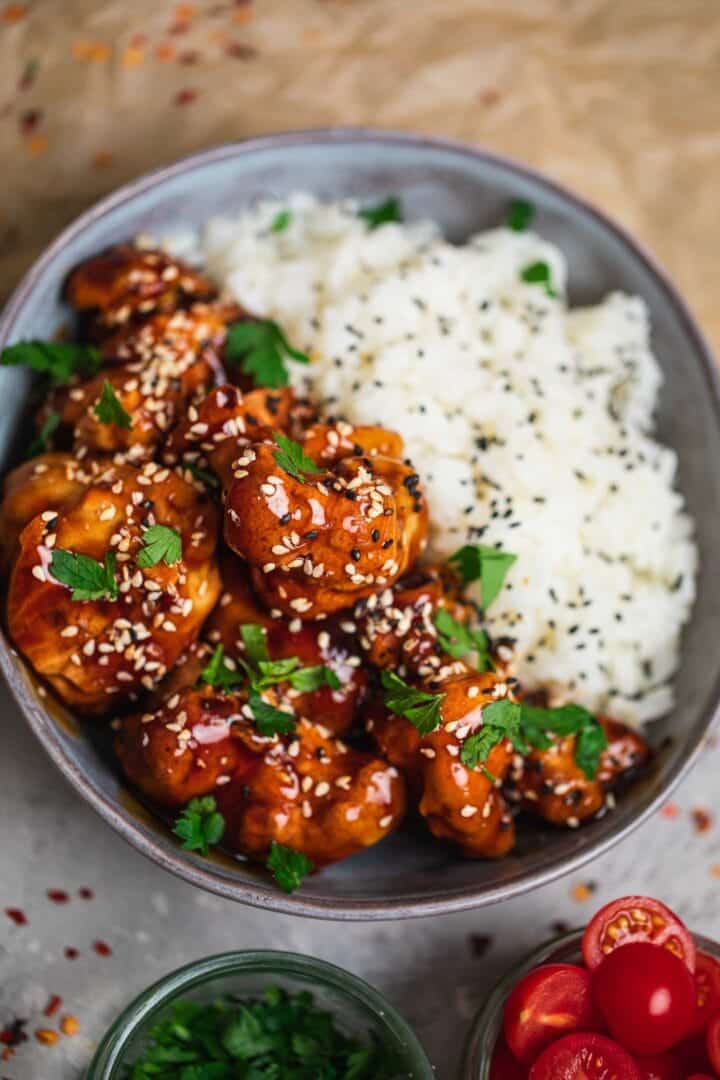
Do not drench the cauliflower in the batter. This is a key step. The cauliflower will then take much longer to bake, also turning out chewy and soggy. When dipping, ensure to shake off any excess batter.
At the same time, make sure that the batter is not too runny. It should stick very easily to the cauliflower florets.
Use a large baking tray (I like these) or use two trays as to avoid overcrowding because this will trap in moisture and make the cauliflower soggy.
Bake for enough time. I know that it may be tempting to take the cauliflower out of the oven after 10-15 minutes when the kitchen starts to smell amazing, but 25-30 minutes is the optimal time to achieve a perfect crunch.
Keep in mind that after you add the sauce to the cauliflower wings, they won't be as crispy. So it's best to serve them immediately. You can also serve the sesame sauce as a dip instead for the most crispiness. The dip option also works great for serving these at parties where they may sit out for a long time.
Ingredients you will need
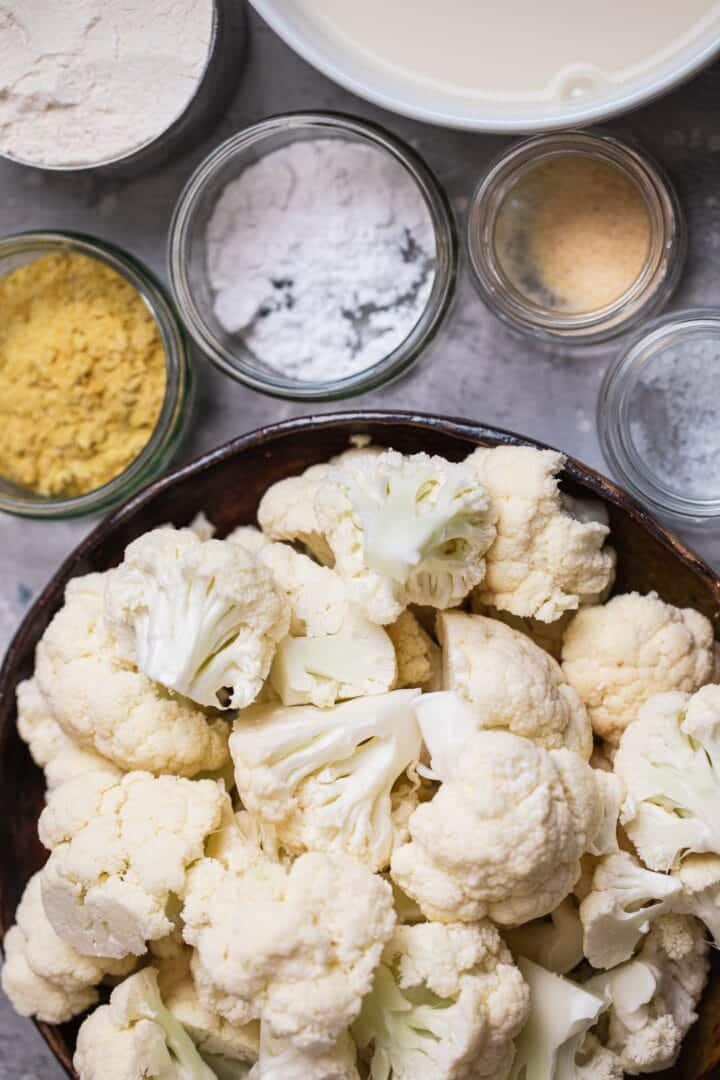
Flour. To make this recipe gluten-free, use gluten-free all-purpose flour. I've made this with gluten-free flour multiple times and it works almost as well as ordinary flour. If this is not a concern, any all-purpose flour will do just fine.
Baking powder to add a bit of fluffiness and thickness to the batter.
Nutritional yeast. This is a great ingredient for adding a 'cheesy' flavor to vegan recipes. This Bragg's Nutritional Yeast is the most well known brand.
Garlic powder and salt for flavoring the batter. You can also add other spices of your choice, such as cumin, paprika and turmeric.
Plant based milk of your choice. Use an unsweetened variety. I used almond milk for mine!
Cauliflower florets. Use fresh cauliflower, rather than thawed from frozen - the latter option will not turn out crispy.
Tomato paste and rice vinegar to add tanginess. You can also use lemon juice instead of rice vinegar.
Tamari or soy sauce, depending on whether you want to make this dish gluten-free. I like this gluten-free tamari.
Maple syrup. You can use any liquid sweetener of your choice, or coconut sugar. I prefer to use maple syrup.
Sriracha. Adjust how much you use depending on how spicy you want the sesame sauce to be. I use this all the time, so I buy these big bottles!
Cornstarch and water to make a cornstarch slurry, which is used to thicken the sauce.
Sesame oil for adding even more crispiness to the cauliflower wings. This is my preferred brand.
Onion, garlic and ginger - the aromatics which are super simple, but level up any dinner.
Sesame seeds. One of the key ingredients here, that will give this dish its signature flare! You can use either black or white sesame seeds, or a mixture of both. These tri-color seeds are a fun choice.
How to make sticky sesame cauliflower
Firstly, preheat the oven to 180 degrees C (400 F) and line a baking tray with parchment paper.
Now, make the batter. Add the flour, baking powder, nutritional yeast, garlic power, salt and plant based milk to a large mixing bowl. Whisk together thoroughly, until no lumps remain.
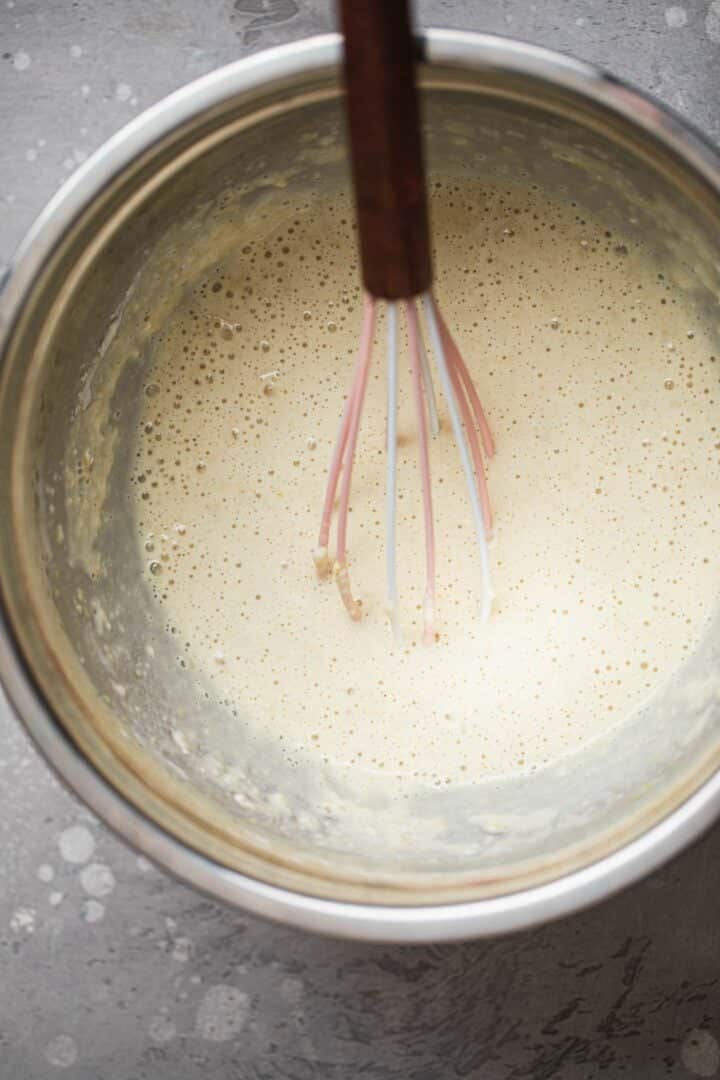

Next, prepare the cauliflower florets. Trim the leaves from the cauliflower and then remove the stem, before chopping it into bite-sized florets.
Dip the cauliflower florets in the batter and shake off any excess batter before laying them out on the baking tray.
Make sure to leave enough space between the florets. Now bake in the preheated oven for 25 minutes, until crispy and golden brown.
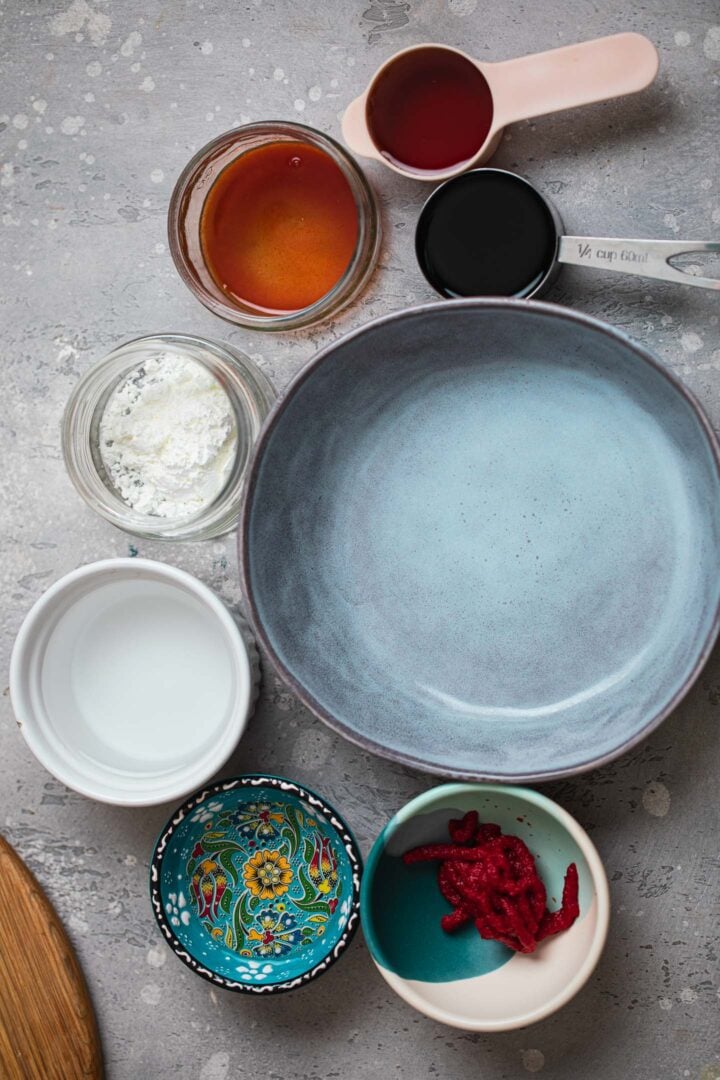
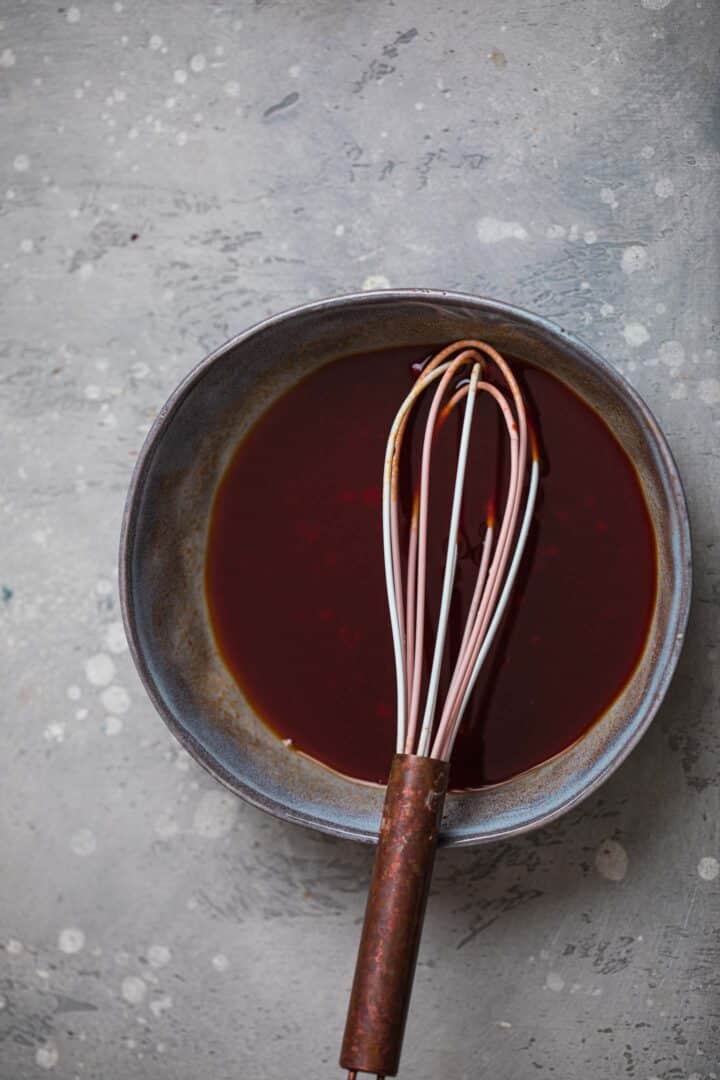
Meanwhile, prepare the sauce by whisking together the tomato paste, rice vinegar, tamari, maple syrup and sriracha.
In a separate mixing bowl, make the cornstarch slurry by mixing together cornstarch and water.
When the cauliflower is almost done, heat the sesame oil in a pan over a medium-high heat.
Add the onion, garlic and ginger, cooking for 3-4 minutes, until fragrant and starting to soften.

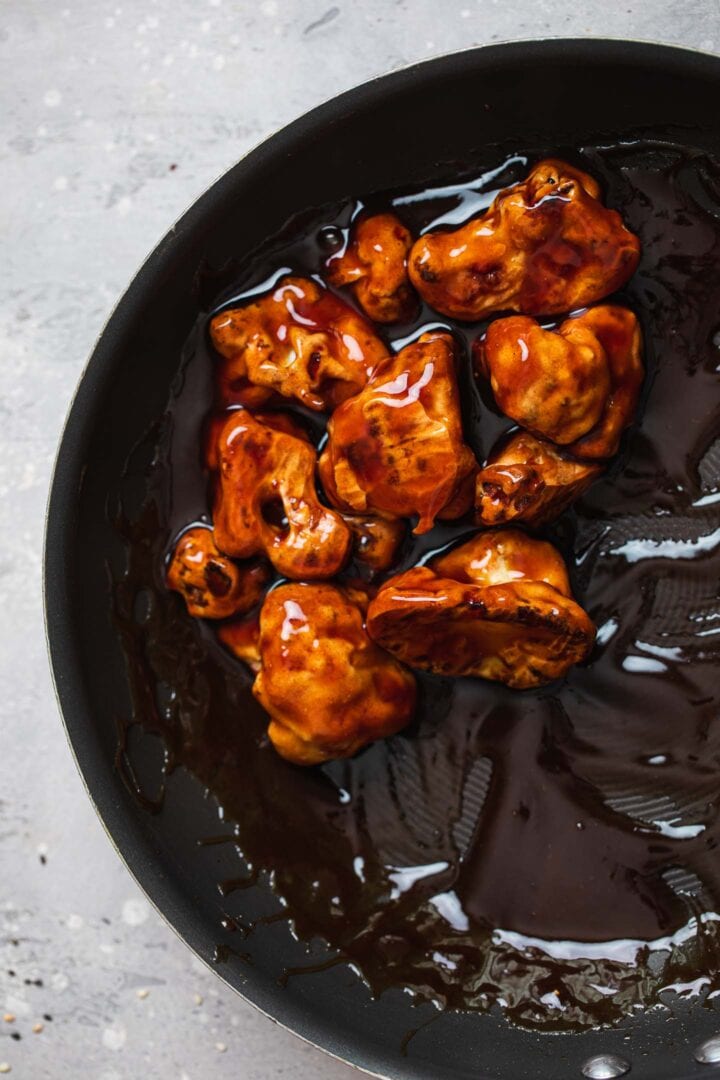
Now add the sauce and cornstarch slurry, lowering the heat. Whisk continuously for around 5 minutes, until the sauce thickens. Remove from the heat and add the cauliflower wings, stirring together thoroughly.
At the last minute, stir in the sesame seeds. This sticky sesame cauliflower is now ready to serve!
Frequently-asked questions
Can I make these cauliflower wings ahead of time?
Cauliflower wings, if kept in the fridge, will lose their crispiness. It's best to serve them immediately, or a few hours after cooking at the latest.
Can I make this recipe gluten-free?
Yes, this recipe can be made gluten-free easily by using gluten-free flour (like this one) for the batter, and tamari or coconut aminos instead of soy sauce.
What can I serve sesame cauliflower with?
You can serve it with any side of your choice, such as rice, noodles, pasta, or vegetables. It's also great as a starter or side dish.
Can the cauliflower wings be frozen?
For sure! To start, place the baked cauliflower wings on a large baking tray and place in the freezer for 3-4 hours. You can then transfer them to a freezer-friendly container or bag for up to 3 months. To reheat, transfer them to a baking tray lined with parchment paper, and bake for 30 minutes at 180 degrees C/350 F. Prepare the sauce when you are ready to serve it!
More amazing cauliflower recipes!
- Check out all of my favorite vegan cauliflower recipes here.
- For an amazing side dish, try out my vegan cauliflower cheese! It's a guaranteed crowd pleaser.
- Red lentil cauliflower Dahl is fantastic for a wholesome and comforting dinner.
- If you love crispy cauliflower with a flavorful sauce, try out my baked orange cauliflower.

Let me know in the comments: what's your favourite way to cook with cauliflower? If you give this sticky sesame cauliflower a go, be sure to tag me on Instagram (@veg.kitchen) so I can see your creations, and leave your feedback in the comments below together with a star rating!
Recipe

Sticky Sesame Cauliflower (Vegan Recipe)
This sticky sesame cauliflower is totally delicious and ready in just 30 minutes! The crispy cauliflower wings are coated in a sweet, tangy sauce that's a surefire crowd pleaser. And it's vegetarian and vegan friendly too.
Print
Pin
Save
Servings: servings
Equipment
- Baking tray
- Mixing bowl
- Frying pan
Ingredients
For the cauliflower 'wings'
- 1 cup all-purpose flour or gluten-free baking flour
- 1 tbsp baking powder
- 2 tbsp nutritional yeast
- ½ tsp garlic powder
- ½ teaspoon salt
- 1 cup plant based milk such as almond milk
- 1 medium head cauliflower around 6 cups
For the sauce
- 2 tablespoon tomato paste
- 2 tablespoon rice vinegar
- ¼ cup tamari or soy sauce
- 2 tablespoon maple syrup
- ½ tablespoon Sriracha
- 2 tablespoon cornstarch
- ½ cup water
- 1 tablespoon sesame oil
- 1 large onion diced
- 2 cloves garlic minced
- 2 tablespoon ginger freshly grated
- ¼ cup sesame seeds
Instructions
- Preheat the oven to 180 degrees C (400 F) and line a baking tray with parchment paper.
- Add the flour, baking powder, nutritional yeast, garlic power, salt and plant based milk to a large mixing bowl. Whisk together thoroughly, until no lumps remain.1 cup all-purpose flour, 1 tablespoon baking powder, 2 tablespoon nutritional yeast, ½ teaspoon garlic powder, ½ teaspoon salt, 1 cup plant based milk
- Prepare the cauliflower florets. Trim the leaves from the cauliflower and then remove the stem, before chopping it into bite-sized florets.1 medium head cauliflower
- Dip the cauliflower florets in the batter and shake off any excess batter before laying them out on the baking tray. Make sure to leave enough space between the florets. Now bake in the preheated oven for 25 minutes, until crispy and golden brown.
- Meanwhile, prepare the sauce by whisking together the tomato paste, rice vinegar, tamari, maple syrup and sriracha. In a separate mixing bowl, make the cornstarch slurry by mixing together cornstarch and water.2 tablespoon tomato paste, 2 tablespoon rice vinegar, ¼ cup tamari, 2 tablespoon maple syrup, ½ tablespoon Sriracha, 2 tablespoon cornstarch, ½ cup water
- When the cauliflower is almost done, heat the sesame oil in a pan over a medium-high heat. Add the onion, garlic and ginger, cooking for 3-4 minutes, until fragrant.1 tablespoon sesame oil, 1 large onion, 2 cloves garlic, 2 tablespoon ginger
- Add the sauce and cornstarch slurry, lowering the heat. Whisk continuously for around 5 minutes, until the sauce thickens. Remove from the heat and add the cauliflower wings, stirring together thoroughly.
- At the last minute, stir in the sesame seeds and serve.¼ cup sesame seeds
Video
Notes
Gluten-free: To make this recipe gluten-free, use gluten-free flour and tamari instead of soy sauce.
To freeze: Arrange the baked cauliflower on a baking tray and place in the freezer for 3-4 hours. Then, transfer to a freezer-friendly container or bag and freeze for up to 2 months.
To reheat: When reheating from frozen, place the cauliflower on a baking tray and bake at 180 degrees C/350 F for 30 minutes.
Nutrition (Estimate per Serving)
Calories: 338kcalCarbohydrates: 53gProtein: 12gFat: 10gSaturated Fat: 1gSodium: 1340mgPotassium: 1087mgFiber: 7gSugar: 12gVitamin A: 126IUVitamin C: 76mgCalcium: 363mgIron: 5mg
Vegan-ize any recipe!Grab our free vegan cheat sheet, packed with my favorite easy substitutions to make any recipe vegan.

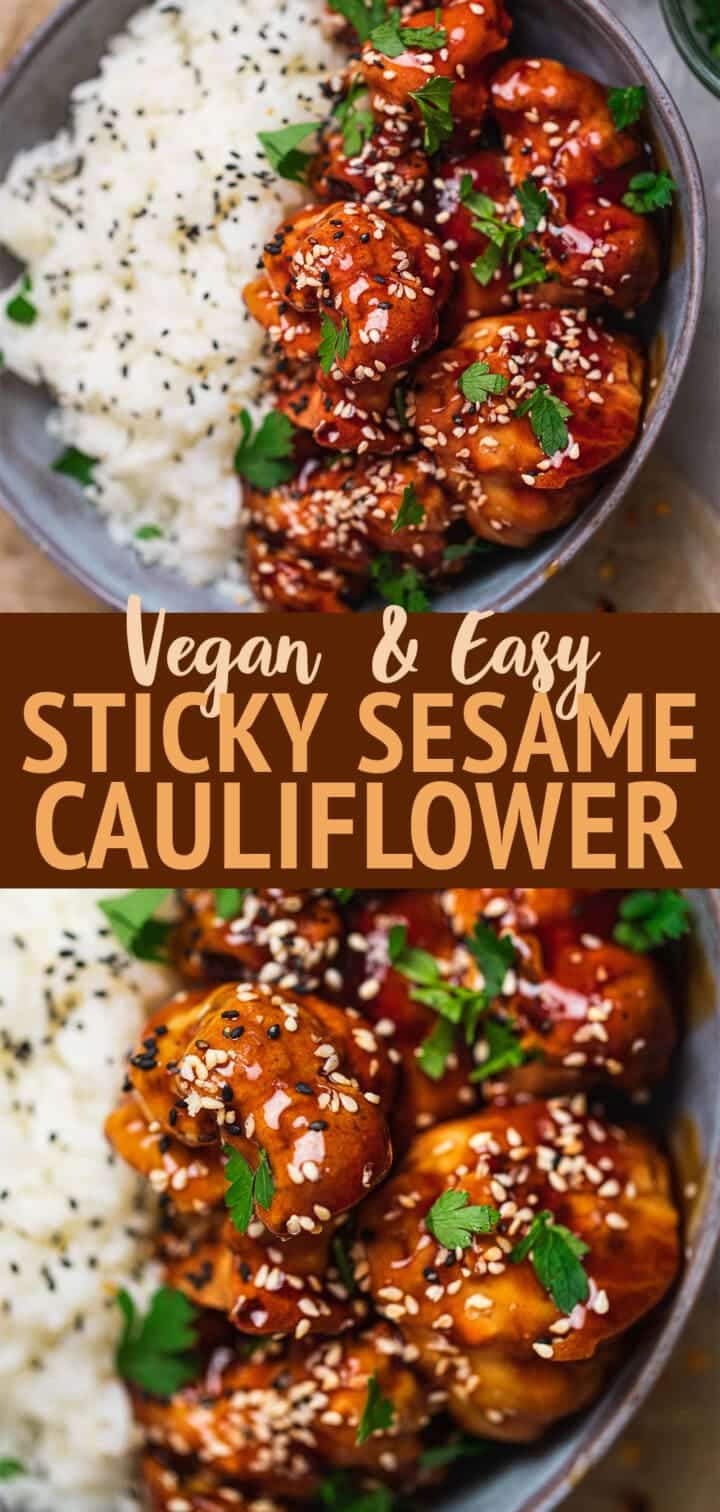
Lentil Fritters with Garlic Sauce
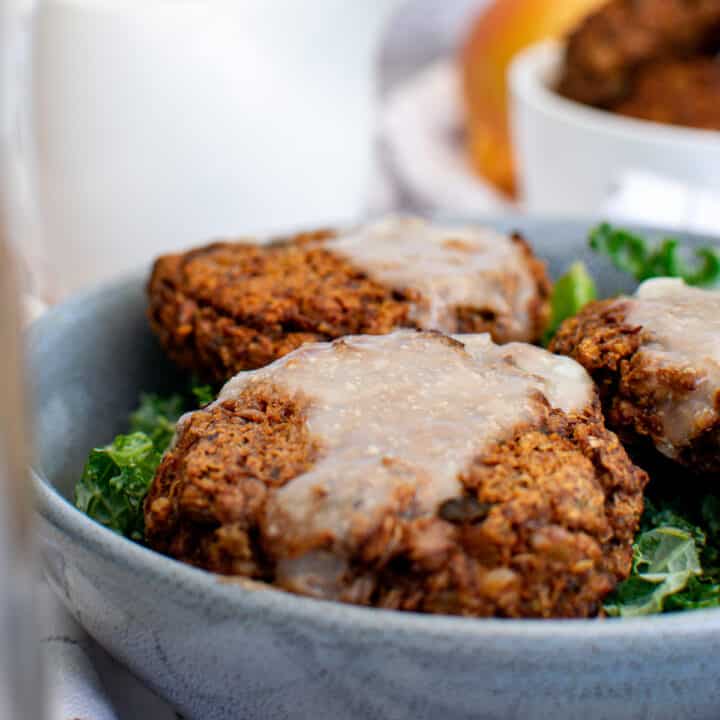
Whip up a batch of these flavorful Lentil Fritters with Garlic Sauce. Mushrooms, garlic, lentils, quinoa, walnuts, and more come together in this lentil cake recipe.
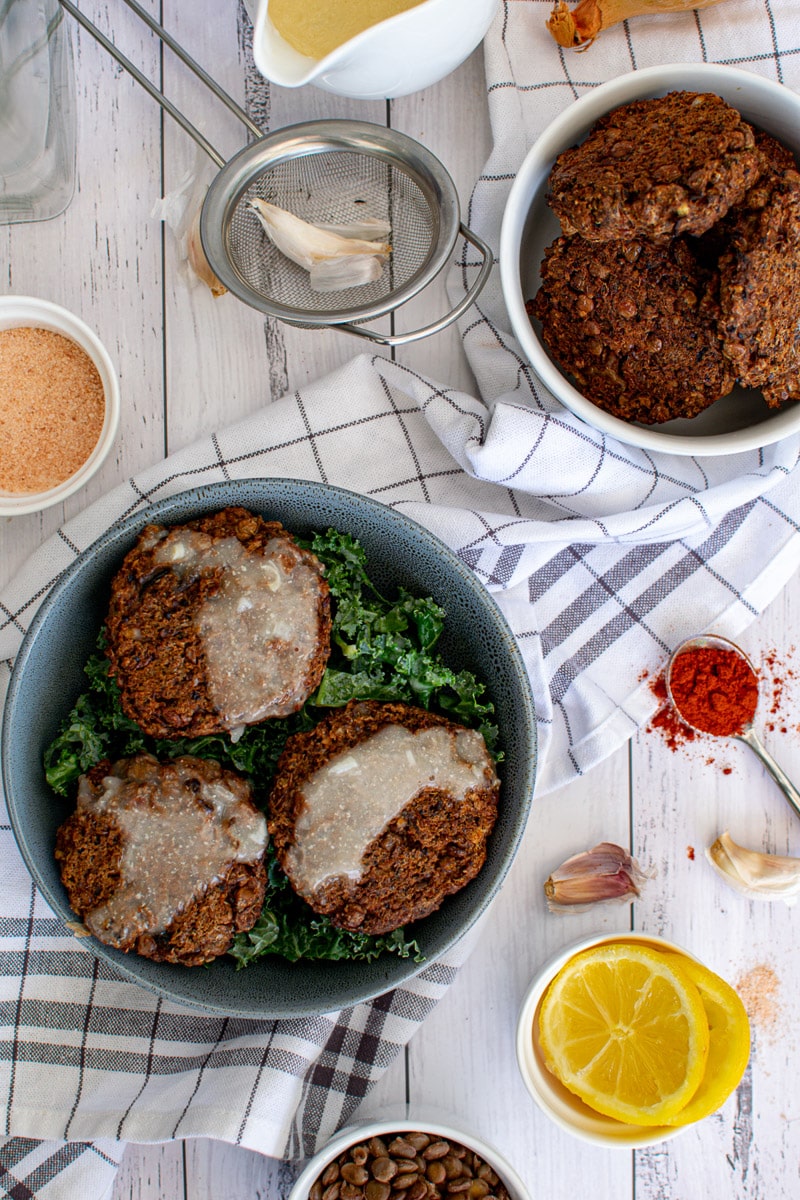
These lentil patties are great for a tasty vegan lunch or dinner. They're also great for meal prepping! Here is a plant-based recipe that kids and adults can enjoy.
This lentil fritters recipe is...
- Vegan
- Vegetarian
- Gluten-free
- Dairy-free
- Flavorful
- Great for meal prepping
How to Make Lentil Fritters with Garlic Sauce
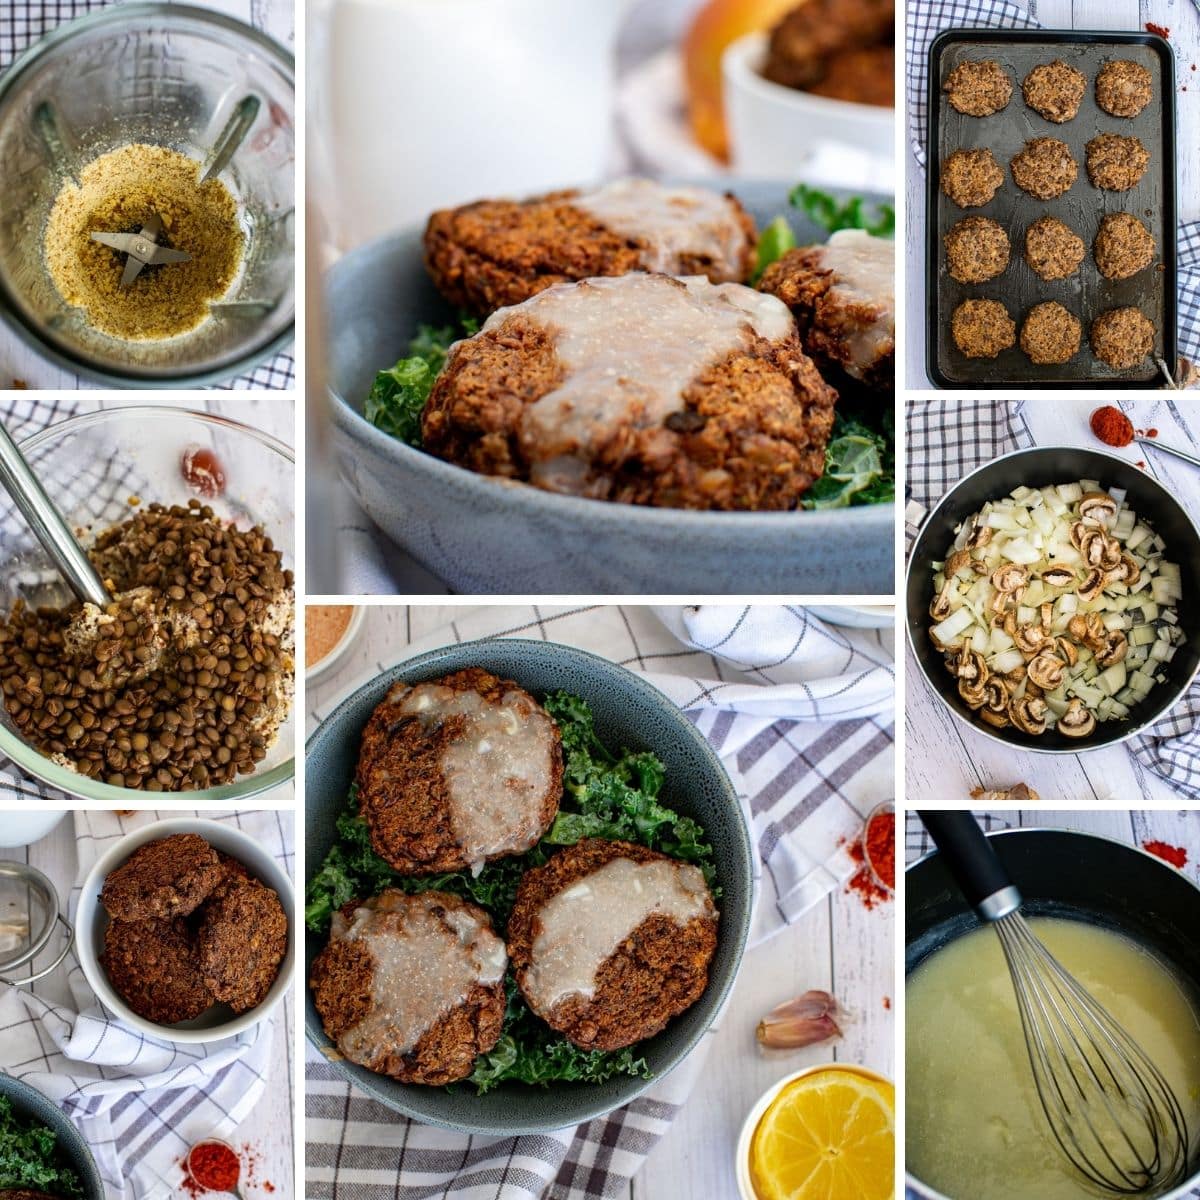
- Start by cooking your lentils as directed on the package.
- In a saucepan, add oil, onion, garlic, and mushrooms. Stir occasionally.
- Add in your nuts and pulse the mixture in a food processor until the walnuts form a powder.
- Add the mushroom mixture and half the lentils to a bowl. Add in walnut powder and mix.
- Add your remaining lentils to the dough. Mix well.
- Create 12-15 patties, and pan sear.
Full measurements and directions can be found in the printable recipe card below.
Lentil Fritters Variations
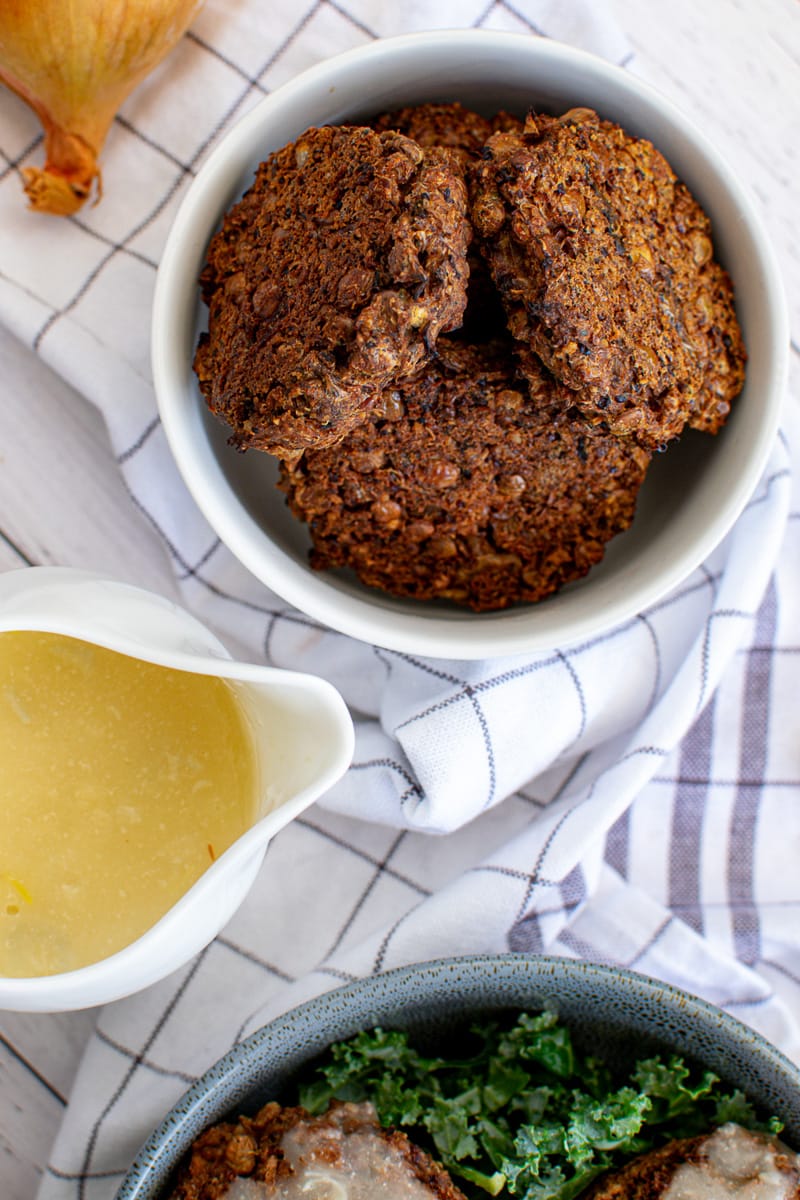
Change Up The Vegetables
Feel free to add extra veggies to these lentil fritters. Any finely chopped vegetables can work well in this dish - carrots, bell peppers, and zucchini are all great additions.
Cook in the Air Fryer
Consider air-frying your lentil fritters instead of baking in the oven. Add a small bit of oil to the air fryer, and cook a few lentil patties at a time, making sure to leave space between them for the hot air to circulate.
Swap the Sauce
If you want to skip the garlic sauce, these fritters are perfectly tasty on their own. Try serving them with a simple squeeze of fresh lemon juice, salt, and pepper for a lighter preparation. Or experiment with other dipping sauces like a vegan cheese sauce, vegan alfredo sauce, or even this vegan Big Mac sauce.
FAQs
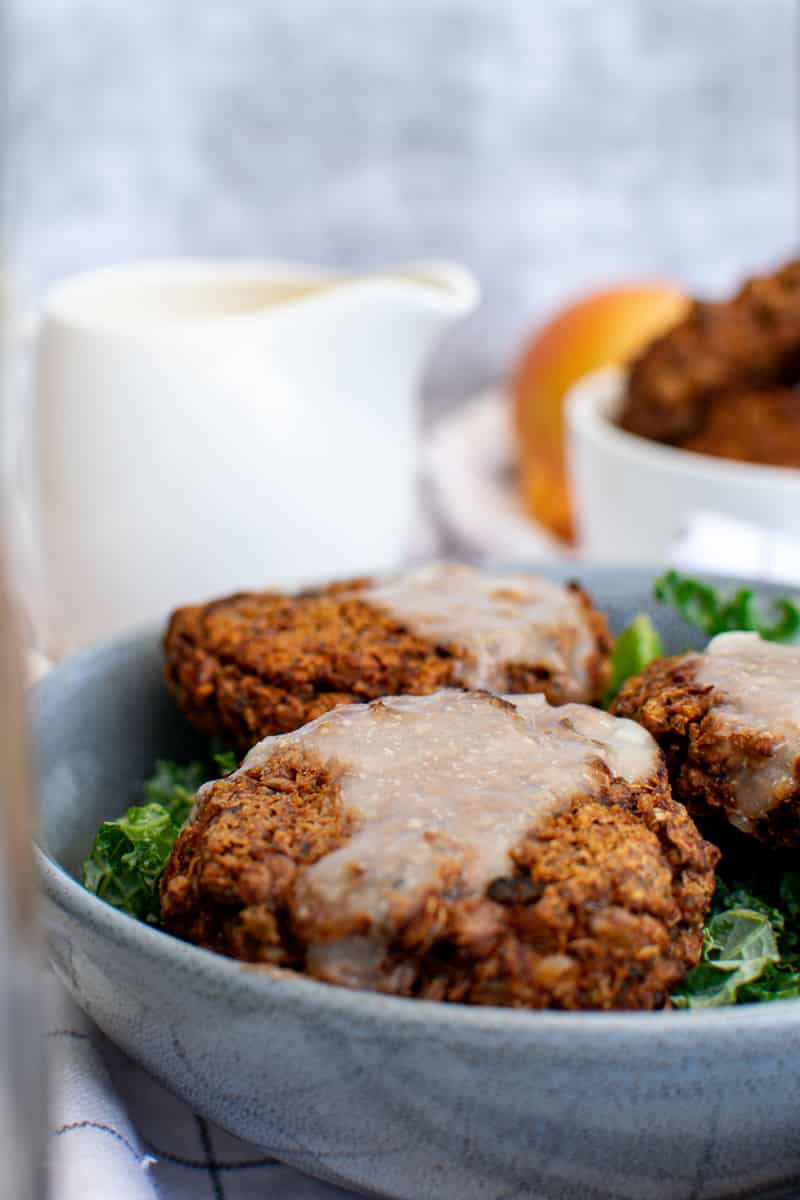
What can I do with leftover cooked lentils?
This lentil cake recipe has become my go-to way to use up leftover cooked lentils from other recipes like these masala lentils, lentil meatloaf, or this pasta salad with lentils.
What do you serve with lentil fritters?
These vegan-friendly lentil fritters are perfect served with a creamy vegan pasta salad, a fresh vegan salad, or this summery tomato and peach salad.
Why are my fritters soggy?
Most of the time, there are two potential reasons for soggy fritters: not enough dry ingredients or too many liquid ingredients. Eyeballing your measurements can make the fritters off-texture. Make sure to measure all your ingredients carefully!
What's the best way to reheat the lentil fritters?
I have found reheating your lentil cakes in a pan on the stove provides the best texture. When you microwave the lentils, it can make them a bit soggy and rubbery. Slowly heating the lentil cakes on the stove allows the outside to crisp back up!
Interested in More Lentil Recipes?
Here are a few more of my favorite vegan lentil recipes:
Also worth trying: our vegan Greek pasta salad.
Recipe

Lentil Fritters with Garlic Sauce
Whip up a batch of these flavorful Lentil Fritters with Garlic Sauce. Vegan friendly fritters are filled with lentils, garlic, and walnuts!
Print
Pin
Save
Servings: patties
Ingredients
Lentil cakes
- 2 cups lentils cooked according to package directions
- 1 tablespoon olive oil
- ½ onion diced
- 4 garlic cloves roughly chopped
- 8 ounces mushrooms sliced
- ½ cup quinoa cooked according to package directions
- ½ cup walnuts or cashews
- 1 teaspoon cumin
- 1 teaspoon smoked paprika
- 1 teaspoon parsley dry or fresh
- ¾ teaspoon salt
- 1 tablespoon ground flax +2 tablespoon of water
- 3 tablespoons water
- 2 teaspoons soy sauce or tamari for gluten free
Garlic sauce
- 1 cup soy milk or other plant based milk
- 2 tablespoon nutritional yeast
- 2 garlic cloves chopped, or 1 tablespoon garlic powder
- 1 tablespoon cornstarch or another thickener
- salt to taste
- lemon juice to taste
Instructions
Instructions for Lentil Cakes
- Cook dry lentils in simmering water until tender. Drain. You will need 2 cups cooked.
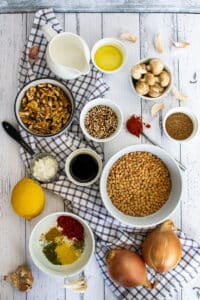
- Sauté the onion, garlic, and mushrooms in olive oil over medium heat for 5 minutes. Add a little water if it gets too dry. Turn heat down to low and cook until very tender and cooked through. Set aside.
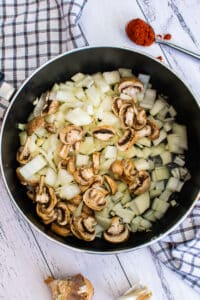
- Blend the walnuts into a coarse flour. Pour that flour into a medium bowl.

- Add half of the lentils and the mushroom mixture, salt, spices, flax egg.
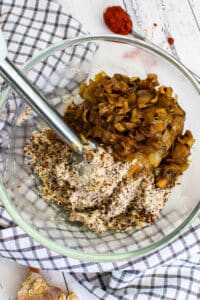
- Mix everything until it's well combined and forms a thick dough using a hand blender. Stir in the remaining whole lentils and quinoa.
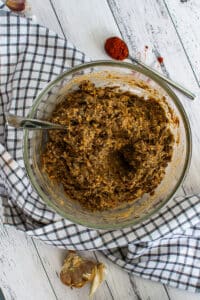
- Using wet hands form into 12-15 little cakes.
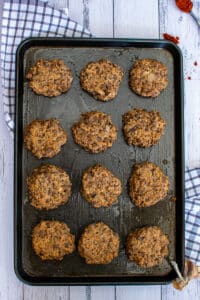
- Sear in a skillet, in a little oil, over medium heat-taking care to let them brown and form a crust before flipping.
- Serve with garlic sauce.

Instructions for Garlic Sauce
- Pour all the ingredients into a heated pan, whisking constantly until thickened-about 3-5 minutes. Then remove from heat.

Nutrition (Estimate per Serving)
Calories: 119kcalCarbohydrates: 13gProtein: 6gFat: 5gSaturated Fat: 1gSodium: 215mgPotassium: 296mgFiber: 4gSugar: 2gVitamin A: 166IUVitamin C: 3mgCalcium: 48mgIron: 2mg
Vegan-ize any recipe!Grab our free vegan cheat sheet, packed with my favorite easy substitutions to make any recipe vegan.
Brown Rice Pilaf with White Beans, Shiitakes, and Spinach
This homey brown rice pilaf is loaded with nutritious flavor from white beans, shiitake mushrooms, and fresh spinach. This simple dish makes a delicious vegan dinner or hearty lunch.
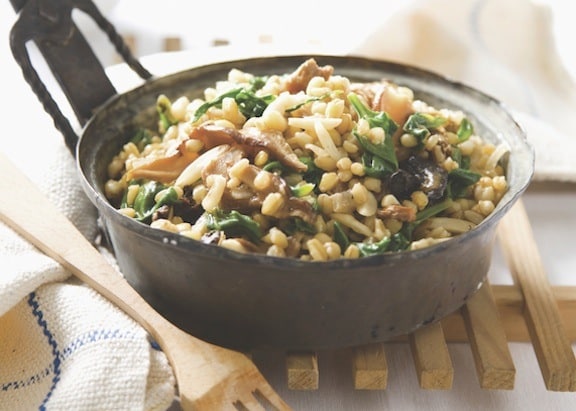
This brown rice pilaf is:
- A hearty vegan meal - comfort food at its best!
- Packed with protein and fiber
- Ready in under an hour
- Easy to make ahead, so it's perfect for meal prep.
Variations
This recipe is infinitely versatile. Instead of rice, you can swap in your own favorite grains like quinoa, wheat berries, or bulgur.
You can also swap out the white beans for cooked lentils, black-eyed peas, or chopped seitan to add an extra dose of protein.
Or add some heat with a minced jalapeño chile!
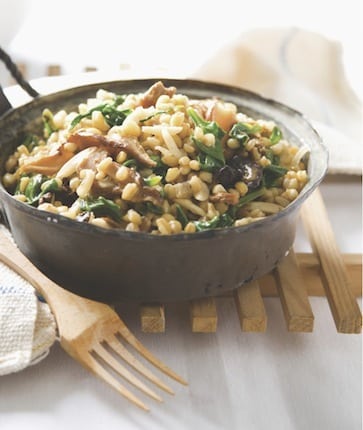
One-Dish Vegan
This recipe is from the amazing vegan cookbook, One-Dish Vegan by Robin Robertson. You can find it listed in the book as Brown Rice with White Beans, Shiitakes, and Spinach. It has been shared with permission of The Harvard Common Press.
For more ways to use brown rice, explore these Classic Rice Dishes.
Recipe
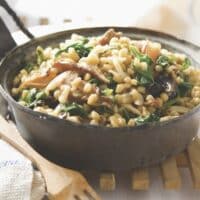
Brown Rice Pilaf
This hearty brown rice pilaf is packed with white beans, spinach, and shiitake mushrooms. It's loaded with nutritious flavor, and it's vegan too.
Print
Pin
Save
Servings: servings
Ingredients
- 1 tablespoon olive oil or ¼ cup water
- 1 large sweet onion chopped
- 3 garlic cloves minced
- 8 ounces shiitake mushrooms stemmed and sliced, about 2 cups
- 1 ¼ cups uncooked brown rice
- 2 cups vegetable broth
- salt and freshly ground black pepper to taste
- 4 scallions chopped
- 8 ounces baby spinach fresh
- 1 ½ cups canned white beans drained and rinsed
- 1 tablespoon fresh dill or basil minced
Instructions
- Heat the oil or water in a large saucepan over medium heat. Add the onion and cook until soft, about 7 minutes. Add the garlic and mushrooms and cook about 3 minutes or until the mushrooms are tender.
- Stir in the rice and cook, stirring, for 1 to 2 minutes. Stir in the vegetable broth and bring to a boil. Reduce the heat, season with salt and pepper to taste, cover, and simmer for 35 minutes, stirring occasionally.
- Uncover, and add the scallions and spinach, stirring until the spinach wilts. Stir in the beans and dill. Cook for 5 minutes longer, or until the broth is absorbed and the rice is tender. Taste and adjust the seasonings if needed. Serve hot.
Nutrition (Estimate per Serving)
Calories: 379kcalCarbohydrates: 71gProtein: 13gFat: 6gSaturated Fat: 1gSodium: 529mgPotassium: 1035mgFiber: 9gSugar: 4gVitamin A: 5687IUVitamin C: 21mgCalcium: 144mgIron: 5mg
Vegan-ize any recipe!Grab our free vegan cheat sheet, packed with my favorite easy substitutions to make any recipe vegan.
Cream of Corn and Watercress Soup
The peppery flavor of watercress provides a delightful contrast to the sweetness of summer corn in this delicious cold soup. Adapted from Vegan Soups and Hearty Stews for All Seasons.
Recipe

Cream of Corn and Watercress Soup
The peppery flavor of watercress provides a delightful contrast to the sweetness of summer corn in this delicious cold soup. Adapted from Vegan Soups and Hearty Stews for All Seasons.
Print
Pin
Save
Servings: servings
Ingredients
- 6 medium ears fresh sweet corn
- 2 tablespoons olive oil
- 2 large onions chopped
- 2 cloves garlic minced
- 2 medium potatoes peeled and diced
- 2 cups chopped watercress leaves and stems
- 2 cups rice milk or as needed
- Salt and freshly ground pepper
- 1 tablespoon fresh oregano leaves or more to taste
Instructions
- Cook the corn in plenty of rapidly simmering water until the kernels are just tender, then remove the corn with tongs and reserve the cooking water. When the corn is cool enough to handle, scrape the kernels off the cobs with a sharp knife. Set the kernels aside.
- Heat the oil in a soup pot. Add the onions and garlic and sauté over medium-low heat until golden.
- Add the potatoes and 4 cups of the cooking liquid from the corn, and bring to a rapid simmer, then lower the heat. Cover and simmer gently for 10 minutes. Add half of the watercress. Simmer until the potatoes are tender, about 10 to 15 minutes longer, then remove from the heat.
- Set aside a cup of the corn kernels and add the rest to the soup. With a slotted spoon, transfer the solid ingredients from the soup to the food processor or blender and puree until smooth, then return to the soup pot. Or, simply insert an immersion blender and puree until smooth.
- Add the reserved corn kernels and watercress along with enough rice milk to give the soup a slightly thick consistency. Season with salt and pepper. Let the soup cool to room temperature, then refrigerate until chilled. Top each serving with a sprinkling of oregano leaves.
Nutrition (Estimate per Serving)
Calories: 469kcalCarbohydrates: 76gProtein: 8gFat: 16gSaturated Fat: 2gPolyunsaturated Fat: 2gMonounsaturated Fat: 10gSodium: 124mgPotassium: 1220mgFiber: 8gSugar: 18gVitamin A: 1142IUVitamin C: 66mgCalcium: 161mgIron: 3mg
Vegan-ize any recipe!Grab our free vegan cheat sheet, packed with my favorite easy substitutions to make any recipe vegan.
Black Bean and Zucchini Tortilla Casserole

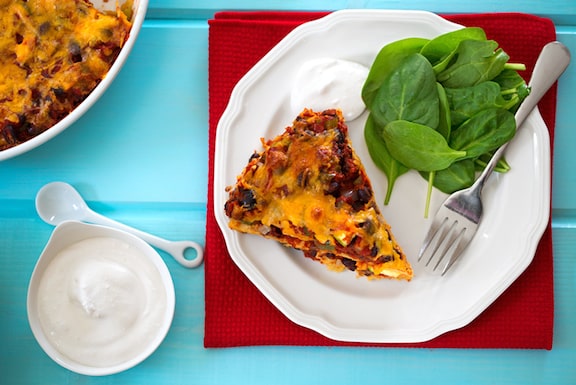
Chilaquiles is a classic Southwestern casserole that layers soft corn tortillas with beans and cheese (vegan in this case).
Adding zucchini and chiles adds to the lively flavors. This recipe makes a nice change-of-pace holiday main dish but is also easy enough to make for weeknight meals.
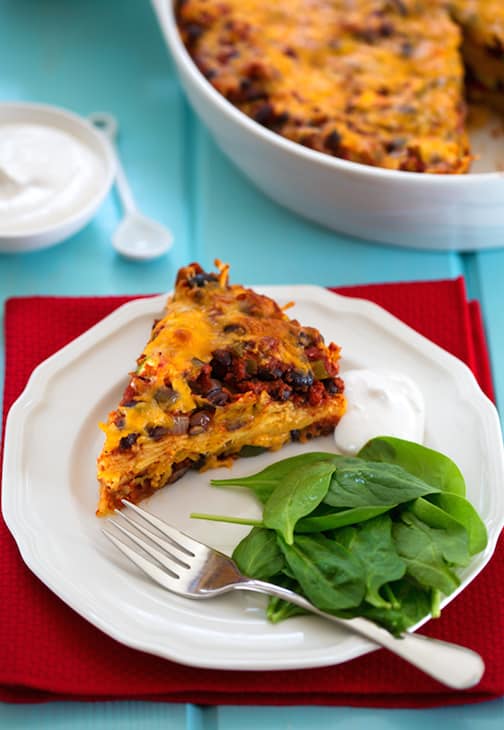
More Recipes
- Here are more easy bean main dishes.
- Find lots more tortilla recipes in A Southwestern Supper.
- Here are more recipes for a Vegetarian and Vegan Friendly Thanksgiving.
- Find more ways to make Special Occasions and Entertaining easier and healthier.
- Browse more of VegKitchen's vegan casserole recipes.
Photos by Hannah Kaminsky.
Adapted from The Vegetarian Family Cookbook.
Recipe

Black Bean and Zucchini Tortilla Casserole
This southwestern-style casserole makes for a nice change-of-pace holiday main dish, but this is also easy enough to make for weeknight meals.
Print
Pin
Save
Servings:
Ingredients
- 1 ½ tablespoon extra-virgin olive oil
- 1 cup chopped onion
- 1 medium green bell pepper diced
- 1 28 oz can crushed or pureed tomatoes
- 1 -2 small fresh hot chile peppers seeded and minced, or 1 (4 oz) can chopped mild green chiles
- 2 teaspoon chili powder or more, to taste
- 1 teaspoon dried oregano
- 1 teaspoon ground cumin
- 1 16-20 oz can black beans, drained and rinsed
- 1 medium zucchini quartered lengthwise and thinly sliced
- 12 corn tortillas torn or cut into several pieces
- 8 oz cheddar-style nondairy cheese Daiya is great with this!
- vegan sour cream homemade or purchased or Cashew Cream for garnish, optional
Instructions
- Preheat the oven to 400°F.
- Heat the oil in a large saucepan. Sauté the onion until translucent. Add the green pepper and continue to sauté until it has softened and the onions are golden.
- Stir in the crushed tomatoes and seasonings, black beans, and zucchini. Bring to a simmer, then simmer gently for 5 minutes.
- Layer as follows in a lightly oiled 9 x 13 inch or 2-quart round casserole dish: half of the tortillas, half of the tomato-black bean mixture, and half of the cheese. Repeat.
- Bake for 15 to 20 minutes, or until the cheese is bubbly. Let stand for 5 to 10 minutes, then cut into squares or wedges to serve.
Nutrition (Estimate per Serving)
Calories: 221kcalCarbohydrates: 29gProtein: 4gFat: 10gSaturated Fat: 3gSodium: 314mgPotassium: 235mgFiber: 5gSugar: 3gVitamin A: 319IUVitamin C: 26mgCalcium: 74mgIron: 2mg
Vegan-ize any recipe!Grab our free vegan cheat sheet, packed with my favorite easy substitutions to make any recipe vegan.
This post was originally published on 21 September 2014.
Chickpea-Mushroom Soup with Tahini
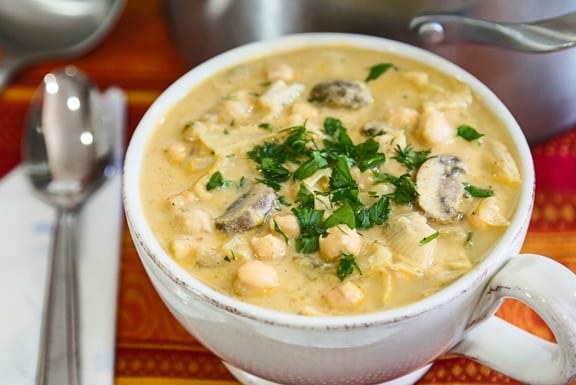
The classic Middle Eastern team of chickpeas and tahini (sesame paste) is combined in this tasty, offbeat soup recipe. Serve with fresh whole wheat pita bread. Middle Eastern tabbouli salad and a steamed green vegetable would round this meal out nicely.
Photos by Evan Atlas. Adapted from Vegan Soups and Hearty Stews for All Seasons.
[Read more...]
Hoisin-Glazed Bok Choy with Tofu and Soba Noodles
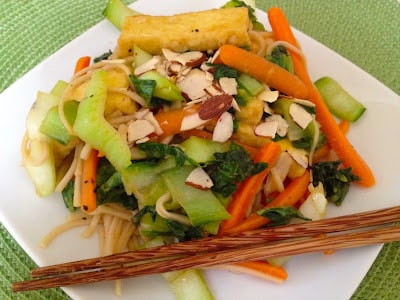
This Hoisin-Glazed Bok Choy with Tofu and Soba Noodles recipe makes a quick, delicious dish of tofu and greens with a hint of citrus. For a dazzling plate, serve with a beet salad. Recipe from Wild About Greens;* photo by Gail Davis of Hungry Vegan. [Read more...]
Easy Zucchini Noodles with Peanut Sauce
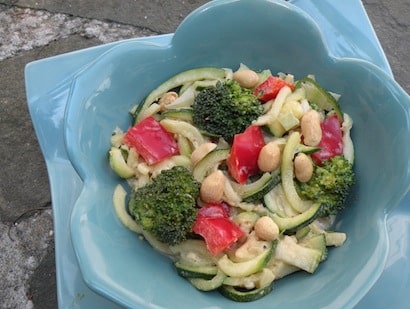
When the heat gets this intense, I try to make meals that don't require much if any heat (even if the A/C is on!). I've really enjoyed my spiral slicer, which makes instant "noodles" from raw zucchini. Now, don't get me wrong—I have no problem with pasta, but in the summer heat, zucchini noodles just feel lighter. And they're ready pretty much instantly, with a few cranks of the lever, and no heat needed. If you don't have a spiral slicer, you can use your favorite noodles—rice noodles, bean-thread noodles, soba, or linguini—this works with all of them. And this recipe adds a nice twist with some tasty peanut sauce. [Read more...]
Strawberry-Vanilla Maca Smoothie

Maca powder, which has so many notable health benefits, has a caramel-y flavor that blends well into smoothies of all sorts. In this Strawberry-Vanilla Maca Smoothie recipe, maca powder teams well with the strawberry, banana, and vanilla flavors. If you're new to maca, use the lesser quantity; if you've been using it for a while, allow for 2 teaspoons per serving. This makes about two 12-ounce servings. Photos by Ollzha.
[Read more...]
Baba Ghanouj (Middle Eastern Eggplant and Tahini Dip)

Baba Ghanouj is-like hummus-a classic Middle Eastern spread meant to be scooped up on wedges of pita bread. It's also good as a dip for raw veggies. This recipe is a must-try for eggplant lovers!
[Read more...]
Mango Lentil Salad with Cilantro-Lime Dressing
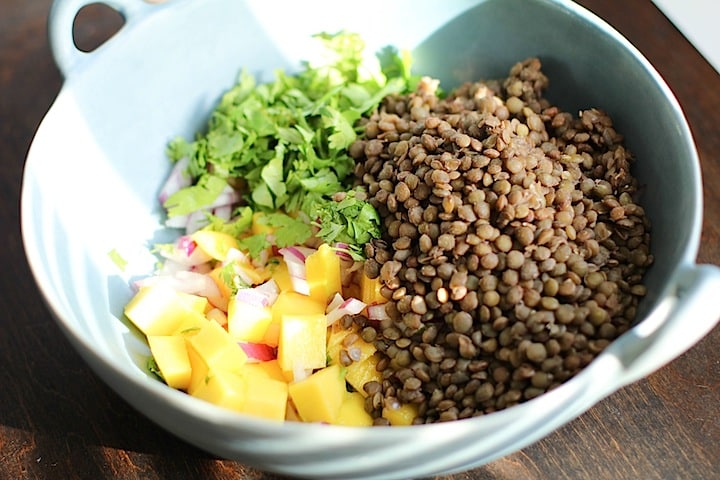
This refreshing Mango Lentil Salad recipe is unique, blending Indian flavors from the cumin and coriander with the Mexican flavors of mango and lime. One of the best things about salad is you can combine ingredients that you wouldn't normally pair up, and it usually works wonderfully. French lentils, also known as du Puy lentils, are the best type of lentil to use in salads. Green, brown, and red lentils are perfect in soups and stews because they're soft and tend to fall apart, while du Puy lentils work better in salads because they hold their shape well when cooked properly. All in all, a refreshing summery salad with great sustenance from the lentils. Recipe and photos contributed by Sophia Zergiotis of Love and Lentils.
Homemade Soft Corn Tortillas
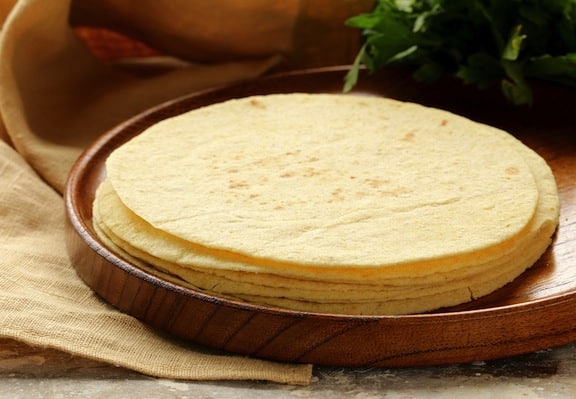
If you can lift a bag of masa harina, you can make homemade corn tortillas and enjoy soft, toasty, corny goodness tonight! Homemade tortillas are best kept simple with basic toppings such as a strip of grilled tempeh or a spoonful of guacamole. Or serve with beans or a hearty Mexican posole. The key is to keep fresh-off-the-grill tortillas well covered to keep them warm and pliable until it’s time to eat. This recipe isn’t really too different from what’s on the bag of masa, but I see it as a way to inspire making homemade tortillas in the event you’ve never tried! Delicious with chili and other Southwestern stews, such as Quick Red Posole with Beans. Recipe from Viva Vegan!: 200 Authentic and Fabulous Recipes for Latin Food Lovers* by Terry Hope Romero. Reprinted courtesy of Da Capo Lifelong Books.
Enlightened Miso Power Bowl
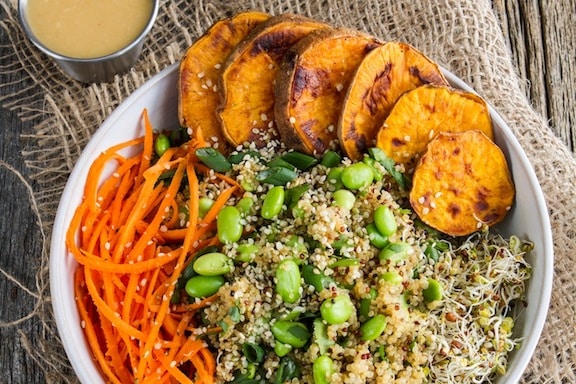
This Enlightened Miso Power Bowl is a fun recipe that will keep your energy high for hours. Miso is a fermented food that aids in digestion and adds a wonderful umami flavor to foods. If you are new to miso, Orange-Maple Miso Dressing is a great way to incorporate it into your diet. It's a great gluten-free, nut-free, refined sugar–free, and soy-free option! Recipe and photo from The Oh She Glows Cookbook* by Angela Liddon. [Read more...]
Tofu Aloo Gobi (Cauliflower and Potato Curry)
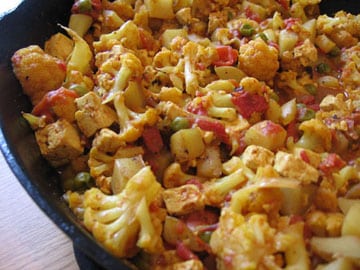
We’ve rarely gone out for Indian food without including this classic cauliflower and potato curry among our selections. It’s a vegetarian and vegan standard! This simplified recipe comes together quickly, and the tofu mimics paneer—the bland, soft cheese found in some Indian dairy dishes. Photo courtesy of In My Box: An Exploration of My CSA Box.
[Read more...]
- « Previous Page
- 1
- …
- 6
- 7
- 8
- 9
- 10
- …
- 23
- Next Page »