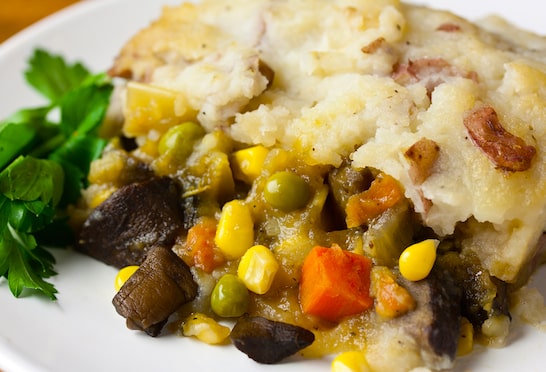
This delicious classic casserole, a vegetable-filled shepherd's pie, requires 30 to 40 minutes of hands-on time, plus about an equal amount of baking. So, while it may not qualify as a quick dish to make when you come home from work, it's a comforting weekend meal. It's substantial and filling.
Search Results for: green beans
Vegan Dinner Recipes
To help you answer the question "what's for dinner?" here's a selection of easy vegan main dish recipes you'll find here on VegKitchen. Great vegan dinners, many of which are quick and easy-can be on the table in 30 minutes or so.
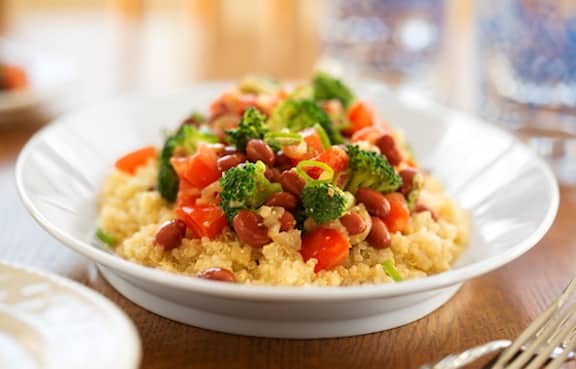
Though this isn't an exhaustive listing of all the possible dinner fare here on VegKitchen (after all, you can serve brunch dishes for dinner, or combine soups and sandwiches or salads-make sure to explore other recipes and categories on the Recipes Galore page), you'll find plenty to choose from in this at-a-glance listing. Pictured at top, Miso Ginger Red Beans with Quinoa and Broccoli.
To help you answer the question "what's for dinner?" here's a selection of easy vegan dinner recipes (suitable for vegetarian diets as well, of course!) you'll find here on VegKitchen. If you're more of a book person, please also explore some of Nava's cookbooks for fast dinner recipes, including Vegan Express, Vegetarian 5-Ingredient Gourmet and Vegetarian Family Cookbook.
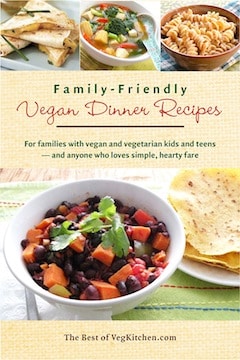
If you're part of a plant-strong family, you might enjoy one of the titles in VegKitchen's pdf e-book series. This compact, affordable 48-page pdf e-book collects VegKitchen's most popular family-friendly recipes. No more poring through recipes on the web (or even just this site, of which there are hundreds! For more information, go to Family-Friendly Vegan Dinner Recipes: For families with vegan and vegetarian kids and teens - and anyone who loves simple, hearty fare.
Vegan Dinner Recipes
Asian Noodle Dishes
- Vegetable Lo Mein
- Hoisin-Glazed Bok Choy with Tofu and Soba Noodles
- Pineapple Coconut Noodles
- Easy Vegan Pad Thai
- Pad Thai with Spicy Peanut Sauce
- Orange Sesame Noodles
- Asian Noodle Platter with Crisp Veggies and Peanut Sauce
- Fresh Chinese Noodles with Mixed Mushrooms and Spinach
- Pan-Fried Sesame Noodles and Broccoli
- Noodles with Peanut Sauce, Broiled Kale, and Butternut Squash
- Japanese Noodles with Tempeh and Vegetables
- Soba Noodles with Tofu, Tomatoes, and Basil
- Vegetable Chow Mein
- Szechuan-Style Eggplant with Noodles
- Asian Noodles with Napa Cabbage, Mushrooms, and Tofu
- Asian Noodles with Spicy Stir-Fried Corn and Cabbage
Burritos, Enchiladas, and Other Tortilla Dishes
- Basic Bean Burritos
- Mashed Potato Burritos
- Big Quesadillas with Black Beans, Broccoli, and Portabellas
- Cauliflower Power Tacos
- Quinoa Tacos
- Super Easy Tortilla Casserole
- Black Bean Tostadas
- Quesadillas with Sweet Potatoes, Zucchini, and Corn
- Big Quesadillas with Refried Beans, Spinach, and Avocado
- Avocado Quesadillas
- Yellow Rice and Black Bean Burritos
- Pinto Bean and Corn Soft Tacos
- Bountiful Vegetable Burritos

Casseroles and Other Comfort Foods
- Vegan Macaroni and Cheese
- Hearty Vegetable Pot Pie
- Quinoa, Broccoli, and Vegan Cheese Casserole
- Baked Risotto
- Classic Veggie Shepherd's Pie
- Butternut Squash and Mixed Mushroom Lasagna
- Sweet and White Potato Casserole with Apples
- Mozzarella Mashed Potato Pie
- Mom's "Tuna"-Noodle Casserole
- Black Bean and Zucchini Tortilla Casserole
Main Dishes Featuring Grains and/or Beans
- Savory Stuffed Winter Squash
- Jamaican-Style Spicy Beans
- Quinoa with Cauliflower, Cranberries, and Nuts
- Valencian-Style Rice and Red Beans
- Tropical Quinoa and Black Beans
- Quinoa and Mushroom Stuffed Peppers
- Pink Bean, Quinoa, and Spinach Soup
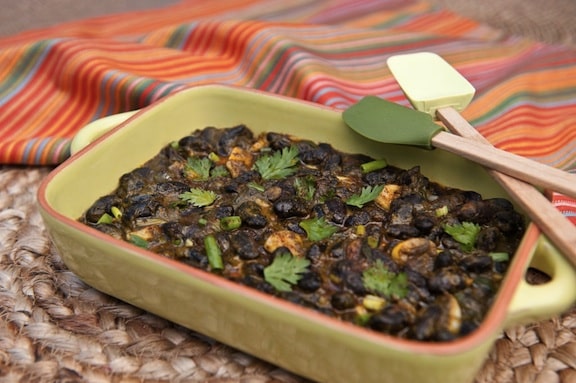
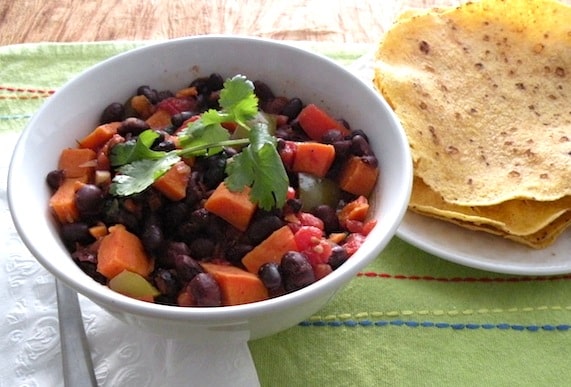
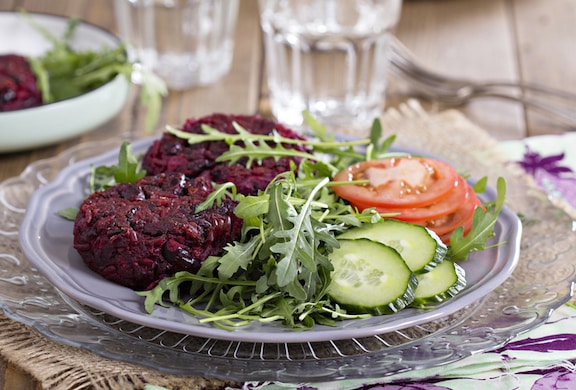
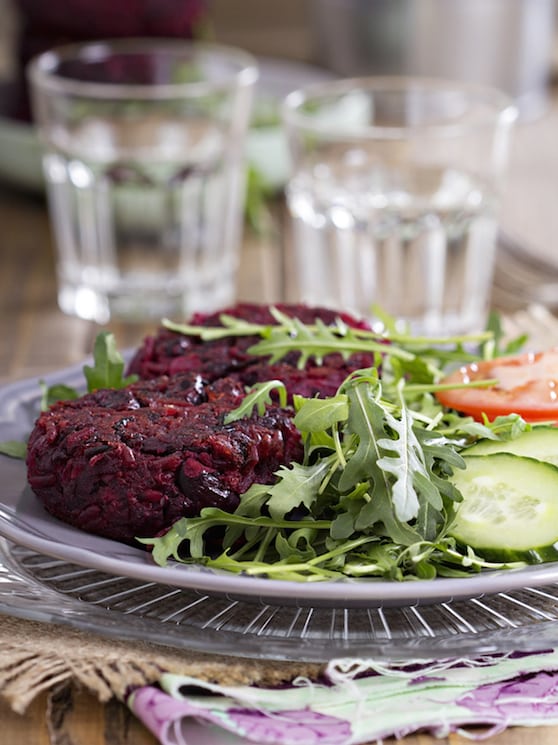
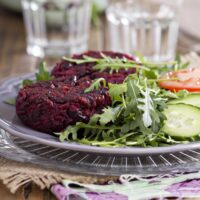
- Miso-Ginger Red Beans with Quinoa and Broccoli
- Pinto Bean and Quinoa Sloppy Joes
- Quinoa with Edamame and Oranges
- Black Bean Hemp Protein Patties
- Polenta with Black Beans and Spinach
- Hummus and Quinoa Wraps
- Skillet Black Beans with Potatoes and Tortillas
- Thai Chickpea Almond Curry
- Quinoa Paella
Pasta Entrées
- Pasta Puttanesca (Pasta with Olive Sauce)
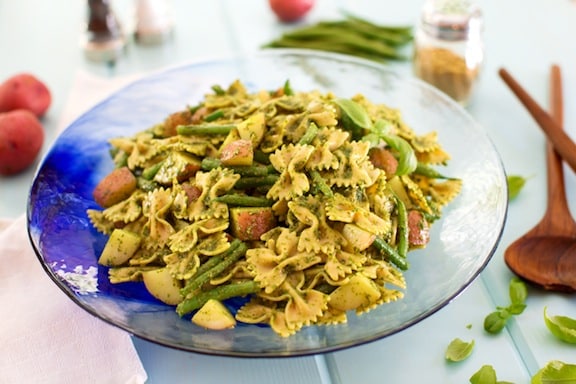
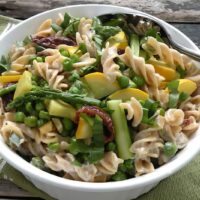
- Pasta with Pesto, Potatoes, and Green Beans
- Vegan Spinach-Mushroom Lasagna
- Pasta, Beans, and Greens with Creamy Cashew Sauce
- Pasta Arabiatta
- Pasta Curry with Cauliflower and Chickpeas
- Penne with Chard and Beans
- Pasta with Roasted Vegetables and Olives
- Mixed Vegetable Lasagna
- Cincinnati "Chili Mac"
- Tortellini or Ravioli in Sweet Potato Sauce
- Pasta, Greens, and Beans in Creamy Cashew Sauce
Pizzas
- Verdant Veggie Pesto Pizza
- Roasted Veggie Pizza
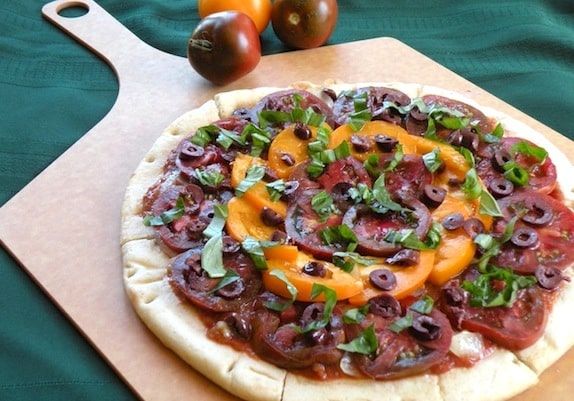
- Garlicky Fresh Tomato and Basil Pizza
- Pizza with Onions, Peppers, and Artichokes
- Mixed Olives and Spinach Pizza
- White Pizza with Asparagus and Spinach
- Artichoke, Green Pea, and Vegan Cheddar Pizza
- Two-Onion Pizza
- White Pizza with Sweet Potato and Carmelized Onions
- Mexican Pizza
- Fresh Tomato, Eggplant, and Olive Pizza
Seitan Recipes
- Dilip's Lime Jerk Seitan with Kale
- Seitan and Polenta Skillet with Fresh Greens
- "Buddhist's Delight" (Seitan and Vegetable Stew)
- Cornmeal-Crusted Seitan
- Seitan and Mushrooms in Paprika Cream
- Tofu and Seitan Sauté with Easy Gravy
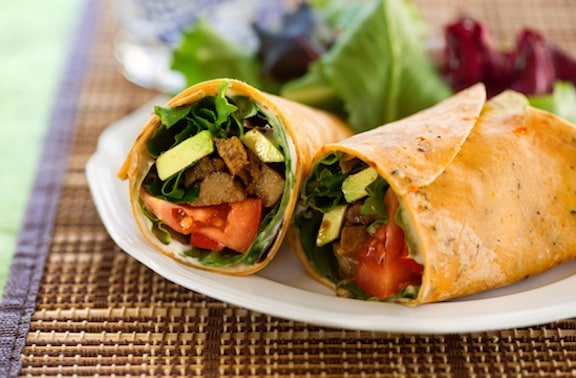
- BBQ-Flavored Seitan and Avocado Wraps
- Seitan "Peppersteak" with Bean Thread Noodles
- Seitan Chow Fun
- Seitan Gyros
- Sweet-and-Sour Seitan and Vegetables
- Seitan, Mushroom and Onion Stir-Fry
- Seitan Peppersteak
- Seitan "Meat and Potatoes" Stew
- Seitan and Broccoli Stir-Fry
Stews & Chilis
- Classic Vegetarian Chili
- Moroccan-Style Vegetable Stew
- Quick Black Bean and Sweet Potato Chili
- Curried Sweet Potatoes with Chard and Chickpeas
- Italian Vegetable Ragout with Chard
- Brazilian-Inspired Black Bean Stew
- Golden Hominy Chili
- Curried Mixed Vegetable Stew
- South American Harvest Stew
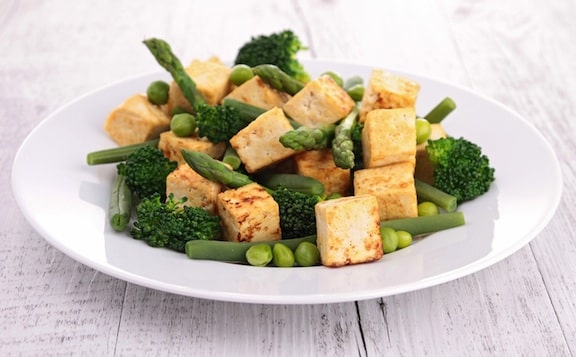
Tofu, Tempeh, and Vegan Sausage Main Dishes
- Spinach, Broccoli, and Tomato Scrambled Tofu
- Stir-Fried Tofu with Spring Greens
- Classic Tofu Quiche
- Citrus Roasted Tofu
- Tempeh Tamale Pie
- Kung Pao Broccoli and Tofu
- Thai Coconut Tempeh with Pineapple Salsa
- Barbecued-Flavored Roasted Tempeh and Vegetables
- BBQ-Flavored White Beans with Sausage and Spinach
- Easy Curried Sweet Potato and Tofu Stew
- Broccoli Frittata
- Tempeh, Kale, and Sweet Potato Skillet
- Tangy Tempeh with Portabella Mushrooms
- Gently Curried Tofu Burgers
- Potatoes and Collard Greens with Vegan Sausage
- Tofu Rancheros
- Tofu with Balsamic-Roasted Italian Vegetables
- Mediterranean Tofu
- Sautéed Tofu with Green Veggies
Olive Rice Salad
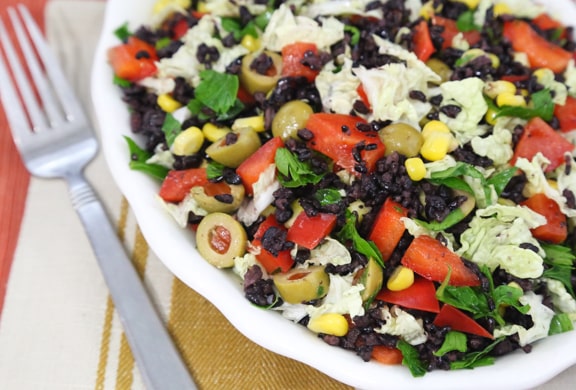
When the season for cold meals arrives, this easy rice salad is most welcome. Served with a simple combination of chickpeas or black beans and tomatoes drizzled with olive oil, balsamic vinegar, and fresh herbs. Add some steamed broccoli or green beans to the meal for a finishing touch. Try using black rice (sometimes marketed as forbidden rice) for added eye appeal. Photos by Evan Atlas. [Read more...]
Maple Glazed Pineapple
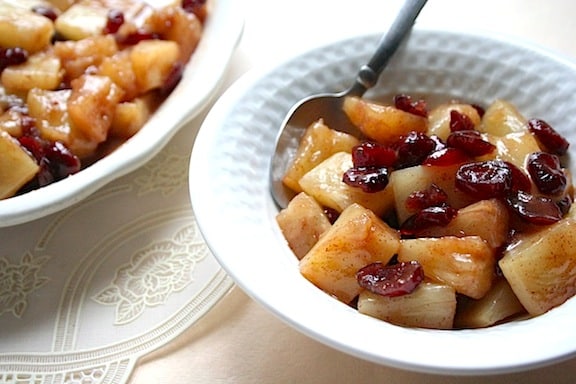
This Maple Glazed Pineapple will really sweeten up your summer. Serve it up for dessert or as a side for your next meal.
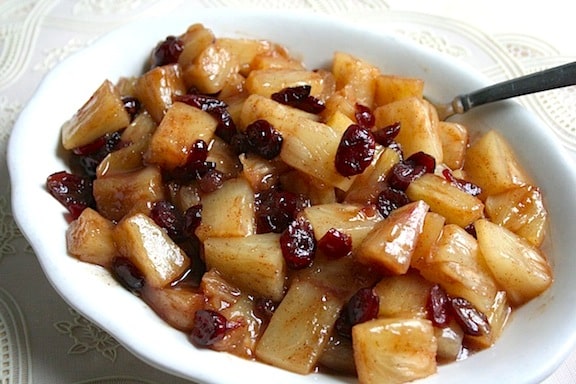
The flavor of maple syrup marries well with pineapple, especially glazed right into the surface. If you like pineapple, you're sure to enjoy this nearly instant dessert! It's particularly appealing when made with canned organic pineapple mini-rings.
Pair this tasty treat with some vanilla ice cream or a warm and gooey chocolate chip cookie. If you're serving it as side dish, these pineapples pair really well with green beans and salads!
How to Make Maple Glazed Pineapple
- Heat plant butter, syrup, and cinnamon in skillet.
- Drain and add pineapple.
- Cook until pineapple is glazed.
- Add dried fruit & remove from heat.
- Serve as desired.
Full directions for how to make Maple Glazed Pineapple are in the printable recipe card below.
Maple Glazed Pineapple FAQs
Can I use a sweetener other than maple syrup?
You can use any kind of sweetener that you prefer! Agave syrup works well, and you can also melt some sugar in the pan and use that.
Does it matter what shape the pineapple is in?
You can use any shape and size of pineapple that you would like! Just make sure to get all the sides coated with maple syrup before you put the pineapple in the pan to glaze. I love using pineapple rings, but cubes are also nice.
Recipe

Maple Glazed Pineapple
This Maple Glazed Pineapple will really sweeten up your summer. Serve it up for dessert or as a side for your next meal.
Print
Pin
Save
Servings:
Ingredients
- 1 tablespoon Earth Balance or other vegan buttery spread
- ¼ cup maple syrup
- ¼ teaspoon cinnamon or to taste
- 3-3 ½ cups diced fresh pineapple or two 15oz cans pineapple chunks or slices, drained
- ¼ cup dried fruit cranberries, cherries, blueberries, raisins, etc.
- optional toppings vanilla coconut yogurt, granola, and/or toasted chopped nuts
Instructions
- Heat the Earth Balance in a medium skillet until melted, then stir in the maple syrup and cinnamon.
- Drain the pineapple well (save the juice for another recipe-smoothies, popsicles, etc.) and add to the skillet.
- Cook over medium-high heat, stirring often, until the pineapple is nicely glazed and golden, 6 to 8 minutes.
- Stir in the dried fruit of your choice and remove from the heat. Transfer the mixture to a serving dish. Allow to cool.
- Serve fruit mixture warm or at room temperature. Top each serving with any or all of the optional toppings as desired.
Nutrition (Estimate per Serving)
Calories: 1281kcalCarbohydrates: 324gProtein: 10gFat: 6gSaturated Fat: 1gPolyunsaturated Fat: 1gMonounsaturated Fat: 3gSodium: 22mgPotassium: 2520mgFiber: 26gSugar: 296gVitamin A: 991IUVitamin C: 186mgCalcium: 344mgIron: 6mg
Vegan-ize any recipe!Grab our free vegan cheat sheet, packed with my favorite easy substitutions to make any recipe vegan.
Photos by Rachael Braun.
Hearty Recipes for Hungry Teens (Vegan and Vegetarian)
If you’re feeding teenagers, especially the male variety, you know that they go through mountains of food, and your grocery bill mounts alarmingly. Here are a handful of hearty, filling dishes that won’t break the bank. Now I'm not saying that young women won't like these hearty dishes, but in my experience, at least, they don't eat in nearly the quantity of their male counterparts. [Read more...]
Orzo Minestrone
Bring a taste of Italy into your home with this delicious Orzo Minestrone! This is a dish you will find yourself coming back to again and again.
[feast_advanced_jump_to]Filling and flavorful, this Italian vegetable soup becomes a meal in itself when served with a robust, whole-grain bread and a green salad. This soup keeps well and develops more flavor as it goes.
How to Make Orzo Minestrone
- Sauté garlic and onions.
- Add carrots and celery, and bring to boil.
- Add more veggies and spices.
- Let simmer while cooking the orzo separately.
- Stir pasta and remaining ingredients into soup.
- Simmer a bit longer, then serve.
Full directions for how to make Orzo Minestrone are in the printable recipe card below.
Orzo Minestrone FAQs
What is Orzo?
Orzo is a type of pasta that looks like rice. It can double as a grain or a pasta and is often used in soups.
Where does minestrone soup come from?
Minestrone soup comes from Italy. It is traditionally a vagetable soup with a tomato base and some kind of grain, usually pasta or rice. This recipe combines the two options by using orzo!
How long will this soup last?
You can keep this soup in your fridge up to 5 days. Make sure to store it in an airtight container. And you'll definitely want to reheat your soup before you eat it again!
Explore other recipes for hearty winter soups.
Recipe

Orzo Minestrone
Bring a taste of Italy into your home with this delicious Orzo Minestrone! This is a dish you will find yourself coming back to.
Print
Pin
Save
Servings:
Ingredients
- 2 tablespoon extra-virgin olive oil
- 1 large onion finely chopped
- 2 cloves garlic minced
- 2 medium carrots peeled and diced
- 2 medium celery stalks diced
- 1 cup green beans trimmed and cut into ½-inch lengths; use frozen if good fresh green beans are unavailable
- 14-16 oz tomatoes diced
- 1 cup tomato sauce
- ¼ cup dry red wine optional
- 2 bay leaves
- 1 teaspoon dried basil
- 1 teaspoon oregano
- ⅔ cup orzo or rosa marina-rice-shaped pasta
- 15-16 oz chickpeas drained and rinsed
- ¼ cup fresh parsley minced
- salt and freshly ground black pepper
Instructions
- Heat the oil in a large soup pot.
- Add the onions and garlic, and sauté over medium-low heat until golden.
- Add the carrots, celery, and just enough water to cover. Bring to a gentle boil.
- Add the green beans, tomatoes, tomato sauce, optional wine, bay leaves, basil, and oregano.
- Bring to a simmer, then cover and simmer very gently until the vegetables tender but not overdone, about 40 to 45 minutes.
- Meanwhile, cook the orzo in a separate saucepan according to package directions until al dente, then drain.
- Stir the cooked orzo, chickpeas, and parsley into the soup. Adjust the consistency with more water if necessary, then season to taste with salt and pepper.
- Simmer over very low heat for 5 minutes longer, then serve.
Nutrition (Estimate per Serving)
Calories: 213kcalCarbohydrates: 33gProtein: 8gFat: 5gSaturated Fat: 1gPolyunsaturated Fat: 1gMonounsaturated Fat: 3gSodium: 182mgPotassium: 549mgFiber: 7gSugar: 8gVitamin A: 3432IUVitamin C: 17mgCalcium: 65mgIron: 3mg
Vegan-ize any recipe!Grab our free vegan cheat sheet, packed with my favorite easy substitutions to make any recipe vegan.
Teriyaki Marinade
A well-flavored marinade, this adds an Asian spin to grilled, stir-fried, or sautéd tofu, tempeh, and seitan. It also enhances vegetables, including eggplant, broccoli, green beans, scallions, carrots, and mushrooms. Use it to pan-sauté or grill vegetables and plant proteins. See our Teriyaki Eggplant recipe. Photo by Evan Atlas.
Curried Mixed Vegetable Stew
This colorful vegetable curry is an easy, aromatic way to enjoy veggies in a warming, spiced (but not too spicy) sauce. Serve with fresh flatbread, brown rice or other grain, and a simple salad of cucumber mixed with coconut yogurt and cilantro. [Read more...]
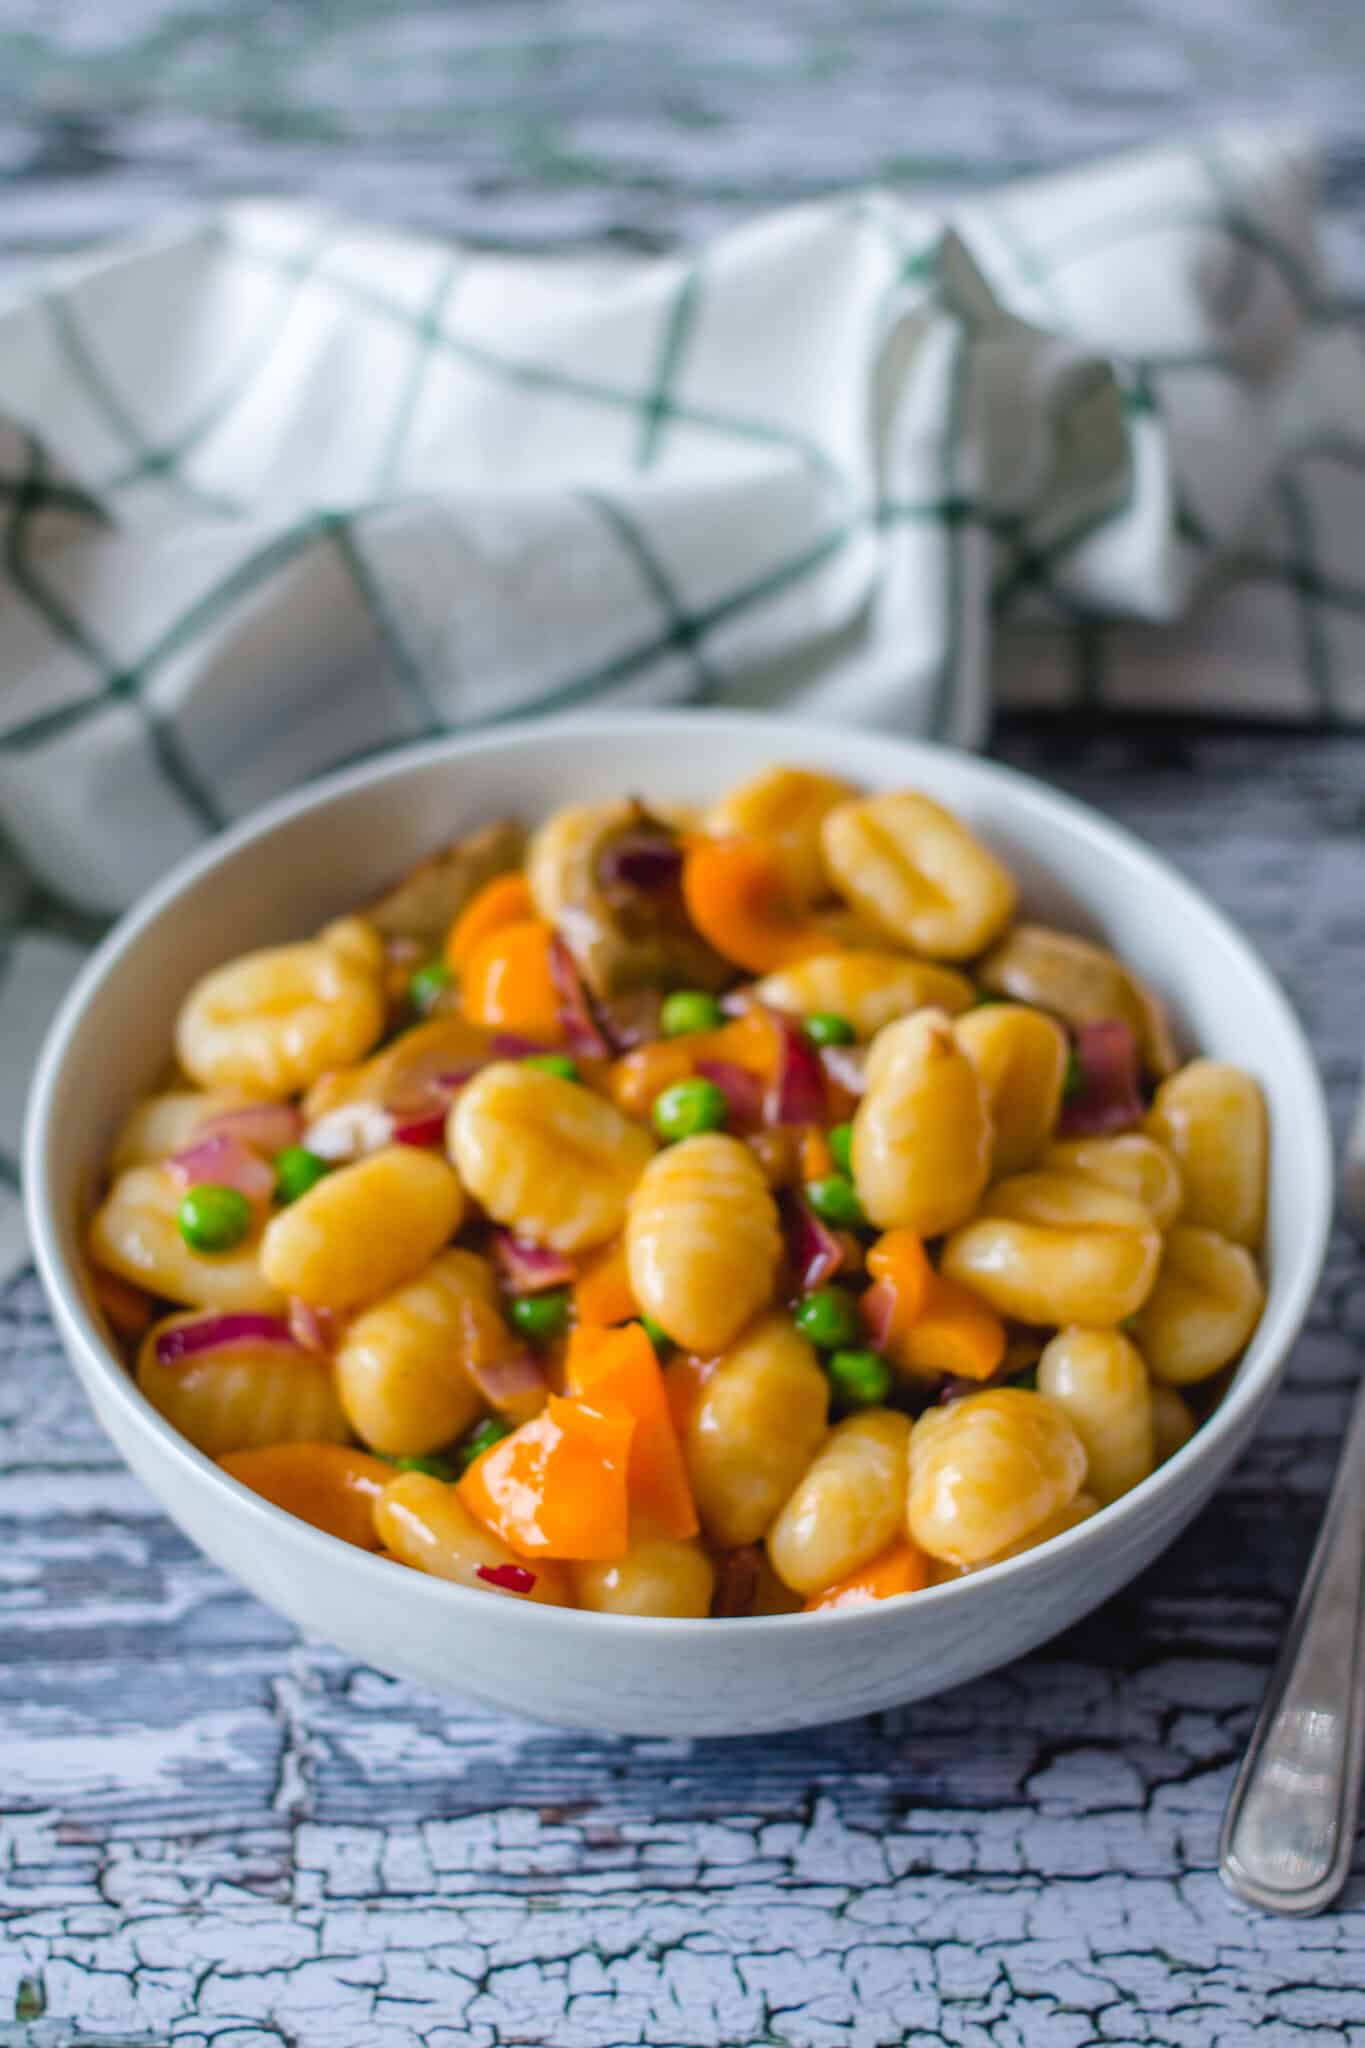
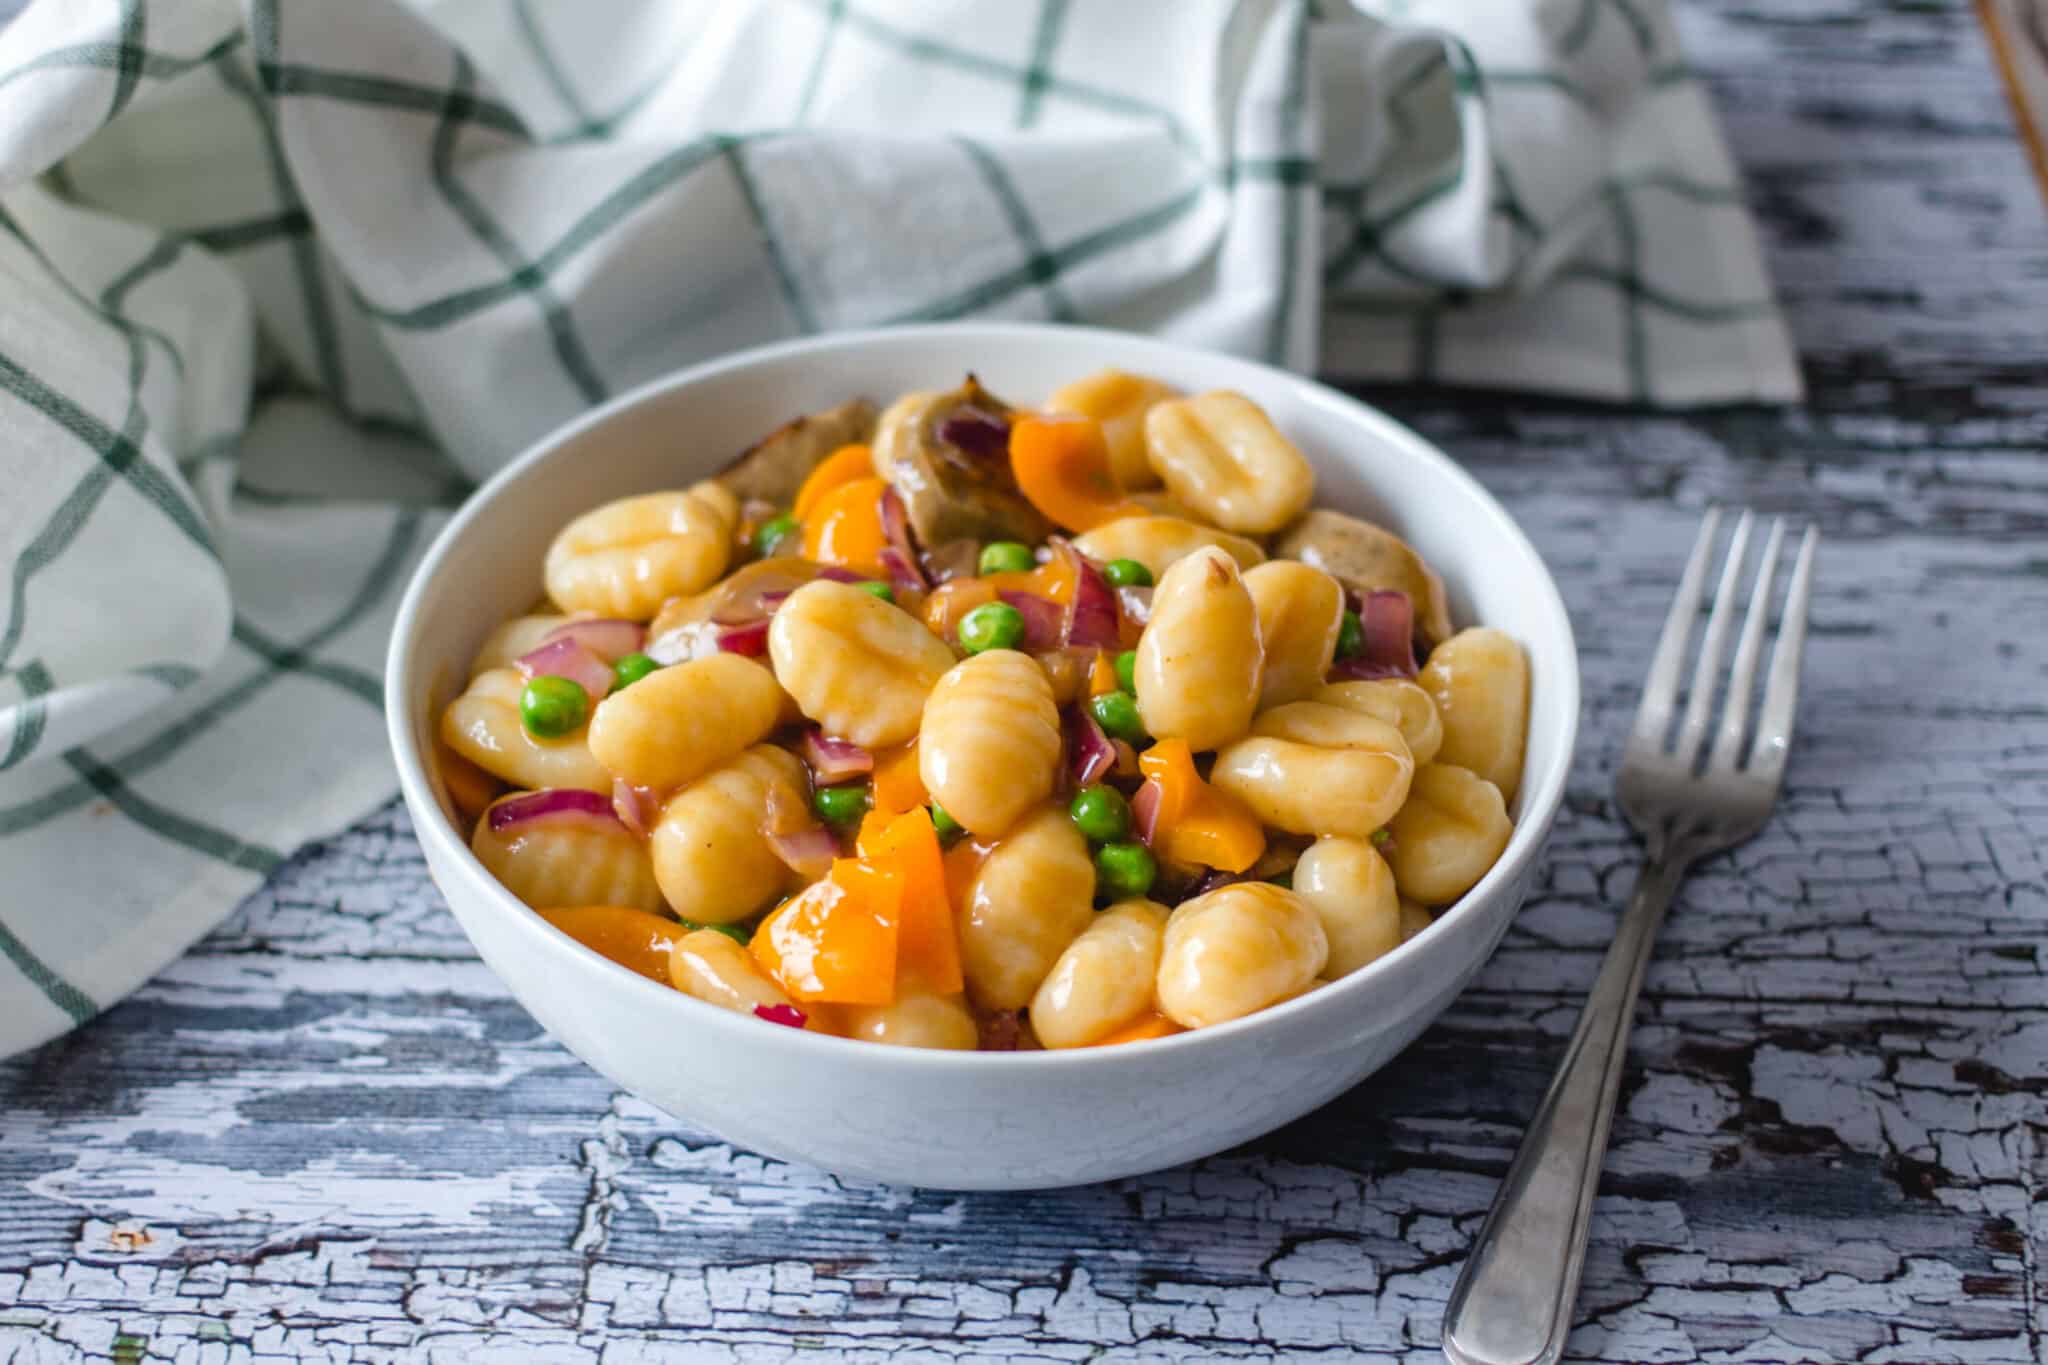
Gnocchi with Vegan Sausage and Gravy

Pillowy gnocchi, savory vegan sausage, and a rich, peppery gravy come together in one skillet for a hearty dinner that feels like pure comfort food.
Key Ingredients & Substitutions
- Gnocchi. One package of store-bought potato gnocchi keeps this recipe weeknight-easy. Look for it in the pasta aisle or refrigerated section. For a gluten-free version, use certified GF gnocchi or make your own with rice flour.
- Vegan Italian sausages. Italian-style links (like Field Roast, Beyond Sausage, or Impossible Sausage) give the dish a smoky, fennel-forward flavor. Feel free to swap in any flavor you like - spicy, apple, or even crumbled breakfast-style sausage all work.
- Vegetable broth. This is the base of the gravy, so use a good-quality broth. For a deeper, more umami-rich flavor, homemade broth works beautifully, or look for a dark, roasted vegetable broth at the store.
- Flour. All-purpose flour thickens the gravy into a silky, pourable sauce. For a gluten-free gravy, substitute with a 1:1 GF flour blend or use cornstarch (start with 2 tablespoons).
- Soy sauce. Adds saltiness and a subtle umami punch that makes the gravy taste richer. Tamari is a great gluten-free swap; coconut aminos work too, though the gravy will be slightly lighter in color.
- Bell pepper. One pepper adds a gentle sweetness and color to the sausage mixture. Red or orange peppers are naturally sweeter; green adds a slightly bitter, more savory note.
- Frozen peas. Stirred in at the end, they add a pop of green and a touch of sweetness without any prep. No need to thaw them first - the heat of the pan does the work.
Helpful Tips
Make the gravy first. The gravy comes together quickly and can sit on low heat while you cook the gnocchi and sausage. Having it ready means everything comes together at once at the end, so nothing sits and gets cold.
Whisk constantly once you add the broth. When making the roux-based gravy, add the vegetable broth in a slow, steady stream while whisking continuously. This prevents lumps and gives you a smooth, silky sauce. Pre-measuring your broth before you start makes this step much easier.
Don't overcook the gnocchi. Gnocchi cook fast - they're done as soon as they float to the surface, usually within 2-3 minutes of the water returning to a boil. Drain them promptly to prevent them from becoming mushy or waterlogged.
Brown the sausage well. Slicing the sausages into coins and letting them sear undisturbed in the pan for a couple of minutes per side creates a slightly caramelized crust that adds great texture and flavor. Resist the urge to stir constantly.
Adjust the gravy to your taste. The recipe makes a generous amount of gravy. Start by adding 1 cup to the finished dish and add more from there - some people like it saucy, others prefer just a light coating. Leftover gravy keeps beautifully and pairs well with vegan mashed potatoes or vegan biscuits.
Variations
- Mushroom gravy gnocchi. Swap the sausage for sautéed cremini or shiitake mushrooms. Deglaze the pan with a splash of red wine before adding the gravy for an earthy, deeply savory dish.
- Spicy sausage version. Use hot Italian-style vegan sausage and add a pinch of red pepper flakes to the gravy for a dish with some kick.
- Greens and gnocchi. Stir in a big handful of baby spinach or chopped kale along with the peas at the end. The greens wilt in about a minute and add nutrition and color.
- Baked gnocchi gratin. Transfer the finished gnocchi mixture to a baking dish, top with vegan shredded cheese or breadcrumbs, and broil for 5-7 minutes until golden and bubbling.
- Lighter herb gravy. For a fresher, less heavy version, use only 1½ cups of broth, reduce the flour to 2 tablespoons, and finish the gravy with a generous handful of chopped fresh thyme or rosemary.
- Sweet potato gnocchi. Use sweet potato gnocchi in place of traditional potato gnocchi for a slightly sweeter, more nutritious twist.
Serving Ideas
This dish is hearty enough to serve as a complete meal on its own - the gnocchi, sausage, vegetables, and gravy cover all your bases. Serve it in deep bowls with a slice of crusty bread to mop up the extra gravy.
If you'd like to round out the meal, a simple green salad dressed with lemon vinaigrette cuts through the richness nicely. Roasted broccoli or asparagus also make a great side if you want more vegetables on the table. For an Italian-inspired dinner spread, pair it with a bowl of Italian-style vegan sausage and peppers and some garlic bread.
Storing & Freezing
Store leftovers in an airtight container in the refrigerator for up to 4 days. The gravy thickens as it sits - when reheating on the stovetop over medium-low heat, add a splash of vegetable broth or water and stir to loosen it back up. You can also microwave individual portions in 90-second intervals, stirring between each one.
This dish doesn't freeze particularly well, as gnocchi tend to become mushy once thawed. That said, you can freeze the gravy separately for up to 2 months - just thaw it in the refrigerator overnight and reheat on the stovetop, then cook fresh gnocchi and sausage to serve with it.
More Vegan Pasta and Dinner Ideas
If you loved this recipe, here are a few more cozy vegan dinners you might enjoy:
- Quick Gnocchi with Beans and Greens
- Vegan Creamy Mushroom Pasta
- Vegan Biscuits and Gravy
- Vegan Pot Pie Casserole
Recipe

Gnocchi with Vegan Sausage and Gravy
Pillowy potato gnocchi tossed with savory vegan Italian sausage, peppers, and peas in a rich, peppery brown gravy — comfort food that comes together in about 45 minutes.
Print
Pin
Save
Servings: servings
Ingredients
Gravy
- 3 tablespoon olive Oil
- 4 tablespoon flour
- 2 ½ cups vegetable broth
- 2 tablespoon soy sauce
- 1 teaspoon ground black pepper
- 1 ½ teaspoon onion powder
- 1 teaspoon garlic powder
- 2 tablespoon white vinegar
Gnocchi
- 1 package gnocchi
- 1 tablespoon olive oil
- 1 onion chopped
- 2 Italian vegan sausages
- 1 pepper
- ½ cup frozen peas
Instructions
Gravy
- Measure out all your gravy ingredients and keep them within reach before you start — you'll need to add the broth quickly after whisking in the flour.
- Heat a medium saucepan over medium-low heat. Add the olive oil, then whisk in the flour and cook for about 1 minute until lightly golden.
- Pour in the vegetable broth in a slow, steady stream, whisking constantly to prevent lumps. Add the soy sauce, black pepper, onion powder, garlic powder, and white vinegar. Stir to combine.
- Bring to a gentle simmer and cook for 5–7 minutes, stirring occasionally, until the gravy has thickened to a pourable consistency. Reduce heat to low to keep warm.
Gnocchi and Sausage
- Bring a large pot of salted water to a boil. Cook the gnocchi according to package directions — they're ready when they float to the surface, about 2–3 minutes. Drain and set aside.
- While the gnocchi cooks, heat 1 tablespoon of olive oil in a large skillet over medium heat. Add the onion and bell pepper and cook for 3–4 minutes until softened.
- Add the sliced vegan sausages to the skillet and cook for 3–4 minutes, turning occasionally, until lightly browned on the outside. Stir in the frozen peas and cook for 1 more minute.
- Add the drained gnocchi to the skillet and pour in 1 to 2 cups of gravy, depending on how saucy you like it. Gently toss everything together until well coated. Serve immediately.
Nutrition (Estimate per Serving)
Calories: 290kcalCarbohydrates: 22gProtein: 6gFat: 15gSaturated Fat: 2gPolyunsaturated Fat: 5gMonounsaturated Fat: 7gSodium: 662mgPotassium: 110mgFiber: 2gSugar: 1gVitamin A: 143IUVitamin C: 3mgCalcium: 24mgIron: 2mg
Vegan-ize any recipe!Grab our free vegan cheat sheet, packed with my favorite easy substitutions to make any recipe vegan.
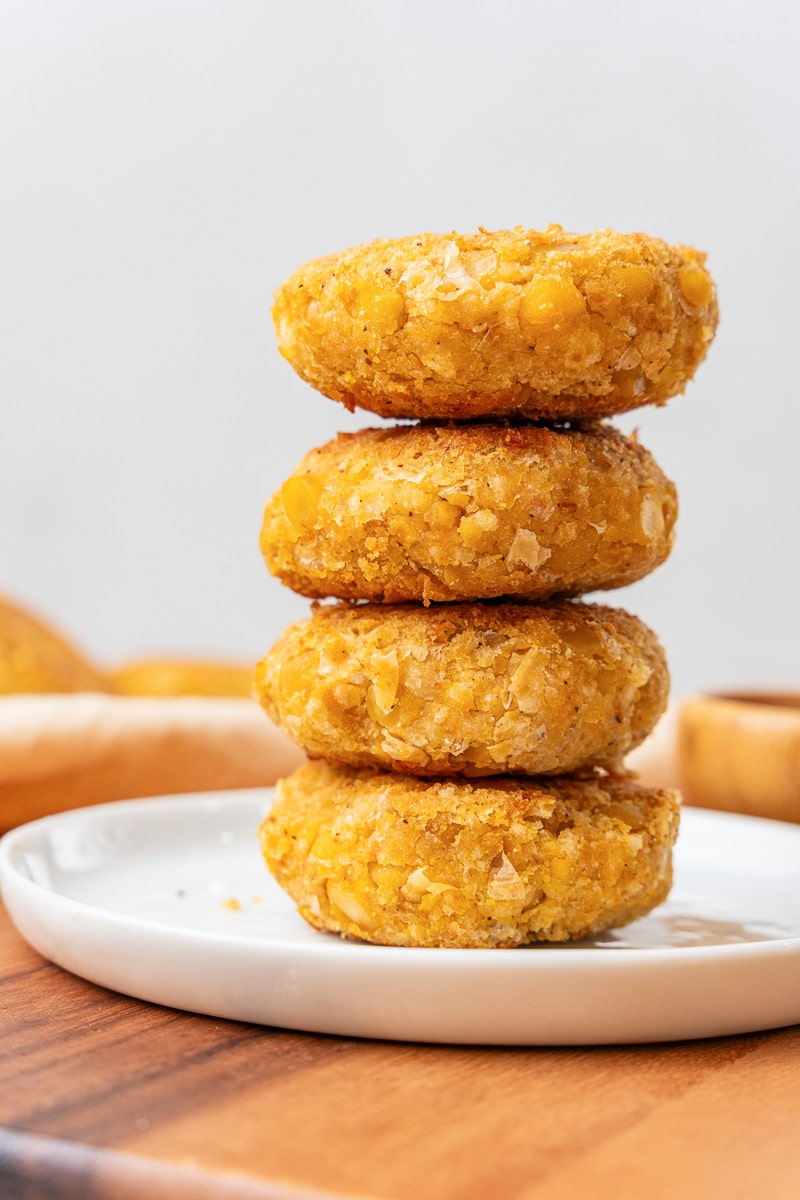
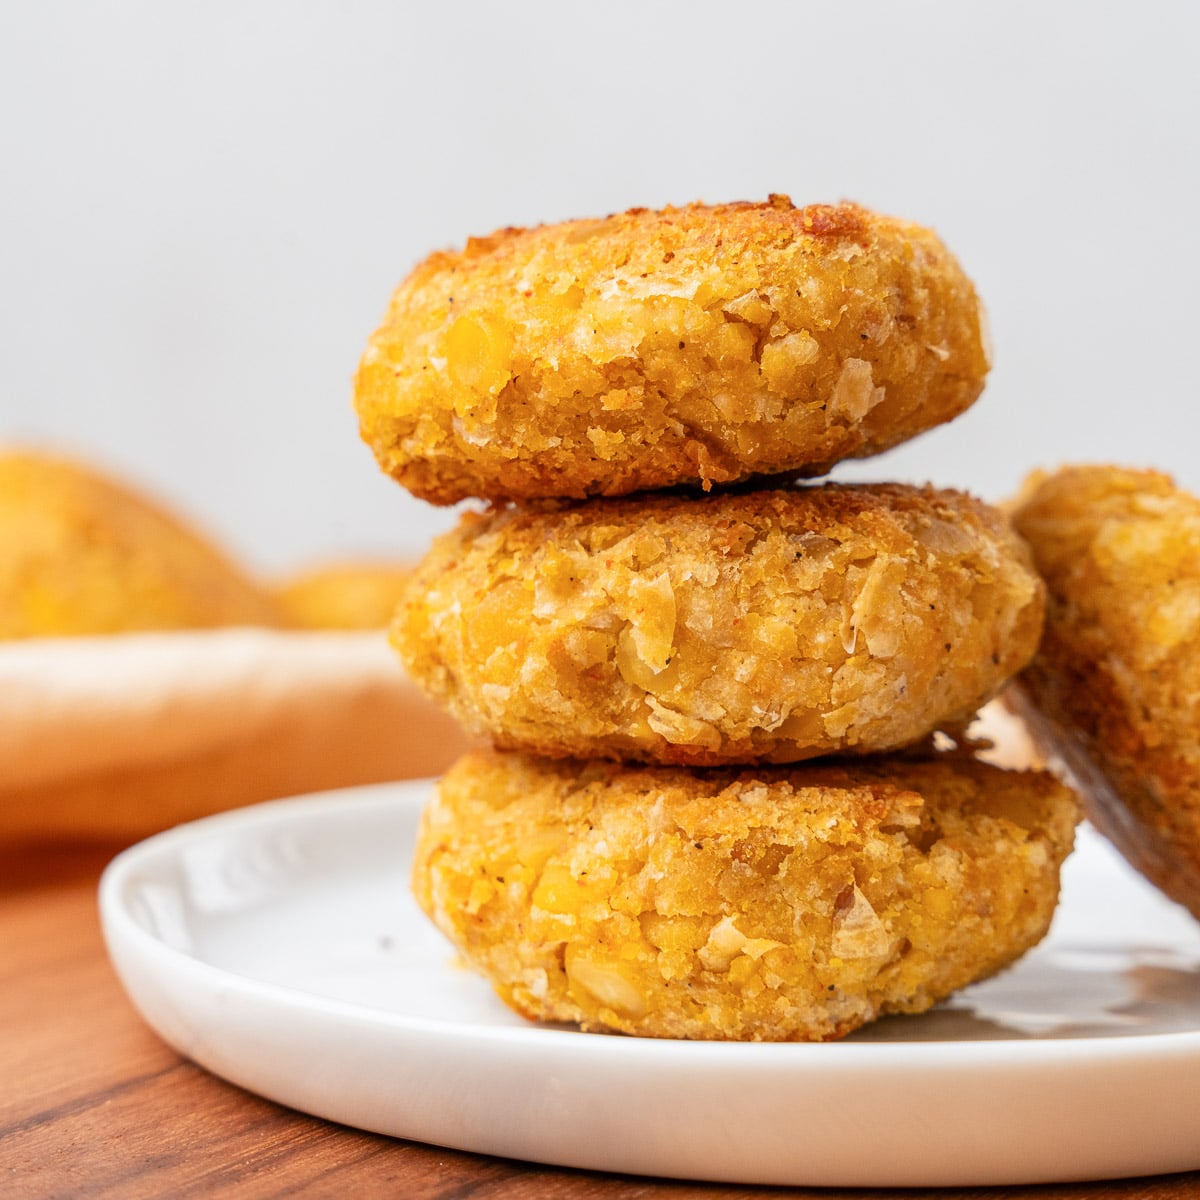
Vegan Chickpea Patties
Crispy, golden, and packed with plant-based protein, these Vegan Chickpea Patties are exactly what weeknight dinners were made for.

Key Ingredients & Substitutions
- Canned chickpeas. The base of the patty - they mash down into a hearty, cohesive texture. One 15 oz can works perfectly. You can use dried chickpeas if you cook them first (about 1½ cups cooked). White beans or cannellini beans make a good substitute if chickpeas aren't on hand.
- Panko breadcrumbs. Panko keeps the patties light and gives them a crispy crust. Regular breadcrumbs work too, but panko is worth it for the texture. For gluten-free, use certified gluten-free breadcrumbs or crushed gluten-free crackers.
- Flax egg. One tablespoon of flax meal whisked with 3 tablespoons of water makes a great egg replacer that binds everything together. Let it sit for 5 minutes before adding. A chia egg (same ratio with chia seeds) works as a swap.
- Smoked paprika. Adds a subtle smoky depth that really makes these patties stand out. Regular sweet paprika can be used instead, though you'll miss a little of that smokiness.
- Garlic and onion powder. The seasoning backbone. The powder keeps the texture uniform and the patties easy to form - fresh garlic and shallot work too if that's what you have.
- Olive oil. For pan-frying to a golden crisp. Coconut oil, avocado oil, or canola oil all work if you prefer.
Helpful Tips
Don't skip the chilling step. After forming your patties, refrigerate them for at least 30 minutes. This helps the flax egg bind fully and firms up the mixture so the patties hold their shape in the pan. You can even chill them overnight - they'll only be better for it.
Mash, don't puree. Whether you use a fork or a food processor, you want the chickpeas roughly mashed with some texture remaining - not a smooth paste. A little chunkiness is what gives these patties their hearty bite. If you're using a food processor, a few quick pulses is all it takes.
Give them space in the pan. Cook the patties in batches rather than crowding the skillet. Crowding drops the pan temperature and leads to steamed, soggy patties instead of the golden crust you're after. Medium heat with a good coat of oil is the sweet spot - 3 to 4 minutes per side.
Bake or grill if you prefer. Pan-frying gives the crispiest result, but these patties are also great baked at 375°F for 20-25 minutes (flip halfway through), or grilled over medium heat for 4-6 minutes per side.
Make them ahead. The uncooked patties keep well in a covered container in the fridge for up to 2 days before cooking. This makes them ideal for meal prepping - pull them out and cook when you're ready to eat.

Variations
- Mediterranean. Add 1 teaspoon of cumin and ½ teaspoon of coriander to the mix, plus a squeeze of lemon zest. Serve with hummus and warm pita.
- Asian-inspired. Stir in 1 tablespoon of soy sauce, 1 teaspoon of sesame oil, a pinch of ginger, and a tablespoon of sesame seeds for a savory, nutty twist.
- Spicy. Add ½ teaspoon of chili flakes or swap the smoked paprika for hot smoked paprika to bring some heat.
- Italian. Mix in 1 teaspoon of dried oregano, ½ teaspoon of dried basil, and 2 tablespoons of finely chopped sun-dried tomatoes for a rich, herby flavor.
- Gluten-free. Replace the panko with certified gluten-free breadcrumbs or crushed gluten-free crackers - same amount, same method.
- Extra veggie. Fold in ¼ cup of finely grated zucchini or carrot (squeeze out excess moisture first) for extra nutrition and color.

Serving Ideas
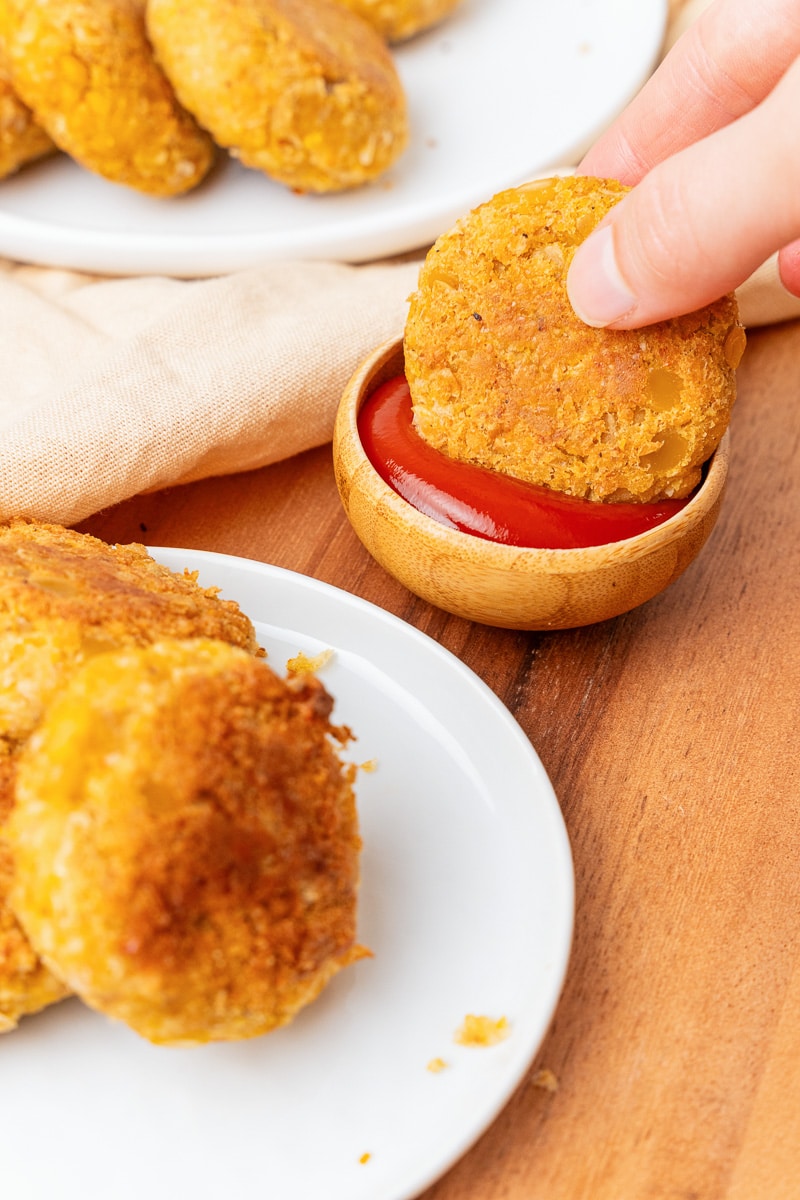
The most obvious move is to serve these as veggie burgers - stack them on toasted buns with lettuce, tomato, red onion, and your favorite condiments. They pair especially well with a tangy vegan aioli or this Easy Vegan Duck Sauce for dipping.
They're also wonderful crumbled over a big green salad for a protein-packed lunch, or served alongside Easy Vegan Coleslaw for a satisfying plate that works for weeknights and cookouts alike. If you're a chickpea fan, you'll also love this Vegan Chickpea Salad for an easy no-cook option. If you love chickpeas in a more saucy, warming dish, our vegan chana masala or these masala lentils are both must-tries. For more patty inspiration, also check out our best vegan burger recipes. And for a quick homemade dressing to serve alongside any salad, our garlic mustard vinaigrette is a pantry staple. For a lighter, grain-free option, also try our cauliflower fried rice.
For something more casual, skip the bun and serve the patties as an appetizer with a variety of dipping sauces on the side. They disappear fast at parties.
Storing & Freezing
Leftover cooked patties can be stored in an airtight container in the refrigerator for up to 4 days. To reheat, pop them in a skillet over medium heat for a couple of minutes per side to get that crispy exterior back - avoid the microwave, which tends to make them soft and soggy.
These patties freeze well. Let them cool completely, then layer between pieces of parchment paper in a freezer-safe container. They'll keep for up to 3 months. Reheat straight from frozen in a 375°F oven for about 15 minutes, or in a skillet over medium-low heat until warmed through.

More Vegan Burgers & Patties
If you loved these chickpea patties, here are a few more vegan burgers worth trying:
- Vegan Chipotle Black Bean Burgers
- Vegan Quinoa Mushroom Burger
- Vegan Beet Burgers
- Easy Vegan Portobella Burgers
- Best Vegan Burger Recipes
Recipe
Vegan Chickpea Patties
These crispy Vegan Chickpea Patties are golden on the outside, hearty on the inside, and ready in under 30 minutes. Perfect as veggie burgers, a protein-packed salad topper, or a crowd-pleasing appetizer.
Print
Pin
Save
Servings: patties
Ingredients
- 15 oz canned chickpeas drained and rinsed
- ¾ cup panko breadcrumbs
- 1 tablespoon flax meal mixed with 3 tablespoons water to make a flax egg
- 1 teaspoon garlic powder
- 1 teaspoon onion powder
- ½ teaspoon salt
- ¼ teaspoon smoked paprika
- ¼ teaspoon black pepper
- olive oil for frying
Instructions
- In a large bowl, use a fork to mash the chickpeas until they are all smashed. Alternatively, use a food processor to pulse them a few times until chopped but not pasty.
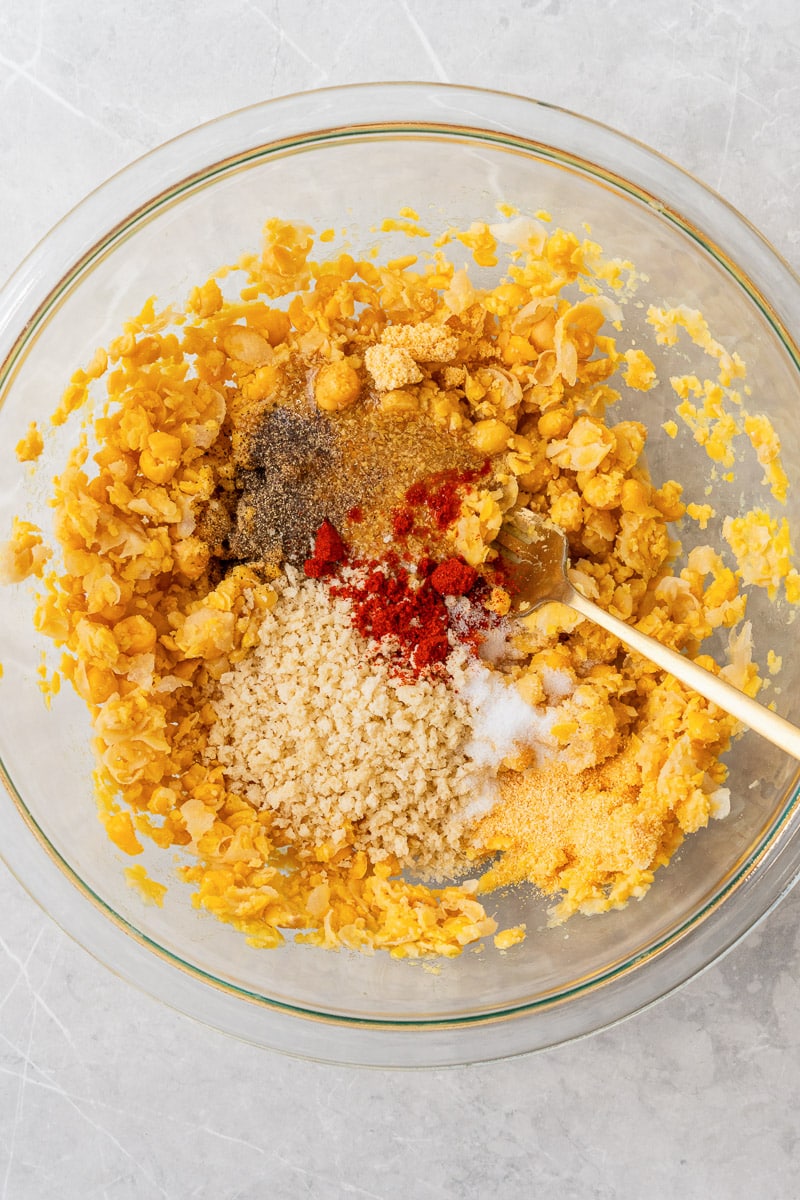
- In a small bowl, whisk together the flax meal and water. Let sit for 5 minutes until thickened into a flax egg.
- Add the panko, flax egg, garlic powder, onion powder, salt, smoked paprika, and black pepper to the mashed chickpeas and stir until evenly combined.
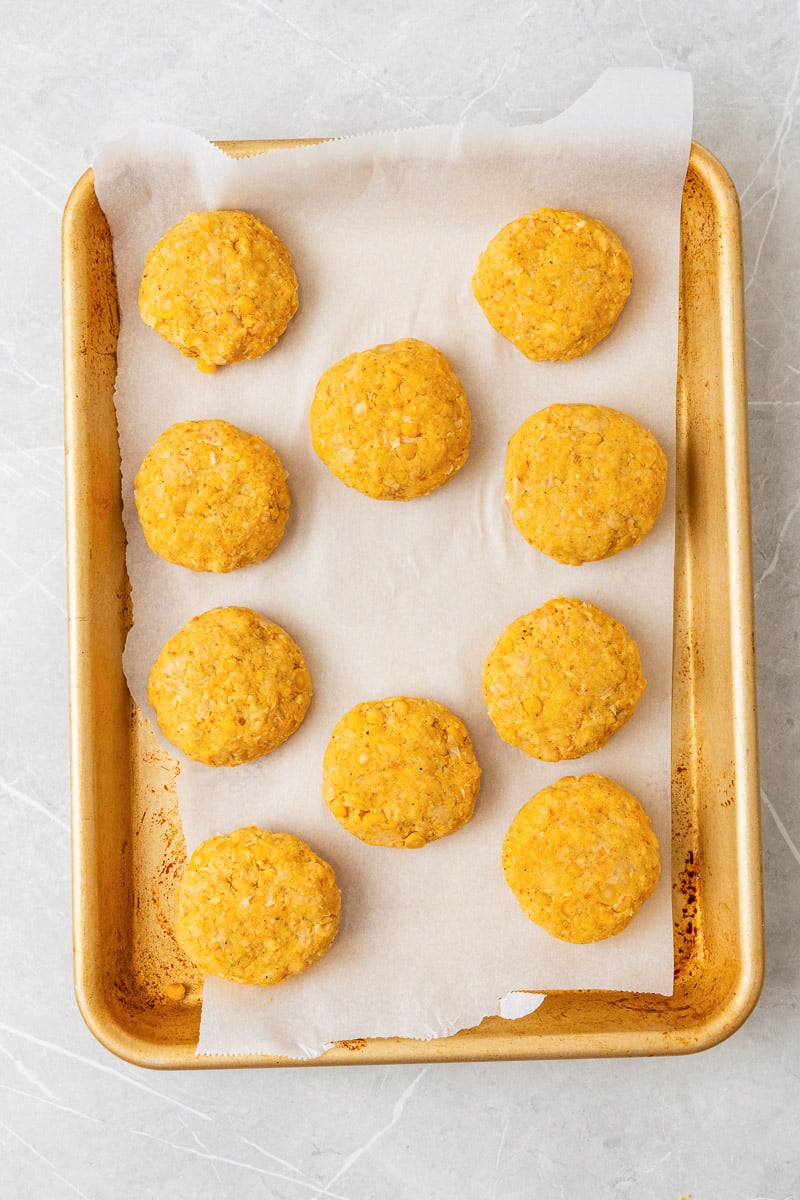
- Form the mixture into small patties and place on a lined baking sheet. Refrigerate for at least 30 minutes to firm up.
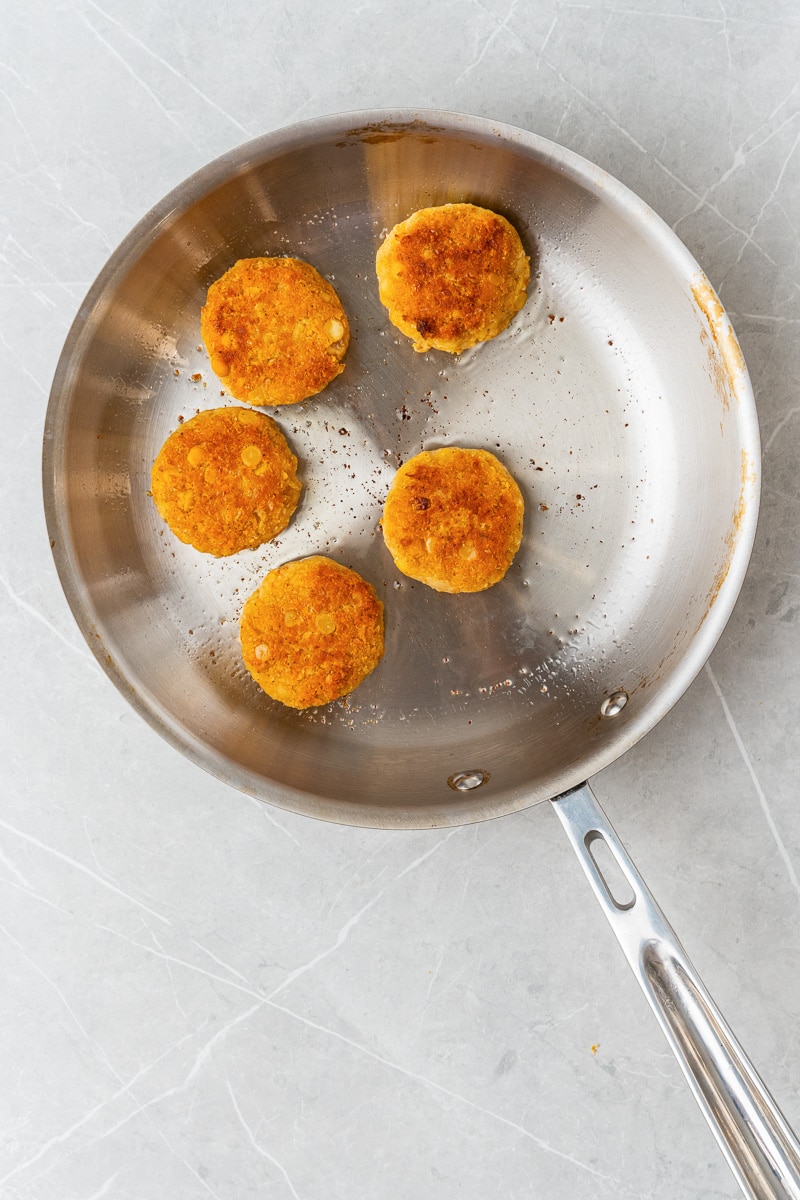
- Heat a skillet over medium heat and add enough olive oil to coat the bottom. Cook the patties in batches for 3–4 minutes per side, until golden brown and heated through.
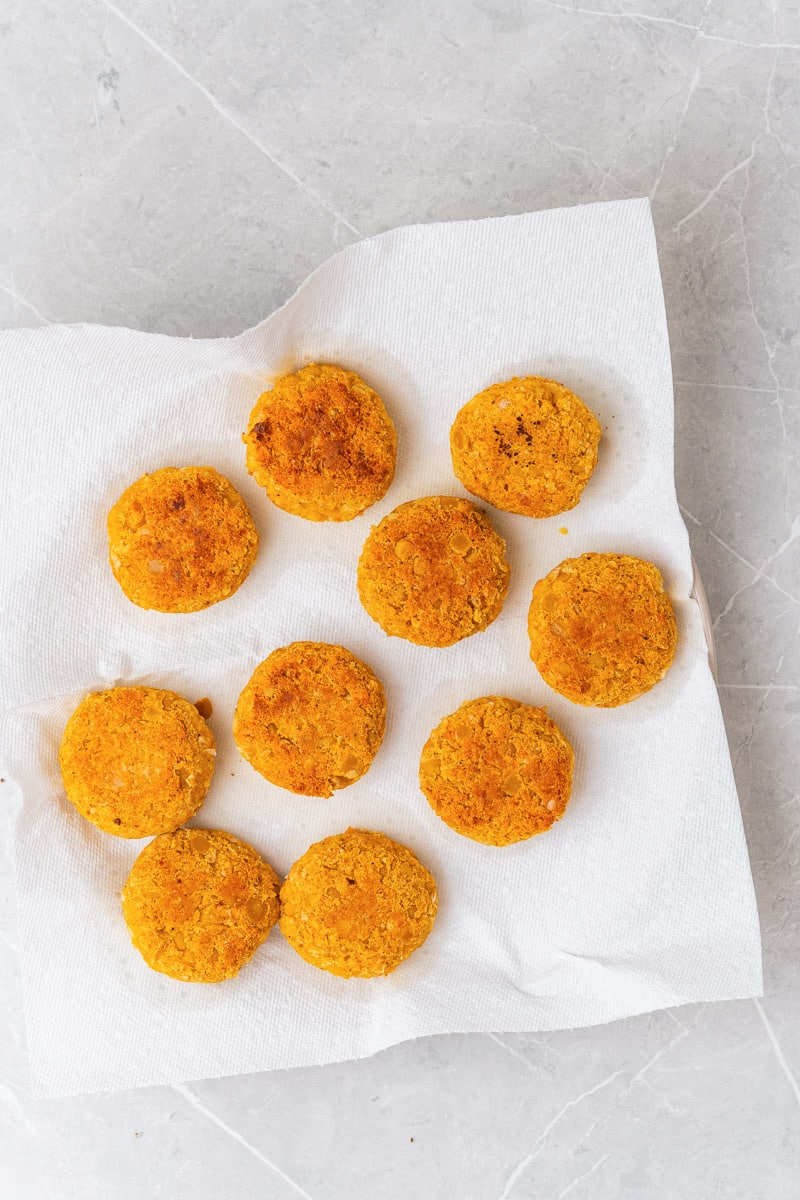
- Transfer to a paper towel-lined plate to absorb any excess oil.
- Serve warm with your favorite dipping sauce or on toasted buns as veggie burgers.
Nutrition (Estimate per Serving)
Calories: 61kcalCarbohydrates: 10gProtein: 3gFat: 1gSaturated Fat: 0.3gPolyunsaturated Fat: 1gMonounsaturated Fat: 1gSodium: 152mgPotassium: 81mgFiber: 2gSugar: 0.4gVitamin A: 6IUVitamin C: 0.1mgCalcium: 26mgIron: 1mg
Vegan-ize any recipe!Grab our free vegan cheat sheet, packed with my favorite easy substitutions to make any recipe vegan.
Also try: our Tomato Relish Salad With Oregano And Thyme.
Also try: our Quinoa And Wild Rice Burgers.
Also try: our Olive And Sun Dried Tomato Tapenade.
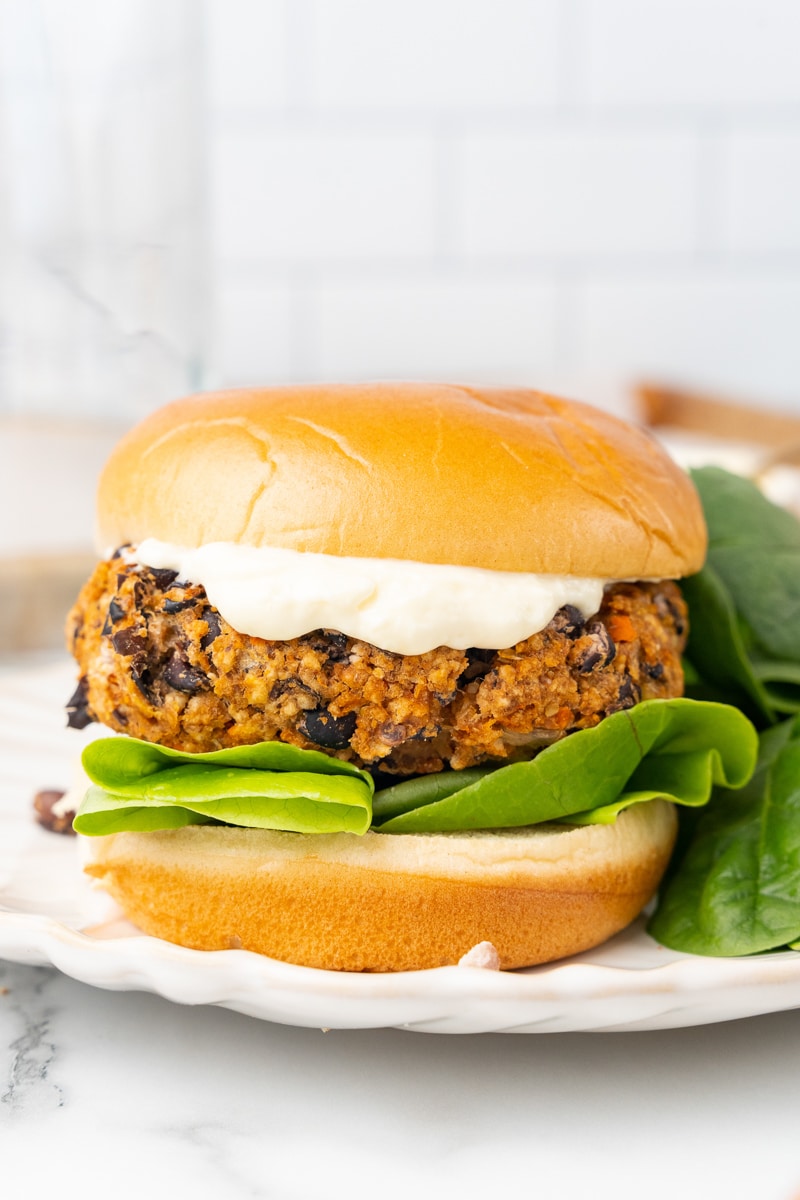
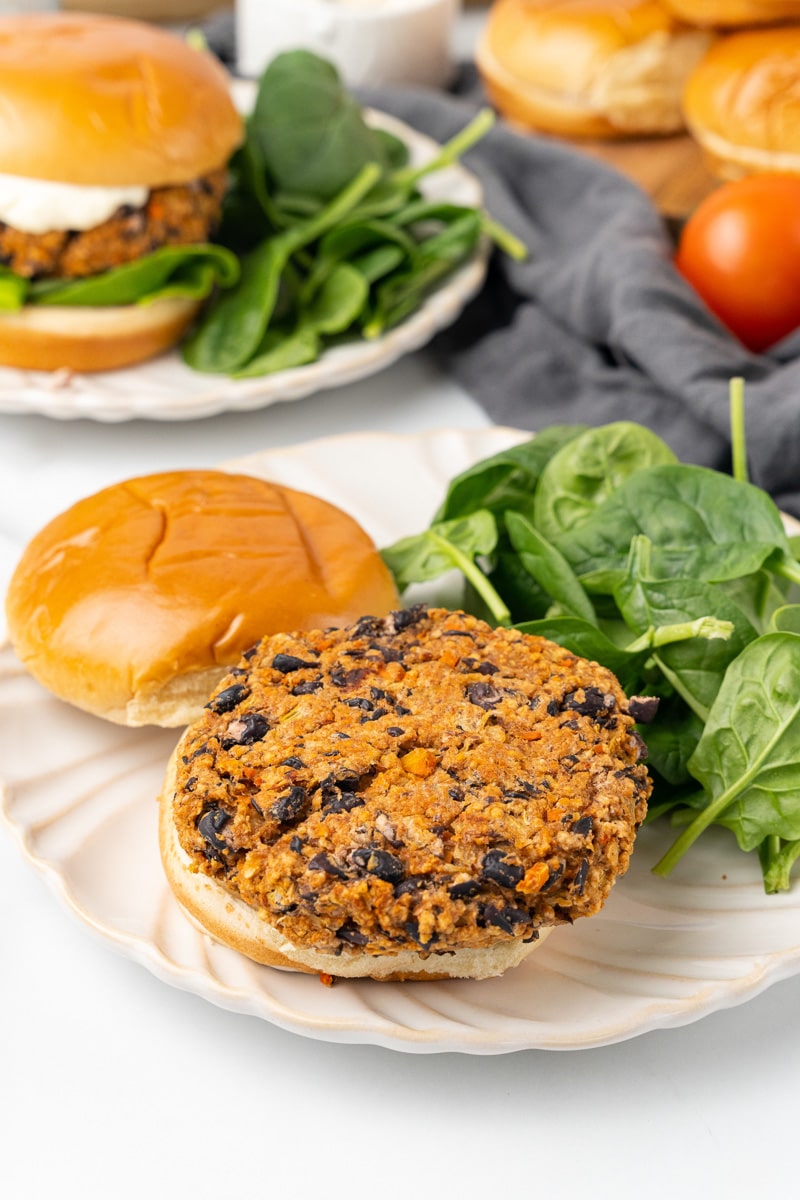
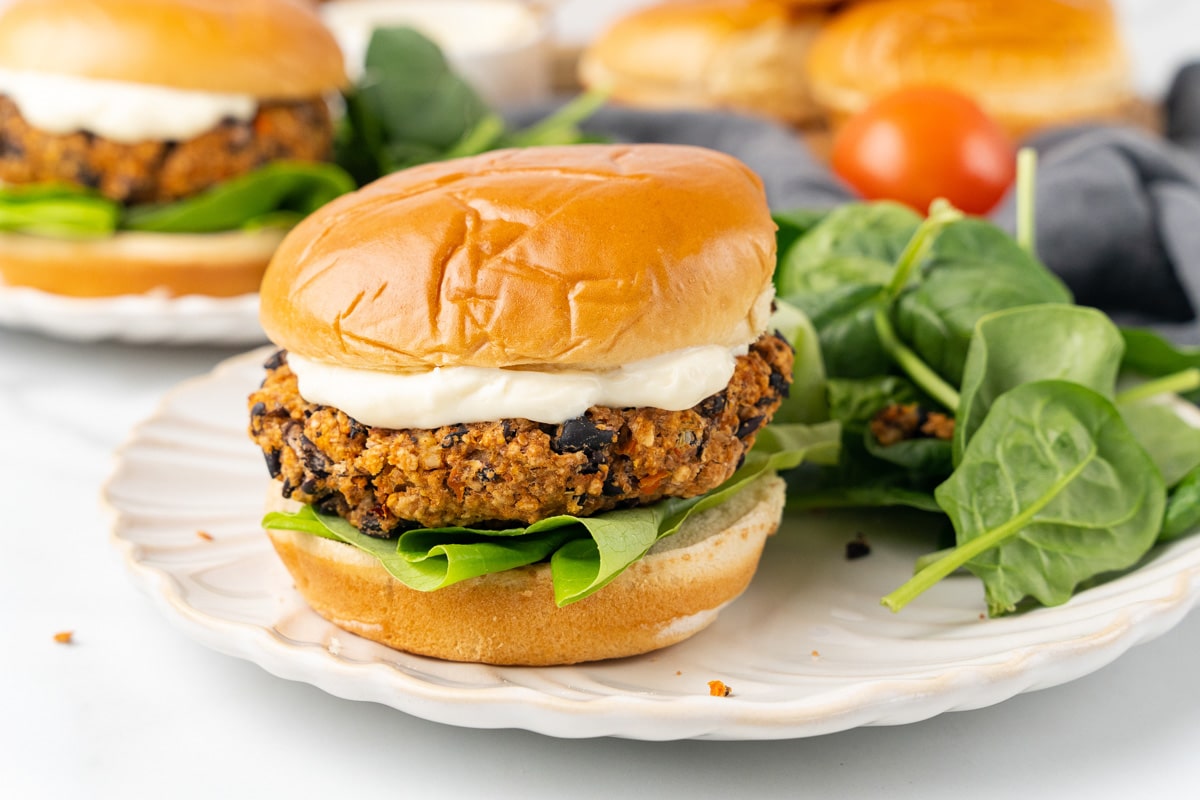
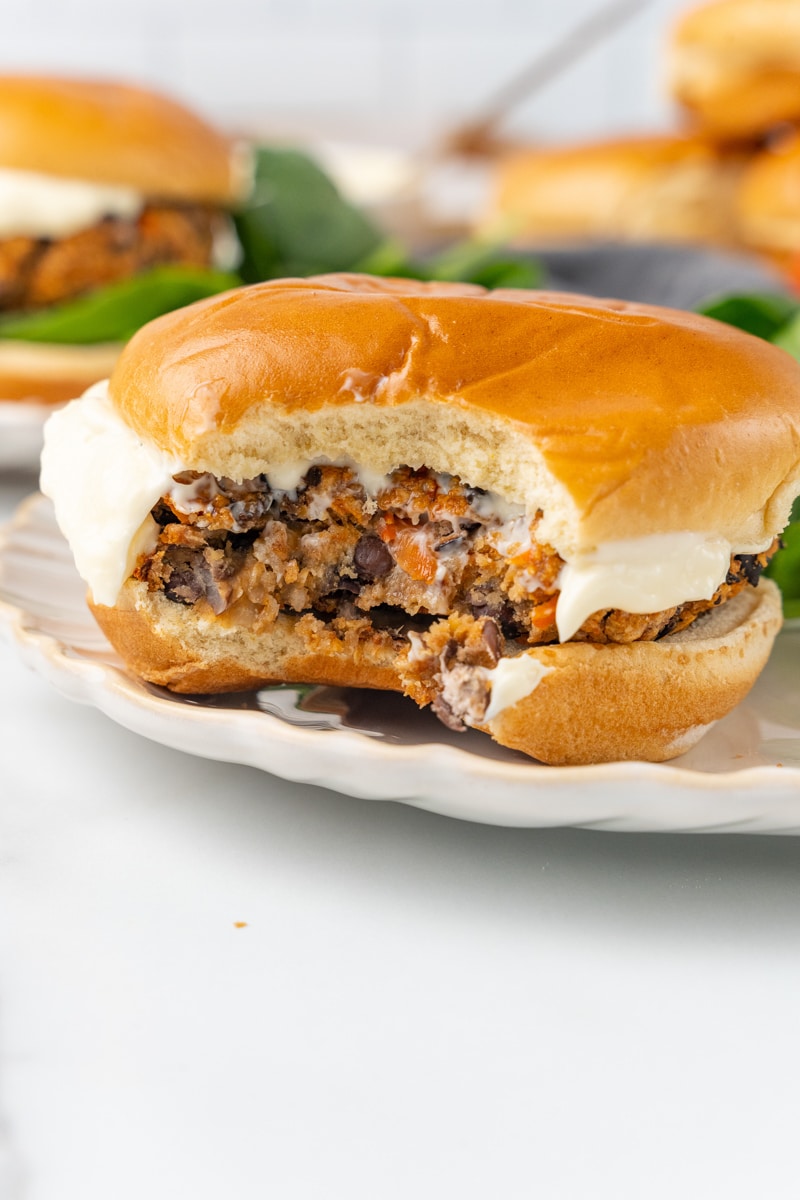
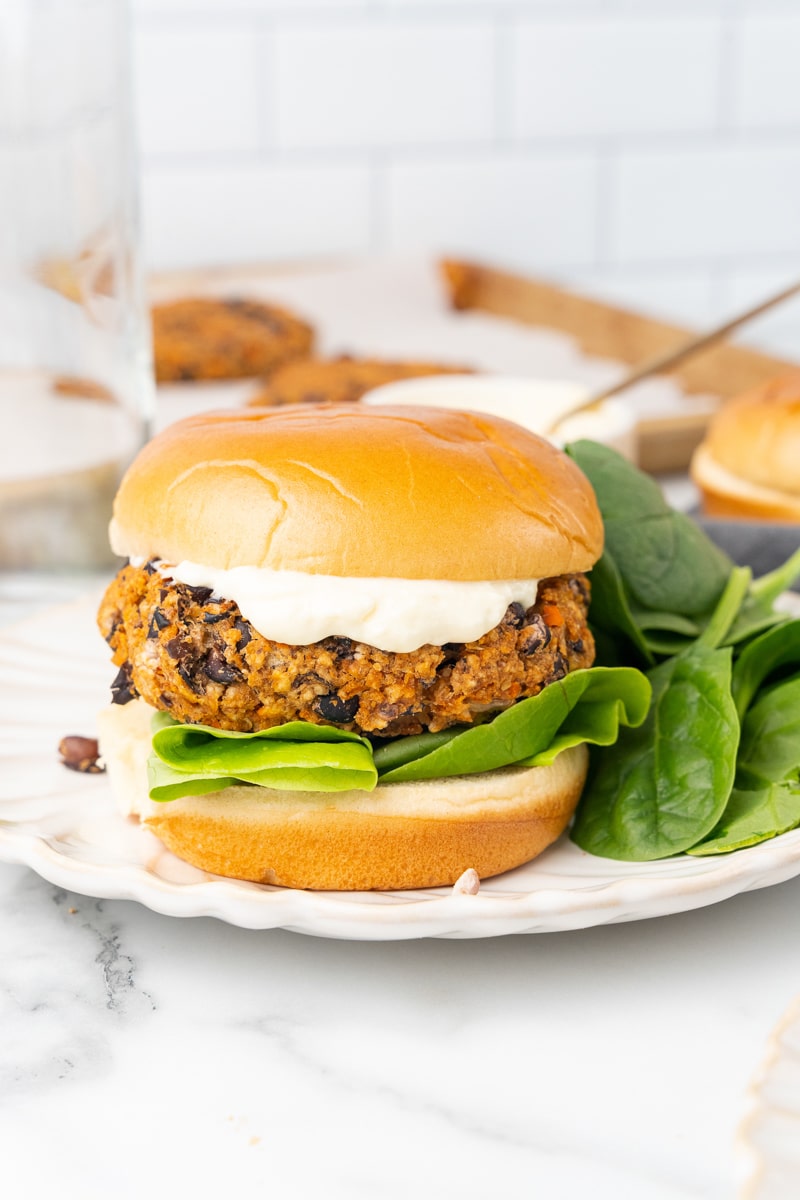
Vegan Chipotle Black Bean Burgers

These vegan chipotle black bean burgers are smoky, spicy, and loaded with bold Mexican-inspired flavor - ready in 30 minutes and freezer-friendly too.
Key Ingredients & Substitutions
- Black beans. The base of the burger - hearty, high in protein, and they mash beautifully. Use canned beans (drained and rinsed) for convenience. Pinto beans or kidney beans can be swapped in if needed.
- Chipotle peppers in adobo. This is the flavor powerhouse of the recipe. Minced chipotle peppers add deep, smoky heat. Start with 2 tablespoons and adjust to your heat tolerance. Chipotle powder alone works as a milder substitute.
- Panko breadcrumbs. Help bind the patties and add a bit of structure. Regular breadcrumbs work fine. For gluten-free, use gluten-free panko or finely ground rolled oats.
- Flax egg. Two tablespoons of ground flaxseed mixed with 3 tablespoons of water creates a binding "egg" that holds the patties together. A chia egg works exactly the same way.
- Vegetables (onion, carrot, celery, garlic). Sautéed aromatics add moisture, sweetness, and body. Feel free to swap in zucchini, bell pepper, or corn.
- Smoked paprika. Layers in more smokiness alongside the chipotle. Regular sweet paprika is a milder option if you're sensitive to heat.
Helpful Tips
Let the flax egg rest. Mix the flaxseed and water before you do anything else - it needs about 5 minutes to gel into an egg-like consistency. Don't skip this step; it's what keeps the patties from falling apart.
Don't over-mash the beans. You want about half the beans mashed to a paste and half left somewhat intact. This gives the patties a great texture - creamy enough to hold, chunky enough to have character. A fork or potato masher works better than a food processor here.
Make evenly sized patties. Divide the mixture into equal portions so all the burgers bake evenly. A ½-cup measure or kitchen scale is helpful. Unevenly shaped patties can end up dry on the edges while underdone in the center.
Chill before baking if possible. If you have 15-20 minutes, refrigerate the shaped patties before baking. This helps them hold their shape better in the oven.
Finish in a skillet for crispier results. After baking, sear each patty in a hot dry skillet for 1-2 minutes per side. It gives them a crispier exterior that holds up beautifully under all your toppings.
Also worth trying: our Italian-style vegan sausage and peppers.
Also worth trying: our vegan sloppy joes.
Also worth trying: our gently curried tofu burgers.
Variations
- Extra smoky. Add a teaspoon of liquid smoke to the mixture along with the chipotle. Intense, campfire-worthy flavor.
- Milder version. Use just one teaspoon of chipotle powder instead of the minced peppers in adobo, and skip the chili powder. Still flavorful, much gentler heat.
- Roasted veggie version. Instead of sautéing, roast the onion, carrot, and garlic at 400°F until caramelized before adding to the mix. Deeper, more complex flavor.
- Loaded with corn and peppers. Stir in ¼ cup of frozen corn and a finely diced roasted red pepper for a Southwestern twist with more color and sweetness.
- Slider size. Use a ¼-cup measure to form smaller patties and reduce baking time to about 15 minutes total. Great for parties.
- Pan-fried. Skip the oven entirely and cook in a thin layer of olive oil over medium heat, about 4 minutes per side, until deeply golden.
Serving Ideas
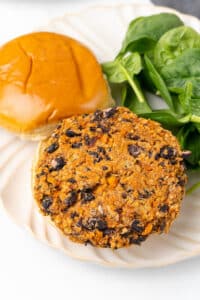
Pile these on toasted buns with Copycat Vegan Big Mac Sauce, sliced avocado, pickled jalapeños, and shredded lettuce for a full loaded burger experience. A dollop of vegan sour cream or guacamole on top takes it even further. The smoky chipotle flavor pairs especially well with Easy Vegan Coleslaw served on the side or right on top of the patty.
These also work brilliantly in lettuce wraps for a lower-carb option, crumbled over a taco salad, or sliced and tucked into a pita with salsa and greens. Don't overlook serving them plain alongside roasted sweet potato wedges and a simple salad - they're substantial enough to shine without any bun at all.
Storing & Freezing
Store cooked patties in an airtight container in the refrigerator for up to 4 days. Reheat in a skillet over medium heat for 2-3 minutes per side, in the oven at 350°F for about 10 minutes, or in the microwave. They stay moist and flavorful reheated any way.
These freeze exceptionally well. Cool completely, then wrap each patty individually in plastic wrap and place in a freezer bag, squeezing out excess air. They'll keep for up to 3 months. Thaw overnight in the fridge, or bake from frozen at 375°F for 12-15 minutes.
More Vegan Burger Recipes
If you loved this recipe, check out our full collection of the best vegan burger recipes, including our quinoa and wild rice burgers and our vegan beet burgers - or here are a few more individual favorites:
- Vegan Quinoa Mushroom Burger
- Baked Chickpea Burgers
- Easy Vegan Portobella Burgers
- Vegan Chickpea Patties
- Best Vegan Burger Recipes
Recipe

Vegan Chipotle Black Bean Burgers
These smoky vegan chipotle black bean burgers are packed with bold Mexican-inspired flavor, ready in 30 minutes, and completely freezer-friendly.
Print
Pin
Save
Servings: servings
Equipment
- Potato masher optional
- Baking tray
Ingredients
- 1 tablespoon olive oil
- 1 onion finely diced
- 1 carrot finely diced
- 1 stalk celery minced
- 2 cloves garlic minced
- 19 oz black beans canned, rinsed and drained
- 1 cup panko breadcrumbs
- 2 tablespoons ground flaxseed + 3 tablespoons water
- 2 tablespoons chipotle pepper in adobo minced
- 1 teaspoon chipotle chili powder
- 1 teaspoon smoked paprika
For serving (optional)
- vegan mayonnaise
- burger buns
- lettuce
Instructions
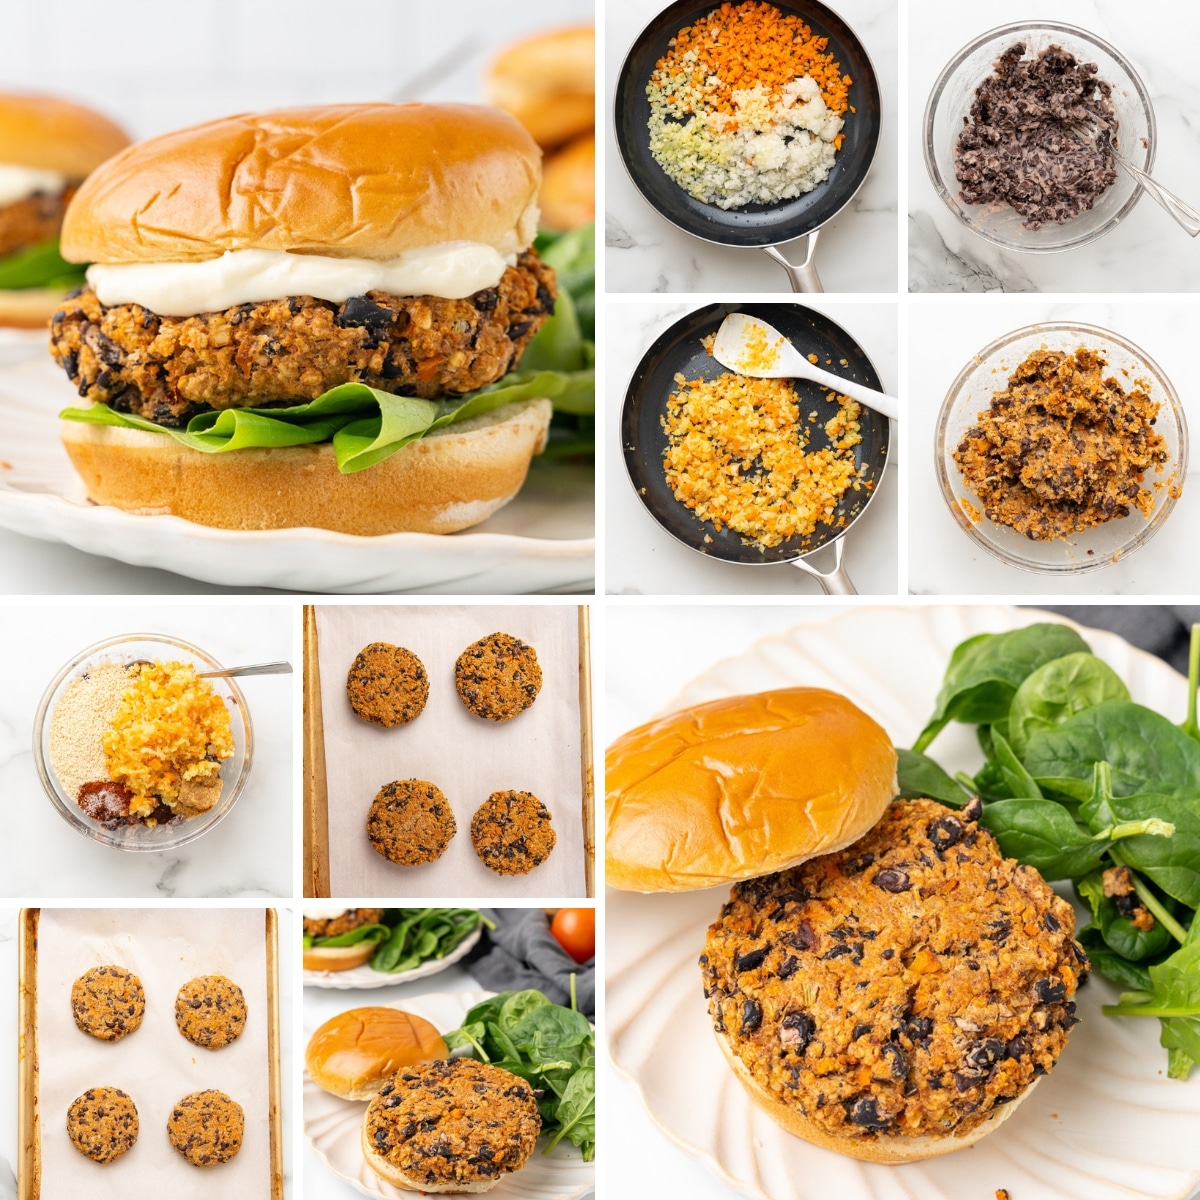
- Preheat oven to 375 F, line a baking sheet with parchment and set aside
- Mix together the flax seed and 3 tablespoon water in a small bowl. Set aside. (This is your "flax egg".)
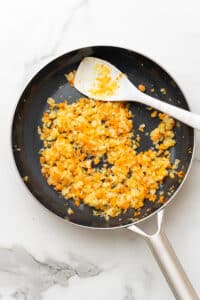
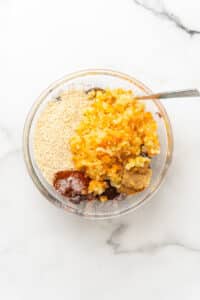
- In a larger pan over medium heat, heat the olive oil, then add the onion, carrot, celery and garlic.
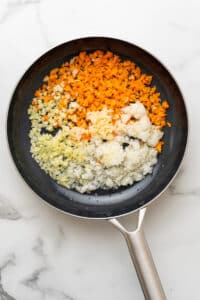
- Cook, stirring frequently, until the vegetables are softened.
- Mash the black beans in a large bowl
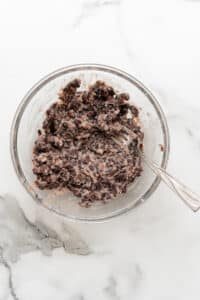
- Then mix in the cooked veggies along with panko, flax egg, chipotles, chili powder and paprika.
- Mix until fully combined.
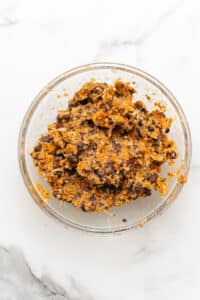
- Form into four large patties and place onto prepared baking sheet.

- Bake in preheated oven for 20 minutes, flipping once halfway through.

- Serve warm on buns with vegan mayo, lettuce, and any other toppings desired
Nutrition (Estimate per Serving)
Calories: 286kcalCarbohydrates: 43gProtein: 13gFat: 8gSaturated Fat: 1gPolyunsaturated Fat: 3gMonounsaturated Fat: 3gSodium: 678mgPotassium: 645mgFiber: 15gSugar: 4gVitamin A: 2953IUVitamin C: 7mgCalcium: 113mgIron: 4mg
Vegan-ize any recipe!Grab our free vegan cheat sheet, packed with my favorite easy substitutions to make any recipe vegan.
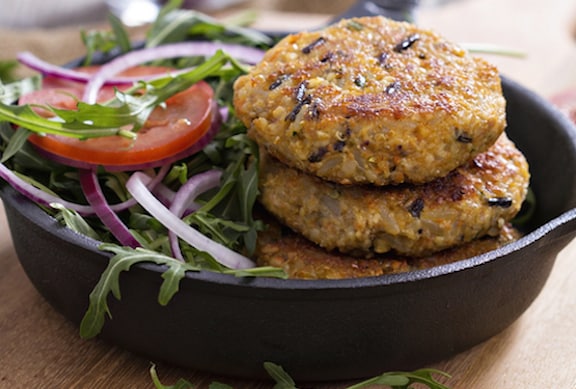
Vegan Beet Burgers
These vegan beet burgers are impossibly vibrant, packed with cumin and smoked paprika, and hearty enough to satisfy even the most skeptical dinner guest at the table.
Key Ingredients & Substitutions
- Fresh beets. The star of the show - cooked and then pulsed in the food processor to create that gorgeous deep-red base. You can microwave, boil, or roast the beets; all methods work, though roasting gives the most concentrated, sweet flavor. No need to peel before cooking - just scrub well and peel after.
- Kidney or red beans. These provide the binding and protein. Red kidney beans blend into the beet color seamlessly. Chickpeas or black beans can be substituted; black beans will give a slightly earthier flavor, while chickpeas yield a firmer, drier texture.
- Quick-cooking oats. Half are soaked in boiling water to act as a binder; the other half go in dry for extra texture. Certified gluten-free oats work for a GF version. Don't use rolled oats - they're too thick and won't blend properly.
- Smoked paprika. This is what takes these burgers from good to memorable. It adds a subtle smokiness that pairs beautifully with the earthy beet. Mesquite seasoning is a direct substitute, or use sweet paprika if smoked isn't available (though you'll lose that depth).
- Ground cumin. Adds warmth and a slightly nutty, savory quality. Don't skip it - it's part of what makes these taste like a real burger rather than just beet patties.
- Scallions. Provide a mild, fresh onion note on top of the sautéed red onion. You can substitute a bit of extra red onion, though scallions give a brighter flavor.
Helpful Tips
Don't over-process in the food processor. Pulse the mixture until finely chopped and combined - you want it cohesive but still with some texture. If you run the machine too long, you'll end up with a smooth paste that makes the patties dense and gummy rather than holding a pleasant, slightly chunky texture.
Pack the measuring cup tightly. The key to a patty that holds its shape is packing the beet mixture firmly into the measuring cup before inverting it onto the baking sheet. Loose packing leads to crumbling. A firm tap to release it, then a gentle press to flatten to about half an inch, and you're set.
Let them get a real crust before flipping. At the 15-minute mark, look for the edges to be visibly browning before you flip. A fully formed bottom crust is what keeps the burger intact through the second side of baking. If it looks pale, give it another 2-3 minutes.
Adjust seasonings before shaping. After mixing everything together, taste the unbaked mixture and bump up the cumin, paprika, or salt as needed. The flavors mellow a bit during baking, so it should taste slightly bold raw.
Pan-fry for an even crispier exterior. These bake beautifully, but for an extra-crisp crust, cook them in a thin layer of olive oil in a skillet over medium-high heat for about 4-5 minutes per side instead. The contact with the hot pan gives a darker, crunchier exterior.
Also worth trying: our garlic mustard vinaigrette.
Variations
- Add walnuts. Pulse ¼ cup of walnuts into the food processor along with the beets. They add healthy fat, a meaty richness, and help the patty hold together even better.
- Make them spicy. Add ¼ teaspoon of cayenne and a pinch of red pepper flakes. Serve with creamy vegan coleslaw to balance the heat.
- Slider version. Use a ¼-cup measure instead of ½-cup to make about 12 slider-sized patties. Great for parties - stack them on small buns with a swipe of hummus and a pickle.
- Mediterranean style. Add 2 tablespoons of chopped kalamata olives and swap the cumin for dried oregano. Serve in pita with tahini sauce and diced cucumber.
- Add quinoa. Replace ¼ cup of the oats with cooked quinoa for extra protein and a slightly nuttier flavor. The patties will be a bit more delicate, so handle carefully.
- Boost with sun-dried tomatoes. Add 2-3 oil-packed sun-dried tomatoes to the food processor. They deepen the umami and add a concentrated, savory richness.
Serving Ideas
These are stunning on a whole-grain bun - the deep red against white vegan mayo and green lettuce looks almost too good to eat. Load them up with classic burger toppings like sliced red onion, pickles, and mustard, or keep it simple with just avocado and a drizzle of copycat vegan burger sauce. A tangy vegan tartar sauce is also a classic pairing that Nicole has always recommended for these.
They work just as well without a bun. Serve them on a bed of mixed greens with beets and walnuts and a light lemon vinaigrette for a complete, restaurant-worthy plate. Or go the grain bowl route - break one patty up over cooked farro or quinoa with roasted vegetables and tahini dressing. The earthy beet flavor ties everything together beautifully.
Storing & Freezing
Store cooled patties in an airtight container in the refrigerator for up to 4 days. Reheat in a dry skillet over medium heat for 2-3 minutes per side, or in a 350°F oven for about 10 minutes. The skillet method gives the best results for reviving the exterior crust.
These freeze very well. Bake them fully and let them cool completely, then freeze on a lined baking sheet until solid before transferring to a zip-close bag. They'll keep for up to 3 months. Reheat from frozen in a 375°F oven for about 18 minutes, flipping once halfway through. No need to thaw first.
More Vegan Burger Recipes
If you loved this recipe, check out our full collection of the best vegan burger recipes or our vegan chickpea patties for a different style of vegan patty - or here are a few more individual favorites:
Also try: our Quinoa And Wild Rice Burgers.
- Vegan Chipotle Black Bean Burgers
- Vegan Beet & Brown Rice Burgers
- Vegan Quinoa Mushroom Burger
- Vegan Chickpea Patties
- Best Vegan Burger Recipes
Recipe
Vegan Beet Burgers
These vegan beet burgers are vibrant, hearty, and packed with flavor - with cumin, smoked paprika, and kidney beans rounding out that gorgeous deep-red beet base.
Print
Pin
Save
Servings: burgers
Ingredients
- 1 to 1¼ pounds beets 3-4 medium, scrubbed
- ½ cup quick-cooking oats divided
- 1 tablespoon olive oil
- 1 medium red onion chopped
- 2 cloves garlic thinly sliced
- 2 scallions chopped
- 15 ounce canned kidney beans drained and rinsed
- 1 teaspoon ground cumin
- 1 teaspoon sweet paprika
- 1 teaspoon smoked paprika or mesquite seasoning
- salt and freshly ground pepper to taste
Instructions
- Cook the beets using any preferred method - microwave, boil, or roast whole - until tender but not overdone. Plunge into cold water to cool, then peel and cut into chunks.
- Preheat the oven to 400°F. Line a baking sheet with parchment paper.
- Place half of the oats in a small bowl and cover with ¼ cup boiling water. Let stand until needed.
- Heat the oil in a small skillet over medium heat. Add the onion and sauté until translucent, about 5 minutes. Add the garlic and scallions and continue to sauté until soft and beginning to turn golden.
- In a food processor, combine the beets, onion mixture, both the soaked and dry oats, beans, cumin, and both kinds of paprika. Pulse until the mixture is evenly and finely chopped, scraping down the sides as needed.
- Transfer the mixture to a bowl. Taste and adjust seasonings, then season with salt and pepper.
- Lightly oil a ½-cup measuring cup and pack it firmly with the beet mixture. Invert onto the baking sheet with a sharp tap and flatten to about ½-inch thickness. Repeat with remaining mixture. (For smaller slider-sized burgers, use a ¼-cup measure.)
- Bake for 15 minutes until the bottom is starting to brown. Carefully flip each burger and bake for another 15 minutes until lightly browned on both sides. Serve hot or warm.
Nutrition (Estimate per Serving)
Calories: 6kcalCarbohydrates: 1gSodium: 1mgPotassium: 20mgSugar: 1gVitamin C: 1mgCalcium: 3mg
Vegan-ize any recipe!Grab our free vegan cheat sheet, packed with my favorite easy substitutions to make any recipe vegan.
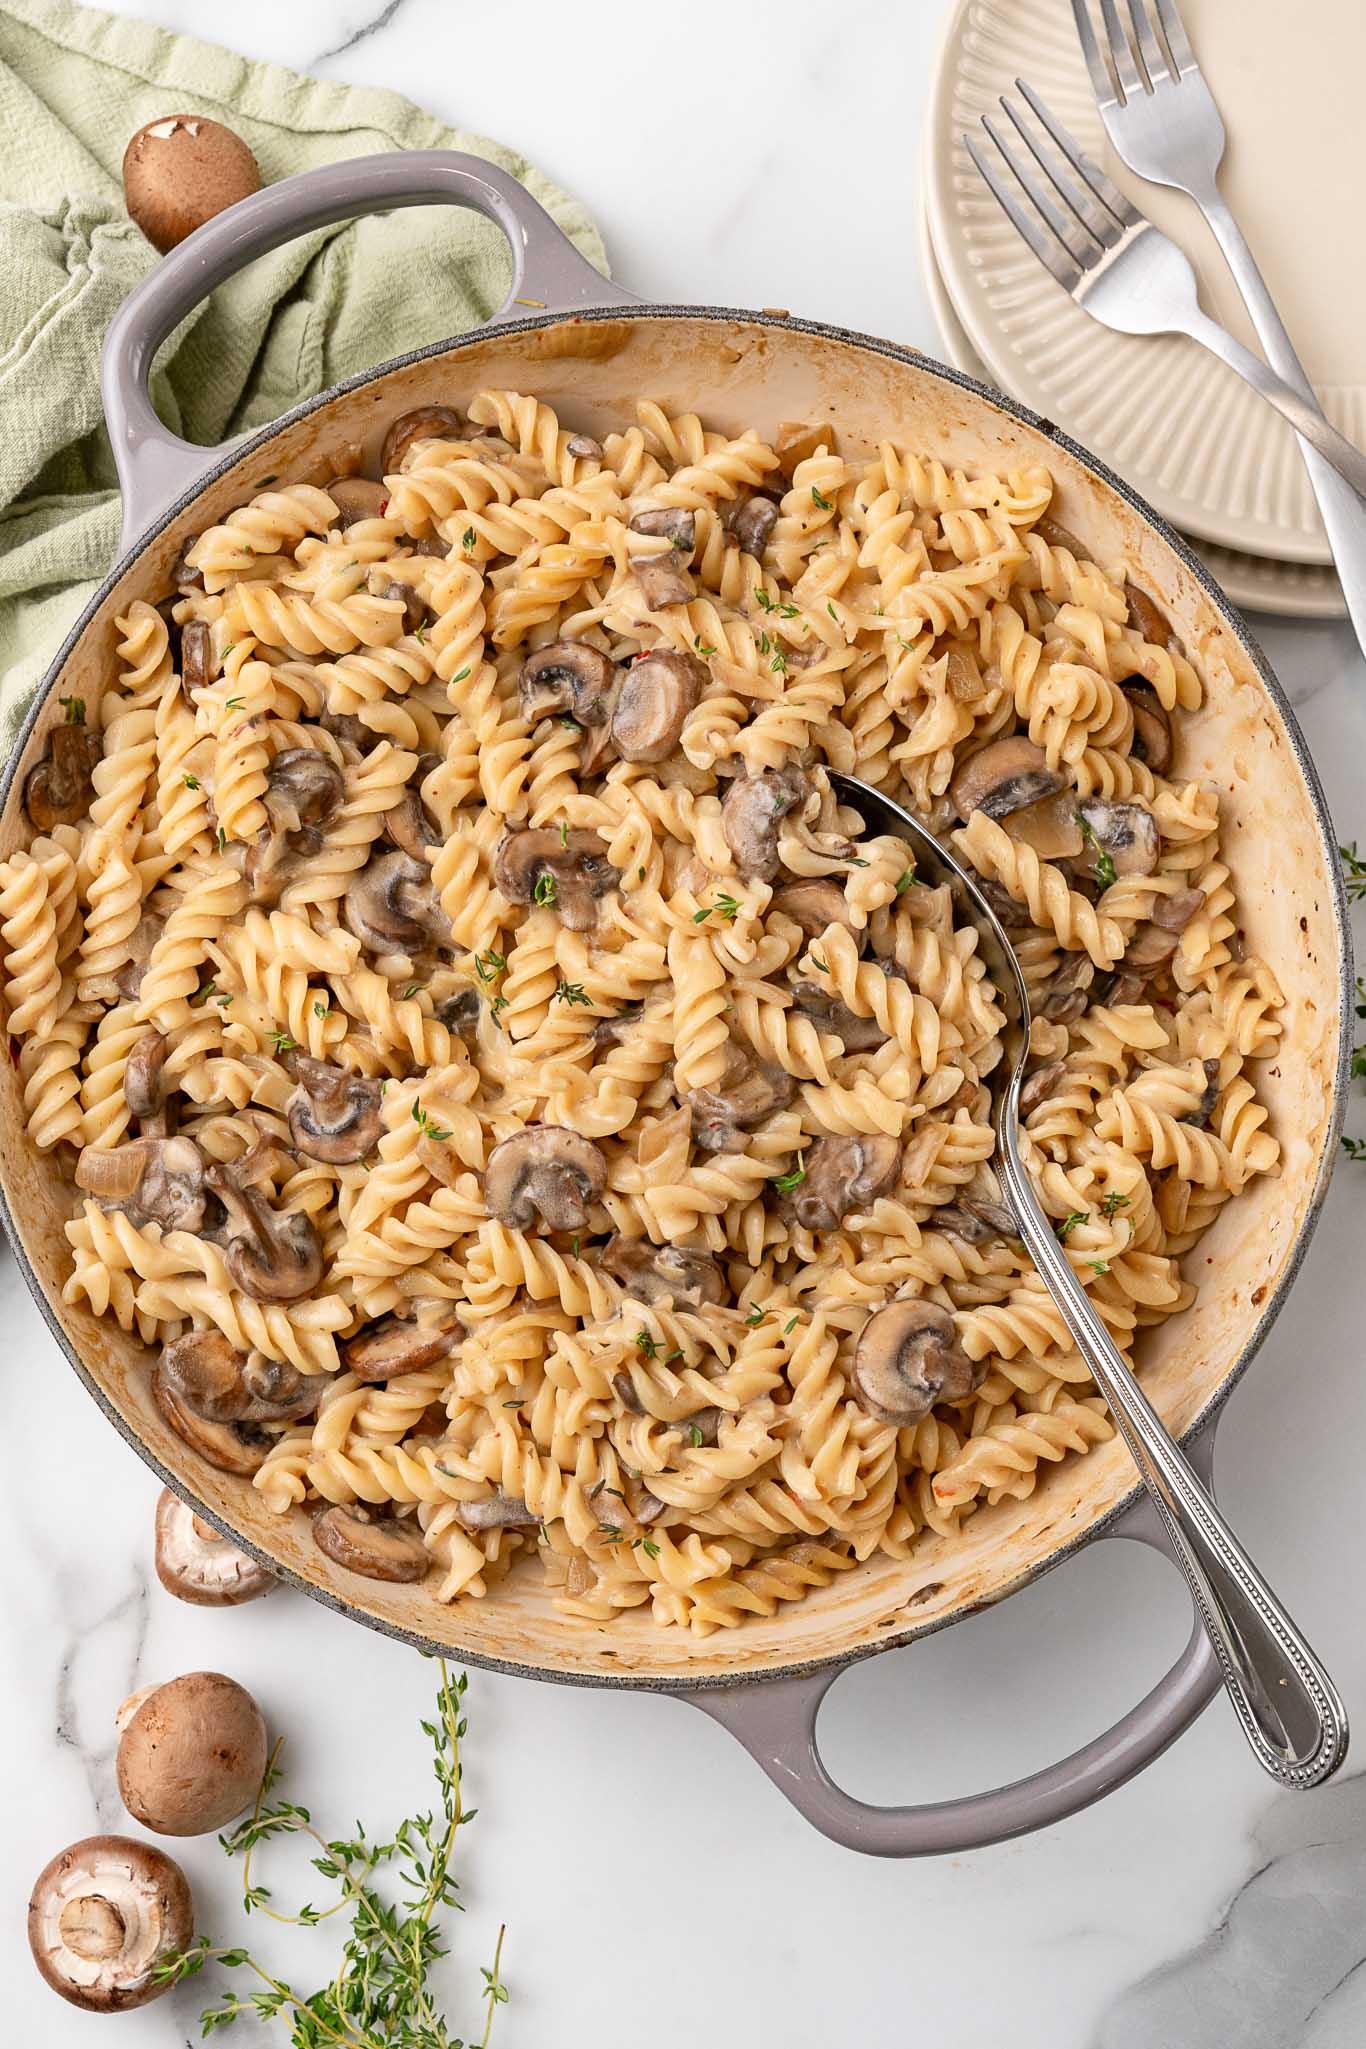
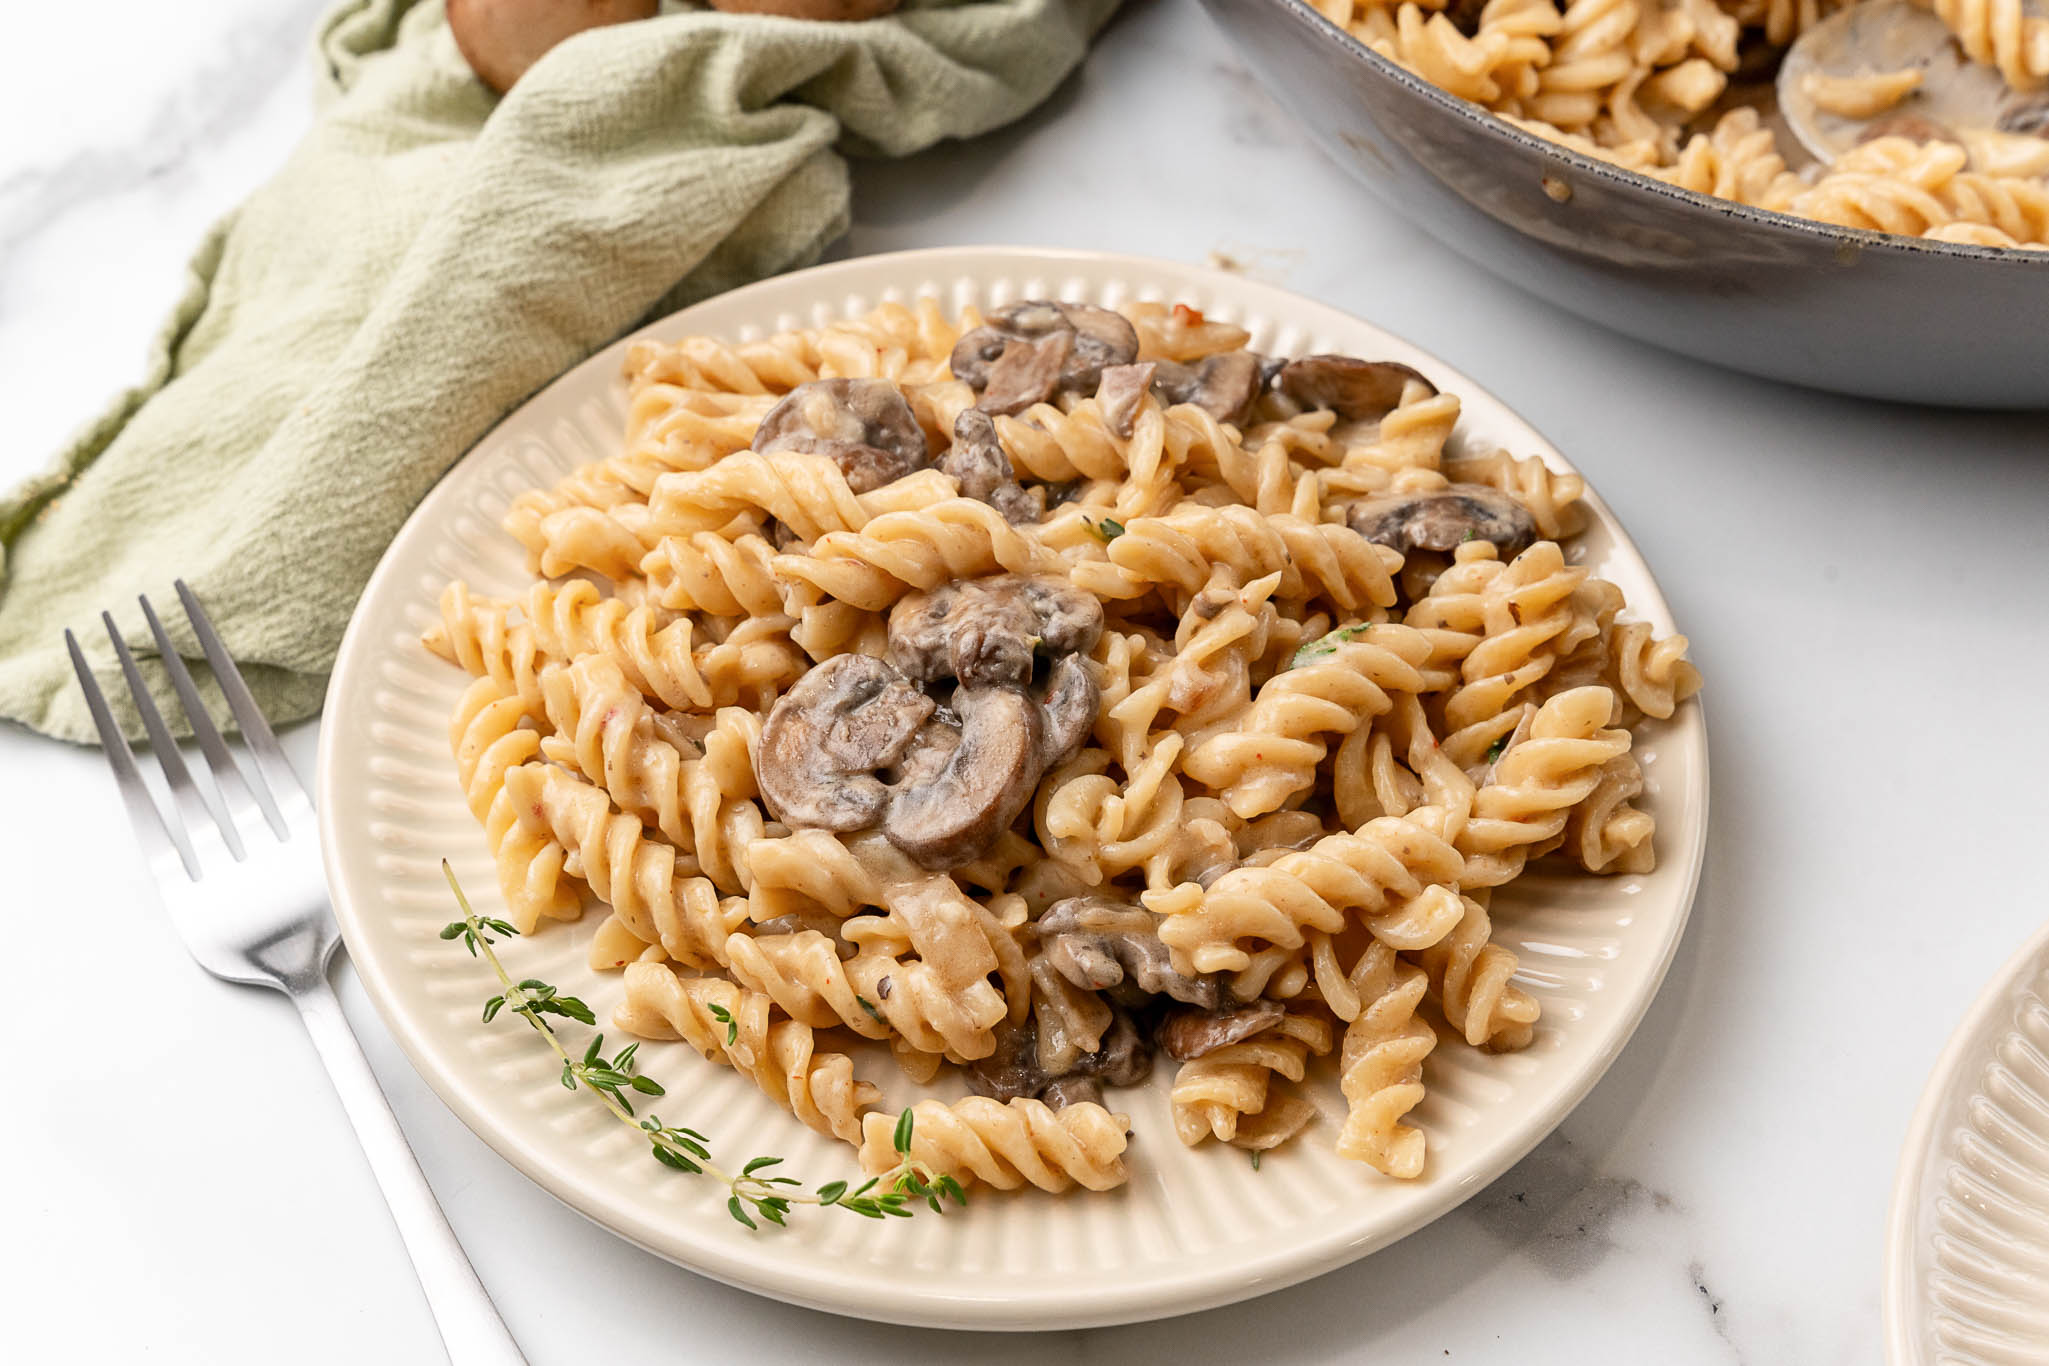
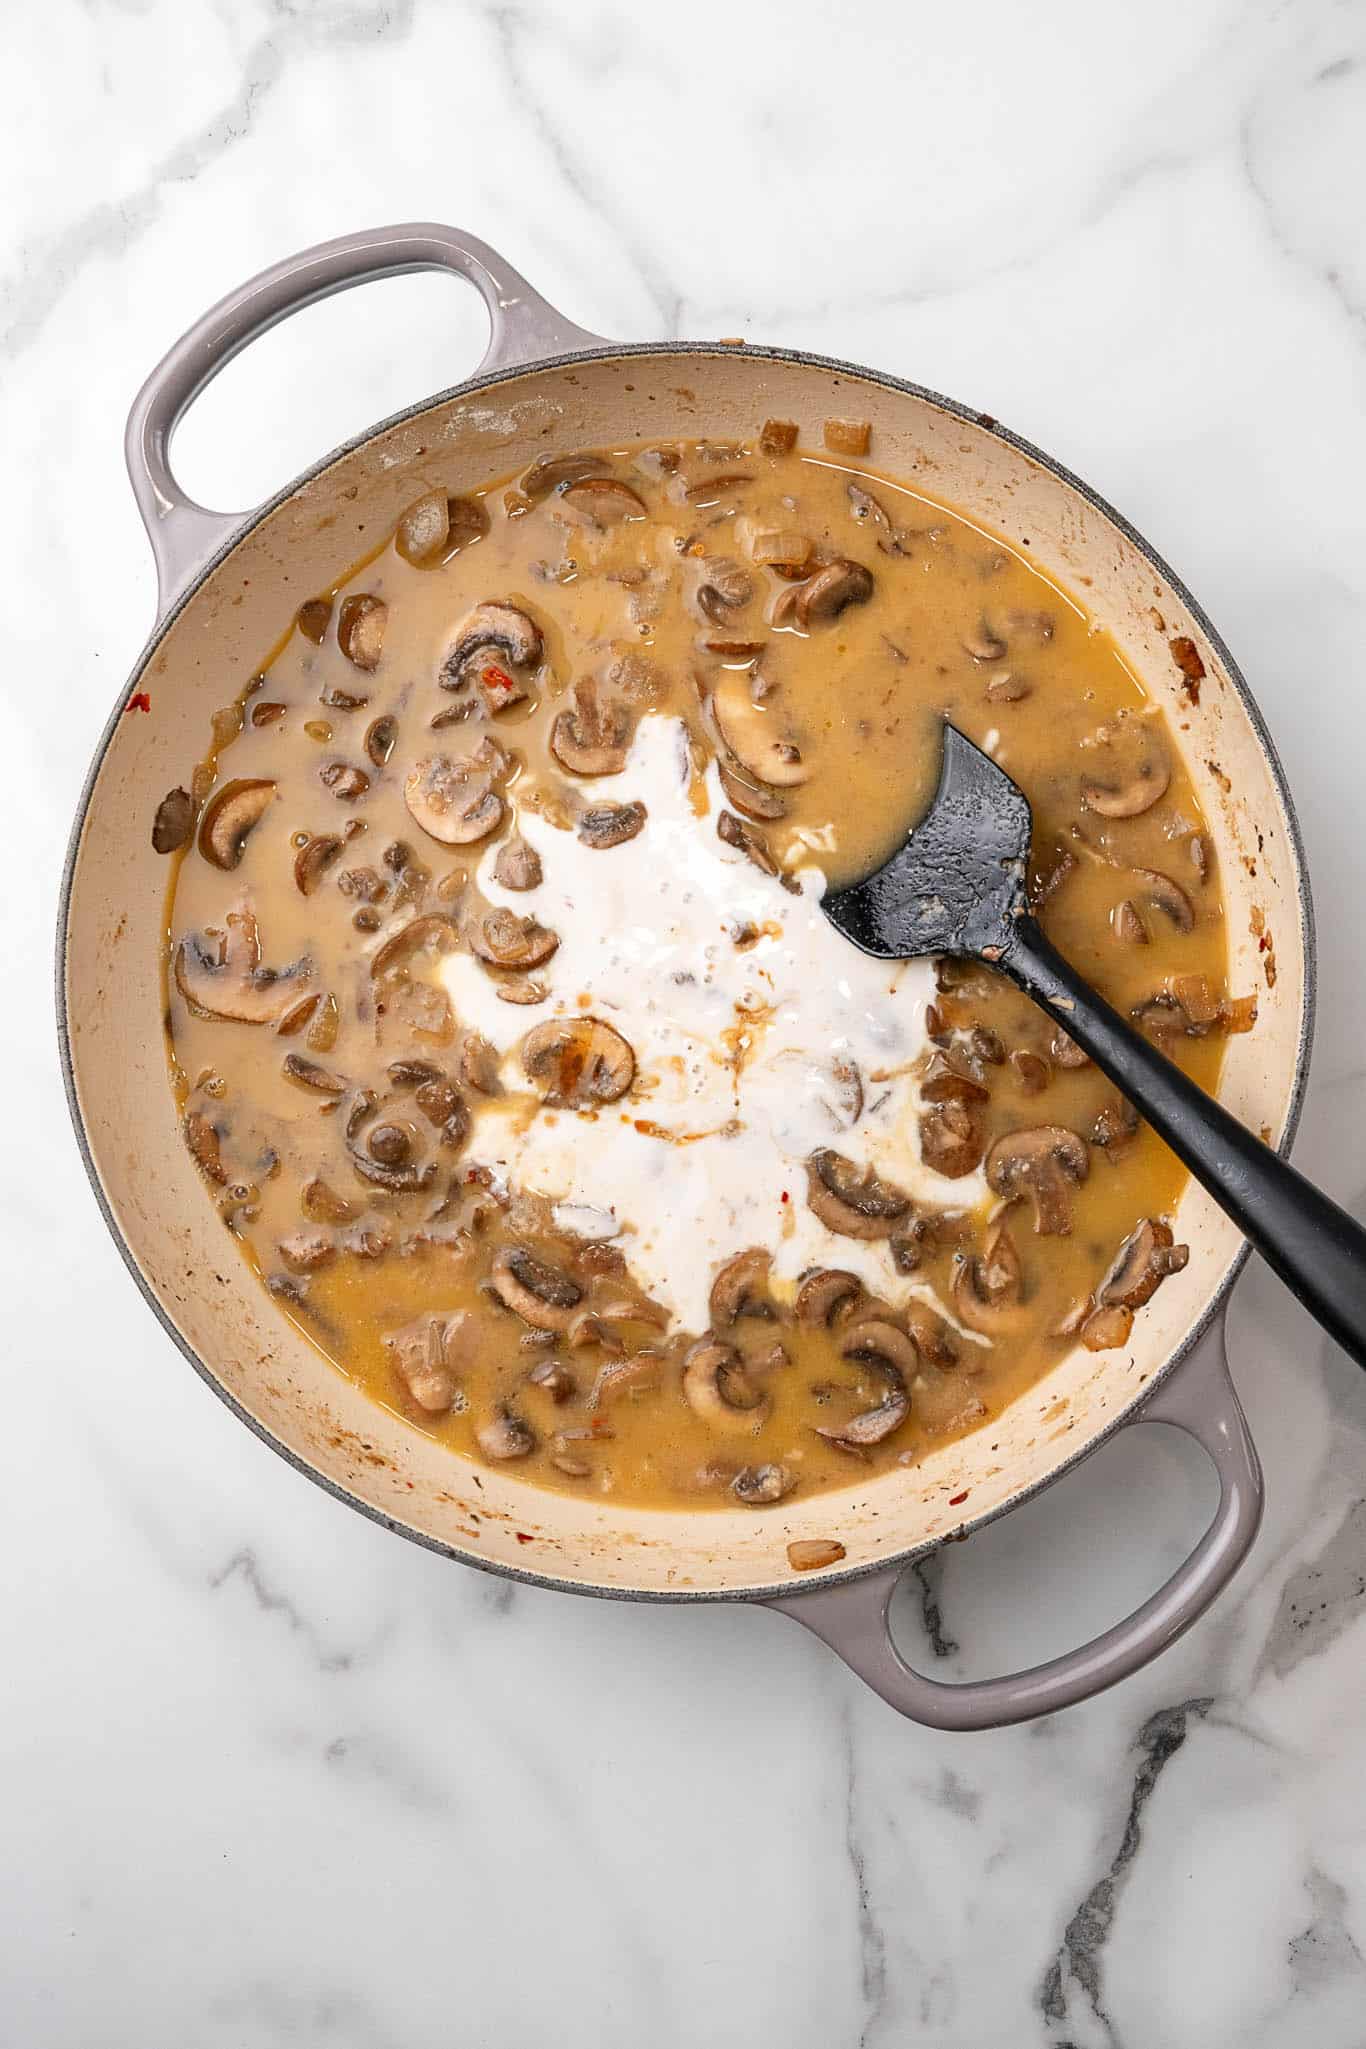
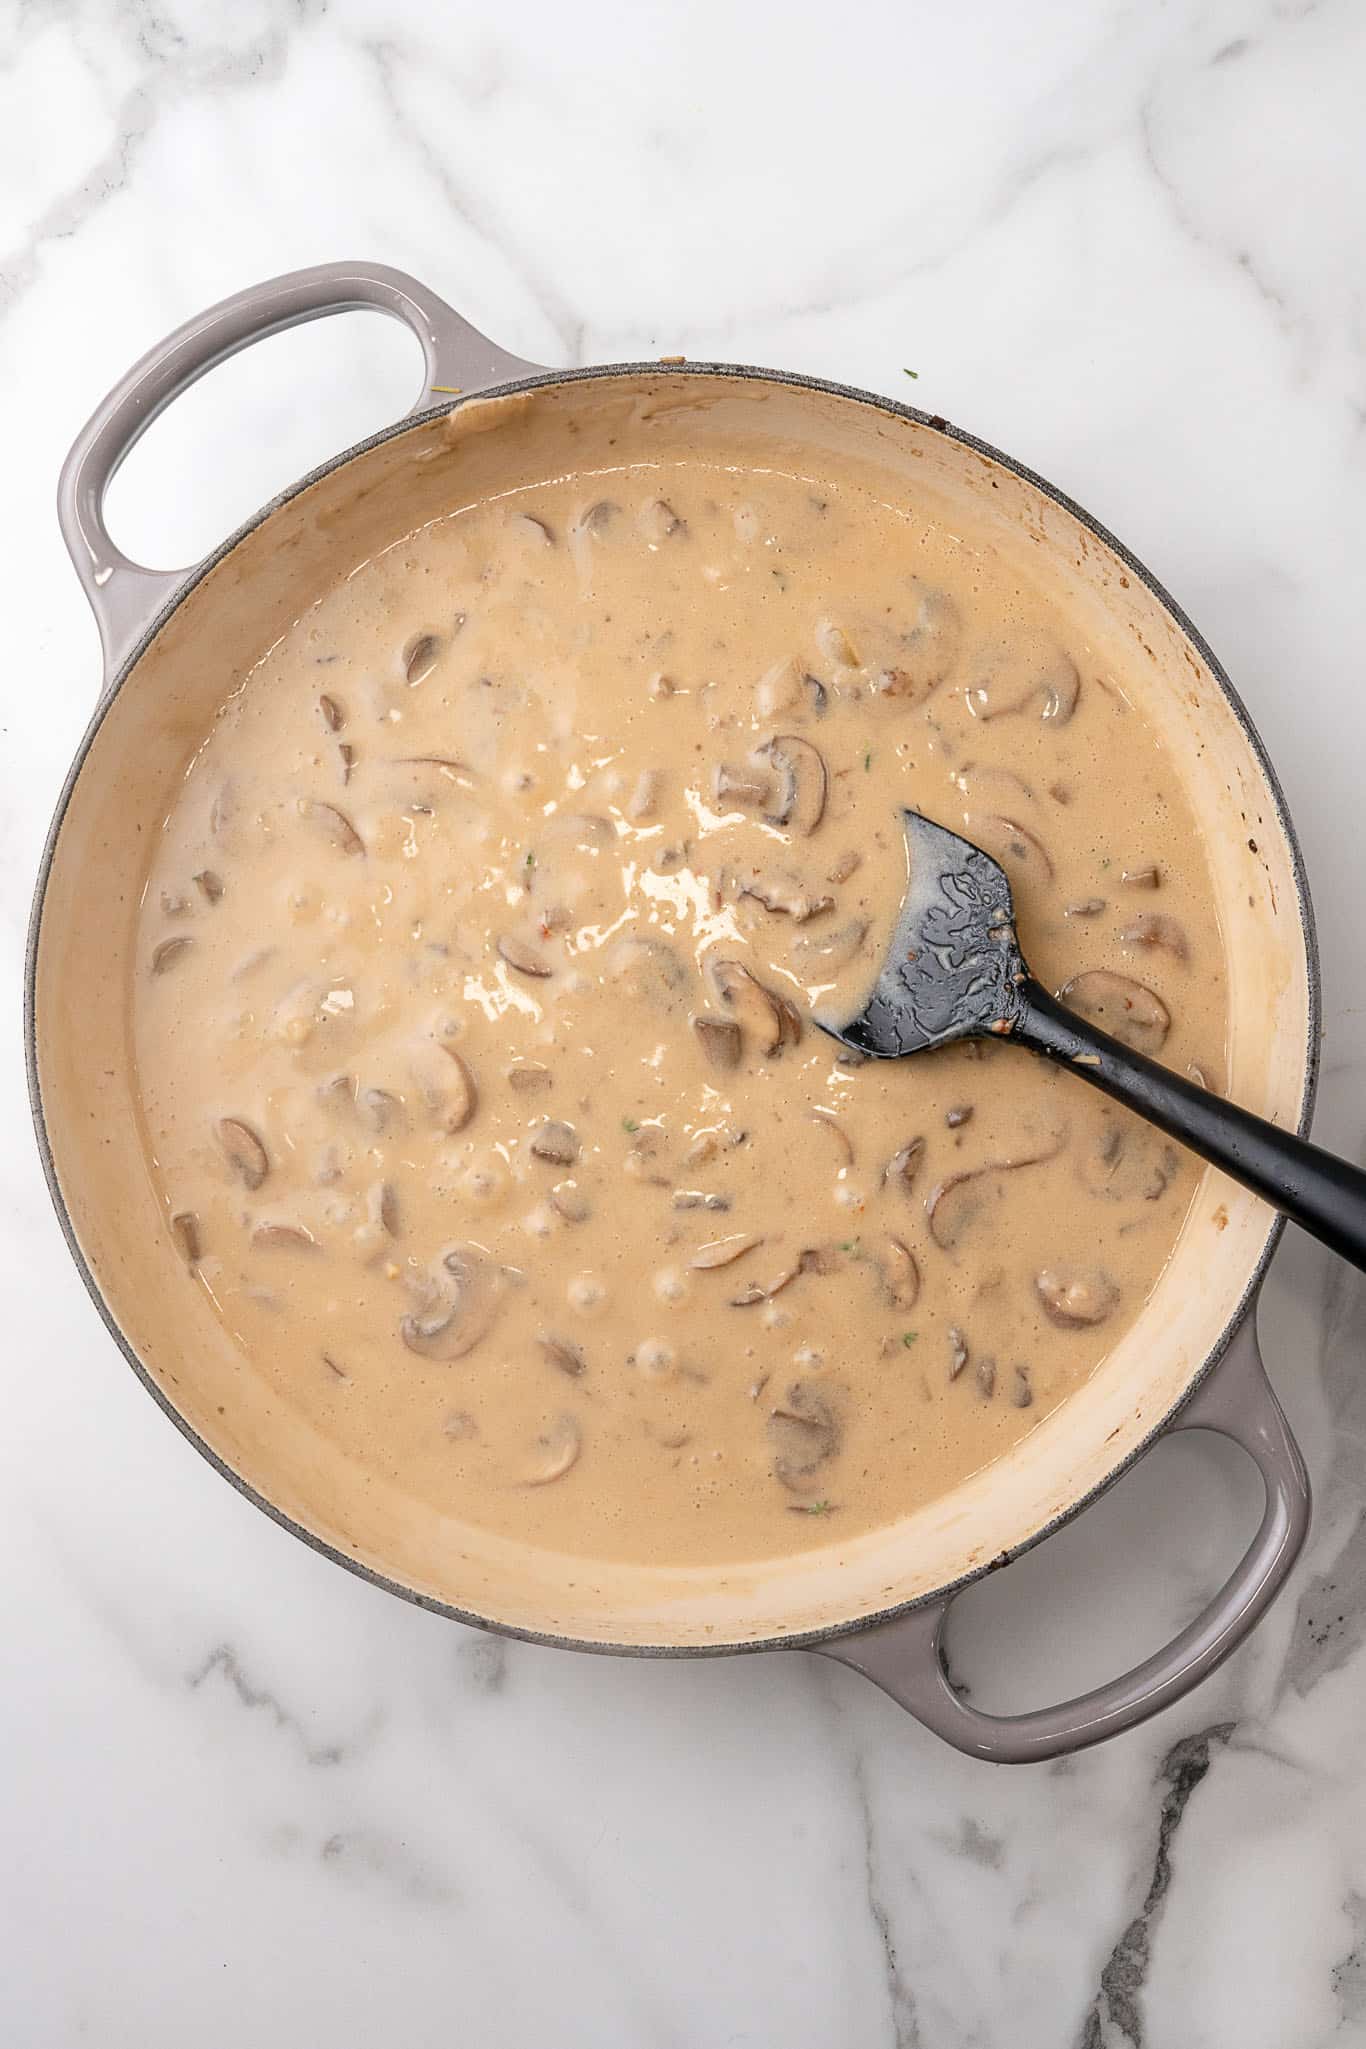
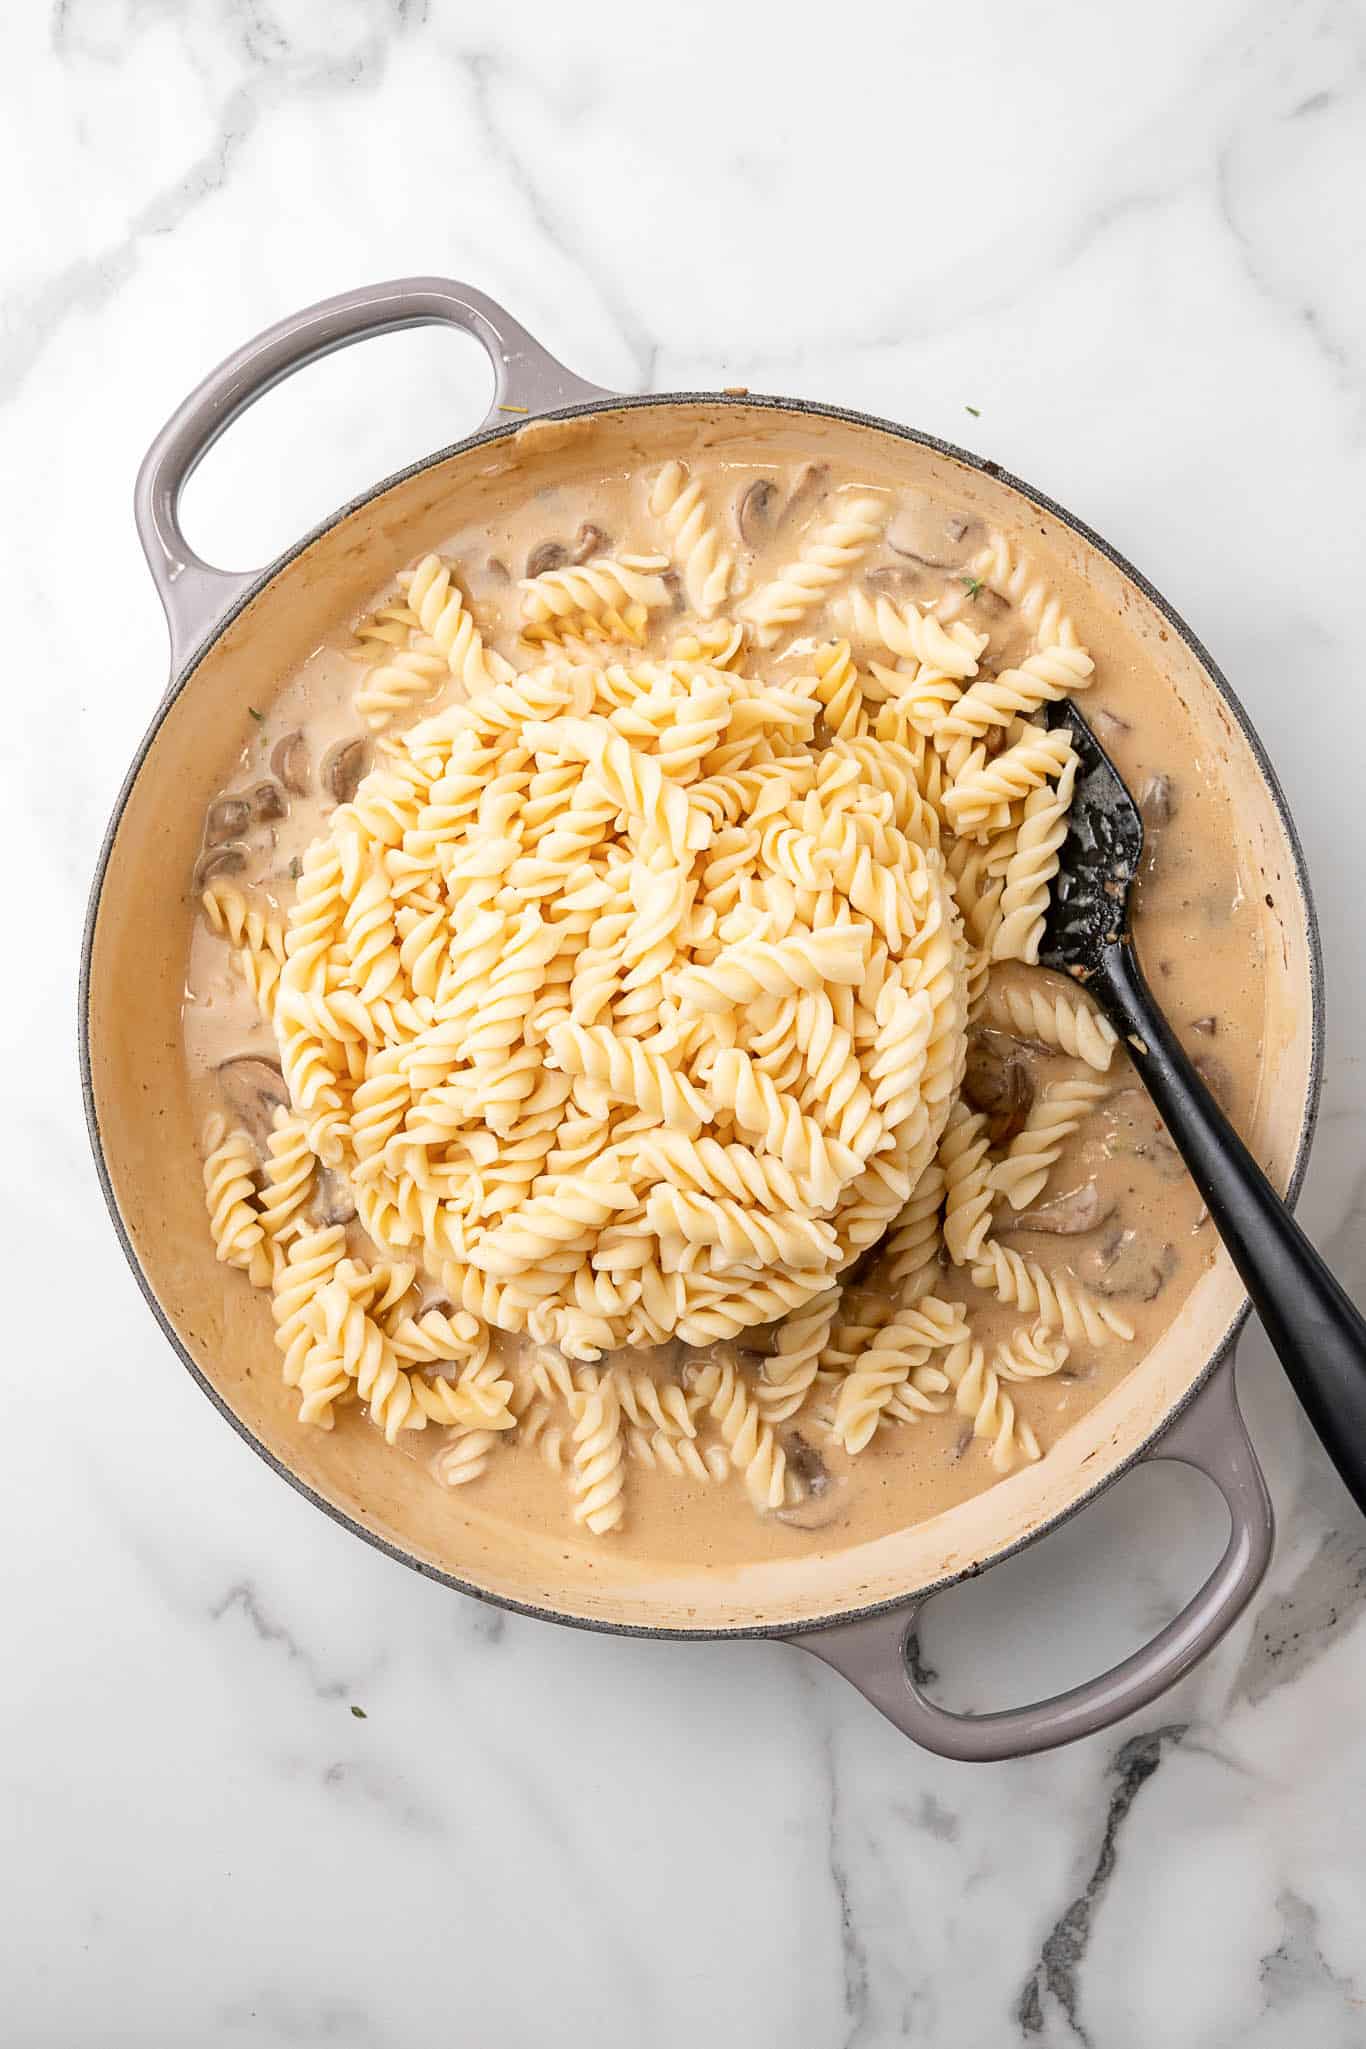
Vegan Creamy Mushroom Pasta
This vegan creamy mushroom pasta delivers everything you want in a comfort food dinner - a velvety, herb-flecked sauce, tender baby bella mushrooms, and hearty pasta, all ready in under 30 minutes.
Key Ingredients & Substitutions
- Pasta. Rotini or penne work beautifully here - their ridges and tubes catch the creamy sauce. Any short pasta shape works; if you use spaghetti or linguine, just be sure to toss well so every strand gets coated.
- Baby bella mushrooms. Also called cremini, these bring a deep, savory flavor and meaty texture. White button mushrooms are the easiest swap, or go more luxurious with shiitakes, oyster mushrooms, or a mix of whatever's at the store.
- Full-fat coconut milk. This is the backbone of the creamy sauce - don't use light coconut milk or the sauce will be thin. Cashew cream (blend 1 cup soaked cashews with ¾ cup water) works beautifully if you want a more neutral flavor.
- Vegan butter. Combined with flour, it forms the roux that thickens the sauce. Olive oil can substitute in a pinch, though the butter adds more richness.
- Vegetable broth. Use a good-quality broth - it forms the other half of the sauce. Low-sodium is fine; just taste and adjust salt at the end.
- Soy sauce. Adds umami depth that makes the sauce complex. Tamari works as a 1:1 swap and keeps the dish gluten-free.
- White wine. A dry white like Chardonnay or Pinot Grigio deglazes the pan and adds brightness. If you'd rather skip it, substitute an equal amount of extra vegetable broth with a small squeeze of lemon juice.
- Fresh thyme. The aromatic that ties everything together. Dried thyme works in a pinch - use about half as much (1 teaspoon dried instead of 2 teaspoons fresh).
Helpful Tips
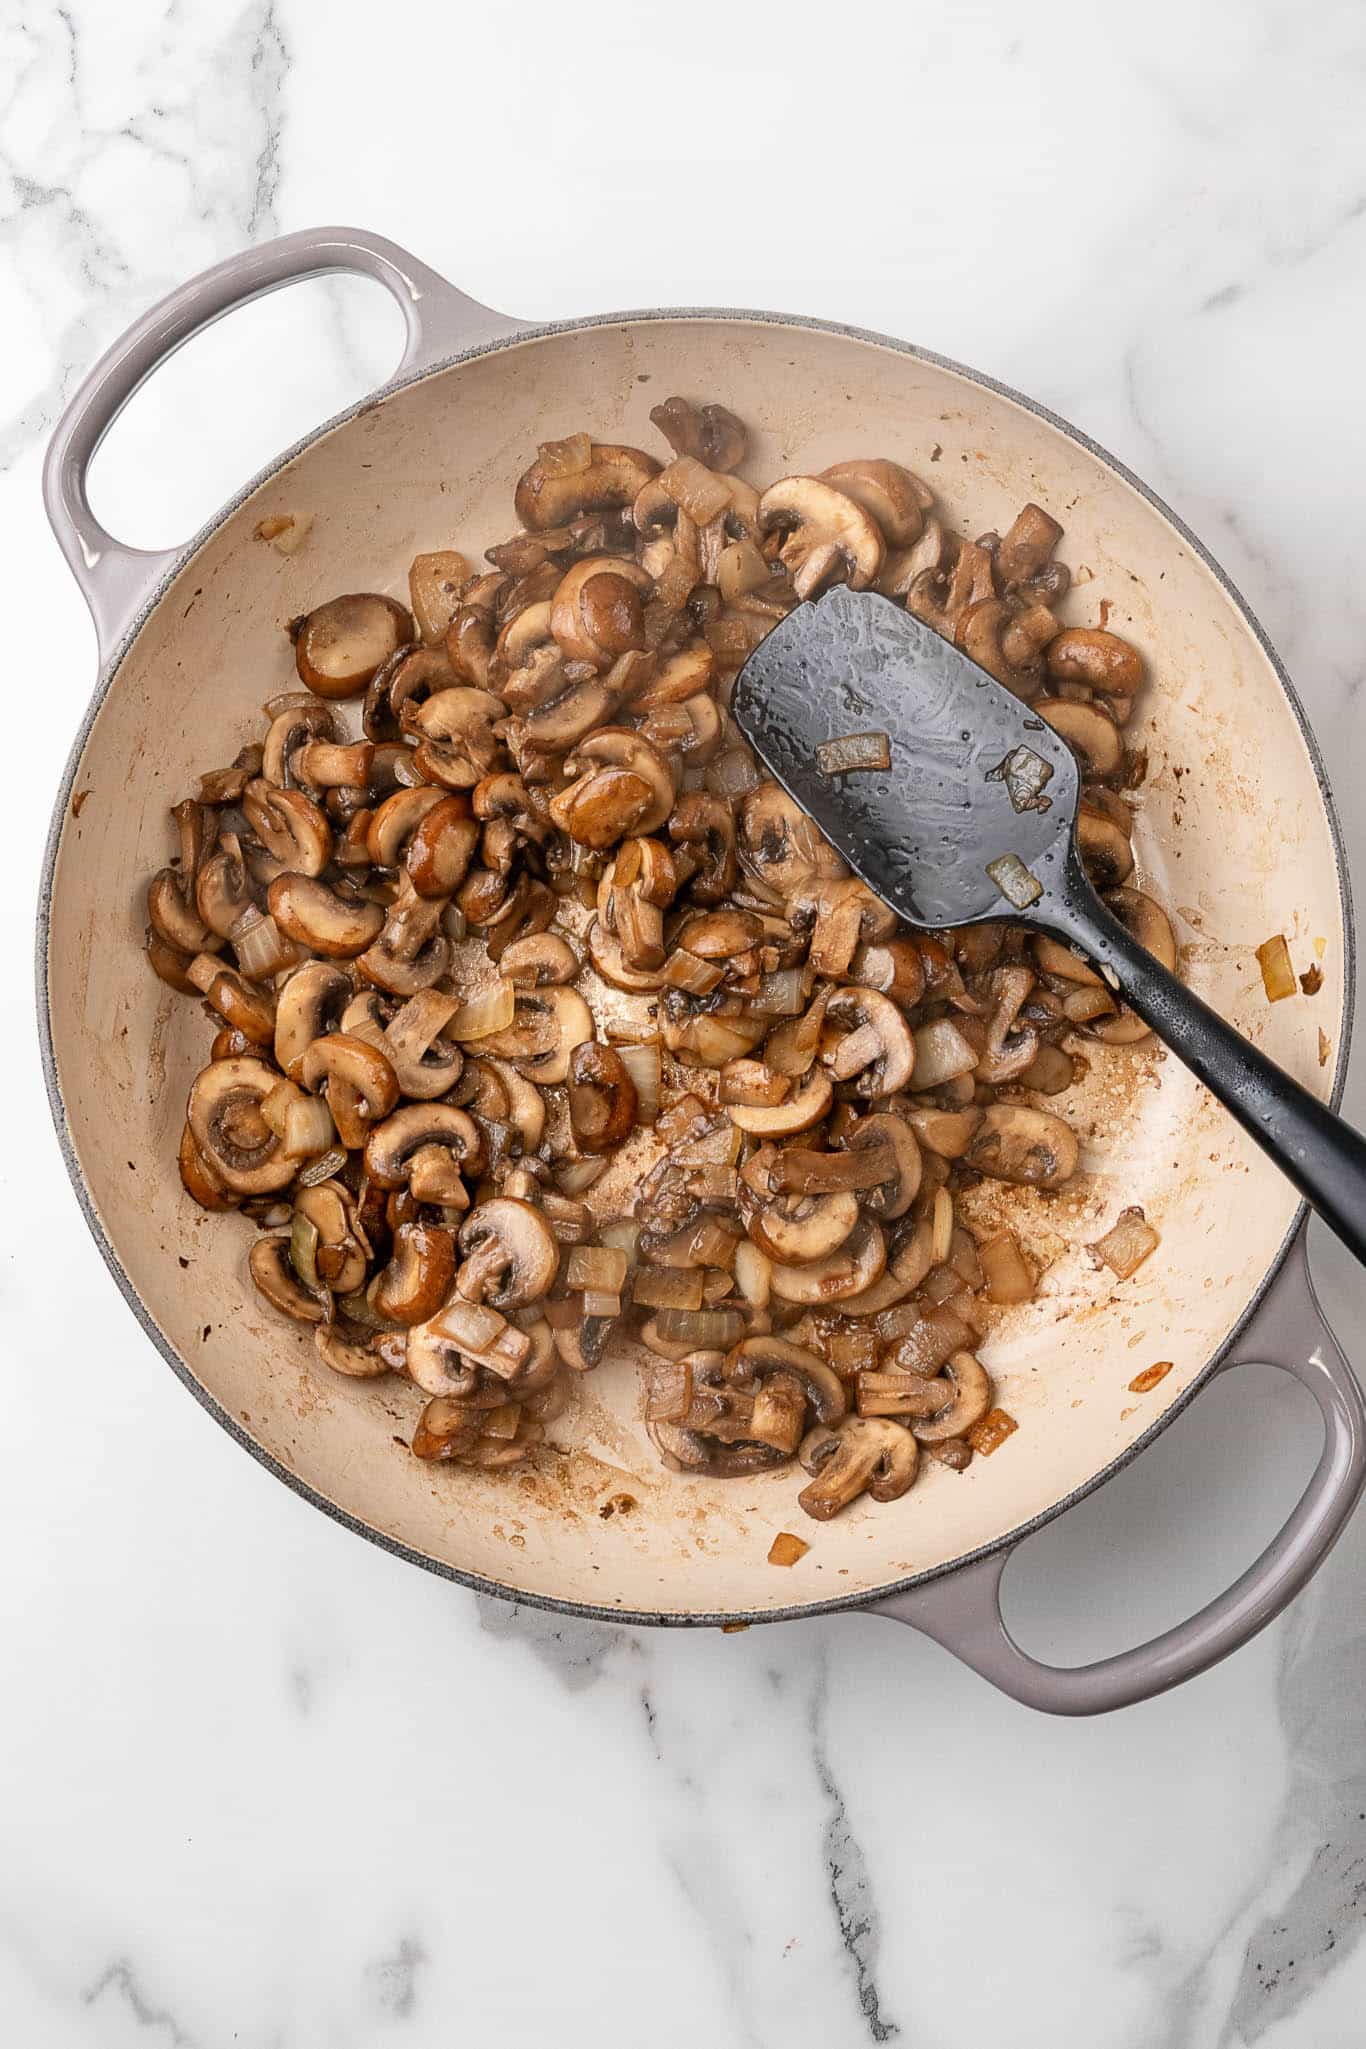
Don't rush the mushrooms. Give them space in the pan and let them cook undisturbed for a couple of minutes before stirring. They need time to release their liquid and then let that liquid fully evaporate - this is where the deep, savory flavor comes from. If you rush this step by stirring constantly, you'll end up with steamed, waterlogged mushrooms instead of golden, concentrated ones.
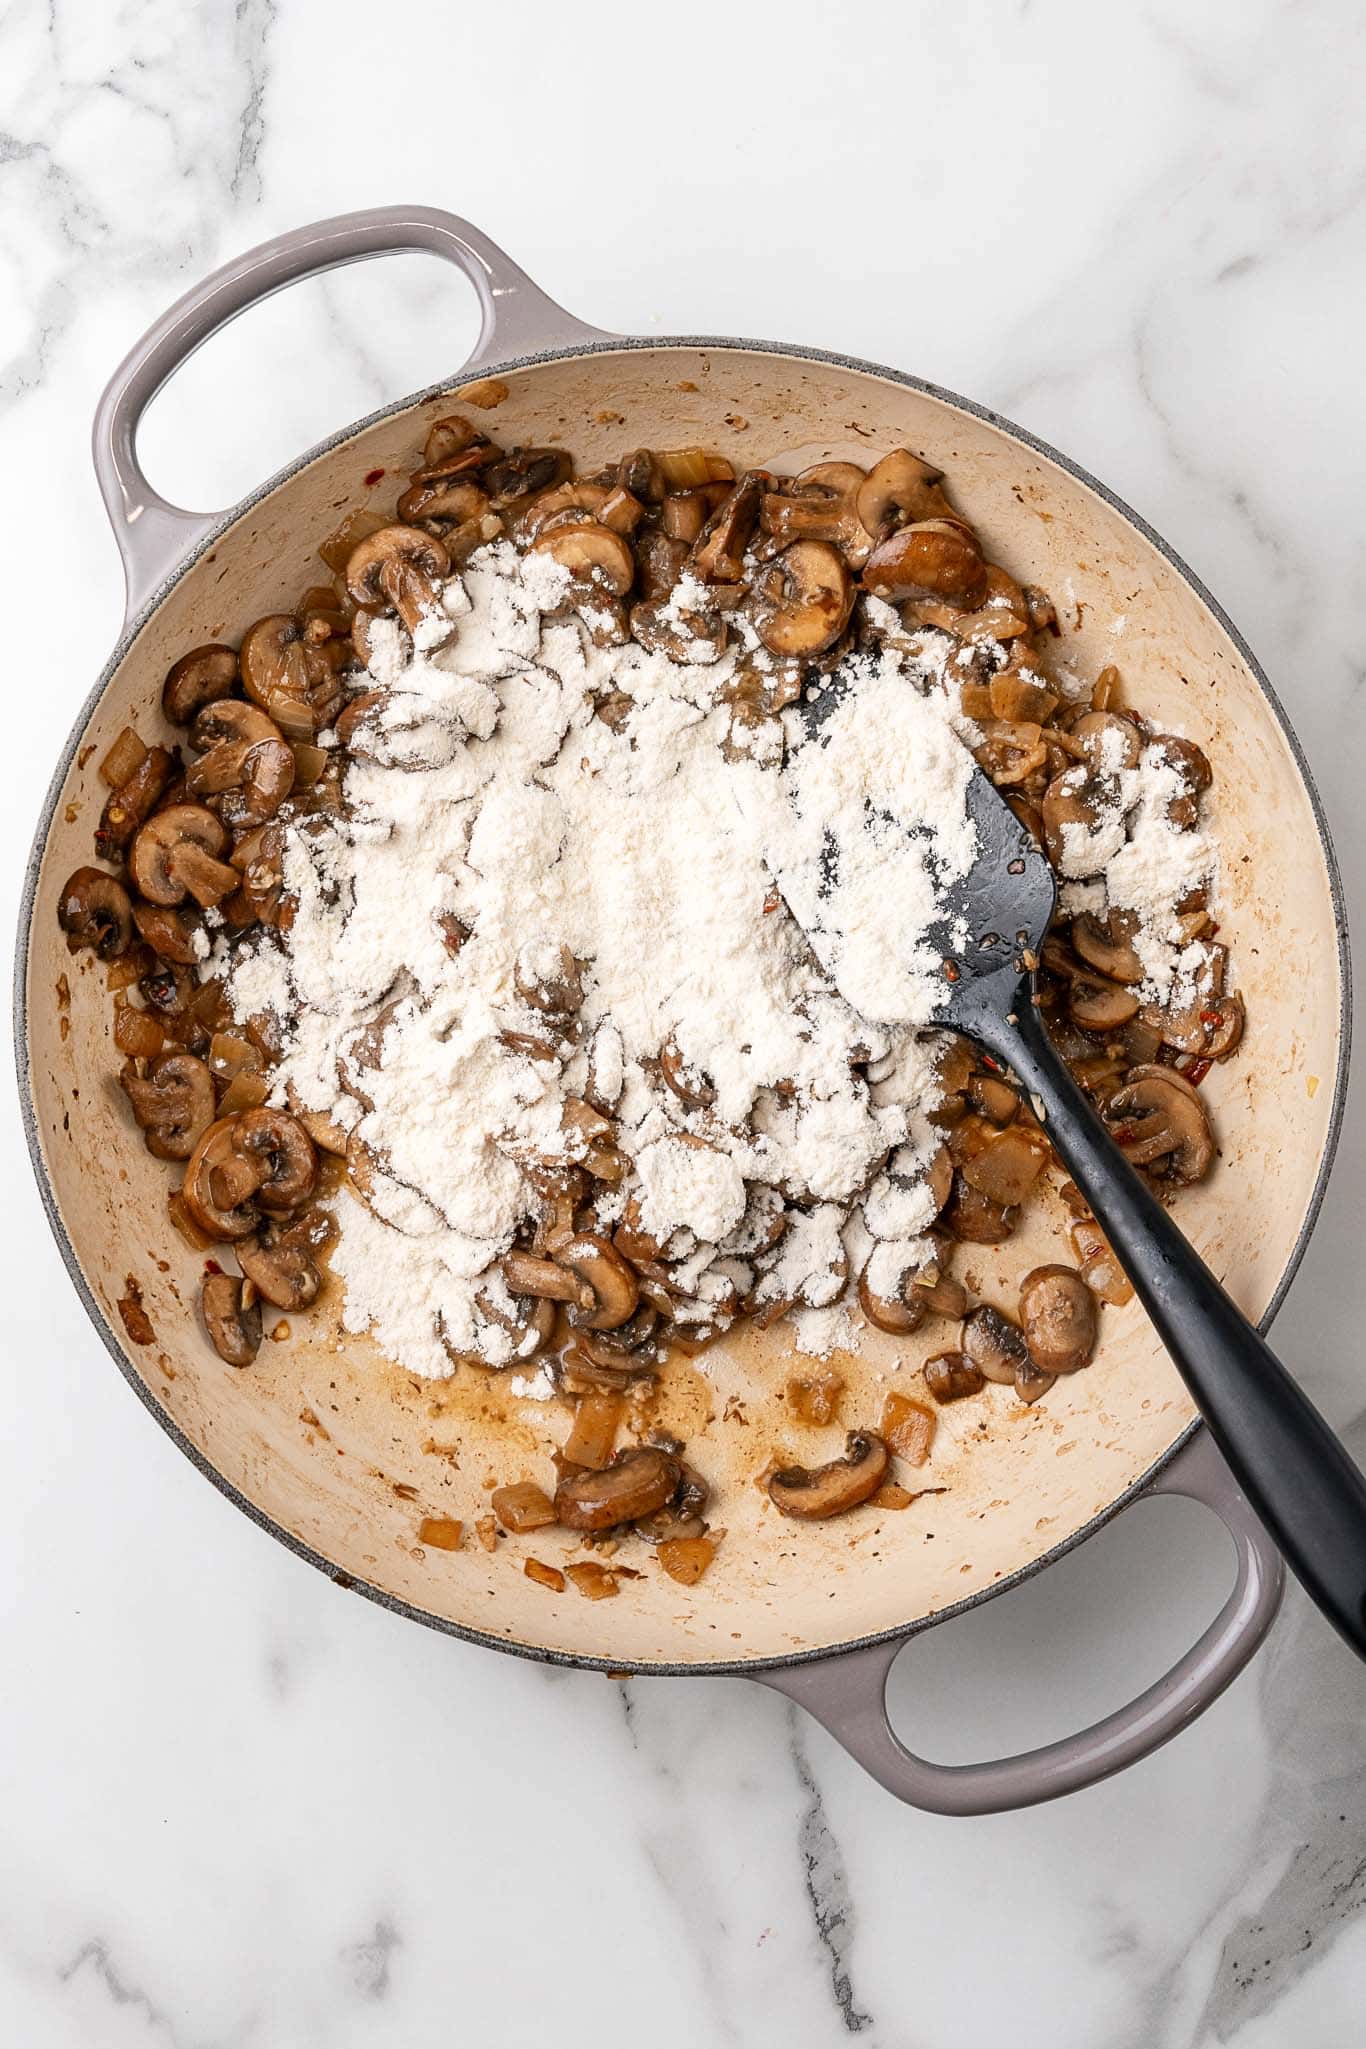
Make a proper roux. After adding the vegan butter to the cooked mushrooms, let it melt fully before sprinkling in the flour. Stir the flour into the butter and vegetables and cook for about a minute - this cooks out the raw flour taste and ensures your sauce won't be starchy. It should look like a pale, sandy paste clinging to the vegetables.
Add the broth slowly. Pour in a splash of vegetable broth, stir vigorously until smooth, then add more. This gradual approach prevents lumps from forming in the sauce. If you do end up with a few lumps, a quick whisk usually smooths everything out.
Use the pasta cooking water. Before you drain the pasta, scoop out a cup of the starchy cooking water. If your sauce turns out thicker than you'd like after adding the pasta, a splash of pasta water loosens it perfectly and helps everything cling together.
Taste before serving. The soy sauce adds salt, and different broths vary in saltiness - so always taste the finished sauce before plating. A pinch of salt, an extra crack of black pepper, or a squeeze of lemon can make a big difference.
Also worth trying: our Italian-style vegan sausage and peppers.
Variations
- Add greens. Stir a few handfuls of fresh spinach or baby kale into the sauce just before adding the pasta - it wilts in about a minute and adds color and nutrients.
- Boost the protein. Fold in crispy baked tofu cubes, white beans, or slices of vegan sausage to make it a heartier meal.
- Make it spicy. Double the red pepper flakes or stir in a teaspoon of sriracha or calabrian chili paste for a sauce with a kick.
- Switch the mushrooms. Shiitakes add a more intense, earthy flavor; oyster mushrooms are silkier and delicate; portobello caps sliced into strips give big, meaty bites. A mix of two or three varieties is especially good.
- Go gluten-free. Use your favorite gluten-free pasta and swap the soy sauce for tamari. The rest of the recipe is naturally gluten-free.
- Add a sun-dried tomato twist. Stir in 2-3 tablespoons of chopped sun-dried tomatoes (oil-packed) with the garlic for a sweet, jammy contrast to the earthy mushrooms.
Serving Ideas
This pasta is a full meal on its own, but a simple side rounds it out nicely. Warm, crusty bread or garlic bread is the obvious choice - you'll want something to swipe up every last bit of sauce from the bowl. A lightly dressed arugula salad with lemon and olive oil cuts through the richness beautifully.
For a bigger spread, roasted broccoli or asparagus alongside this dish is a great pairing - the slight char on the vegetables plays well against the creamy sauce. If you're serving this for guests, pair it with a side of glazed baked onions and pasta dishes like vegan zucchini lasagna or a hearty vegan pot pie casserole or Vegan Pasta Alfredo with Peas & Asparagus for variety.
Storing & Freezing
Leftovers keep well in an airtight container in the refrigerator for up to 4 days. The pasta will absorb some of the sauce as it sits, so when reheating add a splash of vegetable broth or plant milk and stir over medium-low heat until the sauce loosens and everything is warmed through. It reheats beautifully on the stovetop; the microwave works too, just stir halfway through.
This dish doesn't freeze well - the coconut milk sauce tends to separate and become grainy after thawing, and the pasta turns mushy. It's best made fresh or enjoyed within a few days from the fridge. If you want to meal prep ahead, you can make the sauce (without the pasta) and freeze that separately for up to 2 months, then cook fresh pasta to toss with it when ready.
More Vegan Pasta Recipes
If you loved this creamy mushroom pasta, here are a few more vegan pasta dinners to try:
- Vegan Vodka Pasta
- Vegan Spinach Mushroom Lasagna
- Vegan Pasta Alfredo with Peas & Asparagus
- Roasted Butternut Squash and Pasta Casserole
Recipe
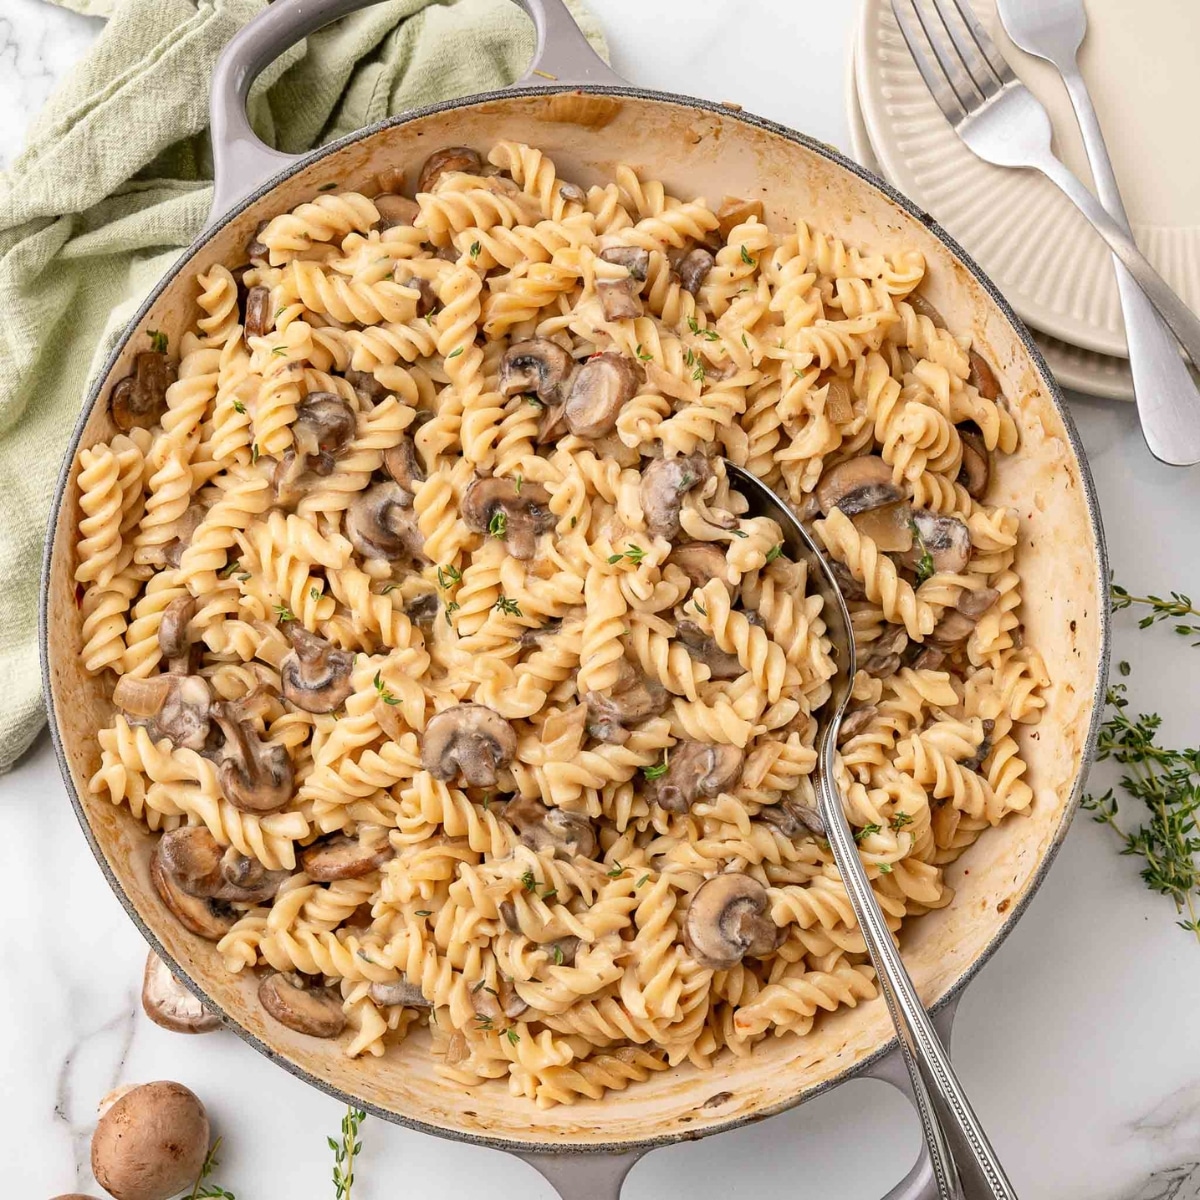
Vegan Creamy Mushroom Pasta
Rich, velvety, and packed with earthy mushroom flavor, this vegan creamy mushroom pasta comes together in under 30 minutes with simple pantry staples — no dairy needed.
Print
Pin
Save
Servings: servings
Ingredients
- 1 lb pasta rotini or penne recommended
- 2 tablespoons olive oil
- 1 medium yellow onion diced
- 16 oz baby bella mushrooms sliced
- 3 cloves garlic minced
- ¼ teaspoon red pepper flakes optional
- 2 tablespoons dry white wine such as Chardonnay or Pinot Grigio; sub extra broth if preferred
- 3 tablespoons vegan butter
- 3 tablespoons all-purpose flour use gluten-free flour blend if needed
- 1 cup vegetable broth
- 1 cup full-fat coconut milk shaken well before opening
- 2 tablespoons soy sauce or tamari for gluten-free
- 2 teaspoons fresh thyme minced, plus more to garnish
Instructions
- Cook the pasta according to package directions until al dente. Reserve a cup of pasta water before draining, then drain and set aside.
- Heat the olive oil in a large skillet over medium heat. Add the diced onion and cook, stirring frequently, until softened and translucent, about 4–5 minutes.
- Add the sliced mushrooms and spread them into a single layer. Cook without stirring for 2 minutes, then stir and continue cooking until the mushrooms have released their liquid and it has fully evaporated, about 8–10 minutes total. Add the minced garlic and red pepper flakes and cook for 1 more minute.
- Pour in the white wine and scrape up any browned bits from the bottom of the pan. Let the liquid reduce by half, about 1 minute. Add the vegan butter and let it melt completely, then sprinkle the flour over the vegetables and stir to coat. Cook for 1 minute to eliminate the raw flour taste.
- Slowly pour in the vegetable broth a little at a time, stirring continuously after each addition to prevent lumps. Once all the broth is incorporated, stir in the coconut milk, soy sauce, and thyme.
- Bring the sauce to a gentle simmer and cook, stirring occasionally, until thickened to a creamy consistency, about 3–4 minutes. If the sauce becomes too thick, loosen it with a splash of reserved pasta water.
- Add the cooked pasta to the skillet and toss well to coat every piece in the sauce. Taste and adjust salt and pepper as needed.
- Serve immediately, garnished with fresh thyme leaves.
Nutrition (Estimate per Serving)
Calories: 3kcalCarbohydrates: 1gProtein: 14gFat: 19gSaturated Fat: 9gPolyunsaturated Fat: 2gMonounsaturated Fat: 6gTrans Fat: 0.03gSodium: 235mgPotassium: 651mgFiber: 3gSugar: 1gVitamin A: 125IUVitamin C: 3mgCalcium: 48mgIron: 3mg
Vegan-ize any recipe!Grab our free vegan cheat sheet, packed with my favorite easy substitutions to make any recipe vegan.
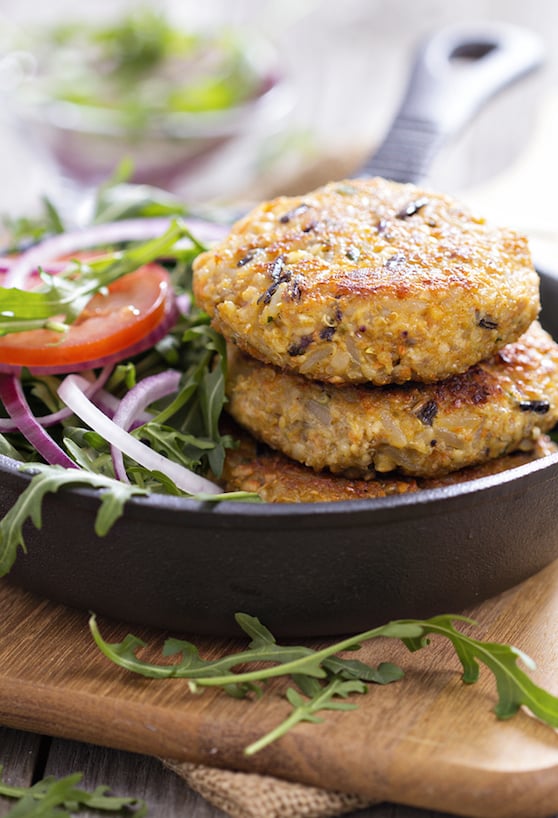
Vegan Quinoa and Wild Rice Burgers
These vegan quinoa and wild rice burgers are hearty, wholesome, and satisfying enough to win over anyone at the table - no meat required.
Key Ingredients & Substitutions
- Wild rice. The chewy, nutty backbone of these burgers. Wild rice holds its texture well after cooking and gives the patties a nice hearty bite. You can swap it for brown rice in a pinch, though you'll lose some of that characteristic chewiness.
- Cooked quinoa. Adds protein and helps bind the patties together. Any color of quinoa works - white, red, or tri-color. If you're making this gluten-free, quinoa flakes are a great substitute for the oats as well.
- Quick-cooking oats. Soaked in boiling water, they become the glue that holds the burgers together. For a gluten-free version, swap in certified gluten-free oats or quinoa flakes as noted in the recipe.
- Salt-free all-purpose seasoning blend. This is the workhorse flavor builder - look for blends like Mrs. Dash or make your own. If you don't have one on hand, a mix of garlic powder, onion powder, dried thyme, and dried oregano works well.
- Smoked paprika. Adds depth and a very subtle smokiness. Sweet paprika is a perfectly good substitute, or try a pinch of chipotle powder for a spicier kick.
- Fresh cilantro or parsley. Optional but recommended - fresh herbs brighten the whole patty. Cilantro gives a more vibrant, punchy finish; parsley is milder. Either works, or you can skip them entirely.
Helpful Tips
Cook the wild rice low and slow. Wild rice takes about 35 minutes at a gentle simmer, and rushing it makes it tough. The grains should just start to split and curl before you pull them off the heat. Undercooked wild rice won't blend into the patty mixture well.
Let the oat mixture absorb fully. When you cover the oats with boiling water, give them a full 5 minutes before mixing. If you rush this step, the oats won't fully hydrate and your patties will be crumbly rather than cohesive.
Pack the measuring cup firmly. Scooping loosely will give you fragile patties. Fill the ½-cup measuring cup with the burger mixture and press it down firmly before inverting onto the baking sheet. The more compact the patty going in, the better it holds together coming out.
Don't skip the flip. At the 15-minute mark, turn each patty gently using a thin spatula. This is what gives both sides that golden, slightly crisp exterior. If a patty sticks or starts to crumble, let it bake another 2 minutes before attempting the flip.
Make ahead and freeze. These patties freeze beautifully. Bake them fully, let them cool completely, then freeze in a single layer on a baking sheet before transferring to a bag. Reheat from frozen in a 375°F oven for about 15 minutes, flipping once.
Also worth trying: our gently curried tofu burgers.
Variations
- Add lentils. Stir in ½ cup of cooked brown or green lentils for even more protein and a slightly denser texture - similar to the filling Vegan Quinoa Mushroom Burger.
- Make them spicy. Add ½ teaspoon of cayenne pepper or a tablespoon of your favorite hot sauce to the mixture. A dash of chipotle powder in place of (or alongside) the smoked paprika works especially well.
- Tex-Mex version. Swap the cilantro for parsley, add ¼ cup of corn and ¼ cup of drained black beans. Serve with salsa, sliced avocado, and a squeeze of lime.
- Mushroom boost. Sauté ½ cup of finely diced cremini mushrooms with the onion and garlic. They add umami depth and extra moisture that melds beautifully with the wild rice.
- Herbed version. Use a full ¼ cup of mixed fresh herbs - parsley, chives, and a little tarragon - and add 1 teaspoon of Dijon mustard to the mix. Great with a simple aioli or vegan burger sauce.
- Pan-fried option. If you prefer a crispier exterior, pan-fry in a thin layer of oil over medium heat for about 5 minutes per side rather than baking. The outside crisps up more quickly, so watch the heat carefully.
Serving Ideas
These burgers are sturdy enough to hold up in a bun with all the classic toppings - lettuce, tomato, onion, pickles, and a generous smear of vegan mayo or copycat vegan Big Mac sauce. A toasted brioche-style bun is especially good here since the slight sweetness contrasts nicely with the earthy grains. You can also tuck them into a pita pocket with shredded cabbage and tahini sauce for a more Mediterranean feel.
Serve them alongside a simple green salad, roasted sweet potato wedges, or fresh tomato relish for a complete meal. They also work beautifully on top of a grain bowl - break one apart over quinoa or farro, add a handful of greens and a drizzle of lemon tahini dressing, and you have a satisfying lunch that holds you for hours.
Storing & Freezing
Let leftover patties cool completely, then store them in an airtight container in the refrigerator for up to 4 days. To reheat, warm them in a 350°F oven for 8-10 minutes or in a dry skillet over medium-low heat for a couple minutes per side. Avoid microwaving if you can - it softens the exterior and makes the patties a bit mushy.
These burgers freeze very well. Once fully baked and cooled, freeze in a single layer on a lined baking sheet until solid, then transfer to a zip-close freezer bag. They'll keep for up to 3 months. Reheat straight from frozen in a 375°F oven for 15 minutes, flipping halfway through. The texture holds up remarkably well after freezing.
More Vegan Burger Recipes
If you loved this recipe, check out our full collection of the best vegan burger recipes, including our chipotle black bean burgers for a smoky kick - or here are a few more individual favorites:
- Vegan Chipotle Black Bean Burgers
- Vegan Quinoa Mushroom Burger
- Vegan Chickpea Patties
- Easy Vegan Portobella Burgers
- Best Vegan Burger Recipes
Recipe

Vegan Quinoa and Wild Rice Burgers
These vegan quinoa and wild rice burgers are hearty and satisfying, with two wholesome grains making up the base. Great on buns, in pitas, or on their own with your favorite sauce.
Print
Pin
Save
Servings: burgers
Ingredients
- ½ cup wild rice uncooked
- 1 tablespoon olive oil
- 1 medium-large onion finely chopped
- 2 cloves garlic minced
- ½ cup quick-cooking oats or quinoa flakes for gluten-free
- 2 cups cooked quinoa firmly packed
- 1 tablespoon salt-free all-purpose seasoning blend
- 1 teaspoon ground cumin
- 1 teaspoon smoked paprika or sweet paprika
- ¼ cup fresh cilantro or parsley minced, optional
- salt and pepper to taste
Instructions
- Preheat the oven to 400°F. Line a baking sheet with parchment paper.
- Combine the wild rice with 1 ½ cups water in a small saucepan. Bring to a rapid simmer, then lower the heat, cover, and cook until the water is absorbed, about 35 minutes.
- Heat the oil in a medium saucepan. Add the onion and sauté over medium heat until translucent, about 5 minutes. Add the garlic and continue until golden.
- Place the oats in a large bowl and cover with 1 cup boiling water. Let stand for 5 minutes. Add the sautéed onion and garlic, cooked wild rice, cooked quinoa, seasoning blend, cumin, paprika, and cilantro (if using). Season with salt and pepper. Mix well.
- Lightly oil a round ½-cup measuring cup. Scoop a level portion of the mixture and invert onto the parchment, tapping firmly to release. Flatten to about ½-inch thickness with the bottom of the cup. Repeat with remaining mixture.
- Bake for 15 minutes, then flip each burger carefully and bake for another 15 minutes, until golden and firm on both sides. Serve on their own or with buns and your favorite condiments.
Nutrition (Estimate per Serving)
Calories: 107kcalCarbohydrates: 14gProtein: 3gFat: 3gPolyunsaturated Fat: 1gMonounsaturated Fat: 1gSodium: 6mgPotassium: 153mgFiber: 3gSugar: 1gVitamin A: 42IUVitamin C: 1mgCalcium: 45mgIron: 2mg
Vegan-ize any recipe!Grab our free vegan cheat sheet, packed with my favorite easy substitutions to make any recipe vegan.
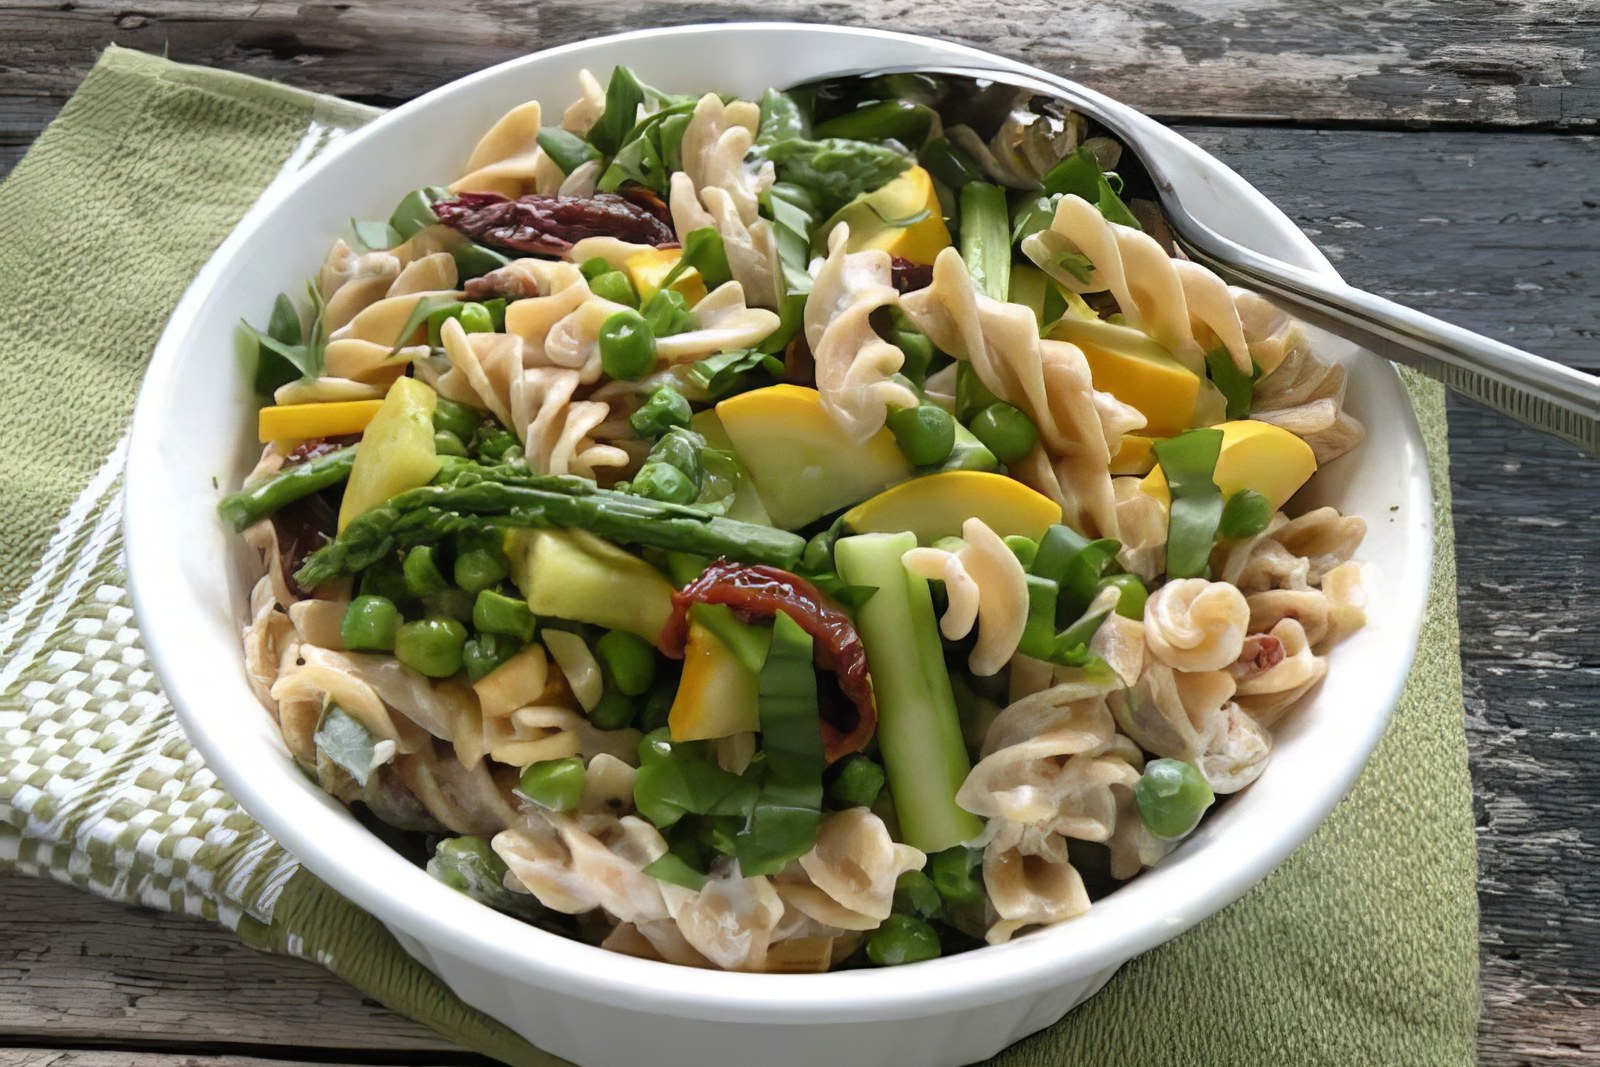
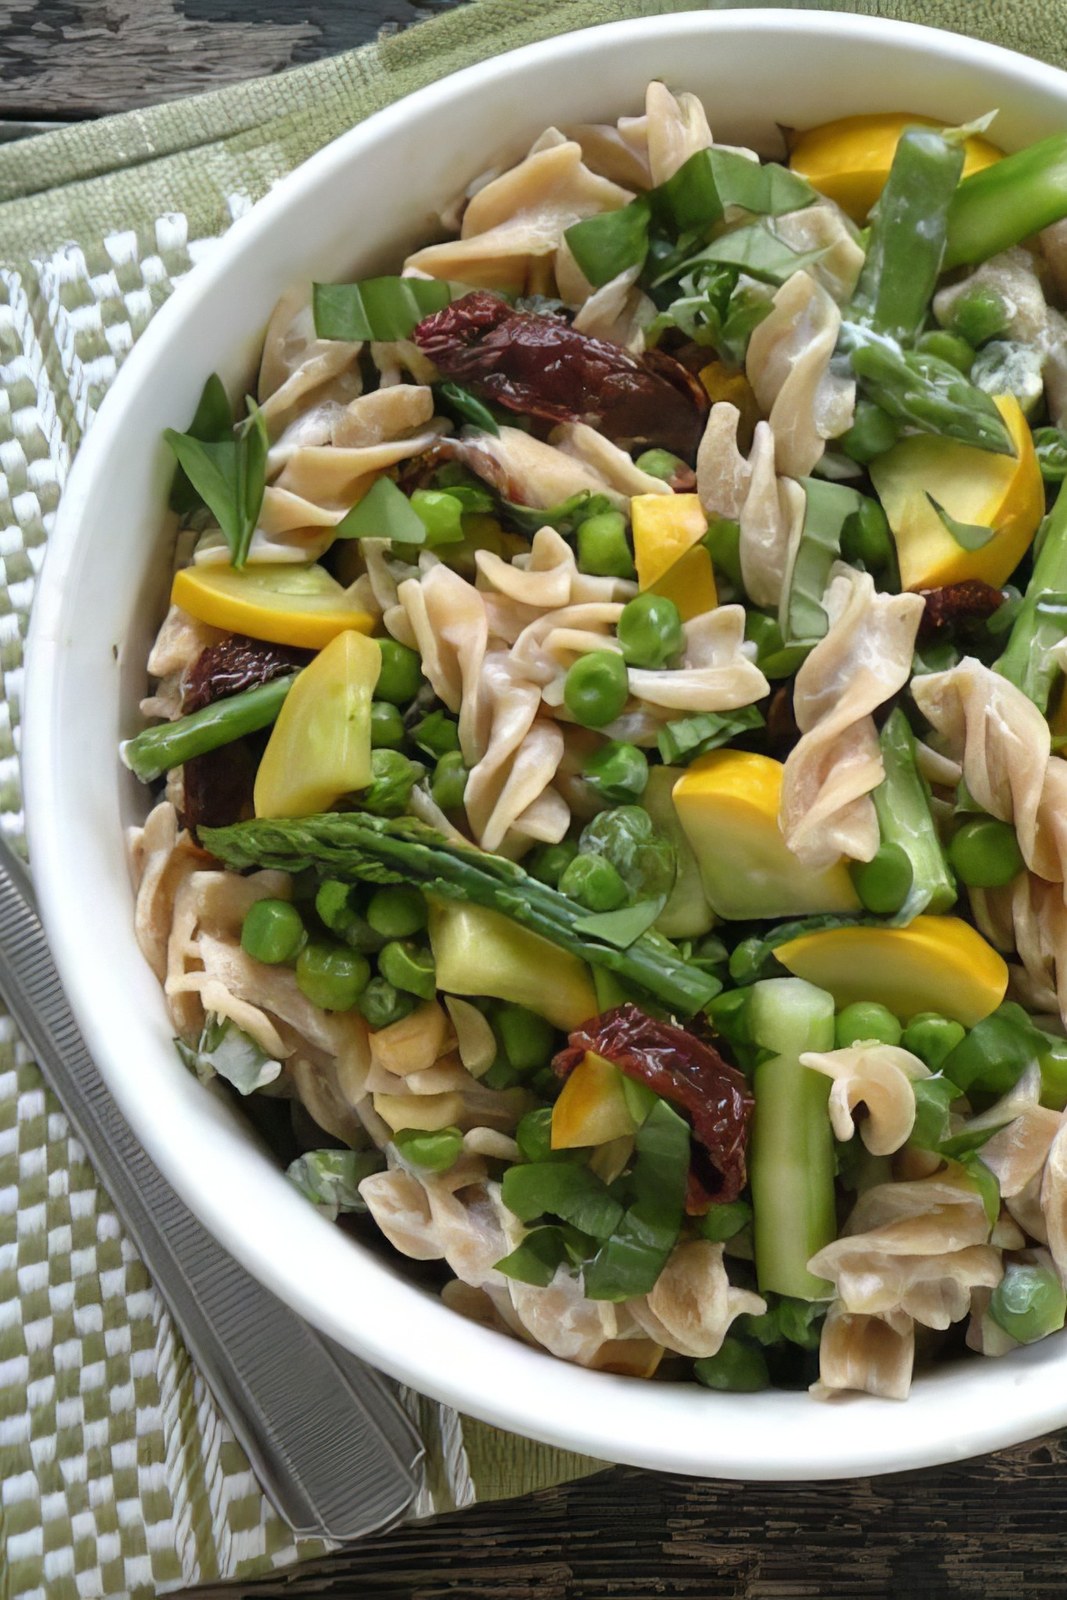
Vegan Pasta Alfredo with Peas & Asparagus
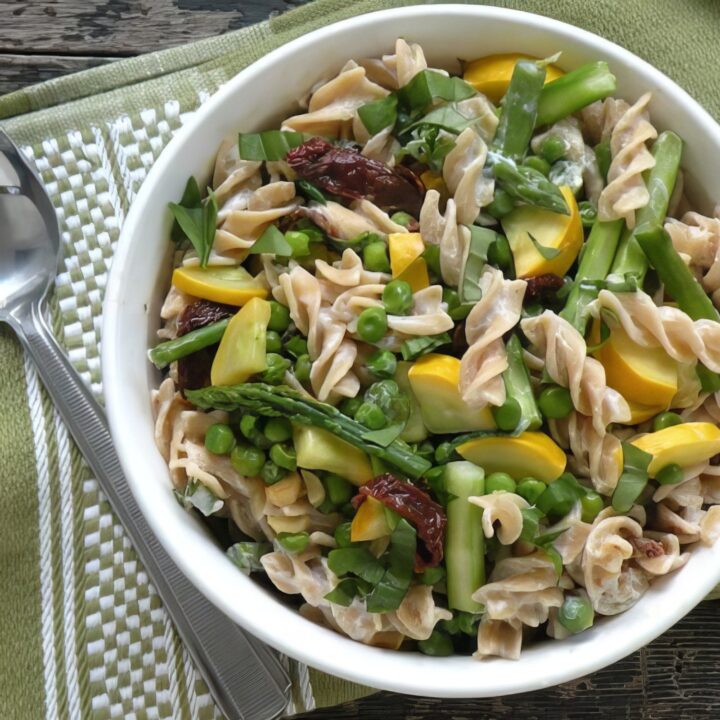
This vegan pasta alfredo with peas and asparagus is spring comfort food at its best - a silky, creamy sauce made entirely from blended silken tofu, tossed with tender spring vegetables and your favorite pasta shape. No dairy, no compromise.
Key Ingredients & Substitutions
- Firm silken tofu. The secret to the dairy-free alfredo sauce - it blends completely smooth and creates a rich, creamy texture without any cream, butter, or cashews. Use firm silken tofu (like Mori-Nu shelf-stable) for the best result. Soft silken tofu works too and gives a slightly thinner sauce. Do not substitute regular firm tofu, which is too grainy to blend smoothly.
- Asparagus. Slender spears are ideal here - they cook quickly and are tender all the way through without peeling. If you can only find thick asparagus, peel the lower third of each stalk. Snap off the woody ends and cut into 1½-inch pieces so they're easy to eat with pasta.
- Yellow summer squash. Adds color and a mild sweetness. Zucchini is a direct swap. You can also skip it and increase the asparagus.
- Frozen peas. Sweet and bright - they thaw almost instantly in the pan. Fresh shelled peas in season are even better if you have them.
- Sun-dried tomatoes. Concentrated, chewy, and deeply savory - they balance the creaminess of the tofu sauce beautifully. Oil-packed or rehydrated dry-packed both work well. Slice them before adding.
- Pasta shape. Use a chunky shape - rotini, fusilli, farfalle, or gemelli - so the sauce and vegetables have something to cling to. Whole-grain pasta adds fiber and a nuttier flavor that plays well with the vegetables.
- Fresh lemon juice. The acid in the tofu sauce is what makes it taste bright and fresh rather than flat. Don't skip it.
Variations
- Add white beans. Stir in a drained 15-ounce can of cannellini or great northern beans for extra protein. For a no-cook pasta option, also try our vegan Greek pasta salad. If you love asparagus, our cream of asparagus soup makes a beautiful spring starter.
- eartiness.
- Make it gluten-free. Use your favorite GF pasta - brown rice pasta, chickpea pasta, or lentil pasta all work well with this sauce.
- Add nutritional yeast. Stir 2 to 3 tablespoons into the tofu sauce before blending for a cheesy, savory depth reminiscent of parmesan.
- Swap the greens. Stir in a few handfuls of baby spinach or arugula with the pasta at the end - they'll wilt just from the heat of the dish.
- Mushroom version. Add 8 ounces of sliced cremini or shiitake mushrooms to the pan with the garlic for an earthier, more substantial dish.
- Lemon herb version. Add the zest of one lemon to the tofu sauce and finish with a generous handful of fresh basil for a brighter, more Italian feel.
Tips for the Best Vegan Pasta Alfredo
- Blend the tofu sauce until completely smooth. Any graininess in the sauce will be noticeable in the final dish. Blend for a full minute, scraping down the sides, until the texture is silky.
- Reserve pasta water. A splash of the starchy cooking water is your best friend for loosening the sauce if it thickens too much when it hits the hot pasta.
- Don't overcook the vegetables. Tender-crisp is what you're after - asparagus and peas should still have a little bite. Five minutes in the covered pan is usually enough.
- Keep the heat low when adding the sauce. Silken tofu can break or become grainy if overheated. Warm it gently over low heat just until it's heated through.
- Serve immediately. Like all creamy pasta dishes, this is best fresh off the stove. The sauce will thicken as it sits - if reheating leftovers, add a splash of water or plant-based milk and warm over low heat.
How to Serve
Serve straight from the pan into wide pasta bowls, topped with extra fresh basil or parsley and a crack of black pepper. This is a complete meal on its own, but it pairs well with a simple green salad, garlic bread, or a wedge of crusty sourdough. For a more elaborate spread, serve alongside a bowl of marinated olives or a light tomato bruschetta. This also pairs beautifully alongside our vegan zucchini lasagna for an Italian dinner spread. Leftovers keep in the fridge for up to 3 days - reheat gently with a splash of water to revive the sauce.
Recipe
Vegan Pasta Alfredo with Peas & Asparagus
A creamy vegan pasta alfredo made with silken tofu instead of dairy — light, luscious, and packed with spring vegetables. Asparagus, sweet peas, yellow squash, and sun-dried tomatoes make every bite colorful and satisfying.
Print
Pin
Save
Servings: servings
Ingredients
Pasta & Vegetables
- 12 ounces rotini, fusilli, farfalle, or other chunky pasta whole-grain preferred
- 1 tablespoon extra-virgin olive oil
- 3 cloves garlic minced
- 10 ounces slender asparagus tough ends snapped off, cut into 1½-inch pieces
- 1 cup frozen green peas or fresh shelled peas
- 1 medium yellow summer squash quartered lengthwise and thinly sliced
- ⅓ cup sun-dried tomatoes sliced (oil-packed or rehydrated)
- ¼ cup fresh parsley or basil minced or thinly sliced
Silken Tofu Alfredo Sauce
- 12.3 ounce package firm silken tofu drained
- 2 tablespoons fresh lemon juice about ½ lemon
- salt and freshly ground black pepper to taste
Instructions
- Cook the pasta in a large pot of well-salted boiling water according to package directions until al dente. Drain and set aside, reserving ¼ cup of the pasta cooking water.
- While the pasta cooks, combine the silken tofu and lemon juice in a blender or food processor. Blend until completely smooth and creamy, about 1 minute. Season with salt and pepper. Set aside.
- Heat the olive oil in a large, wide skillet over medium heat. Add the garlic and sauté for 1 to 2 minutes until fragrant and lightly golden — do not let it brown. Add the asparagus, peas, squash, sun-dried tomatoes, and ¼ cup water. Cover and cook for 4 to 5 minutes, stirring once halfway through, until the vegetables are just tender-crisp.
- Pour the silken tofu sauce over the vegetables and stir to coat. Cook over low heat for 1 to 2 minutes until heated through. If the sauce seems thick, stir in a splash of the reserved pasta water to loosen it.
- Add the drained pasta to the skillet and toss well to combine everything. Stir in the fresh parsley or basil. Taste and adjust salt and pepper. Serve immediately.
Notes
Silken tofu: Firm silken tofu (such as Mori-Nu) blends into a perfectly smooth, dairy-free cream sauce. Do not substitute regular firm tofu — it won't blend smoothly. Soft silken tofu works too and gives a slightly thinner sauce.
Asparagus prep: Use slender asparagus spears — they're tender throughout and don't need peeling. If using thicker spears, peel the lower third of each stalk with a vegetable peeler.
Make it gluten-free: Use your favorite gluten-free pasta. Brown rice pasta or chickpea pasta both hold up well with this sauce.
Add protein: Stir in a drained can of white beans or a handful of shelled edamame with the vegetables for extra plant-based protein.
Nutrition (Estimate per Serving)
Calories: 444kcalCarbohydrates: 23gProtein: 9gFat: 6gSaturated Fat: 2gPolyunsaturated Fat: 1gMonounsaturated Fat: 3gCholesterol: 7mgSodium: 63mgPotassium: 544mgFiber: 3gSugar: 1gVitamin A: 237IUVitamin C: 23mgCalcium: 105mgIron: 3mg
Vegan-ize any recipe!Grab our free vegan cheat sheet, packed with my favorite easy substitutions to make any recipe vegan.
Also try: our vegan creamy mushroom pasta.
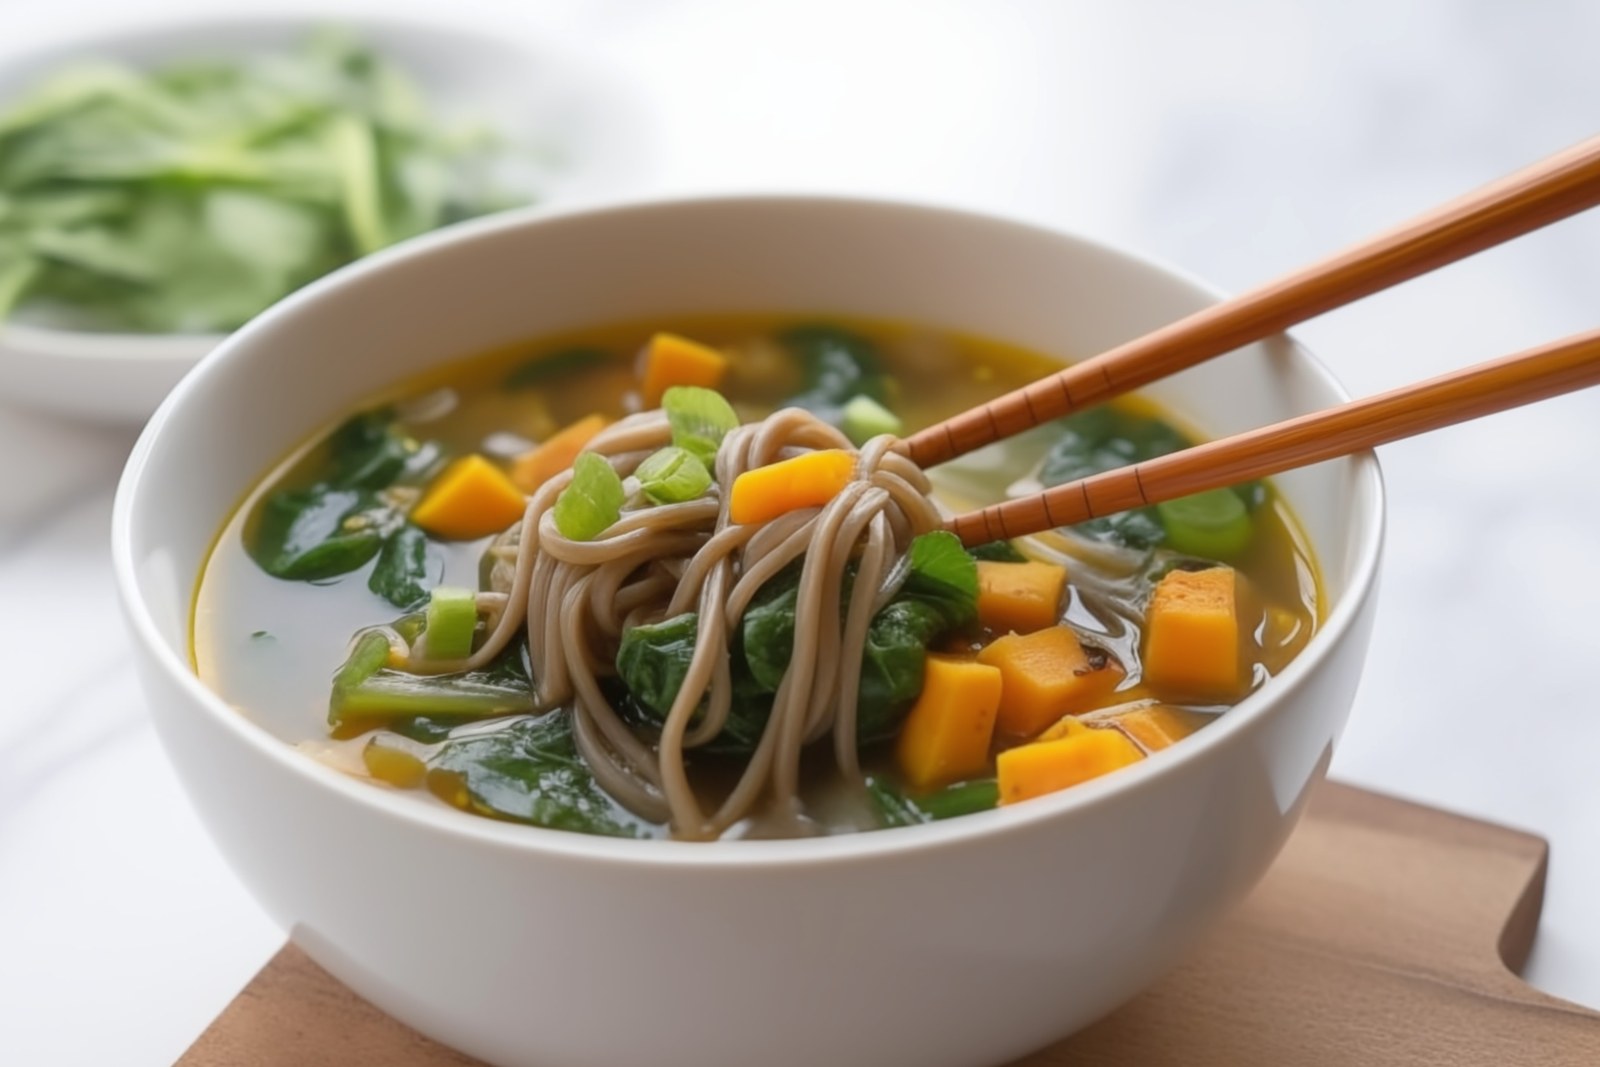
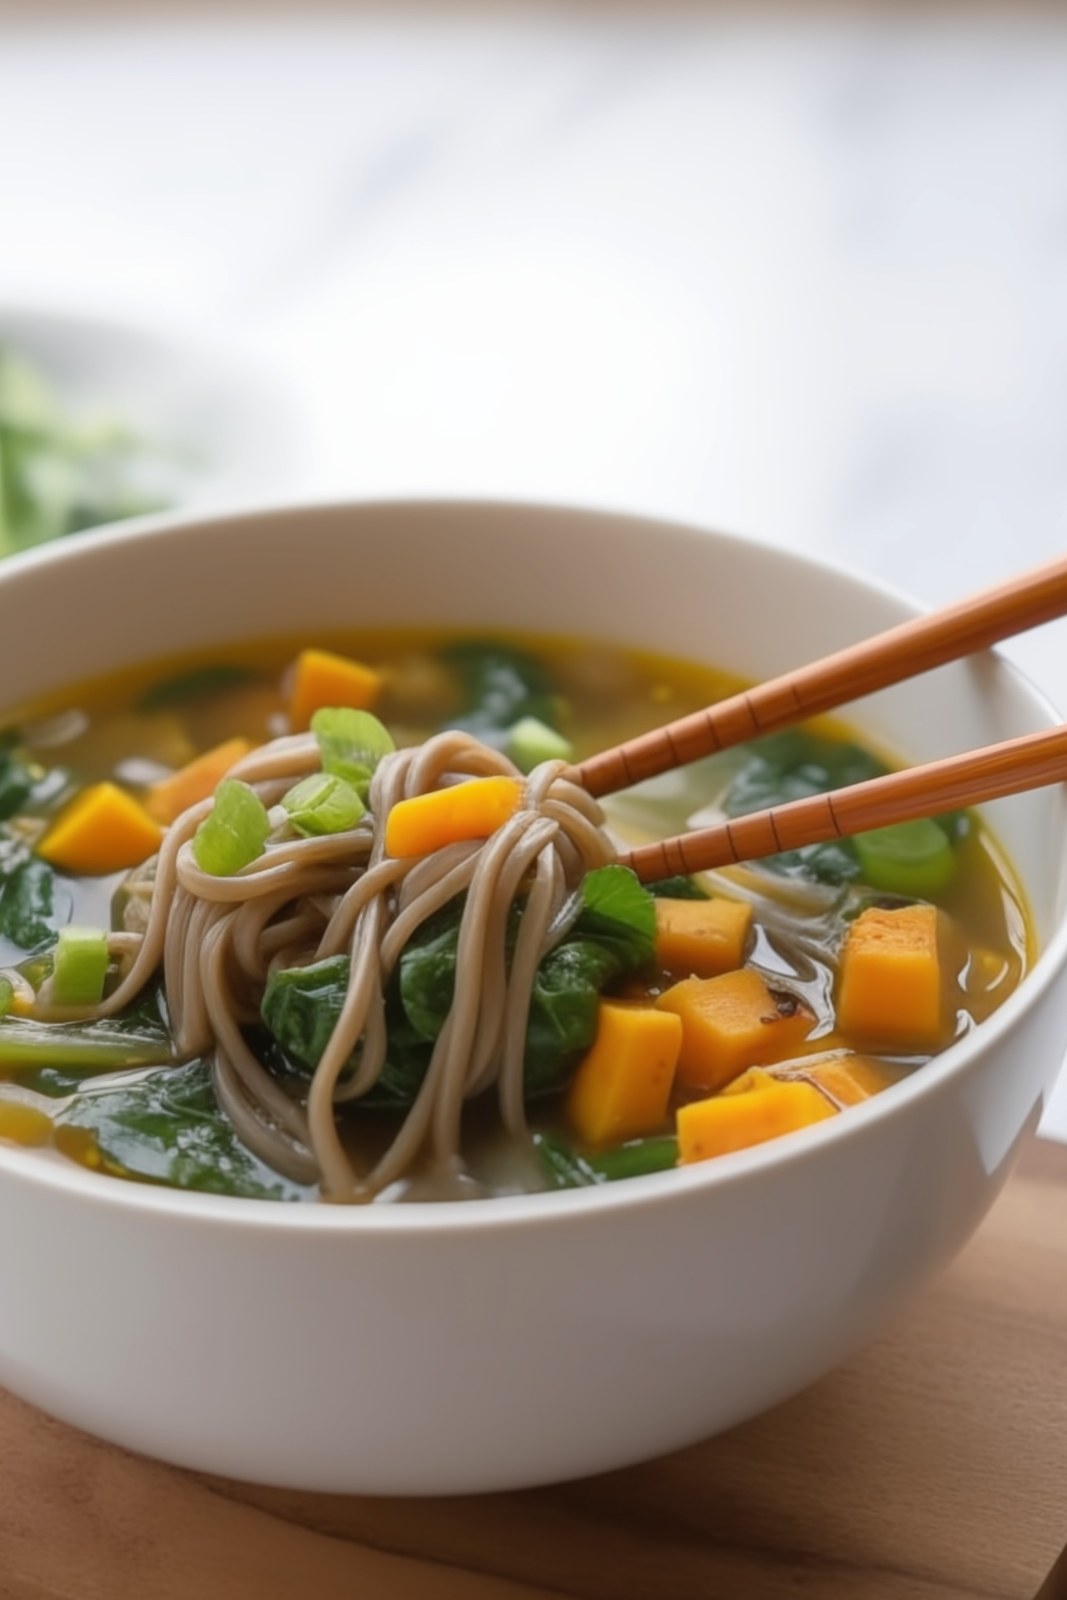
Miso-Butternut Squash Soup with Soba or Udon Noodles
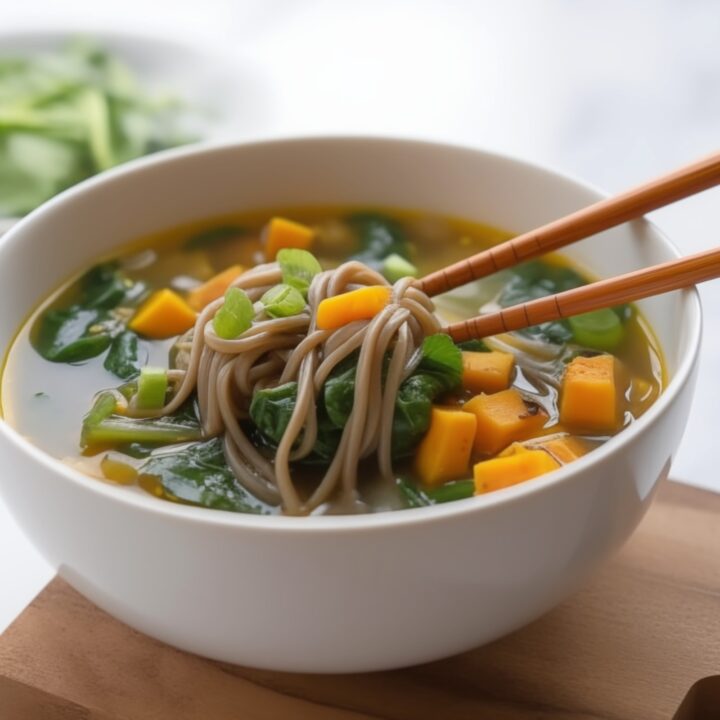
This miso butternut squash soup has been a reader favorite on VegKitchen since 2018 - and it's just as cozy and satisfying as ever. We've given it a fresh update with brand-new photos, but the recipe is the same warming bowl we've always loved: a rich miso-ginger broth, tender squash, soba noodles, and a heap of wilted greens.
Key Ingredients & Substitutions
- Butternut squash. Roasted or microwaved until just tender - it adds natural sweetness and body to the broth. Kabocha squash or sweet potato work as swaps and cook in roughly the same time.
- Vegan miso paste. The soul of this soup. White (shiro) miso is mild and slightly sweet; yellow miso is a bit more savory; red miso is the boldest and most intense. Any variety works - just make sure it's labeled vegan, as some miso pastes contain dashi (fish stock). Stir it in at the very end, off the heat, to preserve its probiotic benefits.
- Soba noodles. Buckwheat soba gives the soup its earthy, nutty character. Pure buckwheat soba is also gluten-free - just check the label, as many commercial soba blends include wheat flour. Udon noodles work equally well for a thicker, chewier texture.
- Fresh ginger. Grated fresh ginger is essential here - it adds warmth and brightness that ground ginger can't replicate. Use as much as you like.
- Vegan vegetable bouillon cubes. Two cubes give the broth depth and savory umami to complement the miso. Choose a low-sodium, MSG-free brand. Vegetable broth works as a direct substitute - just use it in place of the water.
- Baby spinach. Stirred in at the end, it wilts in about a minute and adds color and nutrition. Watercress, baby arugula, baby bok choy, or any tender Asian green are excellent alternatives.
- Frozen peas. A simple addition that adds sweetness, color, and a little extra protein. Thaw them before adding so they don't drag down the broth temperature.
Variations
- Make it brothier. This soup is fairly thick as written. For a more broth-forward bowl, increase the water to 6 cups and add an extra bouillon cube.
- Add tofu. Cube a block of firm or extra-firm tofu and add it with the squash for extra protein. Press it first so it holds its shape in the soup.
- Spicy miso version. Stir a teaspoon of sriracha or a pinch of red pepper flakes into the broth along with the miso for a warming kick.
- Add edamame. Swap the peas for shelled edamame (thawed from frozen) for higher protein and a slightly nuttier flavor.
- Rice noodle version (gluten-free). Use thin rice noodles in place of soba. Soak them separately according to package directions, then add to bowls when serving to keep them from absorbing all the broth.
- Richer broth. Stir in a tablespoon of tahini or a drizzle of toasted sesame oil just before serving for a creamier, nuttier finish.
Tips for the Best Miso Butternut Squash Soup
- Never boil miso. Always dissolve it in warm (not boiling) water and stir it in at the very end with the heat off or very low. Boiling destroys the beneficial probiotics and dulls the flavor.
- Cook the squash just until tender. You want it to hold its shape in the soup, not turn to mush. Whether you're microwaving or roasting, test it with a knife - it should pierce easily but still feel firm.
- Cook noodles separately if making ahead. Soba absorbs broth quickly as it sits. If you think you'll have leftovers, cook the noodles separately and add them to individual bowls at serving time.
- Taste and adjust the miso at the end. Start with 2 tablespoons, then add more to taste. The amount you need depends on the brand and type of miso - some are much saltier than others.
- Prep the squash ahead. The squash can be cooked, peeled, and cubed up to 2 days in advance and kept in the fridge. It makes this a genuinely quick weeknight soup.
How to Serve
Serve immediately in deep bowls with chopsticks for the noodles and a spoon for the broth. This soup is a complete meal on its own but pairs beautifully with a simple cucumber salad, edamame, or steamed dumplings. For a heartier spread, serve alongside brown rice or a wedge of crusty sourdough bread. Leftovers keep for up to 3 days in the fridge - store the noodles and broth separately if possible, and reheat gently over low heat without boiling. For another light and healthy vegan soup, try our yellow squash soup, our cream of asparagus soup, or our fresh tomato and corn soup. For a hearty butternut squash dinner, our creamy butternut squash pasta casserole is wonderfully satisfying.
Recipe

Miso Butternut Squash Soup with Soba Noodles
A warming, deeply savory vegan noodle soup built on a miso-ginger broth with tender butternut squash, soba noodles, spinach, and peas. Quick to pull together once the squash is cooked — and beautiful in the bowl.
Print
Pin
Save
Servings: servings
Ingredients
- 1 small butternut squash about 1 pound
- 4 cups water plus more as needed
- 4 ounces soba (buckwheat) or udon noodles broken in half
- 2 teaspoons fresh ginger grated, or more to taste
- 2 vegan vegetable bouillon cubes low-sodium, no MSG
- 4 ounces fresh baby spinach about 4 to 6 cups loosely packed
- 1 cup frozen green peas thawed
- 3 scallions thinly sliced
- 3 tablespoons vegan miso paste white, yellow, or red — see notes
- freshly ground black pepper to taste
Instructions
- Pierce the butternut squash a few times with a knife. Microwave on high for 4 to 6 minutes, adding 1 minute at a time, until it can be pierced easily with a knife but still holds its shape. Alternatively, wrap the whole squash in foil and bake at 375°F for 30 to 40 minutes until just tender. Let cool until easy to handle, then halve, scoop out the seeds, peel, and cut the flesh into bite-sized chunks. Set aside. (This step can be done ahead of time.)
- Bring the 4 cups of water to a rapid simmer in a large soup pot. Add the soba or udon noodles and cook according to package directions until al dente, about 4 to 5 minutes.
- Add the grated ginger, bouillon cubes, thawed peas, and squash chunks to the pot. Stir to dissolve the bouillon and cook for 3 to 4 minutes over medium heat. Add up to 1 cup additional water if the soup seems too thick.
- Stir in the spinach and cook just until wilted, about 1 to 2 minutes. Add the scallions and stir to combine.
- In a small bowl, whisk the miso paste with ⅓ cup warm (not boiling) water until smooth. Stir into the soup. Taste and add more dissolved miso if desired — do not boil the soup after adding miso, as heat destroys the beneficial probiotics. Season with black pepper and serve immediately.
Notes
Choosing miso: Use white (shiro) or yellow miso for a milder, sweeter flavor; red miso for a more intense, earthy broth. Always check the label — some miso pastes contain dashi (fish stock) and are not vegan. Look for miso labeled vegan or check that the ingredients list only soybeans, salt, and grain (rice or barley).
Soba noodles: Pure buckwheat soba is gluten-free, but many commercial soba blends contain wheat flour — check the label if gluten is a concern.
Greens variation: Watercress, baby arugula, chopped baby bok choy, or other Asian greens all work beautifully in place of or alongside the spinach.
Make ahead: Cook the squash up to 2 days in advance and refrigerate. The assembled soup is best eaten fresh — the noodles will absorb the broth on standing.
Vegan-ize any recipe!Grab our free vegan cheat sheet, packed with my favorite easy substitutions to make any recipe vegan.
Also try: our creamy asparagus and pea pasta.
Cauliflower Fried Rice with Mushrooms & Chickpeas
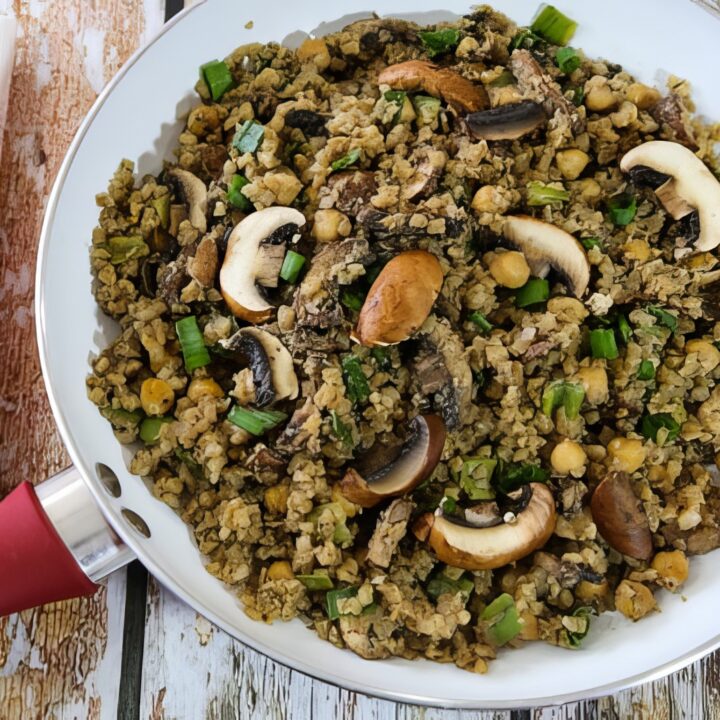
This cauliflower fried rice with mushrooms and chickpeas is a hearty, one-pan vegan dinner that comes together in just 22 minutes - no chopping, no fuss.
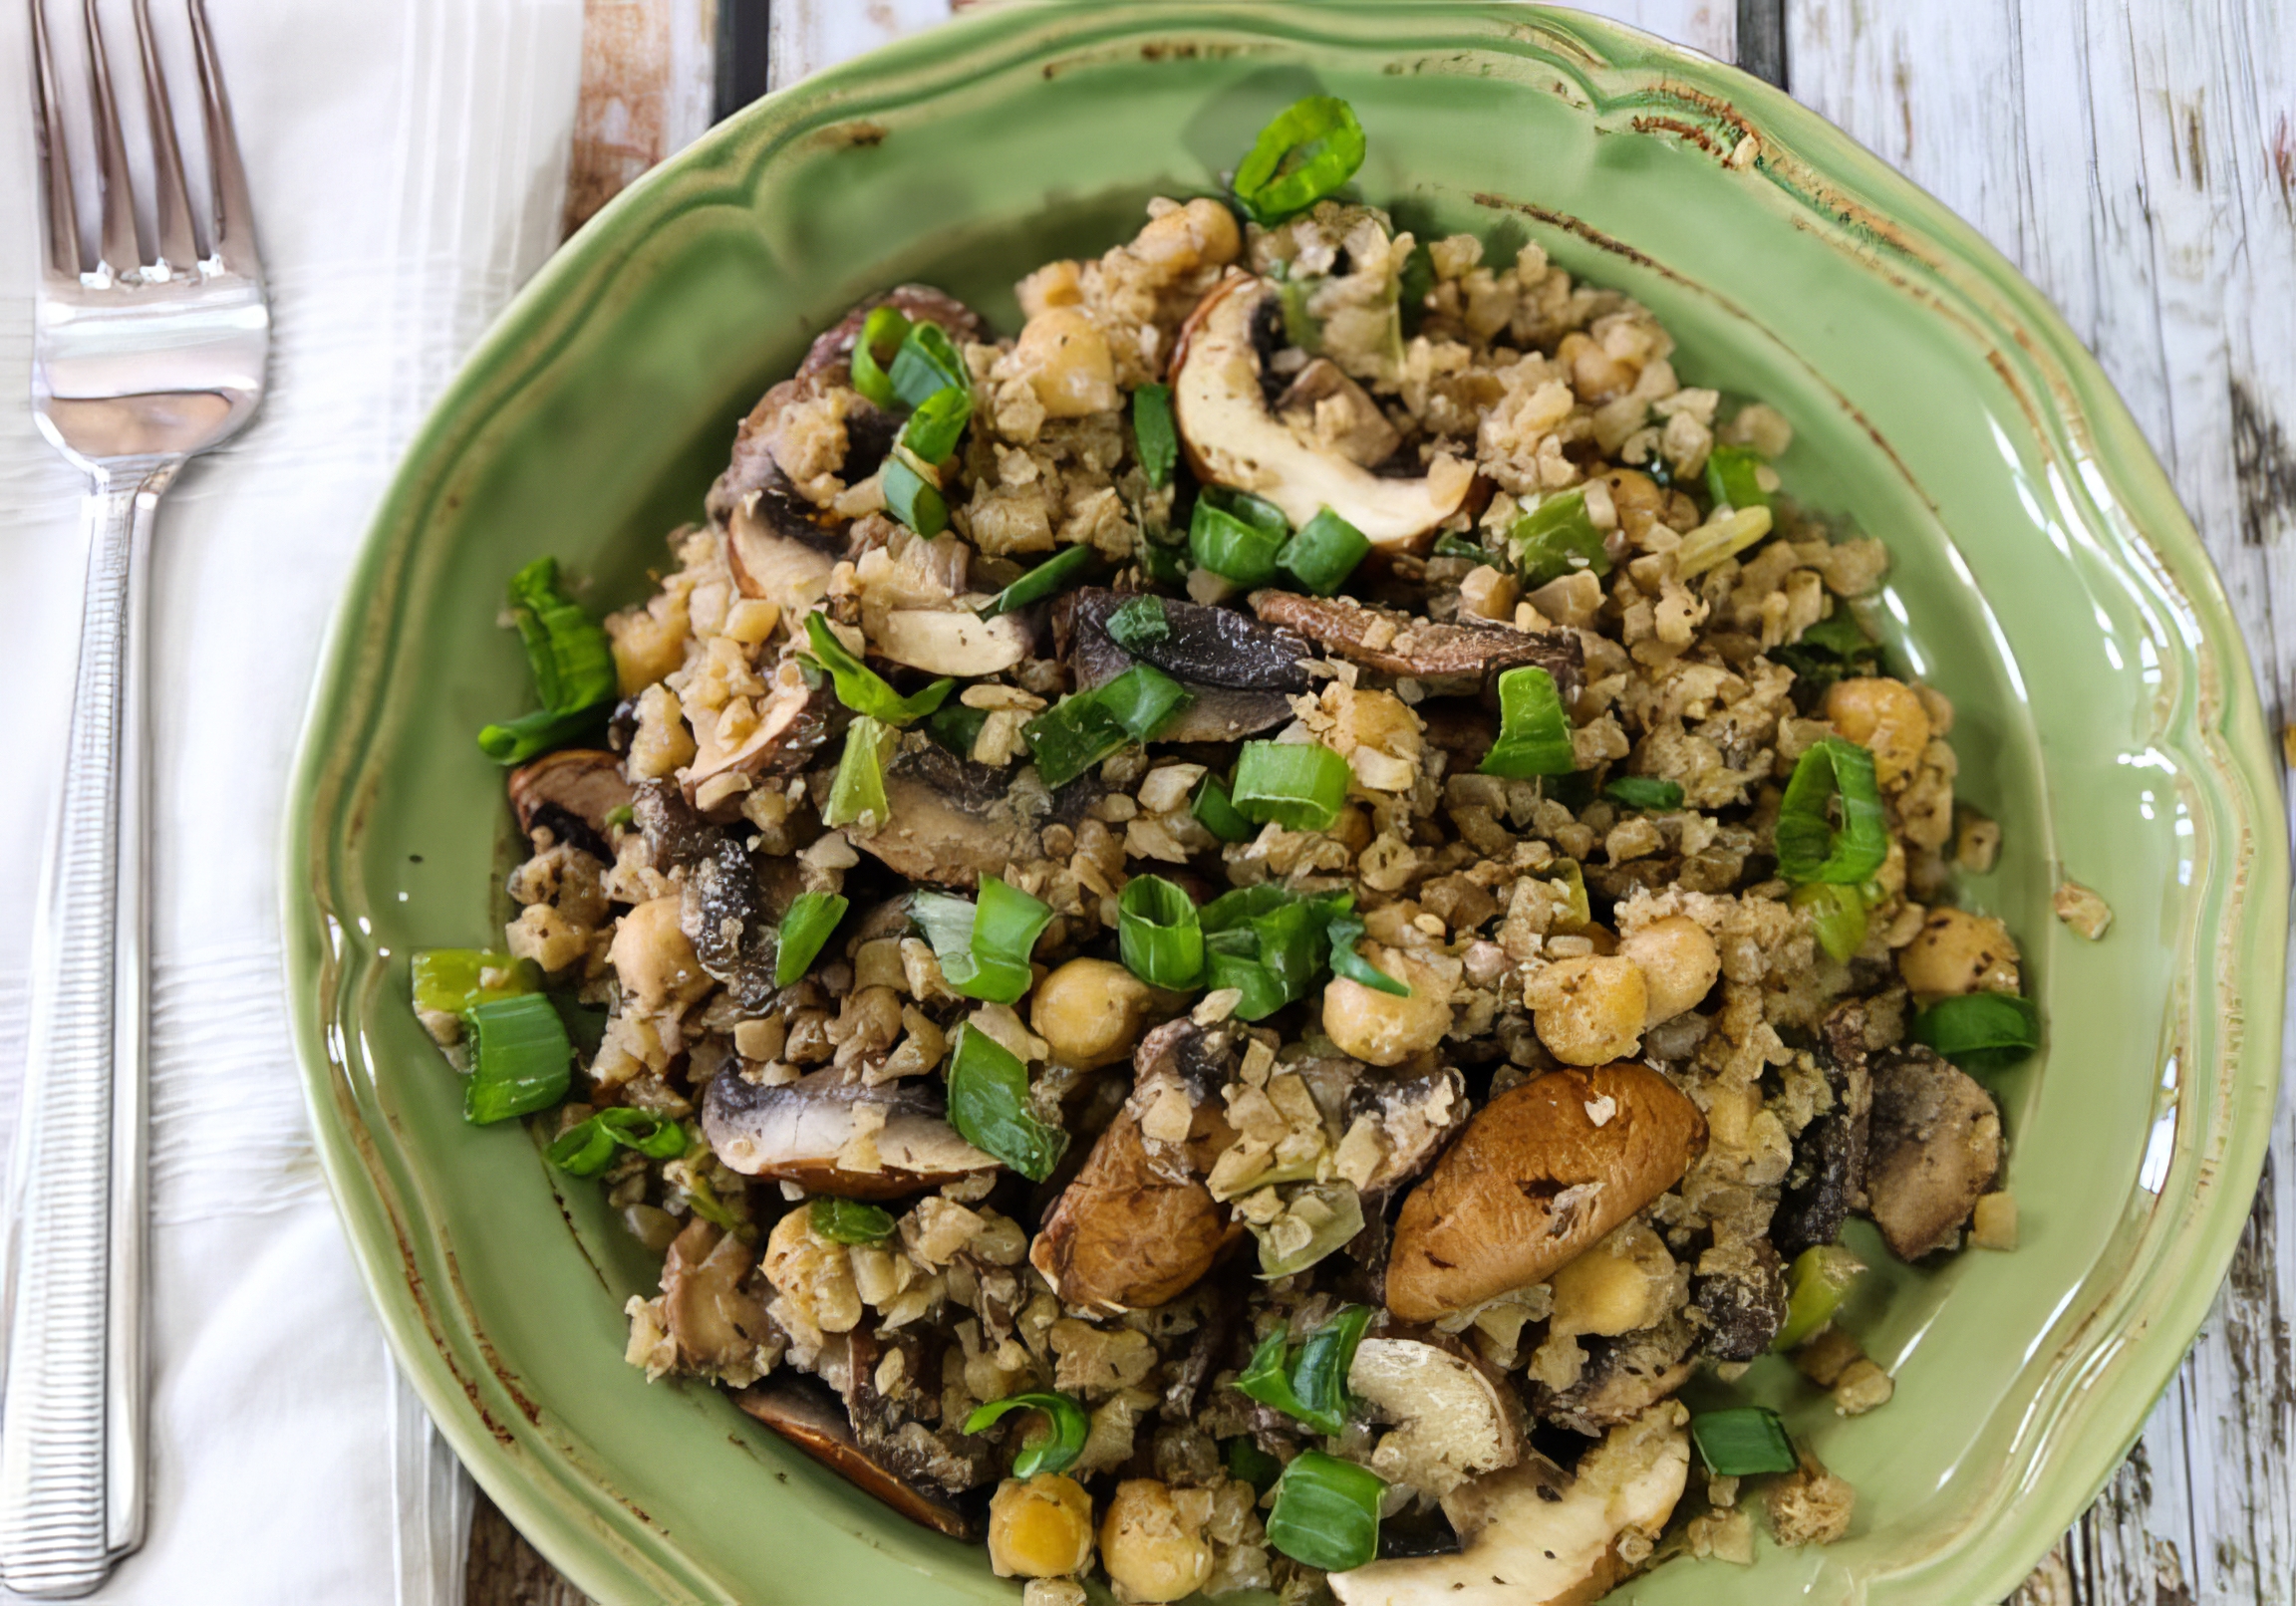
Key Ingredients & Substitutions
- Frozen riced cauliflower. The shortcut that makes this recipe genuinely weeknight-friendly - no head of cauliflower to break down. Green Giant, 365 Organic, and Trader Joe's all work great. Taylor Farms' cauliflower pearls are slightly chunkier if you want more texture. To use fresh, rice it in a food processor and skip the water.
- Mushrooms. Cremini or button mushrooms are the easy default. Shiitake adds a deeper, more savory umami punch that plays especially well with the fried-rice vibe. Pre-sliced is fine - just make sure they look fresh and not dried out.
- Chickpeas. One 15-ounce can (drained and rinsed) adds protein, fiber, and a satisfying heartiness. White beans or black beans swap in easily.
- Scallions. Mild onion flavor and a pop of color. A small shallot or a few tablespoons of diced yellow onion works if you don't have scallions.
- Salt-free seasoning blend. Frontier Co-op or Dash are the go-to brands here. Any all-purpose herb blend works, or use a mix of garlic powder, onion powder, and dried thyme.
- Nutritional yeast. Optional but recommended - 2 tablespoons stirred in at the end adds a subtle cheesy, nutty depth. Skip it if you don't have it.
Variations
- Asian-style fried rice. Stir in 1-2 tablespoons of low-sodium soy sauce (or tamari to keep it gluten-free) and a drizzle of toasted sesame oil at the end.
- Spicy version. Add a pinch of red pepper flakes or a drizzle of sriracha when you add the mushrooms.
- Add more vegetables. Frozen peas, shelled edamame, diced bell pepper, or baby spinach all work well - stir them in with the chickpeas.
- Make it higher protein. Add pan-fried cubed extra-firm tofu or a handful of shelled hemp seeds stirred in at the end.
- Lemon herb version. Swap the seasoning blend for Italian herbs and finish with a squeeze of lemon juice and fresh parsley.
- Grain-free rice bowl. Serve over a bed of mixed greens instead of eating it straight from the pan for a lighter, salad-bowl presentation.
Tips for the Best Cauliflower Fried Rice
- Dry out the cauliflower before adding anything else. Cook the frozen cauliflower with the water over medium heat until the water has fully evaporated - this is what separates fluffy from soggy. Don't rush it.
- Use a large, wide pan. More surface area means more evaporation and more browning. A wok or a 12-inch skillet is ideal. A smaller pan traps steam and makes the whole thing wet.
- Crank the heat at the end. After adding the vegetables and chickpeas, turning the heat up to medium-high for the last few minutes gives the dish its "fried" character - slightly crispy edges and concentrated flavor.
- Don't stir too much at the end. Let the cauliflower sit undisturbed for 30-60 seconds between stirs so it can pick up some color from the pan.
- Season at the end. The seasoning blend goes in with the vegetables, but final salt and pepper adjustments should happen last - after the nutritional yeast - so you can taste accurately.
How to Serve
This works great as a complete main dish on its own - the chickpeas bring enough protein and substance to be satisfying. For a more complete spread, serve it alongside a simple miso soup, a cucumber and rice vinegar salad, our teriyaki eggplant as a side, or drizzle with our easy duck sauce for extra flavor, or our Asian Tofu Salad with Thai Peanut Dressing. Leftovers keep well in the fridge for up to 4 days and reheat best in a skillet over medium heat.
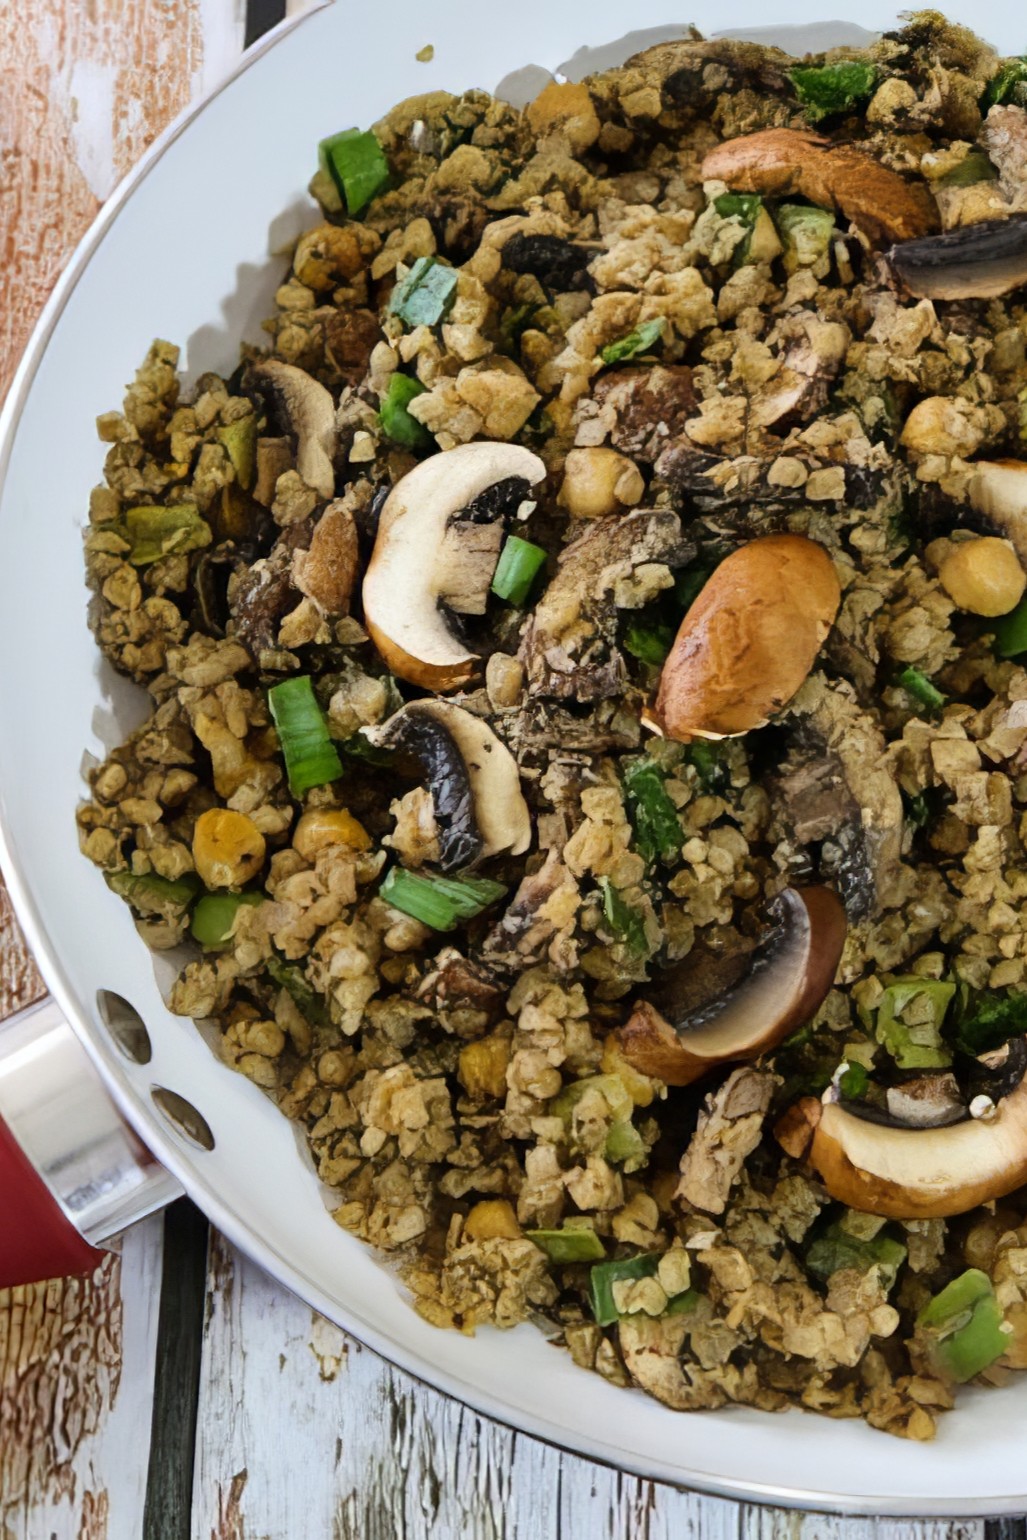
Recipe
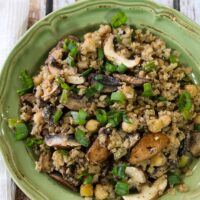
Cauliflower Fried Rice with Mushrooms & Chickpeas
A quick, one-pan vegan dinner that uses frozen riced cauliflower as the base — no chopping required. Hearty mushrooms and chickpeas make it filling enough to stand alone as a main dish.
Print
Pin
Save
Servings: to 6
Ingredients
- 16 ounce bag frozen riced cauliflower
- ½ cup water
- 8 ounces mushrooms cleaned, stemmed sliced (see note)
- 3 scallions thinly sliced
- 15 ounce can chickpeas drained and rinsed
- 2 teaspoons salt-free seasoning blend like Frontier or Mrs. Dash
- 2 tablespoons nutritional yeast optional
- Salt and freshly ground pepper to taste
Instructions
- Combine the riced cauliflower and water in a large skillet or wok over medium heat.
- Cook, stirring occasionally, until the cauliflower is fully thawed and the water has evaporated, about 5 minutes.
- Add the mushrooms, scallions, chickpeas, and seasoning blend. Turn the heat up to medium-high and cook for 5 to 7 minutes, stirring often, until the mushrooms are tender and the cauliflower starts to brown at the edges.
- Stir in the nutritional yeast if using, then season with salt and pepper to taste. Serve immediately.
Nutrition (Estimate per Serving)
Calories: 158kcalCarbohydrates: 26gProtein: 11gFat: 3gSaturated Fat: 1gPolyunsaturated Fat: 1gMonounsaturated Fat: 1gSodium: 336mgPotassium: 803mgFiber: 10gSugar: 4gVitamin A: 148IUVitamin C: 58mgCalcium: 111mgIron: 3mg
Vegan-ize any recipe!Grab our free vegan cheat sheet, packed with my favorite easy substitutions to make any recipe vegan.
Roasted Butternut Squash and Pasta Casserole
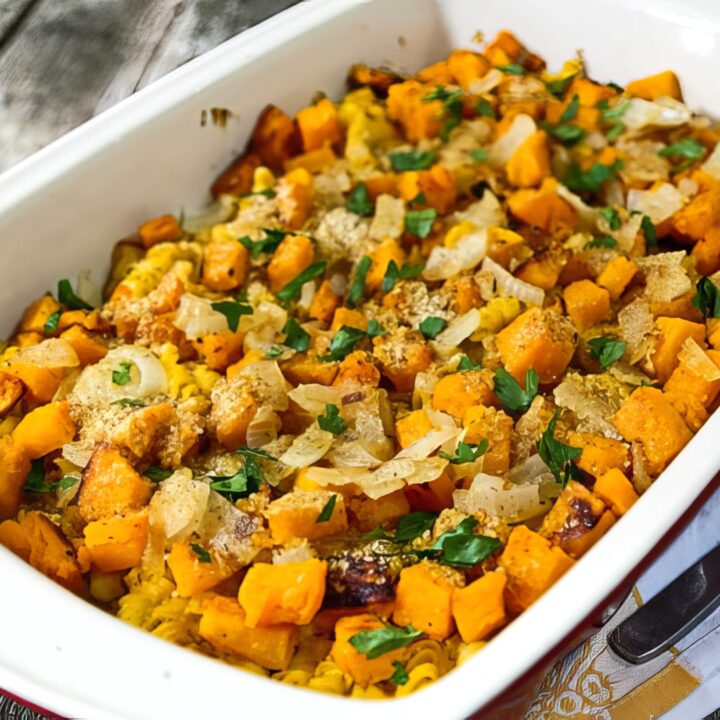
This hearty pasta casserole is loaded with flavor from roasted butternut squash and a velvety, dairy-free sauce, all finished with a golden, crunchy breadcrumb topping. It's comforting, easy to make, and guaranteed to have everyone coming back for seconds.

This is the kind of casserole you make when you're craving comfort food but still want to feel like a responsible adult. It's rich, creamy, baked to golden perfection. And, plot twist: there's no dairy, no cream, and no cheese.
I first made this on one of those in-between fall days - too warm for soup, too cool for salad, and just right for something slowly baked. It turned out to be one of those meals you don't expect to fall in love with, but then you go back for thirds and start texting people about it.
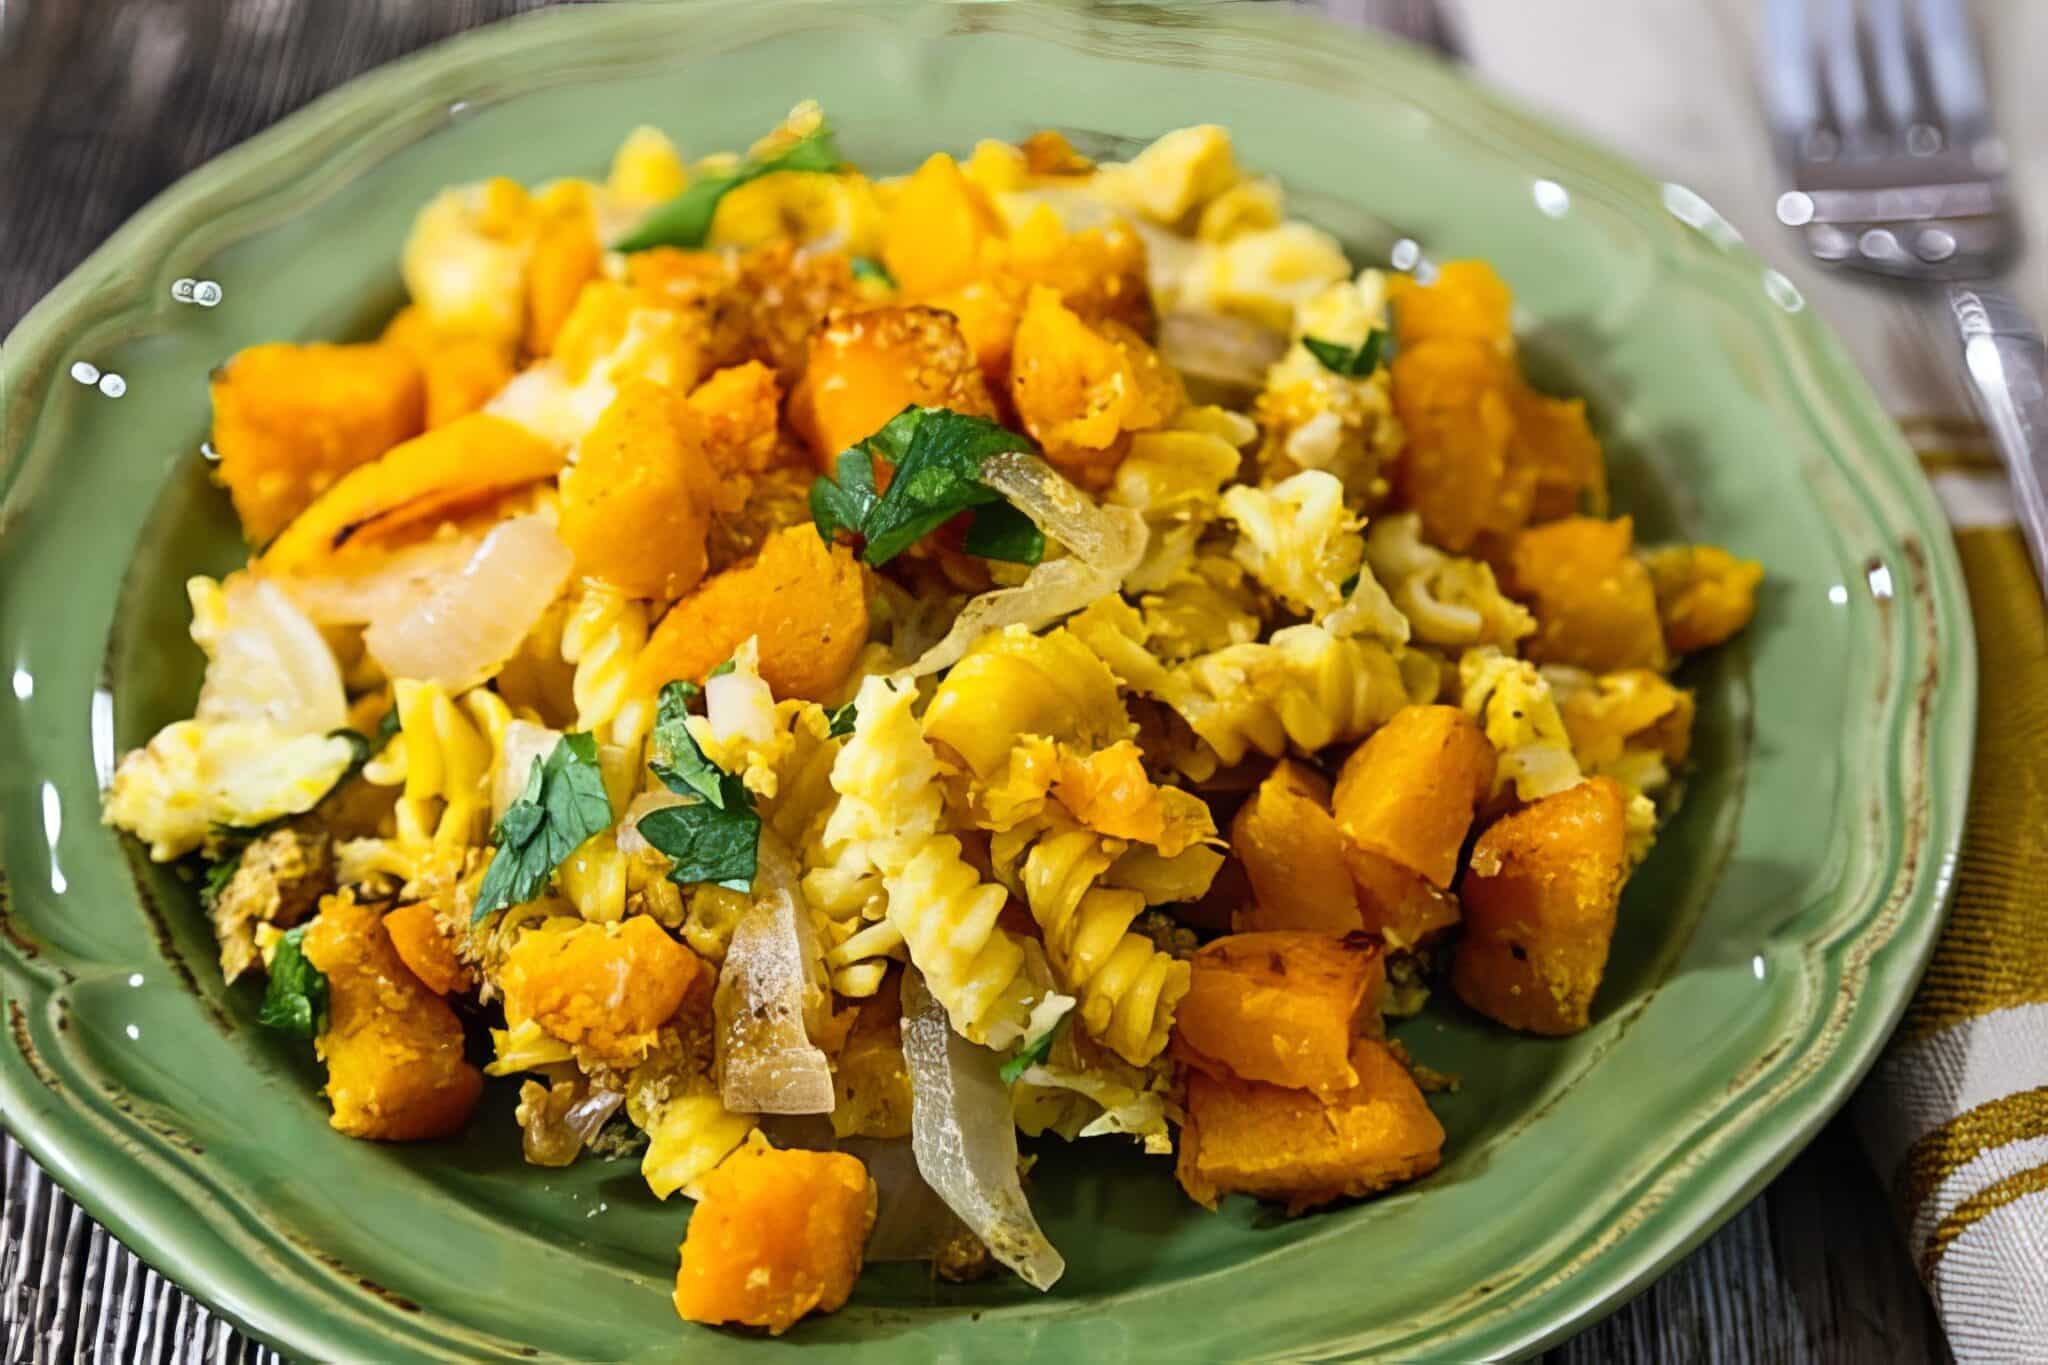
Key Ingredients & Substitutions
- Pasta - Short shapes like rotini or shells hold onto all that dreamy sauce best. You can use whole grain, gluten-free, or just classic white pasta.
- Butternut Squash - Roasted until tender, then blended into the base of the sauce.
- Onion - Sautéed until golden and sweet!
- Silken Tofu - Don't fear the tofu! It makes the sauce ultra-creamy and keeps things nice and light. If you do not want to use tofu, you can substitute cooked (or canned) white beans for a similar consistency.
- Nutritional Yeast - That umami-rich, cheesy flavor - without any dairy.
- Nondairy Milk - Unsweetened, please. Just enough to help everything blend smoothly. You can use almond milk, cashew milk, or your own favorite.
- Paprika - A dash for warmth and color, plus a little extra for sprinkling on top. Smoked paprika works well here also.
- Breadcrumbs - For that golden, crunchy finish.
Helpful Tips
Make ahead tip! You can roast the butternut squash a day ahead and store it in the fridge. This makes prep time a breeze when you're ready to assemble the casserole.
Use the neck for cubes, the base for sauce. - The thicker neck of the squash stays firmer after roasting and is perfect for dicing into cubes for texture in the casserole. The softer base (the bulb) gets softer and blends best into a super creamy sauce.
Blend until smooth and silky. - Take your time when blending the butternut squash sauce. A high-speed blender will give you that ultra-velvety finish, but any blender or food processor will work with a little patience. If the mixture seems too dry, add a bit more almond milk.
Don't overcook the pasta. - Cook the pasta just to al dente. It'll soften more as it bakes, so this helps keep the texture just right.
Customize the topping. - No breadcrumbs? No problem. Use crushed crackers, panko, or even a sprinkle of chopped nuts for a crunchy finish.
Also worth trying: our creamy asparagus and pea pasta.
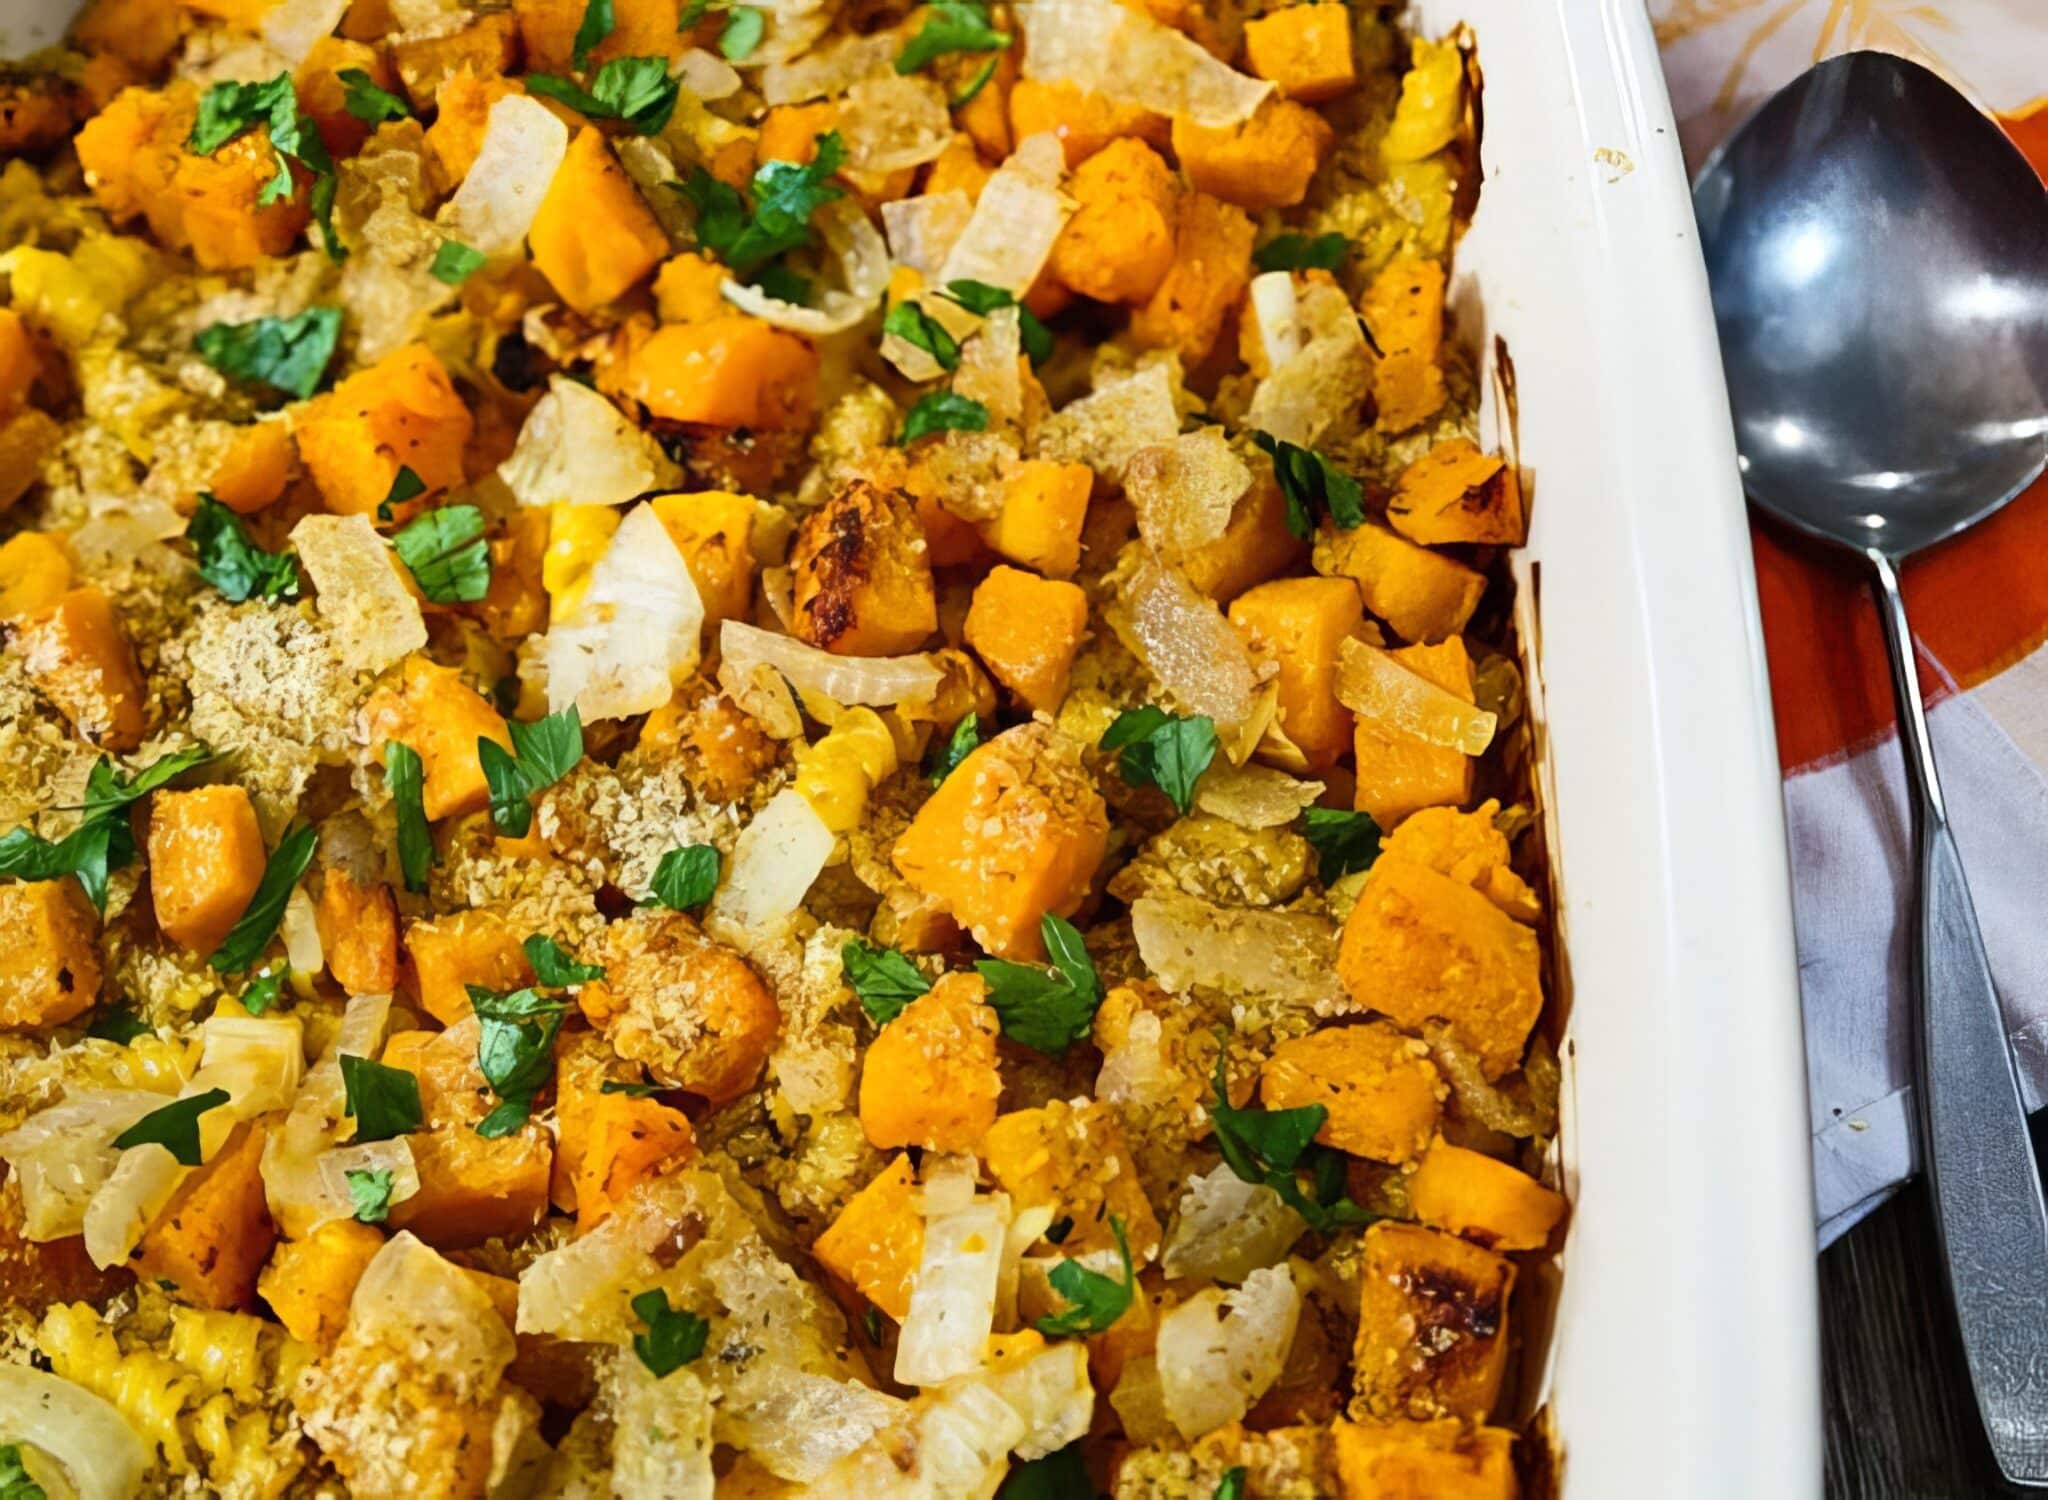
Easy Variations
Add greens. - Stir in a handful of sautéed spinach or kale before baking for an extra boost of color and nutrients.
Make it smoky. - Add a pinch of smoked paprika or chipotle powder to the sauce for a subtle smoky flavor that plays well with the sweetness of the squash.
Gluten-free option. - Use your favorite gluten-free pasta and swap the breadcrumbs for gluten-free panko or crushed rice crackers.
Use zucchini instead of pasta. - Swap the pasta for thin zucchini strips to make a lighter, gluten-free version. For a fully developed take on that idea, check out our vegan zucchini lasagna.
Go herbaceous! - Mix in chopped fresh sage or thyme. A little goes a long way and pairs beautifully with the squash.
Protein boost. - Add cooked lentils, chickpeas, or vegan sausage slices to the mix before baking for a heartier, more filling dish.
Single-serve style - Divide the mixture into ramekins for mini casseroles. Perfect for dinner parties or easy meal prep! For another hearty baked casserole dinner, our vegan pot pie casserole is a crowd-pleasing comfort food classic. For a fresh summer side, also try our zucchini with mint. For a creamy weeknight pasta option, our vegan creamy mushroom pasta is a favorite.
More Tasty Recipes
If you love this casserole, be sure to check out these other delicious recipes:
- Vegan Sweet Potato Casserole
- Black Bean and Zucchini Tortilla Casserole
- 15 Best Vegan Casserole Recipes
- 10 Make Ahead Vegan Breakfast Casseroles
Recipe

Roasted Butternut Squash and Pasta Bake
This hearty pasta casserole is loaded with flavor from roasted butternut squash and a velvety, dairy-free sauce, all finished with a golden, crunchy breadcrumb topping. It's comforting, easy to make, and guaranteed to have everyone coming back for seconds.
Print
Pin
Save
Servings:
Equipment
Ingredients
- 12 ounces pasta such as rigatoni or rotini
- 2 tablespoons olive oil plus extra for topping
- 1 large onion finely chopped
- 1 medium butternut squash
- ¼ cup nutritional yeast
- 12.3 ounces firm or extra-firm silken tofu
- ½ cup almond milk or other nondairy milk, unsweetened
- ½ teaspoon paprika plus extra more for topping
- salt and pepper to taste
- ½ cup breadcrumbs
- 2 tablespoons fresh parsley optional, chopped, for topping
Instructions
- Preheat the oven to 400°F (200°C).
- Cut a medium butternut squash in half lengthwise. Scoop out the seeds and place both halves, cut side down, on a parchment-lined or lightly oiled baking sheet. Roast for 35-45 minutes, or until the wide (bulb) end is completely tender and can be easily pierced with a fork, but is not mushy. The narrow (neck) end should be tender but still hold its shape.
- Let the squash cool until safe to handle. Gently remove the tough skin, so only the tender squash remains. Chop into cubes and set aside. You should get about 3 - 4 cups total.
- While the squash is roasting, cook the pasta according to package directions, then drain and transfer to a large mixing bowl. Set aside.
- Heat 1 tablespoon olive oil in a large skillet over medium heat. Add 1 large finely chopped onion and sauté until golden and soft, about 8-10 minutes. Scoop out about ¼ cup of the cooked onion and set it aside to mix into the casserole later. The rest will go into the sauce.
- Heat half of the oil in a medium skillet. Add the onion cook until golden. Transfer to a food processor or blender, leaving about ½ cup's worth aside for topping.
- Blend the Sauce. In a blender or food processor, approximately ⅔ of the cubed squash, the remaining sauteed onion, silken tofu, nondairy milk, nutritional yeast, paprika, salt and pepper. Blend until completely smooth. The sauce should be velvety and pourable; add a splash more milk if needed.
- In a large mixing bowl, combine the cooked pasta, remaining squash cubes, and the reserved ¼ cup of sautéed onion. Pour the creamy squash sauce over everything and stir gently to coat.
- Transfer the mixture to a lightly oiled 2-quart casserole dish. Sprinkle the breadcrumbs over the top. Add a sprinkle of paprika and a drizzle of olive oil, if desired.
- Bake uncovered at 400°F for 20-25 minutes, or until the top is golden and the edges are bubbling. For extra crispiness, broil for the last 2-3 minutes, watching closely.
- Let the casserole sit for 5-10 minutes after baking. Garnish with parsley, if desired. This helps it set up and makes it easier to serve. Slice, scoop, and enjoy warm!
Nutrition (Estimate per Serving)
Calories: 297kcalCarbohydrates: 51gProtein: 10gFat: 6gSaturated Fat: 1gPolyunsaturated Fat: 2gMonounsaturated Fat: 3gSodium: 80mgPotassium: 578mgFiber: 4gSugar: 5gVitamin A: 10060IUVitamin C: 23mgCalcium: 104mgIron: 2mg
Vegan-ize any recipe!Grab our free vegan cheat sheet, packed with my favorite easy substitutions to make any recipe vegan.
30-Minute Madras Lentils (Vegan)
This quick and easy version of Indian Madras Lentils is ideal for a fast and flavorful weeknight meal. Serve it with a side of basmati rice or warm flatbread for a healthy and hearty vegan dinner. Enjoy!

As the days grow shorter and the nights cooler, there's nothing quite like a bowl of warm, spiced lentils to wrap up your day. Enter these vegan Madras Lentils: a dish that's as comforting as it is quick. It's a modern twist on a classic Indian dish - that you can make with easy ingredients and no special equipment.
So, next time you're in need of a quick culinary escape, let these Madras Lentils transport you to the bustling streets of Chennai, where flavors are always rich and life is full of zest.
What are Madras Lentils?
Despite the fact that you can find the term "Madras Lentils" on both Indian menus and store bought offerings, it's not truly an authentic Indian dish. It's more of a Western creation. 😉
The name 'Madras' comes from the former title of the city now known as Chennai. The dish referred to as 'Madras lentils' is a westernized version of several classic Indian lentil dishes, inspired by the flavors and cuisine of Madras.
Madras lentils draw inspiration from dishes like 'Dal Makhani' or 'Maa ki Dal' which are made with whole black lentils and kidney beans, slow-cooked to perfection with aromatic spices and often finished with butter and cream for richness. The 'Madras' version keeps the essential elements of this comfort food intact - lentils, beans and spices - while omitting the dairy. Perfect for a vegan diet!
While 'Madras lentils' may not be all that authentic - it sure is popular. And it's also one of the simplest Indian recipes that you can make at home in your own kitchen!
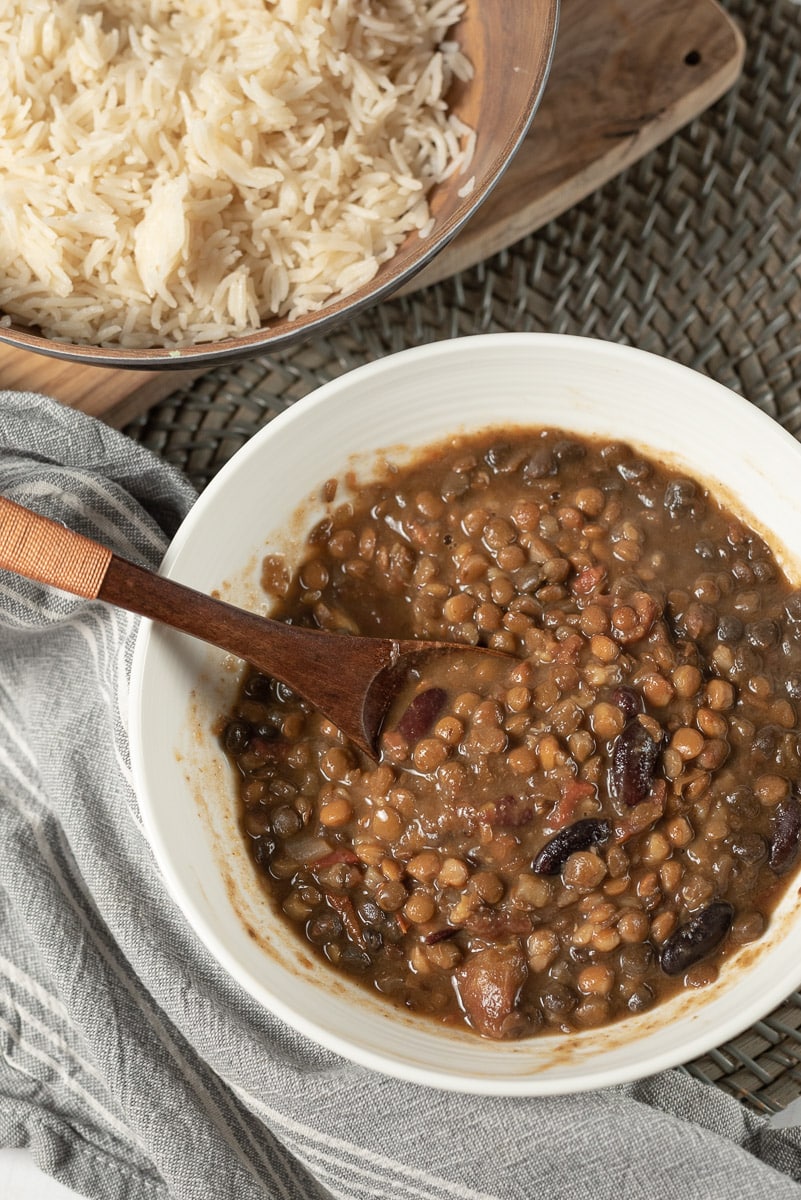
Why You'll Love This Recipe
Who says comfort food can't be nutritious and delicious? These Madras lentils are:
- Healthy & Wholesome. Packed with plenty of plant based protein and fiber, this is a hearty dish that satisfies without weighing you down.
- Quick enough for a Weeknight Dinner. This simplified version of the original dish can be made without a pressure cooker and cooks in under 30 minutes thanks to the use of canned lentils and beans.
- An easy one pot vegan meal! Less fuss and less mess.
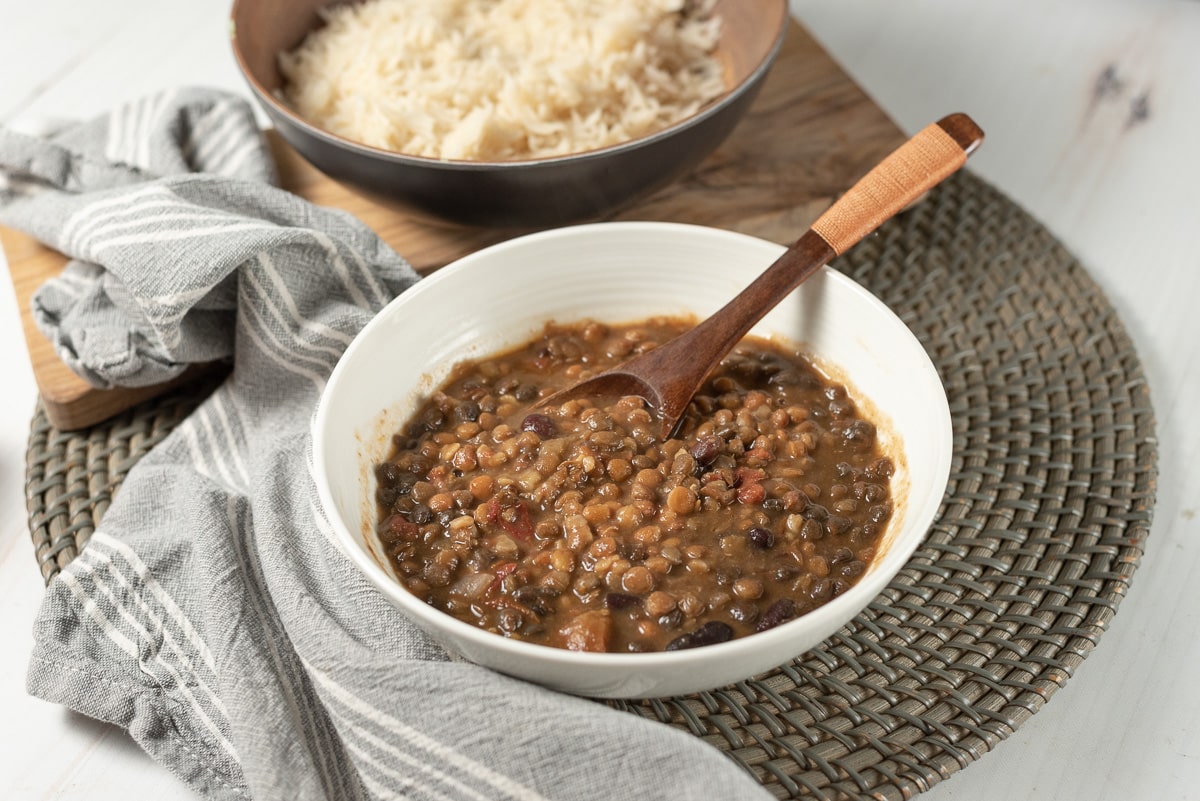
Ingredients & Substitutions
Canned Black Lentils & Kidney Beans
These pantry staples are the stars of the dish! The traditional version of Madras Lentils uses dried beans and lentils that need to be soaked and simmered for a long time. Using the canned versions delivers great results in way less time!
Classic Indian Spices
Cumin, turmeric, garam masala, and coriander all play their part in creating the quintessential Indian flavor profile we all love.
Tomato Options
No crushed tomatoes? No problem. Feel free to use fresh diced tomatoes or even tomato puree in a pinch.
Spice Swap
If garam masala isn't on hand, try a blend of cinnamon, cloves, and nutmeg to mimic its warm, sweet notes.
Oil Alternatives
While olive oil is a great choice, coconut oil can add a subtle sweetness and vegan butter will give a richer flavor.
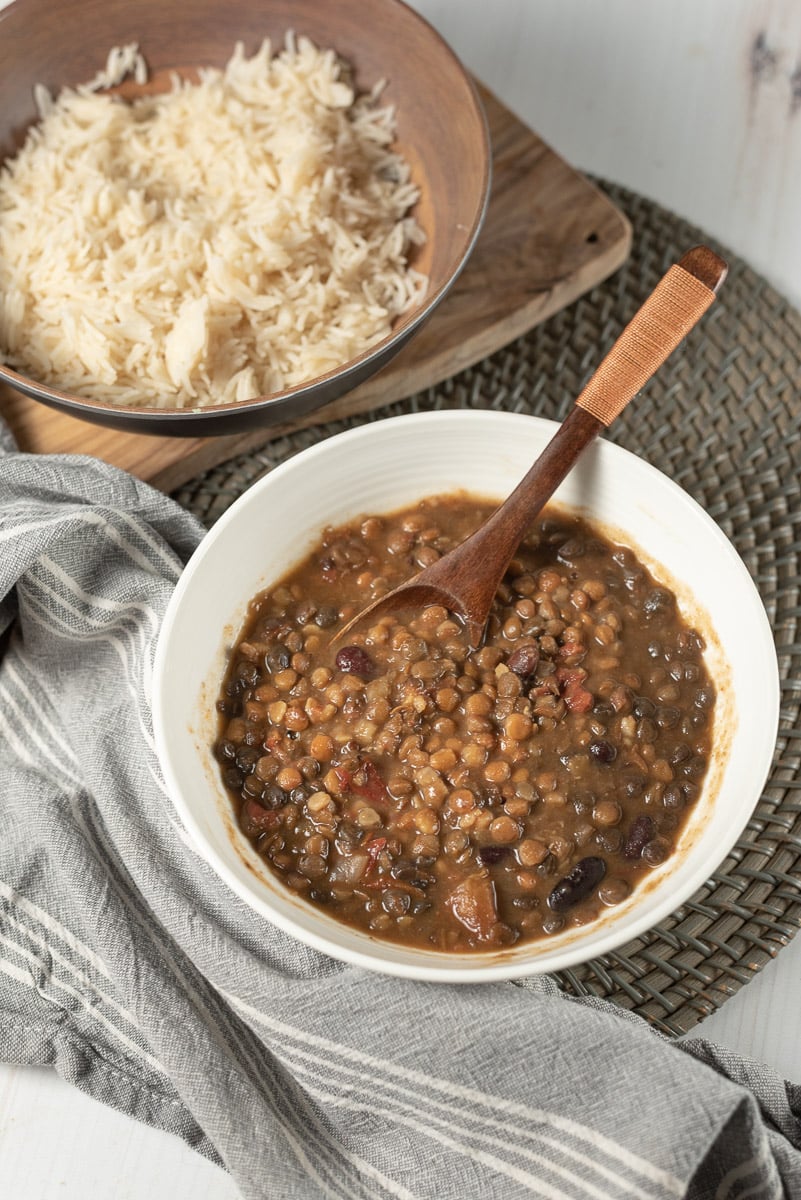
Helpful Tips
Rinse the Lentils and Beans. Canned legumes can be very high in sodium. Use a strainer to give both the beans and lentils a good rinse under cold water to remove all that extra salt before cooking.
Cook it Low and Slow. Even though this is a quick recipe, giving the dish some time to simmer at the end will deepen the flavors. So don't get impatient!
Serving Suggestions. Pair these Madras Lentils with fluffy basmati rice, a warm piece of vegan naan bread, or even serve atop a baked potato for a fun twist! For a complete Indian dinner spread, serve alongside our bhindi masala, our quick vegetable curry, or our aloo gobi.
Get Garnishes! Fresh cilantro adds a pop of color and a burst of freshness to the dish. You may also want to serve your madras lentils with a handful of chopped onions, slivered chili peppers, or a dollop of vegan raita.
Storing Leftovers. Store leftover Madras Lentils in a covered container in the fridge for 3-4 days, or freeze for up to 2 months. To serve the lentils again, allow them to defrost (if frozen) and warm on the stovetop over medium heat.
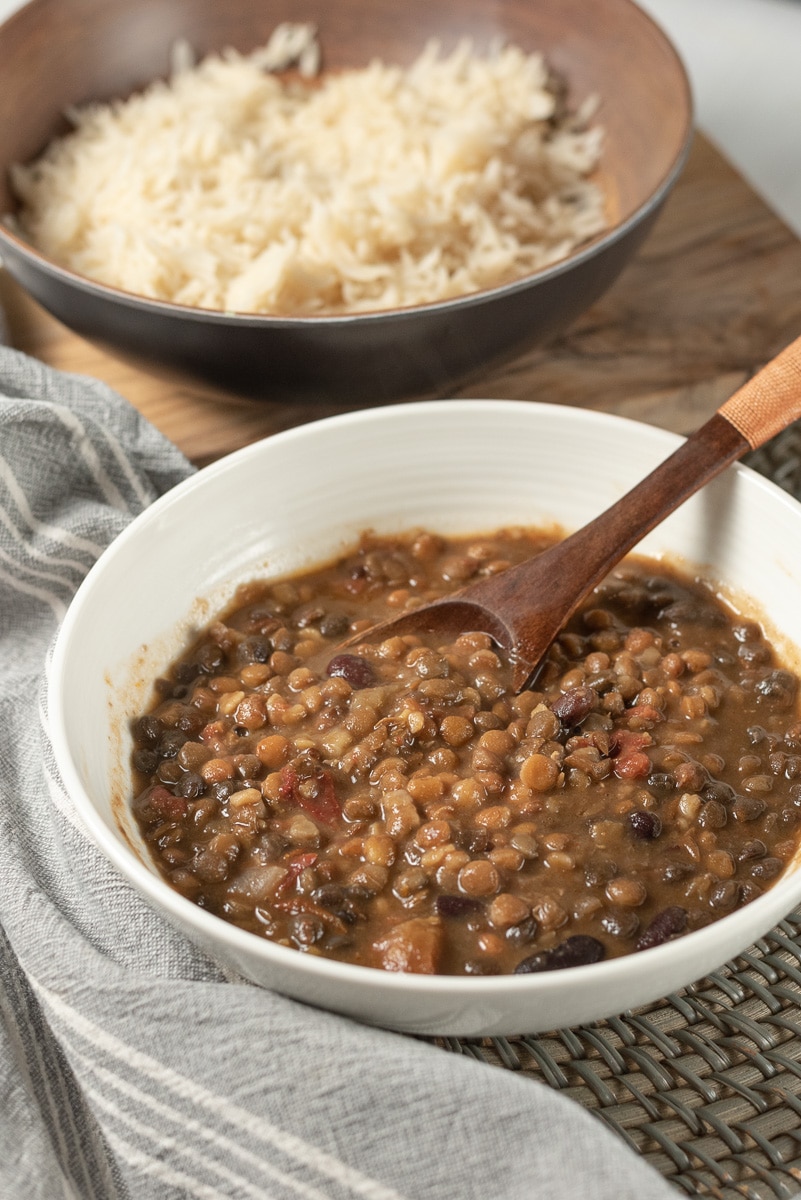
Variations
Add more plant based protein. Amp up the protein by adding cubes of firm tofu or tempeh to the curry!
Add more veggies. Feel free to add more fresh veggies to the dish as well. Bell peppers, zucchini, mushrooms, or kale are all great additions.
More Vegan Indian Recipes
If you love these Madras Lentils, be sure to check out these other tasty vegan ideas:
Also try: our Easy Vegan Dal Tadka.
Recipe
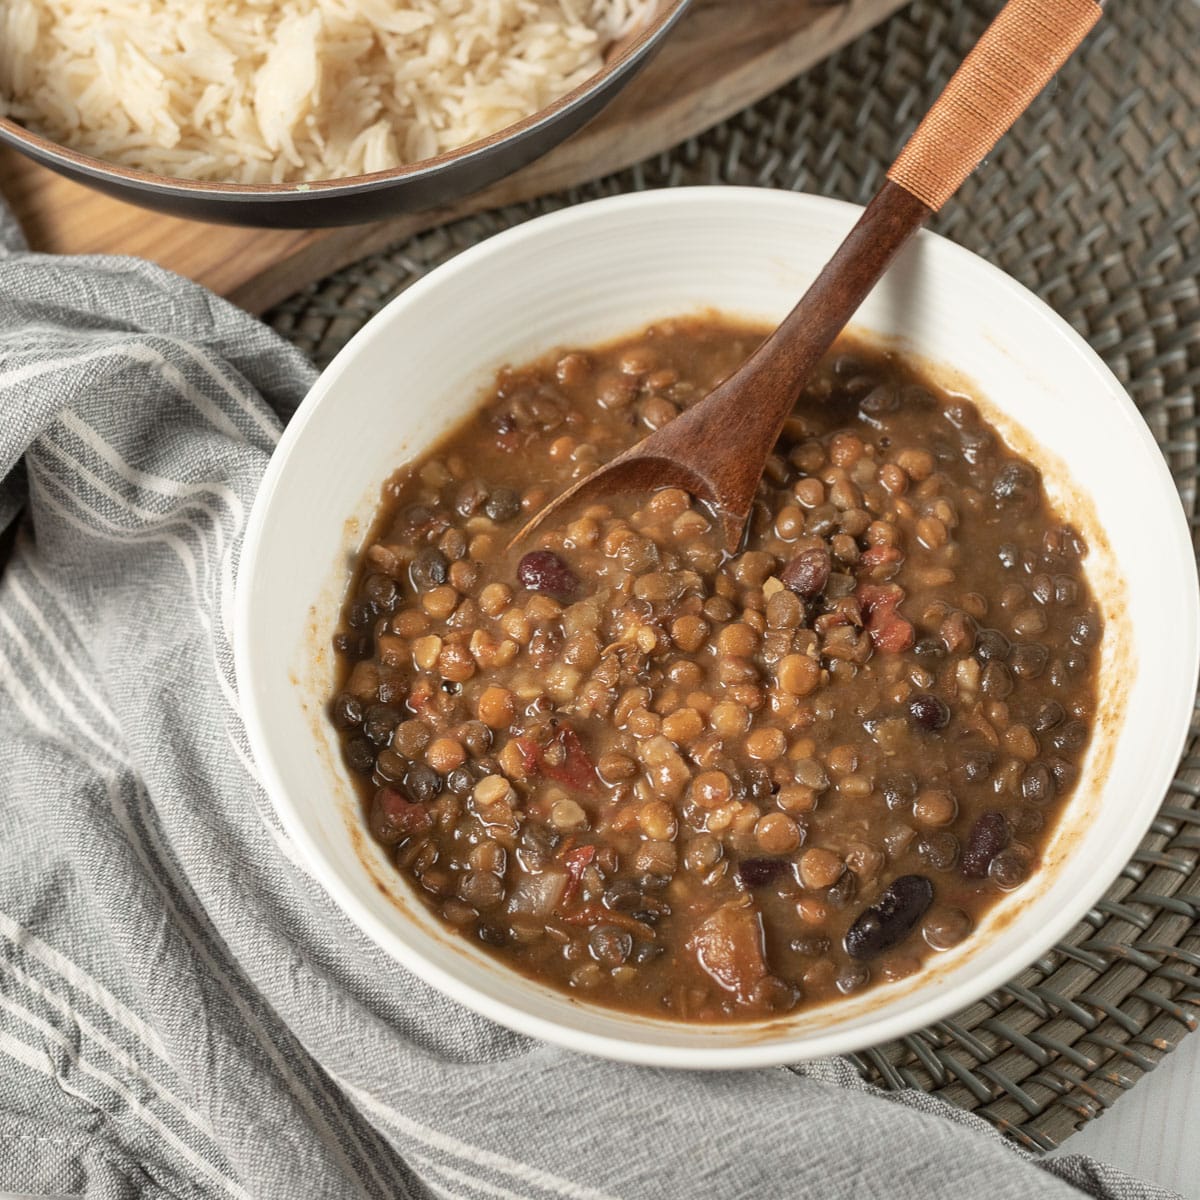
30-Minute Madras Lentils (Vegan)
Serve this easy Madras Lentils with a side of basmati rice or warm flatbread for a healthy and hearty vegan dinner. Enjoy!
Print
Pin
Save
Servings: -6 servings
Ingredients
- 2 cans 15 ounces each black lentils, drained and rinsed
- 1 can 15 ounces red kidney beans, drained and rinsed
- 2 tablespoons olive oil or any vegan cooking oil
- 1 large onion finely chopped
- 3 cloves garlic minced
- 1- inch piece ginger minced
- 1 green chili slit (optional, adjust to heat preference)
- 1 teaspoon cumin seeds
- ½ teaspoon ground turmeric
- ½ teaspoon red chili powder
- 1 ½ teaspoons garam masala
- 1 teaspoon ground coriander
- 1 can 14 ounces crushed tomatoes
- Salt to taste
- 1-2 cups vegetable broth or water for desired consistency
- 1 tablespoon vegan butter or additional olive oil for a buttery flavor
- Fresh cilantro leaves for garnish
Instructions
- Prepare the Canned Lentils and Beans: Since the canned lentils and beans are pre-cooked, simply rinse them to remove any excess sodium and set aside.
- Sauté the Aromatics: Heat the olive oil in a large pot over medium heat. Add the cumin seeds and wait until they start to crackle. Then, add the onions, garlic, ginger, and green chili. Sauté until the onions are soft and golden.
- Add the Spices: Stir in the turmeric, red chili powder, garam masala, and ground coriander. Cook the spices for about a minute until they are fragrant.
- Cook the Tomato Base: Add the crushed tomatoes and salt to the pot. Let the mixture simmer until it thickens slightly, which should take about 8-10 minutes.
- Combine with Lentils and Beans: Add the rinsed lentils and kidney beans to the pot. Mix well with the tomato and spice mixture.
- Adjust Consistency: Pour in the vegetable broth or water to reach the consistency you like for your dal.
- Simmer: Allow the mixture to come to a gentle boil, then reduce the heat and simmer for 10-15 minutes to blend the flavors together.
- Finish with Vegan Butter: Stir in the vegan butter or extra olive oil right before you're ready to serve.
- Garnish: Sprinkle with freshly chopped cilantro for a touch of color and freshness.
Nutrition (Estimate per Serving)
Calories: 126kcalCarbohydrates: 6gProtein: 1gFat: 11gSaturated Fat: 2gPolyunsaturated Fat: 2gMonounsaturated Fat: 7gTrans Fat: 1gSodium: 303mgPotassium: 86mgFiber: 2gSugar: 2gVitamin A: 207IUVitamin C: 4mgCalcium: 21mgIron: 1mg
Vegan-ize any recipe!Grab our free vegan cheat sheet, packed with my favorite easy substitutions to make any recipe vegan.
30-Minute Vegan Chana Masala
This one-pot vegan chana masala is packed with delicious Indian flavor and ready in just 30 minutes. Perfect for a weeknight meal!
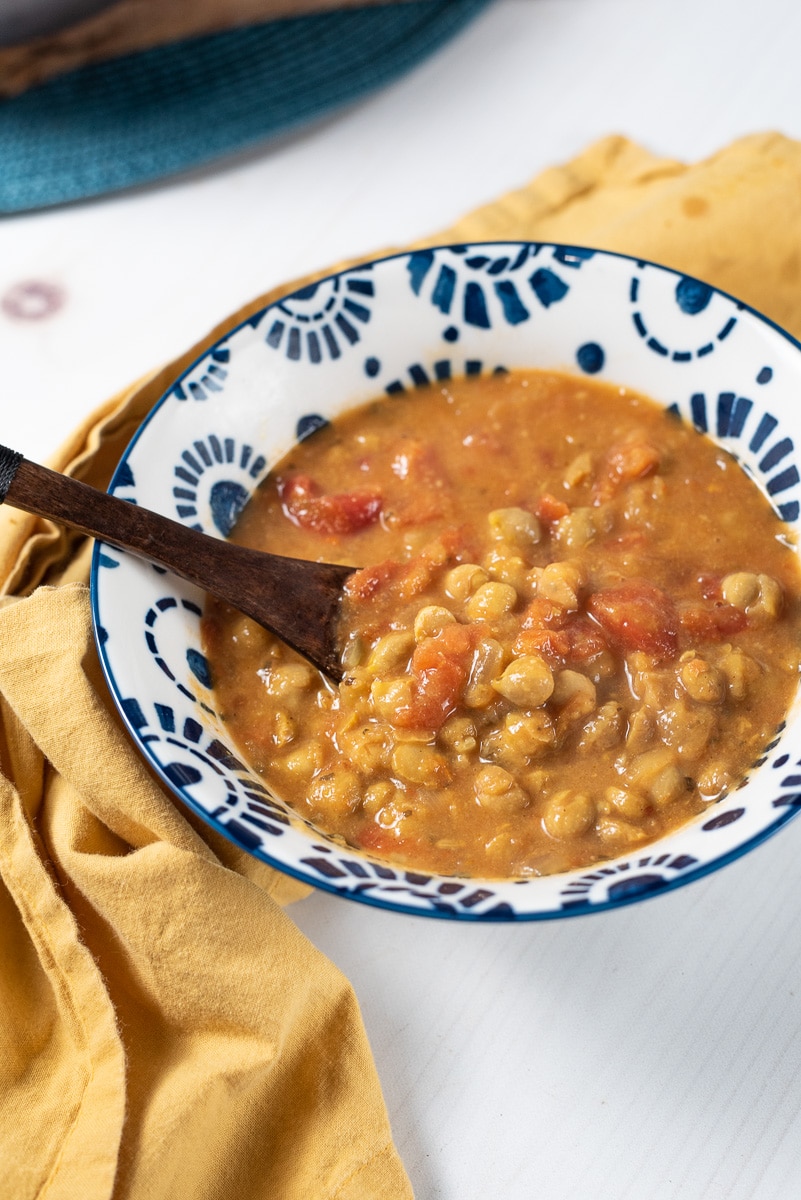
It's been a minute since I've added a new curry recipe to the blog, so I wanted to share this quick and easy Chana Masala recipe with you today. This curry is absolutely packed with flavor, and yet it's simple enough to make on a busy weeknight. What's not to love?
What is Chana Masala?
Chana Masala, also known colloquially as "Chole" in many parts of India, is a popular dish that originates from the Indian subcontinent, particularly in the northern regions.
The name itself is quite descriptive of its ingredients and preparation: "Chana" refers to chickpeas, and "Masala" refers to a particular mixture of spices. This dish reflects the rich culinary heritage of India, where legumes like chickpeas have been a staple for centuries and are celebrated for their versatility and nutritional value.
Chana Masala is traditionally made with chickpeas that are simmered in a spicy, tangy tomato-based sauce infused with an array of aromatic spices like cumin, coriander, garam masala, and turmeric.
The dish has become a beloved part of vegetarian cuisine worldwide. Each region in India has its own version of Chana Masala, with variations in spice blends and cooking techniques, reflecting the diversity of Indian cuisine.
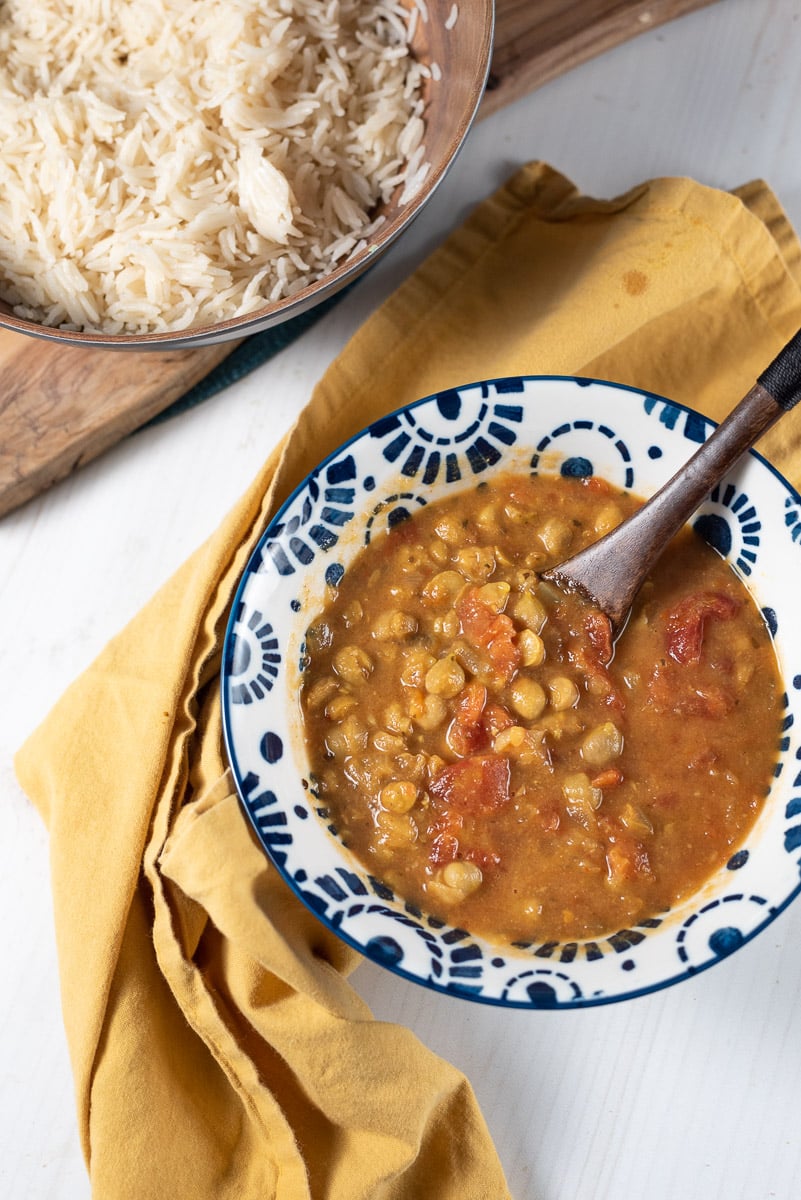
Why You'll Love This Recipe
Vegan Chana Masala is a dish that's as nutritious as it is delicious! Packed with protein-rich chickpeas and a symphony of spices, it's a vegan dish that will delight even the most picky palates. It's:
- Hearty and Satisfying: The chickpeas provide a wonderful, filling base that's both comforting, satisfying, and loaded with healthy protein.
- Flavor-Packed: A blend of traditional Indian spices ensures each bite is bursting with flavor.
- Easy to Make: My simplified version of traditional chana masala uses easy to find ingredients and straightforward steps for an easy recipe that can be ready in just 30 minutes.
Ingredient Spotlight
Chickpeas
These are obviously the star of the show here. I like to use canned chickpeas for convenience, but you can also prepare dried chickpeas for use in this recipe if you prefer. You would need about two cups of cooked chickpeas. Note that chickpeas are also commonly called garbanzo beans!
Garam Masala
I use a handful of common Indian spices in this recipe, but the most important one is the garam masala, which gives the dish it's classic flavor. I recommend using a high quality garam masala powder for the best results! (I like this one.)
Tomatoes
I use fresh tomatoes in my chana masala, and I do think it gives the best flavor and texture. But you can substitute a 15 oz can of chopped or crushed tomatoes if you prefer.
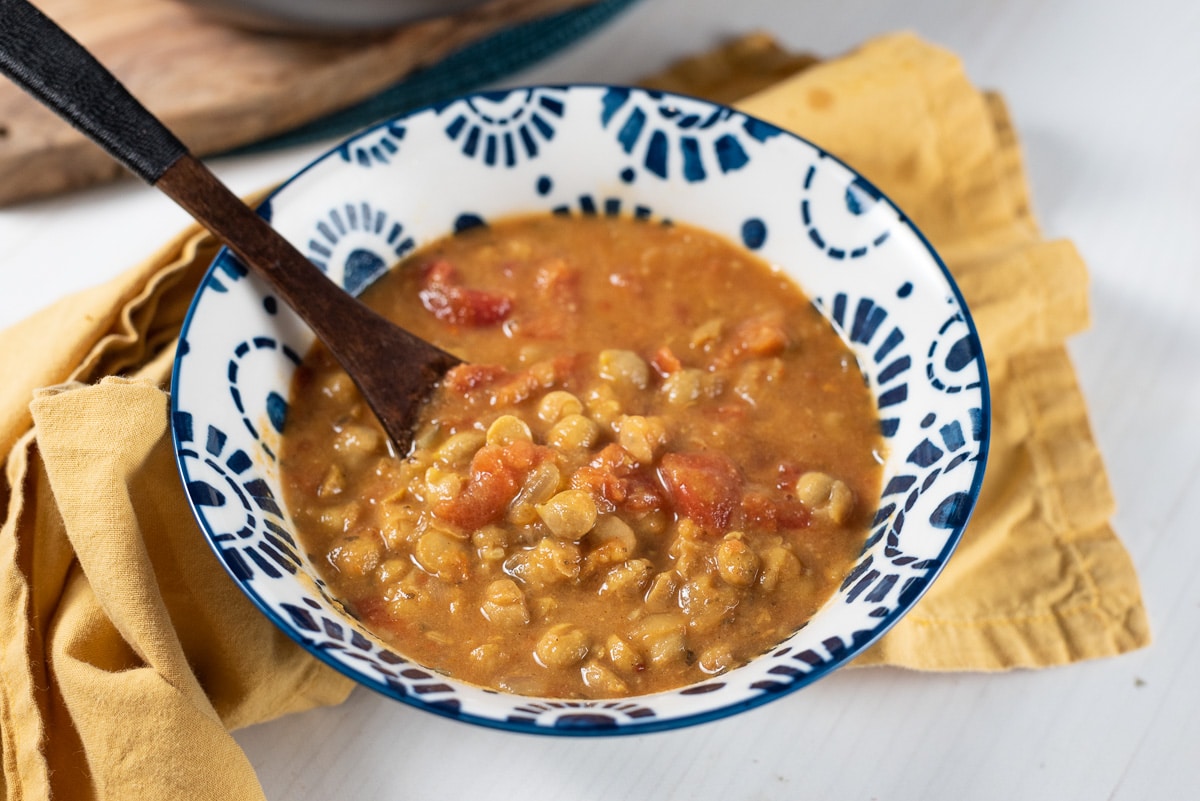
Tips and Tricks
Spice Level
The recipe is mildly spicy as it's written (at least from my perspective!). You can add more chili powder or an additional green chili pepper to amp up the heat. Or cut out both for a milder dish.
Serving Suggestions
Pair this Vegan Chana Masala with fluffy basmati rice, warm vegan naan, or even over a bed of fresh greens for a lighter option. It's versatile and pairs well with various sides.
Storing Leftovers
Store leftover chana masala in the fridge for 3-4 days, or freeze for up to 2 months. To serve again, defrost (if frozen) and reheat over medium heat on the stovetop.
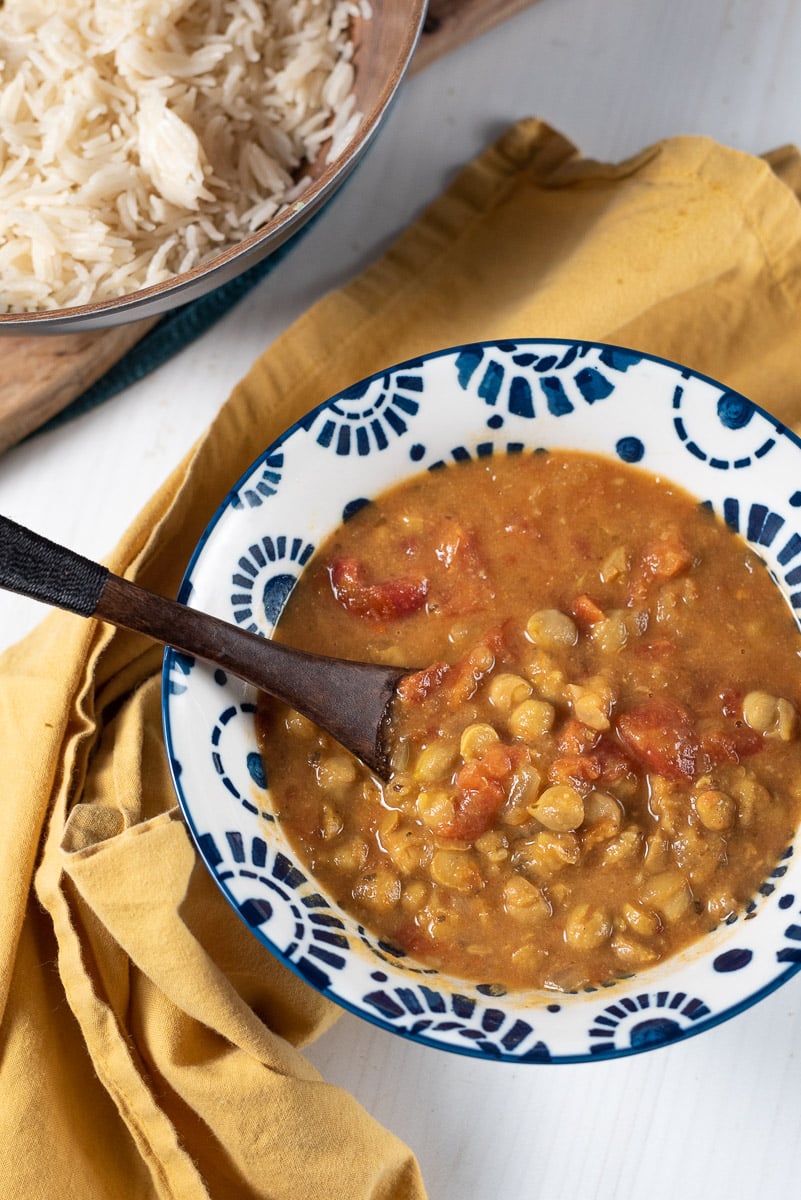
Variations and Substitutions
Make a Creamier Version: Add a splash of coconut milk for a richer, creamier texture.
Tangy Twist: An additional squeeze of lemon juice before serving adds a fresh zing.
Garnish Galore: Top your chana masala with fresh cilantro, diced onions, or a dollop of vegan raita for added flavor and texture.
More Vegan Indian Recipes
If you love this Vegan Chana Masala, be sure to check out these other Indian inspired vegan recipes:
Also try: our Easy Vegan Dal Tadka.
Also try: our Masala Lentils Sabut Masoor.
Recipe
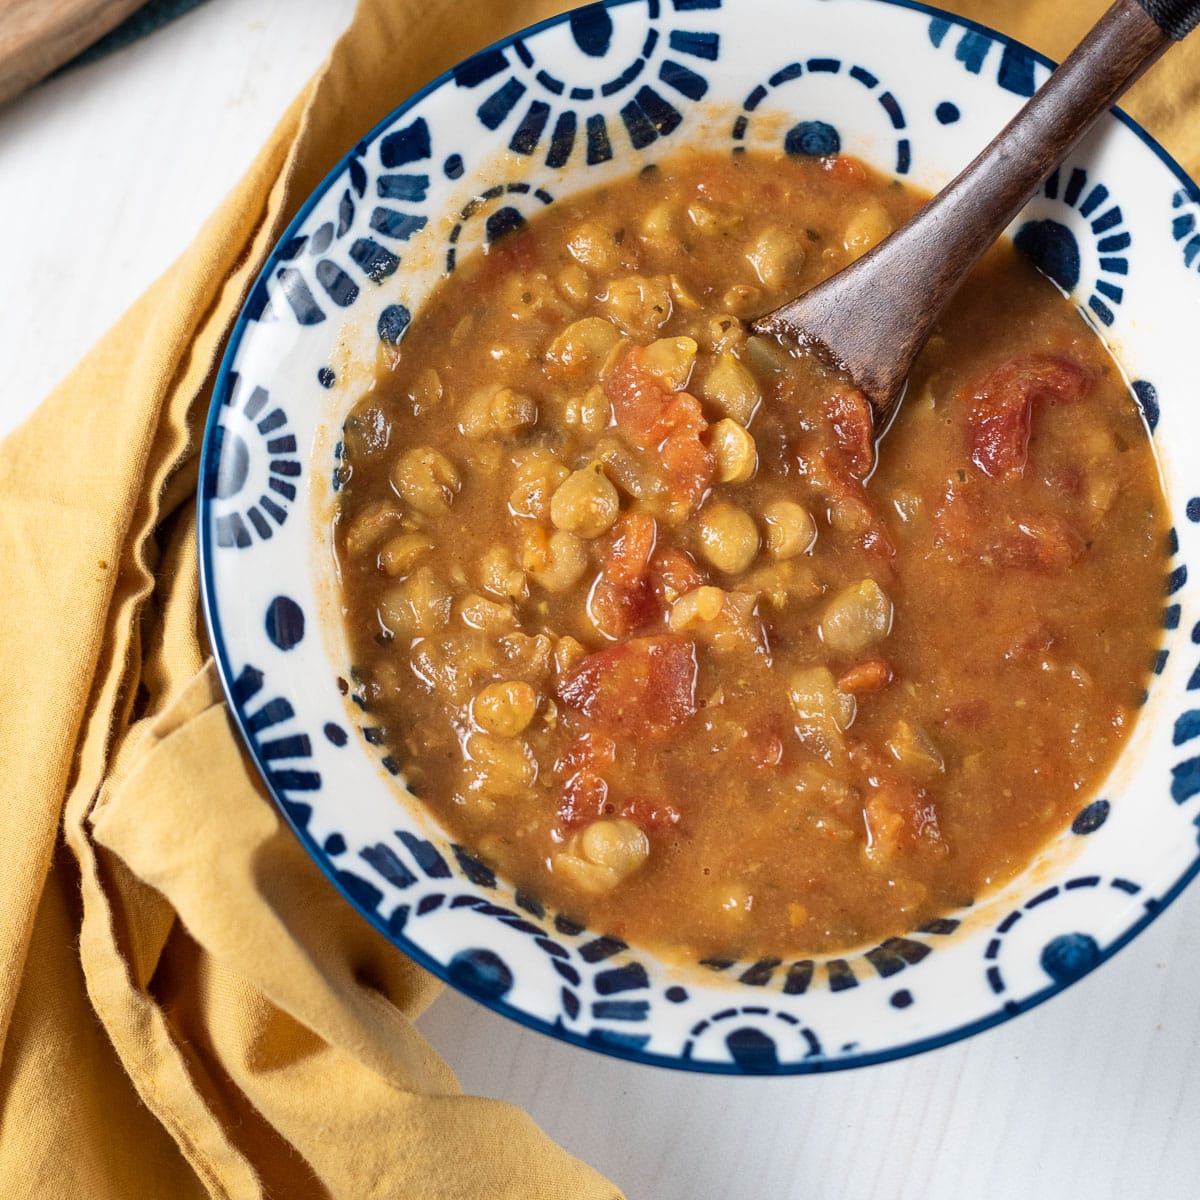
30-Minute Vegan Chana Masala
This one-pot vegan chana masala is packed with delicious Indian flavor and ready in just 30 minutes. Perfect for a weeknight meal!
Print
Pin
Save
Servings: servings
Ingredients
- 15 oz canned chickpeas drained and rinsed
- 1 large onion finely chopped
- 3 cloves garlic minced
- 1 inch piece of ginger minced
- 1 large tomato finely chopped
- 1 green chili finely chopped (optional, adjust to taste)
- 2 tablespoons tomato paste
- 1 teaspoon cumin seeds
- 1 teaspoon ground coriander
- 1 teaspoon garam masala
- ½ teaspoon turmeric powder
- ½ teaspoon red chili powder adjust to taste
- juice of half a lemon
- 2 tablespoons cooking oil such as coconut or vegetable oil
- Salt to taste
- Fresh cilantro optional, for garnishing
- 1 cup vegetable broth
Instructions
- Sauté Spices: Heat the oil in a large pan over medium heat. Add the cumin seeds and let them sizzle for a few seconds. Then add the chopped onions and sauté until they turn golden brown.
- Add Garlic and Ginger: Add the minced garlic and ginger to the pan and sauté for another minute.
- Tomato and Spices: Add the chopped tomatoes, green chili, and tomato paste. Cook until the tomatoes are soft and the oil starts to separate. Then add the ground coriander, garam masala, turmeric, red chili powder, and lemon juice. Stir well.
- Chickpeas: Add the cooked chickpeas to the pan. Mix well to ensure the chickpeas are coated with the spice mixture.
- Simmer: Add the vegetable broth, bring to a boil, then reduce the heat and simmer for about 15-20 minutes. The gravy should thicken, and the flavors will meld together.
- Season and Garnish: Adjust salt to taste. Garnish with fresh cilantro before serving.
- Serve: Serve hot with rice, naan, or your favorite Indian bread.
Nutrition (Estimate per Serving)
Calories: 196kcalCarbohydrates: 23gProtein: 7gFat: 10gSaturated Fat: 1gPolyunsaturated Fat: 3gMonounsaturated Fat: 5gTrans Fat: 0.03gSodium: 640mgPotassium: 390mgFiber: 7gSugar: 4gVitamin A: 600IUVitamin C: 10mgCalcium: 63mgIron: 2mg
Vegan-ize any recipe!Grab our free vegan cheat sheet, packed with my favorite easy substitutions to make any recipe vegan.
Sweet Potato Black Bean Chili
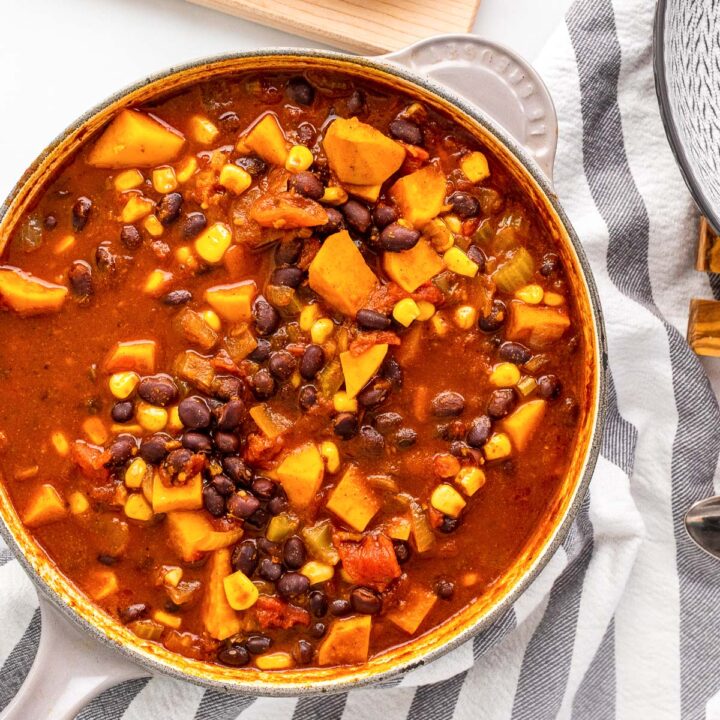
This Sweet Potato Black Bean Chili is loaded with healthy flavors from tender sweet potatoes, hearty black beans, and smoky spices. Plus, it's 100% vegan and easy to make in under an hour.
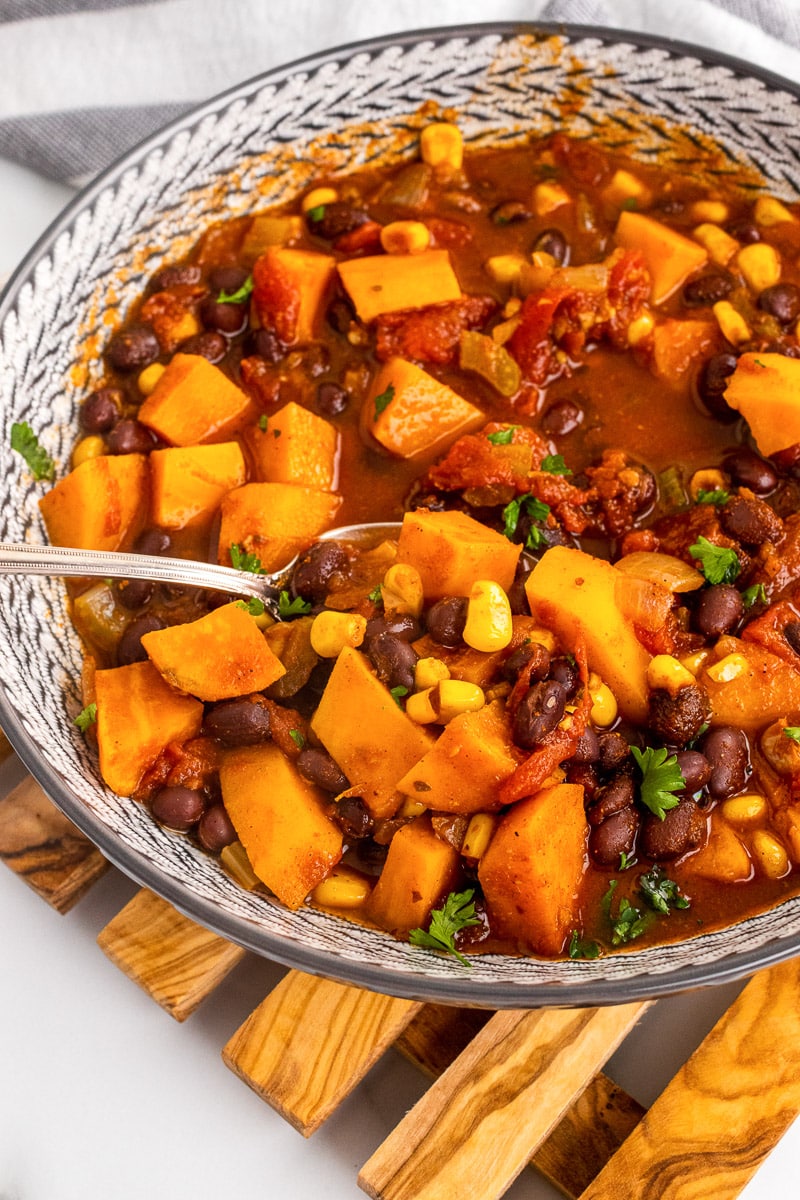
If there's one thing I always crave as soon as the weather starts cooling down, it's a big pot of chili. There's just something about a piping hot one-bowl dinner that makes me want to cozy up in front of the fireplace.
And this Sweet Potato Black Bean Chili is one of my all time favorites. It's so easy to throw together, packed with delicious flavors, and it's great for meal prep too!
This Sweet Potato Black Bean Chili recipe is...
- Full of flavor
- Packed with smoky heat
- Healthy
- Plant-based
- Vegetarian
- Good enough to impress a crowd
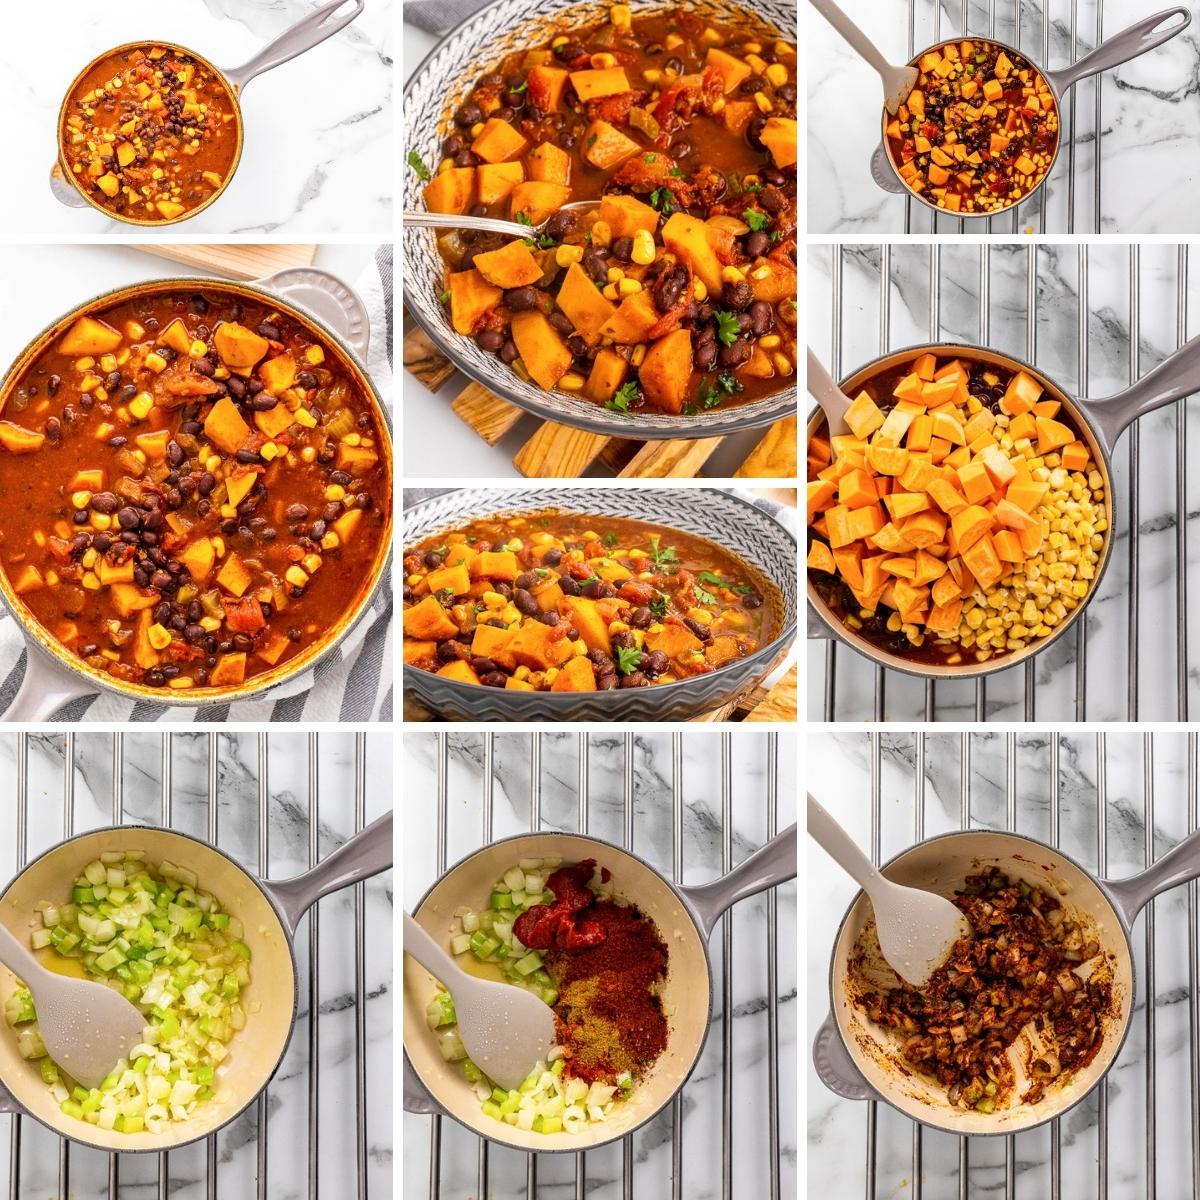
Helpful Tips
Dice your sweet potatoes evenly. This ensures they cook at the same rate and don't turn to mush. Aim for bite-sized pieces - not too chunky, not too small.
Don't skip the sauté. Cooking the onions, garlic, celery, and spices at the start builds a flavorful base. Give the spices a minute or two to bloom in the oil before adding liquids - it makes a difference.
Add broth gradually. Depending on how thick or soupy you like your chili, you can start with less broth and add more as it simmers. It's easier to thin it out than to fix a watery chili.
Let it simmer. Even though the chili comes together quickly, giving it at least 20-30 minutes to simmer helps the flavors meld together and the sweet potatoes fully soften.
Taste and adjust. Chili is one of those recipes that begs for a final taste test. Add more salt, a splash of lime juice, or a dash of hot sauce to finish - whatever makes it pop for you.
Meal Prep, Storing & Freezing Leftovers
This chili holds up like a champ, which makes it perfect for meal prep or cooking once and eating all week.
In the fridge: Store cooled chili in an airtight container for up to 5 days. The flavors actually get better over time, so leftovers are a win. Reheat on the stovetop over medium heat or in the microwave until warmed through.
In the freezer: Let the chili cool completely before transferring it to freezer-safe containers or resealable bags (lay them flat for easy stacking). It'll keep for up to 3 months. Thaw overnight in the fridge, then reheat as usual.
Pro tip: If you're freezing the chili in portions, label with the date and serving size so you're not guessing later. And leave a little space at the top of the containers - liquids expand as they freeze.
Serving Suggestions
This chili is hearty enough to stand on its own, but a few simple add-ons can take it from a basic bowl to something a little more fun (or dinner party-worthy, if that's your thing).
- Add Toppings: Classic chili toppings work great here - think avocado slices, a dollop of vegan sour cream or plain dairy-free yogurt, dairy-free cheese shreds, chopped cilantro, green onions, jalapeño slices, or a squeeze of lime juice for brightness.
- Cornbread on the side: You can't go wrong with a warm piece of vegan cornbread (or corn chips if you're keeping it casual). It's the perfect contrast to the smoky-sweet chili.
- Over rice or quinoa: Stretch your servings by spooning the chili over cooked grains. It makes for a super satisfying, protein-packed meal.
- Stuffed in a baked potato: For a comfort food twist, load it into a baked russet or sweet potato and pile on your favorite toppings.
- Taco night twist: For a light summery alternative, also try our fresh tomato and corn soup. Use the chili as a filling for tacos or burritos - or try swapping in this vegan walnut taco meat for a heartier, protein-packed version. Especially good with shredded lettuce, diced tomatoes, and a little hot sauce.
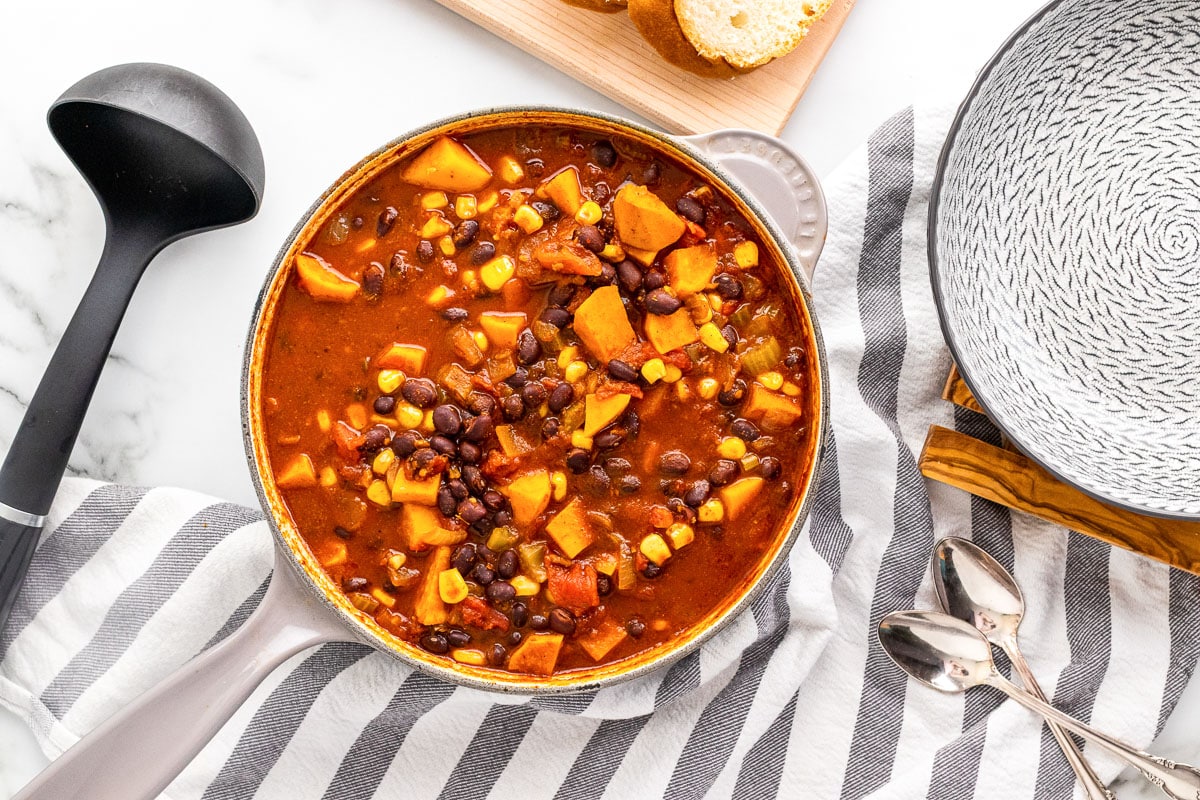
Fun Variations to Try
Add greens: Stir in a few handfuls of chopped kale, spinach, or Swiss chard during the last 5 minutes of cooking. It's an easy way to add color and a boost of healthy greens.
Make it spicier: If you like heat, add a chopped chipotle pepper in adobo sauce, a pinch of cayenne, or extra jalapeño. You can also finish each bowl with your favorite hot sauce.
Use different beans: No black beans? No problem. Pinto beans, kidney beans, or even chickpeas all work well here - or mix a few together for a little variety.
Bulk it up with grains: Stir in cooked quinoa, brown rice, or bulgur for an even heartier chili. Lentils would also be a great addition. It's especially great if you're serving a crowd or stretching leftovers.
Try roasted sweet potatoes: For extra flavor, roast the sweet potatoes in the oven before adding them to the chili. It adds a slightly caramelized edge and changes the texture in a good way.
Make it smoky: Adding a dash of smoked paprika or a splash of liquid smoke can deepen the flavor if you want a more pronounced smoky note without adding spice.
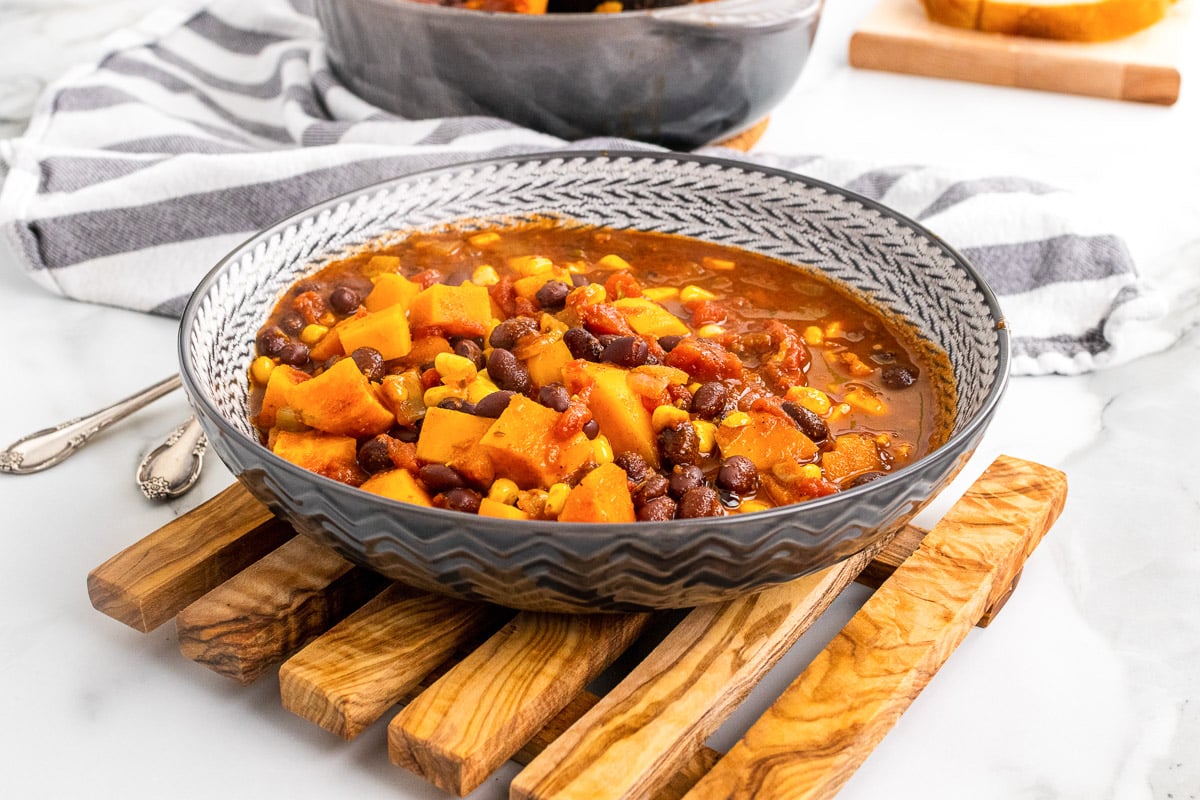
More Vegan Recipes
If you're on the lookout for some other hearty, vegetarian dinner ideas, consider trying a few of our favorites:
- Old-Fashioned Vegan Stew
- Portobello Mushroom Steak
- Marinated Mushrooms with Wild Rice
- Smoky Lentil and Sweet Potato Chili
Recipe
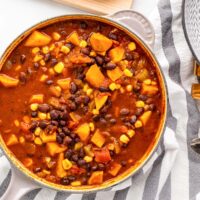
Sweet Potato Black Bean Chili
This Sweet Potato Black Bean Chili is loaded with healthy flavors from tender sweet potatoes, hearty black beans, and smoky spices. Plus, it's vegan and vegetarian friendly!
Print
Pin
Save
Servings: servings
Ingredients
- 2 tablespoon olive oil
- 1 onion peeled and diced
- 3 cloves garlic peeled and minced
- 1 stalk celery minced
- 2 tablespoon tomato paste
- 2 tablespoon chili powder
- 2 teaspoon dried oregano
- 1 teaspoon ground cumin
- 1 teaspoon paprika
- 1 teaspoon salt
- 15 oz black beans canned, rinsed and drained
- 14.5 oz diced tomatoes with chilies
- 1 ½ cups sweet potato peeled and diced,
- 1 cup corn kernels fresh or frozen
- 1 cup vegetable broth homemade or store bought
Instructions
- In a large pot, heat olive oil over medium heat. Add onion, garlic, and celery. Cook until veggies start to soften, about 4-5 minutes.

- Add in tomato paste, chili powder, oregano, cumin, paprika, and salt and cook an additional 1-2 minutes.

- Stir in the black beans, diced tomatoes, sweet potato, corn, and vegetable broth.
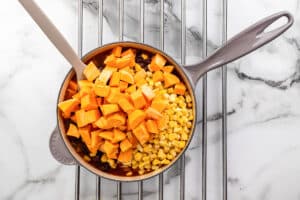
- Bring to a boil. When it reaches a boil, reduce heat to a simmer.
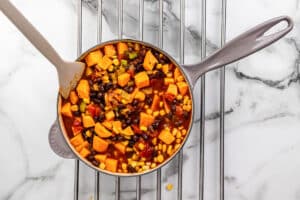
- Simmer for 45 minutes, or until the sweet potatoes are softened.
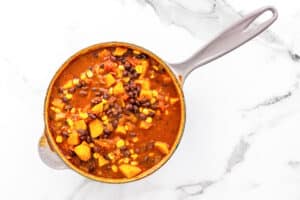
Nutrition (Estimate per Serving)
Calories: 221kcalCarbohydrates: 36gProtein: 9gFat: 6gSaturated Fat: 1gPolyunsaturated Fat: 1gMonounsaturated Fat: 4gSodium: 719mgPotassium: 701mgFiber: 10gSugar: 6gVitamin A: 5841IUVitamin C: 12mgCalcium: 86mgIron: 4mg
Vegan-ize any recipe!Grab our free vegan cheat sheet, packed with my favorite easy substitutions to make any recipe vegan.
Massaged Kale Salad with Orange-Miso Dressing

This massaged kale salad is packed with healthy greens, protein rich black beans, hearty rice, and fresh veggies. All topped with a savory and sweet orange-miso dressing. It makes for a healthy lunch, side, or a deliciously light weeknight meal.
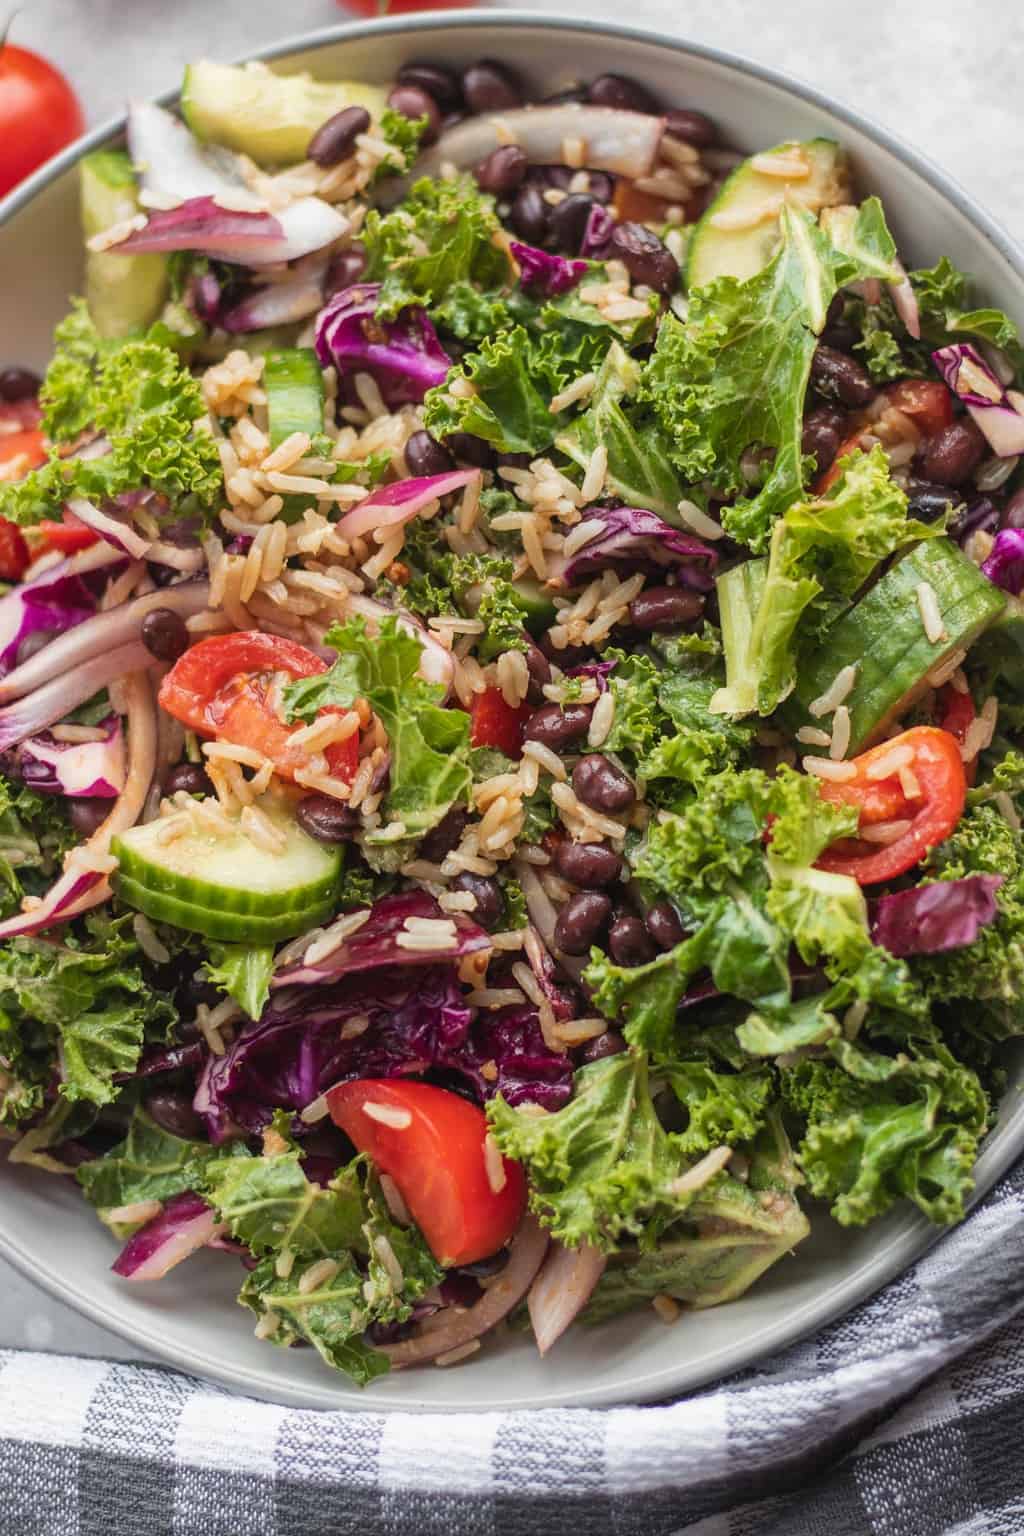
I love taking salads to the next level. Because no one likes a boring salad, right? So I do my best to keep my salads filling, flavorful and also high in protein.
That's why I think autumn and winter are actually my favorite times of year for salads. With a kale salad like this one, you can enjoy an abundance of vegetables while using a carb-y base to make the overall dish super cozy and comforting.
Just add a simple yet delicious dressing, and that's lunch or dinner sorted!
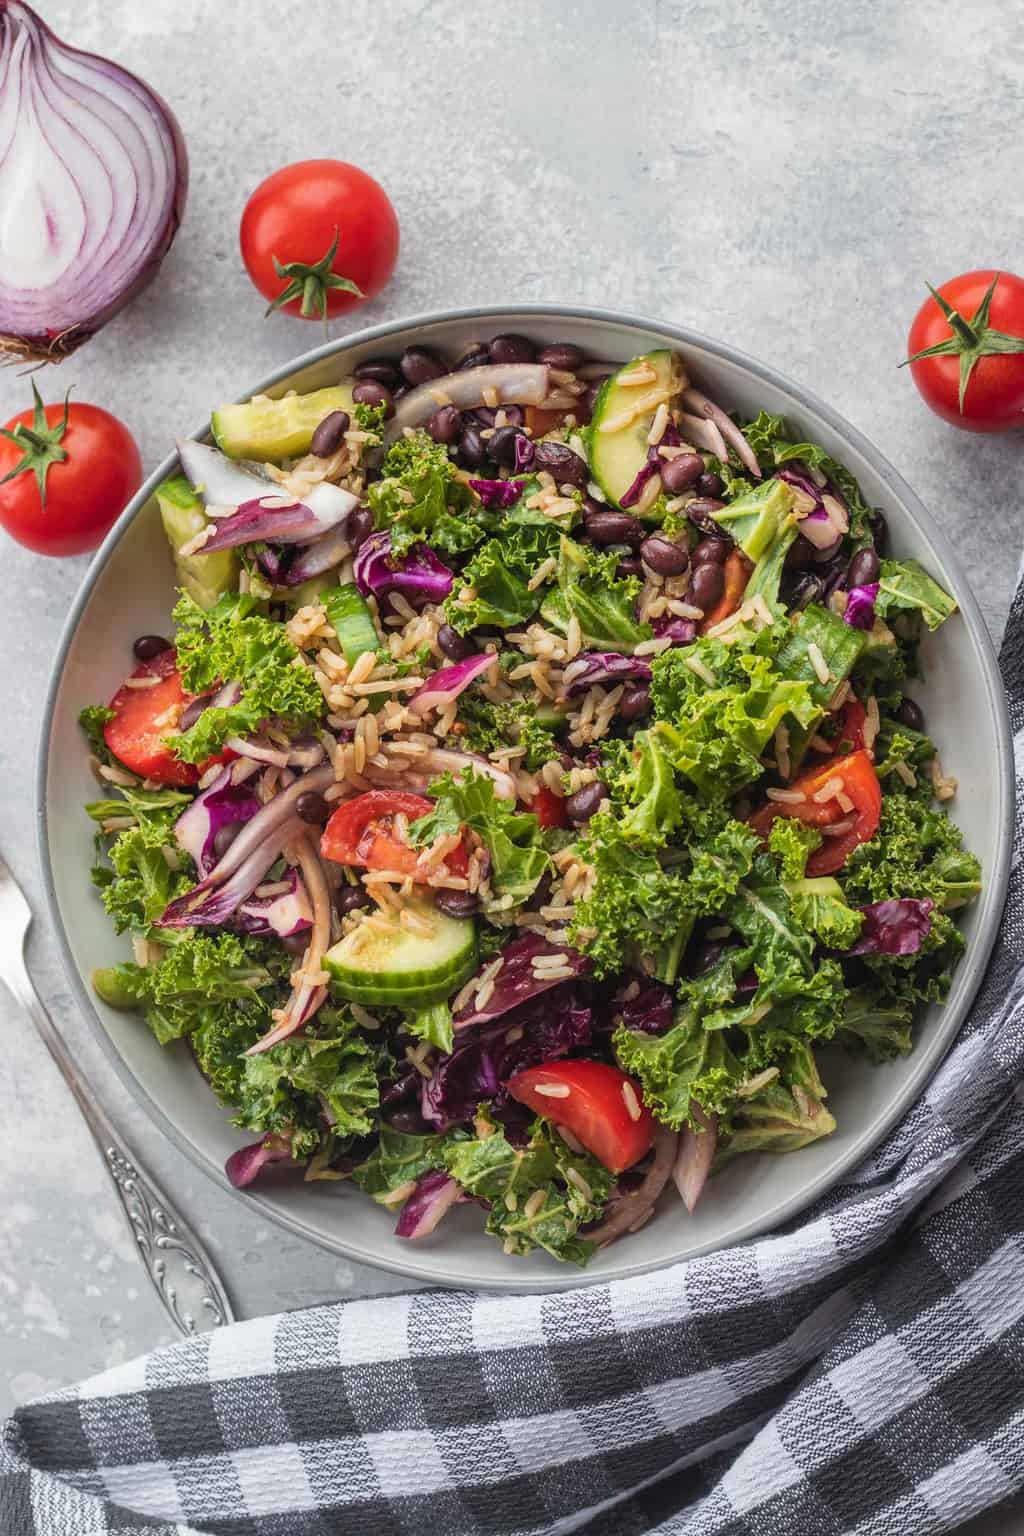
What I love about this particular kale salad is just how simple it is to throw together in just about 25-30 minutes (or even less if you have pre-cooked rice on hand).
I actually first came up with this dish when I had a bunch of leftover veggies in the fridge. Falling in love with the outcome, I tested it once more with a delicious orange-miso dressing - and it was perfect!
This massaged kale salad is:
- Delicious and packed full of flavor
- Vegan friendly!
- Easy to make, with simple ingredients and dressing
- Gluten-free
- Oil-free
- Comforting and cozy
- Ideal for a weeknight dinner.
- Made from whole, minimally processed ingredients
- Versatile - add whatever other veggies you fancy!
This kale salad works really well as a side dish for Christmas and Thanksgiving, or other family get togethers.
It's also a great make ahead or vegan meal prep recipe. And I personally love eating this as a post-workout meal!
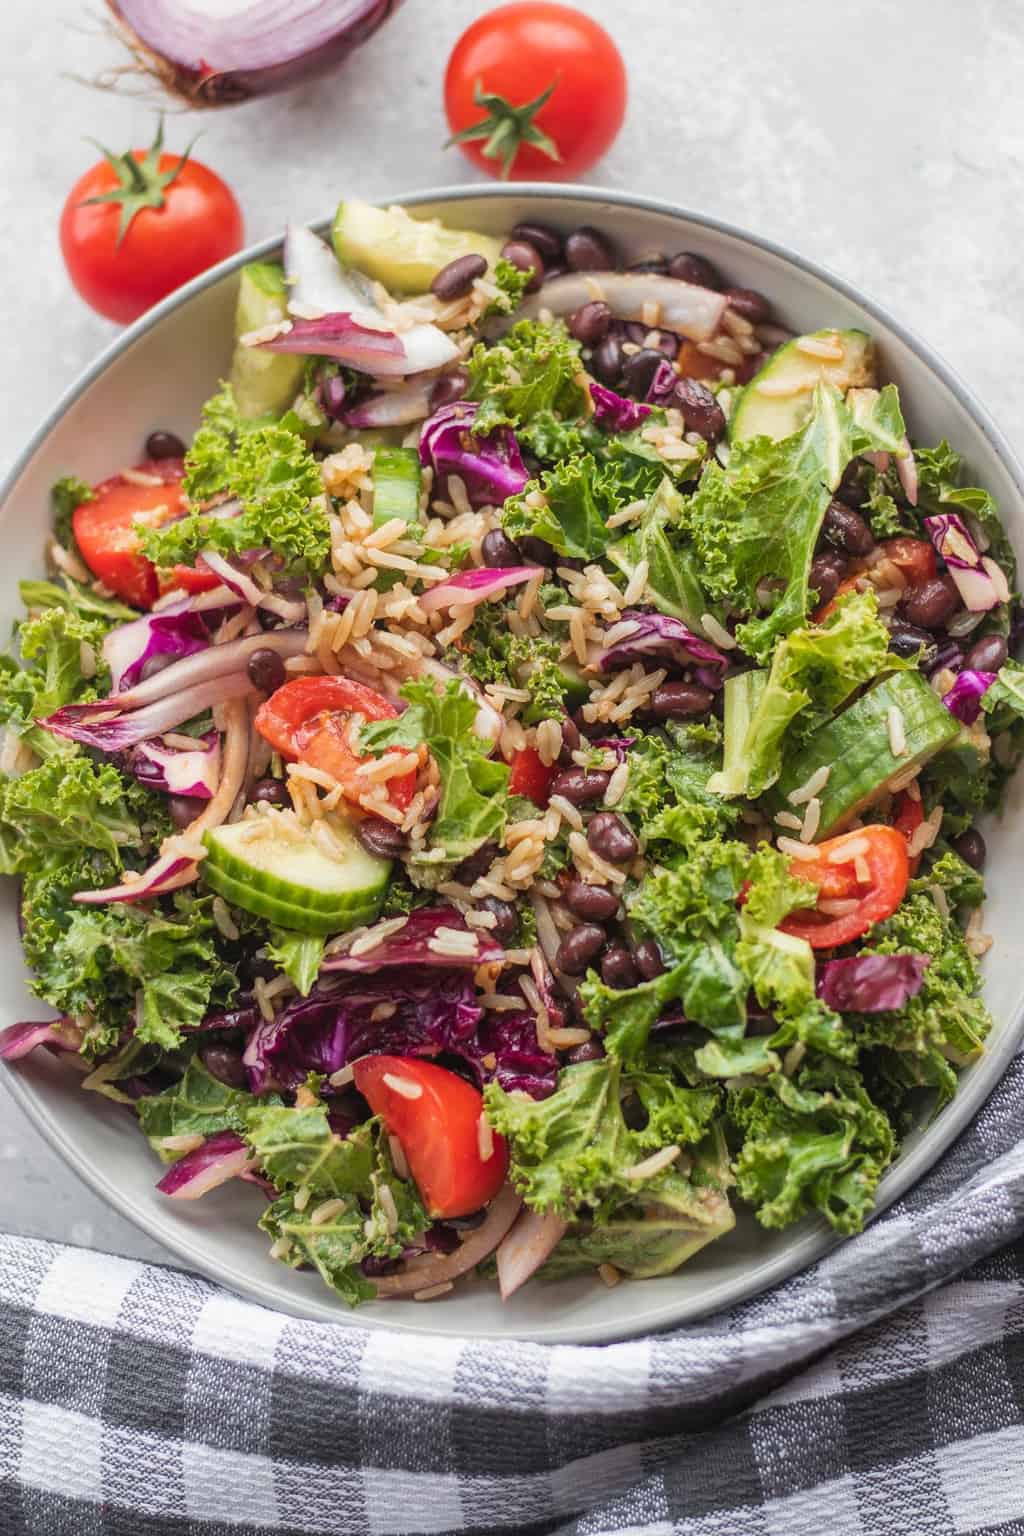
How to Make the Salad
Start by cooking your rice according to the instructions on the packaging. This usually takes around 25-30 minutes.
Meanwhile, massage the kale for 2-3 minutes to shrink it down and soften it up. (This is where the recipe gets its name!) Then stir in the tahini and a pinch of salt.
Next, prepare the dressing by stirring together fresh orange juice, miso paste and apple cider vinegar. Add a pinch of salt, to taste.
Once the rice is ready, add it to a large mixing bowl with the black beans, kale, tomatoes, purple cabbage, cucumber and red onion.
When you're just about ready to serve the black bean salad, stir in the dressing, transfer to serving plates and enjoy!
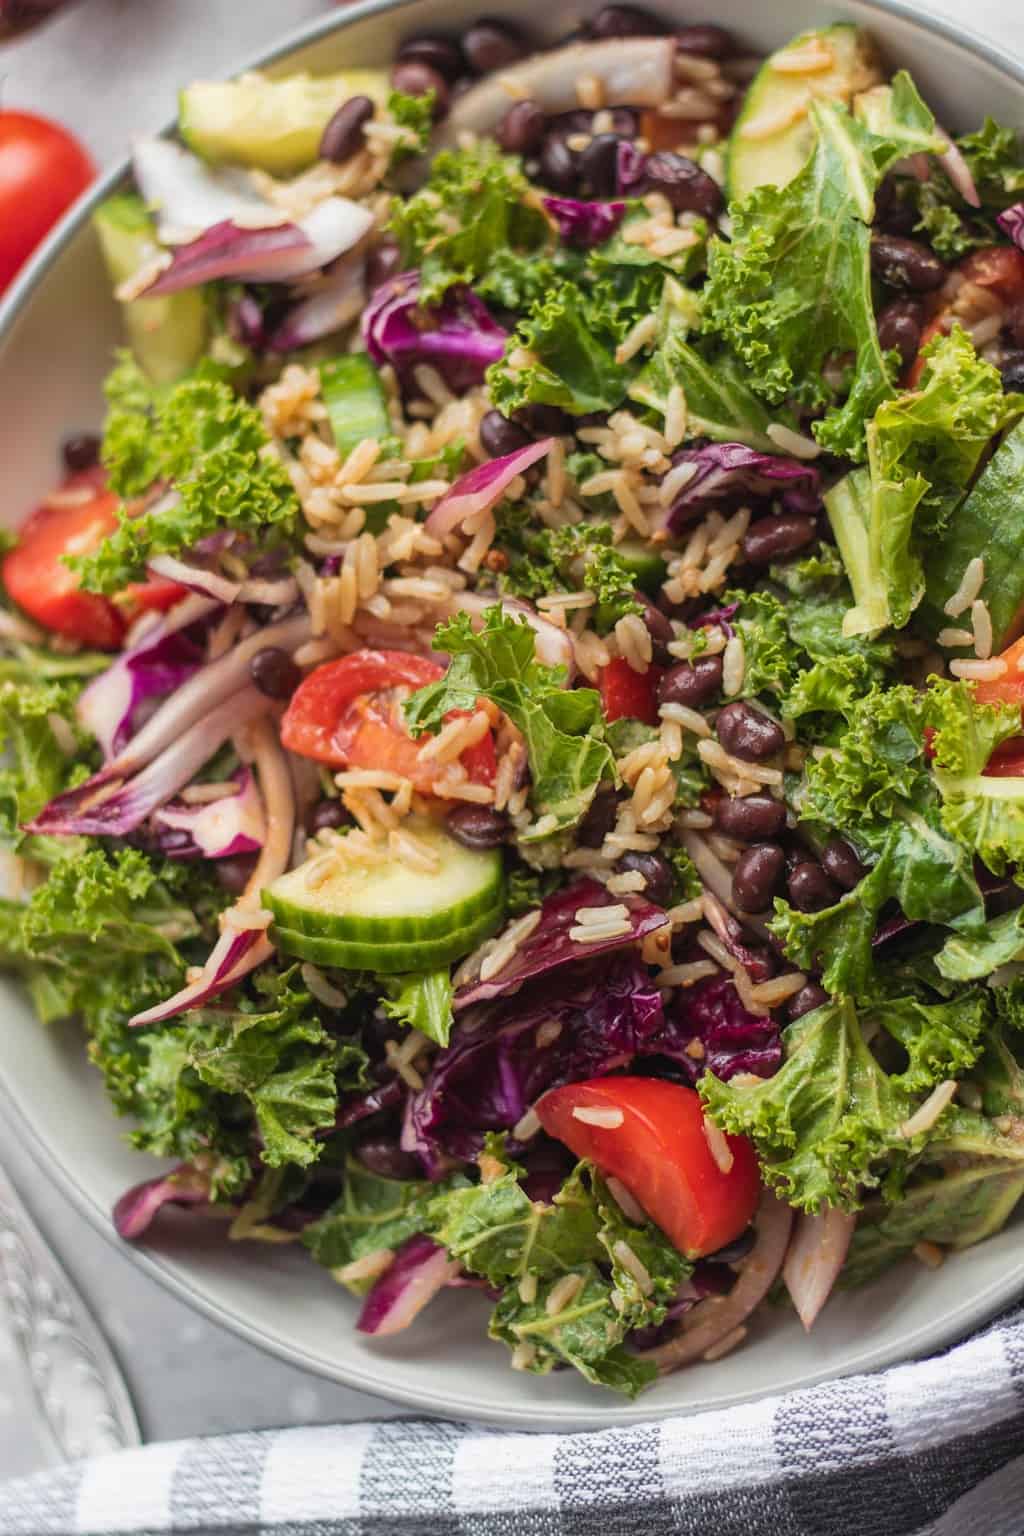
Tips & Tricks
Experiment by adding any other vegetables you have in the fridge. Think zucchini, bell pepper, other types of lettuce or greens. They all work!
If you want the salad less sweet and more tangy, replace the orange juice with the equivalent amount of lemon or lime juice.
You can keep this black bean salad in the fridge in an airtight container for 2-3 days. Although, it's best to store the dressing separate from the salad, so it doesn't get soggy.
More Recipes to Try
If you love this massaged kale salad, be sure to check out these other vegan recipes:
- Massaged Kale Salad with Cranberries and Cashews
- White Bean and Kale Skillet
- Kale Caesar Salad
- Chickpea and Kale Sandwich Spread
Recipe
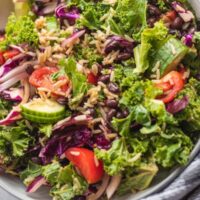
Massaged Kale Salad with Orange-Miso Dressing
This massaged kale salad is packed with healthy greens, protein rich black beans, hearty rice, and fresh veggies. All topped with a savory and sweet orange-miso dressing. It makes for a healthy lunch, side, or a deliciously light weeknight meal.
Print
Pin
Save
Servings: servings
Ingredients
- 1 cup white rice uncooked
- 2 cups kale chopped
- 1 tablespoon tahini
- salt to taste
- 1 can black beans 15oz, drained and rinsed
- 8-9 vine ripened tomatoes medium, chopped
- ½ cup red cabbage chopped
- ½ large cucumber chopped
- ½ red onion medium
For the dressing
- 1 tablespoon apple cider vinegar
- 1 teaspoon brown rice miso paste
- juice of 1 small orange
- salt to taste
Instructions
- Cook the rice according to instructions on packaging. This usually takes 25-30 minutes.
- Meanwhile, massage the kale for 2-3 minutes, then stir in the tahini.
- To make the dressing, stir together the apple cider vinegar, brown rice miso paste, orange juice and salt in a small mixing bowl.
- Once the rice is cooked, stir it together with the kale, black beans, tomatoes, red cabbage, cucumber and red onion. Add the dressing immediately before serving.
Nutrition (Estimate per Serving)
Calories: 538kcalCarbohydrates: 107gProtein: 17gFat: 7gSaturated Fat: 1gSodium: 180mgPotassium: 1845mgFiber: 9gSugar: 16gVitamin A: 11102IUVitamin C: 165mgCalcium: 215mgIron: 4mg
Vegan-ize any recipe!Grab our free vegan cheat sheet, packed with my favorite easy substitutions to make any recipe vegan.
Protein Chocolate Smoothie Bowl & Cookie Dough Bites

This protein-packed vegan chocolate smoothie bowl is the definition of dessert for breakfast! Serve it with the chewy secret ingredient cookie dough bites to start your morning in a healthy, yet delicious way. Gluten-free, oil-free, dairy-free.
You can quite often find me in the kitchen experimenting with new smoothie bowl recipes. From banana ice cream to frozen cauliflower and colorful superfoods, it's easy to throw together something new every day.
And as long as you don't go overboard with any of the ingredients (I've had a few spinach-y disasters in the past), it's quite hard to go wrong in terms of taste. No wonder everyone on Instagram seems to love them!
Simply throw a few ingredients into a blender, and you've got yourself a hydrating, nourishing breakfast.
These vegan smoothie bowls are:
- Packed full of vegan protein. While I don't struggle with protein on my vegan diet, I definitely like to look for interesting ways to boost my intake!
- Creamy and super smooth.
- Ready in ten minutes. Definitely goes to show that healthy eating doesn't have to be boring or time consuming.
- Exactly like eating dessert for breakfast.
- Perfectly chocolatey.
- Gluten-free.
- Oil-free.
- Refined sugar-free.
Vegan Chocolate Smoothie Bowl
However, the one thing I struggle with is that fruit and veg-only smoothies don't keep me full for very long. No matter the portion size, my stomach starts rumbling again within half an hour.
My go-to solution that doesn't take the option of enjoying a bowl of fruity goodness of the table is 'buffing up' my smoothies with healthy fats or a source of protein (a few tablespoons of oats works like magic too).
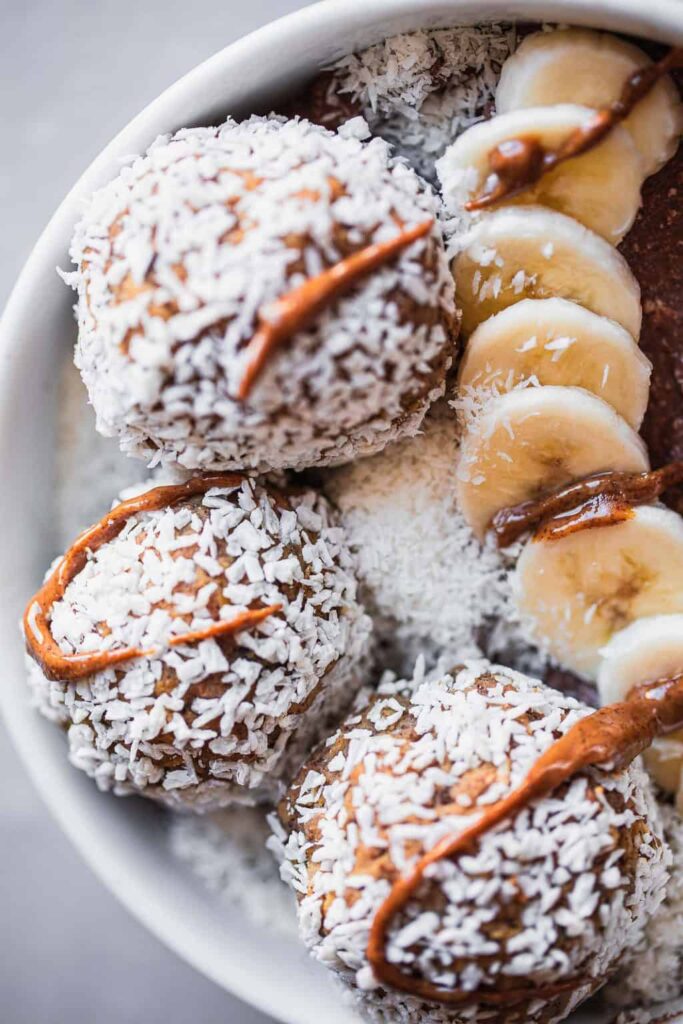
I love adding avocado to green smoothies, cashews to banana ice cream and nut butters to pretty much anything. Avocado also makes an incredible brownie - try our fudgy avocado brownies for proof.
Protein powders are great for extra flavor and helping build muscle and recover from working out at the same time.
Tofu in smoothie bowls?
The protein base of this chocolate smoothie bowl is tofu. Before you run away, hear me out. Of course, tofu is a go-to plant based protein source for many, but I don't blame you if you don't automatically think to put it in a smoothie.
I saw a couple other people do it, which made me skeptical at first. I feared a weird texture and aftertaste. But now that I've given it a go myself, I'm definitely not going back.

You might ask which tofu variety you should use. The recipe works really well with silken tofu, which makes the texture smooth and silky. I like using firm tofu too for a thicker texture that's a little bit like ice cream.
The trick is to use a high speed blender or a good quality food processor, to make sure you're not surprised with any tofu chunks.
No-bake Cookie Dough Balls
Chickpeas are simply amazing. Hummus is an obvious favourite recipe. Cookie dough is not so obvious - but with a few extra ingredients, you can turn beans into dense bites of deliciousness.
Of course, you can make and eat them by themselves, storing them in the fridge for an energizing snack (In fact, I'd recommend leaving them in the fridge for at least half an hour for optimal results).

But when eaten together with the protein smoothie bowl, these cookie dough balls take an already amazing breakfast to the next level.
I added protein powder for a hint of extra flavor. It's optional, as the chickpeas contain a lot of protein in themselves.
Plus, you can adjust the amount of maple syrup used depending on how sweet you want them to be. If you don't use protein powder, I'd recommend adding a few tablespoons extra syrup to bring in more sweetness.

Ingredients and Substitutions
For the cookie dough bites:
- Chickpeas.
- Protein powder. Use either a vanilla, a chocolate, or a neutrally flavored one. (I like this vanilla one.)
- Dark chocolate.
- Plant based milk of your choice. (I prefer almond milk.)
- Maple syrup.
- Almond butter, or any nut or seed butter of your choice.
- Shredded coconut.
For the smoothie bowl
- Banana.
- Tofu, either silken or firm.
- Cacao powder.
- Plant based milk of your choice.
How to Make the Vegan Smoothie Bowl
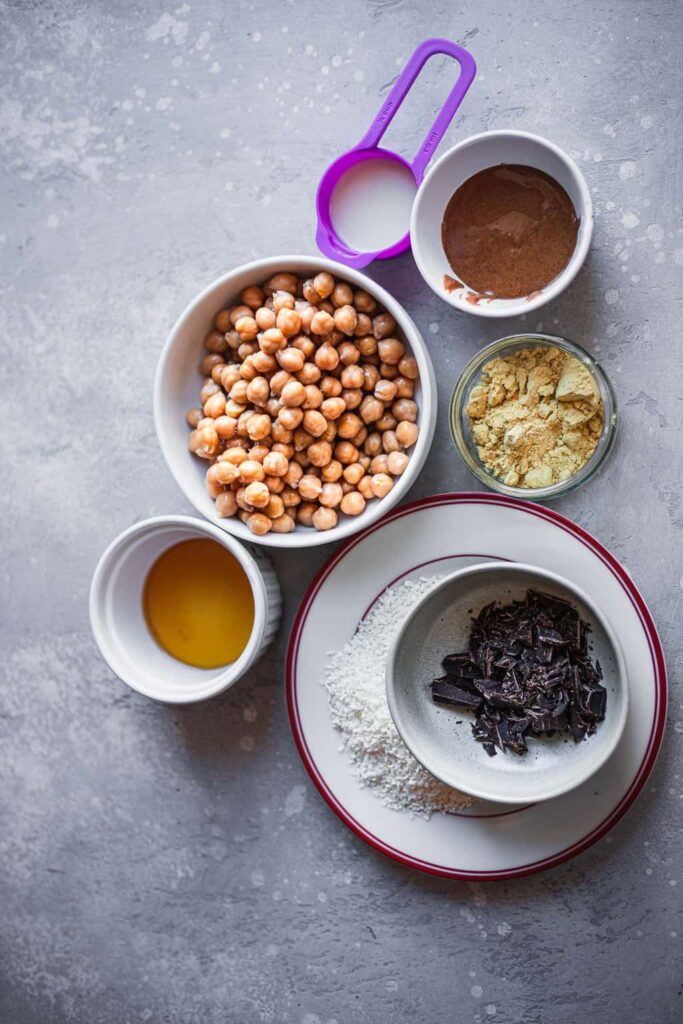
To make the cookie dough bites, add the chickpeas, protein powder, dark chocolate, plant based milk, maple syrup, and almond butter to a high speed blender and blend until smooth.
Using damp hands, make evenly-sized balls from the dough and roll each one in shredded coconut. If you want to, leave in the fridge for 30 minutes to chill to firm them up a little bit more.

To make the smoothie bowl, add the banana, tofu, cacao powder and plant based milk to a blender or food processor and blend until smooth.
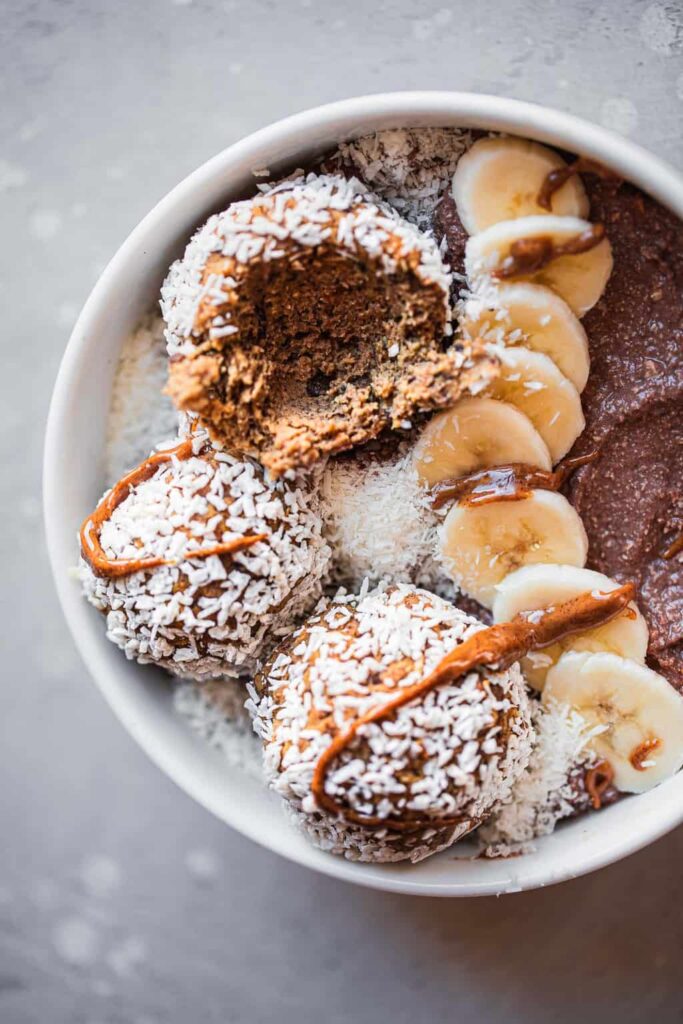
Eat this straight away, ideally as breakfast or a post-workout meal - although, pudding for dinner is never out of the question!
You can even do your preparation in the evening, store it in the fridge, and jump out of bed the next morning, knowing you have a chocolate treat waiting for you.
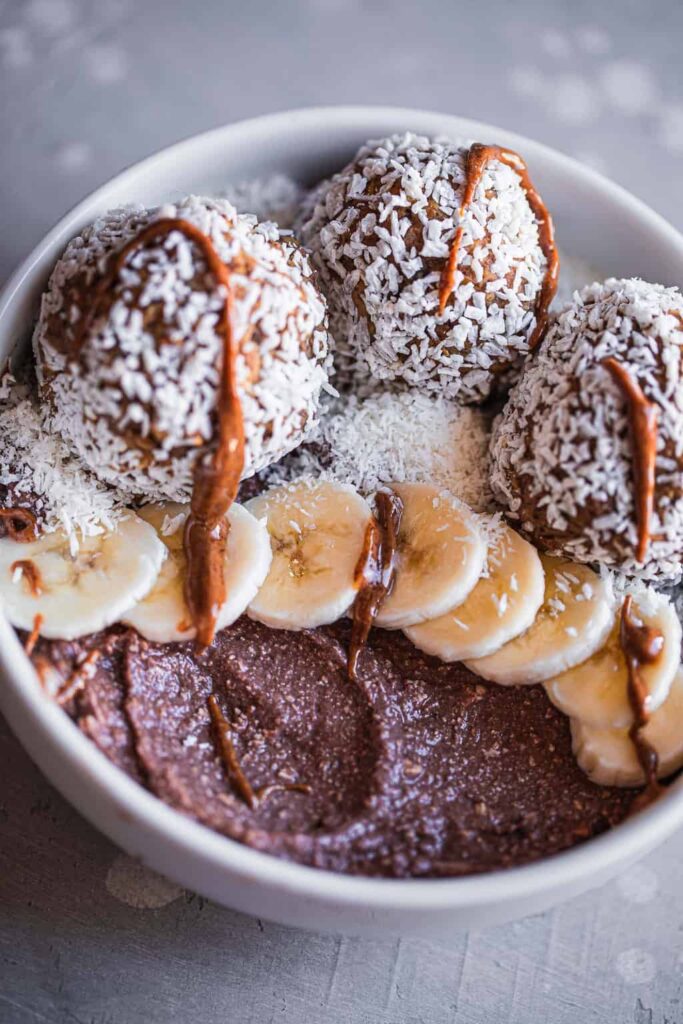
More Recipes
If you love this vegan chocolate smoothie bowl and cookie dough bites, be sure to check out these other delicious recipes:
Also worth trying: our chocolate raspberry banana smoothie.
Also try: our Vegan Chocolate Avocado Cookies With Double Chocolate Chunks.
- Chocolate Mint Green Smoothie
- Green Smoothie Bowl
- Chocolate Cherry Protein Shake
- Vegan Chocolate Desserts
Recipe

Vegan Protein Chocolate Smoothie Bowl & Cookie Dough Bites
This protein-packed vegan chocolate smoothie bowl is the definition of dessert for breakfast! Serve it with the decadent cookie dough bites to start your morning in a healthy, yet delicious way. Gluten-free, oil-free, and dairy-free.
Print
Pin
Save
Servings: servings
Equipment
- Blender
Ingredients
For the smoothie bowl
- 1 large banana
- 7 oz silken tofu
- 1 tablespoon cacao powder
- 2 tablespoon plant based milk
For the cookie dough balls
- 1 can chickpeas drained and rinsed (about 240g or 1.5 cups)
- ½ scoop vegan protein powder optional
- 1 oz dark chocolate chopped
- 3 tablespoon plant based milk
- 2 tablespoon maple syrup
- 2 tablespoon almond butter
- ⅓ cup desiccated coconut
Instructions
TO MAKE THE SMOOTHIE BOWL
- Add the banana, tofu, cacao powder and plant based milk to a blender or food processor and blend until smooth.
TO MAKE THE COOKIE DOUGH BITES
- Add the chickpeas, protein powder, dark chocolate, plant based milk, maple syrup, and almond butter to a high speed blender and blend until smooth. Using damp hands, make evenly-sized balls from the dough and roll each one in shredded coconut. If you want to, leave in the fridge for 30 minutes to chill to firm them up a little bit more.
Nutrition (Estimate per Serving)
Calories: 450kcalCarbohydrates: 44gProtein: 12gFat: 28gSaturated Fat: 13gTrans Fat: 1gCholesterol: 1mgSodium: 68mgPotassium: 772mgFiber: 8gSugar: 26gVitamin A: 44IUVitamin C: 5mgCalcium: 174mgIron: 4mg
Vegan-ize any recipe!Grab our free vegan cheat sheet, packed with my favorite easy substitutions to make any recipe vegan.
Black Bean and Zucchini Tortilla Casserole
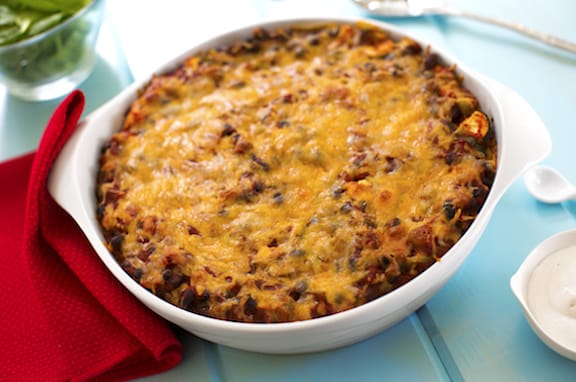
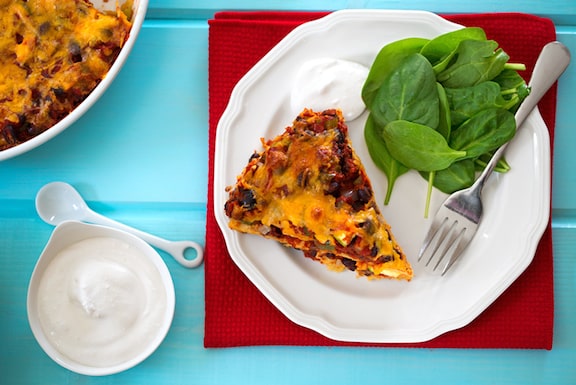
Chilaquiles is a classic Southwestern casserole that layers soft corn tortillas with beans and cheese (vegan in this case).
Adding zucchini and chiles adds to the lively flavors. This recipe makes a nice change-of-pace holiday main dish but is also easy enough to make for weeknight meals.
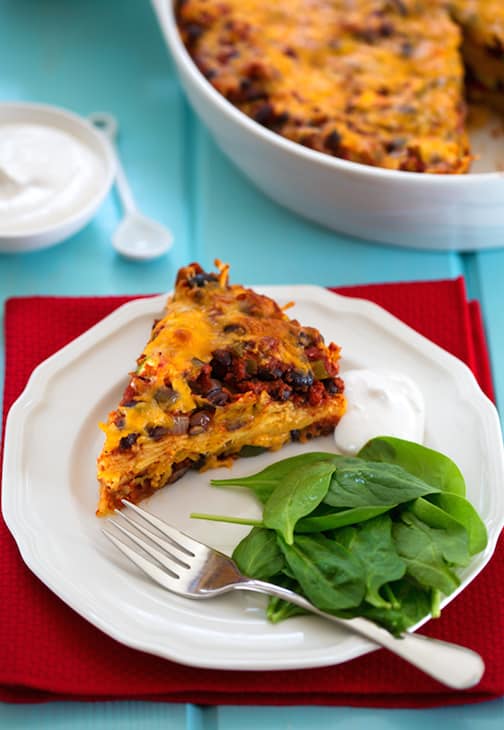
More Recipes
- Here are more easy bean main dishes.
- Find lots more tortilla recipes in A Southwestern Supper.
- Here are more recipes for a Vegetarian and Vegan Friendly Thanksgiving.
- Find more ways to make Special Occasions and Entertaining easier and healthier.
- Browse more of VegKitchen's vegan casserole recipes.
Photos by Hannah Kaminsky.
Adapted from The Vegetarian Family Cookbook.
Recipe

Black Bean and Zucchini Tortilla Casserole
This southwestern-style casserole makes for a nice change-of-pace holiday main dish, but this is also easy enough to make for weeknight meals.
Print
Pin
Save
Servings:
Ingredients
- 1 ½ tablespoon extra-virgin olive oil
- 1 cup chopped onion
- 1 medium green bell pepper diced
- 1 28 oz can crushed or pureed tomatoes
- 1 -2 small fresh hot chile peppers seeded and minced, or 1 (4 oz) can chopped mild green chiles
- 2 teaspoon chili powder or more, to taste
- 1 teaspoon dried oregano
- 1 teaspoon ground cumin
- 1 16-20 oz can black beans, drained and rinsed
- 1 medium zucchini quartered lengthwise and thinly sliced
- 12 corn tortillas torn or cut into several pieces
- 8 oz cheddar-style nondairy cheese Daiya is great with this!
- vegan sour cream homemade or purchased or Cashew Cream for garnish, optional
Instructions
- Preheat the oven to 400°F.
- Heat the oil in a large saucepan. Sauté the onion until translucent. Add the green pepper and continue to sauté until it has softened and the onions are golden.
- Stir in the crushed tomatoes and seasonings, black beans, and zucchini. Bring to a simmer, then simmer gently for 5 minutes.
- Layer as follows in a lightly oiled 9 x 13 inch or 2-quart round casserole dish: half of the tortillas, half of the tomato-black bean mixture, and half of the cheese. Repeat.
- Bake for 15 to 20 minutes, or until the cheese is bubbly. Let stand for 5 to 10 minutes, then cut into squares or wedges to serve.
Nutrition (Estimate per Serving)
Calories: 221kcalCarbohydrates: 29gProtein: 4gFat: 10gSaturated Fat: 3gSodium: 314mgPotassium: 235mgFiber: 5gSugar: 3gVitamin A: 319IUVitamin C: 26mgCalcium: 74mgIron: 2mg
Vegan-ize any recipe!Grab our free vegan cheat sheet, packed with my favorite easy substitutions to make any recipe vegan.
This post was originally published on 21 September 2014.
Creamy Vegan Enchilada Casserole
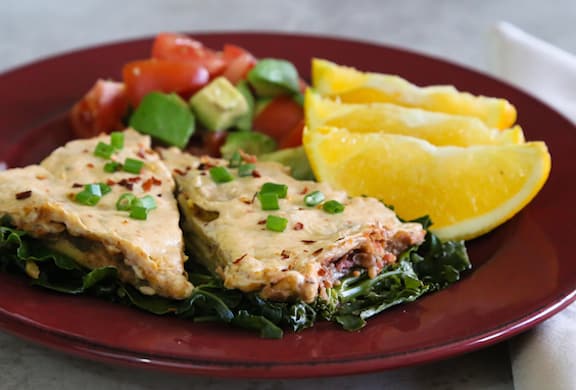
With this luscious creamy vegan enchilada casserole recipe, now you can have “the whole enchilada” without having to fill and roll individual tortillas! While you’ve got the oven going at 400°F, roast some veggies as a side dish. A crisp green salad rounds the meal out nicely. Photos by Evan Atlas. [Read more...]
Southwestern Tofu Scramble (Migas)
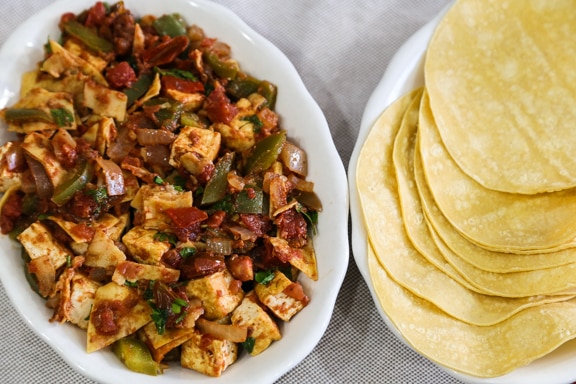
This tasty dish, brimming with lively southwestern flavors, is a vegan version of a traditional southwestern egg dish. It's known as migas, a word that literally means "crumbs" in Spanish, in this case referring to bits of tortilla. In the original recipe, the tortilla pieces are scrambled with eggs; our vegan version replaces eggs with tofu. Serve this dish for a leisurely weekend brunch or as an easy dinner. Round out your meal with a colorful salad and simple bean dish like Refried Pinto Beans or Garlicky Skillet Black Beans. Photos by Evan Atlas. [Read more...]
Vegan Cincinnati “Chili Mac”
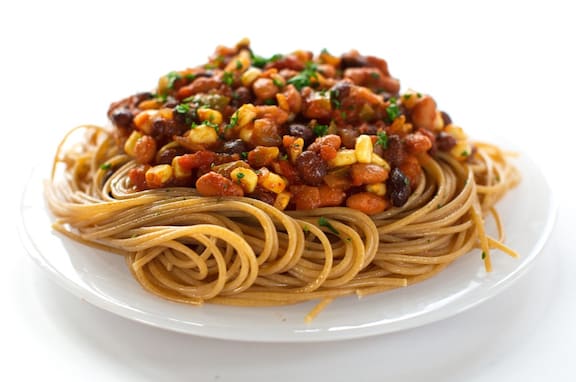
Cincinnati "Chili Mac" features hearty bean chili with varying ingredients and seasonings. The one standard factor is that it’s always served over spaghetti. A touch of sweet spices (such as cinnamon or allspice) are added as well. The result: a hybrid recipe that’s uniquely American. Photo by Hannah Kaminsky. [Read more...]
Cool Refried Bean Wraps
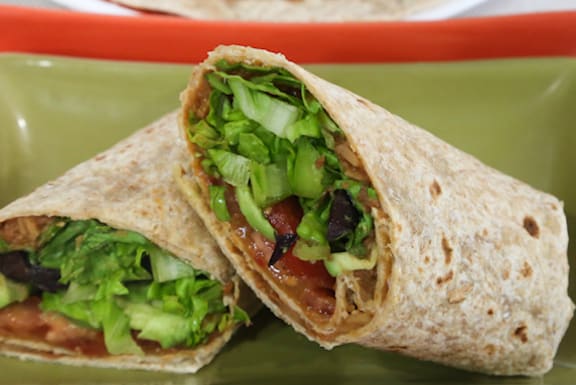
Serve these easy refried bean wraps for lunch with with stone-ground natural tortilla chips and some fruit! Or whip up this recipe for dinner and serve the wraps with baked potatoes or sweet potatoes. (Tortilla chips and salsa are welcome, too.) These wraps are also a good companion to soups, like our Potato, Corn, and Green Chile Soup, for example. Photos by Evan Atlas. [Read more...]
Super-Easy Vegan Tortilla Casserole
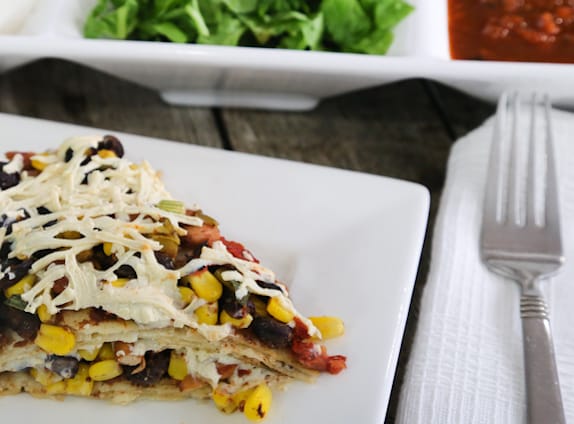
This Super-Easy Vegan Tortilla Casserole is my favorite in-a-hurry casserole filled with southwestern flavors. The recipe involves throwing together a lot of convenient ingredients like canned beans and tomatoes, and frozen corn, but it's unbelievably good when you need an emergency dinner. While it's in the oven, steam a big batch of broccoli or prepared stir-fried collard greens, and make a salad or a raw veggie platter. Adapted from Vegan Express. Photos by Evan Atlas. [Read more...]
Black Bean Salad with Tomatoes, Olives, and Croutons
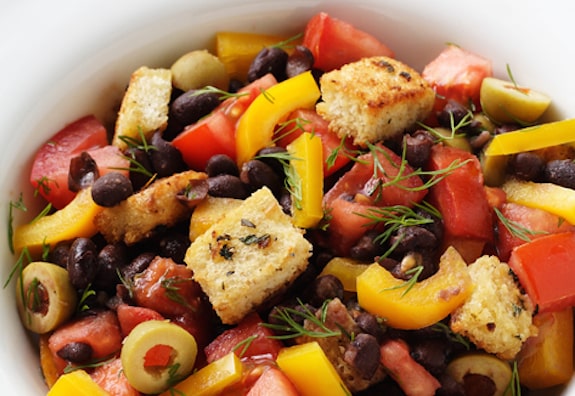
This easy and appetizing black bean and tomato salad adds color and crunch to the plate. Use gluten-free croutons if need be, or replace with sautéed cubes of prepared polenta. Serve this delicious recipe with grain dishes and pastas, or simple quesadillas or soft tacos. Add some sautéed greens or steamed broccoli and you've got a great weekday meal! Adapted from Vegan Express. Photo by Susan Voisin, FatFree Vegan Kitchen. [Read more...]
Black Bean and Avocado Salad with Oranges or Mango
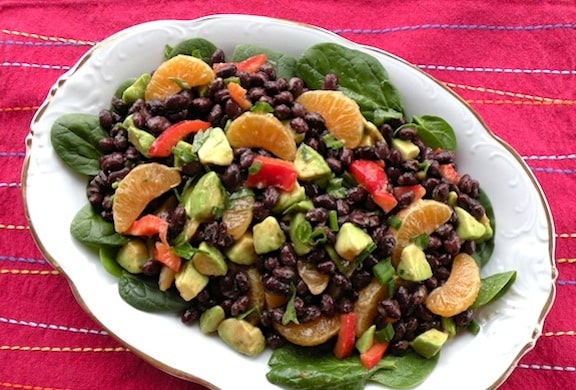
Black beans, diced mango, and avocado taste heavenly together in this delicious salad recipe. Fresh, perfectly ripe mangos are best, of course, but they're not always in season and occasionally unreliable. Once in a while I like to take the guesswork out of mangos and use canned (organic), which is akin to using canned pineapple-you know exactly what you're going to get. Otherwise, tiny clementine sections work well to give little bursts of fruity flavor. [Read more...]
Vegetarian Pasta with Asparagus and Arugula
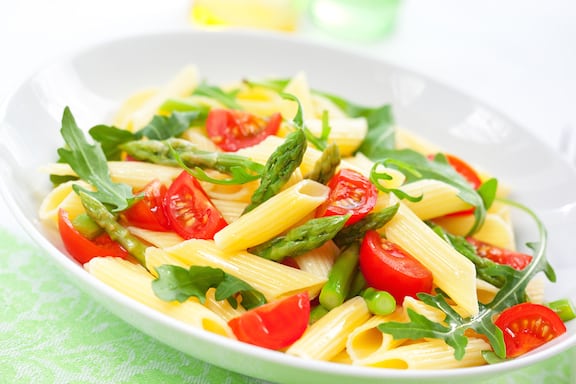
Mellow asparagus and bold arugula contrast nicely in this simple yet delicious pasta recipe. It's perfect springtime fare, though you can enjoy it year round. Complete the meal simply with a big salad (add chickpeas or beans for protein) and a fresh whole grain bread. [Read more...]
Chickpea and Sweet Potato Burger
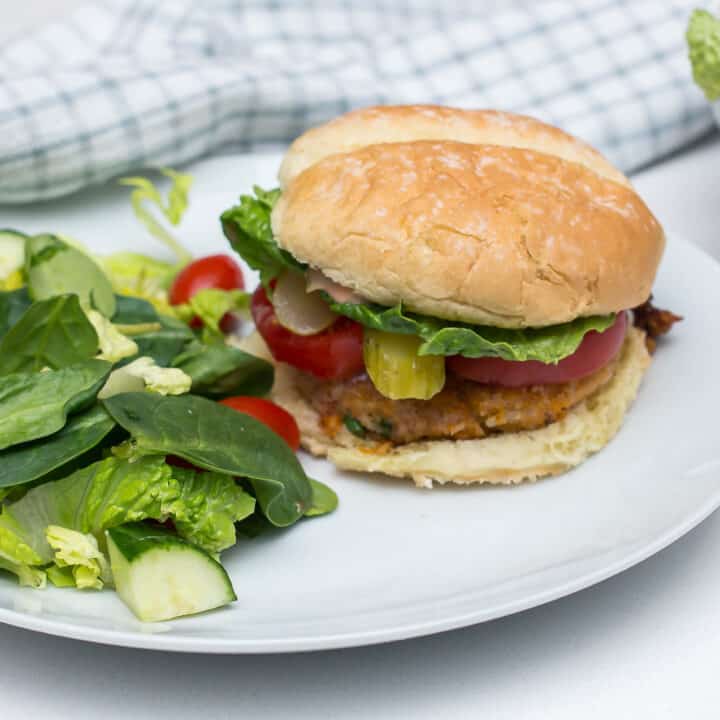
Sweet potato and chickpeas blend into a smoky, hearty patty that bakes up firm and satisfying - no frying required. These Chickpea and Sweet Potato Burgers are easy to make ahead and reheat beautifully.

Key Ingredients & Substitutions
- Sweet potato. Roasted sweet potato gives the patties their natural sweetness, moisture, and binding power. One medium sweet potato yields about 1 cup of flesh once cooked and peeled. You can also use leftover baked sweet potato to save time. Butternut squash works as a substitute with a slightly more neutral flavor.
- Chickpeas. A 540 ml (about 19 oz) can of chickpeas provides the bulk and protein that makes these patties substantial. Make sure they're well-drained and rinsed before going into the food processor - excess moisture leads to soggy patties. Love chickpeas? Try these Vegan Chickpea Patties too.
- Barbecue sauce. This is where most of the flavor comes from. Use your favorite vegan BBQ sauce - smoky, sweet, or spicy all work well. Homemade or store-bought, just make sure it's vegan (most are, but worth checking the label).
- Chili seasoning. Adds warmth and depth to complement the BBQ sauce. Use a mild blend for a family-friendly burger, or go with a spicier mix if you like heat. You can also swap in a combination of cumin, smoked paprika, and garlic powder.
- Breadcrumbs. The binder that helps the patties hold their shape. Regular or panko both work. For gluten-free, use certified gluten-free breadcrumbs or finely crushed gluten-free crackers.
Helpful Tips
Don't over-process the mixture. The food processor is key for getting a uniform, pliable mixture - but stop before it becomes completely smooth. A little texture from the chickpeas helps the patties hold together and gives them a more satisfying bite.
Chill before baking. After forming your patties, freeze them for at least 15 minutes before they go in the oven. This firms them up so they don't fall apart when you transfer them to the baking sheet, and helps them hold their round shape during baking.
Watch your sweet potato moisture. Once you've cooked and peeled the sweet potato, let it cool fully before using. If it seems particularly moist, blot it gently with a paper towel. Too much moisture is the main reason patties come out soft instead of firm.
Use wet hands to shape the patties. The mixture can be a little sticky. Lightly wetting your hands before forming each patty makes it much easier and gives you cleaner edges.
Make them ahead. These patties are great for meal prep - form them, wrap individually, and refrigerate for up to 2 days before baking. Or bake a full batch and refrigerate the cooked patties for quick weeknight dinners.
Variations
- Spicy version. Add ½ teaspoon of cayenne pepper or a tablespoon of sriracha to the food processor for a burger with real heat.
- Smoky BBQ. Use smoked BBQ sauce and add a teaspoon of smoked paprika for an extra layer of smoky flavor throughout.
- Black bean swap. Replace the chickpeas with a well-drained can of black beans for a slightly different texture and earthier flavor profile - similar to these Vegan Chipotle Black Bean Burgers.
- Add roasted corn. Fold in ¼ cup of roasted corn kernels after processing for a sweet, smoky burst in every bite.
- Gluten-free. Swap the breadcrumbs for certified gluten-free breadcrumbs and serve on a gluten-free bun or in a lettuce wrap.
- Herb boost. Stir in 2 tablespoons of finely chopped fresh cilantro or parsley after processing for brightness.
Serving Ideas
Stack these on toasted hamburger buns with the classic lineup - vegan mayo, lettuce, sliced tomato, and pickles. The smoky-sweet flavor of the patty pairs especially well with a tangy sauce, so don't skip it. A creamy Easy Vegan Coleslaw on the side adds the perfect crunch.
They're also wonderful served without bread - break a patty over a grain bowl or hearty green salad with a drizzle of BBQ sauce or tahini dressing. If you're feeding a crowd, put out a spread of toppings and let everyone customize their own burger.
Storing & Freezing
Cooked patties keep well in an airtight container in the refrigerator for up to 4 days. Reheat in a 350°F oven for about 10 minutes, or in a skillet over medium heat for a few minutes per side. Avoid the microwave - it softens the texture.
These patties freeze well. Let them cool completely after baking, then freeze in a single layer before transferring to a freezer bag with parchment between each patty. They'll keep for up to 2 months. Reheat from frozen in a 350°F oven for about 15-18 minutes until heated through.
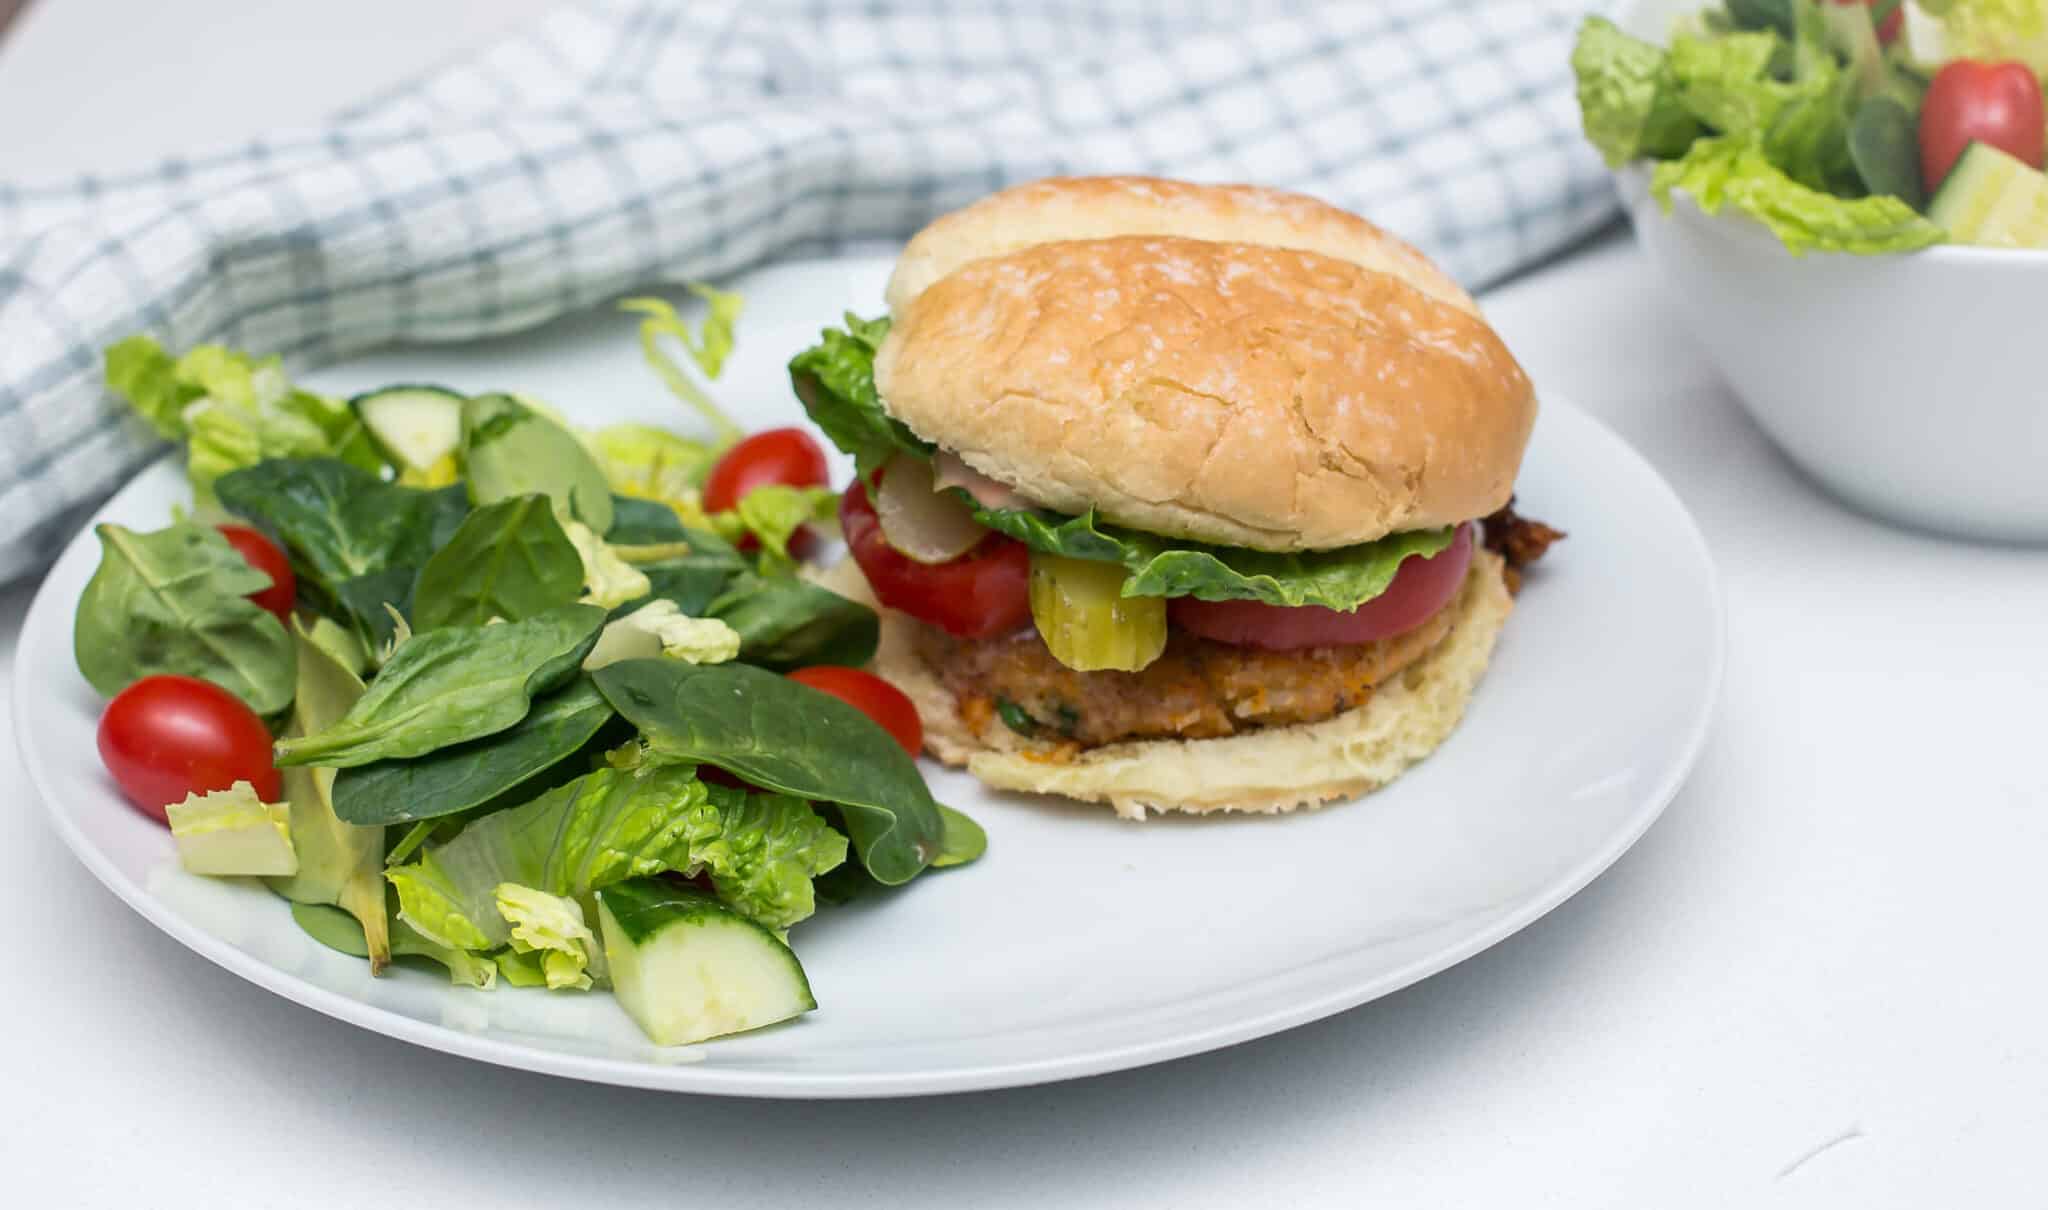
More Vegan Burgers & Patties
If you loved this recipe, here are a few more vegan burgers to try:
- Vegan Chickpea Patties
- Vegan Chipotle Black Bean Burgers
- Vegan Quinoa Mushroom Burger
- Vegan Beet Burgers
- Best Vegan Burger Recipes
Recipe
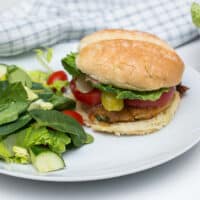
Chickpea and Sweet Potato Burger
These Chickpea and Sweet Potato Burgers are smoky, hearty, and satisfying — baked (not fried) and easy to prep ahead for quick weeknight dinners.
Print
Pin
Save
Servings: burgers
Ingredients
- 1 cup sweet potato meat about a medium sweet potato, cooked and peeled
- 1 can 540 ml chickpeas, drained and well rinsed
- ¼ cup barbecue sauce homemade or commercial
- ¼ teaspoon salt
- 1 tablespoon chili seasoning
- ⅓ cup bread crumbs
- tomatoes
- lettuce
- vegan mayonnaise
- pickles
- 5 hamburger buns
Instructions
- Preheat the oven to 400°F. Pierce the sweet potato a few times with a fork and bake for 45–50 minutes until completely tender. (Alternatively, microwave on high for 8–10 minutes.) Once cool enough to handle, peel and measure out 1 cup of flesh.
- Reduce the oven temperature to 350°F and line a baking sheet with parchment paper.
- Add the sweet potato flesh, chickpeas, barbecue sauce, salt, chili seasoning, and breadcrumbs to a food processor. Pulse until the mixture is uniform and holds together — stop before it becomes completely smooth. Scrape down the sides as needed.
- With lightly wet hands, divide the mixture into 5 equal portions and shape into round patties about ½ inch thick. Place on the prepared baking sheet and freeze for 15 minutes to firm up.
- Bake for 30 minutes, flipping carefully at the 15-minute mark, until the patties are firm and lightly golden on both sides. Let cool for 5 minutes before serving.
- Toast the hamburger buns. Spread vegan mayo on the inside of each bun, then stack with a patty, lettuce, tomato, and pickles. Serve immediately.
Nutrition (Estimate per Serving)
Calories: 145kcalCarbohydrates: 27gProtein: 5gFat: 2gSaturated Fat: 1gPolyunsaturated Fat: 1gMonounsaturated Fat: 1gSodium: 227mgPotassium: 142mgFiber: 2gSugar: 4gVitamin A: 3774IUVitamin C: 1mgCalcium: 70mgIron: 2mg
Vegan-ize any recipe!Grab our free vegan cheat sheet, packed with my favorite easy substitutions to make any recipe vegan.
Italian Pasta and Bean Soup (Pasta e Fagiole)

Like Minestrone, Italian Pasta and Bean Soup is a classic, sometimes referred to as pasta e fagiole. This recipe makes a complete meal with fresh garlic bread and salad. Adapted from Vegan Soups and Hearty Stews for All Seasons by Nava Atlas. [Read more...]
Hummus and Quinoa Wrap
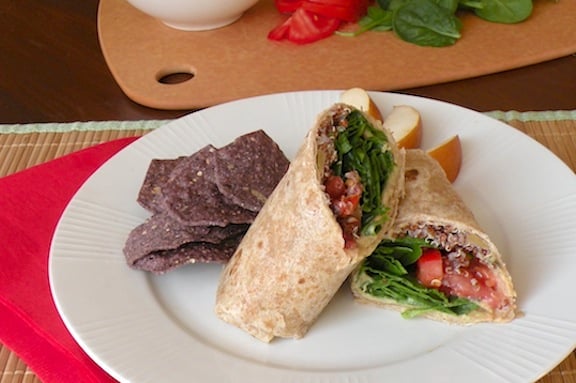
This hummus and quinoa wrap, embellished with fresh and dried tomatoes and leafy greens is chock-full of flavor and protein. Once you have your quinoa cooked (actually, this is a good use for leftover quinoa), this comes together in minutes for an easy dinner or to take along to school or work for lunch. Serve with any sort of soup, a potato dish, salsa and chips, fresh corn — wraps go with most anything! [Read more...]
Chickpea Wraps
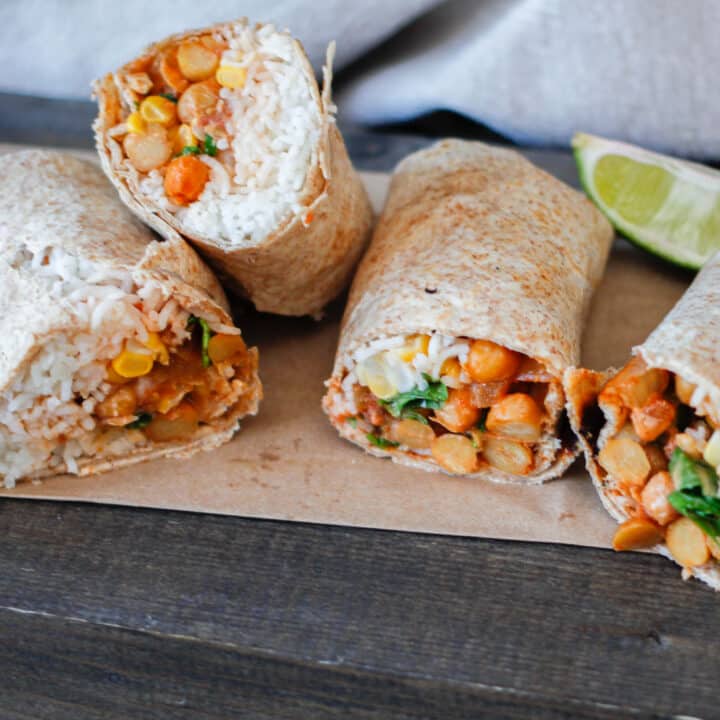
These Chickpea Wraps are deliciousand a bit spicy! Perfect for meal prepping, these wraps will become a staple in your diet.
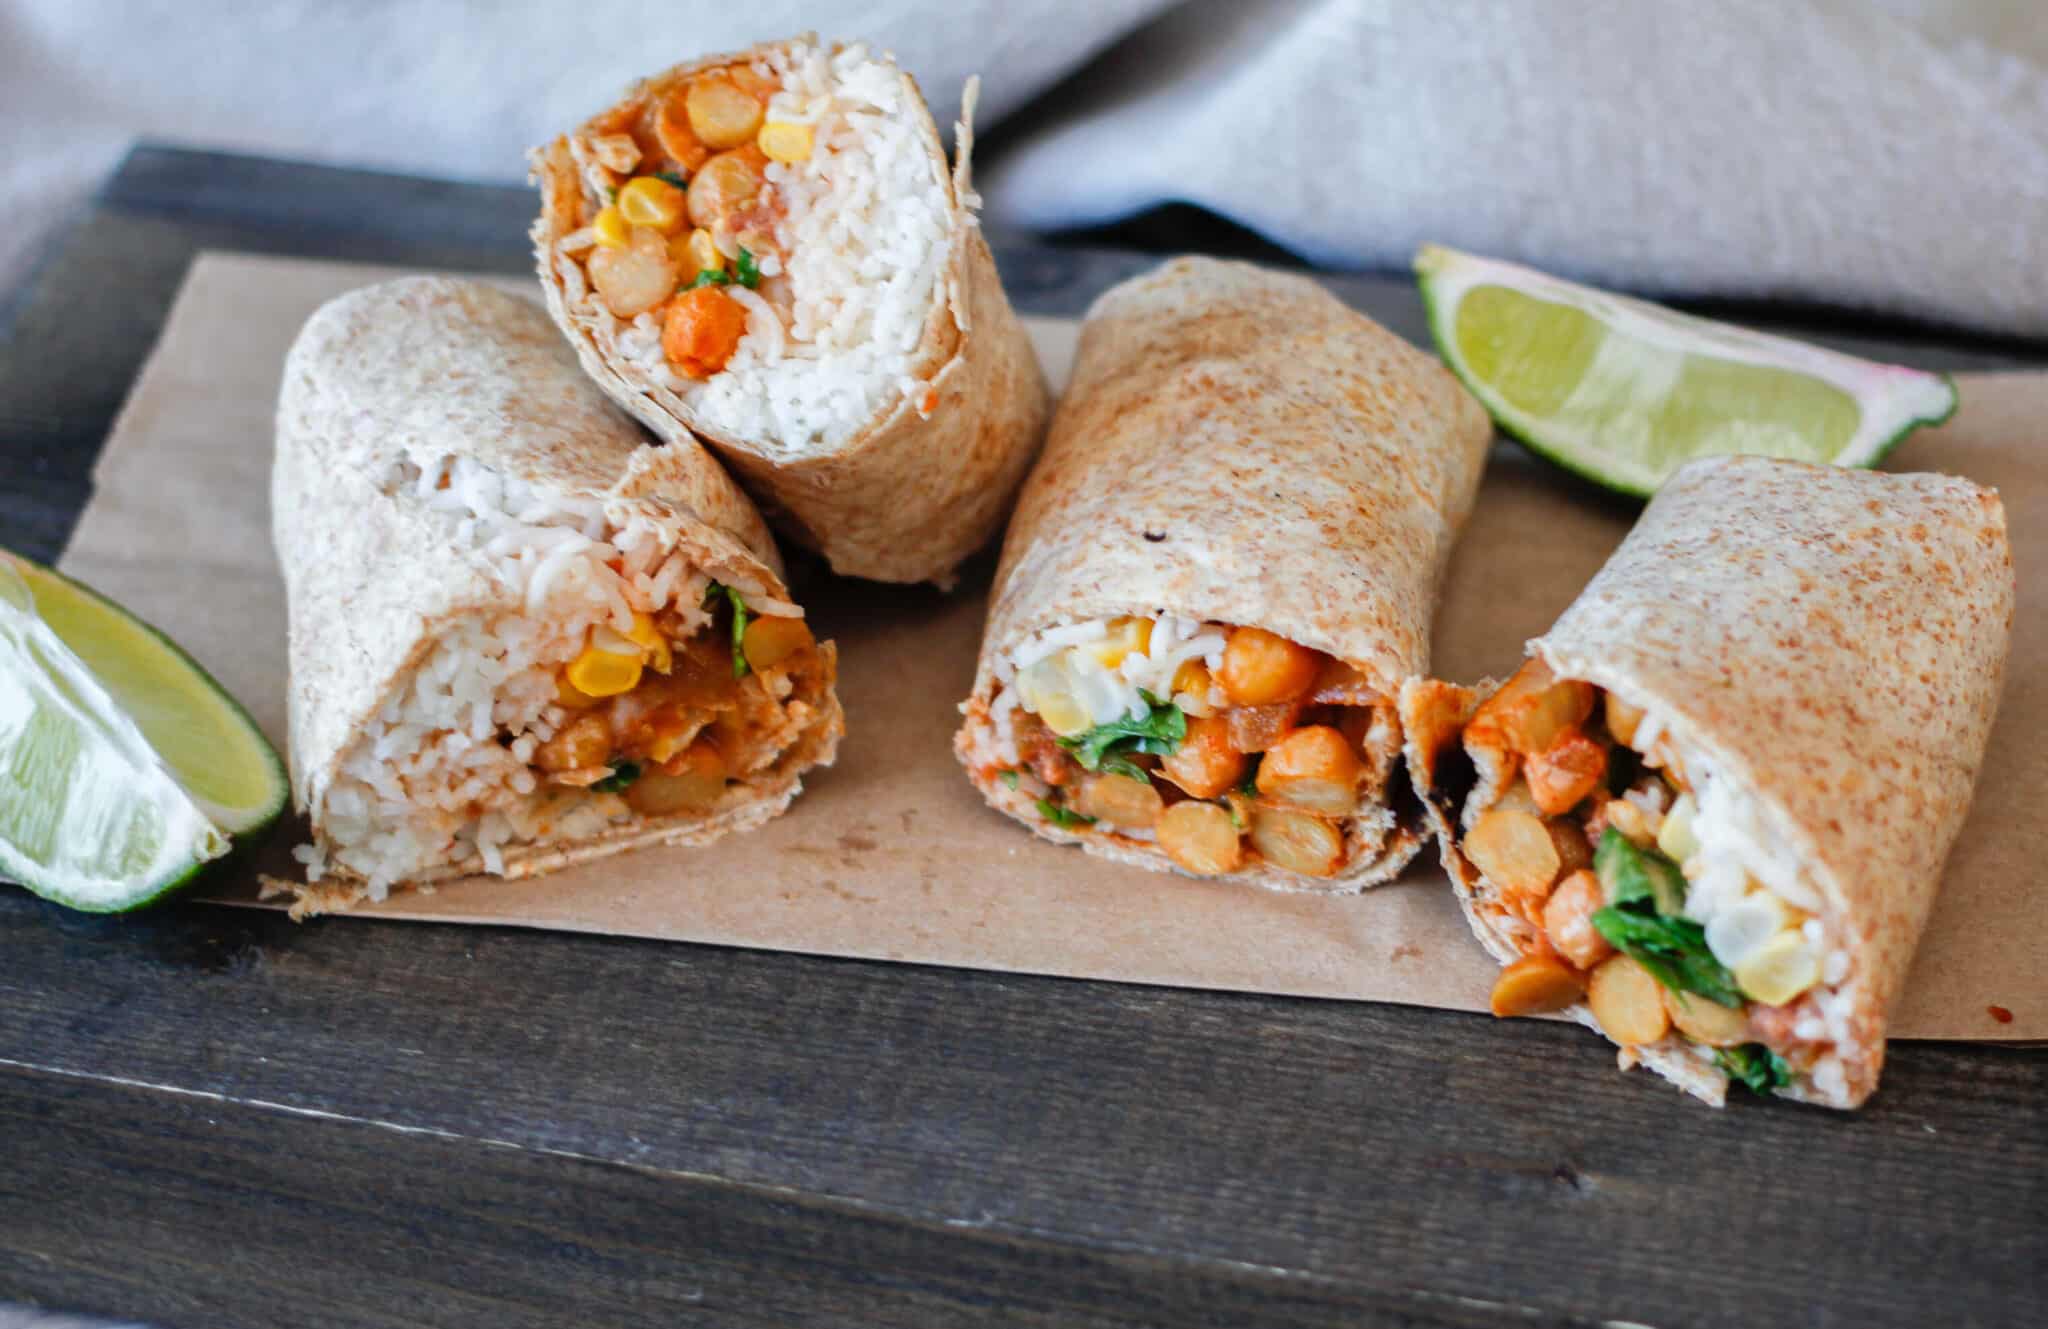
These tasty wraps are great for a grab-and-go lunch and can last quite a while in the fridge. In fact, the filling is so versatile, you can just whip up a batch or two to use throughout the week in pitas, paired with rice in a Buddha bowl, stuffed into peppers, or even sprinkled over pizza!
This Chickpea Wraps recipe is...
- Vegan
- Vegetarian
- Quick & easy to make
- Great for meal prepping
- A good source of protein
And while you're here, don't forget to grab a copy of my free vegan cheat sheet. It's packed with all my favorite substitutions to vegan-ize any recipe!
How to Make Chickpea Wraps
- Heat olive oil with chickpea spices, then add the chickpeas and cook for 5-10 minutes.
- In a separate bowl, mix together ingredients for the sauce.
- Assemble your wraps.
- Roll up and serve with a lemon wedge-it's delicious!
Full directions for how to make Chickpea Wraps are in the printable recipe card below.
Variations
Swap the chickpeas. Instead of chickpeas, you can make this same vegan wrap with white cannellini beans for a completely different flavor.
Mix up the sauce. Try swapping out the tahini sauce for a green goddess dressing or your favorite dairy free Caesar dressing.
Chickpea Wraps FAQs
What are chickpeas?
The chickpea, a very versatile legume, is present in Mediterranean cuisine and is integrated in many preparations such as couscous, falafel, etc. In this recipe, chickpeas replace the meat that is usually found in wraps-a delicious and healthy substitution.
What are the health benefits of chickpeas?
Eating legumes is great for your health! These foods are naturally rich in vegetable proteins, vitamins, minerals, and dietary fiber. In addition, their fat content is low and - like all plant foods - they don't contain cholesterol.
More Tasty Recipes
If you love these chickpea wraps, be sure to check out these other tasty vegan recipes:
Recipe

Chickpea Wraps
These Chickpea Wraps are delicious-and a bit spicy! Perfect for meal prepping, these wraps will become a staple in your diet.
Print
Pin
Save
Servings: servings
Ingredients
Chickpeas
- 2 tablespoon olive oil
- 1 tablespoon cumin
- 1 teaspoon turmeric
- 1 teaspoon paprika
- 1 teaspoon ground ginger
- ½ teaspoon garlic powder
- ½ teaspoon salt
- ½ teaspoon black pepper
- 1 can chickpeas
Wrap
- 1 cup cooked rice
- ½ cup corn
- coriander to taste
- 4 tortillas
Instructions
- Heat 2 tablespoons olive oil with all the chickpea spices for a few minutes. Add the chickpeas and cook for 5-10 minutes.
- In a separate bowl, mix together ingredients for the sauce.
- Assemble your wraps by placing a ¼ cup of rice, coriander, corn, chickpea mix, and the sauce in the middle of a tortilla.
- Roll up your wraps and serve with a lemon wedge-it's delicious!
Nutrition (Estimate per Serving)
Calories: 447kcalCarbohydrates: 40gProtein: 10gFat: 29gSaturated Fat: 4gPolyunsaturated Fat: 9gMonounsaturated Fat: 15gSodium: 512mgPotassium: 324mgFiber: 4gSugar: 3gVitamin A: 341IUVitamin C: 10mgCalcium: 101mgIron: 4mg
Vegan-ize any recipe!Grab our free vegan cheat sheet, packed with my favorite easy substitutions to make any recipe vegan.
Vegan Mexican Pizza

Layer on the Southwestern flavors in this playful vegan Mexican pizza. It starts with refried beans (in place of red sauce), followed by salsa, corn and nondairy cheese. Serve with a colorful green salad and garlic-sautéed greens. This recipe doubles easily. Adapted from Vegan Express.
Fully Loaded Vegan Nachos
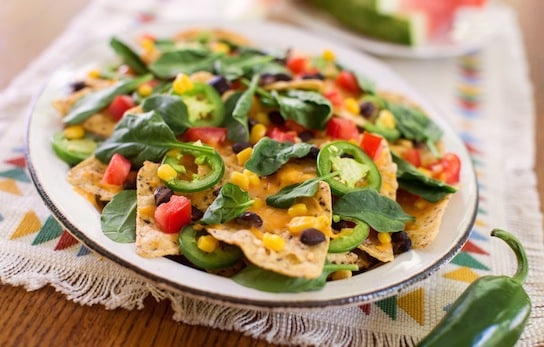
Looking for the perfect vegan dish for that next tailgate party? These super-tasty vegan nachos can be made with simple pantry and refrigerator staples in a matter of minutes.
Nachos are fun fare for any occasion, whether as a snack for a small party, or even as an easy weeknight dinner.
I especially love these vegan nachos because they are so incredibly simple! It uses staple ingredients that you probably already have in your kitchen right now.
How to Make Vegan Nachos
- Arrange tortilla chips on an oven safe dish or baking sheet.
- Top with vegan cheddar cheese shreds and toppings such as black beans, corn, chili peppers, and tomatoes.
- Bake until cheese is melted.
- Top with fresh spinach leaves, if desired.
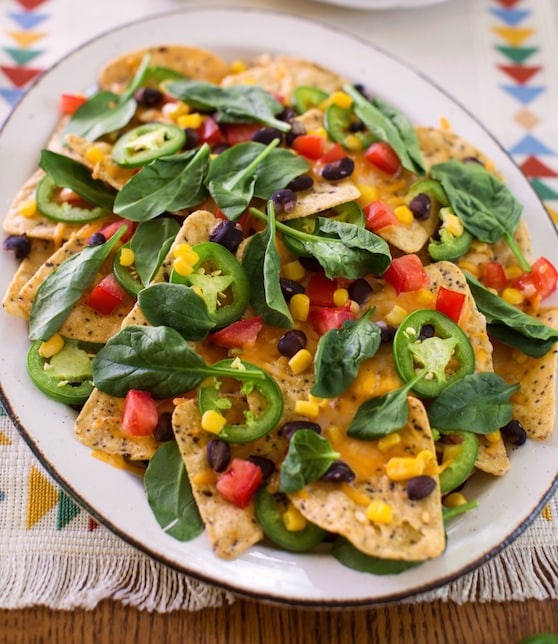
Variations
There are so many ways to make nachos, the combinations are virtually infinite. Some of my other favorite vegan nacho toppings are:
- Any kind of beans. Try kidney beans or refried beans, in addition to black beans!
- Vegan queso - try this vegan cheese sauce!
- Spice it up with chilis in adobo sauce or sliced red chili peppers.
- Black olives.
- Fresh herbs such as parsley or cilantro
- A dollop of dairy free sour cream or plain dairy free yogurt.
- And of course - guacamole!
Have fun experimenting with your own favorite toppings! For another great cheesy party snack, try these vegan mozzarella sticks.
Recipe from the cookbook Plant Power by Nava Atlas. © 2014, published by HarperOne, reprinted by permission. Photos by Hannah Kaminsky.
Recipe

Fully Loaded Vegan Nachos
Here are some super-tasty nachos that can be made with pantry and refrigerator staples in a matter of minutes.
Print
Pin
Save
Servings: servings
Ingredients
- 4 to 5 ounces tortilla chips
- 1 cup vegan cheddar cheese grated
- 1 jalapeño peppers or more to taste, seeded and thinly sliced, or one 4-ounce can chopped mild green chiles
- ½ cup corn kernels fresh or thawed from frozen
- ½ cup black beans canned. drained and rinsed. Or substitute red or pinto beans
- 1 tomato finely chopped, ripe
- baby spinach 2 big handfuls
- Salsa your favorite brand, as desired
Optional garnishes
- Super-Easy Guacamole
- Thinly shredded romaine lettuce
Instructions
- Arrange the tortilla chips on a large platter or a shallow, round casserole dish, about 14 inches in diameter. Sprinkle evenly with the cheese, followed by the chili peppers, corn, beans, and tomato.
- Bake for 8 minutes, more or less, until the cheese is well melted. Or microwave for 3 minutes.
- Scatter the spinach over the top and return to the oven for 2 minutes or so, or to the microwave for another minute, just until it wilts.
- Serve at once. Pass around salsa to top individual portions, as well as any of the optional garnishes.
Nutrition (Estimate per Serving)
Calories: 282kcalCarbohydrates: 36gProtein: 6gFat: 13gSaturated Fat: 3gTrans Fat: 1gSodium: 401mgPotassium: 261mgFiber: 5gSugar: 2gVitamin A: 347IUVitamin C: 9mgCalcium: 79mgIron: 2mg
Vegan-ize any recipe!Grab our free vegan cheat sheet, packed with my favorite easy substitutions to make any recipe vegan.
Hot-and-Cool Tofu Teriyaki Salad
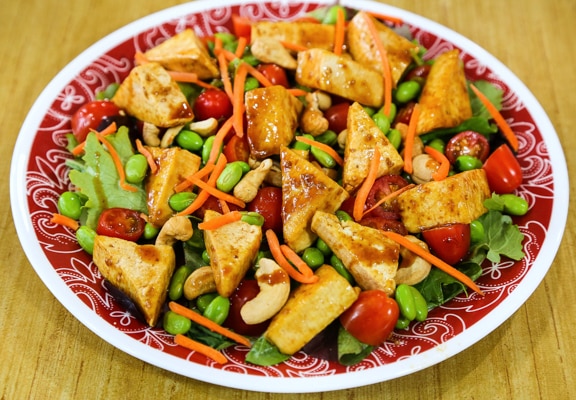
When the weather is cool, I find I need to find ways to entice myself to eat salads. One way that seems to do the trick is to add a warm or hot element to cool greens. This sizzling salad features tofu that's been cooked in tasty teriyaki sauce. Edamame (fresh green soybeans) and cashews add even more protein and a lot of flavor. For me, this is a winter favorite! Photos by Evan Atlas. [Read more...]
16 Meal Prep Tips for Healthier Eating Every Day
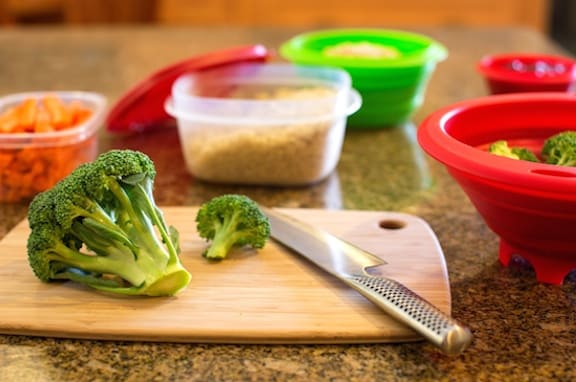
Most of us are busy with work, school, or family (or all of the above!) and don't allow enough time to plan and prep meals. This makes eating in restaurants or ordering take-out food a habit that's too easy to fall back on. Having good meal prep tips and strategies can help you enjoy healthy, balanced meals.
Fortunately, you can eat healthy without spending much time cooking. You just need to prep your meals ahead of time. In fact, if done right, meal prepping can save you money. Whether your goal is to maintain weight, lose weight, save money, or have more energy, here are 16 tips that will help you prep meals with ease.
#1 Have a meal plan
Creating a meal plan is the first thing you should do before you buy food. It'll help you know what to cook and when to cook it. Your meal plan should guide you when making a grocery shopping list. Going shopping without a shopping list can lead to impulse buys of unhealthy foods.
You don't have to come up with a new meal plan every other week. You can use the same meal plan for several weeks-or even months!
If you need some help getting started, be sure to check out our Veggie Kickstart Kit!
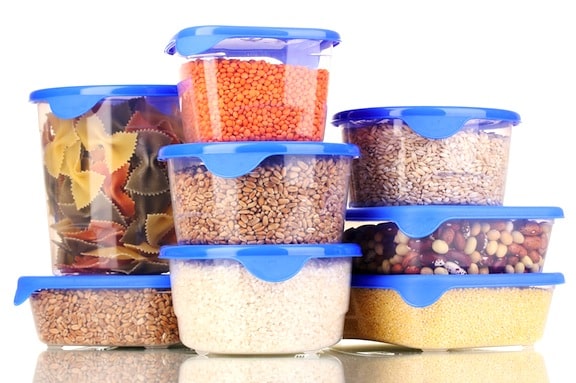
#2 Buy good quality meal prep containers
Having containers makes it easy to store food. Containers keep the food fresh and make it simple to remain organized. Buy containers that are BPA-free to make sure they don't melt in the oven-use glass or Tupperware containers. To avoid confusion and overeating, get containers of the same sizes and shapes.
I'm a fan of these bento style containers with compartments for a few different types of food.
#3 Start slow
Meal prepping is supposed to make life easier. But that doesn't mean you should prep weekly meals. Things will backfire if you try to prep food once a week without prior experience.
Start slow by prepping meals for 2-3 days. By doing this, you'll be able to learn what works and what doesn't. And if you make mistakes, they won't be too costly. Some folks prep dinner meals only, while others prep all meals of the day. Choose to prep the meals you always lack time to cook in advance. Once you have had some practice prepping meals for a few days at a time, you can try cooking weekly meals.
#4 Purchase a food scale
This tip is for people who are trying to lose weight. It's not always necessary to count calories in order to lose weight. But if you're not good at estimating calories or you have a tendency to overeat, a food scale will be a great tool for you.
A perk of meal prepping it that weighing your food will be less hectic, since you only have to weigh portions once or twice a week. Studies show that most dieters underestimate the number of calories they consume. So get a scale if you don't have an estimate of the number of calories you consume.
#5 Don't try new recipes all the time
It's not a good idea to try new recipes when cooking several meals in advance. It'll be a time killer and the whole meal may backfire.
Stick to the recipes you already know how to prepare. Frankly, you don't need to eat dozens of different recipes to stay healthy, as long as your standbys offer good nutrition.
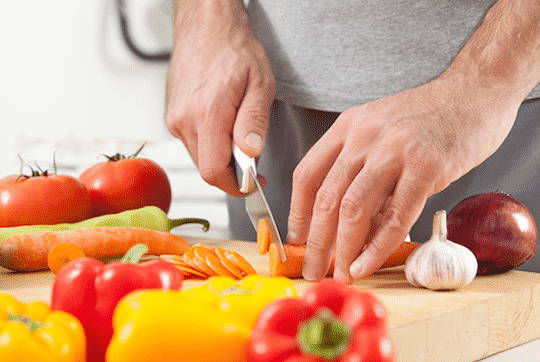
#6 Chop vegetables ahead of time
Meal prepping doesn't only involve cooking-chopping vegetables and fruits in advance can save you time.
If you usually forget to eat your veggies, this approach will be helpful. To prep, chop them and store them in containers. When it's time to cook, just throw them in the pan!
#7 Prepare the complicated recipes first
The order in which you prepare foods will make a huge difference. Cook the complicated recipes at the start of the week (preferably Sunday afternoon), then prep the simple recipes in the middle of the week.
You may get caught up or be too busy to prep complicated recipes in the middle of the week. That's why I advise you use the same strategy for exercise. Do the most challenging exercises first then finish your workout with simpler exercises.
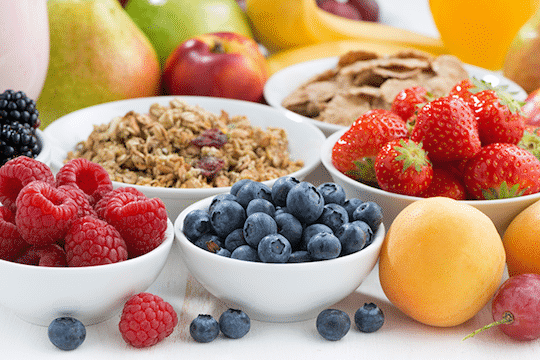
#8 Store healthy snacks in the house
Eating snacks helps control cravings and hunger when dieting. But most folks store unhealthy snacks in the house which encourage binging.
To reverse this, keep only healthy snacks in the house. This could be foods like eggs, fruits, nuts, veggies, and so on. Store your healthy snacks in containers in individual portion sizes-research shows that people overeat snacks when they eat them straight from the bag.
Here are some ideas for healthy homemade vegan snacks.
#9 Don't have the 'all or nothing' mentality
It may not be possible to prep meals all the time or every week, but prep them when you can. Don't assume that there's no point in doing it at all if you can't do it all the time.
Prepping meals occasionally is better than not prepping at all. And as you continue prepping meals, you'll discover new easy and quick ways to do it.
#10 Buy healthy condiments
Eating healthy doesn't mean eating boring and tasteless food. You can make healthy and delicious food without over-salting it.
Use healthy condiments like fresh ginger, olive oil, and lemon to prepare meals. Your food will be delicious and you'll be encouraged to prep meals regularly.
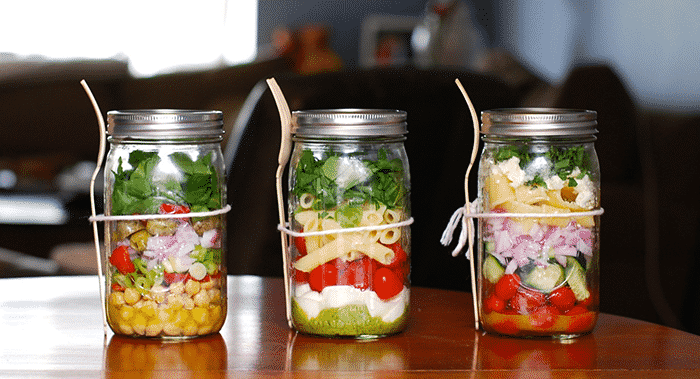
#11 Put lunch salads in a glass jar
Most people think carrying salad to work is a bad idea because it'll get mushy. But if you use a glass jar, the veggies can stay fresh for long.
Put the dressings at the bottom of the jar, then layer vegetables like peppers and beets, and then put the leafy greens for the top. Place a paper towel on top of the glass jar to absorb moisture if you're storing the salad for a couple of days.
I've found that these wide mouth mason jars work best!
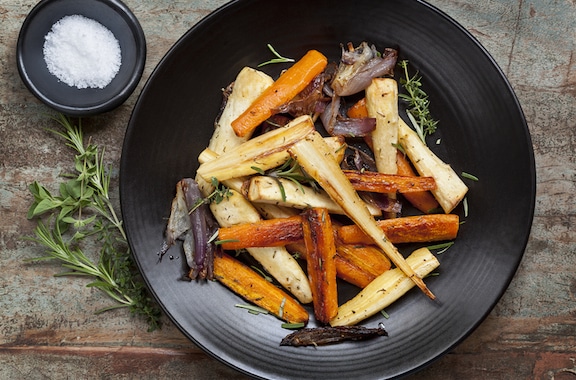
#12 Roast different veggies together
Some vegetables have the same cooking time. Instead of roasting each vegetable individually, you can roast them together to save time.
Some hardier veggies that you can cook together include: potatoes, cauliflower, parsnips, carrots, and onions. As for fast-cooking veggies, you can prepare mushrooms, tomatoes, and asparagus together.
Need a recipe? Check out these roasted veggies with vegan cheese sauce.
#13 Prep freezer-friendly foods
You can freeze any foods, but some meals become mushy when frozen. When prepping meals for several days, cook foods which freeze and reheat easily. Soups, stews, and bean chilis freeze well, as do some casseroles like lasagne. Dishes that feature potatoes or tofu tend to get watery, so avoid freezing those.
You'll just need to heat the dish for a few minutes after it has thawed out, and you'll have yourself a healthy meal.
#14 Keep leftovers in the fridge
Some people find leftovers unappealing, but they can help you to eat healthier and save time. Just put your leftovers in a container and store them in the fridge. Leftovers can be kept in the refrigerator up to 4 days without going bad.
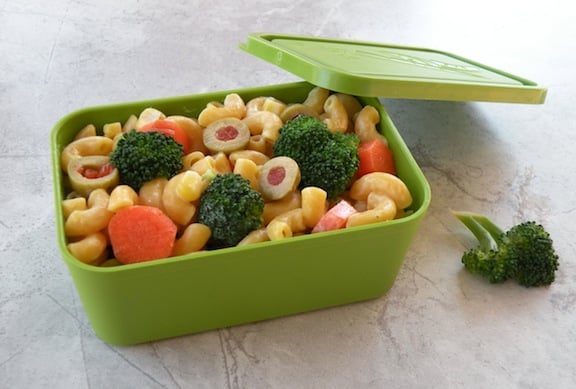
#15 Make lunch the night before
Some folks may not feel the need to prep dinner for several days. If that's you, taking time to make lunch the night before is a good idea, if you'll be at school or work the next day. Leftovers (see #14 above) are good for thermos or container lunches for school or the office.
#16 Organize food in the refrigerator
Refrigerators have different compartments which have different temperatures and serve different purposes.
The door is the warmest part of the fridge, so place foods in it that don't spoil quickly, like condiments. Place cooked foods on the top shelves of the fridge. The lower shelves are the coldest, so place foods there which need to be cooked. You can store a wide variety of foods in the freezer-just make sure to pack the foods tightly in containers and keep them well organized.
Final word
It's hard to eat healthy if you never cook your own meals. So use these meal-prepping tips to make the process easier!
Realize that all meal prepping ideas won't work for you. You'll have to experiment to find what works for you, and then stick to it. Once you put these ideas in action, you'll have more time to exercise-another main aspect of a healthy life. Do you have any meal prepping ideas that have worked for you?
Brian Syuki writes at Focusfitness.net, where he teaches men and women how to stay lean and strong using bodyweight exercises and proper nutrition.
Stuffed Avocados with Corn and Olives
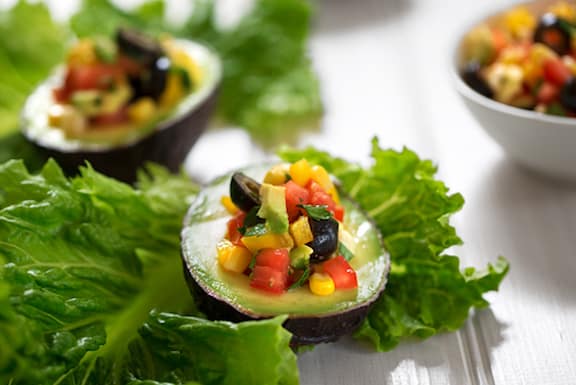
Individual avocado cups, studded with corn and crisp vegetables, are an easy alternative to an ordinary salad, or a nice first course. Double the recipe if you’d like everyone to have two halves rather than one, in which case it can almost be a main-dish salad, especially if you pair it with a bean salad, like Simple Marinated Beans.
5 Best Vegetables for Acid Reflux and Heartburn — and a Smoothie
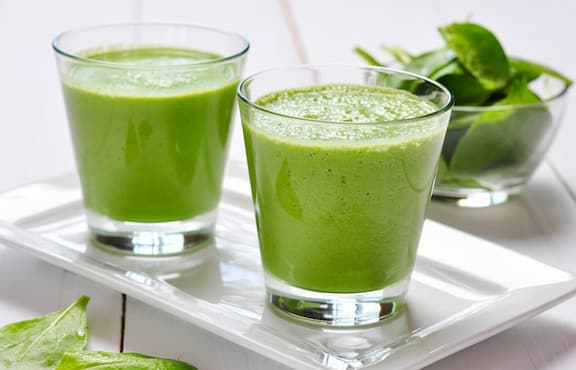
It is a well-known fact that diet plays a decisive role in the annoying symptom known as heartburn or acid reflux - often as a trigger, or root cause.
Changing your diet can help resolve heartburn symptoms for the long run. Some foods have substantial alkaline effects that help alleviate acid reflux quickly and effectively.
Here, we'll discuss the 5 best vegetables for acid reflux and heartburn - remedies you'll find in any produce section or farm market.
Studies are now showing us that certain unexpected vegetables are in fact great home remedies for acid reflux symptoms. The same studies are also showing that other groceries have so far been overrated as heartburn remedies.
At the end of the article we'll show you an easy and tasty anti-heartburn smoothie recipe, which combines the power of all these natural ingredients.
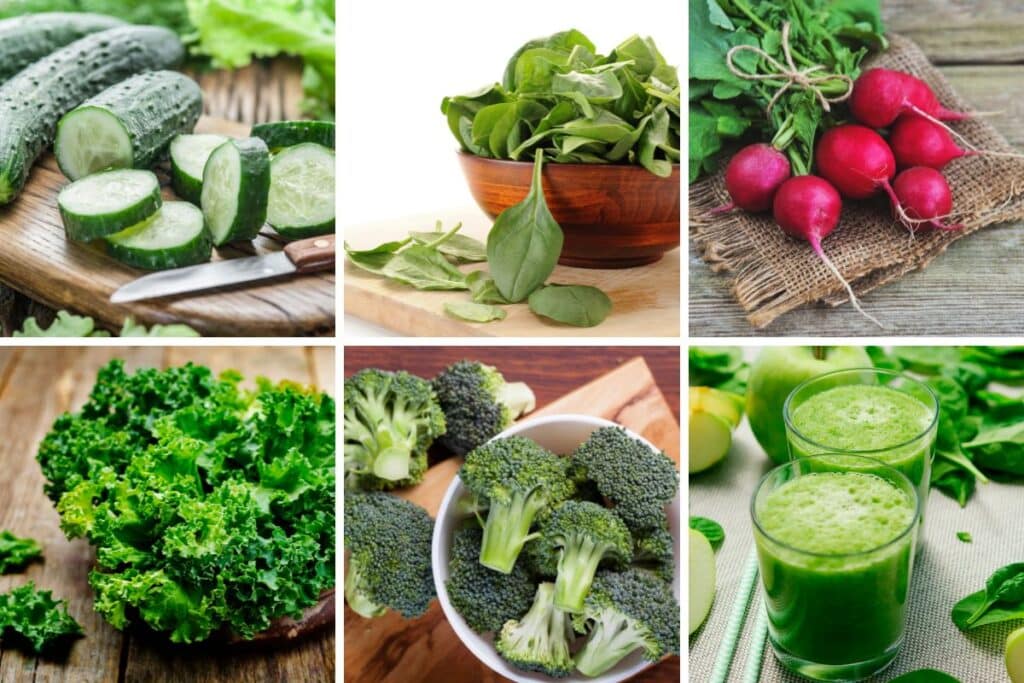
Home Remedies or drugs?
There are many potential causes for heartburn, and you should always talk to your doctor about the possible root cause. But what can be done if you have acute heartburn right now?
One option is medication, like antacids or PPIs. I assume, as you found your way to this site, that this isn't your goal. And that is very good! Many of the available drugs will indeed help against heartburn, but will often cause more severe or risky side effects.
And here I want to emphasize the "home" in remedy. Ideally you want an effective remedy that you already have at home for other reasons (like food for example).
The goal of this article is to present you with 5 vegetables, which almost everyone already has at home and which are excellent remedies for heartburn, as recent studies show. They act as natural antacids to neutralize stomach acid.
Vegetables for neutralizing stomach acid
Out of pure interest, I always keep one eye on the study situation around acid reflux and heartburn. Because of that I have recently encountered two very interesting, fairly recent studies of that topic.
Both studies research how effectively certain foodstuffs can be used as antacids (for neutralizing stomach acid).
These foods support restoring the natural gastrointestinal balance and the function of this tract. They help buffer the acid reflux, support the digestion process, reduce the burning sensation and soothe the inflamed stomach lining.
The study investigates the antacid effect of several foodstuffs and compares their effects to water and to the active controls: sodium bicarbonate and a marketed antacid (ENO). The foods used during this study were broccoli, cucumber, kale, radish, lemon juice, cold milk and curd.
While lemon juice unsurprisingly fails to deliver antacid effects, all the other foods - broccoli, cucumber, kale, radish, and spinach - proved to be strong antacids.
However, I would like to expressly point out the risks of milk and curd as home remedies for heartburn.
Although these have a positive effect on many people in the short term, as the studies have shown, they are unsuitable for safely fighting heartburn. Cow's milk is both difficult to digest and relatively greasy, and therefore remains in the stomach for a long time, thus stimulating gastric acid production. Hence, I would not recommend the milk products (milk or curd), nor lemon juice at all.
Both studies conclude that the tested foods have significant antacid effects, and can therefore be recommended as anti-heartburn additives for your own diet. All 5 vegetables are highly alkaline, but also extremely healthy in many other regards.
The 5 winners and the benefits for your health
Here is an overview of the 5 tested vegetables and a summary of their benefits to your health.
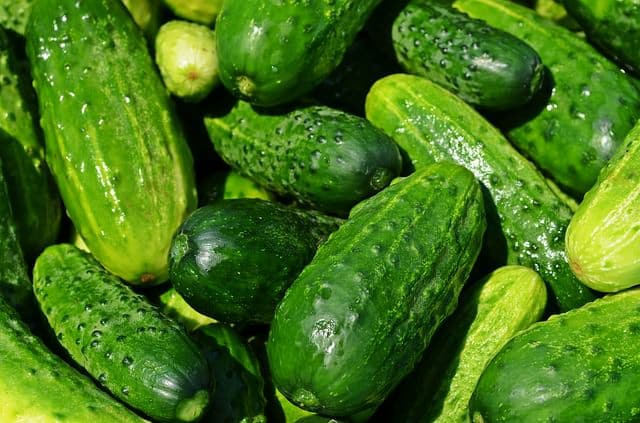
Cucumber
The cucumber includes so-called proteases (enzymes with a protein cleaving function). Thus, cucumber helps to more easily digest protein rich nutrients. The enzymes also clean the intestine by killing bacteria.
Additionally, there are antioxidant substances in a cucumber, which reduce for example the risk of heart diseases.
The cucumber is also one of the most calorie-free foods: one hundred grams contain only about 12 calories. This is mainly due to the high water content (about 95%). So a cucumber can also be a pretty good thirst quencher.
Furthermore, it contains not only water, but also many vitamins such as B (stress control), C (antioxidant - good for the heart), E and minerals like iron, calcium, phosphorus, zinc, magnesium, potassium (sustain healthy blood pressure).
Please note that most of the vitamins actually are in the cucumber peel. So it's best to buy untreated cucumbers or to wash them very well, and eat the skin. And if you use the cucumber as a smoothie or shake ingredient, it is best to blend it with its skin still on.
With regard to heartburn, cucumbers are an alkaline food and thus neutralize acid in the body by increasing the pH value.
Who knew cucumbers were so healthy?! They're also tasty - try them in this hummus and cucumber wrap or this watermelon cucumber cooler.
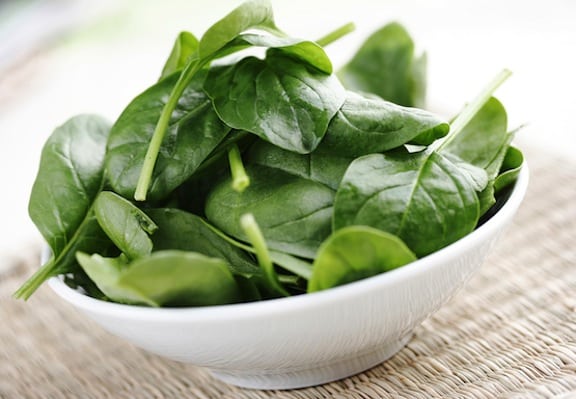
Spinach
Spinach helps against heartburn, as we have shown in the studies above. But this is only one of many benefits of this amazing vegetable.
The alkaline characteristics of the spinach are crucial with regard to heartburn and make it an excellent antacid. But this characteristic is just one of many health benefits.
In short, according to a study by the University of Manchester, spinach is extremely healthy and first and foremost protects the eyes in two ways:
- By a very high percentage of beta carotene, spinach protects against night blindness.
- Through the contained lutein, spinach also protects against AMD, an age-related eye disease.
With one serving of spinach, you cover your daily requirement of beta carotene, vitamin K, fiber and manganese, as well as about half of the magnesium requirement.
Spinach also contains various antioxidants. These have been proven to possess anticancer properties (skin cancer, stomach cancer, breast cancer and prostate cancer).
Furthermore, the magnesium contained in the spinach helps the cardiovascular system by regulating the blood pressure. Even one portion raw spinach salad is sufficient to lower high blood pressure within a few hours.
And if you're looking for some new ways to eat all that spinach - check out this vegan spinach artichoke dip or this Mediterranean Spinach.

Kale
Kale is also a vegetable with highly alkaline properties and therefore suitable as a natural remedy for heartburn.
But just like the other vegetables listed here, this is just the tip of the iceberg. Kale is generally extremely healthy. It contains lots of vitamin K and C, iron, calcium and many antioxidants.
Due to the high quality of the contained protein, it is often recommended as a healthy alternative to animal proteins. As studies prove, kale is a true superfood and possesses various healing effects.
I love kale - this massaged kale salad and this white bean and kale skillet are two of my favorite ways to enjoy it.
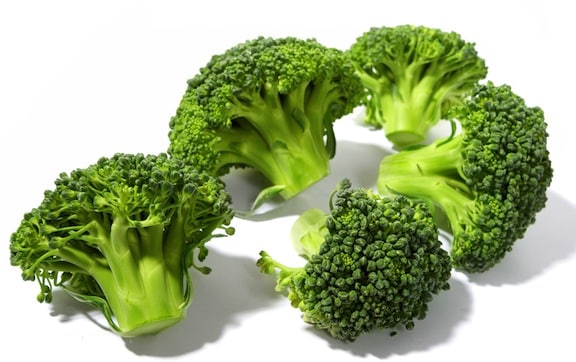
Broccoli
Broccoli is highly alkaline as well and therefore a strong antacid - an excellent food for heartburn. But this is just its side job, so to speak.
Broccoli is also extremely healthy and is one of the great vegetables that have been shown to have a preventive and combative effect on a wide variety of cancers (Study 1 - Ohio State University, Study 2 - University Hospital of Heidelberg/Germany).
However, this topic is beyond the scope of this article. If you are interested in all the details of the anti-carcinogenic properties of the broccoli, I can recommend this summary page from Greenmedinfo to launch for your further reading.
But apart from this sensational property, broccoli can do so much else for your health:
- It strengthens the immune system by possessing a high proportion of beta-carotene, zinc and selenium.
- Broccoli supports the fight against diabetes. The low sugar and high fiber content can be used to minimize insulin requirements.
- The risk of heart disease and stroke is minimized due to lutein, B6 and folate.
- Broccoli contains a lot of vitamin K and the calcium content is even higher than many dairy products. This helps build and maintain a healthy bone structure.
- The amount of potassium, calcium and magnesium supports the regulation of blood pressure.
- It's even known to be a cold remedy, thanks to the vitamin C, antioxidants and inflammation inhibitors.
For tasty broccoli ideas, check out these peanut noodles with broccoli slaw or this Thai Red Curry.
Radish
Radish is a great remedy for heartburn, as already noted above, and it's also very healthy for other reasons. Not everyone likes this root vegetable because of its spiciness.
This characteristic flavor stems from the radish containing a high amount of mustard oils, which are an additional help against your heartburn.
Varieties of radish include horseradish, daikon, red radishes, and many others. Mustard oils soothe the stomach and also lower the production of stomach acid.
Furthermore, the mustard oils have a healing effect on bile and the liver.
Other benefits of radishes are a low calorie and fat content, as well as being rich in vitamin C. Approximately half the daily requirement is covered by just 200 g of radish.
Need a radish recipe? This green pea and radish salad is a winner.
Anti-Heartburn Smoothie
How about a wonderful, extra-healthy anti-heartburn smoothie made from all of the above ingredients? For me this has worked wonderfully against heartburn, whenever I've had some in the past weeks. And it tastes a lot better than you'd think!:
Makes: 1 green smoothie
- A handful of raw spinach (regular or baby spinach
- 3 to 4 broccoli florets (uncooked),
- 1 leaf of kale - fresh and without stems (because of the tough fibers it's best to chop it a little, unless you have a very powerful blender).
- ½ cucumber
- 3- or 4-inch piece horseradish or a handful of regular radishes, chopped (depending on your taste and spiciness of the radish, you can vary the quantity).
- Water as needed
- ½ peeled orange to sweeten, optional
Combine everything in a blender. Blend until completely smooth, and enjoy!
Say good bye to your heartburn and enjoy the many other benefits of the vegetables in this green smoothie.
Let us know what you think, and the results if you use the recommendations here to combat acid reflux. What will you try? Broccoli, cucumber, spinach, radish, kale or maybe our smoothie with all the ingredients?
Learn more about vegan nutrition and healthy eating here.